5. IPS电动独轮车 产品说明书
8. IPS电动独轮车 常见问题
IPS电动独轮车常见问题1.如何控制IPS电动独轮车?IPS电动独轮车是利用内置的高精密陀螺仪进行前后平衡稳定的,它的左右平衡与我们骑自行车的原理一样要靠一定的速度和您的身体来控制。
当您身体前倾,IPS电动独轮车会感知到您的动作进行加速;当您身体后仰,IPS电动独轮车也会控制电机减速以维持您与车体的平衡。
2.初学者能够正常骑行大概需要多长时间?大部分人可以在1~3天之内学会,每天大概花费2小时左右。
刚学习时,因为重心偏离,会有小腿被磕痛的情况,使用护腿可极大改善。
另外小部分人可能因为平衡感较差而学习较为缓慢,这是正常情况,请多多练习。
购买时建议搭配辅助轮,可以方便自己以及他人体验。
第1页3.IPS电动独轮车的最大续航里程?不同型号的IPS电动独轮车续航里程是不一样的。
F400最大续航里程40Km,I200最大续航里程25Km。
根据用户重量不同,路况不同,驾驶风格不同,距离会有所不同。
4.IPS电动独轮车的最高时速是多少?同所有的自平衡车一样,IPS电动独轮车的自平衡能力有限,为了保证您的行驶安全,IPS电动独轮车通过软件限速,控制最高时速在16~18Km/h。
5.下雨天能否使用?一般小雨天是可以短时间使用,禁止在大雨中或者积水比较多的路面行驶,也禁止在雨中长时间骑行。
雨天路滑,为了您的安全考虑,建议下雨天不要使用。
第2页6.充电时间是多少?电池寿命?IPS电动独轮车的电池容量较高,所以充电时间较长,F400单次完全充满时间为4小时,电池容量较低的型号,充电时间较短。
电池的寿命为完全充放电1500次左右。
为了较好保养您的电池,请充满电后及时关闭电源,请尽量不要通宵充电。
7.快速骑行中IPS电动独轮车的“翘头”现象该如何解决?工程师在IPS电动独轮车软件控制中加了限速程序,以保证使用者的安全。
如果车子的行驶速度在12Km/h左右,他的限速控制软件就会启动,给驾驶者一个微微向后的力量,提醒驾驶者注意行驶速度,所以会让驾驶者感觉有“翘头”的现象。
交通行业电动滑板车使用说明书
交通行业电动滑板车使用说明书第一节:产品概述本电动滑板车适用于交通行业从事巡逻、巡查、快速移动等工作人员使用。
采用电动驱动方式,具有环保、便捷、高效的特点。
下面将为您详细介绍电动滑板车的使用方法和注意事项。
第二节:产品组成1. 电动滑板车主体:包括车身、车把等组件。
2. 电池组:为电动滑板车提供动力的关键部件。
3. 控制器系统:控制滑板车的启动、刹车等功能的关键组成部分。
4. 车轮:提供滑板车行驶和平衡支持的部件。
第三节:使用方法1. 准备工作a) 使用前,请确保电动滑板车处于电量充足的状态。
b) 检查滑板车的各项部件是否完好,如车轮、刹车器、车把等。
c) 穿戴安全装备,包括头盔、手套等。
d) 了解并遵守所在地区的交通法规和规定。
2. 启动与停止a) 按下启动按钮,滑板车启动后会发出“呜呜”的声音,即可起步。
b) 滑板车达到预期速度后,可松开启动按钮,进入平稳行驶状态。
c) 刹车时,按下刹车按钮,滑板车会逐渐减速并停止行驶。
3. 转弯与控制a) 通过转动车把实现转弯操作。
向左转动车把即可左转,向右转动车把即可右转。
b) 建议在行驶中保持稳定的速度,以便更好地控制滑板车的方向。
第四节:安全事项1. 佩戴安全装备:在使用电动滑板车前,务必佩戴头盔、手套等安全装备,确保行车安全。
2. 注意行车环境:在选择行驶路线时,避免高速公路、人行道等禁止使用电动滑板车的区域,以确保交通安全。
3. 注意行车速度:根据实际道路情况和交通流量,合理控制行车速度,确保安全行驶。
4. 防止碰撞:在行驶过程中,避免与其他行人、车辆或障碍物发生碰撞,保持安全距离。
5. 坡道行驶:在上坡或下坡时,注意调整速度,避免因坡度过大导致失控。
6. 雨天注意:电动滑板车不适用于雨天行驶,请避免在雨天或湿滑的道路上使用。
第五节:维护保养1. 定期检查电池电量:保持电池处于充足状态,如发现电量不足,请及时进行充电。
2. 保持干燥清洁:经常清除滑板车的灰尘、泥土等杂物,保持干净,以便维持车辆正常运行。
独轮车说明书范文(共4篇)
篇一:极速星独轮车使用手册极速星智能平衡车产品说明书本手册包含有重要的安全及使用说明,在您首次使用前请务必完整仔细阅读!包装箱中含有:极速星智能平衡车、充电器、使用说明书、保修卡、合格证各一只(份)。
目录一、简介二、安全三、基本参数四、使用注意事项五、维护六、保修一、智能平衡车简介极速星自平衡独轮车是新型的高科技代步工具,他是用航天姿态控制原理、模糊算法。
陀螺仪系统,实现前后方向的自平衡,使用者通过身体略微的前倾或后仰,实现前进、后退、加速、减速、转弯、刹车等行车操作,左右方向的平衡则类似于自行车,依靠身体的扭动实现。
自平衡独轮车具有绿色出行环保的特点,可以随身携带,例如乘坐地铁和公交、上班、上学、逛街,是交通出行的好帮手。
二、安全任何代步工具都存在安全风险,自平衡独轮车也不例外,因此您需要详细了解该产品的安全注意事项,并且在行车过程中小心谨慎!非常重要:1、不可急加速或急减速,不可过度前倾或后仰身体,严禁超速行驶;2、若有摔倒风险,请以保护人身安全为主,不要考虑自平衡独轮车;注意事项:1、骑行时建议穿戴好头盔、手套、护肘、护膝等安全防护用品;2、不要在车多的公路上及人多的地方骑行;3、不宜在颠簸路面骑行,如土路、石子路;4、不宜在超过15度的上下坡道上骑行;5、不建议15岁以下儿童学习和骑行;6、不建议在北方寒冷的冬季骑行;在实际骑行过程中,可能会预见及突发性的危险,因此任何时候都需要小心谨慎行驶。
未按照使用说明书使用,造成人身伤害事故本公司不承担任何责任。
三、基本参数(极速星智能平衡车)图片已关闭显示,点此查看图片已关闭显示,点此查看四、使用注意事项1、主要功能部件如图所示 1)一体化电源开关 2)充电插口3)踏板(可以向上转动收起) 2、启动将极速星自平衡独轮车以竖直状态放在地面上,按下电源开关,开关指示灯及电量指示灯会亮起,同时蜂鸣器会发出“滴”声提示音,随后即可骑行。
如按下电源开关时,自平衡独轮车处于前后方向的倾斜状态,那么轻等待它自动修正至竖直状态后在骑行。
全国电动观光车用户使用手册精华版概要资料

前言欢迎您选择武汉科荣电动车辆制造有限公司交流电动观光车,本《用户使用手册》是武汉科荣电动车辆制造有限公司交流电动观光车不可分割的一部分。
车辆售出时,务必将其一并交付给用户。
本手册详细介绍了武汉科荣电动车辆制造有限公司交流电动观光车的特点,阐述了电动观光车的正确使用方法,指出了日常保养的内容。
您通过仔细地阅读本手册,会使您对武汉科荣电动车辆制造有限公司交流电动观光车有一个更深的了解,能更好的使用、维护您的观光车,避免您的观光车受到损伤,更好的感受驾驶的快乐。
通过正确的保养,您可以免于很多事故,节省很多资金。
更重要的是,您可以正确地操作您的车辆。
在阅读本手册的同时请特别注意带有“”及“警告”字样部分的内容,否则,您本人或他人及车辆可能会受到伤害。
本《用户使用手册》适用于武汉科荣电动车辆制造有限公司交流电动观光车,但因为车型配置的不同,其中所介绍的某些装置、设施或功能可能在您所购买的车型上没有。
本手册内容在被许可印刷时均为有效。
但武汉科荣电动车辆制造有限公司电动车有限公司保留因产品的不断升级而中止使用或变更而不另行通知的权利。
本手册版权归武汉科荣电动车辆制造有限公司2010年4月(第一版)敬告用户1.轮胎气压直接影响到汽车的动力性和平顺性,应经常检查轮胎的气压使之保持在300 千帕一350千帕。
对已损坏或过度磨损的轮胎,要及时进行更换。
2.本公司的观光车为交流系统,底盘部分区域有高压电路,严格禁止普通用户对底盘电路进行检修。
为防止电击,禁止用手直接接触动力电池的任何电极。
3.电机控制器内部有高压,为防止电击禁止非专业人士拆开电机控制器。
4.长时间不使用车辆,应将紧急断电开关按压下去,以避免动力电池过度放电。
5.本公司的交流电动观光车均配备无级变速系统,点火开关接通前请务必确认档位处于空档。
6.为保证整车部件装配可靠性,禁止自行拆卸各类金属紧固件,特别是底盘部位相关零件,因为这些紧固件可能涂有防松介质,拆卸后原件不能重复使用。
乐行天下独轮平衡车系列用户手册说明书
乐行天下独轮平衡车深圳乐行天下科技有限公司用户手册系列1. 文档概述1.1. 关于本手册1.2. 相关文档与资料2. 安全驾驶注意事项3. 产品概述3.1. 产品序列号3.2. 检查包装箱3.3. 产品组成3.4. 产品参数3.5. 产品尺寸图4. 产品功能介绍4.1. 助力推杆与助力模式4.2. 防飞转按键4.3. 过载保护4.4. 过温保护4.5. 侧倾保护4.6. 数据蓝牙4.7. 炫彩氛围灯4.8. 音频蓝牙4.9. 语音提示4.10. 手机客户端3 3 334 4 456 78 8 8 9 9 9 9 10 10 10 10目录15. 使用乐行独轮车5.1. 使用前准备5.2. 初学者操作步骤6. 保养与维护6.1. 存放6.2. 充气以及更换内外胎6.3. 调节脚踏板松紧度6.4. 清洁7. 法律声明7.1. 使用声明7.2. 个人信息声明7.3. 知识产权声明8. 联系我们211 11 1212 12 12 13 1314 14 16 17181.产品概述1.1.关于本手册为了您的驾驶安全,在使用乐行天下V10系列独轮车(以下简称V10独轮车)之前请仔细阅读本手册及用户指南宣传页,并请认真观看驾驶指导视频,确保能够按照正确方法使用。
请认真阅读并理解本手册所列出的所有安全警告和注意事项,有助于您更好的驾驶V10系列独轮车。
本手册适用于深圳乐行天下科技有限公司所生产的乐行天下V10独轮车产品。
如果您有任何疑问或无法从本手册中获取您所需的信息,请及时联系乐行天下授权代理商或乐行天下售后部门。
1.2.相关文档与资料《用户手册》的PDF格式文档、《安全视频》的视频文件、手机客户端及其帮助文档,均可从深圳乐行天下科技有限公司官方网站:下载2.安全驾驶注意事项V10独轮车是一款智能代步娱乐的工具。
如果您不按照本手册的规定来使用,将可能给您带来驾驶风险。
无论何时何地,因为跌落、失控、碰撞等原因,包括不遵守本手册所述要求驾驶V10独轮车,均可能导致您受伤甚至死亡及财产损失。
独轮滑板车中英说明书

说明书E轮滑板简介E轮滑板继漂移车,电动独轮车后的又一代新型运动产品。
该滑板具有抗裂变、抗形变、体积小、不易断裂等特点,滑板靠身体重心实现前进后退以及急刹车等动作,不需要脚推滑,配合扭腰运动,可达到显著的瘦身效果,增强个人平衡能力。
参数基本信息中文名:E轮滑板英文名:E—Wheel Scooter最大载重:100Kg 速度12Km/h电池容量:36V,4.4Ah锂电池刹车方式:重心感应续航里程:15-20Km 控制原理:倒立摆系统充电器输入电压:AC110-220V/50-60Hz 最大爬坡能力:15度注意事项1.滑行前建议穿戴好头盔、手套、护肘、护膝等安全防护用品。
2.不宜在人多的危险地方,及车多公路上滑行。
3.不宜在颠簸和沙石路面滑行。
4.不宜在湿滑路面滑行,尤其是冰雪路面。
5.不建议12岁以下儿童学习和滑行。
6.不建议北方在寒冷的冬季滑行。
使用方法1.启动将 E轮滑板平放在地面上,按下电源开关,开关指示灯及电源指示灯会亮起,同时蜂鸣器发出“嘀”声提示音,随后即可滑行。
2.电量提示E轮滑板实用LED灯提示电量状态,当电量大于85%时四颗灯全亮,随电量下降逐渐熄灭。
3.保护当电池电量低于20%,电量显示灯只有一颗亮起,同时蜂鸣器连续发出“嘀”声报警,迫使滑行着停止使用。
4.充电正常情况下仅需1小时左右即可完成充电,充电器上的指示灯红色时表示正在充电,指示灯变绿色时表示电已经充满。
注意:充电时要先插好车上的充电口,再插上电源,以免造成电池及充电器损坏。
5.故障提示当滑板出现故障时,蜂鸣器会发出连续“嘀”声报警:此时严禁继续使用,为了避免造成不必要的损失,建议有相关知识的技术人员对本产品开盖维修。
维护保养1.不要将滑板车存放在潮湿的地方,长时间不使用时建议每两个月对电池进行一次充电,以保电池的使用寿命。
2.尽量避免雨天使用,以免电路系统进水造成电器原件损坏。
驾驶步骤将滑板车平放于地面,短按电源开关,此时电量显示灯亮起,车内蜂鸣器发出“嘀”声。
FreeWalker自由行电动独轮车说明及新手教程
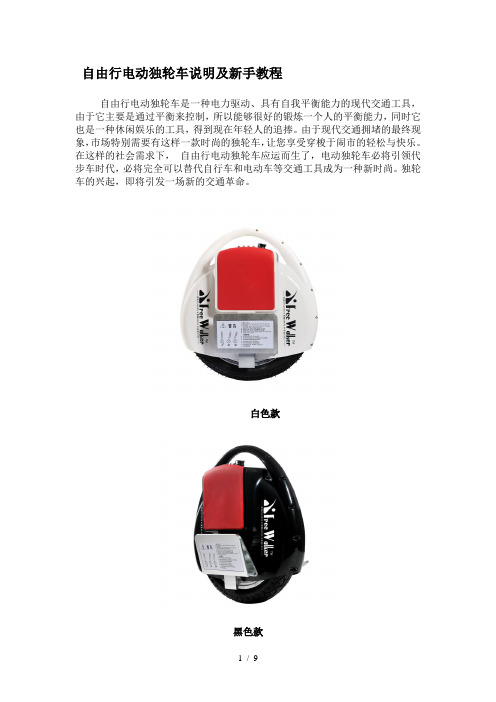
自由行电动独轮车说明及新手教程自由行电动独轮车是一种电力驱动、具有自我平衡能力的现代交通工具,由于它主要是通过平衡来控制,所以能够很好的锻炼一个人的平衡能力,同时它也是一种休闲娱乐的工具,得到现在年轻人的追捧。
由于现代交通拥堵的最终现象,市场特别需要有这样一款时尚的独轮车,让您享受穿梭于闹市的轻松与快乐。
在这样的社会需求下,自由行电动独轮车应运而生了,电动独轮车必将引领代步车时代,必将完全可以替代自行车和电动车等交通工具成为一种新时尚。
独轮车的兴起,即将引发一场新的交通革命。
白色款黑色款基本配置电机组德国电机组分贝超静音磁悬浮动动力技术美国宇航局专用陀螺仪自动行走纠偏及时位微控制器电池组正品原装三星芯片组毫安支持快速充电次电充寿命全国联保天易损固件维修服务,一年保修服务具体技术配置如下:新手使用教程近几年,遍布在公园和大马路上的户外不再仅仅局限于滑板和轮滑,一种叫做" 自由行"的独轮电动车逐渐流行开来,由于自由行无需耗费人力驱动,只需微微倾斜身子就可以得到前进和拐弯动力的优势,越来越被各年龄段的人们的喜爱。
自由行也日渐成为一种新颖轻便的代步工具。
独轮电动车照片由于自由行的种种优势,有不少想要尝试新鲜事物的人们跃跃欲试,在这里小编要告诉大家,独轮电动车( 自由行)虽然好玩,但是对于新手来说还是需要一段时间来熟悉和掌握的,学习独轮车就像一开始学习骑自行车一样,需要身体的协调和适应,为了帮助广大新手朋友们更好的学习如何使用自由行,小编在这里为大家整理总结了详细的使用步骤,下面就跟小编一起来学习吧。
第一步:接通电源、一只手抓住独轮电动车顶部的把手,讲电动车直立在平坦的地面上,并将电动车的两只脚踏板展开;、轻轻按一下电源开关键,这时绿色指示灯亮起,表示开机成功;开关示意图、如果发现绿灯未亮,而红灯亮了,那此时建议您不要尝试骑行,需要将车子进行充电;电源指示灯、通电后先新手朋友们先不要立即上车,应该先抓住把手尝试沿着轮子放心前进和后退几次,感受和适应一下加速和减速的力度。
风雷翼独轮平衡车使用说明
风雷翼智能平衡车使用手册本手册包含有重要的安全使用说明,在您首次使用前请务必仔细完整阅读.目录1简介2产品结构3 产品参数4驾驶注意5使用说明6充电7维护保养8 保修1简介电动独轮车是新一代节能、环保、便携的代步工具。
独轮车适于每日通勤使用或者周末时作为一项休闲运动。
陀螺仪传感器控制平衡,电动机驱动。
使用者把脚分别放在轮子两侧的折叠式踏板上以后,轻轻向前倾斜身体是前进,向后倾斜是停止,向左和向右倾斜身体是转弯。
身体向前倾斜的越厉害,速度就越快,车内的一系列回旋装置确保它能很好地保持平衡。
小巧、携带方便,直接可以放进汽车的后备箱,提到家里或是办公室。
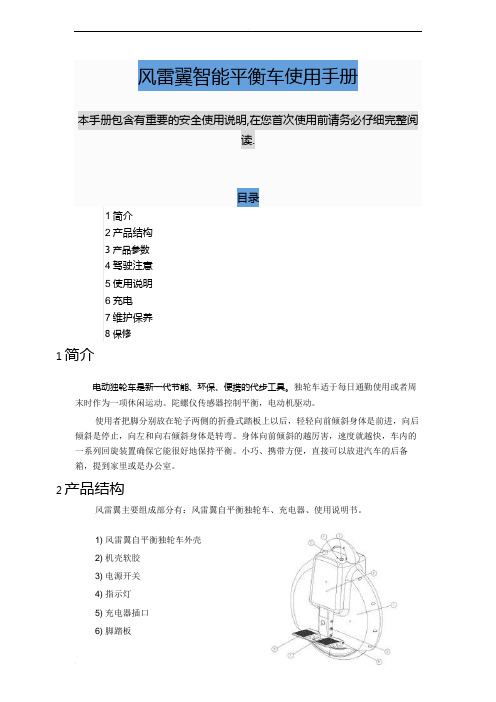
2产品结构风雷翼主要组成部分有:风雷翼自平衡独轮车、充电器、使用说明书。
1) 风雷翼自平衡独轮车外壳2) 机壳软胶3) 电源开关4) 指示灯5) 充电器插口6) 脚踏板7) 脚踏板固定磁块8) 脚踏板安装轴9) 固定螺丝3产品参数注意事项1. 利用辅助轮安全学习驾驶2 当在驾驶过程中失去平衡、不得不跳下车的时候。
3 风雷翼自平衡独轮车是利用陀螺仪进行前后稳定的。
当身体前倾,独轮车会感知到动作进行加速;当身体后仰,平衡独轮车也会控制电机减速以维持驾驶者与车体的平衡。
自平衡独轮车不能帮助左右平衡,就像是骑自行车一样,需要靠一定的速度和身体来控制左右平衡。
准备工作1. 选择适合的场地:请在平坦、空旷、无机动车、人少的场地进行试车。
2. 检查车辆:驾驶前需要检查电力是否充足、摇动车辆是否有异响和松动、手动推行风雷翼自平衡独轮车看车轮是否与外壳产生摩擦。
3. 最好可以找一位朋友一起学习骑行,可以提供协助,会对更快的掌握骑车技巧有帮助。
4. 参考驾驶步骤,开始学习。
7使用说明骑行风雷翼自平衡独轮车一共分为5步。
仔绅阅读并按照说明书指示开始学习,在前一步尚未掌握之前,不要轻易尝试后面的步骤。
这样会有利于更快,更扎实的掌握骑行的基本技巧。
接通电源1) 一只手抓住把手,将风雷翼自平衡独轮车直立于地面,并将两个脚踏板展开。
电动独轮车使用教程

板圣电子的自平衡独轮车的使用教程,技巧
充电之后,按照以下几个步骤操作:
1.抓住自平衡独轮车的手柄,打开电源。
2.打开踏板,把它平放。
3.右脚先上车,往前一两步,左脚上车。
4.开始的时候不要前倾太多。
前半脚掌稍微用力,车子便会向前。
5.把你的重力放到后脚掌,车子便会往后或者停下。
6.左脚稍微用力,往左拐弯。
同理,向右。
记住:刚开始使用的时候不要太过用力,轻微的力气,轻微的身体姿势的改变,车子就可以运动。
循序渐进。
你肯定可以掌握自平衡独轮车的技巧的。
:)you are the master of you unicycle.。
Folding Electric Bike BIKEeb5 Pro Plus用户手册说明书

USER MANUALIn order to continue serving our customers and providing the best products, our product information including our user manuals may receive updates from time to time. Please check our website for the latest user manuals and product materials.Ver. 1.0 8/6/19F O L D I NG E L E C T R I C B I K Ee b 5 p r o p l u sPROTECT YOUR DOME HELMETS SA VE LIVESHelmets can reduce 85% of critical head injuries.Elbow pads can reduce 82% of elbow injuries.Knee pads can reduce 32% of knee injuries.From https:///pubmed/2716781Always wear proper protective gear when riding. This includes knee and elbow pads and an age-appropriate helmet.• Helmets should fit comfortably and snugly, covering the forehead butnot hindering your field of vision.• The helmet should have a chin strap and buckle to keep the helmet inplace.• The helmet should be made out of a hard, protective outer shell andan impact-absorbing inner layer at least 1/2-inch thick.• The helmet should be approved by the U.S. Consumer Product SafetyCommission (CPSC), the Snell Memorial Foundation, or the AmericanSociety for Testing and Materials (ASTM).Thank you for your purchase of the EB5 Pro Plus eBike by SWAGTRON®!You’re about to take the next step in the evolution of transportation. The EB5 Pro Plus takes the fun of a traditional bike, adds an electric boost, and tops it off with an extra bit of swag.To ensure your safety and the safety of others, please read and follow the guidelines in this user manual carefully and thoroughly before riding.If you have any questions regarding your eBike, contact us at 1-844-299-0625 for further assistance.Happy Riding!-The SWAGTRON® TeamTable of ContentsPRODUCT SAFETY NOTICE (1)Section 1. General Information (3)1.1 About the SWAGTRON® EB5 Pro Plus eBike (3)1.2 What’s In the Box? (4)1.3 Diagram (5)Section 2. Assembling the Head (6)Section 3. Folding, Unfolding & Adjusting Your EB5 Pro Plus eBike (7)3.1 Unfolding the Head Tube & Frame (7)3.2 Unfolding & Folding the Pedals (8)3.3 Folding the Head Tube (8)3.4 Folding the Frame (9)3.5 Adjusting the Handlebars (9)3.6 Adjusting Handlebar Height (10)3.7 Adjusting Seat Height (10)Section 4. Charging Your EB5 Pro Plus eBike (11)Section 5. How to Ride (14)Section 6. Safe Riding Techniques & Tips (15)6.1 Disposal at End-of-Life ....................................16Section 7. Maintenance . (17)7.1 Tire Inflation (17)7.2 Cleaning (18)7.3 Storage (18)7.4 Transportation (19)Section 8. Specifications (20)1 Year Limited Hardware Warranty (21)PRODUCT SAFETY NOTICEThe SWAGTRON® EB5 Pro Plus eBike has been designed with the utmost safety in mind for its riders. Extraprecautions have been taken to protect the user from product hardware malfunctions through our meticulous designand engineering.However, like any mode of transportation, the SWAGTRON® EB5 Pro Plus eBike has inherent hazards associated withits use (e.g.: losing control, falling off, or riding into a hazardous situation). Be sure to read and follow all instructionsand safety recommendations in this user manual prior to and when riding your eBike.Before each ride, especially if you may travel a long distance, inspect your bike. First, check the tires for properinflation and cracks on the walls of the tires. Keeping the tires properly inflated and maintained will help preventflats and damage. Second, check all cables and cable housings for fraying, breaks, rust, or corrosion and replace if necessary. Lastly, inspect the brakes to make sure they are working properly. Additionally, check the brake pads forany damage as they will wear over time and eventually need replacement.If a replacement of the brake pads or any other part is needed, please contact customer support for replacement service. In general, it is recommended to make sure all nuts and bolts are taut and properly fastened to preventinjury and unnecessary wear and tear on your eBike.1ENGLISH SWAGTRON EB5 Pro Plus Electric Bike2SWAGTRON EB5 Pro Plus Electric BikeBy riding the SWAGTRON ® EB5 Pro Plus eBike, the user acknowledges and accepts personal responsibility of all risks associated with the use of the SWAGTRON ® EB5 Pro Plus eBike, which may include, but are not limited to, muscle injuries, broken bones, lacerations, or serious injury that may be sustained while using the SWAGTRON ® EB5 Pro Plus eBike.Section 1. General InformationThis user manual will guide you through the functions and usage of your SWAGTRON® EB5 Pro Plus eBike. Before operating this device, read all the instructions for safe assembly, charging, and usage.Please inspect your EB5 Pro Plus upon unpacking for any signs of physical damage or defects. Additionally, ensure that the eBike is fully charged before calibrating and using. For charging instructions, see Section 3. If you have questions, contact SWAGTRON® customer service.1.1 About the SWAGTRON® EB5 Pro Plus eBikeThe EB5 Pro Plus Folding Electric Bike is a compact, zero-emissions, personal transportation device that feels like a bike but rides like a moped! It's environmentally-friendly and uses only the highest quality components and industry-leading safety features.• Riding speeds up to 15.5 mph• Rechargeable, portable, and reliable•Eco-friendly and all-electric with zero emissions3ENGLISH SWAGTRON EB5 Pro Plus Electric BikeUser Manual x 1SWAGTRON ®EB5 Pro Plus Electric Bike x 1Charging Cable & Adapter x 14SWAGTRON EB5 Pro Plus Electric Bike1.2 What’s In the Box?• 1 x SWAGTRON ® EB5 Pro Plus eBike • 1 x Charging Cable & Adapter •1 x User Manual1.3 Diagram5ENGLISH SWAGTRON EB5 Pro Plus Electric BikeSection 2. Assembling the Head ArrayStep 1. Pull the head tube upright, and fold the latch upand use the lock to close it. It will snap into place(1).Step 2. Open the head clamp on top of the head tube.Step 3. Insert the stem into the head tube, pull it upor down to adjust the height of the head to adesired place.Step 4. Close the head clamp to fix the stem onto thehead tube (2).6SWAGTRON EB5 Pro Plus Electric BikeSection 3. Folding, Unfolding & Adjusting Your EB5 Pro Plus eBike Be careful not to position your fingers between the latch and the frame. Doing so may result in injury.3.1 Unfolding the Head Tube & FrameStep 1. Unfold the rear wheel / section and hold your eBike upright with the kickstand.3.2 Unfolding & Folding the PedalsHolding the crank arm vertical, fold or unfold the pedal. Repeat with the otherpedal as needed (6).3.3 Folding the Head TubeWith the latch undone, fold the head tube and handlebars down against the front wheel (8).3.6 Adjusting Handlebar HeightFor more comfortable riding, handlebar height may be adjusted.•Open the clamp on the head tube (11). Pull up or push down the stem to adjust the height, then close the latch to secure the tube andhandlebars.3.7 Adjusting Seat HeightFor better pedaling, safety, and overall comfort, positioning the seat at the right height is key. The rider’s leg length is used to determine the seat’s position. During pedaling, your hips should remain level and your legsshouldn't over-extend. To determine the right seat height, sit on the eBikeIf your knee bends slightly at this position, the seat is at the right height. Additionally, when placing your heel on the pedal, your leg should be nearly straight.First, open the clamp under the seat post. Pull the seat up or push it down tothe head of the seat is parallel with the frame. Lastly, close the clamp to secure the seat in place (12).Section 4. Charging Your EB5 Pro Plus eBikeEnsure the eBike is turned off before charging and remains off while charging.Step 1. Connect the charging adapter and cable together then remove the rubber stopper covering the charging port.Step 2. Insert one end of the charging cable into the charging port and connect the other end to a wall outlet.Step 3. Allow at least 5 hours when charging for the first time. After this initial charge, average charging time is 4-5 hours.Step 4. While the eBike is charging, the adapter's indicator light will turn red.Step 5. When the eBike is fully recharged, the adapter's indicator light will turn green. You may then disconnect the eBike from the charger.Safety tips for charging your battery:•Fully charge the battery before your first use, this may take up to 5 hours.•To maximize the life of the battery, you must charge it after each riding session.•When not in active use, please charge at least once a month to maintain optimal battery levels.•Perform periodic visual inspection of the charging ports and charger cables.•When the battery is fully charged, please STOP CHARGING and unplug the unit.•Keep your charging environment clean and dry at all times.•If the charging port is damp or has any liquid on it, do not charge your eBike.•In order for the battery to operate at maximum efficiency, avoid charging your eBike in extremely hot or extremely cold environments.•Use only the battery and charging cable provided to you by SWAGTRON®, use of third party products may compromise the battery and damage the eBike. If a replacement is needed, please contact SWAGTRON® directly.DO NOT charge the battery in the following cases:•There is excessive odor or heat.•Leakage or physical damage.•the power is on.••••Section 6. Safe Riding T echniques & TipsFollowing these techniques and tips can ensure you have a safe, fun riding experience on the EB5 Pro Plus Electric Bike. Check to make sure your brakes are fully intact, pedals are securely installed, and handlebars are locked in place.• Always wear an ASTM F1492 approved helmet and protective gear to avoid possible injury.• Make sure your feet are always on the pedals. Taking your feet off the pedals while riding is dangerous.• Ensure the battery is fully charged especially if you plan to travel long distances.• Ensure your tires are intact with no punctures.• Ensure the vehicle speed is safe to yourself and others, and be ready to stop at any time.• When riding with friends, keep a safe distance from fellow riders to prevent collisions.• Be aware of your surroundings at all times to ensure a safe ride. Your eyes are your best tools for safely avoiding obstacles and slippery surfaces.• Stay in open spaces and flat areas. Avoid steep slopes or high-traffic areas until you're familiar and comfortable with riding the EB5 Pro Plus.• Only ride the eBike where permitted. You MUST comply with local laws and give way to pedestrians.• Never ride at high speeds, uneven terrain, or steep slopes.• Never perform stunts with the EB5 Pro Plus.• Never turn abruptly without first checking your surroundings.• Never carry passengers on the eBike with you.• Never carry heavy items while riding.• Never ride in the rain.•Never use the eBike to do anything that may cause personal injury or property damage.•Never get off the eBike when it is in motion.FAILURE TO USE COMMON SENSE AND HEED THE ABOVE WARNINGS INCREASES THE RISK OF SERIOUS INJURY OR, IN VERY RARE CASES, DEATH. USE WITH APPROPRIATE CAUTION AND SERIOUS ATTENTION TO SAFE OPERATION.For more safe riding tips or information, visit .6.1 Disposal at End-of-LifeThis product must not be disposed of by incineration, landfilling, or mixing with household trash. Improper disposal of the battery contained within this product may result in the battery heating up, rupturing, or igniting which may cause serious injury. The substances contained inside the battery present chemical risks to the environment. The recommended disposal for any SWAGTRON® product at its end-of-life is to dispose of the entire unit at or through an e-waste recycling center, program, or facility. Local regulations and laws pertaining to the recycling and disposal of lithium-ion batteries and/or products containing them will vary according to country, state, and local governments. You must check laws and regulations corresponding to where you live in order to properly dispose of the battery and/or unit. It is the user’s responsibility to dispose of their waste equipment properly with accordance with local regulations and laws.For additional information about where you should drop off your batteries and electrical or electronic waste, please contact your local or regional waste-management office, your household waste disposal service, or your point-of-sale.Section 7. Maintenance•Do not perform any kind of maintenance while the eBike is charging.• Attempting to repair or modify your eBike can void all warranties. Only authorized repair centers may open and service the eBike.If you need assistance, please contact SWAGTRON®*****************************.7.1 Tire InflationStep 1. Ensure the eBike is powered off and stable, so it doesn’t move during inflation.Step 2. Visually inspect the tires for damage, scuff, or puncture marks. If the tire is damaged, DO NOT INFLATE IT.Contact customer service immediately.Step 3. Find the valve located on the inside of the wheel and remove the cap.Step 4. Use a standard bicycle pump to pump air to the tires slowly.Step 5. Use the pressure gauge periodically to check PSI.Step 6. When the tire reaches 35-45 PSI/2.4-3.1BAR, stop inflating and replace the valve cap.Step 7. Repeat with other tire.•Any PSI marking on the tires indicates a maximum. DO NOT inflate the front tire to this value, only inflate it to 45 PSI as directed above.•Under inflation is strongly recommended if you intend to ride outdoors in temperatures above 90°F. In such conditions, bring the EB5 Pro Plus indoors and deflate the tires by 3-5 PSI. If the PSI is too high andthe tire are exposed to excessively high temperatures, riding outdoors may cause serious damage to thetire including but not limited to stretching and/or rupturing.7.2 CleaningProper cleaning of your eBike can guarantee a longer lifespan and a smooth riding experience.•Wipe the outer body of your eBike with a soft, dry microfiber cloth.•Check around the wheels and ensure there is no blockage.•The eBike meets IPX4 water-resistance, meaning it can withstand splashes; however, do not submerge the eBike in water.•Do not let water and liquids get into the eBike’s electric parts or battery.7.3 StorageBelow are some tips to consider when storing your SWAGTRON® EB5 Pro Plus Electric Bike.•Before storing, fully charge the eBike to prevent battery over-discharge due to non-use.•If storing the eBike for more than one month, discharge and recharge the battery at least once a month.•Cover the eBike to keep dust out. Do not store in a dusty environment as this may cause damage over time.7.4 TransportationBefore moving, lifting, or otherwise transporting the eBike, turn it off and fold it. Note, the eBike weighs approximately 37 lbs. Lift the eBike with both arms or otherwise gain the assistance of someone who may handle the weight without trouble.Lithium-ion batteries are considered hazardous materials; therefore, transportation is governed by federal, state, and local laws.International law prohibits the shipping of bare lithium-ion batteries. If you are shipping yourSWAGTRON® EB5 Pro Plus Electric Bike, you must ship it with the battery installed.Section 8. Specifications1-Year Limited Hardware WarrantyYour SWAGTRON® EB5 Pro Plus E-Bike (“Product”) includes a One-Year Limited Hardware Warranty (“Warranty”). The Warranty covers product defects in materials and workmanship under normal use. This Warranty is limited to residents of the United States and Canada only and is available only to original purchasers. This Warranty gives you specific legal rights and you may also have other rights which vary from state to state.This Warranty starts on the date of your purchase and lasts for one (1) year (the “Warranty Period”). The Warranty Period is not extended if the Product is repaired or replaced. We may change the availability of this limited warranty at our discretion, but any changes will not be retroactive.Warranty services are provided by SWAGTRON®. If a hardware defect arises and a valid claim is received withinthe Warranty Period, at its option and to the extent permitted by law, SWAGTRON® will: (1) repair the hardware defect by using new or refurbished parts that are equivalent to new in performance and reliability; or (2) exchange the Product with a product that is new or refurbished which is substantially equivalent to the original product.This Warranty is for one replacement only of like-items and does not cover items out of production if the productis no longer made or stocked. This Warranty is not assignable or transferable. The original purchaser may call SWAGTRON’s toll-free number at 1-844-299-0625 for service request.When a product or part is exchanged, any replacement item becomes your property and the replaced item becomes SWAGTRON®’s property. This warranty only covers technical hardware defectiveness during the warranty period and under normal use conditions. SWAGTRON® does not warrant uninterrupted or error-free operation of this Product. Return shipping shall only be provided for Products dead on arrival (“DOA”) within thirty (30) days of purchase only. All other returns/repairs shall require payment of shipping cost at discounted rate to be determined as follows:SWAGTRON® E-bikes shall be Twenty Dollars ($20)****shipping prices are subject to change without further notice.This Warranty does not cover any damage due to: (a) transportation; (b) storage; (c) improper use; (d) failure to follow the product instructions or to perform any preventive maintenance; (e) modifications; (f) unauthorized repair;(g)normal wear and tear (including but not limited to wearables and other consumable parts such as tires); or (h) external causes such as accidents, abuse, or other actions or events beyond our reasonable control.Important: Do not disassemble the Product. Disassembling the Product will void this Warranty. Only SWAGTRON® or a party expressly authorized by SWAGTRON® should perform service on this Product.DISCLAIMER OF WARRANTY: THE REMEDIES DESCRIBED ABOVE ARE YOUR SOLE AND EXCLUSIVE REMEDIES AND OUR ENTIRE LIABILITY FOR ANY BREACH OF THIS LIMITED WARRANTY. OUR LIABILITY SHALL UNDER NO CIRCUMSTANCES EXCEED THE ACTUAL AMOUNT PAID BY YOU FOR THE DEFECTIVE PRODUCT, NOR SHALL WE UNDER ANY CIRCUMSTANCES BE LIABLE FOR ANY CONSEQUENTIAL, INCIDENTAL, SPECIAL OR PUNITIVE DAMAGES OR LOSSES, WHETHER DIRECT OR INDIRECT.SOME STATES DO NOT ALLOW THE EXCLUSION OR LIMITATION OF INCIDENTAL OR CONSEQUENTIAL DAMAGES, SO THE ABOVE LIMITATION OR EXCLUSION MAY NOT APPLY TO YOU.SOME STATES DO NOT ALLOW THE EXCLUSION OR LIMITATION OF INCIDENTAL OR CONSEQUENTIAL DAMAGES, SO THE ABOVE LIMITATION OR EXCLUSION MAY NOT APPLY TO YOU.COPYRIGHT © 2019 SWAGTRON.ALL RIGHTS RESERVED.。
Mitsubishi Forklift MCA Series 电动货车说明书
1 000 – 1 500KG @ 600MMC1.0, C1.3, C1.5VNA MAN-UP TRUCKS1.1 Manufacturer (abbreviation) 1.2 Manufacturer’s type designition1.3 Drive: electric (battery or mains), diesel, petrol, fuel gas 1.4 Operator type: hand, pedestrian, standing, seated, order-picker 1.5 Rated capacity / rated load Q (t)1.6 Load centre distancec (mm)1.8 Load distance, centre of drive axle to fork x (mm)1.9 Wheelbase y (mm)2.1 Service weightkg 2.2 Axle loading, laden front/rear kg 2.3 Axle loading, unladen front/rearkg 2.4 Axle loading, fork advanced, laden front/rear kg 2.5 Axle loading, fork retracted, laden front/rear kg3.1 Tyres: polyurethane, topthane, vulkollan, front/rear 3.2 Tyre size, front 3.3 Tyre size, rear3.5 Wheels, number front/rear (x = driven wheels) 3.6 Tread, front b 10 (mm)3.7 Tread, rearb 11 (mm)5.1 Travel speed, laden/unladen km/h 5.2 Lift speed, laden/unladen m/s 5.3 Lowering speed, laden/unladen m/s 5.4 Reaching speed, laden/unladen m/s 5.7 Gradeability, laden/unladen %5.10 Service brake6.1 Drive motor S2 60 minute ratingkW 6.2 Lift motor S3 15% rating Ò kW6.3 Battery according to DIN 43531/35/36 A,B,C, no 6.4 Battery voltage/nominal capacity K5 (V)/(Ah)6.5 Battery weight n K g6.6 Energy consumption according to VDI cyclekWh/h at number of cycles8.1 Type of drive unit 10.1 Operating pressure for attachments bar 10.2 Oil volume for attachmentsl/min 10.7Sound pressure level at the driver’s seatdB (A)4.2 Height, mast lowered h 1 (mm)4.3 Free lift h 2 (mm)4.4 Lifth 3 (mm)4.5 Height, mast extendedh 4 (mm)4.7 Height of overhead guard (cabin) h 6(mm)4.8 Seat height relating to SIP/stand height h 7 (mm)4.11 Additional Lift h 10 (mm)4.14 Stand height, elevated h 12 (mm)4.15 Height, loweredh 13 (mm)4.19 Overall length J l 1 (mm)4.20 Length to face of forks s l 2 (mm)4.21 Overall widthb 1/b 2 (mm)4.22 Fork dimensions DIN ISO 2331 s/e/l (mm)4.23 Fork carriage ISO 2328, class/type A, B 4.24 Fork-carriage widthb 3 (mm)4.25 Distance between fork-arms b 5 (mm)4.27 Width across guide rollers b 6 (mm)4.29 Reach, lateralb 7 (mm)4.31 Ground clearance, laden, below mast m 1 (mm)4.32 Ground clearance, center of wheelbase m 2 (mm)4.34.2 Aisle width for pallets 800mm x 1200mm lengthwise A st (mm)4.35 Turning radiusW a (mm)4.38 Distance to swiveling-fork pivot l 8 (mm)4.39 Length rotator arm n (mm)4.40 Width traverse frame B (mm)4.41 Lost rotator widthF (mm)4.42 Transfer aisle width pallet 1200 x 1200 mm Au (mm) C1.0 C1.3 C1.3 80 Electric (Battery) Electric (Battery) Electric (Battery)Seated / StandingSeated / Standing Seated / Standing 1 1.362 1.362 600 600 600 HYSTER HYSTER HYSTER6276 ]6701 ]6701 ]5590 ] 1886 ] 5874 ] 2127 ] 5874 ] 2127 ] 3796 ] 2480 ] 3987 ] 2714 ] 3987 ] 2714 ] TBD TBD TBD TBD TBD TBD TBD TBDTBD TBDTBD TBDpolyurethane/polyurethane polyurethane/polyurethane polyurethane/polyurethane 350 x 140 350 x 140 350 x 140400 x 160400 x 160400 x 1602 1(x)2 1(x) 2 1(x)1080 - 1285 - 1435 - 15851080 - 1285 - 1435 -15851080 - 1285 - 1435 - 15850 0 0 9.9 10 10.4 10.5 10.4 10.5 0.33 0.42 0.33 0.42 0.36 0.42 0.50 0.50 0.50 0.50 0.60 0.60 0.19 0.20 0.19 0.20 0.19 0.20 6 6 6electric / mechanicalelectric / mechanical electric / mechanical 7.5 7.5 8 2 x 122 x 122 x 15DIN BDIN C DIN C no DIN B DIN C no no DIN A 48/560 48/560 48/700 48/625 48/700 48/840 48/930 48/1085 80/420950 1000 13001400 1360 13601360on requeston requeston requestAC - MOSFET AC - MOSFET AC - MOSFET150 150 150 6 6 6< 70< 70< 70see table (mast 2 stg) see table (mast 2/3 stg) see table (mast 2/3 stg) - - -see table (mast 2 stg) see table (mast 2/3 stg) see table (mast 2/3 stg) see table (mast 2 stg)see table (mast 2/3 stg)see table (mast 2/3 stg)see table see table see table 425 425 4251980 - 2140 - 2720 - 30001980 - 2140 - 2720 - 30001980 - 2140 - 2720 - 3000see table see tablesee table80 80 803538 (6)3698 F (6) 3698 F (6)4484 F 4644 F 4644 F1220 / 1220 - 1425 -1575 - 17251220 / 1220 - 1425 -1575 - 17251220 / 1220 - 1425 -1575 - 172545 / 100 / 1200 u45 / 100 / 1200 u45 / 100 / 1200 uNo No No 720 720 720 508 ÷ 720 508 ÷ 720 508 ÷ 720 1275 - 1475 - 1625 - 1775 1275 - 1475 - 1625 - 1775 1275 - 1475 - 1625 - 1775990 - 1190 - 1340 - 1490990 - 1190 - 1340 - 1490990 - 1190 - 1340 - 1490100 100 100 75 75 75 1600 † 1600 † 1600 †2100 2250 22501101 F r 1101 F r 1101 F r 670 670 6701200 - 1400 - 1550 - 17001200 - 1400 - 1550 - 17001200 - 1400 - 1550 - 1700210 210 2104140 F 4295 F 4295 F D I S T I N G U I S H I N G M A R K SW E I G H T ST Y R E S / C H A S S I SD I ME N S I O N SP E R F O R M A N C E D A T AE L E C T R I C E N G I N ED R I VE T R A I N M E C H A N I S MA D D I T I O N A LD A T ASpecification data is based on VDI 2198C1.0, C1.3, C1.3 80, C1.3 L, C1.5 S, C1.5 M, C1.5 L7034 ]7170 ]7685 ]7921 ]2.16060 ] 2274 ] 6324 ] 2346 ] 6587 ] 2598 ] 6699 ] 2722 ] 2.2 4196 ] 2838 ] 4205 ] 2965 ] 4488 ] 3197 ] 4642 ] 3279 ] 2.3 TBD TBD TBD TBD TBD TBD TBD TBD 2.4 TBD TBDTBD TBDTBD TBDTBD TBD 2.5polyurethane/polyurethane polyurethane/polyurethane polyurethane/polyurethane polyurethane/polyurethane 3.1 350 x 140 350 x 140 350 x 140 350 x 140 3.2 406 x 178 406 x 178406 x 178406 x 178 3.3 2 1(x) 2 1(x) 2 1(x) 2 1(x) 3.51080 - 1285 - 1435 - 15851080 - 1285 - 1435 - 15851080 - 1285 - 1435 - 15851080 - 1285 - 1435 - 15853.60 0 0 0 3.7 10.4 10.5 10.4 10.5 10.4 10.5 10.4 10.5 5.1 0.33 0.42 0.35 0.4 0.35 0.4 0.35 0.4 5.2 0.50 0.50 0,60 0,60 0,60 0,60 0,60 0,60 5.3 0,19 0,20 0,19 0,20 0,19 0,20 0,19 0,20 5.4 6 6 6 6 5.7electric / mechanicalelectric / mechanical electric / mechanical electric / mechanical5.107.5 8 8 8 6.12 x 122 x 15 2 x 15 2 x 156.2 nononononono DIN A DIN A no no DIN Ano nono6.348/875 48/1000 48/1085 48/1240 72/625 72/775 80/560 80/700 72/750 72/780 80/840 72/875 72/1000 72/1240 6.4 1400 1640 1580 1792 815 855160019009409671900 1070 1253 1320 6.5on requeston request on requeston request6.6150 150 150 150 10.1 6 6 6 6 10.2< 70< 70< 70< 7010.3AC - MOSFET AC - MOSFET AC - MOSFET AC - MOSFET 8.1see table (mast 2/3 stg) see table (mast 2/3 stg) see table (mast 2/3 stg) see table (mast 2/3 stg) 4.2 - - - - 4.3see table (mast 2/3 stg) see table (mast 2/3 stg) see table (mast 2/3 stg) see table (mast 2/3 stg) 4.4 see table (mast 2/3 stg)see table (mast 2/3 stg)see table (mast 2/3 stg)see table (mast 2/3 stg)4.5 see table see table see table see table 4.7 425 425 425 425 4.81980 - 2140 - 2720 - 30001980 - 2140 - 2720 - 30001980 - 2140 - 2720 - 30001980 - 2140 -2720 - 30004.11see tablesee tablesee tablesee table4.1480 80 80 80 4.15 3818 F l r 3818 F l r 3948 l r 4143 l r 4.19 4764 F 4764 F 4894 l 5089 l 4.20 1220 / 1220 - 1425 -1575 - 17251220 / 1220 - 1425 -1575 - 17251220 / 1220 - 1425 -1575 - 17251220 / 1220 - 1425 -1575 - 17254.2145 / 100 / 1200 u45 / 100 / 1200 u45 / 100 / 1200 u45 / 100 / 1200 u 4.22No No No No 4.23 720 720 720 720 4.24 508 ÷ 720 508 ÷ 720 508 ÷ 720 508 ÷ 720 4.25 1275 - 1475 - 1625 - 1775 1275 - 1475 - 1625 - 1775 1275 - 1475 - 1625 - 1775 1275 - 1475 - 1625 - 1775 4.27990 - 1190 - 1340 - 1490990 - 1190 - 1340 - 1490990 - 1190 - 1340 - 1490990 - 1190 - 1340 - 14904.29100 100 100 100 4.31 75 75 75 75 4.32 1600 † 1600 † 1600 † 1600 † 4.34.2 2370 2370 2495 2685 4.35 1101 F r 1101 F r 1101 l r 1101 l r 4.38 670 670 670 670 4.391200 - 1400 - 1550 - 17001200 - 1400 - 1550 - 17001200 - 1400 - 1550 - 17001200 - 1400 - 1550 - 17004.40210 210 210 210 4.41 4410 F 4410 F 4540 l 4735 l 4.42WEIGHTS TYRES / CHASSISDIMENSIONSPERFORMANCE DATAELECTRIC ENGINEADDITIONALDATADRIVETRAINMECHANISM3 STAGE TRI-FORM MAST3 STAGE QUAD-FORM MASTAUXILIARY MINI MAST OPTIONSMODELFLh9OALH, h6(Mini Mast)Delta HExt Ht W/h3 = 0h6’Delta h6Delta h9h6’ - h6Delta h4’Delta h4MiniMast CLMFHHOALH h1OALH h6(Mini Mast)FL h9ML h3Ext Ht W/LBRX h4’Ext Ht h4Platform Hth126945 2990 3020 1980 4890 7947 7910 5315 7695 3240 3020 1980 5640 8697 8660 6065 8445 3490 3020 1980 6390 9447 9410 6815 9195 3740 3020 1980 7140 10197 10160 7565 9945 3990 3020 1980 7890 10947 10910 8315 10695 4240 3020 1980 8640 11697 11660 9065 11445 4490 3020 1980 9390 12447 12410 9815 12195 4740 3020 1980 10140 13197 13160 10565 12945 4990 3020 1980 10890 13947 13910 11315 13695 5240 3020 1980 11640 14697 14660 12065 15945 5990 3020 1980 13890 16947 16910 143151980 3020 0 3057 0 0 37 0 0 2950 2140 3020 160 3217 0 160 197 197 0 2950 2720 3585 740 3797 565 740 212 777 565 3515 3000 3865 1020 4077 845 1020 212 1057 845 3795mm mm mm mm mm mm mm mm mm mm mm mm mm mm mm mm mm mm C1.5 MWB C1.5 LWBTRUCK DIMENSIONSNOTE:Specifications are affected by the condition ofthe vehicle and how it is equipped, as well asthe nature and condition of the operating area.If these specifications are critical, the proposedapplication should be discussed with your dealer.]Values for T ruck type / Mast heightF+76mm for 3 stage mast with “n” = 670(C1.0, C1.3, C1.380, C1.3L WB, C1.5SWB)l+150mm for 3 stage mast with “n”=670mm (C1.5MWB, C1.5L WB)u Available fork length800 - 1000 - 1066 - 1200 mm† Ast : load dimension functionr-100mm for “n” = 570 mmG Au = R + Wa + 200 mmJ Forks nesteds Forks forward = 1200 fork lengthn These values may vary of +/- 5%ÒValue referred to S3 25%All values are nominal values and they aresubject to tolerances. For further information,please contact the manufacturer.NOTICECare must be exercised when handlingelevated loads. When the carriage and/or loadis elevated, truck stability is reduced. It isimportant that mast tilt in either direction bekept to a minimum when loads are elevatedOperators must be trained and adhere to theinstructions contained in the Operating Manual.Hyster products are subject to change without notice.Lift trucks illustrated may feature optional equipment.Values may vary with alternative configurations.Safe ty:This truck conforms to the current EU requirements.6DEPENDABILITYn C1.0-1.5 have been through over intense test cycles, including stress analysis, endurance, thermal andstability tests, as well as field tests in multiplecustomer applications.n P atented QUAD-form mast design gives increased rigidity and torsional strength.n N o need for additional support or bracing due to Hyster mast design.PRODUCTIVITYn30 kW / 80 V motors provides industry leading level of performancen M ax flexibility through slim turret head allows the truck to work in very small aislesn I ntegral pantograph on the turret head.n E xcellent fork tip visibility improves handling and controllability.n S tandard load weight sensing calculates speed to height to weight for maximum performance.ERGONOMICSn H yster C-series is designed and built around operator needs, providing comfortable driving experience andmaximum handling efficiency.n P atented seat provides optimal driver comfort: spring-loaded, return to centre, rotating and adjustable to suita wide range of operator weights.n M aximum comfort and leg room through unrivalled cabin space.n F orward-mounted with 3-way adjustable controlsn S eat-side controls, specifically designed for intensive pallet handling environment.n F ully adjustable operator controls, for standing and seated positions.n I nfrared sensors to detect operator presence, avoids the need for continual pressure on a buttonn P atented large foot sensor gives the driver maximum freedom of movement.COST OF OWNERSHIPn S ealed AC motors minimize maintenance.n C ANbus electronic communication and thermal management systems to keep maintenanceto a minimum.n1 000 hrs service intervals.n E fficient energy management system keeps the truck working through extended shifts.n W ide range of truck configurations and options allows customer to select the most productive and costefficient model for any application.SERVICEABILITYn E lectric T ruck AC Control (ETACC) PC-baseddiagnostic tool.n E asy service access speeds up maintenance and improve uptime.n V ehicle System Manager (VSM) delivers diagnostic data to the dash display, anticipating maintenance needs and improving faults diagnisis, as well as aiding correction.PRODUCT FEATURES@fwww.hyster.eu*********************/HysterEurope @HysterEurope/HysterEuropeSTRONG PARTNERS. TOUGH TRUCKS.TMFOR DEMANDING OPERATIONS, EVERYWHERE.Hyster supplies a complete range of warehouse equipment, IC and electric counterbalanced trucks, container handlers and reach stackers. Hyster is committed to being much more than a lift truck supplier.Our aim is to offer a complete partnership capable ofresponding to the full spectrum of material handling issues: Whether you need professional consultancy on your fleet management, fully qualified service support, or reliable parts supply, you can depend on Hyster.Our network of highly trained dealers provides expert,responsive local support. They can offer cost-effective finance packages and introduce effectively managed maintenance programmes to ensure that you get the best possible value. Our business is dealing with your material handling needs so you can focus on the success of your business today and in the future.HYSTER-YALE UK LIMITED trading as Hyster Europe. Registered Address: Centennial House, Building 4.5, Frimley Business Park, Frimley, Surrey, GU16 7SG, United Kingdom.Registered in England and Wales. Company Registration Number: 02636775.HYSTER,and FORTENS are registered trademarks in the European Union and certain other jurisdictions.MONOTROL® is a registered trademark, and DURAMATCH andare trademarks in the United States and in certain other jurisdictions.Printed in Netherlands. Part number: 3990241 Rev05-06/15-TLCHYSTER EUROPECentennial House, Frimley Business Park, Frimley, Surrey, GU16 7SG, England.Tel: +44 (0) 1276 538500。
电动独轮手推车使用方法简介

元裕DL2电动独轮手推车使用方法
电动独轮车手推车主要是用于狭窄路段的运输,对于狭窄路段运输有很大的帮助,适用于工地、田间小路等坡度大、路面窄的地方。
启动发动机
1、关小风门;
2、拉线启动发动机;
3、开大风门,风门是发动机上的黑色旋钮。
4、发动机启动以后,开大手柄上的油门旋钮,手推车就可以开动了。
关闭发动机
1、右手手柄握把是刹车,捏住之后可以刹车,左手手柄握把是礼盒开关,捏住可以挂空挡。
2、调小油门开关,车速逐渐减到0,发动机处于停车怠速状态,这时按一下手柄上的外接熄火开关(开关为红色,DL3型号的没有此开关),发动机就熄火了,此时电动独轮手推车便处于关闭状态。
ips常见问题
常见问题HOME > 独轮车一、如何控制IPS电动独轮车IPS电动独轮车是利用内置的高精密陀螺仪进行前后平衡稳定的,它的左右平衡与我们骑自行车的原理一样要靠一定的速度和您的身体来控制。
当您身体前倾,IPS电动独轮车会感知到您的动作进行加速;当您身体后仰,IPS电动独轮车也会控制电机减速以维持您与车体的平衡。
二、初学者能够正常骑行大概需要多长时间?大部分人可以在1~3天之内学好,每天大概花费2小时左右。
刚学习时,因为重心偏离,会有小腿被磕痛的情况,使用护腿可极大改善。
另外小部分人可能因为平衡感较差而学习较为缓慢,这是正常情况,请多多练习。
购买时建议搭配辅助轮,可以方便自己以及他人体验。
三、IPS电动独轮车的最大续航里程?不同型号的IPS电动独轮车续航里程是不一样的。
F400最大续航里程40Km,I200最大续航里程20Km,IPS101最大续航里程25Km,IPS103最大续航里程10Km。
因为IPS103本身重量较轻,只有10kg,所以建议体重在70kg及以上的用户购买F400或者IPS101。
四、IPS电动独轮车的最高时速是多少?同所有的自平衡车一样,IPS电动独轮车的自平衡能力有限,为了保证您的行驶安全,IPS电动独轮车通过软件限速,控制最高时速在16Km/h。
五、充电时间是多少?电池寿命?IPS电动独轮车的电池容量较高,所以充电时间较长,F400单次完全充满时间为4小时,电池容量较低的型号,充电时间较短。
电池的寿命为完全充放电1500次左右。
为了较好保养您的电池,请充满电后及时关闭电源,请尽量不要通宵充电。
六、快速骑行中IPS电动独轮车的“翘头”现象该如何解决?我们工程师在IPS电动独轮车软件控制中加了限速程序,以保证使用者的安全万无一失。
如果车子的行驶速度在12Km/h左右,他的限速控制软件就会启动,给驾驶者一个微微向后的力量,提醒驾驶者注意行驶速度,所以会让驾驶者感觉有“翘头”的现象。
荆州鑫威电动车使用说明书12.03.24

使用说明书荆州鑫威电动车有限公司JINGZHOU XINWEI ELECTRIC VEHICLE CO.,LTD目录前言 (4)1 质量保证 (4)1.1整车保证 (4)1.2质量保证范围 (4)1.3备件质量保证 (4)2 驾前须知 (5)2.1试车阶段的操作 (5)2.2行车前准备 (5)3 操作与行驶 (5)4 电气系统 (6)5 维护与保养 (8)5.1悬挂与转向系统 (8)5.2驱动系统 (9)5.3制动系统 (9)5.4车轮与轮胎 (10)5.5车身与附件 (11)6 装卸说明 (12)7 售后服务 (13)8 保修期外服务规定 (16)附录A 零部件保修期限 (17)附录B 维修工时定额 (19)附录C 定期保养维护项目卡 (20)前言感谢您购买金洲牌电动车,此说明书目的是对电动车辆的有关使用、操作、检查和保养进行必要介绍。
怎样使您购置的车辆获得最佳效能,是我们和您共同追求的目标,但很大程度取决于您对车辆操作的熟练程度和保养的仔细、深浅。
希望在使用车辆之前,能够通读本说明书,并对其中介绍的操作程序做到得心应手。
本说明书出版时按照当时的电动车结构特点编著的,随着产品不断改进,再版时,本说明书将做相应修订,修订项目恕不做另行通知,请谅解。
任何情况下,请勿以本说明书的数据、插图、说明作为法律依据向本公司提出任何要求。
恳切希望您将在使用该车辆过程中遇到的问题或建议及时反馈我公司,以便不断改进,更好的为您服务。
1 质量保证1.1 整车保证每一辆金洲牌电动车从销售服务中心售出后,都能享受有条件的质量保证,车辆在质量保证期内,在正常使用、保养情况下,发生的质量故障属于质量保证范围内,用户不必承担车辆的维修费用,但必须在本公司特约维修站进行维修。
电动车的质量保证期为12个月,从用户购车发票日期开始计算。
在质量保证期内,车辆按照本公司规定进行计划保养的,整车及部分零部件发生故障,是属于质量保证的,请务必到本公司特约维修站进行检查、维修。
- 1、下载文档前请自行甄别文档内容的完整性,平台不提供额外的编辑、内容补充、找答案等附加服务。
- 2、"仅部分预览"的文档,不可在线预览部分如存在完整性等问题,可反馈申请退款(可完整预览的文档不适用该条件!)。
- 3、如文档侵犯您的权益,请联系客服反馈,我们会尽快为您处理(人工客服工作时间:9:00-18:30)。
一、安全须知
所带来的人身伤害。
为了确保您的行车安全,请完整且仔细地阅读本说明书
中的全部说明和注意事项。
注意:尽管本说明书能够帮助您更好地了解和使用IPS,但是我们不能
确保所有的紧急事故类型都包括在内。
因此,我们提醒您小心驾驶,确保您
的行车安全。
1.使用范围
IPS自平衡电动独轮车是户外运动产品,并非交通工具。
IPS用户只能在空旷平坦的区域骑行,严禁在非机动车
道上骑行!严禁在机动车道上骑行!
第1页
IPS用户在非机动车道和任何机动车道上骑行,一旦发生交通事故,有可能对您造成人身伤害!
2.骑行必须佩戴护具
任何时候,请佩戴头盔,护膝,护肘等各种安全护具。
不佩戴安全护具,有可能对您造成人身伤害!
3.未成年人需在监护人陪同下使用IPS自平衡电动独轮车,避免造成事故。
4.请使用原装充电器充电
请使用产品原装的充电器进行充电。
不可使用IPS其他型号的充电器,更不可使用其他厂家的充电器进行充电。
因未使用原装充电器而造成的任何后果,上海不倒翁投资有限公司将不承担任何责任。
第2页
二、IPS产品结构
1)IPS自平衡电动独轮车外壳
2)电源开关
3)指示灯
4)充电器插口
5)脚踏板
出厂包装含:IPS自平衡电动独轮车一台、充电器一部、手带一条、使用说明书等。
三、指示灯含义
绿色常亮和绿色闪烁:
第3页
1)绿灯常亮:表明当前电量大于67%,您可以放心使用。
2)绿灯闪烁:当闪烁频率较低(约1秒1次),表明当前电量低于67%并且高于33%;
当闪烁频率较高(约1秒5次),表明当前电量低于33%,应该注意充电; 红色:
表明电池量低,需充电。
红色灯闪烁:
1)表明IPS处于危险状态,需立即停车并关闭电源。
2)充满电后打开电源,如果故障没有消除的话,请送至指定维修地点进行检测维修。
第4页
四、驾驶
(一)注意事项
1.利用手带来保证您驾驶的安全
在您还不能熟练驾驶本产品时,利用手带可以帮助您的车避免摔倒刮伤。
1)把手带系在IPS自平衡电动独轮车的把手上。
一只脚踩在脚踏板上,调整手带的长度到舒适的位置。
2)当您在驾驶过程中失去平衡、不得不跳下车的时候,您就可以利用您手上的手带来拽住IPS自平衡电动独轮
车,以免它失去控制造成损坏。
2.如何控制平衡
1)IPS自平衡电动独轮车是利用陀螺仪进行前后稳定的。
2)当您身体前倾,IPS自平衡电动独轮车会感知到您的动作进行加速;当您身体后仰,IPS自平衡电动独轮车也
会控制电机减速以维持您与车体的平衡。
第5页
3)IPS自平衡电动独轮车不能帮助您进行左右平衡,就像您骑自行车一样,需要靠一定的速度和您的身体来控
制左右平衡。
4)请勿在光滑路面或细沙粒覆盖的路面上骑行,因为IPS自平衡电动独轮车需要车轮与地面的摩擦力来维持平
衡。
3.关于启动时间
IPS自平衡电动独轮车有1~3秒的启动时间,当按下开关时,请等待车体进入自平衡状态后,再使用。
4.开机时请不要离地
IPS自平衡电动独轮车在启动状态时,请勿离开地面,避免空转可能带来的危险。
禁止在车轮高速旋转过程中,
用身体任意部位触摸车轮,避免对您造成人身伤害。
第6页
(二)驾驶前准备工作
1.选择适合的场地:请在平坦、空旷、无机动车、人少的场地进行试车。
IPS自平衡电动独轮车是户外运动产品,
并非交通工具。
IPS用户只能在空旷平坦的区域骑行,严禁在非机动车道上骑行!严禁在机动车道上骑行!IPS 用户在非机动车道和任何机动车道上骑行,一旦发生交通事故,有可能对您造成人身安全事故!
2.选择适合的穿着:建议穿运动装、运动鞋。
骑行切勿穿凉鞋、拖鞋或高跟鞋,勿穿裙装或广口裤,避免对您造
成人身伤害!
3.检查车辆:驾驶前您需要检查电力是否充足、摇动车辆是否有异响和松动、手动推行IPS自平衡电动独轮车看车
轮是否与外壳产生摩擦。
4.最好您可以找一位朋友一起学习骑行,大家可以交换心得,相互促进,适当的时候还可以提供协助,对您更快
地掌握骑车技巧有帮助。
5.任何时候,请佩戴头盔,护膝,护肘等各种安全护具。
不佩戴安全护具,有可能对您造成人身伤害!
第7页
6.请将手带穿过把手,并将长度调整至适当位置。
7.请参考说明书的驾驶步骤,开始您的学习。
(三)驾驶步骤
1.打开电源
1)一只手抓住把手,将IPS自平衡电动独轮车直立于地面,并将两个脚踏板展开。
2)按下电源键可以将IPS自平衡电动独轮车电源打开,此时绿灯亮起。
3)假如发现红灯亮起,请不要尝试骑行。
4)我们推荐您沿着轮子前进后退的方向前后拉动把手几次,感受车轮加减速的力度。
第8页
2.骑行
您可以寻找一面墙或者护栏等等来帮助平衡,如果这些都没有,也可以找一个朋友站在您的身边。
在外界的辅助下,您可以先站上IPS自平衡电动独轮车,利用您身体前倾使IPS自平衡电动独轮车慢慢往前移动,逐渐熟悉骑行的感觉,逐步减少对辅助物的依赖直到您完全不需要辅助物。
3.转弯
关于转弯:我们发现,初学者都喜欢以转动上身的方法来进行转弯,但是那样的操作效果不好。
我们建议您通过调整左右脚踩踏的力度来调整车体的左右倾斜程度进行转弯,通过不断地练习,会达到您所期待的转弯效果。
4.重视骑行安全
至此,我们相信您已经学会了如何骑行IPS自平衡电动独轮车。
但是我们还是建议您,一定要在逐渐了解车辆
性能的基础上去逐渐挑战您没有尝试过的动作。
第9页
IPS自平衡电动独轮车的最高时速可达16km/h~18km/h,当速度较快时(约12km/h),车将以翘板的方式提示您注意行车速度。
当翘板或者主机报警时,请不要强制加速,避免摔倒。
IPS自平衡电动独轮车的动力是有限度的,超过限度IPS自平衡电动独轮车会无法支撑您的身体,导致您从车上掉下来,所以我们恳请您务必小心驾驶,不可急加速或者急减速。
五、充电
1.本产品内置一套锂离子电池。
2.确保在干净、干燥的环境下进行充电。
充电器电源线的一端连接交流电源插座,另一端连接IPS自平衡电动独轮
车,红色指示灯亮起表明充电正在进行。
3.充电时间因型号不同,大约为一到四个小时,当充电器红色指示灯变为绿时,表明充电完成。
充电注意事项:
第10页
1.当充电器插入时,IPS自平衡电动独轮车并不能检测到充电器,所以IPS自平衡电动独轮车上没有任何充电指示,
只有充电器上有提示。
2.请不要在充电器插入情况下尝试骑行。
六、保养与维护
(一)保存
1.不要在潮湿的地方放置您的IPS;
2.关机状态下,您每月至少需要对设备充电一次,以免电池电量耗尽。
同时,电池不能被随意拆除,如您想更换
电池,请联系我们,我们将给您提供优质的专业服务;
3.要用湿布和温和的洗涤剂去清洗您的IPS,不能用汽油、溶剂或任何化学试剂清洁车身表面。
4.IPS自平衡电动独轮车保存温度以20摄氏度为宜,过高或过低的温度都将对锂电池产生不良影响。
请不要在环
境温度高于50度的条件下使用,请勿将IPS自平衡电动独轮车长时间置于40度以上的环境中。
第11页
特别提示:请勿在天气炎热季节,将IPS自平衡电动独轮车置于汽车中!高温下有可能导致锂电池完全失效,甚至引起燃烧!
(二)更换轮胎
1.更换轮胎时,需要内六角螺丝刀和十字螺丝刀。
2.用十字螺丝刀拧松盖子外面的所有螺丝(包括把手上的螺丝)。
3.脚踏板下面的两边各有6个螺丝,松动电源开关另一侧的六颗内六角螺丝。
注意:不要拧动电源开关一侧的内
六角螺栓!因为电源开关侧外壳内部安装了电路板。
4.当您拧开这些螺丝后,将盖子以把手为轴心翻开机壳。
在把手的区域有一些电线,小心不要拉断这些电线。
现
在您就可以更换轮胎和修理内胎了。
5.当修理结束后,将盖板安装到原来的位置,拧紧螺丝。
第12页
(三)脚踏板松紧度
您可以调整脚踏板两侧内六角螺丝的松紧度来调整脚踏板的阻尼程度。
七、免责声明
用户在使用IPS自平衡电动独轮车之前,应仔细阅读本说明书,用户一旦使用IPS系列产品,即被视为对本说明书全部内容的认可和接受,任何未严格按照本说明书要求使用我司产品而造成的事故,上海不倒翁投资有限公司将
不承担任何责任。
第13页
八、联系我们
上海不倒翁投资有限公司(IPS)
公司官网:
网上商城:、、 客服热线:86-21-31358280
公司地址:上海市虹口区吴淞路308号耀江国际广场一层、九层。
第14页。
