漫步者m205使用手册
M-Audio USB MIDISPORT Uno 用户指南说明书
USB MIDISPORT UNOUser GuideEnglish© 2006 Avid Technology, Inc. All rights reserved. Product features, specifications, system requirements and availability are subject to change without notice. Avid, M-Audio and USB MIDISPORT Uno are either trademarks or registered trademarks of Avid Technology, Inc. All other trademarks contained herein are the property of their respective owners.IntroductionThank you for purchasing the M-Audio USB MIDISPORT Uno interface. Uno is a class-compliant* 1-in/1-out MIDI interface for USB-equipped PC and Macintosh computers. Uno’s Universal Serial Bus (USB) connection assures reliable and speedy transfer of MIDI data to and from the computer. The interface is portable, self-powered, and can be conveniently attached to your computer’s USB port without requiring computer disassembly or an external power supply. Uno’s sturdy package also includes integrated USB and MIDI cables, eliminating the need for carrying around separate cabling. Expansion is also easy—if you need additional MIDI ports, simply add more Uno interfaces. Follow the installation instructions in this manual and you will be up and running in no time.PLEASE DO NOT connect the Uno to your computer until you have reviewed the installation instructions for your operating system.* NOTE : Only the latest hardware revision of the Uno is class-compliant and will work under Windows XP or Mac OS X without a driver. If you own an earlier version of the Uno that is not class-compliant (i.e., it does not install automatically), you’ll need to install the latest drivers from our website.FeaturesUno USB/MIDI Interface offers the following features:• 1-in/1-out MIDI via USB connection (16 x 16 MIDI channels)• Class-compliant* installation under Windows XP and Mac OS X (no drivers required)• Full-speed connection to either a PC or Apple computer equipped with a USB port • MIDI input and output LED indicators• Bus-powered—requires no external power supply •Compact and lightweight design for easy transportPackage ContentsThe Uno package includes:• Uno USB MIDI interface•M-Audio MIDISPORT Series CD-ROM for Windows and MacintoshBefore You Connect Your UnoPlease follow the installation instructions that pertain to your operating system.Feature Viewå USB cable and connector - Connect this cable to your host computer’s USB port.ç USB LED - This LED pulses when Uno is powered and functioning.é MIDI in and MIDI out LEDs - These LEDs indicate MIDI input or output activity.è “TO MIDI OUT” connector - Connect this plug to your external instrument’s MIDI output port.ê“TO MIDI IN” connector - Connect this plug to your external instrument’s MIDI input port.Note: If you become confused with the MIDI cabling, take a look at the arrows found on each MIDI plug. These arrows indicate which way the MIDI data flows over that connector (i.e., whether the data is going from your keyboard to the computer or whether data is coming from the computer and going into your MIDI device).EnglishOverviewMIDI is the acronym for “Musical Instrument Digital Interface” and is the protocol used by MIDI keyboards and other devices (sound modules, sequencing software, virtual instruments, etc.) to communicate with each other. Uno provides your computer with one MIDI input and one MIDI output port, each supporting 16 MIDI channels.Windows XP & Mac OS X InstallationIf you are using Windows XP or Mac OS X, simply plug in your Uno to the computer’s USB port and you’re ready to go. Since Uno is class-compliant*, it will work without requiring any additional drivers.Installation for Advanced Windows XP UsersWhile Uno is class-compliant*, advanced Windows XP users who intend to use the Uno interface with more than one application at the same time (i.e., “multi-client” operation), plan to use long SysEx (system exclusive) commands or are using other class compliant USB devices with audio capabilities simultaneously should install the special M-Audio drivers for optimal performance. These drivers can be installed by doing the following:PLEASE NOTE: Do not connect Uno to your computer until the M-Audio driver fi les have been installed. The following instructions will indicate when you should connect the interface to your computer.1. Insert the MIDISPORT Series CD-ROM into your computer’s CD-ROM drive.2. T he computer will automatically display the interactive install screen shown in picture 1. If your computer fails to launch the installer, manuallystart the installer by clicking on Start > My Computer > MIDISPORT Series.3. Select “MIDISPORT Uno” from the drop-down menu and click “Install.”4. Follow the driver installer’s on-screen instructions.5. A t various points in this installation process, you may be notifi ed that the driver being installed has not passed Windows Logo Testing. Click“Continue Anyway” to proceed with the installation.6. Click “Finish” once the installer has completed the installation.7. Connect your Uno to an open USB port.8. Windows will identify the interface and will ask if you want to search the Internet for a driver. Select “No, not this time” and press “Next” (2).9. Windows will display a “Found New Hardware” Wizard (3).10. Choose “Install software automatically” and click “Next.”11. Once the Wizard has completed, click “Finish.”12. Once the installation is complete, you will see a message stating, “Your new hardware is installed and ready to use.”123Installation Instructions for Windows 98/Me/2000Installing Drivers For Windows 98/MePLEASE DO NOT plug in Uno until instructed to do so.1. I nsert the MIDISPORT Series Installer CD-ROM. The installer should begin to run automatically. If not, select “Run” from the Start menu and type“D:\autorun” (without the quotes), where “D:” is your CD-ROM drive, then press ENTER. If your CD-ROM drive is identified by a letter other than “D:” use that drive letter in the RUN command line.2. Select “MIDISPORT Uno” from the drop-down menu.3. Click on “install driver.”4. Follow the on-screen instructions.5. When the installation has finished, exit setup.6. Plug Uno into a free USB port on your computer.Windows will continue with the installation of USB and MIDI drivers for your Uno. When finished, Windows may prompt you to restart your computer. If so, please restart and begin using your Uno.Installing Drivers For Windows 2000PLEASE DO NOT plug in Uno until instructed to do so.1. I nsert the MIDISPORT Series Installer CD-ROM. The installer should begin to run automatically. If not, select “run” from the Start menu and type“D:\autorun” (without the quotes), where ‘D:’ is your CD-ROM drive, then press ENTER. If your CD-ROM drive is identified by a letter other than “D:” use that driver letter in the RUN command line.2. Select “MIDISPORT Uno” from the drop-down menu.3. Click on “install drivers.”4. Follow the on-screen instructions.5. When the installation has finished, exit setup.6. P lug Uno into a free USB port on your computer. Windows will automatically recognize your Uno and ask for the Uno Installer CD-ROM.7. Select the CD-ROM drive and click “OK.” Windows will then ask you to select the CD-ROM drive again for the MIDI driver.8. Windows will report the drivers have not been digitally signed. Click “Yes” to continue the installation.9. Select the “D:” drive once more.10. Click “OK” and finish installation.Setting Up Your MIDI StudioA typical MIDI system setup might include your Uno, a computer with MIDI sequencing software, a MIDI controller keyboard, and a MIDI-compatible sound module. This setup is illustrated below:UNO USB MIDI INTERFACEMIDIto MIDI inMIDI Sound Module MIDI Keyboard ComputerUSBto MIDI outIn the set-up described above, Uno is being used to route MIDI data between the controller keyboard, the sound module, and the computer. To set up the Uno in this way:1. Connect Uno to your computer via the USB cable.2. Connect the “To MIDI Out” cable to your keyboard’s MIDI Out port.3. Connect the other cable labeled “To MIDI In” to the MIDI In jack of your sound module.•I mportant note: Uno is not a MIDI THRU device and as such, MIDI data received at Uno’s MIDI in port can never be sent directly to the MIDI out plug of the Uno. However, data received at the MIDI In can be transmitted from the computer to the MIDI Out of your Uno.• C aution: Electrostatic discharges, electrical spikes, and Radio Frequency (RF) interference may cause Uno to malfunction. In such cases, unplug the unit, wait a few moments, and reconnect it to restore normal operation.Warranty Terms & RegistrationWarranty TermsM-Audio warrants products to be free from defects in materials and workmanship, under normal use and provided that the product is owned by the original, registered user. Visit /warranty for terms and limitations applying to your specific product.Warranty RegistrationThank you for registering your new M-Audio product. Doing so immediately both entitles you to full warranty coverage and helps M-Audio develop and manufacture the finest quality products available. Register online at /register to receive FREE product updates and for the chance to win M-Audio giveaways.WARNING: This product contains chemicals, including lead, known to the State of California to cause cancer, and birth defects or other reproductive harm. Wash hands after handling.。
漫步者音箱说明书

漫步者音箱说明书篇一:漫步者 S5.1 使用手册漫步者 S5.1 使用手册欢迎使用欢迎选用爱德发生产的漫步者系列有源音箱。
本产品可为您的家庭娱乐、电脑多媒体、家庭影院提供良好的音质。
请在您使用它之前,详细阅读本使用说明书,以发挥其最佳性能,并避免造成一些不必要的损失。
性能简介1 真正影院级功率推动,采用大功率环型变压器2 低音炮独立两腔结构,两级式后倒相设计,33mm厚双层侧板3 五只卫星箱(包括中置)按thx、杜比digital(ac—3)精神设计,并全部采用两分频4 8英寸铝音圈高强度低音单元,丝绢膜液磁球顶高音单元,4英寸复合纸盆中音单元5 无线红外遥控,前置便捷键控。
微电脑数字控制系统,精密数字电位器,能精确到1db16 大屏幕数码及字符显示,多功能状态指示,开关机音量淡入淡出,断电记忆7 独具6.1声道后级功放,可扩展升级为杜比ex等6.1系统打开包装请确认您所购买音箱的包装箱上的型号标识,如与您欲购买的型号不符,请迅速与您的购买商家联系。
s5.1多通道有源音箱包含两个包装,一个为低音箱包装箱,一个为卫星箱包装箱。
1(低音箱包装箱包含下列物品:s5.1低音箱一只2(卫星箱包装箱包含下列物品:1 音箱五只(前置两只,后环绕两只,中置一只)2 长约2.5米音箱连接线三条(接左右前置和中置音箱)3 长约5米音箱连接线两条(接后置左右环绕音箱)4 说明书及保修卡各一份5 3.5耳机插头,双莲花(rca)音频线三条(录色,蓝色,黄色各一条)6 长2.5米双莲花(rca),双莲花音频线一条(六通道)7 rc16遥控器一个8 七号(aaa)电池两个结构示意1(s5.1系统包含一只低音炮,一只中置音箱,两只前置2卫星箱,两只后置卫星箱,低音箱上带显示,控制面板,除可以用控制面板上的按键进行控制外,还可通过遥控器进行控制,如图1所示:1—前置卫星箱;2—中置音箱;3—显示控制面板;4—低音箱;5—后置环绕卫星箱;6—遥控器前置和后置卫星箱结构、性能等完全一样2(s5.1的输入输出接口都在低音箱后面的后面板上,包括电源连接线,电源开关,线路输入接口,卫星箱功率输出接口等,图2为线路输入接口的局部视图,输入接口全为rca座,其中的标识意义如下:“fl”—前置左声道线路输入口;“sl”—后置环绕左声道线路输入口;“sw”—低音通道线路输入口;“sc”—后置中置通道线路输入口;“fr”—前置右声道线路输入口“sr”—后置环绕右声道线路输入口“ce”—中置声道线路输入口3“n”—闲置口3(图3为功率输出接口的局部视图,其中的标识意义如下:“fl+,fl-”—前置左音箱的功率输出口;“fr+,fr-”—前置右音箱的功率输出口;“sl+,sl-”—后置环绕左音箱的功率输出口;“sr+,sr-”—后置环绕右音箱的功率输出口;“ce+,c e-”—中置音箱的功率输出口;“sc+,sc-”—后置中置音箱的功率输出口;以上的输出口,标“+”的口接音箱的正输入(线夹颜色为红色),标“-’的口接音箱的负输入(线夹颜色为白色)。
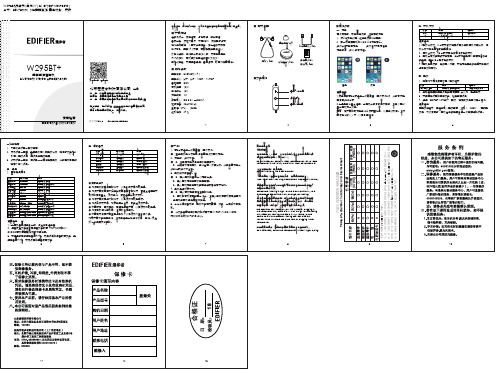
IB-100-W0295B-04 蓝牙立体声耳机使用说明书
温馨提示: 1、当耳机音量调至最大时,您会听到提示音; 2、语音拨号功能需具有语音功能助手(如iPhone的siri), android手机要解锁状态下才起作用。
五、播放音乐
功能 增加音量 减低音量 上一曲 下一曲 暂停播放 恢复播放
耳机状态 播放音乐 播放音乐 播放音乐 播放音乐 播放音乐 暂停播放
为交通安全起见,驾驶时或骑自行车时请勿使用耳机。 For traffic safety, do not use headphones while driving or cycling.
3、未通话时同时短按音量+/-键,开启设备的语音助手功能,再
短按音量+/-键,关闭设备的语音助手功能;
5
6
7
8
9
10
硅胶耳套*4对
USB充电线1 PCS
耳机*1 PCS 收纳铝盒*1PCS
说明书1PCS 保修卡1 PCS
■功能操作
音量+/下一曲 多功能键 音量-/上一曲
2
■操作说明
一、充电
首次使用前,或电量过低时,请先完成充电:
1、将USB充电线插入标准电源的USB插座;
2、另一端连接耳机的Micro USB充电接口。
对后,下次使用时,耳机会自动连接最近一次连接过的设备。
漫步者M200无线蓝牙音箱使用说明书
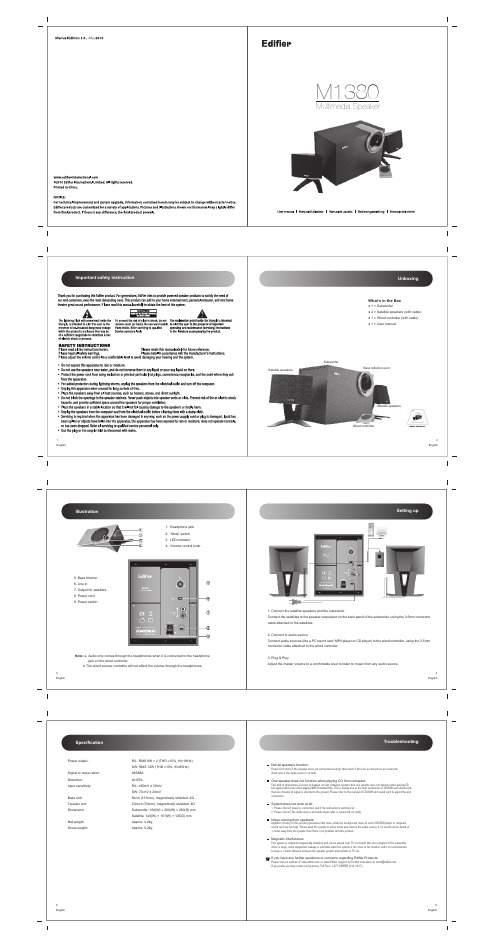
5. Bass trimmer6. Line in7. Output for satellites 8. Power cord 9. Power switch1. Headphone jack2. “Mute” switch3. LED indicator4. Volume control knobNote: a. Audio only comes through the headphones when it is connected to the headphonejack on the wired controller.b.The wired volume controller will not affect the volume through the headphones.Packing listTroubleshootingNot all speakers function:Please first check if the speaker wires are connected securely; then check if the Line-in connectors are reversed; check also if the audio source is at fault.One speaker does not function when playing CD from computer:This kind of phenomena is prone to happen on new computer systems that one satellite does not function when playing CD, but system works fine when playing WAV formatted files. This is mainly due to the fault connection of CD-ROM and sound card, that one channel of signal is shorted to the ground. Please refer to the manual of CD-ROM and sound card to adjust the wire connection.System does not work at all:1. Please check if power is connected, and if the wall outlet is switched on.2. Please check if the audio source and audio input cable is connected correctly.Noise coming from speakers:Amplifier circuitry of this product generates little noise, while the background noise of some VCD/DVD player or computer sound card are too high. Please keep the system in active mode and remove the audio source, if no sound can be heard at 1 meter away from the system, then there is no problem with this product.Magnetic interference:This system is complete magnetically shielded, and can be placed near TV or monitor. But since magnet of the subwoofer driver is large, some magnetism leakage is inevitable when the system is too close to the monitor, and it is recommended to keep a 1 meter distance between the speaker system and monitor or TV set.If you have any further questions or concerns regarding Edifier Products:Pleasevisitourwebsiteat:,oremailEdifierSupportforfurtherassistanceat:****************,If you prefer, you may contact us by phone, Toll Free: 1-877-EDIFIER (334-3437).1English3English5English2English4English6EnglishMultimedia SpeakerIllustrationSpecification JulyM1380UnboxingSetting upWhat’s in the Box● 1 × Subwoofer● 2 × Satellite speakers (with cable)● 1 × Wired controller (with cable)● 1 × User manualPower output: R/L: RMS 8W × 2 (THD =10%, f0=1KHz)SW: RMS 12W (THD =10%, f0=80Hz)Signal to noise ration: ≥85dBA Distortion: ≤0.05%Input sensitivity: R/L: 450mV ± 50mVSW: 70 mV ± 20mVBass unit: 5inch (131mm), magnetically shielded, 4ΩTweeter unit: 2¾inch (70mm), magnetically shielded, 4ΩDimension: Subwoofer: 164(W) × 200(W) × 280(D) mm Satellite: 120(W) × 151(W) × 125(D) mm Net weight: Approx. 4.2kg Gross weight:Approx. 5.2kg1. Connect the satellite speakers and the subwooferConnect the satellites to the speaker output port on the back panel of the subwoofer, using the 3.5mm connector cable attached to the satellites.2. Connect to audio sourceConnect audio sources (like a PC sound card, MP4 player or CD player) to the wired controller, using the 3.5mm connector cable attached to the wired controller.3. Plug & PlayAdjust the master volume to a comfortable level to listen to music from any audio source.SubwooferSatellite speakersWired controller Satellite speakersUser manual Bass reflection porter manualUser ma。
漫步者X230多媒体音箱使用手册说明书
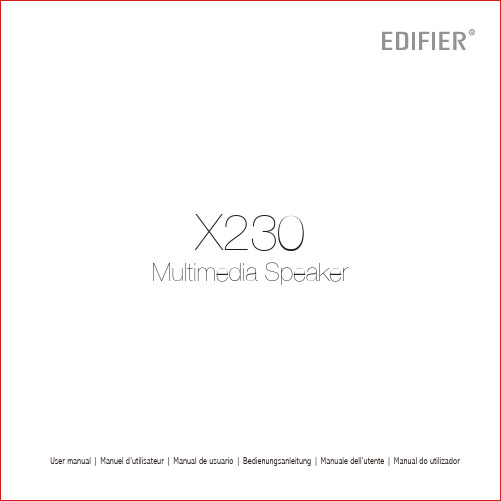
Specification5EnglishTotal watts (peak): 56WTotal watts (RMS): 28W (R/L: 7W+7W SW: 14W)Frequency response: R/L: 210Hz-18KHz SW: 53Hz-240HzDeclaration for EUFrequency Band: 2.402GHz ~ 2.480GHzRF Power output: ≤20 dBm (EIRP)There is no restriction of use.Caractéristiques techniquesWatts totaux (pic) : 56WWatts totaux (RMS) : 28W (D/G: 7W+7W SW: 14W)Réponse en fréquence: D/G: 210Hz-18KHz SW: 53Hz-240HzDéclaration pour l’UEBande de fréquence: 2,402 GHz ~ 2,480 GHzPuissance de sortie RF: ≤20 dBm (EIRP)Il n'y a aucune restriction d'utilisation.11FrançaisEspecificacionesVatios totales (punta): 56WVatios totales (RMS): 28W (D/I: 7W+7W SW: 14W)Respuesta de frecuencia: D/I: 210Hz-18KHz SW: 53Hz-240HzDeclaración para la UEBanda de frecuencia: 2.402GHz ~ 2.480GHzRF Potencia de salida: ≤20 dBm (EIRP)No hay restricciones de uso.17EspañolTechnische DatenGesamtleistung (Spitze): 56WGesamtleistung (RMS): 28W (R/L: 7W+7W SW: 14W) Frequenzgang: R/L: 210Hz-18KHz SW: 53Hz-240HzEU-KonformitätserklärungFrequenzband: 2.402GHz ~ 2.480GHzRF Ausgangsleistung: ≤20 dBm (EIRP)Keine Nutzungseinschränkungen vorhanden.23DeutschSpecificheWatt totali (picco): 56WWatt totali (RMS): 28W (R/L: 7W+7W SW: 14W)Risposta in frequenza: R/L: 210Hz-18KHz SW: 53Hz-240HzDichiarazione per l'Unione EuropeaFrequenza di banda: 2.402GHz ~ 2.480GHzPotenza di uscita RF: ≤20 dBm (EIRP)Non vi sono restrizioni d'uso.29ItalianoEspecificaçõesTotal de watts (pico): 56WTotal de watts (RMS): 28W (D/E: 7W+7W SW: 14W)Resposta de frequência: D/E: 210Hz-18KHz SW: 53Hz-240HzDeclaração para UEBanda de frequência: 2.402GHz ~ 2.480GHzRF Potência de saída: ≤20 dBm (EIRP)Não existem restrições à utilização.35PortuguêsN OT ICE:For the need of technical improvement and system upgrade, information contained herein may be subject to change from time to time without prior notice.Products of EDIFIER will be customized for different applications. Pictures and illustrations shown on this manual may be slightly different from actual product. Picture for reference only, actual product prevails. Manual Edition 1.0, July 2019IB-200-X00230-00Edifier International LimitedP .O . Box 6264General P ost O fficeHong KongTel: +852 2522 6989Fax: +852 2522 1989© 2019 Edifier International Limited. All rights reserved.Printed in China。
EDIFIER漫步者T5有源超低音箱 中文说明书
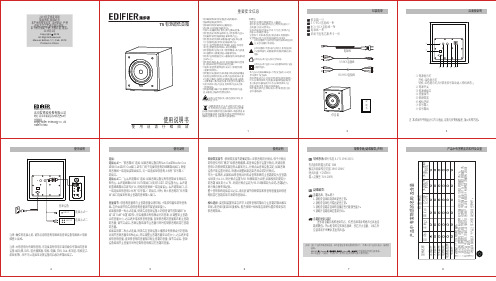
2019年爱德发印制版权所有,翻印必究本手册内所有图文,未经授权,严禁任何方式之全面或部分使用。
本手册为随机手册,不得转卖,散发。
2019年2月Copyright 2019All Rights Reserved.Manual Edition 1.1, Feb. 2019Printed in China注:本说明书中的图片均为示意图,可能与实物有偏差,请以实物为准。
包装清单使用说明说明书低音箱一只3.5-R C A 音频线一条R C A -R C A 音频线一条电源线一条说明书及售后服务卡一份低音箱使用说明书T5 有源超低音箱12后面板说明34使用说明5使用说明6①②③④⑤⑥⑦⑧① 电源指示灯开机:绿色指示灯 待机:红色指示灯(5分钟无信号自动进入待机状态;)② 电源开关③ 电源线接口④ 音量调节⑤ 低频带宽⑥ 相位选择⑦ 信号输入⑧ 信号输出音箱无声,怎么办?1、请检查音源和连接线是否正常。
2、请检查音源信号输出是否正常。
3、请检查音箱或音源的音量是否已被调至最小。
4、请断开音箱电源后重新开机。
音箱的噪声问题?漫步者音箱具有低噪声特点,有些音源本身的噪声会高出音箱的数倍。
所以检查时应拔掉音频线,然后开大音量,1米之外应基本听不到喇叭发出的声音。
疑难解答:规格参数/疑难解答/声明7产品中有害物质的名称及含量8失真限制的输出功率:70W额定声频率响应范围:38Hz-200Hz 噪声声级:≤25dB(A)输入灵敏度:50±20mV规格参数(执行标准:SJ/T 11540-2015)注意:做任何连接之前,请务必把低音炮电源线及音源设备电源线从电源插座上拔掉。
注意:本低音炮为有源低音炮,可连接具有低电平或前级信号输出的音源设备(如功放、DVD、蓝光播放器、电视、电脑、手机、Pad、机顶盒、电视盒子、游戏机等),但不可以连接至功放设备的后级功率输出端子。
连接:连接方式一: “低音输出”连接:如果音源设备具有Sub Out或Woofer Out 或SW Out或LFE Out接口,即专门用于连接低音炮的线路输出接口,则使用音频线一端连接该输出接口,另一端连接至低音炮上标有“信号输入”的接口。
Sennheiser Evolution Wireless Digital 快速指南说明书
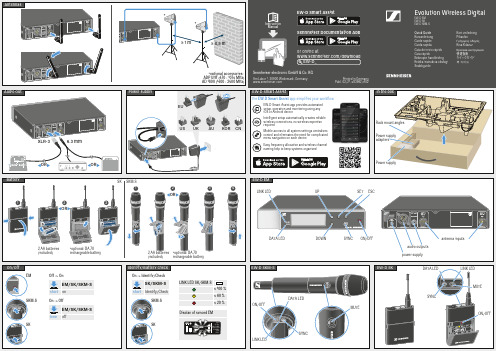
Sennheiser electronic GmbH & Co. KGAm Labor 1, 30900 Wedemark, Germany Printed in Germany Publ. 02/21, 583962/A02Quick Guide Kurzanleitung Guide rapide Guida rapidaGuía de inicio rápido Guia rápidoBeknopte handleiding Krótka instrukcja obsługi SnabbguideKort vejledning PikaohjeΓρήγορος οδηγόςKısa KılavuzКраткая инструкция快速指南퀵 가이드Evolution Wireless DigitalEW-D EM EW-D SK EW-D SKM-SEW-D Smart AssistSennheiser Documentation Appor online at/download EW-D_Instruction ManualEW-D EMEW-D Smart AssistIn the boxAntennasAudio Out Power supply BatteryIdentify/Battery checkEW-D SKEW-D SKM-S On/OffOROROROR6.3 mmXLR-3antenna inputsaudio outputspower supply≥ 0,5 m≥ 1 m***optional accessories: ADP UHF (470 - 1075 MHz)AD 1800 (1400 - 2400 MHz)DATA LED DATA LEDSYNCSYNCSYNC SETUPDOWNESCRack mount anglesPower supplyPower supply adaptersMUTEON/OFFON/OFFON/OFFLINK LEDLINK LEDDATA LEDSK 2 AA batteries (included)*optional: BA 70 rechargeable battery2 AA batteries (included)*optional: BA 70 rechargeable battery**SKM-SLINK LEDEM/SK/SKM-SOff -> OnEMSKM-SSKshortonEM/SK/SKM-SOn -> OfflongoffSK/SKM-SOn -> Identify/CheckshortIdentify/Check≤ 100 %≤ 60 %≤ 20 %LINK LED SK/SKM-SDisplay of synced EMSKM-SSK2311234MUTEThe EW-D Smart Assist app simplifies your workflowEW-D Smart Assist app provides automated setup, operation and monitoring using any iOS or Android deviceEasy frequency allocation and wireless channel naming help to keep systems organizedMobile access to all system settings centralizes control and eliminates the need for complicated menu navigation on each deviceIntelligent setup automatically creates reliable wireless connections, no wireless expertise requiredKOR CNUS UK AU EUDisplayMenuLEDsMuteColor coding setsSyncKey lockMHzdBdB AF OUT GAINAF OUT MUTE LOCK AUTO SCAN CHANNELTUNE RESETGAIN CHRF AF BAToptional accessories for EM, SK and SKM-Swireless link 1:wireless link 2:etc.Firmware update in progressBluetooth active to- sync with transmitter - connect with app --Link okaudio active --No linkDevice switched off-No link--Link okaudio muted or no capsule on SKM --Link ok audio clip --Link okLow transmitter batteryEMEM short pressshort pressshort pressLINK LEDDATA LEDSKM-SDATADATALINKLINKunlockedpress bothlockedSKSKM-S SK25 cm (10")ME 2ME 3ME 4SKM-SSKM-S2...3 cm (1")RadiofrequencylevelTransmitter audio levelChannel Audio output levelGain Transmitter battery MenuFrequencyKey lockMute Mute lock Antennaswitching diversityApp connection470.200MHzdB 060124dBAF OUT GAINAF OUT MUTE LOCK AUTO SCAN CHANNELTUNE RESETGAIN CHRFAFBAT21MHzdB dB AF OUT GAINAF OUT MUTE LOCK AUTO SCAN CHANNELTUNERESETGAINCHRF AFBAT Instruction ManualInstruction ManualInstruction ManualInstruction ManualInstruction ManualInstruction Manual Mute LockInstruction ManualMHzdBdB AF OUT GAINAF OUT MUTE LOCK AUTO SCAN CHANNELTUNE RESETGAIN CHRF AF BAT GainMHzdBdB AF OUT GAINAF OUT MUTE LOCK AUTO SCAN CHANNELTUNE RESETGAIN CHRF AF BAT AF OutMHzdBdB AF OUT GAINAF OUT MUTE LOCK AUTO SCAN CHANNELTUNE RESETGAIN CHRFAFBAT MHzdBdB AF OUT GAINAF OUTCHRF AF BATMute LockMHzdBdB AF OUT GAINAF OUT MUTE LOCK AUTO SCAN CHANNELTUNE RESETGAIN CHRF AF BAT MHzdBdB AF OUT GAINMUTE LOCKCHRF AF BATAuto ScanMHzdBdB AF OUT GAINAF OUT MUTE LOCK AUTO SCAN CHANNELTUNE RESETGAIN CHRF AF BAT MHzdBdB AF OUT GAINAUTO SCANCHRF AFBATChannelMHzdBdB AF OUT GAINAF OUT MUTE LOCK AUTO SCAN CHANNELTUNE RESETGAIN CHRF AF BATMHzdBdB AF OUT GAINCHANNELCHRF AFBATTuneMHzdBdB AF OUT GAINAF OUT MUTE LOCK AUTO SCAN CHANNELTUNE RESETGAIN CHRF AF BAT MHzdBdB AF OUT GAINTUNECHRF AF BATResetMHzdBdB AF OUT GAINAF OUT MUTE LOCK AUTO SCAN CHANNELTUNE RESETGAIN CHRFAFBATMHzdBdB AF OUT GAINGAINCHRF AF BATSK Instruction manual | Bedienungsanleitung | Notice d'emploi | Istruzioni per l'uso | Instrucciones de manejo | Manual de instruções | Gebruiksaanwijzing | Instrukcja obsługi | Bruksanvisning | Betjenings vejledning | Käyttöohje | Οδηγίες λειτουργίας | Kullanım kılavuzu | Инструкция по эксплуатации | 使用说明书 | | 사용 설명서 |Sennheiser Documentation AppEW-D Smart AssistORMHzdBdB AF OUT GAIN CHRF AFBATMHzdBdB AF OUT GAINCHRF AF BATetc.。
克莱斯勒Cherokee漫步者 快速维修技术资料手册

Cherokee快速维修技术资料手册2007年4月Cherokee 快速维修技术资料手册1目录1. 车辆识别号码 ........................................................................ 2 2. 车辆排放控制信息(VECI ) ............................................... 4 3. 车辆证明书标签 .................................................................... 5 4. 公英制转换 ............................................................................ 6 5. 车辆常用扭矩参考说明 ........................................................ 8 6. 液体、润滑油技术参数 ........................................................ 9 7. 保险丝位置和类型 .............................................................. 12 8. 车轮定位参数 ...................................................................... 17 9. 差速器与动力传动系统电子诊断DTC 诊断故障码 ......... 20 10. 制动器部件维修信息 .......................... 错误!未定义书签。
11. ABS 及APS 的DTC 故障码和验证测试 .......................... 20 12. 车身电器 (26)PT 漫步者维修技术资料小手册21. 车辆识别号码车辆识别号码(VIN )牌挂在仪表板的左上侧上。
漫步者 MS50A 无线音箱 用户手册说明书

MS50AWIRELESS SPEAKER User manual• MS50A is an active speaker using both W i-Fi and Bluetooth wireless technologies. The core application is online streaming media playback based on Amazon Alexa (W ork with Alexa). After registering this speaker to Amazon Alexa with an Amazon account, you will be able to use streaming services such as Spotify, Amazon Music, Pandora, etc. The speaker can be controlled in Alexa App as well as using interactive voice devices such as Echo. With Alexa, you can create your personal playlist, control play/ pause, build a multi-room system with other devices, and build two speakers to a stereo group.Thank you for choosing EDIFIER! For correct operations, please carefully read this manual before use.• Information contained herein may be subject to change from time to time without prior notice.Note:• The MS50A is compatible with Apple AirPlay.• This speaker can be connected to phones, PC, etc. for wireless playback via Bluetooth.• You can refer to the Quickstart Guide (included in the box) to set1. Product overviewOpen the box and ensure the following items are included:Speaker Quickstart guidePower cable• Please use the power cable included in the box.2. What’s in the boxButton controls:① Mode switch:Press: audio mode switchPress and hold for 3s:Wi-Fi connection(Wi-Fi mode)Bluetooth pairing(Bluetooth mode)②Previous track ③ Next track④ Pause/playPress and hold for 6s:restore to factory settings ⑤ Power on/off / mute Press: mute/unmute Press and hold for 1.5s: power on/off ⑥ Slide counter-clockwise: volume down ⑦ Slide clockwise: volume up②①③④⑤3. OperationIndicators:StateBlink rapidlySteady litHeartbeat BlinkDescription 3 blinks per second Steady lit1 blink per second Long and short blinks alternativelyFunctions Ready to connect to a new Wi-Fi network Wi-Fi connected Wi-Fi disconnected Mute Blink rapidlySteady litBlinkSteady lit3 blinks per second 1 blink per second StateDescription Functions Mute Bluetooth pairing Bluetooth connected (1) White LED: Wi-Fi mode(2) Blue LED: Bluetooth mode 3s 3s Blink rapidly Blue and white LED lit and off alternately and rapidlyStateDescription Functions starting up / over the air firmware update (3) Blue and white LED blinks alternately:starting up/off and rmware update(1) Unconnected to network: low brightness;(2) Connected to network:Day time (7am to 9pm): full brightnessNight time (9pm to 7am): low brightnessBrightness of indicatorsConnection:Wi-Fi connectionBluetooth connection1. Power on this speaker and wait for it to start up (approximately 20 seconds). Press the " " button to switch to Bluetooth mode (blue LED).2. This speaker is in Bluetooth pairing mode when blue LED blinks rapidly, please select "EDIFIER MS50A" to connect.3. Blue LED will lit steadily after pairing is complete, now you can play music on the paired device.or tablet from the App Store/Google Play Store or from ;2. When powered on for the first time, this speaker will automatically enter W i-Fi connection mode (white LED blinking rapidly). To reset Wi-Fi connection, press the " " button to switch to W i-Fi mode (white LED), then press and hold the " " button for 3s to enter Wi-Fi connection mode again;3. Open the Edifier Home App, follow the instructions to add a device, and connect the speaker to network;4. Once connected, a steady white LED will be lit;5. This speaker can work with alexa, after it is connected to network, the Edifier Home App will prompt you to register this speaker to your Amazon Alexa account, please follow the instructions to complete the registration.Stereo group and multi-room system setup:Stereo group setup:You can use two MS50A to build a stereo group for better music experience.1. Make sure two MS50A speakers are connected to the same network as your mobile device;2. To setup stereo group, open the Edifier Home App, tap "Stereo group" on the home screen and click to add, then follow the instructions to build a stereo group;3. Set the two speakers as the left and right channel output respectively and rename the stereo group.4. To cancel the stereo group, open the Edifier Home App, select the stereo group you want to cancel, and follow the instructions to cancel the stereo group.Multi-room system setup:After this speaker is registered in the Amazon Alexa, you can add it to a multi-room system through the Alexa App and play music/podcasts/news on multiple speakers simultaneously.1. Preparations: Connect this speaker to the same network as the other "work with Alexa" speakers, and ensure they are logged in to the same Amazon Alexa account.2. Setup: Open the Alexa App, switch to the Device interface, follow the instructions to join the existing multi-room system, or create a new multi-room system. Please see relevant instructions of the Alexa App for details.Stereo group and multi-room system setup:Music playback:2. Local playbackVolume control:1. Online steaming media playbackFor local playback devices, you can connect them to this speaker through Bluetooth for playback, or use Apple AirPlay or Spotify Connect to play through W i-Fi.The volume can be controlled in the following ways:(1) Touch panel on this speaker: In W i-Fi or Bluetooth mode, volume level can be controlled through the touch panel on this speaker, please see the touch panel control instructions;(2) Edifier Home App: Click the device already connected to network and enter the playing control interface for volume control;(3) Interactive voice devices: Under the same network, use the interactive voice devices like Echo logging in the same Amazon account to control volume through voice commands. (1) For Amazon Music, Spotify, Pandora, Tuneln, iHeartRadio and other music services linked to Alexa, after relevant accounts are linked, you can play through Alexa and control this speaker by using other interactive voice devices like Echo.(2) This speaker has passed Spotify Connect certification, and you can select to play on this speaker in the Spotify App;(3) This speaker has passed Apple AirPlay 2 certification, and can be air-played by using iPhone, iPad, iMac and other devices.Open the Edifier Home App, select the speaker to update, look for the firmware version code in the " " interface, and upgradeto the latest firmware when the " " icon appears. Please see relevant instructions of the Edifier Home App for details.System update and restore to factory settingsRestore to factory settingsPress and hold the " " button on this speaker for 6s or click "Restore to factory settings" in the Edifier Home App to restore to factory settings, please note that W i-Fi connection, Bluetooth pairing and Amazon account registration information will all be cleared, meanwhile, this speaker will return to Wi-Fi mode and the volume will resume to 50% level.System updateTroubleshooting Cannot nd "MS50A" in Bluetooth mode?1. Check if the speaker is ON.2. Ensure the speaker is switched to Bluetooth mode.3. Disconnect from any Bluetooth device by pressing and holdingthe " " button, then search for "MS50A" again.4. Turn off the speaker and restart it, then switch to Bluetooth mode and search for "MS50A" again.No sound1. Check if main power is connected, or if the wall outlet is switched on.2. Ensure the audio cables are firmly connected and the input is set correctly on the speaker.3. Check if there is a signal output from the audio source.4. Try to turn up the volume using the volume control.5. Turn off the speaker and restart it.4. TroubleshootingSpeci cationsPower output: mid-bass+treble: 25W+15WFrequency response: 52Hz-18KHzAudio input: Wi-Fi, BluetoothDeclaration for EUFrequency Band (Bluetooth): 2.402GHz ~ 2.480GHzFrequency Band (2.4G): 2.400GHz ~ 2.4835GHzFrequency Band (5G): 5.15GHz ~ 5.35GHz, 5.47GHz ~ 5.725GHz,5.725GHz ~ 5.85GHzRF Power output: ≤20 dBm (EIRP) (5.725GHz~5.850GHz excluded)RF Power output: ≤14 dBm (EIRP) (5.725GHz~5.850GHz)Model: EDF100008FCC ID: Z9G-EDF112IC: 10004A-EDF112Edifier International LimitedP.O. Box 6264General Post OfficeHong KongTel: +852 2522 6989Fax: +852 2522 1989© 2021 Edifier International Limited. All rights reserved.Printed in ChinaNOTICE:For the need of technical improvement and system upgrade, informationcontained herein may be subject to change from time to time without prior notice.Products of EDIFIER will be customized for different applications. Pictures and illustrations shown on this manual may be slightly different from actual product.If any difference is found, the actual product prevails.@Edifier_Global @Edifier_Global @Edifierglobal /support5. AppendixNote:。
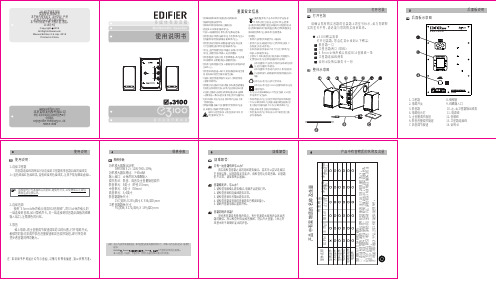
EDIFIER漫步者e3100多媒体有源音箱使用说明书
声明:由于产品的不断更新发展,我们保留没有事先通知的情况下,对本公司产品进行变动、修改的 权利。
均为爱德发持有的注册商标。
我公司保留一切权利,仿冒必究。
其他所涉及的商标均属于其所有者。
EDIFIER Ramble Xemal Copyright 2018All Rights Reserved.Manual Edition 2.6, Apr. 2018Printed in China2018年爱德发印制版权所有,翻印必究本手册内所有图文,未经授权,严禁任何方式之全面或部分使用。
本手册为随机手册,不得转卖,散发。
2018年4月* 请仔细阅读本说明书并妥善保管以备将来参考。
* 请使用制造商指定的附件。
* 请按说明书的连接说明进行正确的安装。
* 建议在0-35℃的环境中使用本产品。
* 为减少火灾和触电危险,请勿让本产品淋雨或受潮。
* 请不要在靠近水的地方使用本产品,也不要将本产品浸入 任何液体中或将任何液体滴落、泼溅到本产品上。
* 请不要在靠近任何热源(如散热器、暖气设备、炉灶或其 它产生热量的设备)的地方安装和使用本产品。
* 本产品上面严禁放置任何装水的器具,如花瓶;也不要在 本产品上放置任何形式的明火,如点亮的蜡烛。
* 请不要堵塞本产品的开口处,不要将物体塞入本产品的通 风口或槽隙中,这样做会有起火或触电的危险。
* 请在本产品的周围留足空间,以便能够保持良好的通风(建 议5cm以上)。
* 请不要强行将插头插入端口中,连接前请检查端口是否堵 塞、 插头和端口是否匹配和方向是否正确。
* 为避免儿童误食所提供的配件(如尖钉),请将配件放在 儿童拿不到的地方。
* 请勿擅自打开或移开外壳进行维修,那有可能会使您触及 危险电压或导致其它危险。
无论本产品因何原因损坏,都 必须请专业维修人员修理,如电源线或插头损坏、液体溅 入或物 体落入、淋过雨或受过潮、不能正常工作或被摔过。
* 在用干布擦拭、清洁产品之前,请先将本产品关机,并拔下供电的插头。
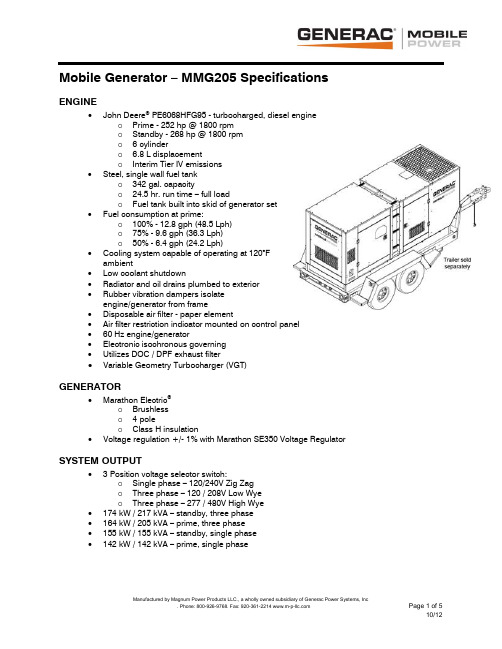
杰尼韦Moblie Generator MMG205产品说明书
Mobile Generator – MMG205 SpecificationsENGINE∙John Deere ® PE6068HFG95 - turbocharged, diesel engineo Prime - 252 hp @ 1800 rpmo Standby - 268 hp @ 1800 rpmo 6 cylindero 6.8 L displacemento Interim Tier IV emissions∙ Steel, single wall fuel tanko 342 gal. capacityo 24.5 hr. run time – full loado Fuel tank built into skid of generator set∙ Fuel consumption at prime:o 100% - 12.8 gph (48.5 Lph)o 75% - 9.6 gph (36.3 Lph)o 50% - 6.4 gph (24.2 Lph)∙ Cooling system capable of operating at 120°Fambient∙ Low coolant shutdown∙ Radiator and oil drains plumbed to exterior∙ Rubber vibration dampers isolateengine/generator from frame∙ Disposable air filter - paper element∙ Air filter restriction indicator mounted on control panel∙ 60 Hz engine/generator∙ Electronic isochronous governing∙ Utilizes DOC / DPF exhaust filter∙ Variable Geometry Turbocharger (VGT) GENERATOR∙ Marathon Electric ®o Brushlesso 4 poleo Class H insulation∙Voltage regulation +/- 1% with Marathon SE350 Voltage Regulator SYSTEM OUTPUT∙ 3 Position voltage selector switch:o Single phase – 120/240V Zig Zago Three phase – 120 / 208V Low Wyeo Three phase – 277 / 480V High Wye∙ 174 kW / 217 kVA – standby, three phase∙ 164 kW / 205 kVA – prime, three phase∙ 155 kW / 155 kVA – standby, single phase∙142 kW / 142 kVA – prime, single phaseSYSTEM CONTROLS∙Microprocessor-based controllero Backlit, 128x64 pixel resolution displayo-40°F to 185°F operating temperature rangeo Thermostatically controlled LCD heatero Six LED indicators w/ lamp test♦Alarm / Fault (Red)♦Ready / Manual (Red)♦Running (Green)♦Warning (Yellow)♦Ready / Auto (Green)♦Supplying Load (Green)∙Push buttons for easy operationo Manual or Auto Starto Engine Start or Stopo Alarm Cancel & Fault Reseto Scrolling Arrows for Diagnostic Information♦System kW output display♦Line output & frequency display♦Engine diagnostic display∙Oil pressure∙Engine temperature∙Fuel level∙Battery♦System hours∙Running hours∙kW hours∙Time to serviceo Alarm list – warnings / shutdowns are date & time stamped♦Fuel level: warning – 15%; shutdown – 5%♦Overspeed protection: shutdown – 115%♦Oil pressure: warning – 25 psi; shutdown – 20 psi♦Coolant temperature: warning – 220°F; shutdown – 230°F♦Battery voltage: over – 15VDC; under – 11VDC♦Generator over voltage: warning – 110%; shutdown – 111%♦Generator under voltage: warning – 87%; shutdown – 86%♦Generator over frequency: warning – 105%; shutdown – 110%♦Generator under frequency: warning – 95%; shutdown – 90%♦Over current shutdownELECTRICAL CONTROLS∙Remote start / stop contacts located next to lug box∙Lockable control box door with diagnostics window∙Lockable lug box with safety switcho Trips main breaker when lug door is openedDisables voltage regulator∙Cable entry guides to the lug boxo Restricts access of foreign objects∙Output ground connection lug inside lug box∙800A main breaker with shunt trip∙Convenience receptacles with individual breakers (restricted use in high wye mode)∙Convenience receptacles with individual breakers (restricted use in high wye mode) o(2) 120V 20 Amp GFCI duplex outlets (Nema 5-20R type)o(3) 125 / 250V 50 Amp, 3 pole, 4 wire twistlock (Non-Nema 6369) ∙Panel mounted rheostat for voltage adjustment - +/- 10%∙1000 CCA wet cell batteryENCLOSURE∙Generac Mobile Power decals∙Aluminum, sound attenuated enclosureo UV & fade resistant, high temperature cured, white polyester powder painto Insulated and baffledo68 dB(A) at 23 feet – prime power∙Fully lockable enclosure including doors and fuel fill∙Stainless steel hinges on doors∙Emergency stop switch located on outside of enclosure∙Central lifting point∙Multi-lingual operating/safety decals∙Document holder with operating manual including AC/DC wiring diagramsTRAILER∙DOT approved tail, side, brake, and directional lightso Recessed rear lights∙Transportation tie downs∙Safety chains with spring loaded safety hooks∙3” lunette ring hitch∙(2) 6000 lb. axles with surge brakes∙5000 lb. tongue jack with footplate∙ST235/80R16 tubeless tires – 10 ply∙NATM compliantWEIGHTS & DIMENSIONSmountedSkid∙Dry weight: 6624 lbs (3005 kg)∙Operating weight: 9052 lbs (4106 kg)∙144 x 50 x 77 in(3.66 x 1.27 x 1.96 m)Trailer mountedDry weight: 8020 lbs (3638 kg)∙Operating weight: 10448 lbs (4739 kg)∙210 x 86 x 93 in(5.33 x 2.18 x 2.36 m)WARRANTY∙Engine and generator covered under OEM warranty – consult factory for details. CERTIFICATIONS∙CSA certifiedMMG205 OptionsENGINE OPTIONS♦In-line engine block heater (Kim Hotstart)♦Fuel transfer pumpELECTRICAL CONTROLS OPTIONS♦Battery disconnect♦Battery charger – 2A trickleGENERATOR OPTIONS♦PMG Generator - critical grade power quality♦Super Start Generator - motor starting applications▪178 kW / 222 kVA – standby, three phase▪166 kW / 208 kVA – prime, three phase▪176 kW / 176 kVA – standby, single phase▪167 kW / 167 kVA – prime, single phaseVOLTAGE OUTPUT OPTIONS♦ 4 position phase switch▪Single phase – 120 / 240V Zig Zag▪Three phase – 120 / 208V Low Wye▪Three phase – 277 / 480V High Wye▪Three phase – 120 / 240V Delta♦Dedicated voltage configurations♦Buck Transformer kit - Provides 120V at GFCI outlets when in 277/480V ♦Cam locksSYSTEM CONTROLS OPTIONS♦Auxiliary strobe/audible indication for soft & hard alarm conditionsCOOLANT OPTIONS♦60/40 Coolant - cold weather applicationsENCLOSURE OPTIONS♦Fire extinguisher♦Interior cabinet light♦Control panel lightFUEL TANK OPTIONS♦120% ContainmentTRAILER OPTIONS♦Tandem axle trailer w/ electric brakes♦ 6 pin or 7 spade electrical connectors♦Spare tire/wheel kit。
NSM-205Fx 用户手册说明书
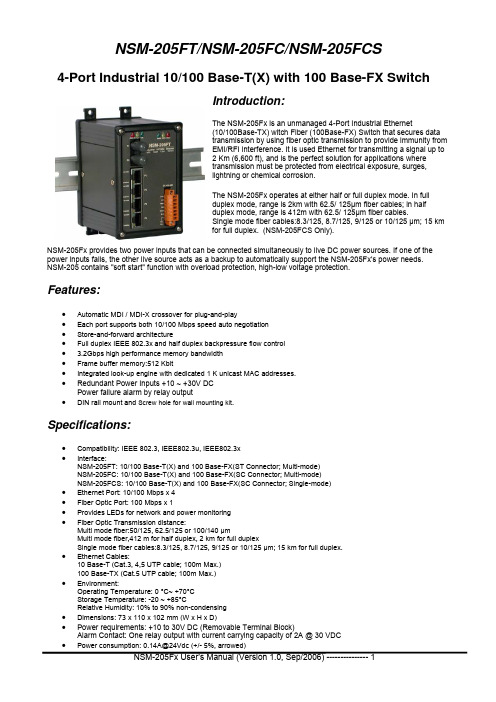
NSM-205FT/NSM-205FC/NSM-205FCS4-Port Industrial 10/100 Base-T(X) with 100 Base-FX SwitchIntroduction:The NSM-205Fx is an unmanaged 4-Port Industrial Ethernet(10/100Base-TX) witch Fiber (100Base-FX) Switch that secures datatransmission by using fiber optic transmission to provide immunity fromEMI/RFI interference. It is used Ethernet for transmitting a signal up to2 Km (6,600 ft), and is the perfect solution for applications wheretransmission must be protected from electrical exposure, surges,lightning or chemical corrosion.The NSM-205Fx operates at either half or full duplex mode. In fullduplex mode, range is 2km with 62.5/ 125μm fiber cables; in halfduplex mode, range is 412m with 62.5/ 125μm fiber cables.Single mode fiber cables:8.3/125, 8.7/125, 9/125 or 10/125 μm; 15 kmfor full duplex. (NSM-205FCS Only).NSM-205Fx provides two power inputs that can be connected simultaneously to live DC power sources. If one of the power inputs fails, the other live source acts as a backup to automatically support the NSM-205Fx's power needs.NSM-205 contains "soft start" function with overload protection, high-low voltage protection.Features:•Automatic MDI / MDI-X crossover for plug-and-play•Each port supports both 10/100 Mbps speed auto negotiation•Store-and-forward architecture•Full duplex IEEE 802.3x and half duplex backpressure flow control• 3.2Gbps high performance memory bandwidth•Frame buffer memory:512 Kbit•Integrated look-up engine with dedicated 1 K unicast MAC addresses.•Redundant Power Inputs +10 ~ +30V DCPower failure alarm by relay output•DIN rail mount and Screw hole for wall mounting kit.Specifications:•Compatibility: IEEE 802.3, IEEE802.3u, IEEE802.3x•Interface:NSM-205FT: 10/100 Base-T(X) and 100 Base-FX(ST Connector; Multi-mode)NSM-205FC: 10/100 Base-T(X) and 100 Base-FX(SC Connector; Multi-mode)NSM-205FCS: 10/100 Base-T(X) and 100 Base-FX(SC Connector; Single-mode)•Ethernet Port: 10/100 Mbps x 4•Fiber Optic Port: 100 Mbps x 1•Provides LEDs for network and power monitoring•Fiber Optic Transmission distance:Multi mode fiber:50/125, 62.5/125 or 100/140 μmMulti mode fiber,412 m for half duplex, 2 km for full duplexSingle mode fiber cables:8.3/125, 8.7/125, 9/125 or 10/125 μm; 15 km for full duplex.•Ethernet Cables:10 Base-T (Cat.3, 4,5 UTP cable; 100m Max.)100 Base-TX (Cat.5 UTP cable; 100m Max.)•Environment:Operating Temperature: 0 °C~ +70°CStorage Temperature: -20 ~ +85°CRelative Humidity: 10% to 90% non-condensing•Dimensions: 73 x 110 x 102 mm (W x H x D)•Power requirements: +10 to 30V DC (Removable Terminal Block)Alarm Contact: One relay output with current carrying capacity of 2A @ 30 VDC•Power consumption: 0.14A@24Vdc (+/- 5%, arrowed)LED functions:Standard RJ45 female connectors are provided. A standard RJ45 plug cable is necessary to connect your device to the unit since switch that supports auto crossover.Redundant Power Inputs:B o t h p o w e r i n p u t s c a n b e c o n n e c t e d simultaneously to live DC power sources. If one power source fails, the other live source acts as a backup, and automatically supplies all of NSM-205Fx’s power needs.Soft start Power Inputs:Integrated “soft-start” function that limits the in-rush current to the device being powered.Delay time + Rise time = 2 second at power on.Pin Function For Terminal Block:External power supply is connected using the removable terminal block:PWR1 : Power input 1 (+10 to +30Vdc) PWR2 : Power input 2 (+10 to +30Vdc) GND : Ground : Common(Form "A” Relay) for Alarm contact.R.NO : Normal Open (Form "A” Relay) for Alarm contact.F.G. :F.G. stands for Frame Ground (protective ground). It is optional. If you use this pin, it can reduce EMI radiation; improve EMI performance and ESD protection.LED Color DescriptionRed On Core Power is OK PWR_OK Red Off Core Power is Off Yellow On Full Duplex Full for P0 Yellow Off Half Duplex Green On Link/Act Link for P0 Green Off Not Networking Yellow On Link/Act Yellow Off Not Networking Green On Link to 100 Mbps Ethernet Port(P1 ~ P4) Green Off Link to 10 MbpsGreen On Power is being supplied to power input PWR2 PWR2 Green Off Power is not being supplied to power input PWR2 Yellow On Power is being supplied to power input PWR1 PWR1 Yellow Off Power is not being supplied to power input PWR1Red On Power is not being supplied to power input PWR1 and PWR2 FAULTRed OffPower is being supplied to power input PWR1 and PWR2Application Note:Figure shows common media conversion system network topologies. This figure is a simple end-to-end configuration; it is easy way to verify proper operation of the media converter(s), assuming that the Network Interface Cards (NIC’s) or Ethernet ports in each PC/workstation end link partner are properly configured.Figure:Full / Half-Duplex Selection:There are two modes of data transmissions, full-duplex and half-duplex transmission.The data can be transmitted in both directions on a single carrier atthe same time when you select Full-duplex mode. But the data can only betransmitted in one direction on a single carrier at the same time when youselect Half-duplex mode. You may select Full or half-duplex mode according toyour equipment requirement.Block Diagram:Dimensions:102.01m m 72.58mm110.02m m。
爱普生M205说明书
黑白多功能一体机用户指南NPD5529-00 SC请妥善保管此说明书(保留备用)。
安装、使用产品前请阅读使用说明。
在本产品的说明书中,打印部件将简称为打印机,扫描部件将简称为扫描仪。
本产品资料中使用的示意图仅供参考,本产品实际可能与之存在差异,以包装箱内产品实际为准。
本产品使用说明和包装箱上的数据来源于爱普生实验室测试。
此手册描述中出现的墨瓶代表爱普生原装墨水补充装。
产品驱动光盘盘面上、驱动和软件中所显示的型号可能与实际销售产品的型号稍有不同,不影响产品的使用。
其他信息,可查看产品本身、产品包装和其他形式的资料,包括爱普生网页 ()。
版权和商标版权和商标No part of this publication may be reproduced, stored in a retrieval system, or transmitted in any form or by any means, electronic, mechanical, photocopying, recording, or otherwise, without the prior written permission of Seiko Epson Corporation. No patent liability is assumed with respect to the use of the information contained herein. Neither is any liability assumed for damages resulting from the use of the information herein. The information contained herein is designed only for use with this Epson product. Epson is not responsible for any use of this information as applied to other products.Neither Seiko Epson Corporation nor its affiliates shall be liable to the purchaser of this product or third parties for damages, losses, costs, or expenses incurred by the purchaser or third parties as a result of accident, misuse, or abuse of this product or unauthorized modifications, repairs, or alterations to this product, or (excluding the U.S.) failure to strictly comply with Seiko Epson Corporation’s operating and maintenance instructions.Seiko Epson Corporation and its affiliates shall not be liable for any damages or problems arising from the use of any options or any consumable products other than those designated as Original Epson Products or Epson Approved Products by Seiko Epson Corporation.Seiko Epson Corporation shall not be held liable for any damage resulting from electromagnetic interference that occurs from the use of any interface cables other than those designated as Epson Approved Products by Seiko Epson Corporation.EPSON® is a registered trademark, and EPSON EXCEED YOUR VISION or EXCEED YOUR VISION is a trademark of Seiko Epson Corporation.Intel® is a registered trademark of Intel Corporation.PowerPC® is a registered trademark of International Business Machines Corporation.Epson Scan software is based in part on the work of the Independent JPEG Group.libtiffCopyright © 1988-1997 Sam LefflerCopyright © 1991-1997 Silicon Graphics, Inc.Permission to use, copy, modify, distribute, and sell this software and its documentation for anypurpose is hereby granted without fee, provided that (i) the above copyright notices and thispermission notice appear in all copies of the software and related documentation, and (ii) the namesof Sam Leffler and Silicon Graphics may not be used in any advertising or publicity relating to thesoftware without the specific, prior written permission of Sam Leffler and Silicon Graphics.THE SOFTWARE IS PROVIDED “AS-IS” AND WITHOUT WARRANTY OF ANY KIND,EXPRESS, IMPLIED OR OTHERWISE, INCLUDING WITHOUT LIMITATION, ANYWARRANTY OF MERCHANTABILITY OR FITNESS FOR A PARTICULAR PURPOSE.IN NO EVENT SHALL SAM LEFFLER OR SILICON GRAPHICS BE LIABLE FOR ANY SPECIAL,INCIDENTAL, INDIRECT OR CONSEQUENTIAL DAMAGES OF ANY KIND, OR ANYDAMAGES WHATSOEVER RESULTING FROM LOSS OF USE, DATA OR PROFITS, WHETHEROR NOT ADVISED OF THE POSSIBILITY OF DAMAGE, AND ON ANY THEORY OFLIABILITY, ARISING OUT OF OR IN CONNECTION WITH THE USE OR PERFORMANCE OFTHIS SOFTWARE.Microsoft®, Windows®, and Windows Vista® are registered trademarks of Microsoft Corporation. Apple®, Macintosh®, Mac OS®, and OS X® are registered trademarks of Apple Inc.ABBYY® and ABBYY FineReader® names and logos are registered trademarks of ABBYY Software House. Adobe, Adobe Reader, Acrobat, and Photoshop are trademarks of Adobe systems Incorporated, which may be registered in certain jurisdictions.General Notice: Other product names used herein are for identification purposes only and may be trademarks of their respective owners. Epson disclaims any and all rights in those marks.Copyright © 2016 Seiko Epson Corporation. All rights reserved.The contents of this manual and the specifications of this product are subject to change without notice.未经精工爱普生株式会社事先书面许可,本出版物(手册)的任何部分,不得被复制,或存储于检索系统中,或以任何形式、任何方式传播包括电子、手工、复印、录音录像以及其他方式。
漫步者m205使用手册
漫步者m205使用手册摘要:1.漫步者M205 简介2.漫步者M205 的基本功能3.如何使用漫步者M2054.漫步者M205 的注意事项5.漫步者M205 的售后服务正文:一、漫步者M205 简介漫步者M205 是一款高品质的音响设备,其设计精良,外观时尚,性能稳定,适合各种场合使用。
它具有出色的音质和强大的功能,可以满足用户对音响设备的需求。
二、漫步者M205 的基本功能漫步者M205 具有以下基本功能:1.高保真音质:采用高品质的音频技术,可以输出清晰、自然的音效,带给用户舒适的听觉体验。
2.多功能接口:支持多种音源设备,如手机、电脑、平板等,用户可以根据自己的需求选择不同的音源。
3.遥控操作:配备遥控器,用户可以在远距离进行操作,方便快捷。
三、如何使用漫步者M205使用漫步者M205 的步骤如下:1.连接设备:将音响设备的电源线插入电源插座,将音源设备通过3.5mm 音频线或蓝牙连接至音响设备。
2.开机:按下音响设备上的电源键,开启音响设备。
3.调节音量:使用遥控器或音响设备上的音量键,调整音量大小。
4.切换音源:通过遥控器或音响设备上的音源键,切换不同的音源设备。
四、漫步者M205 的注意事项在使用漫步者M205 时,请注意以下几点:1.不要将音响设备暴露在阳光直射或潮湿的环境中,以免损坏设备。
2.不要在音响设备上放置重物,以免损坏设备。
3.使用音响设备时,请勿将音量调至过高,以免对听力造成损害。
五、漫步者M205 的售后服务漫步者公司为您提供完善的售后服务,如果您在使用过程中遇到任何问题,可以拨打我们的客服电话进行咨询。
- 1、下载文档前请自行甄别文档内容的完整性,平台不提供额外的编辑、内容补充、找答案等附加服务。
- 2、"仅部分预览"的文档,不可在线预览部分如存在完整性等问题,可反馈申请退款(可完整预览的文档不适用该条件!)。
- 3、如文档侵犯您的权益,请联系客服反馈,我们会尽快为您处理(人工客服工作时间:9:00-18:30)。
漫步者m205使用手册
(实用版)
目录
1.漫步者 M205 简介
2.漫步者 M205 的功能与特点
3.如何使用漫步者 M205
4.注意事项及维护
5.结论
正文
【漫步者 M205 简介】
漫步者 M205 是一款性能卓越的便携式蓝牙音响,它具有出色的音质和强大的功能,是您户外活动或家庭娱乐的理想选择。
【漫步者 M205 的功能与特点】
1.强大的音质:漫步者 M205 采用高品质扬声器,能提供清晰、强劲的声音,让您沉浸在音乐的海洋中。
2.蓝牙连接:支持与各种蓝牙设备连接,如手机、平板电脑等,无需拘泥于线缆的束缚,让您的娱乐更加自由。
3.便携设计:M205 体积小巧,重量轻便,方便携带,适合各种户外活动。
4.长续航:内置大容量电池,可提供长时间音乐播放,满足您的户外娱乐需求。
5.多功能按键:M205 设有多个功能按键,方便您快速进行音量调节、播放/暂停、切换歌曲等操作。
【如何使用漫步者 M205】
1.开机:按下音响侧面的电源键,待指示灯亮起,表示音响已开启。
2.蓝牙连接:打开您的蓝牙设备,搜索附近的可用蓝牙设备,找到“Edifier M205”并点击连接。
成功连接后,音响会发出“嘀”的一声。
3.播放音乐:打开您设备的音乐播放器,选择您想播放的音乐,享受美妙的音乐时光。
4.关机:在音响待机状态下,长按电源键约 5 秒,直到指示灯熄灭,表示音响已关机。
【注意事项及维护】
1.请勿将音响浸入水中或置于潮湿环境中,以免损坏音响设备。
2.请勿将音响暴露在高温、阳光直射的环境下,以免损坏音响设备。
3.请勿在音响上施加过大的重压,以免损坏音响设备。
4.如发现音响出现异常现象,请立即关闭电源并联系售后服务。
5.定期清洁音响表面,使用干净柔软的布轻轻擦拭,以免损坏音响表面。
【结论】
漫步者 M205 是一款具有出色音质、便携设计和强大功能的蓝牙音响,适合各种户外活动和家庭娱乐。
