索尼RX100使用说明
索尼相机微单基本操作方法
索尼相机微单基本操作方法
索尼相机微单基本操作方法包括以下几个步骤:
1. 开关机:按下相机上的电源按钮,相机将开机;再按下电源按钮,相机将关机。
2. 设置拍摄模式:通过操作模式旋钮选择拍摄模式,如自动模式、程序模式、光圈优先模式、快门优先模式等。
3. 对焦:通过按下快门按钮半途,相机将对焦,并在取景器中显示对焦框。
4. 调整曝光:通过曝光补偿按钮或菜单选项,增加或减少曝光量。
5. 调整焦距:通过镜头旋转焦距环,调整拍摄对象与相机的距离。
6. 拍照:按下完整的快门按钮,相机将进行拍照。
7. 查看照片:按下回放按钮,在LCD屏幕或取景器中查看拍摄的照片。
8. 删除照片:在回放模式下,通过操作菜单选项选择删除照片。
9. 更改设置:通过菜单按钮进入菜单界面,可以更改相机的各种设置,如ISO
感光度、白平衡、对焦模式等。
10. 连接计算机:通过USB线或Wi-Fi功能,将相机连接到计算机,以传输照片或进行远程拍摄。
这些是索尼相机微单的基本操作方法,具体的操作方法可能略有不同,还需参考相机的使用说明书。
索尼RX100M6黑卡6使用技巧分享
索尼RX100M6黑卡6使用技巧分享一、推荐设置方案这个设置,不是纯粹的全自动模式。
而是最大限度利用黑卡6的对焦优势。
让你更高效的去拍摄,无论是静态摆拍,还是运动抓拍,无论是人像,还是风景,都可以非常从容的体验相机魅力。
步骤1,机器顶部转盘,设置到P档(对模式比较熟悉的同学可以设置到S、A、M)2,按下主面板的FN键,对焦模式设置成“AF-C”,对焦区域设置成“区”,ISO设置为“ISO AUTO”。
3,menu键,顶部图标1→6/12页→ISO AUTO最小速度”设置为一个可以固定住画面的快门值(这是此设置中最大的变量,参数参考:边走边拍1/500S,户外摆拍1/250s,室内1/60S,手持夜景1/30S。
快门速度越快对光线的要求越高,光线弱的环境使用高速快门,相机会通过提高ISO来平衡曝光,画面就会产生噪点,影响画质,所以务必根据实际环境光线设置最低快门速度)4, menu键,顶部图标2→9/10页→自定义键, C按钮→3/20页→对焦标准实战拍摄1、相机会根据画面场景自动识别对焦区域,按C按钮(即删除键),通过方向键可以选择对焦区域范围2、如果需要用到精准对焦,只需点击触摸屏上对应的对焦区域就能实现精准对焦。
需要恢复区域对焦模式时,只需点击屏幕上的图标取消触屏对焦即可3、人像拍摄时,人物头部在对焦区域范围内,按住方向键中央按钮键不松手,系统会自动识别人物眼睛,将焦点自动对在眼睛上,实现更精准的对焦。
4、画面的明暗控制,可以通过调整方向键的下键曝光补偿功能,来控制画面明暗程度二、WIFI连接教程应用市场下载”PlayMemories Mobile相机→menu→网络1→发送到智能手机功能→发送到智能手机→手机选图/相机选图打开手机APP→扫描拍摄装置的NFC/QR Code→扫描相机屏幕二维码自动获取wifi密码→打开相机wifi设置→连接DIRECT-ueC3:DSC-RX100M6→打开APP就可以正常传输了注:扫描二维码的步骤只需要进行一次,之后连接都不需要重复操作。
黑卡rx100的使用技巧
黑卡rx100的使用技巧随着科技的进步,数码相机已经成为人们记录生活、旅行和纪念重要时刻的常用工具。
索尼RX100系列相机作为一款高端数码相机,拥有出色的画质和便携性,在摄影爱好者和专业人士中广受好评。
下面是一些关于黑卡RX100使用的技巧,帮助您充分发挥它的潜力。
1.了解相机的基本设定:在使用相机之前,您需要了解一些基本设定,如曝光补偿,ISO,光圈和快门速度等。
这些设置可以帮助您控制照片的亮度、对焦和模糊效果,从而得到更好的照片质量。
2.利用RAW格式拍摄: RX100支持拍摄RAW格式的照片,这样可以在后期处理时更好地处理照片细节和色彩。
使用RAW格式拍摄还可以帮助您更好地控制曝光和白平衡。
3.使用HDR模式: HDR模式可以帮助您处理光线明暗不一的场景,提高照片的细节和动态范围。
在高对比度的环境中使用HDR模式可以得到更加平衡的照片效果。
4.尝试不同的对焦模式: RX100有多种对焦模式可以选择,包括单点对焦、广域对焦和跟踪对焦等。
根据拍摄环境和主题,选择合适的对焦模式可以帮助您更好地捕捉主题的清晰轮廓。
5.利用特殊模式和滤镜: RX100还有一些特殊的拍摄模式和滤镜可以使用,如夜景模式、人像模式和黑白滤镜等。
尝试使用这些模式和滤镜可以给您的照片带来更多的创意和效果。
6.学习如何使用手动模式: RX100的手动模式可以让您完全掌控照片的曝光和焦距。
学习如何使用手动模式可以帮助您拍摄出符合自己创意和风格的照片。
7.使用外部闪光灯: RX100自带的闪光灯在某些情况下可能无法提供足够的光线。
在这种情况下,您可以考虑使用外部闪光灯来提供更多的光线,从而拍摄出更亮和细节丰富的照片。
8.购买适配器和其他附件: RX100系列相机提供了多种适配器和附件,如广角转接环、滤镜和鱼眼转接环等。
购买一些适配器和其他附件可以帮助您进一步扩展相机的功能和应用。
9.练习稳定手持: RX100虽然小巧轻便,但在长时间手持拍摄时仍然需要一定的稳定性。
Sony索尼 DSC-RX100 使用说明书
•有关使用本相机的注意事项•准备工作▪检查随机附件▪产品检视▪电池充电和能够记录的影像数/时间▪插入存储卡(另售)▪设定日期和时间▪在电脑上安装“PlayMemories Home”•拍摄/观看影像▪拍摄(静止影像)▪拍摄(动态影像)▪观看影像•查看▪观看功能介绍•使用拍摄功能▪改变静止影像照相模式▪清晰地变焦影像▪自动检测拍摄条件▪对指定的被摄体持续对焦拍摄(跟踪对焦)▪拍摄全景影像▪调节背景的虚化程度进行拍摄(光圈优先)▪改变移动物体的表现进行拍摄(快门优先)▪以所需的曝光拍摄(手动曝光)▪调出注册的设置进行拍摄▪选择与用途匹配的影像尺寸/影像质量▪选择闪光模式▪使用连续拍摄/自拍/人像自拍▪改变屏幕显示▪调整影像亮度▪用自己喜爱的设置拍摄(照片创作)▪使用与场景匹配的照相模式(场景选择)▪使用效果创建独创质感(照片效果)▪选择ISO感光度▪选择对焦方式▪改变Fn(功能)按钮的设置功能▪改变控制环的设置功能•使用观看功能▪搜索影像(影像索引)▪连续观看静止影像(幻灯片播放)▪观看动态影像•删除影像▪删除影像•连接至其他设备▪在电视机上观看影像▪打印静止影像▪在电脑上观看影像▪制作动态影像光盘•改变相机设置▪改变电子音效设置▪在影像上叠加拍摄日期▪使用MENU项目•其他▪您可以使用的存储卡▪静止影像可记录数和动态影像的可记录时间▪屏幕上显示的图标列表▪学习更多有关相机的内容(Cyber-shot用户手册)▪故障排除▪使用须知▪主要规格▪索引。
索尼RX100使用报告
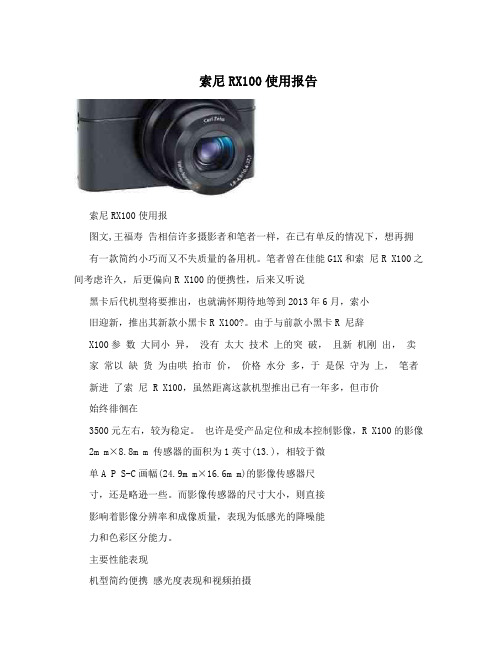
索尼RX100使用报告索尼RX100使用报图文,王福寿告相信许多摄影者和笔者一样,在已有单反的情况下,想再拥有一款简约小巧而又不失质量的备用机。
笔者曾在佳能G1X和索尼R X100之间考虑许久,后更偏向R X100的便携性,后来又听说黑卡后代机型将要推出,也就满怀期待地等到2013年6月,索小旧迎新,推出其新款小黑卡R X100?。
由于与前款小黑卡R 尼辞X100参数大同小异,没有太大技术上的突破,且新机刚出,卖家常以缺货为由哄抬市价,价格水分多,于是保守为上,笔者新进了索尼 R X100,虽然距离这款机型推出已有一年多,但市价始终徘徊在3500元左右,较为稳定。
也许是受产品定位和成本控制影像,R X100的影像2m m×8.8m m 传感器的面积为1英寸(13.),相较于微单A P S-C画幅(24.9m m×16.6m m)的影像传感器尺寸,还是略逊一些。
而影像传感器的尺寸大小,则直接影响着影像分辨率和成像质量,表现为低感光的降噪能力和色彩区分能力。
主要性能表现机型简约便携感光度表现和视频拍摄索尼R X100是一款名副其实的口袋机,当镜头伸缩复原后,如图3,彩条间的分界线很明显会随着I S O值提高体积为101.6m m×58.1m m×35.9m m,而一包中华香烟的体积出现轻微模糊和噪点增加。
从I S O800开始,彩条间其而为88m m×55m m×23m m,还是能轻易塞进口袋的。
笔者当初线出现了轻微的噪点,颜色细节也出现了轻微的损则分界物色备用机的时候,也曾考虑过索尼微单,其可更换镜头的的确当I S O800以上,噪点和细节损失逐渐明显,锐度在失。
能带来拍摄题材的多样性和提高影像质量,但是其微单镜头不能线下降,可见,R X100的适用感光度在I S 确也呈直缩内置,长度和重量显然成了设计上的一种不足,可能设计师考O80,800之间。
SONY HDR-XR100E XR105E XR106E XR200E XR200VE 说明书
点击Handycam 手册HDR-XR100E/XR105E/XR106E/XR200E/XR200VE您可以使用Adobe Reader 按照关键词搜索一个项目。
有关如何使用Adobe Reader 的提示,请参阅Adobe Reader 的帮助。
您可以打印出Handycam 手册。
关于本Handycam 手册本Handycam 手册中出于演示目的而使用的示例图像均使用数码照相机拍摄,因此可能看上去与摄像机上实际出现的图像和画面指示有所不同。
除非另外说明,否则均使用HDR-XR200VE 为本书提供图示。
在本Handycam 手册中,摄像机的内部硬盘和“Memory Stick PRO Duo”称为“录制媒体”。
“Memory Stick PRO Duo”和“Memory Stick PRO-HG Duo”在本手册中统称为“Memory Stick PRO Duo”。
本摄像机和附件的设计和规格如有变更,恕不另行通知。
使用Handycam手册 (2)快速搜索信息 (2)有用的录制技巧 (6)部件和控制装置 (7)画面指示 (10)“HOME”和“ (11)使用 HOME MENU (11)使用 (11)菜单列表 (12)HOME MENU列表 (12)列表 (13)操作本摄像机之前,请先阅读本文 (14)关于使用硬盘驱动Handycam (15)准备工作步骤1:对电池组充电 (17)步骤2:打开电源,设定日期和时间 (19)更改语言设定 (20)录制/播放成功录制的五点建议 (21)轻松记录和播放动画、照片(Easy Handycam操作) (22)录制动画 (22)拍摄照片 (24)播放动画 (25)观看照片 (27)录制 (29)录制动画 (29)拍摄照片 (31)录制动画和拍摄照片时的有用功能 (33)变焦 (33)录制更具现场效果的声音(5.1声道环绕声录制) (33)在动画录制过程中录制高质量照片(Dual Rec) (34)在黑暗场所录制(NightShot)(HDR-XR200E/XR200VE) (34)以镜像模式录制 (35)以慢镜头录制快速动作(平稳缓慢拍摄) (35)切换画面显示或打开/关闭液晶显示屏背光 (36)获取位置信息(GPS)(HDR-XR200VE) (36)目录在摄像机上播放 (38)播放动画 (38)观看照片 (40)播放动画和观看照片时的有用功能 (41)按照录制位置搜索想要的场景(地图索引)(HDR-XR200VE) (41)通过精确定点搜索想要的场景(电影滚动索引) (42)按照人脸搜索想要的场景(人脸索引) (43)播放动画汇编(精彩场面播放)(HDR-XR200E/XR200VE) (44)按照日期搜索想要的图像(日期索引) (45)对照片使用播放变焦 (46)播放一系列照片(幻灯片放映) (47)在电视机上播放图像 (48)使用[电视机连接指南]连接电视机 (48)连接至高清晰电视机 (49)连接至非高清晰16:9(宽荧幕)或4:3电视机 (50)使用“BRAVIA”Sync (52)编辑删除动画和照片 (53)获取当前位置信息(HDR-XR200VE) (55)从动画中捕获照片 (55)将动画和照片从内部硬盘复制到“Memory Stick PRO Duo” (56)复制动画 (56)复制照片 (57)保护录制的动画和照片(保护) (58)分割动画 (59)使用动画的播放列表 (60)建立播放列表 (60)播放播放列表 (61)用DVD刻录机制作光碟 (62)用DVD刻录机等制作高清晰图像质量(HD)光碟。
索尼RX100的使用技巧
精心整理索尼RX100的使用技巧(2014-01-2411:36:35)一、拍照1、影像尺寸分20M 、10M 、5M ,这里不是指文件大小,而是指2000万像素、1000万像素、500万像素。
万像素少些。
(1(2费。
(3(416002分例就是63、影像质量分RAW 、RAW&JPEG 、精细、标准,RAW 是原始文件,精细和标准都是JPG 文件,是经过机内处理过后的成品。
RAW 文件大小约20M ,精细一般4-8M ,标准一般3-5M 。
一张16G 的卡,你选择RAW&JPEG 模式拍摄能拍500多张,用JPG 模式能拍3000张。
大光比环境下(如逆光、晚上拍开着灯的商店、灯具、在阴影的地方拍到有阳光的天空、白天室内对门外或窗户拍、夕阳等)及过渡丰富的画面(如蓝天)RAW 比JPG调整余地大,能找回高光下的更多细节。
一般情况下两者差不多。
RAW的后期调整比JPG速度慢,如果电脑配置一般,差别会更明显。
连拍时选择RAW格式,连拍速度会明显下降而且存储时间会加倍。
(1)特别注重后期的用RAW&JPEG,之所以不单独选RAW,是因为RAW打开后直接导出往往不如机内的JPG好,有时RAW经过种种处理但质感仍不如机内直出(2(345(1(2(3秒10就拍个拍个1(4(5)人像自拍:分一个人和两个人。
(6)定时(连拍):10秒3张影像。
这个在暗光下会自动打开对焦辅助灯,即使你把对焦辅助灯关了。
(7)阶段曝光:就是包围曝光,一次拍三张曝光值的照片(-0.3EV,正常,+0.3EV),用于后期合成一张宽容度高的照片。
(8)白平衡阶段曝光:一次拍三张色温不同的照片,然后你选一张满意的。
正常情况下选单张拍摄,遇到运动方面可选连拍或速度优先连拍,其他一般用的少。
6、闪光模式(1)禁止闪光:拍婴儿、博物馆以及一些禁止拍照的场合用。
一般情况下选禁止闪光,因为黑卡光圈大,高感尚可,普通场景能应付。
Sony数码相机 DSC-RX100M4 帮助指南
如何使用
开始使用前
各部分名称
检查相机和附件 产品检视
图标和指示
屏幕上的图标列表
使用带子
使用腕带 使用肩带(另售)
调节取景器
调节取景器(屈光度调节)
相机内功能介绍
关于[相机内功能介绍]
准备相机
给电池充电
将电池插入相机 给装在相机中的电池充电 通过连接到电脑充电
电池使用时间和使用电池可记录/播放的影像数 从墙壁插座供电 取出电池
选择画面显示模式
切换画面显示(播放期间) 在取景器和屏幕之间切换 DISP按钮 (取景器) DISP按钮 (显示屏) TC/UB显示切换
选择静止影像尺寸/影像质量
影像尺寸(静止影像) 纵横比(静止影像) 影像质量(静止影像) 全景: 影像尺寸 全景: 方向
调节对焦
对焦模式 对焦区域 中央锁定AF 对焦锁定 手动对焦 直接手动对焦(DMF) MF帮助(静止影像) 放大对焦 对焦放大时间 峰值水平 峰值色彩 预先AF(静止影像) AF/MF控制 AF辅助照明(静止影像) 眼控AF
PlayMemories Camera Apps
推荐的电脑环境
安装应用程序
开设服务帐户 下载应用程序 利用WiFi功能将应用程序直接下载到本产品
启动应用程序
启动下载的应用程序
管理应用程序
卸载应用程序 改变应用程序的顺序 确认PlayMemories Camera Apps的帐户信息
使用电脑
推荐的电脑环境
24p/60p输出切换(动态影像)(仅限于兼容1080 60i的型号) HDMI控制 HDMI信息显示 TC输出(动态影像) REC控制(动态影像) HDMI音频输出(动态影像) 4K输出选择 (动态影像) USB连接 USB LUN设定 USB电源供给 语言 日期时间设置 区域设置 版权信息 格式化 文件序号 选择REC文件夹 新文件夹 文件夹名 修复影像数据库 显示媒体信息 版本 认证标识 (仅限于某些型号) 出厂重置
索尼Cyber-shot RX100数码相机说明书
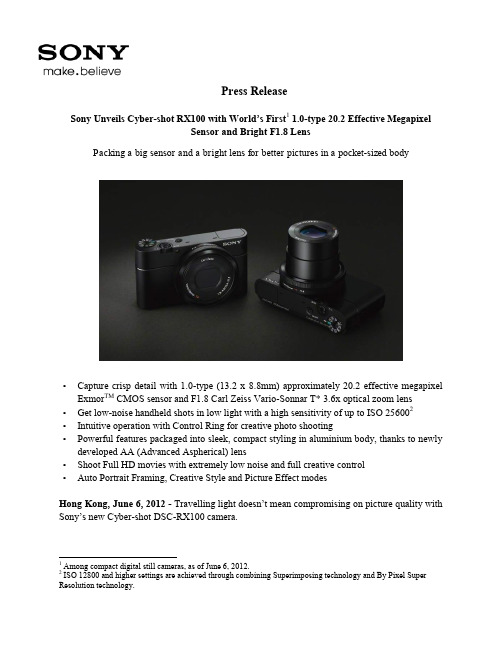
Press ReleaseSony Unveils Cyber-shot RX100 with World’s First1 1.0-type 20.2 Effective MegapixelSensor and Bright F1.8 LensPacking a big sensor and a bright lens for better pictures in a pocket-sized body•Capture crisp detail with 1.0-type (13.2 x 8.8mm) approximately 20.2 effective megapixel Exmor TM CMOS sensor and F1.8 Carl Zeiss Vario-Sonnar T* 3.6x optical zoom lens •Get low-noise handheld shots in low light with a high sensitivity of up to ISO 256002•Intuitive operation with Control Ring for creative photo shooting•Powerful features packaged into sleek, compact styling in aluminium body, thanks to newly developed AA (Advanced Aspherical) lens•Shoot Full HD movies with extremely low noise and full creative control•Auto Portrait Framing, Creative Style and Picture Effect modesHong Kong, June 6, 2012 - Travelling light doesn‟t mean compromising on picture quality with Sony‟s new Cyber-shot DSC-RX100 camera.1 Among compact digital still cameras, as of June 6, 2012.2 ISO 12800 and higher settings are achieved through combining Superimposing technology and By Pixel Super Resolution technology.Sleekly crafted in aluminium for strength, lightness and luxurious looks, the RX100 inherits many advanced imaging features from Sony‟s α range of A-mount and E-mount camera families. It is an accomplished partner for travel, portraits or street photography, with impressive picture quality and intuitive, comfortable control options that make the RX100 ideal as a step-up from point-and-shoot cameras. It is also ideal as a pocket-sized second camera for enthusiasts who want to capture pristine stills and Full HD video while they are on the move.At the heart of the Cyber-shot RX100 is the world‟s first1 1.0-type Exmor CMOS sensor with a resolution of 20.2 effective megapixels. Specially developed by Sony, the sensor has an area that is around four times larger than the 1/2.3-type imager in regular point-and-shoot cameras. Capturing far more light than small-sensor cameras, it is the key to beautiful, detail packed images and Full HD movie clips with very low noise.The larger sensor is partnered with an ultra-bright Carl Zeiss Vario-Sonnar T* lens with 3.6x optical zoom range. In contrast with standard point-and-shoot cameras, the wide F1.8 maximum aperture lets in more light to complement the resolving power of the large 1.0-type Exmor CMOS sensor.In common with high-performance DSLR optics, the lens features a seven- bladed circular aperture. This makes it easy to produce pro-style …bokeh‟ effects, with subjects in sharp focus against a smoothly-blurred background. The lens also features an Advanced Aspherical (AA) glass element that contributes to the camera‟s extremely compact dimensions wit hout sacrificing optical performance or resolution.Complementing the 1.0-type sensor and lens, the optimised BIONZ image processor maximises shooting responses while assuring exceptionally clean, natural images. It also extends sensitivity right up to ISO 256002(using Multi Frame Noise Reduction), allowing exceptionally clear handheld images in dim light. Speedy burst shooting at up to 10 frames per second (full-resolution) lets users grab split-second photo opportunities, while high-speed autofocus locks onto a user‟s target in as little as 0.13 seconds3.Even if users are shooting outdoors, it is easy to see subtle details and tones on the bright, high contrast 7.5cm (3") Xtra Fine LCD. With an extremely high 1229k dot resolution, the screen debuts new WhiteMagic™4 technology that uses white pixels in addition to RGB to boost screen brightness.It is easy to fine-tune the image with a wide range of manual adjustments, whether users are shooting stills or Full HD video.3 Actual autofocus speed depends on scene and lighting conditions.4 WhiteMagic is a trademark of Japan Display Inc.Experienced photo enthusiasts will appreciate the unique Control Ring that surrounds the lens body. Allowing smooth, fingertip adjustment of exposure, zoom, Picture Effect and other functions, it makes versatile DSLR-style creative control over the image easily accessible.Frequently-used functions can be assigned to a handy Fn (function) button for instant access. Memory Recall stores up to three groups of settings for instant recall – a big time-saver when users don‟t want to keep adjusting parameters for favourite scenes.Just like a DSLR camera, there‟s a choice of auto and manual focus modes for even greater control over the image. If users are focusing manually, MF Assist magnifies the image to simplify fine adjustments. There is also a convenient Peaking function that highlights sharply-focused areas of the image on screen.There is a generous choice of artistic options to expand shooting possibilities for enthusiasts and novice photographers alike. It is easy to fine-tune the look of the image with Photo Creativity to suit the scene or user‟s personal preferences. Picture Effect offers an inspiring choice of 'in camera' effects that can be previewed on the LCD screen, including Toy Camera, Partial Colour, Pop Colour, HDR Painting, Miniature, Illustration, Watercolour and others (Note: real-time preview not available with all Picture Effect settings).Shared with the latest α range of A-mount and E-mount cameras, Auto Portrait Framing makes it simple to capture personality-packed photos of family and friends. Cyber-shot does all the hard work, automatically detecting faces and cropping the scene to create tighter, pro-style compositions without sacrificing pixel count.Newly created for the DSC-RX100, the NP-BX1 Type X rechargeable battery features a slim, energy-efficient design to allow up to 330 still shots or 80 minutes of AVCHD video shooting per charge. Exclusively designed to match the camera, the LCJ-RXA is a stylish …jacket style‟ carry case with an attractive leather-look textured finish and supplied shoulder strap. Attaching securely to the camera, the case opens to allow easy shooting while users are on the move.The new Cyber-shot RX100 digital compact camera from Sony will be available in early July 2012.For customer enquiries, please contact Sony sales and services hotline at (852) 2345-2966. About Hong Kong Marketing CompanyHong Kong Marketing Company (HKMC), a division of Sony Corporation of Hong Kong Limited, provides sales, marketing and after sales services for Sony‟s consumer electronics products as well as broadcast and professional products in Hong Kong and Macau. For more information on Sony‟s products and services, please visit its web site on . About make.believe“make.believe” (make dot believe) is a Group-wide brand message that unites Sony‟s communications initiatives across electronics, games, movies, music, mobile phones and network services. “make.believe” symbolizes the spirit of Sony –the power of creativity, the ability to turn ideas into reality and the belief that anything you can imagine, you can make real.# # #Specifications of Sony Cyber-shot digital camera DSC-RX100:。
索尼相机怎么用
索尼相机怎么用
使用索尼相机的步骤如下:
1. 确保相机已经充电并装上存储卡。
2. 打开相机开关,将模式选择拨轮旋转到所需的模式,例如自动模式或手动模式。
3. 使用相机的视图查找器或液晶屏幕来查看物体。
4. 如果需要调整焦距,您可以旋转镜头上的变焦环或使用相机背部的缩放按钮。
5. 按下快门按钮将照片拍下。
6. 根据需要,您可以通过菜单按钮进入菜单系统来调整相机的设置,例如白平衡、曝光或ISO感光度。
7. 如果您想录制视频,切换至视频模式并按下录制按钮开始录制。
同样的,您也可以使用菜单按钮调整视频设置。
8. 拍摄完成后,您可以将存储卡插入计算机中,使用相机自带的USB连接线或读卡器将照片传输到计算机上进行编辑或分享。
以上是一般使用索尼相机的步骤,具体操作可能会根据不同型号和功能而有所不同。
建议您查看相机的用户手册以获取更详细的操作说明。
索尼RX100使用说明

• MENU 2 [中央按鈕功能] 要使用的模式 標準:指定給控制輪上中央按鈕的功能會因為[自動對焦
•
區域]設定而異。
AEL切換
• AF/MF控制切換 :指定您設定的功能。 對焦放大鏡
•
• [中央按鈕功能]設定為[標準]時指定的功能。
• [自動對焦區域]設定指定的設定
• 多重
追蹤對焦
• 中心
追蹤對焦
• 彈性定點
變更對焦區域
• AEL切換 • 很難取得被攝體的適當曝光時,這個功能可以讓您對具有
您所要亮度的區域對焦並測光,以鎖定曝光。 • MENU 2 [中央按鈕功能] [AEL切換] • 將相機對準您要配合曝光的區域。 • 曝光就會被設定。 • 按控制輪上的 。 • 曝光鎖定之後, (AE鎖定)會點亮。 • 對被攝體對焦並拍攝。 • 若要取消曝光鎖定,再會重疊影像。 記錄影像時比較花時間,而且閃光燈不會閃光。
• 對焦放大鏡
在[手動對焦]模式中,您可以用[對焦放大鏡] 放大螢幕上的影像,讓手動對焦更容易一些。
1. MENU 2 [中央按鈕功能] [對焦放大鏡] 2. 按 以放大影像。 • 您可以用[對焦放大時間]設定放大影像的時間
長度。
• 測光模式
• 選擇[測光模式],以設定要根據被攝體的哪個 部分決定曝光值。
焦調整。 • 自動對焦之後,以手動方式微調焦距。 • 想對窄小範圍對焦時很有用。半按下快門按鈕,然後轉動
控制環。 • 先手動調整對焦,然後使用自動對焦。 • 對於偏向場景後方的被攝體很有用,因為使用自動對焦調
整時,這些被攝體往往會超出焦點範圍之外。
中央按鈕功能
• 讓您選擇常用功能並將其指定給控制輪上的中央按鈕。
• MENU 3 [測光模式] 要使用的模式
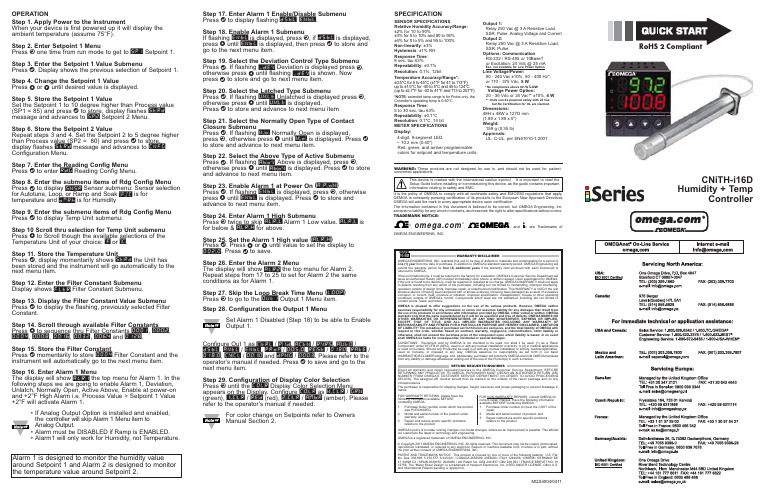
DSC-RX100M3 数字单反摄影机用户指南说明书
Step 17. Enter Alarm 1 Enable/Disable Submenu Press d to display flashing DSBL / ENBL .Step 18. Enable Alarm 1 SubmenuIf flashing ENBL is displayed, press a , if DSBL is displayed,press b until ENBL is displayed, then press d to store and go to the next menu item.Step 19. Select the Deviation Control Type Submenu Press d . If flashing _DEV Deviation is displayed press a ,otherwise press b until flashing _DEV is shown. Now press d to store and go to next menu item.Step 20. Select the Latched Type SubmenuPress d . If flashing UNLT Unlatched is displayed press a ,otherwise press b until UNLT is displayed.Press d to store and advance to next menu itemStep 21. Select the Normally Open Type of Contact Closure SubmenuPress d . If flashing N.o.Normally Open is displayed,press a , otherwise press b until N.o.is displayed. Press d to store and advance to next menu item.Step 22. Select the Above Type of Active Submenu Press d . If flashing ABoV Above is displayed, press a ,otherwise press b until ABoV is displayed. Press d to store and advance to next menu item.Step 23. Enable Alarm 1 at Power On (A.P.oN )Press d . If flashing ENBL is displayed, press a , otherwise press b until ENBL is displayed. Press d to store and advance to next menu item.Step 24. Enter Alarm 1 High SubmenuPress a twice to skip ALR.L Alarm 1 Low value. ALR.L is for below & ALR.H for above.Step 25. Set the Alarm 1 High value (ALR.H )Press d . Press b or c until value to set the display to 002.0. Press d to save.Step 26. Enter the Alarm 2 MenuThe display will show ALR2the top menu for Alarm 2.Repeat steps from 17 to 25 to set for Alarm 2 the same conditions as for Alarm 1.Step 27. Skip the Loop Break Time Menu (LOOP )Press a to go to the OUT1Output 1 Menu item.Step 28. Configuration the Output 1 MenuSet Alarm 1 Disabled (Step 18) to be able to Enable Output 1.Configure Out 1 as CTRL / PID , ACTN / RVRS , AUTO /DSBL , ANTL / ENBL , PRoP / 005.0, REST / 0180, RATE /018.0, CYCL / 0010and DPNG / 0003. Please refer to the operator’s manual if needed. Press d to save and go to the next menu item.Step 29. Configuration of Display Color Selection Press a until the COLR Display Color Selection Menu appears on the Display. Configure COLR as N.CLR /GRN (green), 1.CLR / RED (red), 2.CLR /AMBR (amber). Please refer to the operator’s manual if needed.For color change on Setpoints refer to Owners Manual Section 2.OPERATIONStep 1. Apply Power to the InstrumentWhen your device is first powered up it will display the ambient temperature (assume 75°F).Step 2. Enter Setpoint 1 MenuPress a one time from run mode to get to SP1Setpoint 1. Step 3. Enter the Setpoint 1 Value SubmenuPress d . Display shows the previous selection of Setpoint 1.Step 4. Change the Setpoint 1 ValuePress b or c until desired value is displayed.Step 5. Store the Setpoint 1 ValueSet the Setpoint 1 to 10 degree higher than Process value (SP1 = 85) and press d to store, display flashes STRD message and advances to SP2Setpoint 2 Menu.Step 6. Store the Setpoint 2 ValueRepeat steps 3 and 4. Set the Setpoint 2 to 5 degree higher than Process value (SP2 = 80) and press d to store,display flashes STRD message and advances to CNFG Configuration Menu.Step 7. Enter the Reading Config Menu Press d to enter RDG Reading Config Menu.Step 8. Enter the submenu items of Rdg Config Menu Press d to display SNSR Sensor submenu: Sensor selection for Autotune, Loop, or Ramp and Soak °F.°C is for temperature and DRRh is for HumidityStep 9. Enter the submenu items of Rdg Config Menu Press d to display Temp Unit submenu:Step 10 Scroll thru selection for Temp Unit submenu Press b to Scroll though the available selections of the Temperature Unit of your choice: °F or °C .Step 11. Store the Temperature UnitPress d , display momentarily shows STRD the Unit has been stored and the instrument will go automatically to the next menu item.Step 12. Enter the Filter Constant Submenu Display shows FLTR Filter Constant Submenu.Step 13. Display the Filter Constant Value Submenu Press d to display the flashing, previously selected Filter Constant.Step 14. Scroll through available Filter Constants Press b to sequence thru Filter Constants 0001, 0002,0004, 0008, 0016, 0032, 0064and 0128.Step 15. Store the Filter ConstantPress d momentarily to store 0004Filter Constant and the instrument will automatically go to the next menu item.Step 16. Enter Alarm 1 MenuThe display will show ALR1the top menu for Alarm 1. In the following steps we are going to enable Alarm 1, Deviation,Unlatch, Normally Open, Active Above, Enable at power-on and +2°F High Alarm i.e. Process Value > Setpoint 1 Value +2°F will activate Alarm 1.•If Analog Output Option is installed and enabled,the controller will skip Alarm 1 Menu item to Analog Output.•Alarm must be DISABLED if Ramp is ENABLED.•Alarm1 will only work for Humidity, not Temperature.MQS4004/0411SPECIFICATIONSENSOR SPECIFICATIONSRelative Humidity Accuracy/Range:±2% for 10 to 90%±3% for 5 to 10% and 90 to 95%±4% for 0 to 5% and 95 to 100%Non-linearity : ±3%Hysteresis : ±1% RH Response Time :8 sec, tau 63%Repeatability : ±0.1%Resolution : 0.1%, 12bitTemperature Accuracy/Range*:±0.5°C for 5 to 45°C (±1°F for 41 to 113°F); up to ±1.5°C for -40 to 5°C and 45 to 124°C (up to ±2.7°F for -40 to 41°F and 113 to 257°F)*NOTE:extended temp range is for Probe only, the Controller’s operating temp is 0-50°CResponse Time : 5 to 30 sec, tau 63%Repeatability : ±0.1°C Resolution : 0.1°C, 14 bit METER SPECIFICATIONS Display:4-digit, 9-segment LED,•10.2 mm (0.40")Red, green, and amber programmable colors for setpoint and temperature units.Output 1:Relay 250 Vac @ 3 A Resistive Load,SSR, Pulse, Analog Voltage and Current Output 2:Relay 250 Vac @ 3 A Resistive Load,SSR, PulseOptions:Communication RS-232 / RS-485 or 10BaseT or Excitation:24 Vdc @ 25 mAExc. not available for Low Power OptionLine Voltage/Power:90 - 240 Vac ±10%,50 - 400 Hz*, or 110 - 375 Vdc, 5 W* No compliance above 60 Hz Low Voltage Power Option:20 - 36 Vdc or 24 Vac** ±10%, 4 W** Units can be powered safely with 24 Vacbut No Certification for UL are claimed.Dimensions:48H x 48W x 127D mm (1.89 x 1.89 x 5")Weight:159 g (0.35 lb)Approvals:UL, C-UL, per EN61010-1:2001WARNING:These products are not designed for use in, and should not be used for, patient-connected applications.It is the policy of OMEGA to comply with all worldwide safety and EMC/EMI regulations that apply. OEMGA is constantly pursuing certification of its products to the European New Approach Directives. OMEGA will add the mark to every appropriate device upon certification.The information contained in this document is believed to be correct, but OMEGA Engineering, Inc. accepts no liability for any errors it contains, and reserves the right to alter specifications without notice.TRADEMARK NOTICE:®,®,, andare Trademarks ofOMEGA ENGINEERING, INC.®This Quick Start Reference provides informationon setting up your instrument for basic operation.The latest complete Communication and OperationalManual as well as free Software and ActiveX Controlsare available at /specs/iseries oron the CD-ROM enclosed with your shipment. SAFETY CONSIDERATIONThe instrument is a panel mount device protected in accordance with EN61010-1:2001. Remember that the unit has no power-on switch. Building installation should include a switch or circuit-breaker that must be compliant to IEC 947-1 and 947-3.SAFETY:•Do not exceed voltage rating on the label located onthe top of the instrument housing.•Always disconnect power before changing signal andpower connections.•Do not use this instrument on a work bench withoutits case for safety reasons.•Do not operate this instrument in flammable orexplosive atmospheres.•Do not expose this instrument to rain or moisture. EMC:•Whenever EMC is an issue, always use shielded cables.•Never run signal and power wires in the same conduit.•Use signal wire connections with twisted-pair cables.•Install Ferrite Bead(s) on signal wire close to theinstrument if EMC problems persist.MOUNTINGPanel Mounting Instruction:ing the dimensions from the panel cutout shown inexploded views, cut an opening in the panel.45mm +.61/-.00square with R 1.5, 4 places(1.772”+.024/-.000square with R 0.06”, 4 places)Panel thickness: 6.4mm (0.25”) max / 0.8mm (0.03”) min.2.Insert the unit into the opening from the front of the panel,so the gasket seals between the bezel and the front of the panel.3.Slide the retainer over the rear of the case and tightenagainst the backside of the mounting panel.。
索尼HDR-XR100 80GB HDD高清摄像机说明书
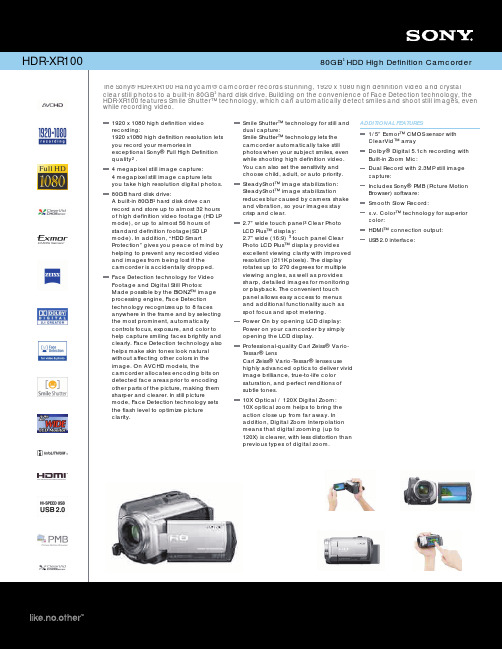
The Sony® HDR-XR100 Handycam® camcorder records stunning, 1920 x 1080 high definition video and crystalclear still photos to a built-in 80GB hard disk drive. Building on the convenience of Face Detection technology, the HDR-XR100 features Smile Shutter™ technology, which can automatically detect smiles and shoot still images, even while recording video.11920 x 1080 high definition video recording:1920 x1080 high definition resolution lets you record your memories inexceptional Sony® Full High Definition quality .2 4 megapixel still image capture:4 megapixel still image capture lets you take high resolution digital photos.80GB hard disk drive:A built-in 80GB hard disk drive can record and store up to almost 32 hours of high definition video footage (HD LP mode), or up to almost 56 hours of standard definition footage(SD LP mode). In addition, “HDD SmartProtection” gives you peace of mind by helping to prevent any recorded video and images from being lost if the camcorder is accidentally dropped.1 Face Detection technology for Video Footage and Digital Still Photos:Made possible by the BIONZ™ image processing engine, Face Detection technology recognizes up to 8 faces anywhere in the frame and by selecting the most prominent, automatically controls focus, exposure, and color to help capture smiling faces brightly and clearly. Face Detection technology also helps make skin tones look natural without affecting other colors in the image. On AVCHD models, thecamcorder allocates encoding bits on detected face areas prior to encoding other parts of the picture, making them sharper and clearer. In still picturemode, Face Detection technology sets the flash level to optimize picture clarity.Smile Shutter™ technology for still and dual capture:Smile Shutter™ technology lets the camcorder automatically take still photos when your subject smiles, even while shooting high definition video. You can also set the sensitivity and choose child, adult, or auto priority.SteadyShot™ image stabilization: SteadyShot™ image stabilizationreduces blur caused by camera shake and vibration, so your images stay crisp and clear.2.7” wide touch panel Clear Photo LCD Plus™ display:2.7” wide (16:9) touch panel Clear Photo LCD Plus™ display providesexcellent viewing clarity with improved resolution (211K pixels). The display rotates up to 270 degrees for multiple viewing angles, as well as provides sharp, detailed images for monitoring or playback. The convenient touch panel allows easy access to menus and additional functionality such as spot focus and spot metering.3 3 Power On by opening LCD display:Power on your camcorder by simply opening the LCD display.Professional-quality Carl Zeiss® Vario-Tessar® LensCarl Zeiss® Vario-Tessar® lenses use highly advanced optics to deliver vivid image brilliance, true-to-life color saturation, and perfect renditions of subtle tones.10X Optical / 120X Digital Zoom:10X optical zoom helps to bring the action close up from far away. In addition, Digital Zoom Interpolation means that digital zooming (up to120X) is clearer, with less distortion than previous types of digital zoom.ADDITIONAL FEATURES1/5” Exmor™ CMOS sensor with ClearVid™ arrayDolby® Digital 5.1ch recording with Built-in Zoom Mic:Dual Record with 2.3MP still image capture:Includes Sony® PMB (Picture Motion Browser) software:Smooth Slow Record:x.v. Color™ technology for superior color:HDMI™ connection output: USB 2.0 interface:Sony Electronics Inc. • 16530 Via Esprillo • S an Diego, CA 92127 • 1.800.222.7669 • w Last Updated: 02/16/20091. 80GB available. Storage capacity may vary. A portion of the memory is used for data management functions.2. This camcorder captures high definition footage in the AVCHD format. DVD media containing AVCHD footage should not be used with DVD based players or recorders, as the DVDplayer/recorder may fail to eject the media and may erase its contents without warning. DVD media containing AVCHD footage must only be played back on a compatible Blu-ray Disc devices, PC with supplied software or PLAYSTATION®3 devices. 3. Viewable area measured diagonally.9. Requires Microsoft Windows XP SP3/ Windows Vista SP1. Not supported by Mac OS. 10. Smooth Slow Record captures 3 seconds of video which play back over 12 seconds.© 2008 Sony Electronics Inc. All rights reserved. Reproduction in whole or in part without written permission is prohibited. Sony, Handycam, Optical SteadyShot, BIONZ, Clear Photo LCD Plus, Smile Shutter, AVCHD, ClearVid, x.v. Color, BRAVIA, Exmor, Memory Stick Duo and the Memory Stick logo are trademarks of Sony. Microsoft, Windows, and Windows Vista are trademarks of MicrosoftCorporation. Blu-ray Disc and it’s logo are trademarks. PLAYSTATION is a registered trademark of Sony Computer Entertainment. Dolby is a registered trademark of Dolby Laboratories. All other trademarks are trademarks of their respective owners.*Logo mentions need to be included if logo shown or listed in copyPlease visit the Dealer Network for more information at/dnSpecificationsGeneralImaging Device: 1/5" Exmor™ CMOS sensorwith ClearVid array Pixel Gross: 2360KRecording Media: 80GB Non-Removeable Hard Disk DriveMemory Stick PRO Duo™ Media (Sold Separately)Recording and Playback Times: 80GB HDD: High Definition: FH = up to 580 min., HQ = up to 1180 min. SP = up to 1440 min., LP = up to 920 min.Standard Definition: HQ = up to 1180 min., SP = up to 1750 min., LP = up to 3360 min. When using 16GB Memory Stick PRO Duo™ Media (sold separately): HighDefinition: FH = up to 110 min., HQ = up to 230 min. SP = up to 280 min., LP = up to 375 min.Standard Definition: HQ = up to 230 min., SP = up to 340 min., LP = up to 655 min. Video Actual: 1430K Pixels (16:9), 1080K Pixels (4:3)Still Actual: 1490K Pixels (16:9), 1990K Pixels (4:3)Processor: BIONZ™ image processor Video Resolution: 1920 x 1080Still Picture Resolution: 4 megapixelAudioRecording Format: Dolby® Digital 5.1 Microphone: Built-in Zoom MicrophoneConvenienceMemory Stick PRO™ Media Compatibility: Memory Stick PRO Duo™ Media (Sold Separately)Still Image Mode(s): JPEG Face Detection: Yes Hybrid: YesQuick On: Power on by LCD Dual Record: 2.3 megapixel Smile Shutter: YesConvenience FeaturesEasy Operation: YesMultiple Language Display: Yes Slide Show Mode: YesScene Mode(s): Auto, Twilight, Candle, Sunrise & Sunset, Fireworks, Landscape, Portrait, Spotlight, Beach, Snow Dynamic Range Optimizer: Yes Fader Effect(s): Black, White Face Index: Yes Film Roll Index: YesPhoto Capture from Movie: Yes x.v.Color™: YesSteadyShot® Image Stabilization: SteadyShot™ image stabilizationWhite Balance: Auto / outdoor / indoor / Onepush (Touch Panel) BRAVIA® Sync™: YesVideoFormat: HD: MPEG4 AVC/H.264; SD: MPEG2 Video Signal: HD: 1920 x 1080/60i; SD: NTSC color, EIA standardsVideo FeaturesPhotoTV HD: YesInputs and OutputsAnalog Audio/Video Output(s): Included (via A/V Remote Terminal)Digital Audio/Video Output(s): HDMI USB Port(s): Hi-speed (2.0 compliant) Component Video (Y/Pb/Pr) Output(s): Supplied (via A/V Remote jack)S-Video Output(s): Sold separately (via A/V Remote jack)HDMI™ Connection Output(s): Yes (mini) Audio/Video Remote Terminal: Video / S Video / Audio / Component Out / RemoteDisplayLCD Screen: 2.7" wide touch panel Clear Photo LCD Plus™ display (211k pixels)HardwareMemory Stick slot: Memory Stick PRO Duo™ MediaManual / Auto Lens Cover: Manual S/S & Zoom button on LCD: YesOptics/Lens35mm Equivalent: 42 - 497mm (16:9), 52 - 608mm (4:3) Aperture: F1.8-2.2Exposure: Yes (Touch Panel) Filter Diameter: 30mmFocal Distance: 3.2 - 32mmFocus: Full range Auto / Manual (Touch Panel)Shutter Speed: Auto (Slow Shutter ON), 1/30 - 1/1000;Auto (Slow Shutter OFF) 1/60 - 1/1000; Scene Selection, 1/2 - 1/1000 Optical Zoom: 10x Digital Zoom: 120xResolution: 4 megapixel stillLens Type: Carl Zeiss® Vario-Tessar® Minimum Illumination: 5 lux(Auto Slow Shutter ON, 1/30 Shutter Speed )PowerPower Consumption: 3.9WBattery Type: InfoLITHIUM® with AccuPower™ Meter System (NP-FH60)Power Requirements: 7.2V (battery pack); 8.4V (AC Adaptor)Service and Warranty InformationLimited Warranty Term: Limited Warranty --- 1 Year Parts; 90 Days LaborSoftware Supplied Software: PMB Ver.4.2.00 Supports Windows 2000 Professional Service Pack4?SP4?, Windows XP Service Pack3?SP3??32bit?Windows Vista Service Pack1?SP1??32bit/64bit?. Not supported by Mac OS.DimensionsWeight: w/o battery: 11oz (330g), w battery: 14.5oz (410g)Measurements: 2 3/4 x 2 3/4 x 5 1/8 inch (69 x 68 x 129mm)Supplied AccessoriesAC adaptor (AC-L200)Rechargable Battery Pack (NP-FH60) Component A/V Cable A/V Connecting CableApplication Software / USB Driver / (CD-ROM) USB CableOptional AccessoriesRechargeable InfoLITHIUM Batteries (NP-FH50/FH70/FH100) Case (LCS-BBDB/R/L)Starter Kit (ACC-ASH6, ACC-HDH6)AC Adaptor/Charger for H series batteries (AC-VQH10)Travel Charger (BC-TRP)Wide Angle Conversion Lens (VCL-HGE07A) HDMI Cable (mini) (VMC-30MHD) Tripod (VCT-80AV)Video Light (HVL-10NH)Underwater Sports Pack (SPK-HCE) GPS Unit (GPS-CS3KA) UPC Code: 027*********。
sony dsc rx100 iv firmware update 说明书

疾速精灵——索尼黑卡RX100V数码相机试用手记
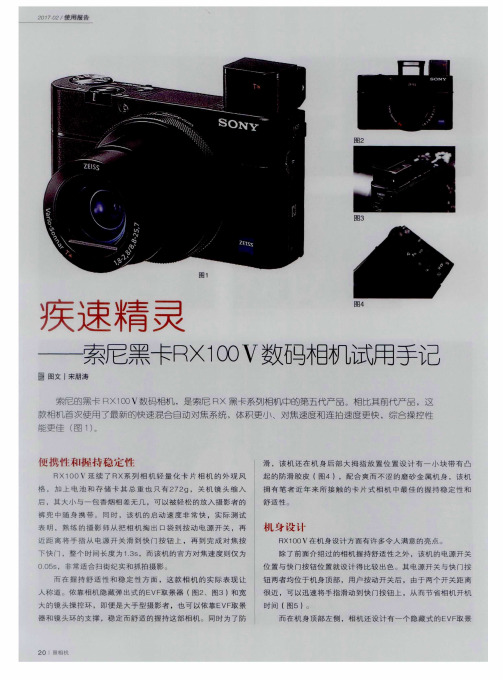
心 。拨 动 机 顶 后脊 处 的 闪光 灯 释 放 拨
杆 ,相 机 的 闪 光 灯 会 随 即 弹 出 , 由 于 弹 出 高 度 高 于 镜 头 本 身 , 因 此 可 以 在 所 有
能更佳 ( 图1 ) 。
他 挑
l 摊 特稳 定
滑 ,该 机 还 在 机 身 后 部 大 拇 指 放 置 位 置 设 计 有 一 小 块 带 有 凸 起 的防滑胶 皮 ( 图4).配 合 爽 而 不 涩 的 磨 砂 金 属 机 身 ,该 机 拥 有 笔 者 近 年 来 所 接 触 的 卡 片 式 相 机 中 最 佳 的 握 持 稳 定 性 和
功 能 也 是 一 个 设 计 亮 点 , 用 户 只 需 要
一
根 标 准 安 卓 数 据 线 , 外 接 普 通 充 电
器 , 就 可 以 对 相 机 内 的 锂 电 池 进 行 充
电 ( 图9)。 不 过 ,令 人 遗 憾 的 是 ,RX1 0 0V的
图6 图9
三 脚架螺孔设计 位置并 不是特 别合理 。 其 螺 孔与 电池 / 存 储 卡 舱 被 设 计 在 了 一 起 ,如 果 在 使 用 三 脚 架 时 需 要 更 换 电 池 或 存 储 卡 ,就 必 须 先 拆 卸 掉 相 机 上 的 云
舒适性 。
RX1 0 0Y延 续 了 RX系 列 相 机 轻 量 化 卡 片 相 机 的 外 观 风 格 ,加 上 电池 和存 储 卡 其 总重 也 只有 2 7 2 g, 关 机 镜 头 缩 入 后 ,其 大 小 与 一 包 香烟 相 差 无 几 ,可 以被 轻 松 的 放 入 摄 影 者 的 裤 兜 中 随 身 携 带 。 同 时 ,该 机 的 启 动 速 度 非 常 快 ,实 际 测 试 表 明 ,熟 练 的 摄 影 师 从 把 相 机 掏 出 口袋 到 按 动 电 源 开 关 ,再
索尼黑卡RX100设置与后期详解
索尼黑卡RX100设置与后期详解一、拍照1、影像尺寸分20M、10M、5 M,这里不是指文件大小,而是指2000万像素、1000万像素、500万像素。
无论选哪个拍摄和存储速度是一样的。
1000万和500万像素是从2000万像素缩放而来的,和软件缩放效果一样的,所以100%看比2000万像素清晰些,噪点也少些。
但如果把他们再放大到2000万像素,和原先拍的2000万像素比较就要差一些了,所以一般情况下选2000万像素。
以下情况选500万像素:(1)你拍到卡快满了,到没备用卡,又实在不想删一些照片。
(2)拍一些纸质文字,比如翻拍个日记啥的,500万像素已经很够了,再多也是浪费。
(3)急需上传到网络且画质要求不高的。
像素越少文件越小,上传越快。
(4)喜欢100%看图且忍受不了噪点的,黑卡的500万像素同ISO下噪点相当于1600万像素的APS-C相机,还是较干净的,黑卡1000万像素ISO125下也是有明显噪点的。
2、纵横比分3:2、16:9、4:3和1:1,黑卡传感器尺寸为13.2*8.8mm,全像素比例就是3:2,其他几种都是从这上面剪裁的,所以还是选3:2吧,如果以后洗成6寸相片也是3:2,无需剪裁。
如果喜欢拍宽屏风景而且直出就选16:9。
3、影像质量分RAW、RAW&JPEG、精细、标准,RAW是原始文件,精细和标准都是JPG文件,是经过机内处理过后的成品。
RAW文件大小约20M,精细一般4-8M,标准一般3-5M。
一张16G的卡,你选择RAW&JPEG模式拍摄能拍500多张,用JPG模式能拍3000张。
大光比环境下(如逆光、晚上拍开着灯的商店、灯具、在阴影的地方拍到有阳光的天空、白天室内对门外或窗户拍、夕阳等)及过渡丰富的画面(如蓝天)RAW比JPG调整余地大,能找回高光下的更多细节。
一般情况下两者差不多。
RAW的后期调整比JPG速度慢,如果电脑配置一般,差别会更明显。
连拍时选择RAW格式,连拍速度会明显下降而且存储时间会加倍。
【相机评测】小机身中的黑科技——黑卡RX100M5体验
【相机评测】⼩机⾝中的⿊科技——⿊卡RX100M5体验在摄影界有⼀句“底⼤⼀级压死⼈”的调侃话,说看⼀台相机好不好就看这台相机的CMOS⼤不⼤?可是⾃从索尼⿊卡系列出现以后,⿊卡系列正影响着相机的发展,索尼⿊卡RX100M5个⼈感觉这台相机是⾯向未来趋势的相机——超⼩的尺⼨,强悍的电⼦性能。
笔者就还原这⼀个星期的使⽤情况,看看这个⼩机⾝中到底有哪些⿊科技?⼀、外观赏析▼包装盒主题采⽤了⿊⾊包装,再加橙⾊点缀,并且带有索尼的原装⽩⾊封条。
盒⼦左上⾓为SONY标志,标志下⽅为RX100V,盒⼦正⾯为⿊卡M5的渲染图。
▼盒⼦顶部是⿊卡RX100M5的⼀些制式格式说明,其中有⼏个格式⼤众都能看得懂,如4K、杜⽐⾳效、HDMI接⼝、⾼清1080P和WiFi等等。
▼想必⼤家都想看⼀下⿊卡RX100M5的真⾯⽬了,所以为了节约⼤家时间,外包装的其他4⾯就不⼀⼀展⽰了,咱们直接开箱。
▼这⼀章节咱们先来把玩⼀下⿊卡RX100M5,其他配件都放在了下⼀章节,下图是镜头收缩时的样⼦,可以看到显眼的蓝⾊“蔡司”logo、SONY标志、焦距和光圈等信息。
▼机⾝顶部的部件⽐较多,包含了电源开关键、电源/充电指⽰灯、快门按钮、模式转盘、变焦杆、闪光灯、屈光度调节杆、取景器等。
咋⼀眼看上密密⿇⿇都是字,索尼这种做法估计为了帮助初⼊摄影的⼩⽩着想的,对于专业摄影⼈员来说,操作⼀圈过后,就基本知道哪些按键对应哪些功能了。
▼机⾝背⾯是延续了好⼏代的显⽰屏幕,这块屏幕被⼈们吐槽最多的就是“不⽀持触摸”,显⽰器正下⽅⼜是SONY标志,这是满⾝SONY标志。
除了这个屏幕外,还有⼀些功能按键Fn按钮、MOVIE(动态影像)按钮、MENU按钮、控制拨轮、播放按钮、删除按钮。
▼机⾝右侧为Multi/Micro USB端⼦、HDMI微型接⼝、腕带安装部,那个有Wi-Fi字样的标志就是⿊卡RX100M5的内置Wi-Fi天线。
▼机⾝底部的⽂字说明就⽐较少了,⼀下⼦看起来清爽了不少,底部的部件主要为电池插槽、三脚架安装孔、存取指⽰灯、存储卡插槽、电池/存储卡盖等。
- 1、下载文档前请自行甄别文档内容的完整性,平台不提供额外的编辑、内容补充、找答案等附加服务。
- 2、"仅部分预览"的文档,不可在线预览部分如存在完整性等问题,可反馈申请退款(可完整预览的文档不适用该条件!)。
- 3、如文档侵犯您的权益,请联系客服反馈,我们会尽快为您处理(人工客服工作时间:9:00-18:30)。
• MENU 2 [中央按鈕功能] 要使用的模式 標準:指定給控制輪上中央按鈕的功能會因為[自動對焦
•
區域]設定而異。
AEL切換
• AF/MF控制切換 :指定您設定的功能。 對焦放大鏡
•
• [中央按鈕功能]設定為[標準]時指定的功能。
• [自動對焦區域]設定指定的設定
• 多重
追蹤對焦
• 中心
追蹤對焦
• MENU 3 [測光模式] 要使用的模式
•
• 附註 • 相機設定為[手動曝光]時,不能選擇[ISO AUTO]。
[ISO 125]是預設的設定。 • [ISO]設定為低於ISO 125的數值時,可以記錄的被攝
體亮度範圍(動態範圍)可能會降低。
• 至於動態影像,ISO 125至ISO 3200之間的數值都可以使 用。
• 對焦放大鏡
在[手動對焦]模式中,您可以用[對焦放大鏡] 放大螢幕上的影像,讓手動對焦更容易一些。
1. MENU 2 [中央按鈕功能] [對焦放大鏡] 2. 按 以放大影像。 • 您可以用[對焦放大時間]設定放大影像的時間
長度。
• 測光模式
• 選擇[測光模式],以設定要根據被攝體的哪個 部分決定曝光值。
• AF/MF控制切換
您可以暫時切換自動對焦與手動對焦。
1. MENU 2 [中央按鈕功能] [AF/MF控制切 換]
2. 按 切換自動對焦與手動對焦。 • [對焦模式]設定為[手動對焦]時,相機會切
換至[單次AF],而[對焦模式]不是設定為 [手動對焦]時,則會切換至[手動對焦]。按 以返回先前的模式。
(手動對焦) 手動調整對焦。
使用[DMF]/[手動對焦]
1.MENU
2 [對焦模式] [DMF]或[手動對焦]
2.轉動控制環以調整對焦。
•使用峰值功能、[對焦放大鏡]或[MF輔助]更輕鬆的調整對焦。
•[對焦模式]設定為[DMF]時,自動對焦會在您半按下快門按鈕時啟動。
• 用[DMF]設定對焦 • 利用[DMF],可以用下列方式合併使用手動與自動對
• 彈性定點
變更對焦區域
• AEL切換 • 很難取得被攝體的適當曝光時,這個功能可以讓您對具有
您所要亮度的區域對焦並測光,以鎖定曝光。 • MENU 2 [中央按鈕功能] [AEL切換] • 將相機對準您要配合曝光的區域。 • 曝光就會被設定。 • 按控制輪上的 。 • 曝光鎖定之後, (AE鎖定)會點亮。 • 對被攝體對焦並拍攝。 • 若要取消曝光鎖定,再按 。
焦調整。 • 自動對焦之後,以手動方式微調焦距。 • 想對窄小範圍對焦時很有用。半按下快門按鈕,然後轉動
控制環。 • 先手動調整對焦,然後使用自動對焦。 • 對於偏向場景後方的被攝體很有用,因為使用自動對焦調
整時,這些被攝體往往會超出焦點範圍之外。
中央按鈕功能
• 讓您選擇常用功能並將其指定給控制輪上的中央按鈕。
• [ISO]設定為[多框雜訊消除]時,相機不會重疊影像。 記錄影像時比較花時間,而且閃光燈不會閃光。
對焦模式
ቤተ መጻሕፍቲ ባይዱ選擇適合被攝體動作的對焦方法。
AF代表“自動對焦”,一個自動調整焦點的功能。
1.MENU
2 [對焦模式] 要使用的模式
(單次AF) (連續AF)
相機會在完成對焦時鎖定對焦。被攝體靜止不動時使用[單次AF]。 相機會在快門按鈕按下一半時持續對焦。被攝體移動時使用這個選項。
(DMF)
讓您合併使用手動對焦與自動對焦。
拍攝模式的圖示清單
1-1
1-2
1-3
2
3
1
2
1.將模式轉盤設定為 (智慧式自動)。
1.如圖所示將相機握穩。 •請不要以您的手指蓋住閃光燈。
1.將快門按鈕按下一半以便對焦。 影像合焦時,會發出嗶聲,而且( 或 )會點亮。
對焦指示 點亮:影像合焦。 點亮:影像合焦。合焦位置會隨著被攝體的動作改變。 點亮:相機正在對焦。 點亮:對焦失敗。
