SOCKET 由于目标机器积极拒绝,无法连接的解决办法
由于目标机器积极拒绝,无法连接__解决办法_SVN===
由于目标机器积极拒绝,无法连接__解决办法_SVN
错误提示:由于目标机器积极拒绝,无法连接.
今天下午准备在winserver2003服务器上布置SVN服务(以Subvision为服务器端,TortoiseSVN为客户端),于是引发了如题错误.解决方案:
∙1windows自带的或用户自己安装的防火墙屏蔽了相应的端口
∙
2客户端主机由于路由等原因无法连接到svn服务器主机
∙
3客户端错误地配置了代理
∙
4其它
可以先用以下命令测试一下服务器是否有回应,如果没有,就应该检查网络连接方面的问题.
如果有回应,应再根据客户端具体的出错提示来查找原因
telnet 服务器IP 端口
如:
1 telnet 192.168.0.1 3690
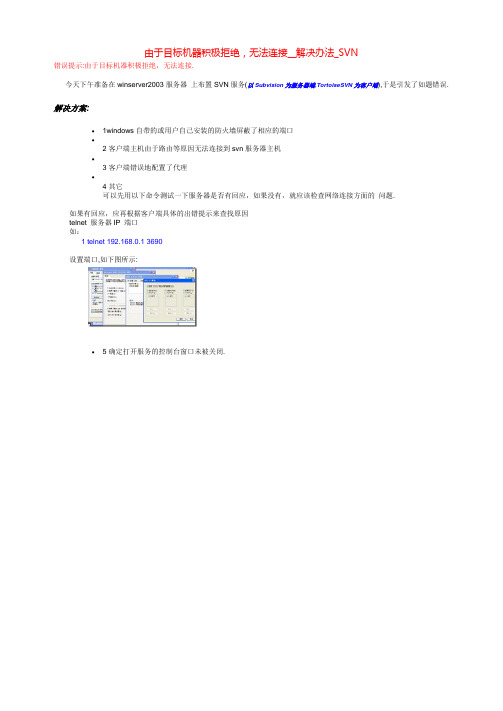
设置端口,如下图所示:
∙5确定打开服务的控制台窗口未被关闭.。
socket异常解决方案

socket异常解决方案
《Socket异常解决方案》
在开发网络应用程序时,我们经常会遇到socket异常的问题。
socket异常可能会导致网络连接失败,数据传输中断,甚至导
致程序崩溃。
在面对这些问题时,我们需要及时解决并找出根本原因。
首先,我们需要了解造成socket异常的可能原因。
常见的原
因包括网络连接问题,服务器故障,数据包丢失等。
在了解了可能的原因后,就需要针对性地解决这些问题。
解决socket异常的方案可能包括以下几点:
1. 检查网络连接:确认网络连接是否正常,尝试其他网络环境,比如切换到4G网络或者使用VPN连接。
如果网络连接出现
问题,可能是导致socket异常的原因之一。
2. 重启服务器:如果是服务器端出现了问题,可以尝试重启服务器或者联系服务器管理员进行排查。
3. 检查数据包:数据包丢失可能会导致socket异常,对于这
种情况,我们可以使用数据包监控工具来检查数据传输情况,找出问题所在。
4. 异常处理:在程序中加入异常处理机制是很重要的,比如捕获socket异常并进行相应的处理,比如重新连接,重传数据
等。
5. 更新软件版本:有时socket异常可能是由于软件版本过低或者存在bug所致,及时更新软件版本可能解决这些问题。
总之,解决socket异常需要综合考虑网络环境、服务器端和客户端的问题,及时采取合理的措施来解决和避免出现异常情况。
希望上述的解决方案能帮助大家更好地解决socket异常的问题。
目标计算机积极拒绝无法连接

目标计算机积极拒绝无法连接在计算机应用中,经常会遇到无法连接到目标服务器或目标设备的情况。
无法连接可能是因为网络故障、服务器故障或设备故障等原因引起的。
在这种情况下,计算机的积极拒绝是一种重要的处理方式,其目的是及时发现并解决连接问题,以保证系统的正常运行。
首先,计算机可以通过检查网络连接状态来积极拒绝无法连接的情况。
它可以检查本地计算机与目标服务器或设备之间的网络连接是否正常。
通过检查网络连接的状态,计算机可以及时发现网络故障,比如网络线路被断开、路由器故障等,并立即采取相应的措施,如重新连接网络、更换网络线路等,以恢复网络连接。
其次,计算机可以通过检查目标服务器或设备的状态来积极拒绝无法连接的情况。
它可以向目标服务器或设备发送连接请求,并等待目标服务器或设备发出响应。
如果一段时间内没有收到响应,计算机可以判断目标服务器或设备可能出现故障,例如服务器宕机、设备断电等。
在这种情况下,计算机可以积极拒绝继续尝试连接,并向系统管理员或维护人员报告故障,以便及时修复并恢复连接。
此外,计算机还可以通过使用备用的连接方式来积极拒绝无法连接的情况。
当计算机无法通过常规的网络连接方式访问目标服务器或设备时,它可以尝试使用其他的连接方式,如使用备用网络连接、使用蓝牙连接等。
通过采用备用连接方式,计算机可以提高连接成功的几率,同时减少因无法连接而造成的系统故障。
总之,目标计算机的积极拒绝无法连接是一种重要的处理方式,它能够帮助计算机及时发现和解决连接问题,以保证系统的正常运行。
计算机可以通过检查网络连接状态、检查目标服务器或设备的状态以及使用备用的连接方式来积极拒绝无法连接的情况。
通过这些措施,计算机可以在出现连接问题时快速响应,并采取相应的措施,以确保系统连接的稳定性和可靠性。
易飞ERP-电子签核常见问题及解决方案

电子签核常见问题及解决方案第一版易飞研发部2011-05目录一、在调用表结构传输完成后出现的,表结构批次传输作业报错 (3)二、Webservice测试连接时,报如下错误 (3)三、易飞单据正常送签至工作流之后,在工作流中审核报错 (4)四、易飞客户端易飞WebService测试连接失败 (6)五、易飞客户端工作流WebService测试连接失败 (7)六、表结构批次传输作业直接处理报错 (8)七、送签单据时,电子表单派班中心报‘更新寄出流程名单种的相关资料时发生错误。
在位置0处没有任何运行’ (9)八、送签单据时,电子表单派班中心报有问题 (9)九、工作流WebService始终测试连接失败 (10)十、录入电子签核单据配置自动展单身报错 (10)十一、工作流审批报错:灾难性故障产生错误(Server Error)Yifei (11)十二、采购单单头的字段名称在工作流中没有显示,其他集成表单都没问题 (11)十三、送签单据时,派班中心一直显示‘运行中’ (11)十四、个案程序在工作流中审核不通过 (11)十五、签核状态码不能正常回写 (12)十六、工作流版本引起的工作流WebService测试连接失败 (12)十七、工作流WebService测试连接失败 (12)十八、派班中心一直显示‘运行中’ (14)十九、派班中心显示‘call counter(EsayFlow Webservice)Error:’ (15)二十、附件送签到工作流之后打开报错 (16)二十一、传给EasyFlow的xml格式不正确!! (17)二十二、目标服务器积极拒绝,无法连接 (17)二十三、查看签核状态问题 (18)一、在调用表结构传输完成后出现的,表结构批次传输作业报错二、Webservice测试连接时,报如下错误三、易飞单据正常送签至工作流之后,在工作流中审核报错六、表结构批次传输作业直接处理报错1.工作流webservice有问题。
博思软件操作步骤
开票端操作说明双击桌面“博思开票”图标,单击“确定”,进入开票界面:一、开票:日常业务——开票——选择票据类型——增加——核对票号无误后——单击“请核对票据号”——输入“缴款人或缴款单位”——选择”收费项目”、“收入标准”——单击“收费金额”。
(如需增加收费项目,可单击“增一行”)(如需加入备注栏(仅限于收款收据)),则在右侧“备注”栏内输入即可)确认无误后,单击“打印”——“打印”二、代收缴款书:日常业务——代收缴款书——生成——生成缴款书——关闭——缴款——输入“专用票据号”——保存——缴款书左上角出现“已缴款”三个红字即可。
三、上报核销:日常业务——上报核销——选择或输入核销日期的截止日期——刷新——核销。
(注意:“欠缴金额”处无论为正或为负均不可核销,解决方法见后“常见问题”)常见问题一、如何作废“代收缴款书”日常业务——代收缴款书——缴款——删除“专用票据号”和“缴款日期”——保存——作废。
二、上报核销时出现欠缴金额,无法完成核销,或提示多缴。
1、首先检查有没有选择好截止日期,选择好后有没有点击“刷新”。
2、其次检查有没有做代收缴款书。
注意:最后一张缴款书的日期不得晚于选择上报核销日期。
3、若上述方法仍无效,则可能是由于以前作废过票据而未作废缴款书。
解决方法:首先作废若干张缴款书(直到不能作废为止),然后重新做一张新的缴款书。
再核销。
三、打开“博思开票”时,出现“windows socket error:由于目标机器积极拒绝,无法连接。
(10061),on API’connect’”单击“确定”,将最下面一行的连接类型“SOCKET”更换为“DCOM”,再点“连接”即可。
四、如何设置密码双击桌面“博思开票”,单击登录界面的右下方“改口令”输入用户编号、新密码和确认密码,单击“确认”即可。
五、更换开票人名称或增加开票人进入开票系统——系统维护——权限管理1、更换开票人名称:单击“用户编码”——删除“用户名”——输入新的开票人名称——单击“保存用户”即可。
【教程】 UT常见错误和解决办法
【教程】UT 常见错误和解决办法μTorrent(由于μTorrent 不便于书写常作UT ) 是一个小巧强劲,全功能,用C++编写,支持Windows 、Mac OS X 和GNU/Linux 平台的免费BitTorrent 客户端。
以下是其在使用过程中常出现的错误以及相应的解决办法:1.错误:失败:You already are downloading the same torrent.You may only leech from one location at a time.原因:意外断网,意外重启,非法关闭客户端软件造成的服务器数据不同步,通常表现为:任务重复。
解决方法:耐心等待半小时即可。
2.错误:Sorry ,minimum announce interval=30 sec.Plesae retry after 30 sec原因:频繁更新TRACKER 地址导致,在手工更新TRACKER 地址后,停止任务,且马上重新开始任务,就会造成minimum announce interval=30 sec 的红种解决方法:勿频繁更新TRACKER ,停止任务后不要急于手工更新tracker3.错误:connection limit exceeded=Connection limit execeeded!You may only leech from one location at a time原因:连接受限,据分析与最大连接数,以及TRACKER 能承受的最大连接数有关 解决方法:手动更新TRACKER 即可解决4.错误:Invalid passkey!Please re-download .torrent file原因:PASSKEY 泄露或被盗,或者重置自己的PASSKEY 之后没有重新下载种子解决方法:重置自己的PASSKEY 之后右键你的任务属性中填入修改后的PASSKEY 即可。
博思开票操作步骤和常见问题

开票端操作说明双击桌面“博思开票”图标,单击“确定”,进入开票界面:开票端操作流程简易说明一、票据领退当用户单位存在多个开票点时,用户应使用子母开票卡方式进行开票。
首先用母卡到财政票据管理部门去购票,将所购发票的起止读入主开票机,然后由主开票机将发票的分配到各分开票机的子卡上,再读入各分开票机进行开票。
注:母卡不具备开票功能。
(1)票据下发:①首先在主开票机上插入母卡及分开票机的子卡②点击【票据下发】③在【智能卡】栏选择子卡编号④在票据【起始号】【终止号】中输入下发票据段⑤点【下发】⑥此时该子卡可使用票据信息中,将出现所领用该段票据,下发成功⑦将子卡插入分开票机,并读入数据即可进行开票(2)退票:①首先在主开票机上插入母卡及分开票机的子卡②点击【退票】③在【智能卡】栏选择子卡编号④在票据【起始号】【终止号】中输入下发票据段二、开票步骤:进入日常业务中的开票功能模块。
在【日常业务】的【票据】中(1)点击左上方的【增加】按钮,此时用户应核对“当前票据号为”中所显示的票据,与打印机上的纸质电脑票据是否相符,两者核对一致,点击【请核对票据号!!!】;如图:(2)输入【缴款人或缴款单位】信息;(3)在【收费项目】下点击【▼】选取具体收费项目;(4)在【计费数量】下输入收费数量;(5)点击金额栏,此时系统自动运算单项金额,并且在合计栏显示合计的大小写金额;(6)增加收费项目时,点击,重复第3、4、5步(7)删除收费项目时,将光标指向该项目,点击,即可删除该行项目;(8)完成项目录入后,点击注意:只要按下按钮,系统即默认该发票已使用,不能更改其容,如发现错误可对其“作废”处理。
(9)按下【打印】按钮,开始打印发票;(10)发票打印完毕,系统返回开票界面,发票自动递增,进行下一发票的录入、打印。
三、缴款书步骤:(1)进入“日常业务”中“代收缴款书”,点击【生成】,系统自动显示【截止日期】前已开具票据属于委托代收项目的累计数量及金额。
socket错误详解
WSAEINTR (10004)∙翻译:中断函数调用。
∙说明:阻止操作被中断通过调用WSACancelBlockingCall (Wsapiref_704y.asp)。
WSAEACCES (10013)∙翻译:权限被拒绝。
∙说明:尝试访问套接字访问权限被禁止的方式。
例如,用于发送到广播的地址,但广播的权限未设置通过使用setsockopt(SO_BROADCAST) 时,将发生此错误。
另一个可能导致WSAEACCES 错误的原因是,当调用绑定(Wsapiref_6vzm.asp)函数(在Microsoft Windows NT 4.0 Service Pack 4 [SP4] 或更高版本),另一个程序、服务或内核模式驱动程序绑定到同一地址具有独占访问权。
这种独占的访问是一项新功能的Windows NT 4.0 SP4 和更高版本,并且它使用SO_EXCLUSIVEADDRUSE 选项的实现。
WSAEFAULT (10014)∙翻译:错误的地址。
∙说明:尝试使用指针参数的调用时,系统检测到一个无效的指针地址。
如果程序传递了无效的指针值,或者如果缓冲区的长度太小,则会发生此错误。
例如,如果一个参数,它是一种SOCKADDR 结构的长度小于sizeof(SOCKADDR) 的值,将发生此问题。
WSAEINVAL (10022)∙翻译:无效的参数。
∙说明:setsockopt (Wsapiref_94aa.asp) 函数提供了无效的参数(例如,指定参数的%)。
有时,它也就是从插座的当前状态,调用例如,未在侦听的套接字接受(Wsapiref_13aq.asp)。
WSAEMFILE (10024)∙翻译:打开的文件太多。
∙说明:有太多打开的套接字。
每个实现都可能具有套接字句柄可用的最大数目。
这些句柄可能会提供每个进程的全局,或每个线程。
WSAEWOULDBLOCK (10035)∙翻译:资源暂时不可用。
∙说明:将返回此错误,无法立即完成,例如,非阻塞套接字操作从接收(Wsapiref_2i9e.asp)时无数据排队要从套接字读取。
【教程】 UT常见错误和解决办法

【教程】UT 常见错误和解决办法μTorrent(由于μTorrent 不便于书写常作UT ) 是一个小巧强劲,全功能,用C++编写,支持Windows 、Mac OS X 和GNU/Linux 平台的免费BitTorrent 客户端。
以下是其在使用过程中常出现的错误以及相应的解决办法:1.错误:失败:You already are downloading the same torrent.You may only leech from one location at a time.原因:意外断网,意外重启,非法关闭客户端软件造成的服务器数据不同步,通常表现为:任务重复。
解决方法:耐心等待半小时即可。
2.错误:Sorry ,minimum announce interval=30 sec.Plesae retry after 30 sec原因:频繁更新TRACKER 地址导致,在手工更新TRACKER 地址后,停止任务,且马上重新开始任务,就会造成minimum announce interval=30 sec 的红种解决方法:勿频繁更新TRACKER ,停止任务后不要急于手工更新tracker3.错误:connection limit exceeded=Connection limit execeeded!You may only leech from one location at a time原因:连接受限,据分析与最大连接数,以及TRACKER 能承受的最大连接数有关 解决方法:手动更新TRACKER 即可解决4.错误:Invalid passkey!Please re-download .torrent file原因:PASSKEY 泄露或被盗,或者重置自己的PASSKEY 之后没有重新下载种子解决方法:重置自己的PASSKEY 之后右键你的任务属性中填入修改后的PASSKEY 即可。
socket 由于目标机器积极拒绝,无法连接的解决办法
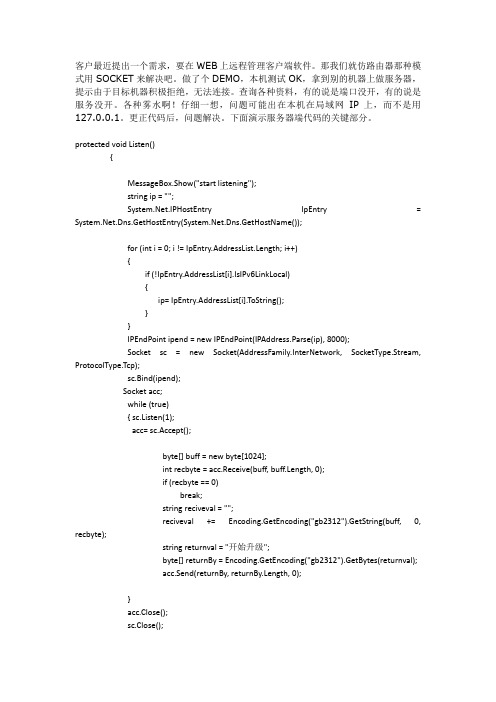
{
if (!IpEntry.AddressList[i].IsIPv6LinkLocal)
{
ip= IpEntry.AddressList[i].ToString();
}
}
IPEndPoint ipend = new IPEndPoint(IPAddress.Parse(ip), 8000);
Socket sc = new Socket(AddressFamily.InterNetwork, SocketType.Stream, ProtocolType.Tcp);
sc.Bind(ipend);
Socket acc;
while (true)
{ sc.Listen(1);
acc= sc.Accept();
string returnval = "开始升级";
byte[] returnBy = Encoding.GetEncoding("gb2312").GetBytes(returnval);
acc.Send(returnBy, returnBy.Length, 0);
}
acc.Close();
sc.Close();
}
public string sendMessage()
{
IPEndPoint ipend = new IPEndPoint(IPAddress.Parse("192.168.XXX.XXX"),8000);
Socket sc = new Socket(AddressFamily.InterNetwork,SocketType.Stream,ProtocolType.Tcp);
connectionrefused怎么解决
connectionrefused怎么解决
当遇到“connection refused”错误时,这通常意味着尝试建立的网络连接被目标主机拒绝了。
以下是一些可能的解决方法:
1.检查目标主机的状态:确保你要连接的目标主机是运行状态,并且正在监听你要连接的端口。
你可以尝试使用其他工具(如telnet 或ping)来测试连接是否畅通。
2.检查防火墙设置:防火墙可能会阻止你的连接请求。
确保你的防火墙设置允许你要建立的连接通过。
如果你使用的是Linux系统,你可以检查iptables或ufw等防火墙工具的配置。
3.检查网络连接:确保你的设备连接到网络,并且网络连接是正常的。
尝试重启路由器或调制解调器,或者切换到其他网络环境试试。
4.检查代码中的主机名或IP地址:确保你在代码中提供的主机名或IP地址是正确的。
如果使用的是域名,请检查DNS是否解析正确。
5.检查端口号:确保你要连接的端口号是正确的,并且目标主机正在监听该端口。
6.检查代码中的错误处理:如果你的代码中没有适当的错误处理机制,那么当连接被拒绝时,你的程序可能会崩溃。
确保你的代码能够妥善处理这种错误情况。
请注意,以上方法仅供参考,具体问题需要具体分析,根据实际情况选择适合的方法进行解决。
Socket Error代码解释大全

Socket error 10036 - Operation now in progress 目前正在执行一个阻止性操作。
Socket error 10037 - Operation already in progress 在一个非阻止性套接字上尝试了一个已经在进行的操作。
Socket error 10043 - Protocol not supported请求的协议还没有在系统中配置,或者没有它存在的迹象。
Socket error 10044 - Socket type not supported 在这个地址家族中不存在对指定的插槽类型的支持。
Socket error 10045 - Operation not supported 参考的对象类型不支持尝试的操作。
Socket error 10041 - Protocol wrong type for socket 在套接字函数调用中指定的一个协议不支持请求的套接字类型的语法。
Socket error 10042 - Bad protocol option在 getsockopt 或 setsockopt 调用中指定的一个未知的、无效的或不受支持的选项或层次。
Socket error 10014 - Bad address系统检测到在一个调用中尝试使用指针参数时的无效指针地址。
Socket error 10022 - Invalid argument提供了一个无效的参数。
Socket error 10024 - Too many open files打开的套接字太多。
关于“由于目标机器积极拒绝,无法连接”问题的分析处理

图-3 查看端口对应 PID 值
第 二 步 , 通 过 【 任 务 管 理 器 】 查 找 PID 为 50508 的 进 程 , 显 示 对 应 进 程 为 SufAppServer.exe,如图-4 所示。【任务管理器】默认未显示 PID 列,可以单击【查看】菜 单下的【选择列】,然后在列表中勾选【PID(进程标识符)】即可。
图-6 手工修改注册表
(4)打开【开始】菜单下的【运行】,输入命令“services.msc”并单击【确定】按 钮,打开【服务】窗口,然后启动服务“Lonntec Suf 7.0 Application Service”。
金蝶软件(中国)有限公司 客户服务中心
第 6 页 共 10 页
第三章 Web 站点访问异常分析
金蝶软件(中国)有限公司 客户服务中心
第 4 页 共 10 页
金蝶知识库文档
图-4 通过【任务管理器】查看对应 PID 的进程
第三步,查询进程 SufAppServer.exe 对应系统服务中的“Lonntec Suf 7.0 Application Service”服务,分别如图-5 所示。
图-5 找到进程对应的服务
3.1 问题分析.................................................................................................................7 3.2 解决方案.................................................................................................................9 第四章 总结说明............................................................. 9
ftp上传时数据Socket错误连接超时的解决方法
ftp上传时数据Socket错误连接超时的解决方法ftp上传时数据Socket错误解决方法一些网友在上传网站时,虽然可以连接但出现如下错误--------------------------------------------200TypesettoASCII.PASV227EnteringPassiveMode(61,151,251,110,4,64).数据Socket错误:连接已失败(连接已拒绝)--------------------------------------------或是-------------------------------------------------命令:>REST0350Restartingat0.SendSTOREorRETRIEVE.命令:>PASV550Passivemodenotallowedonthisserver.错误:>请求的操作未执行(如,文件或目录未找到,不能访问)。
错误:>建立数据socket失败。
-----------------------------------------------------经常登录各种FTP服务器,会遇到socket错误,朋友也经常遇到,来问我。
偏偏大家使用的是不同的FTP软件,所以,今天我把几种目前常用FTP软件的解决办法告诉大家。
★CuteFTP3.5英文版:FTP—>Settings—>Options—>Firewall,将“PASVmode”前复选框中的打勾去掉。
★CuteFTP3.5中文版:FTP—>设置—>选项—>防火墙,“PASV方式(A)”前复选框中的打勾去掉。
★CuteFTP4.0中文版:右击你所建立的ftp站点—>选择属性(properties)—>去掉"usePASVmod"选择项★CuteFTPPro2.0中文版:编辑—>全局设置—>连接—>连接类型,“PASV/PORT”下拉选项菜单选择PORT。
【免费下载】WSAGetLastErrorerrorcode错误代码
【免费下载】WSAGetLastErrorerrorcode错误代码10004—WSAEINTR函数调用中断。
该错误表明由于对WSACancelBlockingCall的调用,造成了一次调用被强行中断。
10009—WSAEBADF文件句柄错误。
该错误表明提供的文件句柄无效。
在MicrosoftWindowsCE下,socket函数可能返回这个错误,表明共享串口处于“忙”状态。
10013—WSAEACCES权限被拒。
尝试对套接字进行操作,但被禁止。
若试图在sendto 或WSASendTo中使用一个广播地址,但是尚未用setsockopt和SO_BROADCAST这两个选项设置广播权限,便会产生这类错误。
10014—WSAEFAULT地址无效。
传给Winsock函数的指针地址无效。
若指定的缓冲区太小,也会产生这个错误。
10022—WSAEINVAL参数无效。
指定了一个无效参数。
例如,假如为WSAIoctl调用指定了一个无效控制代码,便会产生这个错误。
另外,它也可能表明套接字当前的状态有错,例如在一个目前没有监听的套接字上调用accept或WSAAccept。
10024—WSAEMFILE打开文件过多。
提示打开的套接字太多了。
通常,Microsoft提供者只受到系统内可用资源数量的限制。
10035—WSAEWOULDBLOCK资源暂时不可用。
对非锁定套接字来说,如果请求操作不能立即执行的话,通常会返回这个错误。
比如说,在一个非暂停套接字上调用connect,就会返回这个错误。
因为连接请求不能立即执行。
10036—WSAEINPROGRESS操作正在进行中。
当前正在执行非锁定操作。
一般来说不会出现这个错误,除非正在开发16位Winsock应用程序。
10037—WSAEALREADY操作已完成。
一般来说,在非锁定套接字上尝试已处于进程中的操作时,会产生这个错误。
比如,在一个已处于连接进程的非锁定套接字上,再一次调用connect或WSAConnect。
错误信息
错误信息:No connection could be made because the target machine actively refused it “错误,连接服务器失败,网络繁忙或者服务器已关闭(状态:正在连接)解决办法点工具--------账号管理------服务器-------勾选发送服务器需要身份验证同时要注意自己的端口设置有没有错误,我以前设置端口的时候老是喜欢打错英文字母1.像这种问题我也出现过,一般多试几次就好了,也有可能对方邮箱已满,提醒对方删除邮箱的邮件,但是记得一定要去网页里删除,在foxmail删除是没有用的,网页里的邮箱还是保存了的2.程序抛出这个异步目前我已知的有以下几种原因:1) 操作系统有防火墙,并且阻挡了指定的端口2)程序被放到宿主程序中,但宿主没有启动3) Net.Tcp Listener Adapter(NetTcpActivator)服务和Net.Tcp Port Sharing Service(NetTcpPortSharing)没有启动3.WSAECONNREFUSED (10061) Connection refused . No connection could be made because the target machine actively refused it. This usually results from trying to connect to a service that is inactive on the foreign host—that is, one with no server application running.An error has occurred while processing the page.Please try to refresh the page, or return to the home page.4.The following system error occurred : No connection could be made because the target machine actively refused it以下系统发生的错误:不能做任何连接,因为目标机器积极地拒绝它error in the OLE DB provider, an error occourred while loading the connection错误的OLE DB提供者,一个错误occourred而加载连接5. A running P2V conversion job fails if you create a new conversion job for the same Windows source machine and use a different port to deploy the Converter Standalone agent If, while running a P2V conversion job, you start creating another conversion job for the same powered on Windows source machine, and specify a port for the connection, Converter Standalone deploys the Converter Standalone agent using the port you specified. If the connection port is different from the one that is being used for the already running conversion job, both jobs fail. The following error message appears in the Job summary tab for the first conversion job: FAILED: A general system error occurred: No connection could be made because the target machine actively refused it. The following error message appears in the Job summary tab for the second conversion job: FAILED: Unable to create a VSS snapshot of the source volume(s). Error code: 2147754774 (0x80042316).You cannot copy running conversion or configuration jobsIf you open the Copy As New wizard for a running configuration or conversion job when the source is a virtual machine or a backup image and you click Next, the wizard displays the error message Unable to obtain hardware information for the selected machine.Workaround: Wait for the job to complete before selecting Copy as New in its pop-up menu.Linked Cloning of source images greater than 2GB to a network share that does not support large files failsCreating linked clones from source images that are larger than 2GB to a network share that does not support large files (for example, to a Linux SMB share) fails. Converter Standalone does not split the source files into smaller chunks. If the source is larger than the supported file size on the destination, the conversion tasks fails.Conversions of vSphere virtual machine sources with 15 or more disks to any ESX destinationmanaged by VirtualCenter 2.5 failIf you convert a virtual machine source that resides on an ESX 3.5 host to an ESX 3.5 destination managed by VirtualCenter 2.5, and the source machine has 15 or more VMDK files, the conversion job fails with the following error message in Converter Standalone logs:FAILED: agent.internal.fault.NfcConnectionFault.summaryWorkaround:Convert the source machine to a hosted virtual machine destination, such as Workstation.Convert the resulting virtual machine to the ESX managed by VirtualCenter where you want it to reside.Creating a conversion job to convert a standalone VMware source with a VMDK file greater than 2GB from a network share that does not support large files, failsIf you select a standalone virtual machine source with VMDK file greater than 2GB residing on a remote network location that does not support large files (for example, Linux SMB share), the following error message appears in the Converter wizard on clicking Next orView source details: Unable to obtain hardware information for the selected machine.Workaround: Map the network shared folder to the machine where Converter Standalone runs, and select the source from there.Converter Standalone cannot detect the power state of VMware Workstation or other VMware hosted source virtual machines if they are located on a read-only network shareIf the source machine is a Workstation or another VMware hosted source and is located on a network share with read-only permissions, Converter Standalone cannot detect if the source is powered on or suspended. This might lead to data inconsistency on the destination machine if changes are made to the powered on source virtual machine during conversion. Workarounds:Verify that the source virtual machine is powered off prior to conversion.Provide write privileges to the network share where the source virtual machine resides.Task progress is not shown when converting a virtual machine that is larger than 1TB Converter Standalone does not display the progress of conversion tasks if the source virtual machine is larger than 1TB. Conversion tasks are completed successfully, but the user cannot monitor their progress.Workaround: You can monitor the disk performance of the destination ESX host to check if tasks are running properly.Conversion jobs from and to ESX hosts that are not connected to vCenter Servers fail if the number of disks on the source machine is more than nineWhen converting a source machine that has more than nine disks, conversion fails with the following error in the log file:Error on logout (ignored): Operation timed outSSLStreamImpl::BIORead (3BBA4E8) timed out.The error is due to the limited number of NFC connections that can be established to ESX hosts that are not connected to vCenter Servers.Workaround: Connect to the destination ESX host through a vCenter Server. In this case, the number of source disks is limited to 27 for ESX and to 23 for ESXi hosts.Converting source volumes with unrecognized file systems might prevent the destination virtual machines from startingWhile you are setting up a volume-based cloning task in one of the Converter Standalone wizards, the volume name might be missing in some rows of the Source Volumes tab. This means that Converter Standalone does not recognize the file system on those volumes. The destination virtual machine that is created as a result of such a conversion task might fail to start up. Nevertheless, Converter Standalone copies the source volume data to the destination using block-level copying.Workaround: configure the destination virtual machine after the conversion.Converting standalone VMware sources with a VMDK file greater than 2GB to a hosted destination that resides on a network share that does not support large files, failsIf you select a standalone virtual machine source with VMDK file greater than 2GB and try to convert it to hosted destination residing on a remote network location that does not support large files (for example, Linux SMB or NFS share), the conversion job might fail with one of following error messages:Unable to connect to the virtual diskRemote server closed connection after 0 response bytes readAn error occurred during an operation on a virtual disk.If conversion is successful, the following error message related to the VMDK file might appear when you power on the destination virtual machine:Internal Inconsistency errorsWorkaround:In the main application window of Converter Standalone, right-click the failed job and select Copy As New...Go to the Options page and select Data to Copy.In the Data to Copy pane, select the volumes to copy and click Advanced.On the Destination layout tab, select 2GB Split not pre-allocated or 2GB Split pre-allocated as the destination disk type.Click Next to view a summary of the conversion job.On the Ready to Complete page, click Finish to resubmit the job.Converter Standalone is unable to detect the system volume if it resides on a SCSI disk and IDE disks are present in the source machineOn source machines with SCSI and IDE disks, Converter is unable to detect the system volume if the system volume resides on a SCSI disk. Converter only checks the first IDE disk in such configurations.If the hardware configuration of the source machine is modified while the Conversion wizard is open, you need to restart the conversion wizard if you want to view correct source details Source machine details are retrieved per wizard session, as this is a time-consuming process. If some changes occur on the source machine (such as adding memory or hard drives) after this information is retrieved, the Conversion wizard does not show information about the changes. Workaround: Restart the conversion wizard.Cloning a source that contains file system errors might result in a damaged virtual machine See Cloning a source that contains file system errors may result in a damaged copy (KB 1006689).Timeout on SSL handshake when converting over a WAN linkConverter Standalone does not support conversion over a WAN. When trying to perform aconversion over a WAN link, you might experience an SSL timeout because the timeout for SSL handshakes is two minutes.Workaround:To avoid the two-minute handshake, perform a conversion to a hosted destination machine (for example, Workstation) in the same LAN.Copy the temporary virtual machine and send it over the WAN to the remote site.If the intended destination is a Workstation virtual machine, this completes the process.If the intended destination is ESX, import the Workstation virtual machine to the ESX server.User Account Control (UAC) prevents installing Converter Standalone agent if you are not using the default Administrator account to connect to a powered on source machineIf you are setting up a task to convert a powered on source machine that runs Windows Server 2008, Windows Vista, or Windows 7 and you use a non-default Administrator account to log in to the source machine, the following error message might appear when you try to install Converter Standalone agent on the source machine: Insufficient permissions to connect to xxxxxxx. Here xxxxxxx is the IP address of the source machine. This is because Converter Standalone server cannot install Converter Standalone agent when UAC is enabled and you are logged in to the source as non-default Administrator user.Workaround: Disable the UAC on the source machine before you start the Conversion wizard. You can search the Microsoft Web site for procedures on disabling the UAC depending on the source operating system.The Reconfigure Virtual Machine wizard does not display correctly the vDS port group name When you reconfigure a virtual machine that uses dvSwitch and you navigate to the Network interface settings pane, the Network name text box does not display the name of the dvSwitch after the port group name. Only port group is displayed instead.The reported network transfer rate might not be correctThe reported network transfer rate might be higher than the actual one because of the inherent compression used by the network protocol. This does not affect the network throttling.Adding a virtual machine to a domain might fail if you specify a fully qualified user name When configuring a virtual machine, you might not be able to add the virtual machine to a domain if you use a fully qualified user name (DOMAIN_NAME/USER_NAME). Workaround: Specify the user name without including the domain name.Conversion of a physical machine running Microsoft Windows XP or Windows Server 2003 with a BCD manager (Boot Manager for Windows Vista) and later might failIf you try to convert a physical machine with a BCD manager, the P2V conversion might fail in the following cases:Microsoft Windows Vista or later is installed on the source physical machine, which is a dual-boot machine currently running Microsoft Windows XP or Windows Server 2003.Microsoft Windows Vista or later is installed as a second operating system on the source physical machine and later is removed, but the BCD manager is left on the source machine.Workaround 1: In case of a dual-boot machine conversion :Boot the later version of Windows (Windows Vista, Windows Server 2008, or Windows 7).Perform a physical source conversion.On the newly created virtual machine, boot a repair CD for the earlier version of Windows (Windows XP or Windows Server 2003).Remove the BCD manager and revert the operating system to its compatible boot process.Shut down the virtual machine and reconfigure it by using the Converter Standalone configuration wizard. Now you can boot the machine.Workaround 2: In case of converting a source machine running Windows XP or Windows Server 2003 with a BCD manager:On the source machine, boot a repair CD of the corresponding operating system.Remove the BCD manager and revert the operating system to its compatible boot process.For more information on how to repair BCD, see the Microsoft knowledge base article Windows no longer starts after you install an earlier version of the Windows operating system in a dual-boot configuration.You cannot perform a P2V conversion without having administrative privilegesIf you start the Converter Standalone client under the context of a non-administrative user, you will not able to perform a remote physical to virtual migration.Workaround: Start the Converter Standalone client under the context of a user with administrative privileges.Conversion fails if the datastore name contains the @ symbolIf the datastore name of the managed source or destination contains "@", the conversion fails. Workaround: Remove the @ symbol from the datastore name and perform the conversion.Submitting a job might fail with The specified parameter was not correct:"info.owner"messageIf Converter Standalone is installed in a client-server mode and you have connected with a Windows domain username by entering the IP address or the host name of the Converter server, submitting a job might fail with The specified parameter was not correct:"info.owner" message. Workaround: Connect either to a local server or by using a local username instead of a domain one.You might not be able to convert more than nine disks at onceOn ESX 3.5 and 4.0, conversion might fail if you try to convert more than nine disks. Workaround: Perform conversion in multiple steps to convert the disks in portions of up to nine. Then, attach all the disks to the target machine.。
socket的一个错误的解释SocketException以及其他几个常见异常

socket的⼀个错误的解释SocketException以及其他⼏个常见异常写socket程序有可能会遇见这个问题其他信息: 由于套接字没有连接并且(当使⽤⼀个 sendto 调⽤发送数据报套接字时)没有提供地址,发送或接收数据的请求没有被接受。
这种情况我的错误原因:使⽤了监听的socket执⾏了接受数据的任务代码:public void SetSocket(){Socket socket = new Socket(AddressFamily.InterNetwork, SocketType.Stream, ProtocolType.Tcp);socket.Bind(new IPEndPoint(IPAddress.Parse(this.txtIp.Text), int.Parse(this.txtPoint.Text)));socket.Listen(10);ThreadPool.QueueUserWorkItem(new WaitCallback(SendInfoOfService), socket);}//接收连接请求,使⽤线程调⽤接受客户短信息的⽅法public void SendInfoOfService(object socket){var proxSocket = (Socket)socket;while (true){var serverSocket = proxSocket.Accept();clientSocket.Add(serverSocket);ThreadPool.QueueUserWorkItem(new WaitCallback(ReciveInfo), serverSocket);}}之前是在线程池⾥⾯的队列⾥传递了⼀个监听的socket作为参数,到了接收信息的⽅法⾥⾯我没有再重新创建⼀个接收数据的线程,所以就引发了这个错,现在加⼊了var serverSocket = proxSocket.Accept();这个并且把这个监听线程作为参数传递下去到这个⽅法⾥://接受客户短信息public void ReciveInfo(object socket){var proxSocket = (Socket)socket;byte[] data = new byte[1024 * 1024];while (true){int i = proxSocket.Receive(data, 0, data.Length, SocketFlags.None);if (i <= 0){proxSocket.Shutdown(SocketShutdown.Both);proxSocket.Close();clientSocket.Remove(proxSocket);return;}string str = Encoding.Default.GetString(data, 0, i);this.txtContent.Text = str;}}问题解决此外,还有⼏个地⽅需要使⽤try catch去处理,防⽌异常,1、防⽌⽤户异常退出,在接收数据的信息⾥⾯如果发送的字节是0则表⽰⽤户退出,为了防⽌推出异常,加⼊如下代码,这个异常的处理应该在客户端和服务器端都写上 int len = 0;try{len = proxSocket.Receive(data, 0, data.Length, SocketFlags.None);}catch (Exception ex){//异常退出AppendTextToTxtLog(string.Format("服务器端:{0}⾮正常退出", proxSocket.RemoteEndPoint.ToString()));StopContnet();//关闭连接return;}if (len <= 0){//客户端正常退出AppendTextToTxtLog(string.Format("服务器端:{0}正常退出", proxSocket.RemoteEndPoint.ToString())); StopContnet();//停⽌连接return;//让⽅法结束,终结当前接受客户端数据的异步线程。
解决adb网络连接中出现的“由于目标计算机积极拒绝,无法连接”错误
解决adb网络连接中出现的“由于目标计算机积极拒绝,无法连接”错误在调试一块全志A83T安卓工控板(已root),启动后,安卓系统正常,设置好以太网的静态IP地址:192.168.1.181,并接好网线,同时开发电脑WIN7系统IP地址也是129.168.1.x, 在同一网段。
win系统的cmd命令窗口中,先进行网络连接测试,输入 ping 192.168.1.60命令进行测试,正常,表示网络已连通。
输入命令:adb connect 192.168.1.181,adb网络连接方式调试,报告“由于目标计算机积极拒绝,无法连接”的错误。
解决方法:1 通过USB线连接安卓板和开发电脑。
2 设置安卓系统如下,安卓系统中的开发者选项中的<<USB调试>>项是开启的,<<USB配置>>是MTP选项。
3 在开发电脑WIN系统中,通过cmd打开命令行窗口界面,输入adb devices,如果能够看到,列出所连接的设备,表示usb方式连接好Android系统。
4 win系统命令行界面中先后输入如下两条命令:adb root //权限提权。
adb shell //进入到安卓系统的shell.5 进入到安卓系统后,输入命令:setprop service.adb.tcp.port 5555 //设置adb服务端口为5555,打开adb网络调试功能附加说明: setprop service.adb.tcp.port -1 //表示打开adb的usb调试功能。
6 输入 exit 命令,退出android shell。
7 输入命令:adb tcpip 5555 //让设备在 5555 端口监听 TCP/IP 连接。
8 这时拔掉usb连接线。
9 使用 adb connect 192.168.1.181 进行adb 网络连接,可以正常连接。
总结:无法连接的原因是安卓系统未打开adb网络调试功能, 通过usb方式连接到安卓系统并设置即可。
目标服务器积极拒绝

目标服务器积极拒绝目标服务器积极拒绝是指服务器在接收到用户请求后,主动拒绝提供服务的一种情况。
这种情况可能出现的原因有以下几种:1. 服务器负载过高:当服务器的负载达到了极限,无法处理更多的请求时,服务器会积极拒绝新的连接。
这可以是由于服务器硬件性能不足、网络带宽有限或者其他资源限制导致的。
2. 安全策略限制:服务器可能会配置安全策略来保护系统和应用程序免受潜在的攻击。
当请求不符合安全策略时,服务器会积极拒绝连接,以防止潜在的风险。
3. 资源限制:服务器可能会设置资源限制,如并发连接数、带宽限制等。
当并发连接数超过服务器设置的限制时,服务器会拒绝部分或全部连接,以确保系统能够正常运行,并保证每个连接能够获得足够的资源。
4. 维护和升级:为了保持服务器的正常运行和提供更好的服务,服务器可能需要进行维护和升级操作。
在服务器维护期间,通常会暂停对外服务,并在此期间积极拒绝连接。
在遇到服务器积极拒绝的情况时,用户可以采取以下措施:1. 重新尝试:由于服务器可能是由于负载等原因拒绝连接,用户可以尝试重新发送请求。
在等待一段时间后,再次发送请求,有可能会得到正常的响应。
2. 调整请求频率:服务器可能会设置请求频率限制,用户可以尝试降低请求频率,以避免触发服务器的拒绝机制。
可以通过增加请求的间隔时间或减少请求的数量来调整请求频率。
3. 检查网络连接:用户可以检查自己的网络连接是否正常。
存在网络问题时,可能导致服务器的拒绝连接。
可以尝试重启网络设备或者与网络服务提供商联系以解决问题。
4. 联系管理员或技术支持:如果用户无法解决积极拒绝的问题,可以联系服务器的管理员或技术支持团队,寻求帮助和解决方案。
综上所述,服务器积极拒绝可能是由于负载过高、安全策略限制、资源限制或维护升级等原因导致的。
用户可以通过重新尝试、调整请求频率、检查网络连接或联系管理员等方式来解决这个问题。
- 1、下载文档前请自行甄别文档内容的完整性,平台不提供额外的编辑、内容补充、找答案等附加服务。
- 2、"仅部分预览"的文档,不可在线预览部分如存在完整性等问题,可反馈申请退款(可完整预览的文档不适用该条件!)。
- 3、如文档侵犯您的权益,请联系客服反馈,我们会尽快为您处理(人工客服工作时间:9:00-18:30)。
Socket sc = new Socket(AddressFamily.InterNetwork, SocketType.Stream, ProtocolType.Tcp);
sc.Bind(ipend);
Socket acc;
while (trห้องสมุดไป่ตู้e)
{ sc.Listen(1);
{
if (!IpEntry.AddressList[i].IsIPv6LinkLocal)
{
ip= IpEntry.AddressList[i].ToString();
}
}
IPEndPointipend = new IPEndPoint(IPAddress.Parse(ip), 8000);
连接。查询各种资料,有的说是端口没开,有的说是服务没开。各种雾水啊!仔细一想,问题可能出在本机在局域网IP上,而不是用127.0.0.1。更正代码后,问题解决。下面演示服务器端代码的关键部分。
protected void Listen()
{
MessageBox.Show(&uot;start listening&uot;);
reciveval += Encoding.GetEncoding(&uot;gb2312&uot;).GetString(buff, 0, recbyte);
string returnval = &uot;开始升级&uot;;
byte[] returnBy = Encoding.GetEncoding(&uot;gb2312&uot;).GetBytes(returnv
stringip = &uot;&uot;;
.IPHostEntryIpEntry = .Dns.GetHostEntry(.Dns.GetHostName());
for (int i = 0; i != IpEntry.AddressList.Length; i++)
acc= sc.Accept();
byte[] buff = new byte[1024];
intrecbyte = acc.Receive(buff, buff.Length, 0);
if (recbyte == 0)
break;
stringreciveval = &uot;&uot;;
