minigui代码分析
浅析minigui图形引擎的初始化
浅析minigui图形引擎的初始化浅析minigui图形引擎的初始化// pdc->surface->pixels就是mmap创建的framebuffer对应的fb_mem起始地址,// 所以向pdc的cur_dst写入数据,将直接反应到lcd屏幕上[luther.gliethttp]static void _dc_move_to_1 (PDC pdc, int x, int y){pdc->cur_dst = (BYTE*)pdc->surface->pixels + pdc->surface->pitch * y;pdc->cur_dst += x;}InitGUI==>InitGALint InitGAL (void){int i;int w, h, depth;char engine [LEN_ENGINE_NAME + 1];char mode [LEN_MODE + 1];#ifndef __NOUNIX__char* env_value;if ((env_value = getenv ("gal_engine"))) { // 环境变量中是否有定义strncpy (engine, env_value, LEN_ENGINE_NAME);engine [LEN_ENGINE_NAME] = '\0';}else#endifif (GetMgEtcValue ("system", "gal_engine", engine, LEN_ENGINE_NAME) < 0) {// 环境变量中没有定义,那么接下来查找InitMgEtc()加载进来的MiniGUI.cfg配置文件// [system]节是否有定义,我的配置文件有该定义,其值为[luther.gliethttp]// gal_engine=fbcon或者// gal_engine=qvfbreturn ERR_CONFIG_FILE;}// ok, 这里engine="fbcon"if (GAL_VideoInit (engine, 0)) { // 初始化lcd,源码见后.GAL_VideoQuit ();fprintf (stderr, "NEWGAL: Does not find matched engine: %s.\n", engine);return ERR_NO_MATCH;}#ifndef __NOUNIX__if ((env_value = getenv ("defaultmode"))) {strncpy (mode, env_value, LEN_MODE);mode [LEN_MODE] = '\0';}else#endifif (GetMgEtcValue (engine, "defaultmode", mode, LEN_MODE) < 0)if (GetMgEtcValue ("system", "defaultmode", mode,LEN_MODE) < 0)return ERR_CONFIG_FILE;// 查找InitMgEtc()加载进来的MiniGUI.cfg配置文件// defaultmode数值,我的定义为:// [fbcon]// defaultmode=1024x768-16bppif (!GAL_ParseVideoMode (mode, &w, &h, &depth)) { // 解析"1024x768-16bpp"字符串GAL_VideoQuit ();fprintf (stderr, "NEWGAL: bad video mode parameter: %s.\n", mode);return ERR_CONFIG_FILE;}// 对于我的配置[luther.gliethttp]// w=1024// h=768// depth=16// 设置current_video为w,h和depth// 赋值给全局量__gal_screenif (!(__gal_screen = GAL_SetVideoMode (w, h, depth, GAL_HWPALETTE))) {// Set the requested video mode, allocating a shadow buffer if necessary.// 对于每个像素大于8位的video,没有palette[luther.gliethttp] // 然后根据w,h,depth这些video属性调用FB_SetVideoMode 重新设置// video的这3个属性[luther.gliethttp]// 这样framebuffer的ubuntu就使用这个新属性来显示了[luther.gliethttp]// 同时FB_SetVideoMode将同样设置`// current->pixels = mapped_mem+mapped_offset;GAL_VideoQuit ();fprintf (stderr, "NEWGAL: Set video mode failure.\n");return ERR_GFX_ENGINE;}#ifdef _LITE_VERSIONif (w != __gal_screen->w || h != __gal_screen->h) {fprintf (stderr, "The resolution specified in MiniGUI.cfg is not ""the same as the actual resolution: %dx%d.\n""This may confuse the clients. Please change it.\n",__gal_screen->w, __gal_screen->h);GAL_VideoQuit ();return ERR_GFX_ENGINE;}#endiffor (i = 0; i < 17; i++) {SysPixelIndex [i] = GAL_MapRGB (__gal_screen->format,SysPixelColor [i].r,SysPixelColor [i].g,SysPixelColor [i].b);}return 0;}int GAL_VideoInit (const char *driver_name, Uint32 flags){GAL_VideoDevice *video;GAL_PixelFormat vformat;Uint32 video_flags;/* Check to make sure we don't overwrite 'current_video' */ if ( current_video != NULL ) {GAL_VideoQuit();}// 这里engine="fbcon",flags=0video = GAL_GetVideo(driver_name); // 根据engine名字获取对应的video驱动结构体[luther.gliethttp]源码见后if ( video == NULL ) {return (-1);}video->screen = NULL;current_video = video; // 当前current_video设置为video/* Initialize the video subsystem */memset(&vformat, 0, sizeof(vformat));if ( video->VideoInit(video, &vformat) < 0 ) { // 调用FB_VideoInit,源码见后[luther.gliethttp]// 设置this->hidden->mapped_mem内存映射地址// 同时填充RGB分别对应的mask// 以及x,y像素数和每像素字节数[luther.gliethttp]GAL_VideoQuit();return(-1);}/* Create a zero sized video surface of the appropriate format */// #define GAL_SWSURFACE MEMDC_FLAG_SWSURFACE /* Surface is in system memory */// #define GAL_HWSURFACE MEMDC_FLAG_HWSURFACE /* Surface is in video memory */// #define GAL_VideoSurface (current_video->screen)// 定义向system内存写入video数据video_flags = GAL_SWSURFACE;// 源码见后// #define GAL_VideoSurface (current_video->screen) // 设置screenGAL_VideoSurface = GAL_CreateRGBSurface(video_flags, 0, 0,vformat.BitsPerPixel,vformat.Rmask, vformat.Gmask, vformat.Bmask, 0);if ( GAL_VideoSurface == NULL ) {GAL_VideoQuit();return(-1);}GAL_VideoSurface->video = current_video; // 指定软内存对应的硬件video.[luther.gliethttp]video->info.vfmt = GAL_VideoSurface->format; // 获取depth,r,g,b,a的结构体[luther.gliethttp]/* We're ready to go! */return(0);}static VideoBootStrap *bootstrap[] = {......#ifdef _NEWGAL_ENGINE_FBCON&FBCON_bootstrap, // 名为"fbcon"的驱动#endif#ifdef _NEWGAL_ENGINE_QVFB&QVFB_bootstrap,#endif......NULL};GAL_VideoDevice *GAL_GetVideo(const char* driver_name) {GAL_VideoDevice *video;int index;int i;index = 0;video = NULL;if ( driver_name != NULL ) {// 我们这里driver_name="fbcon";[luther.gliethttp]for ( i=0; bootstrap[i]; ++i ) {if ( strncmp(bootstrap[i]->name, driver_name,strlen(bootstrap[i]->name)) == 0 ) {if ( bootstrap[i]->available() ) { // 调用FB_Availablevideo = bootstrap[i]->create(index); // 调用FB_CreateDevice break;}}} else {// 如果没有定义driver_name,那么// 使用第一个可用的video驱动创建一个video.(个人觉得并不推荐)[luther.gliethttp].for ( i=0; bootstrap[i]; ++i ) {if ( bootstrap[i]->available() ) {video = bootstrap[i]->create(index); // new一个video,该video内存将填充对应的video操作方法[luther.gliethttp] if ( video != NULL ) {break;}}}}if (video == NULL)return NULL;video->name = bootstrap[i]->name; // 该video的名字,我们这里就是"fbcon"[luther.gliethttp]/* Do some basic variable initialization */video->screen = NULL;video->physpal = NULL;video->offset_x = 0;video->offset_y = 0;memset(&video->info, 0, (sizeof video->info));return video;VideoBootStrap FBCON_bootstrap = {"fbcon", "Linux Framebuffer Console",FB_Available, FB_CreateDevice};static int FB_Available(void){int console;const char *GAL_fbdev;GAL_fbdev = getenv("FRAMEBUFFER");if ( GAL_fbdev == NULL ) {GAL_fbdev = "/dev/fb0";}console = open(GAL_fbdev, O_RDWR, 0);if ( console >= 0 ) {// 能打开/dev/fb0,说明linux已经开启framebuffer显示功能,所以返回true[luther.gliehttp]close(console);}return(console >= 0);}static GAL_VideoDevice *FB_CreateDevice(int devindex){GAL_VideoDevice *this;/* Initialize all variables that we clean on shutdown */this = (GAL_VideoDevice *)malloc(sizeof(GAL_VideoDevice));if ( this ) {memset(this, 0, (sizeof *this)); // 清0this->hidden = (struct GAL_PrivateVideoData *)malloc((sizeof *this->hidden));}if ( (this == NULL) || (this->hidden == NULL) ) {GAL_OutOfMemory();if ( this ) {free(this);}return(0);}// 内存空间已经全部申请成功[luther.gliethttp]memset(this->hidden, 0, (sizeof *this->hidden));// #define wait_vbl (this->hidden->wait_vbl)// #define wait_idle (this->hidden->wait_idle)// #define mouse_fd (this->hidden->mouse_fd)// #define keyboard_fd (this->hidden->keyboard_fd)// #define console_fd (this->hidden->console_fd)wait_vbl = FB_WaitVBL; // linux没有该功能,该函数将直接返回[luther.gliehttp]wait_idle = FB_WaitIdle; // 等待设备空闲,对于framebuffer来说,也是直接返回[luther.gliethttp]mouse_fd = -1;keyboard_fd = -1;/* Set the function pointers */this->VideoInit = FB_VideoInit; // 设备初始化函数this->ListModes = FB_ListModes;this->SetVideoMode = FB_SetVideoMode;this->SetColors = FB_SetColors;this->VideoQuit = FB_VideoQuit;#if defined(_LITE_VERSION) && !defined(_STAND_ALONE) this->RequestHWSurface = FB_RequestHWSurface;#endifthis->AllocHWSurface = FB_AllocHWSurface;this->CheckHWBlit = NULL;this->FillHWRect = NULL;this->SetHWColorKey = NULL;this->SetHWAlpha = NULL;this->UpdateRects = NULL;#if 0this->LockHWSurface = FB_LockHWSurface;this->UnlockHWSurface = FB_UnlockHWSurface;this->FlipHWSurface = FB_FlipHWSurface;#endifthis->FreeHWSurface = FB_FreeHWSurface;this->free = FB_DeleteDevice;return this;}static int FB_VideoInit(_THIS, GAL_PixelFormat *vformat) {struct fb_fix_screeninfo finfo;struct fb_var_screeninfo vinfo;int i;int current_index;unsigned int current_w;unsigned int current_h;const char *GAL_fbdev;/* Initialize the library */GAL_fbdev = getenv("FRAMEBUFFER");if ( GAL_fbdev == NULL ) {GAL_fbdev = "/dev/fb0";}console_fd = open(GAL_fbdev, O_RDWR, 0);if ( console_fd < 0 ) {GAL_SetError("NEWGAL>FBCON: Unable to open %s\n", GAL_fbdev);return(-1);}/* Get the type of video hardware */// 获取framebuffer参数,比如我的linux下[luther.gliethttp]// /boot/grub/menu.lst// 设置的启动参数为vga=0x0317// 0x0317代表的意思为,1024*768像素,16位每像素[luther.gliethttp]if ( ioctl(console_fd, FBIOGET_FSCREENINFO, &finfo) < 0 ) { GAL_SetError("NEWGAL>FBCON: Couldn't get console hardware info\n");FB_VideoQuit(this);return(-1);}switch (finfo.type) {case FB_TYPE_PACKED_PIXELS:/* Supported, no worries.. */break;#ifdef VGA16_FBCON_SUPPORTcase FB_TYPE_VGA_PLANES:/* VGA16 is supported, but that's it */if ( finfo.type_aux == FB_AUX_VGA_PLANES_VGA4 ) {if ( ioperm(0x3b4, 0x3df - 0x3b4 + 1, 1) < 0 ) {GAL_SetError("NEWGAL>FBCON: No I/O port permissions\n");FB_VideoQuit(this);return(-1);}this->SetVideoMode = FB_SetVGA16Mode;break;}/* Fall through to unsupported case */#endif /* VGA16_FBCON_SUPPORT */default:GAL_SetError("NEWGAL>FBCON: Unsupported console hardware\n");FB_VideoQuit(this);return(-1);}switch (finfo.visual) {case FB_VISUAL_TRUECOLOR:case FB_VISUAL_PSEUDOCOLOR:case FB_VISUAL_STATIC_PSEUDOCOLOR:case FB_VISUAL_DIRECTCOLOR:break;default:GAL_SetError("NEWGAL>FBCON: Unsupported console hardware\n");FB_VideoQuit(this);return(-1);}#if 0/* Check if the user wants to disable hardware acceleration */{ const char *fb_accel;fb_accel = getenv("GAL_FBACCEL");if ( fb_accel ) {finfo.accel = atoi(fb_accel);}}#endif/* Memory map the device, compensating for buggy PPC mmap() */mapped_offset = (((long)finfo.smem_start) -(((long)finfo.smem_start)&~(getpagesize () - 1)));mapped_memlen = finfo.smem_len+mapped_offset;#ifdef __uClinux__# ifdef __TARGET_BLACKFIN__mapped_mem = mmap(NULL, mapped_memlen,PROT_READ|PROT_WRITE, MAP_PRIVATE, console_fd, 0);# elsemapped_mem = mmap(NULL, mapped_memlen,PROT_READ|PROT_WRITE, 0, console_fd, 0);# endif#else// 执行内存映射[luther.gliethttp]// #define mapped_mem (this->hidden->mapped_mem) mapped_mem = mmap(NULL, mapped_memlen,PROT_READ|PROT_WRITE, MAP_SHARED, console_fd, 0);#endifif (mapped_mem == (char *)-1) {GAL_SetError("NEWGAL>FBCON: Unable to memory map the video hardware\n");mapped_mem = NULL;FB_VideoQuit(this);return(-1);}/* Determine the current screen depth */if ( ioctl(console_fd, FBIOGET_VSCREENINFO, &vinfo) < 0 ) { GAL_SetError("NEWGAL>FBCON: Couldn't get console pixel format\n");FB_VideoQuit(this);return(-1);}vformat->BitsPerPixel = vinfo.bits_per_pixel; // 1个像素对应bits位数[luther.gliethttp]if ( vformat->BitsPerPixel < 8 ) {/* Assuming VGA16, we handle this via a shadow framebuffer */vformat->BitsPerPixel = 8; // 强制为1个字节[luther.gliethttp] }for ( i=0; i<vinfo.red.length; ++i ) {// 生成红色mask,以vinfo.red.offset位开始向高位数vinfo.red.length个位,// 比如vinfo.red.offset等于0,// vinfo.red.length等于5,// 那么该for循环完毕之后// vformat->Rmask = 0x1F;[luther.gliethttp]vformat->Rmask <<= 1;vformat->Rmask |= (0x00000001<<vinfo.red.offset);}for ( i=0; i<vinfo.green.length; ++i ) {vformat->Gmask <<= 1;vformat->Gmask |= (0x00000001<<vinfo.green.offset);}for ( i=0; i<vinfo.blue.length; ++i ) {vformat->Bmask <<= 1;vformat->Bmask |= (0x00000001<<vinfo.blue.offset);}for ( i=0; i<vinfo.transp.length; ++i ) {// 透明色[luther.gliethttp]vformat->Amask <<= 1;vformat->Amask |= (0x00000001<<vinfo.transp.offset);}saved_vinfo = vinfo;/* Save hardware palette, if needed */FB_SavePalette(this, &finfo, &vinfo); // 保存调色板/* If the I/O registers are available, memory map them so we can take advantage of any supported hardware acceleration.*/if ( finfo.accel && finfo.mmio_len ) {// 如果存在寄存器io映射,那么mmap它们,这样有些硬件特性特效,我们可以去强硬控制[luther.gliethttp]mapped_iolen = finfo.mmio_len;mapped_io = mmap(NULL, mapped_iolen, PROT_READ|PROT_WRITE,MAP_SHARED, console_fd, mapped_memlen);if ( mapped_io == (char *)-1 ) {/* Hmm, failed to memory map I/O registers */mapped_io = NULL;}}#if defined(_LITE_VERSION) && !defined(_STAND_ALONE)if (mgIsServer) {#endif/* Query for the list of available video modes */current_w = vinfo.xres; // x轴像素数,对于vga=0x0317,该值为1024current_h = vinfo.yres; // y轴像素数,对于vga=0x0317,该值为768 [luther.gliethtttp]current_index = ((vinfo.bits_per_pixel+7)/8)-1; // 一个像素字节数-1.#if defined(_LITE_VERSION) && !defined(_STAND_ALONE)}#endif/* Fill in our hardware acceleration capabilities */this->info.hw_available = 1;this->info.video_mem = finfo.smem_len/1024;if ( mapped_io ) {switch (finfo.accel) {case FB_ACCEL_MATROX_MGA2064W:case FB_ACCEL_MATROX_MGA1064SG:case FB_ACCEL_MATROX_MGA2164W:case FB_ACCEL_MATROX_MGA2164W_AGP:case FB_ACCEL_MATROX_MGAG100:/*case FB_ACCEL_MATROX_MGAG200: G200 acceleration broken! */case FB_ACCEL_MATROX_MGAG400:#ifdef FBACCEL_DEBUGfprintf(stderr, "NEWGAL>FBCON: Matrox hardware accelerator!\n");#endifFB_MatroxAccel(this, finfo.accel);break;case FB_ACCEL_3DFX_BANSHEE:#ifdef FBACCEL_DEBUGfprintf(stderr, "NEWGAL>FBCON: 3DFX hardware accelerator!\n");#endifFB_3DfxAccel (this, finfo.accel);break;#ifdef FB_ACCEL_NEOMAGIC_NM2070case FB_ACCEL_NEOMAGIC_NM2200:case FB_ACCEL_NEOMAGIC_NM2230:case FB_ACCEL_NEOMAGIC_NM2360:case FB_ACCEL_NEOMAGIC_NM2380:#ifdef FBACCEL_DEBUGfprintf(stderr, "NEWGAL>FBCON: NeoMagic hardware accelerator!\n");#endifFB_NeoMagicAccel (this, finfo.accel);#endifbreak;default:#ifdef FBACCEL_DEBUGfprintf(stderr, "NEWGAL>FBCON: Unknown hardware accelerator!\n");#endifbreak;}}if (FB_OpenKeyboard(this) < 0) { // 我们这里函数FB_OpenKeyboard直接返回FB_VideoQuit(this);return(-1);}/* We're done! */return(0);}GAL_Surface * GAL_CreateRGBSurface (Uint32 flags,int width, int height, int depth,Uint32 Rmask, Uint32 Gmask, Uint32 Bmask, Uint32 Amask) {GAL_VideoDevice *video = current_video;GAL_VideoDevice *this = current_video;GAL_Surface *screen;GAL_Surface *surface;/* Check to see if we desire the surface in video memory */ if ( video ) {// #define GAL_PublicSurface (current_video->screen)screen = GAL_PublicSurface;} else {screen = NULL;}if ( screen && ((screen->flags&GAL_HWSURFACE) == GAL_HWSURFACE) ) {// 表示为硬件framebuffer对应的screen缓冲区// 我们的flags = GAL_SWSURFACE; 软接口if ( (flags&(GAL_SRCCOLORKEY|GAL_SRCALPHA)) != 0 ) {flags |= GAL_HWSURFACE;}if ( (flags & GAL_SRCCOLORKEY) == GAL_SRCCOLORKEY ) { if ( ! current_video->info.blit_hw_CC ) {flags &= ~GAL_HWSURFACE;}}if ( (flags & GAL_SRCALPHA) == GAL_SRCALPHA ) {if ( ! current_video->info.blit_hw_A ) {flags &= ~GAL_HWSURFACE;}}} else {flags &= ~GAL_HWSURFACE; // 不能使用硬件缓冲区}/* Allocate the surface */surface = (GAL_Surface *)malloc(sizeof(*surface)); // 申请内存if ( surface == NULL ) {GAL_OutOfMemory();return(NULL);}if ((flags & GAL_HWSURFACE) == GAL_HWSURFACE)surface->video = current_video; // 挂上它对应的物理video elsesurface->video = NULL; // GAL_SWSURFACE; 软接口,所以没有物理videosurface->flags = GAL_SWSURFACE; // 为软接口,并且它的video为NULL.if ( (flags & GAL_HWSURFACE) == GAL_HWSURFACE ) {depth = screen->format->BitsPerPixel;Rmask = screen->format->Rmask;Gmask = screen->format->Gmask;Bmask = screen->format->Bmask;Amask = screen->format->Amask;}// depth为一个像素对应字节数// RGBA分别对应红绿蓝和透明色对应的mask掩码值[luther.gliethttp]surface->format = GAL_AllocFormat(depth, Rmask, Gmask, Bmask, Amask);if ( surface->format == NULL ) {free(surface);return(NULL);}if ( Amask ) {surface->flags |= GAL_SRCALPHA; // 含有透明色}surface->w = width;surface->h = height;surface->pitch = GAL_CalculatePitch(surface);surface->pixels = NULL;surface->offset = 0;surface->hwdata = NULL;surface->map = NULL;surface->format_version = 0;GAL_SetClipRect(surface, NULL);/* Get the pixels */if ( ((flags&GAL_HWSURFACE) == GAL_SWSURFACE) ||(video->AllocHWSurface(this, surface) < 0) ) {if ( surface->w && surface->h ) { // 我们这里w和h都定义为0[luther.gliethttp]// pitch为屏幕一行像素所占字节数// surface->h为一个屏幕一共多少行// 所以它们2个相乘之后,就是整个屏幕所需内存大小[luther.gliethttp]surface->pixels = malloc(surface->h*surface->pitch); // 申请屏幕所有像素对应的字节内存[luther.gliethttp]if ( surface->pixels == NULL ) {GAL_FreeSurface(surface);GAL_OutOfMemory();return(NULL);}/* This is important for bitmaps */memset(surface->pixels, 0, surface->h*surface->pitch); // 清空内存数据surface->flags &= ~GAL_HWSURFACE; // 软内存空间标志}}/* Allocate an empty mapping */surface->map = GAL_AllocBlitMap();if ( surface->map == NULL ) {GAL_FreeSurface(surface);return(NULL);}/* The surface is ready to go */surface->refcount = 1; // ok了#ifdef CHECK_LEAKS++surfaces_allocated;#endifreturn(surface);}。
MiniGUI源码分析

MiniGUI源码分析上一篇:MiniGUI源码分析--hellowworld(1) :MiniGUIMain中有什么奥秘上一篇讲到MiniGUI程序的启动过程。
当MiniGUI完成了初始化之后,就可以创建一个主窗口。
(主窗口是唯一可以作为根窗口的窗口对象。
这可能是MiniGUI在当初设计时为了方便而设立的。
但是个人认为,这实在是一个蹩脚的设计。
应该将主窗口与控件的接口完全统一了,就像windows API那样。
)创建主窗口函数,是CreateMainWindow ,这是一个内联函数:[cpp]view plaincopy1.static inline HWND GUIAPI CreateMainWindow (PMAINW INCREATE pCreateInfo)2.{3.return CreateMainWindowEx (pCreateInfo, NULL, NULL, N ULL, NULL);4.}而CreateMainWindowEx的定义如下:[cpp]view plaincopy1.MG_EXPORT HWND GUIAPI CreateMainWindowEx (PMAI NWINCREATE pCreateInfo,2.const char* werdr_name, const WINDOW_ELEMENT_ATTR * we_attrs,3.const char* window_name, const char* layer_name);该函数后面的参数都是和LF渲染器有关的,这一部分会在以后的章节专门叙述。
最后一个参数可以忽略。
最重要的参数就是PMAINWINCREATE,它描述了一个窗口的主要信息,它的定义是:[cpp]view plaincopy1./**2.* Structure defines a main window.3.*/4.typedef struct _MAINWINCREATE5.{6./** The style of the main window */7.DWORD dwStyle;8.9./** The extended style of the main window */10.DWORD dwExStyle;11.12./** The caption of the main window */13.const char* spCaption;14.15./** The handle to the menu of the main window */16.HMENU hMenu;17.18./** The handle to the cursor of the main window */19.HCURSOR hCursor;20.21./** The handle to the icon of the main window */22.HICON hIcon;23.24./** The hosting main window */25.HWND hHosting;26.27./** The window callback procedure */28.int (*MainWindowProc)(HWND, int, WPARAM, LPARA M);29.30./** The position of the main window in the screen coo rdinates */31.int lx, ty, rx, by;32.33./** The pixel value of background color of the main wi ndow */34.int iBkColor;35.36./** The first private data associated with the main win dow */37.DWORD dwAddData;38.39./** Reserved, do not use */40.DWORD dwReserved;41.}MAINWINCREATE;42.typedef MAINWINCREATE* PMAINWINCREATE;其中最重要的就是MainWindowProc了,这是窗口的过程回调。
实验八:MiniGUI应用程序设计实验
实验八 MiniGUI应用程序设计实验一、实验目的1.了解MiniGUI的基本结构。
2.练习MiniGUI的系统配置和编译安装。
3.交叉编译、在目标板上运行MiniGUI。
4.分析并了解 MiniGUI应用程序hello world。
5.在目标板上运行hello world程序。
二、实验设备和仪器1.计算机2.FS2410P教学实验平台三、实验内容及要求1.MiniGUI的系统配置和编译安装2.分析并了解 MiniGUI应用程序hello world。
3.交叉编译MiniGUI应用程序hello world。
4.在开发板上运行hello world程序。
四、实验原理及步骤1. 实验原理MiniGUI是一种面向嵌入式系统和实时系统的图形用户界面支持系统。
它主要运行于Linux控制台,实际可以运行在任何一种具有线程支持的POSIX兼容系统上。
MiniGUI同时也是国内最早出现的几个自由软件项目之一。
与Microwindows相比,MiniGUI和MicroWindows均为自由软件,只是前者遵循LGPL条款,后者遵循MPL条款。
这两个系统的技术路线也有所不同。
MiniGUI的策略是首先建立在比较成熟的图形引擎之上,比如SVGALib和LibGGI,开发的重点在于窗口系统如图形接口; MicroWindows目前的开发重点则在底层的图形引擎,窗口系统和图形接口方面的功能还比较欠缺。
举个例子来说,MiniGUI 有一套用来支持多字符集和多编码的函数接口,可以支持各种常见的字符集,包括GB、Big5、Unicode等,而MicroWindows在多字符集的支持上尚没有统一接口。
-MiniGUI最初是为了满足一个工业控制系统的需求而设计和开发的。
这个工业控制系统是清华大学为一台数控机床设计的计算机数控系统(CNC)。
在比较了DOS、Windows 98、Windows NT、Linux等系统之后,该项目组决定选择RT-Linux作为实时操作系统,以便满足2ms甚至更高的实时性。
第05章 MiniGUI菜单编程

int GUIAPI GetMenuItemInfo (HMENU hmnu, int item, BOOL flag, PMENUITEMINFO pmii); int GUIAPI SetMenuItemInfo (HMENU hmnu, int item, BOOL flag, PMENUITEMINFO pmii);
哈尔滨工业大学华德应用技术学院—计算机应用技术系— 哈尔滨工业大学华德应用技术学院—计算机应用技术系—嵌入式系统方向
5.1 菜单的创建和操作
5.1.3 操作菜单项属性
应用程序可以通过 GetMenuItemInfo 函数获得 感兴趣的菜单项属性, 感兴趣的菜单项属性,也可以通过 SetMenuItemInfo 函数设置 感兴趣的菜单项属性。原型如下: 感兴趣的菜单项属性。原型如下:
哈尔滨工业大学华德应用技术学院—计算机应用技术系— 哈尔滨工业大学华德应用技术学院—计算机应用技术系—嵌入式系统方向
5.1 菜单的创建和操作
如果这个菜单项有子菜单, 如果这个菜单项有子菜单,则可通过 设置菜单项的 hsubmenu 变量来指 定菜单项的子菜单句柄( 定菜单项的子菜单句柄(由函数 来创建子菜单句柄) CreatePopupMenu 来创建子菜单句柄)
MiniGUI 编程模型(一)
(2) 新建工程 )
使用VC的【文件|新建】菜单,选“工程”标签,选择win32 console application 工程类型。输入文件名HelloWorld,选 择工作路径为解压后了路径,比如解压后放在 E:\miniguidoc\minigui-dev-1.6.2-for-win32\目录下, 那么工程的保存路径应为E:\miniguidoc\minigui-dev-1.6.2for-win32\HelloWorld。如图:
按确定后选择An empty project。如图 按确定后选择 。
按下Finish即可。 即可。 按下 即可
(3)输入源代码 输入源代码
1、新建立文件输入代码,可以复制上文中的源 代码。保存明为helloWorld.c。 2、使用菜单【project | add to project | files 】 打开对话框,选择我们刚才建立的helloWorld.c
到这一步,编译设置全部完成! 到这一步,编译设置全部完成!
(5)编译工程 编译工程
现在就可以编译工程了,使用 的工具 现在就可以编译工程了,使用VC的工具
具体方法参考VC使用手册。 具体方法参考 使用手册。 使用手册
(6)运行 程序 运行
要运行工程先要把我们解压后的目录下的wvfb.exe 要运行工程先要把我们解压后的目录下的 (windows下的 下的minigui窗口程序仿真器)运行起来。 窗口程序仿真器)运行起来。 下的 窗口程序仿真器 如图
然后运行HelloWorld。使用VC的工具栏 。使用 的工具栏 然后运行
运行效果如下: 运行效果如下:
2、选择 、选择Linux页面,选择 页面, 选项。 页面 选择Category为General选项。 为 选项 在Object/library modules:下面的编辑框后面添 : 加minigui.lib pthreadVC1.lib两个库。
linux minigui的用法

linuxminigui的用法在Linux中,GUI工具包是一个很重要的库,因为它可以让开发人员更方便地开发图形用户界面应用程序。
尽管有很多不同的图形工具包可用,但是其中最流行的是GTK+。
不过,如果您需要使用另一种库来开发图形应用程序,LinuxMiniGUI可能是一个很好的选择。
它是一个小巧且轻量级的图形用户界面库,专门为Linux系统设计。
这篇文章将向您展示如何使用LinuxMiniGUI开发图形用户界面应用程序。
一、安装LinuxMiniGUI要使用LinuxMiniGUI,您需要首先将其安装到您的Linux系统中。
您可以使用包管理器来安装它。
例如,在Ubuntu上,您可以使用以下命令来安装MiniGUI:```arduinosudoapt-getinstalllibmigui3libmiguitpl1```二、创建简单的GUI应用程序安装完MiniGUI后,您可以使用GTK+工具来创建简单的GUI应用程序。
但是,如果您想要使用MiniGUI本身,您需要编写一些代码来创建窗口、按钮和其他GUI元素。
以下是一个简单的示例代码:```c#include<windows.h>#include<migui/migui.h>intWINAPIWinMain(HINSTANCEhInst,HINSTANCEhPrevInst,LPSTRa rgs,intncmdshow){MigWindow*window=migui_win_create(NULL,"MyWindow","MyWind owTitle",WINDOW_TYPE_NORMAL);MigLayout*layout=migui_lay_create(window,NULL);migui_lay_add(layout,migui_btn_create(window,"MyButton"));migui_win_show(window);while(1){MSGmsg;while(GetMessage(&msg,NULL,0,0)){TranslateMessage(&msg);DispatchMessage(&msg);}}return0;}```这段代码创建了一个窗口和一个按钮。
MiniGUI 编程模型(二)
一、对话框
在 MiniGUI 中,对话框是一类特殊的主窗口, 这种主窗口只关注与用户的交互――向 用户提供输出信息,但更多的是用于用户输入。 对话框可以理解为子类化之后的主窗口类。 它针对对话框的特殊性(即用户交互)进行了 特殊设计。
1、对话框模板
在 MiniGUI 中,用两个结构来表示对话框模板 (minigui/window.h),详见PDF文档: 结构 CTRLDATA 用来定义控件,DLGTEMPLATE 用来 定义对话框本身。在程序中,分两步来做: (1)首先利用 CTRLDATA 定义对话框中所有的控件, 并用数组表示。控件在该数组中的顺序,也就是对话框 中用户按 TAB 键时的控件切换顺序。 (2)然后定义对话框,指定对话框中的控件数目,并指 定 DLGTEMPLATE 结构中的 controls 指针指向定义控件 的数组。
HWND GUIAPI CreatWindowEx (const char *spClassName,const char *spCaption,DWORD dwstyle,DWORD dwExstyle, Int id,int x,int,y,int w,int h,HWND hParentWnd,DWORD dwAddData);
如前所述,控件是和用户交互的主角。当控件 上发生了某种时间时,控件将会想其父窗口 发送一条消息来通知所发生的事件,这里的 父窗口既可以是主窗口,也可以是父控件。 但是通常来说应该将控件的父窗口设为主窗 口,因为消息队列通常是由主窗口的窗口过 程处理的。 实际上MiniGUI中还有控件类的概念,但是作 为初学者,先用熟练预先定义好的类是最重 要的。
int GUIAPI DialogBoxIndirectParam (PDLGTEMPLATE pDlgTemplate, HWND hOwner, WNDPROC DlgProc, LPARAM lParam); BOOL GUIAPI EndDialog (HWND hDlg, int endCode); void GUIAPI DestroyAllControls (HWND hDlg); 在 DialogBoxIndirectParam 中,需要指定对话框模板(pDlgTemplate)、 对话框的托管主窗口句柄(hOwner)、对话框回调函数地址DlgProc,以 及要传递到对话框过程的参数值(lParam)。EndDialog 用来结束对话框 过程。DestroyAllControls 用来销毁对话框(包括主窗口)中的所有子控件。
MINIGUIV1.6.0及V1.3.3触摸屏较正简单方案

MINIGUIV1.6.0及V1.3.3触摸屏较正简单方案•步骤一:readpos编译执行•步骤二:修改SMDK2410源程序2410.c•步骤三:重新配置编译libminigui1.6.0•步骤四:重新编译我的PDA应用程序•步骤五:改写配置文件Minigui.cfg及ts.conf并测试Crosstool: arm-linux-gcc-3.4.1硬件环境:Host:X86PCTarget:友善之臂mini2440开发板软件环境:Host:fedora 10.0Target:arm-linux kernel:linux-2.6.17本实验方案采纳Singlewolfyu (大漠孤狼)在MiniGUI 1.3.3 移植详解中带屏幕校正功能的 2410 的 IAL ,作者通过改写MiniGUI 1.3.3 版本中的 2410 的 IAL 程序,采用SMDK2410作为IAL引擎,实现了触摸屏原理,我将该方案弄到V1.6.0版本也成功地实现触摸屏的较正。
改写的程序我命名为2410_touchmodify.c该程序的说明:在2410_touchmodify.c中定义了两个数组,如下typedef struct mPoint { int x,y ;} mPOINT ;static mPOINT ts_position[4]={ {940,926},{940,102},{96,104},{120,940} };static mPOINT display_position[4]={ {0,0},{0,319},{239,319},{239,0} };ts_position 意思为 TouchScreen?的位置 display_position 意思为屏幕上显示的位置比如我前面说的,我的屏幕是240x320 的,我交叉编译tslib并移植tslib到开发板,然后我点四个角{0,0},{0,319},{239,319},{239,0} ,从触屏上读出来的数据分别为{26,283},{26,32},{216,31},{216,285} ,填入这两个数就行所以使用方法就是,你自己取四个顶角的点,点这四个点,得到相应的触摸屏读出来的值,把这些数据填到这两个数组中,OK,你的触摸屏就可以正常工作了:)得到四个顶点的原始坐标可以采用大漠孤狼的readpos.c 的程序,也可以采用我的方法交叉编译、移植tslib,运行tslib的./ts_print_raw 来得到,关于tslib的交叉编译及使用,请参考我的另一篇文章,minigui V1.6.10 + tslib 触摸屏较正完美解决方案,博客地址/huangsihua/archive/2009/03/15/39927 75.aspx我这里就不写出来了。
【最新2018】MINIGUI开发中遇到的问题和对应学习方法word版本 (14页)
本文部分内容来自网络整理,本司不为其真实性负责,如有异议或侵权请及时联系,本司将立即删除!== 本文为word格式,下载后可方便编辑和修改! == MINIGUI开发中遇到的问题和对应学习方法篇一:MINIGUI开发中遇到的问题及解决方法MINIGUI开发中遇到的问题及解决方法MiniGui是基于消息机制的开发工具,由于不具备可视化性,这就要求开发人员熟悉其控件及消息机制。
首先要阅读其中的开发文档如:MINIGUI-USER-MANUAL.pdf(了解其配置、编译及安装方法);MiniGUITechWhitePaper-2.0-4C.pdf(了解控件及其用途);MINIGUI-PROG-GUIDE-V2.0-4C.pdf(具体控件属性、消息等);另外,给出了控件的示例,可以编译学习,示例程序一般在mg-samples-2.0.4文件夹中。
在开发中遇到了一些问题,折腾了半天最后才发现是MiniGui的问题。
程序员开发时大多数是边做边学的,遇到问题再查找解决方法,这样印象更深刻。
下面把经常遇到,甚至是低级幼稚的问题总结一下,做个记录。
1、不想修改的编辑框仍可以输入或输入的一个字符却显示两个等;大多数可编辑的控件都有READONLY属性(不同控件前缀可能不同),该属性决定编辑框为只读属性,用户不能修改编辑框中的内容,但插入符可见,因此,如果不想让编辑框可编辑,加上此属性就ok了。
2、编辑框上不该有光标闪烁时,却总是会闪烁;MiniGui有自己的消息循环机制,常用的如MSG_PAINT,用于屏幕输出。
一般有以下情况时系统会收到MSG_PAINT消息:① 用户移动窗口或显示窗口时;② 用InvalidateRect更新窗口的无效区域;③ 调用UpdateWindow重绘窗口;④ 覆盖程序窗口的对话框或消息框被消除;⑤ 下拉或弹出菜单被消除;出现闪烁光标就要检查程序中是否有以上情况发生;3、如何修改控件的背景颜色;MiniGui各控件的背景颜色是已经在MiniGUI.cfg的windowelementcolors 段设置好的。
第二次课:MiniGUI程序架构
MiniGUI程序架构 程序架构分析: 程序架构分析:
主窗口创建时消息动作过程: 主窗口创建时消息动作过程:
SendMessage MSG_CREATE CREATEMAINWINDOW SHOWWINDOW
IT Education & Training
GetMessage
WndProc
PostMessage MSG_PAINT
7
MiniGUI程序架构
程序架构分析: 程序架构分析:
IT Education & Training
• 3) 设置主窗口属性 —— ——MAINWINCREATE 结构描述 • CreateInfo.dwStyle = WS_VISIBLE | WS_BORDER | WS_CAPTION; • 设置主窗口风格,这里把窗口设为初始可见的,并具有边框和标题 栏。 • CreateInfo.deExStyle = WS_EX_NONE; • 设置主窗口的扩展风格,该窗口没有扩展风格。 • CreateInfo.spCaption = “HelloWorld” • 设置主窗口的标题为”HelloWorld”。
• 设置主窗口在屏幕上的位置,该窗口左上角位于(0, 0),右下角位 于(320, 240)。
11
MiniGUI程序架构
程序架构分析: 程序架构分析:
• 4) 创建和显示主窗口
• •
IT Education & Training
//创建主窗口
hMainWnd = CreateMainWindow (&CreateInfo);
• 6) 窗口过程函数 • static int HelloWinProc(HWND hWnd, int message, WPARAM wParam, LPARAM lParam)
6.6 MiniGUI

新建目录 /usr/local/arm/2.95.3/armlinux/include/freetype1/freetype
E. 安装TrueType字体库(续)
mkdir -p /usr/local/arm/2.95.3/armlinux/include/freetype1/freetype cp *.h /usr/local/arm/2.95.3/arm-linux/include/freetype1/freetype
cd /opt/s3c2410 tar zxf /opt/linux/mg-samples-1.3.0.tar.gz cd mg-samples-1.30 ./configure make ls src
检查是否src目录下有例子程序
F. 修改MiniGUI配置文件
编辑
/usr/local/etc/MiniGUI.cfg文件
包含了MiniGUI的综合演示程序
ms-samples-1.3.0.tar.gz:
包含了MiniGUI的配套实例程序包
3. MiniGUI模拟环境构建
启动Red Hat Linux 9,用root登 陆 建立自己的开发目录
cd /opt
mkdir s3c2410 cd s3c2410
执行make install需要在armlinux下新建两个目录(见下页)
D. 安装jpeg图形库(续)
mkdir -p /usr/local/arm/2.95.3/arm-linux/man/man1
make install
jpeg图形库安装完毕
E. 安装TrueType字体库
mkdir -p /opt/s3c2410/libttf/extend
MINIGUI-主窗口和控件的理解
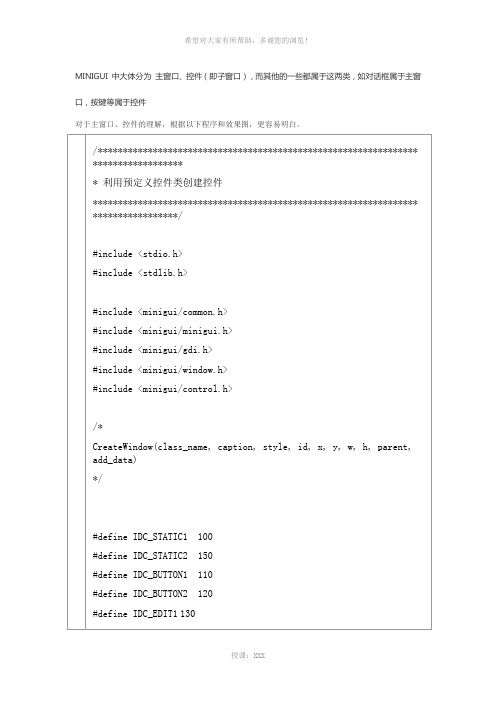
CreateInfo.dwStyle = WS_VISIBLE | WS_BORDER | WS_CAPTION;
CreateInfo.dwExStyle = WS_EX_NONE;
CreateInfo.spCaption = "Hello, world";
{
HWND hStaticWnd1, hStaticWnd2, hButton1, hButton2, hEdit1, hEdit2;
//创建一个静态框
hStaticWnd1 = CreateWindow(CTRL_STATIC,
"This is a static control",
WS_CHILD | SS_NOTIFY | SS_SIMPLE | WS_VISIBLE | WS_BORDER,
IDC_STATIC1,
10, 10, 180, 300, hWnd, 0);
//在 hStaticWnd1 中创建两个按钮控件
hButton1 = CreateWindow(CTRL_BUTTON,
"Button1",
WS_CHILD | BS_PUSHBUTTON |WS_VISIBLE,
IDC_BUTTON1,
//在 hStaticWnd1 中创建一个编辑框控件
hEdit1 = CreateWindow(CTRL_EDIT,
"Edit box 1",
WS_CHILD | WS_VISIBLE | WS_BORDER,
IDC_EDIT1,
20, 80, 100, 24, hStaticWnd1, 0);
MINIGUI输入模块代码文件分析

MINIGUI输入模块代码文件分析一、文件分析1、ial.h输入抽象层相关的数据结构和宏定义(1)对各类鼠标击键事件展开宏定义。
#defineial_mouse_leftbutton4#defineial_mouse_middlebutton2#defineial_mouse_rig htbutton1#defineial_mouse_fourthbutton8#defineial_mouse_fifthbutton16#defineia l_mouse_sixthbutton32#defineial_mouse_resetbutton64(2)对鼠标事件和键盘事件进行宏定义。
#defineial_mouseevent1#defineial_keyevent2(3)定义处置输出事件的结构体inputtypedefstructtaginput{char*id;//initializationandterminationbool(*init_input)(structtaginput*input,constchar*mdev,constchar*mtype);void(*t erm_input)(void);//mouseoperationsint(*update_mouse)(void);void(*get_mouse_xy)(int*x,int*y);void(*set_mouse_xy)( intx,inty);int(*get_mouse_button)(void);void(*set_mouse_range)(intminx,intminy,intmaxx,intmaxy);void(*suspend_mouse)(v oid);int(*resume_mouse)(void);//keyboardoperationsint(*update_keyboard)(void);constchar*(*get_keyboard_state)(void);void(*suspen d_keyboard)(void);int(*resume_keyboard)(void);void(*set_leds)(unsignedintleds);int(*wait_event)(intwhich,intmaxfd,fd_set*in,fd_set*out,fd_set*except,structti meval*timeout);charmdev[max_path+1];}input;(4)定义处置输出事件的函数。
MiniGUI程序框架
//创建主窗口 hMainWnd = CreateMainWindow (&CreateInfo);
• CreateMainWindow创建主窗口,参数是指向 MAINWINCREATE结构的指 针— CreateInfo,返回值为所创建的主窗口的句柄。MAINWINCREATE 结 构描述一个主窗口的属性。
IT Education & Training
版权所有 计算机协会 2006,By CSK
6
6
MiniGUI程序架构
程序架构分析:
• 3) 设置主窗口属性 ——MAINWINCREATE 结构描述
Neusoft Institute of Information
• • • • • • • • • • • • • • •
• MiniGUI 对 MiniGUI程序维护一种名叫消息队列的数据结构。在发生事件 之后,MiniGUI 将事件转换为一个消息,并将消息放入目标程序的消息队 列之中。应用程序现在的任务就是执行消息循环代码,不断地从消息队 列中取出消息,进行处理。
• • • • •
//消息循环 while (GetMessage(&Msg, hMainWnd)) { TranslateMessage(&Msg); DispatchMessage(&Msg); }
IT Education & Training
版权所有 计算机协会 2006,By CSK
7
7
MiniGUI程序架构
程序架构分析:
Neusoft Institute of Information
• 3) 设置主窗口属性 ——MAINWINCREATE 结构描述 • CreateInfo.dwStyle = WS_VISIBLE | WS_BORDER | WS_CAPTION; • 设置主窗口风格,这里把窗口设为初始可见的,并具有边框和标题 栏。 • CreateInfo.deExStyle = WS_EX_NONE; • 设置主窗口的扩展风格,该窗口没有扩展风格。 • CreateInfo.spCaption = “HelloWorld” • 设置主窗口的标题为”HelloWorld”。
MINIGUI编程
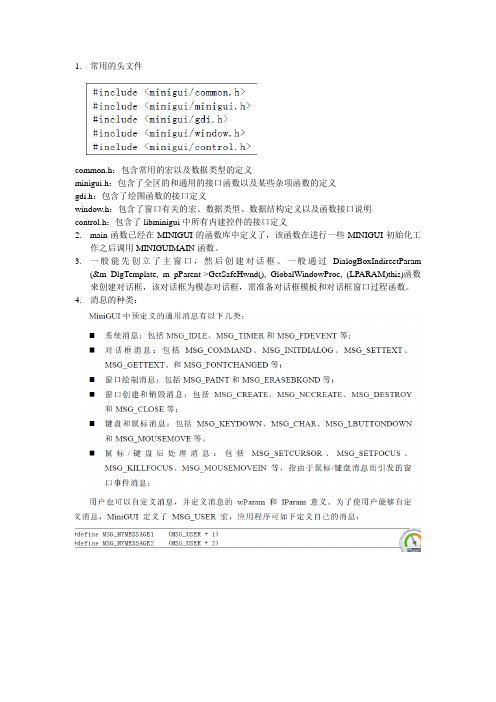
1.常用的头文件
common.h:包含常用的宏以及数据类型的定义
minigui.h:包含了全区的和通用的接口函数以及某些杂项函数的定义
gdi.h:包含了绘图函数的接口定义
window.h:包含了窗口有关的宏、数据类型、数据结构定义以及函数接口说明
control.h:包含了libminigui中所有内建控件的接口定义
2.main函数已经在MINIGUI的函数库中定义了,该函数在进行一些MINIGUI初始化工
作之后调用MINIGUIMAIN函数。
3.一般能先创立了主窗口,然后创建对话框。
一般通过DialogBoxIndirectParam
(&m_DlgTemplate, m_pParent->GetSafeHwnd(), GlobalWindowProc, (LPARAM)this)函数来创建对话框,该对话框为模态对话框,需准备对话框模板和对话框窗口过程函数。
4.消息的种类:
消息一般处理流程:
MINIGUI中的几个重要的消息处理函数
对话框操作函数
静态框类型:
单选按钮的设置
获取按钮的图像
列表框常用风格
窗口绘制
更新域(无效区域)
装载位图
填充位图。
MiniGUI 编程指南说明书

MiniGUI 编 程 指 南
目录
简 介 ..................................................................................................................... I 版权声明 ....................................................................................................................II 目 录 .................................................................................................................. III 1 前言........................................................................................................................ 1
2.2 一个简单的 MiniGUI 程序 ............................................................................................ 4
MiniGUI利用触摸屏实现屏幕键盘驱动输入法的设计
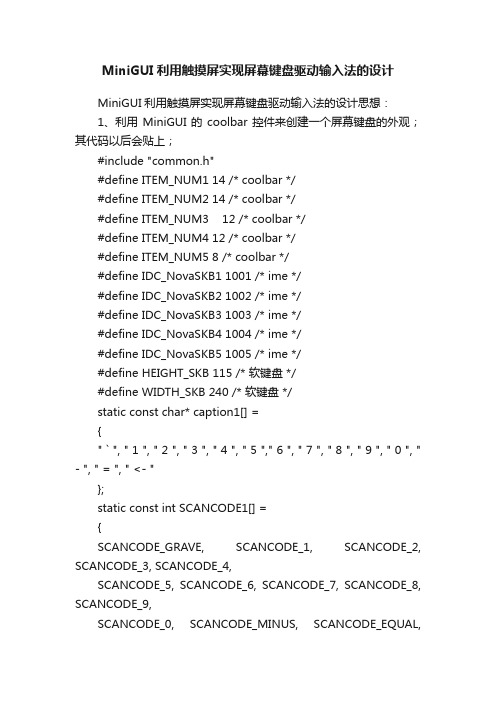
MiniGUI利用触摸屏实现屏幕键盘驱动输入法的设计MiniGUI利用触摸屏实现屏幕键盘驱动输入法的设计思想:1、利用MiniGUI的coolbar控件来创建一个屏幕键盘的外观;其代码以后会贴上;#include "common.h"#define ITEM_NUM1 14 /* coolbar */#define ITEM_NUM2 14 /* coolbar */#define ITEM_NUM3 12 /* coolbar */#define ITEM_NUM4 12 /* coolbar */#define ITEM_NUM5 8 /* coolbar */#define IDC_NovaSKB1 1001 /* ime */#define IDC_NovaSKB2 1002 /* ime */#define IDC_NovaSKB3 1003 /* ime */#define IDC_NovaSKB4 1004 /* ime */#define IDC_NovaSKB5 1005 /* ime */#define HEIGHT_SKB 115 /* 软键盘 */#define WIDTH_SKB 240 /* 软键盘 */static const char* caption1[] ={" ` ", " 1 ", " 2 ", " 3 ", " 4 ", " 5 "," 6 ", " 7 ", " 8 ", " 9 ", " 0 ", " - ", " = ", " <- "};static const int SCANCODE1[] ={SCANCODE_GRAVE, SCANCODE_1, SCANCODE_2, SCANCODE_3, SCANCODE_4,SCANCODE_5, SCANCODE_6, SCANCODE_7, SCANCODE_8, SCANCODE_9,SCANCODE_0, SCANCODE_MINUS, SCANCODE_EQUAL,SCANCODE_BACKSPACE};static const char* caption2[] ={"Tab", " q ", " w ", " e ", " r ", " t "," y ", " u ", " i ", " o ", " p ", " [ ", " ] ", " \\ "};static const int SCANCODE2[] ={SCANCODE_TAB, SCANCODE_Q, SCANCODE_W, SCANCODE_E, SCANCODE_R,SCANCODE_T, SCANCODE_Y, SCANCODE_U, SCANCODE_I, SCANCODE_O,SCANCODE_P, SCANCODE_BRACKET_LEFT, SCANCODE_BRACKET_RIGHT, SCANCODE_BACKSLASH };static const char* caption3[] ={"Shift ", " a ", " s ", " d ", " f ", " g "," h ", " j ", " k ", " l ", " ; ", " ' "};static const int SCANCODE3[] ={SCANCODE_LEFTSHIFT, SCANCODE_A, SCANCODE_S, SCANCODE_D, SCANCODE_F,SCANCODE_G, SCANCODE_H, SCANCODE_J, SCANCODE_K, SCANCODE_L,SCANCODE_SEMICOLON, SCANCODE_APOSTROPHE};static const char* caption4[] ={"Ctrl ", " z ", " x ", " c ", " v ", " b "," n ", " m ", " , ", " . ", " / ", " Enter "};static const int SCANCODE4[] ={SCANCODE_LEFTCONTROL, SCANCODE_Z, SCANCODE_X, SCANCODE_C, SCANCODE_V,SCANCODE_B, SCANCODE_N, SCANCODE_M, SCANCODE_COMMA, SCANCODE_PERIOD,SCANCODE_SLASH, SCANCODE_ENTER};static const char* caption5[] ={"Del ", " 英 ", " 中 ", " Space "," | ", " | ", " -> ", " <- "};static const int SCANCODE5[] ={SCANCODE_REMOVE, -1, -1, SCANCODE_SPACE, SCANCODE_CURSORBLOCKDOWN,SCANCODE_CURSORBLOCKUP,SCANCODE_CURSORBLOCKLEFT,SCANCODE_CURSORBLOCKRIGHT};static void create_novaskb1 (HWND hWnd){HWND cb;COOLBARITEMINFO item;int i;static BITMAP del_bmp;if (LoadBitmap (HDC_SCREEN, &del_bmp, "./little/del.bmp") != ERR_BMP_OK)exit(1);cb = CreateWindow (CTRL_COOLBAR,"",WS_CHILD | WS_VISIBLE | WS_BORDER,IDC_NovaSKB1,0, 0, 240, 20,hWnd,0);item.ItemType = TYPE_TEXTITEM;item.Bmp = NULL;item.dwAddData = 0;for (i = 0; i < ITEM_NUM1-1; i++) {item.insPos = i;item.id = i;item.Caption = caption1[i];item.ItemHint = NULL;SendMessage (cb, CBM_ADDITEM, 0, (LPARAM)&item);}/* del 按键 */item.insPos = i;item.id = i;item.ItemType = TYPE_BMPITEM;item.Bmp = &del_bmp;item.ItemHint = NULL;item.Caption = NULL;item.dwAddData= 0;SendMessage (cb, CBM_ADDITEM, 0, (LPARAM)&item); }static void create_novaskb2 (HWND hWnd){HWND cb;COOLBARITEMINFO item;int i;cb = CreateWindow (CTRL_COOLBAR,"",WS_CHILD | WS_VISIBLE | WS_BORDER,IDC_NovaSKB2,0, 22, 240, 20,hWnd,0);item.ItemType = TYPE_TEXTITEM;item.Bmp = NULL;item.dwAddData = 0;for (i = 0; i < ITEM_NUM2; i++) {item.insPos = i;item.id = i;item.Caption = caption2[i];item.ItemHint = NULL;SendMessage (cb, CBM_ADDITEM, 0, (LPARAM)&item); }}static void create_novaskb3 (HWND hWnd){HWND cb;COOLBARITEMINFO item;int i;cb = CreateWindow (CTRL_COOLBAR,"",WS_CHILD | WS_VISIBLE | WS_BORDER,IDC_NovaSKB3,0, 44, 240, 20,hWnd,0);item.ItemType = TYPE_TEXTITEM;item.Bmp = NULL;item.dwAddData = 0;for (i = 0; i < ITEM_NUM3; i++) {item.insPos = i;item.id = i;item.Caption = caption3[i];item.ItemHint = NULL;SendMessage (cb, CBM_ADDITEM, 0, (LPARAM)&item); }}static void create_novaskb4 (HWND hWnd){HWND cb;COOLBARITEMINFO item;int i;cb = CreateWindow (CTRL_COOLBAR,"",WS_CHILD | WS_VISIBLE | WS_BORDER,IDC_NovaSKB4,0, 66, 240, 20,hWnd,0);item.ItemType = TYPE_TEXTITEM;item.Bmp = NULL;item.dwAddData = 0;for (i = 0; i < ITEM_NUM4; i++) {item.insPos = i;item.id = i;item.Caption = caption4[i];item.ItemHint = NULL;SendMessage (cb, CBM_ADDITEM, 0, (LPARAM)&item);}}static void create_novaskb5 (HWND hWnd){HWND cb;COOLBARITEMINFO item;int i;static BITMAP down_bmp;static BITMAP up_bmp;static BITMAP left_bmp;static BITMAP right_bmp;if (LoadBitmap (HDC_SCREEN, &down_bmp, "./little/down.bmp") != ERR_BMP_OK)exit(1);if (LoadBitmap (HDC_SCREEN, &up_bmp, "./little/up.bmp") != ERR_BMP_OK)exit(1);if (LoadBitmap (HDC_SCREEN, &left_bmp, "./little/left.bmp") != ERR_BMP_OK)exit(1);if (LoadBitmap (HDC_SCREEN, &right_bmp,"./little/right.bmp") != ERR_BMP_OK)exit(1);cb = CreateWindow (CTRL_COOLBAR,"",WS_CHILD | WS_VISIBLE | WS_BORDER,IDC_NovaSKB5,0, 88, 240, 20,hWnd,0);item.ItemType = TYPE_TEXTITEM;item.Bmp = NULL;item.dwAddData = 0;for (i = 0; i < ITEM_NUM5 - 4; i++) {item.insPos = i;item.id = i;item.Caption = caption5[i];item.ItemHint = NULL;SendMessage (cb, CBM_ADDITEM, 0, (LPARAM)&item);}#if 1/* down 按键 */item.insPos = i;item.id = i;item.ItemType = TYPE_BMPITEM;item.Bmp = &down_bmp;item.ItemHint = NULL;item.Caption = NULL;item.dwAddData= 0;SendMessage (cb, CBM_ADDITEM, 0, (LPARAM)&item);/* up 按键 */i++;item.insPos = i;item.id = i;item.ItemType = TYPE_BMPITEM;item.Bmp = &up_bmp;item.ItemHint = NULL;item.Caption = NULL;item.dwAddData= 0;SendMessage (cb, CBM_ADDITEM, 0, (LPARAM)&item); /* left 按键 */i++;item.insPos = i;item.id = i;item.ItemType = TYPE_BMPITEM;item.Bmp = &left_bmp;item.ItemHint = NULL;item.Caption = NULL;item.dwAddData= 0;SendMessage (cb, CBM_ADDITEM, 0, (LPARAM)&item); /* right 按键 */i++;item.insPos = i;item.id = i;item.ItemType = TYPE_BMPITEM;item.Bmp = &right_bmp;item.ItemHint = NULL;item.Caption = NULL;item.dwAddData= 0;SendMessage (cb, CBM_ADDITEM, 0, (LPARAM)&item);#endif}static int NovaSKBProc(HWND hWnd, int message, WPARAM wParam, LPARAM lParam){switch (message){case MSG_CREATE:create_novaskb1(hWnd);create_novaskb2(hWnd);create_novaskb3(hWnd);create_novaskb4(hWnd);create_novaskb5(hWnd);break;case MSG_COMMAND:{int id = LOWORD (wParam);int code = HIWORD (wParam);switch (id){case IDC_NovaSKB1:SendMessage (hIMEWnd, MSG_KEYDOWN, SCANCODE1[code], 0);break;case IDC_NovaSKB2:SendMessage (hIMEWnd, MSG_KEYDOWN, SCANCODE2[code], 0);break;case IDC_NovaSKB3:SendMessage (hIMEWnd, MSG_KEYDOWN, SCANCODE3[code], 0);break;case IDC_NovaSKB4:SendMessage (hIMEWnd, MSG_KEYDOWN, SCANCODE4[code], 0);break;case IDC_NovaSKB5:if (code == 1){/* 英文 */SetIMEStatus(IS_ENABLE, 0);/* 刷新输入窗口 */ShowWindow(hIMEWnd, SW_HIDE);ShowWindow(hIMEWnd, SW_SHOWNORMAL);}else if (code == 2){/* 中文 */SetIMEStatus(IS_ENABLE, 1);/* 刷新输入窗口 */ShowWindow(hIMEWnd, SW_HIDE);ShowWindow(hIMEWnd, SW_SHOWNORMAL);}else{SendMessage (hIMEWnd, MSG_KEYDOWN, SCANCODE5[code], 0);// Send2ActiveClient (MSG_KEYDOWN, SCANCODE_CURSORDOWN, 0);// Send2ActiveClient (MSG_KEYUP, SCANCODE_CURSORDOWN, 0);}break;}}break;case MSG_KEYDOWN:Send2ActiveClient (MSG_KEYDOWN, wParam, lParam);break;case MSG_DESTROY:DestroyAllControls (hWnd);return 0;case MSG_CLOSE:DestroyMainWindow (hWnd);PostQuitMessage (hWnd);return 0;}return DefaultMainWinProc(hWnd, message, wParam, lParam);}static void InitNovaSKBCreateInfo (PMAINWINCREATE pCreateInfo, int x, int y){pCreateInfo->dwStyle = WS_ABSSCRPOS | WS_BORDER | WS_VISIBLE;pCreateInfo->dwExStyle = WS_EX_TOOLWINDOW;pCreateInfo->spCaption = "NovaSKB" ;pCreateInfo->hMenu = 0;pCreateInfo->hCursor = GetSystemCursor(IDC_ARROW);pCreateInfo->hIcon = 0;pCreateInfo->MainWindowProc = NovaSKBProc;pCreateInfo->lx = x;pCreateInfo->ty = y;pCreateInfo->rx = x + WIDTH_SKB;pCreateInfo->by = y + HEIGHT_SKB;pCreateInfo->iBkColor = PIXEL_lightwhite ;pCreateInfo->dwAddData = 0;pCreateInfo->hHosting = HWND_DESKTOP;}HWND NovaSKBWindow(HWND hosting, int x, int y){HWND hwnd_novaskb;MAINWINCREATE CreateInfo;InitNovaSKBCreateInfo(&CreateInfo, x, y);CreateInfo.hHosting = hosting;hwnd_novaskb = CreateMainWindow (&CreateInfo);if (hwnd_novaskb == HWND_INVALID)return -1;ShowWindow(hwnd_novaskb, SW_HIDE);return hwnd_novaskb;}//不要认为这段代码可以直接编译通过,但没有思想上的和语法上的错误;次程序只是位了说明一下思想,//要是真想学,琢磨下,我以后在贴上测试过的代码;2、在MSG_CREATE消息中利用GBIMEWindow来创建一个IME 窗口;3、在coolbar的proc中用SendMessage(hIMEWnd,MSG_KEYDOWN,SCANCODE,0)来向IME窗口发送模拟键盘的消息;4、IME接收到MSG_KEYDOWN后会把此消息当做键盘消息来做;进而屏幕键盘实现。
10、MiniGUI应用程序(helloworld)含解释

10、以下是MiniGUI(helloworld)应用程序,请认真阅读以下程序,回答各程序片段的功能。
/*** $Id: helloworld.c,v 1.17 2004/06/10 06:12:53 weiym Exp $** Listing 2.1** helloworld.c: Sample program for MiniGUI Programming Guide** The first MiniGUI application.** Copyright (C) 2003 Feynman Software.** License: GPL*/#include <stdio.h>#include <string.h>#include <minigui/common.h>#include <minigui/minigui.h>#include <minigui/gdi.h>#include <minigui/window.h>#include <minigui/mywindows.h>static const char* en_text = "If you see this text, MiniGUI on this board is OK now.";static char msg_text [256];static RECT msg_rc = {10, 50, 300, 80};/*-----第1个程序片段开始---------*/static int HelloWinProc(HWND hWnd, int message, WPARAM wParam, LPARAM lParam){ //窗口过程函数HelloWinProcHDC hdc;RECT rc;switch (message) {case MSG_CREATE://窗口创建消息在窗口成功创建并添加到MiniGUI的窗口管理器之后发送到窗口过程strcpy (msg_text, "No message so far.");printf ("created helloworld.\n");break;case MSG_LBUTTONDOWN: //左键按下消息printf ("The left button pressed.\n");strcpy (msg_text, "The left button pressed.");InvalidateRect (hWnd, &msg_rc, TRUE);break;case MSG_LBUTTONUP: //左键放开消息printf ("The left button released.\n");strcpy (msg_text, "The left button released.");InvalidateRect (hWnd, &msg_rc, TRUE);// InvalidateRect函数使整个矩形区域变成无效break;case MSG_PAINT://窗口绘制消息在需要进行窗口重绘时发送到窗口过程printf ("BeginPaint.\n");hdc = BeginPaint (hWnd);#if 1rc.left = 10; rc.top = 10;rc.right = 300; rc.bottom = 40;printf ("DrawText1.\n");DrawText (hdc, en_text, -1, &rc, DT_LEFT | DT_WORDBREAK);printf ("DrawText2.\n");DrawText (hdc, msg_text, -1, &msg_rc, DT_LEFT | DT_WORDBREAK);#elseTextOut (hdc, 10, 10, en_text);TextOut (hdc, 10, 50, msg_text);#endifEndPaint (hWnd, hdc);printf ("EndPaint.\n");return 0;case MSG_KEYDOWN: //键盘按下消息printf ("The %d key pressed.\n", wParam);sprintf (msg_text, "The %d key pressed", wParam);InvalidateRect (hWnd, &msg_rc, TRUE);return 0;case MSG_KEYUP://键盘放开消息printf ("The %d key released.\n", wParam);sprintf (msg_text, "The %d key released", wParam);InvalidateRect (hWnd, &msg_rc, TRUE);return 0;case MSG_CLOSE://单击“关闭”按钮时,向窗口过程发送此消息DestroyMainWindow (hWnd);//调用DestroyMainWindow函数销毁主窗口PostQuitMessage (hWnd);//在消息队列中投入一个MSG_QUIT消息(0)GetMessage退出循环return 0;}return DefaultMainWinProc(hWnd, message, wParam, lParam);//DefaultMainWinProc处理窗口过程函数不予处理的消息,由它来进行默认处理}/*-----第1个程序片段结尾---------*/程序片段1功能如下:/*窗口过程函数是MiniGUI程序的主体部分,任务是接收和处理窗口收到的各种消息(是一个回调函数)。
minigui代码分析
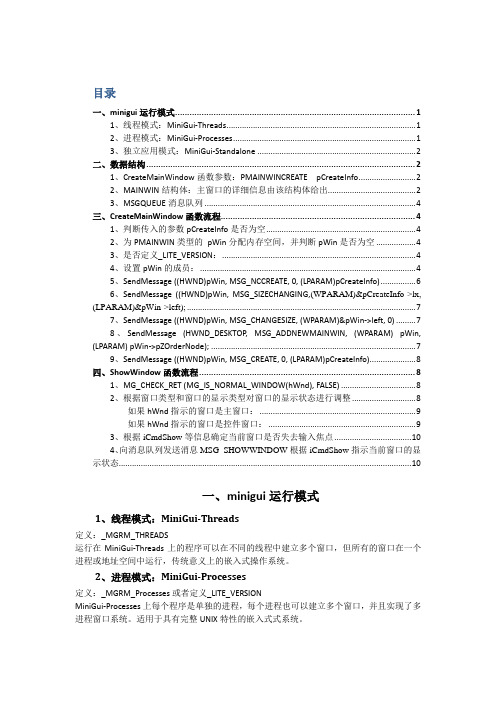
目录一、minigui运行模式 (1)1、线程模式:MiniGui-Threads (1)2、进程模式:MiniGui-Processes (1)3、独立应用模式:MiniGui-Standalone (2)二、数据结构 (2)1、CreateMainWindow函数参数:PMAINWINCREATE pCreateInfo (2)2、MAINWIN结构体:主窗口的详细信息由该结构体给出 (2)3、MSGQUEUE消息队列 (4)三、CreateMainWindow函数流程 (4)1、判断传入的参数pCreateInfo是否为空 (4)2、为PMAINWIN类型的pWin分配内存空间,并判断pWin是否为空 (4)3、是否定义_LITE_VERSION: (4)4、设置pWin的成员: (4)5、SendMessage ((HWND)pWin, MSG_NCCREATE, 0, (LPARAM)pCreateInfo) (6)6、SendMessage ((HWND)pWin, MSG_SIZECHANGING,(WPARAM)&pCreateInfo->lx,(LPARAM)&pWin->left); (7)7、SendMessage ((HWND)pWin, MSG_CHANGESIZE, (WPARAM)&pWin->left, 0) (7)8、SendMessage (HWND_DESKTOP, MSG_ADDNEWMAINWIN, (WPARAM) pWin,(LPARAM) pWin->pZOrderNode); (7)9、SendMessage ((HWND)pWin, MSG_CREATE, 0, (LPARAM)pCreateInfo) (8)四、ShowWindow函数流程 (8)1、MG_CHECK_RET (MG_IS_NORMAL_WINDOW(hWnd), FALSE) (8)2、根据窗口类型和窗口的显示类型对窗口的显示状态进行调整 (8)如果hWnd指示的窗口是主窗口: (9)如果hWnd指示的窗口是控件窗口: (9)3、根据iCmdShow等信息确定当前窗口是否失去输入焦点 (10)4、向消息队列发送消息MSG_SHOWWINDOW根据iCmdShow指示当前窗口的显示状态 (10)一、minigui运行模式1、线程模式:MiniGui-Threads定义:_MGRM_THREADS运行在MiniGui-Threads上的程序可以在不同的线程中建立多个窗口,但所有的窗口在一个进程或地址空间中运行,传统意义上的嵌入式操作系统。
- 1、下载文档前请自行甄别文档内容的完整性,平台不提供额外的编辑、内容补充、找答案等附加服务。
- 2、"仅部分预览"的文档,不可在线预览部分如存在完整性等问题,可反馈申请退款(可完整预览的文档不适用该条件!)。
- 3、如文档侵犯您的权益,请联系客服反馈,我们会尽快为您处理(人工客服工作时间:9:00-18:30)。
目录一、minigui运行模式 (1)1、线程模式:MiniGui-Threads (1)2、进程模式:MiniGui-Processes (1)3、独立应用模式:MiniGui-Standalone (2)二、数据结构 (2)1、CreateMainWindow函数参数:PMAINWINCREATE pCreateInfo (2)2、MAINWIN结构体:主窗口的详细信息由该结构体给出 (2)3、MSGQUEUE消息队列 (4)三、CreateMainWindow函数流程 (4)1、判断传入的参数pCreateInfo是否为空 (4)2、为PMAINWIN类型的pWin分配内存空间,并判断pWin是否为空 (4)3、是否定义_LITE_VERSION: (4)4、设置pWin的成员: (4)5、SendMessage ((HWND)pWin, MSG_NCCREATE, 0, (LPARAM)pCreateInfo) (6)6、SendMessage ((HWND)pWin, MSG_SIZECHANGING,(WPARAM)&pCreateInfo->lx,(LPARAM)&pWin->left); (7)7、SendMessage ((HWND)pWin, MSG_CHANGESIZE, (WPARAM)&pWin->left, 0) (7)8、SendMessage (HWND_DESKTOP, MSG_ADDNEWMAINWIN, (WPARAM) pWin,(LPARAM) pWin->pZOrderNode); (7)9、SendMessage ((HWND)pWin, MSG_CREATE, 0, (LPARAM)pCreateInfo) (8)四、ShowWindow函数流程 (8)1、MG_CHECK_RET (MG_IS_NORMAL_WINDOW(hWnd), FALSE) (8)2、根据窗口类型和窗口的显示类型对窗口的显示状态进行调整 (8)如果hWnd指示的窗口是主窗口: (9)如果hWnd指示的窗口是控件窗口: (9)3、根据iCmdShow等信息确定当前窗口是否失去输入焦点 (10)4、向消息队列发送消息MSG_SHOWWINDOW根据iCmdShow指示当前窗口的显示状态 (10)一、minigui运行模式1、线程模式:MiniGui-Threads定义:_MGRM_THREADS运行在MiniGui-Threads上的程序可以在不同的线程中建立多个窗口,但所有的窗口在一个进程或地址空间中运行,传统意义上的嵌入式操作系统。
2、进程模式:MiniGui-Processes定义:_MGRM_Processes或者定义_LITE_VERSIONMiniGui-Processes上每个程序是单独的进程,每个进程也可以建立多个窗口,并且实现了多进程窗口系统。
适用于具有完整UNIX特性的嵌入式式系统。
3、独立应用模式:MiniGui-Standalone定义:_MGRM_STANDALONE 或者定义_LITE_VERSION和_STAND_ALONE通过独立任务的方式运行,既不需要多进程支持也不需要多线程支持。
二、创建主窗口CreateMainWindow1、数据结构1、CreateMainWindow函数参数:PMAINWINCREATE pCreateInfo结构体MAINWINCREATE 定义了被创建的窗口的位置、标题、类型等基本参数。
实际上包含了创建窗口的UI风格和窗口处理函数两方面的内容。
PMAINWINCREATE为指向该结构体的指针。
typedef struct _MAINWINCREATE{DWORD dwStyle; //主窗口的类型DWORD dwExStyle; //主窗口的扩展类型const char* spCaption; //主窗口的标题HMENU hMenu; //主窗口菜单句柄HCURSOR hCursor; //主窗口光标句柄HICON hIcon; //主窗口图标句柄HWND hHosting; //主窗口的托管窗口The hosting main windowint (*MainWindowProc)(HWND, int, WPARAM, LPARAM); // 窗口回调函数int lx, ty, rx, by; //主窗口在屏幕坐标中的位置int iBkColor; //主窗口颜色的像素值DWORD dwAddData; //私有数据The first private data associated with the main windowDWORD dwReserved; //没有用到}MAINWINCREATE;typedef MAINWINCREATE* PMAINWINCREATE;2、MAINWIN结构体:主窗口的详细信息由该结构体给出typedef struct _MAINWIN{/** These fields are similiar with CONTROL struct.*/short DataType; // the data type.short WinType; // the window type.int left, top; // the position and size of main window.int right, bottom;int cl, ct; // the position and size of client area.int cr, cb;DWORD dwStyle; // the styles of main window.DWORD dwExStyle; // the extended styles of main window.int iBkColor; // the background color.HMENU hMenu; // handle of menu.HACCEL hAccel; // handle of accelerator table.HCURSOR hCursor; // handle of cursor.HICON hIcon; // handle of icon.HMENU hSysMenu; // handle of system menu.PLOGFONT pLogFont; // pointer to logical font.HDC privCDC; // the private client DC.INVRGN InvRgn; // the invalid region of this main window. PGCRINFO pGCRInfo; // pointer to global clip region info struct. PZORDERNODE pZOrderNode;PCARETINFO pCaretInfo;// pointer to system caret info struct. DWORD dwAddData; // the additional data.DWORD dwAddData2; // the second addtional data.int (*MainWindowProc)(HWND, int, WPARAM, LPARAM);// the address of main window procedure. char* spCaption; // the caption of main window.int id; // the identifier of main window. SCROLLBARINFO vscroll;// the vertical scroll bar information. SCROLLBARINFO hscroll;// the horizital scroll bar information.struct _MAINWIN* pMainWin;// the main window that contains this window.// for main window, always be itself.HWND hParent; // the parent of this window.// for main window, always be HWND_DESKTOP. /** Child windows.*/HWND hFirstChild; // the handle of first child window.HWND hActiveChild; // the currently active child window.HWND hOldUnderPointer; // the old child window under pointer. HWND hPrimitive; // the premitive child of mouse event. NOTIFPROC NotifProc; // the notification callback procedure./** window element data.*/struct _wnd_element_data* wed;/** Main Window hosting.* The following members are only implemented for main window.*/struct _MAINWIN* pHosting; // the hosting main window.struct _MAINWIN* pFirstHosted;// the first hosted main window.struct _MAINWIN* pNextHosted;// the next hosted main window. PMSGQUEUE pMessages;// the message queue.GCRINFO GCRInfo;// the global clip region info struct.// put here to avoid invoking malloc function.} MAINWIN;3、MSGQUEUE消息队列struct _MSGQUEUE{DWORD dwState; // message queue statesPQMSG pFirstNotifyMsg; // head of the notify message queuePQMSG pLastNotifyMsg; // tail of the notify message queueIDLEHANDLER OnIdle; // Idle handlerMSG* msg; /* post message buffer */int len; /* buffer len */int readpos, writepos; /* positions for reading and writing */int FirstTimerSlot; /* the first timer slot to be checked */DWORD TimerMask; /* timer slots mask */int loop_depth; /* message loop depth, for dialog boxes. */ };2、CreateMainWindow函数流程1、判断传入的参数pCreateInfo是否为空Case NULL:若参数为空,返回HWND_INVALIDCase NOT NULL:若参数不为空,继续执行22、为PMAINWIN类型的pWin分配内存空间,并判断pWin是否为空C ase NULL:分配空间失败,返回HWND_INVALIDCase NOT NULL:分配空间成功,继续执行33、是否定义_LITE_VERSION:3.a没有定义_LITE_VERSION,代表minigui的运行模式为MiniGui-Threads设置pWin的成员pWin->pMessages和pWin->pHosting3.b定义了_LITE_VERSION,代表minigui的运行模式为非MiniGui-Threads设置pWin的成员pWin->pMessages和pWin->pHosting4、设置pWin的成员:pWin->pMainWin= pWin;pWin->hParent= 0;pWin->pFirstHosted= NULL;pWin->pNextHosted= NULL;pWin->DataType= TYPE_HWND;pWin->WinType= TYPE_MAINWIN;#ifndef _LITE_VERSIONpWin->th = pthread_self();#endifpWin->hFirstChild= 0;pWin->hActiveChild= 0;pWin->hOldUnderPointer = 0;pWin->hPrimitive= 0;pWin->NotifProc= NULL;pWin->dwStyle= pCreateInfo->dwStyle;pWin->dwExStyle= pCreateInfo->dwExStyle;pWin->hMenu= pCreateInfo->hMenu;pWin->hCursor= pCreateInfo->hCursor;pWin->hIcon= pCreateInfo->hIcon;if ((pWin->dwStyle & WS_CAPTION) && (pWin->dwStyle & WS_SYSMENU)) pWin->hSysMenu= CreateSystemMenu ((HWND)pWin, pWin->dwStyle);elsepWin->hSysMenu = 0;pWin->pLogFont= GetSystemFont (SYSLOGFONT_WCHAR_DEF);pWin->spCaption= FixStrAlloc (strlen (pCreateInfo->spCaption));if (pCreateInfo->spCaption [0])strcpy (pWin->spCaption, pCreateInfo->spCaption);pWin->MainWindowProc = pCreateInfo->MainWindowProc;pWin->iBkColor= pCreateInfo->iBkColor;pWin->pCaretInfo = NULL;pWin->dwAddData = pCreateInfo->dwAddData;pWin->dwAddData2 = 0;#if !defined (_LITE_VERSION) || defined (_STAND_ALONE)if ( !( pWin->pZOrderNode = malloc (sizeof(ZORDERNODE))) )goto err;#endif/* Scroll bar */if (pWin->dwStyle & WS_VSCROLL) {pWin->vscroll.minPos = 0;pWin->vscroll.maxPos = 100;pWin->vscroll.curPos = 0;pWin->vscroll.pageStep = 0;pWin->vscroll.barStart = 0;pWin->vscroll.barLen = 10;pWin->vscroll.status = SBS_NORMAL;}elsepWin->vscroll.status = SBS_HIDE | SBS_DISABLED;if (pWin->dwStyle & WS_HSCROLL) {pWin->hscroll.minPos = 0;pWin->hscroll.maxPos = 100;pWin->hscroll.curPos = 0;pWin->hscroll.pageStep = 0;pWin->hscroll.barStart = 0;pWin->hscroll.barLen = 10;pWin->hscroll.status = SBS_NORMAL;}elsepWin->hscroll.status = SBS_HIDE | SBS_DISABLED;5、SendMessage ((HWND)pWin, MSG_NCCREATE, 0, (LPARAM)pCreateInfo)#define MSG_NCCREATE 0x0061作用:表示该窗口已经创建但是还没有向系统进行注册,当收到这种类型的消息时可以对自己创建的对象进行初始化,但不能创建子窗口,也不能进行绘图。