VxRail超融合平台软件更新手册
EMC现代数据中心和VxRail超融合系统介绍
易于管理
让应用装置保持在健康、可用和优化状态 将 VxRAIL 应用装置作为 单个群集进行管理 用 VCE VISION 发现 VxRAIL 应用装置
20
24
512GB
15.2TB
28
Cores
Memory
64GB
3.6TB
6
128GB
4.8TB
12
192GB
6TB
16
256GB
8TB
20
512GB
10TB
19TB
Storage Network
RJ45
SFP+
RJ45
SFP+
同一个VxRail应用设备不能混插不同类型节点, 同一个群集可混搭不同的VxRail型号设备
© Copyright 2016 EMC Corporation. All rights reserved.
连续复制确保业务连续性
面向 VMware 简单、高效且经过验证的灾难恢复 内含 EMC RecoverPoint for VMs
无缝集成 VMware vCenter 恢复到任意时间点 连续数据保护 保护精细到 VM 级别
VxRail超融合系统软件架构
云整合 数据保护及容灾 EMC CloudArray EMC Hybrid Cloud /EHC ( 可选 ) VDP ( EMC Avamar )
EMC RecoverPoint for VM
VxRail Manager Extension
VxRail管理
VCE Vision (可选)
轻松扩展 VxRAIL 系统功能
内置 VxRAIL 应用商店
一键式访问 — 通过 VxRail manager
EMC VxRail超融合平台-管理手册

EMC VxRail超融合平台-管理手册
本文档致力于介绍EMC VxRail超融合平台的管理手册,帮助
用户了解和使用该平台。
以下是该平台的管理手册内容:管理平台介绍
EMC VxRail超融合平台是一种全新的数据中心架构,将计算、网络和存储集成到一起,以提供最佳的IT基础设施。
环境配置和配置要求
在使用EMC VxRail超融合平台之前,用户需要检查并满足以
下配置要求:
- 主机应至少有64GB的RAM。
- 操作系统需要安装VMware vSphere ESXi 5或更高版本。
- 存储至少需要2TB的空间。
- 网络要求为10GbE的网络适配器,可选配InfiniBand HCA。
管理步骤和操作指南
在使用EMC VxRail超融合平台过程中,我们应该按照以下步骤操作:
1. 登录EMC VxRail管理页面。
2. 点击“虚拟机管理器”进入虚拟机管理页面。
3. 在虚拟机管理页面中,您可以创建、修改和删除虚拟机,以及查看虚拟机性能。
4. 在EMC VxRail超融合平台的管理页面中,您可以查看和管理整个集群、主机和存储的状态。
故障排除及支持
在EMC VxRail超融合平台的使用过程中,如果出现故障,您可以尝试以下措施:
- 测试网络连通性。
- 检查存储设备的状态。
- 检查集群节点的状态。
如果您仍然无法解决问题,您可以联系EMC VxRail超融合平台的技术支持。
结论
本文档介绍了EMC VxRail超融合平台的管理手册,希望能帮助用户更好地使用这一平台。
EMCVxRail超融合平台-性能测试报告

EMCVxRail超融合平台-性能测试报告EMCVxRail超融合平台性能测试报告⽬录Contents1.测试⼯作准备 (3)1.1.测试⼯具介绍 (3)1.2.测试环境介绍 (3)1.3.测试项⽬ (4)1.4.测试参数设置 (5)2.测试结果 (9)2.1.供参考数据 (11)1.测试⼯作准备1.1.测试⼯具介绍本次测试选⽤Iometer进⾏测试;Iometer是⼀个单机或者集群的I/O⼦系统的测量和描述⼯具。
它最初是由英特尔公司在1998年2⽉17⽇的英特尔开发者论坛(IDF)宣布,⾃那时以来,在⾏业内⼴泛的蔓延,成为了标准。
Iometer包括2个程序,Iometer.exe和Dynamo.exe。
其中Iometer是控制程序,是图形界⾯,让你轻松的调节参数和显⽰测试结果,⽽Dynamo就是让测试盘产⽣压⼒测试的主程序了,⽤Iometer来控制Dynamo程序。
在Windows下运⾏Iometer时,会⾃动打开Dynamo程序。
测试⼯具版本为iometer-1.1.0-win64.x86_64-bin。
1.2.测试环境介绍环境中数据库以虚拟机⽅式运⾏在VMware虚拟化环境中,拓扑结构如下:... ...EMC VxRAIL其中VxRail 超融合设备内置4个服务器节点,每个节点配置1块800GBSSD 盘和5块2TBSATA 盘,共4块800GBSSD 盘和20块2TBSATA 盘。
针对超融合架构,我们在每个节点部署2个Windows 2008R2虚机,并安装 IOmeter 软件,测试的虚拟机配置2×4颗处理器核⼼,32GB 内存和80GB 系统盘,100GB 数据盘。
本次测试针对该虚拟机数据盘磁盘⽂件进⾏性能测试。
利⽤IOmeter ⽣成特定负载,在 VxRailManager 观察系统负载情况,并收集 IOmeter 详细结果。
1.3. 测试项⽬1.4.测试参数设置本次测试使⽤8个CPU核⼼,对应图中Topology栏内Worker1-8,对所有Worker均设置相同参数;DiskTargets栏中选择相应磁盘(这⾥选择E:,图中标⽰有误),MaximumDiskSize保持默认为0(图中标⽰有误),其他参数均保持为默认;AccessSpecifications栏中指定IO类型,其中测试⼀和测试⼆已有现成的对应规则,测试三需要编辑修改Default规则;点击编辑进⼊规则编辑页⾯,将TransferRequestSize设置为8KB,其他保持不变,该IO类型即为Oracle数据库IO类型;ResultDisplay栏中UpdateFrequency保持默认5s采集⼀次数据;TestSetup栏中RunTime设置为5分钟;2.测试结果(详细结果见《EMC VxRail 性能测试详细结果》)测试⼀:最⼤IO处理能⼒测试四:常规应⽤顺序读:测试五:常规应⽤随机读:测试六:常规应⽤顺序写2.1.供参考数据。
VxRail 8.0 对vSphere8.0同步版本支持及VxRail vSAN ESA介绍
VxRail8.0 对vSphere8.0同步版本支持及VxRail vSAN ESA介绍VxRail 创造更好的HCI 体验为VMware设计,与VMware联合,对VMware增强的HCI 解决方案。
Dell VxRail™是一个与VMware 联合开发的超融合基础架构系统,利用它可以轻松快速地扩展VMware 环境。
采用VMware vSAN ™技术而且通过VMware vCenter 界面进行管理,VxRail为现有VMware 客户提供一致的运营体验。
作为戴尔科技云平台的基础,VxRail是一个与VMware Cloud Foundation SDDC Manager 完全集成的超融合系统,提供一个完整的自动化平台。
丰富的机型供您挑选基于Dell PowerEdge 14代和15代的VxRail机型,将全面适配VxRail 8.0 的升级和部署VxRail 同步版本支持VxRail 为VMware vSphere 8.0提供了25000小时的测试从VMware 8.0研发启动开始,VMware每两周产生8.0EarlyAccess(EA)发布版本,VxRail会对EA版本做持续的更新集成测试。
Simship支持VxRail承诺30 天同步发布VMware HCI 更新。
DellTechnologies 更是通过持续的测试和验证以及单一支持来源,进一步提升客户的体验效果。
VxRail 8.0 用户界面支持VxRail保证用户体验的一致性VxRail8.0的初始化部署界面和VxRail7.0 的部署界面风格保持一致用户可以通过熟悉的VxRail初始化界面来完成集群的自动发现,定义配置,有效性校验并完成VxRail VSAN 集群的整体部署。
在VxRail8.0的初始化界面中,我们也对VSAN ESA的初始化界面做了特别的定制。
VxRail 8.0 vCenter管理组件VxRail 8.0 VxRail管理组件已经从本地插件更新为远程插件架构。
VxRail 超融合平台初始化及更新手册
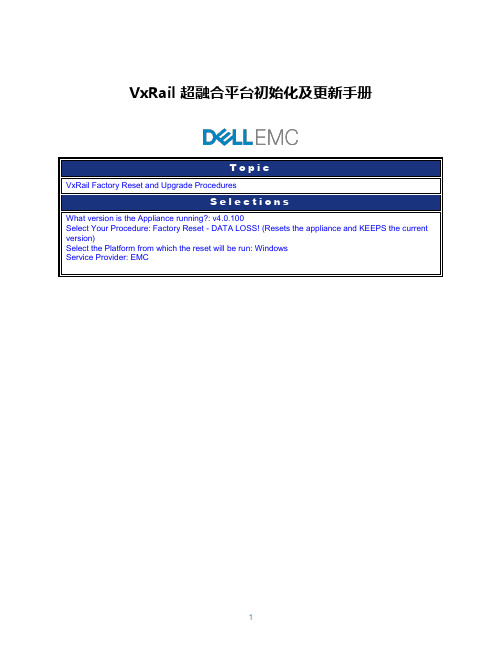
VxRail 超融合平台初始化及更新手册目录Preliminary Activity Tasks (3)Read, understand, and perform these tasks (3)Service Provider, Project Information and Customer Contact form (4)VxRail Reset Procedure (4)Attention: (4)Warnings and Disclaimers (4)Intended Audience: (5)Materials Required: (5)Reset Procedure (5)Prerequisites (5)Preparing for Reset (5)Running Reset (8)Example using Reset on Windows (8)After Reset (8)Reset Command Options (9)Best Practices and Troubleshooting (10)Resetting Clusters with Multiple Appliances (10)If you want to restore a multi-appliance VxRail cluster: (10)If you want to separate the appliances into multiple VxRail clusters: (10)Reset Output: Example output of Successful reset: (10)Reset Failure (11)Known Issues (12)Appendix A:VxRail Appliances with a Custom Initial IP address (13)Preliminary Activity TasksThis section may contain tasks that you must perform before going to the customer site. Make sure these tasks are complete before performing the procedure.Read, understand, and perform these tasks1. [ ] Table 1 lists tasks, cautions, warnings, notes, knowledgebase (KB) solutions, and Top 10 ServiceTopics that you need to be aware of before performing this activity. Read, understand, and when necessary perform any tasks contained in this table and any tasks contained in any associatedknowledgebase solution.Table 1 List of cautions, warnings, notes, KB solutions, and Top 10 Service Topics for thisactivityService Provider, Project Information and Customer Contact formThis form is automatically populated based on the information that is provided in the VxRail® Procedure Generator questionnaire prior to generating the procedure. This information is collected and used for reference purposes when referring back to this procedure at a later date and time.Section 2:Section 3:VxRail Reset ProcedureThese instructions describe how to reset the VxRail Appliance using the Factory Reset Script which returns the appliance to a first run state but leaves the underlying software load unchanged. The reset script can be executed in the field by a VxRail Appliance reseller, distributor, or EMC CSE.Use this process to reset between demonstrations or moves between customer sites for evaluation.The reset script takes approximately 30 minutes to complete, however if there are environmental problems (network connectivity, i.e.) it can fail.The unit must be in an otherwise healthy state, connected to the network and functioning for the reset script to be used.Attention:The reset script tool will wipe all data and defined User VMs from the appliance. If the customer wants to keep their data or VMs, they must back them up prior to running the tool.Always use the latest VxRail Reset tool for the factory reset function based on your model of VxRail. Warnings and Disclaimers•Reset destroys all virtual machines and datastores in your VxRail Cluster. VMs on mounted datastores that you don’t want the reset to delete should be unregistered.prior to executing the reset.The process cannot be interrupted and there are no data recovery options available once the Reset starts.•The Reset script and documentation may only be utilized by properly trained personnel.•The Reset script and documentation are only available to properly trained engineering, support, and sales organizations.•The Reset script and documentation must not be provided to anyone who is identified as a direct end-user of a VxRail product.•The Reset script and documentation must be removed from the customer’s appliance and premises after Reset is performed by qualified personnel.Note: Reset script 4.0.100 is required for all VxRail appliances with Release 4.0.100 software. Intended Audience:This procedure is intended to be used by QEP Distribution Partners and VARs performing POC demos. This Procedure is not to be used on production systems!Materials Required:From the website, download the reset package:•File Name: v4.0.100_reset.zip•MD5Sum: 966d86f7ef0b9b02445bcb06eb263dcbWARNING: This procedure deletes all data on the system. It should never be used on a production system.Reset ProcedureReset restores an appliance to factory settings. It uses the original software images and the factory-created backup file to restore your appliance:/vmfs/volumes/<service_datastore>/images,/vmfs/volumes/<service_datastore>/reset/configBundle.tgzPrerequisites• A workstation/laptop with a web browser is required. It must be either plugged into the 10GbE switch or able to logically reach the VxRail management VLAN on the 10GbE switch.Note: This PC must be able to access both the pre-reset and post-reset VLANs and IP Addresses. •The VxRail appliance must have all software images and the configBundle.tgz file on the service datastore.•The document assumes you are familiar with the VxRail Setup Guide, the VxRail Product Guide, vSphere Web Client usage, and ESXi usage (DCUI/CLI).•All ESXi hosts must have the same version of both the ESXi and VxRail VIB on them. Preparing for ResetWARNING: To prevent a possible issue with the decompression of the software bundle, EMC recommends that the upgrade bundle is decompressed using a 3rd party decompression utilitysuch as WinZip. Windows Explorer decompression may have difficulty handling large files resulting in file corruption.1. [ ] Download reset bundle v4.0.100_reset.zip from the EMC Support Zone website to VxRailworkstation/laptop.Note: All files can be found in bundle with name v4.0.100_reset.zip from the VxRail Support page on https:///downloads. EMC Highly recommends that all files be verified using the md5 sum for each ova file to ensure integrity.2. [ ] On the VxRail workstation/laptop, uncompress it into a folder that you can browse, such asC:\reset or /tmp/reset. This archive contains:•Reset script: consisting of two python scripts: reset.pyc and gen_ovfenv.pyc •reset.pyc is in the package reset_4.0.100-4907696.zip.•You should uncompress it first in order to get the reset script.•The v4.0.100_reset.zip bundle contains three files:•reset_4.0.100-4907696.zip•Python-2.7.8.msi•VMware-viclient-all-6.0.0-3562874.exe•Python libraries: pyVim and pyVMomiPython 2.7 is required for Reset. Python 2.6 will fail. If necessary, python 2.7.8 is recommended and includes the install exe for installation on your VxRail Management workstation/laptop.The Reset script is backwards compatible with all versions of VxRail so users should update to the latest version of the reset script. If previous versions of Python are installed on the managementworkstation, those versions should be uninstalled first and Python v2.7 installed.3. [ ] For VxRail appliances connected to an External vCenter, manually remove thecluster/VDS/management accounts in the External vCenter.4. [ ] (Optional) In the vSphere Web Client, go to the Marvin-Virtual-SAN-Datastore. Click on Manageand then Files. Delete the ISO and UPGRADE directories. DO NOT delete any directories named witha UUID.5. [ ] For each VxRail host in the VxRail cluster, identify the IP address assigned to the factory-createdVMkernel management interface (vmk0) in one of the following ways:a. The IP address is displayed in the vSphere Web Client (use vcserver to locate the networkinformation for the VMkernel adapter on each ESXi host)orb. The IP address is displayed in DCUI (console user interface for ESXi)orc. ssh into each ESXi host (or connect a console or monitor via BMC) and run the esxcli networkip interface ipv4 get command on each host. The username is root. Use the password for the ESXi hosts that was set during VxRail Initial Configuration. (For an un-configured VxRail appliance, the password is Passw0rd!) The output will be similar to what is shown below:esxcli network ip interface ipv4 get | grep "vmk0"vmk0 MARVIN Management IPv4 10.10.10.5 255.255.255.0 10.10.10.25500:25:90:eb:bc:0a 1500 65535 true STATICOn an un-configured VxRail appliance, ESXi IP addresses are either assigned by DHCP (if it was available in your network) or configured as IPv4 link-local addresses (starting with 169.254.x.y). On a configured VxRail appliance, ESXi IP addresses are specified by the user who set up the appliance.6. [ ] Fill in the IPv4 address of each ESXi host in the cluster (use additional space if there is more thanone appliance in a cluster):Host IPv4 AddressESXi host on node 1ESXi host on node 2ESXi host on node 3ESXi host on node 47. [ ] From the VxRail workstation/laptop, verify that you can ping each IPv4 addressNote: If you cannot access a host, try power-cycling the node first.8. [ ] Use vSphere Client to login vCenter Server to check current Management VLAN as below:Figure 1 Example: the management VLAN ID in this appliance is 117Note: If you cannot access vCenter Server, you will have to ask the customer for the management VLAN ID.Running ResetReset is run from the VxRail workstation/laptop, using the options described in the Reset Command Options section. Before running Reset, be sure to read the section on Best Practices and Troubleshooting so that you can use the Reset script correctly.Note: Using the --vlan option for Reset is recommended even if current management VLAN is not set ( in this case, use 0 for VLAN ID). It will modify the management VLAN ID saved in configBundle first before actually using the configBundle. It simplifies initial setup because the management VLAN ID is configured on all 4 ESXi hosts. Likewise, the --initialIpAddress,--initialSubnet, and --initialGateway options also simplify initial setup.Another benefit comes when a VxRail appliance is reset and remains in the same environment (I.e. It is not relocated to another network). In this case, retaining the management VLAN ID and initial IP information during a reset permits the VxRail Manager workstation/laptop to remain set for the correct VLAN and IP. If these options are not used, the instructions in the VxRail SetupGuide can be followed at a later time.If the VLAN option is not used, no changes will be made to the Management VLAN settings. It will remain exactly as previously set.All appliances and nodes in a VxRail cluster should be reset if one appliance or node needs to be reset. Use the following procedure:•If you have more than one appliance in your VxRail cluster, reset each secondary appliance, one at a time. We recommend that the secondary appliances be reset in the order in which they were added to the cluster. Power off all nodes after each appliance is reset.•If you only have one appliance in the VxRail cluster, or when you have finished resetting and shutting down all secondary appliances, reset the primary appliance.Example using Reset on Windows1. [ ] To reset the appliance use the following command:Example:C:\Python27\python.exe c:\reset\reset.pyc -d --destroyAllVMs -f <IPv4_node1> -a <IPv4_node2> -a <IPv4_node3> -a <IPv4_node4> --vlan <vlan_id>[ --initialIpAddress=<init_IPaddr> --initialSubnet=<init_netmask>--initialGateway=<init_gateway> ]After ResetNote: The password is now Passw0rd! for all ESXi hosts, vCenter Server Appliance, and VxRail Manager.1. [ ] For VxRail appliances connected to an External vCenter, manually remove thecluster/VDS/management accounts in the External vCenter.2. [ ] Point a browser to the VxRail Manager user interface to begin VxRail initial configuration followingthe instructions in “VxRail Initial Configuration” in the VxRail Setup Guide. The location is one of the following:<init_IPaddr>specified in the ‘--initialIpAddress’ option supplied to Resetorhttps://192.168.10.200, the default value for ResetIf you cannot reach VxRail at one of these IP addresses after Reset, follow the instructions in AppendixA to configure another initial IP address.Reset Command OptionsBest Practices and TroubleshootingResetting Clusters with Multiple AppliancesIf you want to restore a multi-appliance VxRail cluster:After performing initial configuration on the primary appliance in the VxRail cluster, power on and configure each secondary appliance, one at a time. The primary appliance will discover each secondary appliance when it is powered on. Then you will add it to the cluster before continuing with the next secondary appliance. For more information, including configuring the Management VLAN, see the VxRail Setup Guide, “Adding Appli ances to a VxRail Cluster”.If you want to separate the appliances into multiple VxRail clusters:When you run Reset on each appliance, assign a unique <init_IPaddr> with the ‘--initialIpAddress’option. Then point your browser to each <init_IPaddr> and run VxRail initial configuration to create separate VxRail clusters.Reset Output: Example output of Successful reset:Reset succeeds with INFO and WARNING output similar to the following:c:\Python27\python.exe reset.py -d --destroyAllVMs -f 10.10.10.11 --initialIpAddress=10.10.10.250 --initialSubnet=255.255.254.0--initialGateway=10.10.10.253 -a 10.10.10.12 -a 10.10.10.13 -a 10.10.10.14 Post-configuration Password:INFO Primary node supplied: 10.10.10.11 INFO Secondary node supplied:10.10.10.12 INFO Secondary node supplied: 10.10.10.13 INFO Secondary nodesupplied: 10.10.10.14INFO MARVIN VIB 3.x discovered on hostsVxRail 3.x WARNING================================================WARNING THE FOLLOWING ARE THE CURRENTLY REGISTERED VIRTUAL MACHINES:WARNING ['VMware vCenter Server Appliance', 'VxRail Manager', 'VMware vRealize Log Insight'] WARNING CONTINUING WILL DESTROY ALL VIRTUAL MACHINES REGISTERED WITH THE APPLIANCE.CONFIRM (YES/NO): YESWARNING DESTROYING ALL VMs ON 10.10.10.11: ['VMware vCenter Server Appliance', 'VxRail Manager', 'VMware vRealize Log Insight']…INFO Host 10.10.10.11 has VMs [] remaining. INFO Removing hosts from VSAN cluster.INFO Putting hosts in maintenance mode. INFO Resetting and rebooting hosts.INFO Waiting for hosts to finish rebooting to confirm reset ...…INFO Trying to connect to 10.10.10.14 ...INFO Host 10.10.10.14 not yet available, still waiting ... INFO Trying to connect to 10.10.10.14 ...INFO Connection to host 10.10.10.14 successful.INFO Regenerating VSAN and VMs on primary node (10.10.10.11). Assuming default password. INFO Deploying VM: VMware vCenter Server Appliance fromimages/vcsa-restore-original/.INFO Deploying VM: VxRail Manager from images/evorail-restore-original/. INFO Upgrading hardware on VM: VMware vCenter Server ApplianceINFO Enabling Ivy Bridge EVC for VM: VMware vCenter Server Appliance INFO Upgrading hardware on VM: VxRail ManagerINFO Enabling Ivy Bridge EVC for VM: VxRail ManagerINFO Setting VM AutostartInfo for: VxRail manager on 10.10.10.11. INFOstartAction: powerOn; stopAction: guestShutdownINFO Powering on VM: VxRail ManagerINFO Deploying VM: VMware vRealize Log Insight fromimages/log-insight-original/. INFO Reconfiguring VM 'VMware vRealize Log Insight' OVF environment: success.INFO Upgrading hardware on VM: VMware vRealize Log InsightINFO Enabling Ivy Bridge EVC for VM: VMware vRealize Log Insight INFO Restarting 'loudmouth'.INFO Finalizing settings on Shamu.Reset FailureReset can fail for a variety of reasons. If it does not complete successfully on all nodes in an appliance, it can be rerun just on the node(s) that did not reset properly.Infrequently, Reset can report a failure but eventually succeed. This can happen if an ESXi host takes longer to reboot than the 720-second timeout in Reset. The ESXi node can still continue to boot and it may finally succeed. You can determine whether or not an ESXi host was successfully reset by attempting to login in via ssh or DCUI. The password should have been reset to Passw0rd!If you cannot login with this default password, the host was NOT reset properly. Run Reset again only on the host that did not boot successfully.Another reason that Reset could fail is if the IPv4 address for vmk0 does not match the information saved in configBundle.tgz. This would happen if ESXi was assigned a static IP address instead of link-local DHCP after configBundle.tgz was created, but before initial configuration. The failure message displayed would indicate failure to connect to all hosts.Usin g the ‘--onlyRegeneratePrimary’ option will quickly redeploy the service VMs.Note: Since you have already reset the appliance, the default password, Passw0rd!, must be used instead of your original password.C:\Python27\python.exe c:\reset\reset.pyc -f <IPv4_node1>--onlyRegeneratePrimary --initialIpAddress=<init_IPaddr>--initialSubnet=<init_netmask> --initialGateway=<init_gateway>The reasons that Reset can fail include the following:•Failing to connect to or locate a specified ESXi host•Using an invalid IPv4 address as Reset command options•Having a proxy server configured on the VxRail workstation/laptop•Failing to deploy the Log Insight VM or VxRail Manager•Still failing after several automatic retriesKnown IssuesIf you have a typo on the Reset command line, such as using a space instead of ‘=’ in the option/value pairs that require one (--initialIpAddress, --initialSubnet, --initialGateway), all 3 options will be ignored. (e.g--initialIpAddress=10.10.10.200 is correct; --initialIpAddress 10.10.10.200 is incorrect) If Reset otherwise succeeds, you can follow the instructions in Appendix A to set the initial IP address.Appendix A: VxRail Appliances with a Custom Initial IP address WARNING: The following steps are to configure a custom IP address for initial access to VxRail if you cannot use the <init_IPaddr> specified in the ‘--initialIpAddress’ option or the default IP address, 192.168.10.200.Note: You are setting the IP address for the VxRail Manager in Release 4.0.1. [ ] Connect the vSphere (C#) Client to the IP address of ESXi host 1 using the root user and thepassword that Reset configured during ESXi software installation, Passw0rd!2. [ ] Click the Virtual Machines tab and select “VxRail Manager”. The VM should already be poweredon. If not, click the green play button to power it on and wait for it to boot.3. [ ] Open the Console and login as root with the default password Passw0rd!4. [ ] Stop vmware-marvin:/usr/bin/systemctl stop vmware-marvin.service5. [ ] Using the vami_set_network command, change the default IP address to a custom IP address,netmask, and gateway using the following syntax (all arguments are required)./opt/vmware/share/vami/vami_set_network eth0 STATICV4 <init_IPaddr><init_netmask> <init_gateway>6. [ ] Start vmware-marvin and restart loudmouth on VxRail Manager:/usr/bin/systemctl start vmware-marvin.service/usr/bin/systemctl restart vmware-loudmouth.service7. [ ] Restart loudmouth on the primary ESXi host:/etc/init.d/loudmouth restart。
DellEMC VXrail超融合平台技术白皮书
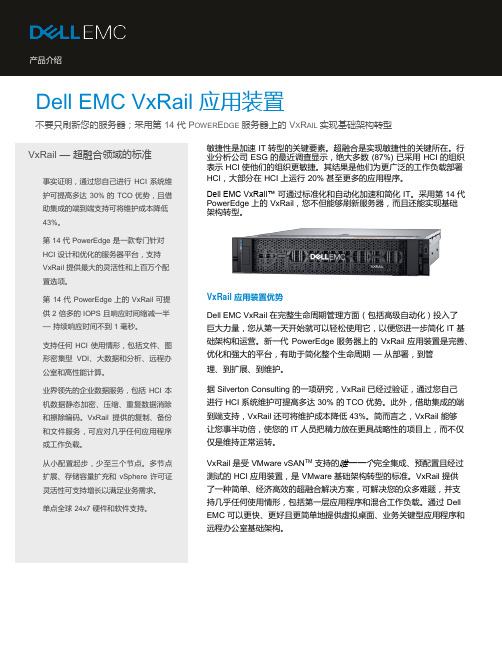
产品介绍Dell EMC VxRail 应用装置不要只刷新您的服务器;采用第 14 代 P OWER E DGE 服务器上的 V X R AIL 实现基础架构转型 敏捷性是加速 IT 转型的关键要素。
超融合是实现敏捷性的关键所在。
行业分析公司 ESG 的最近调查显示,绝大多数 (87%) 已采用 HCI 的组织表示 HCI 使他们的组织更敏捷。
其结果是他们为更广泛的工作负载部署 HCI ,大部分在 HCI 上运行 20% 甚至更多的应用程序。
Dell EMC VxRail™ 可通过标准化和自动化加速和简化 IT 。
采用第 14 代PowerEdge 上的 VxRail ,您不但能够刷新服务器,而且还能实现基础架构转型。
VxRail 应用装置优势 Dell EMC VxRail 在完整生命周期管理方面(包括高级自动化)投入了巨大力量,您从第一天开始就可以轻松使用它,以便您进一步简化 IT 基础架构和运营。
新一代 PowerEdge 服务器上的 VxRail 应用装置是完善、优化和强大的平台,有助于简化整个生命周期 — 从部署,到管 理、到扩展、到维护。
据 Silverton Consulting 的一项研究,VxRail 已经过验证,通过您自己进行 HCI 系统维护可提高多达 30% 的 TCO 优势。
此外,借助集成的端到端支持,VxRail 还可将维护成本降低 43%。
简而言之,VxRail 能够让您事半功倍,使您的 IT 人员把精力放在更具战略性的项目上,而不仅仅是维持正常运转。
VxRail 是受VMware vSAN TM 支持的唯一一个完全集成、预配置且经过测试的 HCI 应用装置,是 VMware 基础架构转型的标准。
VxRail 提供了一种简单、经济高效的超融合解决方案,可解决您的众多难题,并支持几乎任何使用情形,包括第一层应用程序和混合工作负载。
通过 DellEMC 可以更快、更好且更简单地提供虚拟桌面、业务关键型应用程序和远程办公室基础架构。
VxRail超融合平台技术规格

PRODUCT OVERVIEWVCE VXRAIL™ APPLIANCEThe VCE VxRail™ Appliance, the exclusive hyper-converged infrastructure appliance from VCE|EMC and VMware, is the easiest and fastest way to stand up a fully virtualized Software-Defined Data Center (SDDC) environment. With the power of a whole Storage Area Network (SAN) in just two rack units, it provides a simple, cost-effective hyper-converged solution that delivers compute, network, storage,virtualization, and management for a wide variety of applications and workloads. Built on the foundation of VMware Hyper-Converged software and managed through the familiar vCenter interface, the VxRail Appliance provides existing VMware customers an experience they are already familiar with. Seamless integration with existing VMware tools, such as vRealize Operations, lets customers leverage and extend their existing IT tools and processes. Additionally, the VxRail Appliance is discoverable and visible in VCE Vision™ Intelligent Operations for a comprehensive IT core to edge management ecosystem.The VxRail Appliance is fully loaded with integrated mission-critical data services—including replication, backup, and cloud tiering—all at no additional charge. The VxRail Appliance incorporates data protection technology, including EMC RecoverPoint for VMs and VMware vSphere Data Protection. Integrated EMC CloudArray seamlessly extends the VxRail Appliance to public and private clouds to securely expand storage capacity without limits, providing an additional 10 TB of on-demand cloud tiering included per appliance.The VxRail Appliance architecture is a distributed system consisting of common modular building blocks that scale linearly from 1 to 16 2U/4 node appliances, up to 64 nodes in a cluster. Multiple compute, memory, and storage options deliver configurations to match any use case.A fully populated all-flash appliance supports up to 112 cores and up to 76 TB of raw storage. A 64-node all-flash cluster delivers 1,792 cores and 1,216 TB of raw storage, making it the industry’s most powerful HCIA to date to maximize performance and scale for applications that demand low latency.The VxRail Appliance is backed by a single point of world-class support for both hardware and software. The VxRail Appliance is available with EMC Enhanced and Premium support options, both of which include EMC ESRS for call home and proactive two-way remote connection for remote monitoring, diagnosis, and repair to ensure maximum availability.Detailed specifications and a comparison of the VxRail Appliances follows.VxRailVXRAIL APPLIANCE SPECIFICATIONS—HYBRID NODESCOMPONENTS VXRAIL APPLIANCE 60 VXRAIL APPLIANCE 120 VXRAIL APPLIANCE 160 VXRAIL APPLIANCE 200 PROCESSOR CORES(PER NODE)6 12 16 20PROCESSOR (PER NODE)1 Intel® Xeon® ProcessorE5-2603 v3 1.6 GHz2 Intel® Xeon® ProcessorE5-2620 v3 2.4 GHz2 Intel® Xeon® ProcessorE5-2630 v3 2.4 GHz2 Intel® Xeon® ProcessorE5-2660 v3 2.6 GHzMEMORY/RAM (PER NODE)64 GB (4 x 16 GB) 128 GB (8 x 16 GB) or192 GB (12 x 16 GB) or256 GB (16 x 16 GB)256 GB (16 x 16 GB) or512 GB (16 x 32 GB)256 GB (16 x 16 GB) or512 GB (16 x 32 GB)CACHING SSD(PER NODE)200 GB 400 GB or 800 GB 400 GB or 800 GB 400 GB or 800 GBSTORAGE-RAW(PER NODE)3.6 – 10 TB 3.6 – 10 TB4.8 – 10 TB 4.8 – 10 TBMINIMUM NODES PERCLUSTER4 4 4 4MAXIMUM NODES PERCLUSTER164 64 64 64SCALING INCREMENTS(IN NODES)1 1 1 1CHASSIS 2U, 19” rack-mounted chassis supporting 4 hot swappable nodes and 2 hot swappable power suppliesPOWER SUPPLIES 2 1200W high-efficiencyredundant PSUs,110/220V AC 50/60Hz 2 1600W high-efficiencyredundant PSUs, 220VAC 50/60Hz2 1600W high-efficiencyredundant PSUs, 220VAC 50/60Hz2 1600W high-efficiencyredundant PSUs, 220VAC 50/60HzCOOLING Dedicated cooling/node (no single point of failure) – 4 80X5M6 mm variable-speed fans MAX TOTAL POWERCONSUMPTION (FULLYLOADED APPLIANCE-KVA)1003 1337 1337 1486MAX HEATDISSIPATION (FULLY-LOADED APPLIANCE-BTU/HR)3422.236 4561.844 4561.844 5070.232NETWORK CONNECTION 4 x 1 GbE RJ45 2 x 10 GbE SFP+ or2 x RJ45 ports2 x 10 GbE SFP+ or2 x RJ45 ports2 x 10 GbE SFP+ or2 x RJ45 portsMANAGEMENT PORT(OPTIONAL, PER NODE)1 x 100 Mbps RJ45 port 1 x 100 Mbps RJ45 port 1 x 100 Mbps RJ45 port 1 x 100 Mbps RJ45 port 1Scale to 64 nodes via approved RPQ only.VXRAIL APPLIANCE SPECIFICATIONS—ALL-FLASH NODESCOMPONENTS VXRAIL 120F VXRAIL 160F VXRAIL 200F VXRAIL 240F VXRAIL 280F CORES(PER NODE)12 16 20 24 28PROCESSOR (PER NODE) 2 Intel® Xeon®Processor E5-2620v3 2.4GHz /15M Cache2 Intel® Xeon®Processor E5-2630v3 2.4GHz /20M Cache2 Intel® Xeon®Processor E5-2660v3 2.6GHz /25M Cache2 Intel® Xeon®Processor E5-2680v3 2.5GHz /30M Cache2 Intel® Xeon®Processor E5-2683v3 2.0GHz /35M Cache(PER NODE)or 512GB (16 x32GB) or 512GB (16 x32GB)or 512GB (16 x32GB)or 512GB (16 x32GB)(PER NODE)STORAGE-RAW(PER NODE)MINIMUM NODESPER CLUSTER4 4 4 4 4MAXIMUM NODESPER CLUSTER164 64 64 64 64SCALINGINCREMENTS(IN NODES)CHASSIS 2U, 19” rack-mounted chassis supporting 4 hot swappable nodes and 2 hot swappable power suppliesPOWER SUPPLIES 2 1600W high-efficiencyredundant PSUs,220V AC 50/60Hz 2 1600W high-efficiencyredundant PSUs,220V AC 50/60Hz2 1600W highefficiencyredundant PSUs,220V AC 50/60Hz2 1600W high-efficiencyredundant PSUs,220V AC 50/60Hz2 1600W high-efficiencyredundant PSUs,220V AC 50/60HzCOOLING Dedicated cooling/node (no single point of failure) – 4 80X5M6 mm variable-speed fansMAX TOTALPOWERCONSUMPTION(FULLY LOADEDAPPLIANCE-KVA)1240 1240 1389 1500 1500MAX HEATDISSIPATION(FULLY-LOADEDAPPLIANCE-BTU/HR)4230.88 4230.88 4739.268 5118 5118NETWORK CONNECTION 2 x 10GbE SFP+ orRJ45 ports2 x 10GbE SFP+ orRJ45 ports2 x 10GbE SFP+ orRJ45 ports 2 x 10GbE SFP+ 2 x 10GbE SFP+(OPTIONAL, PERNODE)port port port port port 1Scale to 64 nodes via approved RPQ only.PHYSICAL SPECIFICATIONSCOMPONENTS HEIGHT (MM/IN)WIDTH (MM/IN)DEPTH (MM/IN)WEIGHT (MAX KG/LB)APPLIANCE87.3mm/3.44” 447mm/17.6IN 774.7mm/30.5”41.42KG / 91.31LBOPERATING RANGEAMBIENT OPERATING TEMPERATUREO° to 40° COPERATING AND STORAGE RELATIVE HUMIDITY 10% to 85% (non-condensing) STORAGE TEMPERATURE RANGE- 40°C to + 65°CTRANSPORTATION TEMPERATURE RANGE - 40C to + 70C (short-term storage) OPERATING ALTITUDE WITH NO DERATINGS3200m (about 10656ft)ABOUT VCEVCE, an EMC Federation Company, is the world market leader in converged infrastructure and converged solutions. VCE accelerates the adoption of converged infrastructure and cloud-based computing models that reduce IT costs while improving time to market. VCE delivers the industry's only fully integrated and virtualized cloud infrastructure systems, allowing customers to focus on business innovation instead of integrating, validating, and managing IT infrastructure. VCE solutions are available through an extensive partner network, and cover horizontal applications, vertical industry offerings, and application development environments, allowing customers to focus on business innovation instead of integrating, validating, and managing IT infrastructure.For more information, go to .© 2016 VCE Company, LLC. All rights reserved. Vblock, VxBlock, VCE Vscale,VCE Vision, and the VCE logo are trademarks or registered trademarks of VCE Compare features, see options, get pricing at /vxrailCONFIGURE AND QUOTE VXRAIL。
VxRail超融合产品功能详解

VxRail超融合产品功能详解超融合架构凭借效率、灵活性、规模、成本和数据保护,已经成为最近几年的热门词汇。
超融合是指在同一套单元设备中不仅仅具备计算、网络、存储和服务器虚拟化等资源和技术,同时拥有横向扩展能力,可以为用户提供一个统一的资源池部署应用程序。
VxRail系列设备就是一款基于VMware vSphere、vSAN 和EMC软件的超融合解决方案,旨在帮助用户实现一体化IT基础架构的转型。
它采用模块化的分布式存储设计,实现了计算和存储的融合,用户可以从小规模起步,按需扩展,同时提供多种计算、内存和存储选项以满足各种使用情形的配置。
本文将主要介绍VxRail的硬件、网络和功能软件。
VxRail是Dell EMC今年推出的超融合产品,定位的目标市场包括虚拟桌面架构VDI、远程办公室、私有云和中小企业。
用户通过VxRail和vBlock或者VxRack就可以搭建一套完整的企业级解决方案,适合所有类型的工作负载,通过VMware vCenter实现统一管理,同时还拥有企业级的复制和保护能力。
VxRail 以集群的形式存在,集群由多个节点组成,系统最多支持16个硬件盒子,64个节点,3000台以上的虚拟机。
单个节点拥有独立的CPU、内存、存储和网络资源,采用X86架构,支持横向扩展功能。
硬件配置部分VxRail提供混合模式和全闪存模式二种硬件配置,全闪存模式单节点最多支持28个CPU内核,512GB 内存和19TB存储容量,混合模式单节点最多支持20个CPU内核,512GB内存和10TB存储容量。
具体配置见下图:VxRail全闪存模式推出了5种型号,具体配置见下表:VxRail混合模式推出4种型号,具体配置见下表:VxRail硬件配置规则汇总:∙在3.5版本中,单个集群最低配置为4个节点。
在4.0版本中,单个集群最低配置为3个节点;∙单个逻辑集群最多支持64个节点,超过32个节点需要进行RPQ;∙集群中前4个节点必须使用相同硬件型号;∙单个集群中不支持混合模式和全闪存模式二种节点共存;∙单个集群中不支持10G模块和1G模块混合使用;VxRail硬件扩展规则汇总:∙节点可以无中断地添加到集群o节点可以增量地添加到VxRail集群;o每个Quanta节点扩展都需要一个磁盘包。
vxrail白皮书
vxrail白皮书VxRail是一种基于VMware软件定义技术和Dell EMC硬件的超融合基础设施解决方案。
它的设计旨在提供简单、高效和强大的IT基础设施,以支持企业的现代化工作负载。
本白皮书将介绍VxRail超融合基础设施的架构、功能和优势。
我们将详细解释VxRail超融合基础设施的关键技术和组件,并探讨它如何提供高性能、可靠性和弹性,以满足企业不断增长的需求。
VxRail超融合基础设施是由计算、存储和网络组件组成的一体化解决方案。
它采用了软件定义存储(SDS)和软件定义网络(SDN)技术,以提供高度集成的虚拟化环境。
在VxRail超融合基础设施中,计算节点由多个物理服务器组成,每个服务器配有强大的多核处理器、大内存容量和高速存储驱动器。
这些计算节点共享统一存储池,以提供高吞吐量和低延迟的存储性能。
VxRail超融合基础设施采用了高度自动化的管理平台,用于部署、监视和维护整个基础设施。
管理员可以通过这个平台进行集中管理,并轻松实现资源弹性伸缩和自动化操作。
VxRail超融合基础设施的主要功能包括:1. 高性能:VxRail采用了最新的硬件技术和优化的软件算法,以提供卓越的计算和存储性能。
它支持高密度虚拟机部署和密集的I/O工作负载,可以满足企业的高性能需求。
2. 可靠性:VxRail具有多层次的数据保护功能,包括快照、备份和容灾技术。
它可以提供高可用性和灾难恢复能力,确保企业的数据始终安全可靠。
3. 弹性:VxRail超融合基础设施具有良好的扩展性和灵活性。
企业可以根据需要扩展计算和存储资源,以适应不断增长的工作负载。
4. 简化管理:VxRail提供了一套直观、易用的管理工具,使管理员能够轻松地配置、监视和维护整个基础设施。
它还支持自动化操作,可以大大减少日常管理工作量。
5. 兼容性:VxRail完全兼容VMware软件定义技术,包括vSphere、vSAN和NSX等。
它还与Dell EMC的其他解决方案集成,包括备份和恢复、复制和数据保护等。
VxRail 超融合平台初始化及更新手册
VxRail 超融合平台初始化及更新手册目录Preliminary Activity Tasks (3)Read, understand, and perform these tasks (3)Service Provider, Project Information and Customer Contact form (4)VxRail Reset Procedure (4)Attention: (4)Warnings and Disclaimers (4)Intended Audience: (5)Materials Required: (5)Reset Procedure (5)Prerequisites (5)Preparing for Reset (5)Running Reset (8)Example using Reset on Windows (8)After Reset (8)Reset Command Options (9)Best Practices and Troubleshooting (10)Resetting Clusters with Multiple Appliances (10)If you want to restore a multi-appliance VxRail cluster: (10)If you want to separate the appliances into multiple VxRail clusters: (10)Reset Output: Example output of Successful reset: (10)Reset Failure (11)Known Issues (12)Appendix A:VxRail Appliances with a Custom Initial IP address (13)Preliminary Activity TasksThis section may contain tasks that you must perform before going to the customer site. Make sure these tasks are complete before performing the procedure.Read, understand, and perform these tasks1. [ ] Table 1 lists tasks, cautions, warnings, notes, knowledgebase (KB) solutions, and Top 10 ServiceTopics that you need to be aware of before performing this activity. Read, understand, and when necessary perform any tasks contained in this table and any tasks contained in any associatedknowledgebase solution.Table 1 List of cautions, warnings, notes, KB solutions, and Top 10 Service Topics for thisactivityService Provider, Project Information and Customer Contact formThis form is automatically populated based on the information that is provided in the VxRail® Procedure Generator questionnaire prior to generating the procedure. This information is collected and used for reference purposes when referring back to this procedure at a later date and time.Section 2:Section 3:VxRail Reset ProcedureThese instructions describe how to reset the VxRail Appliance using the Factory Reset Script which returns the appliance to a first run state but leaves the underlying software load unchanged. The reset script can be executed in the field by a VxRail Appliance reseller, distributor, or EMC CSE.Use this process to reset between demonstrations or moves between customer sites for evaluation.The reset script takes approximately 30 minutes to complete, however if there are environmental problems (network connectivity, i.e.) it can fail.The unit must be in an otherwise healthy state, connected to the network and functioning for the reset script to be used.Attention:The reset script tool will wipe all data and defined User VMs from the appliance. If the customer wants to keep their data or VMs, they must back them up prior to running the tool.Always use the latest VxRail Reset tool for the factory reset function based on your model of VxRail. Warnings and Disclaimers•Reset destroys all virtual machines and datastores in your VxRail Cluster. VMs on mounted datastores that you don’t want the reset to delete should be unregistered.prior to executing the reset.The process cannot be interrupted and there are no data recovery options available once the Reset starts.•The Reset script and documentation may only be utilized by properly trained personnel.•The Reset script and documentation are only available to properly trained engineering, support, and sales organizations.•The Reset script and documentation must not be provided to anyone who is identified as a direct end-user of a VxRail product.•The Reset script and documentation must be removed from the customer’s appliance and premises after Reset is performed by qualified personnel.Note: Reset script 4.0.100 is required for all VxRail appliances with Release 4.0.100 software. Intended Audience:This procedure is intended to be used by QEP Distribution Partners and VARs performing POC demos. This Procedure is not to be used on production systems!Materials Required:From the website, download the reset package:•File Name: v4.0.100_reset.zip•MD5Sum: 966d86f7ef0b9b02445bcb06eb263dcbWARNING: This procedure deletes all data on the system. It should never be used on a production system.Reset ProcedureReset restores an appliance to factory settings. It uses the original software images and the factory-created backup file to restore your appliance:/vmfs/volumes/<service_datastore>/images,/vmfs/volumes/<service_datastore>/reset/configBundle.tgzPrerequisites• A workstation/laptop with a web browser is required. It must be either plugged into the 10GbE switch or able to logically reach the VxRail management VLAN on the 10GbE switch.Note: This PC must be able to access both the pre-reset and post-reset VLANs and IP Addresses. •The VxRail appliance must have all software images and the configBundle.tgz file on the service datastore.•The document assumes you are familiar with the VxRail Setup Guide, the VxRail Product Guide, vSphere Web Client usage, and ESXi usage (DCUI/CLI).•All ESXi hosts must have the same version of both the ESXi and VxRail VIB on them. Preparing for ResetWARNING: To prevent a possible issue with the decompression of the software bundle, EMC recommends that the upgrade bundle is decompressed using a 3rd party decompression utilitysuch as WinZip. Windows Explorer decompression may have difficulty handling large files resulting in file corruption.1. [ ] Download reset bundle v4.0.100_reset.zip from the EMC Support Zone website to VxRailworkstation/laptop.Note: All files can be found in bundle with name v4.0.100_reset.zip from the VxRail Support page on https:///downloads. EMC Highly recommends that all files be verified using the md5 sum for each ova file to ensure integrity.2. [ ] On the VxRail workstation/laptop, uncompress it into a folder that you can browse, such asC:\reset or /tmp/reset. This archive contains:•Reset script: consisting of two python scripts: reset.pyc and gen_ovfenv.pyc •reset.pyc is in the package reset_4.0.100-4907696.zip.•You should uncompress it first in order to get the reset script.•The v4.0.100_reset.zip bundle contains three files:•reset_4.0.100-4907696.zip•Python-2.7.8.msi•VMware-viclient-all-6.0.0-3562874.exe•Python libraries: pyVim and pyVMomiPython 2.7 is required for Reset. Python 2.6 will fail. If necessary, python 2.7.8 is recommended and includes the install exe for installation on your VxRail Management workstation/laptop.The Reset script is backwards compatible with all versions of VxRail so users should update to the latest version of the reset script. If previous versions of Python are installed on the managementworkstation, those versions should be uninstalled first and Python v2.7 installed.3. [ ] For VxRail appliances connected to an External vCenter, manually remove thecluster/VDS/management accounts in the External vCenter.4. [ ] (Optional) In the vSphere Web Client, go to the Marvin-Virtual-SAN-Datastore. Click on Manageand then Files. Delete the ISO and UPGRADE directories. DO NOT delete any directories named witha UUID.5. [ ] For each VxRail host in the VxRail cluster, identify the IP address assigned to the factory-createdVMkernel management interface (vmk0) in one of the following ways:a. The IP address is displayed in the vSphere Web Client (use vcserver to locate the networkinformation for the VMkernel adapter on each ESXi host)orb. The IP address is displayed in DCUI (console user interface for ESXi)orc. ssh into each ESXi host (or connect a console or monitor via BMC) and run the esxcli networkip interface ipv4 get command on each host. The username is root. Use the password for the ESXi hosts that was set during VxRail Initial Configuration. (For an un-configured VxRail appliance, the password is Passw0rd!) The output will be similar to what is shown below:esxcli network ip interface ipv4 get | grep "vmk0"vmk0 MARVIN Management IPv4 10.10.10.5 255.255.255.0 10.10.10.25500:25:90:eb:bc:0a 1500 65535 true STATICOn an un-configured VxRail appliance, ESXi IP addresses are either assigned by DHCP (if it was available in your network) or configured as IPv4 link-local addresses (starting with 169.254.x.y). On a configured VxRail appliance, ESXi IP addresses are specified by the user who set up the appliance.6. [ ] Fill in the IPv4 address of each ESXi host in the cluster (use additional space if there is more thanone appliance in a cluster):Host IPv4 AddressESXi host on node 1ESXi host on node 2ESXi host on node 3ESXi host on node 47. [ ] From the VxRail workstation/laptop, verify that you can ping each IPv4 addressNote: If you cannot access a host, try power-cycling the node first.8. [ ] Use vSphere Client to login vCenter Server to check current Management VLAN as below:Figure 1 Example: the management VLAN ID in this appliance is 117Note: If you cannot access vCenter Server, you will have to ask the customer for the management VLAN ID.Running ResetReset is run from the VxRail workstation/laptop, using the options described in the Reset Command Options section. Before running Reset, be sure to read the section on Best Practices and Troubleshooting so that you can use the Reset script correctly.Note: Using the --vlan option for Reset is recommended even if current management VLAN is not set ( in this case, use 0 for VLAN ID). It will modify the management VLAN ID saved in configBundle first before actually using the configBundle. It simplifies initial setup because the management VLAN ID is configured on all 4 ESXi hosts. Likewise, the --initialIpAddress,--initialSubnet, and --initialGateway options also simplify initial setup.Another benefit comes when a VxRail appliance is reset and remains in the same environment (I.e. It is not relocated to another network). In this case, retaining the management VLAN ID and initial IP information during a reset permits the VxRail Manager workstation/laptop to remain set for the correct VLAN and IP. If these options are not used, the instructions in the VxRail SetupGuide can be followed at a later time.If the VLAN option is not used, no changes will be made to the Management VLAN settings. It will remain exactly as previously set.All appliances and nodes in a VxRail cluster should be reset if one appliance or node needs to be reset. Use the following procedure:•If you have more than one appliance in your VxRail cluster, reset each secondary appliance, one at a time. We recommend that the secondary appliances be reset in the order in which they were added to the cluster. Power off all nodes after each appliance is reset.•If you only have one appliance in the VxRail cluster, or when you have finished resetting and shutting down all secondary appliances, reset the primary appliance.Example using Reset on Windows1. [ ] To reset the appliance use the following command:Example:C:\Python27\python.exe c:\reset\reset.pyc -d --destroyAllVMs -f <IPv4_node1> -a <IPv4_node2> -a <IPv4_node3> -a <IPv4_node4> --vlan <vlan_id>[ --initialIpAddress=<init_IPaddr> --initialSubnet=<init_netmask>--initialGateway=<init_gateway> ]After ResetNote: The password is now Passw0rd! for all ESXi hosts, vCenter Server Appliance, and VxRail Manager.1. [ ] For VxRail appliances connected to an External vCenter, manually remove thecluster/VDS/management accounts in the External vCenter.2. [ ] Point a browser to the VxRail Manager user interface to begin VxRail initial configuration followingthe instructions in “VxRail Initial Configuration” in the VxRail Setup Guide. The location is one of the following:<init_IPaddr>specified in the ‘--initialIpAddress’ option supplied to Resetorhttps://192.168.10.200, the default value for ResetIf you cannot reach VxRail at one of these IP addresses after Reset, follow the instructions in AppendixA to configure another initial IP address.Reset Command OptionsBest Practices and TroubleshootingResetting Clusters with Multiple AppliancesIf you want to restore a multi-appliance VxRail cluster:After performing initial configuration on the primary appliance in the VxRail cluster, power on and configure each secondary appliance, one at a time. The primary appliance will discover each secondary appliance when it is powered on. Then you will add it to the cluster before continuing with the next secondary appliance. For more information, including configuring the Management VLAN, see the VxRail Setup Guide, “Adding Appli ances to a VxRail Cluster”.If you want to separate the appliances into multiple VxRail clusters:When you run Reset on each appliance, assign a unique <init_IPaddr> with the ‘--initialIpAddress’option. Then point your browser to each <init_IPaddr> and run VxRail initial configuration to create separate VxRail clusters.Reset Output: Example output of Successful reset:Reset succeeds with INFO and WARNING output similar to the following:c:\Python27\python.exe reset.py -d --destroyAllVMs -f 10.10.10.11 --initialIpAddress=10.10.10.250 --initialSubnet=255.255.254.0--initialGateway=10.10.10.253 -a 10.10.10.12 -a 10.10.10.13 -a 10.10.10.14 Post-configuration Password:INFO Primary node supplied: 10.10.10.11 INFO Secondary node supplied:10.10.10.12 INFO Secondary node supplied: 10.10.10.13 INFO Secondary nodesupplied: 10.10.10.14INFO MARVIN VIB 3.x discovered on hostsVxRail 3.x WARNING================================================WARNING THE FOLLOWING ARE THE CURRENTLY REGISTERED VIRTUAL MACHINES:WARNING ['VMware vCenter Server Appliance', 'VxRail Manager', 'VMware vRealize Log Insight'] WARNING CONTINUING WILL DESTROY ALL VIRTUAL MACHINES REGISTERED WITH THE APPLIANCE.CONFIRM (YES/NO): YESWARNING DESTROYING ALL VMs ON 10.10.10.11: ['VMware vCenter Server Appliance', 'VxRail Manager', 'VMware vRealize Log Insight']…INFO Host 10.10.10.11 has VMs [] remaining. INFO Removing hosts from VSAN cluster.INFO Putting hosts in maintenance mode. INFO Resetting and rebooting hosts.INFO Waiting for hosts to finish rebooting to confirm reset ...…INFO Trying to connect to 10.10.10.14 ...INFO Host 10.10.10.14 not yet available, still waiting ... INFO Trying to connect to 10.10.10.14 ...INFO Connection to host 10.10.10.14 successful.INFO Regenerating VSAN and VMs on primary node (10.10.10.11). Assuming default password. INFO Deploying VM: VMware vCenter Server Appliance fromimages/vcsa-restore-original/.INFO Deploying VM: VxRail Manager from images/evorail-restore-original/. INFO Upgrading hardware on VM: VMware vCenter Server ApplianceINFO Enabling Ivy Bridge EVC for VM: VMware vCenter Server Appliance INFO Upgrading hardware on VM: VxRail ManagerINFO Enabling Ivy Bridge EVC for VM: VxRail ManagerINFO Setting VM AutostartInfo for: VxRail manager on 10.10.10.11. INFOstartAction: powerOn; stopAction: guestShutdownINFO Powering on VM: VxRail ManagerINFO Deploying VM: VMware vRealize Log Insight fromimages/log-insight-original/. INFO Reconfiguring VM 'VMware vRealize Log Insight' OVF environment: success.INFO Upgrading hardware on VM: VMware vRealize Log InsightINFO Enabling Ivy Bridge EVC for VM: VMware vRealize Log Insight INFO Restarting 'loudmouth'.INFO Finalizing settings on Shamu.Reset FailureReset can fail for a variety of reasons. If it does not complete successfully on all nodes in an appliance, it can be rerun just on the node(s) that did not reset properly.Infrequently, Reset can report a failure but eventually succeed. This can happen if an ESXi host takes longer to reboot than the 720-second timeout in Reset. The ESXi node can still continue to boot and it may finally succeed. You can determine whether or not an ESXi host was successfully reset by attempting to login in via ssh or DCUI. The password should have been reset to Passw0rd!If you cannot login with this default password, the host was NOT reset properly. Run Reset again only on the host that did not boot successfully.Another reason that Reset could fail is if the IPv4 address for vmk0 does not match the information saved in configBundle.tgz. This would happen if ESXi was assigned a static IP address instead of link-local DHCP after configBundle.tgz was created, but before initial configuration. The failure message displayed would indicate failure to connect to all hosts.Usin g the ‘--onlyRegeneratePrimary’ option will quickly redeploy the service VMs.Note: Since you have already reset the appliance, the default password, Passw0rd!, must be used instead of your original password.C:\Python27\python.exe c:\reset\reset.pyc -f <IPv4_node1>--onlyRegeneratePrimary --initialIpAddress=<init_IPaddr>--initialSubnet=<init_netmask> --initialGateway=<init_gateway>The reasons that Reset can fail include the following:•Failing to connect to or locate a specified ESXi host•Using an invalid IPv4 address as Reset command options•Having a proxy server configured on the VxRail workstation/laptop•Failing to deploy the Log Insight VM or VxRail Manager•Still failing after several automatic retriesKnown IssuesIf you have a typo on the Reset command line, such as using a space instead of ‘=’ in the option/value pairs that require one (--initialIpAddress, --initialSubnet, --initialGateway), all 3 options will be ignored. (e.g--initialIpAddress=10.10.10.200 is correct; --initialIpAddress 10.10.10.200 is incorrect) If Reset otherwise succeeds, you can follow the instructions in Appendix A to set the initial IP address.Appendix A: VxRail Appliances with a Custom Initial IP address WARNING: The following steps are to configure a custom IP address for initial access to VxRail if you cannot use the <init_IPaddr> specified in the ‘--initialIpAddress’ option or the default IP address, 192.168.10.200.Note: You are setting the IP address for the VxRail Manager in Release 4.0.1. [ ] Connect the vSphere (C#) Client to the IP address of ESXi host 1 using the root user and thepassword that Reset configured during ESXi software installation, Passw0rd!2. [ ] Click the Virtual Machines tab and select “VxRail Manager”. The VM should already be poweredon. If not, click the green play button to power it on and wait for it to boot.3. [ ] Open the Console and login as root with the default password Passw0rd!4. [ ] Stop vmware-marvin:/usr/bin/systemctl stop vmware-marvin.service5. [ ] Using the vami_set_network command, change the default IP address to a custom IP address,netmask, and gateway using the following syntax (all arguments are required)./opt/vmware/share/vami/vami_set_network eth0 STATICV4 <init_IPaddr><init_netmask> <init_gateway>6. [ ] Start vmware-marvin and restart loudmouth on VxRail Manager:/usr/bin/systemctl start vmware-marvin.service/usr/bin/systemctl restart vmware-loudmouth.service7. [ ] Restart loudmouth on the primary ESXi host:/etc/init.d/loudmouth restart。
VxRail超融合技术培训-集群部署与扩容

VCE VXRAIL APPLIANCE SITE INSTALLATIONOBJECTIVES•Upon completion of this module, you should be able to:–Review the Pre-Site Checklist–Describe the major steps for installing a VxRail system into the customer data center–Review the pre-site checklist and verify the networkingenvironment–Discuss the consideration for adding additional VxRailindividual nodes to the cluster•Built for simplified installation–Pre-initialized to speed deployment and assure availability –Wizard guided customer customization•Prior to installing confirm:–Available rack space•Compute and network–Sufficient power•Dual Power ZonesVXRAIL APPLIANCE SITE INSTALLATION•Key tools and documentation for installation and configuration•Overview of the Pre-Installation Site checklist •Installation and configuration requirementsPRE-INSTALLATION SITE CHECKLIST (CONT.)REGISTER EMC SUPPORT ACCOUNTRegister for an EMCSupport account•/vxrailsupport•EMC will send aconfirmation emailwithin 48 hours•VxRail Appliance is built in factory to a default operating environment•Site specifications must beconfigured at time of deployment –Must include IP address range, VLANs, uplinks, etc •ToR switch must be configured to VCE defined specifications –Protocol options must be set for both IPV4 and IPV6 VXRAIL NETWORK CONFIGURATIONVxRail ApplianceToR VxRail Appliance DistributionSwitch•VxRail Appliance has 2 network ports per node.–Each configured with different port groups for distinctapplication workloads•VxRail Appliance requires a network layer 2connections for connectivity.•Connections from A and B side switchare plugged in and linked up•Must validate that the links are goodCONNECT VXRAIL APPLIANCE TO NETWORKVXRAIL NETWORK CONSIDERATIONS •Routing between networks or VLANs occurs at the aggregation layer–Routing information is exchanged at core switchinfrastructure–Can configure a VM-based router or firewall to routebetween VMs•10Gb Network•SFP+ or RJ45•The network can be flat or use VLAN (preferred) •Enable IPv6 on all ports•Enable IPv4 and IPv6 multicast on all ports•To use a flat network, you have 2 options–Enable IGMP snooping AND Querier - Preferred–Disable IGMP snooping•Set VLAN if users plan to use VLANNETWORK REQUIREMENTS•Protocol that sends packets from one-to-many or many to one•Uses a special destination address to logically identify a group of receivers •Frees up computing resources instead of having to send individual packet of duplicated data to recipients•Must be enabled at:–All ToR ports connected to VxRail Appliance–All ISL ports between Top-of-Rack switchesLOUDMOUTH MULTICAST REQUIREMENTS Node B Node CIPV4 MULTICASTS FOR VSAN•Virtual SAN uses a clustered metadata database and monitoring service (CMMDS) where the host must contain an identical copy of the metadata•This provides the ability to quickly discover hosts in the cluster.–Optimizes bandwidth consumption of metadata updates–Eliminates computing resources and network bandwidthpenalties that unicast traffic would impose•Used to prevent each network device attached to an active port from receiving multicast traffic •Constrains IPv4 multicast traffic to only switch ports that have devices attached and are looking for the multicast traffic•Benefits of using IGMP snooping and IGMP querier –Avoids unnecessary load on other network devices in layer2 segment•Similar to IPv4 IGMP snooping, but used for IPv6 •Constrains multicast traffic at layer 2 by looking at the traffic in the MLD membership reports sent by network entities in the layer 2 domain•Benefits of using MLD snooping–Only sends multicast traffic to multicast members–Significantly reduces the volume of IPv6 multicast trafficService laptop with a webbrowser connectionTOR SWITCH TOPOLOGY – DUAL SWITCH HA at NIC level HA at uplink level HA at ToR switch levelPacket buffer bank Packet buffer bank Packet buffer bankPacket buffer bankTCP-IP CONFIGURATION DEFAULTS•Appliance Nodes default to DHCP for IPv4 and IPv6 •Appliance should have a “Link Local” address: –IPv4 – either from DHCP server, or 169.254.y.z–IPv6 – either from DHCP server (unlikely), or FE80:: •VxRail Appliance–IPv4 – Static on 192.168.10.200–IPv6 – DHCP•IMPORTANT:–No need to manually set an ANY static IP address for ESXi –Let VxRail Configuration handle the process–For IP Diagnostics use the “Link Local” addresses•Connect to the BMC or VNC•On all four ESXi nodes•Enable DCUI Command-Line Shell–Select Troubleshooting Mode Options >> Enable ESXi Shell and SSH–Alt+F1 to reach command-line UIesxcli network vswitch standard portgroup set -p "Management Network" -v <VLANID> esxcli network vswitch standard portgroup set -p "VM Network" -v <VLANID>UPDATE ESXI MANAGEMENT NETWORK•Connect the appliance to a supported network switch configured to VCE specifications•Power on all fours nodes in the enclosure:–Start with node four and than sequentially through to nodeone (4, 3, 2 and finally node 1)•Configure the network address to talk to VxRailManager•Browse to the VxRail Manager Initial IP address and choose “Get Started”VXRAIL CONFIGURATION1. Set password on VxRail Manager VM2. Configure VxRail Manager VM Hostname3. Install private DNS (dnsmasq) on VxRail Manager VM4. Configure private DNS (dnsmasq) on VxRail Manager VM5. Perform vCenter Server first boot configuration6. Install private DNS (dnsmasq) on vCenter7. Configure private DNS (dnsmasq) on vCenter8. Setup management network on ESXi hosts9. Configure NTP on ESXi Hosts 10. Configure Syslog in ESXi hosts11. Configure Syslog in vCenter12. Configure Syslog in VxRail Manager VM13. Restart Loudmouth in VxRail Manager VM14. Create Service Account on vCenter15. Register ESXi hosts with vCenter16. Setup ESXi hostnames17. Create Distributed Switch18. Register ESXi hosts with Distributed Switch19. Create Distributed PortgroupINITIAL APPLIANCE CONFIGURATIONThese are automated steps performed byConfiguration Wizard!20. Configure ESXi NetworkingManagement, vMotion, VM networks onvmnic0, and VSAN Networking on vmnic1in an Active/Standby configuration on asingle Standard Switch)21. Rename “VM Network” to be “vCenter Server Network”22. Remove Standard Switch23. Setup DNS on ESXi host to use DNS (dnsmasq) on vCenter24. Restart Loudmouth on ESXi hosts25. Create Storage Policy for VSAN with vCenter 26. Rename VSAN Datastore from vsanDatastore to MARVIN-Virtual-SAN-Datastore27. Set vCenter to auto-start28. Enabled Enhanced vMotion Compatibility29. Configure ESXi root password30. Initialize vCenter licensing ready for Product Activation Code (PAC)31. Enable HAAPPLIANCE CONFIGURATION (CONTINUED)•Start to configure the pre-imaged VxRail Appliance after the system has properly been configured for the network•Wizard provides guidance for the site-specific configurationCONFIGURE WALK THROUGHVXRAIL SETUP EULASTEP-BY-STEPSYSTEM MANAGEMENT•Improved SystemManagementinterface•Includes livevalidationVMWARE VMOTION NETWORK RANGE •Include IP Address Range and VLAN IDVMWARE VIRTUAL SAN NETWORK RANGE •Include IP Address Range and VLAN IDVIRTUAL MACHINE NETWORK•Add VM network segments•Select NEXT ButtonVXRAIL MANAGER SOLUTION•Provide logging for Log InsightSYSTEM VALIDATIONDRASTICALLY REDUCES INSTALLATION ISSUESBasic Validation:▪Locate Images and Components▪Missing or un-expected Networks▪Missing NICs▪Incorrect Network Device Speeds▪Default Passwords on Hosts▪Expired Licenses▪Hosts ConnectivityDeep Validation (First-Run Pre-check)▪Check IP addresses availability▪Check VSAN Network▪Check vMotion Network▪Check NTP server▪Check DNS server▪Check Proxy Server•Check IP addresses availability–ARPing check new VxRail IP–Config VxRail IP and gateway–Ping check Management and VM IPs•Check VSAN Network–Setup VSAN Portgroup–Setup VLAN for VSAN Portgroup if not 0–Setup interface for VSAN Portgroup–Check VSAN interface are reachable•Check VMotion Network–Setup vMotion PortGroup–Setup VLAN for vMotion PortGroup if not 0–Setup interface for vMotion PortGroup–Check if vMotion interface are reachable •Check NTP server–Check if NTP service is usable from all NTP servers•Check DNS server(s)–Check if DNS service is usable from allDNS servers•Check Proxy Server–Check VxRail is able to access through proxy serverconnection–Note: This is an optional check and it will not return error message to GUI for nowVXRAIL CONFIGURATION PRE-CHECKSTART VXRAIL CONFIGURATION•Build image has a hard coded IP Address –This gets changed as part of the configuration–Uses user input values during configuration walkthroughCONFIGURATION PROCESSCONFIGURATION COMPLETE!•Launch VxRail Manager to complete the appliance initializationLAUNCHING VXRAIL MANAGERJSON CONFIGURATION FILEA VxRail Appliance configuration file is a JSON file that can be uploaded during the initial VxRail Appliance configuration process. The VxRail engine builds your VxRail Appliance environment using values defined in the configuration file. These values are used populate data fields in the appliance set up process.–The JSON file format may change between VxRail Appliance releases. Please get the sample JSON file that corresponds to the software release that yourappliance was built with at the factory; then edit the sample file for yourconfiguration–The VxRail Appliance expects the data in the configuration file in a specific format. Any changes to the JSON format will result in unexpected results orcrashes–There is no built-in capability to generate and export an updated copy of an JSON configuration file from the user interfaceUPLOAD CONFIGURATION FILECONFIGURATION FILE - SAMPLE•Validate Virtual SAN configuration:1.Navigate to the Home tab, select Hosts & Clusters2.Expand the Marvin-Datacenter and Marvin-Virtual-SAN-Cluster to show you now have four hosts provided by the VxRail Appliance3.With the Marvin-Virtual-SAN-Cluster selected, click theManage T ab, and under the Settings column, select General under Virtual SAN4.Confirm that all 4 hosts are marked as “Eligible” and thenetwork status is “Normal“•If multicast not enabled a status of “Misconfiguration Detected” is returnedVALIDATING A SUCCESSFUL INSTALLATIONCHECK THE HEALTH STATUS OF VXRAIL APPLIANCE USING VCENTERVXRAIL APPLIANCE INSTALLATION PROCESS DEMONSTRATION VIDEONow let’s watch a shortvideo on the initialinstallation of theVxRail Appliance.VXRAIL 3.5 INCLUDED LICENSES VSPHERE INDEPENDENCE AND FLEXIBILITYNote: A supported vSphere license is required and must purchased separatelyVSPHERE ENTERPRISE PLUS RECOMMENDED FOR BEST VXRAIL EXPERIENCEVXRAIL VSPHERE LICENSES CHOICESDRAMATICALLY INCREASESADMINISTRATOR PRODUCTIVITYLOWER UPFRONT COSTS;MANUAL ADMINISTRATION Automated Rebalancing When ScalingOne-Click Shutdown & Auto RebalanceStreamlined Drive ReplacementAutomated VM Failover for HAManual Workload Balancing When ScalingOne-Click Shutdown, Manual RebalanceService Intensive Drive ReplacementManual VM Failover for HAVSPHERE EDITIONS AND PACKAGES LICENSING MODELS AND VSPHERE FUNCTIONAL LEVELESRS VIRTUAL EDITION CONFIGURATION •Activate and enableESRS/VE•Register with EMCSupport•Enter access code fordeployment•Validate ESRS/VEACTIVATING ESRS/VE•You must have an EMC Online Support account before you activate ESRS•You must activate ESRS to enable features in VxRailPREREQUISITES•The VCE VxRail appliance must have already been installed and initialized•You must have an available IP address for the ESRS/VE Gateway that is on the same subnet as the VxRail manager•Ensure that you have an active EMC Online Support account and you can log into that accountCONFIGURING ESRS/VEDEPLOYINGDEPLOYED。
VxRail超融合平台-功能培训

5
跳转到vCenter
VxRail是完整集成到vCenter的 在VxRail控制面板的顶行,点击vCenter可以跳转到vCenter登陆页 面
6
VxRail监控与维护
• 通过本节我们将了解VxRail的监控与维护功能 • 支持 显示支持信息 • 事件 跟踪系统状态与任务 • 运行状况 跟踪VxRail集群,装置,节点运行情况 • 配置 访问VxRail配置选项
4
VxRail控制面板
• 总体系统运行状况 显示整个VxRail系统的运行状况 • VxRail社区 当系统可以连接公网时会显示EMC VxRail论坛上关于VxRail的文 章 • 支持 需要公网,VxRail连接EMC Support自动将设备故障发送到EMC ,以便快速维修处理 • 事件历史 显示最近的系统事件 • 扩展 当VxRail发现有新的装置时,将引导添加装置
VxRail超融合平台 功能培训
1
VxRail是什么
• VxRail是一款由EMC和 Vmware共同加入开发的 超融合装置。 • VxRail依赖于vSAN, vSphere,vCente基础。 • VxRail打包了 vSAN,vSphere,vCenter Server和一套来至EMC 和VMware的业界领先的 数据服务软件。
了解vxrail控制面板通过vxrail控制面板访问vspherewebclient总体系统运行状况显示整个vxrail系统的运行状况vxrail社区当系统可以连接公网时会显示emcvxrail论坛上关于vxrail的文支持需要公网vxrail连接emcsupport自动将设备故障发送到emc以便快速维修处理事件历史显示最近的系统事件扩展当vxrail发现有新的装置时将引导添加装置跳转到vcentervxrail是完整集成到vcenter的在vxrail控制面板的顶行点击vcenter可以跳转到vcenter登陆页支持显示支持信息事件跟踪系统状态与任务运行状况跟踪vxrail集群装置节点运行情况配置访问vxrail配置选项vxrail集成了emc支持中心服务来监控与维护vxrail集群在事件标签页中以列表形式显示vxrailmanger事件每个事情点击后会显示事件的详细信息10运行状况逻辑你可以看到vxrail装置节点的健康状态以及显示总体的cpu内存存储的利用情况利用情况会以颜色显示使用等级红色
EMC VxRail超融合平台-运维管理手册
EMC VxRail超融合平台运维管理手册目录1. 产品信息 (3)1.1.产品清单 (3)1.2.售后支持 (3)1.2.1.登录VxRail Manager (3)1.2.2.查看系统状态 (4)1.2.3.登录VCenter (10)2. VxRail管理信息 (11)2.1.IP地址信息 (11)2.2.用户登录信息 (12)2.3.设备开机 (13)2.4.设备关机 (13)1.产品信息1.1.产品清单1.2.售后支持设备在使用中有任何问题,请联系EMC24小时支持热线:固话拨打:800-819-0009手机拨打:400-670-0009请提供故障设备的序列号,并记录case号码。
1.2.1.登录VxRail Manager1.单击“管理VxRail”,登录至管理介面输入用户名及之前设置的密码:***************************1.2.2.查看系统状态进入Dashbord主界面进入Support支持页面查看系统告警事件进入系统健康状态查看页面查看节点逻辑状态查看节点硬件状态进入系统配置界面1.2.3.登录VCenter登录vCenter地址192.168.105.19, 输入用户名及之前设置的密码:***************************2.VxRail管理信息2.1.IP地址信息2.2.用户登录信息2.3.设备开机按指定顺序启动VxRail的每个Node,间隔至少30s以上顺序为:Node4→Node3→Node2→Node12.4.设备关机登录VxRail Manager点击如下按钮,关闭整个集群。
VxRail Manager->配置->关闭。
VxRail超融合产品功能详解
VxRail超融合产品功能详解超融合架构凭借效率、灵活性、规模、成本和数据保护,已经成为最近几年的热门词汇。
超融合是指在同一套单元设备中不仅仅具备计算、网络、存储和服务器虚拟化等资源和技术,同时拥有横向扩展能力,可以为用户提供一个统一的资源池部署应用程序。
VxRail系列设备就是一款基于VMware vSphere、vSAN 和EMC软件的超融合解决方案,旨在帮助用户实现一体化IT基础架构的转型。
它采用模块化的分布式存储设计,实现了计算和存储的融合,用户可以从小规模起步,按需扩展,同时提供多种计算、内存和存储选项以满足各种使用情形的配置。
本文将主要介绍VxRail的硬件、网络和功能软件。
VxRail是Dell EMC今年推出的超融合产品,定位的目标市场包括虚拟桌面架构VDI、远程办公室、私有云和中小企业。
用户通过VxRail和vBlock或者VxRack就可以搭建一套完整的企业级解决方案,适合所有类型的工作负载,通过VMware vCenter实现统一管理,同时还拥有企业级的复制和保护能力。
VxRail 以集群的形式存在,集群由多个节点组成,系统最多支持16个硬件盒子,64个节点,3000台以上的虚拟机。
单个节点拥有独立的CPU、内存、存储和网络资源,采用X86架构,支持横向扩展功能。
硬件配置部分VxRail提供混合模式和全闪存模式二种硬件配置,全闪存模式单节点最多支持28个CPU内核,512GB 内存和19TB存储容量,混合模式单节点最多支持20个CPU内核,512GB内存和10TB存储容量。
具体配置见下图:VxRail全闪存模式推出了5种型号,具体配置见下表:VxRail混合模式推出4种型号,具体配置见下表:VxRail硬件配置规则汇总:∙在3.5版本中,单个集群最低配置为4个节点。
在4.0版本中,单个集群最低配置为3个节点;∙单个逻辑集群最多支持64个节点,超过32个节点需要进行RPQ;∙集群中前4个节点必须使用相同硬件型号;∙单个集群中不支持混合模式和全闪存模式二种节点共存;∙单个集群中不支持10G模块和1G模块混合使用;VxRail硬件扩展规则汇总:∙节点可以无中断地添加到集群o节点可以增量地添加到VxRail集群;o每个Quanta节点扩展都需要一个磁盘包。
EMCVxRail超融合平台-安装配置手册

EMC VxRail 超融合平台安装配置手册目录目录1. 客户信息 (4)1.1. 客户联系信息 (4)1.2. 产品清单 (4)1.3. 售后支持 (4)2. 地址与用户名规划 (5)2.1. IP 地址信息 (5)2.2. 用户登录信息 (6)2.3. DNS 配置 (6)3. VxRail 设备安装 (7)3.1. VxRail 初始化准备 (7)3.1.1. 环境准备 (7)3.1.2. 网络连接 (7)3.1.3. 启动VxRail (7)3.2. VxRail 初始化安装 (8)3.2.1. 初始化配置 (8)3.2.2. 登录VxRail Manager (15)3.2.3. 登录VCenter (18)4. VxRail 管理 (19)4.1. 设备开机 (19)4.2. 设备关机 (19)1. 客户信息1.1. 客户联系信息客户名称:地址:邮编:第一联系人:职务:电话:Email 第二联系人:职务:电话:Email1.2. 产品清单产品名称设备型号设备序列号VxRail VxRail 120 QCFVR1640980011.3. 售后支持设备在使用中有任何问题,请联系EMC24 小时支持热线:固话拨打:800-819-0009手机拨打:400-670-0009请提供故障设备的序列号,并记录case 号码。
2. 地址与用户名规划2.1. IP 地址信息设备信息IP 地址子网掩码网关vLAN ID vCenter 192.168.17.19 255.255.255. 192.168.17 17 Platform ServicesController192.168.17.22 0 .1VxRail Manger 192.168.17.20vRealize Log Insight 192.168.17.21ESXi01-ESXi04 192.168.17.15-18vMotion(ESXi01-ESXi04) 192.168.13.11-14 255.255.255.N/A 13vSAN (ESXi01-ESXi04)192.168.14.11-14 255.255.255.N/A 14 BMC 地址Node 1 Node 2 192.168.17.11 255.255.255.192.168.17.12 255.255.255.192.168.17.1端口acccess 到vlan17Node 3 192.168.17.13 255.255.255.Node 4192.168.17.14 255.255.255.2.2. 用户登录信息设备信息用户名密码vCenter ***************************Platform ServicesControllerN/AVxRail Manger ***************************vRealize Log Insight adminESXi01-ESXi04 rootBMC admin2.3. DNS 配置请在DNS 服务器上增加如下域名解析:IP 地址域名192.168.17.15 192.168.17.16 192.168.17.17 192.168.17.18 192.168.17.19 192.168.17.20 192.168.17.21 192.168.17.22 3. VxRail 设备安装3.1. VxRail 初始化准备3.1.1. 环境准备1. 本次安装的为 1 台VXRAIL APPLIANCE 120 ,网卡为10GB SFP+ 网卡2. 一台带有电口网卡的PC Server ,用于初始化VxRail3.1.2. 网络连接(本次环境为10GB SFP+ 网络)3.1.3. 启动VxRail1. 按指定顺序启动VxRail 的每个Node ,间隔至少30s 以上顺序为:Node4 Node3 Node2 Node13.2. VxRail 初始化安装3.2.1. 初始化配置1. 使用IE 登录VxRail 默认IP:https://192.168.10.200 , 并点击“开始”(笔记本应提前配置IP,例如192.168.10.201/24)2. 使点击“接受”3. 选择“分步”4. 添写系统相关信息5. 设置Hostname 、网络、用户密码6. 设置vMotion 网络7. 设置vSAN 信息8. 设置虚拟机网络9. 设置Loginsight 信息10. 点击验证11. 点击“构建VxRail ”,进行VxRail 初始化。
EMC VxRail超融合方案介绍
移除旧应用装置
无任何中断
满载 — 应有尽有
…而且通过现有工具进行管理
复制 备份 云 市场
VxRail超融合系统软件架构
云整合 数据保护及容灾 EMC CloudArray EMC Hybrid Cloud /EHC ( 可选 ) VDP ( EMC Avamar )
EMC RecoverPoint for VM
虚拟化
vCenter Server vSphere ESXi
VxRail Manager
硬件
EMC|VCE专用硬件设备 万兆网络交换机 (客户提供)
IPMI / BMC
复制确保业务连续性
面向 VMWARE 的简单、高效且经过验证的灾难恢复
EMC VxRail 超融合方案介绍
自动化一切
尽可能消除人工任务 服务目录
vRealize
自助服务和自动化 自动化架构服务
加速部署 融合架构
传统架构
为何选择 HCI?— 没有时间去自行构建!
超级融合系统设计
超级融合
服务器
+
存储
传统 软件定义的
为何选择超级融合?
复杂性
成本
风险
标准很重要
自行 构建
收效时间加快 8 倍
即时
问题诊断
超过 2 小时的
升级时间节约
12:1
的占用空间缩减
“EMC 支持服务的质量让我们充满信心,我们相信, 他们实现的超级融合基础架构将相当可靠。”— CIO
再没有整体式迁移
常青树群集简化了技术更新
10GbE
VM
添加新应用装置到群集中 通过 VMOTION 将工作负载移至新应用装置
1,600 个 VM
VxRail 超融合平台安装部署手册
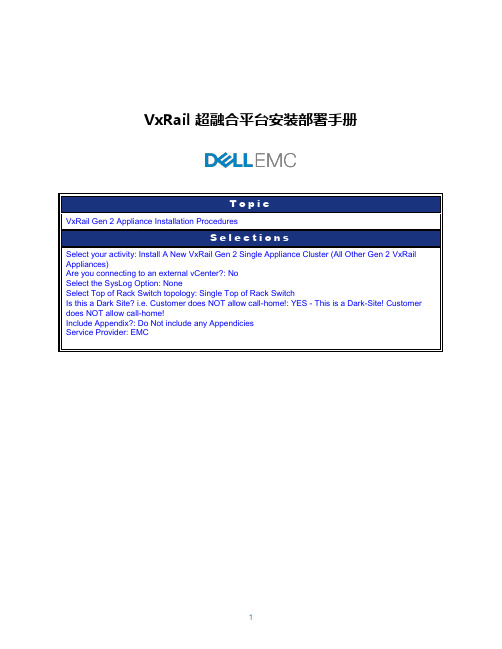
VxRail 超融合平台安装部署手册目录Preliminary Activity Tasks (3)Read, understand, and perform these tasks (3)Service Provider, Project Information and Customer Contact form (4)VxRail Single Appliance Installation Procedure (4)Overview: (4)Pre-installation preparation (4)VxRail hardware installation overview (5)VxRail model and software release cluster requirements (5)Site requirements (5)Task 1:Unpacking the VxRail appliance (6)Task 2:Installing the appliance in a cabinet (7)Task 3:Connecting cables to the VxRail appliance (14)Task 4:Connecting to a single TOR switch (15)Task 5:Before powering on VxRail (16)Task 6:Powering on the appliance (17)Using the VxRail BMC interface (17)Before you begin (17)About the VxRail BMC interface (18)Task 7:Accessing BIOS from a local console (18)Task 8:Identifying the BMC LAN Port configuration in BIOS (19)Task 9:Identifying the BMC DHCP address (20)Task 10:Configuring the BMC LAN Static IP Address (21)Task 11:Accessing the BMC Web console (22)Task 12:Using the BMC Web console to launch the remote console (23)Task 13:Using the BMC Web console to control server power (26)Configuring VxRail for the First time (26)Task 14:Configuring VxRail for the first time (26)Task 15:Installing the bezel (38)How to Change the IB Status for VSPEX BLUE/VxRail (40)Task 16:Connect to the Salesforce site (40)Task 17:Under ‘Case details’ complete the fields (40)Preliminary Activity TasksThis section may contain tasks that you must perform before going to the customer site. Make sure these tasks are complete before performing the procedure.Read, understand, and perform these tasks1. [ ] Table 1 lists tasks, cautions, warnings, notes, knowledgebase (KB) solutions, and Top 10Service Topics that you need to be aware of before performing this activity. Read, understand, and when necessary perform any tasks contained in this table and any tasks contained in any associated knowledgebase solution.Table 1 List of cautions, warnings, notes, KB solutions, and Top 10 Service Topics forthis activityService Provider, Project Information and Customer Contact formThis form is automatically populated based on the information that is provided in the VxRail® Procedure Generator questionnaire prior to generating the procedure. This information is collected and used for reference purposes when referring back to this procedure at a later date and time.Section 2:Section 3:VxRail Single Appliance Installation ProcedureOverview:This procedure only covers the physical hardware installation of a single VxRail Appliance. Out of scope for this procedure is adding an additional appliance to an already configured cluster. Additionally, this procedure does not cover any of the network configuration tasks necessary to result in a successful VxRail implementation. It is the customer’s responsibility to make certain that the network requirements have been met for the VxRail Appliance prior to the provisioning of VxRail.Pre-installation preparationIMPORTANT: It is critical to an efficient, successful installation to completely capture and confirm all network elements, IP, ToR Switch details, VLAN information as described in the Pre-Installation Checklist. Perform the following:1. Download the most recent version of the Pre-Installation Checklist and thoroughly review it. Thechecklist is available via the SolVe Desktop for VxRail.2. Collaboratively work with designated customer contacts to confirm all the necessary pre-requisiteshave been met per the checklist prior to going on site to perform the physical installation.3. Collaboratively work with designated customer contacts to capture and record the configuration andnetwork elements described in the checklist prior to going on site to perform the physical installation.4. Ensure the IP pool size is sufficient for the number of appliances in the cluster. Refer to individualswitch vendor documentation as described in the Pre-Installation Checklist for the individualconfiguration and confirmation techniques for customer relevant network elements.5. Pay special attention to confirmation of customer network topology, differences in ToR switch modelsincluding firmware and licenses within the planned target cluster.Note: The As-Built Configuration deliverable is automatically generated by completing the checklist and can be printed for reference on site. Use it for reference during VxRail configuration.VxRail hardware installation overviewThe procedure details the key steps necessary to install VxRail hardware and prepare it for implementation.These steps include but are not limited to:•Unpacking the appliance•Mounting the VxRail Appliance into the customer provided rack•(If applicable) mounting the ToR Switches into the customer provided rack•Cabling ToR switches to VxRail appliance nodes•Connecting to the customer network•Powering on VxRail applianceIMPORTANT: Confirm network readiness before performing an installation. Failure to have a properly configured Top of Rack switch will result in VxRail provisioning failure.VxRail model and software release cluster requirementsWhile new appliances are automatically discovered on addition to a cluster, the appliances being added must match the model and release level of the cluster in place.IMPORTANT: Adding a VxRail appliance with a newer software release DOES NOT automatically update other appliances in a cluster.Site requirementsThere are no restrictions on the location of the server in the cabinet. Allow at least 36 inches of service clearance in front of and behind the cabinet. Power distribution must support the number of outlets required for the servers and the server power rating listed on the Device Rating label on the chassis. For additional information, refer to the preparation/planning guides for your specific site and cabinet.Ensure you have the following available before installing the VxRail appliance:•Two people to lift the VxRail appliance.•Philips screwdriver.•Laptop or PC with Internet access to register for EMC Online Support, and with local network access to configure the VxRail system (Refer to the Pre-installation Site Checklist)• A cable to connect the laptop or PC to the top-of-rack switch. This may require a media converter depending on the type of ToR switch and the type of connectors on the appliance (SFP+ or RJ45). •Two 110 VAC circuits (VxRail 60 only) or two 220 VAC circuits (all other Gen 2 VxRail Appliances).Task 1: Unpacking the VxRail applianceWhen unpacking the appliance, preserve all the packaging materials in case you need to ship the appliance in the future.CAUTION: The appliance is heavy and should be removedfrom the package by two people. To avoid personal injuryand/or damage to the appliance, do not attempt to lift theappliance without a mechanical lift and help from anotherperson.1. [ ] Inspect the package for damage. If the package (or any of the packaging material) is damaged,contact your shipper.2. [ ] Using a utility knife, carefully open the shipping box.3. [ ] Remove the contents of the package as illustrated in the following table.Table 1 Removing package contents4. [ ] Verify that your package includes the following items:•VxRail appliance•Rack mount kit•Power cords•Front bezel and bezel key•Four red CAT6 Ethernet cables5. [ ] Verify that the customer also has the following items:•Eight blue CAT6 Ethernet cables (for appliances with RJ45 NICs only)•Eight SFP TwinAx cables (for appliances with SFP/SFP+ NICs only)Task 2: Installing the appliance in a cabinetTo install the server in a cabinet, you must perform the tasks below in the order listed.a. Review the warnings and recommendations section.b. Verify the contents of the mounting kit.c. Adjust the rail assemblies for the cabinet channel holes.d. Remove the inner rails from the rail assemblies.e. Attach the inner rails to the server.f. Install the slide rails in the cabinet.g. Install the server on the slide rails in the cabinet.h. Connect cables to the server.i. Install the bezel on the server.IMPORTANT: The cabinet in which you will install the server must have a full earth ground to provide reliable grounding. Additionally, the cabinet should have its own switchable power distribution. We suggest that you use a cabinet that has dual power distribution units, one on each side.We recommend that you use cabinet anti-tip devices, especially if you are installing or removing a server in the upper half of the cabinet when the lower half is empty.1. [ ] Verify that the server mounting kit includes the parts listed in the following table.Table 2 Mounting kit parts2 universal rail assemblies (consists of slide rails forconnection to the cabinet and inner rails for connectionto server)Four Phillips pan-head 8-32 x 0.35 in screws2U bezel (application specific)You need a # 2 Phillips-head screwdriver to complete the installation of the rails and server.2. [ ] Adjust the rail assemblies for the cabinet channel holes.The rail assemblies ship with round alignment posts at the end of the rails for cabinet channels(NEMA rails) with round holes. If your cabinet has channels with square holes, switch the railalignment posts to square posts.a. Remove the screw that secures the alignment post assembly.b. Push the plastic tab on the alignment post assembly up or down, depending on the rail end, andhold the tab in.c. Rotate the alignment post assembly either clockwise to switch from round posts to square posts orcounter clockwise to switch from square posts to round posts until the assembly clicks into place.d. Secure the alignment post assembly in place with the screw that you removed.Note: The screw goes in the hole opposite the hole from which you removed it.Figure 1 Switching from round rail alignment posts to square alignment posts3. [ ] Remove the inner rails from the rail assemblies.a. Slide the inner rail out from the slide rail as far as possible.b. On the inner rail, slide the blue disconnect tab forward to release the inner rail from the slide rail.c. Slide the inner rail completely out of the slide rail.Figure 2 Removing the inner rail from the slide rail4. [ ] Attach the inner rails to the server.a. With the flat side of the inner rail facing the side of the server, align the large end of the railnotches of the inner rail with the connection studs on the server and push the inner rail onto the connection studs.b. Slide the inner rail forward along the server until the studs fit securely into the small end of the railnotches.An audible click indicates that the rail is secure.Figure 3 Attaching an inner rail to the server5. [ ] Install the slide rails in the cabinet.The universal rail assemblies for this server support cabinets in which the front and rear mounting channels are 24 inches to 34 inches apart. Each assembly contains a right and a left slide rail.a. Select the 2U (3.5 in) of cabinet space for the server.Figure 4 Location for the rails in the 2U space for the serverb. From the front of the cabinet, align rail alignment posts with the rear channel holes for the selectedcabinet space for the server, and insert the alignment posts securely into the holes.An audible click indicates that the connection is secure.Figure 5 Inserting rail alignment posts into rear channel holesc. Secure the rail to the rear channel with a small stabilizer screw.Figure 6 Installing stabilizer screws6. [ ] Install the server on the rails in the cabinetCAUTION: The enclosure is heavy and should be installed into or removed from a rack by two people. To avoid personal injury and/or damage to the equipment, do not attempt to lift and install the enclosure into a rack without a mechanical lift and/or help from another person.a. On each slide rail, bring the ball bearing retainer assembly fully to the front, so it rides onto thesecurity knob.b. From the front of the cabinet, align the inner rails attached to the server, with the white plasticguide block on the front inside of each slide rail.Figure 7 Aligning the inner rail with white plastic guide block Note: When installing the server in the cabinet, do not pick the server up by its power/control modules and do not push on its power/control modules. These modules are on either side of the front of the server.c. From the front of the cabinet, align the inner rails, attached to the server, with the white plasticguide block on the front inside of each slide rail.d. Slide the server into the cabinet so the inner rail extends over the plastic guide blocks and the firstpart of the ball bearing retainer assemblies.e. Once the inner rails properly engage with the ball bearing retainer assemblies, push the serverinto the cabinet until the slide rails engage and lock.An audible click indicates that the slide rails are engaged and locked.f. On the outside of each rail assembly, slide the blue disconnect tab forward to unlock the server,and push the server completely into the cabinet.Figure 8 Inserting the server in the cabinetg. To further secure the rail assembly and server in the cabinet, insert and tighten a small stabilizerscrew directly behind each bezel latchFigure 9 Installing the stabilizer screwsTask 3: Connecting cables to the VxRail applianceIMPORTANT: Refer to the VxRail Pre-installation Site Checklist as needed for the customer environment specifics. Do not power on the VxRail appliance until after you have confirmed the ToR switch configuration is complete.1. [ ] Plug the power cords into the power supplies and connect these cords to AC power sources.2. [ ] Attach the I/O cables as appropriate:•Connect the VxRail appliance to a single ToR switchTask 4: Connecting to a single TOR switchIf you are using a single top-of-rack (TOR) switch, make the network connections as shown.Each of the four nodes in a VxRail appliance has two network ports.Figure 10 Single ToR Switch with SFP+ network connectionsFigure 11 Single ToR Switch with RJ45 network connections1. [ ] Connect each port on a node to the configured ports on the TOR switch.Note: Work with the customer and refer to the VxRail Pre-installation Site Checklist as needed for the port assignments on the ToR Switch. Plugging into any available port does not guarantee network connectivity.Figure 1 SFP+ Twinax 10GbE Network portsFigure 2 RJ45 10GbE Network ports2. [ ] Connect the management PC to a port on the switch, or to a VLAN that can access theappliance.When connecting the management PC, the key take-away is that you must have network connectivity from the management PC to the VxRail Appliance default IP address of 192.168.10.200.CAUTION: Do not power on the VxRail appliance until after you have confirmed the TOR switch configuration is complete. Refer to the VxRail Networking Guide for switch protocol requirements. Refer to the ToR switch vendor documentation for configuration instructions.Task 5: Before powering on VxRailDo not power on your VxRail until you have completed the following tasks:•Properly install the appliance in a cabinet.•Connect the VxRail NIC ports to one or more TOR switches.•Verified with the customer that the TOR switch and supporting network are configured according to the VxRail Networking Guide, including:•Reserved, non-conflicting IP addresses•Configured IPv4 and IPv6 multicast•Disabled Link Aggregation on ToR switch (LACP/EtherChannel)•Configured network services such as DNS•Connect your management PC to the TOR switch.Task 6: Powering on the applianceTurn the appliance on by selecting the power button for each node as illustrated in the following table.After powering on a node wait at least 30 seconds before powering up the next node. This avoids conflicts between the nodes during power up and ensure that all nodes can be discovered.1. [ ] Power up one node at a time in the following sequence:a. Node 4b. Node 3c. Node 2d. Node 12. [ ] Verify the fans are operational and no amber fault lights appear. Refer to the following table forLED indicator light status.Using the VxRail BMC interfaceBefore you beginFollow these precautions before using the VxRail appliance BMC Web and remote console. CAUTION: Failure to follow these guidelines can cause VxRail to operate incorrectly, and can cause data loss.•Do not power cycle the appliance using the BMC interface. VxRail centrally manages all of the nodes in the appliance. You must follow the proper procedure to gracefully shut down and start up theVxRail appliance. A hard power cycle through the BMC interface, without interfacing with VxRail, may leave the appliance in an unknown state that could have negative consequences such as dataunavailability or data loss.•Only configure the BMC LAN settings. Do not modify any other BIOS or BMC settings in any way.•Do not upgrade the BIOS or BMC firmware. Configuration changes or version mismatches will cause VxRail to stop operating.•Use the BMC Web console and remote console solely for read-only monitoring.About the VxRail BMC interfaceVxRail offers a baseboard management controller (BMC) interface for monitoring the physical state of the appliance through an independent connection. The VxRail BMC port is an interface that provides access through a LAN or Internet connection.The BMC on the appliance node can support a dedicated port or a shared port. A dedicated BMC port is required because the 10Gb ports are reserved exclusively for VxRail.Figure 3 SFP+ NodeFigure 4 RJ45 NodeYou can access the BIOS/BMC through either a locally attached VGA monitor and keyboard or a remote session if the BMC port is assigned a known IP address. Use a locally attached VGA monitor and keyboard to discover the BMC port configuration if the IP address is not known.Task 7: Accessing BIOS from a local consoleBefore starting, be sure the VGA/keyboard is properly connected to the appliance node.1. [ ] During the power-on self-test (POST), press <F2> to enter BIOS Setup.Figure 5 Press F2 to enter BIOS2. [ ] When prompted for a password, enteremcbiosTask 8: Identifying the BMC LAN Port configuration in BIOSVerify the BMC interface is set to a dedicated port.1. [ ] On the BIOS main screen, navigate to Server Mgmt > BMC network Configuration.2. [ ] Look at the entry for “Current BMC LAN Port State”. The setting should be “Dedicated-NIC”.Figure 6 BMC LAN Port Configuration3. [ ] Select “BMC LAN Port Configuration” to modify this setting to “Dedicated-NIC”, if necessar y.4. [ ] Be sure the Ethernet cable is positioned in the dedicated port on the appliance node.Task 9: Identifying the BMC DHCP addressIf the VxRail BMC port has been assigned an address by the DHCP server, use this procedure to find the IP address using a locally attached VGA display and keyboard.1. [ ] On the BIOS main screen, navigate to Server Mgmt > BMC network Configuration.2. [ ] Look for the “Station IP a ddress” in the BMC LAN configuration section. The following exampleshows the assigned IP address for the dedicated BMC port is 192.168.101.49.Figure 7 BMC LAN Configuration using DHCPTask 10: Configuring the BMC LAN Static IP AddressIn the event that a DHCP server is not available on the network segment that the VxRail appliance is connected to, the following instructions describe how to configure a static BMC LAN IP Address.1. [ ] On the BIOS main screen, navigate to Server Mgmt > BMC network Configuration.2. [ ] Using the arrow keys on the keyboard, select “Configuration Address Source”.3. [ ] Press the <Enter> key to select.4. [ ] Using the arrow keys, ch ange the selection to “Static on next reset”.5. [ ] Press <Enter> to make the selection.6. [ ] Configure the IP Address, Subnet Mask and Default Gateway according to the customer’snetwork requirements.7. [ ] Press F10 to save changes and exit the BIOS.8. [ ] Repeat for each additional node in the appliance or cluster if more than one appliance is present.Figure 8 Setting Static IP address for BMC portTask 11: Accessing the BMC Web consoleOnce the BMC port settings are correctly configured in BIOS, a web session can be initiated to BMC with a browser.•The BMC web console uses secure HTTP (HTTPS) for connectivity. Be sure to use a browser that support a cipher strength of at least 128-bit encryption.•To use the remote console (KVM) window from the BMC web console, Java Runtime Environment (JRE) must be installed.1. [ ] Use your Web browser to navigate to the BMC port IP address.For example:http://192.168.103.52. [ ] Log into the BMC Web console by entering the following username and password:Username: adminPassword: adminFigure 9 BMC Web Console LoginNote: Be sure to comply with the “Required Browser Settings” before initiating a web session.Figure 10 BMC DashboardTask 12: Using the BMC Web console to launch the remote console1. [ ] Navigate to Remote Control > Console RedirectionFigure 11 Starting Remote Console from BMC Web Sessiona. When you click “Java Console ”, a window is displayed to download the Java Network Launch Protocol,(jviewer.jnlp) file. This in turn downloads the standalone Java application implementing the remote console.Figure 12 Launch Java ConsoleFigure 13 Launch Java ViewerNote: The remote console window is a Java Applet that establishes TCP connections to the Integrated BMC Web console. The protocol used to run these connections is a unique KVM protocol and not HTTP or HTTPS. This protocol uses ports 7578 for KVM, 5120 for CDROM media redirection, and 5123 for Floppy/USB media redirection. Your local network environment must permit these connections to be made. Your firewall and, if you have a private internal network, your NAT (network address translation) settings must be configured accordingly.Figure 14 Remote Console with Java ViewerTask 13: Using the BMC Web console to control server powerActivities in the BMC web console must be limited as to not impact the operations of the VxRail appliance. The BMC web console can be used to remotely control power to an appliance node if necessary.1. [ ] From the BMC dashboard, navigate to Remote Control > Server Power ControlFigure 15 Power Control in BMC DashboardConfiguring VxRail for the First timeTask 14: Configuring VxRail for the first timeConnect your management PC or laptop to a powered on VxRail appliance to begin initial configuration. IMPORTANT: The VxRail Pre-Installation Site Checklist includes the entries for all of the customer configuration details to be applied to the VxRail appliance. Be sure you have access to this spreadsheet before continuing to configure the VxRail appliance.1. [ ] Before you proceed with the initial configuration of the new VxRail appliance:a. Configure the PC you are using to connect to an address on the same subnet as the VxRailappliance (default is 192.168.10.x/24).b. Connect your PC to a port on the TOR switch integrated with the VxRail appliance.Note: This switch port must be configured accordingly to allow proper network connectivity.c. Confirm that you can ping the VxRail initial IP address (default is 192.168.10.200).d. Confirm that the gateway is reachable.e. Work with the customer to confirm that the DNS server(s) are reachable (unless you are in anisolated environment) and that all host names are resolvable ein both forward and reverse look-up.Note: Refer to the Pre-Installation Site Checklist for information on forward and reverse lookup.2. [ ] Refer to the Pre-Installation Site Checklist and connect to VxRail Manager as follows,:Note: When entering hostnames in the VxRail First Run Wizard, all hostnames for ESX, vCenter, PSC, etc should be entered as simple hostnames. Do not enter FQDN hostnames as this will cause a mis-configuration.a. Launch a browser on your PC.b. Browse to the VxRail Manager IP address: https://192.168.10.200.The VxRail Welcome screen is displayed.Figure 16 VxRail Welcome ScreenYou are now connected to VxRail Manager and can provision the VxRail appliance.3. [ ] Before you provision the VxRail appliance for the first time, note the following:IMPORTANT: If the appliance is a DEMO or POC, refer to the DEMO KIT for instructions.Note: Successful provisioning completes in about 25 minutes during the "Build Appliance" phase.4. [ ] On the VxRail Manager Welcome screen, click GET STARTED.Figure 17 Initializing VxRail Configuration5. [ ] Select ACCEPT to accept the End User License Agreement (EULA).Figure 18 VxRail EULA 6. [ ] The Expected nodes page displays.Figure 19 Expected nodes7. [ ] Wait for all the nodes to load. Click the ‘I confirm I want to configure the listed hosts’checkbox and locate the Next button on the right side of the the screen.Figure 20 Expected nodes8. [ ] Click the Next button.9. [ ] Select how you would like to configure VxRail.Figure 21 VxRail Data Entry OptionsClick Step-by-step to continue. The Step-by-step option enables a wizard to enter the required VxRail information interactively.If you select Configuration file you will be prompted to select the *json file created within the Pre-installation Site Checklist. This file will populated the required VxRail information and you can skip to step 15 to continue.10. [ ] Enter the information on the System tab. Use the information collected on the Pre-InstallationSite Checklist .Note: If you are using the JSON file for pre-defined configuration, then use the steps below to review the input parameters as opposed to manually entering them.。
EMC VxRail超融合数据中心-方案建议书
EMC 融合平台EMC VxRail超融合数据中心方案建议书EMC VXRAIL 超融合平台:超级融合基础架构的跨越腾飞日期客户联系人全名客户公司名称客户公司地址尊敬的客户联系人称呼:您好!事物需要变革,而直面变革的时机已到。
IT 基础架构的作用不再仅仅是为业务提供支持,而是主动地推动业务发展。
压力在肩,您的基础架构必须利用有限的预算和资源来满足新应用程序与服务等不断浮现的业务需求。
当前,各类需求不断演化发展,要对硬件、软件和网络解决方案进行持续评估和集成,时间十分有限。
您需要打造一种能适应您业务需求的自动化动态基础架构。
如果您的 IT 基础架构妨碍到您调动资源、适应各种新的业务开展方式,那么,贵组织将面临在竞争中落后甚至被淘汰的风险。
为了满足层出不穷的业务需求,您曾经尝试过推进您的 IT 基础架构现代化进程,然而,不断的维护需求、长时间的集成以及漫长的技术评估周期统统成了阻挡您前进的拦路虎。
倘若无法让基础架构生命周期得到简化和重复利用,贵组织必然难以开展创新工作,及时响应市场需求。
您很清楚,您需要打破被动响应的恶性循环,找到能推动贵组织业务水平更上一层楼的 IT 基础架构解决方案。
您是锐意进取的革新者,您知道软件定义的数据中心 (SDDC) 这种作为服务交付的全自动敏捷型虚拟基础架构就是您未来要实现的目标。
但问题在于,如何才能通过经济高效的简单方式达成这一目标。
VCE VxRail™应用装置由 EMC 和 VMware 联合开发,是市面上唯一一款采用 VMware 超级融合软件进行了全面集成、预配置以及测试的超级融合基础架构应用装置,是部署完全虚拟化 SDDC 环境最简单、快捷的方式。
该应用装置将始终为您提供最新的 VMware 技术,通过简单、经济高效的超级融合解决方案为您实现数据中心转型,适用于多种任务关键型工作负载。
在其帮助下,您可以胸有成竹地实现可预测的发展,持续实现基础架构现代化目标。
- 1、下载文档前请自行甄别文档内容的完整性,平台不提供额外的编辑、内容补充、找答案等附加服务。
- 2、"仅部分预览"的文档,不可在线预览部分如存在完整性等问题,可反馈申请退款(可完整预览的文档不适用该条件!)。
- 3、如文档侵犯您的权益,请联系客服反馈,我们会尽快为您处理(人工客服工作时间:9:00-18:30)。
VxRail 超融合平台软件更新手册目录Service Provider, Project Information and Customer Contact form (3)VxRail v4.0.100 Mobile Build Server Setup (3)Task 1:Verify Build System Components (3)Task 2:Install VMware Workstation (4)Task 3:Disable Firewall (8)Task 4:Enable Setting IP Address Automatically (8)Task 5:Configure Workstation virtual network (9)Task 6:Download VxRail software packages (14)Task 7:Ensure Your System Time is Accurate (14)Task 8:Deploy VxRail Build Server Virtual Appliance (16)Task 9:Upload VxRail v4.0.100 software update image to Build Server (22)VxRail Gen2 Appliance v4.0.x Software Image Installation Using Mobile Build Server. (24)Overview (24)Task 10:Verify all required pre-requisites have been met (24)Task 11:Verify VxRail configuration and network settings are captured (24)Task 12:Have access to the required VxRail upgrade hardware and software (25)Task 13:Disable Firewall (25)Task 14:Enable DHCP (set IP address automatically) (25)Task 15:Identify the VxRail Appliance (26)Task 16:Set up the isolated Build Server Network (27)Task 17:Start the Build of the VxRail Appliance (30)Service Provider, Project Information and Customer Contact formThis form is automatically populated based on the information that is provided in the VxRail® Procedure Generator questionnaire prior to generating the procedure. This information is collected and used for reference purposes when referring back to this procedure at a later date and time.Section 2:Section 3:WARNING: DATA LOSS!WARNING: This procedure is destructive.If there is any data on the system that the customer needs, it must be backed up or migrated off the system prior to performing this procedure.VxRail v4.0.100 Mobile Build Server SetupTask 1: Verify Build System ComponentsVerify you have access to the following build system components:• A portable server or laptop with the following characteristics:•CPU: 2 cores that support virtualization technology•Memory: At least 8 GB RAM•Disk: At least 70 GB of free disk space•Network: 1 NIC, 1 dedicated 1Gb Ethernet Switch and 4 GBIC adapters• A 64-bit operating system that supports at least version 10 of VMware Workstation•Access to the install image for version 10 or later of VMWare workstation version 10 or later.Note: VMware Workstation can be obtained via EMC’s ELA with VMware. License s can be ordered through ART.•Access to the EMC Online Support site for download of the VxRail Build Server virtual appliance and software images.Task 2: Install VMware Workstation1. [ ] Download and Install VMware Workstation version 10 or later.Figure 1 VMware Workstation SetupFigure 2 VMware Workstation Setup – License AgreementFigure 3 VMware Workstation Setup – Setup TypeFigure 4 VMware Workstation Setup – Destination FolderFigure 5 VMware Workstation Setup – Software UpdatesFigure 6 VMware Workstation Setup – User ExperienceFigure 7 VMware Workstation Setup – ShortcutsFigure 8 VMware Workstation Setup – Ready to Perform Requested OperationsFigure 9 VMware Workstation Setup – License KeyTask 3: Disable FirewallDisable the Firewall on your laptop. If the laptop has McAfee installed on it, disable the Firewall as follows:1. [ ] Locate the McAfee icon.2. [ ] Right-click, go to Quick Settings.3. [ ] Disable Firewall.Figure 10 Disable FirewallTask 4: Enable Setting IP Address Automatically1. [ ] For the Connection port that is connected to the dedicated/internal build switch, ensure that IPV4is set to the Obtain an IP address automatically.Figure 11 TCP/IP PropertiesTask 5: Configure Workstation virtual networkThe VxRail Build Server is a virtual appliance that will use the virtual networks configured in VMware Workstation to communicate with the VxRail appliance nodes. The virtual network must be configured before deploying the VxRail Build Server virtual appliance.1. [ ] Access the Virtual Network Editor from the VMware Workstation main menu.Figure 12 VMware Workstation – Edit Virtual Network Editor2. [ ] Remove the default VMnet0, VMnet1 and VMnet8 networksFigure 13 Virtual Network Editor 3. [ ] Add VMnet10 for Build Server connectivity.Figure 14 Select 'Add Network'Figure 15 Select 'VMnet10'Figure 16 Set properties for VMnet104. [ ] Set the following properties for VMnet10:•Modify the VMNet10 setting to NAT•Uncheck “Use local DNS…”•Setup the subnet IP to “192.168.254.0”.5. [ ] Add VMnet VMnet11 to enable bridged connectivity. Set VMnet11 to Bridged to enableconnectivity to the physical Ethernet connection NIC. This NIC will be connected to the dedicated Ethernet switch.Figure 17 Configure Bridged virtual networkFigure 18 Workstation Virtual Network Final SettingsTask 6: Download VxRail software packages1. [ ] The VxRail update packages will consist of the Build Server virtual appliance archive, and theVxRail software update images. Packages may be downloaded from and unzipped to a local directory.Task 7: Ensure Your System Time is Accurate1. [ ] Disable the Firewall on your laptop. If the laptop has McAfee installed on it, disable the Firewallas follows:2. [ ] On the right corner of the screen, click the time, and click “Change date and time settings…“Figure 19 Change Data and Time Settings3. [ ] In the “Date and Time” dialog, ensure the time is correct regarding to the time zone.Figure 20 Data and Time4. [ ] If not, change the time to the correct time/time zone.Note: The time zone does not required to be set the same as local, but the current time regarding to the time zone must be set correctly.Task 8: Deploy VxRail Build Server Virtual ApplianceThe Build Server is a VMware virtual appliance. Deploy the virtual machine from the virtual machine archive file.1. [ ] Locate the Build Server virtual appliance. The file is in OVA format.2. [ ] Deploy Build Server virtual appliance on VMWare Workstation.•Click File•Open, and browse to the Build System VM package.•Then, follow the instruction below to import VM.Figure 21 Import Virtual MachineFigure 22 Importing Virtual Machine3. [ ] Right-click the just deployed VM and select Settings….Figure 23 Edit Settings 4. [ ] Modify Memory for this virtual machine to at least 4096.Figure 24 Virtual Machine Settings5. [ ] Configure virtual machine network settings:The Build Server VM is configured with six Network Adapters (1 to 6). In this customized Build Server setup, only two Network Adapter 1-2 will be used.a. Click on Edit Virtual Machine Settings.b. Map each Network Adapter as follows:a. Network Adapter 1 - VMNet10, Check box “Connect at Power on”b. Network Adapter 2 - VMNet11, Check box “Connect at Power on”c. Network Adapter 3 - HostOnly, Uncheck box “Connect at Power on”d. Network Adapter 4 - HostOnly, Uncheck box “Connect at Power on”e. Network Adapter 5 - HostOnly, Uncheck box “Connect at Power on”f. Network Adapter 6 - HostOnly, Uncheck box “Connect at Power on”Figure 25 Set Virtual Network Adapter to VMnet10Figure 26 Set virtual network adapter to VMnet11Figure 27 Final VM Network Settings 6. [ ] Power on and test Build Server virtual machine.Figure 28 Build Server Power-ona. The Build Server has a static IP address of 192.168.254.20. Check Linux virtual machine networkand build network connections for the following IPs.ping 192.168.254.20ping 192.168.252.252Task 9: Upload VxRail v4.0.100 software update image to Build ServerThe Build Server is a Linux-based virtual machine accessible by web browser. The web interface is used to upload the VxRail software images to the Build Server. The software that will be loaded into the appliances is all bundled as one package. The part number of this package is 992-720-600. Load the Image bundle into the build server for provision an appliance with following steps.1. [ ] Launch a Build Server browser to http://192.168.254.20 and enable system configurationFigure 29 Enable Build Server System Configuration2. [ ] Upload the golden image to the build server VM.a. From the configuration interface, click “Click to upload golden image”Figure 30 Upload upgrade packageb. Browse to the golden image package, select the file, and wait for import to finishc. After the import completes, Click the Blue banner that says: “Click to install package”3. [ ] Upload the upgrade packagea. From the configuration interface, click “Click to upload a upgrade package”. Browse to theloc ation where the “Upgrade Image Package” is located, select the file, and wait for import to finish.Figure 31 File SelectionFigure 32 Golden Image File importFigure 33 Build Server ready for usageb. Once the upload is complete, a message will pop up and the system is ready for upgrading VxRailappliances.VxRail Gen2 Appliance v4.0.x Software Image Installation Using Mobile Build Server.OverviewThis guide provides instructions on how to upload a new version of the VxRail software image to a VxRail Gen2 appliance. This process uses a mobile build server, which is a portable virtual machine that runs on a laptop using VMware Workstation (Windows) or VMware Fusion (Mac). The build server contains the VxRail software image, and the code instructions to upload the image to each node. This process requires dedicated and isolated network connectivity between the build server and each of the VxRail nodes in the appliance.WARNING: This Procedure is destructive and will permenantly erase all data on the appliance. Prior to using this procedure to upgrade an VxRail Appliance, All customer data must be backed up or migration off the appliance.This process includes these major milestones in order to assure a successful upgrade:1. [ ] All the planning and preparation steps are completed before performing the upgrade.2. [ ] Physical network connectivity is established between the ‘uild Server and all of the VxRail nodes.3. [ ] Connectivity to the Build Server web interface is established.4. [ ] The VxRail software update completes successfully.5. [ ] The updated VxRail appliance is re-configured.Task 10: Verify all required pre-requisites have been metThe required pre-requisites are listed on the ‘VxRail Upgrade Pre-Requisites’ tab within the VxRail Pre-Upgrade Migration Site Checklist. Verify that all of these conditions have been met before proceeding. Task 11: Verify VxRail configuration and network settings are capturedThe software image process will force a re-initialization of the VxRail appliance. The ‘VxRail Upgrade Settings’ tab within the VxRail Pre-Upgrade Migration Site Checklist contains the items that are required to reconfigure the appliance after the upgrade is complete. Verify the VxRail configuration and network settings have been captured in this worksheet.Task 12: Have access to the required VxRail upgrade hardware and softwareThe VxRail software image process requires specific infrastructure be available at the location to perform the upgrade• A portable server or laptop with the following characteristics:•CPU: 2 cores that support virtualization technology•Memory: At least 8 GB RAM•Disk: At least 70 GB of free disk space•Network: 1 NIC, 1 dedicated 1Gb Ethernet Switch and 4 GBIC adapters• A 64-bit operating system that supports at least version 10 of VMware Workstation •The VxRail Build Server virtual appliance is deployed on the laptop.•The VxRail software upgrade packages have been downloaded onto the VxRail Build Server.• A dedicated 1Gb Ethernet switch with a minimum of 9 ports. (The Ethernet switch is used to create an isolated network between the laptop and VxRail appliance. No other devices can be connected to this switch).•At least 9 Ethernet cables for connectivity between the laptop and VxRail appliance.•For SFP+ appliances, you will need a minimum of 4 SFP to RJ45 media converters.•Refer to EMC part number: 100-652-581•The description is:Brocade LBL 1GbE Copper SFP for MP 7800 & FXb-24Task 13: Disable FirewallDisable the firewall on your laptop. If the laptop has McAfee installed on it, disable the firewall as follows:1. [ ] Locate the McAfee icon.2. [ ] Right click the icon, select to Quick Settings.3. [ ] Disable Firewall.Figure 34 Disable McAfee FirewallTask 14: Enable DHCP (set IP address automatically)For the Ethernet port on the laptop that is connected to the dedicated/internal build switch, ensure that the IPV4 is set to the Obtain an IP address automatically.Figure 35 Enable DHCP on connected portTask 15: Identify the VxRail ApplianceLocate and record the PSNT of the VxRail appliance.•For Gen 2 appliances, the PSNT is located on the pull out tab on the top left of the appliance chassis.Figure 36 VxRail Gen2 PSNT LocationTask 16: Set up the isolated Build Server NetworkThe re-imaging process will use remote management and an onboard Ethernet port to enable communications between the build server and the VxRail appliance.Note: An isolated network between the laptop and VxRail Gen 2 appliance is required for the upgrade procedure. No other devices can be connected to this switch.1. [ ] Connect the Ethernet port on the laptop running the VxRail Build Server to the dedicated switch.2. [ ] Connect all 4 nodes from the VxRail Appliance to the dedicated build switch.a. Connect the RMM4 (BMC) port on each node to the dedicated build switch as shown inFigure 37 for the VxRail Dual 10GbE Appliance or Figure 38 for the the VxRail 60 Quad 1GbEAppliance.b. Connect Ethernet port ‘eth0’ on each node to the dedicated build switch as shown in Figure 37for the VxRail Dual 10GbE Appliance or Figure 38 for the the VxRail 60 Quad 1GbE Appliance. Note: Label all cables before removing them from the nodes.Figure 37 VxRail Dual 10GbE SFP+ or RJ45 Appliance Build Network CablingFigure 38 VxRail 60 Quad 1GbE RJ45 Appliance Build Network CablingNote: If connecting to a VxRail appliance using SFP+ network connections, use the SFP+ to RJ45 Media Converter adapter when connecting to the host NIC.3. [ ] Power on the system, press F2 to enter the BIOS setting dialog.4. [ ] If prompted for BIOS setting, use emcbios.5. [ ] In the BIOS settings, go to Server Mgmt tab, and select BMC network configuration.Figure 39 BIOS –Server Management – BMC Selection 6. [ ] Ensure BMC is running with DHCP. Change if needed.Figure 40 BIOS – Server Management – BMC SettingsTask 17: Start the Build of the VxRail Appliance1. [ ] On the Build Laptop, open Web browser and navigate to http://192.168.254.202. [ ] Click “Create Build”.Figure 41 Create Build of VxRail3. [ ] Enter the information to initialize the build operation.Figure 42 Create Builda. Enter the PSNT number in the first entry location.Note: The PSNT must be entered in capital letters and must conform to a specific format. This value must be the same as the previous PSNT setting or the VxRail Gen1 appliance (VSPEX BLUE) will not call home correctly.b. Select the appliance model from the drop-down box.c. Select Slot 1.Example:PSNT: EMCVB152100697Model: Standard SFP+ (VSB-V-HW-2U4N-SO)Available Slot: Slot 1Send Genealogy and Build Automatically (Leave it Uncheck)4. [ ] Click Submit to start.。