CINEWARE 中文用户手册
ZEISS cinemizer OLED 3D视角手册说明书

Quick Guide2Table of Contents / Inhalt PageBrief overview (english) 3Safety and Operation (english) 16Kurzübersicht (deutsch) 23Sicherheit und Handhabung (deutsch) 36Safety and operation (other countries) 42Overview of the cinemizer OLEDBrief overview Video glasses 3 Battery box 4 HDMI ® adapter 5 Getting started 5 Powering on 6 Acuity 6 Nose pad 7 Earpiece 8 Ear clips 10 Volume 10 Travel case 11 Important functions 12 Accessories 15 S upport 15Safety and operation 16RegistrationPlease register at /cinemizer/registration to receive notifications directly when a firmware update is available.of the acuity for each eyeEar clipsErgonomic fixing of the glasses EarpieceRemovable earpieceEarpiece storageFor safe storage of the earpieces3Multifunction switch Video mode, on-screen display and volumeMode LEDs 2D/3D display modeAV-in jack Battery box ®- Reset the video glassescinemizer HDMI® adapterWhen the cinemizer HDMI® adapter isplugged into the battery box, an HDMI®device, e.g. gaming console, PC, Blu-rayplayer, can be connected to the cinemizer®The plug type on the other end of the HDMI cable depends on the used video source.gaming consoleBlu-ray player Gaming console and Blu-ray player not included6Set the acuity (-5 to +2 diopters) separately for each eye by turning the adjustment wheel until the image is in focus.7Adapter AAdapter BNose padThe nose pad can be attached in3 different ways for best possiblecomfort:1. Nose pad without adapterinto jack until it stops into cablechannel 8then insert the in-ear headphones.The in-ear headphones come with three different size ear caps: small, medium and After use, store the head-phones in the parking bay.10Ear clipsWhile wearing the cinemizer OLED video glasses, move the ear clips onto the ears from the back.Volumecinemizer video glasses in the travel case.1. Both ear clipsout of the glasses.2. Fold the temple armsand put the glassesaround the glasses.4. Put the battery box withconnected adapteron top of the glasses.1112Charging the batteryTo charge the battery, connect theUSB cable to the mini USB jack on thecinemizer OLED.A flashing LED indicates that thebattery is charging; a steady greenLED indicates a fully-charged battery.On-screen display (OSD)A configuration menu is displayed. Briefly press the multifunction switch to enable the OSD.*Press (~2 seconds) the multifunction switch to alternate between 2D and 3D mode. The two mode LEDs show the current mode.14CompatibilityThe cinemizer OLED multimedia video glasses can be connected to gaming consoles, Blu-ray players and PCs via an HDMI ® interface. It also accommodates other playback devices such as DVD players and smartphones via a 3.5 mm, 4-pin video cable.Please note that in case of playback via the AV-in jack, the iPod/iPhone adapter or the HDMI The cinemizer OLED is also compatible with iPhone and iPod models. The iPod/iPhone kit is avai l able in online shops and specialist stores.Please visit /cinemizer/shops formore information.15AccessoriesThe cinemizer head tracker (motion sensor). light shade and more are available in online shops and specialist stores.Please visit /cinemizer/shops . More information on the cinemizer OLED multi m edia video glasses is avai l able at /cinemizer .Comprehensive support information is available online at/cinemizer/support .The cinemizer OLED user manual and other documents are available at/cinemizer/documents .Note:Prior to using the video glasses for the first time, read for your own safety the user instructions, the safety instructions and the docu-mentation for the cinemizer and the devices to which you connect the cinemizer. Failure to do so may result in injury or damage.Safety and operationThe cinemizer multimedia video glasses simulate a screen with a 105 cm (40-inch) diagonal at a distance of 2 meters (6 feet) - we therefore recommend behavior similar to that with comparable televisions.If you leave an unchanging image (like a login screen or other permanent picture) on the screen for a long period of time, you may see a faint remnant of the image even after a new image re-places it. This is called ”persistence“. Please avoid unchanging pictures! If you see a faint remnant of an image in the glasses, please play full screen and changing pictures for a longer time which might eliminate persistence.Immediately remove the cinemizer if you experience headaches.Avoid using the device for long periods with the volume too loud as this can lead to irreversible hearing damage in extreme cases. Con-sult a doctor if required.Some people can experience epileptic fits or conditions affecting consciousness when exposed to certain flashing or lighting effects - this may also occur when using the device.Even those whose medical histories show no sign of epilepsy and who have never had epileptic fits can also be affected. If, when exposed to flashlight effects, you or a family member have ever experienced symptoms which are potentially linked to epilepsy (such as fits and situations a ffecting consciousness), please consult your doctor before using the c inemizer. If you experience symp-16toms such as d izziness, impaired vision, twitching of eyes or mus-cles, loss of consciousness, disorientation, any kind of involuntary movement or cramp while using a computer or video game, switchoff the device immediately and consult a doctor before re-using the video glasses.The video glasses shield you from your environment during use; therefore, you should only use them when you feel completely safe within your environment and do not need to react to events from outside. Never wear the video glasses in situations that require your attention, such as walking or driving.To prevent accidents, ensure that the cable from the display deviceto the video glasses does not create a hazard. Do not drop the video glasses. Do not pry open, bend or shatter the glasses. Do not throw the video glasses into a fire and do not insert anything into the device.Avoid touching the optical surfaces of the video glasses and protect them from fingerprints, dirt and dust. As with conventional televi-sion sets, please ensure children are supervised when using the device. Ensure that the device is not used excessively and that breaks are taken at regular intervals.Keep the cinemizer and its accessories away from children under the age of 5 as they can swallow the nose pad or adapters, or be-come entangled in the cables, resulting in accidents, injuries or life-threatening situations!Excessive volume from headphones can damage your hearing.Storage and transportationOnly use the video glasses in a temperature range of 5ºC to 35ºC (41°F - 95°F). The battery life can be shortened temporarily in low temperatures. When using the glasses in temperatures over 35°C (95°F), the risk of persistence increased when images do not change regularly. Only store the video glasses at a tempera-ture range of -20ºC to 60ºC (-4°F - 140°F). Never leave the video17glasses in a parked car because the temperature can rise beyond this range. K eep to the ambient conditions for storing and trans-porting and avoid temperature and humidity fluctuations.Do not allow the video glasses to come into contact with liquids as they are neither splash-proof nor waterproof. Never use them in the rain or in damp environments. If the video glasses are exposed to moisture, switch them off and disconnect them from the display device. Allow the device to fully dry before switching on again. Do not attempt to use an external heat source to dry the video glasses, such as a microwave oven or hairdryer.RepairsNever perform modifications yourself to the video glasses or ac-cessories. Disassembling the cinemizer glasses or battery box may lead to damage that is not covered by the warranty. For repair work, please contact the cinemizer support team./cinemizer/support.Battery(Li-ion 3.7V 1100mAh 4.1Wh) The battery in the device is rechargeable. Only charge the battery in the operating temperature range specified above (and not next to fire or in intense sunshine). Only use a charging adapter that conforms to the specification. The battery may only be replaced by an authorized store. Standard commercially available batteries must not be used. Do not connect the battery terminals because this presents a risk of short-circuit.Cleaning the cinemizer multimedia video glassesBefore cleaning, switch off the video glasses and disconnect the videocable or adapter from the battery box. Please only clean the video glasses with Carl Zeiss cleaning wipes. Use a clean microfiber cloth for all surfaces (as used for normal glasses). Ensure there are no dust particles on the viewing windows when cleaning them.1819Approval regulations for Europe Video glasses leave the factory in perfect condi t ion as regards safety. They satisfy electromagnetic compatibility requirements as stipulated in Directive 2004/108/EC and bear the CE label. The device may switch off automatically under the effects of electro-static discharge. The device may be re-used after being switched on again.Approval regulations for Korea 이 기기는 가정용(B급) 전자파적합기기로서 주로 가정에서 사용하는 것을 목적으로 하며, 모든 지역에서 사용할 수 있습니다.This equipment is home use (Class B) electromagnetic wave suit-able equipment and to be used mainly at home. It can also be used in all areas.Approval regulations for Turkey EEE Yönetmeliği‘ne uygundur.Approval regulations for USA and Canada This device satisfies Part 15 of the FCC provisions and meets all requirements laid down in Canadian regulations for interference-causing equipment (ICES-003 B). The thresholds should guarantee adequate protection from interference when operated in residential neighborhoods.This device generates and uses high-frequency energy and can emit it. Not installing or using the device as specified in the operating instructions may result in interference with radio and television re-ception. No guarantee can be provided that there is no inter f erence at a particular installation. If the device causes interference in radio or television reception (this can be tested by switching the device on and off), the user can try to rectify the situation by doing one or more of the following:20- moving or re-aligning the reception antenna - increasing the distance between the device and receiver - plugging the device into a socket which is not on the same circuit as the receiver - contacting the retailer or an experienced radio/television technician for more recommendationsCarl Zeiss AG accepts no responsibility for interference in radio/tele v ision reception caused by non-approved modifications to this device or as a result of using cables or accessories other than those specified by Carl Zeiss AG. The user is responsible for the rectification of malfunctions arising from non-authorized modifica-tions or connections.The use of shielded I/O cables is a requirement if this device is c onnected to optional peripheral equipment or a host computer. Failure to comply may represent a breach of FCC and ICES regula-tions.China ROHSDisposal Do not throw out your video glasses in the household garbage – they must be disposed of (and accessories) in accordance with the regulations applicable for your country. Please contact your localauthority for more information on disposal and recycling.21Warranty The statutory warranty period of 24 months is offered with the product within the EU. 6 months is offered in the USA. This may vary from country to country.Never perform modifications by yourself to the video glasses, bat-tery box or accessories. Any problems or damages caused by modi-fications or opening the glasses, the battery box or accessories will not be covered by the warranty. The warranty does not cover the weakening of the recharable battery.Please read the online help (/cinemizer/support ) be-fore claiming under the terms of the warranty. If you then still have a question please contact the c inemizer support team at /cinemizer/support The HDMI ® Logo, and High-Definition Multimedia Inter f ace are trademarks or registered trademarks of HDMI ® Licensing LLC in the United States and other countries.iPhone and iPod are trademarks of Apple Inc., registered in the U.S. and other countries.“Made for iPod” and “Made for iPhone” mean that an electronic accessory has been designed to connect specifically to iPod or iPhone, respectively, and has been certified by the developer to meet Apple performance standards. Apple is not responsible for the operation of this device or its compliance with safety and regu-latory standards. Please note that the use of this accessory with iPod or iPhone may affect wireless performance.© Copyright Carl Zeiss AG 2013cinemizer ® is a registered trademark of Carl Zeiss Designed by Carl Zeiss Germany Made in China ®Carl Zeiss AG Carl-Zeiss-Straße 22 73447 OberkochenGermany /cinemizer。
ALIENWARE M11x MOBILE手册说明书

注、小心和告
注:“注”表示帮助您更好地使用计算机的重要信息。 小心:“小心”表示潜在的硬件损坏或数据丢失并告诉您如何避免此类问题。
警告:“警告”表示潜在的资产损坏、人身伤害或死亡。
__________________ 此处内容如有更改,恕不另行通知。 © 2011 Dell Inc. 保留所有权利。 未经 Dell Inc. 事先书面许可,严禁以任何方式复制这些材料。 本手册中使用的商标:Alienware®、AlienFX® 以及 AlienHead 徽标是 Alienware Corporation 的商标或注册商 标;Dell™是 Dell Inc.的商标;Microsoft®、Windows® 和 Windows 开始按钮徽标 是 Microsoft Corporation 在 美国和/或其他国家或地区的商标或注册商标;Intel® 以及 SpeedStep® 是 Intel Corporation 在美国和其他国家 或地区的注册商标,Core™是 Intel Corporation 在美国和其他国家或地区的商标;Blu‑ray Disc™是 Blu‑ray Disc Association 的商标;Bluetooth® 是 Bluetooth SIG, Inc. 拥有的注册商标。 本手册中所述及的其它商标和商品名称是指拥有相应商标和商品名称的公司或其产品。Dell Inc. 对不属于自己的商 标和商品名称不拥有任何所有权。 管制型号:P06T 管制类型:P06T003 Rev. A01 2011 - 05
3
目錄
第 3 章:使用膝上型计算机 . . . . . . . . . . . . . . . . . . . . . . . . . . . . . . . . . . . . . . . . . . . . . . . . . . . . . . . . . . . 37 Alienware 命令中心 . . . . . . . . . . . . . . . . . . . . . . . . . . . . . . . . . . . . . . . . . . . . . . . . . . . . . . . . . . . . . . 38 FastAccess 人脸识别(可选) . . . . . . . . . . . . . . . . . . . . . . . . . . . . . . . . . . . . . . . . . . . . . . . . . . . . . 42 电池组 . . . . . . . . . . . . . . . . . . . . . . . . . . . . . . . . . . . . . . . . . . . . . . . . . . . . . . . . . . . . . . . . . . . . . . . . . . . 42 使用无线控制功能 . . . . . . . . . . . . . . . . . . . . . . . . . . . . . . . . . . . . . . . . . . . . . . . . . . . . . . . . . . . . . . . . 44 电源管理 . . . . . . . . . . . . . . . . . . . . . . . . . . . . . . . . . . . . . . . . . . . . . . . . . . . . . . . . . . . . . . . . . . . . . . . . . 45 NVIDIA Optimus 技术 . . . . . . . . . . . . . . . . . . . . . . . . . . . . . . . . . . . . . . . . . . . . . . . . . . . . . . . . . . . . . 47 配置 BIOS . . . . . . . . . . . . . . . . . . . . . . . . . . . . . . . . . . . . . . . . . . . . . . . . . . . . . . . . . . . . . . . . . . . . . . . . 49
Cineroid EVF4RVW 电子查看器说明书
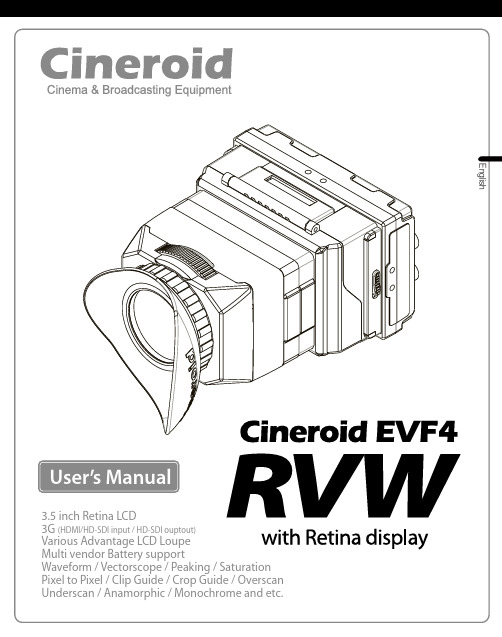
Thank you for purchasing the Cineroid EVF.The Cineroid EVF (hereafter referred to as “EVF") is a view finder that can be mounted on any video camera with a HDMI output signal. Please thoroughly read the user manual for best operation and understanding of all of the functions of the EVF.Test Before OperatingIt is recommended to test the EVF before operating. Check if the EVF can be turned on once powered, and check if the information/menu is being properly displayed on the LCD.Copyrights and ProhibitionsThe use of images of people, property, and places can without permission can be prohibited by law. Please refer to your region’s laws regarding copyrights.02○ Canon and EOS are registered trademarks of Canon.○ Nikon is a registered trademark of Nikon.○ Sony is a registered trademark of Sony.○ Panasonic is a registered trademark of Panasonic.1. Do not face the eyecup directly into the sun as it may damage the LCD.2. The shadow disk is installed on EVF at factory. This shadow disk can be removed by disassembling eyecup from loupe.EnglishSafety Precautions◎ Do not use any batteries, power cord, or accessories that are not specified in this document.◎ When using a power cord, be sure to plug it in completely. Do not handle power plugswhen your hands are wet. When unplugging the power cord, grasp the plug body or adapter instead of the cord.◎ Power cords that are scratched, heavily bent or twisted can potentially be hazardous and a source of electric shock and/or fire.◎ Do not insert foreign objects into the product’s electric or cable components.◎ Do not place the power cord near sources of heat as this may melt or cause damage to the cord potentially causing fire or electric shock.◎ Do not disassemble or modify the product. This may damage the product and cause danger due to a malfunction.◎ Please keep the product out of reach of young children. Injuries may occur due to damage to the product.◎ When using the product in an airplane or hospital setting, it is recommended to acquireauthorization first as signals or electro-magnetic waves from the product may cause other equipment to malfunction.◎ Do not store the product in a dusty or humid environment as damage may occur.◎ When the product is mounted on a camera, do not lift or move the camera by grabbing the product. This may cause damage to the product or the camera mount.◎ Do not clean the product with paint thinner, benzene, or other volatile solvents. This may cause damage to the product and become a fire hazard.◎ This product is not waterproof. If the product is dropped in water, contact the servicecenter immediately.Please observe the following safety precautions as they are meant for the safe and proper use of the product to reduce the risk of accidents. Upon reading the user manual, keep it in a safe and available place.03Table of ContentsSafety PrecautionsTable of ContentsComponentsPartsBefore Using the EVFOpenable Optical LoupeHood for LoupeSeparate of LoupeAdjusting the Diopter / Connecting Extention Tube Installing the BatteryConnecting External PowerConnecting input / outputPower On/OffBasic FeaturesOperating the MenuAdjusting ColorAdjusting the ScreenVolume Control 03 04 06 07 08 08 09 09 10 10 11 1112 13 13 1304EnglishShooting Features Peaking Pixel to Pixel Clip guideWaveform / Vectorscope False color 1 False color 2 Monochrome Look up table FreezeOver Scaling Underscan Crop Guide Anamorphic Center Marker Time Code Screen FlipSetting User Controls Custom Button Functions Firmware UpgradeCustom Display Settings Parameter Save And Restore Factory ResetProduct Specifications Optional Products051415151617172020212518212323251919242418222224ComponentsPlease ensure all parts are present after opening the box.06EnglishParts 0708Openable Optical LoupeHood for LoupeThe optical loupe attached to the EVF body can beflipped open 180 degrees.English09Separate of Loupecompletely.When viewing through the optical loupe, the user can adjust the diopter accordingly. Rotate the dial in either direction until the image becomes clear. and Extention tube is used toextend loupe length for old eye.Adjusting the Diopter / Connecting Extension tube1 Touch Removealbe10Connecting External PowerDC in 6~17VProper voltage for external power is 6-17V.Attention to the connecting polarities and voltage, otherwise the connectors may be damaged.When both external power and battery is connected, battery is not consumed.Before Using the EVF Connecting input / outputOperating the Menu3. to access that feature.EnglishPeakingOn/Off : Menu - Control1 - Peaking Setting : Menu - Setting1 - PeakingPeaking Red ONPeaking Red OFF Peaking On / OffPeaking SettingTo activate the peaking feature, simply press the F1 button on the left side of theEVF body. The peaking will show in the mode that is currently selected.Simple Peaking Button*Peaking Sharpness OFF Peaking Sharpness ONEnglishPixel to pixelOn/Off : Menu - Control1 - Pixel to PixelPixel to Pixel Off Pixel to Pixel OnPixel to Pixel Off Clip GuideOn/Off : Menu - Control1 - Clip Guide Setting : Menu - Setting1 - Clip GuideClip Guide Off Clip Guide Color mode Clip Guide Zebra modeClip Guide On / Off Clip Guide SettingPixel to Pixel OnWaveform / VectorscopeOn/Off : Menu - Control1 - Waveform Setting : Menu - Setting1 - WaveformStyle 1. Only horizontal waveform withimage croppingWaveform OFFStyle 2. Horizontal and vertical waveform with small vectorscope Style 3. Horizontal and vertical waveform with big vectorscopeWaveform On / OffWaveform Setting T o c h a n g e t h e w a v e f o r m s t y l e,s i m p l y s c r o l lthe wheel button on the left side of the cineroidE V F4R V W's b o d y.T h e w a v e f o r m s t y l e w i l ls h o w i n t h e m o d e t h a t i s c u r r e n t l y s e l e c t e d.Simple change waveform style*False Color2 Off False Color2 OnLook up tableOn/Off : Menu - Control1 - Look up tableLook up table Off(The image applied adjusting color)Look up table OffLook up table On(Original image)Monochrome (B /W, Blue, Red, Green)On/Off : Menu - Control1 - Monochrome Setting : Menu - Setting1 - MonochromeMonochrome On / Off Monochrome SettingMonochrome (B/W) OffMonochrome (B/W) OnFreezeOn/Off : Menu - Control1 - FreezeEnglish Freeze Off Freeze OnFreeze Off Freeze OnCrop guideOn/Off : Menu - Control2 - Crop Guide Setting : Menu - Setting1 - Crop GuideCrop guide Off Crop guide OnCrop guide On / Off Crop guide SettingUnderscanOn/Off : Menu - Control2 - UnderscanUnderscan Off Underscan OnUnderscan Off Underscan OnEnglish21Shooting FeaturesCenter MarkerOn/Off : Menu - Control2 - Center MarkerCenter Marker Off Center Marker Off Center Marker OnCenter Marker OnAnamorphicOn/Off : Menu - Control2 - Anamorphic Setting : Menu - Setting1 - AnamorphicAnamorphic Off Anamorphic OnAnamorphic On / Off Anamorphic SettingTime CodeOn/Off : Menu - Control2 - Time CodeTime code Off Time Code OnTime Code On / Off Time Code Setting22TC 01:22:34EnglishCustom Button FunctionsSetting : Menu - Setting2 - Key AllocationThe left side of the EVF body contains the buttons F1, F2, F3, F4. The factory default forFirmware Upgrade1. Firmware is upgradable by special cable.2. Connect EVF and computer by cable.3. Select On of Firmware Upgrade. The screen is changed to waiting message.4. EVF starts firmware upgrade.Setting User ControlsControl1 Control2 Setting1 Setting2 System ExitF1-Back / Exit Firmware Upgrade set V01.03Input Select Parameter Save Parameter Restore Firmware Exit Upgrade Cancel23Setting User ControlsCustom Display SettingsSetting : Menu - Setting1 - AnamorphicYou can select to view the current state of the battery usage, volume, etc. on the LCD.Factory reset1. Powering on the EVF while pressing down the F1 button will reset the EVF to its original default settings.2. Once the reset is complete, fully power off the EVF before powering on for further use.Parameter save and restoreSetting : Menu - System - Parameter Save/RestoreThe all parameters of function can be stored on bank0 or bank1. The parameters can be restored from bank0 or bank1. Factory is the initial parameter of factory.Parameter Save Parameter Restore24Peaking ONOSD Pixel to Pixel ONEnglishProduct Specifications25Optional Product2627Seculine Co., LTD.Tel +82.70.4347.4901 / Fax +82.2.850.3027Rm.510, Kolon Science Valley #2, Guro-dong, 811, Guro-gu, Seoul, 152-728, Korea Homepage E-mail *******************Printed in KoreaEVF1.0We will strive to create the best products andprovide superb service.。
ZEISS Cinemizer 3D视讯眼镜说明书

Safety and HandlingFor detailed information pleaserefer to the cinemizer user manualat /cinemizerPlease also see the section“Safety and Handling”.cinemizer: Overview 2Video glasses3 Battery Box• Mini-USB port for charging cinemizer and iPod/iPhone • AV-In plug 3,5mm for DVD player and mobile phone connection• Mode LEDs for 2D/3D-mode indication• Multi-function switch for video mode,contrast/brightness and volume• Power On/Off + test picture• 3,5 mm stereo headphone plug• Reset button to reset video glasses• Approx. 4 hours battery life when fully charged• Charging time: minimum 2.5 hours4iPod Clips and iPod ConnectorFit the appropriate clip for your iPodLatch your iPod to the connector on the battery box.You can connect other playback devices via the AV-In port using a separate cable* (not included). This will only work if an iPod is not connected.* See page 10iPod is not charged simultaneously. Otherwise, shortly press the power on/off button.Wait until the red mode-LED stops blinking (authorization process).Start your video.Using cinemizer5The cinemizer offers diopter adjustment for each eye separately (+/–3.5 D). Turn the adjustment wheel until the picture is sharply focused. While adjusting the sharpness for one eye, keep the other eye closed.A test picture is offered by pressing the power on/off button for more than 5 seconds.No astigmatism correction is performed.67To reach best possible wearing comfort, there are 3 options how to connect the nose pad:a) nose pad without adapterb) nose pad with adapter Ac) nose pad with adapter B8Adjust the inclination and length of each earphone to fit each ear.After putting on the video glasses:Slide the earpieces to the desired position.Earphone9(<1 sec.) the multi-function switch.3 pre-configured profiles are available.Select and start a video on your iPod.10Listen to and watch your videos responsibly.Made for iPod touch, iPod classic, iPod withVideo and iPod nano (3rd and 4th generation).Works with iPhone, iPhone 3G.To get connected with multimedia player, DVDplayer or multimedia mobile phone (e.g. NokiaNseries) a specific cable is required, which is notincluded in the delivery package. Compatiblecables are e.g. Archos Video Cabel404/504/604/704 or Creative Zen Vision:M Video Cabel.When buying a cable, be absolutely sure thatthe pin definition is correct:/cinemizer pin1 = GND/Common pin2 = Videopin3 = Audio Right pin4 = Audio LeftSafety and HandlingCaution:Please read the Safety and Handling information in this chap-ter as well as the documentation for the devices that you connect to your cinemizer before using it for the first time to ensure trouble-free use of this high-quality device. Warning:Please observe the warnings to avoid injuries.Note:Please observe the instructions to avoid damaging the cinemizer.Safety and HandlingCaution: Failure to observe the following safety and hand-ling information can lead to electrical damage, damage to system components or injuries.Remove the cinemizer immediately if you get a headache. Avoid using the video glasses for longer periods of time at high audio volumes. In extreme cases, this can lead to irre-parable hearing damage. Consult a physician if necessary.In particular cases, some people may experience epileptic sei-zures or impaired consciousness if they are exposed to certainflashing lights or light effects. These persons could possibly suffer a seizure under such conditions. Even persons with no prior medical history of epilepsy and who have never had an epileptic seizure before may also be affected by this.If you or a family member has ever had symptoms that could possibly be associated with epilepsy (such as seizures or im-paired consciousness) when exposed to flashing lights, please consult your physician before using the cinemizer. If you expe-rience symptoms such as dizziness, impaired vision, twitching eyes or muscles, loss of consciousness, disorientation or any kind of involuntary movements or cramps while using a com-puter or video game, switch off the device immediately and consult a physician before you resume using the video glasses.As with traditional TV viewing, children should use this device under parental guidance. Please prevent excessive use of this device. When children use the cinemizer, we advise usage breaks at regular intervals.The cinemizer and its accessories have to be stored out of reach of small children under 5 years, as they may swallow small parts like the nosepad or adapters or tangle themselves in the cables. This may lead to accidents or injuries.The video glasses isolate you from your immediate surroun-dings while using them. Therefore you should use them onlywhen you feel absolutely secure in your surroundings and do not have to react to external influences. Never wear the video glasses in situations which require your attention, e.g. walking, riding a bike or driving a motorcycle, automobile or other vehicle.Make sure you run the cables from the playback device to the video glasses in a safe manner to avoid accidents.Do not drop the video glasses. Do not use force to open, break or bend the video glasses. Do not throw the video glasses into an open fire and do not insert any objects into the device.Avoid touching the optical surfaces of the video glasses and protect these from fingerprints, dirt and dust.When iPod/iPhone is connected to the battery box and used for longer period of time, heat is generated. However, this warming is within the operating conditions specified by Apple when the iPod with video is in proper working order.Storage and TransportOnly use the video glasses in a temperature range between 5 ºC and 35 ºC / 41°F and 95°F. The battery run time will be temporarily reduced if used at lower temperatures. Store the video glasses in a temperature range between –20 ºC and 45 ºC / -4°F and 113°F.Do not leave the video glasses in a parked vehicle as the temperature may exceed the range. Observe these environ-mental conditions when operating, storing and transporting, and avoid fluctuations in temperature and humidity.Do not allow the video glasses to come into contact with liquids. The video glasses are neither water-resistant nor waterproof. Therefore, do not use in rain or damp environ-ments. Should the video glasses be exposed to moisture, turn them off completely and disconnect them from the playback device. Allow the device to dry completely before turning it on again. Do not attempt to dry the video glasses with an external source of heat, e.g. in a microwave oven or with a hair dryer.RepairNever attempt to repair or tamper with the video glasses or the accessories yourself. Have the video glasses and acces-sories serviced and repaired by an authorized specialist. You can find a list of contacts at: /cinemizer BatteryThe integrated battery is rechargeable. It must be replaced only by an authorized specialist. Standard batteries cannot be used with the cinemizer.Do not connect the poles of the battery as this can cause a shirt circuit. Do not charge the battery at temperatures exceeding the above-mentioned operating temperatures (noteven next to an open fire or under strong solar radiation). Only use a charger that meets the device specifications. Cleaning the cinemizerBefore cleaning the video glasses, be sure to turn off the vi-deo glasses completely and disconnect the cable from the playback device or remove the iPod from the clip on the bat-tery box. Do not clean the video glasses with liquids contai-ning solvents. Use a clean microfiber cleaning cloth for all surfaces as you would for cleaning eyeglasses. Be sure to re-move dust particles from the viewing openings when clea-ning them.Approval regulations for EuropeRegarding safety, this pair of video glasses left the factory in perfect condition. It meets the requirements on electromag-netic compatibility in accordance with directive 2004/108/EC and bears the CE label. The device can turn off by itself as a result of electrostatic discharge. It can be used after turning it on again.Approval regulations for the USA and CanadaThis device complies with Part 15 of the FCC Rules and meets all requirements of the Canadian Interference-Causing Equip-ment Regulations (ICES-003). These limits are designed to provide reasonable protection against harmful interference in a residential installation. This devise generates, uses and can radiate radio frequency energy and, if not installed and used in accordance with the instructions, may cause harmfulinterference to radio communications. However, there is no guarantee that interference will not occur in a particular in-stallation. If this devise does cause harmful interference to radio or television reception, which can be determined by turning the devise on and off, the user is encouraged to try to correct the interference by one or more of the following measures:– R eorient or relocate the receiving antenna.– I ncrease the separation between the devise and the receiver.– C onnect the devise into an outlet on a circuit different from that to which the receiver is connected.– Consult the dealer or an experienced radio/T.V. technician for help.Carl Zeiss AG is not responsible for any radio or television interference caused by unauthorized modifications of this devise or the substitution or attachment of connecting cables and equipment other than those specified by Carl Zeiss AG. The correction of interference caused by such unauthorized modification, substitution or attachment will be the responsi-bility of the user.The use of shielded I/O cables is required when connecting this devise to any and all optional peripheral or host devices. Failure to do so may violate FCC and ICES rules.DisposalDispose of the video glasses with accessories properly accor-ding to the legal requirements for electronic devices in your country. Do not dispose of in household waste. You can learn more about the proper disposal and recycling options available from your local public authorities.WarrantyThis product is subject to the legal warranty requirements of 24 months applicable in the EU and 6 months for the USA. There is a 6-month warranty on the battery. This can vary from country to country.Made for iPod touch, iPod classic, iPod with video and iPod nano (3rd and 4th generation). Works with iPhone and iPhone 3G. Multimedia player, DVD player and multimedia mobile phones are also supported (optional cable required*).* see page 1019“Made for iPod” logo means that an electro-nic accessory has been designed to connectto an iPod and has been certified by the de-veloper to meet Apple performance standards. Apple is not responsible for the operation of this device or its compliance with safety and regulatory standards. iPod is a trademark of Apple Inc., registered in the U.S. and other countries.iPhone is a trademark of Apple Inc.© Copyright Carl Zeiss AG 2009cinemizer ® is a registered trademark of Carl Zeiss Designed by Carl Zeiss GermanyCarl Zeiss AGCarl-Zeiss-Straße 2273447 Oberkochen/cinemizer。
华硕(ASUS) H2W2GR1 equIP Series Cameras 用户手册说明书

14256IR IP Pancake CameraH2W2GR1equIP Series CamerasReset/WPSMicro SD12673Invisible LED radiation (850 nm). Avoid exposure to beam.Cautions and Warnings132H2W2GR112341x512346****************H2W2GR1Regulatory StatementsNote Changes or modifications not expressly approved by the party responsible for compliance could void the user's authority to operate the equipment.This Class A digital apparatus complies with Canadian ICES-003.FCC Statement of ComplianceManufacturer's Declaration of ConformanceWaste Electrical and Electronic Equipment (WEEE)Correct Disposal of this Product (applicable in the European Union and other European countries with separate collection systems).Important Safeguards• Read and keep these instructions.• Please en sure that your installation area can safely support the weight of the camera.• Do not aim the camera to ward a bright light source for extended periods to preventdamage to the imager. Avoid operating the unit under or close to unstable light sources (may cause flickering), or close to fluorescent lamps or objects reflecting light.• Do not touch the camera lens.• Do not drop the camera or subject it to physical shock.• Do not use a strong or abrasive detergent when cleaning the camera.• Avoid operating or storing the unit in extremely humid, dusty, hot/cold environments, where the operating temperature is outside the recommended range of -22°F to 140°F (-30°C to 60°C).• Avoid operating the unit close to sources of powe rful electromagnetic radiation, such as radio or TV transmitters.The manufacturer declares that the equipment supplied with this guide is compliantwith the European Parliament and Council Directive on the Restrictions of the use of certain hazardous substances in electrical and electronic equipment (2011/65/EU), General Product Safety Directive (2001/95/EC), and the essential requirements of the EMCDirective (2014/30/EU), conforming to the requirements of standards EN 55032 for emissions, EN 50130-4 for immunity, and EN 60950-1 for electrical equipment safety.Information to the User: This equipment has been tested and found to comply with the limits for a Class A digital device, pursuant to part 15 of the FCC Rules. These limits are designed to provide reasonable protection against harmful interference when the equipment is operated in a commercial environment. This equipment generates, uses, and can radiate radio frequency energy and, if not installed and used in accordance with the instruction manual, may cause harmful interference to radio communications. Operation of this equipment in a residential area is likely to cause harmful interference in which case the user will be required to correct the interference at his own expense.This product should be disposed of, at the end of its useful life, as per applicable local laws, regulations, and procedures.Manufacturer's Name and AddressHoneywell Security(China) Co., Ltd.Building 21, 22, 28, Section 2, Huaide Cuigang Industrial Estate,Fuyong, Bao’an District, ShenZhen, China.+1 800 323 4576 (North America only)https:///ss/techsupp/index.htmlDocument 800-24078 – Rev A – 02/2018© 2018 Honeywell International Inc. All rights reserved. No part of this publication may be reproduced by any means without written permission from Honeywell. The information in this publication is believed to be accurate in all respects. However, Honeywell cannot assumeresponsibility for any consequences resulting from the use thereof. The information contained herein is subject to change without notice. Revisions or new editions to this publication may be issued to incorporate such changes. For patent information, see /patents./securityTHIS SYMBOL INDICATES THAT DANGEROUS VOLTAGE CONSTITUTING A RISK OFELECTRIC SHOCK IS PRESENT WITHIN THE UNIT.THIS SYMBOL INDICATES THAT IMPORTANT OPERATING AND MAINTENANCE INSTRUCTIONS ACCOMPANY THIS UNIT.CAUTION: TO REDUCE THE RISK OFELECTRIC SHOCK, DO NOT REMOVE COVER(OR BACK).NO USER SERVICEABLE PARTS INSIDE.REFER SERVICING TO QUALIFIED SERVICEPERSONNEL.WARNING To ensure compliance with electrical safety standards,CSA Certified/UL Listed LPS or Class 2 power adapters are required. Power over Ethernet (PoE) shall be provided by listed InformationTechnology Equipment meeting the IEEE 802.3af PoE standard. The PoE is not intended to be connected to exposed (outside plant) networks.CautionCaution This is a Class A product. In a domestic environment this product may cause radio interference in which case the user may be required to take adequate measures.。
天地伟业卫士系列网络摄像机硬件用户手册
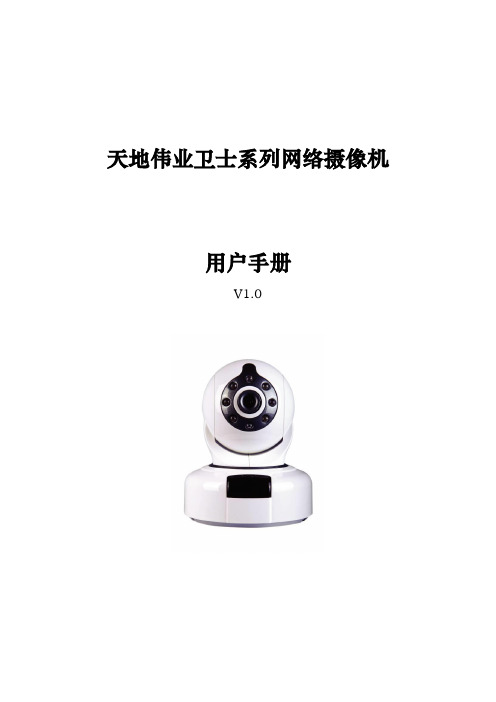
天地伟业卫士系列网络摄像机用户手册V1.0重要声明一、感谢您选用由天津天地伟业数码科技有限公司出品的卫士系列网络摄像机产品。
使用本产品之前,请认真阅读本使用手册。
在您开始使用此产品时,天地伟业数码科技有限公司将认为您已经阅读过本产品使用手册。
二、本手册所涵盖的内容均参考此使用手册编写时最新的消息,当涉及的内容发生改变时,恕不另行通知。
侵犯版权警告一、卫士系列网络摄像机产品的使用方式不得触犯或侵害国际与国内之法律和法规。
一旦因使用不当而发生触犯或侵犯国际和国家法律及法规的行为,天地伟业数码科技有限公司将不为此负担任何民事和刑事责任。
二、请注意,即使摄录的视频仅供个人使用,在某些情况下使用该摄像机复制表演、展览或商业资产的图像,仍有可能侵犯版权或其他法律权益。
警告事项本品仅限室内(温度-20℃-60℃、湿度10%-90%)使用,电源适配器只限工作于AC 90V-264V 50/60HZ交流电源下。
如在此范围之外工作,有可能引起设备工作不正常甚至损坏设备。
本产品不适合于在强磁环境下使用,如使用需采用可靠的第三方防磁设备保护。
请使用随机附件中的电源适配器,选用其他电源可能带来故障。
请勿将摄像头正对阳光或者强烈光线,有可能导致图像失真或者损坏图像传感器。
请将此器材存放于儿童及婴儿触及不到的地方,若遇意外损坏,可能导致身体损伤,如:破损的外壳可能导致皮肤划伤,SD卡可能导致意外吞食。
请勿试图拆开或改装本指南没有说明的任何部分,请勿让器材触及、浸入水或液体。
如果外壳接触到液体或盐分空气,请用吸水软布擦干外壳。
请勿使用酒精、汽油、稀释剂、或其他易燃物质清洁或护理本器材。
请勿切割、损坏、改装电线或放置重物于电线上。
如双手潮湿,请勿接触本产品及附属电源线路。
采用壁装或吊装方式安装本产品时,请确保支架安装牢固,以免发生意外事故。
长期不使用本产品时,应切断产品的电源将产品妥善包装,并采取必要的防潮措施。
目录一、产品概述 (2)二、产品外观 (2)三、技术参数 (3)四、使用指南 (5)4.1 工作环境 (5)4.2 产品接口 (6)4.3 设备连接 (7)4.4 网页插件安装 (8)4.5 网页管理 (8)一、产品概述天地伟业卫士系列网络摄像机是基于最新的H.264视频压缩技术开发的新一代个人及家庭视频监控产品,天地伟业卫士系列网络摄像机采用高性能ASIC核心处理芯片,具备强劲的视频压缩处理能力,与市场上大部分的民用摄像机只能在ADSL下提供每秒5-7帧的M-JPEG图像相比,天地伟业卫士系列网络摄像机采用最先进的H.264压缩算法,可以实现高清分辨率下每秒25帧的全实时流畅传输。
变色龙工作站使用说明书

变色龙工作站使用说明书之南宫帮珍创作创作时间:二零二一年六月三十日1. 开机及设定:翻开仪器电源, 启动电脑在电脑右下脚, 呈现灰色变色龙图标, 如下图:如果没呈现上图灰色变色龙图标则按如下把持, 点开电脑左下脚“开始”、点“法式”选择“chromleon”下的“Server monitor”呈现如下对话框:点上图中“start”键启动后关闭, 则电脑右下脚托盘区, 呈现灰色变色龙图标, 如下图:即可双击桌面上快捷方式“”进入工作站:点击上述图中绿色变色龙图标(即根目录):右边即呈现根目录内的内容, 最下面为仪器的控制面板, 双击翻开:左边为泵的控制区, 在“Flow”下输入流速, 在“%B”“%C”“%D”内输入比例,右边为检测器控制区, 点击“Lamp on”前的方框, 开灯,三分钟后可以收集基线, 点击快捷栏蓝色圆点呈现如下对话框:在需要收集的通道前打勾, 分别点“UV_VIS_1”、“UV_VIS_2”、“UV_VIS_3”、“UV_VIS_4”在“Wavelength”内输入波长:即可收集.2.单针进样:待基线平稳后, 点停止收集, 点击快捷栏内的,输入进样体积, “OK”, 再点击收集, 进样即可, 待所有峰出完后, 在再点击如果需要保管, 在“Save to sequence”前打勾, 选择保管路径保管.3.批进样:a.新建文件夹:点击快捷栏内的“Browser”, 回到根目录, 点击绿色根目录,点“File”选择“New directory”:输入文件夹名称, 如为“XXX”.注:可输中文.“OK”.B.新建法式文件:左击文件夹“XXX”,点“File”选择“New”:呈现如下对话框:选择“Program File”,“OK”:“下一步”,分别输入A、B、C、D的比例和总的流速.“下一步”,设定收集时间和所需收集的信号通道, “下一步”,输入波长, “下一步”, “下一步”, 分别输入波长, 直至:下一步,完成:在此可以更改各项参数, 然后点右键, 选择“Check”,确定, 后点快捷键保管:选择路径“XXX”, 输入名称, 如:“XXX”保管后关闭, C.建方法文件:左击文件夹“XXX”,点“File”选择“New”:呈现如下对话框:选择“Method File”,“OK”,点“File”, 点“Save As”:呈现如下对话框:选择路径“XXX”, 输入名称, 如:“XXX”保管后关闭, D.建进样序列:左击文件夹“XXX”,点“File”选择“New”:呈现如下对话框:选择“Sequence (using wizard)”,“OK”,下一步,下一步,未知样品设定, 如果没有未知样品如下图, 选择“No unknows”然后只能“下一步”, 有则选“Use template(用模板)”,在“Template for Sample Name:”下输入样品名, 如“测试”, 后缀进样序号“#n”、样品位置“#p”、每个样品重复进样次数“#r”, 以下依次是“样品数量”、“每个样品进样次数”、“开始位置”、“进样体积”, 点“Apply”, 下一步,标准样品设定同未知样品, 下一步,由上至下点击“Browse...”:找到文件夹, 双击, 如“XXX”, 如下:选择法式文件, 如“XXX”, “Open”,下一个“Browse...”,选择方法文件, 如“XXX”, “Open”,下一步,在“Seqence Name”下输入名称如“测试”, 点“Browse...”选择保管路径.下一步, Done点击快捷,用“Remove”移去不需要执行的序列, 用“Add”添加需要执行的序列“Seqence”,选择需要执行的序列, “Open”,“Start”, 依次第列顺序进样.4.定量方法编纂待进样结束后, 双击“Seqence”内部上方的方法文件如“”进入如下界面,点下方“Detection”如上图红色箭头, 在上方表格区域, 设定积分参数, 通常使用参数如上图, “”下是时间, 及积分参数生效时间, “”下是参数名称, 可选择积分参数, 可点红色区下拉选择, 如图:也可双击红色区, 如下图, 呈现右边对话框:可在绿色区选择积分参数后“OK”, 如需更多参数, 可在表格区点右键, 如图:点“Line”, 选择“Insert Line”(在该行前增加一行), 点“Append Line”(在最后增加一行), “Delete Line”(删除该行), 增加一行后, 参数选择同上.“Detection”设定结束后, 点“Peak Table”如图:点右键, 如下图,选择“Autogenerate Peak Table”, 呈现:“OK”,“确定”在黑色箭头区输入“”如果年夜于0.1不用改, 双击红色箭头区, 呈现上图对话框, 由上至下, 分别是“External(外标法)”、“Internal(内标法)”、“External/ Internal(内外标法)”、“Use this peak as Internal Standard(确定内标峰)”, 若是外标法, 选“External”“OK”即可, 若是内标法, 先在对应内标峰栏内选“Use this peak as Internal Standard”, 后再在主峰栏内选择“Internal”“OK”即可,双击箭头区,呈现上述对话框, 通经常使用峰面积计算, 选择“Area”, “OK”双击箭头区, 呈现右边对话框, 单点校正选择“Linear(LIN)过零点”, 多点校正选择“Linear with Offset(LOFF)有截距”, “OK”.点下图红色箭头区“Amount Table”, 点右键, 选择“Columns”选择“Edit Amount Column...”呈现下面对话框,点红色箭头位置下拉菜单,选择黑色箭头“Name”, 点红色箭头, “Auto-Generate”选择第一行“Generate a separate amount column for EACH standard”后点“Apply”,“OK”.在红色区输入对比品浓度, 点红色箭头保管.点黑色箭头“Browser”回到根目录,在红色区域输入未知样品称样量, 在黑色区域输入未知样品稀释倍数.双击任何一个样品看结果:红色区域自左至右依次是:积分结果、校正曲线结果、峰分析结果(即系统适用性)、“Summary”为综合结果.点红色箭头区打印陈说:红色区为各类陈说.。
CineEye 2S Pro 双频无线视频传输系统用户手册说明书
CineEye 2S ProUser Manualv1.0Transmitter x1Receiver x1User manual x1Antenna x9Hot/Cold shoe mount adapter x2In the Box1CineEye 2S Pro① 1/4 Screw ② Group Knob ③ Battery Lock ④ Camera Control Interface ⑤ 1.3 Inch OLED⑥ Left Key⑦ Right Key⑧ Menu/OK Key ⑬ Antenna Connector (RP-SMA Male)⑨ Power Button ⑩ SDI In ⑪ HDMI In ⑫ DC Port 2CineEye 2S Pro① 1/4 Screw ② Group Knob ③ Battery Lock ④ Camera Control Interface ⑤ 1.3 Inch OLED⑥ Left Key⑦ Right Key⑧ Menu/OK Key ⑬ Antenna Connector (RP-SMA Male)⑨ Power Button ⑩ SDI Out ⑪ HDMI Out ⑫ DC Port 3Typical Application4Typical Application51. CineEy e 2S Pro uses a group knob to pair the t ransmitterand receiver, both the transmitter and the receiver havea group knob on the side. The transmitter and receiverwill pair automatically if their group knobs are in thesame position (group number is the same), otherwisethey will not pair and cannot communicate .2. If users want to connect more than one receiver to thesame transmitter , set all of the rec eiver’s group numb ersto the same as the transmitter . Up to four receivers canbe paired to the same transmitter.3. If multiple CineEye 2S Pro units are being used in the samearea,each transmitter and receiver pairings needs to havea different group number.Note: If the group setting has changed, please bring the transmitter and receiver in close range, or the pairing may fail. If group setting has changed after power on, the change will take effect after reboot.1. Install the antennas as demonstrated.2. U se the hot/cold shoe mount adapter to in stall the CineEye 2S Proonto the camera or camera cage.3. Use a NP-F970/F750/F550 battery or DC source to powerthe CineEye 2S Pro.4. Connect camera output via HDMI to transmitter HDMI input port.5. Connect receiver to the monitor (monitor not included in this product).①②030201Operation Instructions6Operation Instructions①②③④⑤⑥① Input video info ② Input audio info③ Current group setting④ Battery level/DC input⑤ Connection status ⑥ Current 5G WiFi channel Connection Status:Transmitter: The connection status indicates how many devices are connected, if no d evices are connected the unit will display “0”.Receiver: The connection status will display “1” if the receiver is connected to a transmitter, or will display “0”.Setting steps:Click the “Menu” button to enter “Data Rate Setting” → choosing a data rate mode → click “Menu” button to take effect.③②①① High Quality Mode② Normal Mode (Default setting)③ Speed Mode04057Operation Instructions061. Only the transmitter has the “Channel Setting” menu.2. The default setting is “Auto” which means the transmitter will select a channel withthe least interference automatically after power on.3. If users want to select a channel manually, please follow below steps: Click “Menu”button to enter “Channel Setting” menu->choosing a channel → click “Menu” button to confirm → Choosing “Yes” → Click “Menu” button to reboot the transmitter and the setting will take effect.07Only the transmitter has the “Network Reset” menu. Users can reset the WiFi SSID and password to factory settings by “Network Reset” menu.Setting steps:Click “Menu” button to enter “Network Reset” menu → choosing “Yes” → click “Menu”button to confirm → Choosing “Yes” → Click “Menu” button to reboot, the SSID and password of the 5G WiFi will be reset to factory settings.81. App downloadPlease download the App (Accsoon Go) from the Google Play or iOS App Store.2. Connect the App to the CineEye 2S Pro transmitterLaunch the “Accsoon Go” app and then select “CineEye 2S Pro”, open the WLAN(Wirless/WiFi) settings page of the mobile devices, then choose the CineEy e 2S ProWiFi and connect to it. The name of the CineEye 2S Pro WiFi is “CineEye2Pro_XXXX” and the default password is“12345678”.3. MonitoringReturn to Accsoon Go and ensure CineEye 2S Pro is selected, click “Monitor” to enter the monitoring page and you will be able to monitor the live feed of the camera.Note:CineEye 2S Pro has two WiFi signals, one is 2.4G and another is 5G, the 2.4GW iFi name is “CineEye2-Pro-GroupX”, please don’t connect to this WiFi.1. Firmware downloadMake sure your mobile phone has internet access, then launch “Accsoon Go” and select “CineEye 2S Pro”, Click “Firmware Update”, then the App will check if there is an update. C lick “Download” button to download the firmware if there is an update available.2. UpdateAfter the firmware is downloaded, connect the CineEye 2S Pro receiver to thetransmitter a nd then connect the mobile devices to the transmitter. Go back to the A pp and click “Next” to update.08099Specification 10HDMI Input SDI Input Video OutputVideo InputAudio Antenna Connector Latency OLED Transmission Power Transmission Range Camera Control Power Consumption Operating Temperature Dimensions WeightSDI/HDMI SDI/HDMI 1080p 23.98/24/25/29.97/30/50/59.94/60fps720p 50/59.94/60fps480p 59.94/60fps1080p 23.98/24/25/29.97/30/50/59.94/60fps44.1KHz/48KHz 16bit/24bit PCM4 RP-SMA Male<0.06 seconds(Camera latency not included)1.3 inch OLED17~20dBm1200 feet(no obstacles, no interference)YesNone 4.5 Watt (Typical)5.5 Watt(Typical)-10~40℃125mm×77mm×31mm(Antenna not included )Transmitter 260 gram/Receiver 260 gra m (Antenna not included )Warranty011. If there is a quality problem that occurs within 15 days after receiving th e product,we will provide complimentary maintenance or replacement.2. The warranty period for transmitter and receiver units is one year. With in t he warrantyperiod, if under the usage of instruction manual for any product problem Accsoon will offer repair service for free.3. The accessories and cables warranty period is 3 months.021. Unauthorized maintenance, misuse, impact damage, liquid infiltration, or modification.2. Incorrect use of the product or altering the label and warranty sticker.3. The warranty period has been exceeded.4. Damage due to fire, flood, lightning, etc.03Customer shall contact the local dealer to solve their problem. If t here is no local dealer available,pleasecontactAccsoondirectlyviaemail(*******************)orourwebsite (). You will get detailed information, and Accsoon reserves the right to review the damaged products.11Q&A011.Please make sure the transmitter and receiver have the same group setting.2.Please check that all antennas are tightened well.021.Please ensure the SDI/HDMI cable is plugged into the “SDI/HDMI In" port of thetransmitter.2.Please check if the output format of the camera is compatible w ith theCineEye 2S Pro input formats and check if the camera has video output enabled via the SDI/HDMI port.031.Please check if the antennas are tight.2.Please make sure there is no cable around the antenna.3.Please switch to another channel manually.041.Please check if your mobile devices support 5G WiFi.051.CineEye 2S Pro has two WiFi networks available, one is2.4G and another is 5G,the 2.4G WiFi name is “CineEye2-Pro-GroupX”, please don’t connect to this WiFi. 12Website Facebook YoutubeContact UsMore details about the product please visit This document is subject to change without notice.Accsoon is a trademark of Accsoon Technology Co., Ltd.Copyright 2020 Accsoon. All rights reservedWebsite:E-mail:*********************************************.,Ltd。
THINKWARE F200 用户指南说明书
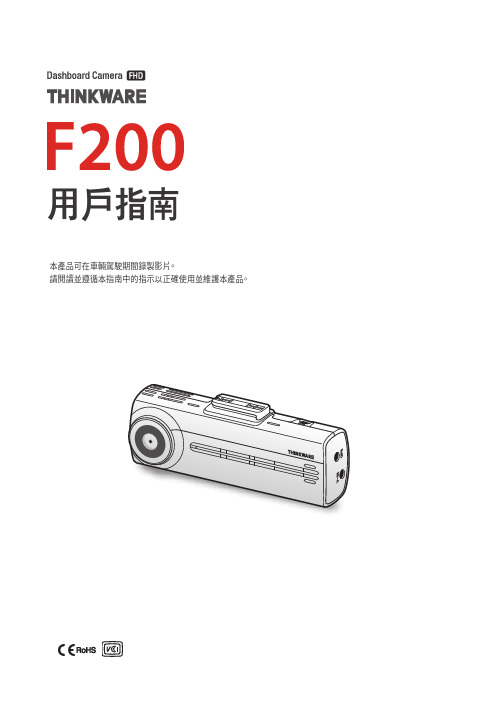
本產品可在車輛駕駛期間錄製影片。
請閱讀並遵循本指南中的指示以正確使用並維護本產品。
用戶指南使用本產品前關於產品本產品可在車輛駕駛期間錄製影片。
本產品僅在調查事故或交通意外時供參考之用。
本產品不保證錄製全部活動及提供雲端服務。
若小碰撞過於輕微而無法啟動碰撞感應器,或者發生意外時碰撞過大,導致車輛電池的電池電壓偏離工作範圍,裝置可能無法正常錄製意外。
產品完全開啟 (啟動) 後影片錄製才會開始。
若要確保錄製全部車輛事件,請等待產品在開啟後完全啟動,然後再開始駕駛車輛。
THINKWARE 不負責交通意外導致的任何損失,亦不負責提供與交通意外的結果相關的任何支援。
視乎車輛的配置或駕駛條件而定,例如安裝遠端門鎖裝置、ECU 設定或 TPMS 設定,可能會不支援部分產品功能,不同的韌體版本可能會影響產品的效能或功能。
關於用戶指南製造商更新其服務政策時,指南中提供的資訊可能會變更。
本用戶指南僅用於 THINKWARE F200 型號,可能含有技術錯誤、編輯錯誤或遺漏資訊。
版權本指南中內容與地區的全部權利由 THINKWARE 保留,而且受到版權法的保護。
未經 THINKWARE 書面同意,禁止擅自複製、修訂、發佈或傳播本指南,否則將受到法律起訴。
註冊商標THINKWARE F200 是 THINKWARE 的註冊商標。
本指南中的其他產品標誌與服務名稱是相關公司的商標。
加拿大工業部輻射暴露聲明本設備符合為非受控環境規定的加拿大工業部輻射暴露聲明限制。
本設備在安裝與操作時應使輻射器與人體之間至少保持 20 厘米的距離。
FCC 聲明本裝置符合 FCC 規則第 15 部分。
操作需遵循以下兩個條件:(1) 本裝置不得導致有害干擾,及 (2) 本裝置必須接受收到的任何干擾,包括可能導致意外操作的干擾。
本設備已經過測試,根據 FCC 規則第 15 部分,發現符合針對 B 類數字裝置的限制。
這些限制旨在提供合理的保護,以防在住宅安裝中出現有害干擾。
亿维网络摄像机用户使用手册

网络摄像机用户使用手册本手册适用于我公司生产的普通网络摄像机、红外网络摄像机、网络半球型摄像机、网络室内匀速球型摄像机、无线网络摄像机。
用户使用手册安全注意说明本机的设计和制造充分考虑了安装人员、操作人员以及辅助设备的安全问题,但不正确的安装和使用也可能引起触电伤人或漏电失火,所以为了确保本机使用安全并且获得满意的性能,在安装本机时,须考虑下述情况:♦在搬运或者移动本机时,请轻拿轻放,以免引起机器内部的接插件接触不良。
请不要在机器上放置重物,以免压坏机器;在通风、干燥(湿度< 85%)的环境中使用本机;♦在常温或低温(0< 环境温度< 55℃)的环境下使用本机,保证环境通风、散热良好;♦普通网络摄像机、网络半球型摄像机使用直流 12V 1A的电源;♦红外网络摄像机、网络红外匀速球使用直流 12V 3A的电源;♦在带电情况下,严禁拔插任何线缆,包括音视频输入/输出线、RS485通讯线、报警输入/输出线、SD 卡等;♦请勿让强电接触到本机的任何部分;♦非专业人员请勿打开摄像机机身,遇到故障时,请与产品供应商联系。
声明本手册可能在某些技术细节方面描述不够准确或存在印刷错误,假如您在使用过程中按照使用手册无法解决问题时,请致电我公司技术部垂询相关操作方法。
本手册的内容将做不定期的更新,恕不另行通知。
装箱清单1.网络摄像机一台2.DC12V电源适配器一只(选配项)3.用户使用手册一本4.随机光盘一张5.合格证以及保修卡一张6.控制以及报警设备接头各产品具体配件可能会有不同,请根据随机的装箱清单进行核对注:本手册亦适合我公司出产的智能网络(红外)匀速球和智能网络(红外)高速球,因安装和结构复杂,本手册只描述这几款产品的软件部分,关于硬件安装和调试请参阅随机的安装说明书。
- 1 -用户使用手册- 2 - 目录系统介绍篇 ...........................................................................错误!未定义书签。
洛雷技术高清安全摄像系统用户指南说明书

VIEW YOUR WORLD IN HDExperience crystal clear 720p video day or night. See double the detail of 960H.Stay connected wherever you go with free Apps and no recurring fees.4/8/13Cameras720P1-2TB HDD4/8/16ChannelsNight Vision130/90FT12X Optical Zoom300°/SEC Panning Speed•High definition 720p recording. Double the resolution of 960H 1 •Real-time recording at 30fps per channel •24/7 security-grade hard drive•Continuous, scheduled and motion recording •H.264 video compression 2•HDMI cable included for simple connection to HD TVs •PTZ cameras supported, remote control through App 1 •Accurate time stamps with NTP & daylight savings time •Click and drag digital zoom in live view and playback •2 video outputs (HDMI & VGA) to connect multiple monitors •Instant USB backup of live video from selected camera •Automatic firmware upgrade •3-Step remote view with FLIR Cloud™ 3 •PC and Mac compatible 4•Free iOS and Android compatible apps 4•Advanced apps with live viewing, playback, video recording, and snap shot •Push notifications of motion events•Instant email alerts with snap shot attachment •Dual streaming to conserve bandwidthDVR FEATURES:CAMERA FEATURES:•High definition 720p 1 megapixel image sensor delivers double the resolution of 960H 1•Crystal clear video with outstanding detail, day or night •Infrared cut filter ensures accurate color representation •Night vision range up to 130ft (40m) in ambient lighting & 90ft (28m) in total darkness 2•Close up recognition in the dark with SmartIR•Anti-glare feature ensures clear images under strong lighting conditions•ClearNight imaging for superior low light performance, improving recording efficiency•Split glass design minimizes IR reflection •Weatherproof for outdoor & indoor installation (IP66 Rated) 3•Extreme temperature performance (-22°F ~ 122°F)•Wide angle 90° field of view•Vandal resistant design with cable pass-through bracket •Lightweight and durable polycarbonate housing •Removable camera base and integrated cable for flexibleinstallation•Versatile ceiling or wall mounting options •Residential and business friendly compact design •60ft BNC/Power extension cable included per camera •Energy-efficient CEC (California Energy Commission) compliant power adapter included•Extend the video signal up to 800ft (242m) with a single-run RG59 coaxial cable for flexible installations 4•High definition 720p image sensor delivers double the resolution of 960H 1 •Crystal clear video with outstanding detail, day or night •Infrared cut filter ensures accurate color representation•Night vision range up to 90ft (28m) in ambient lighting & 130ft (40m) in total darkness 2 •Close up recognition in the dark with SmartIR•ClearNight imaging for superior low light performance, improving recording efficiency •Extreme temperature performance (-22°F ~ 140°F) •Weatherproof for outdoor & indoor installation (IP66 Rated) 3 •Wide angle 90° field of view•Residential and business friendly compact design •3-axis design for wall / ceiling mountingFEATURES:Indoor/outdoor720P ResolutionNight Vision 130/90FTVIEW YOUR WORLD IN HDKeep an eye on your home or business day or night with this high definition HD security camera.•High definition 720p resolution 1.3 MP Sony Exmor® image sensor 1•Powerful 12 x optical zoom and 16 x digital zoom to focus in on even the finest details•Full 360° continuous pan rotation for complete area coverage. Fast 300° per second panning speed •Zoom lens for viewing small or distant objects with enhanced definition •Control PTZ camera movement and transmit video over a single coaxial cable•Program preset viewing points, patterns, scan cycles and tours when connected to a DVR •Remote control of the PTZ camera using a smartphone or tablet (when connected to a DVR)•Day/Night mode: picture automatically switches to B&W delivering better clarity in low light conditions •ClearNight imaging for superior low light performance 2 •Infrared cut filter ensures accurate color representation •High definition video with outstanding detail, day or night •Weatherproof for outdoor & indoor installation (IP66 Rated) 3•Wall mount & 100ft extension cable included for installation flexibilityWeatherproof for outdoor & indoor installation (IP66 Rated) 3 •Wall mount & 100ft extension cable included for installation flexibilityFEATURES:VIEW THE ENTIRE SCENE WITH PAN-TILT-ZOOMView your world in full 360° with advanced pan-tilt-zoom capabilities and exceptional high definition 720p video quality.720 P12XOptical Zoom300°/SECPanning SpeedSYSTEMOperating System Linux (embedded)Pentaplex SimultaneousView, Record, Playback, Backup & Remote Monitoring Number of Channels 4/8/16chINPUTS/OUTPUTSVideo IN 4/8/16 x 1Vp-p, CVBS, 75ohms, BNCVideo OUT NoVGA OUT Y esHDMI Y esAudio IN 1 line IN (RCA) for service only - audio recording not supported Audio OUT 1 line IN (RCA) for service only - audio recording not supported USB Port 1 at the back, 1 at the frontAlarm IN NoneAlarm OUT NoneVideo Output Resolution 1920x1080 HDMI, 1280x1024, 1024x768PTZ control RS-485 Pelco D & P ProtocolDISPLA YLive Display 4 ch: 1, 48 ch: 1, 4, 8, 916 ch: 1, 4, 8, 9, 16Live Display Speed 4 ch: 120 NTSC, 100 P AL8 ch: 240 NTSC, 200 P ALOSD ON/OFFSystem Navigation USB Mouse, IR Remote Controller, Front PanelMotion Area Setting Adjustable grid (22x18)Sensitivity levels 6Firmware Upgrade Automatic over the Internet & via USB device and NetworkUser Authority By user groupTime Synchronization Auto time sync by NTP serverRECORDINGVideo Compression H.264Audio Compression G.711Recording Resolution NTSC:720P (1280x720), 960x480, 704x480, 352X480, 704x240,352x240, 176x120PAL:720P (1280x720), 960x576, 704x576, 352x288, 176x144 Recording Resolution Setting Per camera for different resolutionsRecording Quality Control 5 levelsRecording Schedule By hour, by day, by recording mode, by motion, bychannelPre Recording Max.30 SecsPost Recording Max.5 MinutesReliability W atch-Dog, Auto-recovery after power failureCovert Video Y es PLA YBACKPlayback Channel Single channel or quad playbackPlayback Speed V ariableMax 16xPlayback Players Backup PlayerSearch By time & eventLog Search Up to 1,000 lines for motion detected, configurationchanges, connects/disconnects and video loss Audio Play noSTORAGE & ARCHIVEStorage Up to 1 HDD’s (SA T A)Maximum Capacity up to 1 x 4TBBackup Media USB Flash Drive & HDDBackup File Format DA V or ASF fileCONNECTIVITYCloud Connection Flir Cloud ™Supported Operating Systems Windows™Mac OSXRemote Software Client Software (PC) & Safari (Mac)Email notification T extwith snapshotInstant Smart Phone iPad®, iPhone®, Android™& T ablet Support †DDNS Free Lorex DDNSSystem Configuration Full setup configuration over networkPorts Programmable by UserNetwork Protocol HTTP, IPv4/IPv6, TCP/IP, UPNP, RTSP, UDP, SMTP, NTP,DHCP, DNS, PPPOE, DDNS, FTP, IP FilterNetwork Interface 10/100-Base-TX, RJ-45Network Speed Control 48Kb ~ 8MB/sec.GENERALPower Consumption Approx. 10 watts (no HDD included)Supply V oltage 4/8 ch: 100V AC-240V AC, 12VDC , 2A, 50/60Hz16 ch: 100V AC-240V AC, 12VDC, 3A, 50/60Hz Unit Dimensions 12.8” /325mm x9.6”/245mm x2.0”/50mmUnit W eight (KGs) 1.5 kg/3.3 LbsOperating temperature 32° ~ 104° F / 0° ~ 40° CHumidity 10 ~ 90% RHLBV1521 SeriesImage Sensor: 1/2.9” 720p 1 Megapixel Video Format: NTSCEffective Pixels: H: 1280 V: 720 Resolution: 720pScan System: ProgressiveSync System: InternalS/N Ratio: 50dB (AGC Off)Iris: AESAES Shutter Speed: 1/50 ~ 1/100,000 Sec. Min. Illumination: 0.1 Lux without IR LED0 Lux with IR LEDVideo Output: Lorex Analog HDLens / Lens Type: 3.6mm F1.9 / FixedFOV (Diagonal): 90°T ermination: BNC TypeIR LED Qty / Type: 12 pieces /850nmNight Vision Range: 130ft (40m) / 90ft (28m) Power Requirement: 12V DC ±10%Power Consumption: Max. 180mA (w/IR) Operating T emp. Range: –22° ~ 122°F / –30° ~ 50°C Operating Humidity Range: < 95% RH Environmental Rating: Both (IP66)W eight (including stand): 0.3lbs / 0.1kg Image Sensor: 1/2.9” 720p Megapixel Pixel Sensor Video Format: NTSCEffective Pixels: H: 1280 V: 720Resolution: 720pScan System: ProgressiveSync System: InternalS/N Ratio: 50dB (AGC Off)Iris: AESAES Shutter Speed: 1/60 ~ 1/100,000 Sec.Min. Illumination: 0.01 Lux without IR LED0 Lux with IR LEDVideo Output: Composite 1.0Vpp @ 75ohmLens / Lens Type: 3.6mm F1.2 / FixedFOV (Diagonal): 90°T ermination: BNC TypeIR LED Qty / Type: 12 pieces /850nmNight Vision Range: 130ft (40m) / 90ft (28m)Power Requirement: 12V DC ±10%Power Consumption: Max. 200mA (w/IR)Operating T emp. Range: –22° ~ 140°F / –30° ~ 60°C Operating Humidity Range: < 90% RHEnvironmental Rating: Both (IP66)W eight (including stand): 0.75lbs / 0.34kgLEV1522 SeriesImage Sensor: 1/3” 1.3MP Sony ExmorVideo Format: NTSC/P ALEffective Pixels: 1280(H) x 960 (V)Resolution: up to 720p (1280 x 720)Range: 360° Pan (Endless); -2–90° Tilt (Auto-Flip) Pan/Tilt Speed: Max 300°/Sec (Pan); Max 200°/Sec (Tilt) Zoom: 12x Optical Zoom & 16x Digital Zoom Protocol: DH-SD1, MPX CVIMin. Illumination: 0.1 Lux in Color0.01 Lux in Black and WhiteLens/Lens Type: Auto Focus / 5-61mm F 1.6Field of View (Horizontal): 4–51°Field of View (Diagonal): 6–64°S/N Ratio: >55db (AGC Off)Scan System: ProgressiveSynchronization: InternalIris: AESDay/Night: IR Cut Filter (ICR)T ermination: BNC Video/AC Power/RS485 (service only) Video Output: Composite 1.0Vpp @ 75ohmPower Requirement: 24V DC ±10%Power Consumption: Max. 500mAOperating T emperature Range: 14°F ~ 140°F / -10°C ~ 60°C Operating Humidity Range: within 90%RHIndoor/Outdoor: Both (IP66)W eight: 2.9lbs / 1.3kgLZV1722BDVR Inputs & OutputsDimensions:LBV1521 CameraDVR8 Channel DVR16 Channel DVRLEV1522 Camera LZV1722B CameraDVR Disclaimers:1. Compatible with Lorex 720p wired HD cameras only. For a list of compatible cameras, please visit /support2. Recording time may vary based on recording resolution & quality, lighting conditions and movement in the scene.3. Requires a high speed internet connection and a router (not included). A minimum upload speed of 1Mbps is required for the best video performance. Up to 3 devices may connect to the system at the same time.4. For the latest list of supported apps and devices, please visit /support* Number of Channels/ Cameras/ Accessories/ HDD (hard disk drive) capacity may vary by model. Check your package label for specific content information.All trademarks belong to their respective owners. No claim is made to the exclusive right to use the trademarks listed, other than the trademarks owned by Lorex Technology Inc. We reserve the right to change models, configurations or specifications without notice or liability. Product may not be exactly as shown. Images are simulated.Bullet & Dome Camera Disclaimers:1. Compatible with Lorex HD DVR LHV1000 series only.2. Stated IR illumination range is based on ideal conditions in typical outdoor night time ambient lighting and in total darkness. Actual range and image clarity depends on installation location, viewing area, and light reflection / absorption level of object. In low light, the camera will switch to black and white.3. Not intended for submersion in water. Installation in a sheltered location recommended.4. The extension cable must be a single stretch of cable between the DVR and camera. You cannot connect multiple extension cables to each other. For cable runs above 300ft(92m), you must connect the power adapter directly to the camera, rather than at the end of the extension cable.PTZ Camera Disclaimers:1. Compatible with Lorex HD DVR LHV1000 series only.2. This camera features an ultra-low light sensitive image sensor and therefore does not feature Infra-Red LEDs. The camera requires ambient lighting (for example, street/ building lighting, star or moon light) to render a night time image. In total darkness (zero Lux), the camera will not produce a night time image and therefore the camera should not be installed in completely dark areas.3. Not intended for submersion in water. Installation in a sheltered location recommended.Product Information:MODEL CONFIGURATION PACKAGE W x D x HInches & mm WEIGHT CUBE UPC CodeLHD8188 channel HD DVR with 1TB HDD & 8x 720p Cameras (LBV1521PK4B)Retail Box424mm x 360mm x 307mm16.7” x 14.2” x 12.1”20 lbs / 9 kg 1..6cft / 0.04cbm6-95529-00131-9LHD818F8 channel HD DVR with 1TB HDD & 8x 720p Cameras (LBV1521PK4B)Retail Box424mm x 360mm x 307mm16.7” x 14.2” x 12.1”20 lbs / 9 kg 1..6cft / 0.04cbm6-95529-00232-3LHV10082TC8PM8 channel HD DVR with 2TB HDD & 8x 720p Cameras (LBV1521PK4B)Retail Box424mm x 360mm x 307mm16.7” x 14.2” x 12.1”20 lbs / 9 kg 1.6cft / 0.04cbm6-95529-00098-5LHV10041TC4 4 channel HD DVR with 1TB HDD & 4x 720p Cameras (LBV1521PK4B)Retail Box388mm x 226mm x 368mm15.3” x 8.9” x 14.5”10.6 lbs / 4.8 kg 1.14cft / 0.03cbm6-95529-00184-5LHV10045GC4B 4 channel HD DVR with 500GB HDD &4 x 720p Cameras (LBV1521PK4B)Brown Box388mm x 226mm x 368mm15.3” x 8.9” x 14.5”10.6 lbs / 4.8 kg 1.14cft / 0.03cbm6-95529-00234-7LHV10082TC48 channel HD DVR with 2TB HDD & 4x 720p Cameras (LBV1521PK4B)Retail Box388mm x 226mm x 368mm15.3” x 8.9” x 14.5”11 lbs / 4.9 kg 1.6cft / 0.03cbm6-95529-00185-2LHV10162TC816 channel HD DVR with 2TB HDD & 8x 720p Cameras (LBV1521PK4B)Retail Box424mm x 360mm x 307mm16.7” x 14.2” x 12.1”20 lbs / 9 kg0.6cft / 0.04cbm6-95529-00186-9LHV10162TC12Z1B16 channel HD DVR with 2TB HDD & 8x 720p Cameras (LBV1521PK4B), 4 x720p Dome Cameras (LEV1522PK4B),1 x PTZ Camera (LZV1722B)Brown Box571mm x 312mm x 508mm22.2” x 12.3” x 25”36 lbs / 16.3 kg 3.95cft / 0.11cbm6-95529-00227-9DVR Includes:DVR with Pre-Installed HDD, HDMI Cable, Remote Control, Power adapter, Mouse, Ethernet Cable, Quick Start Guides.Bullet & DomeCameras Include:4 or 8 x Cameras, 4 or 8 x Mounting kit with Allen key, 4 or 8 x 60ft BNC / power extension cables, 1 or 2 x 4-in-1 Power adapters.PTZ Camera Includes:1x PTZ Camera, 1x Wall Mount, 1x Pendant Cap, 1x 100ft BNC / Power Extension Cable, 4x Mounting Screws & Anchors, 1x Power Adapter, 4x O-Rings, 4x Allen Bolts, 1x Allen Key, Mounting Template & Instruction Manual.。
Interra 电脑视频与音频输入模块用户指南说明书

1INTRODUCTIONThis manual covers:ISC2000-W – VGA & Audio (white) Line Driver ISC2000-I – VGA & Audio (ivory) Line Driver400-0087-00421Please read this manual carefully before using your ISC2000-W/ISC2000-I . Keep this manual handy for future reference. These safety instructions are to ensure the long life of your ISC2000-W/ISC2000-I and to prevent fire and shock hazard. Please read them carefully and heed all warnings.1.1 GENERAL• Qualified Altinex service personnel, or theirauthorized representatives must perform all service.1.2 INSTALLATION• To prevent fire or shock, do not expose this unitto rain or moisture. Do not place the ISC2000-W/ISC2000-I in direct sunlight, near heaters or heat radiating appliances, or near any liquid.Exposure to direct sunlight, smoke, or steam can harm internal components.• Handle the ISC2000-W/ISC2000-I carefully.Dropping or jarring can damage internal components.• Never install the ISC2000-W/ISC2000-I in thesame enclosure with high voltage wires or their associated components, such as power sockets,dimmers or switches. Always use proper isolation techniques to ensure that the ISC2000-W/ISC2000-I is never installed in an enclosure that has high voltages within it.1.3 CLEANING• Clean surfaces with a dry cloth. Never usestrong detergents or solvents, such as alcohol or thinner. Do not use a wet cloth or water to clean the unit.1.4 FCC / CE NOTICE• This device complies with part 15 of the FCCRules. Operation is subject to the following two conditions: (1) This device may not cause harmful interference, and (2) this device must accept any interference received, including interference that may cause undesired operation.• This equipment has been tested and found tocomply with the limits for a Class A digital device, pursuant to Part 15 of the FCC Rules.These limits are designed to provide reasonable protection against harmful interference when the equipment is operated in a commercial environment. This equipment generates, uses,and can radiate radio frequency energy and, if not installed and used in accordance with the instruction manual, may cause harmful interference to radio communications. Operation of this equipment in a residential area is likely to cause harmful interference in which case the user will be required to correct the interference at his own expense.• Any changes or modifications to the unit notexpressly approved by Altinex, Inc. could void the user’s authority to operate the equipment.400-0087-00432The ICS2000 is a 1-in, 1-out VGA and Audio Line Driver designed for installation into a wall. The unit provides a method of transmitting signals to a remote display and audio receiver or amplifier.The ISC2000 offers a female VGA-type 15-pin HD input connector and a stereo audio mini jack on its front panel. The rear panel offers two terminal block connectors. One is for the connection of balanced stereo audio and the other is for low voltage input power. Additionally, there is a 10-pin IDC connector for use with either the 5-BNC connector cable provided or the VGA output connector that is also included.The computer video RGB signals are passed through the ISC2000, but the video sync signals are buffered to ensure signal quality over long cable runs. Likewise, the incoming unbalanced stereo audio signal is converted to a balanced stereo audio on the output. This ensures better signal transmission over long cable runs.3FEATURES/DESCRIPTION ISC2000-W/ISC2000-IGENERAL InputsComputer Video Input 15-pin HD Female Audio Input Connector 3.5mm stereo audio OutputsVideo Output Connector 5 BNC/15pin HD Audio Output Connector Terminal BlockPower DC Source 2-pin terminal patibilityVGA/SVGA/XGA UXGA MAC/SUN/SGI and other analog computer video sourcesTable 1. ISC2000-W/ISC2000-I GeneralMECHANICAL ISC2000-W/ISC2000-I Depth (inches) 1.2 in. (30.5mm)Width (inches) 1.5 in (38.1mm)Height (inches) 2.6 in. (66mm)Weight (pounds).2 lb. (.12kg)Ship Weight (pounds) 1.6 lb. (.73kg)Material Steel FinishBlack Zinc Front Panel White or Ivory T° Operating 10°C -35°C T° Maximum 50°CHumidity90% non-condensingMTBF (calculations)40,000 hrs.Table 2. ISC2000-W/ISC2000-I MechanicalELECTRICAL ISC2000-W/ISC2000-I Input Video Signal Pass Thru Input Sync Signals Horizontal & Vertical TTL (+/-)Impedance 10 kOhms Output Video Signals Pass Thru Output Sync Signals Horizontal, & Vertical TTL (+/-)Impedance 75 Ohms Bandwidth -3dB @ 350MHz Audio Input Impedance 10k Ohms Max Level 0dBu Audio Throughput Gain Balanced / Unbal.+6dB / 0dB Freq. Response 10Hz-20kHz, +/- .05 dB Noise Floor -98dB @ 20kHz CMRR <40dB, 10Hz - 20kHz Audio Output Impedance 50 Ohms Drive >10dBu External Power 9VDC 500mA supply Table 3. ISC2000-W/ISC2000-I Electrical400-0087-00444400-0087-00454.1 VIDEO INPUTThe computer input is a 15-pin HD connector on the front of the ICS2000-W/ISC2000-I . It is connected to the video output of a desktop computer or similar device.PIN No.Input signals on 15-pin HDfemale connector1RED 2GREEN 3BLUE4SIGNAL RETURN 5SIGNAL RETURN 6SIGNAL RETURN 7SIGNAL RETURN 8SIGNAL RETURN 9VESA POWER INPUT 10SIGNAL RETURN 11SIGNAL RETURN12SDA13HORIZONTAL 14VERTICAL 15SCLTable 4. ISC2000-W/ISC2000-I ’s Video Input Pins4.2 VIDEO OUTPUTThe ISC2000-W/ISC2000-I offers a video output through a 10-pin IDC connector on the back of the ISC2000-W/ISC2000-I . The Distribution Amplifier allows a connection to different types of projectors or monitors using Altinex breakout cables.PIN No.VIDEO OUTPUTS ON 10-PIN IDCBLOCK1RED2GROUND 3GREEN 4GROUND 5BLUE 6GROUND 7HORIZONTAL 8GROUND 9VERTICAL10SIGNAL RETURNTable 5. 10-Pin IDC Connector Video Output Pins4.3 AUDIO INPUT & OUTPUTThe ISC2000-W/ISC2000-I accepts computer audio input and offers balanced stereo output through a terminal block connector on the back. There is a 3.5mm jack for computer audio input. A 5-pin terminal block is available for stereo audio transmission to the main sound system. These connectors are easily adaptable to stereo mini or RCA type connectors.PIN No.AUDIO OUTPUTS ON 5-PIN MALETERMINAL BLOCK1L+IN (Left Channel)2L-IN (Left Channel)3SIGNAL RETURN4R+IN (RIGHT Channel)5R-IN (RIGHT Channel)Table 6. 5-Pin Male Terminal Block for Audio Output4.4 POWER INPUT CONNECTORThe ISC2000-W/ISC2000-I has a power terminal block for connection to a 9VDC 500mA external adapter. Power regulation is provided inside the unit.PIN No.INPUT POWER ON 2-PIN MALETERMINAL BLOCK1+9VDC 2GNDTable 7. 2-Pin Male Terminal Block for Power Input400-0087-00465TYPICAL SETUPBREAKOUT VIDEO CABLE CONNECTION400-0087-00476PREPARATIONStep 1.There are a few common items to checkbefore testing the setup connections:a.Make sure the monitor and sound system work with the source computer before using the ISC2000.b.Ensure the source computer screen-savers do not shut down the video source during the system check.c.Verify the source audio level isreasonable, not too low or too high.VERIFICATIONStep 2.In order to verify proper connections andoperation before final installation, the following may be used to verify setup connections:a.Video InputsA video source such as a computer works well.b.Audio InputsA computer with a sound card is a convenient audio source.c.Video OutputsA standard computer monitor.d.Audio OutputsExternal computer speakers with built-in audio amplifier are sufficient.OUTPUT CONNECTIONSStep 3.Determine the proper breakout cablerequired for the video signal.Two special breakout cables that attach to the ISC2000 video output connector are included. One allows connection to a VGA 15 pin HD type connector cable. The other connects to RGBHV coaxial cables.Step 4.Attach the breakout cable to the videooutput connector. Make sure the breakout cable's connector mounting hole aligns with the ISC2000 screw hole and secure it with the screw provided. See Application Diagram 2 for details.Step 5.Connect the video breakout cable to thereceiving display device.Step 6The audio output from the ISC2000 can be balanced or unbalanced.If a balanced or unbalanced signal is needed, use a four-conductor cable with overall shield.For an unbalanced signal, connect one of the wires to ground. Use only the positive output form the ISC2000 to drive unbalanced signals. The negative output does not need to be connected to ground.INPUT CONNECTIONSStep 7. A 9VDC, 500mA power supply is neededto power the ISC2000. Connect the 9VDC power to the ISC2000 power input terminal block. The LED will turn red,indicating power is ON.Step 8.Connect an active video source to thefront of the ISC2000. If the cabling on the back of the ISC2000 is connected to a display, you should see an image.Step 9.Connect an active audio source to thefront of the ISC2000. If the cabling on the back of the ISC2000 is connected to an audio amplifier with speakers, you should hear sound.7There are no settings or adjustments on the ISC2000. The unit will operate successfully as long as cables are properly attached and other technical specifications are followed.400-0087-00488We have carefully tested and have found no problems in the supplied ISC2000 unit; however,we would like to offer the following suggestions:8.1 LED IS NOT LIT Cause 1:There is no 9VDC.Solution:Verify the 9VDC adapter is connected to the 2 pin terminal block input. If it is and the LED is not on,see Solution 2.Solution 2:Ensure there is AC power applied tothe power adapter and that the cables are plugged in all the way. If there is AC power and the cabling is correct, see Solution 3.Solution 3:Verify the power adapter is capableof supplying 500mA. If it is and the LED is still not on, call ALTINEX at (714) 990-2300.8.2 NO DISPLAY Cause 1:The source has a problem.Solution:Check the source and make sure that there is a signal present and all source connections are correct.Make sure that the input amplitude of the video analog signals are less than 1.5V and that the SYNC levels are TTL. If the source is good and there is still no display, see Cause 2.Cause 2:Cable connections are incorrect.Solution:Make sure that the cables are properly connected. Also, make sure that the continuity and wiring are good. If there is still no display present, see Cause 3.Cause 3:The display has a problem.Solution:Ensure the display has power and is ON. If there is still no display, call Altinex at (714) 990-2300.8.3 NO SOUND/BAD SOUND QUALITYNOTE:For very small audio signals, the amplifier for the speakers must necessarily amplify both the signal and any noise in the system. For very large audio output signals,distortion and clipping may occur. The source and the audio amplifier function best when the audio levels are set to midrange values. This is normal for an audio system regardless of whether an ISC2000 is used.If unwanted noise is heard on the audio circuit,consider alternate ways of wiring the audio output. Also, examine the system for possible sources of noise and route the audio signals as far as possible from the noise sources.Cause 1:The source has a problem.Solution :Check the source and make sure that it is working at an appropriate volume level and all source connections are correct. If the source is working and there is still no sound, see Cause 2.Cause 2:Audio devices are not compatible.Solution:Make sure that the audio devices are compatible. If so, see Solution 2.Solution 2:Connect the receiving device directlyto the source and verify proper operation. If there is still no sound,see Cause 3.Cause 3:Cable connections are incorrect.Solution:Make sure that all cables are connected properly. Also, make sure that the continuity and wiring are good. If there is still no sound present, see Cause 4.400-0087-0049Cause 4:Destination amplifier is bad.Solution 1:Make sure that the destinationamplifier is powered. If there is still no sound, see Solution 2Solution 2:Set the volume of the destinationamplifier to a reasonable level. If there is still no sound, call ALTINEX at (714) 990-2300.99.1 LIMITED WARRANTY/RETURN POLICYPlease see the Altinex website at for details on warranty and return policy.9.2 CONTACT INFORMATION ALTINEX, INC 592 Apollo Street Brea, CA 92821 USA TEL: 714 990-2300TOLL FREE: 1-800-ALTINEX WEB: E-MAIL: *********************。
多媒体投影机中文说明书(PDF 84页)
电源开 / 关. . . . . . . . . . . .15 自选画面 , 自选画面锁定 , 消息 , 源名称
开启电源. . . . . . . . . . . . 15 选项菜单. . . . . . . . . . . . .40
关闭电源. . . . . . . . . . . . 15 自动搜索 , 自动梯形校正 , 自动开机 ,
3
S&E
多媒体投影机 CL66X 用户指南
数多码媒投体影投机影机
XC6L666X
用用户户的指指南南
警告 ► 在使用本产品之前,请阅读本产品的所有说明书。请务必首先阅读《产 品安全指南》。阅读后,请妥善保管以备日后查询。
关于本说明书
本说明书中使用的各种符号。这些符号的意义说明如下。
警告
本符号表示如果忽略这些信息可能会因错误操作而导致人身伤害, 甚至死亡。
调节位置. . . . . . . . . . . . 19 关闭投影机. . . . . . . . . . . 57
校正梯形失真. . . . . . . . . . 20 ห้องสมุดไป่ตู้设所有设定值. . . . . . . . . 57
使用放大功能. . . . . . . . . . 20 容易误认为是故障的现象. . . . . 58
目录
目录
关于本说明书. . . . . . . . . . . 1 简易菜单. . . . . . . . . . . . .24
目录. . . . . . . . . . . . . . . 2 特点. . . . . . . . . . . . . . . 3 准备. . . . . . . . . . . . . . . 3
索尼CineAltaV电影摄影机快速使用手册.pdf说明书
索尼CineAltaV 电影摄影机速查手册基于V6.0固件01. 拆卸PL卡口底座为E卡口底座 02. 安装AXS-R7记录单元03. 安装CineAltaV分体延长线结构04. 安装无线模块,并进行无线远程控制01. 进入底层全部菜单02. 格式化SxS卡03. 格式化AXS卡04. 设置SxS卡记录格式05. 设置AXS卡记录格式06. 设置SxS卡代理记录子格式07. 设置AXS与SxS同步录制08. 设置系统帧频09. 设置升降格帧频10. 切换双原生基准感光度11. 设置快门单位12. 选择不同的机内预设LUT123716171819212223252627293001页15页第2章CineAltaV 常见功能设置第1章CineAltaV与相关产品组装13. 加载并选择自定义LUT14. 在SDI 3/4端口加载LUT15. 在Monitor端口加载LUT16. 设置手动白平衡17. 设置画面分辨率与宽高比18. 设置色彩空间19. 时码设置20. 连接并设置外部时码21. 设置摄影机编号22. 设置卷号23. 设置机位位置24. 设置字符与显示状态信息:“信息A”与“信息B”25. 设置画框线显示信息:“线A”与“线B”26. 设置用户自定义宽高比画框线27. 设置寻像器显示字符与画框线28. 设置SDI 3/4端口显示字符与画框线29. 设置Monitor端口的显示字符与画框线31 35 36 37 39 40 41 43 44 45 46 47 48 49 50 51 5230. 设置水平尺31. 设置SDI端口的输出格式32. 设置Monitor端口的输出格式33. 查看固件版本34. 查看系统信息35. 查看存储卡剩余空间36. 设置变形镜头输出挤压还原37. 设置自定义按键38. 控制E卡口电动镜头光圈39. 设置翻转画面40. 进行素材回看41. 设置录制预览(快速回看)42. 设置伪色彩43. 使用内置8档ND滤镜53 54 55 56 57 58 59 60 61 62 63 65 66 6801. 如何使用分体结构的机头电源输出?02. 分体结构的机头电源输出能实现什么功能?03. 如何使用分体结构的机头SDI信号输出?04. 电源输入有何要求?05. 激光对摄影机有何影响?06. CMOS进灰应该如何处理?07. 出现EXXX报错信息如何解决?08. 出现SxS卡提示修复应该如何操作?09. 如何调整PL卡口法兰距?10. 如何使用s709色彩模式?s709与R709有什么区别?11. 在达芬奇中对CineAltaV拍摄的X-OCN素材有何设置技巧?12. APR功能是什么?CineAltaV提示APR校正时应该如何操作?13. 寻像器亮度一般如何设置?14. 寻像器泛白是怎么回事?15. 什么是ART文件?16. 如何制作ART文件?69 70 71 72 73 74 75 76 77 79 81 82 83 84 85 8669页第3章常见问题与注意事项01. 各格式下升降格帧率一览02. 成像器拍摄模式一览03. 变形宽银幕模式一览表04. AXS S48与S24系列卡支持的记录格式和帧率一览05. 常用格式的文件大小与码率等相关数据一览表(帧频为25P)06. 自定义按钮可设置功能一览07. S-Gamut3.Cine/SLog3与S-Gamut3/Slog3的区别08. 索尼维修站信息一览87页第4章常见数据一览878889909193104105取下图示中的六颗2.5mm内六角螺丝,即可拆卸PL卡口适配器。
M-Vision Cine 3D系列数字视频投影仪操作手册说明书
OPERATING GUIDEM-Vision Cine 3D seriesHigh Brightness Digital Video Projector16:9 widescreen displayAbout this Guide (1)Symbols used in this guide (1)Warnings (1)Notes (1)Product revision (1)Using the Menus (2)Navigating the menus (2)Submenus (3)Selecting parameters (4)Sliders (5)Commands (5)A Tour of the Menus (6)Main Menu (6)Aspect.Ratio (6)Presets (7)Brightness,.Contrast,.Saturation,.Hue,.Sharpness.and.Noise.Reduction (8)Overscan (8)Input.Select (8)Resync (8)3D.Settings (8)Advanced Menu (9)Color.Space (9)Gamma,.Color.Temperature.and.Color.Gamut (9)Brilliant.Color®.and.Adaptive.Contrast (9)Fine.Sync (9)RGB.Adjust (9)System Menu (10)Language (10)Menu.Position (10)Blank.Screen (10)Auto.Power.Off (10)Auto.Power.On (10)Rear.Projection (11)Ceiling.Mode (11)Lamp.Power (11)Control Menu (12)Keys.1.to.5 (12)Trigger.1.and.2 (12)Auto-Source (12)Service Menu (13)Information (13)Factory.Reset (13)Blue.Only (14)Test.Patterns (14)Altitude (14)Menu Map (15)MAIN (15)ADVANCED (15)SYSTEM (16)CONTROL (16)SERVICE (16)ing.the.projector,.and.keep.it.handy.for.future.reference.A.serial.number.is.located.on.the.side.of.the.projector..Record.it.here:.Symbols used in this guideWarningsELECTRICAL WARNING: this symbol indicates that there is a danger of electrical shock unless the instructions are closely followed.WARNING: this symbol indicates that there is a danger of physical injury to yourself and/or damage to the equipment unless the instructions are closely followed.Product revisionBecause.we.at.Digital.Projection.continually.strive.to.improve.our.products,.we.may.change.specifications.and.designs,.and.add.new.features. without.prior.notice..Projectors.built.prior.to.this.revision.of.the.Operating.Guide.may.therefore.not.include.all.the.features.described.Use.the.buttons.on.the.projector.control.panel.or.on.the.remote.control,.to.access.the.menu.system.Projector control panelNavigating the menusTo.open.another.menu,.first.close.the.current.menu.by.pressing.MENU ,ing,••To.open.or.close.the.on-screen.display.(OSD),.press.MENU .The.first.item.in.the.menu.is.highlighted.(When.closing.the.OSD,.you.may.need.to.press.MENU .more.than.once.if.any.sub-menus.are.open.)•ing•then.press.ENTER /SELECT .The.first.item.in.the.new.menu.is.highlighted.•Submenusingthen.press.ENTER /SELECT .••The.submenu.opens,.with.the.first.item.highlighted.•To.close.the.submenu,.press.MENU .•Selecting parametersMost.parameters.are.changed.by.selecting.from.a.list:ing.The.change.will.be.made.immediately.••Some.parameters.are.changed.by.selecting.from.a.submenu.Press.ENTER/SELECT .to.open.the.submenu.ingThe.change.will.be.made.when.you.press.ENTER /SELECT .to.confirm.the.selection.••••SlidersActivate.the.slider.by.pressing.•Commandsmand,.press.ENTER/SELECT .In.the.example.below,use.to.select.YES .or.NO ,then.press.ENTER/SELECT .to.confirm.your.selection.••Use.to.adjust.the.value.Press.MENU .or.ENTER/SELECT .to.accept.the.value.••Main MenuAspect RatioUse..to.choose.between.16:9,.Theaterscope ,.4:3,.4:3 Narrow .and.Native .Examples•1 :9 image using Native setting1 :9 image using 16:9 setting: image using Native setting : image using 4:3 setting4:3 Narrow without anamorphic lens 4:3 Narrow with anamorphic lens2. :1 image using 16:9 setting without anamorphic lens 2. :1 image using Theaterscope settingwithout anamorphic lens Examples with anamorphic lens2. :1 image using Theaterscope settingwithanamorphic lensPresetsThe.current.image.settings.can.be.saved.to.one.of.four.Presets..Any.of.the.four.Presets.or.the.Default.settings,ter.•The.following.settings.are.saved:From.the.Main .menu:Aspect Ratio Brightness Contrast Saturation HueSharpness Noise Reduction Overscan From.the.Advanced .menu:Color SpaceGammaColour Temperature Color Gamut RGB Offsets RGB GainsBrilliant ColorAdaptive Contrast•Brightness, Contrast, Saturation, Hue, Sharpness and Noise ReductionAdjust.the.sliders.for.these.settings.OverscanChoose.from.Off,.Crop.or.Zoom.Input SelectChoose.which.input.source.to.display.ResyncPress.ENTER/SELECT .to.force.the.projector.to.re-synchronise.with.the.current.input.signal.3D SettingsPress.ENTER/SELECT .to.open.the.3D.settings.sub-menu.Set.3D Enable .to.On .or.Off .Set.3D Type .to.suit.the.configuration.of.the.3D.input.signal.Set.DLP Link .to.On ,ing.3D.glasses.that.can.utilise.the.DLP.Link®.signal.embedded.in.the.image.If.the.3D.images.are.displayed.in.the.wrong.order,.set.L-R Swap .to.Swap .•••••••••Advanced MenuColor SpaceSet.this.to.Auto ,.except.when.the.projector.has.problems.selecting.between.YPbPr ,.YCbCr .and.RGB.Gamma, Color Temperature and Color GamutSet.this.to.suit.the.specification.of.the.input.source,.or.to.improve.the.appearance.of.the.projected.image.Brilliant Color® and Adaptive ContrastSet.these.to.suit.your.brightness.and.contrast.requirements.Fine SyncAdjust.these.settings.to.suit.the.configuration.of.the.input.signal.RGB AdjustAdjust.the.RGB.offset.and.gain.settings.to.improve.the.colour.balance.of.the.projected.image.•••••System MenuLanguageThis.product.is.available.only.in.English.at.present.Menu PositionSet.this.to.determine.the.position.of.the.menus.on.the.screen.Blank ScreenSet.this.to.determine.what.appears.on.screen.when.the.projector.is.searching.for.a.valid.input.source.Auto Power OffSet.this.to.On ,.if.you.want.the.projector.to.go.into.Standby mode .when.no.input.source.is.detected.for.20.minutes.Auto Power OnSet.this.to.On ,.if.you.want.the.projector.to.start.up.imediately.when.the.mains.is.connected.Set.this.to.Off ,.if.you.want.the.projector.to.go.into.Standby mode .when.the.mains.is.connected..In.this.case,.the.projector.will.not.start.up.until.the.POWER .button.is.pressed.on.the.control.panel.or.the.remote.control.••••••Rear ProjectionSet.this.to.On .to.reverse.the.image.from.left.to.right,e.in.Rear.Projection.Mode.Ceiling ModeSet.this.to.On .to.reverse.the.image.from.top.to.bottom,e.in.Ceiling.Mode.Lamp PowerSet.this.to.Economy mp.at.reduced.power.•••Control MenuKeys 1 to 5Trigger 1 and 2Choose.from.Screen ,.Aspect Ratio .or.RS232,.to.determine.what.will.cause.each.Trigger output .to.activate.Auto-SourceWhen.this.is.set.to.On ,.the.projector.will.search.for.an.alternative.input.source.when.the.current.input.source.is.disconnected When.this.is.set.to.Off ,.the.projector.will.show.a.‘blank’.screen.when.the.current.input.source.is.disconnected.••••Service MenuInformationPress.ENTER/SELECT rmation.about.the.projector,.eg:Factory ResetPress.ENTER/SELECT .to.restore.all.settings.to.their.factory.defaults.When.the.warning.message.appears,.use.to.select.YES .or.NO ,.then.press.ENTER/SELECT .to.confirm.your.selection.•••Blue OnlySet.this.to.On ponent.of.the.input.signal,.for.calibration.or.test.purposes.Test PatternsUse.to.select.from.a.range.of.test.patterns.Press.MENU .to.return.to.the.menu,.or..ENTER/SELECT .to.return.to.the.currently.selected.input.signal.AltitudeWhen.this.is.set.to.Auto ,.the.internal.fan.will.operate.at.Low .speed,.and.rise.to.High .speed.automatically.if.the.internal.temperature.rises.When.this.is.set.to.High ,.the.fan.will.operate.at.High .speed.continuously,e.at.high.altitude.locations.•••••MAINAspect Ratio 1 :9, Theaterscope, : , : Narrow, NativePresetsRecall..A, B, C, D, DefaultSave..A, B, C, DBrightnessContrastSaturationHueSharpnessNoise ReductionOverscan Off, Crop, ZoomInput Select all available inputsResync Projector will re-synchronise with the current input signal3D Settings3D.Enable..Off, On3D.Type..SBS Dual, L-R DualDLP.Link..Off, OnL-R.Swap..Normal, SwapADVANCEDColor Space A uto, YPbPr, YCbCr, RGB PC, RGB VideoGamma Film, Video, Punch, Graphics, CRTColor Temperature 00K, 00K, 00K, 9 00K, NativeColor Gamut Auto, REC 09, SMPTE-C, EBU, NativeBrilliantColor On, OffAdaptive Contrast On, OffFine Sync V Position, H Position, Phase, Tracking, Sync LevelRGB Adjust RGB Offset and GainSYSTEMLanguage English onlyMenu Position Top Left, Top Right, Bottom Left, Bottom Right, Centre Blank Screen Logo, Black, Blue, White Auto Power Off On, Off Auto Power On On, Off Rear Projection Off, On Ceiling Mode Off, OnLamp Power Standard, EconomyCONTROL1 Key all available inputs2 Key all available inputs3 Key all available inputs4 Key all available inputs5 Key all available inputsTrigger 1 Screen, 1 :9, Theaterscope, : , : Narrow, RS2 2Trigger 2 Screen, 1 :9, Theaterscope, : , : Narrow, RS2 2Auto Source On, OffSERVICEInformation Model Name, Serial Number, Software Version, Active Source, Signal Format, Pixel Clock,H⁄V Refresh Rate, Lamp HoursFactory Reset Projector will ask for confirmation before restoring all settings to factory defaults Blue Only Off, OnTest Patterns Off, White, Black, Red, Green, Blue, Cyan, Magenta, Yellow, Chequer Grid Altitude Auto, HighMenu Sub Menus and Controls。
影音骇客 H.264网路电视盒 说明书

TUNER IN:類比電視射頻訊號輸入接口,連接有線/無線電視纜線, 輸入類比電視射頻訊號。
2 TUNER OUT:類比電視射頻訊號輸出接口,輸出類比電視射頻訊號 可將此接口接至一般電視之輸入接口(必須 IN 有訊號輸入的情況下 OUT 才有輸出訊號)。
AV1 IN:影音輸入接口,連接來自 STB、DVR、DVD 或攝影機之影 3 音(S-VIDEO/VIDEO/AUDIO)。
影音駭客
1-5
緒論
電視盒燈號顯示之狀態 :
所處狀態 電視盒插入電源後 前 8 秒為準備狀態 準備狀態結束後將 進入開機狀態(此 狀態將持續 12 秒) 系統開機完成, Internet 連 線 設 定 成功
系統開機完成, Internet 連 線 設 定 失敗 用戶登入電視盒 (使用中)
遙控器學習狀態
AV1 OUT:影音輸出接口,AV1 IN 輸入的所有訊號將由 AV1 OUT 4 輸出。
5 ETHERNET:乙太網線接口,經網路線用來連接上網設備。 6 DC IN:電源輸入接口 (規格: 5V DC 2.5A)
請謹慎使用[Reset]按鍵,執行[Reset]之後電視盒硬體的一切參數都將回 復到出廠預設值。恢復的資料包括: 1、管理員(admin)的密碼恢復到初始值“admin" 2、其他非管理員之使用者帳號及密碼將被全部刪除 3、電視盒端的頻道表將被清空 4、電視盒已學習的遙控器功能將被清除 5、電視盒的網路連線方式將回復到”自動取得 IP 位址”方式 (如果您的電視盒網路連線方式已設定為 [固定 IP 位址] 或者 [PPPoE] 的方式,在您執行[Reset]之後需要重新把電視盒設定成相應的 連線方式。)
使用手冊
Version 1.0
前言
- 1、下载文档前请自行甄别文档内容的完整性,平台不提供额外的编辑、内容补充、找答案等附加服务。
- 2、"仅部分预览"的文档,不可在线预览部分如存在完整性等问题,可反馈申请退款(可完整预览的文档不适用该条件!)。
- 3、如文档侵犯您的权益,请联系客服反馈,我们会尽快为您处理(人工客服工作时间:9:00-18:30)。
CINEWARE 与 After Effects 定义显示的类型。原来的CINEMA 4D设置将被显示为线框或盒子,以允许更流畅的工作。 无纹理/着色器 禁用纹理更快的导航显示。 无预先计算 禁用动态,布料和粒子模拟渲染以及运动图形模拟,以提高显示速度。因此,这些过程的显示的结果将是不准确的。不应该被启用为最终渲 染这个选项 - 或模拟应该已经在CINEMA 4D的文件被缓存。 Tip 不应该启用此选项用于最终渲染,因为粒子效果,许多运动图形功能,动态和布料将无法显示或正确呈现。
使用引用 CINEMA 4D图层层在After Effects是一款2D层。要切实把3D图层从After Effects中的一个成分,它可以帮助,如果关于CINEMA 4D的位置信 息作为物体表面的颜色/固体变为可用。对于出现这种情况,在CINEMA 4D场景的多边形对象或层必须分配给他们的外部合成标记。可以启用 实体选项和一个大小为在After Effects的颜色表面可以被定义。 使用CINEWARE提取功能来导入相应的数据。 要导入CINEMA 4D的场景到After Effects时,为避免出现问题,保存多边形的混色和保存动画的混色选项应该在CINEMA 4D的首选项中启用文 件菜单。
加载和编辑MAXON CINEMA 4D的文件 现有的CINEMA 4D的文件(.C4D)可以在Adobe After Effects项目窗口直接加载为资源,并放置在该合成中为CINEMA 4D层。参数将显示为 CINEMA 4D层,在效果窗口的CINEWARE'效果。附加效果可以添加像往常一样到CINEMA 4D层。这些效果都会由CINERENDER渲染引擎生成的渲染。
CINEWARE 与 After Effects 使用After Effects的摄像机现有动画,也可以转移到CINEMA 4D的场景。这可以通过在命令菜单中的合并选项来完成。 使用 文件>导出>CINEMA 4D 导出... 命令来保存C4D文件,AFX摄影机,灯光和空对象将被导出在CINEMA 4D使用
如果提取函数用于提取CINEMA 4D相机到After Effects中,建议使用的中心合成摄像机(Centered Comp Camera)。否则,视图将被抵消的偏 离坐标系的结果。
图层
CINEMA 4D具有可以用来组织复杂三维场景的综合层体系。这种层系统的目的不是要建立一个叠层的层次结构,在After Effects而是一群场景 元素,方便,高效的服务。一个场景的各个部分可以隐藏和取消隐藏,如果必要的。这些CINEMA 4D层可以在After Effects中单独激活或停 用。只有激活的CINEMA 4D的图层才会在该合成被渲染。这使得能够使用单个CINEMA 4D文件多次在一个给定的合成中,作为其本身CINEMA 4D层 和显示场景的特定元素。
CINEWARE 与 After Effects
要更改已导入到After Effects一个CINEMA 4D的文件,请选择该资源或CINEMA 4D的图层,然后选择>编辑>编辑原稿...(Cmd&CTRL + E)。在 项目中的CINEMA 4D文件将使用安装在您的计算机上的CINEMA 4D打开,然后进行编辑。 高效的工作流程 已修改并保存的CINEMA 4D项目将自动在After Effects更新。 配置显示/渲染设置 在CINEMA 4D的集成渲染引擎CINERENDER中,使得它可以直接在After Effects渲染CINEMA 4D层。这意味着,After Effects的用户可以最终保 持在其合成中完全控制渲染所有的3D元素。渲染设置由CINEWARE效果设置来控制。 请注意,每个CINEMA 4D的图层基本上都有自己的渲染和显示设置。使用渲染设置菜单中的"全部应用"设置应用于所有实例加载到合成中的 CINEMA 4D文件。 每个渲染帧将被缓存,以加快工作流程。当使用减少或自动分辨率,CINEMA 4D渲染结果也将有一个相应降低分辨率。 为了确保更快的工作流程,渲染设置可以在合成特效面板中设置为软件预览。纹理将被显示在低分辨率/着色器将被评估,从而加快编辑效率。 也可以停用纹理和渲染软件渲染选项停用纹理和着色器;渲染草案只停用纹理和防止过早计算动力学或粒子模拟。但是,应该启用这些选项在 CINEMA 4D的场景最终渲染或缓存,然后模拟(烘焙)。 详细另请参阅动力学和粒子烘焙。 渲染速度也可以使用RAM缓存,增加RAM缓存选项加快渲染。 摄像机和CINEMA 4D的场景元素 正如在After Effects中,任何数量的摄像机具有不同的设置,包括动画,可以被添加到CINEMA 4D文件。为了确保两个应用程序之间的适当整 合,镜头运动必须同步。这是在CINEWARE项目设置菜单中完成。
例如,3D背景和前景元素可以被分离并集聚在After Effects的合成或在After Effects结合片段。 请注意,所有CINEMA 4D的元素图层将始终活跃在各个CINEMA 4D层。 多通道图像 多通道3D渲染是一个图像作为单独的图像元素,而不是使所有元素结合在一起作为一个单一图像的渲染过程。 这些元素都汇集在合成其中这些单独的图像元素可以被编辑,调整或修改,包括彩色校正。多通道渲染一个典型的例子分别是输出不同的表面 反射(漫反射,高光,阴影等),并把他们聚在一起在After Effects中通过不同的模式叠加混合。
CINEWARE 与 After Effects
用户手册
版权(C) 2014金源影视后期汉化 官方博客:/adobecn
CINEter Effects中,CINEMA 4D的场景和动画可以直接加载到一个After Effects合成,并且可以在After Effects中查看和渲 染。
在Adobe最新版本的After Effects的中,复杂的3D元素,场景和动画,甚至可以从MAXON CINEMA 4D被加载到一个After Effects合成。这些应 用程序的独特的集成可以让After Effects用户,甚至速度更快,比以前更容易创建令人印象深刻的运动图形组成。
为了确保使用最佳的易用性,强大的CINEMA 4D渲染引擎CINERENDER被整合到After Effects的方式,使得它可以很容易地直接呈现装入组成 CINEMA 4D层。这消除了需要的应用程序,或根据生产工作流之间切换的往复,使三维数据重复的请求。
在这里,您可以定义After Effects的摄像机或者使用现有的CINEMA 4D相机。 包含以下四个选项:
在上图中,该选项CINEMA 4D摄像机将使用当前活动的CINEMA 4D的场景摄像机。使用选择CINEMA 4D摄像机(Select CINEMA 4D Camera)选 项,选择一个现有的CINEMA 4D的摄像机。需要注意的是仅可以选择已存在于CINEMA 4D场景中的摄像机。 下面的两个选项让After Effects的用户创建摄像机。备选方案之间的区别是所用的坐标系。使用CINEMA 4D的坐标系统的原点位于现场的中 心,它的轴取向成三维空间中在正方向和负方向。在After Effects,坐标的零点在于当前合成的左上角。 这就是为什么CINEWARE设置提供了两个方法在After Effects中使用摄像机。如果使用合成摄像机(Comp Camera),After Effects和CINEMA 4D 的坐标将是不相同的。这可能会稍微混乱的长期的After Effects用户,可以使用中心合成摄像机(Centered Comp Camera)选项来对准两个坐 标系。
CINEWARE 与 After Effects 创建的每一个多通道,将包含一个活跃的渲染元素。设置多通道过滤选项允许你定义什么将在一个给定的CINEMA 4D层显示。
要创建单独的渲染元素附加层,可以被复制一个所需的元素,使用上述的选项添加。 使用分配的所有按钮,同步呈现在一个给定的成分设置适用于所有CINEMA 4D层。 多通道还用于输出对象传递,这将在After Effects中用作亮度蒙版对各个元素的分离校正。注意,至少在草案标准渲染模式必须以生成单个 道次被激活。额外的输出只能通过合成标记输出。 要配置对象的推移,在CINEMA 4D相应的对象必须具有分配给他们所需的组ID的合成标记。还必须在CINEMA 4D启用多通选项渲染设置与定义所 需的对象。 但是,请注意,CINEMA 4D特效和个别灯光分离(多通道)还没有支持这种集成。 要多通道工作时达到最佳效果,建议使用Adobe项目设置并设置为线性工作流(线性化的工作空间)和一个32位浮点色彩深度使用,如果可能 的话。否则,可能会出现伪影。
Note that only those lights will be transferred that have the Export to AFX option enabled in their General tab's settings in CINEMA 4D. This option is enabled by default for every Light object and every camera in CINEMA 4D.
在3D的迷人世界入门很简单。如果你还没有拥有一个完整版本的CINEMA 4D,您可以使用包含在After Effects中的CINEMA 4D的精简版。
为全面,专业的工作在3D世界中,我们建议使用CINEMA 4D Broadcast 或者 CINEMA 4D Studio版本。 所有的产品信息,请访问
交换场景信息
为了使CINEMA 4D和After Effects融合,摄像机和灯光,包括动画,在CINEMA 4D的场景设置可以被转移到After Effects中在任何时间进行摄 像机动画或场景照明编辑。所有摄像机和灯光属性将保持一致。点击提取(Extract)按钮,在CINEMA 4D的命令菜单将在After Effects合成中创 建相应的元素。
如果没有CINEMA 4D的文件存在,可以通过After Effects菜单中的>文件>新建>MAXON CINEMA 4D文件,新建一个文件。如果你想在现有的组合 创建一个新的CINEMA 4D层,在After Effects的图层菜单使用相同的命令。