系统安装操作说明书
凝思安全操作系统龙蜥版 V6.0.97 AN7 X86_64 安装手册说明书

凝思安全操作系统龙蜥版V6.0.97 AN7X86_64安装手册V1.0北京凝思软件股份有限公司目录一、安装准备 (1)1、安装介质 (1)2、安装前信息准备 (1)二、安装凝思安全操作系统龙蜥版V6.0.97 (2)1、配置硬件 (2)2、引导安装介质 (2)3、加载内核,硬件初始化,检查安装介质 (4)4、本地化设置 (5)5、软件安装 (8)6、系统安装位置 (11)7、设置网络和主机名 (15)8、KDUMP设置 (19)9、用户设置 (21)10、系统初始设置 (25)三、操作系统基本设置 (34)1、本地YUM源配置 (34)表格插图插图 1 (3)插图 2 (4)插图 3 (5)插图 4 (6)插图 5 (7)插图 6 (8)插图 7 (9)插图 8 (10)插图 9 (11)插图 10 (12)插图 11 (13)插图 12 (14)插图 13 (16)插图 14 (17)插图 15 (18)插图 16 (19)插图 17 (20)插图 18 (21)插图 19 (22)插图 20 (23)插图 21 (24)插图 22 (25)插图 23 (26)插图 24 (27)插图 25 (28)插图 26 (29)插图 27 (31)插图 28 (32)插图 29 (33)一、安装准备1、安装介质安装凝思安全操作系统龙蜥版V6.0.97应使用符合硬件平台版本的操作系统介质,按照硬件平台的 CPU 和应用系统的兼容新对操作系统的要求进行选择。
操作系统安装介质为DVD,U盘等等。
2、安装前信息准备在安装前需要准备好安装中所需要的基本信息。
其中硬盘系统的规划是最主要的安装前准备信息,一旦按照指定的硬盘规划进行安装就无法在安装后更改,如果要进行更改则需重新安装。
其他需要的信息:主机名、IP 地址、子网掩码、网关、默认密码等。
二、安装凝思安全操作系统龙蜥版V6.0.971、配置硬件服务器通常都配有磁盘阵列卡,在安装操作系统之前必须先对磁盘阵列卡进行配置,具体配置请参考硬件手册。
统信服务器操作系统企业版V20安装手册说明书

统信服务器操作系统企业版V20安装手册统信软件技术有限公司2020年07月目录1.概述 (1)1.1.支持的硬件 (1)1.1.1.支持的体系 (1)1.1.2.多处理器的支持 (2)1.1.3.图形卡的支持 (2)1.1.4.外围设备的支持 (3)1.1.5.存储系统的支持 (3)1.2.需要固件的设备 (3)1.3.避免专有或封闭的硬件 (4)1.4.安装介质 (5)1.4.1.U盘 (5)1.4.2.CD-ROM/DVD-ROM (6)1.4.3.网络 (6)2.安装准备 (7)2.1.备份数据 (7)2.2.硬件环境 (7)2.3.网络设置 (8)2.4.系统分区 (8)2.5.最低配置要求 (10)2.6.获取镜像 (10)2.7.制作安装介质 (10)2.7.1.光盘刻录 (11)2.7.2.U盘制作 (11)2.8.PXE安装配置 (12)2.8.1.概述 (12)2.8.2.网络图 (12)2.8.3.服务器要求 (13)2.8.4.客户机要求 (14)2.8.5.服务器软件安装 (14)2.8.6.NFS安装配置 (14)2.8.7.TFTP安装配置 (15)2.8.8.Dnsmasq安装配置 (17)2.9.相关设置 (19)2.9.1.BIOS设置菜单的使用 (20)2.9.2.选择引导设备 (20)2.9.3.具有UEFI固件的系统 (21)2.9.4.需要留心的硬件问题 (22)3.安装过程 (23)3.1.虚拟机安装 (23)3.1.1.统信操作系统 (23)3.1.2.Windows或其它操作系统 (23)3.2.安装引导 (23)3.2.1.U盘启动 (24)3.2.2.光盘启动(CD/DVD) (24)3.2.3.网络引导启动 (24)3.3.引导界面 (25)3.3.1.Install UOS Server Enterprise20(Graphic) (25)3.3.2.Check ISO md5sum (26)3.4.执行安装 (27)3.4.1.图形方式安装 (27)4.系统配置 (34)4.1.选择时区 (35)4.1.1.地图选择 (35)4.1.2.列表选择 (36)4.1.3.时间设置 (36)4.2.创建用户 (37)4.2.1.创建用户 (37)4.2.2.选择键盘布局 (38)4.3.网络设置 (39)4.4.登录系统 (40)5.使用系统 (42)5.1.激活系统 (43)5.2.更新系统 (44)5.3.关闭系统 (45)1.概述本文档主要讲述的是64-bit设备,统信服务器操作系统企业版V20的安装及相关配置。
安居宝操作安装说明书

安居宝操作安装说明书安居宝管理软件操作系统安装及使用说明书第一部分:操作系统安装安居宝智能小区管理系统网络版包括电子巡更系统、多表抄集、停车场系统、综合系统,包括门禁系统、住宅监控、边界报警三个子系统,~系统结构为C/S(客户机/服务器一般数据都放在服务器上~工作站只结构的网络版系统),是安装管理软件~这样有利保护数据。
下面介绍两种常见的操作系统安装模式:1、客户机\服务器模式 2、单一PC使用模式一、客户机\服务器模式安装方法,此方法适用于大型网络系统,:1、服务器安装,客户机\服务器模式,服务器要求运行在Windows 2000 Server以上的网络操作系统版本~而且服务名建议设置为Server~客户机要求是Windows98/2000都行。
网络协议采用TCP/IP ~如果网络中有两台以上的PC~建议一台作专门的服务器用或服务器与工作站并用~用于运行数据库~Windows 2000Server安装完后~建议为该服务器配置域。
第一次启动后出现:,图1,第 , 页 / 共 11 页图1也可以通过打开《实用工具》中的《服务器配置》来完成此项~如果不配置~可以把下面的方框中的勾去掉。
,1, 服务器装完后为客户分配用户名~打开《开始》-> 《程序》->《管理工具》,《Active Directory用户和计算机》菜单上后出现窗口如下,图2,:图2如上选择《新建》-><Users>后,图3,第 , 页 / 共 11 页图3JuBao,就是你工作站登录时的用户名~其它其中的,An都是标识~然后点<下一步>为它设置登录密码即可完成。
2、客户机安装:工作站可以装Windows98或以上的操作系统都行~配置一下网络~在登录时~输入在服务器中建的用户登录名<User>,并输入密码即可登录到服务器域中。
二、如果只有一台PC进行管理~建议操作系统装Windows 2000Profession 版即可。
水控机系统安装使用说明书
水控机系统安装使用说明书一、引言水控机系统是一种智能化的管道控制设备,适用于各类液体管道的自动控制与管理。
本文档旨在为用户提供水控机系统的安装和使用指南,以确保系统能够正常运行并发挥其最佳性能。
二、安装前准备在安装水控机系统之前,请确保已经完成以下准备工作:1. 确定安装位置:选择一个稳定、通风良好的位置,以便安装和维护水控机系统。
2. 确保供电条件:水控机系统需要稳定的电源供应,因此请在安装前确保供电电压符合系统要求,并且接地良好。
3. 检查管道连接:确保管道连接紧固,无泄漏情况,并清洁管道以预防污染。
4. 准备所需工具:安装水控机系统可能需要使用螺丝刀、扳手等基本工具。
请确保这些工具已准备就绪。
三、安装步骤1. 安装支架:根据系统的安装指南,安装支架并将其牢固固定在安装位置上。
2. 连接电源:将水控机系统的电源线与供电电源连接。
确保电源线与接线端子紧固并无松动。
3. 连接管道:根据系统的管道连接图,将各个管道与水控机系统连接起来。
确保连接紧密,无泄漏。
4. 安装传感器:根据系统的传感器安装指南,将各个传感器正确安装在管道上,并确保传感器的位置与要求吻合。
5. 连接控制设备:根据系统的连接图,将水控机系统与控制设备(如计算机或显示屏)进行连接,确保连接稳固。
四、系统配置1. 设置参数:在安装完水控机系统后,进入系统配置界面。
根据系统的说明书,设置各项参数,如流量范围、报警阈值等。
2. 校准传感器:根据系统的传感器校准指南,对安装的传感器进行校准,以确保测量的准确性。
3. 学习模式:根据系统的学习模式说明,进行系统的学习。
系统会根据学习模式自动调整管道的控制参数,以达到最佳的管道控制效果。
五、使用说明1. 启动系统:按照系统的启动步骤,依次打开主电源和系统电源,等待系统启动并进入正常工作状态。
2. 监控管道状态:通过连接的控制设备,在监控界面上可以实时显示管道的流量、压力等参数,以及管道的运行状态。
SBQH-SM清灰系统安装使用说明书
清灰系统安装使用说明书编号:SBQH-SM版本:A杭州杭锅工业锅炉有限公司2010年5月目录一、 系统概述二、 系统的主要构件简介三、 设备安装四、 冷态试运行五、 系统在运行中的操作注意事项与维护保养编制校对审核批准日期日期日期日期一、 系统概述本系统从功能模块来区分,由四个装置组成。
1,清灰装置:将钢珠均匀地散落在受热面上。
2,运输装置:将锅炉底部淌出的钢珠收集,并输送至锅炉顶部。
3,防雨装置:对清灰系统进行防护。
4,收集装置:将灰斗中的钢珠收集起来,并转递给输送装置。
二、 系统的主要构件简介(一) 它主要由主动轮装置、减速机装、从动轮装置、播撒装置、张紧装置、限位装、输送链条、收集装置、上下支架架、防雨装置等部件组成。
如图所示意:1、减速机装置减速机装置采用摆线针轮减速电机作为动力源。
安放于整套输送装置的上部。
减速机与运行部分之间以双排链联接并传递扭矩,从而达到输送链及料斗沿导轨运行的目的。
传动轴的另一端固定倒车装置(棘轮),防止突发性断电时链斗运送部分出现逆转。
电机参数:380V,11KW,IP54,要求控制系统对其进行变频控制,初期设定为20HZ;电机就地控制柜(设计院设计,用户自理)要求布置在锅炉底部,靠近收集装置的区域,以便根据下部设备的运行情况来随时控制驱动装置的开停,同时便于地面人员操作。
2、运行部分运行部分是用于输送物料的装置,它主要由两条牵引链(由内外链板组成)、料斗、传动链轮及导向轮组成。
牵引链与传动链轮之间以齿啮合方式联接,牵引链中的轴套沿机架的导轨滚动,确保链条平稳运行。
料斗是直接承受物料的载体,每8节链板设一只料斗、两斗之间设置一个定位装置。
料斗两侧以铰接的方式固定在牵引链上,随同牵引链向前移动,以确保料斗在运行过程中始终保持承料部分的重心在支点以下,从而保证物料不会撒落。
传动链轮通过装在同一主轴上的齿链轮以双排链联接到驱动电机之上,从而达到带动运行部件运行的目的。
统信 UOS 系统安装与激活指导手册说明书

统信UOS系统安装与激活步骤指导手册版权所有©杭州海康威视数字技术股份有限公司2019。
保留一切权利。
本手册的任何部分,包括文字、图片、图形等均归属于杭州海康威视数字技术股份有限公司或其子公司(以下简称“本公司”或“海康威视”)。
未经书面许可,任何单位和个人不得以任何方式摘录、复制、翻译、修改本手册的全部或部分。
除非另有约定,本公司不对本手册提供任何明示或默示的声明或保证。
关于本手册本手册描述的产品仅供中国大陆地区销售和使用。
本手册作为指导使用。
手册中所提供照片、图形、图表和插图等,仅用于解释和说明目的,与具体产品可能存在差异,请以实物为准。
因产品版本升级或其他需要,本公司可能对本手册进行更新,如您需要最新版手册,请您登录公司官网查阅()。
海康威视建议您在专业人员的指导下使用本手册。
商标声明为海康威视的注册商标。
本手册涉及的其他商标由其所有人各自拥有。
责任声明●在法律允许的最大范围内,本手册所描述的产品(含其硬件、软件、固件等)均“按照现状”提供,可能存在瑕疵、错误或故障,本公司不提供任何形式的明示或默示保证,包括但不限于适销性、质量满意度、适合特定目的、不侵犯第三方权利等保证;亦不对使用本手册或使用本公司产品导致的任何特殊、附带、偶然或间接的损害进行赔偿,包括但不限于商业利润损失、数据或文档丢失产生的损失。
●若您将产品接入互联网需自担风险,包括但不限于产品可能遭受网络攻击、黑客攻击、病毒感染等,本公司不对因此造成的产品工作异常、信息泄露等问题承担责任,但本公司将及时为您提供产品相关技术支持。
●使用本产品时,请您严格遵循适用的法律。
若本产品被用于侵犯第三方权利或其他不当用途,本公司概不承担任何责任。
●如本手册内容与适用的法律相冲突,则以法律规定为准。
前言本节内容的目的是确保用户通过本手册能够正确使用产品,以避免操作中的危险或财产损失。
在使用此产品之前,请认真阅读产品手册并妥善保存以备日后参考。
win10系统安装方法

win10系统安装方法
1. 打开计算机,插入Win10安装光盘或U盘。
2. 重启电脑,在启动界面按下相应的键(一般是F2或者Del 键)进入BIOS设置。
3. 在BIOS设置中将启动顺序调整为首先从光盘或U盘启动。
4. 保存设置并退出BIOS,电脑将会重新启动并自动从安装光
盘或U盘启动。
5. 在安装界面选择语言、时间和键盘输入方式,点击“下一步”。
6. 点击“安装现在”并同意许可协议。
7. 选择“自定义:仅安装 Windows(高级)”。
8. 选择安装的目标磁盘,点击“下一步”开始安装Win10系统。
9. 完成安装后根据提示进行系统设置和账户创建。
10. 安装完成后,将BIOS设置恢复为原来的启动顺序。
浪潮英信服务器 操作系统安装指南说明书

浪潮英信服务器操作系统安装指南文档版本V1.0发布日期2022-05-20版权所有© 2022浪潮电子信息产业股份有限公司。
保留一切权利。
未经本公司事先书面许可,任何单位和个人不得以任何形式复制、传播本手册的部分或全部内容。
内容声明您购买的产品、服务或特性等应受浪潮集团商业合同和条款的约束。
本文档中描述的全部或部分产品、服务或特性可能不在您的购买或使用范围之内。
除非合同另有约定,浪潮集团对本文档内容不做任何明示或暗示的声明或保证。
由于产品版本升级或其他原因,本文档内容会不定期进行更新。
除非另有约定,本文档仅作为使用指导,本文档中的所有陈述、信息和建议不构成任何明示或暗示的担保。
商标声明●Inspur浪潮和“英信”是浪潮集团有限公司的注册商标。
●Windows是微软公司的注册商标。
●Intel、Xeon是Intel公司的注册商标。
●其他商标分别属于其相应的注册公司。
使用声明在您正式使用本服务器系统之前,请您先阅读以下声明。
只有您阅读了以下声明并且同意以下各条款后,方可正式开始使用本服务器系统;如果您对以下条款有任何疑问,请和您的供货商联系或直接与我们联系。
如您未向我们就以下条款提出疑问并开始使用本系统,则是默认您已经同意了以下各条款。
●我们提醒您特别注意:在任何时候,除了我们提示您可以修改的参数以外,您不要修改本服务器系统主板BIOS中的任何其他参数。
●在您使用的服务器系统出现任何硬件故障或您希望对硬件进行任何升级时,请您将机器的详细硬件配置反映给我们的客户服务中心;您不要自行拆卸服务器系统机箱及机箱内任何硬件设备。
●本服务器系统的内存、CPU、CPU散热片、风扇、硬盘托架、硬盘、电源等都是特殊规格的,请您不要将它们和任何其他型号机器的相应设备混用。
●您在使用服务器系统过程中遇到的任何软件问题,我们希望您首先和相应软件的提供商联系,由他和我们联系,以方便我们沟通、共同解决您遇到的问题。
对于如数据库、网络管理软件或其他网络产品等的安装、运行问题,我们尤其希望您能够这样处理。
安居宝操作安装说明书
安居宝操作安装说明书安居宝管理软件操作系统安装及使用说明书第一部分:操作系统安装安居宝智能小区管理系统网络版包括电子巡更系统、多表抄集、停车场系统、综合系统,包括门禁系统、住宅监控、边界报警三个子系统,~系统结构为C/S(客户机/服务器一般数据都放在服务器上~工作站只结构的网络版系统),是安装管理软件~这样有利保护数据。
下面介绍两种常见的操作系统安装模式:1、客户机\服务器模式 2、单一PC使用模式一、客户机\服务器模式安装方法,此方法适用于大型网络系统,:1、服务器安装,客户机\服务器模式,服务器要求运行在Windows 2000 Server以上的网络操作系统版本~而且服务名建议设置为Server~客户机要求是Windows98/2000都行。
网络协议采用TCP/IP ~如果网络中有两台以上的PC~建议一台作专门的服务器用或服务器与工作站并用~用于运行数据库~Windows 2000Server安装完后~建议为该服务器配置域。
第一次启动后出现:,图1,第 , 页 / 共 11 页图1也可以通过打开《实用工具》中的《服务器配置》来完成此项~如果不配置~可以把下面的方框中的勾去掉。
,1, 服务器装完后为客户分配用户名~打开《开始》-> 《程序》->《管理工具》,《Active Directory用户和计算机》菜单上后出现窗口如下,图2,:图2如上选择《新建》-><Users>后,图3,第 , 页 / 共 11 页图3JuBao,就是你工作站登录时的用户名~其它其中的,An都是标识~然后点<下一步>为它设置登录密码即可完成。
2、客户机安装:工作站可以装Windows98或以上的操作系统都行~配置一下网络~在登录时~输入在服务器中建的用户登录名<User>,并输入密码即可登录到服务器域中。
二、如果只有一台PC进行管理~建议操作系统装Windows 2000Profession 版即可。
智能家居系统安装操作指南

智能家居系统安装操作指南第1章产品介绍与包装内容 (3)1.1 产品概述 (3)1.2 包装内容检查 (4)1.3 产品组件介绍 (4)1.3.1 智能主机 (4)1.3.2 传感器 (4)1.3.3 控制器 (4)1.3.4 通讯模块 (4)1.3.5 电源适配器及连接线 (5)1.3.6 产品说明书及保修卡 (5)1.3.7 安装配件 (5)第2章系统要求与环境准备 (5)2.1 系统兼容性 (5)2.2 网络环境要求 (5)2.3 设备安装位置选择 (5)第3章设备硬件安装 (6)3.1 主控制器安装 (6)3.1.1 准备工作 (6)3.1.2 安装步骤 (6)3.2 传感器设备安装 (6)3.2.1 准备工作 (6)3.2.2 安装步骤 (7)3.3 执行器设备安装 (7)3.3.1 准备工作 (7)3.3.2 安装步骤 (7)第4章系统初始化与网络配置 (7)4.1 设备上电与初始化 (8)4.1.1 上电前准备 (8)4.1.2 设备上电 (8)4.1.3 初始化过程 (8)4.2 网络连接与配置 (8)4.2.1 连接WiFi (8)4.2.2 配置网络 (8)4.2.3 网络连接检测 (8)4.3 账号注册与登录 (8)4.3.1 注册账号 (8)4.3.2 登录账号 (9)第5章智能家居APP与安装 (9)5.1 APP与安装 (9)5.1.1 途径 (9)5.1.2 系统要求 (9)5.2 账号登录与设备绑定 (9)5.2.1 账号注册与登录 (9)5.2.2 设备绑定 (9)5.3 主界面功能介绍 (10)5.3.1 设备控制 (10)5.3.2 场景模式 (10)5.3.3 设备管理 (10)5.3.4 系统设置 (10)第6章设备管理与场景设置 (10)6.1 设备管理 (10)6.1.1 添加设备 (10)6.1.2 编辑设备信息 (10)6.1.3 删除设备 (10)6.2 创建智能场景 (11)6.2.1 场景概述 (11)6.2.2 创建场景 (11)6.3 场景触发条件与执行动作 (11)6.3.1 触发条件设置 (11)6.3.2 执行动作设置 (11)第7章系统安全与权限管理 (11)7.1 修改密码与账号安全 (11)7.1.1 修改密码 (12)7.1.2 账号安全 (12)7.2 设备共享与权限设置 (12)7.2.1 设备共享 (12)7.2.2 权限设置 (12)7.3 数据隐私保护 (13)第8章常用功能操作与使用技巧 (13)8.1 灯光控制 (13)8.1.1 开关控制 (13)8.1.2 灯光调节 (13)8.2 窗帘控制 (14)8.2.1 开合控制 (14)8.2.2 定时开合 (14)8.3 温湿度监控 (14)8.3.1 实时监控 (14)8.3.2 历史数据查询 (14)8.4 影音设备控制 (14)8.4.1 开关控制 (14)8.4.2 音量调节 (15)8.4.3 播放控制 (15)第9章系统维护与故障处理 (15)9.1 系统更新与升级 (15)9.1.2 与安装更新 (15)9.1.3 注意事项 (16)9.2 常见问题解答 (16)9.2.1 如何恢复出厂设置? (16)9.2.2 如何更改设备名称? (16)9.2.3 如何添加新设备? (16)9.3 故障排除方法 (16)9.3.1 网络连接故障 (16)9.3.2 设备无法控制 (16)9.3.3 系统响应缓慢 (16)9.3.4 无法更新系统 (17)第10章售后服务与客户支持 (17)10.1 联系售后服务 (17)10.1.1 客服:拨打我们的客服,将有专业客服人员为您解答疑问,提供技术支持。
UNIS CD2000 台式机 操作系统安装指导说明书

UNIS CD2000台式机操作系统安装指导紫光恒越技术有限公司资料版本:6W101-20201230Copyright © 2020 紫光恒越技术有限公司及其许可者版权所有,保留一切权利。
未经本公司书面许可,任何单位和个人不得擅自摘抄、复制本书内容的部分或全部,并不得以任何形式传播。
UNIS为紫光恒越技术有限公司的商标。
对于本手册中出现的其它公司的商标、产品标识及商品名称,由各自权利人拥有。
由于产品版本升级或其他原因,本手册内容有可能变更。
紫光恒越保留在没有任何通知或者提示的情况下对本手册的内容进行修改的权利。
本手册仅作为使用指导,紫光恒越尽全力在本手册中提供准确的信息,但是紫光恒越并不确保手册内容完全没有错误,本手册中的所有陈述、信息和建议也不构成任何明示或暗示的担保。
前言本手册介绍了UNIS CD2000台式机的操作系统简介、操作系统安装方法等内容。
前言部分包含如下内容:•读者对象•本书约定•资料意见反馈读者对象本手册主要适用于如下工程师:•网络规划人员•现场技术支持与维护人员•负责台式机配置和维护的网络管理员本书约定1. 命令行格式约定格式意义粗体命令行关键字(命令中保持不变、必须照输的部分)采用加粗字体表示。
斜体命令行参数(命令中必须由实际值进行替代的部分)采用斜体表示。
[ ] 表示用“[ ]”括起来的部分在命令配置时是可选的。
{ x | y | ... }表示从多个选项中仅选取一个。
[ x | y | ... ]表示从多个选项中选取一个或者不选。
{ x | y | ... } *表示从多个选项中至少选取一个。
[ x | y | ... ] *表示从多个选项中选取一个、多个或者不选。
&<1-n>表示符号&前面的参数可以重复输入1~n次。
# 由“#”号开始的行表示为注释行。
2. 图形界面格式约定格式意义< > 带尖括号“< >”表示按钮名,如“单击<确定>按钮”。
银河麒麟高级服务器操作系统 V10 安装手册说明书

银河麒麟高级服务器操作系统V10安装手册麒麟软件有限公司2021年04月目录银河麒麟最终用户使用许可协议 (1)银河麒麟高级服务器操作系统隐私政策声明 (5)第一章概述 (13)第二章安装准备 (13)第三章引导安装 (13)第四章欢迎页面 (15)第五章安装信息摘要 (16)5.1. 软件 (16)5.1.1. 安装源 (16)5.1.2. 软件选择 (17)5.2. 系统 (18)5.2.1. 安装位置 (18)5.2.2. KDUMP (21)5.2.3. 网络和主机名 (21)第六章开始安装 (23)第七章安装完成 (24)银河麒麟最终用户使用许可协议尊敬的银河麒麟操作系统及相关产品用户(以下称“您”或“贵机构”): 首先感谢您选用由麒麟软件有限公司开发并制作发行的银河麒麟操作系统软件产品。
请在打开本软件介质包之前,仔细阅读本协议条款、提供的所有补充许可条款(统称“协议”)及银河麒麟操作系统隐私政策声明。
一旦您打开本软件介质包,即表明您已接受本协议的条款,本协议将立即生效,对您和本公司双方具有法律约束力。
1. 使用许可按照已为之支付费用的用户数目及计算机硬件类型,麒麟软件有限公司(下称“麒麟软件”)向您授予非排他、不可转让的许可,仅允许内部使用由麒麟软件提供的随附软件和文档以及任何错误纠正(统称“本软件”)。
-软件使用许可在遵守本协议的条款和条件的情况下,麒麟软件给予贵机构非独占、不可转让、有限的许可,允许贵机构至多使用软件的五(5)份完整及未经修改的二进制格式副本,而此种软件副本仅可安装于贵机构操作的电脑中。
-教育机构使用许可在遵守本协议的条款和条件的情况下,如果贵机构是教育机构,麒麟软件给予贵机构非独占、不可转让的许可,允许贵机构仅在内部使用随附的未经修改的二进制格式的软件。
此处的“在内部使用”是指由在贵机构入学的学生、贵机构教员和员工使用软件。
-字型软件使用软件中包含生成字体样式的软件(“字型软件”)。
ScrapMaster 模型 SM 和 PSM 垃圾洗浴系统安装和操作指南说明书

Installation & OperatingI NS T RUCT IO NSScrapMaster Models 300-SM, 500-SMPot/Pan ScrapMaster Models 300-PSM, 500-PSMSensor technology protected byU.S. Pat. No. 7,815,1342 System Components3 Fabricator Instructions & Attaching the Disposer4 Plumbing & Electrical5 Operating Instructions6 Troubleshooting & How it Works7 Warranty8General Terms and Conditions of SaleALL INSTALLATIONS SHOULD BE MADE IN ACCORDANCE WITH LOCAL AND NATIONAL PLUMBING AND ELECTRICAL CODES.4530 East 75th Terrace Kansas City, MO 64132-2081, USA Toll Free: 1.888.725.8256 I Fax: 1.800.832.9373Manufacturers of Commercial Food Waste Solutions - Since 1944Model SM or PSM ScrapMasterFood Waste Disposer(Ships in separate box)ElectricalELECTRICALThe Salvajor ScrapMaster is designed for easy electrical installation. Internal components such as the pump motor, solenoids, separator motor, etc. are all factory pre-wired. The field wiring on the ScrapMaster consists of two (2) simple steps.First, wire from the disposer to the 1/2” knockout provided for you on the control panel that is located on the front of the ScrapMaster.Second, run power from the power source to the control panel. A 1/2” knockout is provided on the water harness side of the control plete wiring diagrams will be found inside the ScrapMaster control panel. The disposer wiring diagram will be found attached to the junc-tion box cover located on the bottom of the disposer, as well as in the disposer installation manual.IMPORTANT:The pump and separator must be checked for proper rotation.NOTE: The ScrapMaster is equipped with a safety lid switch which is located at the safety cover over the disposer. The safety lid switch is activated whenever the disposer safety cover is out of place, cutting power to the ScrapMaster system.ALWAYS USE WATERTIGHT CONDUIT AND FITTINGS WHEN WIRING THIS PRODUCT.HARD WIRE SCRAPMASTER ONLY. DO NOT CONNECT TO GFI.MAKE ALL CONNECTIONS IN ACCORDANCEThere are two (2) drain connections to be made on the ScrapMaster system. The ScrapMaster reservoir tank drain is supplied with a simple quick-opening drain valve using a 2” rubber coupler to connect to your 2” drain pipe. 3” piping is recommended for the disposer drain. These two (2) drain lines can be run separately or can be combined per local plumbing codes.HOT WATER CONNECTIONCOLD WATER CONNECTIONTO START:Close DRAIN VALVE.Position RESERVOIRSCREENS in bottom of tank.Position SALVAGE BASIN over reservoir screens.Lower SAFETY COVER over disposer.Press START button on CONTROL PANEL.(See HydroLogic ControlOperating Instructions below.)Adjust WATER PLUME VALVE.Recommended plume height 4” - 6”.TO STOP:Press STOP button on the CONTROL PANEL.Open DRAIN VALVE.Remove and drain SALVAGE BASIN.Remove RESERVOIR SCREENS from tank.Do not dump waste in tank.Rinse SALVAGE BASIN, SCREENS, tank interior and separator discs thoroughly.1. Press the START button to begin operation. Note: If the Line Disconnect is in the OFF position it will need to be turned to the ON position. • Display will read “TANK FILL DELAY”.*• The pump then starts.2. Choose from 2 modes of operation.On/Off Mode - Display reads “SYSTEM ON”. Unit will run until turned off.Water Saver Mode - Press ON/OFF to activate. The blue light will illuminate and the display will read “SYSTEM ON”. Unit will run at a normal flow rate until the operator leaves. If the operator leaves, the display will read “RUN TIME” and a timer will start. The unit will run at a reduced flow rate until the operator returns or the run timer reaches 0:00. The unit will turn off when the run timer reaches 0:00. To increase or decrease the run time, use the + and -buttons to adjust to the desired run time. If the operator returns before the run timer reaches 0:00, the unit returns to normal operation and the run timer will reset.Note: An *appears in the upper left corner of the display when the operator is in range of the sensor.Press the STOP button to end all operations.HYDROLOGIC ® CONTROL OPERATING INSTRUCTIONSU.S. Pat. No. 7,815,134LineDisconnectWARNING! DISCONNECT THE POWER TO THE SYSTEM BEFORE SERVICING.This troubleshooting guide is to provide basic checks to facilitate problem isolation and repair.All repairs should be made according to local codes and by a qualified technician.IMPORTANT! Do NOT use corrosive chemicals for scrapping or cleaning purposes!How it Works• Warm water enters the tank and the ScrapMaster pump recirculates water through the gusher tube.• Cold water is introduced directly into the disposer grind chamber of the disposer.• As dishes are passed through the water plume, they are scrapped and pre-rinsed at the same time.• Water falls through the separator and returns to the tank reservoir while the food waste falls into the disposer.Equipment coveredby this warranty:All Salvajor commercial disposers, disposer systems, collector systems, accessories and parts. Length of this warranty: Parts and labor for 12 months from date of installation or 15 months from date of shipment from the factory, whichever expires first, onall disposers and systems. Accessories manufactured by Salvajor are covered for parts and labor when they are sold as partof the original disposer assembly or system package. Accessories not manufactured by Salvajor are covered for parts only. Accessories and parts sold separately are covered for parts and/or workmanship for 90 days from date of installation.Warranty coverage: Providing the equipment is unaltered, has been properly installed, maintained and operated, Salvajor will repair or replace atno cost, defective parts due to material or workmanship, if such service is performedby a Salvajor Authorized Service Center. Parts wear is not considered a defect.Conditions not covered by this warranty:Faulty or improper electrical installations, faulty or improper plumbing installations, disposer jammed by foreign object, tripped overload (re-set button), clogged drains, pump jams, clogged solenoid valves, blown fuses, abuse, accidental damage, unit improperly sized for application accordingto factory recommendations.This warranty is limited to the continental United States, Hawaii and Canada.For your nearestFactory Authorized Service Center: Call 1- 888- SALVAJOR or 816 -363 -1030 Fax 1- 800- 832- 9373or 816 -363 -4914********************These Terms and Conditions shall govern the transaction by and between The Salvajor Company (herein referred to as the “Seller”) and the customer or person or entity purchas-ing goods (“Goods”) from Seller (therein referred to as “Buyer”), together with any quotation or acknowledgment from Seller relevant to the sale of the Goods and all documents incorporated by specific reference therein, and shall constitute the complete and exclusive agreement governing the sale of Goods by Seller to Buyer. Buyer’s acceptance of the Goods will manifest Buyer’s assent to these Terms and Conditions.1. PRICESUnless otherwise specified in writing by Seller, Seller shall have the right to change the price for the Goods to Seller’s price for the Goods at the time of shipment. All prices are exclusive of taxes, transportation and insurance which are to be borne by Buyer.2. TAXESAll taxes or government charge (or increase in same) affecting Seller’s costs or which seller is otherwise required to pay or collect in connection with the sale, purchase, delivery, storage processing, use or consumption of Goods shall be for Buyer’s account and shall be added to the price.3. TERMS OF PAYMENTNet 30 days invoices will bear the date on which shipment is made and terms are based upon date of shipment and not on date of arrival. Seller shall have the right among other remedies, to terminate or suspend performance under any order, if Buyer fails to make any payment when due. Buyer shall be liable for all expenses, including attorney’s fees, relating to the collection of past due amounts. Delinquent payments shall bear interest at a rate to be determined by Seller, which shall not exceed the legal maximum rate, from the date due until paid. Should Buyer’s financial responsibility become unsatisfactory to Seller, Seller may require cash payments or satisfactory security.4. SHIPMENT AND DELIVERYDeliveries are made F.O.B. Seller’s shipping point. Risk of loss or damage and liability therefore shall pass to Buyer upon delivery to carrier. Shortages or damages must be acknowledged and signed for at the time of delivery. While Seller will use all reason-able commercial efforts to maintain the delivery date (s), all shipping dates are approx-imate and not guaranteed. Seller reserves the right to make partial shipments. If the shipment of the Goods is postponed or delayed by Buyer for any reason, Buyer agrees to reimburse Seller for any and all storage costs and other resulting expenses.5. LIMITED WARRANTYSubject to the limitations of Section 6 Seller warrants that the Goods manufactured by Seller will be free from defects in material and workmanship and meet Seller’s published specifications at the time of shipment under normal use and regular service and maintenance for a period of one year from the date of shipment of the Goods by Seller unless otherwise specified by Seller in writing. Products purchased by Seller from a third party for resale to Buyer (“Resale Products”) shall carry only the warranty extended by the original manufacturer whether or not the component is incorporated in goods sold by the Seller.The warranties provided herein are the sole and exclusive warranties by seller with respect to the goods and are in lieu of and exclude all other warranties, express or implied arising by operation of law or otherwise, including without limitation, merchantability and fitness for a particular purpose whether or not the purpose or use has been disclosed to seller in specifications drawings or otherwise and whether or not seller’s products are specifically designed and/or manufactured by seller for Buyer’s use or purpose.These warranties do not extend to any losses or damages due to misuse, accident, abuse, neglect, normal wear and tear, Buyer’s negligence, unauthorized modifica-tion or alteration use beyond rated capacity, or improper installation, maintenance or application. To the extent that Seller has relied upon any specifications, informa-tion representation or operating conditions or other data supplied by Buyer or its agents to Seller in the selection or design of the Goods and the preparation of Seller’s quotation, and in the event that actual operating conditions or other conditions differ from those represented by Buyer and relied upon by Seller, any warranties or other provisions contained herein which are affected by such conditions shall be null and void.If within thirty (30) days after Buyer’s discovery of any nonconformity with warranty within the warranty period, Buyer notifies Seller thereof in writing, Seller shall, at its own option repair, correct or replace F.O.B. point of manufacture, that portion of the nonconformity. Failure by Buyer to give such written notice within the applicable time period shall be deemed an absolute and unconditional waiver of Buyer’s claim for such nonconformity. Goods repaired or replaced during the warranty period shall be covered by the foregoing warranties for the remainder of the original warranty period or ninety (90) days, whichever is longer.Buyer assumes all other responsibility for any loss, damage, or injury to persons or property arising our of connected with or resulting from the use of Goods, either alone or in combination with other products/components.6. LIMITATION OF REMEDY AND LIABILITYThe sole and exclusive remedy for breach of any term or condition or warranty hereunder (other than the warranty provided under Section 7) shall be limited at Seller’s option to repair, correction or replacement under Section 5 or refund of the purchase price. Seller shall not be liable for damages caused by delay in performance and in no event, regardless of the form of the claim or cause of action (whether based in contract, infringement, negligence, strict liability, other tort or otherwise) shall Seller’s liability to Buyer and/or its customers exceed the price paid by Buyer forBuyer agrees that in no event shall seller’s liability to buyer and/or its customers ex-tend to include incidental, consequential or punitive damages. The term consequential damages shall include without limitation loss of anticipated profits business interrup-tion loss of use or revenue, cost of capital or loss or damage to property or equipment.It is understood that any technical advice furnished by Seller with respect to the use of the Goods is given without charge and Seller assumes no obligation or liability for the advice given, or results obtained, all such advice being given and accepted at Buyer’s risk.7. PATENTS AND COPYRIGHTSSubject to the limitations of the second paragraph of Section 6, Seller warrants that the Goods sold except as are made specifically for Buyer according to Buyer’s specifications do not infringe any valid U S patent or copyright in existence as of the date of shipment. This warranty is given upon the condition that Buyer promptly notify Seller of any claim or suit in-volving Buyer in which such infringement is alleged and, that Buyer cooperate fully with Seller and permit Seller to control completely the defense settlement or compromise of any such allegation of infringement. In the event such Goods are held to infringe such a U S patent or copyright in such suit, and the use of such Goods is enjoined, or in the case of a compromise or settlement by Seller, Seller shall have the right, at its option and expense to procure for Buyer the right to continue using such Goods or replace them with non-in-fringing Goods, or modify same to become non-infringing, or grant Buyer a credit for the depreci-ated value of such Goods and accept return of them.8. EXCUSE OF PERFORMANCESeller shall not be liable for delays in performance or for non-performance due to acts of God, acts of Buyer, war, fire, flood, weather, sabotage, strikes, or labor or civil distur-bance, government requests, restrictions, laws, regulations, orders of actions, unavailabil-ity of or delays in transportation, default of suppliers, or unforeseen circumstances or any event or causes beyond Seller’s reasonable control Deliveries or other performance may be suspended for an appropriate period of time or canceled by Seller upon notice to Buyer in the event of any of the foregoing, but the balance of the agreement shall otherwise re-main unaffected as a result of the foregoing. If Seller determines that its ability to supply the total demand for the Goods or to obtain material used directly or indirectly in the manufac-ture of the Goods is hindered, limited or made impracticable due to causes set forth in the preceding paragraph, Seller may allocate its available supply of the Goods or such material (without obligation to acquire other supplies of any such Goods or material) among itself and its purchasers on such basis as Seller determines to be equitable without liability for any failure of perfor-mance which may result therefrom.9. CANCELLATIONSeller may cancel this agreement at any time for any reason upon 30 days written notice. Unless otherwise agreed in writing by Seller, Buyer may not cancel this agreement for any reason.10. CHANGESBuyer may request changes or additions to the Goods consistent with Seller’s specifica-tions and criteria. In the event such changes or additions are accepted by Seller, Seller may revise the price and dates of delivery. Seller reserves the right to change designs and specifications for the Goods without prior notice to Buyer, except with respect to Goods being made-to-order for Buyer.11. ASSIGNMENTBuyer shall not assign its rights or delegates its duties hereunder or nay interest therein or any rights hereunder without the prior written consent of the Seller, and any such assignment without such consent, shall be void. Seller may assign its rights and delegate its duties hereunder.12. GENERAL PROVISIONSThese terms and conditions supersede all other communications, negotiations and prior oral or written statements regarding the subject matter of these terms and condi-tions. No change, modifications, rescission, discharge, abandonment, or waiver of these terms and conditions shall be binding upon the Seller unless made in writing and signed on its behalf by a duly authorized representative of the Seller. No conditions, usage or trade, course of dealing or performance, understanding, or agreement purporting to mod-ify, vary, explain, or supplement these terms and conditions shall be binding unless hereafter made in writing and signed by the party to be bound and no modification shall be affected by the Seller’s receipt, acknowledgment, or acceptance of purchase orders, shipping instruction forms, or other documentation containing terms at variance with or in addition to those set forth herein. No waiver by either party with respect to any breach or default or of any right or remedy and no course of dealing, shall be deemed to constitute a continuing waiver of any other breach or default or of any other right or remedy, unless such waiver be expressed in writing and signed by the party to be bound. All typographical or clerical errors made by Seller in any quotation, acknowledgment or publication are subject to correction.The validity, performance and all other matters relating to the interpretation and effect of this agreement shall be governed by the law of the state of Missouri. Buyer and Seller agree that the proper venue of all actions arising in connection herewith shall be only in the state of Missouri. The Convention for the International Sales of Goods shall not apply to this agreement.13. COMPLIANCE WITH CERTAIN LAWSThese Goods shall be produced in compliance with the requirements of the Fair LaborStandards Act of l938, as amended and Executive Order 11246.GENERAL TERMS AND CONDITIONS OF SALE。
集中监控应用管理系统配置安装说明书
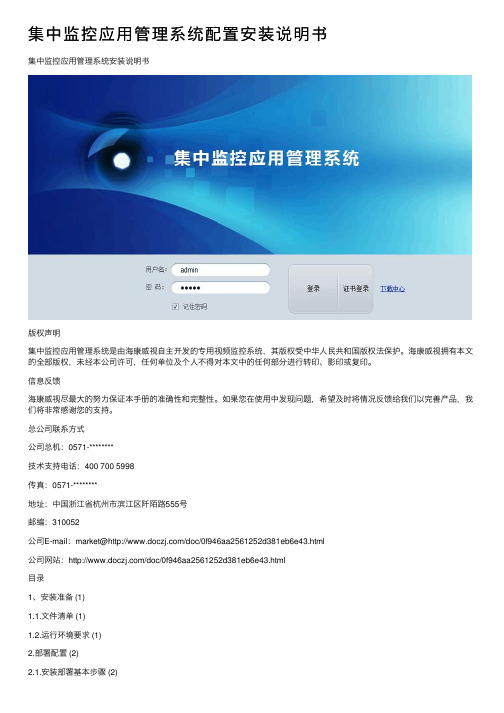
图 2.2.3.2 安装成功后,可以按照如下步骤验证CMS服务是否正常启动 1.打开IE浏览器,按照下图,将服务器IP地址添加到信任站点。
图 2.2.3.3 2.在IE浏览器地址栏输入平台地址(如果端口不是80,请在地址后面加上端口),首次登 录会提示要上传授权文件,导入liscense后可以正常登录,平台默认用户名为admin,密码为12345 注意:在有些情况下需要重新导入liscense,可以输入如下地址导入授权文件http://服务器IP /licenseUpload.jsp 2.2.4.平台服务组件安装 1、安装包为Server_Setup_V1.1.1505_186057_Build20150602,双击安装包弹出安装向导, 点击下一步直到出现以下界面,该界面需要选择安装类型: 全部安装:会安装所有的组件,建议如果没有使用全部的服务组件不要选择全部安装。 定制安装:要求用户选择需要的服务组件安装,建议选择该选项。 选择完安装类型后,会要求修改安装路径(默认d:\ivms\server),继续点击“下一步” 按钮
图 3.2.3.4 5)在分组配置框处点击新建磁盘分组按钮在弹出框中按需输入数据确定即 可
图 3.1.1 2.点击“系统配置”按钮
图 3.1.2 3、弹出“添加网域”对话框,填写“网域名称”、“平台地址”、“平台端口”
图 3.1.3 3.2.服务器添加和配置 项目上使用一般必须添加NMS、V AG、VTDU、VRM、TVMS 5个服务器。3.2.1.VTDU服务添加与配置 VTDU(流媒体服务),用于视频流转发功能,添加流程如下: 1) 点击添加按钮,进入服务添加页面:
图 3.2.3.1 2)右键点击看门狗打开文件所在位置找到pcnvr目录进入并进入 NvrDiskConfig_Tool目录
JSK-2006A系统安装使用说明书

故障现象
原因
处理方法
1
开“总电源”开关后,
主机不工作,无显示
1.“总电源”开关损坏
2.“复位”电路有故障
1.更换“总电源”开关
2.维修“复位”电路
2
计量不准
1.流量计发讯器故障
2.信号输入电路故障
1.维修流量计发讯器
2.维修信号输入电路
3
与数据管理机不能传送数据
1.传输电缆故障
2.通讯电路故障
2.4.4温度输入: 4~20mA标准电流信号。
2.5 输出特性
2.5.2 阀门状态和报警指示: LED 发光二极管。
2.5.3 提供一次流量转换器用电源: DC.+5V , DC.+12V , DC.-12V。
2.5.4提供温度变送器用电源:DC.+24V。
2.5.5提供电液阀控制用电源:AC.220V(可直接驱动电液阀)。
5.1.1 键盘布置如图(二),用户也可根据自己的需要提出更改,但须在订货合同中注明。
确定/输入
1
2
3
4
确定/输入
清 除
5
6
7
8
清 除
发 油
9
0
。
±
发 油
停 止
暂停/继续
参数设定
参数设定
暂停/继续
停 止
图(二):JSK-2006型下位机键盘布置(1台控制2货位)
5.1.2 " 总电源 "开关: 开此开关下位机通电工作,显示“货位号”和“时间”,用户操作键盘可进行参数设置或发油准备工作。关此开关下位机不工作。
JSK-2006型发油控制器隔爆结构,防爆等级dⅡBT4,防爆合格证编号CNEX.03.313。
Plan32系统安装使用说明书

Plan32安装操作说明书Plan32系统方案原理:内冲洗是一种控制温度、延长机械密封寿命的有效措施。
冲洗目的在于带走热量、控制密封腔温度,防止液膜汽化,改善润滑条件,防止干运转、杂质集积、介质聚合结焦和气囊形成。
当机械密封需要内冲洗时,而泵送介质含有颗粒,或介质温度过高、容易气化,自冲洗对密封有损坏时,需要用Plan32方案。
是利用外来的冲洗液注入密封腔内进行冲洗。
冲洗液应是与密封介质相容的洁净液体。
Plan32主要组成部件:单向阀、过滤器(通常安装在冲洗源管路上,不在约翰克兰Plan32系统供货范围内。
)、流量计(可选)、流量调节阀、压力表、温度计(可选)。
Plan32系统的安装:一端接到冲洗源管路上,一端接到密封的内冲洗口上(以上配管不在约翰克兰供货范围内。
),安装时注意单向阀上标注的箭头指向密封腔,单向阀的作用是:在泵失调(超压)或冲洗源压力下降的状态下,阻止带压介质返流到冲洗源中。
Plan32系统的压力、流量操作:所需冲洗流量的大小主要取决于泵内的喉部衬套间隙,有效阻止泵送介质进入密封腔的冲洗液流量一般不低于8L/min,流量过高会引起密封的冲蚀和能源的浪费,32系统中可用流量调节阀调节流量。
当Plan32系统中没有流量计时,一般通过观察冲洗液压力来监控冲洗流量,冲洗液的压力应比泵内的喉部衬套处的压力高,一般控制在高于喉部衬套处压力0.05~0.1MPa。
简单的Plan32系统P&ID图:Plan32系统注意事项:a.注意单向阀的安装方向;b.注意流量调节阀不能关闭;c.启泵前先打开32系统冲洗,停泵后当密封腔温度低于80℃后再关闭32冲洗系统;d.冲洗液与工作介质相容;e.注意各个接口是否有泄漏。
达梦数据库管理系统 安装手册 V3.0说明书

目录第1章安装简介 (2)1.1 DM产品的构成 (2)1.2 硬件环境需求 (6)1.3 软件环境需求 (6)1.4 计算机管理员准备工作 (6)1.5 数据库管理员准备工作 (7)1.6第三方代码及协议信息 (7)第2章 DM安装及卸载 (9)2.1 Windows下DM的安装与卸载 (9)2.1.1 安装前准备工作 (9)2.1.2 安装DM (10)2.1.3 卸载DM (17)2.2 Linux(Unix)下DM的安装与卸载 (19)2.2.1 安装前准备工作 (19)2.2.2 安装DM (23)2.2.3 卸载DM (34)第3章许可证(License)的安装 (39)3.1 Windows下License的安装 (39)3.2 Linux(Unix)下License的安装 (39)第4章数据库配置工具使用说明 (40)4.1 数据库配置工具使用说明 (40)附录1注意事项 (48)附录2 DM技术支持 (53)第1章安装简介达梦数据库管理系统(以下简称DM)是基于客户/服务器方式的数据库管理系统,可以安装在多种计算机操作系统平台上,典型的操作系统有:Windows(Windows2000/2003/XP/Vista/7/8/10/Server等)、Linux、HP-UNIX、Solaris、FreeBSD和AIX等。
对于不同的系统平台,有不同的安装步骤。
在安装DM之前,请用户仔细阅读本手册,本手册包含了重要的安装指导信息。
在安装开始之前,首先应该检查所得到的DM产品是否完整,并准备好DM所需的硬件环境、软件环境。
本章主要介绍在安装DM产品前需要进行的准备工作。
1.1 DM产品的构成DM产品包括产品光盘和相关的技术资料。
根据不同的应用需求与配置,DM提供了多种不同的产品系列:1.标准版 Standard Edition2.企业版 Enterprise Edition3.安全版 Security Edition◆DM Standard Edition标准版DM标准版是为政府部门、中小型企业及互联网/内部网应用提供的数据管理和分析平台。
方德桌面操作系统v3.1安装手册说明书
方德桌面操作系统V3.1安装手册版权所有©2019 中科方德软件有限公司联系电话:400-882-8801电子邮件:***********************官方网站:——微信公众号————产品及服务——目录1.适用范围 (1)2.系统安装前期准备工作 (1)2.1运行环境及硬件配置要求 (1)2.2安装方式 (1)2.3数据备份 (1)3.安装实施 (2)3.1启动安装光盘/U盘 (2)3.2安装类型说明及其步骤详解 (7)3.2.1安装类型说明 (7)3.2.2“共存模式”安装方式 (8)3.2.3“清空磁盘”安装方式 (10)3.2.4“自定义”安装方式 (15)3.3系统安装 (17)4.系统启动配置 (19)4.1 在双系统中隐藏/开启Windows系统 (19)4.2 修改开机默认系统顺序 (20)5.应用安装 (21)5.1应用软件安装 (21)5.2在线安装flash插件 (24)6.系统注册 (25)7.常见问题 (28)8.联系方式 (32)版权所有©中科方德软件有限公司1.适用范围本手册仅适用于方德桌面操作系统V3.1的安装、启动配置和应用安装。
如果您在使用过程中有任何问题或建议,欢迎联系我们,感谢支持!2.系统安装前期准备工作2.1运行环境及硬件配置要求方德桌面操作系统的运行环境及硬件配置要求如下:●平台:支持绝大部分X86硬件平台●CPU:支持Intel、AMD和兆芯等X86平台处理器,主频1GHz 以上,推荐双核主频1GHz 以上●内存:1G以上,推荐4G 或更高配置●硬盘:25G 以上空间,推荐50G 或更高配置●显卡:支持主流集显、独显,推荐256MB 独立显卡或更高配置2.2安装方式1)光盘使用原厂提供的系统安装光盘进行安装。
2)U盘使用原厂提供或技术支持人员协助制作的安装U盘进行安装。
2.3数据备份1)目标机器已有系统或有数据需要备份如果预安装的主机,已有Windows或其他系统,则开机进入主机系统(Windows系统),详细了解Windows系统内盘符结构和各个盘符存放的数据情况。
智慧教学系统安装及操作手册说明书

Smart Classroom System智慧教学系统 Installation and Operating Manual安装及操作手册V 1.0重要的安全说明重要的安全说明1. 在安装和使用设备前请先仔细阅读本安全操作规程。
2. 请保存好您的安全操作指南便于以后作参考用。
3. 请遵守所有设备操作指南中的“警告”事项。
4. 须遵守各项操作指南中的规章原则。
5. 清洁设备:清洁设备之前,请先关掉电源,从插座中拔出设备插头,将各连接的系统单元拆卸出来,清洁时请用干燥的软布擦拭。
6. 未经生产厂家同意,不要使用任何不匹配的附件配置,这都有可能引起危险事故。
7. 勿将设备置于潮湿或靠近热源的地方,以免发生危险。
8. 设备不应遭受水滴或水溅,不应放置诸如花瓶一类装满液体的物品。
9. 电源插头作为断接装置,应便于操作。
10. 设备应可靠连接到带保护接地的电网电源输出插座上。
11. 勿将设备放置在不稳固的台面上;在运输过程中避免设备遭受强烈振动而引起损坏,建议在运输前选用合适的包装或使用原包装。
12. 请勿阻塞设备上的通风开口,并保持室内的空气通畅,便于设备的维护。
13. 供电电压:AC 100 V-240 V 50 Hz/ 60 Hz14. 设备连接所需要的延长电缆线请绕道穿行,勿有重物挤压,这样能有效维护系统的正常工作。
15. 每套系统中所连接的接收器不得超过规定数量,否则可能会导致整个系统中设备的异常工作,如有特殊要求请与距离您最近的深圳台电售后服务中心取得联系。
16. 确保设备不被任意拆开机壳,也不允许任何硬质导体或液态物质残留在机壳内。
17. 设备有需要维护时,不要自行拆卸,请及时与距离您最近的深圳台电售后服务中心取得联系。
18. 所有TAIDEN产品将提供一定期限(详见保修卡)免费保修,但人为损坏除外,例如:A. 设备因人为作用被摔坏;B. 因操作员操作不当而导致设备受损;C. 自行拆卸后而导致部分设备零件受损或丢失。
系统安装部署说明书

项目编号和项目名称
安装部署说明书
版本号
郑重声明:XX软件股份有限公司版权所有。
本文档中任何部分未经XX软件股份有限公司书面授权,不得将材料泄露给第三方,不得以任何手段、任何形式进行复制与传播。
目录
1概述 1
2准备工作 (1)
3系统安装 (1)
3.1 数据库安装及初始化 (1)
3.2 中间件安装 (1)
3.3 其他产品模块安装 (1)
4系统部署 (1)
4.1 配置数据库连接 (1)
4.2 程序发布 (1)
5注意事项 (1)
1概述
简要说明系统安装部署的基本步骤,以及系统的组成,包含的程序包有哪些。
2准备工作
说明系统对硬件环境的基本要求及建议配置
其他需要准备的工作,如检查硬盘空间,必须在指定操作系统下安装,必须先安装.net framework等。
3系统安装
3.1数据库安装及初始化
描述数据库安装步骤及初始化方法
3.2中间件安装
3.3其他产品模块安装
4系统部署
4.1配置数据库连接
4.2程序发布
5注意事项
说明安装部署过程中特别要注意的问题、部署技巧,以及安装部署过程中的常见问题解答。
- 1、下载文档前请自行甄别文档内容的完整性,平台不提供额外的编辑、内容补充、找答案等附加服务。
- 2、"仅部分预览"的文档,不可在线预览部分如存在完整性等问题,可反馈申请退款(可完整预览的文档不适用该条件!)。
- 3、如文档侵犯您的权益,请联系客服反馈,我们会尽快为您处理(人工客服工作时间:9:00-18:30)。
系统安装操作说明书
一、安装前电脑设置
1、本软件适用于windows操作系统。
2、设置打印机输出纸张规格9.5×5.5(24.13×13.97cm)
二、软件安装
1、运行好管家软件安装程序,按提示完成每一步。
三、帐套建立
1、运行【系统管理】
2、以系统管理员身份【admin】登录,初始密码admin
3、建立新帐户:【帐户管理】→【建立帐户】
* 帐户编号不能设为【999】, 【999】帐户编号为演示帐号。
本系统允许建立多个帐户,如帐户个数小于100个,可以设帐户编号为2位数。
* 上图所有项目必须填写完整,单击【下一步】
4、设置会计期间,设置开始日期和终止日期,上图按公历自然月设置会计期间,可以对其进行
修改。
设置完毕单击【下一步】
5、完成建帐
* 如果以数据设置完整无娱,单击【确认】完成建立帐户。
如单击【确认】前检查设置是否正确,可以单击【上一步】,各步骤均有此功能。
四、帐套备份、恢复和删除
1、备份
2、恢复
3、删除
选择要删除的帐户,按【确定】。
五、结转年度帐
* 选择要结转帐户,按【下一步】设置新的会计期间,确认无误按【确定】。
六、新增用户(操作员)及设置权限
六、设置报表
1、如果单据报表打印输出不符合要求,可以通过【设置报表】打开报表,进行页面设置,并调
整位置。
七、软件注册
1、未经注册的软件,可使用演示版[帐户编号999]。