N85中文说明书
ZN85安装使用说明书

设计文件名称 安装使用说明书 KR3816.0.400.101 产品型号 名称ZN85-40.5/T 系列户内高压交流真空断路器共 14 页第 1 页底图总号 签 字 编 制 资料来源1、概述ZN85-40.5/T 系列(3AV3)户内高压交流真空断路器(以下简称断路器)作为配电线路中的一个重要元件,承担着线路电力的接通、切断、故障保护等功能。
本断路器可以使用在三相交流50Hz 、额定电压为40.5kV 及以下的电力系统中,可供工矿企业、发电厂以及变电站作电气设备的控制和保护之用,并适用于频繁操作的场所。
1.1、产品名称、型号含义:Z N 85 –40.5/ T xxxx - xxx 型户内高压交流真空断路器额定短路开断电流(kA) 额定电流(A) 弹簧操动机构 额定电压(kV) 设计序号使用场所(户内) 真空1.2、环境条件a) 周围空气温度不超过40°C,日平均温度不超过35°C ,最低周围空气温度为-25°C.b) 日相对温度平均值不超过95﹪,日水蒸气压力的平均值不超过2.2kPa ;月相对湿度平均值不超过90﹪,月水蒸气压力的平均值不超过1.8kPa ; c) 海拔不超过1000m ;d) 周围空气没有明显的受到尘埃、烟、腐蚀性和/或可燃性气体、蒸汽或盐雾的污染; e) 来自开关设备和控制设备外部的振动或地动是可以忽略的。
特殊的使用环境条件,订货时请与制造厂协商。
底图总号签字3、产品结构及特点3.1、产品外型尺寸图ZN85-40.5/T系列绝缘筒式户内高压交流真空断路器7 合闸时间ms ≤1008 分闸时间ms ≤609 每极主回路直流电阻μΩ≤80(1600A及以下)≤35(2000A)≤25(2500A)10 动、静触头允许磨损累计厚度mm 3底图总号签字ZN85-40.5/T系列固封极柱式户内高压交流真空断路器3.2、动、静触头配合尺寸4、产品结构及工作原理4.1、产品结构断路器采用上下布置结构,有效地减小断路器的深度。
诺基亚 N85 说明书

N85 用户手册
版本 1
© 2008 诺基亚。保留所有权利。 声明 我们诺基亚公司郑重声明产品 RM-335 符合指令 1999/5/EC 中的基本要求及其他相关条款。此声明的全文可经由 /phones/declaration_of_conformity/ 找到。 诺基亚、Nokia、Nokia Connecting People、Nseries (N 系列)、N85、N-Gage、Navi 和 Visual Radio (可视收音机) 是诺基亚公司 的商标或注册商标。Nokia tune 是诺基亚公司的声音标志。在本文档中提及的其他产品或公司的名称可能是其各自所有者的商标或商名。 在未经诺基亚事先书面许可的情况下,严禁以任何形式复制、传递、分发和存储本文档中的任何内容。 此软件基于 FreeType Team 的部分成果。此产品受以下一项或多项专利的保护:美国专利 US 5155805 号、美国专利 US 5325479 号、美国专利 US 5159668 号、美国专利 US 2232861 号和法国专利 9005712 号。 美国专利 US 5818437 号以及其他待定专利。T9 文字输入软件版权所有 © 1997-2008。Tegic Communications, Inc. 保留所有权利。 产品所包含的部分软件已获得 Symbian Software Ltd 的许可证授权 © 1998-2008。Symbian 和 Symbian 操作系统是 Symbian Ltd. 的商标。
Java 和所有基于 Java 的标志都是 Sun Microsystems, Inc. 的商标或注册商标。 “诺基亚地图”软件的部分版权归 © 1996-2008 FreeType 项目所有。保留所有权利。 This product is licensed under the MPEG-4 Visual Patent Portfolio License (i) for personal and noncommercial use in connection with information which has been encoded in compliance with the MPEG-4 Visual Standard by a consumer engaged in a personal and noncommercial activity and (ii) for use in connection with MPEG-4 video provided by a licensed video provider. No license is granted or shall be implied for any other use. Additional information, including that related to promotional, internal, and commercial uses, may be obtained from MPEG LA, LLC. See . 本产品已取得 MPEG-4 Visual Patent Portfolio License 的许可证授权,因此 (i) 当涉及由从事个人及非商业活动的用户以符合 MPEG-4 视频标准的编码方式 编码的信息时,可将本产品用于相关的个人及非商业用途,且 (ii) 当视频内容由已取得许可证授权的视频内容供应商提供时,可将本产品用于相关用途。对于 任何其他用途,则不授予或默许任何许可证。有关更多信息,包括与可能从 MPEG LA, LLC. 获得的优惠、内部和商业使用权相关的信息,请访问 http:// 。 诺基亚遵循持续发展的策略。因此,诺基亚保留在不预先通知的情况下,对本文档中描述的任何产品进行修改和改进的权利。 在适用法律允许的最大限度内,在任何情况下,诺基亚或其任何许可证持有方均不对任何数据或收入方面的损失,或任何特殊、偶然、附带或间接损失承担责 任,无论该损失由何种原因引起。 本文档的内容按“现状”提供。除非适用的法律另有规定,否则不对本文档的准确性、可靠性和内容做出任何类型的、明确或默许的保证,其中包括但不限于 对适销性和对具体用途的适用性的保证。诺基亚保留在不预先通知的情况下随时修订或收回本文档的权利。
N85实战导航GarminMobileXT5
N85实战导航GarminMobileXT5智能手机60v3高明软件设置本GarminMOBILE某T教程帖发布也快一年了,在此感谢各位机油的大力支持只要严格按照教程安装,100%能够成功的,由于本帖篇幅较长,因此希望大家能够耐心看帖以后只要有升级,我定会第一时间更新帖子的,请大家放心关于安装及使用过程中会碰到的典型问题,在本帖3楼底部已经汇总,往后不再跟帖解疑,望大家谅解祝大家用机愉快!前言:本帖图片附件比较多,如果看不全图片或者图片显示为某,请刷新几次!关于安装问题,提问之前请仔细看完本帖1楼智能手机60v3高明软件设置关于设置问题,提问之前请仔细看完本帖3楼关于一些常见问题的解决办法,提问之前也请仔细看完3楼最后部分不要上来就问一些帖子里面已经有说明的问题令人抓狂GarminMobile某T破解安装后进行导航完全免费,不用GPRS联网,所以不会产生任何费用!而且GarminMobile某T明确支持步行模式(设置方法见三楼最下面)一楼:破解安装+接收GPS信号设置+个性化文件+N85GPS搜星能力简单评测三楼:GarminMobile某T使用感受及设置方法+搜索使用技巧+简单评测使用GarminMobile某T常见问题解决办法汇总(见3楼底部)GarminMobile某T软件是全世界在导航界里排名第一的品牌GarminMobile某T刚推出时是配搭他们的接收器GarminMobile10一起售卖的,软件必需要和硬件一起才能运作,不过最近推出的新版本开始可以使用其他的GPS接收器了,除了蓝牙接收器外也可以使用N85等的内置接收器,前题是先把软件解锁,外国的高手就着手破解这个软件了,最近一位叫JetMoue的兄弟成功制作出适合所有版本使用的注册程序,包括S60/UIQ3/PPC/SP版的GarminMobile某T也可以以他的程序来把软件解锁了!智能手机60v3高明软件设置软件效果预览:智能手机60v3高明软件设置智能手机60v3高明软件设置智能手机60v3高明软件设置智能手机60v3高明软件设置智能手机60v3高明软件设置智能手机60v3高明软件设置下面切入正题注意:在正式安装Garmin之前,最好删除手机里面安装的第三方输入法,不然可能会导致程序的冲突如果你一定要使用第三方输入法,请确保输入法版本是最新版本如果是早期老版本的可能会造成无法使用Garmin或者不能正常使用Garmin的部分功能!智能手机60v3高明软件设置1、主程序:GarminMobile某T5.00.60(已整合V4报警点文件、防飘文件、一枚汽车图标)GarminMobile某T5.00.60.part01.rar(2MB)GarminMobile某T5.00.60.part02.rar(2MB)GarminMobile某T5.00.60.part03.rar(2MB)GarminMobile某T5.00.60.part04.rar(2MB)GarminMobile某T5.00.60.part05.rar(2MB)GarminMobile某T5.00.60.part06.rar(2MB)GarminMobile某T5.00.60.part07.rar(2MB)GarminMobile某T5.00.60.part08.rar(2MB)GarminMobile某T5.00.60.part09.rar(1.53MB)2、破解程序需要的算号器:garmin_kgen.rar(425.16KB)3、最新V5版报警点文件:SpeedCameraV5_CHS.rar(589.36KB)含有两个文件:China_SpeedCamera_CHS.gpi:测速信息文件China_TrafficPeccancyCamera_CHS.gpi:违章照相信息文件升级方法:将内存卡上Garmin--POI文件夹下面的所有文件删除,接着将此压缩包内的两个文件复制到内存卡上Garmin--POI文件夹里面4、GarminMobile某T使用手册GarminMobile某T使用手册.part1.rar(2MB)GarminMobile某T使用手册.part2.rar(1.99MB)5、地图文件:(包括最新V7.6版地图及V6.6C老版地图,请大家自行选择)智能手机60v3高明软件设置A、7.6版新地图最新的7.6版地图更新了超过700个城市的地图数据,地图覆盖市/县达2216个,覆盖县/区达2784个。
浓缩氧化锂电池 Nuvo 8 Mark 5 产品说明书

NOTE:USE THIS DRAWING ON UNITS EARLIER THAN SERIAL#062-11663A-1.1BASE ASSEMBLYNuvo0100-0300Q Rev BNOTE:USE THIS DRAWING ON UNITS AFTER SERIAL#062-11663A-2MAIN STRUCTURE ASSEMBLYFRONT VIEWNUVO0140-0300REV CA-3MAIN STRUCTURE ASSEMBLYREAR VIEWNUVO0140-0300REV CNUVO0160-0300REV AA-5COMPRESSOR ASSEMBLYNOTE:USE THIS DRAWING ON UNITS EARLIER THAN SERIAL#062-11663Nuvo0200-0300Rev.AA-5.1COMPRESSOR ASSEMBLYNOTE:USE THIS DRAWING ON UNITS AFTER SERIAL#062-11663Nuvo0200-0350Rev.BA-6CONTROL PANEL ASSEMBLYUNIT WITH OCSIFRONT VIEWNOTE:USE THIS DRAWING ON UNITS EARLIER THAN SERIAL#062-11663Nuvo0300-0330Rev.AA-6.1CONTROL PANEL ASSEMBLYUNIT WITHOUT OCSIFRONT VIEWNOTE:USE THIS DRAWING ON UNITS AFTER SERIAL#062-11663Nuvo0300-0300Rev.BA-7CONTROL PANEL ASSEMBLYUNIT WITH OCSIREAR VIEWNOTE:USE THIS DRAWING ON UNITS EARLIER THAN SERIAL#062-11663Nuvo0300-0330Rev.AA-7.1CONTROL PANEL ASSEMBLYUNIT WITH OCSIREAR VIEWNOTE:USE THIS DRAWING ON UNITS AFTER SERIAL#062-11663N UVO0300-0330R EV.BA-8CONTROL PANEL ASSEMBLY STANDARD UNIT WITHOUT OCSIFRONT VIEWNUVO0300-0300Rev AA-9CONTROL PANEL ASSEMBLY STANDARD UNIT WITHOUT OCSIREAR VIEWNUVO0300-0300Rev AA-10AIR TANK ASSEMBLYNOTE:USE THIS DRAWING ON UNITS EARLIER THAN SERIAL#062-11663N UVO0350-0300R EV.BA-10.1AIR TANK ASSEMBLYNOTE:USE THIS DRAWING ON UNITS AFTER SERIAL#062-11663N UVO0350-0300R EV.BA-11FRONT CABINET ASSEMBLY Nuvo0500-0300Rev.ANuvo0500-0300Rev.BA-12REAR CABINET ASSEMBLY NUVO0550-0300REV AA-12.1REAR CABINET ASSEMBLY Nuvo0550-0300Rev.BNUVO0600-0300Rev AREPLACEMENT PARTS LISTINGItem numbers reference call-out bubbles on the illustrationsItem Part Number Description Qty UOMBASE ASSEMBLY19250-1000BASE,NUVO1EA 28300-8068CASTER4EA 39250-1066FOAM,BASE ASSY.1EAMAIN STRUCTURE ASSEMBLY19250-1003BASE,PLATE NUVO1EA 29250-1004STRUCTURE,MAIN NUVO1EA 37206-0027BATTERY,9VOLT1EA 49250-1017HOURMETER,UNV SNAP-IN1EA 59250-1047BOLT,1/4-20X3/4"LG.GRADE24EA 69250-1020WASHER,FLAT1/4"5EA 79250-1028FILTER,AIR INLET1EA 86814-9228ELBOW,1/2DOUBLE BARB,NYLON2EA 99250-1030GOMMET,RUBBER3EA 109250-1069A TUBE,ASSY.SOUND INLET1EA 119250-1500HARNESS,WIRING115VOLT1EA 11a9250-1510HARNESS,WIRING230VOLT1EA 129250-1059CONNECTOR,MOLDED INLET1EA 139250-1022CAPACITOR,15UF W/STUD MOUNT1EA 149250-1027HOSE,PREFORMED CLEAR1EA 159250-1051FOAM,EXHAUST MUFFLER2EA 167854-6065HOSE1/2"IDX.728"OD X14.5"L1EA 179250-1046SCREW10X..5"LG HEX WASHER1EA 189250-1062TIE WRAP,14"LONG2EA 199250-1102FOAM,KIT VIBRATION1EA 259030-6008TIE,WRAP4~5EA 269250-1058BOLT,1/4-20X.5"LG.1EAREGULATOR ASSEMBLY19250-1043HOSE,1/4OD X7"LG1EA 26814-9221ELBOW,1/8NPTF X1/4ODT1EA 39250-1060REGULATOR,2PORT FREEDOM1EA 47854-6054HOSE5/32X11/32X10"LG SIL1EA 56491-1008TEE NYLON3/16HOSE BARB1EA 67854-6052HOSE5/32X11/32X2LG SILIC1EA 76956-9674VALVE CHECK¼HOSE MPC A9751EACOMPRESSOR ASSEMBLY19250-1018PLATE,COMPRESSOR1EA 29250-1023FAN,MUFFIN110VOLT1EA 2a9250-1024FAN,MUFFIN230VOLT1EA 37355-3638COMPRESSOR2660110V1EA 3a7355-3639COMPRESSOR2660230V1EA 49250-1052FITTING,BRASS1/4"NPX3/8"TUBE1EA 59250-1094TUBE,HEAT EXCH.3/8"O.D.1EA 66191-5003ELBOW,NYL1/4NPT X1/2HOSE1EA 79250-1016SPRING,COMPRESSOR VIBRATION4EA 89250-1105BOLT,1/4"X20X2"LGGRADE24EA 99250-1111SLEEVE,1/4"ID X1.29"LG4EA 109250-1112CAP,COMP.SPR.TOP4EA 129250-1109WASHER,FLAT.25"ID X1.25"OD4EA 139250-1110WASHER,LOCK1/4"ID.4EA 149250-1049BRACKET,EXH.TUBE COMP.1EA 159250-1058BOLT,1/4-20X.5"LG.GRADE23EA 169250-1020WASHER,FLAT1/4"3EA 179250-1029CLAMP,HOSE NYLON.538"-.608"ID2EA 189250-1115HOSE3/8ID X.375"X.575"X5.0"1EA 199250-1064BUMPER,.5'DIAX.06THK.BLACK4EA 999030-6008TIE,WRAP4~1EACONTROL PANEL ASSEMBLY(OCSI MODEL)19250-1005PANEL,CONTROL1EA 29250-1080BOARD,OCSI MODULE1EA 39250-1045SCREW,PLASTITE#4X3/8"PAN.HD2EA 49250-1041HOSE5/32X11/32X5LONG SIL1EA 57631-1053FILTER,BACTERIAL MK-51EA 67854-6051HOSE5/32X11/32X3LONG SIL1EA 76956-9674VALVE CHECK1/4HOSE MPC A9751EA 89250-1012SWITCH,POWER110VOLT1EA 8a9250-1013SWITCH,POWER230VOLT1EA 56491-1007ADAPTER5/32X3/32HOSE BARB1EA 67854-6050HOSE5/32X11/32X6LONG SIL1EA 76491-1006ADAPTER1/4ODT X3/16HOSE1EA 99250-1050SCREW,10-32X3/8PAN HD.PHIL8EA 109250-1040O-RING,5.0"ID X.125THICK2EA 119250-1048WASHER,NYLON.44"IDX.75"X.062"1EA 129007-6G32HUMIDIFIER FITTING DISS1EA 139250-1039COVER,PRESS TO RESET3/8"1EA 159250-1009FLOWMETER,0-5LPM1EA 169250-1011BREAKER,CIRCUIT10AMP1EA 16a9250-1010BREAKER,CIRCUIT5AMP1EA189250-1038NUT,HEX,NICKEL3/8"-271EA 199250-1021HUMIDIFIER BLOCK1EA 207854-6052HOSE5/32X11/32X2LG SILIC1EA 217854-6054HOSE5/32X11/32X10"LG SIL1EA 227854-6055HOSE5/32X11/32X7"LG SIL1EACONTROL PANEL ASSEMBLY(STD–NON OCSI)19250-1005PANEL,CONTROL1EA 29250-1090BOARD,STD NON-OCSI1EA 39250-1045SCREW,PLASTITE#4X3/8"PAN.HD2EA 47854-6048HOSE1/16X3/16X5LONG SILI1EA 56491-1007ADAPTER5/32X3/32HOSE BARB1EA 67854-6050HOSE5/32X11/32X6LONG SIL1EA 76491-1006ADAPTER1/4ODT X3/16HOSE1EA 89250-1041HOSE5/32X11/32X5LONG SIL1EA 97631-1053FILTER,BACTERIAL MK-51EA 107854-6052HOSE5/32X11/32X2LG SILIC1EA 116956-9674VALVE CHECK1/4HOSE MPC A9751EA 129250-1012SWITCH,POWER110VOLT1EA 12a9250-1013SWITCH,POWER230VOLT1EA 139250-1050SCREW,10-32X3/8PAN HD.PHIL8EA 149250-1040O-RING,5.0"ID X.125THICK2EA 159250-1048WASHER,NYLON.44"IDX.75"X.062"1EA 169007-6G32HUMIDIFIER FITTING DISS1EA 179250-1039COVER,PRESS TO RESET3/8"1EA 199250-1009FLOWMETER,0-5LPM1EA 209250-1011BREAKER,CIRCUIT10AMP1EA 20a9250-1010BREAKER,CIRCUIT5AMP1EA 229250-1038NUT,HEX,NICKEL3/8"-271EA 239250-1021HUMIDIFIER BLOCK1EA 247854-6054HOSE5/32X11/32X10"LG SIL1EA 257854-6055HOSE5/32X11/32X7"LG SIL1EA 999030-6008TIE,WRAP4~1EAAIR TANK ASSY,NUVO19250-1031TUBE,AIR TANK ALUM3/8"1EA 29250-1019BRACKET,AIR TANK1EA 36134-0916SCREW,10-32X1/2~RD PHILLIPS1EA 49250-1037NUT,10-32,LOCKNYLON INSERT1EA 59250-1056FITTING,BRASS AIR TANK1EA 67355-4775CONNECTOR,STRAIGHT1/8~MNPT X2EA 79250-1055TANK,AIR6"O.D.X10"LG1EA 89007-4G25WICK ASSY.1EA 99250-1026CLAMP,HOSE NYLON.67"-.78"ID2EA109250-1053HOSE1/2"ID X3/4"OD X10.125"1EA 119200-1006FITTING,QUICK DISCONNECT1EA 129200-1612HOSE,1/4OD X18LG1EAPOWER CORD ASSEMBLY19250-1311CORD,POWER CONC(US)1EA 1A9250-1330CORD,POWER CONC(Europe)CABINET FRONTASSEMBLY19250-1002CABINET,FRONT NUVO1EA 29250-1050SCREW,10-32X3/8PAN HD.PHIL4EACABINET BACK ASSEMBLY19250-1001CABINET,BACK NUVO1EA 29250-1006DOOR,ACCESS NUVO1EA 39250-1025FILTER,CABINET INLET1EA 49250-1050SCREW,10-32X3/8PAN HD.PHIL4EAMODULE ASSEMBLY19250-8005MODULE115V60HZ NEW1EA 29022-8G06MODULE125V60HZ REBUILT1EA 1A9250-8008MODULE230V50HZ NEW1EA 2A9022-8G07MODULE230V50HZ,REBUILT1EALABELS19250-1076LABEL,FRONT STD.1EA 1A9250-1078LABEL,FRONT W/OCSI1EA 29250-1070LABEL FRONT"NUVO"1EA 39250-1071LABEL,TOP WARNING ICON1EA 49250-1075LABEL BACK115/601EA 4A9250-1077LABEL BACK CE1EA 72010-2224F OPERATING GUIDE,STD NUVO1EA 7A2010-2224CE OPERATING GUIDE,CE MODEL1EASHIPPING MATERIAL19250-1600CARTON,CONCENTRATOR NUVO1EA 29250-1601PACK,BOX TOP1EA 39250-1602PACK,BOX BOTTOM1EAACCESSORIES19012-8780CANNULA W/7FT TUBING1EA 29012-8781TUBING EXTENSION25FT1EA 39012-8774HUMIDIFIER350CC1EA 49012-8783HOSE CONNECTOR1EA 59012-8785ADAPTER DISS TO HOSE1EA。
Phoenix Contact PTCM 0,5 8-PI-2,5 WH 连接器说明书

03/15/2019 Page 1 / 8PCB connector, nominal current: 6 A, rated voltage (III/2): 160 V, number of positions: 8, pitch: 2.5 mm,connection method: Crimp connection, color: white Your advantages White design: Stable color when welding and during use High current carrying capacity of 6 A in very compact dimensions Inverted connector with pin contacts for touch-proof device outputs or free-hanging cable/cable connections Cost-effective connection of crimped conductors in large quantitiesTools for manual and automatic crimping available as an optionKey Commercial DataTechnical dataItem propertiesElectrical parametersConnection capacityMaterial data - housingDimensions for the productPackaging informationAmbient conditions03/15/2019 Page 2 / 8Termination and connection method Mechanical tests according to standardAir clearances and creepage distancesCurrent carrying capacity / derating curves Mechanical tests (A)Durability tests (B)03/15/2019 Page 4 / 8Climatic tests (D)Environmental and durability tests (E)Environmental Product ComplianceDrawingsDiagramAmbient temperature [°C]C u rr e n t s t r e Type: PTCM 0,5/...-PL-2,5 WH with PTCM 0,5/...-PI-2,5 WHClassificationseCl@ss03/15/2019 Page 5 / 8ETIMApprovals ApprovalsApprovals cULus Recognized Ex ApprovalsApproval detailsAccessoriesAccessoriesCrimp contactAccessories - PTCM-MP-PI 0,34-0,75 R - 1013987Crimp contact, type of contact: Male connector, connection method: Crimp connection, contact surface: Tin, type of packaging: Taped on roll03/15/2019 Page 6 / 8Crimp contact, type of contact: Male connector, connection method: Crimp connection, contact surface: Tin, type of packaging: Taped on rollAccessories - PTCM-MP-PI 0,34-0,75 - 1013989Crimp contact, type of contact: Male connector, connection method: Crimp connection, contact surface: TinAccessories - PTCM-MP-PI 0,14-0,5 - 1013990Crimp contact, type of contact: Male connector, connection method: Crimp connection, contact surface: TinCrimping toolCrimping pliers - CRIMPFOX-P CC 0.75 L - 1064998Crimping pliers, for COMBICON crimp connectors with cross section: 0.14 ... 0.75 mm². Unlockable pressure lock,precise parallel crimping, front entry, B crimp, incl. 2 positioning aidsAdditional productsPrinted-circuit board connector - PTSM 0,5/ 8-P-2,5 WH - 1704861PCB connector, nominal current: 6 A, rated voltage (III/2): 160 V, number of positions: 8, pitch: 2.5 mm, connection method: Push-in spring connection, color: white, contact surface: Tin03/15/2019 Page 7 / 8Feed-through header - PTSM 0,5/ 8-HHI-2,5-SMD WHR44 - 1708001PCB headers, nominal current: 6 A, rated voltage (III/2): 160 V, number of positions: 8, pitch: 2.5 mm, color: white,contact surface: Tin, mounting: SMD soldering, Article with anti-rotation pinFeed-through header - PTSM 0,5/ 8-HHI0-2,5-SMD WHR44 - 1815251PCB headers, nominal current: 6 A, rated voltage (III/2): 160 V, number of positions: 8, pitch: 2.5 mm, color: white,contact surface: Tin, mounting: SMD solderingFeed-through header - PTSM 0,5/ 8-HHI-2,5-THR WH R32 - 1815044PCB headers, nominal current: 6 A, rated voltage (III/2): 160 V, number of positions: 8, pitch: 2.5 mm, color: white,contact surface: Tin, mounting: THR solderingPrinted-circuit board connector - PTSM 0,5/ 8-PL-2,5 WH - 1709465PCB connector, nominal current: 6 A, rated voltage (III/2): 160 V, number of positions: 8, pitch: 2.5 mm, connection method: Push-in spring connection, color: white, contact surface: TinPrinted-circuit board connector - PTCM 0,5/ 8-PL-2,5 WH - 1015458PCB connector, nominal current: 6 A, rated voltage (III/2): 160 V, number of positions: 8, pitch: 2.5 mm, connection method: Crimp connection, color: white03/15/2019 Page 8 / 8。
N85产品说明书

产品使用说明书 N85高速球型高清网络摄像机中维世纪科技有限公司 400-630-7888非常感谢您购买我公司的产品,如您有任何疑问或需求请随时联系我们。
本手册适用于N85高速球型高清网络摄像机。
本手册可能包含技术上不准确的地方、或与产品功能及操作不相符的地方、或印刷错误。
我公司将根据产品功能的增强或变化而更新本手册的内容,并将定期改进及更新本手册中描述的软硬件产品。
更新的内容将会在本手册的新版本中加入,恕不另行通知。
本手册中内容仅为用户提供参考指导作用,不保证与实物完全一致,请以实物为准。
安全使用注意事项此内容的目的是确保用户正确使用本产品,以避免危险或财产损失。
在使用此产品之前,请认真阅读此说明手册并妥善保存以备日后参考。
警告:无视警告事项,可能会导致死亡或严重伤害。
注意:无视注意事项,可能会导致伤害或财产损失。
警告1.在本产品安装使用中,必须严格遵守国家和使用地区的各项电气安全规程。
2.请使用正规厂家提供的电源适配器,供电电源要求为AC24V/3A。
3.请不要将多个高速球连接至同一电源适配器(超过适配器负载量,可能会产生过多热量或导致火灾)。
4.在接线、拆装等操作时请一定要将高速球电源断开,切勿带电操作。
5.在墙壁或天花板上安装本产品时,请牢固地固定住高速球。
6.如该高速球中出现冒烟现象,或产生恶臭,或发出杂音,请立即关掉电源并且将电源线拔掉,并同经销商或服务中心联系。
7.如果设备工作不正常,请联系购买设备的商店或最近的服务中心,不要以任何方式拆卸或修改设备(对未经认可的修改或维修所导致的问题,本公司不承担责任)。
注意1.请不要使物体摔落到设备上或大力震动设备,并使设备远离存在磁场干扰的地点。
2.避免将设备安装到表面震动或容易受到冲击的地方(忽视此项可能会损坏设备)。
3.网络摄像机在易遭雨淋场所要加防水罩。
4.请不要在高温(超过65℃)、低温(低于-30℃)或高湿度(高于90%)地点使用设备。
n85拆机教程
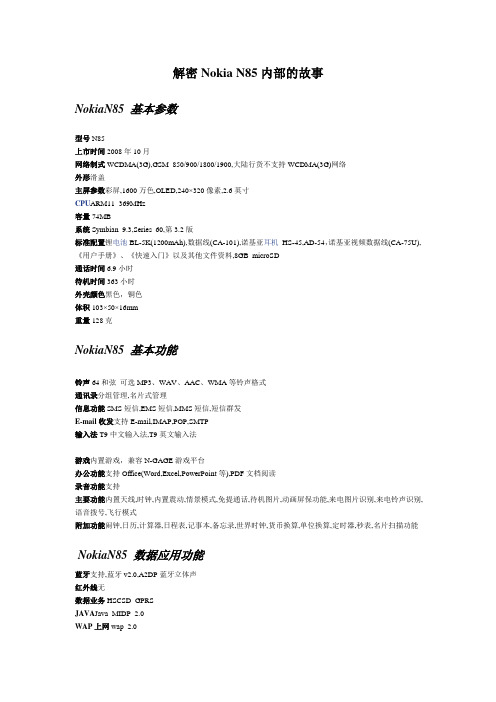
解密Nokia N85内部的故事NokiaN85 基本参数型号N85上市时间2008年10月网络制式WCDMA(3G),GSM 850/900/1800/1900,大陆行货不支持WCDMA(3G)网络外形滑盖主屏参数彩屏,1600万色,OLED,240×320像素,2.6英寸CPU ARM11 369MHz容量74MB系统Symbian 9.3,Series 60,第3.2版标准配置锂电池BL-5K(1200mAh),数据线(CA-101),诺基亚耳机HS-45,AD-54,诺基亚视频数据线(CA-75U),《用户手册》、《快速入门》以及其他文件资料,8GB microSD通话时间6.9小时待机时间363小时外壳颜色黑色,铜色体积103×50×16mm重量128克NokiaN85 基本功能铃声64和弦可选MP3、WAV、AAC、WMA等铃声格式通讯录分组管理,名片式管理信息功能SMS短信,EMS短信,MMS短信,短信群发E-mail收发支持E-mail,IMAP,POP,SMTP输入法T9中文输入法,T9英文输入法游戏内置游戏,兼容N-GAGE游戏平台办公功能支持Office(Word,Excel,PowerPoint等),PDF文档阅读录音功能支持主要功能内置天线,时钟,内置震动,情景模式,免提通话,待机图片,动画屏保功能,来电图片识别,来电铃声识别,语音拨号,飞行模式附加功能闹钟,日历,计算器,日程表,记事本,备忘录,世界时钟,货币换算,单位换算,定时器,秒表,名片扫描功能NokiaN85 数据应用功能蓝牙支持,蓝牙v2.0,A2DP蓝牙立体声红外线无数据业务HSCSD GPRSJAVA Java MIDP 2.0WAP上网wap 2.0数据线支持数据线,MicroUSB接口,usb2.0接口WLAN(WiFi)支持,802.11b/g 大陆行货不支持WiFi功能GPS定位系统支持扩展卡支持TF卡(microSD卡),支持热插拔,最大可支持8GB其它数据功能内置Modem,USSD功能,SyncML功能NokiaN85 多媒体娱乐功能摄像头内置摄像头,卡尔蔡司光学系统,Tessar镜头像素500万像素传感器类型CMOS传感器闪光灯内置闪光灯,双LED补光灯变焦模式自动对焦,人脸识别拍摄功能描述多种照片分辨率选择/最大支持分辨率为2048*1536像素/多种拍摄模式选择/多种照片质量选择/支持连拍,特效设置视频拍摄有声视频拍摄,支持640*480像素为22fps,320*240像素为30/15fps,176*144像素为15fpsMP3播放器支持多媒体FM收音,Flash功能好,赶紧来切入主题,拆解本次的主角N85。
N85实用技巧
最全的键盘使用技巧【短信编辑类】:☆一条信息,按住笔型键,再按删除C键,可以将短信复制到记事本(什么意思呢,就是在看信息的时候按住笔型键再按一下C字键,然后去记事本看一下,是不是已经存进去了……这样就可以放心看一条删一条了,这样别人打开收件箱向来没有短信,其实都在记事本里……哈哈哈哈,想跟我斗??……)☆需要连续输入符号时,只须按*移动你想要输入的符号,按几下5键然后再按确定键,就可以了,(输无敌分隔线-------和一些表情比如^-^ -_-!!! 时很方便)☆写完短信后按拨号键可以直接发送☆长按住#就可以立刻转换为数字输入法☆要输入哪个数字,可以不必切换输入法,直接长按那个数字就可以了,省的来回换☆按住笔形键加方向键上下左右实现文本编辑里的涂黑☆中文输入方式下,输完拼音按*键就会出现声调,按一次换一个声调,这样找某些变态人名就方便多了☆按一下0是空格,两下是数字0,三下是回车换行,(四下还是空格0 回车空格0 回车空格0 回车空格0 回车空格0 回车,在下真变态……)☆中文输入方式下,按一下1是。
2下1是,3下1是?4下1是!(4个常用的足够了,5下之后的、等等,如果和在下一般变态的话,可以测验手速和评测键盘……)【键盘程序类】☆在程序管理菜单下,直接按C键就可以删程序了☆待机下长按数字0键就可以进入网络☆短按多媒体键是开启设置好的程序,长按是重新设置程序☆长按功能键,会打开有已开程序的菜单,如果想退出其中一个,直接可以按“C”键退出,就不用进入后再退出了☆待机状态下长按#键转情景模式(无声)当然还有切换线路2的☆长按住右软键能打开“声控命令”下的程序☆头顶上的关机键,未锁键盘的情况下,按一下可以调出情景模式选择菜单【一些进阶应用,只有自己用惯了或者会用才能体会到的…】☆在“十二宫格”的程序菜单里,直接按数字键1-9、*、0、#键可以直接打开对应位置的图标。
☆键盘锁住时如何打开背景灯看时间?说明书上说抠电源键特色功能及应用技巧1.“情景模式”里多个“说出呼叫方姓名”,开启后有来电时会报出来电者的名字,前提时这个号码已经在手机里存上的。
N85基本问题汇总

1:N85的屏幕是多大的分辨率是多少?答:屏幕是2.6寸,分辨率320*240.2:N85可以放什么格式的影片?答:N85本身携带的播放器可以播放3GP和MP4格式的影片,装入第三方播放器后,基本上市面上流行的影片格式都是可以播放的,但是N85不带自动适应分辨率全屏功能,所以影片需要转换!3:OX游戏按键在哪里,是不是就是滑盖上的播放/停止那两个键?答:专门的游戏按键在下滑盖里,共有4个按键,中间两个是专门的游戏按键,边缘的两个按键是图片的放大与缩小按键!4:这款手机可选颜色只有黑色吗?那女生用户怎么办!?答:哪款手机只是会出黑色的?这点可以放心,N85正式开卖后肯定会推出别的颜色来占领女性市场的! 5:N85的滑盖做工质量还是象N95那样吗?答:据国外媒体对N85的评测是:N85的滑盖设计比N95大有改观,滑盖很实在很结实,并不存在N95华盖的摇晃和摩擦问题!相信是采用了新的滑盖设计!6:N85正面采用的是抛光设计这样会不会很容易磨花?答:所有手机的屏幕都是抛光设计的!关键是N85的按键部分也采用了抛光设计!从NOKIA这个季度新的投诉居高不下!从N78正面采用的耐磨的材质可以简单的说N85这代产品的正面应该不会那么容易磨花!NOKIA也在考虑自己的做工了!只能期待他的做工材质是好的!7:N85的上市价格会是4500块吗?答:不是4500块,但是只多不少!欧洲定价是450欧元!这里不包括税和代理商的补贴!所以N85上市价格可能在5500元左右!饱含水分!8:N85的CPU是什么的?有没有采用新的CPU?答:N85的CPU是OMAP 2420,这种CPU在图象处理和3D处理上都非常的优秀!但是他不是新的CPU! 9:N85没有充电插口?要用USB充电不是很麻烦!!?答:本来的手机有USB和充电两个插口!现在省缺掉了充电那个插口,而融合到了USB,相对应的到N85出来的时候会出个USB的直充!!这是一种很好的更新!你是喜欢手机多个插口还是少个插口呢....首先要明白,从N85开始USB也能充电了!!10:听说N78的FM发射功能被国行***掉了,N85的会吗?答:N85发布那天已经说N85的国行FM发射器不会被***掉!11:国行的N85是不是就不带WIFI功能了?答:是的!由于中国信产部明文规定为保护国家利益所以行货手机的WIFI全都是取消的!建议大家买港行!即可以保修,也可以利用热点无限上网!而且还便宜点!12:N85的电池续航能力好不好呀?答:N85采用的是1200毫安的电池!根据各网站的评测,待机能力还是不错的!13:听说N85采用了新的屏幕是不是很费电!?答:不是的,新的屏幕有以下几个特性!1:自发光!不再需要二级管去发光了!2:可视角度广!180度每个角度都能看见屏幕显示,并且颜色正宗!3:色彩更加艳丽真实!4:消耗电力少!所以说耗电更少才对!14:为什么国行的手机没有wifi?答:WIFI是无线局域网的一个标准。
panasonic+nv-gs85gc+操作说明书
使用說明書Operating InstructionsLSQT1123 A2LSQT1123安全注意事項ª請仔細閱讀使用說明書並正確使用攝像機。
≥由於未按照使用說明書中說明的操作步驟進行操作,而導致的損害或材料的損壞僅由用戶負責。
試用攝像機在記錄首個重要事件前,首先要試用一下攝像機,以保證其錄製性能與各種功能能夠正常使用。
製造商對於錄製內容的損失不承擔任何責任。
製造商對於因攝像機、其附件或錄影帶的故障或缺陷造成的任何損失概不負責。
請嚴格遵守版權法。
若非個人使用,複製先期錄製的錄影帶、磁碟、其他出版物或播放材料都侵犯版權法。
即使是個人使用,也嚴禁複製某些特定的材料。
≥攝像機使用了版權保護技術,並且被日本和美國的專利技術和知識產權所保護。
要想使用這些版權保護技術,必須得到Macrovision 公司的授權。
禁止分解或改裝攝像機。
≥SDHC 徽標是商標。
≥mini SD 徽標是商標。
≥使用說明書中的所有其他公司和產品名稱都是各個公司的商標或註冊商標。
錄製在SD 卡上的檔案本攝像機可能無法回放由其他設備錄製和創建的檔案,反之亦然。
為此,請預先檢查設備的相容性。
參照頁參照頁頁碼的兩側標有短划線,例如:-00- 菜單操作流程用>>表示。
警告:若想降低起火、電擊或產品損壞的危險,≥請勿將本設備暴露於雨中、潮濕、滴水或濺水的環境中,並且勿將盛滿液體的物體(如花瓶)放在本設備上。
≥請僅使用推薦的附件。
≥請勿卸下機身的前蓋(或後蓋);機身內沒有用戶可維修的部件。
需要維修時,請聯繫授權的維修人員。
注意!≥請勿將此設備安置在書櫃、壁櫥或其他狹窄的地方。
請確保本機通風良好。
若想降低由於過熱而導致的電擊或火災的危險,請勿讓窗簾或其他物品遮住通風孔。
≥請勿用報紙、桌布、窗簾及類似物品遮住本機的通風孔。
≥請勿將明火放置在本機上,如點燃的蠟燭。
≥用環保的方式處理電池。
電源插座應當安置在本設備附近,並便於連接。
Kitchener 8 号钢铁电麦克风机器人说明书

#8 STAINLESS STEEL ELECTRIC MEAT GRINDEROWNER’S MANUALThank you very much for choosing a Kitchener™ product! For future reference, please complete the owner’s record below:Model: _______________ Purchase Date: _______________Save the receipt, warranty and these instructions. It is important that you read the entire manual to become familiar with this product before you begin using it.This machine is designed for certain applications only. The distributor strongly recommends this machine is not modified and/or used for any application other than that for which it was designed. If you have any questions relative to a particular application, DO NOT use the machine until you have first contacted the distributor to determine if it can or should be performed on the product.For technical questions and replacement parts, please call 1-800-222-5381.TECHNICAL SPECIFICATIONSHP 0.35 HPVolts 120VWatts 250WNeck #8Overall Dimensions (L x W x H) 19.3in. x 8.3in. x 13.6in. (490 x 212 x 345 mm) Capacity Per Hour 264 lbs. (Pork) / 198 lbs. (Beef)Motor Speed - No Load 240 RPMHopper Size Elliptic 11.8in. x 7.9in. x 4.3in. (300 x 200 x 109 mm) Inlet Diameter 2in. (51mm)Outlet Diameter 2.4in. (62mm)Plate Diameter 2.4in. (62mm)Size of Plate Holes 3/16in. (4.5mm), 3/8in. (10mm)Stuffing Tubes Included 3/8in. (10mm), 3/4in. (20mm), 1-1/4in. (30mm) Discharge Pan Dimensions (L x W x H) 9.4in. x 8.7in. x 1.6in. (240 x 220 x 42 mm)GENERAL SAFETY RULESWARNING:Read and understand all instructions.Failure to follow all instructions listed below may result in electric shock, fire and/or serious injury.WARNING:The warnings, cautions, and instructions discussed in this instruction manual cannot cover all possible conditions or situations that could occur. It must be understood by the operator that common sense and caution are factors which cannot be built into this product, but must be supplied by the operator.SAVE THESE INSTRUCTIONSWARNING:YOUR SAFETY IS THE MOST IMPORTANT ISSUE WHEN USING ANY ELECTICAL PRODUCT. BASIC SAFETY PRECAUTIONS MUST ALWAYS BE FOLLOWED! •ALWAYS disconnect unit from power source before servicing unit.•NEVER use this appliance outdoors or in a wet or damp environment. Never allow power cord to be exposed to water or any other liquid. Electrical shock may cause serious injury or even death.•ALWAYS check grinder for any damaged parts prior to using, including power cord.•NEVER modify power cord or plug in any way. ALWAYS use the proper outlet with a 3 prong grounded line.•ALWAYS make sure the power switch is in the off position before plugging in or removing the unit’s power cord. NEVER use the cord to remove the plug from the outlet.•NEVER use the appliance in an area where the cord is exposed to possible entanglement.ALWAYS protect the cord from being snagged as this could cause the appliance to be turned over.•NEVER attempt to operate this appliance while under the influence of alcohol, drugs or medications. •NEVER leave your appliance unattended. ALWAYS turn off the power switch and disconnect the unit from the power source before leaving the work area.•ALWAYS keep children and inexperienced users a safe distance away from this appliance.Children and inexperienced users should never be allowed to operate this unit.•Trim all excess tendons, cartilage, cords, blood clots and remove meat from bones.•NEVER leave this appliance unattended while it is in operation or while connected to a power source, which would allow anyone unqualified to turn on this unit.•ALWAYS make certain the appliance is seated firmly on a level, stable surface.•NEVER operate this appliance without animal meat in the unit. Severe damage can occur if unit is run for any length of time without product in the unit.•ALWAYS tie back loose hair and clothing before attempting to operate this appliance and roll back any long sleeves you may be wearing.•ALWAYS remove any rings, watches, bracelets or other jewelry before attempting to operate this appliance. Not doing so could cause serious injury and damage the unit.•ALWAYS wear eye protection (safety goggles) when operating this appliance.•WARNING: NEVER use fingers to push meat into hopper intake. Doing so could result in loss of appendages and serious injury. Always use food plunger.WARNING:NEVER use hands or fingers to pull or scrape meat away from the grinding plate outlet. Doing so could result in loss of appendages and serious injury.•NEVER extend your reach or reach over any object to feed the grinder. Keep a stable balance and firm footing at all times.•NEVER insert any foreign object into this appliance. Always use the accessories that were provided with your unit.•ALWAYS turn off and disconnect the appliance if it becomes jammed. Wait until the unit has come toa complete stop before attempting to remove any jammed matter.•NEVER force this appliance to operate beyond its designed rate. Trying to push the unit will only result in problems. Practice safety and allow the unit to work properly.•NEVER attempt to grind bones, cartilage or tendons. Make sure all metal matter (bullets, shot, etc.) have been removed from all meat.•ALWAYS allow all moving parts to come to a complete stop before using the reverse mode.Reverse mode is designed to run for only a few seconds. Prolonged usage will result in damage to the unit’s motor. Hitting the reverse mode while the unit is still running will also damage the motor. •NEVER attempt to remove or attach the hopper tray, grinder head, locking cap or other accessories while the appliance is in operation or plugged into the power outlet.ASSEMBLY AND OPERATION INSTRUCTIONSBefore Use:✓Disassemble the grinder head and wash each part thoroughly in warm soapy water, removing all food-grade packing grease and oil from the surfaces. Dry all parts before re-assembly.✓Keep packing material for future storage of grinder and grinder parts.Assembly Instructions:✓Insert grinder head into gear housing; be sure that the hopper tray throat is facing upward. Holding grinder head with one hand, place locking knob into the hole on the side of Motor housing and tighten it clockwise (See Fig 1).✓Insert auger into the grinder head. You may need to turn the auger to align it with the drive shaft of the motor (See Fig 2).✓Place cutting knife blade onto Feed Screw shaft of the auger with the Flat edge of blade facing the front (See Fig 3).✓If blade is not seated properly, meat will not be ground.✓Place desired grinding plate next to Cutting Blade. The notch in the plate should align with the protrusion on the grinder head (See Fig 4).✓Firmly screw ring cap onto grinder head. Do not over tighten (See Fig 5).✓Insert the Hopper meat tray onto the throat of the head (See Fig 6).Grinding Instructions:✓For best results, trim all excess tendons, cartilage, cords and blood clots and remove meat from bones.✓Optimal results occur when meat is chilled to 32-34°F before grinding.✓Cut meat into pieces that will easily fit in throat of grinder head. (Approximately 1in. squares.)✓Place cubed meat into tray. Be sure not to over fill the tray. Make sure the throat opening of the tray remains clear and open.✓Place a dish, bowl or tray under grinder head to catch ground meat.✓Switch grinder to on position. Carefully begin to feed meat down the throat. Use plunger to push meat. DO NOT use fingers or utensils other than the plunger provided; bodily injury may occur and you could damage your grinder.If Jamming Occurs or Performance Slows:WARNING:Shut grinder off immediately and remove power cord from outlet.✓Carefully remove Grinder head ring cap, grinder plate and cutting blade.✓Carefully clean grinder plate holes thoroughly and remove any tendons from around cutting blade. ✓Replace cutting blade, grinder plate and screw ring cap back onto grinder head.✓Continue grinding✓Repeat steps as necessary to enhance grinder performance.Grinders Reverse Function:✓Switch off the machine.✓Switch CIRCUIT BREAKER to reset.✓Press OFF/REVERSE to clear any materials that are jamming the machine.✓Reverse operation will continue for as long as OFF/REVERSE is pressed.*Extended use of Reverse is not recommended and will cause damage to motor.✓If performance remains slow or there is still a jam go to steps under “If jamming occurs or Performance slows” above and repeat as needed.Sausage Stuffing Directions:✓Properly prepare casings as directed on casing packaging. Place artificial or natural intestines onto sausage funnel.✓Load hopper with prepared meat and feed meat into grinder head opening before operating unit.Do not operate grinder without meat in grinder head. Damage to auger and/or motor can occur.✓Plug in and turn switch to on position when ready to start.✓Hold the casing on the sausage tube in one hand and slowly let the meat output pull the casing from the tube. Fill casing as desired by holding casing back on tube.✓Twist or tie the sausage into links as desired. Tie end of casing into a knot.✓It is recommended that 2 people perform sausage stuffing.✓Add small amounts of water to your ground meat when stuffing sausage to improve output of meat through sausage stuffing tube.After use:✓Unplug and disassemble all parts and wash thoroughly in soapy water.✓NOTE: Do not place parts in a dishwasher; wash all parts by hand✓You must remove all foreign material from all appliance parts. (Grinding stale bread may help remove food residue.)✓Dry all surfaces.✓Do not use bleach or chlorine-based chemicals to clean. Discoloration of plastic parts can occur.✓Wipe down all non stainless steel parts with a food grade spray. Alternatively, wipe down with a salad oil to keep from rusting.✓Do not immerse motor housing in water. Damage to motor can occur. Wipe with damp cloth to clean.TROUBLE HOOTINGPROBLEMS SOLUTIONSGrinder has no power Check power to outlet. Make sure unit is securely plugged into outletGrinder has no power, but outlet does First, check and reset circuit breaker. Problem may be with switch or power cord. Contact customer service.Grinder hums or runs in only one direction Grinder has switch or internal problem. Try resetting circuit breaker. Contact customer service.Grinder hums or labors to operate Possible cold gear grease problem. Move grinder to warmer area. If this does not work contact customer service.Grinder runs slowly and erratically Possible cold gear grease problem. Move grinder to warmer area. If this does not work contact customer service.Meat is backing up at the back of the grinder Auger is not able to handle large portions of meat. Cut meat into smaller pieces so auger can work properly.Meat is only turning around the auger andcompressing against the head Meat is too warm. Cool meat to a temperature around 40°.Meat does not flow through grinder Make sure grinder head is properly assembled. Check sharpness of knife blade.Meat is backing up at head and will not flow Meat may be snagging on the auger or other parts. Lubricate internal parts with food-grade silicone spray.PARTS DIAGRAMPARTS LISTPart No. Description Qty. Part No. Description Qty.1 Motor Assembly 1 each 21 Gasket 1 each2 Motor Cover 1 each 22 Hex Screw 4 each3 Meat tray 1 each 23 Hex Nut4 each4 Meat Stomper 1 each 24 Flat washer 4 each5 Grinder Head 1 each 25 Elastic washer 4 each6 End Nut 1 each 26 Cable Box 1 each7 Stuffing tubes 3 each 27 Support Base 1 each8(a) Plate - coarse 1 each 28 S/S Cross Screw 4 each 8(b) Plate - fine 1 each 29 Foot 4 each9 Blade 1 each 30 Cable clip 1 each10 Stud 1 each 31 Cable 1 each11 Auger 1 each 32 Waterproof switch 1 each12 Auger Bushing 1 each 33 Hex Screw 4 each 13,14,15,16,17,19 Gear Assembly 1 each 34 Star Handle 1 each18 Front panel of gear box 1 each 35 Receiving meat tray 1 each20 Back Panel of Gear Box 1 eachFor technical questions and replacement parts, please call 1-800-222-5381.WARRANTYOne-Year Limited WarrantyDistributed byNorthern Tool + Equipment Co., Inc.Burnsville, MN 55306-6936Made in China.。
氖熱器N8MSN、N8MSL零件手册说明书
PARTS MANUAL Gas Furnace N8MSN, N8MSLTABLE OF CONTENTSMODEL NUMBER IDENTIFICATION GUIDE2........PARTS DIAGRAM3..............................PARTS LIST 5..................................MODELSN8MSN0451408A1N8MSL0451408A1..............N8MSN0451412A1N8MSL0451412A1..............N8MSN0701408A1N8MSL0701408A1..............N8MSN0701412A1e of the AHRI Certified TM Mark indicates a manufacturer’s participation in the program.For verification of certification for individual products, go to .MODEL NUMBER IDENTIFICATION GUIDEDIGIT POSITION 123456,7,89,1011,121314N8M S L0451412A1 N = Entry8 = 80% AFUE E FFICIENCYM = Multiposition POSITIONV = Variable Speed Blower Motor − ECMX = ECM Blower MotorS = Single−stageT = Two−stage TYPEN = StandardL = Low NOx FEATURE045 = 44,000 BTU/hr070 = 66,000 BTU/hr090 = 88,000 BTU/hr110 = 110,000 BTU/hr135 = 132,000 BTU/hr155 = 154,000 BTU/hr HEAT INPUT14 = 14−3/16”17 = 17−1/2”21 = 21”24 = 24−1/2”CABINET WIDTH08 = 800 CFM12 = 1200 CFM14 = 1400 CFM16 = 1600 CFM20 = 2000 CFM22 = 2200 CFM NOMINAL MAXIMUM COOLING AIRFLOW @ .5 IN. W.C.SALES (MAJOR) REVISION DIGITENGINEERING (MINOR) REVISION DIGITECM-Electronically Commutated MotorACCESSORIES PART NUMBER IDENTIFICATION GUIDEDIGIT POSITION12345, 6, 78, 910, 11N A H A00101DH N = Non−Branded BRANDINGA = Accessory PRODUCT GROUPH = Heating KIT USAGEA = OriginalB = 2nd Generation MAJOR SERIESProduct Identifier NumberPackage QuantityType of Kit (Example: DH = Draft Hood − Chimney Adapter)N8MSN, N8MSL PARTS LISTKEYNO.DESCRIPTION FAST PARTSNO.N8MS(N,L)45148A1N8MS(N,L)451412A1N8MS(N,L)7148A1N8MS(N,L)71412A1N8MS(N,L)71716A1N8MS(N,L)91714A1N8MS(N,L)92116A1N8MS(N,L)9212A1N8MS(N,L)111712A1N8MS(N,L)112116A1N8MS(N,L)112122A1N8MS(N,L)1352116A1N8MS(N,L)1352422A1N8MS(N,L)155242A11HEAT EXCHANGER ASY118342622333444555667 2SWITCH VENT PRESSURE1183418111111−1−−111−2SWITCH PRESSURE1183920−−−−−−1−11−−−1 3WHEEL BLOWER DD10 X 6 X 1/2 CW CV11769341111−−−−−−−−−−3WHEEL BLOWER DD10 X 8 X 1/2 CW CC1176935−−−−−1−−1−−−−−3WHEEL BLOWER DD10 X 10 X 1/2 CW CC1176936−−−−−−1−−−−1−−3WHEEL BLOWER DD11 X 11 X 1/2 CW CC1176937−−−−−−−1−−1−11 3WHEEL BLOWER DD11 X 8 X 1/2 CW CV1177180−−−−1−−−−−−−−−5MTR BLR 1/115 1/5 HP 1075/311769301−1−−−−−−−−−−−5MTR BLR 1/115 1/3 HP 1075/31176931−1−1−1−−1−−−−−5MTR BLR 1/115 1/2 HP 1075/31176932−−−−1−1−−1−1−−5MTR BLR 1/115 3/4 HP 1075/31176933−−−−−−−1−−1−11 6CAP RN OV 370V 7.51171728−−11−−1−−−−−−−6CAP RN OV 370V 10117172911−−−1−1111111 6CAP RN OV 370V 151171730−−−−1−−−−−−−−−7TRANSFORMER 40VA 120−24V117721711111111111111 8BOARD CIRCUIT118338411111111111111 9SWITCH DOOR117198111111111111111 10BURNER ASY117691411−−−−−−−−−−−−10BURNER ASY1176915−−111−−−−−−−−−10BURNER ASY1176916−−−−−111−−−−−−10BURNER ASY1176917−−−−−−−−111−−−10BURNER ASY1176918−−−−−−−−−−−11−10BURNER ASY1184074−−−−−−−−−−−−−1 11SENSOR FLAME117692011111111111111 12IGNITOR117691911111111111111 14ORIFICE117692822333444555667 15VALVE GAS117692911111111111111 16SWITCH LIMIT 350 F117703322222222222222 17SWITCH LIMIT AUTO RESET1176903−−−−−−−−−1−−−−17SWITCH LIMIT 165 F1176905−−−1−−−−−−11−−17SWITCH LIMIT 180 F1176906−−1−−11−−−−−−1 17SWITCH LIMIT 220 F11769071−−−−−−−−−−−−−17SWITCH LIMIT 235 F1176908−−−−−−−−−−−−1−17SWITCH LIMIT 240 F1176909−1−−−−−−−−−−−−17SWITCH LIMIT 190 F1183523−−−−−−−1−−−−−−17SWITCH LIMIT 160 F1183524−−−−1−−−−−−−−−17SWITCH LIMIT 185 F1184056−−−−−−−−1−−−−−18INDUCER MOTOR ASY117691011111−−−−−−−−−18INDUCER MOTOR ASY1176911−−−−−111−−−−−−18INDUCER MOTOR ASY1176912−−−−−−−−111111 19SWITCH LIMIT AUTO RESET 200 F117690211111111111111 20ELBOW VENT ASY118347311111111111111 21SWITCH LIMIT 210 F1176904−−−−−−−−−−1−−−22INDUCER FAN118344211111111111111 23WHEEL INDUCER 4.5 X 1.5118345411111111111111 24SHAFT SEAL118344311111111111111 25CLIP117719611111111111111 27DOOR LATCH118348722222222222222 28KNOB118348822222222222222 29INDUCER MTR 1/115 2−SPD1183448−−−−−−1−−−−−−−29INDUCER MTR 1/115 8.1 3000118352511111−−−−−−−−−29INDUCER MTR 1/115 16 30001183526−−−−−1−1−−−−−−29INDUCER MTR 1/115 30 30001183527−−−−−−−−111111 A TOP PLATE11834141111−−−−−−−−−−A TOP PLATE1183415−−−−11−−1−−−−−A TOP PLATE1183416−−−−−−11−111−−KEY NO.N 8M S (N ,L )1552N 8M S (N ,L )1352N 8M S (N ,L )1352N 8M S (N ,L )1102N 8M S (N ,L )1102N 8M S (N ,L )1101N 8M S (N ,L )0902N 8M S (N ,L )0902N 8M S (N ,L )0901N 8M S (N ,L )0701N 8M S (N ,L )0701N 8M S (N ,L )0701N 8M S (N ,L )0451N 8M S (N ,L )0451FAST PARTSNO.DESCRIPTIONA TOP PLATE 1183417−−−−−−−−−−−−11AA CELL PANEL 118342711−−−−−−−−−−−−AA CELL PANEL 1183428−−11−−−−−−−−−−AA CELL PANEL 1183429−−−−−1−−−−−−−−AA CELL PANEL 1183430−−−−−−−−−−1−−−AA CELL PANEL 1183431−−−−−−−−−−−−1−AA CELL PANEL 1183494−−−−−−−−−1−−−−AA CELL PANEL 1183528−−−−1−−−−−−−−−AA CELL PANEL 1183529−−−−−−11−−−−−−AA CELL PANEL 1183554−−−−−−−−−−−1−−AA CELL PANEL 1184054−−−−−−−−−−−−−1AA CELL PANEL 1184055−−−−−−−−1−−−−−B BOX AUX J118342111111111111111BB GASKET OUTLET 2 CELL 117689711−−−−−−−−−−−−BB GASKET OUTLET 3 CELL 1176898−−11−−−−−−−−−−BB GASKET OUTLET 4 CELL 1176899−−−−−11−−−−−−−BB GASKET OUTLET 5 CELL 1176900−−−−−−−−111−−−BB GASKET OUTLET 6 CELL 1176901−−−−−−−−−−−11−BB GASKET OUTLET 3 CELL 1183530−−−−1−−−−−−−−−BB GASKET OUTLET 4 CELL 1183555−−−−−−−1−−−−−−BB GASKET OUTLET 7 CELL 1184058−−−−−−−−−−−−−1C COVER BOX AUX J 118342211111111111111CC GASKET INLET 2 CELL 117689211−−−−−−−−−−−−CC GASKET INLET 3 CELL 1176893−−111−−−−−−−−−CC GASKET INLET 4 CELL 1176894−−−−−111−−−−−−CC GASKET INLET 5 CELL 1176895−−−−−−−−111−−−CC GASKET INLET 6 CELL 1176896−−−−−−−−−−−11−CC GASKET INLET 7 CELL 1184057−−−−−−−−−−−−−1D SHELF ASY BLOWER 11770341−−−−−−−−−−−−−D SHELF ASY BLOWER 1177035−1−−−−−−−−−−−−D SHELF ASY BLOWER 1177036−−1−−−−−−−−−−−D SHELF ASY BLOWER 1177037−−−1−−−−−−−−−−D SHELF ASY BLOWER 1177038−−−−−1−−−−−−−−D SHELF ASY BLOWER 1177039−−−−−−1−−−−−−−D SHELF ASY BLOWER 1177040−−−−−−−−−1−−−−D SHELF ASY BLOWER 1177041−−−−−−−−−−1−−−D SHELF ASY BLOWER 1177042−−−−−−−−−−−−1−D SHELF ASY BLOWER 1183531−−−−1−−−−−−−−−D SHELF ASY BLOWER 1183556−−−−−−−1−−−−−−D SHELF ASY BLOWER 1183557−−−−−−−−−−−1−−D SHELF ASY BLOWER 1184049−−−−−−−−1−−−−−D SHELF ASY BLOWER1184050−−−−−−−−−−−−−1DD RADIATOR FLAME − N8MSL (LOW NOx ONLY)117704622333444555667E HOUSING ASY BLOWER 11834621111−−−−−−−−−−E HOUSING ASY BLOWER 1183463−−−−−1−−1−−−−−E HOUSING ASY BLOWER 1183464−−−−−−−1−−1−11E HOUSING ASY BLOWER 1183532−−−−1−−−−−−−−−E HOUSING ASY BLOWER 1183533−−−−−−1−−1−1−−EE BOX SAFE GUARD117695811111111111111FF COVER SAFE GUARD BOX 117695911111111111111G CUTOFF BLOWER 11769381111−−−−−−−−−−G CUTOFF BLOWER 1176939−−−−−1−−−−−−−−G CUTOFF BLOWER 1176939−−−−−−−−1−−−−−G CUTOFF BLOWER 1176940−−−−−−1−−1−1−−G CUTOFF BLOWER 1176941−−−−−−−1−−1−11G CUTOFF BLOWER1183535−−−−1−−−−−−−−−GGCLIP HARNESS RETAINER117692211111111111111KEY NO.N 8M S (N ,L )1552N 8M S (N ,L )1352N 8M S (N ,L )1352N 8M S (N ,L )1102N 8M S (N ,L )1102N 8M S (N ,L )1101N 8M S (N ,L )0902N 8M S (N ,L )0902N 8M S (N ,L )0901N 8M S (N ,L )0701N 8M S (N ,L )0701N 8M S (N ,L )0701N 8M S (N ,L )0451N 8M S (N ,L )0451FAST PARTSNO.DESCRIPTIONH STRAP CAPACITOR OVAL 117064311111111111111HH CLIP HARNESS RETAINER 117694611111111111111J BRACKET BLOWER MTG 1183461−−−−−−−−−−−−−1J BRACKET CONTROL MTG 1183472111111−1−−111−J BRACKET BLOWER MTG 1183534−−−−−−1−−1−−−−J BRACKET BLOWER MTG 1184053−−−−−−−−1−−−−−K HARNESS ASY 80% 1−STG 118353611111111111111L BLOWER DOOR ASY 11835581111−−−−−−−−−−L BLOWER DOOR ASY 1183559−−−−11−−1−−−−−L BLOWER DOOR ASY 1183560−−−−−−11−111−−L BLOWER DOOR ASY 1183561−−−−−−−−−−−−11LL SIGHTGLASS 118347811111111111111M BRACKET DOOR SWITCH 118342511111111111111MM INDUCER MOTOR SHIELD 118344611111111111111N OUTER DOOR ASY 11835621111−−−−−−−−−−N OUTER DOOR ASY 1183563−−−−11−−1−−−−−N OUTER DOOR ASY 1183564−−−−−−11−111−−N OUTER DOOR ASY 1183565−−−−−−−−−−−−11NN INDUCER MOTOR BRACKET 118344511111111111111P MANIFOLD 117692311−−−−−−−−−−−−P MANIFOLD 1176924−−111−−−−−−−−−P MANIFOLD 1176925−−−−−111−−−−−−P MANIFOLD 1176926−−−−−−−−111−−−P MANIFOLD 1176927−−−−−−−−−−−11−P MANIFOLD 1184075−−−−−−−−−−−−−1PP INDUCER MOTOR SUPPORT 118344411111111111111RR SCREW 118344733333333333333SS GROMMET 118345333333333333333T SUPPORT ASY BURNER 117702811−−−−−−−−−−−−T SUPPORT ASY BURNER 1177029−−111−−−−−−−−−T SUPPORT ASY BURNER 1177030−−−−−111−−−−−−T SUPPORT ASY BURNER 1177031−−−−−−−−111−−−T SUPPORT ASY BURNER 1177032−−−−−−−−−−−11−T SUPPORT ASY BURNER 1184076−−−−−−−−−−−−−1TT BRACKET IGNITER 118345511111111111111VV SCREW 118345733333343443334X INDUCER HOUSING ASY 1183432−1−−−−−−−−−−−−X INDUCER HOUSING ASY 1183433−−−1−−−−−−−−−−X INDUCER HOUSING ASY 1183434−−−−−1−−−−−−−−X INDUCER HOUSING ASY 1183435−−−−−−−−−11−−−X INDUCER HOUSING ASY 1183436−−−−−−−−−−−−1−X INDUCER HOUSING ASY 11835411−−−−−−−−−−−−−X INDUCER HOUSING ASY 1183542−−−−1−−−−−−−−−X INDUCER HOUSING ASY 1183543−−−−−−1−−−−−−−X INDUCER HOUSING ASY 1183566−−1−−−−−−−−−−−X INDUCER HOUSING ASY 1183567−−−−−−−1−−−−−−X INDUCER HOUSING ASY 1183568−−−−−−−−−−−1−−X INDUCER HOUSING ASY 1184051−−−−−−−−1−−−−−X INDUCER HOUSING ASY 1184052−−−−−−−−−−−−−1Z GASKET INDUCER MOTOR 117691311111111111111PARTS NOT SHOWN)(NAHA00801LP − GAS CONV NAT>LP 118338811111111111111)(NAHA00801NG − GAS CONV LP>NAT 118338911111111111111)(KIT GASKET BLW DOOR LEAKAGE118341311111111111111。
LNMJ8.5型使用说明书

目录一、概述 (1)二、主要技术参数 (1)三、主要性能指标 (2)四、工艺流程 (2)五、基本结构及其简图 (3)六、安装、操作及维护的注意事项 (3)七、常见故障及排除 (3)八、随机附件及易损件 (6)一、概述LNM8.5型砻碾组合米机是吸收国内外最先进高效的各种砻谷机与碾米机的优点,再经我公司深入研究、合理组合、精心制造而成的新颖砻碾组合米机。
该机由去石机、砻谷机、喷风碾米机、稻壳分离器或稻壳粉碎机等部件组成。
该机能连续完成从稻谷去石、脱壳到碾成白米的加工作业,同时分别将稻壳和米糠排出机外,米糠用布袋收集。
如果不需要碾成白米,可单独进行脱壳作业,生产糙米。
该机具有脱壳率高、出米率高、碎米少、成品米不含石、米质好、能耗低等特点。
该机可配电动机安装在固定场所进行加工作业,也能置于三轮车或手扶拖拉机上,可共用柴油机动力,实现流动上门加工;该机造型美观、结构紧凑、操作容易、维护方便,是广大农村尤其是多丘陵地域的西部农村粮食加工个体户用于固定或流动式加工使用的最佳选择。
该砻碾组合米机取代黄谷米机,出米率可提高1.5~2%,碎米率降低10~15%,能实现不占耕地的粮食增产,提高农民生活质量,给用户带来经济效益。
二、主要技术参数二、主要性能指标加工精度:标准一等 《GB1354-86大米》 出米率:≥68% 含糠率:≤0.2% 含谷量:≤5粒/公斤 含碎率(总量):≤ 30%三、 工艺流程稻壳 原粮 去石 真空脱壳 糙壳分离器 糙米 喷风铁辊碾米 成品米细糠稻谷由人工倒入料斗,通过料门控制产量大小后进入去石机,去石后的稻谷流到真空脱壳室,脱壳后的糙米及稻壳混合物在负压气流作用下送入稻壳分离器进行风选分离,稻壳经吸壳风机吸走排出机外,糙米(含有少量稻谷)直接进入碾米机进料口,在螺旋推进器推力作用下进入碾白室,在一定压力下进行碾白,白米由出料口排出,米糠从六角筛孔由米糠风机吸出,并送至集糠器收集。
出米口装有第二次吸糠装置,白米流经出米嘴吸风口时,混在白米中的糠粉和糠片即被吸除,出米嘴上装有白米小溜筛,可分离部分小碎米。
Rinnai Q85SN Q85SP 高效冷凝式燃气锅炉使用说明书

8U .52.40.03 / 01.13 C h a n g e s r e s e r v e dUser information manualPictured: Q85SN, Q130SN Q85SP , Q130SPNotice! This manual must be retained for future reference.- Do not store or use gasoline or other flammablevapors and liquids in the vicinity of this or any other appliance.- WHAT TO DO IF YOU SMELL GAS - Do NOT try to light any appliance.- Do NOT touch any electrical switch. - Do NOT use any phone in your building.- Immediately call your gas supplier from a neighbor’s phone. Follow the gas supplier’sinstructions.- If you cannot reach your gas supplier, call the firedepartment.WARNING!If you do not follow these instructions exactly, a fire or explosion may result causing property damage, personal injury or loss of life.High efficiency condensing gas boilerQ85SN/Q130SN/Q175SN/Q205SN/Q175CN Q85SP/Q130SP/Q175SP/Q205SP/Q175CPAddress: 103 International Drive, Peachtree City, GA, 30269Toll-free: 1-800-621-9419 • Fax: 678-829-1666 • WARNING!Installation and service must be performed by a licensed professional, service agency or the gas supplier.O p e r a t i n g i n s t r u c t i o n s R i n n a i Q -S e r i e s2Contents of instructionsThese instructions contain important information for the safe use of Rinnai Q-Series gas boilers.These user instructions are intended for the owner or responsible tenant of the premises where the boiler is installed.Subject to technical changesChanges may be made to the illustrations, process steps and technical data as a result of our policy of continuous improvement without prior notice.Updating of documentationPlease contact us if you have any suggestions for improvements or corrections.Find our contact details on the back of this manual.O p e r a t i n g i n s t r u c t i o n s R i n n a i Q -S e r i e s3Please observe these instructions in the interest of your own safety.The boiler is designed to heat water for a central heating system and, if applicable, generating domestic hot water. The boiler is delivered with a burner controller pre-installed.The boiler can be fitted with a modulating outdoor reset control ARV12 (included), a room controller RS100 (optional), a zone controller (optional) or an On/Off thermostat or relay panel end switch(accessories).The following defined terms are used throughout the documentation to bring attention to the presence of hazards of various risk levels. Notices give important information concerning the operation of the product.DANGER:Indicates the presence of hazards that will cause severe personal injury, death or substantial property damage.WARNING:Indicates the presence of hazards that can cause severe personal injury, death or substantial property damage .CAUTION:Indicates presence of hazards that will or can cause minor personal injury or property damage.NOTICE:Indicates special instructions on installation, operation or maintenance that are important but not related to personal injury or propertydamage.CAUTIONWARNINGNOTICEiDANGERO p e r a t i n g i n s t r u c t i o n s R i n n a i Q -S e r i e s4These operating instructions describe the operation of the Rinnai Q-Series condensing gas boilers. This manual is for the end user. For installation and servicing there is a installation & servicing instructions manual for the installer.Read this manual fully before operating the boiler. In case of doubt or errors contact your installer. The manufacturer reserves the right to change the specifications and dimensions without prior notice.Work on the boiler must be carried out by a State licenced contractor, (Ref: Gas Safety Installation and Use) using correctly calibrated instruments with current test certification.O p e r a t i n g i n s t r u c t i o n s R i n n a i Q -S e r i e sO p e r a t i n g i n s t r u c t i o n s R i n n a i Q -S e r i e s6Should overheating occur or the gas supply fail to shut off, do not turn off or disconnect the electrical supply to the pump. Instead, shut off the gas supply at a location external to the appliance.Protection for corrosionDo not use any sprays, chlorine containing agents, solvents, paint etc. around the boiler or around the air intake supply entrance of the boiler. These substances have negative influences on the boiler and can lead to corrosion resulting in failure ofthe boiler.DANGERNOTICEiChecking the water pressureCheck the water pressure in the central heating installation regularly.Use only potable water for filling.Additives only after clearance by Rinnai.Contact your installer in case of doubt.Spray cans containing chloro-/fluorcarbons Ammonium and/or ammonium solutions Permanent wave solutions (hair product)Chlorinated waxes and/or cleanersSwimming pool chemicals based on chlorine Calcium chloride used for thawingSodium chloride used for water softening Refrigerant leaksPaint or varnish removersHydrochloric acid/muriatic acid Cements and gluesAntistatic fabric softeners used in clothes dryersChlorine-type bleaches, detergents, and cleaning solvents found in household laundry roomsAdhesives used to fasten building products and other similar productsDry cleaning/laundry areas and establishments Swimming poolsMetal fabrication plants Beauty shopsRefrigeration repair shops Photo processing plants Auto body shopsPlastic manufacturing plantsFurniture refinishing areas and establishments New building construction Remodeling areasGarages with workshopsWARNINGO p e r a t i n g i n s t r u c t i o n s R i n n a i Q -S e r i e s7has an integrated domestic hot water feature.The boiler is provided with a integrated control system. Because an outdoor sensor is connected to the boiler, the boiler works weather dependantly. This means that the boiler control measures the outside temperature and flow temperature. With this data the boiler calculates the optimal flow temperature for the installation.When the boiler is connected to an RS100 room thermostat information can be retrieved from the boiler. For more information about the Rinnai thermostats. Please refer to the user manuals.On the bottom left side of the front panel there is a small door. Through the transparent panel you can see the boiler status on the display. After opening this door you will find the function buttons. On the following pages you will find the explanation of the function buttons and display messages.O p e r a t i n g i n s t r u c t i o n s R i n n a i Q -S e r i e s8Only licensed professionals who are trained for these boilers are permitted to make alterations in the controller to program the boiler to the installation.1. Display .See following pages for further information.2. ON-OFF SwitchThis switch turns the power supply to the boiler on or off.3. Central Heating program button.Switching the Central Heating on or off (Led on/off);4. Hot Water program button.Switching the Domestic Hot Water (DHW) facility on or off (Led on/off);5. Pump program button.When the pump program LED is ON, the pumpis switched into a continuous circulation mode. When the pump mode is switched OFF, LED is off the pump is control by the boiler processor. In most situations it is best to leave the pump mode OFF and let the boiler control cycle the pump as needed.During freezing temperatures it is possible (when there is no outside sensor connected), to manually place the circulation pump in constant circulation mode, thus reducing the chance of freezing pipes (garage, attic or other cold spaces / rooms) which are sensitive to frost.NOTICEiNOTICEiO p e r a t i n g i n s t r u c t i o n s R i n n a i Q -S e r i e s96 Mode-button.Only for Service personel 7 Step-button.After briefly pressing, the water pressure can be retrieved.After pressing for 5 seconds it switches from the Good-state to technical read out and vice versa (see following pages);8 Reset-button.When a fault occurs it will be shown by the flashing E (Error) with a number code after which the boiler is shut down. After pressing the reset key you can try to start the boiler again. If the error message keeps occurring contact your installer.DO NOT attempt to make repairs or remove any of the boiler panels. Contact a licensed professional to make necessary repairs oradjustments.WARNINGO p e r a t i n g i n s t r u c t i o n s R i n n a i Q -S e r i e s10Two boiler displays, “Good or Technical” see below.Goodor standard read out.During this reading the display will only show what is necessary. Under normal circumstances the display will give a Good reading. In case of a fault this will be shown with, alternate display of Good, with an E or BL code. See further "Errors, maintenance and warranty" .TechnicalThe second way is a technical read out. In normal situations the following will be shown:• on the left the status in which the boiler is active (see bottom of this page);• on the right the supply temperature in °F; • the water pressure in the installation in PSI. When a message (E or BL code) is necessary this will be shown instead of the technical read out.Operation indication(in the first display position by technical read out)No heat demand Fan pre/post purge Ignition phaseBurner active on central heating Burner active on DHW Fan checkBurner off when room thermostat is demanding Pump overrun phase for central heating Pump overrun phase for hot waterBurner off because of to high flow temperatureAutomatic de-aeration program (Press no button for 17 min.)O p e r a t i n g i n s t r u c t i o n s R i n n a i Q -S e r i e s11The installation will function optimally with a water pressure of between 16 and 18 PSI.If the water pressure drops below 12 PSI, the display will show FILL . During this message the boiler will remain functioning at a reduced level. After replenishing the system (see following chapter) just above 22 PSI the message FILL will disappear and the boiler will function normally again.When the water pressure drops below 10 PSI, the display will show a flashing FILL text.The boiler will shut down and will function normally again after replenishing the system to just above 22 PSI.To retreive the water pressure on the display from the Good reading:- Press the Step key once briefly. The water pressure will be shown.Press the Step key briefly to return to the Good reading .Water pressure is too high (>42 PSI), if HIGH indication remains continuously visible, the boiler is taken out of operation. The installation pressure needs to be decreased by draining water until thepressure is between 16 and 18 PSI.Message ' Water pressure too low' on your RS100 thermostat.On the display of the RS100 a low water pressure can be indicated. For further information see the relevantuser manual.O p e r a t i n g i n s t r u c t i o n s R i n n a i Q -S e r i e s12The central heating installation needs to be filled with potable (drinking) water. For topping up the installation you use the filling loop according to the following procedure:Contact your licensed professional installer if your installation is not provided with a filling loop.1 Switch all functions off (heating, DHW and pump);2 Briefly push the 'STEP'-button: P x.x = water pressure in PSI;3 Slowly open the filling loop (Indication on display increases);4 Fill up slowly to between 16 and 18 PSI;5 STOP appears on the display;6 Close the filling loop;7 De-aerate the complete installation , start at the lowest point;8 Check the water pressure and if necessary top it up; 9 Close the filling loop;10 Activate functions required (heating, DHWand/or pump );11 If A xx appears on the display, wait for 17 minutes;12 Check the waterpressure and if necessary top it up to 16 to 18 PSI13 Close the filling loop;14 Press the ‘STEP’-button;15 Be sure that the filling loop is closed.After the automatic de-aeration programm (A xx) is finished the boiler will return to the Good reading or Technical reading.NOTICEiO p e r a t i n g i n s t r u c t i o n s R i n n a i Q -S e r i e s13Holiday period:Adjust the thermostat* to the holiday period. See the user thermostat manual. The hot water facility can be switched off by means of the program button on the control panel.Re-setting the central heating system: , , when these are activated. Switch off the power supply. When the boiler is being drained one should take into account that a part of the heating water will remain in the boiler. When risk of freezing arises one should take care that the remaining central heating water in the boiler does not freeze.Holiday* If you have a RS100 thermostat it is provided with a holiday program. The holiday period can be adjusted on the thermostat itself. The central heating and DHW supply are switched off during that period. There is also the option that only the central heating is switched off. With all of these possibilities the freeze protection system is active.Check the water pressure regularly and top up the installation when necessary.The working pressure of the installation should be between 16 and 18 PSIO p e r a t i n g i n s t r u c t i o n s R i n n a i Q -S e r i e s14If a fault is detected the boiler will be blocked. This will be reflected, by an alternate display of Good, with an E of Error or a BL of Blocking and a number code.You can try to reset the boiler by pressing the Reset key once. If the problem remains please contact your installer and inform them about the fault and give them the number code.If you discover any leaks from the boiler contact your installer.We advise you to obtain a service contract with your installer for regular maintance and adjustment to keep your boiler safe and in good condition.The casing of the boiler consists of metal and plastic parts which can be cleaned with a normal non abrasive cleaning agent.Periodic cleaning of the condensate collection and disposal system must be carried out.Before putting the boiler into operation after periodic cleaning fill the condensate trap with 1.27 cups / 300 ml of water.Step 1: Condensate trap- First remove the condensation cup (7); Check this for impurities. If there are no impurities it is not necessary to clean the condensate cup - Grease the O-rings again with acid free O-ring grease to make fitting easier;- If there is a leak at the condensation cup (7) or tray (9) the complete condensate trap unit (10) has to be replaced by # 809000054;Step 2: Refitting is done in reverse order.Note that all gaskets seal completely.NOTICEi NOTICEi NOTICEi NOTICEiO p e r a t i n g i n s t r u c t i o n s R i n n a i Q -S e r i e s15Maintenance or changes to the appliance may only be carried out by a licensed professional.You can find the warranty conditions in the warranty card which is supplied with the boiler.NOTICEiE. & O. E.T h i s r e n e w e d p u b l i c a t i o n c a n c e l s a l l p r e v i o u s i n s t a l l a t i o n i n s t r u c t i o n s . T h e c o m p a n y r e s e r v e s t h e r i g h t t o c h a n g e t h e s p e c i fi c a t i o n s a n d d i m e n s i o n s w i t h o u t p r i o r n o t i c e .Distributor for the USARinnai America Corporate • 103 International Drive • Peachtree City, GA 30269To l l F r e e : (800) 621-9419 • Te l : (678) 829-1700 • F a x : (678) 829-1666 • E -m a i l : i n f o @r i n n a i.u s • I n t e r n e t : w w w.r i n n a i.u s800000010 01/2013。
九号电动摩托车N系列说明书

*新车自激活日起免费赠送一年的智能服务及流量费用。
后续相关服务费用标准以及智能服务使用期限与政策,详见《九号出行》APP。
感谢您选择九号电动摩托车/九号电动轻便摩托车(简称九号电摩)。
九号电摩通过CCC认证,获得道路车辆产品公告,是一款可以上机动车牌照的摩托车。
九号电摩采用先进的无线电定位技术,该技术配合《九号出行》APP(以下简称APP)使用,让您获得更加安全、智能、个性的骑行体验。
九号电摩N系列是九号公司针对"刚需"一族推出的一款均衡、实用、经济型电动摩托。
它能充分满足日常用车场景,它具有更高的性价比和更多的充电方式选择,充分满足您的各种日常用车场景。
整车附件● 九号电摩是一款时尚便利的交通工具。
您需要通过练习掌握驾驶技巧。
● 驾驶九号电摩需持有摩托车驾驶证。
● 您有义务知悉您所在区域的法律,并遵守所适用的法律。
● 在目前尚无摩托车相关法规的国家和地区驾驶时,请您务必严格遵守本手册中对于驾驶者的安全要求。
● 为了您的安全,请勿私自改装九号电摩,如需更换九号电摩的零部件,请联系售后服务。
● 如果九号电摩发出异响或故障报警,请立即停止使用,联系售后服务电话以获得专业指导意见或维修保养服务。
驾驶者要求:以下人员不应驾驶九号电摩:i. 未成年人Ii. 受到酒精或药物影响的人员Iii. 由于患病而无法从事剧烈体力活动的人员iv. 孕妇驾驶环境要求:● 请勿在恶劣天气或极度疲劳时驾驶。
● 复杂路况请小心慢速行驶。
驾驶九号电摩高速越过障碍物、凹凸不平地面、湿滑路面、材质疏散地面或陡坡或急弯时,可能导致车辆失控。
● 与其他道路车辆一样,雨雪天气驾驶时,九号电摩的轮胎阻力相对降低、制动距离相对增加,加大了驾驶者控制的难度,更容易导致车辆失控。
为了确保雨雪天的驾驶安全,请您更加谨慎驾驶。
驾驶前准备:● 每次驾驶前,需检查车辆,确保刹车和轮胎良好,紧固件无松动、零件无受损。
● 请确保驾驶者佩戴摩托车头盔及其他护具。
V85功能操说明书资料

85板功能简要操作说明一、功能简介:1.工作频段◆FM 65 – 108 MHZ (接收)◆VHF 136 – 174 MHZ (接收/发射)或◆UHF 400 – 520 MHZ (接收/发射)2.工作模式:频率模式、信道模式3.数字调谐FM 收音机4.信道接收提示音5.双段、双显、双频点守候6.双PTT键发射7.U/V段中继跨段收发8.DTMF 双音多频编码9.中/英文语言报号10.紧急呼叫报警11.CTCSS 从60.0 HZ 到259.9 HZ 任意可编辑12.CTCSS,DCS 自动搜索13.发射超时限制14. 6 档步进频率(2.5K、5K、6.25K、10K、12.5K、20K、25K)15.0-9级静噪电平可选16.高/低功率切换17.宽/窄带功能18.省电模式19.VOX 声控发射20.繁忙禁发功能21.低电压指示22.自动背光23.自动锁键盘24.三种信道显示方式(频率、信道号、信道名称)25.DTMF 侧音开关26.身份识别码27.三种扫描方式(时间、载波、搜索)28.PTT-ID 功能(可选择按下PTT发码、松开PTT 发码、按下松开均发码)29.频率模式下频差方向可选30.菜单项键盘数字直选功能31.信道参数可在频率模式下编辑储存或删除32.128个存储信道33.倒频功能(收发频率倒置)34.强光手电功能35.有线复制功能36.电脑编程二、键盘定义(一)键功能定义【MENU】:短按进入菜单设置状态,已经在菜单状态下,按下此键表示对当前菜单项菜单值的确认。
按住【MENU】键再开机实现信道模式与频率模式之间的切换。
【UP/DOWN】:频率模式下待机状态时以当前设置的步进频率上下改变当前接收频率,信道模式下待机状态上下切换信道,菜单状态下前后改变要设置的菜单项和菜单值,常按2 秒以上将快速前进或后退。
扫描状态下改变扫描方向。
【EXIT/AB】:在输入状态下,清除已输入的信息,在待机状态下,按【EXIT/AB】键进行A/B切换,在收音机状态下进行65-75/ 76-108MHz 频段切换。
机床及激光器操作方法

说明本资料仅用于汇田激光部培训使用,请勿外传。
手册局部容摘录于其它书籍及资料,作者不承当任何责任。
本手册容为奔腾楚天HYPE-CUT 系列切割机的各方面知识点。
手册不保证能够适应于其它激光切割机。
编写本手册的目的主要为了使学员更快的掌握奔腾楚天HYPE-CUT系列激光切割机的知识要点和根本操作方法。
由于本手册作者水平有限,如有错误请给予指正。
目录第一章机床操作方法21.1 操作面板按键说明21.2 常用操作方法31.2.1 开机后的机械回零操作31.2.2 翻开套料程序31.2.4 显示/编辑程序41.2.5 对切割原点:51.2.6 手动建立局部原点51.2.7 返回辅助辅原点51.2.8 标定切割材料的两种方法51.2.9 查看程序是否超出行程61.2.10 重返断点61.2.11 氧割前的放气操作61.2.12 打光心操作步骤71.3 切割操作流程及考前须知8切割前请确认以下事项:81.3.2 切割流程81.3.3 班组生产流程91.3.4 切割操作步骤9第二章激光器操作方法102.1 控制面板功能102.2 开机112.3 关机122.4 将激光器设定为省电模式〔停顿放电〕122.5 查看激光器高压状态的电流及电压值122.6 查看激光器最大功率13图1.1机床控制面板示意图2.7 激光器常见报警的解除13 2.8 常见报警的原因及解决方法建议13 附A 激光器界面常见英语对照16 附B 第三代切割机知识要点17第一章 机床操作方法1.1操作面板按键说明1.紧急停顿按钮:由于故障或其他原因使机床处于危险或不受控的紧急情况下,按下此按钮。
此时,整个机床处于急停状态,所有的D/A 模块的输出为0,NC 程序的处理被终止,使系统处于一种保护状态。
〔按下的同时激光器也会断电,非紧急情况不建议使用〕 5. 数控复位按钮:在紧急停顿或故障排除后用此按钮初始化系统。
6. 数控开场按钮:用于执行NC程序和一些数控操作,也可用于继续运行执行暂停的程序。