HP new computer
HP计算机内存模块替换指南说明书
Moduli di memoria Guida per l'utente© Copyright 2006 Hewlett-Packard Development Company, L.P.Le informazioni contenute in questo documento sono soggette a modifiche senza preavviso. Le sole garanzie per i prodotti e i servizi HP sono definite nelle norme esplicite di garanzia che accompagnano tali prodotti e servizi. Nulla di quanto contenuto nel presente documento va interpretato come costituente una garanzia aggiuntiva. HP non risponde di eventuali errori tecnici ed editoriali o di omissioni presenti in questo documento.Prima edizione: Settembre 2006Numero di parte del documento: 419930-061Sommario1 Sostituzione di un modulo di memoria2 Espansione dello spazio disponibile sull'unità disco rigido per il file di sospensioneIndice analitico (6)ITWW iiiiv ITWW1Sostituzione di un modulo di memoria Nel computer è presente uno scomparto per moduli di memoria, situato nella parte inferiore. La capacitàdi memoria del computer può essere espansa aggiornando il modulo di memoria che si trova nello slot.AVVERTENZA Per ridurre il rischio di scosse elettriche e danni all'apparecchiatura, scollegareil cavo di alimentazione e rimuovere tutte le batterie prima di installare un modulo di memoria.ATTENZIONE Le scariche elettrostatiche possono danneggiare i componenti elettronici. Primadi iniziare qualsiasi procedura, ricordarsi di scaricare a terra tutta l'elettricità statica toccando unoggetto metallico collegato a massa.Per sostituire un modulo di memoria, seguire le istruzioni riportate di seguito:1.Salvare il lavoro.2.Spegnere il computer e chiudere il display.Se non si è certi che il computer sia effettivamente spento e non in modalità di sospensione,accenderlo premendo il pulsante di alimentazione/standby, quindi spegnerlo attraverso il sistemaoperativo.3.Scollegare tutte le periferiche esterne collegate al computer.4.Scollegare il cavo di alimentazione dalla presa elettrica CA.5.Capovolgere il computer su una superficie piana.6.Rimuovere la batteria dal computer.7.Allentare le viti del coperchio dello scomparto dei moduli di memoria (1).ITWW18.Sollevare dal computer il coperchio dello scomparto dei moduli di memoria (2).9.Per rimuovere il modulo di memoria, seguire le istruzioni riportate di seguito:a.Rilasciare i gancetti di fissaggio (1) sui due lati del modulo di memoria.Il modulo di memoria si inclinerà verso l'alto.ATTENZIONE Per non danneggiare il modulo di memoria, fare attenzione adafferrarlo solo per i bordi. Non toccare i componenti presenti sul modulo di memoria.b.Afferrare il modulo per il bordo (2) ed estrarlo delicatamente dallo slot.Per proteggere un modulo di memoria dopo averlo rimosso, conservarlo in un contenitoreantistatico.2Capitolo 1 Sostituzione di un modulo di memoria ITWW10.Per inserire un nuovo modulo di memoria, seguire le istruzioni riportate di seguito:a.Allineare l'estremità scanalata (1) del modulo con l'apposita sporgenza dello slot.ATTENZIONE Per non danneggiare il modulo di memoria, fare attenzione adafferrarlo solo per i bordi. Non toccare i componenti del modulo di memoria e nonpiegarlo.b.Tenendo il modulo inclinato di 45 gradi rispetto alla superficie dello scomparto della memoria,spingerlo nello slot (2) fino a che non risulta perfettamente inserito nello stesso.c.Facendo attenzione a esercitare la stessa pressione su entrambi i bordi destro e sinistro delmodulo di memoria, spingerlo con delicatezza verso il basso (3) fino a far scattare i gancettidi fissaggio.11.Allineare le linguette (1) del coperchio dello scomparto agli incavi sul computer.12.Chiudere il coperchio (2).13.Stringere le viti del coperchio dello scomparto dei moduli di memoria (3).ITWW314.Installare nuovamente la batteria.15.Ricollegare il cavo di alimentazione e le periferiche esterne.16.Accendere il computer.4Capitolo 1 Sostituzione di un modulo di memoria ITWW2Espansione dello spazio disponibile sull'unità disco rigido per il file disospensioneQuando la modalità di sospensione è avviata, il sistema operativo salva le informazioni in un file disospensione nell'unità disco rigido primaria e il computer si spegne. Il sistema operativo riserva spaziosull'unità disco rigido per memorizzare il file di sospensione in base alla quantità di memoria del sistema.Quando si espande la memoria del sistema, il sistema operativo aumenta lo spazio sull'unità disco rigidoriservato al file di sospensione.Se si riscontrano problemi con la modalità di sospensione dopo l'espansione della memoria, verificareche la quantità di spazio libero sull'unità disco rigido sia superiore allo spazio richiesto dal file disospensione.Per visualizzare la quantità di spazio libero sull'unità disco rigido, seguire le istruzioni riportate diseguito:1.Selezionare Start > Risorse del computer.2.Nell'elenco, fare clic con il pulsante destro del mouse sull'unità disco rigido primaria desiderata,quindi scegliere Proprietà.Per visualizzare la quantità di spazio sull'unità disco rigido necessario per il file di sospensione, eseguirela procedura riportata di seguito:▲Selezionare Start > Pannello di controllo > Prestazioni e manutenzione > Opzioni risparmio energia > scheda Sospensione.Se lo spazio libero sull'unità disco rigido è inferiore allo spazio richiesto dal file di sospensione,aumentare la quantità di spazio libero sull'unità disco rigido:▲Selezionare Start > Guida in linea e supporto tecnico > Prestazioni e manutenzione > Freeing up disk space (Come liberare spazio sul disco rigido) e seguire le istruzioni visualizzate.ITWW5Indice analiticoCcoperchio dello scomparto deimoduli di memoriachiusura3rimozione2Ddisco rigido, spazio disponibile5Ffile di sospensione5Mmemoriaespansione5sostituzione dei moduli dimemoria1modulo di memoriachiusura1inserimento3rimozione2Ssospensione5Uunità disco rigido, spaziodisponibile56Indice analitico ITWW。
HP ZBook移动工作站系列产品说明说明书

HP EliteBook 800 series Notebook
HP ZBook Mobile Workstations also deliver*
Form factors • 14.0-inch diagonal • 15.6-inch dia4.0-inch diagonal • 15.6-inch diagonal • 17.0-inch diagonal
Sales guide | Why a mobile workstation?
HP recommends Windows.
While our HP EliteBook 800 series Notebook can provide you with excellent value, the ZBook Mobile Workstations deliver superb performance, uncompromised reliability and wide-ranging scalability as well as a range of screen sizes to fit various needs.
Warranty 1/1/0 or 3/3/0 support; on site service is extra
Expandability • Up to 32 GB memory3 • Up to 4 HDD storage4 bays • ThunderboltTM17 2 port for faster
HP一体机中英文对照表

HP一体机中英文对照表HP OfficeJet 5608/5609/5679 一体机面板按钮的功能,及相应面板设置的中英文对照列表。
HP Officejet 5608/5609/56791 开/关机:启动或关闭 HP All-in-One。
当 HP All-in-One 打开时,“开/关机”按钮点亮。
在执行作业时该指示灯会闪烁。
HP All-in-One 关机后,仍有少量的电提供给设备。
要完全切断对 HP All-in- One 的供电,请关闭设备,然后拔掉电源线。
2 快速拨号:选择快速拨号号码。
3 重拨/暂停:重拨上次拨过的号码,或在传真号码中插入 3 秒的停顿。
4 单键快速拨号按钮:访问前5 个快速拨号号码。
5 键盘:输入传真号码、数值或文字。
6 警示灯:警示灯闪烁时,表示有错误发生,需要注意。
7 设置/?:出现或删除“设置菜单”,以便生成报告、更改传真和其他维护设置以及访问“帮助”菜单。
从“帮助”菜单中选择的主题将在计算机的屏幕上打开一个帮助窗口。
8 向左箭头:减小控制面板显示屏上的数值。
9 OK:选择控制面板显示屏中的菜单或设置。
10 向右箭头:增大控制面板显示屏上的数值。
11 取消:停止作业、退出菜单或退出设置。
12 开始/黑白:开始黑白复印、扫描、照片打印或传真作业。
13 开始/彩色:开始彩色复印、扫描、照片打印或传真作业。
14 扫描:出现“扫描到”菜单,以便选择扫描目的地。
15 传真:出现“传真菜单”,以便选择选项。
16 复印:出现“复印菜单”,以便选择选项。
菜单设置方法HP OfficeJet 5608/5609/5679 一体机主要有四大菜单:设置按钮复印按钮灯传真按钮灯扫描按钮灯使用这四个功能按钮,需要先按一下这个功能按钮,然后再配合左右箭头和“OK”键,可以对所有的功能进行设置。
以下分别介绍一下:“设置”菜单按按钮面板上液晶屏左下角的“设置”按钮,配合左右箭头和“OK”按钮,可以对所有的菜单进行设置。
computer的汉语是什么意思

computer的汉语是什么意思computer的汉语是什么意思我们要知道单词computer的读音,还要掌握它的汉语意思。
店铺为大家精心准备了英文单词computer的几种汉语意思,欢迎大家前来阅读。
computer的汉语意思英 [kmpju:t(r)] 美 [kmpjut]第三人称复数:computerscomputer 基本解释名词(电子)计算机,电脑例句1. The entire operation is done by computer.整个运算是由计算机完成的。
computer的单语例句1. Police recently busted a gang of youngsters illegally making guns in a computer workshop.2. Gonzales is awaiting trial in New York for allegedly helping hack the computer network of the national restaurant chain Dave and Buster's.3. A small button battery will pollute 600 cubic meters water and more than 50 percent of computer components contain poisonous chemicals.4. Over time, you essentially buy back the computer from the bank by buying computer cards.5. A computer was the item most respondent wanted to buy in 2010, while travel was the second most popular.6. Buyers need to hand over their ID cards and driving licenses, while their details and those of sellers will also be recorded in the dealer's computer.7. She said she ruled out buying an HP computer because of last year's reports about its faulty products.8. She revealed that she always kept in touch with the star of the Matrix, but by letter and not email because Reeves does not have a computer.9. Pollard told Reuters the 5 C estimate for triggering a collapse was a rough guide, based on an computer model computer的.双语例句1. An uncommon practice is to submerse the computer's components in a thermally conductive liquid.一种少见的做法是淹没计算机的组件的导热液体。
HP 笔记本计算机说明书

HP 笔记本计算机用户指南© Copyright 2009 Hewlett-Packard Development Company, L.P.Bluetooth 是其所有者拥有的商标,Hewlett-Packard Company 按许可协议中的规定进行使用。
SD 徽标是其所有者的商标。
Microsoft 和 Windows 是 Microsoft Corporation 在美国的注册商标。
本文档中包含的信息如有更改,恕不另行通知。
随 HP 产品和服务附带的明确有限保修声明中阐明了此类产品和服务的全部保修服务。
本文档中的任何内容均不应理解为构成任何额外保证。
HP 对本文档中出现的技术错误、编辑错误或遗漏之处不承担责任。
第一版:2009 年 9 月文档部件号:586038-AA1产品通告本用户指南介绍大多数机型的常用功能。
某些功能可能在您的笔记本计算机上未提供。
要获取《HP 笔记本计算机用户指南》中最新的信息,请转至 HP 网站/ support。
安全警告通告警告!为减少烫伤或笔记本计算机过热的情况,请勿将笔记本计算机直接放在膝盖上或阻塞其通风孔。
请仅在坚硬且平整的表面上使用笔记本计算机。
不要让坚硬物体(例如旁边的打印机)或柔软物体(例如枕头、毛毯或衣物)阻碍空气流通。
同时,在操作时不要让交流电源适配器接触皮肤或柔软表面(如枕头、毛毯或衣物)。
笔记本计算机和交流电源适配器要符合信息技术设备安全性国际标准 (IEC60950) 中定义的用户可接触的表面温度限制。
iiiiv安全警告通告目录1 硬件功能识别硬件 (1)顶部组件 (1)触摸板 (1)指示灯 (2)按钮 (3)按键 (4)前部组件 (4)右侧组件 (5)左侧组件 (6)显示屏组件 (7)底部组件 (8)无线天线 (9)其他硬件组件 (10)识别标签 (10)2 无线和局域网使用无线设备 (12)识别无线和网络状态图标 (12)使用无线控制 (13)使用无线按钮 (13)使用 Wireless Assistant 软件(仅限某些机型) (13)使用 HP Connection Manager(仅限某些机型) (14)使用操作系统控制 (14)使用 WLAN (15)设置 WLAN (15)保护 WLAN (15)连接到 WLAN (16)漫游到其他网络 (17)使用 HP Mobile Broadband(仅限某些机型) (18)插入 SIM 卡 (18)取出 SIM 卡 (19)使用 Bluetooth 无线设备 (21)Bluetooth 和 Internet 连接共享 (ICS) (21)v解决无线连接问题 (22)无法连接到 WLAN (22)无法连接到首选 WLAN 网络 (22)未显示 WLAN 的网络图标 (23)当前 WLAN 网络安全代码不可用 (23)WLAN 连接信号很弱 (23)无法连接到无线路由器 (24)连接到局域网 (LAN) (25)3 多媒体多媒体功能 (26)识别多媒体组件 (26)调节音量 (28)多媒体软件 (29)使用预安装多媒体软件 (29)从 Internet 安装多媒体软件 (29)音频 (30)连接外接音频设备 (30)检查音频功能 (30)视频 (31)连接外接显示器或投影仪 (31)连接 HDMI 设备 (31)配置 HDMI 音频(仅限某些机型) (32)网络摄像机 (33)4 驱动器和外接设备驱动器 (34)识别已安装的驱动器 (34)取放驱动器 (34)改善硬盘驱动器性能 (35)使用磁盘碎片整理程序 (35)使用磁盘清理程序 (35)更换硬盘驱动器托架中的硬盘驱动器 (36)使用外接驱动器 (38)连接可选的外接驱动器 (39)共享光驱 (39)外接设备 (40)使用 USB 设备 (40)连接 USB 设备 (40)移除 USB 设备 (40)使用数字介质插槽卡 (41)插入数字卡 (41)取出数字卡 (42)vi5 内存模块6 指点设备和键盘设置指点设备首选项 (47)使用指点设备 (47)使用触摸板 (47)连接外接鼠标 (47)使用键盘 (47)使用热键 (47)启动睡眠模式 (48)切换屏幕图像 (49)降低屏幕亮度 (49)提高屏幕亮度 (49)启动 QuickLock (49)将扬声器调为静音 (50)减小扬声器音量 (50)增大扬声器音量 (50)7 电源管理设置电源选项 (51)使用节能模式 (51)启动和退出睡眠模式 (51)启动和退出休眠模式 (52)使用电池指示器 (52)使用电源计划 (52)查看当前的电源计划 (52)选择不同的电源计划 (53)自定义电源计划 (53)设置唤醒时的密码保护 (53)使用外部交流电源 (53)连接交流电源适配器 (54)测试交流电源适配器 (54)使用电池电源 (55)在“帮助和支持”中查找电池信息 (55)使用“电池检查” (55)显示电池的剩余电量 (56)放入或取出电池 (56)为电池充电 (57)最大程度延长电池放电时间 (58)管理电池电量不足的情况 (58)识别电池电量不足的情况 (58)解决电池电量不足的情况 (59)当有外部电源时解决电池电量不足的情况 (59)vii当有充电的电池时解决电池电量不足的情况 (59)当没有电源时解决电池电量不足的情况 (59)当笔记本计算机无法退出休眠模式时解决电池电量不足的情况 (59)校准电池 (59)步骤 1:为电池充足电 (59)步骤 2:禁用休眠和睡眠模式 (60)步骤 3:为电池放电 (60)步骤 4:为电池重新充足电 (61)步骤 5:重新启用休眠模式和睡眠模式 (61)节约电池电量 (61)存放电池 (61)处理废旧电池 (62)关闭笔记本计算机 (62)8 安全保护保护笔记本计算机 (63)使用密码 (63)在 Windows 中设置密码 (64)在设置实用程序中设置密码 (64)管理员密码 (65)管理管理员密码 (65)输入管理员密码 (65)开机密码 (65)管理开机密码 (66)输入开机密码 (66)使用防病毒软件 (67)使用防火墙软件 (68)安装重要的更新程序 (69)9 软件更新更新 BIOS (71)确定 BIOS 版本 (71)下载 BIOS 更新程序 (71)更新程序和驱动程序 (73)10 设置实用程序启动设置实用程序 (74)使用设置实用程序 (74)更改设置实用程序的语言 (74)在设置实用程序中进行浏览和选择 (74)显示系统信息 (75)在设置实用程序中恢复默认设置 (75)退出设置实用程序 (75)viii设置实用程序菜单 (75)主菜单 (76)安全保护菜单 (76)系统配置菜单 (76)诊断菜单 (77)索引 (78)ixx1硬件功能识别硬件由于区域和机型不同,笔记本计算机中的组件会有所不同。
惠普笔记本电脑使用指南说明书

使用指南©Copyright 2015 HP Development Company, L.P.AMD 是 Advanced Micro Devices, Inc. 的商標。
Bluetooth 是其所有人擁有的商標,HP Inc.依授權使用。
Intel 是 Intel Corporation 在美國和其他國家/地區的商標。
Java 是 Sun Microsystems, Inc. 的美國商標。
Microsoft 和 Windows 是 Microsoft 公司集團的商標。
SD 標誌是其所有人的商標。
本文件包含的資訊可能有所變更,恕不另行通知。
HP 產品與服務的保固僅列於隨產品及服務隨附的明確保固聲明中。
本文件的任何部份都不可構成任何額外的保固。
HP 不負責本文件在技術上或編輯上的錯誤或疏失。
第一版:2015 年 10 月文件編號:839473-AB1產品聲明本使用指南說明大部分機型最常用的功能。
有些功能可能無法在您的電腦上使用。
並非所有功能在所有 Windows 版本中皆可使用。
此電腦可能需要升級和/或另外購買硬體、驅動程式和/或軟體,才能充分利用 Windows 的功能。
如需詳細資訊,請前往。
如需存取最新的使用指南,請前往/support,然後選取您所處的國家/地區。
選取驅動程式與下載,然後依照螢幕上的指示進行。
軟體條款透過安裝、複製、下載或以其他方式使用本電腦預先安裝的任何軟體產品,即表示您同意接受 HP 使用者授權合約(EULA) 條款之約束。
如果您不接受這些授權條款,可於 14 天內退回完整未使用的產品(含硬體與軟體),並依據銷售商的退款原則取得全額退款,此為唯一補償形式。
欲瞭解進一步資訊,或要求該電腦的全額退款,請與銷售商聯絡。
安全警告注意事項面(例如枕頭、毯子或衣服)阻礙空氣流通。
此外,作業期間也請不要讓 AC 變壓器接觸到皮膚或柔軟表面(例如枕頭、地毯或衣服)。
使用者可存取的電腦與 AC 變壓器的表面溫度限制,符合International Standard for Safety of Information Technology Equipment (IEC 60950-1) 的國際安全標準。
HP笔记本计算机用户指南说明书

用户指南© Copyright 2014 Hewlett-Packard Development Company, L.P. Bluetooth 是其所有者的商标,Hewlett-Packard Company 经授权得以使用。
Intel、Celeron、Centrino 和 Pentium 是 Intel Corporation 在美国和其他国家/地区的商标。
Java 是 Sun Microsystems, Inc. 在美国的商标。
Microsoft 和 Windows 是 Microsoft 集团公司在美国的注册商标。
本文档中包含的信息如有更改,恕不另行通知。
随 HP 产品和服务附带的明确有限保修声明中阐明了此类产品和服务的全部保修服务。
本文档中的任何内容均不应理解为构成任何额外保证。
HP 对本文档中出现的技术错误、编辑错误或遗漏之处不承担责任。
第一版: 2014 年 10 月文档编号: 781076-AA1产品通告本用户指南介绍了大多数机型的常用功能。
您的笔记本计算机上可能未提供某些功能。
并非所有功能在所有 Windows 版本中都可用。
该笔记本计算机可能需要升级和/或单独购买硬件、驱动程序和/或软件,以充分利用 Windows 功能。
如需详细信息,请转到。
要访问最新的用户指南,请转到/support,然后选择您所在的国家/地区。
选择驱动程序和下载,然后按照屏幕上的说明进行操作。
软件条款如果安装、复制、下载或以其他方式使用此笔记本计算机上预安装的任何软件产品,即表明您同意受 HP 最终用户许可协议 (EULA) 条款的约束。
如果您不接受这些许可条款,唯一的补救办法是在 14 天内将全部产品(硬件和软件)原封不动地退回经销商处,并依据经销商的退款政策获得全额退款。
有关任何其他信息或申请笔记本计算机的全额退款,请联系您的经销商。
安全警告声明如旁边的打印机选件)或柔软物体(例如枕头、毛毯或衣物)阻挡空气流通。
惠普电脑快速入门指南.pdf_1700874399.2528007说明书
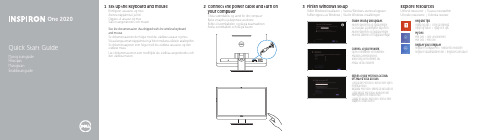
Set up the keyboard and mouseKonfigurer tastaturet og musAsenna näppäimistö ja hiiriOppsett til tastatur og musStäll in tangentbordet och musenConnect the power cable and turn onyour computerTilslut strømkablet og tænd for din computerKytke virtajohto ja käynnistä tietokoneKoble til strømkabelen, og slå på datamaskinenAnslut strömkabeln och slå på datorn132Finish Windows setupUdfør Windows Installation | Suorita Windows-asennus loppuunFullfør oppsett av Windows | Slutför Windows-inställningenEnable security and updatesAktivér sikkerhed og opdateringerOta suojaus ja päivitykset käyttöönAktiver sikkerhet og oppdateringerAktivera säkerhet och uppdateringarSign in to your Microsoft accountor create a local accountLog på din Microsoft-konto eller opreten lokal kontoKirjaudu Microsoft-tilillesi tai luo uusi tiliLogg inn på Microsoft-kontoen dineller opprett en lokal kontoLogga in till ditt Microsoft-konto ellerskapa ett lokalt kontoConnect to your networkOpret forbindelse til netværketMuodosta verkkoyhteysKoble deg til nettverket dittAnslut till ditt nätverkExplore resourcesUdforsk ressourcer | Tutustu resursseihinUtforske ressursene | Utforska resurserHelp and TipsHjælp og tips | Ohje ja vinkkejäHjelp og støtte | Hjälp och tipsMy DellMin Dell | Dell-tietokoneeniMin Dell | Min DellRegister your computerRegistrer computeren | Rekisteröi tietokoneRegistrer datamaskinen din | Registrera din dator See the documentation that shipped with the wireless keyboardand mouse.Se dokumentationen der fulgte med det trådløse tastatur og mus.Viittaa langattoman näppäimistön ja hiiren mukana tulleisiin asiakirjoihin.Se dokumentasjonen som fulgte med det trådløse tastaturet og dentrådløse musa.Läs i dokumentationen som medföljde det trådlösa tangentbordet ochden trådlösa musen.Product support and manualsProduktsupport og manualer Tuotetuki ja käyttöoppaat Produktstøtte og håndbøker Produktsupport och handböcker /support/support/manuals /windows8Contact DellKontakt Dell | Dellin yhteystiedotKontakt Dell | Kontakta Dell/contactdellRegulatory and safetyLovgivningsmæssigt og sikkerhedSäädöstenmukaisuus ja turvallisuusLovpålagte forhold og sikkerhetReglering och säkerhet/regulatory_compliance Regulatory model and typeRegulatorisk model og typeSäädösten mukainen malli ja tyyppi Lovregulerende modell og type Regleringsmodell och -typ W06BW06B001Computer modelComputermodel | Tietokoneen malli Datamaskinmodell | Datormodell Inspiron One 2020FeaturesFunktioner | Ominaisuudet | Funksjoner | Funktioner1. Camera-status light2. Camera3. Microphone4. Optical-drive eject button5. Optical drive6. Hard-drive activity light7. Power button8. USB 2.0 ports (3)9. Network port10. Power-adapter port11. Security-cable slot12. Media-card reader13. USB 2.0 ports (2)14. Microphone port15. Headphone port16. Display off/on button17. Display brightness decrease button18. Display brightness increase button1. Kameran tilan merkkivalo2. Kamera3. Mikrofoni4. Optisen aseman poistopainike5. Optinen asema6. Kiintolevyn toimintavalo7. Virtapainike8. USB 2.0 -portit (3)9. Verkkoportti10. Verkkolaiteportti11. Suojakaapelin paikka12. Muistikortin lukija13. USB 2.0 -portit (2)14. Mikrofoniliitäntä15. Kuulokeliitäntä16. Näyttö päälle/pois -painike17. Näytön kirkkauden vähennyspainike18. Näytön kirkkauden lisäyspainike1. Statusindikator for kamera2. Kamera3. Mikrofon4. Knappen, der bruges til at skubbedet optisk drev ud5. Optisk drev6. Indikator for harddiskaktivitet7. Tænd/sluk-knap8. USB 2.0-porte (3)9. Netværksport10. Port til strømsadapter11. Sikkerhedskablets åbning12. Mediekortlæser13. USB 2.0-porte (2)14. Mikrofonport15. Hovedtelefonport16. Skærmens tænd/sluk-knap17. Skæmens knap til atformindske lysstyrken18. Skærmens knap til at øge lysstyrken1. Statuslys for kamera2. Kamera3. Mikrofon4. Utløserknapp for optisk stasjon5. Optisk disk6. Aktivitetslampe for harddisk7. Strømknapp8. USB 2.0-kontakter (3)9. Nettverksport10. Port for strømadapter11. Spor for sikkerhetskabel12. Mediekortleser13. USB 2.0-kontakter (2)14. Mikrofonport15. Hodeltelefonport16. Av/på-knapp for skjerm17. Knapp for å redusere lysstyrkenpå skjerm18. Knapp for å øke lysstyrken på skjerm1. Kamerastatuslampa2. Kamera3. Mikrofon4. Utmatningsknapp för optisk enhet5. Optisk enhet6. Lampa för hårddiskaktivitet7. Strömbrytare8. USB 2.0-portar (3)9. Nätverksport10. Nätadapterport11. Plats för kabellås12. Mediakortläsare13. USB 2.0-portar (2)14. Mikrofonport15. Hörlursport16. Skärm av/på-knapp17. Knapp för att minskabildskärmens ljusstyrka18. Knapp för att ökabildskärmens ljusstyrka45762013-09Printed in China.© 2013 Dell Inc.© 2013 Microsoft Corporation.。
惠普公司英文介绍
惠普公司英文介绍商英101 [1**********]2 徐年红HP = Hewlett-Packard Development Company, LPAbout Hp labshistorysome opportunitiesWorldwide sitesProductsAbout Hp labsHP is a technology company that operates in more than 170 countries around the world. We explore how technology and services can help people and companies address their problems and challenges, and realize their possibilities, aspirations and dreams. We apply new thinking and ideas to create more simple, valuable and trusted experiences with technology, continuously improving the way our customers live and work.No other company offers as complete a technology product portfolio as HP. We provide infrastructure and business offerings that span from handheld devices to some of the world's most powerful supercomputer installations. We offer consumers a wide range of products and services from digital photography to digital entertainment and from computing to home printing. This comprehensive portfolio helps us match the right products, services and solutions to our customers' specific needs. HistoryStanford University classmates Bill Hewlett and Dave Packard founded HP in 1939. The company's first product, built in a Palo Alto garage, was an audio oscillator —an electronic test instrument used by sound engineers. One ofHP's first customers was Walt Disney Studios, which purchased eightoscillators to develop and test an innovative sound system for the movie Fantasiasome opportunities that we believeCloud and Security – Delivering the secure application and computing end-state of Everything-as-a-Service.Intelligent infrastructure – Designing a system of smarter, more secure enterprise computing devices, networks, and storage built on scalable architectures. It’s about creating technology that blends into the way we work and live our lives as individuals and in business.Mobile and Immersive Experiences – Designing compelling user experiences that fundamentally change how people communicate, collaborate, socialize, and entertain---utilizing multimedia technologies to deliver intuitive, interactive, mobile, and immersive audio-visual experiences.Networking and Communication – Creating the next generation of network architectures and communications technologies, which provide predictable, high-quality and power-efficient networking while reducing management complexity.Printing and Content Delivery – Transforming inflexible, manual mass production printing processes to flexible, customized, on-demand printing processes which are enabled by new digital technologies that allow for lower cost, higher quality commercial printing.Services – Creating technologies and processes that deliver new ways to leverage data across different formats and business disciplines, enabling faster, betterWorldwide sites»Bangalore, India »Beijing, China »Bristol, England»Fusionopolis, Singapor »Haifa, Israel »Palo Alto, USA»St. Pe tersburg, RussiaProductslaptopsLaptop & Tablet PCs »Laptops for home»Laptops for businessPavilion, Presario, Mini, EliteBook, and more laptops and notebook computersprinterPrinters & All-in-ones »Printers for home»Printers for businessInkjet, laser, all-in-one, multifunction, large-format, and otherprinters SoftwareSoftware »Software productsSoftware and operating systems for management, security and moreDesktops»Desktops forbusines sPCs, Workstations, Thin Clients, POS, and more desktop computerSupplies»Supplies for home»Supplies for businessInk, toner, paper and other printer suppliesScanners»Scanners for home»Scanners for businessScanners, fax and products that do scan / fax / copy / printSmartphones & HandheldsFor home »Smartphones & handhelds»CalculatorsFor business»Smartphones & handhelds»CalculatorsMore smartphones, accessories & calculators.Monitors»Monitors for home»Monitors for businessFlat screens, LCDs and more computer monitors Monitors »Monitors for home »Monitors for businessFlat screens, LCDs and more computer monitors。
抽象工厂和Builder模式区别
director.Construct(ibmBuilder); //创建IBM对象
IBM ibm=(IBM)director.GetComputer(); //获取IBM对象
irector.Construct(hpBuilder); //创建HP对象
抽象工厂和Builder模式区别
(1)侧重产品生成结果,侧重产品过程
(2)后者测试相同过程的产生,或有序列的生产过程
(3)后面有相同的生产过程,用于被创建的对象之间有紧密的关系,前者一般不需要
因此核心要点在于:Builder需要有相同的生产过程,且有部件需要生产,而工厂模式一般没有,更侧重生产结果。
两种模式的共同点使得在刚刚开始学习的时候,非常容易混淆,其实仔细研究,两者之间的区别也是非常明显的,而我认为两者之间最本质的区别是,抽象工厂通过不同的构建过程生成不同的对象表示,而Builder模式通过相同的构建过程生成不同的表示。
builder 也是一个高层建筑,但是他和Abstract Factory侧重点不同,Abstract Factory侧重于创建东西的结果,而builder侧重的是创建东西的过程。当你需要做一系列有序的工作来完成创建一个对象时 builder就派上用场啦
hp.Attach(new HP所需硬盘); //装配硬盘
return hp; //返回构建好的对象
}
}
class Director //指导者类
...{
protected Computer computer=null; //保存具体对象
上面的文字比较抽象,下面举个例子说明。
HP多媒体硬件用户指南说明书

Multimedia User Guide© Copyright 2007 Hewlett-Packard Development Company, L.P.Windows is a U.S. registered trademark of Microsoft Corporation.The information contained herein is subject to change without notice. The only warranties for HP products and services are set forth in the express warranty statements accompanying such products and services. Nothing herein should be construed as constituting an additional warranty. HP shall not be liable for technical or editorial errors or omissions contained herein.First Edition: July 2007Document Part Number: 448446-001Product noticeThis user guide describes features that are common to most models. Some features may not beavailable on your computer.iiiiv Product noticeTable of contents1 Using multimedia hardwareUsing the audio features (1)Using the audio-in (microphone) jack (3)Using the audio-out (headphone) jack (3)Adjusting the volume (4)Using the video features (5)Using the external monitor port (5)Using an optical drive (6)Identifying the installed optical drive (6)Inserting an optical disc (CD or DVD) (6)Removing an optical disc (CD or DVD) (7)When the disc tray opens (7)When the disc tray does not open (7)2 Working with multimedia softwareOpening preinstalled multimedia software (10)Installing multimedia software from a disc (10)Using multimedia software (10)Preventing playback disruptions (11)Changing DVD region settings (12)Observing the copyright warning (12)Index (13)vvi1Using multimedia hardwareUsing the audio featuresThe following illustration and table describe the audio features of the computer.NOTE:Your computer may look slightly different from the illustration in this section.Component Description(1)Volume mute hotkey (f9)Mutes and restores computer sound when pressed in combinationwith the fn key.(2)Volume down hotkey (f11)Decreases computer sound when pressed in combination with thefn key.(3)Volume up hotkey (f12)Increases computer sound when pressed in combination with thefn key.(4)Speaker Produces sound.(5)fn key Controls volume when pressed in combination with f9, f11, or f12.Using the audio features1Component Description(6)Audio-in (microphone) jack Connects an optional computer headset microphone, stereo arraymicrophone, or monaural microphone.(7)Audio-out (headphone) jack Connects optional powered stereo speakers, headphones, earbuds, a headset, or television audio.2Chapter 1 Using multimedia hardwareUsing the audio-in (microphone) jackThe computer is equipped with a stereo (dual-channel) microphone jack that supports an optional stereo array or monaural microphone. Using sound recording software with external microphones allows forstereo recordings.When connecting a microphone to the microphone jack, use a microphone with a 3.5-mm plug. Using the audio-out (headphone) jackWARNING!To reduce the risk of personal injury, adjust the volume before putting on headphones,earbuds, or a headset. For additional safety information, refer to the Regulatory, Safety andEnvironmental Notices.CAUTION:To prevent possible damage to an external device, do not plug a single sound channel(monaural) connector into the headphone jack.In addition to connecting headphones, the headphone jack is used to connect the audio-out function of an audio device such as external powered speakers or a stereo system.When connecting a device to the headphone jack, use only a 3.5-mm stereo plug.When a device is connected to the headphone jack, the speaker is disabled.Using the audio features3Adjusting the volumeYou can adjust the volume using the following controls:●Computer volume hotkey—A combination of the fn key (1) and either the f9(2), f11(3), or f12(4)function key:◦To mute or restore volume, press fn+f9.◦To decrease volume, press fn+f11.◦To increase volume, press fn+f12.●Windows® volume control:a.Click the Volume icon in the notification area, at the far right of the taskbar.b.Increase or decrease the volume by moving the slider up or down. Click the Mute icon to mutethe volume.– or –a.Right-click the Volume icon in the notification area, and then click Open Volume Mixer.b.In the Speakers column, you can increase or decrease the volume by moving the Volumeslider up or down. You can also mute the volume by clicking the Mute icon.If the Volume icon is not displayed in the notification area, follow these steps to add it:a.Right-click in the notification area, and then click Properties.b.Click the Notification Area tab.c.Under System icons, select the Volume check box.d.Click OK.●Program volume control:Volume can also be adjusted within some programs.4Chapter 1 Using multimedia hardwareUsing the video featuresUsing the external monitor portThe external monitor port connects an external display device, such as an external monitor or a projector, to the computer.▲To connect a display device, connect the device cable to the external monitor port.NOTE:If a properly connected external display device does not display an image, press fn+f4 totransfer the image to the device. Repeatedly pressing fn+f4 alternates the screen image between thecomputer display and the device.Using the video features5Using an optical driveDepending on the type of optical drive and software installed in your computer, the optical drive plays, copies, and creates CDs or DVDs.Identifying the installed optical drive▲Select Start > Computer.Inserting an optical disc (CD or DVD)1.Turn on the computer.2.Press the release button (1) on the drive bezel to release the disc tray.3.Pull out the tray (2).4.Hold the disc by the edges to avoid touching the flat surfaces and position the disc label-side upover the tray spindle.NOTE:If the tray is not fully accessible, tilt the disc carefully to position it over the spindle.5.Gently press the disc (3) down onto the tray spindle until the disc snaps into place.6.Close the disc tray.NOTE:After you insert a disc, a short pause is normal. If you have not selected a media player, anAutoPlay dialog box opens. It prompts you to select how you want to use the media content.6Chapter 1 Using multimedia hardwareRemoving an optical disc (CD or DVD)There are 2 ways to remove a disc, depending on whether the disc tray opens normally or not. When the disc tray opens1.Press the release button (1) on the drive bezel to release the disc tray, and then gently pull out thetray (2) until it stops.2.Remove the disc (3) from the tray by gently pressing down on the spindle while lifting the outeredges of the disc. Hold the disc by the edges and avoid touching the flat surfaces.NOTE:If the tray is not fully accessible, tilt the disc carefully as you remove it.3.Close the disc tray and place the disc in a protective case.When the disc tray does not open1.Insert the end of a paper clip (1) into the release access in the front bezel of the drive.2.Press in gently on the paper clip until the tray is released, and then pull out the tray (2) until it stops.Using an optical drive73.Remove the disc (3) from the tray by gently pressing down on the spindle while lifting the outeredges of the disc. Hold the disc by the edges and avoid touching the flat surfaces.NOTE:If the tray is not fully accessible, tilt the disc carefully as you remove it.4.Close the disc tray and place the disc in a protective case.8Chapter 1 Using multimedia hardware2Working with multimedia software The computer includes preinstalled multimedia software. Some computer models also include additionalmultimedia software on an optical disc.Depending on the hardware and software included with the computer, the following multimedia tasksmay be supported:●Playing digital media, including audio and video CDs, audio and video DVDs, and Internet radio●Creating or copying data CDs●Creating, editing, and burning audio CDs●Creating, editing, and burning a video or movie to a DVD or video CDCAUTION:To prevent loss of information or damage to a disc, observe the following guidelines:Before writing to a disc, connect the computer to a reliable external power source. Do not write to a disc while the computer is running on battery power.Before writing to a disc, close all open programs except the disc software you are using.Do not copy directly from a source disc to a destination disc or from a network drive to a destinationdisc. Instead, copy from a source disc or network drive to your hard drive, and then copy from your hard drive to the destination disc.Do not use the computer keyboard or move the computer while the computer is writing to a disc. Thewrite process is sensitive to vibration.NOTE:For information about using software included with the computer, refer to the softwaremanufacturer's instructions that may be provided on disc, as online Help files, or on the softwaremanufacturer's Web site.9Opening preinstalled multimedia software1.Select Start > All Programs.2.Click the program that you want to open.Installing multimedia software from a disc1.Insert the disc into the optical drive.2.When the installation wizard opens, follow the on-screen instructions.3.Restart the computer if prompted to do so.Using multimedia software1.Select Start > All Programs, and then open the multimedia program you want to use. For example,if you want to use Windows Media Player to play an audio CD, click Windows Media Player.NOTE:Some programs may be located in subfolders.2.Insert the media disc, such as an audio CD, into the optical drive.3.Follow the instructions on the screen.– or –1.Insert the media disc, such as an audio CD, into the optical drive.An AutoPlay dialog box opens.2.Click a multimedia task from the list of tasks.10Chapter 2 Working with multimedia softwarePreventing playback disruptionsTo reduce the possibility of playback disruption:●Save your work and close all open programs before playing a CD or a DVD.●Do not connect or disconnect hardware while playing a disc.Do not initiate Hibernation or Sleep while playing a disc. Otherwise, you may see a warning message asking if you want to continue. If this message is displayed, click No. After you click No, the computer may behave in either of the following ways:●Playback may resume.– or –●The playback window in the multimedia program may close. To return to playing the CD or DVD,click the Play button in your multimedia program to restart the disc. In rare cases, you may needto exit the program and then restart it.Preventing playback disruptions11Changing DVD region settingsMost DVDs that contain copyrighted files also contain region codes. The region codes help protectcopyrights internationally.You can play a DVD containing a region code only if the region code on the DVD matches the regionsetting on your DVD drive.CAUTION:The region settings on your DVD drive can be changed only 5 times.The region setting you select the fifth time becomes the permanent region setting on the DVD drive.The number of region changes remaining is displayed on the DVD Region tab.To change settings through the operating system:1.Select Start>Computer>System properties.2.In the left pane, click Device Manager.NOTE:Windows includes the User Account Control feature to improve the security of yourcomputer. You may be prompted for your permission or password for tasks such as installingapplications, running utilities, or changing Windows settings. Refer to Windows online Help formore information.3.Click the "+" sign next to DVD/CD-ROM drives.4.Right-click the DVD drive for which you want to change region settings, and then clickProperties.5.Make the desired changes on the DVD Region tab.6.Click OK.Observing the copyright warningIt is a criminal offense, under applicable copyright laws, to make unauthorized copies of copyright-protected material, including computer programs, films, broadcasts, and sound recordings. Do not use this computer for such purposes.12Chapter 2 Working with multimedia softwareIndexAaudio features1audio-in (microphone) jack2, 3 audio-out (headphone) jack2, 3 Bbutton, volume mute4CCDinserting6playing11protecting9removing7writing to9copyright warning12DDVDchanging region setting12inserting6playing11protecting9removing7writing to9DVD region settings12Eearbuds2external monitor port5Hheadphones2hotkeysvolume down1volume up1hotkeys, volume mute1Jjacksaudio-in (microphone)2, 3audio-out (headphone)2, 3Mmicrophones, supported3monitor, connecting5multimedia softwaredescribed9using10mute button4mute hotkey1Ooptical discinserting6removing7writing to9optical driveplaying11protecting9Pportsexternal monitor5programsmultimedia9using10projector, connecting5protecting playback11Rregion codes, DVD12Ssoftwaremultimedia9using10speaker1TTV3VVCR3volume down hotkey1volume hotkeys4volume mute button4volume mute hotkey1volume up hotkey1volume, adjusting4Index13。
HP 笔记本电脑用户指南说明书

用户指南摘要本指南提供有关组件、网络连接、电源管理、安全性和备份等相关信息。
法律信息©Copyright 2022 HP Development Company, L.P.Windows 是 Microsoft Corporation 在美国和/或其他国家/地区的注册商标或商标。
USB Type-C 和 USB-C 是 USB Implementers Forum 的注册商标。
DisplayPort™ 和 DisplayPort™ 徽标是 Video Electronics Standards Association (VESA) 在美国和其他国家/地区所有的商标。
本文所含信息如有更改,恕不另行通知。
HP 产品和服务附带的明示保修声明中阐明了此类产品和服务的全部保修服务。
本文档中的任何内容均不构成任何额外保修。
HP 对本文档中出现的技术错误、编辑错误或遗漏之处不承担任何责任。
第一版:2022 年 2 月文档部件号:N16146-AA1产品通知本指南介绍大多数产品共有的功能。
您的计算机上可能未提供某些功能。
并非所有功能在所有 Windows 版本中都可用。
系统可能需要升级和/或单独购买硬件、驱动程序、软件或 BIOS 更新,才能充分利用Windows 功能。
Windows 会自动更新,此功能始终处于启用状态。
需要高速互联网和Microsoft 帐户。
可能会收取 ISP 费用,在更新过程中可能还会有其他要求。
请参阅。
如果您的产品出厂随附 S 模式的 Windows:S 模式的Windows 仅适用于来自 Windows 的 MicrosoftStore 中的应用。
某些默认设置、功能和应用不能更改。
某些兼容 Windows 的配件和应用程序可能无法运行(包括某些防毒软件、PDF 编写器、驱动程序实用程序和辅助功能应用程序)。
而且,即使您退出 S 模式,性能也可能会有所不同。
如果切换至Windows,则无法再切换回 S 模式。
HP产品初始设置和使用说明书

Quick SetupQuick TourSetup InstructionsNOTE: The power button is located on the bottom-right of the product.Your product is protected by a free subscription to McAfee LiveSafe™ service for a limited time from the first time you use the computer. You will have the option to purchase McAfee LiveSafe service upon expiration of the subscription. McAfee LiveSafe service helps protect your identity, your data, and your devices with a single subscription.** Select products only.3132Find more informationWindows models To learn more about Windows and to access help topics, select the Start button, and then select the Get Started app.To access the user guides, select the Start button, select All apps , select HP Help and Support , and then select HP Documentation .Linux modelsDouble-click the HP Documents icon on the desktop.FreeDOS modelsOn the Boot Menu, select HP Documents . NOTE: You do not need to connect to the Internet to access the user guides.NOTE: A User Guides disc is included with some models.Go wirelessSelect the network icon in the right corner of the taskbar , and then connect to one of the available networks.– or –Type wifi in the taskbar search box, and then select Change Wi-Fi settings .NOTE: To set up a WLAN and connect to the Internet, you need a broadband modem (either DSL or cable) (purchased separately), high-speed Internet service purchased from an Internet service provider , and a wireless router (purchased separately).Multifunction buttonsThe buttons on the bottom-right of your product perform the following functions:NOTE: Refer to the Bottom components section for the location of the buttons.Volume/down buttonIf the OSD menu is open, press the button to move down. If the OSD menu is not open, press the button to decrease the volume. Press the input switch/up button to increase the volume. Press and hold the volume/down button to mute or unmute the volume.Input switch/ up button If the OSD menu is open, press the button to move up. If the OSD menu is not open, press the button to switch between the computer and HDMI-in.Menu/ OK button Opens, selects from, or exits the OSD menu. If the OSD menu is open, press the button again to make a selection.Front1Internal microphones (2)2IR camera 3Webcam light 4Webcam 5IR projector 6Speakers (2)7Power lightBottom8Audio-in (microphone)/audio-out (headphone) combo jack9Memory card reader -USB 3.0 charging (powered) port q USB 3.0 portwVolume/down button e Input switch/up button r Menu/OK button tPower buttonBacky Power connector u HDMI-out port i USB 3.0 ports (2)o RJ-45 (network) jack p USB 2.0 ports (2) a HDMI-in port s Security cable slot67w 98-q1123456er ty u iop a sAdjust/tilt thecomputer angleNOTE: Computer color , features, and accessories may vary.13NOTE: Depending on the model number of your product, the USBtransceiver is either preinstalled in your product or located inside the mouse box. For setup instructions for the mouse, see the outside of the mouse box. For setup instructions for the keyboard, see the outside of the keyboard box.2OR823851-002Navigating the Windows Start ScreenThe Windows Start screen provides a central location where you can access your information and email, browse the Web, stream videos, view photos, and access your social media websites.Display the Start menuSelect the Start buttonin the lower-left corner of the taskbar.SearchIn the taskbar search box, begin typing the name of an app, setting, file, or Internet topic.List your appsSelect the Start button, and then select All apps.Shut down your computerSelect the Start button , select the Power icon, and thenselect Shut down .Switch between open appsSelect the Task view iconin the taskbar.NOTE: The appearance of the Windows screen may vary.。
hp的中文翻译是指什么意思
hp的中文翻译是指什么意思hp的中文翻译意思基本解释abbr.美国惠普公司; Horsepower 马力; Health Point 生命值网络解释1. 惠普:三星(SAMSUNG)、松下(PANASONIC)、理光(RICOH)、夏普(SHARP)、佳能(CANON),惠普(HP)、兄弟(BROTHER)累计修复各种型号的传真机1000余台,整体修复率目前已达95%以上,积累了丰富的维修经验,维修备件充足,2. 生命值:4.生命值(HP): 生命值(HP)标志着可以还可以承受多少的伤害量. 除了1509点基础HP外,剩余的HP全部按照1Sta=10HP(或特定装备/附魔)进行修正. 牛头人因为种族天赋的缘故,HP上限提高5%. 二.战士攻击力的参数:武器伤害(Damage),3. 血量:库勒卡鼠人谁知道这个怪在哪??? 问题补充:库勒卡鼠人是8级的怪物名�Q 等���e �傩��N族性�e 血量(HP) 魔力(MP) ��值(Exp) 技能�c��(SP) 善�褐�4. 马力:911年表型号容积(c.c.) 马力(hp) 0-100km/h(秒) 极速(km/h) 年代大事记 911 1991 130 8.8 210 1963 九月IAA法兰克福车展Porsche编号901的跑车首度亮相,但由于与法国标致汽车(Peugeot)已注册的车款编号方式相同(三码中间带0),5. hp:helicobucter pylory; 幽门螺旋杆菌6. hp:hewlett packard; 惠普公司7. hp:hit points; 生命值8. hp:house power; 马力hp的单语例句1. She said she ruled out buying an HP computer because of last year's reports about its faulty products.2. Motorola and HP were among the pilot foreign companies selected by SAFE before the formal regulation was formulated.3. Dell and HP had already received " cease and desist " letters from the company, urging them to stop distributing computers containing the alleged copied software on Tuesday.4. Dunn had previously planned to remain an HP director after relinquishing the chairmanship in January, but now she is leaving the board entirely.5. " This combination will bring together two businesses where HP has established global leadership, " HP's chief executive officer Meg Whitman said in a statement.6. HP said the job cuts will come in its product segments, such as PCs and printers.7. HP said the commercial data centers will help its corporate clients run their businesses faster and more efficiently.8. HP contended in a statement last week that there were some " common symptoms " in certain models of its notebook computers sold in China.9. Speculation had also been high that Ms Fiorina's fellow board members were still unhappy about her 2002 purchase of Compaq and HP's performance ever since.10. Batteries in HP and Compaq notebooks are the subject of a safety recall after two incidents where the batteries overheated and caught fire.hp的双语例句1. Ex Lind1. Methods: The chemical compositions of volatile oil of the plant which were obtained by steam distillation with hexane were analyzed by GC-MS equipped with a elastic quartz capillary column-HP-5MS5% Phenyl Methyl Siloxane (30 m× 0.25 mm ×0.25 μm).利用有机溶剂-水蒸气蒸馏法提取挥发油,用气相色谱-质谱联用进行测定,色谱柱为HP-5MS5%Phenyl Methyl Siloxane(30m×0.25mm×0.25μm)弹性石英毛细管柱,结合计算机检索技术对分离的化合物进行结构鉴定,应用色谱峰面积归一化法计算各成分的'相对百分含量。
HP 模式与局域网用户指南说明书

ENWW
iii
iv
ENWW
1 Modem
The modem in the computer must be connected to an analog telephone line using a 6-pin, RJ-11 modem cable. In some countries, a country-specific modem cable adapter is also required. Jacks for digital PBX systems may resemble analog telephone jacks, but they are not compatible with the modem.
To add a location setting for the modem:
1. Select Start > Control Panel > Network and Internet Connections.
2. On the upper menu in the left pane of the Network and Internet Connections window, click Phone and Modem Options.
First Edition: March 2006
Document Part Number: 406814-001
Table of contents
1 Modem Connecting the modem cable ............................................................................................................... 2 Connecting a country-specific modem cable adapter .......................................................................... 3 Selecting a location setting ................................................................................................................... 4 Viewing the current country selection .................................................................................. 4 Adding new locations when traveling ................................................................................... 5 Solving travel connection problems ..................................................................................... 6 Using preinstalled communication software ......................................................................................... 7
英语四级作文参考:二手电脑广告
英语四级作文参考:二手电脑广告英语四级作文参考范文:二手电脑广告在我们平凡的日常里,大家总少不了接触作文吧,作文是由文字组成,经过人的思想考虑,通过语言组织来表达一个主题意义的`文体。
一篇什么样的作文才能称之为优秀作文呢?以下是店铺帮大家整理的英语四级作文参考:二手电脑广告,欢迎阅读与收藏。
【题目】Directions: For this part, you are allowed 30 minutes to write an advertisement on your campus website to sell a computer you used at college. Your advertisement may include its brand, specifications/features, condition and price, and your contact information.You should write at least 120 words but no more than 180 words. Write your essay on Answer Sheet 1.【参考范文】AdvertisementThis advertisement is to sell a laptop I used . The detailed information is listed as the following .At the top of the list, the brand of the computer is HP, in black color. In addition, the laptop is at good condition,with its CPU and inner memory satisfying, so you can write papers , watch videos or listen to music and so on with it as morally as you do with a brand-new one. Therefore,its function, generally speaking could meet you needs, and I promise that you would love it. Last but not least, I would like to sell the laptop at 1500 yuan, personally an attractive price.If you have any questions concerning the laptop, please do not hesitate to contact me. And I can be reached at 86543217 or **************.Ortoknowmoredetailsaboutthelaptop,you could also visit me at my dorm: 101Room at Dorm 1. Pleasecontact me by telephone before visit. Thank you very much.Li Ming【参考译文】广告本则广告是要售卖一台二手笔记本电脑。
hp kv 家用笔记本新品上市.doc
HP Compaq Presario CQ32 新品上市!新品特性CQ32 系列采用金棕色时尚外观设计,最新32纳米酷睿平台,支持DX11 的ATI HD5450 DDR3 1G大显存的极速显卡,7200转高速硬盘,16:9的13.3LED显示屏新品图片CQ32-时尚潮流本1.新一轮时尚简约的金棕色ID设计,隐约感到Envy系列的风采2.全新的3Dimprint亚光纹理设计,内敛和张扬协调统一,减少指纹保持笔记本清洁3.全金属内部框架设计,特别是金属转轴的设计,进一步提高CQ32的安全性和稳定性4.16:9的LEDBright view高亮液晶屏,让你轻松观看最喜欢的高清电影5.Intel32纳米全新酷睿处理器,性能提升约36%,功耗降低约54%.性能更强劲,待机更长久!!6.最新一代支持DX11ATI HD5450 DDR3独立显卡,高达1G独立大显存7.7200RPM高速硬盘,性能高出将30%8.支持盘面光雕技术的DVD+/-RW刻录机,自由制作个性化光盘9.“大眼睛提拉米苏”高感光摄像头10.奥特蓝星音响11.HDMI高清接口HP Pavilion dv3 dm4 dv6 新品上市!一、Dv3靓纹时尚版新品特性Dv3靓纹时尚版采用经典典雅的黑莓色设计,人性化的健康的5°倾角设计,Intel 32纳米升级酷睿处理器, 支持DX11的ATI HD5450 DDR3 1G大显存的极速显卡,独有Switchable双显卡切换技术!!新品图片Dv3-全能娱乐本⏹13寸小巧机身,但是支持四核运算!⏹经典典雅的黑莓色外观,尽显品位个性⏹Intel32纳米全新酷睿处理器,性能提升约36%,功耗降低约54%.性能更强劲,待机更长久!!⏹支持DX11的ATIHD5450 DDR3独立显卡,高达1G的极速独立显存⏹独有的Switchable双显卡切换技术,电池使用时间可延长到5小时⏹13.3寸16:9 LED背光BrightView高亮屏技术⏹8秒钟极速上网,HPQuickWeb不开机娱乐功能⏹超大面积的多点触控鼠标板,支持中文手写输入⏹奥特蓝星音响,配备杜比高级音质技术认证⏹集成的高感光摄像头,全向数字麦克风⏹具备光雕功能的DVD双层刻录技术⏹3D硬盘保护技术⏹高速eSATA接口二、 Dv3城市流光版新品特性Dv3城市流光版采用最新的金属风尚ID设计,人性化的健康的5°倾角设计,Intel 32纳米升级酷睿处理器, 支持DX11的ATI HD5450 DDR3 1G大显存的极速显卡,独有Switchable双显卡切换技术!!新品图片Dv3 城市流光版⏹13寸小巧机身,但是支持四核运算!⏹高贵时尚的金属蚀刻“城市流光”纹理外观,尽显品位个性⏹Intel32纳米全新酷睿处理器,性能提升约36%,功耗降低约54%.性能更强劲,待机更长久!!⏹支持DX11的ATIHD5450 DDR3独立显卡,高达1G的极速独立显存⏹独有的Switchable双显卡切换技术,电池使用时间可延长到5小时⏹13.3寸16:9 LED背光BrightView高亮屏技术⏹8秒钟极速上网,HPQuickWeb不开机娱乐功能⏹超大面积的多点触控鼠标板,支持中文手写输入⏹奥特蓝星音响,配备杜比高级音质技术认证⏹集成的高感光摄像头,全向数字麦克风⏹具备光雕功能的DVD双层刻录技术⏹3D硬盘保护技术⏹高速eSATA接口三、dm4城市流光版Dm4系列-最轻薄的内置光驱14寸机型,仅重2.0KG,最薄处仅25mm,采用最新的金属风尚ID设计,人性化的健康的5°倾角设计,Intel 32纳米升级酷睿处理器, 支持DX11的ATI HD5450 DDR3 1G大显存的极速显卡,独有Switchable双显卡切换技术!!新品图片Dm4-全能轻薄本⏹带有光驱的全能薄轻14寸金属机身,仅重2.0Kg,最薄处仅25mm⏹新颖坚固的全新金属外观,金属蚀刻“城市流光”纹理,品位高贵的个性⏹Intel32纳米全新酷睿处理器,性能提升约36%,功耗降低约54%.性能更强劲,待机更长久!!⏹支持DX11的ATIHD5450 DDR3独立显卡,高达1G的极速独立显存⏹独有的Switchable双显卡切换技术,电池使用时间可延长到6.5小时⏹14寸16:9 LED背光BrightView高亮屏技术⏹8秒钟极速上网,HPQuickWeb不开机娱乐功能⏹超大面积的多点触控鼠标板,支持中文手写输入⏹奥特蓝星音响,配备杜比高级音质技术认证⏹集成的高感光摄像头,全向数字麦克风⏹具备光雕功能的DVD双层刻录技术⏹3D硬盘保护技术⏹高速eSATA接口四、dv6城市流光版Dv6系列采用最新的金属风尚ID设计,人性化的健康的5°倾角设计,New Core四核i7酷睿处理器, 支持DX11的ATI HD5650 DDR3 1G大显存的极速显卡,独有Switchable双显卡切换技术!!新品图片Dv6-超级游戏娱乐本⏹新颖坚固的全新金属外观,金属蚀刻“城市流光”纹理,品位高贵的个性⏹支持并采用newcore四核i7-720QM处理器!!⏹支持DX11的高性能ATIHD5650 DDR3独立显卡,高达1G的极速独立显存⏹独有的Switchable双显卡切换技术,电池使用时间可延长到5小时⏹15.6寸16:9 LED背光BrightView高亮屏技术⏹8秒钟极速上网,HPQuickWeb不开机娱乐功能⏹超大面积的多点触控鼠标板,支持中文手写输入⏹奥特蓝星音响,配备杜比高级音质技术认证⏹集成的高感光摄像头,全向数字麦克风⏹具备光雕功能的DVD双层刻录技术⏹3D硬盘保护技术⏹高速eSATA接口CQ42 AMD三核四核处理器平台新品特性CQ42 系列采用新一轮时尚简约的ID设计,全新的3D imprint亚光纹理,AMD最新三核四核处理器平台,最新一代ATI HD545V DDR3极速显卡,7200转高速硬盘,16:9的LED 显示屏!!!新品图片CQ42-经济易用本AMD⏹新一轮时尚简约的ID设计,隐约感到Envy系列的风采⏹全新的3Dimprint亚光纹理设计,内敛和张扬协调统一,减少指纹保持笔记本清洁⏹全金属内部框架设计,特别是金属转轴的设计,进一步提高CQ42的安全性和稳定性⏹16:9的LEDBright view高亮液晶屏,让你轻松观看最喜欢的高清电影⏹AMD全新40纳米三核四核处理器平台,性能更强劲,功耗更低!!⏹最新一代ATI HD545V DDR3独立显卡,高达512M独立显存⏹1066MHZDDR3极速内存⏹7200RPM高速硬盘,性能高出将30%⏹支持盘面光雕技术的DVD+/-RW刻录机,自由制作个性化光盘⏹“大眼睛提拉米苏”高感光摄像头⏹奥特蓝星音响⏹HDMI高清接口HP消费类笔记本tm2tm2系列为采用Intel 平台的Touch 笔记本,tx2的升级系列!!tm2-1006TX金属超薄酷炫外观,采用Intel酷睿2双核低电压处理器,并配以支持双显卡切换的HD4550 512M DDR3高性能显卡,Win7 64位操作系统!HP Touchsmart tm2系列主要卖点⏹12.1”高清LED液晶屏⏹全新且惊艳的多点触摸液晶屏技术⏹可旋转三模式应用显示屏设计⏹金属超薄酷炫外观⏹高性能独立显卡⏹享受手指操控优化的MediaSmart娱乐平台带来的快乐⏹敏锐智能的手写图文功能,随时捕捉时尚灵感⏹悬浮式巧克力IMR涂层键盘⏹内置高感光摄像头和双阵列式排噪麦克风⏹内置安全易用的指纹识别功能⏹超长8小时电池续航时间。
电脑计算机英语怎么拼写
电脑计算机英语怎么拼写而伴随着多年低迷的股价,英特尔公司一直在扩大个人电脑和计算机服务器市场以外的狩猎。
下面店铺为大家带来电脑计算机的英语意思和相关用法,欢迎大家一起学习!电脑计算机的英语拼写computer电脑计算机的相关英语例句1. We want to buy Branded Laptop, Computer, Monitor, Second Hand Good Working Condition Laptop, Computer Supply.我们要采购一般品牌的笔记本电脑, 计算机, 显示器, 二手良好的工作条件,笔记型电脑, 电脑供应.2. Today all desktop and notebook hard disk drives implement the security features.现在所有的桌面计算机和笔记本电脑硬盘都采用该安全功能.3. That kind of computer was and still is a remarkable one.该计算机过去是,现在仍然是一种了不起的电脑.4. We look forward to hearing about International Computer's newest computer.我们期待听到国际计算机公司新型电脑的进一步情况.5. I hastily closed the window and restarted the computer.我匆忙地关闭电脑窗口,重新启动计算机.6. CAI and computer network is applied more and more extensively in teaching.计算机辅助教学(CAI)、电脑网络在教学中的应用也越来越广泛.7. Much of their work is marked by a computer programme Computer - marked assignments.他们的作业多数是由计算机程序来批改的,这被称为是“电脑批改作业”.8. Motorcycles, Scooters and Two Wheeler Parts, Computer,Monitors, Used Computers, Monitors, Printers.采购产品摩托车, 摩托车和二个车夫配件, 计算机, 显示器, 二手电脑, 显示器, 打印机.9. Just plug it into your computer USB port an instant breeze anywhere.直接插入您的笔记本电脑支持通过USB接口连接您的计算机.10. Which means the home computer home computer, also as the home computer.家用电脑即是指家用的微型计算机, 也称家用微机.11. Equipped with advanced computer - aided design ( CAD ) systems and computer management system.配有先进的计算机辅助设计 ( CAD ) 系统和电脑管理系统.12. To enter, process, or store ( information ) in a computer or system of computers.用电脑处理在计算机或计算机系统中输入、处理或存储 ( 信息 )13. PC Cards are a special case normally associated with laptop computers.个人计算机卡是通常与笔记型电脑有关的一个特别的外壳.14. This in turn reduced prices and enabled the PC to democratise computing.结果相应使价格下降,使个人电脑普及了计算机技术.15. Proficient in computer and PC usage.精通计算机和电脑应用.电脑计算机的英文例句现在很多人购买电脑,计算机变得越来越普及。
- 1、下载文档前请自行甄别文档内容的完整性,平台不提供额外的编辑、内容补充、找答案等附加服务。
- 2、"仅部分预览"的文档,不可在线预览部分如存在完整性等问题,可反馈申请退款(可完整预览的文档不适用该条件!)。
- 3、如文档侵犯您的权益,请联系客服反馈,我们会尽快为您处理(人工客服工作时间:9:00-18:30)。
HP Business Desktop dx5150 MT
2
QuickSpecs
–
Microsoft Windows Norton AntiVirus 2004 Microsoft® Office 2003 Personal Edition Microsoft® Office 2003 Professional Enterprise Edition Norton AntiVirus 60
• SMART
HP Business Desktop dx5150 MT
14
QuickSpecs
(
USB USB
HP Business Desktop dx5150 MT
HP Business Desktop dx5150 MT
CD DPS F10 DPS
----• •
• Diagnostics for Windows® DPS •
Windows
SMART Self-Monitoring, Analysis, and Reporting Technology SMART Self-Monitoring, Analysis and Reporting Technology SMART I – SMART II SMART III – • •
256KB
32 939 FC-PGA 2000MHz 512KB
64
L2 AMD Enhanced Virus Protection AMD Cool ‘n Quiet L2 /
1024KB
I/O – 939 DIMM 2.5V PCI Express PCI-E PCI 32 Flash ROM LPC CD ROM IN CMOS CPU CMOS TPM – ZIF
2000V • • Ultra ATA CRC •
− − − −
32
ATA RAID CD Web 2 LED LED LED
HP Business Desktop dx5150 MT
---------
LED
1
2
12
QuickSpecs
2 3 4 5 6 7 8 ROM Compaq Diagnostic for Windows® Software Compaq = = = = = = PCA =
1.44MB 1 CD-ROM CD-RW DVD-ROM CD-RW/DVD-ROM DVD±R/RW DVD+R DL
48 48 16 48 16
HP Business Desktop dx5150 MT
1
QuickSpecs
–
I/O IEEE 1394a FireWire 400 FH PCI
− − −
Advanced Configuration and Power Management Interface
−
/
/ uATX
I/O I/O DVI-D×1 ×1
ATX I/O ×1
USB 2.0 ×2 USB 2.0×6 VGA×1 ×1 ×1 ×2 PS2×2 RJ45×1
I/O /UART USB
ROM
F10
ROM ROM
HP Business Desktop dx5150 MT
F10 xxyy
• ROM
ROM F10
11
QuickSpecs
• SW • •
HP Business Desktop dx5150 MT
SMBIOS
-------------
USB /
USB
/
Smartcard ----• • SMART • SMART
HP Business Desktop dx5150 MT
AMD Athlon™ 64
Serial Presence Detect
PCI AMD Sempron™ 32 /64 CPU CPU /
32 939 FC-PGA 1600MHz 128KB
L2 AMD Enhanced Virus Protection AMD Cool ‘n Quiet™ L2 / AMD Athlon™ 64 32 /64 CPU CPU /
HP Business Desktop dx5150 MT
MT
HP Business Desktop dx5150 MT
3
QuickSpecs
–
HP Business Desktop dx5150 MT
/go/EasyDeploy
HP Business Desktop dx5150 MT
SMSC LPC47B397 Super I/O ×1 ×1 USB 2.0 ×8 ×2 RJ-45 PS2 PS2
×6
USB USB
HP Business Desktop dx5150 MT
7
QuickSpecs
HP Business Desktop dx5150 MT
250 W ATX 115v/230v APFC ½ PFC 115V APFC
PS/2 PS/2 VGA/DVI-D H W D
1 1 1 1 1/1 36.8 17.5 41.4
H W D /
10.8Kg 27.0 1651 14.5Kg 32 59.5cm 33.7cm 59.7cm DDR I SDRAM PC3200 400MHz Non-ECC 4GB 1GB Non-ECC
-----
------------0 3,048m/10,000ft
Rh Rh
1500ft/ 1500ft/
----0 /9,144m/30,000ft
ROM CD CD -----
BIOS F10
USB disk-on-key Repset.exe
HP
4 Altiris eXpress 30 • • • • ----• • • F10 DIMM Serial Presence Detect DIMM
---------
-----
--------------------) PCI PCI-E VGA NIC
ZIP DIMM NIC LED (
-----------------
2 LED ROM
LED
-----
HP Business Desktop dx5150 MT
13
QuickSpecs
CD 3.5 5.25
HP Business Desktop dx5150 MT
ROM ROM
-----------------
(IM ) HP OS CD (Restore OS CD) HP Restore CD CD Flash ROM PCA 3.3V LED PCA 5V LED ON /PS_ON LED OFF LED CMOS CMOS
*11ms *11ms ---------
HP Business Desktop dx5150 MT
5G* 20G*
-----
0.000215 G²/Hz 10Hz 300Hz 0.25G 0.0005 G²/Hz 10Hz 500Hz 0.5G 10% 90% 28°C 5% 95% 38.7°C
– PFC
230V
90 132VAC 100 127VAC 50 60Hz 47 63Hz 5A @ 100VAC/2.5A @ 200VAC 250W 1260BTU/ 317kg-cal/ 256BTU/ 65kg-cal/ PS PS
PFC 180 264VAC 200 240VAC
APM 1.2
FEMP Blue Angel ES PC / CD-ROM
S5 S5-
2W 5w RAM (S3) S3 2W
Web DOS Windows® Windows® Windows® Windows® Windows® 3.1 95 98 NT 4.X 2000/Windows® XP Pro
Windows ® 2000 Windows® XP Pro SP2 Windows® XP Home SP2
2000MHz 2000MHz
7,200rpm 7,200rpm 7,200rpm 7,200rpm 7,200rpm 7,200rpm
1 256MB DDR SDRAM PC3200 400MHz Non-ECC 256 DIMM 1 512MB DDR SDRAM PC3200 400MHz Non-ECC 256 DIMM 2 1GB DDR SDRAM PC3200 400MHz Non-ECC 512 DIMM 2
HP Business Desktop dx5150 MT
8
QuickSpecs
/im/ Insight Windows® 2000 Grantsdale Windows® XP Pro SP2 Windows® XP Home SP2 Mandrake Linux 9.1 Web
HP Business Desktop dx5150 MT
MT
PS/2
2 USB
PS/2
NIC Broadcom NetXtreme Gigabit Ethernet
ATI Radeon 9600 – VGA DVI-D TV ATI Radeon X300 SE 128MB DDR FP PCIE DVI
QuickSpecs
–
1 Microsoft Windows XP Professional SP2 Microsoft Windows XP Home SP2 1 L2 512KB 1024KB
HP Business Desktop dx5150 MT
MT
MT