软路由MikroTik RouterOS 简明教程
MikroTik RouterOS API 操作手册
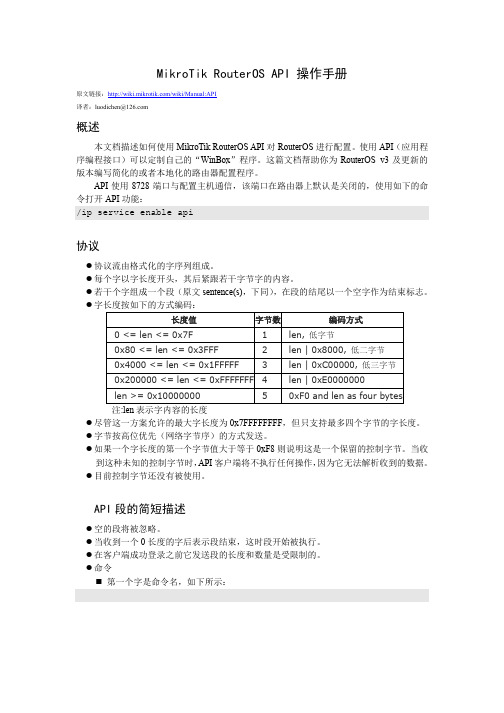
print 命令允许使用查询限定字来限定返回的条目,这一特性从 v3.21 版本开始出现。 查询限定字由问号“?”开头。 查询限定字的顺序是重要的,从第一个查询字开始处理。 查询限定字匹配每一个条目,如果匹配成功,则该条目被处理,否则忽略该条目。 查询匹配系统使用一个布尔栈来工作,在初始时这个栈中包含无穷多个 true,在处理完
!re =.id=*5802 =disabled=no =name=routeros-x86 =version=3.0beta2 =build-time=oct/18/2006 16:24:41 =scheduled=
!re =.id=*5805 =disabled=no =name=system =version=3.0beta2 =build-time=oct/18/2006 17:20:46 =scheduled= ... more !re sentences ...
?查询匹配系统使用一个布尔栈来工作在初始时这个栈中包含无穷多个true在处理完成后若栈中包含至少一个false则该查询匹配失败
MikroTik RouterOS API 操作手册
原文链接:/wiki/Manual:API 译者:luodichen@
概述
本文档描述如何使用 MikroTik RouterOS API 对 RouterOS 进行配置。使用 API(应用程 序编程接口)可以定制自己的“WinBox”程序。这篇文档帮助你为 RouterOS v3 及更新的 版本编写简化的或者本地化的路由器配置程序。
API 使用 8728 端口与配置主机通信,该端口在路由器上默认是关闭的,使用如下的命 令打开 API 功能: /ip service enable api
MikroTikRouterOS安装及注册图解
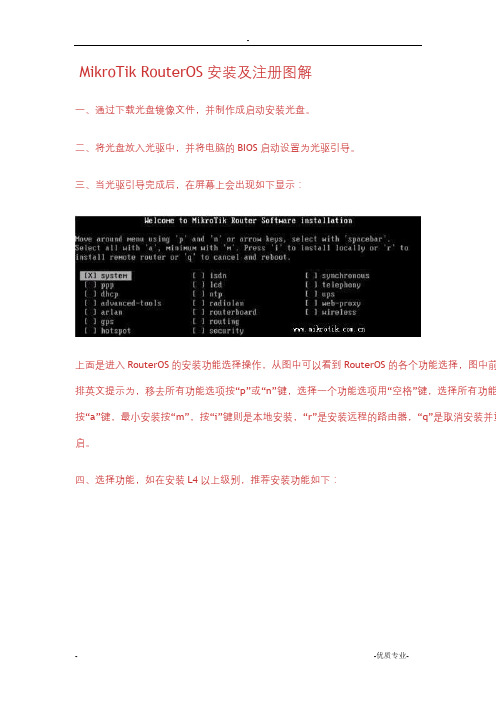
MikroTik RouterOS安装及注册图解一、通过下载光盘镜像文件,并制作成启动安装光盘。
二、将光盘放入光驱中,并将电脑的BIOS启动设置为光驱引导。
三、当光驱引导完成后,在屏幕上会出现如下显示:上面是进入RouterOS的安装功能选择操作,从图中可以看到RouterOS的各个功能选择,图中前排英文提示为,移去所有功能选项按“p”或“n”键,选择一个功能选项用“空格”键,选择所有功能按“a”键,最小安装按“m”,按“i”键则是本地安装,“r”是安装远程的路由器,“q”是取消安装并重启。
四、选择功能,如在安装L4以上级别,推荐安装功能如下:五、选择好功能组件后,即可按“i”键进行安装,此时会提示“硬盘上的所有数据都会被删除,是否继续”选择“y”继续,如果是“n”键安装会停止,并会重启。
选择“y”继续后,会提示是否保持以前配置,这是升级安装,并想保留以前路由器的设置参数,选择“y”,如果是不想保留则选择“n”。
(新安装则选择“n”)六、选择完后RouterOS开始安装七、安装完后RouterOS提示按“回车”键,并重启。
八、安装完后,进入系统会提示输入注册码,如下图:九、在进入系统后,会有24小时的使用时间,“Software ID”表示的是ROS的ID号,如上图所示为KRYH-I8N 通过此ID号申请注册码。
因为注册码比较长所以需要使用winbox进行操作,更为简便直观。
十、首先将Winbox下载到可以与RouterOS相连接的Windows电脑上,然后双击打开,如图:十一、在没有设置IP地址前使用MAC地址登录,点击winbox中扫描按钮,选择需要登录的ROS,默认的为“admin”,密码为空;按回车或者点击“connect”进行登录。
十二、当您获得注册码后,请通过复制注册码的所有信息,进入Winbox中的system >> license项,点击paste key选项粘贴注册码。
Mikrotik RouterOS正版软件的注册和升级
Mikrotik RouterOS正版软件的注册和升级时间:2006-4-28 9:00:46 来源:中国软路由网吧应用技术网阅读14147次正版RouterOS如何注册,如何升级一、RouterOS正版软件的注册 Mikrotik RouterOS官方版本只有24小时的试用期,试用期满之前(系统还能正常使用),如对RouterOS的性能满意,可以考虑购买正式版本。
未注册的软件24小时后将自动失效,注册步骤:(1)取得SoftWare ID(软件ID)。
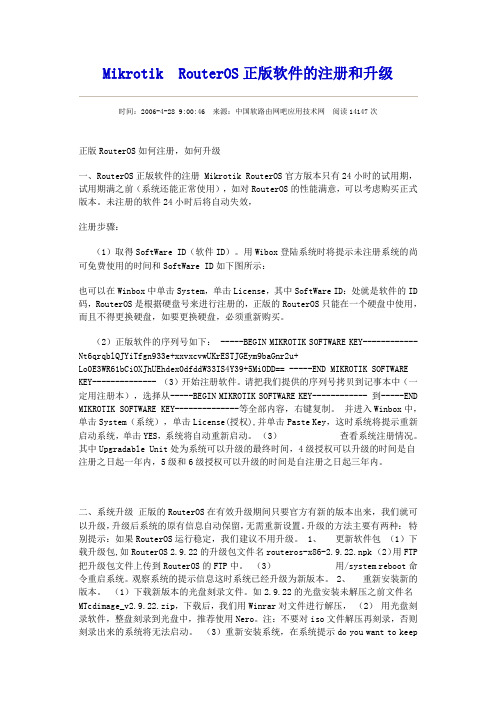
用Wibox登陆系统时将提示未注册系统的尚可免费使用的时间和SoftWare ID如下图所示:也可以在Winbox中单击System,单击License,其中SoftWare ID:处就是软件的ID 码,RouterOS是根据硬盘号来进行注册的,正版的RouterOS只能在一个硬盘中使用,而且不得更换硬盘,如要更换硬盘,必须重新购买。
(2)正版软件的序列号如下: -----BEGIN MIKROTIK SOFTWARE KEY------------ Nt6qrqblQJYiTfgn933e+xxvxcvwUKrESTJGEym9baGnr2u+Lo0E3WR61bCiOXJhUEhdex0dfddW33IS4Y39+5MiODD== -----END MIKROTIK SOFTWARE KEY-------------- (3)开始注册软件。
请把我们提供的序列号拷贝到记事本中(一定用注册本),选择从-----BEGIN MIKROTIK SOFTWARE KEY------------ 到-----END MIKROTIK SOFTWARE KEY--------------等全部内容,右键复制。
并进入Winbox中,单击System(系统),单击License(授权),并单击Paste Key,这时系统将提示重新启动系统,单击YES,系统将自动重新启动。
MikroTikRouterOS安装后初始化配置(PPPOE拨号上网)
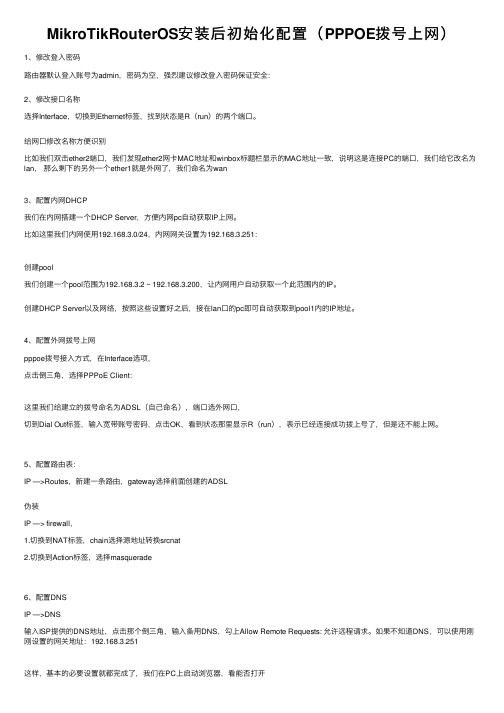
MikroTikRouterOS安装后初始化配置(PPPOE拨号上⽹)1、修改登⼊密码路由器默认登⼊账号为admin,密码为空,强烈建议修改登⼊密码保证安全:2、修改接⼝名称选择Interface,切换到Ethernet标签,找到状态是R(run)的两个端⼝。
给⽹⼝修改名称⽅便识别⽐如我们双击ether2端⼝,我们发现ether2⽹卡MAC地址和winbox标题栏显⽰的MAC地址⼀致,说明这是连接PC的端⼝,我们给它改名为lan,那么剩下的另外⼀个ether1就是外⽹了,我们命名为wan3、配置内⽹DHCP我们在内⽹搭建⼀个DHCP Server,⽅便内⽹pc⾃动获取IP上⽹。
⽐如这⾥我们内⽹使⽤192.168.3.0/24,内⽹⽹关设置为192.168.3.251:创建pool我们创建⼀个pool范围为192.168.3.2 ~ 192.168.3.200,让内⽹⽤户⾃动获取⼀个此范围内的IP。
创建DHCP Server以及⽹络,按照这些设置好之后,接在lan⼝的pc即可⾃动获取到pool1内的IP地址。
4、配置外⽹拨号上⽹pppoe拨号接⼊⽅式,在Interface选项,点击倒三⾓,选择PPPoE Client:这⾥我们给建⽴的拨号命名为ADSL(⾃⼰命名),端⼝选外⽹⼝,切到Dial Out标签,输⼊宽带账号密码,点击OK,看到状态那⾥显⽰R(run),表⽰已经连接成功拨上号了,但是还不能上⽹。
5、配置路由表:IP —>Routes,新建⼀条路由,gateway选择前⾯创建的ADSL伪装IP —> firewall,1.切换到NAT标签,chain选择源地址转换srcnat2.切换到Action标签,选择masquerade6、配置DNSIP —>DNS输⼊ISP提供的DNS地址,点击那个倒三⾓,输⼊备⽤DNS,勾上Allow Remote Requests: 允许远程请求。
MikroTikRouterOS安装及注册图解
MikroTik RouterOS安装及注册图解一、通过下载光盘镜像文件,并制作成启动安装光盘。
二、将光盘放入光驱中,并将电脑的BIOS启动设置为光驱引导。
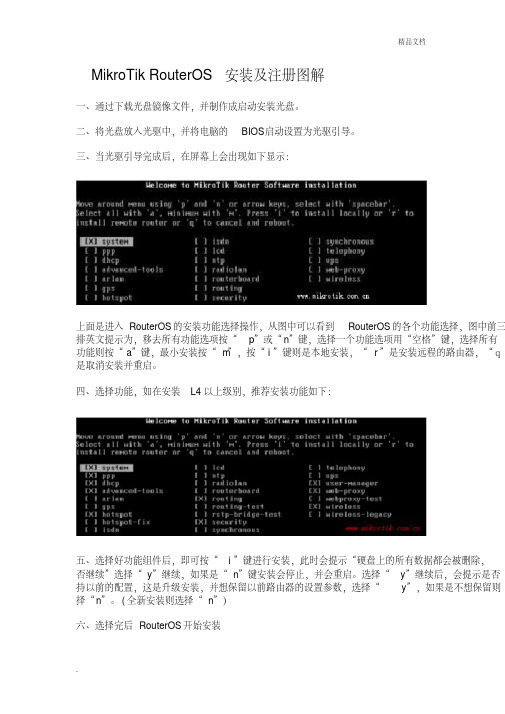
三、当光驱引导完成后,在屏幕上会出现如下显示:上面是进入RouterOS的安装功能选择操作,从图中可以看到RouterOS的各个功能选择,图中前三排英文提示为,移去所有功能选项按“p”或“n”键,选择一个功能选项用“空格”键,选择所有功能则按“a”键,最小安装按“m”,按“i”键则是本地安装,“r”是安装远程的路由器,“q是取消安装并重启。
四、选择功能,如在安装L4以上级别,推荐安装功能如下:五、选择好功能组件后,即可按“i”键进行安装,此时会提示“硬盘上的所有数据都会被删除,否继续”选择“y”继续,如果是“n”键安装会停止,并会重启。
选择“y”继续后,会提示是否持以前的配置,这是升级安装,并想保留以前路由器的设置参数,选择“y”,如果是不想保留则择“n”。
(全新安装则选择“n”)六、选择完后RouterOS开始安装七、安装完后RouterOS提示按“回车”键,并重启。
八、安装完后,进入系统会提示输入注册码,如下图:九、在进入系统后,会有24小时的使用时间,“Software ID”表示的是ROS的ID号,如上图所为:KRYH-I8N 通过此ID号申请注册码。
因为注册码比较长所以需要使用winbox进行操作,更为便和直观。
十、首先将Winbox下载到可以与RouterOS相连接的Windows电脑上,然后双击打开,如图:十一、在没有设置IP地址前使用MAC地址登录,点击winbox中扫描按钮,选择需要登录的ROS,默认的帐号为“admin”,密码为空;按回车或者点击“connect”进行登录。
十二、当您获得注册码后,请通过复制注册码的所有信息,进入Winbox中的system >> license项,点击paste key选项粘贴注册码。
Mikrotikros软路由中文版使用图文教程
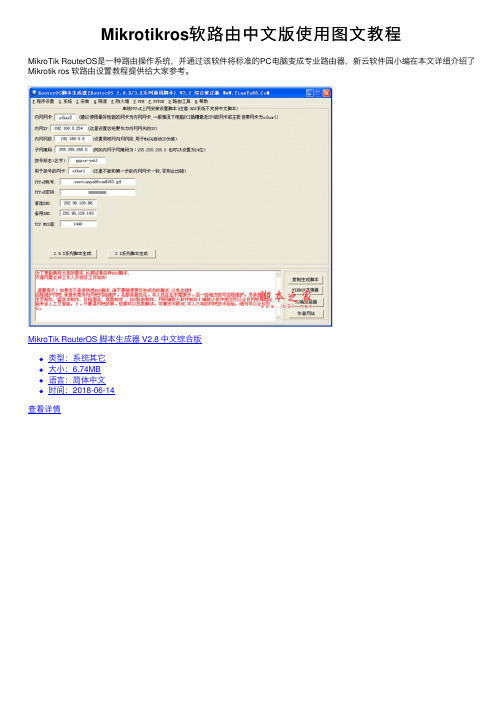
Mikrotikros软路由中⽂版使⽤图⽂教程MikroTik RouterOS是⼀种路由操作系统,并通过该软件将标准的PC电脑变成专业路由器,新云软件园⼩编在本⽂详细介绍了Mikrotik ros 软路由设置教程提供给⼤家参考。
MikroTik RouterOS 脚本⽣成器 V2.8 中⽂综合版类型:系统其它⼤⼩:6.74MB语⾔:简体中⽂时间:2018-06-14查看详情Winbox 基于windows下远程管理ROS的软件 v3.31 绿⾊版类型:远程控制⼤⼩:1.10MB语⾔:英⽂软件时间:2021-09-18查看详情winbox下调试根据你所设的局域⽹IP。
输⼊(我的是192.168.1.1) 下载winbox得到如下图:输⼊管理员⽤户admin,默认密码为空,如图:第⼀项:interfaces。
这⾥可以更改你的⽹卡名称,查看个内外⽹总体查看外⽹流量如图:(选择⽹卡名称第四项traffic)第⼆项,IP由于你已经填写好了内外⽹的IP,所以IP Addresses⾥⽆须再管了。
注意事项,外⽹掩码请仔细询问你当地的电信或者⽹通部门2、ip routes,这⾥是更改你所⾛的⽹关⽤的,如图3、IP pool(不管他)4、IP arp(这⾥是⽹卡mac地址与ip地址绑定,我是绑定了),具体操作,双击前⾯带D(代表未arp绑定)的IP地址,点tools选择copy,点OK,哈哈,前⾯的D就没啦,恭喜你绑定成功。
5、IP vrrp(不管他)6、IP firewall(重点哦)到这⾥了,是不是还拼不通外⽹啊,哈哈,没有IP伪装啊,当然上不了啊。
IP—firewall—source,点加号加⼀条规则,第⼀项⾥⾯填你的设置的内⽹⽹段,不是⽹关哦,后⾯跟24,不是32哦。
切记!如图能上⽹了吧,这时候你的软路由⾮常脆弱,所以,我们来给他增“墙”,本⽂核⼼,防⽕墙配置。
input 设置图:⼀些重要的端⼝改变图:为什么要改变端⼝,⽤途很明显,默认的⼤家都知道,⽽你所改的呢?只有你⾃⼰知道,哈哈,这就是效果!看到没?⽐如telnet啊,winbox啊,upnp,http(这⾥是指访问你的路由的http端⼝哦)。
尚择优选Mikrotik RouterOS 资料说明书及功能
Mikrotik RouterOS5.4 3线接入电信级高端路由器一、产品描述 (1)★硬件概览 (1)★软件预装 (1)★功能介绍 (1)QoS带宽流量管理: (2)VPN功能: (2)专业级防火墙: (2)支持端口映射: (2)PPPOE服务器功能: (3)其他功能: (3)二、技术规格 (3)三、更多功能 (4)桥接功能: (4)多线路支持: (4)隧道协议: (5)Hotspot热点认证服务: (5)脚本控制 (5)TCP/IP协议组: (6)二层链接 (6)管理工具: (7)一、产品描述★硬件概览Mikrotik RouterOS 电信级高端路由器,针对中大型网吧,小区宽带,企业校园网络等设计,经实际网络环境运行,有良好的稳定性。
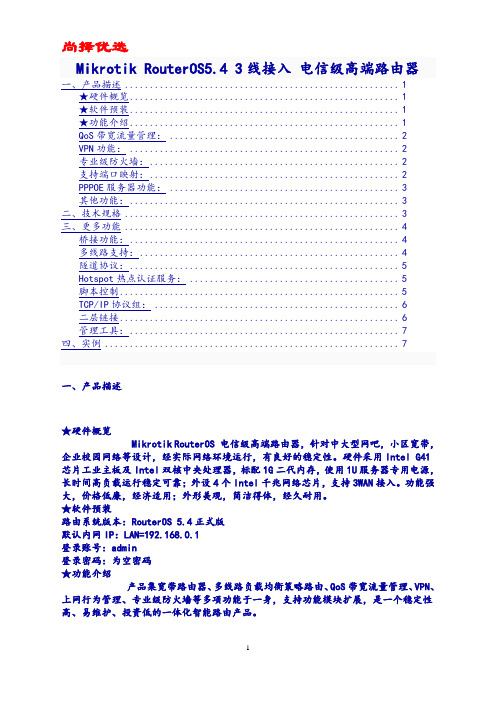
硬件采用Intel G41芯片工业主板及Intel双核中央处理器,标配1G二代内存,使用1U服务器专用电源,长时间高负载运行稳定可靠;外设4个Intel千兆网络芯片,支持3WAN接入。
功能强大,价格低廉,经济适用;外形美观,简洁得体,经久耐用。
★软件预装路由系统版本:RouterOS 5.4正式版默认内网IP:LAN=192.168.0.1登录账号:admin登录密码:为空密码★功能介绍产品集宽带路由器、多线路负载均衡策略路由、QoS带宽流量管理、VPN、上网行为管理、专业级防火墙等多项功能于一身,支持功能模块扩展,是一个稳定性高、易维护、投资低的一体化智能路由产品。
多线路负载均衡:支持电信、网通、铁通等宽带接入,支持ADSL固接/PPPOE及时制/Cable Modem/光纤接入/FTTX等各种协议。
支持负载均衡、静态路由、策略路由,自动线路备援。
QoS带宽流量管理:系统提供基于HTB (Hierarchical Token Bucket)算法的流量管理功能,可有效提高带宽利用率和限制P2P等海量下载软件的使用,对于正常上网的内网主机,系统将允许它偶然突破最大限速;相反,对于长期使用P2P等软件的内网主机,系统将会减小它的带宽,使其对其他主机的影响降到最低。
[实用参考]Mikrotik RouterOS 资料说明书及功能.doc
![[实用参考]Mikrotik RouterOS 资料说明书及功能.doc](https://img.taocdn.com/s3/m/b43399732e3f5727a5e96241.png)
MikrotikRouterOS5.43线接入电信级高端路由器一、产品描述 (1)★硬件概览 (1)★软件预装 (1)★功能介绍 (1)QoS带宽流量管理: (2)VPN功能: (2)专业级防火墙: (2)支持端口映射: (2)PPPOE服务器功能: (3)其他功能: (3)二、技术规格 (3)三、更多功能 (4)桥接功能: (4)多线路支持: (4)隧道协议: (5)Hotspot热点认证服务: (5)脚本控制 (5)TCP/IP协议组: (6)二层链接 (6)管理工具: (7)四、实例 (7)一、产品描述★硬件概览MikrotikRouterOS电信级高端路由器,针对中大型网吧,小区宽带,企业校园网络等设计,经实际网络环境运行,有良好的稳定性。
硬件采用IntelG41芯片工业主板及Intel双核中央处理器,标配1G二代内存,使用1U服务器专用电源,长时间高负载运行稳定可靠;外设4个Intel千兆网络芯片,支持3WAN 接入。
功能强大,价格低廉,经济适用;外形美观,简洁得体,经久耐用。
★软件预装路由系统版本:RouterOS5.4正式版默认内网IP:LAN=192.168.0.1登录账号:admin登录密码:为空密码★功能介绍产品集宽带路由器、多线路负载均衡策略路由、QoS带宽流量管理、VPN、上网行为管理、专业级防火墙等多项功能于一身,支持功能模块扩展,是一个稳定性高、易维护、投资低的一体化智能路由产品。
多线路负载均衡:支持电信、网通、铁通等宽带接入,支持ADSL固接/PPPOE 及时制/CableModem/光纤接入/FTTG等各种协议。
支持负载均衡、静态路由、策略路由,自动线路备援。
QoS带宽流量管理:系统提供基于HTB(HierarchicalTokenBucket)算法的流量管理功能,可有效提高带宽利用率和限制P2P等海量下载软件的使用,对于正常上网的内网主机,系统将允许它偶然突破最大限速;相反,对于长期使用P2P等软件的内网主机,系统将会减小它的带宽,使其对其他主机的影响降到最低。
mikrotik_routerOS基础教程

安装步骤:使用方向键和空格键选择需要的模组功能,按空格键进行选 定,按“a”键全部选择,“m”键选择最小选择.按“i”键确定安装; 接着询问: Do you want to keep old configuraton?(你需要保留 旧的结构)选择“n”,Coutinue?选择“y”;然后开始自动的格式 化磁盘、安装核心、安装模组,最后提示:Press ENTER to Reboot ,按回车重新启动机器。
Winbox 控制台是用于MikroTik RouterOS 的管理和配置,使用图形管理接口(GUI),通过连 接到MikroTik 路由器的HTTP(TCP 80 端口)欢迎界面下载Winbox.exe 可执行文件, 下载并保存在你的Windows 中,之后直接在你Windows 电脑上运行Winbox.ex [admin@MikroTik] /ip address> /ip route [admin@MikroTik] /ip route> add gateway=172.16.0.1 [admin@MikroTik] /ip route> print
Flags: X - disabled, A - active, D - dynamic, C - connect, S - static, r - rip, b - bgp, o - ospf, m - mme, B - blackhole, U - unreachable, P – prohibit
Winbox基本操作
Winbox中一些基本名词解释:
src-address:源地址(发送数据的ip地址) dst-address:目标地址(接收数据的ip地址) Input:进入路由器,是指发往routeros自己的数据(也就是目的ip是routeros接口中的 一个ip地址) output: 从路由器出发,是指从routeros发出去的数据(也就是数据包源ip是routeros接 口中的一个ip地址) forward: 经路由转发中 是指通过routeros转发的(比如你内部计算机访问外部网络,数 据需要通过你的routeros,进行转发出去 Srcnat与dstnat:srcnat(源地址转换)用的最多就是共享上网功能;dstnat(目标地址 转换)意思就是针对内网有对外公布的服务器,就是常用的端口地址映射。 in-interface:进入的网卡; out-interface:出去的网卡 Rx与Tx:RX (receive)接收,TX(transmit)传送,在RouterOS中,我们查看WAN网卡的流量时 RX为下行流量、TX为上行流量、查看LAN网卡的流量时,RX为上行流量、TX为下行流量 ;以ROS为中心,WAN网卡接收的流量,即从ISP进来的流量,则为下行以ROS为中心, LAN网卡接收的流量,即从工作站进来的流量,则为上行。TX同理。
mikrotik_routerOS基础教程

Winbox 控制台是用于MikroTik RouterOS 的管理和配置,使用图形管理接口(GUI),通过连 接到MikroTik 路由器的HTTP(TCP 80 端口)欢迎界面下载Winbox.exe 可执行文件, 下载并保存在你的Windows 中,之后直接在你Windows 电脑上运行Winbox.exe 文件.
接着设置adsl的内网: [admin@MikroTik] /interface pppoe-client> /ip address [admin@MikroTik] /ip address> add address=192.168.1.1/24 interface=lan [admin@MikroTik] /ip address> print Flags: X - disabled, I - invalid, D - dynamic # ADDRESS NETWORK BROADCAST INTER FACE 0 192.168.1.1/24 192.168.1.0 192.168.1.255 lan
刻录好相应版本的RouterOS安装; BIOS中设置光盘引导系统,自动进入到如下安装界面:
• • • • • • • • • • • •
System:主要是包的基本服务和驱动程序; Ppp:提供PPP,PPTP,L2TP,PPPoE和ISDN PPP Dhcp:DHCP 客户端和服务器 advanced-tools:邮件客户端,pingers,netwatch和其他的工具 Gps:支持GPS装置 Hotspot:允许给无线客户或非安全客户提供公共网络访问 Routerboard:支持路由主板的一些函数和工具 Routing:支持RIP,OSPF和BGP4协议 Security:支持IPSEC,SSH和安全的WinBox连接 user-manager:用户管理服务 web-proxy:HTTP web代理支持 Wireless:提供支持Cisco的Aironet卡, prismii和Atheros的无线站 和接入点
MikroTik Router OS(软路由服务器)ppt
轻松上网,快乐工作每一天!
谢 谢
7.间接经济效益 7.间接经济效益
1.稳定安全的网络环境可以提高工作效率 1.稳定安全的网络环境可以提高工作效率 2.方便快捷的网速可以提供互联网最新技术和信息 2.方便快捷的网速可以提供互联网最新技术和信息 3.网络客户来源 3.网络客户来源 4.公司扩大,网络设备的更新和淘汰 4.公司扩大,网络设备的更新和淘汰 5.变废为宝 5.变废为宝 6. 公司OA系统Internet在线查询与浏览 公司OA系统Internet在线查询与浏览 。。。。。。
1.使用软路由代理服务器背景 1.使用软路由代理服务器背景
公司在搬入软件园后,使用硬件路由 器法正常进行远程维 护和大文件发送,无法进行远程安装,无 法限制下载速度和过滤不良网站,信息等。
2.软路由和硬件路由的比较 2.软路由和硬件路由的比较
4.使用Router OS系统创新点 4.使用Router OS系统创新点
研究使用MikroTik 研究使用MikroTik Router OS系统,将公司所 OS系统,将公司所 有上网电脑做模拟电信拨号上网,客户端不需要 IP地址,通过公司统一分配拨号上网帐户,可以 IP地址,通过公司统一分配拨号上网帐户,可以 轻松浏览互联网,服务器可对上网帐号进行流量 控制和数据监控,屏蔽BT,电驴等下载软件,解 控制和数据监控,屏蔽BT,电驴等下载软件,解 决一些客户端使用这些下载软件下载时,其他用 户无法正常访问互联网的问题。 为特殊客户端提供专用帐户,特殊客户端可以使 用专用帐户快速发送和接受大文件。
5.公司日常的应用情况 5.公司日常的应用情况
1.模拟电信拨号上网 1.模拟电信拨号上网 2.外网VPN接入 2.外网VPN接入 3.防火墙自定义 3.防火墙自定义 4封闭常见的病毒及木马端口 5.针对BT,电驴等P2P下载软件限制 5.针对BT,电驴等P2P下载软件限制 6.一般用户浏览互联网 6.一般用户浏览互联网 7.特殊用户连接互联网 7.特殊用户连接互联网 8.黑客入侵、冲击波、震荡波 8.黑客入侵、冲击波、震荡波 9.日常维护 9.日常维护
MikroTik RouterOS Manual Interface LTE说明书
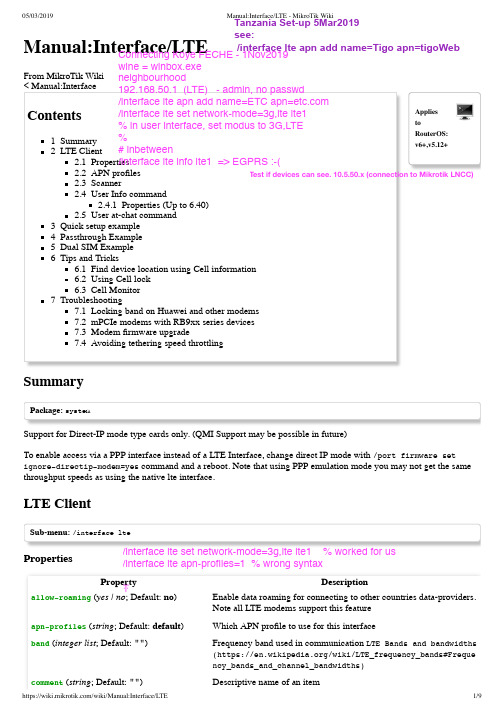
05/03/2019Manual:Interface/LTE - MikroTik Wiki Applies to RouterOS:v6+,v5.12+Manual:Interface/LTEFrom MikroTik Wiki < Manual:Interface Contents 1Summary 2LTE Client 2.1Properties 2.2APN profiles 2.3Scanner 2.4User Info command 2.4.1Properties (Up to 6.40)2.5User at-chat command 3Quick setup example 4Passthrough Example 5Dual SIM Example 6Tips and Tricks 6.1Find device location using Cell information 6.2Using Cell lock 6.3Cell Monitor 7Troubleshooting7.1Locking band on Huawei and other modems7.2mPCIe modems with RB9xx series devices7.3Modem firmware upgrade7.4Avoiding tethering speed throttlingSummaryPackage: systemSupport for Direct-IP mode type cards only. (QMI Support may be possible in future)To enable access via a PPP interface instead of a LTE Interface, change direct IP mode with /port firmware set ignore-directip-modem=yes command and a reboot. Note that using PPP emulation mode you may not get the same throughput speeds as using the native lte interface.LTE ClientSub-menu: /interface lteProperties PropertyDescription allow-roaming (yes | no ; Default: no )Enable data roaming for connecting to other countries data-providers.Note all LTE modems support this feature apn-profiles (string ; Default: default )Which APN profile to use for this interface band (integer list ; Default: "")Frequency band used in communication LTE Bands and bandwidths(https:///wiki/LTE_frequency_bands#Frequency_bands_and_channel_bandwidths)comment (string ; Default: "")Descriptive name of an item Tanzania Set-up 5Mar2019see:/interface lte apn add name=Tigo apn=tigoWeb /interface lte set network-mode=3g,lte lte1 % worked for us/interface lte apn-profiles=1 % wrong syntaxꔉConnecting Koye FECHE - 1Nov2019wine = winbox.exe neighbourhood 192.168.50.1 (LTE) - admin, no passwd/interface lte apn add name=ETC apn=/interface lte set network-mode=3g,lte lte1% in user interface, set modus to 3G,LTE %# inbetween /interface lte info lte1 => EGPRS :-(Test if devices can see. 10.5.50.x (connection to Mikrotik LNCC)disabled (yes | no; Default: yes)Whether interface is disabled or not. By default it is disabled.mac-address (MAC; Default: "")Media Access Control number of an interface.modem-init (string; Default: "")Modem init string (AT command that will be executed at modemstartup)mtu (integer; Default: 1500)Maximum Transmission Unit. Max packet size that LTE interfacewill be able to send without packet fragmentation.name (string; Default: "")Descriptive name of the interface.network-mode (3g | gsm | lte; Default:3g,gsm,lte)Select/force mode for LTE interface to operate withoperator (integer; Default: "")used to lock device to specific operator full PLMN number is used forlock consisting from MCC+MNC. PLMN codes (https://en.wikipedi/wiki/Public_land_mobile_network)pin (integer; Default: "")SIM Card's PIN code.APN profilesAll network related settings are moved under profiles, starting from RouterOS 6.41Sub-menu:/interface lte apnProperty Descriptionadd-default-route (yes | no)Whether to add default route to forward all traffic over the LTEinterface.apn (string)Service Provider's Access Point Nameauthentication (pap | chap | none; Default:none)Allowed protocol to use for authenticationdefault-route-distance (integer; Default: 1)Sets distance value applied to auto created default route, if add-default-route is also selectedip-type (ipv4 | ipv4-ipv6 | ipv6; Default: )Requested PDN typeipv6-interface (; Default: )Interface on which to advertise IPv6 prefixname (string; Default: )APN profile namenumber (integer; Default: )APN profile numberpassthrough-interface (; Default: )Interface to passthrough IP configuration (activates passthrough) passthrough-mac (MAC; Default: auto)If set to auto, then will learn MAC from first packet password (string; Default: )Password used if any of the authentication protocols are active use-peer-dns (yes | no; Default: yes)If set to yes, uses DNS recieved from LTE interfaceuser (integer)Username used if any of the authentication protocols are active ScannerIt is possible to scan LTE interfaces with /interface lte scan commandAvailable read only properties:Property Descriptionduration (integer)Duration of scan in secondsfreeze-frame-interval (integer)time between data printoutnumber (integer)Interface number or nameUser Info commandIt is possible to send special "info" command to LTE interface with /interface lte info command.Properties (Up to 6.40)Property Descriptionuser-command (string; Default: "")send a command to LTE card to extract useful information, e.g. withAT commandsuser-command-only (yes | no; Default: )User at-chat commandIt is possible to send user defined "at-chat" command to LTE interface with /interface lte at-chat command.[admin@MikroTik] > /interface lte at-chat lte1 input="AT*mrd_imei\?"output: *MRD_IMEI:356159060388208OKYou can also use "at-chat" function in scripts and assign command output to variable.[admin@MikroTik] > :global "lte_command" [/interface lte at-chat lte1 input="AT*mrd_imei\?" as-value ][admin@MikroTik] > :put $"lte_command"output=*MRD_IMEI:356159060388208OKQuick setup exampleStart with network settings -Warning: This guide is for RouterOS versions starting from 6.41Start with network settings - Add new connection parameters under LTE apn profile (provided by network provider):/interface lte apnadd name=profile1 apn= authentication=chap password=web user=webSelect newly created profile for LTE connection:/interface lte set [find] apn-profiles=profile1LTE interface should appear with running (R) flag:[admin@MikroTik] > /interface lte printFlags: X - disabled, R - running0 R name="lte1" mtu=1500 mac-address=AA:AA:AA:AA:AA:AAFrom RouterOS=>6.41 DHCP client is added automatically. If it's not added - add a DHCP Client to LTE Interface manually:/ip dhcp-clientadd default-route-distance=1 disabled=no interface=lte1If required, add NAT Masquerade for LTE Interface to get internet to the local network:/ip firewall natadd action=masquerade chain=srcnat out-interface=lte1After interface is added, you can use "info" command to see what parameters client acquired (parameters returned depends on LTE hardware device):[admin@MikroTik] > /interface lte info lte1 oncestatus: call in progresspin-status: no password requiredfunctionality: fullmanufacturer: Huawei Technologies Co., Ltd.model: ME909u-521revision: 12.631.07.01.00current-operator: vodafone EScurrent-cellid: 44436007access-technology: Evolved 3G (LTE)signal-strengh: -79 dBmframe-error-rate: n/aearfcn: n/aimei: 860461024123456imsi: 234012555034981uicc: n/arssi: -79dBmrsrp: -109dBmrsrq: -13dBsinr: -1dB[admin@MikroTik] >Passthrough ExampleStarting from RouterOS v6.41 some LTE interfaces support LTE Passthrough feature where the IP configuration is applied directly to the client device. In this case modem firmware is responsible for the IP configuration and router is used only to configure modem settings - APN, Network Technologies and IP-Type. In this configuration the router will not get IP configuration from the modem. The LTE Passthrough modem can pass both IPv4 and IPv6 addresses if that is supported by modem. Some modems support multiple APN where you can pass the traffic from each APN to a specific router interface.Passthrough will only work for one host. Router will automatically detect MAC address of the first received packet and use it for the Passthrough. If there are multiple hosts on the network it is possible to lock the Passthrough to a specific MAC. On the host on the network where the Passthrough is providing the IP a DHCP-Client should be enabled on that interface to. Note, that it will not be possible to connect to the LTE router via public lte ip address or from the host which is used by the passthrough. It is suggested to create additional connection from the LTE router to the host for configuration purposes. For example vlan interface between the LTE router and host.To enable the Passthrough a new entry is required or the default entry should be changed in the '/interface lte apn' menu Examples.To configure the Passthrough on ether1:[admin@MikroTik] > /interface lte apn add apn=apn1 passthrough-interface=ether1[admin@MikroTik] > /interface lte set lte1 apn-profiles=apn1To configure the Passthrough on ether1 host 00:0C:42:03:06:AB:To configure multiple APNs on ether1 and ether2:[admin@MikroTik] > /interface lte apn add apn=apn1 passthrough-interface=ether1[admin@MikroTik] > /interface lte apn add apn=apn2 passthrough-interface=ether2[admin@MikroTik] > /interface lte set lte1 apn-profiles=apn1,apn2To configure multiple APNs with the same APN for different interfaces:[admin@MikroTik] > /interface lte apn add name=interface1 apn=apn1[admin@MikroTik] > /interface lte apn add name=interface2 apn=apn1 passthrough-interface=ether1[admin@MikroTik] > /interface lte set lte1 apn-profiles=interface1[admin@MikroTik] > /interface lte set lte2 apn-profiles=interface2Dual SIM ExampleFor some boards with dual SIM slots (like LtAP mini) it is possible to alternate between cellular providers. Follow this link - Dual SIM Application, to see an example how to change SIM slot based on roaming status with help of RouterOS scripts and scheduler.Tips and TricksThis paragraph contains information for additional features and usage cases.Find device location using Cell informationOn devices using R11e-LTE International version card (wAP LTE kit) some extra information is provided under info command (from 6.41rc61)current-operator: 24701lac: 40current-cellid: 2514442PropertyDescription current-operator (integer ; Default: )Contains MCC and MNC. For example: current-operator: 24701breaks to: MCC=247 MNC=01lac (integer ; Default: )location area code (LAC)current-cellid (integer ; Default: )Station identification numberValues can be used to find location in databases: Cell Id Finder (http://cellidfi/cells/findcell)Using Cell lockIt is possible to lock R11e-LTE International version modem and R11e-4G equipped devices to exact LTE tower. LTE info command provides currently used cellular tower information:phy-cellid: 384earfcn: 1300 (band 3, bandwidth 20Mhz, cqi 8)PropertyDescription phy-cellid (integer ; Default: )Physical Cell Identification (PCI) of currently used cell tower.earfcn (integer ; Default: )Absolute Radio Frequency Channel Number [admin@MikroTik] > /interface lte apn add apn=apn1 passthrough-interface=ether1 passthrough-mac=00:0C:42:03:06:A[admin@MikroTik] > /interface lte set lte1 apn-profiles=apn1Exact tower location as well as available bands and other information can be acquired from mobile carrier or by using online services:CellMapper (https:///map)By using those acquired variables it's possible to send AT command to modem for locking to tower in current format: for R11e-LTEAT*Cell=<mode>,<NetworkMode>,<band>,<EARFCN>,<PCI>where<mode> :0 – Cell/Frequency disabled1 – Frequency lock enabled2 – Cell lock enabled<NetworkMode>0 – GSM1 – UMTS_TD2 – UMTS_WB3 – LTE<band>Not in use, leave this blank<EARFCN>earfcn from lte info<PCI>phy-cellid from lte infoTo lock modem at previously used tower at-chat can be used:/interface lte at-chat lte1 input="AT*Cell=2,3,,1300,384"After reboot or modem reset, all set on locks are lost. Cell data can be also gathered from "cell-monitor".for R11e-4GAT%CLCMD=<mode>,<mode2>,<EARFCN>,<PCI>,<PLMN>AT%CLCMD=1,1,3250,244,\"24705\"where<mode> :0 – Cell/Frequency disabled1 – Cell lock enabled<mode2> :0 - Save lock for first scan1 - Always use lock(after each reset modem will clear out previous settings no matter what is used here)<EARFCN>earfcn from lte info<PCI>phy-cellid from lte info<PLMN>Mobile operator codeAll PLMN codes available here (https:///wiki/Mobile_country_code) this variable can be also left blank To lock modem to the cell - modem needs to be in non operating state, easiest way for R11e-4G modem is to add CellLock line to "modem-init" string:/interface lte set lte1 modem-init=AT%CLCMD=1,1,3250,244,\"24705\"Multiple cells can also be added by providing list instead of one tower informatin in following format: AT%CLCMD=<mode>,<mode2>,<EARFCN_1>,<PCI_1>,<PLMN_1>,<EARFCN_2>,<PCI_2>,<PLMN_2>For example to lock to two different PCIs within same band and operator:/interface lte set lte1 modem-init="AT%CLCMD=1,1,6300,384,\"24701\",6300,385,\"24701\"Cell MonitorCell monitor allows to scan available nearby mobile network cells:[admin@MikroTik] > interface lte cell-monitor lte1PHY-CELLID BAND EARFCN RSRP RS11 B3 1300 -107dBm -175306 B1 150 -115dBm -195 373 B3 1300 -111dBm -195 374 B3 1300 -111dBm -195 384 B1 150 -106dBm -12 384 B7 2850 -115dBm -175 384 B20 6300 -97dBm -195 Gathered data can be used for more precise location detection or for Cell lock.TroubleshootingEnable LTE logging:[admin@MikroTik] > /system logging add topics=lteCheck for errors in log:[admin@MikroTik] > /log print11:08:59 lte,async lte1: sent AT+CPIN?11:08:59 lte,async lte1: rcvd +CME ERROR: 10search for CME error description online,in this case: CME error 10 - SIM not insertedLocking band on Huawei and other modemsTo lock band for Huawei modems /interface lte set lte1 band="" option can't be used.It is possible to use AT commands to lock to desired band manually.To check all supported bands run at-chat command:[admin@MikroTik] /interface lte at-chat lte1 input="AT^SYSCFGEX=\?"output: ^SYSCFGEX: ("00","03","02","01","99"),((2000004e80380,"GSM850/GSM900/GSM1800/GSM1900/WCDMA BCI/WCDMA BC (3fffffff,"All Bands")),(0-2),(0-4),((800d7,"LTE BC1/LTE BC2/LTEBC3/LTE BC5/LTE BC7/LTE BC8/LTE BC20"),(7fffffffffffffff,"All Bands"))OKExample to lock to LTE band 7,[admin@MikroTik] /interface lte set lte1 modem-init="AT^SYSCFGEX=\"03\",3FFFFFFF,2,4,40,,"Change last part 40 to desired band specified hexadecimal value where:4 LTE BC340 LTE BC780000 LTE BC207FFFFFFFFFFFFFFF All bandsetcAll band HEX values and AT commands can be found in Huawei AT Command Interface Specification guide (http://do /download/downloadCenter?downloadId=29741&version=72288&siteCode=)Check if band is locked:[admin@MikroTik] /interface lte at-chat lte1 input="AT^SYSCFGEX\?"output: ^SYSCFGEX: "03",3FFFFFFF,0,2,40OKFor more information check modem manufacturers AT command reference manuals.mPCIe modems with RB9xx series devicesFor mPCIe modems to work in RB9xx series devices it is required to set the USB type to mPCIe, this can be done using the following command:/system routerboard usb set type=mini-PCIeIn case your modem is not being recognized after a soft reboot, then you might need to add a delay before the USB port is being initialized. This can be done using the following command:/system routerboard settings set init-delay=5sModem firmware upgradeStarting from RouterOS version 6.44beta20 it is possible to upgrade modems firmware.Firmware update is only available for R11e-LTE and R11e-4G modems.Firmware upgrade can only be done through working mobile connection - it will download approx 5.5MB firmware file. Firmware upgrades usually includes small improvements in stability or small bug fixes that can't be included into RouterOS.Check currently used firmware version by running:[admin@MikroTik] > /interface lte info lte1 once-----revision: "MikroTik_CP_2.160.000_v008"-----Check if new firmware is available:[admin@MikroTik] > /interface lte firmware-upgrade lte1installed: MikroTik_CP_2.160.000_v008latest: MikroTik_CP_2.160.000_v010Upgrade firmware:[admin@MikroTik] > interface lte firmware-upgrade lte1 upgrade=yesstatus: downloading via LTE connection (>1min)Whole upgrade process may take up to 10 minutes, depending on mobile connection speed.After successful upgrade issue USB power-reset, reboot device or run AT+reset command, to update modem version readout under info command:[admin@MikroTik] > /interface lte at-chat lte1 input="AT+reset"Avoiding tethering speed throttlingSome operators (TMobile, YOTA etc.) allows unlimited data only for device SIM card is used on, all other data coming from mobile hotspots or tethering is highly limited by volume or by throughput speed. Some sources (https://www.reddi /r/hacking/comments/54a7dd/bypassing_tmobiles_tethering_data_capthrottling/) have found out that this limitation is done by monitoring TTL (Time To Live) values from packets to determinate if limitations need to be applied (TTL is decreased by 1 for each "hop" made). RouterOS allows changing the TTL parameter for packets going from the router to allow hiding sub networks. Keep in mind that this may conflict with fair use policy./ip firewall mangleadd action=change-ttl chain=postrouting new-ttl=set:65 out-interface=lte1 passthrough=yesMore information: YOTA (https:///en/post/238351/), TMobile (https:///r/mikrotik/comment s/acq4kz/anyone_familiar_with_configuring_the_ltap_us_with/)[ Top | Back to Content ]Retrieved from "https:///index.php?title=Manual:Interface/LTE&oldid=32954"Categories: Manual VPN InterfaceThis page was last edited on 28 February 2019, at 15:45.。
MikroTik ROS软路由器
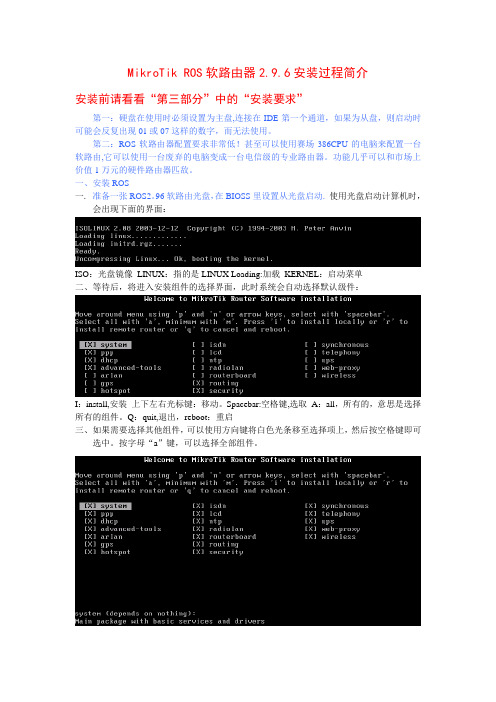
MikroTik ROS软路由器2.9.6安装过程简介安装前请看看“第三部分”中的“安装要求”第一:硬盘在使用时必须设置为主盘,连接在IDE第一个通道,如果为从盘,则启动时可能会反复出现01或07这样的数字,而无法使用。
第二:ROS软路由器配置要求非常低!甚至可以使用赛场386CPU的电脑来配置一台软路由,它可以使用一台废弃的电脑变成一台电信级的专业路由器。
功能几乎可以和市场上价值1万元的硬件路由器匹敌。
一、安装ROS一.准备一张ROS2。
96软路由光盘,在BIOSS里设置从光盘启动.使用光盘启动计算机时,会出现下面的界面:ISO:光盘镜像LINUX:指的是LINUX Loading:加载KERNEL:启动菜单二、等待后,将进入安装组件的选择界面,此时系统会自动选择默认级件:I:install,安装上下左右光标键:移动。
Spacebar:空格键,选取A:all,所有的,意思是选择所有的组件。
Q:quit,退出,reboot:重启三、如果需要选择其他组件,可以使用方向键将白色光条移至选择项上,然后按空格键即可选中。
按字母“a”键,可以选择全部组件。
四、选择好所需组件后,按字母“i”键,即可开始安装程序,此时系统会提示“硬盘上的所有数据都会被删除,是否继续”,此时选择“y”:五、选择“y”后,系统再次提示“是否保留原来的配置信息”,此时选择“n”。
六、安装过程开始,系统会自动创建及格式化分区,并显示各组件安装进度条。
警告:磁盘中的所有数据会被删除!继续?(y/n)你要保留旧的配置吗?(y/n)创建分区。
格式化磁盘。
组件安装进度七、待各组件安装结束后,系统会提示“软件安装完成,按‘回车’键重启计算机”,此时按回车键重启计算机即可按“回车”键重启计算机八、启动计算机后,在BIOSS里设置从硬盘启动,屏幕出现第一次的启动画面:检测硬盘是否有错误询问是否要继续检测(y/n)SSH:是一种登陆接口,和我们常用的WINBOX,TELNET,WEB,作用是一样。
MkroTik RouterOS 基础应用教程
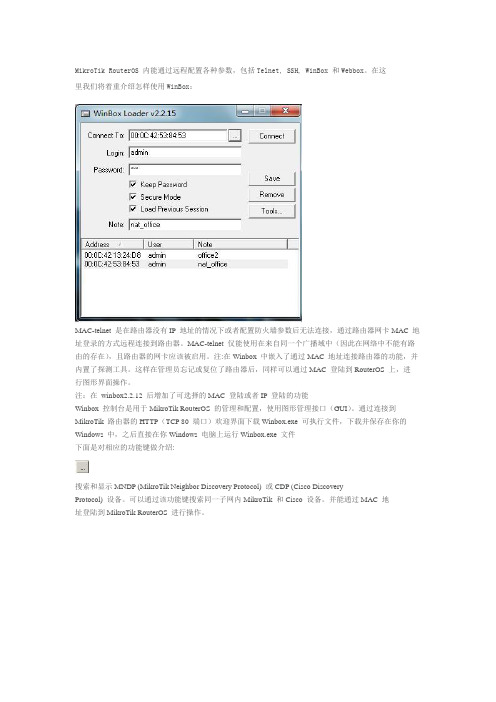
MikroTik RouterOS 内能通过远程配置各种参数,包括Telnet, SSH, WinBox 和Webbox。
在这里我们将着重介绍怎样使用WinBox:MAC-telnet 是在路由器没有IP 地址的情况下或者配置防火墙参数后无法连接,通过路由器网卡MAC 地址登录的方式远程连接到路由器。
MAC-telnet 仅能使用在来自同一个广播域中(因此在网络中不能有路由的存在),且路由器的网卡应该被启用。
注:在Winbox 中嵌入了通过MAC 地址连接路由器的功能,并内置了探测工具。
这样在管理员忘记或复位了路由器后,同样可以通过MAC 登陆到RouterOS 上,进行图形界面操作。
注:在winbox2.2.12 后增加了可选择的MAC 登陆或者IP 登陆的功能Winbox 控制台是用于MikroTik RouterOS 的管理和配置,使用图形管理接口(GUI)。
通过连接到MikroTik 路由器的HTTP(TCP 80 端口)欢迎界面下载Winbox.exe 可执行文件,下载并保存在你的Windows 中,之后直接在你Windows 电脑上运行Winbox.exe 文件下面是对相应的功能键做介绍:搜索和显示MNDP (MikroTik Neighbor Discovery Protocol) 或CDP (Cisco DiscoveryProtocol) 设备。
可以通过该功能键搜索同一子网内MikroTik 和Cisco 设备。
并能通过MAC 地址登陆到MikroTik RouterOS 进行操作。
通过指定的IP 地址(默认端口为80,不许特别指定,如果你修改了端口需要对具体访问端口做自定)或MAC 地址(如果路由器在同一子网内)登陆路由器。
保存当前连接列表(当需要运行它们时,只需双击)删除从列表中选择的项目删除所有列表中的项目,清除在本地的缓存,从wbx 文件导入地址或导出为wbx 文件•Secure Mode(安全模式)提供保密并在winbox 和RouterOS 之间使用TLS(Transport Layer Security)协议•Keep Password(保存密码)保存密码到本地磁盘的文本文件中Winbox 控制台使用TCP/8291 端口,在登陆到路由器后可以通过Winbox 控制台操作MikroTik 路由器的配置并执行与本地控制台同样的任务。
MikroTikRouterOSV3安装设置详细手册
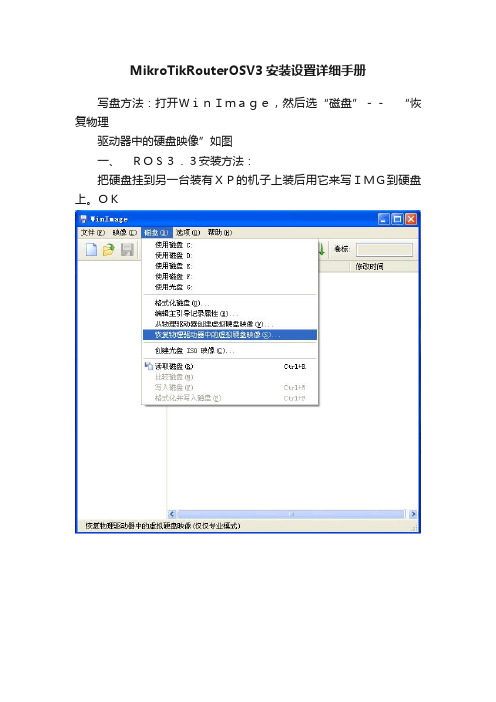
MikroTikRouterOSV3安装设置详细手册写盘方法:打开WinImage,然后选“磁盘”--“恢复物理驱动器中的硬盘映像”如图一、ROS3.3安装方法:把硬盘挂到另一台装有XP的机子上装后用它来写IMG到硬盘上。
OK然后下载一个WinImage安装。
如果在列表中没有你要刻的硬盘的话就钩上“包括不可移动的硬盘”选项再选择你挂上去那个硬盘。
然后选择要刻到硬盘上的ROS3.3的IMG映像文件。
记得文件类型选所有文件类型,刻好盘后就OK了,只要把刻好盘的盘挂机器上,启动后等10分钟后ROS就会自动重启。
重启登陆后你只要输入syslipr你就可以看到你的许可是L6级别的了。
MikroTik RouterOS v3安装设置手册二、用WINBOX图形管理器登陆ROS:打开WINBOX开始配置RouterOS。
点击IP地址窗口后的扫描MAC登陆按钮选择相应的MAC登陆。
点击System里的License看看是否成功注册破解。
接下来的就是配置的关键步骤了。
例如:内网=LAN、外网=WAN,无线网卡可以设为WLAN。
三、ROS基本设置:随便设定,好记明了即可。
一般高速的网卡设为内网的网卡,低速点的设为外网网卡1、设置网卡的名称:点开Interfaces可以看到网卡的名称及使用状况。
双击网卡的名称即可以打开修改窗口。
2、计算IP的子网掩码比如:172/135/10等不常用的,比如168头的。
点IP里的Addresses设置网卡对应的IP及子网掩码,内网IP尽量设置冷门的3、添加IP地址比如:172/135/10等不常用的,尽量不要设置热门IP比如168头的。
点AddressList里的"+"号添加相应IP、网关等然后点OK保存。
4、添加网关进入IP-Routers中添加网关。
点AddressList里的"+"在Gateway中填写网关等然后点OK保存。
进入IP-Routers中添加网关,列如网关假设为172.168.11.1,在路由列表中点加号,列如网关假设为172.168.11.15、IP伪装当IP地址和网关设置完毕后,这时可根据自己的路由器需要是否伪装内网的IP地址(即NAT功能),具体设置如下:进入IP-firewall-nat中添加一条策略。
MikroTikRouterOS软路由上网配置教程
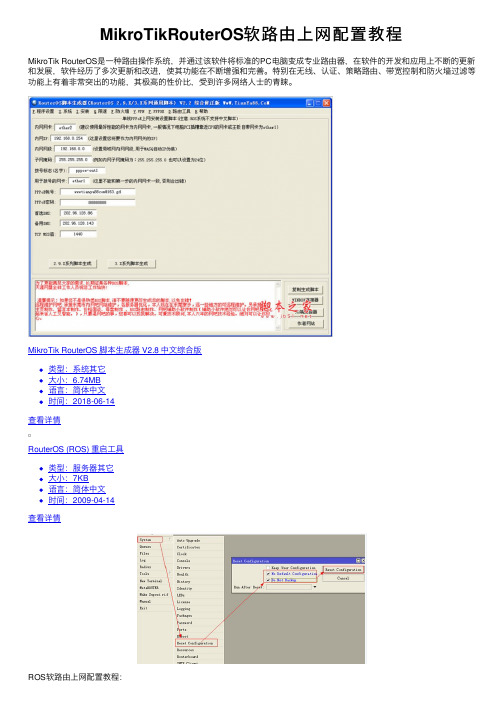
MikroTikRouterOS软路由上⽹配置教程MikroTik RouterOS是⼀种路由操作系统,并通过该软件将标准的PC电脑变成专业路由器,在软件的开发和应⽤上不断的更新和发展,软件经历了多次更新和改进,使其功能在不断增强和完善。
特别在⽆线、认证、策略路由、带宽控制和防⽕墙过滤等功能上有着⾮常突出的功能,其极⾼的性价⽐,受到许多⽹络⼈⼠的青睐。
MikroTik RouterOS 脚本⽣成器 V2.8 中⽂综合版类型:系统其它⼤⼩:6.74MB语⾔:简体中⽂时间:2018-06-14查看详情RouterOS (ROS) 重启⼯具类型:服务器其它⼤⼩:7KB语⾔:简体中⽂时间:2009-04-14查看详情ROS软路由上⽹配置教程:⼀般拿到了RouterOS软路由,肯定要做的事情就是使⽤它来上⽹。
以 RouterBOARD 750(下⾯简称 RB750)为例配置简单的上⽹教程系统版本5.25;RB750的接⼝数量:5⼝拿到ROS设备后的简单的上⽹配置步骤:1.通电,测试接⼝状态(每个⼝插上⽹线指⽰灯正常);2.复位设备:让设备⽆任何默认配置(通过winbox 登录设备后复位,也有其他⽅式);3.配置外⽹的连接⽅式(pppoe 拨号或是专线);4.配置内⽹⽹关I P;5.DNS配置6.DHCP配置;7.路由配置;8.NAT配置;9.系统时间配置;10.系统备份⾸先我们做下简单的规划:1⼝不使⽤(因为很多1⼝是POE供电⼝,有时候拿来供电,我就不喜欢⽤)2⼝做外⽹⼝,3-5⼝做内⽹⼝内⽹⽹关:192.168.1.254/24内⽹DHCP地址段:192.168.1.100-192.168.1.200DNS地址:61.139.2.69 8.8.8.8配置步骤:1.通电,测试接⼝状态(每个⼝插上⽹线指⽰灯正常);⽤⽹线插到ROS设备的每个接⼝上,另⼀头插到交换机或者电脑上⾯,看看接⼝灯是否能正常,在电脑上⽤winbox登录,是否能够登录;2.复位设备:让设备⽆任何默认配置(通过winbox登录设备后复位,也有其他⽅式);Winbox复位设备:⽤winbox登录到ROS上后,按以下图1⽅式操作,操作成功后ROS会重启。
mikrotikros软路由家用级如何设置拨号上网
mikrotik ros软路由家用级如何设置拨号上网
mikrotik ros软路由家用级PPPOE拨号上网,很多小白购买了ros路由器,看到全英文界面都会头晕,不过没关系,下面就由店铺跟大家分享具体的操作方法吧,希望对大家有所帮助~
mikrotik ros软路由家用级拨号上网的方法
网线连接到设备的2口,把设备与电脑连接在同一局域网打开winbox工具,点击扫描按键。
选中要配置设备的MAC地址默认用户名admin,密码是空,点击“connect”连接。
首次进到设备会弹出默认配置的提示框,点击remove configuration 移除默认配置
进到快速配置界面。
Quick Set---Home AP
设备内外网。
密码等信息
拨号上网
自动获取IP
静态IP
教程就是这样。
- 1、下载文档前请自行甄别文档内容的完整性,平台不提供额外的编辑、内容补充、找答案等附加服务。
- 2、"仅部分预览"的文档,不可在线预览部分如存在完整性等问题,可反馈申请退款(可完整预览的文档不适用该条件!)。
- 3、如文档侵犯您的权益,请联系客服反馈,我们会尽快为您处理(人工客服工作时间:9:00-18:30)。
软路由MikroTik RouterOS 简明教程[ At 2010-4-20 By admin Add comments命令说明:RouterOS的基本设置包括四个部分interface、ip address、ip route 、ip firewall src-nat。
1.interface的命令中主要为修改接口称和激活接口;2.ip address的命令主要为分别在两接相应接口上增加外网IP地址和局域网IP地址;3.ip route的命令主要是墙加路由表,这里简单的网络路由表中只有三条,一条是手动加的,两条是动态路由项;4.ip firewall src-nat 的命令是用来设置网络地址转换,这里的伪装masquerade)即是网络地址转换NAT)的一种特殊形式,局域网多台机器使用一个外网IP上网一般都用伪装masquerade)。
如果只是做单纯的路由器来使用,把上面绿色部分的IP按实际的网络修改即可!此过程本人已全新安装测试多次,均很正常,如果你按照此命令设置仍不能让局域网访问外网,最有可能的是你的内网和外网网线插反了网卡,更不要忘了客户机的TCP/IP属性配置。
设置RouterOS筒明教程官方设置) RouterOS V2.8设置RouterOS筒明教程如何设置RouterOS文档版本:1.5 应用于:MikroTik RouterOS V2.8怎么样保护你的MikroTik RouterOS™?属性描述要保护你的MikroTik RouterOS™, 你不应该只是修改你的admin的密码,还需要设置数据包的过滤,所以目的地到路由器的数据包需要在一次经过ip firewall的input链表处理。
注意input链表不会去**通过路由器的传输数据。
你可以添加下面的规则到/ip firewall rule input 只需要通过'copy 和paste'到路由器的Terminal Console(终端控制台)或在winbox中配置相关的参数):/ip firewall rule input add connection-state=invalid action=drop \comment="Drop invalid connections"/ip firewall rule input add connection-state=established \comment="Allow established connections"/ip firewall rule input add connection-state=related \comment="Allow related connections"/ip firewall rule input add protocol=udp comment="Allow UDP"/ip firewall rule input add protocol=icmp comment="Allow ICMP Ping"/ip firewall rule input add src-address=10.0.0.0/24 \comment="Allow access from our local network. Edit this!"/ip firewall rule input add src-address=192.168.0.0/24 protocol=tcp dst-port=8080 \comment="This is web proxy service for our customers. Edit this!"/ip firewall rule input add action=drop log=yes \comment="Log and drop everything else"使用/ip firewall rule input print packets 命令可以看到有多少个数据包被里面的规则处理过。
使用reset-counters 命令去复位统计值。
检查系统日志文件通过/log print可以看到数据包被丢弃的信息。
你可能需要在里面添加允许来至确认主机的访问。
例如:记住出现在列表中的防火墙规则在命令中被处理。
一个规则匹配的数据包,不会被之后其他的规则处理。
添加了新的规则后,如果想优先被处理,通过move命令移动到所以规则之上。
怎样保护你的MikroTik RouterOS™从来至 Spam的请求DescriptionTo protect your MikroTik RouterOS™ from being used as spam relay you have to: 保证你的路由器使用了防火墙规则。
See the How To section about it!配置web proxy 访问列表web proxy访问列表配置在/ip web-proxy access下。
例如,添加下面规则允许来至确认主机的访问。
只需要通过'copy 和paste'到路由器的Terminal Console(终端控制台)或在winbox中配置相关的参数):/ip web-proxy access add src-address=192.168.0.0/24 \comment="Our customers"/ip web-proxy access add dst-port=23-25 action=deny \comment="Deny using us as telnet and SMTP relay"/ip web-proxy access add action=deny \comment="Deny everything else"注意,允许确认服务首先你应该由规则,并且在规则的最后通常为拒绝任何的访问。
如何连接你的家庭网络到xDSL?属性描述确认你的家用DSL modem以安装好,并想通过一个安全的方式将你的家庭网络连接到Internet,首先你需要安装MikroTik路由器在DSL modem和你家庭网络中间:下一步连接你的家庭网络到xDSL:首先你的MikroTik路由器有两张以太网卡,一个对应家庭的DSL modem ,一个对应你的家庭网络。
安装时,确定你安装了dhcp软件功能包。
启用两个网卡,如下:/interface enable ether1,ether2配置DHCP客户端在对外的接口上xDSL) 接收来至IP配置的服务:/ip dhcp-client set enabled=yes interface=ether1检查,如果你收到IP配置信息后使用lease print,如下:[admin@MikroTik] ip dhcp-client> lease printaddress: 81.198.16.4/21expires: may/10/2001 04:41:49gateway: 81.198.16.1primary-dns: 195.13.160.52secondary-dns: 195.122.1.59[admin@MikroTik] ip dhcp-client>添加你的私有网络地址到ether2网卡上,如下:/ip address add address=192.168.0.1/24 interface=ether2在你的本地网络配置伪装:/ip firewall src-nat add out-interface=ether1 action=masquerade\ comment="Masquerades everything leaving the external interface"配置防火墙保护你的路由器:/ip firewall rule input add connection-state=invalid action=drop \comment="Drop invalid connection packets"/ip firewall rule input add connection-state=established \comment="Allow established connections"/ip firewall rule input add connection-state=related \comment="Allow related connections"/ip firewall rule input add protocol=udp comment="Allow UDP"/ip firewall rule input add protocol=icmp comment="Allow ICMP Ping"/ip firewall rule input add src-address=192.168.0.0/24 \comment="From my home network"/ip firewall rule input add action=drop log=yescomment="Log and drop everything else"可选)配置DHCP服务散发IP配置到你的家庭网络中去:/ip pool add name=private ranges=192.168.0.2-192.168.0.254/ip dhcp-server network add gateway=192.168.0.1 address=192.168.0.0/24 \ dns-server=195.13.160.52,195.122.1.59 domain=""/ip dhcp-server add name=home interface=ether2 lease-time=3h \address-pool=private/ip dhcp-server enable home这样!你能通过你的家庭网络访问Internet。
如何保持我的路由器的更新属性描述保持你的路由器更新,你应该:更新最新的RouterOS软件版本如果你有一个RouterBoard,需要更新BIOS固件版本在这部分将介绍你如何升级你的RouterBoard的BIOS固件版本。
