onepace linux manual
linux系统管理手册
Linux系统管理员手册0.6.1版Lars Wirzeniusliw@iki.fi翻译:赵炯gohigh@(gohigh@)Linux系统管理者手册:0.6.1版Lars Wirzenius著Linux系统新手的系统管理概述。
Lars Wirzenius 1993-1998 版权所有翻译者赵炯gohigh@这里所涉及的商标归他们的拥有者所有。
制作和分发该手册的完全拷贝在保留本版权信息和许可信息的条件下被许可。
…Trademarks are owned by their owners.Permission is granted to make and distribute verbatim copies of this manual provided the copyright notice and this permission notice are preserved on all copies.Permission is granted to process the document source code through TeX or other formatters and print the results, provided the printed document carries copying permission notice identical to this one.Permission is granted to copy and distribute modified versions of this manual under the conditions for verbatim copying, provided that the entire resulting derived work is distributed under the terms of a permission notice identical to this one.Permission is granted to copy and distribute translations of this manual into another language, under the above conditions for modified versions, except that this permission notice may be stated in a translation approved by the Free Software Foundation.The Free Software Foundation may be contacted at:59 Temple Place Suite 330Boston, MA 02111-1307 USAThe appendices not written by Lars Wirzenius are copyrighted by their authors, and can be copied and distributed only in unmodified form.The author would appreciate a notification of modifications, translations, and printed versions. Thank you.致谢这里用于将来的致谢部分原程序和预格式化的其他版本本书的原程序及其它可读格式可以在internet上通过anonymous FTP 在 Linux文档计划的主页/LDP找到,或者从本书的主页http://www.iki.fi/liw/linux/sag/上得到。
linux笔记全(无图版)
linux笔记全(⽆图版)1、ls 查看当前⽬录下的所有内容⿊⾊的是⽂件,蓝⾊的是⽂件夹,也就是⽬录2、rm -f anaconda-ks. cfg 彻底删除⽂件(如不确定,则需要先保存备份,也就是快照)3、ifconfig 查看⽹卡的配置信息(ip地址等)4、ifconfig ens33 192.168.18. 201 /24(⽹络地址/⼦⽹掩码)更改ip地址5、systemctl restart network 重启⽹络服务6、桥接模式,直接可以进⾏通信(同⼀⽹段,配置ip)7、能不能通信的2个条件:在同⼀个物理⽹络内,ip地址也在同⼀⽹段内8、仅主机模式,虚拟机和物理机不能进⾏通信,相当于虚拟机和物理机进⾏了隔离与笔记本(真机)通信截图9、NAT模式,⾃动分配⽹络地址和⽹关,以及dns,可以直接上⽹可以访问互联⽹内的主机,但互联⽹内的主机不能访问本机(max特点)10、route -n 查看⽹关11、cat /etc/resolv. conf 查看dns(注意cat后⾯有⼀个空格,空格不可少)12、验证nat模式可以直接上⽹13、shell:通常指linux的字符界⾯,图形界⾯和字符界⾯都属于shell,但图形界⾯的shell常称为gui,字符界⾯的shell常称为cli14、cat /etc/shells 查看⽂件内容(linux⾥⾯提供的所有的shell)15、linux默认使⽤的shell是bash的shell16、echo $SHELL 查看当前使⽤的shell17、shell默认指的是bash,它的应⽤是最⼴泛的18、linux是彻底的多⽤户多任务,它可以直接多个⽤户同时进⾏操作19、ctrl+alt+f2-f6 对应5个shell ctrl+alt+f1 开始图形界⾯shell 作⽤:如何开始shell(也就是如何打开命令界⾯)20、虚拟终端的缩写为tty, 在字符界⾯下执⾏“tty"命令就可以显⽰⽤户⽬前所在的终端编号(终端名称)。
2021韩顺平图解Linux课程(全面升级)实操篇
2021韩顺平图解Linux课程(全⾯升级)实操篇第5章 Linux 实操篇-远程登录到 Linux 服务器远程登录 Linux-Xshell6Xshell6:在 Linux 服务器上,使⽤ ipconfig 命令查看 IP 地址。
远程上传下载⽂件-Xftp6Xftp:在 Linux 服务器上,使⽤ ipconfig 命令查看 IP 地址。
第6章 Linux 实操篇-Vi 和 Vim 编辑器Vi 和 Vim 常⽤的三种模式正常模式/⼀般模式:⽤ Vim 打开⼀个⽂件就直接进⼊正常模式(默认模式)。
在这个模式中,可以上下左右移动光标、删除整⾏、复制、粘贴等等。
插⼊模式/编辑模式:在正常模式下,键⼊ i,I,o,O,a,A,r,R 任何⼀个字母之后才会进⼊插⼊模式。
命令⾏模式/末⾏模式:在插⼊模式下,键⼊ Esc 进⼊正常模式,再输⼊ : 进⼊命令⾏模式。
在此模式下,可以查询、替换、保存、退出、显⽰⾏号等等。
Vi 和 Vim 的快捷键拷贝当前⾏:yy,拷贝当前⾏向下的5⾏:5yy,粘贴:p。
删除当前⾏:dd,删除当前⾏向下的6⾏:5dd。
在⽂件中查找某个单词:命令⾏模式下输⼊ /关键词,回车查找,再键⼊ n 查找下⼀个。
设置⽂件的⾏号:set nu;取消⽂件的⾏号:set nonu。
⼀般模式下,使⽤快捷键 G 到该⽂件的最末⾏,使⽤ gg 到⽂件的最⾸⾏。
⼀般模式下,使⽤快捷键 u 撤销上次执⾏的操作。
⼀般模式下,将光标移动到指定⾏,键⼊⾏号 G,如20G。
、第7章 Linux 实操篇-开机、重启和⽤户登录注销开机、重启命令不管是重启系统还是关闭系统,⾸先要运⾏ sync 命令,把内存中的数据写到磁盘中。
shutdown -h now:⽴即进⾏关机shutdown -h 1:1分钟后⾃动关机(和 shutdown 命令效果⼀样)shutdown -r now:现在重新启动计算机halt:关机(上⾯的 -h 就是指 halt)reboot:现在重新启动计算机sync:把内存的数据同步到磁盘⽤户登录和注销登录时尽量少⽤ root 账号登录。
「干货」Linux中常见的中英文单词对照表

「干货」Linux中常见的中英文单词对照表使用Linux中常见的单词system 系统setting 设置network 网络proxy 代理clock 时钟location 位置option 选项method 方法resolution 分辨率manually手动required 需要terminal 终端shutdown 关闭关机poweroff关闭电源reboot重启error错误drop丢弃frame帧overrun过载carrier载波collision碰撞manual 手册指南list列表清单copy复制remove删除移除move 移动转移make创建shell贝壳框架命令解释器which 哪一个哪一些find 查找搜索executable执行symbolic符号的force强制强行interactive 交互式的preserver 保留保持initialization初始化level级别restart重新启动root跟根部swap交换的configure配置reload重新加载刷新status状态情况dump 倒,卸bootloader自举器,引导器,启动器respawn重生,再次生成buffer缓冲器process程序,进程concatenate连结more更多的还有less更少的tail尾巴,尾部count统计,计算create创建,制造lgnore忽略tar焦油沥青柏油zip拉链拉上拉链inverse反转的反向的verbose详细的具体的package包manager管理者,管理器configure配置prefix前缀make制作生成source来源erase擦除,移除upgrade升级freshen更新rebuild重建,恢复initial初始化wire金属线,电线shark鲨鱼ldentify确定识别owner所有者change更改,改变ownership所有权modify模式样式login登陆,进入logout注销退出shadow阴影finger手指daemon后台程序wheel 轮子旋转block块partition分割file system文件系统mount挂载contain包容protected被保护的valid有效的invalid无效的cylinder柱面sectors扇面track磁道logical逻辑的extend扩展的quota配额manager管理员管理器scan扫描display显示reduce减少,削弱resize调整大小,变更大小check检查,探测inode网点wipe擦除,抹去process程序,进程statistic统计信息top顶部,最高kill杀死,结束total总共的used已使用的free空闲的task任务,工作tree树,树形结构running正在运行的sleeping休眠的,睡眠的stoped停止的,暂停的backgroup后台,背景foreground前台,前景at在...的时候date日期zombie僵死的,僵尸cron克龙,时间单位spool线轴,卷筒log日志,记录rescue救援,急救secure安全single单个的,单身的messages消息,信息stamp标签starup启动average平均busy忙碌的mismatch不匹配environment环境maintenance维护interface接口configuration配置offer提供discover发现,发觉request请求,要求default默认的gateway关口,网关static静态的destination目的地lease租约loop回环,循环trace追踪,追溯,发现release释放,解除Samba桑巴舞,这里指Linux系统中的一种文件共享程序browseable可浏览的,可见的writable可写的unavailable不可用的allow允许,许可deny拒绝,禁用common通用的,公共的comment注释,说明client客户端,客户机map映射,地图backend后端get获得,下载put放置,上传anonymous匿名的download下载upload上传rate速率,比率daemon精灵,守护神passive被动的binary双的,二进制transfer传输,转移pluggable可插拔的,可插件authentication认证,鉴定module模版wrappers包装,封套Berkeley伯克利(美国加州的一个城市名))zone区域master主人,主要的slave奴隶,辅助的,跟从的forward转发,向前reverse反向,逆向的recursion递归hint暗示,默认的view视角,视图,视野authoritative权威的,官方的exchange交换,兑换transfer传输,转移syntax语法foundation基础index索引listen监听default默认的document文档custom光顾update更新include包括Rewrite改写character字符patchy打补丁order顺序requite要求valid有效的directory目录authentication认证authorization授权extra额外的digest摘要type类型Dababase数据库Grant授权Revoke撤销Privilege特权Medium中等的Row行column列Describe描述Flush清空Dump倾倒Extension扩展Admin管理Development开发,测试production生产string字符串secret秘密engine引擎short短的module模块guard保护Application应用Blowfish河豚Echo回声Read读取Source源Script脚本Express表达式Export输出History历史Utility效用Cache缓存Bus总线Disk磁盘Power电源Reset复位Memory存储器Master主要的Option选项Load载入Default默认Serial序列Graphic数字Socket插口Virtual虚拟的Machine机器Host主机Guest来宾Skip跳过Tool工具key钥匙license许可证workstation工作站delete删除insert插入Bit位,比特Lock锁Professional专业的Boot启动Ultimate旗舰Enterprise企业Premium高级Basic基础Program程序File文件Explorer探索者Enter进入,确定service服务Performance性能Log日志Print打印Index索引screen屏幕task任务Manager管理者Configure配置Service服务Update升级Client客户端Search搜索Theme主题Remote远程的Schedule时间表Policy策略Defender防御者Workstation工作站Printer打印机Helper助手Procedure过程Ghost幽灵Clone克隆Disk磁盘Partition分区Image镜像Restore恢复source来源drive驱动器Compress压缩Percent百分比Elapse消逝Remain剩余Description描述Proceed进行Progress进度Indicator指示条Terminal终端Services服务Access访问Remote Desktop远程桌面Connection连接TSWeb 终端服务网页访问NLA网络级身份验证RFB远程帧缓冲More更多Control控制Format格式Background背景Version版本Support支持Policy策略Edit编辑Current当前的Panel面板Authentication身份验证lock锁Desktop桌面Reset复位Folder文件Missing丢失Explorer探测器Execute执行ROM只读存储器UPS不间断电源System系统Setting设置Network网络Proxy代理Clock时钟Location位置Option选项Method方法resolution分辨率Manually手动Required需要Terminal终端Shutdown 关闭Poweroff关闭电源Reboot重启Error错误Drop丢弃Frame帧Overrun过载Carrier载波Collision碰撞Manual手册List列表Copy复制Remove删除Move移动Make创建Shell框架命令解释器Which哪一个Find查找Executable执行Symbolic符号的Force强制Interactive交互式的Preserver保留保持test测试if如果then那么else其他,否则exist存在great大的less小的equal相等的grade评分,等级free空闲的cache缓存for对于while当...的时候case情况in在...之中done已完成true真实的false假的prefix前缀price价格hit敲击sleep睡眠security安全terminal终端cryptic加密的alias别名age年龄attribute属性access访问lssue出版pluggable可插拔的authentication认证module模块wheel轮子,旋转remote远程permit允许keys秘钥generate生成passphrase密码wrapper包装permanent永久的grace宽限filter过滤器input进入output出去forward转发accept允许,接受reject拒绝drop丢弃,结束source来源destination目标policy策略rule规则chain链mangle调整raw天然的general通用的implicit隐含的,未指明的explicit明确的,指明的translation转译,翻译,转换source来源destination目标masquerade冒充,伪装module模块probe探测,检查state状态track跟踪repository仓库pre_boot预启动prompt提示trivial琐碎的rescue急救,救援remove移除dependency附属,依赖关系label卷标,标签graphic图形solution解决办法subscription订阅kick踢,踹environment环境sync同步,同时notify通知,告知incremental增量的wait等待,等候watch观察,监视attribute属性queue队列modify修改。
Ubuntu 20.04 Linux Inbox Driver用户手册说明书

Ubuntu 20.04 Linux Inbox Driver User Manual20.04Document HistoryTable of Contents1Firmware Burning (4)2Port Type Management (5)2.1Port Type Management/VPI Cards Configuration (5)3Modules Loading and Unloading (9)4Important Packages and Their Installation (10)5SR-IOV Configuration (10)5.1Setting up SR-IOV in ConnectX Adapters (10)Default RoCE Mode Setting for RDMA_CM Application (12)1Firmware Burning1.lspci | grep MellanoxExample:04:00.0 Ethernet controller: Mellanox Technologies MT27700 Family[ConnectX-4]04:00.1 InfiniBand controller: Mellanox Technologies MT27700 Family[ConnectX-4]07:00.0 Ethernet controller: Mellanox Technologies MT27710 Family[ConnectX-4 Lx]07:00.1 Ethernet controller: Mellanox Technologies MT27710 Family[ConnectX-4 Lx]0a:00.0 Network controller: Mellanox Technologies MT27520 Family[ConnectX-3 Pro]21:00.0 InfiniBand controller: Mellanox Technologies MT27600 [Connect-IB] 24:00.0 Ethernet controller: Mellanox Technologies MT28800 Family[ConnectX-5 Ex]24:00.1 InfiniBand controller: Mellanox Technologies MT28800 Family[ConnectX-5 Ex]2.# mstflint -d 81:00.0 qImage type: FS4FW Version: 16.26.4012FW Release Date: 10.12.2019Product Version: 16.26.4012Rom Info: type=UEFI version=14.19.17 cpu=AMD64type=PXE version=3.5.805 cpu=AMD64Description: UID GuidsNumberBase GUID: ec0d9a0300d42de4 8Base MAC: ec0d9ad42de4 8Image VSD: N/ADevice VSD: N/APSID: MT_0000000009Security Attributes: N/A3.Download the firmware BIN file from the Mellanox website that matches your card's PSID: → Support →Support → Firmware Download4.Burn the firmware.# mstflint -d <lspci-device-id> -i <image-file> b5.Reboot your machine after the firmware burning is completed.6.Validate new firmware burned successfully:# ethtool -i ens3driver: mlx5_coreversion: 5.0-0firmware-version: 16.26.4012 (MT_0000000009)expansion-rom-version:bus-info: 0000:24:00.0supports-statistics: yessupports-test: yessupports-eeprom-access: nosupports-register-dump: nosupports-priv-flags: yes2Port Type Management2.1Port Type Management/VPI CardsConfigurationConnectX®-3/ConnectX®-3 Pro/ConnectX®-4 ports can be individually configured to work as InfiniBand or Ethernet ports. By default, both ConnectX®-5 VPI ports are initialized as InfiniBand ports. If you wish to change the port type use the mstconfig after the driver is loaded.1.Install mstflint tools.apt install mstflint2.Check the PCI address.lspci | grep MellanoxExample:24:00.0 Ethernet controller: Mellanox Technologies MT28800 Family[ConnectX-5 Ex]e mstconfig to change the link type as desired IB -- for InfiniBand, ETH -- forEthernet.mstconfig –d <device pci> s LINK_TYPE_P1/2=<ETH|IB|VPI>Example:# mstconfig -d 00:06.0 s LINK_TYPE_P1=ETHDevice #1:----------Device type: ConnectX5Name: MCX556A-EDA_AxDescription: ConnectX-5 Ex VPI adapter card; EDR IB (100Gb/s)and 100GbE; dual-port QSFP28; PCIe4.0 x16; tall bracket; ROHS R6Device: 24:00.0Configurations: Next Boot New LINK_TYPE_P1 IB(1) ETH(2)Apply new Configuration? (y/n) [n] : yApplying... Done!-I- Please reboot machine to load new configurations.4.Reboot your machine.5.# mstconfig -d 00:06.0 qDevice #1:----------Device type: ConnectX5Name: MCX556A-EDA_AxDescription: ConnectX-5 Ex VPI adapter card; EDR IB (100Gb/s) and 100GbE; dual-port QSFP28; PCIe4.0 x16; tall bracket; ROHS R6 Device: 24:00.0Configurations: Next BootMEMIC_BAR_SIZE 0 MEMIC_SIZE_LIMIT _256KB(1) HOST_CHAINING_MODE DISABLED(0) HOST_CHAINING_DESCRIPTORS Array[0..7] HOST_CHAINING_TOTAL_BUFFER_SIZE Array[0..7] FLEX_PARSER_PROFILE_ENABLE 0 FLEX_IPV4_OVER_VXLAN_PORT 0 ROCE_NEXT_PROTOCOL 254 ESWITCH_HAIRPIN_DESCRIPTORS Array[0..7] ESWITCH_HAIRPIN_TOT_BUFFER_SIZE Array[0..7] NON_PREFETCHABLE_PF_BAR False(0) NUM_OF_VFS 4 SRIOV_EN True(1) PF_LOG_BAR_SIZE 5 VF_LOG_BAR_SIZE 1 NUM_PF_MSIX 63 NUM_VF_MSIX 11 INT_LOG_MAX_PAYLOAD_SIZE AUTOMATIC(0) SW_RECOVERY_ON_ERRORS False(0) RESET_WITH_HOST_ON_ERRORS False(0) ADVANCED_POWER_SETTINGS False(0) CQE_COMPRESSION BALANCED(0)IP_OVER_VXLAN_EN False(0) PCI_ATOMIC_MODEPCI_ATOMIC_DISABLED_EXT_ATOMIC_ENABLED(0)LRO_LOG_TIMEOUT0 6 LRO_LOG_TIMEOUT1 7 LRO_LOG_TIMEOUT2 8 LRO_LOG_TIMEOUT3 13 LOG_DCR_HASH_TABLE_SIZE 11 DCR_LIFO_SIZE 16384 LINK_TYPE_P1 ETH(2) LINK_TYPE_P2 IB(1) ROCE_CC_PRIO_MASK_P1 255 ROCE_CC_ALGORITHM_P1 ECN(0) ROCE_CC_PRIO_MASK_P2 255 ROCE_CC_ALGORITHM_P2 ECN(0) CLAMP_TGT_RATE_AFTER_TIME_INC_P1 True(1) CLAMP_TGT_RATE_P1 False(0) RPG_TIME_RESET_P1 300 RPG_BYTE_RESET_P1 32767 RPG_THRESHOLD_P1 1 RPG_MAX_RATE_P1 0 RPG_AI_RATE_P1 5 RPG_HAI_RATE_P1 50 RPG_GD_P1 11 RPG_MIN_DEC_FAC_P1 50 RPG_MIN_RATE_P1 1 RATE_TO_SET_ON_FIRST_CNP_P1 0 DCE_TCP_G_P1 1019 DCE_TCP_RTT_P1 1 RATE_REDUCE_MONITOR_PERIOD_P1 4 INITIAL_ALPHA_VALUE_P1 1023 MIN_TIME_BETWEEN_CNPS_P1 2 CNP_802P_PRIO_P1 6 CNP_DSCP_P1 48 CLAMP_TGT_RATE_AFTER_TIME_INC_P2 True(1) CLAMP_TGT_RATE_P2 False(0) RPG_TIME_RESET_P2 300 RPG_BYTE_RESET_P2 32767 RPG_THRESHOLD_P2 1 RPG_MAX_RATE_P2 0 RPG_AI_RATE_P2 5 RPG_HAI_RATE_P2 50 RPG_GD_P2 11 RPG_MIN_DEC_FAC_P2 50 RPG_MIN_RATE_P2 1 RATE_TO_SET_ON_FIRST_CNP_P2 0DCE_TCP_G_P2 1019 DCE_TCP_RTT_P2 1 RATE_REDUCE_MONITOR_PERIOD_P2 4 INITIAL_ALPHA_VALUE_P2 1023 MIN_TIME_BETWEEN_CNPS_P2 2 CNP_802P_PRIO_P2 6 CNP_DSCP_P2 48 LLDP_NB_DCBX_P1 False(0) LLDP_NB_RX_MODE_P1 OFF(0) LLDP_NB_TX_MODE_P1 OFF(0) LLDP_NB_DCBX_P2 False(0) LLDP_NB_RX_MODE_P2 OFF(0) LLDP_NB_TX_MODE_P2 OFF(0) DCBX_IEEE_P1 True(1) DCBX_CEE_P1 True(1) DCBX_WILLING_P1 True(1) DCBX_IEEE_P2 True(1) DCBX_CEE_P2 True(1) DCBX_WILLING_P2 True(1) KEEP_ETH_LINK_UP_P1 True(1) KEEP_IB_LINK_UP_P1 False(0) KEEP_LINK_UP_ON_BOOT_P1 False(0) KEEP_LINK_UP_ON_STANDBY_P1 False(0) KEEP_ETH_LINK_UP_P2 True(1) KEEP_IB_LINK_UP_P2 False(0) KEEP_LINK_UP_ON_BOOT_P2 False(0) KEEP_LINK_UP_ON_STANDBY_P2 False(0) NUM_OF_VL_P1 _4_VLs(3) NUM_OF_TC_P1 _8_TCs(0) NUM_OF_PFC_P1 8 NUM_OF_VL_P2 _4_VLs(3) NUM_OF_TC_P2 _8_TCs(0) NUM_OF_PFC_P2 8 DUP_MAC_ACTION_P1 LAST_CFG(0) SRIOV_IB_ROUTING_MODE_P1 LID(1) IB_ROUTING_MODE_P1 LID(1) DUP_MAC_ACTION_P2 LAST_CFG(0) SRIOV_IB_ROUTING_MODE_P2 LID(1) IB_ROUTING_MODE_P2 LID(1) PCI_WR_ORDERING per_mkey(0) MULTI_PORT_VHCA_EN False(0) PORT_OWNER True(1) ALLOW_RD_COUNTERS True(1) RENEG_ON_CHANGE True(1) TRACER_ENABLE True(1) IP_VER IPv4(0)BOOT_UNDI_NETWORK_WAIT 0UEFI_HII_EN False(0)BOOT_DBG_LOG False(0)UEFI_LOGS DISABLED(0)BOOT_VLAN 1LEGACY_BOOT_PROTOCOL PXE(1)BOOT_RETRY_CNT1 NONE(0)BOOT_LACP_DIS True(1)BOOT_VLAN_EN False(0)BOOT_PKEY 0EXP_ROM_UEFI_x86_ENABLE False(0)EXP_ROM_PXE_ENABLE True(1)IBM_TUNNELED_ATOMIC_EN False(0)IBM_AS_NOTIFY_EN False(0)ADVANCED_PCI_SETTINGS False(0)SAFE_MODE_THRESHOLD 10SAFE_MODE_ENABLE True(1)*************************************************************************3Modules Loading and UnloadingMellanox modules for ConnectX®-2/ConnectX®-3/ConnectX®-3 Pro are:④mlx4_en, mlx4_core, mlx4_ibMellanox modules for ConnectX®-4/ConnectX®-4 Lx/ConnectX®-5 are:④mlx5_core, mlx5_ibIn order to unload the driver, you need to first unload mlx*_en/ mlx*_ib and then themlx*_core module.④To load and unload the modules, use the commands below:•Loading the driver: modprobe <module name>modprobe mlx5_ib•Unloading the driver: modprobe –r <module name>modprobe –r mlx5_ib4Important Packages and TheirInstallationrdma-corerdma-core RDMA core userspace libraries and daemonslibibmad5: Low layer InfiniBand diagnostic and management programslibibmad5 OpenFabrics Alliance InfiniBand MAD libraryopensm: InfiniBand Subnet Manageropensm OpenIB InfiniBand Subnet Manager and management utilitiesIbutils: OpenIB Mellanox InfiniBand Diagnostic Toolsibutils OpenIB Mellanox InfiniBand Diagnostic Toolsinfiniband-diags: OpenFabrics Alliance InfiniBand Diagnostic Toolsinfiniband-diags OpenFabrics Alliance InfiniBand Diagnostic Toolsperftest: IB Performance testsperftest IB Performance Testsmstflint: Mellanox Firmware Burning and Diagnostics Toolsmstflint Mellanox firmware burning toolTo install the packages above, run:# apt-get install <packages names>5SR-IOV Configuration5.1Setting up SR-IOV1.Download mstflint tools.# apt install mstflint2.lspci | grep MellanoxExample:24:00.0 Ethernet controller: Mellanox Technologies MT28800 Family[ConnectX-5 Ex]3.Check if SR-IOV is enabled in the firmware.mstconfig -d <device pci> qExample:# mstconfig -d 00:06.0 qDevice #1:----------Device type: ConnectX3ProPCI device: 00:06.0Configurations: CurrentSRIOV_EN True(1)NUM_OF_VFS 8LINK_TYPE_P1 ETH(2)LINK_TYPE_P2 IB(1)LOG_BAR_SIZE 3BOOT_PKEY_P1 0BOOT_PKEY_P2 0BOOT_OPTION_ROM_EN_P1 True(1)BOOT_VLAN_EN_P1 False(0)BOOT_RETRY_CNT_P1 0LEGACY_BOOT_PROTOCOL_P1 PXE(1)BOOT_VLAN_P1 1BOOT_OPTION_ROM_EN_P2 True(1)BOOT_VLAN_EN_P2 False(0)BOOT_RETRY_CNT_P2 0LEGACY_BOOT_PROTOCOL_P2 PXE(1)BOOT_VLAN_P2 1IP_VER_P1 IPv4(0)IP_VER_P2 IPv4(04.Enable SR-IOV:mstconfig –d <device pci> s SRIOV_EN=<False|True>5.Configure the needed number of VFs.mstconfig –d <device pci> s NUM_OF_VFS=<NUM>Note: This file will be generated only if IOMMU is set in the grub.conf file (by adding intel_iommu=on to /boot/grub/grub.conf file).6.[mlx4 devices only] Edit the file /etc/modprobe.d/mlx4.conf:options mlx4_core num_vfs=[needed num of VFs] port_type_array=[1/2 for IB/ETH],[ 1/2 for IB/ETH]Example:options mlx4_core num_vfs=8 port_type_array=1,17.[mlx5 devices only] Write to the sysfs file the number of needed VFs.echo [num_vfs] > /sys/class/infiniband/mlx5_0/device/sriov_numvfs 8.Reboot the driver.9.Load the driver and verify that the VFs were created.lspci | grep mellanoxExample:24:00.0 Ethernet controller: Mellanox Technologies MT28800 Family[ConnectX-5 Ex]24:00.1 Infiniband controller: Mellanox Technologies MT28800Family [ConnectX-5 Ex]24:00.2 Ethernet controller: Mellanox Technologies MT28800 Family[ConnectX-5 Ex Virtual Function]24:00.3 Ethernet controller: Mellanox Technologies MT28800 Family[ConnectX-5 Ex Virtual Function]24:00.4 Ethernet controller: Mellanox Technologies MT28800 Family[ConnectX-5 Ex Virtual Function]24:00.5 Ethernet controller: Mellanox Technologies MT28800 Family[ConnectX-5 Ex Virtual Function]For further information, refer to section Setting Up SR-IOV MLNX_OFED User Manual. Default RoCE Mode Setting for RDMA_CM Application1.Mount the configfs file.# mount -t configfs none /sys/kernel/config2.Create a directory for the mlx4/mlx5 device.mkdir -p /sys/kernel/config/rdma_cm/mlx4_0/3.Validate what is the used RoCE mode in the default_roce_mode configfs file.# cat /sys/kernel/config/rdma_cm/mlx4_0/ports/1/default_roce_modeIB/RoCE v14.Change the default RoCE mode,•For RoCE v1: IB/RoCE v1•For RoCE v2: RoCE v2# echo "RoCE v2" >/sys/kernel/config/rdma_cm/mlx4_0/ports/1/default_roce_mode# cat /sys/kernel/config/rdma_cm/mlx4_0/ports/1/default_roce_modeRoCE v2# echo "IB/RoCE v1" >/sys/kernel/config/rdma_cm/mlx4_0/ports/1/default_roce_mode# cat /sys/kernel/config/rdma_cm/mlx4_0/ports/1/default_roce_modeIB/RoCE v1NoticeThis document is provid ed for information purposes only and shall not be regarded as a warranty of a certain functionality, c ondition, or quality of a product. NVIDIA Corporation NVIDIA makes no representations or warranties, expressed or implied, as to the accuracy or completeness of the information contained in this docum ent and assumes no responsibility for any errors contained herein. NVIDIA shall have no li ability for the consequences or use of such information or for any infringement of patents or other rights of third parties that may result f rom its use. This document is not a commitm ent to develop, release, or deliver any Material (defined below), code, or functionality.NVIDIA reserves the right to make corrections, modifications, enhancements, improvements, and any other changes to this docum ent, at any time without notice.Customer should obtain the latest relevant information before placing orders and should verify that such inform ation is curre nt and complete. NVIDIA products are sold subject to the NVIDIA standard term s and conditions of sale supplied at the tim e of order acknowledg ement, unless otherwise agreed in an individual sales agreement signed by authorized representatives of NVIDIA and customer Terms of Sale NVIDIA hereby expressly objects to applying any customer general terms and conditions with regards to the purchase of the NVIDIA product re ferenced in this document. No contractual obligations are formed either directly or indirectly by this document.NVIDIA products are not designed, authorized, or warranted to be suitable for use in medical, military, aircraft, space, or l ife support eq uipment, nor in applications where failure or malfunction of the NVIDIA product can reasonably be expected to result in personal injury, deat h, or property or environmental damage. NVIDIA accepts no liability for inclusion and/or use of NVIDIA products in such equipment or applicatio ns and therefore such inclusion and/or use is at customer s own risk.NVIDIA makes no representation or warranty that products based on this document will be suitable for any specified use. Testi ng of all parameters of each product is not necessarily performed by NVIDIA. It is customer s sole responsibilit y to evaluate and determine the applicability of any inform ation contained in this document, ensure the product is suitable and fit for the application planned by customer, and perform the n ecessary testing for the application in order to avoid a d efault of the application or the product. Weaknesses in customer s product designs may affect the quality and reliability of the NVIDIA product and may result in additional or different conditions and/or requirements beyond those contained in this document. NVIDIA accepts no liability related to any default, dam age, costs, or problem which may be based on or attributable to: (i) the use of the NVIDIA product in any manner that is contrary to this document or (ii) customer product d esigns.No license, either expressed or implied, is granted under any NVIDIA patent right, copyright, or other NVIDIA intellectual pr operty right und er this document. Information p ublished by NVIDIA regard ing third-party products or services does not constitute a license from NVIDIA to use such products or services or a warranty or endorsement thereof. Use of such inform ation may require a license from a third party under the patents or other intellectual property rig hts of the third party, or a license from NVIDIA under the patents or other intellectual property ri ghts of NVIDIA. Reproduction of information in this document is p ermissible only if approved in advance by NVIDIA in writing, reproduced with out alteration and in full compliance with all applicable export laws and regulations, and accomp anied by all associated conditions, limitations, and no tices.TrademarksNVIDIA, the NVIDIA logo, and Mellanox are trademarks and/or registered trademarks of NVIDIA Corporation in the U.S. and other countries. O ther company and product names may b e tradem arks of the respective companies with which they are associated.For the complete and most up dated list of Mellanox trademarks, visit /page/tradem arks.Copyright© 2020 NVIDIA Corporation. All rights reserved.NVIDIA Corporation | 2788 San Tomas Expressway, Santa Clara, CA 95051。
linux 命令的中文手册

linux 命令的中文手册
Linux命令的中文手册是Linux系统中非常重要的资源,它提
供了关于各种命令的详细信息和用法说明,帮助用户更好地理解和
使用Linux系统。
Linux命令的中文手册通常以man(manual)命令
的形式提供,用户可以通过在终端中输入"man 命令名"来查看相应
命令的手册。
Linux命令的中文手册主要包括以下内容:
1. 命令的功能和作用,手册会详细介绍每个命令的功能和作用,帮助用户理解该命令可以完成的任务。
2. 语法和选项,手册会列出命令的语法结构和可用的选项,用
户可以根据手册了解命令的正确使用方法。
3. 示例和实例,手册通常会提供一些示例和实例,演示命令的
具体用法,帮助用户更好地理解命令的实际操作过程。
4. 相关说明和注意事项,手册还会包含一些相关说明和注意事项,帮助用户避免一些常见的错误使用情况。
用户可以通过man命令查看Linux命令的中文手册,比如要查
看ls命令的手册,可以在终端中输入"man ls"。
手册通常分为多个
部分,用户可以通过按下"q"键来退出手册的查看。
此外,还有一些在线资源和文档提供了Linux命令的中文手册,用户可以通过搜索引擎或者Linux系统自带的帮助文档来获取相关
信息。
总之,Linux命令的中文手册对于用户学习和使用Linux系
统非常重要,可以帮助用户更好地理解和掌握各种命令的用法和功能。
浪潮 InPath for Linux 用户手册说明书
浪潮存储平台用户手册文档版本发布日期适用版本尊敬的用户:衷心感谢您选用浪潮存储!浪潮存储秉承“云存智用运筹新数据”的新存储之道,致力于为您提供符合新数据时代需求的存储产品和解决方案。
本手册用于帮助您更详细地了解和便捷地使用本存储,涉及的截图仅为示例,最终界面请以实际设备显示的界面为准。
由于产品版本升级或其他原因,本手册内容会不定期进行更新,如有变动恕不另行通知。
除非另有约定,本手册仅作为使用指导,本手册中的所有陈述、信息和建议不构成任何明示或暗示的担保。
浪潮拥有本手册的版权,保留随时修改本手册的权利。
未经浪潮许可,任何单位和个人不得以任何形式复制本手册的内容。
如果您对本手册有任何疑问或建议,请向浪潮电子信息产业股份有限公司垂询。
技术服务电话:4008600011地址:中国济南市浪潮路1036号浪潮电子信息产业股份有限公司邮编:250101在您正式使用本存储之前,请先阅读以下声明。
只有您阅读并且同意以下声明后,方可正式开始使用本存储。
如果您对以下声明有任何疑问,请和您的供货商联系或直接与我们联系。
如您在开始使用本系统前未就以下声明向我们提出疑问,则默认您已经同意了以下声明。
1.请不要自行拆卸本存储的机箱及机箱内任何硬件设备。
在本存储出现任何硬件故障或您希望对硬件进行任何升级时,请您将机器的详细硬件配置反映给我们的客户服务中心。
2.请不要将本存储的设备与任何其他型号的相应设备混用。
本存储的内存、CPU、CPU散热片、风扇、硬盘托架、硬盘等都是特殊规格的。
3.在使用本存储时遇到任何软件问题,请您首先和相应软件的提供商联系。
由提供商和我们联系,以方便我们共同沟通和解决您遇到的问题。
对于数据库、网络管理软件或其他网络产品的安装、运行问题,我们尤其希望您能够这样处理。
4.上架安装本存储前,请先仔细阅读相关产品手册中的快速安装指南。
我们致力于产品功能和性能的持续提升,部分功能及操作与手册描述可能会有所差异,但不会影响使用。
linux下常用的办公软件有哪些

Linux 系统下有很多可用的办公软件,以下是一些常用的办公软件:
1. LibreOffice:这是最常用的开源办公套件之一,包括文档处理器、电子表格、演示文稿、图形编辑器和数据库管理器等常用组件。
2. GIMP:这是一个开源的免费图像编辑器,功能强大,许多人使用它来进行图片处理。
3. Inkscape:这是一个功能强大的开源矢量图形编辑器,用于创建和编辑各种类型的矢量图形。
4. Krita:这是一款开源的免费数字绘画和绘图软件。
具有易于使用的绘图界面和各种各样的功能,适用于绘图、涂鸦和涂色等任务。
5. Scribus:这是一款开源的免费桌面出版软件,提供了一套完整的出版工具包,包含最初的设计、版面设置、文本处理和绘图等内容。
6. WPS Office:这是一个由中国国内厂商Kingsoft 开发的功
能强大的办公套件,包括文字、表格和演示文稿工具,提供了与Microsoft Office 兼容的文件格式。
这些是Linux 下常用的办公软件,可以满足大多数的日常办公需求。
如果你需要其他的功能,还可以查找Linux 社区中其他的开源软件。
Fujitsu PRIMERGY Linux安装后操作指南(适用于x86版本3.0)说明书
2005-11-01 Notes on Using Red Hat Enterprise Linux AS (v.3 for x86) PrefaceAbout This ManualThis manual provides notes on PRIMERGY operation with Linux installed. Be sure to read this manual before using Linux.Intended ReadersThis manual is intended for persons who operate PRIMERGY.Organization of This ManualThis manual consists of the following chapters:Chapter 1 Notes on OperationThis chapter provides notes on operation after installation. Be sure to read this chapterbefore operating PRIMERGY with Linux installed.Chapter 2 Addition of Peripheral Devices and Option CardsThis chapter explains the procedures for adding peripheral devices and cards afterinstallation and provides notes on adding these options. Read this chapter as required.Chapter 3 OthersThis chapter explains other functions and provides other notes such as notes on limits.Operation VerificationThe operations of the products described in this manual have been confirmed by Fujitsu. Please note, however, that these operations are subject to change without prior notice.Support & ServiceA support service(SupportDesk Product basic service), available for a fee, provides customers usingLinux with an enhanced sense of security and confidence. Customers concluding a support and service agreement are entitled to receive support in such areas as assistance with queries regarding this manual and questions and problems that may come up during the installation and operation of this product.Please consider taking advantage of this service option by concluding a support and service agreement with us.CopyrightAll rights Reserved, Copyright (C) FUJITSU LIMITED 20051. Notes on Operation1.1 Assignment of Device NamesLinux assigns device names to a variety of devices, such as the hard disk drive, in the order that it recognizes them during its startup sequence. If the system is restarted after a device such as a hard disk drive or controller fails, the assigned device names may be changed because the system cannot recognize a device that has failed.Example: When hard disk drives are connected to SCSI ID 1, 2, and 3, device names /dev/sda, /dev/sdb, and /dev/sdc are assigned respectively to the disk drives. If /dev/sdb failsunder this condition, the device previously assigned /dev/sdc/ is moved up by one andrecognized as /dev/sdb after the system is restarted.If an assigned device is unexpectedly changed, it may prevent the system from starting or,in the worst case, may damage your data. If a device fault is detected, therefore, Fujitsurecommends starting the system in rescue mode and checking for hardware faults beforerestarting the system (*1). Repair the hardware fault, restore the system by means suchas the backup tape, and then restart the system.*1 For details on starting the system in rescue mode, see Section 1.4, "Starting theSystem in Rescue Mode."After starting the system, use the fdisk command to check whether the relevant hard diskdrive can be recognized, and take necessary steps such as checking for hardware errormessages in /var/log/messages.1.2 Installation of Red Hat Enterprise Linux AS (v.3 for x86) PackagesRed Hat Enterprise Linux provides installation types so that the optimum system can be constructed according to the use purpose. For this reason, packages required for your purposes might not be installed. If a required package has not been installed, log in as the root and install it by executing the following procedure:Install the necessary packages by using the installation CDs (1/4 to 4/4) that have beencreated according to the Installation Procedure included in the driver kit.# mount -r /dev/cdrom /mnt/cdrom# cd /mnt/cdrom/RedHat/RPMS# rpm -ivh <package_file>Example: To install package "make"# rpm -ivh make-3.79.1-17.i386.rpm# cd /# umount /mnt/cdrom# eject* Remove the CD.1.3 Installing and Setting Up Global Array Manager (GAM)Use Global Array Manager (GAM) as a RAID management tool in a system with a mounted onboard SCSI-RAID and SCSI-RAID card (PG-142E3).For details on installing GAM-Client (Windows), see "Outline of Installation Procedure for Global Array Manager-Client", which is an attachment.The GAM-Server (Linux) installation procedure is explained below.[Notes]1)The screen display may become unstable during GAM installation or GAM service startup.This is not an operational problem.2)Specify the port numbers shown below for GAM service.Take care when configuring firewall settings.Port numbers: 157,158(1)To install GAM-Server (Linux), insert the driver CD into the CD-ROM drive, and entercommands as follows:# mount -r /dev/cdrom /mnt/cdrom# cd /mnt/cdrom/UTY/GAM/Linux# rpm -ivh gam-server-6.02-21.i386.rpm# rpm -ivh gam-agent-6.02-21.i386.rpm- Enter the following only if onboard SCSI for RX200 S2# rpm -ivh 1030SNMPAgent-2.4-3.i386.rpm# sh ./insgam* Confirm that “GAM is installed successfully.” is displayed.# cd /# umount /mnt/cdrom# eject* Remove the CD.(2)For user accounts in Linux, create "gamroot" as a user account with GAM administratorauthority and then create user accounts (e.g., "gamuser") with user authority.(If a user account with user authority has already been created, another account need not be created.) # adduser gamroot# passwd gamrootChanging password for user gamrootNew-password <--- Enter a password.Retype new password <--- Re-enter the same password for confirmation.passwd: all authentication tokens updated successfully* Create a user account with user authority in the same way as explained above.(3)Edit three lines as shown below in the /etc/sysconfig/gam file.Events can be posted to GAM-Client after this editing is completed.# vi /etc/sysconfig/gam[Before editing]START_GAMEVENT=nGAMEVENT_OPTIONS=""[After editing]START_GAMEVENT=y <--- Change "n" to "y".GAMEVENT_OPTIONS="-h ip-address" <--- Specify the IP address of the managementWindows system on which GAM-Client isinstalled.[Before editing]START_GAMEVLOG=n[After editing]START_GAMEVLOG=y <--- Change "n" to "y".(4)Restart the system.# shutdown -r now* The following message may be displayed after the system starts. It does not indicate an operational problem.[Message]gamagent: gamagent: Connection refusedgamagent connect failure1.4 Starting the System in Rescue ModeUsing only one of the installation CDs that have been created according to the Installation Procedure included in the driver kit, you can start the system in rescue mode. This may enable system recovery in the event of a problem that prevents the system from starting normally.This section explains only how to start the system as one that has minimum functionality.Start the system in rescue mode as follows:(1)Start the system from installation CD 1/4 that was created according to the InstallationProcedure included in the driver kit. Enter the appropriate response in the following window,and press the [Enter] key.(2)In the Choose a Language window, select "English" and select "OK."(3)In the Keyboard Type window, select "jp106" and select "OK."If an accessory keyboard such as of a flat display (PG-R1DP3) is used, select "us" here.(4)In the following window, select "Yes."(5)In the following window, select "Add Device."(6)In the Driver List window, select the drivers for the devices installed in the system, and select"OK." The following drivers must be selected:[onboard SCSI type for TX200 S2][onboard SCSI type or onboard SCSI-RAID type for RX200 S2]Two drivers must be selected. Select drivers as follows:1.Select the driver shown below, and select "OK.""LSI Logic Fusion MPT Base Driver (mptbase)"2.The Device Selection window is displayed. Select "AddDevice."3. A list of drivers is displayed. Select the driver shown below, and select "OK.""LSI Logic Fusion MPT SCSI Driver (mptscsih)"[SCSI-RAID card(PG-140D1/PG-142E3) for TX200 S2][onboard SCSI-RAID type for RX300 S2]Select the driver shown below, and select "OK.""LSI MegaRAID controller (megaraid2)"(7)Make sure that the selected driver is displayed in the following window, and select "Done."(8)The Setup Networking window is displayed. Select "No" because network settings need not beconfigured at this time.(9)Select "Continue" in the Rescue window.(10)If the root partition (/) in the existing Linux system has been mounted successfully under/mnt/sysimage, this is reported in the Rescue window. Select "OK."(11)When the prompt is displayed, enter the chroot command to change the root path to the harddisk drive.sh-2.05b# chroot /mnt/sysimage(12)This completes startup in rescue mode. To exit rescue mode, enter the exit command twice.sh-2.05b# exit <--- Exit from the chroot environment.sh-2.05b# exit <--- Exit from the rescue mode.1.5 Power-off at ShutdownPower is not automatically turned off at shutdown.When [Power down] is displayed on the console screen, press the power switch to turn off the power.Note that the power is automatically turned off when the system is shut down in an environment in which ServerView is installed.2. Addition of Peripheral Devices and Option Cards2.1 Adding a SCSI DiskThe number of LUNs is set to 1 by default. To add a SCSI disk, shared disk, or tape library, log in as the root and define the number of LUNs as shown below. Multiple LUN referencing is enabled after the system is started next.(1)Add the following lines to /etc/modules.conf:options scsi_mod max_scsi_luns=N <--- Add* N is the number of LUNs. Define the appropriate number.(2)Enter the mkinitrd command to create initrd.To create initrd, enter the mkinitrd command appropriate for the type of kernel used.* Enter the following command to check the type of kernel used:# uname -r[2.4.21-32.0.1.EL (kernel for single CPU)]# cp /boot/initrd-2.4.21-32.0.1.EL.img /boot/initrd-2.4.21-32.0.1.EL.img.bak# mkinitrd -f /boot/initrd-2.4.21-32.0.1.EL.img 2.4.21-32.0.1.EL[2.4.21-32.0.1.EL smp (kernel for multi-CPU)]#cp /boot/initrd-2.4.21-32.0.1.ELsmp.img /boot/initrd-2.4.21-32.0.1.ELsmp.img.bak# mkinitrd -f /boot/initrd-2.4.21-32.0.1.EL smp.img 2.4.21-32.0.1.EL smp(3)Restart the system.Enter the following command to restart the system.# shutdown -r now2.2 Adding Option CardsIf any of the option cards supported by the models listed in the following table is added after system installation, kudzu is automatically started at system startup. This section explains the operations that enable the system to automatically recognize the added card at each subsequent system startup.The table lists models and the option cards supported by them.TX200 S2 RX200 S2 RX300 S2PG-128 V -- -- SCSI cardPG-130L -- V V PG-140D1V V -- SCSI-RAID cardPG-142E3V V -- PG-1852 V V -- PG-1853 V -- -- PG-1853L -- V -- PG-1862 V V -- PG-1882 V -- -- PG-1882L -- V V PG-1892 V -- -- LAN cardPG-1892L -- V V PG-FC106V V V onboard Fibre-Channel cardPG-FC107V V VSCSI cardPG-128 -- -- V SCSI-RAID cardPG-142E3-- -- V PG-1852 -- -- V PG-1853 -- -- V PG-1862 -- -- V PG-1882 -- -- V LAN cardPG-1892 -- -- V PG-FC106-- -- V Raiser Card Fibre-Channel cardPG-FC107-- -- VV: Supported --: Not supported- TX200 S2 or RX300 S2If any of the option cards supported by the models listed in the above table is added after system installation, kudzu is automatically started at system startup. To add a fibre channel card, follow the steps below. Except for a fibre channel card, select "configure."To add a LAN card, configure network settings according to the instructions displayed in the window. Login as a root user at system startup, and perform the operations explained in Section 2.3, "Executing mkinitrd."This section explains the operations that enable the system to automatically recognize the added card at each subsequent system startup.[A fibre channel card is added](1)If a fibre channel card is added after system installation,kudzu is automatically started at system startup.Always select "ignore ."(2)Add the following line to /etc/modules.conf.If SCSI or SCSI-RAID device is installed in the system,number the end of "scsi_hostadapter", as "2, 3, ...".options scsi_mod max_scsi_luns=128 Add- RX200 S2If any of the option cards supported by the models listed in the above table is added after systeminstallation, kudzu is automatically started at system startup.To add a fibre channel card or LAN card, follow the steps below.Except for a fibre channel card and LAN card, select "configure." Login as a root user at system startup, and perform the operations explained in Section 2.3, "Executing mkinitrd."This section explains the operations that enable the system to automatically recognize the added card at each subsequent system startup.[A LAN card(PG-1852, PG-1862, PG-1882L or PG-1892L) is added](1)If any of the LAN cards supported by the models listed in the above table is addedafter system installation, kudzu is automatically started at system startup.Always select " ignore."(2)Add the following lines to /etc/modules.conf.[ PG-1852, PG-1853L,PG-1892L, or PG-1882L]alias eth0 e1000alias eth1 e1000alias eth2 e1000 <--- Add[ PG-1862]alias eth0 e1000alias eth1 e1000alias eth2 e1000 <--- Addalias eth3 e1000 <--- Add(3)Set up the network.[ PG-1852, ,PG-1853L ,PG-1892L, or PG-1882L]# netconfig -d eth0# netconfig -d eth1# netconfig -d eth2[ PG-1862]# netconfig -d eth0# netconfig -d eth1# netconfig -d eth2# netconfig -d eth3[A fibre channel card is added](1)If a fibre channel card is added after system installation,kudzu is automatically started atsystem startup.Always select "ignore ."(2)Add the following line to /etc/modules.conf.If SCSI or SCSI-RAID device is installed in the system,number the end of "scsi_hostadapter",as "2, 3, ...".options scsi_mod max_scsi_luns=128 Add2.3 Executing mkinitrd(1) Create initrd by executing the mkinitrd command.Create initrd by executing the mkinitrd command according to the kernel used.* Enter the following command to check the kernel used:# uname -rCommand execution examples are shown below.[2.4.21-32.0.1.EL (kernel for a single CPU)]# cp /boot/initrd-2.4.21-32.0.1.EL.img /boot/initrd-2.4.21-32.0.1.EL.img.bak# mkinitrd -f /boot/initrd-2.4.21-32.0.1.EL.img 2.4.21-32.0.1.EL[2.4.21-32.0.1.EL smp (kernel for multi-CPUs)]# cp /boot/initrd-2.4.21-32.0.1.EL smp.img /boot/initrd-2.4.21-32.0.1.ELsmp.img.bak# mkinitrd -f /boot/initrd-2.4.21-32.0.1.EL smp.img 2.4.21-32.0.1.EL smp(2) Restart the system.Restart the system as follows:# shutdown -r now3. Others3.1 Sound FunctionNo sound function is supported.3.2 PCI Hot Plug FunctionThe PCI hot plug function is not supported.3.3 Usable KernelsThe kernels that can be used vary depending on the hardware conditions.See the table below for the kernels that can be used.Note that middleware specifications might limit the kernel to be selected. In this case, select the kernel in accordance with the middleware specifications.Hardware conditionsKernel to be selectedMemory Number of logical CPUs (*1)for single CPU1CPU Kernel Up to 4 GB2 or more CPUs Kernel for multi-CPUMore than 4 GB and up to 8 GB No conditions Kernel for multi-CPU(*1) Even when only one CPU is installed, the number of logical CPUs is 2if Hyper Threading = Enabled.3.4 Distribution LimitationsOperation is not guaranteed if one of the following CPU, memory, and file system limitations is exceeded:Maximum number of logical CPUs: 16Maximum memory size: 8 GBFile system: Less than 1 TB3.5 Installation ProcedureFor information on the procedure for installing Red Hat Enterprise Linux ES (v.3 for x86), see the Installation Procedure included in the "Installation Kit" downloaded from Download Search.Attachment Outline of Global Array Manager Client Installation* Perform this operation only when an onboard SCSI-RAID or a SCSI-RAID card (PG-140D1 or PG-142E3) are mounted.* GAM-Client runs on Windows2000 and Windows2003. Prepare a management Windows system.1. Insert the driver CD into the CD-ROM drive in the management Windows system.2. Execute setup.exe in RHEL3¥UTY¥GAM¥Windows on the driver CD.3. When the "Welcome" window is displayed, click "Next."4. The "Software License Agreement" window is displayed. Read the statements and click "Yes" if youaccept the terms of this agreement.5. The "Select Components" window (Figure 1) is displayed. Confirm that the check box before "GlobalArray Manager Client" is selected. Clear the "Global Array Manager Server" and "SAN Array Manager Client" check boxes, and click "Next."Figure 1* "SAN Array Manager Client" is not supported. Do not install it.6.The "Choose Destination Location" window is displayed.Click "Browse," specify the location that you want as the installation destination, and click "Next."* If GAM-Client is already installed, a message confirmingwhether to overwrite is displayed. Click "OK" to continue.7. A dialog box for specifying the GAM-Client installation destination is displayed. Click "Next." and thesetup program starts copying files.8. The "Setup Complete" window is displayed.Click "Finish" to exit the GAM-Client installation wizard.-- END --。
linux使用手册

linux使用手册Linux 是一种开源的操作系统,具有较高的可靠性和安全性,许多用户和开发人员都非常喜欢使用它。
下面是一些 Linux 的使用手册,希望能够帮助到您。
1. 基本命令Linux 提供了许多基本命令,例如 `cd` 命令用于改变当前工作目录,`ls` 命令用于列出当前目录下的文件和文件夹,`mkdir` 命令用于创建新文件夹,`rm` 命令用于删除文件或目录等等。
您可以通过查看 `man` 文件以查看这些命令的详细解释。
2. 文件和目录权限Linux 系统中文件和目录的权限是非常重要的,因为访问文件和目录的权限可以影响系统的访问和操作。
您可以通过使用 `chmod` 命令来修改文件和目录的权限。
3. 文件和目录重命名当您需要对文件和目录进行重命名时,可以使用 `mv` 命令。
例如,如果您要将文件 `file.txt` 重命名为 `new_file.txt`,您可以使用以下命令:```mv file.txt new_file.txt```4. 文件和目录删除如果您需要删除文件或目录,可以使用 `rm` 命令。
例如,如果您要删除目录 `directory`,您可以使用以下命令:```rm directory```5. 文件和目录打开您可以通过使用 `open` 命令来打开文件或目录。
例如,如果您要打开文件 `example.txt`,您可以使用以下命令:```open example.txt```6. 文件和目录权限查看您可以通过使用 `chmod` 命令来查看文件和目录的权限。
例如,您可以使用以下命令查看文件 `example.txt` 的权限:```chmod 664 example.txt```7. 系统安全性Linux 系统具有较高的安全性,许多功能和操作都具有安全措施。
例如,您可以通过使用 `ps` 命令来查看当前用户的权限状态,或者使用 `chmod` 命令来修改文件和目录的权限。
linux服务器中间件使用手册
Linux服务器中间件使用手册是一个非常广泛的指南,因为它涵盖了许多不同的软件和服务。
以下是一些常见的Linux服务器中间件及其使用手册:
1. Nginx:Nginx是一个高性能的HTTP和反向代理服务器。
它的官方文档提供了详细的安装、配置和使用说明。
您可以在Nginx的官方网站上找到这些文档。
2. Apache Tomcat:Tomcat是一个用于Java Servlet和JavaServer Pages技术的开源实现。
它的官方文档提供了安装、配置和使用说明,以及如何部署Web应用程序的指南。
3. Redis:Redis是一个开源的、内存中的数据结构存储系统,它可以用作数据库、缓存和消息代理。
Redis的官方文档提供了详细的安装、配置和使用说明。
4. MySQL:MySQL是一个流行的关系数据库管理系统。
MySQL 的官方文档提供了安装、配置和使用说明,以及如何创建和管理数据库的指南。
5. PostgreSQL:PostgreSQL是一个开源的对象-关系数据库管理系统。
PostgreSQL的官方文档提供了安装、配置和使用说明,以及如何创建和管理数据库的指南。
这些中间件都有自己的使用手册,您可以根据您的需求和中间件的选择来查找和使用相应的使用手册。
另外,您还可以在互联网上找到许
多教程和指南,这些教程和指南通常会提供有关如何安装、配置和使用这些中间件的详细说明。
LinuxCNC入门指南说明书
Getting Started V2.8.1, 2020-11-29 The LinuxCNC Team该手册正在编写中。
如果您能够在编写, 编辑或者图片准备上为我们提供帮助, 联系文档编写团队任何成员,或加入我们团队。
发送电子邮件至***************************.net版权所有©2000-2020 授予复制,分发和/或修改本文档的权限 根据GNU Free Documentation License Version 1.1的条款 或自由软件基金会发布的任何更高版本; 没有不变的部分,没有前封面文字,也没有后封面文字。
许可证的副本包含在标题为“GNU Free Documentation License”中。
LINUX®是Linus Torvalds在美国和其他国家/地区的注册商标。
注册商标Linux®是根据来自Linux商标协会(LMI)分许可证使用, LMI是Linus Torvalds的独家许可持有人,全球范围内商标的所有者。
LinuxC NC项目不属于Debian®。
Debian是公益软件公司(Software in the Public Interest,Inc.)拥有的注册商标,Linux C N C项目不属于UBUNTU®。
B NT是科能软件有限公司(C anonical Limited)拥有的注册商标。
关于LinuxCNC软件•LinuxCNC(增强型机器控制器)是一个软件系统,用于机床(例如铣床和车床),机器人(例如puma 和scara)以及其他最多9轴的计算机控制器。
•LinuxCNC是开源代码的免费软件。
当前版本的LinuxCNC完全根据GNU通用公共许可证和次要GNU通用公共许可证(GPL和LGPL)获得许可•LinuxCNC提供:◦图形用户界面(实际上是几个界面可供选择)◦G代码的解释器(RS-274机床编程语言)◦具有超前的实时运动调度系统◦底层机器电子设备(例如传感器和电机驱动器)的操作◦易于使用的"面包板"层,可为您的机器快速创建独特的配置◦可通过梯形图编程的软件PLC◦使用Live-CD轻松安装•不提供工程图(CAD-计算机辅助设计)或从工程图生成G代码(CAM-计算机自动化制造)的功能。
Linux系统管理技术手册

Linux系统管理技术手册1. 导言Linux是一种开源的操作系统,具有广泛应用和强大的系统管理功能。
本手册旨在提供关于Linux系统管理的技术指导和实践经验,帮助读者更好地理解和运用Linux系统。
2. Linux系统概述Linux系统是以Unix为原型开发的操作系统,具有稳定性、可靠性和安全性。
它的核心组件包括操作系统内核、系统工具和应用程序。
3. Linux系统安装与配置3.1 硬件要求:在安装Linux系统之前,需确保硬件满足最低配置要求。
3.2 安装过程:详细介绍安装Linux系统的步骤和注意事项。
3.3 系统配置:包括网络配置、用户管理、文件系统管理等内容。
4. Linux命令行工具4.1 Shell介绍:不同的Linux发行版使用不同的Shell,默认为Bash。
4.2 基本命令:介绍常用的Linux命令,如目录操作、文件管理、进程管理等命令。
4.3 命令行通配符和重定向:使用通配符匹配文件名、输出重定向和输入重定向等。
5. 系统和网络管理5.1 进程管理:介绍进程的概念、常用命令和进程管理技巧。
5.2 系统监控:使用系统监控工具对系统性能和资源进行监控和优化。
5.3 网络配置:包括IP地址配置、网络接口配置和网络服务配置等。
5.4 防火墙配置:详细介绍使用iptables命令配置Linux防火墙规则。
6. 软件包管理6.1 软件包管理工具:介绍常用的包管理工具,如yum和apt-get。
6.2 软件包安装和更新:通过包管理工具安装和更新软件包。
6.3 软件包依赖性:解决软件包之间的依赖关系,确保软件正常运行。
7. 安全与备份7.1 用户和权限管理:通过用户和权限管理提高系统的安全性。
7.2 文件系统加密:使用加密文件系统保护敏感数据。
7.3 数据备份与恢复:制定合理的数据备份策略,并恢复丢失的数据。
8. 系统维护与故障排除8.1 日志管理:解析日志文件以诊断和解决系统问题。
8.2 内存管理:监控和优化内存使用,提升系统性能。
Linux管理基础教程_学习笔记
第三章安装软件3.1 RPMRPM(RedHat Package Manager):RPM软件包管理器是一种用于Internet下载包的打包及安装工具,为二进制已编译文件,与之对应的开源代码的格式为SRPM。
RPM命令中,长命令格式--query与缩写命令格式-q相对应。
下面是简单的命令说明:命令行选项--install 安装一个软件包--upgrade 升级或将当前已安装软件更新到最新版本--erase 移出或删除一个已安装软件包--query 查询软件信息--force 强制进行安装。
-h 使用符号“#”指示安装进度,与-v参数同时显示效果更好。
--percent 显示已完成百分比进度。
-nodeps 不进行依赖关系检查--test 测试安装是否能成功完成。
-V 检验系统中的RPM包或文件。
-v(/--verbose,详细的) 通知RPM报告每一步操作的详细信息。
例:rpm -qi bash,显示bash包详细信息rpm -ql bash,列出bash包包含的所有文件rpm -qc bash,列出bash包中配置文件rpm -q --qf “[%{INSTALLTIME:date}% \n]” bash,查找bash包安装至系统中的时间使用RPM安装软件包1)# mount /media/cdrom,插入Fedora光盘,将在CDReadOnlyMeida中的文件挂载至/media/cdrom/中;2)# cd /media/cdrom/Fedora/RPMS/,并#ls joe*确定文件是否在其目录下;3)# rpm –install –verbose –hash –test joe*,测试软件依赖关系;4)# rpm –ivh joe*,安装软件;5)# rpm –q joe,查询命令以确认应用安装至系统中。
删除RPM软件包# rpm –e –vvv joe,删除joe软件包并显示详细信息。
飞思网巡linux安装手册
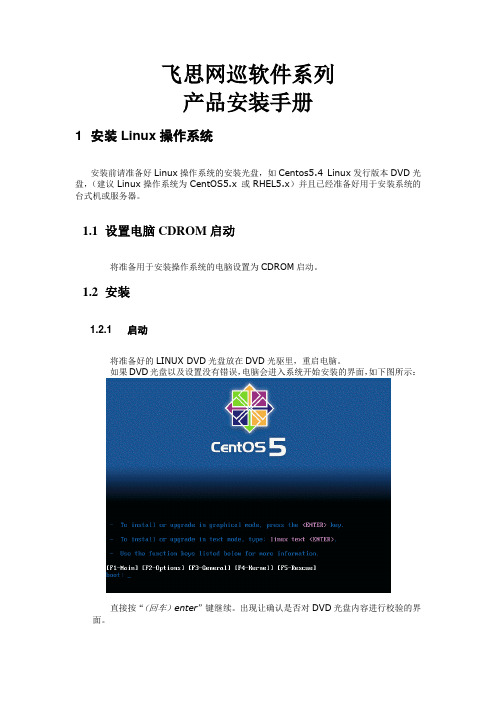
飞思网巡软件系列产品安装手册1 安装Linux操作系统安装前请准备好Linux操作系统的安装光盘,如Centos5.4 Linux发行版本DVD光盘,(建议Linux操作系统为CentOS5.x 或RHEL5.x)并且已经准备好用于安装系统的台式机或服务器。
1.1设置电脑CDROM启动将准备用于安装操作系统的电脑设置为CDROM启动。
1.2安装1.2.1 启动将准备好的LINUX DVD光盘放在DVD光驱里,重启电脑。
如果DVD光盘以及设置没有错误,电脑会进入系统开始安装的界面,如下图所示:直接按“(回车)enter”键继续。
出现让确认是否对DVD光盘内容进行校验的界面。
我们假设DVD光盘是完好的,按一下“tab”键,选择“Skip”按钮,按“(回车)enter”键,跳过检查继续。
1.2.2 进入图形安装界面进入图形化安装界面后,如果接了鼠标,就应该可以使用鼠标操作了。
按“Next”按钮,继续。
1.2.3 确认自动重新分区警告执行下面的步骤后,电脑上硬盘的数据将会全部丢失!!!按“Yes”,继续。
按“Yes”,继续。
1.2.4 网络设置1.2.4.1使用DHCP获取IP如果这台电脑是连接到局域网上,并且局域网内有DHCP服务器的,可以使用DHCP服务,按“Next”,继续。
1.2.4.2使用固定IP地址如果这台电脑要分配一个固定的IP地址,点击“Edit”配置IP地址,比如配置IP地址为:192.168.1.155/255.255.255.0,点击OK。
再配置相应的网关和DNS。
按“Next”按钮,继续。
选择Asia/Shanghai的时区后,按“Next”按钮,继续。
设置Linux系统的root密码,按“Next”按钮,继续。
点击一下“Desktop-Gnome”前面的框框,取消选中勾勾,按“Next”继续。
开始安装软件包,按“Next”继续。
安装完成后,按“Reboot”,自动重启电脑。
1.3第一次运行系统1.3.1 取出DVD光盘将DVD光盘重光驱中取出,让电脑从硬盘引导进入新安装的操作系统。
onepace linux manual

THE ONE PAGE LINUX MANUALA summary of useful Linux commandsVersion 3.0May 1999squadron@.au Starting & Stoppingshutdown -h now Shutdown the system now and do notreboothalt Stop all processes - same as aboveshutdown -r 5Shutdown the system in 5 minutes andrebootshutdown -r now Shutdown the system now and rebootreboot Stop all processes and then reboot - sameas abovestartx Start the X systemAccessing & mounting file systemsmount -t iso9660 /dev/cdrom /mnt/cdrom Mount the device cdrom and call it cdrom under the /mnt directorymount -t msdos /dev/hdd /mnt/ddrive Mount hard disk “d” as a msdos file system and call it ddrive under the /mnt directorymount -t vfat /dev/hda1 /mnt/cdrive Mount hard disk “a” as a VFAT file system and call it cdrive under the /mnt directoryumount /mnt/cdrom Unmount the cdrom Finding files and text within filesfind / -name fname Starting with the root directory, lookfor the file called fnamefind / -name ”*fname*”Starting with the root directory, lookfor the file containing the string fname locate missingfilename Find a file called missingfilenameusing the locate command - thisassumes you have already used thecommand updatedb (see next) updatedb Create or update the database of fileson all file systems attached to the linuxroot directorywhich missingfilename Show the subdirectory containing theexecutable file called missingfilenamegrep textstringtofind /dir Starting with the directory called dir , look for and list all files containing textstringtofindThe X Window Systemxvidtune Run the X graphics tuning utilityXF86Setup Run the X configuration menu withautomatic probing of graphics cards Xconfigurator Run another X configuration menu withautomatic probing of graphics cardsxf86config Run a text based X configuration menu Moving, copying, deleting & viewing filesls -l List files in current directory usinglong formatls -F List files in current directory andindicate the file typels -laC List all files in current directory inlong format and display in columnsrm name Remove a file or directory callednamerm -rf name Kill off an entire directory and all it’sincludes files and subdirectoriescp filename/home/dirnameCopy the file called filename to the/home/dirname directorymv filename/home/dirnameMove the file called filename to the/home/dirname directorycat filetoview Display the file called filetoviewman -k keyword Display man pages containingkeywordmore filetoview Display the file called filetoview onepage at a time, proceed to next pageusing the spacebarhead filetoview Display the first 10 lines of the filecalled filetoviewhead -20 filetoview Display the first 20 lines of the filecalled filetoviewtail filetoview Display the last 10 lines of the filecalled filetoviewtail -20 filetoview Display the last 20 lines of the filecalled filetoviewInstalling software for Linuxrpm -ihv name.rpm Install the rpm package called name rpm -Uhv name.rpm Upgrade the rpm package callednamerpm -e package Delete the rpm package calledpackagerpm -l package List the files in the package calledpackagerpm -ql package List the files and state the installedversion of the package calledpackagerpm -i --force package Reinstall the rpm package calledname having deleted parts of it (notdeleting using rpm -e)tar -zxvf archive.tar.gz ortar -zxvf archive.tgzDecompress the files contained inthe zipped and tarred archive calledarchive./configure Execute the script preparing theinstalled files for compilingUser Administrationadduser accountname Create a new user call accountname passwd accountname Give accountname a new passwordsu Log in as superuser from current login exit Stop being superuser and revert tonormal userLittle known tips and tricksifconfig List ip addresses for all devices onthe machineapropos subject List manual pages for subject usermount Executes graphical application formounting and unmounting filesystems/sbin/e2fsck hda5Execute the filesystem check utility on partition hda5fdformat /dev/fd0H1440Format the floppy disk in device fd0tar -cMf /dev/fd0Backup the contents of the current directory and subdirectories to multiple floppy diskstail -f /var/log/messages Display the last 10 lines of the system log.cat /var/log/dmesgDisplay the file containing the boot time messages - useful for locating problems. Alternatively, use the dmesg command.*wildcard - represents everything. eg.cp from/* to will copy all files in the from directory to the to directory?Single character wildcard. eg.cp config.? /configs will copy all files beginning with the name config. in the current directory to the directory named configs.[xyz]Choice of character wildcards. eg.ls [xyz]* will list all files in the current directory starting with the letter x, y,or z.linux singleAt the lilo prompt, start in single user mode. This is useful if you have forgotten your password. Boot in single user mode, then run the passwd command.ps List current processeskill 123Kill a specific process eg. kill 123Configuration files and what they do/etc/profile System wide environment variables for all users./etc/fstabList of devices and their associated mount points. Edit this file to add cdroms, DOS partitions and floppy drives at startup./etc/motd Message of the day broadcast to all users at login.etc/rc.d/rc.localBash script that is executed at the end of login process. Similar to autoexec.bat in DOS./etc/HOSTNAME Conatins full hostname including domain./etc/cron.*There are 4 directories that automatically execute all scripts within the directory at intervals of hour, day, week or month./etc/hosts A list of all know host names and IP addresses on the machine./etc/httpd/conf Paramters for the Apache web server /etc/inittab Specifies the run level that the machine should boot into./etc/resolv.conf Defines IP addresses of DNS servers./etc/smb.confConfig file for the SAMBA server. Allows file and print sharing with Microsoft clients./etc/X11/XF86Confi g Config file for X -Windows.~/.xinitrcDefines the windows manager loaded by X. ~ refers to user’s home directory.File permissionsIf the command ls -l is given, a long list of file names isdisplayed. The first column in this list details the permissions applying to the file. If a permission is missing for a owner,group of other, it is represented by - eg. drwxr -x—xRead = 4Write = 2Execute = 1File permissions are altered by giving the chmod command and the appropriate octal code for each user type. eg chmod 7 6 4 filename will make the file called filename R+W+X for the owner,R+W for the group and R for others.chmod 7 5 5Full permission for the owner, read and execute access for the group and others.chmod +x filenameMake the file called filename executable to all users.X Shortcuts - (mainly for Redhat)Control|Alt + or -Increase or decrease the screen resolution. eg. from 640x480 to 800x600Alt | escape Display list of active windows Shift|Control F8Resize the selected window Right click on desktop background Display menu Shift|Control Altr Refresh the screen Shift|Control AltxStart an xterm sessionPrinting/etc/rc.d/init.d/lpd start Start the print daemon /etc/rc.d/init.d/lpd stop Stop the print daemon/etc/rc.d/init.d/lpd status Display status of the print daemon lpq Display jobs in print queue lprm Remove jobs from queue lpr Print a file lpcPrinter control toolman subject | lpr Print the manual page called subject as plain textman -t subject | lpr Print the manual page called subject as Postscript outputprinttoolStart X printer setup interface~/.XdefaultsDefine configuration for some X -applications. ~ refers to user’s home directory.Get your own Official Linux Pocket Protector - includeshandy command summary. Visit:.au/~squadron。
LinuxONE常见问题FAQ

IBM LinuxONE2015 年 9 月IBM LinuxONE TM常见问题集全球范围问:IBM®LinuxONE™ 是什么?答:IBM LinuxONE 可为您提供不受限制的Linux®。
IBM LinuxONE 是一个集硬件、软件和服务解决方案于一体的组合,旨在支持业务关键型 Linux 应用。
LinuxONE 汇集了Linux 的灵活性、敏捷性和协作环境的优势,结合了业界最先进、最高效、最可靠的处理平台,增强了当今企业的 IT 环境,将企业中的 Linux 推上一个新台阶。
IBM LinuxONE 可以为您提供针对云、移动、分析和 DevOps 的系统和解决方案组合,为您的 Linux 提供支持。
IBM LinuxONE 可以支持您的 Linux 策略,释放 Linux 的全部潜力。
问:IBM LinuxONE 有哪些关键优势?答:IBM LinuxONE 的优势是:■开放:可以选择您喜欢的工具和应用■灵活:更好的应对未来无限的扩展需求■简单:服务器更少、复杂性更低、成本更低■高效:获得非并行的使用效率和速度■可靠:内含永不停机的安全性和服务IBM LinuxONE 可以帮助您充分利用您的 Linux,获取最大价值。
问:IBM LinuxONE 如何帮助释放 Linux 的全部潜力?答:IBM LinuxONE 可以为您提供以下支持:■由你做主的 Linux。
IBM LinuxONE 可以让您自由选择 Linux 的版本、管理程序、应用和数据库、管理工具和服务,这就是您所熟知和喜爱的 Linux,它会为您的业务提供所需的开放性、灵活性和敏捷性。
■不受局限的 Linux。
极速响应以及近乎无限制的扩展,让您的应用在 Linux 上自由畅游。
■没有风险的 Linux。
行业最安全、最灵活的 Linux 系统,确保数据和服务得到全面保护,让您的客户可以随时随地获得所需的数据和服务。
ExpressCluster X SingleServerSafe 2.1 Linux版快速参考指南
ExpressCluster® X SingleServerSafe 2.1Linux versionQuick Reference Guide for SSS installation & configuration of a sample service - ApacheInstalling SSS1. Install the SSS server rpm package•rpm –ivh expressclssss-2.1.0-1.i686.rpmThe rpm package is different for 64 bit machine. Choose the one that matches CPU configuration.2. After the installation is successful, register the license•clplcnsc – i ECX2.1_trial_lin_SSS1.key –p XSSS21Here ECX2.1_trial_lin_SSS1.key is the license key name & XSSS21 is the product id.Similarly install other license applicable. If the license is installed properly then following message will displayed in the command terminal:“Command Succeeded”Using SSS to configure application (Apache)For details on how to start the web manger & definitions of features available. Refer the SSS manuals. Given below is a brief demonstration on how to configure SSS using sample service application.Sample application being used is Apache web serverStep 1: using the cluster generation wizard, create new cluster using the server name of the server where SSS is installed. In this demo let’s assume it to be “SSS”Step 2: Add a failover group by right clicking the “Groups” icon.Step 3:Once group is added the resources required to create the configuration is to be added.Right click on failover & select “Add Resource”.Step 4: A Resource definition window will pop up, select exec resource & type name you want to give to the resource (here its apache). Click nextStep 5: Apache being a service we can write a customized script to start the apache service. Check the radio button “Script created with this product”Then select Start script & click on edit button. (This will open start.sh script with editor.Modify this script as per the method in which the resource needs to be started)Script is being used to start the Apache service, below is the snapshot of the script start.shHere for event “Start” & “Failover”, the command given is to start the httpd serviceSimilarly configure the stop.sh script to stop the apache service.Step 6: After editing the start & stop script, click on “Tuning” button to modify resource settings.In the Parameter tab select radio button “Synchronous”In the Maintenance tab select log output path if you need to generate log messages.Then choose OK & click Next.Step 7 Choose “Retry count” value & the “Final Action” value. Please refer SSS guide to decide what to fill in these values. Click Next & then Finish.Step 8 Resource has been added successfully. Let’s add the monitor for the resource now. Right click on “Monitor” & choose Add Monitor ResourceStep 9 Choose the type as “Custom monitor” & assign any name in the Monitor name field. Click Next. (Here we chose Custom monitor option because we will write a customized monitor script for this resource)Step 10 Choose the radio button “Script created with this product” & click on edit button This will open the monitor script in editor. Modify the script accordingly.Usually to write custom monitors one can work upon the return status of that command which is then passed to SSS in order to decide if its success or failure. See sample below to know more:Here return status of wget command will go as parameter to SSS event handler.Step 11 In the Monitor type select radio button “Synchronous”. Give log output path if you wish to have log messages from the monitor. Click nextStep 12 Set Interval, Timeout & other values as per requirements. Refer SSS Manual to know what these value means.Step 13Select Monitor Timing as active, browse to select Target resource (in this case apache i.e name we gave to exec resource while adding resource) Click Next.Step 14Browse & choose Recovery target as “failover”. Set Final action value as per requirement.The configuration is now complete. Follow steps given in manual to save/upload config file &start the cluster.End Result: What to expect?The Apache server has been successfully configured with SSS. When “Start Cluster” command is selected from the Web manager, the resource (httpd service in this case) will be invoked by SSS & httpd service will start running. This can be checked via command prompt using given command:$ service httpd statusThe status message of the resource can also be seen in the Web manager.* Before cluster is started make sure that httpd service is not running already!。
Linux基础.man中文手册离线安装教程
Linux基础.man中文手册离线安装教程一. 进入man手册之后,该如何使用man手册?–例子:mkdir1.如何说,我们想查询mkdir命令怎么用? --> mkdir --> 命令--> 1手册 --> man 1 mkdirNAME:对查询的内容简单描述mkdir - make directories --> 创建目录SYNOPSIS:使用格式mkdir [OPTION]… DIRECTORY…[]: 如何出现中括号,说明该项是可以省略!携带选项: mkdir 选项1 参数1 选项2 参数2 ... 目录1路径目录2路径 ...不携带选项: mkdir 目录1路径目录2路径 (123)DESCRIPTION:功能/参数详细描述功能: Create the DIRECTORY(ies), if they do not already exist.//可以同时创建多个不存在的目录参数:-m, --mode=MODEset file mode (as in chmod), not a=rwx - umask //给新建目录设置一个起始权限,不受到umask影响。
123例子:gec@ubuntu:~$ mkdir -m 666 diraaagec@ubuntu:~$ mkdir --mode=666 diraaa以上两个命令是等价的!结果:drw-rw-rw- 2 gec gec 4096 Mar 11 18:38 diraaa-p, --parents //没有等号,该选项后面不需要添加参数no error if existing, make parent directories as needed //如果文件存在不报错,可以同时创建多级目录12//如果文件存在不报错gec@ubuntu:~$ mkdir diraaamkdir: cannot create directory `diraaa’: File existsgec@ubuntu:~$ mkdir diraaa -pgec@ubuntu:~$//可以同时创建多级目录gec@ubuntu:~$ mkdir a/b/c/dmkdir: cannot create directory `a/b/c/d’: No such file or directorygec@ubuntu:~$ mkdir -p a/b/c/dgec@ubuntu:~$1.如果现在是mkdir函数不会用,怎么办? --> 函数 --> 2/3 —> man -f mkdir --> man 2 mkdirNAME:对查询的内容简单描述mkdir - create a directorySYNOPSIS:使用格式//头文件#include <sys/stat.h>#include <sys/types.h> --> 只要在工程中使用了mkdir(),就一定要包含这些头文件。
- 1、下载文档前请自行甄别文档内容的完整性,平台不提供额外的编辑、内容补充、找答案等附加服务。
- 2、"仅部分预览"的文档,不可在线预览部分如存在完整性等问题,可反馈申请退款(可完整预览的文档不适用该条件!)。
- 3、如文档侵犯您的权益,请联系客服反馈,我们会尽快为您处理(人工客服工作时间:9:00-18:30)。
THE ONE PAGE LINUX MANUALA summary of useful Linux commandsVersion 3.0May 1999squadron@.au Starting & Stoppingshutdown -h now Shutdown the system now and do notreboothalt Stop all processes - same as aboveshutdown -r 5Shutdown the system in 5 minutes andrebootshutdown -r now Shutdown the system now and rebootreboot Stop all processes and then reboot - sameas abovestartx Start the X systemAccessing & mounting file systemsmount -t iso9660 /dev/cdrom /mnt/cdrom Mount the device cdrom and call it cdrom under the /mnt directorymount -t msdos /dev/hdd /mnt/ddrive Mount hard disk “d” as a msdos file system and call it ddrive under the /mnt directorymount -t vfat /dev/hda1 /mnt/cdrive Mount hard disk “a” as a VFAT file system and call it cdrive under the /mnt directoryumount /mnt/cdrom Unmount the cdrom Finding files and text within filesfind / -name fname Starting with the root directory, lookfor the file called fnamefind / -name ”*fname*”Starting with the root directory, lookfor the file containing the string fname locate missingfilename Find a file called missingfilenameusing the locate command - thisassumes you have already used thecommand updatedb (see next) updatedb Create or update the database of fileson all file systems attached to the linuxroot directorywhich missingfilename Show the subdirectory containing theexecutable file called missingfilenamegrep textstringtofind /dir Starting with the directory called dir , look for and list all files containing textstringtofindThe X Window Systemxvidtune Run the X graphics tuning utilityXF86Setup Run the X configuration menu withautomatic probing of graphics cards Xconfigurator Run another X configuration menu withautomatic probing of graphics cardsxf86config Run a text based X configuration menu Moving, copying, deleting & viewing filesls -l List files in current directory usinglong formatls -F List files in current directory andindicate the file typels -laC List all files in current directory inlong format and display in columnsrm name Remove a file or directory callednamerm -rf name Kill off an entire directory and all it’sincludes files and subdirectoriescp filename/home/dirnameCopy the file called filename to the/home/dirname directorymv filename/home/dirnameMove the file called filename to the/home/dirname directorycat filetoview Display the file called filetoviewman -k keyword Display man pages containingkeywordmore filetoview Display the file called filetoview onepage at a time, proceed to next pageusing the spacebarhead filetoview Display the first 10 lines of the filecalled filetoviewhead -20 filetoview Display the first 20 lines of the filecalled filetoviewtail filetoview Display the last 10 lines of the filecalled filetoviewtail -20 filetoview Display the last 20 lines of the filecalled filetoviewInstalling software for Linuxrpm -ihv name.rpm Install the rpm package called name rpm -Uhv name.rpm Upgrade the rpm package callednamerpm -e package Delete the rpm package calledpackagerpm -l package List the files in the package calledpackagerpm -ql package List the files and state the installedversion of the package calledpackagerpm -i --force package Reinstall the rpm package calledname having deleted parts of it (notdeleting using rpm -e)tar -zxvf archive.tar.gz ortar -zxvf archive.tgzDecompress the files contained inthe zipped and tarred archive calledarchive./configure Execute the script preparing theinstalled files for compilingUser Administrationadduser accountname Create a new user call accountname passwd accountname Give accountname a new passwordsu Log in as superuser from current login exit Stop being superuser and revert tonormal userLittle known tips and tricksifconfig List ip addresses for all devices onthe machineapropos subject List manual pages for subject usermount Executes graphical application formounting and unmounting filesystems/sbin/e2fsck hda5Execute the filesystem check utility on partition hda5fdformat /dev/fd0H1440Format the floppy disk in device fd0tar -cMf /dev/fd0Backup the contents of the current directory and subdirectories to multiple floppy diskstail -f /var/log/messages Display the last 10 lines of the system log.cat /var/log/dmesgDisplay the file containing the boot time messages - useful for locating problems. Alternatively, use the dmesg command.*wildcard - represents everything. eg.cp from/* to will copy all files in the from directory to the to directory?Single character wildcard. eg.cp config.? /configs will copy all files beginning with the name config. in the current directory to the directory named configs.[xyz]Choice of character wildcards. eg.ls [xyz]* will list all files in the current directory starting with the letter x, y,or z.linux singleAt the lilo prompt, start in single user mode. This is useful if you have forgotten your password. Boot in single user mode, then run the passwd command.ps List current processeskill 123Kill a specific process eg. kill 123Configuration files and what they do/etc/profile System wide environment variables for all users./etc/fstabList of devices and their associated mount points. Edit this file to add cdroms, DOS partitions and floppy drives at startup./etc/motd Message of the day broadcast to all users at login.etc/rc.d/rc.localBash script that is executed at the end of login process. Similar to autoexec.bat in DOS./etc/HOSTNAME Conatins full hostname including domain./etc/cron.*There are 4 directories that automatically execute all scripts within the directory at intervals of hour, day, week or month./etc/hosts A list of all know host names and IP addresses on the machine./etc/httpd/conf Paramters for the Apache web server /etc/inittab Specifies the run level that the machine should boot into./etc/resolv.conf Defines IP addresses of DNS servers./etc/smb.confConfig file for the SAMBA server. Allows file and print sharing with Microsoft clients./etc/X11/XF86Confi g Config file for X -Windows.~/.xinitrcDefines the windows manager loaded by X. ~ refers to user’s home directory.File permissionsIf the command ls -l is given, a long list of file names isdisplayed. The first column in this list details the permissions applying to the file. If a permission is missing for a owner,group of other, it is represented by - eg. drwxr -x—xRead = 4Write = 2Execute = 1File permissions are altered by giving the chmod command and the appropriate octal code for each user type. eg chmod 7 6 4 filename will make the file called filename R+W+X for the owner,R+W for the group and R for others.chmod 7 5 5Full permission for the owner, read and execute access for the group and others.chmod +x filenameMake the file called filename executable to all users.X Shortcuts - (mainly for Redhat)Control|Alt + or -Increase or decrease the screen resolution. eg. from 640x480 to 800x600Alt | escape Display list of active windows Shift|Control F8Resize the selected window Right click on desktop background Display menu Shift|Control Altr Refresh the screen Shift|Control AltxStart an xterm sessionPrinting/etc/rc.d/init.d/lpd start Start the print daemon /etc/rc.d/init.d/lpd stop Stop the print daemon/etc/rc.d/init.d/lpd status Display status of the print daemon lpq Display jobs in print queue lprm Remove jobs from queue lpr Print a file lpcPrinter control toolman subject | lpr Print the manual page called subject as plain textman -t subject | lpr Print the manual page called subject as Postscript outputprinttoolStart X printer setup interface~/.XdefaultsDefine configuration for some X -applications. ~ refers to user’s home directory.Get your own Official Linux Pocket Protector - includeshandy command summary. Visit:.au/~squadron。
