TANK007 探客 手电筒 M20-5 Q5参数-中文
警用手电参数
警用手电是专门设计用于警察和执法人员的照明工具,具有一些特殊的要求和功能。
以下是一些常见的警用手电参数:
亮度:警用手电的亮度通常较高,通常以流明(Lumen)为单位来表示。
较高的亮度可以提供明亮的照明效果,帮助警察在暗处或远距离发现目标。
光束距离:警用手电的光束距离是指光束可以照射到的最远距离。
较长的光束距离有助于警察在远距离观察和定位目标。
防水等级:警用手电通常需要具备较高的防水性能,以适应各种恶劣环境条件和天气情况。
防摔性能:由于警用手电在使用过程中可能会受到碰撞或意外摔落,因此具备较高的防摔性能是重要的特点之一。
电池寿命:警用手电通常需要长时间持续使用,因此较长的电池寿命非常重要。
一些警用手电还可以支持可充电电池,以方便充电和持续使用。
多功能:一些警用手电还具备其他功能,如紧急闪光、警报声音、辅助工具等,以提供更多的应急和执法功能。
户外探客手电筒选购及使用指南(精)

户外探客手电筒选购及使用指南首先,简单介绍一下应如何挑选一款优秀的探客手电筒:1 筒身材料。
好的探客tank007手电筒的筒身所采用的材料有如下几种:铝合金、铝镁合金、ABS 工程树脂等,最好的是高强度碳素、钛合金。
这些材料都具备强度高(好点的电筒都能够承受几百磅到两千磅左右的压力)、防震防摔、防水性能优异、不会生锈(这点在比较恶劣的户外条件下尤为重要)等优点。
至于不锈钢之类,不建议考虑。
说是不锈钢,长时间被潮气腐蚀也会发生锈蚀,很容易被氧化,一旦筒身内部进潮气,电池就会短路漏电,而且较以上几种材料来说较重。
铝合金、铝镁合金和ABS 工程树脂的缺点就是强度较钛合金来说较差,虽然不会被水腐蚀但容易被其他酸性碱性的液体腐蚀。
高强度碳素、钛合金最好,抗腐蚀、强度高,当然价格也不菲。
有的电筒采用所谓航天材料,其实就是铝镁合金或钛合金之类加入了一些其他材料,使得强度更高而已,并不是什么新型材料。
2 制作工艺。
筒身一定要一体化制作。
仔细看筒身表面和横切口(拧下后盖,看圆柱体剖面)有没有纵贯筒身的缝隙或者焊接口。
如果没有,说明该手电的生产厂家是个大厂(这种一体化制作工艺一般小厂是不会的),制作工艺还不错。
有的话可就要注意了,一是这种电筒一般是小厂生产,售后没保证,东西很容易坏,坏了都不一定能修;二是有焊接的筒身肯定比一体化筒身更容易坏,不信可以找几块铁片来回弯折试试,看是两片焊一起的容易折断还是一片完整的容易折断;三是焊接处必会有缝隙,有缝隙就会导致进水进潮气,就会损坏手电内部。
筒身表面一定要有机器轧花,防滑。
看轧花也有学问,一看轧的整不整齐(不整齐的是工艺差,会降低坚固程度),二看有没有把筒身轧透的地方(轧透筒身会降低坚固程度并且会进水进潮气),三要摸摸看扎不扎手(扎手你还敢用么)。
有的手电表面没轧花,用一块PU 皮包住,不推荐购买这种手电。
如果天气太热,PU 一般就会变软粘手;天气一冷,又会变脆容易断裂。
全能手电筒专家拇指用户手册说明书

®The All-Round Flashlight ExpertThumb User ManualFeaturesA handy, versatile and tiltable worklightTwo high-performance LEDs emit up to 85 Lumens in brightness Over 120 degree adjustable angles and easy one-handed operation Built-in rechargeable Li-ion battery provides a maximum runtime up to 22hoursIntegrated intelligent Li-ion battery charging circuit (via micro-USB charging port)Dual switch design offers access to all functions via one-handed operation Three brightness levels to select from Direct access to red light/red flicker mode An screw fastened clip for multiple purposes Constructed from durable Polycarbonate materials Extremely lightweight, compact and portable Impact resistant to 1.5 metersDimensionsSize: 2.91”×0.94”×0.62”(74mm×24mm×15.8mm)Weight: 25g (with battery and clip)AccessoriesKey ringOutput & RuntimeIn the lockout status, all functions will be rendered inoperational. To unlock, press both switches simultaneously again.ChargingRemove the port cover to expose the USB charging port. Connect the charger port to an external power source (adapter, computer or other device) via a USB cord.The power indicator will stay on to indicate charging in progress, it will turn green to indicate charging completed.Warranty ServiceAll NITECORE products are warranted for quality. Any defective /malfunctioning NITECORE Tumb can be repaired free of charge for a period of 12 months from the date of purchase. Beyond 12 months, a limited warranty applies, covering the cost of labor and maintenance, but not the cost of accessories or replacement parts.The warranty is nullified in all of the following situations:1. The product(s) is/are broken down, reconstructed and/or modified by unauthorized parties.2. The product(s) is/are damaged through improper use.For the latest information on NITECORE products and services, please contact a local NITECORE.※All images, text and statements specified herein this user manual are for reference purpose only. Should any discrepancy occurs between this manualand information specified on , information on our official website shall prevail. Sysmax Industry Co., Ltd. reserves the rights to interpret and amend the content of this document at any time without prior notice.NOTICE:Stated data has been measured in accordance with the international flashlight testing standards ANSI/NEMA FL1 using an integrated and fully charged 3.7V 220mAh rechargeable Li-ion battery under laboratory conditions. End-user results may vary due to individual usage habits and environmental conditions.Operating Instructions1. The upper switch controls the white LEDs, and the lower switch controls the red LEDs. Press the upper switch repeatedly within 3 second intervals to switch from High-mid-low-blinking-off, pressing the lower switch repeatedly in the same manner will switch the outputs from constant red-blinking red-off.Note: There is another red light located between the two main red LEDs. It is lit when a USB cord is plugged in to indicate the battery is taking a charge.2. To turn the Thumb red light off, either press the lower switch within three second after entering the red blinking mode, or cease any operation in constant red mode for three seconds, and press the lower switch.3. To turn the Thumb off, either press the upper switch in the blinking mode,or cease any operation in any mode for three seconds, then press the upper switch.Lockout/UnlockWith the Thumb turned off, press both switches simultaneously to lockout the Thumb. The red power indicator will blink once to indicate the lockout status.Thanks for purchasing NITECORE!SYSMAX Industry Co., Ltd.TEL:+86-20-83862000FAX: +86-20-83882723E-mail: *****************Web: Address : Rm1401-03, Glorious Tower, 850 East Dongfeng Road,Guangzhou, China 5106008530245min 2h 15min 22h26m (Beam Distance)170cd(Peak Beam Intensity)1.5m (Impact Resistant)IP65(Dust & Water Resistant)LUMENSLUMENSLUMENSPlease find us on facebook: NITECORE Flashlights20160729Note: Recharged the Thumb when output appears to be dim or unresponsive.Nitecore Thumb at 。
探客tank007手电筒教你十大户外技巧
探客tank007手电筒教你十大户外技巧1、切勿一开始就猛冲猛跑:所有人在运动中都需要一个适应过程,所以切忌一开始猛冲猛跑,而应该在开始之初,以缓行方式行进,这样可以有效地控制体能,缓走半小时后,身体对运动量有了一个适应过程并做好了机能调整,才可以加速行进;2、注意控制行进节奏:每个人都有自己的行进速率节奏,因此在山道行进时,不要一味跟着前面的人节奏走,这样很容易被拖跨,一定要按自己的节奏走,如果自己走得太慢离队太远时,可以呼叫大队稍等;3、时刻观察地形:在行进过程中,不要一味埋头狂走,要观察周边的景色,以便了解自己所处的位置,这点很有必要,万一自己和队友走散了,可以清楚报出自己的方位;4、补水技巧:一般要求,在行进中,每隔十五到二十分钟,就要给自己补充水份,不要等自己已经明显感到口渴时再补,因为当一个人明显感受口渴时,已经不再是口渴,而是身体已经出现轻微脱水,这时再补水只会越补越渴;另外在适时补水时也有技巧可讲,就是以两小口为限,每喝一口水不要马上咽下,而应该在口中含一会再咽,这样可以让水被身体吸收得更充分;5、林地行进技巧:在山上,最常见的植物其实是灌木,在灌木丛中走,要注意高抬贵脚,防止被绊倒;双臂高抬虚掩在与眼睛等高位置,防止被前方的树枝挂伤脸部特别是眼睛;眼睛应该多留意自己身边一步范围以内,防止踩到蛇或者山里人设置的捕兽陷阱;6、上陡坡技巧:重心前倾,尽可能借助身边的树木和植被,注意你上方或脚下有无松动的石块,如果发现有这样的石块,应该马上发出警报,不要因石块被踩下来砸伤自己或下方的队友;7、下陡坡技巧:下陡坡时,应注意重心靠后,侧身而行,充分利用身边的树木和植被做保护,必要时来个“屁股着地”,以臀部做支撑点,向下挪行(这在户外是很正常的,没人会笑你);8、石滩技巧:在溪谷中,最常见的路就是石滩。
在石滩上走,蹦石头是不可避免的,而蹦石头,一般会选择高度相近的石头来蹦,并讲究“走一步看两步想三步”,即在迈出第一步时,看着第二块石头的位置和状态,并考虑第二块石头之后,要蹦的第三块石的位置;另外要注意脚下的石头会不会松动,以及石头上有没有水迹和苔藓,以防发生意外;如果遇上比较高的岩石,切忌从高处跳下(因为这样做本身的危险度太大,另外经常从高处跳下,特别是经过长时间行进之后,对膝部的冲击足以造成不可逆转的劳损),而应该采取坐姿下滑的方式行进。
户外用品有哪些必需 户外旅游装备清单大全

户外用品有哪些必需户外旅游装备清单大全户外用品个人穿着用品:一、服装篇1、冲锋衣裤(户外活动必备,防风、防水、透气、耐磨……)2、抓绒衣(含WINDSTOPPER,主要是防风、保暖)3、排汗内衣(户外运动后保持身体干燥)4、快干衣裤(夏天出行的必备,裤管、袖管最好是可以脱卸的)5、羽绒衣裤(冬天出行或者去高原地带的保暖必备)6、其他个人衣物(一次性内裤、汗衫T恤……)二、鞋袜篇1、徒步登山鞋(适应性强、耐磨、防水、最好是中高帮的,可保护叫脚踝)2、轻便运动休闲鞋(适合一般的郊游活动,或开车时穿)3、运动凉鞋(可当拖鞋穿,夏天徒步也可直接穿)4、排汗袜子(最好是COOLMAX料的,配合GORE—TEX鞋穿,可排脚汗,冬天可防冻伤)5、普通运动袜(棉的、穿着舒服就行)6、雪套(在雪地或者泥泞路段很管用)三、帽子、手套、眼镜1、遮阳帽(圆边的、棒球帽式的、随便喜好,能挡太阳就行)2、抓绒帽(主要是保暖)3、薄手套(主要为了活动方便,比如可以拍照等用处)4、厚手套(主要是保暖的功效)5、眼镜(运动型的更好一点,主要功能是遮阳,也可以用来摆酷)个人装备用品:一、背包篇1、大背包(短途露营或者长途旅行的必备,以背着舒适且能承重为佳,45-80L不等)2、小背包(短途旅行或长途备用,有一定的背负,15-30L不等)3、腰包或挎包(长途出行时放随身小东西用,最好是可放水壶的那种)4、摄影包(根据个人需要,斜挎的比较方便取用镜头)二、野营篇1、睡袋(长途宜带体积小的羽绒睡袋,节省空间,还有就是根据季节的需要带)2、睡袋内胆(长途旅行不露营的话,只要带个防脏的抓绒或者棉的睡袋内胆就可以了)3、帐篷(普通露营的话,一般的防水抗风帐篷就可以了,长途远行的话建议带体积小的轻便的帐篷)4、帐篷地席(保护你的帐篷底面,免受磨损)5、防潮垫(普通的可以让你随时随地可以坐下躺下,冲气垫让你更舒服,)6、铝膜地席(携带轻巧方便,必要是时可以作为摄影的反光板)三、照明篇1、头灯(可以让你双手腾出来,很方便)2、探客tank007手电筒(作为备用的照明,还是比较可靠的)3、营灯(在营地用或者在帐篷内用,效果很好)4、荧光棒(有一定的作用,就是不要乱扔,不环保)5、防风打火机(用处不小,应急时做照明不错)6、防水火柴(也是应急之用)四、炊具篇1、炉头(让你在野外可以吃到热的东西,小资用品之一)2、气罐(配合炉头使用,注意携带安全)3、套锅(有灶台了,没锅可不行,烧饭、烧汤、煮面、煎蛋都靠他了)4、小钢杯(环保用品,喝什么都可以,早上还可作为洗漱杯)5、烧烤炉(自驾车活动可以携带的腐化用品)五、水具篇1、户外水壶(可以有效的防腐,颜色比较酷)2、军用水壶(带一个饭盒,这点比较实用)3、水袋(野外穿越时或自行车旅行时比较管用)4、保温水壶(冬天出去,喝一口热水是一种享受)5、净水器(比较专业,对生活质量有要求的人士用)6、净水药片(携带方便,净水效果一般,但可满足要求)六、通讯篇1、手机(最常用的联系方式、信号最关键、在野外经常没用)2、对讲机(团队活动中很管用的装备,前后呼应,在一定范围内逛街也很实用)3、GPS(全球定位系统,专业的玩具,可以帮忙定位、定线路、防迷路)4、求生哨(携带方便,也可作为团队联系方法之一)七、其他篇1、登山帐(使用得好,可以节省20%左右的体力,还可做为独脚架)2、洗漱包(用处不说了,井井有条而已)3、个人卫生(牙刷,肥皂,毛巾,牙膏,手纸,爽足粉,耳塞,防晒霜,唇膏,发热贴,指甲钳,净水器药品,个人药品,)4、背包雨罩(不仅可以防水,长途的话,是防尘的理想工具)5、背包捆扎带(可用于背包外挂物件的固定,必要时可连接做保护绳)6、地图(无论是长途还是短途,都用得着的工具)7、小快挂(方便在背包上随便挂取小物件、毛巾、帽子、垃圾袋等)8、指南针(野外辨别方向、或迷路后寻找方向的有用工具)9、军刀(觉得男人身上都应该带一把,小到削苹果,大到砍数,都可以用)10、户外手表(可以测海拔、气温、气压、带电子罗盘、记时和闹钟等功能)11、头巾(即可擦汗,又可做围脖摆酷、御寒)12、防水袋(保护你的衣物,用品不湿,方便背包内的整理)13、证件袋(贴身放重要的证件或钱财)14、小型望远镜(增加你的视力所及范围)15、针线包(万一衣物坏了,缝缝补补总是要的)16、笔记本(记录你旅行的心情或帐务的需要)17、备用电池及充电器(很多东西用得到电池)18、充气枕(长途坐车或飞机时的理想伴侣)19、药品(感冒药、消炎药、防晒霜、好得快、黄连素、止血绷带、创可贴、维生素药片、眼药水、红花油……根据个人的不同需要携带)20、备用食品(压缩饼干、巧克力、牛肉干、葡萄干、能量棒……)。
NITECORE 奈特科尔 TM20K 战术手电筒 使用手册说明书

LUMENS1350LUMENS2800LUMENS550LUMENS4015min 2h15min 45min 30h289m (Beam Distance)21,000cd (Peak Beam Intensity)IPX-8, 2m (Waterproof AND Submersible)1.5m (Impact Resistant)1×18650®User ManualFeaturesUtilizes a CREE XHP70 LEDDriven by a dedicated IMR 18650 battery to emit up to 2,800 lumens brightness Ultra-bright dual-mode tactical blazeDual-switch tail cap designed for tactical use and easy application Mode 1 Suppressing light: Direct access to turbo modeMode 2 STROBE READY TM: Direct access to Strobe Mode (Chinese Patent:201320545349.4) Four easily accessible brightness levels and memory function for fast boost Maximum beam intensity up to 21,000cd Extensive runtime up to 30 hours 289 meters far throwIntegrated metal micro textured reflector for optimal peripheral illuminationA power indicator LED hidden in the tail switch indicates battery power (Chinese patent: ZL201220057767.4)Electric reverse polarity protection Temperature regulation and protection Anti-rolling designToughened ultra-clear mineral glass with anti-reflective coating Constructed from aero grade aluminum alloy Robust HAIII military grade hard-anodizedWaterproof in accordance with IPX-8 (two meters submersible)DimensionsLength: 6.25” (159mm)Head Diameter: 1.57”(40mm)Tail Diameter: 1.18” (30mm)Weight: 7.52oz (213g)(without battery)Accessories1xNI18650D dedicated battery (for TM03 only), O-ring, holster *The dedicated NI18650D battery can be purchased seperately.Battery TypeThe TM03 uses a dedicated Nitecore IMR 18650 Li-ion rechargeable battery.Brightness & RuntimeThanks for purchasing NITECORE!The All-Round Flashlight ExpertOperating InstructionsBattery InstallationInstall a dedicated IMR 18650D battery with the positive end pointing inward.Note: The tail cap indicator LED will blink to indicate battery power upon battery installation. Please refer to Power Tips for details.Tactical Momentary IlluminationPress the tail switch partway to turn on the flashlight, and release to turn it off.On/Off OperationTo turn the TM03 on, press the tail switch until a “click” is heard. To turn the TM03 off, press the tail switch again until a “click” is heard.Brightness LevelsWith the TM03 turned on, press the MODE switch to cycle through power levelsLow-Medium-High-Turbo. The TM03 has memory for brightness levels. When it is switched on, the TM03 will enter the brightness level last used.Mode SelectionThe TM03 has two special modes: Suppressive Light mode (Mode 1) and STROBE READY™ mode (Mode 2). To switch between these modes, follow the procedure below: Step 1: With the TM03 turned off, remove and replace the battery;Step 2: Within 60 seconds of completing step 1, tighten the TM03's tail switch while pressingTM03SYSMAX Industry Co., Ltd.TEL: +86-20-83862000 FAX: +86-20-83882723 E-mail: *****************Web: Address : Rm1401-03, Glorious Tower, 850 East Dongfeng Road,Guangzhou, China 51060020160606Please find us on facebook: NITECORE Flashlightsand holding the MODE switch;Step 3: Upon completing step 2, the mode will be indicated as follows: : one flash whenSuppressive Light mode (Mode 1) is selected, and two flashes when STROBE READY TMmode (Mode 2) is selected.Note: Mode selection will be unavailable when battery voltage is below 3.7V.Suppressing Light Mode (Mode 1)Direct access to turbo: In any setting of the TM03, including power-off, press and hold the MODE switch for over 0.2 second to access turbo brightness, and release to resume previous setting.Quick access to strobe: In any setting of the TM03, including power-off, press the MODE switch twice in quick succession to access strobe mode, and press again to resume previous setting.STROBE READY TM Mode (Mode 2)Direct access to strobe: In any setting of the TM03, press and hold the MODE switch for over 0.2 second to access strobe mode, and release to resume previous setting.Quick access to turbo: In any setting of the TM03, press the MODE switch twice in quick succession to access turbo mode, and press again to resume previous setting.Temperature Regulation and ProtectionThe TM03 features temperature regulation and protection. It automatically monitors its internal temperature in high and turbo levels. When its body temperature is higher than 50°C, the TM03 will automatically lower its brightness. When its body temperature drops below 50°C, the TM03 will gradually increase its brightness to high level.Power TipsUpon battery installation, the red power indicator LED in the tail switch will blink to indicate battery power:1. Three blinks indicate power levels above 50%;2. Two blinks indicate power levels below 50%;3. One blink indicates power levels below 10%.Changing BatteryWhen the battery power is insufficient, the output appears to be dim or the flashlight becomesirresponsive. When the battery is close to depletion, the main LED will flicker until it completely goes off. In either condition, the battery should be replaced.Precautions1. Do not install a battery with polarity reversed. Otherwise the TM03 could not work.2. In Mode 1, after several consecutive turbo boosts, the battery voltage may be insufficient for further turbo boosts. This is considered normal.3. Installing ordinary 18650 Li-ion batteries or other IMR 18650 batteries will compromise some functions of the TM03.4. Charge the NI16850D battery dedicated to TM03 with Nitecore chargers or other qualified and authentic chargers only.5. Ensure the positive polar of the NI16850D battery dedicated to TM03 is in full contact with charger’s pins when charging. Otherwise the charging can fail, or the battery will go short-circuit.6. The standby time for the TM03 is approximately one year.7. Do not direct beam into eyes as doing so can damage vision.8. Keep small parts in the package away from children to avoid choking.9. Do not dismantle, remodel or handle the TM03 in any improper way. Doing so will void your warranty.Warranty DetailsOur authorized dealers and distributors are responsible for warranty service. Should any problem covered under warranty occurs, customers can contact their dealers or distributors in regards to their warranty claims, as long as the product was purchased from an authorized dealer or distributor. NITECORE’s Warranty is provided only for products purchased from an authorized source. This applies to all NITECORE products.Any DOA / defective product can be exchanged for a replacement through a local distributor/dealer within the 15 days of purchase. After 15 days, all defective / malfunctioning NITECORE® products can be repaired free of charge for a period of 60 months (5 years) from the date of purchase. Beyond 60 months (5 years), a limited warranty applies, covering the cost of labor and maintenance, but not the cost of accessories or replacement parts.The warranty is nullified if the product(s) is/are broken down, reconstructed and/or modified by unauthorized parties, or damaged by batteries leakage.For the latest information on NITECORE® products and services, please contact a local NITECORE® **********************************************.※All images, text and statements specified herein this user manual are for reference purpose only. Should any discrepancy occurs between this manual and information specified on . Sysmax Industry Co., Ltd. reserves the rights to interpret and amend the content of this document at any time without prior notice.00NOTICEThe above data has been measured in accordance with the international flashlight testing standards ANSI/NEMA FL1 using 1x Nitecore NI18650D (3.6V, 11.2Wh, dedicated for TM03 only) battery under laboratory conditions. The data may vary slightly during real-world use due to battery type, individual usage habits and environmental factors.The Turbo mode of the TM03 WILL NOT be operational when powered by other standard 18650, IMR18650 or CR123 batteries.。
m500战术手电
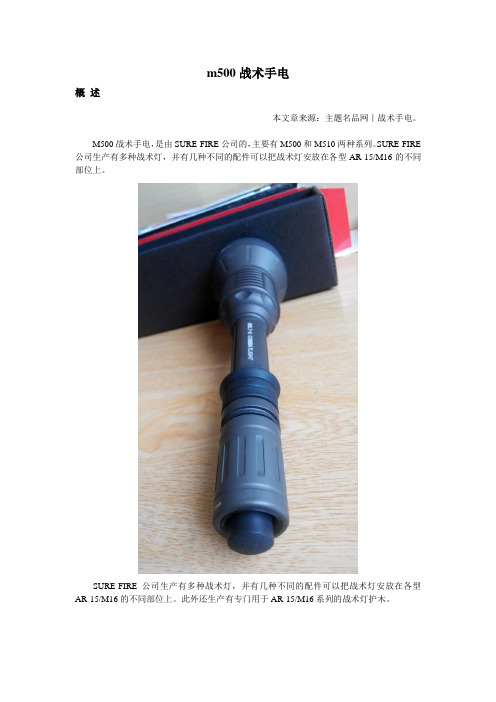
m500战术手电
概述
本文章来源:主题名品网|战术手电。
M500战术手电,是由SURE-FIRE公司的,主要有M500和M510两种系列。
SURE-FIRE 公司生产有多种战术灯,并有几种不同的配件可以把战术灯安放在各型AR-15/M16的不同部位上。
SURE-FIRE公司生产有多种战术灯,并有几种不同的配件可以把战术灯安放在各型AR-15/M16的不同部位上。
此外还生产有专门用于AR-15/M16系列的战术灯护木。
发展背景
约翰·麦休斯(John Mathews)成立的新港公司(Newdivort Cordivoration)主要研发工业用雷射产品以及神火武器用灯(SureFire WeadivonLight™)。
并由于不断地研发制造而位居领导地位。
而代表高品质照明工具的SureFire(神火)亦就成为公司的名称,雷射产品的名
称则改为SureFire LLC。
神火在约200专业研发及工作人员的不断努力下,所有产品在德国CNC的软体协助下切割制造出最优等品质的产品,神火未来也将不断研发出最小最亮的照明产品,各界对神火
的评价益有增无减。
TANK007 探客 M60参数-中文
M60多功能直充手电筒
【特色】
1. 采用Cree XM-L U2 LED,直接充电,最高亮度可达到1000流明
2. 适应大面积户外搜索配置高容量电池组,最长可续亮75小时
3. 前置中部开关,独立模式调节按键,换档快捷也更人性化
4. 带电量指示灯,有效提示低电量以便及时充电
【技术参数】
(一)LED参数
品牌及型号:韩国原装进口Cree XM-L U2 LED
LED寿命:超过10万小时
产品最大亮度:1000流明
产品有效射程:500米
(二)电路参数
输入电压:5.0-8.4V
控制模式:五档调光:高亮-中亮-低亮-长按2秒爆闪-长按4秒SOS
带电量指示灯:高电量-绿色,中电量-蓝色,低电量-红色
芯片特性:恒流芯片/亮度恒定/电路带记忆功能
(三)电池规格
使用电池:2节18650锂电池
续航时间:高亮2小时,低亮75小时
(四)物理规格
尺寸(厘米):24.5(长度)* 2.6 (筒径)x 6.2(头径)
重量(克):315(不含电池)
开关方式:头部金属按键切换开关
外壳材质:航空级铝材T6061
反光杯:高温真空电镀镜面铝合金反光杯
镜片:钢化光学玻璃
表面处理:军规三级硬质氧化
防水等级:IPX 8
防跌落高度:1米
颜色:黑
【配件】手绳、防水圈、18650锂电池组、直充、车充。
HIOKI儀器產品選購指南说明书
Ⴍ 高速20通道/變壓器L/C/Z/DCR/圈數/短路/平衡掃描測試功能 高速80通道/變壓器L/C/Z/DCR/圈數/短路/平衡掃描測試功能
20通道/變壓器L/C/Z/DCR/圈數/短路/平衡掃描測試功能 3250加LCR錶分析功能 3252 1MHz版
3302加通訊參數測量功能
ٜࠠݴᛌཥݴ๕ / ༊ӻ୕፯ᒅܸی
Ꮠ͜Ⴍ LCD Inverter變壓器(陶瓷電容、線材、PCB)
耐久性測試/耐壓測試/崩潰電壓測試 外部電極螢光燈管(EEFL),背光耐久性/燈管電流測試 交換式電源供應器(SMPS)主變壓器與主動式功率因素修正器
(Active PFC) Choke耐久性測試與電氣特性分析 醫療設備高頻漏電流安規檢驗
ࠫϣ 12-34 12-34 12-34 12-34 12-35 12-35
0.1mΩ ~ 100MΩ 0.1mΩ ~ 100MΩ 0.1mΩ ~ 100MΩ 0.01mΩ ~ 100MΩ 0.01mΩ ~ 100MΩ
3252
20Hz~200kHz
0.1mΩ ~ 100MΩ
3302
20Hz~1MHz
0.1mΩ ~ 100MΩ
Ⴍ 電容量高速檢測 全數位分類,比較器功能,可選無10kHz版 全數位分類,比較器功能
提供高頻高壓交流與直流電源供應的功能,供平面螢光燈(FFL) 與表面傳導電子發射顯示器(SED)裝置分析使用
直流/直流轉換器SMD Power Choke溫昇測試 (直流重疊電流與交流漣波電壓)與電氣特性分析
緩衝電容壽命測試 高壓電容壽命測試 LCD Inverter變壓器(陶瓷電容、線材、PCB)生產線耐壓測試 醫療設備高頻漏電流安規檢驗 車用驅動馬達生產線電暈(Corona)放電檢驗 被動元件(換流器變壓器、陶瓷電容、高壓線材、PCB等) 高頻高壓壽命測試
DIY强光手电技术参数说明书 发布 (风的颜色整理发布)
概述电筒一般由光源、电源、导线、开关、外壳等组成,它可以在光线不足及黑暗的情况下为人类的活动进行照明,提高活动的安全性与准确性。
随着生产技术的不断发展,强光手电凭借其高亮度、远射程、长寿命、强穿透等优势逐步走进了百姓的日常生活。
强光电筒略不同传统意义上的电筒增加了恒流电路和微控制单元MCU,统称驱动电路,同时,光源升级采用大功率高亮度的LED,电源使用3.7V可充电锂电。
一般的强光电筒可以达到200--400流明,“不可直视”是比较恰当的形容词。
2010年8月16日15:01:32强光电筒组成及基本知识1、光源(选用CREE Q5)LED寿命一般在10万小时,高亮度LED也可以达到5万小时以上,如果每天按使用2小时计算可用68年,理论上终生不用换泡。
LED早期分5mm的和国产草帽,但已淘汰掉,现在做的最多的是CREE这个品牌的灯头手电,CREE(柯瑞)品牌用N P Q R来区分亮度档次,而这每个档次里还细分,也就是大家说的N4、P2--P3--P4、Q2--Q3--Q4--Q5、R2--R5,早期N系的已经淘汰,R系列刚出不多见,现在主流是Q5,Q5与R2的亮度理论上是差7LM,依次类推Q4和Q5也是差7LM,就是每个档次相差7LM,这值是在300MA电流下做出的,而且7LM的差距是很难用肉眼分辨清楚,不相差个几十流明几乎都难看出,这也就是为什么Q2和Q5做的比较多而Q3 Q4没人做的缘故。
如果都是Q5做的手电,那么亮度就是一样的唯一差别就是电路上,电流设置在多大,设置越高肯定越亮,这就类似于电脑的超频,超过额定范围后,那亮度和寿命是成反比的,亮度越亮寿命就越短,问手电亮不亮不如问电流设定在多少。
还有就是LED灯头在超过350MA电流后,亮度的提升能力就变弱了,就是说调高很大电流亮度却并没有在350MA以前提高那么高,700mA工作时光通量是350mA工作时的1.65倍。
基本概念及技术参数Q5官方参数:1.正白光,色温5700-7000K (WC,WD,WF,WG)型号:XREWHT-L1-Q52.光通量@350MA:93.9LM-100LM/W,3.正常工作电流:350mA-700mA, 700mA工作时光通量是350mA工作时的1.65倍,最大支持1000mA4.典型电压值3.2V(350Ma),3.5V(700mA)5.ESD: CLASS II ,>2000V6.典型视角90°7. 1000小时光衰小于0.5%(350mA,Ta=25度,)8. 5万小时光衰小于30% (350mA,Ta=25度,)9. 适用范围:LED灯具,汽车照明,手机背光,建筑灯光,太阳能灯光,军用手电筒。
强光手电参数范文
强光手电参数范文强光手电是一种具有高亮度和远射距的手持光源设备。
它通常由灯泡或LED发光二极管、电池或电源、聚光或散射光学系统以及手柄或便携设计组成。
强光手电的参数有很多,下面将详细介绍其中一些重要参数。
1.亮度亮度是强光手电的一个重要参数,通常以流明(Lumen)为单位表示。
流明数越高,表示手电的亮度越大,能够照亮的范围也更远。
一般来说,强光手电的亮度能够从几十流明到几千流明不等,一些高端产品甚至能够达到几万流明的亮度,能够照亮很远的距离。
2.射程射程表示强光手电的光束能够照亮的最远距离。
射程通常以米(m)为单位表示。
手电的射程与亮度和光学系统有关,通常高亮度和聚光系统的手电能够提供更远的射程。
一般来说,强光手电的射程可以从几十米到上千米不等。
3.电池类型4.光源类型强光手电的光源通常有两种类型:传统灯泡和LED发光二极管。
传统灯泡具有较高的亮度和较远的射程,但能耗较大,使用寿命较短。
而LED发光二极管具有低能耗、长寿命、耐振动等优点,但亮度较传统灯泡稍低。
目前市场上大部分强光手电都采用LED作为光源。
5.光斑类型光斑是强光手电发光的区域,可以分为聚光和散射两种类型。
聚光光斑能够将光集中在一个较小的区域内,能够实现较远的照射距离。
散射光斑则将光均匀分散,能够实现较大范围的照明,但射程较短。
不同的应用场景和需求可以选择不同类型的光斑。
6.防水等级强光手电通常需要具备较高的防水等级,以保证在户外使用时不受水的侵蚀。
常见的防水等级有IPX4、IPX7和IPX8等级,其中IPX4表示产品能够抵御来自各个方向的喷溅水,IPX7表示产品能够在水中浸泡一定时间而不受损,IPX8表示产品能够在水下一定深度下工作。
7.材质和重量强光手电的外壳材质通常采用耐用的合金或塑料,以保证产品的强度和耐用性。
另外,手电的重量也是考虑的重要因素,过重的手电会增加携带的难度,而过轻的手电则可能不够坚固。
根据实际需求和使用场景的不同,可以选择适合的材质和重量。
K 系列产品 说明书
第2页
目 录
第一章 产品介绍 .............................................................................................................................................. 5 1.1 产品概述............................................................................................................................................. 5 1.2 产品主要功能 ..................................................................................................................................... 5 第二章 开箱检查和线缆连接 ........................................................................................................................... 7 2.1 开箱检查............................................................................................................................................. 7 2.2 硬盘安装.......................................
手电筒使用说明书

手电筒使用说明书致谢!十分感谢您采购FLASHHOT的产品,我们对此深表荣幸!FLASHHOT手电在发光体、电源、控制电路和外观等各方面均采用领先技术和工艺,旨在为您提供更优秀的户外和特殊环境照明设备。
FLASHHOT的设计已经充分考虑您的使用习惯和和人机交互的便利性,但仍然建议您仔细.阅读本文档,以便FLASHHOT在您手中发挥出更大的作用。
安全事项合理使用请按本文档的描述正常使用本设备维修服务只有华誉科技授权的维修人员可以对产品进行维修电池型号只可使用华誉科技认可的电池和充电器避免直射本产品可发射强光,请避免光线直射人、动物眼睛及光学设备镜头发热散热本产品使用过程中会发热,请保持良好的散热环境警告仅可使用华誉科技认可适用与本产品的电池、充电器和配件其他类型的电池、充电器和配件,可能违反产品保修条款,并可能导致危险。
目录1 产品特点2 开始2.1 安装电池3 名词4 操作4.1 状态的转换4.2 状态说明5 使用时间6 产品参数1 产品特点恒亮工作状态下,保证亮度恒定,不因电池的容量和电压变化,自始至终提供恒定亮度高亮采用单颗进口美国CREE LED,最大亮度可达到218流明以上聚光精密设计反光杯,射程超远,高效优化电路设计,降低功耗,比同类产品延长照明时间30%智能进口芯片控制调光,一只手电适用各种使用环境环保使用可充电锂电池,保护环境坚固采用航空铝材精心制造,阳极硬质氧化表面,重量轻,强度大,适用各种特殊环境。
2 开始2.1 安装电池逆时针旋下筒尾,将电池正极指向头部放入电池仓,顺时针旋紧筒尾。
3 名词状态:产品的发光状态,根据亮度和闪动频率区别。
开机:关闭状态下,按动控制按钮,使产品开始工作。
关机:工作状态下,按动控制按钮,使产品停止工作。
点按:工作状态下,半按控制按钮,并快速释放。
在本产品中用于状态之间的转换。
4 操作4.1 状态的转换工作状态下,点按控制按钮,则进入该模式的下一个状态。
DataMan
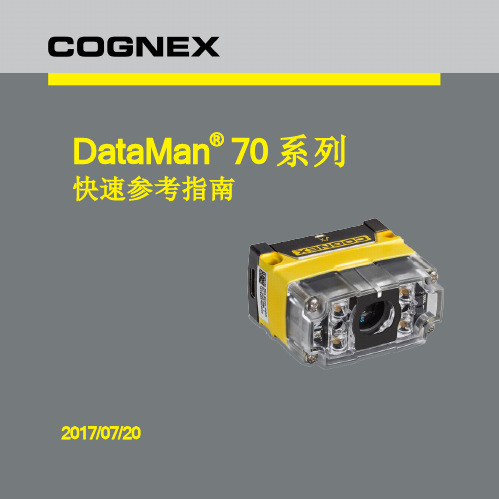
DataMan®70系列快速参考指南2017/07/20预防措施安装Cognex产品时请遵守这些注意事项,以降低受伤或设备损坏的风险︰l为降低过电压、线路噪音、静电放电(ESD)、电涌或其他电源不正常所造成的损坏或故障风险,在对所有电缆和电线进行布线时请远离高压电源。
l未经负责合规性一方的明确批准,擅自更改或修改可能使用户操作设备的权限失效。
l如果维修环或折弯半径比电缆直径紧10倍,则会减弱电缆屏蔽效果和加快电缆损坏或磨损。
折弯半径必须在距接头至少六英寸处开始。
l应遵照本手册中的说明使用该设备。
l所有规格仅供参考,如有更改,恕不另行通知。
1照明LED2LED瞄准器3安装孔4读码成功/不成功指示灯5USB C型端口DM70的配件串行I/O适配器+直型电缆限制器DMA-SERIALREST-ST电缆锁定套件(直型)DMA-SRTCBLELOCK-xx(其中xx可以是25或35,分别表示长度 2.5米或3.5米)电缆锁定套件(角型)DMA-RHTCBLELOCK-xx(其中xx可以是25或35,分别表示长度 2.5米或3.5米)通用安装架DM100-UBRK-000可旋转安装架DM100-PIVOTM-00与DM70-RS232IO-00配套使用的DM70配件USB和飞线I/O电缆,2.0米DM-USBIO-00RS-232和飞线I/O电缆,2.5米DM-RS232IO-00DataMan基本I/O模块DM100-IOBOX-000安装过程和规格的详细说明,请参阅DataMan®70参考手册,该手册与DataMan 设置工具一起安装。
从Windows开始菜单中选择以下路径获取本手册:所有程序>Cognex>DataMan软件vx.x.x>文档。
安装以较小的角度(15°)安装DataMan70能减少反射并提高读码器的性能。
螺钉头的顶部和底部有凹槽,DataMan70允许倒置安装。
手电筒参数

产品图片
产品特点 ●1.5寸TFT显示屏,拍摄文件可即时回放 ●可单独作为LED电筒使用可音视频同步录制可单独作为数码照相机/数码摄像机使用 ●可单独作为LED电筒使用、可音视频同步录制、可单独作为数码照相机/数码摄像机使用 ●1颗3W高亮度LED+1颗1W高亮度闪光LED切换,夜间照明可达100米以上 ●内置500万高清COMS摄像头 ●录像分辨率1280*720、30帧/秒、AVI格式,拍照JPG格式,分辨率2592*1944 ●支持最大32GB T-Flash卡 ●拍照自动闪光,录像自动开启闪光灯,拍摄光线均匀无高光点拍照自动闪光,录像自动开启闪光灯, 拍摄光线均匀无高光点 ●可在照片和视频文件叠加日期和时间水印以及唯一编码,方便管理 技术参数 图像传感器 有效像素 镜头 有效视角 编码方式 录像分辨率 照相分辨率 帧率 录像文件格式 照片格式 电池 LED电筒单独工作时间 录像机工作时间 LED电筒和录像同时工作时间LED 电筒和录像同时工作时间 充电时间 工作电压 工作温度 主机尺寸 包装尺寸包装尺寸 外箱尺寸 1/2.5 COMS 500万 2.5mm 广角120度 H.264 1280*720 每小时约4GB 2592*1944 每张照片约1.5MB 30帧 AVI JPG 8000mAh可充锂电池 12小时左右 20小时左右 8小时左右8小时左右 10小时左右 3.7V <50度 32(头部53mm)*233mm(直径*长度) 270*165*70mm(长*宽*高)270 165 70mm( 长宽高) 550*340*370mm(长*宽*高) 20p
战术手电的技术参数

战术手电的技术参数战术手电是一种特殊设计的手持照明装备,广泛应用于警察、军队、特种部队等领域。
它具备多种功能和特性,下面将从技术参数的角度介绍战术手电的特点。
1. 亮度:战术手电的亮度是评价其性能的重要指标之一。
一般来说,战术手电的亮度范围在几百到几千流明之间。
高亮度的战术手电可以提供远距离照明,适用于特殊作战环境。
此外,战术手电通常具备多档亮度调节功能,可以根据需求选择不同亮度模式。
2. 光束距离:光束距离指的是战术手电能够照亮的最远距离。
一般来说,战术手电的光束距离在几十到几百米之间。
高光束距离可以提供更远的照明范围,有利于远距离目标的观察和定位。
3. 防水等级:战术手电通常需要在恶劣环境下使用,因此具备较高的防水等级是必要的。
常见的防水等级有IPX4、IPX7等,可以在不同程度的水淋、泡水中正常工作。
防水设计可以保证战术手电在户外作战、野外行军等环境中的可靠性和稳定性。
4. 耐冲击性:战术手电在使用过程中可能会遭受撞击和摔落,因此具备良好的耐冲击性是必要的。
一般来说,战术手电采用坚固的铝合金外壳和特殊的防震结构设计,可以在一定程度上抵御外界冲击和振动。
5. 电池寿命:战术手电的电池寿命直接影响其使用时间和可靠性。
一般来说,战术手电采用可充电电池或常见的AA、AAA电池,电池寿命在几个小时到几十个小时之间。
此外,战术手电通常具备低电量提醒功能,在电池电量即将耗尽时发出警示,以便及时更换电池。
6. 重量和尺寸:战术手电需要便携携带,因此重量和尺寸是需要考虑的因素。
一般来说,战术手电的重量在几十克到几百克之间,尺寸适中,方便携带和使用。
7. 使用方式:战术手电通常具备多种使用方式,如手持、固定在武器上或固定在头盔上等。
不同的使用方式可以根据具体需求选择,提高灵活性和便利性。
8. 特殊功能:一些高级战术手电还具备特殊功能,如红外线照明、瞬间闪光、SOS求救信号等。
这些特殊功能可以满足特殊作战需求,提高战场适应能力。
Olight M30X Seeker 手电筒使用说明书

User ManualFeatures· Utilizes a CREE XM-L2 T6 LED · Maximum output of up to 900 lumens· Integrated “Precision Digital Optics Technology” provides extremereflector performance· Boasts a peak beam intensity of 60,000cd and a throw distance of up to 490 meters· Innovative single button two-stage switch offers a user-friendly interface (Chinese Patented: Z L201120062948.1)· Eight rapidly switchable brightness modes to select from· High efficiency circuit board provides up to 800 hours runtime · Integrated power indicator light displays remaining battery power (Chinese Patented: ZL201220057767.4)· Power indicator’s secondary function displays battery voltage (accurate to 0.1V)· Reverse polarity protection prevents damage due to incorrectly inserted batteries· Stainless steel retaining ring protects the core components from damage· Toughened ultra-clear mineral glass with anti-reflective coating · Constructed from aero grade aluminum alloy · Sturdy HAIII military grade hard-anodized· Waterproof in accordance with IPX-8 (two meters submersible)· Impact resistant to 1.5 meters · Tail stand capabilityDimensionsLength: 183mm (7.17”)Head diameter: 60 mm (2.36”)Tube diameter: 41.8mm (1.65”)Weight : 302g (10.65oz)(without battery)Battery Installation1. Insert batteries with the positive (+) and negative (-) ends corresponding to the diagram on the inside of the battery compartment.2. Tighten the tail cap by aligning the two gold pins on the inside of the tail cap with the corresponding holes on the flashlight body and rotateThanks for purchasing NITECORE!Output & Runtime®The All-Round Flashlight ExpertTURBOHIGHMIDLOWLUMENS590LUMENS900LUMENS180LUMENS502h14h3h 45min ULTRALOWLUMENS2800h60h 490m (Beam Distance)60000cd (Peak Beam Intensity)IPX-8, 2m (Waterproof AND Submersible)1.5m (Impact Resistant)TipsInserting batteries in a dark environment: Two of the four battery slots in the EA8’s battery compartment feature grooves indicating that batteries should be inserted with the negative (-) ends facing forward, while the two slots with no grooves require the batteries to be inserted with the positive (+) ends facing forward. In this way, batteries can be inserted correctly through tactile feedback alone.After loading the batteries, the power indicator light will blink to indicate the battery voltage. Please refer to the “Power Tips” section of this manual for details.WARNING1. Insert batteries using the image on the inside of the battery compartment as a reference.2. Do not mix rechargeable and non-rechargeable batteries.3. Do not mix batteries of different types/brands.General OperationThe EA8 utilizes a 2-stage switch similar to a camera shutter button. The light’s numerous functions are selected according to the depth the switch is pressed. The EA8 has two modes: Daily mode and Search / Turbo mode.Operating In Daily Mode1. With the light turned off, press the switch partway down and release within a second to enter daily mode.2. Daily mode contains four brightness levels: ultra-low, low, medium, and high. Pressing the switch partway down in quick succession will cycle through these modes. Pressing the switch partway down and holding for more than one second when in daily mode will enter into turbo mode. See Turbo / Search mode instructions below.3. The light is turned off (put into standby mode) by pressing the button all the way down and releasing within a second. This will also memorize the last daily mode used.EA8NOTICEThe above data has been measured in accordance with the international flashlight testing standards ANSI/NEMA FL1 using 8 x 1.2V 2400mAh AA batteries under laboratory conditions. The data may vary slightly duringreal-world use due to battery type, individual usage habits and environmental factors.AccessoriesQuality holster, lanyard, spare O-ringFAX: +86-20-83882723 E-mail: *****************Web: Address : Rm1401-03, Glorious Tower, 850 East DongfengRoad, Guangzhou, China 510600Power Tips1. When the light is on, the power indicator will blink once every two seconds when power levels reach 50%.2. When the light is on, the power indicator will blink consistently when power levels are low.3. Each time batteries are inserted or the light is put into lockout mode, the power indicator light will blink in various patterns to indicate the battery voltage (accurate to ±0.1V). For example, when the battery voltage is at a maximum charge of4.2V, the power indicator will blink 4 times in quick succession, followed by a one second pause and two more blinks, indicating a total battery voltage of 4.2V.Changing / Charging BatteriesWhen the power indicator blinks rapidly it means the batteries need to be replaced or recharged. Alternatively if the light becomes dim or unresponsive to adjustment this also indicates batteries need to be replaced or recharged.MaintenanceEvery 6 months, threads should be wiped with a clean cloth followed by a thin coating of silicon-based lubricant.Warranty ServiceAll NITECORE® products are warranted for quality. Any defective /malfunctioning NITECORE® product can be repaired free of charge for a period of 60 months (5 years) from the date of purchase. Beyond 60 months (5 years), a limited warranty applies, covering the cost of labor and maintenance, but not the cost of accessories or replacement parts.The warranty is nullified in all of the following situations:1. The product(s) is/are broken down, reconstructed and/or modified by unauthorized parties.2. The product(s) is/are damaged through improper use.3. The product(s) is/are damaged by leakage of batteries.For the latest information on NITECORE® products and services, please contact a local NITECORE® distributor or send an email to ********************※All images, text and statements specified herein this user manual are for reference purpose only. Should any discrepancy occurs between this manual and information specified on , information on our official website shall prevail. Sysmax Industry Co., Ltd. reserves the rights to interpret and amend the content of this document at any time without prior notice.4. Daily mode has a momentary function which allows the light to be turned on only when the switch is held. With the light turned off, press the switch partway down and hold to activate daily mode’s momentary function. The light will turn off the moment the switch is released.Operating in Search / Turbo Mode1. With the light turned off, press the switch all the way down and release within one second to enter turbo mode. To cycle between high and turbo modes press the button partway down while in turbo mode.2. To turn the light off when in turbo mode, once again press the button all the way down and release within one second.3. With the EA8 turned on in Search/Turbo mode, partway presses of the button will cycle between high and ultra-high mode. There is no memory function in Search/Turbo mode.Standby Mode / Lockout and Unlock functionsWith the light turned on, press the switch all the way down and release within one second to enter into standby mode. In this mode, the light will consume small amounts of power to maintain the settings in the MCU (micro control unit) but appear to be turned off. When in standby mode the power indicator light will flash once every three seconds to show the location of the light.With the light turned on, press the switch all the way down and hold for more than one second. The light will turn off and enter into lockout mode. Lockout mode consumes almost no battery power and prevents the light from accidentally turning on. Holding the switch for more than one second to exit the lockout mode.NB:1. When entering lockout mode, the power indicator will flash to indicate specific battery voltage. Please refer to the “Power Tips” section of this manual for details.2. When EA8 is kept in a backpack or left unused for extended periods, Nitecore recommends the bezel is loosened to cut off the power entirely, thus saving battery power and preventing accidental activation of the flashlight.Special Strobe / SOS mode and Location BeaconWith the light turned on, press the switch all the down twice in quicksuccession to enter strobe mode. When in strobe mode, press the switch all the way down and hold for more than one second to cycle through strobe, SOS and location beacon modes. To select any of these modes Thanks for purchasing NITECORE!®The All-Round Flashlight Expert。
Aurora A25 A27 A28 多功能 EDC 手电筒产品说明书
Aurora A25/A27/A28 Multipurpose EDC Flashlights 产品说明书(CN)产品特征& 参数:⚫提供发光壳体和透明壳体(A28)可选⚫A28独有的可发光电池底座⚫可选高亮CREE XP-L灯珠或高显色Nichia 219C灯珠(A28专属)⚫多用途的侧灯,提供红/白和UV/白可选⚫600mAh可充可更换聚合物电池⚫续航最长72小时⚫通过Micro USB接入电源最快可在1小时内充满⚫标配强力抱夹材料:聚碳酸酯长度:76mm直径:21.5mm重量:46.3g包装内容:1*说明书,1*不锈钢钥匙环,1*1米伞绳,1*手绳,1*保修卡操作方式:1. 主灯⚫一键即亮:按住开关不放进入月光模式,松开即灭⚫开机:双击⚫换挡:单击循环低-中-高-极亮⚫关机:任意档位下长按0.3秒;或者任意档位下工作超过3分钟,单击关机记忆模式:工作三分钟后记忆该档位,下次开机进入记忆档位降档:极亮档和高亮档工作时,因为产生大量的热,手电亮度会在1分半内降到300/100流明。
2. 侧灯⚫开机1)三击:A25R/A27R: 红灯;A25U/A27U/A28:白灯2)四击:A25R/A27R:白灯;A25U/A27U/A28:UV⚫换挡:单击循环1)A25R/A27R:红-红慢闪-红快闪;A25U/A27U/A28: 低-高2)A25R/A27R:低-高;A25U/A27U/A28:单击关机⚫关机:任意档位下长按0.3秒;或者任意档位下工作超过3分钟,单击关机充电:建议收到本产品后第一次使用前先充满电!⚫打开位于尾部的充电口,通过Micro USB线接入电源⚫充电指示灯:充电状态为红色,充满为蓝色⚫充电时间:1小时(5V/1A)⚫电压低于2.6V时,充电指示灯持续亮红色提醒充电⚫截止电压:2.4V警告!!⚫当手电点亮时,请勿直视发光体(LED)⚫请勿将本产品照射人眼或动物眼睛⚫年龄低于12岁的小孩未在监护人陪护下禁止使用本产品质保服务:⚫保修期:自购买日起2年⚫任何明显人为原因造成的功能故障或外观不良不在保修范围内Features & Parameters:⚫Optional GITD case (A25 & A27) or clear case (A28)⚫Green GITD battery holder for the A28⚫Optional CREE XP-L or Nichia 219C (A28 only) front LED⚫Versatile sidelights White/Red or White/UV combination⚫Rechargeable and replaceable 600mAh li-po battery⚫Long lasting up to 72 hours⚫Micro USB charge in 1 hour⚫Pocket clip includedParametersMaterial: PolycarbonateLength: 76mm/2.99”Diameter: 21.5mm/0.846”Weight: 46.3g/1.633ozWhat’s in the box: 1*User Manual, 1*SS Key Ring, 1*Paracord (1m), 1*Lanyard, 1*Warranty CardOperation/User Interface1. Front LED⚫Momentary ON: Press and hold for Moonlight, release to turn off⚫Turn ON: Double click⚫Switch mode: click to cycle thru Low-Med-High-Turbo *Memory: When the light worked at a mode over 3mins, it will be turned on from the memorized mode next time.**Step down: The light will step down to 300lm/100lm in 90s when working at Turbo/High due to the massive heat generated 2. Side LEDs⚫Turn ON1) Triple click: A25R/A27R: Steady Red; A25U/A27U/A28:White2) Quad click: A25R/A27R: White; A25U/A27U/A28: UV⚫Switch mode1) A25R/A27R: Steady Red-Red beacon-Red FlashA25U/A27U/A28: White Low-White High2) A25R/A27R: White Low-White HighA25U/A27U/A28: Click to turn off⚫Turn Off:1) At any mode, long press the button 0.3s;2) Click to turn off when the light works at any mode over 3mins. Charging:Highly recommend charging the light before the first use.⚫Open the USB port cover and connect to a power source thru Micro USB cable⚫Charging indicator: Red is in charging, Blue is fully charged. ⚫Charging time: 1 Hour (5V/1A)⚫The indicator will stay ON when the battery voltage is lower than2.6V⚫Cutoff voltage: 2.4VWarning!!⚫DO NOT look directly into the emitter when it’s ON⚫DO NOT point the light at human eyes or animal eyes⚫Child under 12 years old is NOT permitted to use the light unsupervised.Warranty:⚫ 2 years international manufacturer warranty⚫Any human-made malfunction or defective is out of warranty.User Manual (EN)产品规格/ Specifications/ パラメーター注:以上数据在实验室条件下取得,可能会因使用环境,使用方法等会有所差异; A25和A27上的UV侧灯仅用于给发光外壳充能,不具备365nmUV灯的正常功能。
Cuckoo cmc-q5 series 使用说明书

CMC-Q5 SeriesICOOK Q5 PREMIUMOperating InstructionsKOREA NO.1CUCKOOElectric Multi Pressure CookerThank you very much for purchasing “CUCKOO ”Electric Multi Pressure CookerRead the following instruction manual carefully before use or when facing problems. 在使用产品之前或是使用过程中出现任何问题, 请仔细阅读该产品的说明书.Lea atentamente a las siguientes instrucciones antes de su uso o en caso de cualquier mal funcion.※The actual color of this product may be different.※因本产品是系列产品,图片与实际颜色可能有所不同。
※El color real de este producto puede ser diferente.CONTENTS2CONTENTSBEFORE USINGImportant safeguards (3)How to use extension cord (5)Specifications (5)Safety precautions …………………………………………6~7Name of each part (10)How to clean ………………………………………………11~15Function operating part (16)WHEN USINGHOW TO SET FUNCTION (17)HOW TO PRESET COOKING (18)COOKER SETTINGS OVERVIEW (19)PREPARATION BEFORE COOKING (20)HOW TO COOK …………………………………………21~23KEEP WARM, REHEAT, VOLTAGE SAG PROTECTION (24)PROBLEM CHECKLISTPLEASE CHECK BEFORE CALLING FOR SUPPORT……25~27TABLA DE CONTENIDOSANTES DE USARIImportant safeguards (3)ESPECIFICACIONES (5)NOMBRE DE LAS PIEZAS (50)CÓMO LIMPIAR ………………………………………51~55Panel de Control y Pantalla (56)CUANDO USASCómo configurar (57)Cómo preconfigurar la cocción (58)Tabla de resumen (59)Preparación antes de cocinar (60)Cómo Cocinar ……………………………………………61~63Mantener Caliente, Recalentar, Protección de caída de voltaje (64)LISTA DE COMPROBACIÓN DE PROBLEMASPor favor verifique antes de pedir soporte…………65~67TABLE DES MATIÈRESAVANT L'UTILISATIONMesures de protection importantes (4)Comment utilizer une rallonge (5)Spécifications (5)Mesures de sécurité …………………………………………8~9 (3) (5) (30)………………………………………………31~35 (36) (37) (38) (39) (40)……………………………………………………41~43 (44)………………………………………45~47ӈ ҍ ӲГ控制&显示板使用时设定功能预约煮饭方法压力锅设置概览煮饭方法煮饭方法保温, 再加热, 防止电压低下问题检查表常见故障及处理方法31. Read all instructions before using this appliance.2. Do not touch hot surfaces. Use handles or knobs.3. To protect against fire, electric shock and / or injury to persons do not immerse cord, plugs, or Pressure Cooker Body in water or any other liquid.4. Close supervision is necessary when this appliance is used by or near children. This appliance is not intended for use by young children without supervision.5. Unplug cord from outlet when not in use and before cleaning. Allow appliance to cool before putting on or taking off parts, and before cleaning the appliance.6. Do not operate any appliance with a damaged cord or plug, after the appliance malfunctions, or has been damaged in any manner. Return the appliance to the nearest authorized service facility for examination, repair or adjustment.7. The use of accessory attachments not recommended by the appliance manufacturer may result in fire,electric shock, and / or injury to persons.8. If the supply cord is damaged, it must be replaced by a special cord or assembly available from the manufacturer or your service agent.9. Do not use outdoors.10. Do not let the cord hang over the edge of a table or counter, or touch hot surfaces.11. Do not place on or near a hot gas, electric burner, or in a heated oven.12. Always attach the plug to the appliance first, then plug the cord into the wall outlet. To disconnect, orset all control to “off”, then remove the plug from the wall outlet.13. Do not use this appliance for other than its intended use.14. Extreme caution must be used when moving an appliance containing hot oil or any hot liquids.15. Oversized foods, metal foil packages, or utensils must not be inserted into the appliance as they are arisk of fire or electric shock.16. Fire may occur if the appliance is covered or touching flammable material, including curtains, draperies,walls, etc while in operation.17. To reduce the risk of electric shock, cook only in the provided removable container.18. This appliance cooks under pressure. Improper use may result in scalding injury. Before operating theunit, properly secure and close the unit. See “Operating Instructions.”19. Before use always check the pressure releasing device for clogging.20. Do not use this pressure cooker to fry in oil.21. This appliance is not intended for use by persons (including children) with reduced physical, sensory ormental capabilities, or lack of experience and knowledge, unless they have been given supervision or instruction concerning use of the appliance by a person responsible for their safety. 22. Never immerse the appliance in water while cleaning.SAVE THESE INSTRUCTIONSTHIS APPLIANCE IS FOR HOUSEHOLD USE ONL YWARNING :This appliance generates heat and releases steam during use. Use proper precaution toprevent risk of burns, fires, other injuries, or damage to property.1. Keep hands and face away from the Pressure Release Valve when releasing pressure.2. Take extreme caution when opening the Lid after cooking. Severe burns can result from steam inside.3. Never open the Lid while the unit is in operation.4. Do not use without the inner Pot in place.5. Do not cover the Pressure Valve with anything as an explosion may occur.6. Do not touch the inner pot nor any heating parts, immediately after use. Allow the unit to cool down completely first.This appliance is intended to be used in household and similar applications such as :- staff kitchen areas in shops, offices and other working environments;- farm houses;- by clients in hotels, motels and other residential type environments;- bed and breakfast type environments.ADDITIONAL IMPORTANT SAFEGUARDSIMPORTANT SAFEGUARDS1. Lisez toutes les instructions avant d'utiliser cet appareil.2. Ne touchez pas les surfaces chaudes. Utilisez les poignées ou les boutons.3. Pour prévenir les risques d'incendie, les chocs électriques et/ou les blessures, ne plongez pas le cordon, les prises ou le corps autocuiseur dans l'eau ou tout autre liquide.4. Une surveillance étroite est nécessaire quand cet appareil est utilisé par des enfants ou qu'il se situe à leur portée.Cet appareil n'est pas prévu pour être utilisé par de jeunes enfants sans surveillance.5. Débranchez le cordon de la prise lorsque vous ne vous servez pas de l'appareil et avant de le nettoyer. Laissez l'appareil refroidir avant de remettre en place ou de retirer des pièces, et avant de le nettoyer.6. N'utilisez aucun appareil si le cordon ou la fiche est endommagé, s'il ne fonctionne pas correctement ou s'il est endommagé de quelque façon que ce soit. Renvoyez l'appareil à un centre technique agréé le plus proche pour le faire examiner, réparer ou régler.7. L'utilisation d'accessoires non recommandés par le fabricant peut causer un incendie, un choc électrique et/ou des blessures.8. Si le cordon d'alimentation est endommagé, il doit être remplacé par un cordon ou ensemble prévu à cet effet,disponible auprès du fabricant ou de réparateurs agréés.9. N'utilisez pas l'appareil à l'extérieur.10. Ne laissez pas le cordon pendre d'une table ou d'un comptoir. Ne le laissez pas non plus en contact avec une surface chaude.11. Ne placez pas l'appareil au-dessus ou près d'un brûleur à gaz, sur une plaque électrique ou dans un four chaud.12. Branchez toujours la fiche sur l'appareil en premier, puis branchez le cordon dans la prise murale. Pour débrancher,ou désactiver toutes les commandes, retirez la fiche de la prise murale.13. N'utilisez pas cet appareil à des fins autres que celles pour lesquelles il a été conçu.14. Une prudence extrême est requise lorsque vous déplacez l'appareil contenant de l'huile chaude ou tout autre liquide chaud.15. Des denrées alimentaires de taille excessive, les emballages sous feuille métallique, ou les ustensiles ne doivent pas être insérés dans l'appareil car ils constituent un risque d'incendie ou de choc électrique.16. Un incendie peut se déclarer si l'appareil est couvert ou en contact avec des matériaux inflammables, y compris des rideaux ou des draperies, des murs, etc durant son fonctionnement.17. Afin de réduire le risque de choc électrique, faites cuire uniquement dans le récipient amovible fourni.18. Cet appareil cuit sous pression. Un mauvais usage peut entraîner des brûlures. Avant d'utiliser l'appareil, mettez l'appareil bien en place et fermez-le. Reportez-vous à la section « Instructions d'utilisation ».19. Avant toute utilisation, vérifiez toujours si le dispositif de relâchement de la pression est obstrué.20. N'utilisez pas cet autocuiseur pour faire frire dans de l'huile.21. Cet appareil n'est pas conçu pour être manipulé par des personnes (y compris des enfants) dont les capacités physiques sensorielles ou mentales sont réduites ou qui manquent d'expérience et de connaissance, à moinsqu'elles n'aient reçu une une formation ou des instructions sur l'utilisation de l'appareil par une personne responsable de leur sécurité22. Ne jamais immerger l'appareil dans l'eau pendant le nettoyage.CONSERVEZ CES INSTRUCTIONSCET APPAREIL EST DESTINÉ À UN USAGE DOMESTIQUE UNIQUEMENTAVERTISSEMENT :Cet appareil génère de la chaleur et libère de la vapeur durant son fonctionnement. Utilisez lesprotections appropriées pour prévenir le risque de brûlures, d'incendies, de blessures ou de dégâts matériels.1. Gardez vos mains et votre visage à l'écart de la soupape de décharge lors du relâchement de la pression.2. Faites extrêmement attention lors de l'ouverture du couvercle après la cuisson. La vapeur à l'intérieur peut provoquer des brûlures graves.3. N'ouvrez jamais le couvercle lorsque l'appareil est en fonctionnement.4. N'utilisez pas l'appareil sans la cuve de cuisson à sa place.5. Ne recouvrez pas la soupape de pression par un objet quelconque, une explosion pourrait survenir.6. Ne touchez pas la cuve de cuisson ni les éléments chauffants immédiatement après utilisation. Laissez tout d'abord l'appareil refroidir complètement. Cet appareil est prévu pour être utilisé à la maison à des fins telles que :- la cuisine pour le personnel dans des magasins, des bureaux et d'autres environnements de travail;- les fermes;- par des clients dans des hôtels, des motels et autres environnements de type résidentiel;- des environnements de type chambres d'hôtes.MESURES DE PROTECTION SUPPLÉMENTAIRESMESURES DE PROTECTION IMPORTANTES4Note:A.A short power-supply cord (or cord set) is provided to reduce the hazards from entanglement by a longer cord.B. Extension cord should be used properly.C. Extension cord usage for the rice cooker:(1) The correct rated voltage should be used for the rice cooker.(2) If the appliance is set on the ground, the extension cord should also be set on the ground.(3) The cord wires and extension cord should always be arranged to prevent hazards to children."This appliance has a polarized plug (one blade is wider than the other).To reduce the risk of electric shock, this plug is intended to fit into a polarized outletonly one way. If the plug does not fit fully into the outlet, reverse the plug. If it still does not fit,contact a qualified electrician. do not attempt to modify the plug in any way."Remarque :A.Un cordon d'alimentation court (ou câble) est fourni pour réduire les dangers d'emmêlement causés par un cordon plus long.B. La rallonge doit être utilisée correctement.C. L'utilisation de la rallonge pour le cuiseur à riz :(1) La tension nominale correcte doit être utilisée pour le cuiseur à riz.(2) Si l'appareil est installé sur le sol, la rallonge doit aussi être installée sur le sol.(3) Les câbles et la rallonge doivent toujours être disposés dans le but d'éviter les dangers pour les enfants."Cet appareil possède une fiche polarisée (une lame plus large que l'autre).Afin de réduire le risque d'électrocution, cette fiche est conçue pour s'adapter à une prise polarisée dans un seul sens. Si la fiche ne s'emboîte pas complètement dans la prise, inversez la fiche. S'il ne convient toujours pas,veuillez communiquer avec un électricien qualifié. N'essayez pas de modifier la fiche de quelque façon que ce soit."CMC-Q5 SeriesAC120V~, 60Hz1150W 1.3m78.4KPa(0.8kgf/cm 2)7.5kg 30.4cm 39.5cm 28.2cmSPECIFICATIONS / 规格 / ESPECIFICACIONESModel name/型号名称/Modelo Power supply/电源/Alimentación eléctrica Power consumption/功耗/Consumo de energíaPower cord length/电源线长度/Longitud del cable eléctricoPressure/压力/Presión Weight/重量/PesoWidth/宽度/AnchuraLength/长度/LongitudHeight/高度/AlturaMenu/菜单/MenúSoup Meat Vegetables Rice Porridge Steam Cook Multi Cook Slow Cook Browning Fry Auto Clean Dimension/尺寸/Dimensiones 5HOW TO USE EXTENSION CORD / COMMENT UTILISER UNE RALLONGERead the following product safety guide carefully to prevent any accidents and/or serious danger.‘Warning’ and ‘Caution’ are different as follows.● ●SAFETY PRECAUTIONS67SAFETY PRECAUTIONSS A F E T Y P R E C A U T I O N SLisez attentivement le guide de sécurité du produit qui suit afin d'éviter les accidents et/ou les dangers graves.MESURES DE SÉCURITÉ89MESURES DE SÉCURITÉM E S U R E S D E S ÉC U R I T ÉPot HandleTemperature10it down. a neutral detergent.direction of the arrow.How to Clean The Pressure Weight Nozzle11HOW TO CLEANH O W T O C L E A NUnless detachable cover is mounted, preset coo king cannot be done. (Alarm may sound while k eeping warm.) -Clean the detachable cover to prevent odors. Array12• proper maintenance of the pressure packing helps keep high airtightness, adds durability to packing and ensures the taste of the food.• Read the directions below carefully to install your packing properly.How to remove and clean the pressure packingHow to install the Double Motion Packing (Pressure Packing)The all-stainless cover is not only delamination-free and easy to clean, but it also lasts long, In addition, CUCKOO’s special stainless CSV-a CUCKOO’s patented technology, improves the product’s durability and makes it easier to clean.①Unplug the power cord and wait until the pot cools down before opening the Top Cover.③ After hand washing it with a neutralcleaning liquid and a sponge, wipe it clean with a well wrung dish cloth.② To remove the pressure packing, hold it asshown in the picture above and pull it out.Figure.1Standard pointsStandard notches245136How to reassemble the pressure packing② ①to insert it into the groove. Repeat with points #2 to # 6.13HOW TO CLEANH O W T O C L E A N①Visual inspection• check the entire circumference carefully for any crack or damage between the Inner Pot lid and the pressure packing.③ Water boiling test• Pour water in the Inner Pot up to water level 2 (for “Rice”) and press the Menu/Selection button to select the self-cleaning mode.Then push the Pressure Cook/Turbo button.• Within 10 minutes, the pressure regulator weight will start rattling and hissing while emitting stream. If there is no steam coming out from the pot other than through the pressure regulator weight the packing has been properly installed.• If steam comes out from other parts, stop the test and pull out the power cord. Wait until the pot cools down before removing the pressure packing from the lid. Once reinstalled repeat the boiling test.• For a more precise water boiling test, you can wrap plastic around the circumference of the closed Top Cover. By doing so, you can easily check where the steam leakage is.• If you still have a problem with reassembling the packing, please contact our Customer Service.②Physical inspection• Check if the pressure packing is thoroughly put into the groove by rubbing the inside rimeof the packing with a finger around the entire circumference as shown in the picture above.• Check if the pressure packing is properly putinto the groove of the Inner Pot lid by pushing the outer rim with a finger around the entire circumference as shown in the picture.• Check if the pressure packing is thoroughlyput into the groove by pushing the inside of the rim packing with a finger around the entire circumference as shown in the picture.How to double check whether the packing is well assembledNormal assemblyAbnormal assemblyNormal assembly Abnormal assemblyHOW TO CLEAN14How to use the handlehandle to unlock shown in the picture on the right.main body.When top cover does not close perfectlyDo not try to close the top cover by force. It can damage your cooker and cause problems.grasping thedented part withyour fingers andpulling to the side while lifting gently.way.locked.pressing it in thedirection as shown above.1. After cooking, turn the handle from “Lock” to “Unlock” to open2. After cooking, turn the handle from “Lock” to “Unlock” turn the handle to open.If there is unreleased steam in the Inner pot it might be hard to turn the handle. In this case twist the pressure weight and let the excess steam out. Do not open by force.3. Handle must be turned to “Unlock” when opening and closing.15HOW TO CLEANH O W T O C L E A NKEEP WARM /REHEAT buttonUsed to keep warm or heat up food right before your mealCOOK buttonUsed to start cooking (Refer to page 21)CANCEL buttonUsed to cancel a selected function or to automatically discharge steam(Press the button for two seconds to cancel during cooking.)Menu buttonUsed to select among SOUP,MEAT, VEGETABLES, RICE,PORRIDGE, BROWNING FRY,MULTI COOK, STEAM COOK,SLOW COOK, and AUTO CLEANPRESET button(Refer to page 18)HEAT / TIME buttonUsed to set the heating level or the Used to set the heating level and the cooking time (Refer to page 22, 23).Used to change the preset time (Refer to page 18)This appears when the Inner Pot is not mounted.This indicates that the Temperature Sensor fails to work.Contact our customer service center.This appears when you press the COOK or PRESET button without completely turning the Cover pletely turn the Cover Handle to “ ” (Lock).For any incorrect use or when it does not work properly, the Display Panel will display the below signs to alert.If a sign keeps showing even in a normal condition for use or after proper action has taken, please contact our customer service center.Error Inspection Function of Display PanelThis appears when the Cover Handle is not turned to “ ” (Open) in the Keep Warm mode after cooking is done and you press the COOK or the PRESET button again after entering in the Standby mode. This function is to check the operation of the Cover Fastening Sensor. Turn the Cover Handle to “ ” (Open) and then turn it to “ ” (Lock).If the problem persists, contact our customer service center.This indicates that there is an error with the externalmemory of MICOM. Contact our customer service center.This appears when you boil only water continuously or there is a malfunction with the product.Contact our customer service center.This indicates that the Environmental Sensor fails to work. Contact our customer service center.This indicates that there is an error with the internalmemory of MICOM. Contact our customer service center.NAMES AND FUNCTIONS ON CONTROL PANEL / MALFUNCTION INSPECTION OF DISPLAY PANEL16HOW TO SET FUNCTION(LANGUAGE, VOLUME, KEEP WARM TEMPERATURE)HOW TO PRESET COOKING18Press the HEAT / TIME button to enter the heating level Setting mode,and then press the SELECTION -, + buttons to set the heating level.▶It is applied to the menus of BROWNING FRY, MULTI COOK, STEAM COOK, and SLOW COOK.Press the PRESET button.▶▶the set time and the PRESET sign blinking.▶▶time.▶In the Standby mode, the PRESET button won't work.▶preset time.▶Press the PRESET button or the COOK button, and the product presets cooking.▶Here, the preset starts with the voice saying “SOUP(the set menu) has been reserved.”.▶After pressing the PRESET button, if you don't press any button in 7 seconds, the Preset mode will start automatically.▶When the Preset mode begins, the Preset lamp will stop blinking and the preset time will decrease by a minute until it starts thepreset cooking.(While the preset cooking continues, the “ ”sign between the hour and the minute blinks.)▶The preset time is the time remaining until the preset cooking will be completed.(The time of completion may differ according to the quantity of food and conditions for use.)▶If you want to change the preset time, press the CANCEL button to cancel the preset cooking, and then start all over again.19COOKER SETTINGS OVERVIEWP R E S E T C O O K I N G / O V E R V I E W T A B L EPREPARATION BEFORE COOKING20B E FO 21Press the HEAT / TIME button to enter the heating level Setting mode, and press the SELECTION -, +buttons to set the heating level.•It is applied to the menus of BROWNING FRY, MULTI COOK, STEAM COOK, and SLOW COOK.Press the COOK button.▶Press the COOK button, and the RICE cooking begins.H O W T O C O O K23HOW TO COOKMULTI COOK, STEAM COOK, SLOW COOKTurn the Cover Handle to “ ”(Lock), and press the MENU button to select the desired menu.▶The selected Menu's lamp blinks.Turn the Cover Handle to “ ”(Lock), and press the MENU button to select BROWNING FRY.▶The BROWNING FRY menu lamp blinks.Press the COOK button.▶Press the COOK button, and the product starts cooking. When the product starts cooking,the remaining time is displayed.▶The Adjust lamp is turned off. If you press the HEAT / TIME button during cooking, the product displays the heating level and the cooking time.▶In case of Multi Cook, if you press down the Preset button for two seconds within 10seconds after cooking begins (while the Pressure lamp blinks), the product can cook with no pressure.Press the SELECTION -, + buttons to set the time.▶Each time you press the button, the cooking time is adjusted by one minute.▶In the Cooking Time Setting mode, the Adjust lamp blinks.Press the HEAT / TIME button to enter the heating level Setting mode.▶Press the HEAT / TIME button again, and the product returns to the Time Setting mode.▶In the heating level Setting mode, the Adjust lamp blinks.Press the SELECTION -, + buttons to set the heating level.▶Each time you press the button, the heating level is adjusted by one step.Press the COOK button.▶Press the COOK button, and the BROWNING FRY cooking begins.When the BROWNING FRY cooking begins, the remaining time is displayed.▶For the BROWYING FRY menu, the Adjust lamp is turned on during cooking, and while the Adjust lamp is turned on, you can adjust the heating level and the cooking time.Press the SELECTION -, + buttons to set the time.▶Each time you press the button, the BROWNING FRY time is adjusted by one minute.▶In the Cooking Time Setting mode, the Adjust lamp blinks.Press the SELECTION -, + buttons to set the heating level.▶Each time you press the button, the heating level is adjusted by one step.Press the HEAT / TIME button to enter the heating level Setting mode.▶Press the HEAT / TIME button again, and the product returns to the Time Setting mode.▶In the heating level Setting mode, the Adjust lamp blinks.12435e.g.) When MULTI COOK is selectede.g.) When MULTI COOK is selectede.g.) When MULTI COOK is selectedBROWNING FRY23546Type BROWNING FRYMULTI COOKSTEAM COOKSLOW COOKCooking TimeSetting15~90min (Def: 10 min)15~90min (Def: 20 min)15~90min (Def: 20 min)15 min~12 hr (Def: 2 hr)Heating LevelSettingLE1~LE6(Def: Level 4)LE1~LE9(Def: Level 7)LE1~LE6(Def: Level 3)LE1~LE6(Def: Level 3)The BROWNING FRY menu is used for stir-frying or roasting food.※Please be careful when using the Browning Fry function with the cover open, the food may splatter.1Open the Cover and prevent pressure from being applied into the Inner Pot.Cautions for Keeping Warm▶When you open the cover right after cooking or during the Keep Warm function, the cover may not open properly due to pressure. Always bend back the pressure weight to completely remove the pressure before opening the cover.▶Always lock the cover handle when keeping warm or reheating food. (If not, there may be damage caused to the Cover Open button and the Keep Warm function.)▶If there is no food in the inner pot during the Keep Warm function or if you are not using the product, press the Cancel button to cancel the Keep Warm function or remove the power cord from the power outlet.▶Do not use the Keep Warm function with a rice spatula left in the inner pot. In particular, a wooden spatula may generate germs and odors.When you serve your meal▶If you want to serve your meal during the Keep Warm mode and want the food hot, press the KEEP WARM /REHEAT button, and then the Keep Warm / Reheat function begins with the voice saying “REHEATing is starting”. Then, in 9 minutes, you can eat the heated food.Warm function is 3 hours.minutes while the Keep Warm lamp is blinking with the “”sign on the Display going round and round."REHEAT has been completed" and the product starts the Keep Warm function again, displaying the time elapsed.KEEP WARM / REHEAT FUNCTION AND VOLTAGE SAG PROTECTION FUNCTION24▶Clean the product often. In particular, if the Cover is not cleaned completely, germs may grow, which can cause smell during the Keep Warm mode.▶Even if the product looks clean outside, germs may grow anywhere, which can cause smell during the Keep Warm mode. Thus, if the product smells, clean the product by using the Auto Clean menu.After the Auto Clean function is completed, the Inner Pot must be washed completely.▶If you don't wash the Inner Pot after cooking and then use the Keep Warm function, the food may smell or stink.When it smells during The Keep Warm mode▶This product remembers its status even when a blackout occurs, so if electricity gets back again within around 2 minutes, this product will normally work again. (There may be differences according to the product.)▶If cooking is canceled because of a blackout, you need to press the COOK button again to resume cooking.▶If a blackout occurs during cooking, the cooking time is delayed for the duration of the blackout, and the status of cooking may differ to some extent according to the time of the blackout.▶If a blackout occurs The Keep Warm function and when the food becomes cold, the Keep Warm function is canceled.Voltage Sag Protection Function?。
手持式快速进行 多功能墙体探测仪 使用说明书

用户手册注意:使用前请仔细阅读使用说明书,遵守安全规则和使用说明书中所列的注意事项,本公司保留说明书修改权。
应用范围是一款手持式快速进行墙体测试的仪器,主要用来探测隐藏在墙壁、天花板和地板中的磁性金属,例如钢筋,铁管;无磁性金属,例如铝管、铜管;非金属,例如木梁、PVC水管和带电的物体,例如电线。
技术参数最大探测深度含铁金属:110毫米非铁金属:110毫米带电电线(110V/230V):50毫米木头(非金属):25毫米工作温度:-10℃~+50℃储藏温度:-20℃~+70℃湿度:≤75%;海拔高度:≤2000米电池:3节1.5V,AAA电池尺寸:185*85*33mm重量:180g或非磁性金属:金属或非金属显示操作说明测量时始终将仪器贴紧墙面,缓慢移动如图示(1),感应光圈A变绿,进入待测状态,当仪器探测到隐藏物时,刻度条1逐渐满格,感应强度上升,感应光圈A变红并报警,感应刻度如图(2)。
当要精确定位隐藏物的中心位置时,在探测到的隐藏物上方重复左右移动仪器,观察仪器窗口刻度圆点2(刻度条到圆点的变化),当在隐藏物上方的中心时,刻度条满格并显示中心圆点如图(3)。
1.开机/关闭(ON/OFF)短按开机键开启,长按3秒关机;开机时,仪器自动会初始化,显示窗口上的刻度条会上升到满格状态,并迅速消退,进入待机状态,如果3分钟内仪器上任何按键未被操作,或者未探测任何物体,3分钟之后探测仪会自动关闭。
2.自动模式AUTO开机后的测量模式被默认为自动模式,也可以通过按下键切换到自动测量模式;在自动模式下,如同时探测到几种物质,会优先显示图标次序:带电→金属→磁性→非磁性→非金属。
例如探测物中有金属和木材,显示屏上优先会显示金属物体图标。
3.金属模式短按键进入金属模式用于手动探测磁性、非磁性金属,不受墙体特性的影响。
4.交流电线探测:按下按键,探测模式切换到AC测试模式●本仪器只能探测电压大于110V,50~60Hz的交流电线●本仪器只能探测实心电线,双绞线的电线不能探测5.开启/关闭信号声短按键可以开启和关闭探测报警声;背景灯打开和关闭长按键可以开动和关闭显示屏的照明(需长按约3秒)6.电池安装/更换用螺丝刀旋开紧固螺丝,并向上掀开电池盒盖,打开电池盒盖,装入3节AAA电池(碱性电池)。
- 1、下载文档前请自行甄别文档内容的完整性,平台不提供额外的编辑、内容补充、找答案等附加服务。
- 2、"仅部分预览"的文档,不可在线预览部分如存在完整性等问题,可反馈申请退款(可完整预览的文档不适用该条件!)。
- 3、如文档侵犯您的权益,请联系客服反馈,我们会尽快为您处理(人工客服工作时间:9:00-18:30)。
M20-5 Q5 磁控手电筒
【特色】
1.M20是特意为各种作业现场设计的独创吸磁手电,乃维修、固定照明首选
2.表面斜纹防滑处理,美观大方,手感舒适,不易脱手
3.尾部特设强力磁铁,能牢牢吸附于金属表面,也可以卸下吸磁分体,转换为无磁状态
4.有一模式/多模式可选,可从尾部外形区分:一模式采用圆形尾部,多模式采用多边形尾部
5.核心电路采用恒流芯片,亮度恒定;多模式产品采用带记忆功能的单片机,可根据用户习惯记忆常用模式
6. 配合专门设计的柔光罩,可以当台灯、露营灯、信号灯、壁灯等使用
【技术参数】
(一)LED参数
品牌及型号:美国原装进口CREE XR-E Q5
LED寿命:超过10万小时
产品最大亮度:160流明
产品有效射程:120米
(二)电路参数
输入电压:0.8-4.2V
控制模式:五档(高亮-中亮-低亮-暴闪-SOS)
芯片特性:恒流芯片/亮度恒定/电路带记忆功能
(三)电池规格
使用电池:1节AA或1节14500
续航时间:高亮0.6小时,低亮40小时
(四)物理规格
尺寸(厘米):9.2(长度)* 2.2 (筒径)
重量(克):62.3 (不含电池)
开关方式:头部旋转式开关
外壳材质:航空级铝材T606
反光杯:高温真空电镀镜面铝合金反光杯
镜片:钢化光学玻璃
表面处理:军规三级硬质氧化
防水等级:IPX 8
防跌落高度: 1.5米
颜色:黑
【配件】
配件:手绳、防水圈;
自愿选购配件:¢2123柔光罩、26110#电筒套。
