Acer LCD显示器使用安装
Acer 彩色液晶显示器 说明书
Power adaptor
Video Audio cable
简体中文 6
软件安装
A. Microsoft® Windows®95 / 98 / 2000
1. 将"Acer LCD 显示器" CD-ROM 光盘片放入您的 CD-ROM 光驱中。 2. 按一下 "开始",然后按一下 "设定"。
3. 按两下控制台上的"显示器" 图标。
简体中文 7
Acer 彩色液晶显示器使用手册 4. 从 "显示器内容" 窗口,选择"设定"卷标。按一下右下角的 "进阶" 按钮。
A. 确定计算机及显示器上的电源皆已关闭。请依照下列步骤安装您的显示器。
1 . 把信号电缆和功率转接器与宏基 LCD监视器连接好。 2 . 把声频电缆与宏基 LCD监视器声频输入端连接。 3 . 首先把功率绳连接到功率转接器中,然后把功率转接器连接到LCD监视器中。
B. 把信号电缆与在计算机上的图形卡VGA输出端连接。 C. 把声频电缆与你的计算机连接。 D. 把监视器后面的功率绳连接到交流电源插座(AC)上。请确保插座没有被封闭,如果需
版权所有
Acer 彩色液晶显示器使用手册
版权 © 2001 属于明基电通股份有限公司 (Acer Communications & Multimedia Inc.) 所有。保留所有 权利。本使用手册未事先经明基电通股份有限公司许可,不可以任何形式或任何方法 电子、机械、 磁性、光学、化学、手工或其它方法,部份复制、传送、抄写、储存在撷取系统中,或翻译成任何 语言或计算机语言。
液晶led显示器怎么安装

液晶led显示器怎么安装
显示器,作为电脑的一种特殊外设。
很多人都不知道怎么安装,而且要是不小心装错就坏了,为此店铺为大家整理推荐了相关的知识,希望大家喜欢。
液晶led显示器安装的方法
1、首先将切割好的型材拼接,也就是组装好显示屏的外框。
市场上通用型材无非方形、圆形,但组装方法是一样的
2、把外框架组装完毕,将P10单元板摆放于框架内(注意框架的正反面,有槽的一面是正面),这时候安装背条的位置是相当准确的,避免错一根而改全部的麻烦,如下图所示:
3、背条固定完毕,将框架移开,安装磁铁,下图所示:
4、固定好单元板
5、连接好排线、上下电源线
6、固定好显示屏电源和LED控制卡, LED控制卡与电源线的连接. 将LED控制卡用电源线与就近的单元板连接,控制卡上有标明正负极
7、显示屏电源与显示屏单元板接线,注意正负极,建议使用SVV2*1.0软芯线,也就是1平方双股软芯线主电源根据屏的大小选择。
8、控制卡与单元板排线连接(特别重要),连接之前请仔细看明白为止,屏未固定在墙上,这是最关键一步,可以先通过测试按钮检查屏安装是否正确
9,数据线(短距离一般用超5类网线就可以)正常一般用串口2、3、5交叉线,也有平行线,软件光盘上一般都有接线说明。
液晶显示屏的安装说明

液晶显示屏的安装说明液晶显示屏是一种常见的显示装置,广泛应用于电视、电脑、手机等各种设备中。
安装液晶显示屏是一项关键任务,需要按照正确的步骤进行操作,以确保显示屏的正常使用和稳定性。
下面将为您介绍液晶显示屏的安装步骤。
安装前的准备在开始安装液晶显示屏之前,首先需要确认所使用的显示屏与设备兼容,并确保具备安装所需的工具和材料。
常见的工具和材料包括螺丝刀、螺丝、安装支架等。
另外,确保安装区域无尘、无水分及通风良好,以保护显示屏的使用寿命和性能。
步骤一:确认安装位置首先需要确定液晶显示屏的安装位置。
通常,显示屏的安装位置应选择在平整、稳固且无磁性的表面上。
避免将显示屏安装在震动较大或热源附近的地方,以防止屏幕的损坏。
同时,还需考虑显示屏与观看者之间的距离,以保证观看效果的舒适性。
步骤二:固定安装支架接下来,将安装支架固定在选择的位置上。
根据显示屏的尺寸和重量,选择相应的支架,并使用螺丝刀将支架牢固固定在墙壁或支架架构上。
确保安装支架牢固可靠,以承载显示屏的重量。
如遇到特殊情况,建议请专业技术人员进行安装。
步骤三:安装显示屏将显示屏小心地安装在预先固定好的支架上。
通常,液晶显示屏的底部会设计有安装孔或固定槽,将其与支架上的螺丝孔对应并进行连接。
使用螺丝刀适当拧紧螺丝,但要避免过度拧紧导致显示屏损坏。
在安装过程中,要注意保护屏幕表面,避免刮擦或碰撞。
步骤四:调整显示屏位置与角度安装完毕后,需要根据实际需求调整显示屏的位置和角度,以达到最佳观看效果。
通过调整显示屏的倾斜度、左右摇晃和高低调整等参数,使其与观看者的视线保持垂直并具备合适的观看角度。
同时,确保显示屏与周围环境的光线相互协调,以避免出现反射和眩光。
步骤五:连接信号源和配件最后一步是将液晶显示屏与设备的信号源进行连接。
通常,液晶显示屏会提供多种接口,包括HDMI、VGA、DVI等,根据实际情况选择合适的接口,并使用合适的信号线将其连接至设备。
同时,根据需要,可连接配件如喇叭、遥控器等,以提供更完整的使用体验。
LCD电视快速安装指南说明书

Quick Start GuideI NSTALLING LCD TV ON T HE W ALL . . 1TV C HANNEL I NSTALLATION . . . . . . . . 2P RESENTATION OF THE LCD TV.. . . . . 2A CCESSORIES . . . . . . . . . . . . . . . . . . . . 3B ATTERY I NSTALLATION . . . . . . . . . . . . 3R EMOTE C ONTROL O PERATION . . . . . . 3A NTENNA TV . . . . . . . . . . . . . . . . . . 4 B ASIC C ABLE TV C ONNECTION . . . . . . . . 4T UNER M ODE C ONTROL . . . . . . . . . . .5A UTO P ROGRAM (S ETTING U PC HANNELS . . . . . . . . . . . . . . . . . . . . . 5C ABLE B OX (WITH RF I N /O UTPUTS ) . . 6C ABLE B OX (WITH A UDIO /V IDEOO UTPUTS ) . . . . . . . . . . . . . . . . . . . . . 6VCR, DVD P LAYER , OR OTHER D EVICES WITH RCA C ONNECTORS . . . . . . . . . 7DVD P LAYEROR OTHER V IDEO D EVICES WITH C OMPONENT V IDEOC ONNECTORS . . . . . . . . . . . . . . . . . . 7D IGITAL TV R ECEIVER , OR A D IGITAL S ATELLITE R ECEIVER WITH HD (H IGH D EFINITION ) O UTPUT . . . . . . . . . . . . . 8PC (M ONITOR ) C ONNECTIONS . . . . . 8D IGITAL S ATELLITE R ECEIVER WITH DVI C ONNECTOR . . . . . . . . . . . . . . . . . . . 9AV O UTPUT . . . . . . . . . . . . . . . . . . .10Before you can install your LCD TV on the wall, you must fi rst remove the base using the steps below:Place the set facing down on a fl at surface with aRemove the 2 metal pins.13now ready for wall mounting.4Remove 3 screws from base. Grasp the base and pull it out.2When installing the LCD TV on the wall, please consult a professional technician for proper installing. The manufacture accepts no liability for installations not performed by professional technician.uick Use and HookupGuideImmediately after unpacking and plugging in your new television, run the auto program function to set up the TV for the broadcast or cable channels available in your area. If you do not run the auto program function to set up the channels , your television may not operate properly.1234Television Keys• VOLUME + / - : To adjust sound level.• CHANNEL + / - : To select programs.• MENU : To access or close onscreen menu.Power button, LED light and infrared sensor• • Aim remote control at infrared sensors to activate TV controls.Rear connectorsRemove the cable cover to access the connectors at the rear of the LCD TV.Bottom connectorsLocated at the bottom of the set.Please follow these steps to install TV channels:Select a TV source via AV button on your remote control.Press the CURSOR RIGHT button to confi rm.Press MENU button on your remote control to open the onscreen menu. Press CURSOR DOWN to move to INSTALL, press CURSOR RIGHT on your remote control to enter INSTALL.Press CURSOR DOWN to move to AUTO PROGRAM. Press CURSOR RIGHT to start auto install the TV Channels.1234For more detailed explanation of AUTO PROGRAM, please refer to AUTO PROGRAM section on page 5.5123When you unpack this unit, make sure it includes the following:Tuner L-AdapterPower cable Tuner L-AdapterWarranty CardRemove the battery compartment lid on the bottom of the remote control.Place two AAA batteries in the remote. batteries line up as marked inside thebattery compartment.Reattach the battery compartment lid.A/CH buttonSleep buttonTheatre.Menu buttonmenu.Volume buttonlevel.Mute buttonUnused keyPicture Format buttonPress the FORMAT button repeatedly to toggle among the six screen format sizes; WIDESCREEN, 4:3, ZOOM 14:9, ZOOM 16:9, SUBTITLE ZOOM or SUPERWIDE.Power buttonPress to turn the LCD TV on or off.I-II button / Sound modePress repeatedly to select Mono, Stereo, Dual I, Dual II, Nicam Mono, Nicam Stereo, Nicam Dual I, Nicam Dual II.Smart Picture buttonPress repeatedly to select either Personal, Rich, Natural, Soft, or Multimedia picture setting.Virtual Surround buttonAdds greater depth and dimension to TV sound.Select from Virtual Surround or OFF.Channel buttonPress to adjust the channel up or down.Number buttonsPress the number buttons for direct access to the TV channels. For a 2 digit channel, enter the 2nd digit after enter 1st digit.AV buttonPress to select the video input source: PC, DVI, TV, AV1, AV2, AV3, S-Video1, S-Video2, Component, HD.A combination antenna receives normal broadcast channels (VHF 2–13 and UHF 14–69). Your connection is easy because there is only one 75 Ω (ohm) antenna jack on the side of your TV, and that’s where the antenna goes.Outdoor or Indoor AntennaTwin-leadwire to 300-75ΩadpterThe Cable TV singal from Cable Company 75Ωcoaxial cableIf your antenna has a round cable (75 ohm) on the end, then you’re ready to connect it to the LCD TV. If your antenna has fl at, twin-lead wire (300 ohm), you fi rst need to attach the antenna wires to the screws on a 300- to 75-ohm adapter(not supplied).Connect the antenna (or adapter) to one end of thesupplied L-Adapter as shown, and connect the other end of the L-Adapter to the TV jack on the side of the LCD TV.Plug the power cable into AC inlet on LCD TV set. Plug the power cable into an outlet and switch TV set on.Run the AUTO PROGRAM function to set up the TV for the broadcast or cable channels available in your area. If you do not run the auto program function to set up the channels , your television may not operate properly.1234Your Cable TV input into your home may be a single (75 ohm) cable or use a cable box decoder. In either case the connection is verysimple. Follow the steps below to connect your cable signal to your new television.Direct cable connections:Connect the Cable TV signal to one end of the supplied L-Adapter as shown, and connect the other end of the adapter to the TV jack on the LCD TV.Plug the power cable into AC inlet on LCD TV set. Plug the power cable into an outlet and switch TV set on.Run the AUTO PROGRAM function to set up the TV for the broadcast or cable channels available in your area. If you do not run the auto program function to set up the channels , your television may not operate properly.123Your LCD TV can automatically set itself for local area (or cable TV) channels. This makes it easy for you to select only the TV stations in your area by pressing the CH(+) or CH(-) button.Press the MENU button on the remote control to show the onscreen menu.Press the CURSOR DOWN button to highlight the INSTALL menu.Press the CURSOR RIGHT button to enter the INSTALL menu.Press the CURSOR DOWN button to highlight the AUTO PROGRAM control.Press the CURSOR RIGHT button to start the AUTO PROGRAM scanning of channels.Press the MENU button repeatedly to clear the menu from the screen, after AUTO STORE has finished.123456Press the MENU button on the remote control to show the onscreen menu.Press the CURSOR DOWN button to highlight the INSTALL menu, then press CURSOR RIGHT to enter.Select the MANUAL STORE, then press the CURSOR RIGHT button to activate auto search channel frequence or press number button to show your desired channel frequence.After the channel frequence confirmed, select PROGRAM NO. by pressing CURSOR DOWN.Press the number button or CURSOR RIGHT/LEFT to give the channel number.If the channel reception is not satisfactory, press CURSOR DOWN button to highlight the FINETUNE, then press CURSOR RIGHT/LEFT to adjust. Note: If the channel reception is satisfactory, please go to step 7.Press CURSOR DOWN to highlight STORE function. Press CURSOR RIGHT to confirm stored.Press the MENU button repeatedly to clear the menu from the screen.12345678Connect the Cable TV signal to the IN jack (or RF IN or CABLE IN) on the Cable Box.Connect an RF coaxial cable (not supplied) to the OUT jack (or TO TV or RF OUT) of the Cable Box.Connect the other end of the coaxial cable to one end of the supplied L-Adapter as shown, and connect the other end of the adapter to the TV jack on the LCD TV.Plug the power cable into AC inlet on LCD TV set. Plug the power cable into an outlet and switch TV set on.Set the Channel 3/4 (or Output channel) switch of the Cable Box to 3 or 4. Set the TV to the same channel. When watching TV programming, change channels at the Cable Box, not the LCD TV.12345This connection will supply stereo sound to the LCD TV.Connect the Cable TV signal to the IN jack (or RF IN or CABLE IN) on the Cable Box.Using an RCA-type video cable (not supplied) connect one end of the video cable to the Video Out jack of the Cable Box. Connect the other end of the cable to the yellow VIDEO jack on the side of the TV. Video cables are usually marked with yellow and are available from Philips or electronics retailers. Video jacks on most equipment are yellow.Using RCA-type, stereo audio cables (not supplied), connect one end of the cables to the left and right Audio Out jacks of the Cable Box. Connect the other end of that cable to the Audio jack on the side of the LCD TV. Audio cables are usually marked with red and white and are available from Philips or electronics retailers. The right audio jack is red and the left audio jack is white. Match the cable colors to the jack colors.Plug the power cable into AC inlet on LCD TV set. Plug the power cable into an outlet and switch TV set on.123Note: Use the AV button on the remote control to tune to the AV channel for the cable box signal. Once tuned, change channels at the cable box, not the television.When you watch programs using VCR, it’s recommended to select Soft Mode via Smart picture.412312The AV IN jacks on the rear of the LCD TV enable quickconnections of other equipment. Connect a DVD player, VCR Video Game, Camcorder, etc., to these jacks. To view thematerial playing on the other equipment, set the LCD TV to its AV mode.Component Video Input (Y, Pb, Pr) provide the highest possiblecolor and picture resolution in the playback of digital signal source material, such as with DVD player.34Using an RCA-type Video and Audio cable (usually marked yellow, red, and white), connect the VCR’s Video and Audio Out jacks to the TV’s Video and Audio In jacks.Plug the power cable into AC inlet on LCD TV set. Plug the power cable into an outlet and switch TV set on.Use AV button on the remote control to select AV 1 (or AV2, AV3, S-Video1, or S-Video2 if you use the different jacks for this hookup) to watch VCR.Note:1. If your VCR equipped with a S-Video Out jack, uses S-Videoconnection for better picture detail and clarity. Use the S-Video cable to connect the VCR’s S-Video Out jacks to the TV’s S-Video In jacks.2. When you watch programs using VCR, it’s recommended to select SOFT Mode via Auto picture.3. You can also use the Video and Audio jacks in AV IN 2 and AV IN 3 located on the rear of the TV to connect your VCR or other Video Devices.4. If your DVD Player is equipped with Component (Y, Pb, Pr) Output Jacks, please refer to “Connecting a DVD Player or other Video Equipments with Component Video Connectors” section for use of Component Video Connection for highest color and picture resolution in video playback.Using a Component Video cable (not supplied), connect the DVD3 connections.Note: The Component (Y, Pb, Pr) Video Input in AV IN 3 connections can display SD (480i/576i) image only. If your DVD player can output Progressive scanned or HD (High Defi nition) image, please refer to “Digital TV Receiver, or a Digital Satellite Receiver with HD (High Defi nition) Output” in next ing an AUDIO cable, connect the DVD player’s AUDIO OUT jacks to the TV’s AUDIO IN jacks in AV IN 3 connections.Plug the power cable into AC inlet on LCD TV set. Plug the power cable into an outlet and switch TV set on.Use AV button on the remote control to select COMPONENT to watch DVD.Note: 1. The Y, Pb, Pr jacks do not provide audio, so audio cables must be connected to provide sound.123A Digital TV Receiver or a Digital Satellite Receiver is able to produces HD (High Defi nition) video signal with 480p, 576p, 720p, and 1080i formats. A Component (Y Pb, Pr) Connection is required for this kind of setup. Note: This setup also support 480i/576i.Using a Component Video cable, connect the Digital TV Receiver’s Y, Pb, Pr jacks to the Y, Pb, Pr jacks on the TV. Use the HD IN connections.Note: Component Video (Y, Pb, Pr) connections in HD IN connections is necessary to view 480p, 576p, 720p, and 1080i formats. Note that the Component Video Input in Side Connections can only support 480i /576i format.Using an Audio cable, connect the Digital TV Receiver’s AUDIO OUT jacks to the TV’s AUDIO IN jacks in HD IN connections.Plug the power cable into AC inlet on LCD TV set. Plug the power cable into an outlet and switch TV set on.Use AV button on the remote control to select HD to watch DVD.Note: The Y, Pb, Pr jacks do not provide audio, so audio cables must be connected to provide sound.This LCD TV can be used as a PC monitor. Your computer will have to equipped with a VGA type video output and VGA cable.Using a VGA cable (not supplied), connect PC’s VGA OUT connector to the VGA connector on the TV. Use the PC IN ing a MINI-JACK type AUDIO cable (not supplied), connect the PC’s AUDIO OUT connector to the AUDIO connector on the TV. Use the PC IN connections.Plug the power cable into AC inlet on LCD TV set. Plug the power cable into an outlet and switch TV set on.Use AV button on the remote control to select PC to use your LCD TV as a PC monitor.Note: Please refer to “Setting Up the PC Mode” section for all the supported PC display modes. If possible, use the 1280 x 720@60Hz video mode to obtain the best PC image quality.12344Connect the digital DVI output of your HDdevice (e.g. DVD player, Set Top Box..) to the DVI connector of the DVI IN connection.Connect the AUDIO cable (if audio is present) to the Audio outputs of your HD device and to the AUDIO R (right) and L (left) inputs of the DVI IN connection.Use AV button on the remote control to select DVI to watch the programs.Your LCD TV offers Digital Video Interface (DVI) with High Defi nition Copy Protection (HDCP) connections. This feature allows a digital connection between set-top boxes and the LCD TV, creating a more vibrant image. DVI HDCP technology allows content provid-ers the ability to utilize the full bandwidth of high defi nition signals.12Disconnect all power sources before making any connections.DVI is a specifi c digital input allowing encrypted transmission ofuncompressed HD content. DVI includes HDCP (High-Bandwidth Digital Content Protection), which is supported by Hollywood, satellite providers, and most of the consumer electronics industry. DVI is gaining monumentum and quickly becoming an industry standard for the consumer to view high defi nition material while keeping content protected.Note:1. Proper working is only guaranteed with DVI compliant consumer products.2. Digital devices from different manufactures have the possibility of differing output standards which may cause diffi culties for the television to properly display.3. It is not recommended to connect your PC to LCD TV via DVI connection, since the LCD TV may not support the PC display mode you are using.3Connect one end of the yellow Video Cable to the VIDEO jack of AV OUT connection. Connect the other end to the VIDEO IN jack on the VCR.Connect one end of the red and white Audio Cable from the L and R AUDIO jack of AV OUT connection to the AUDIO IN jack on the VCR.Turn the VCR on, insert a blank VHS tape and it’s ready to record what’s being viewed on the TV screen.Note: The Program recording is only possible when the input signal is TV, AV1, AV2, AV3.T he AV (Audio/Video) out jacks are great for recording with a VCR or used to connect an external audio system for better audio.12For VCR Connection/Recorder:3Disconnect all power sources before making any connections.。
宏基液晶显示器快速安装指南

根据 EMC 规范,至其它计算设备的所有连接必须使用屏蔽线。
注意:外设
只能将经认证符合 B 类限制的外设(输入/输出设备、终端、打印机等)连接至此设备。使用未经 认证的外设可能对无线电和电视接收造成干扰。
小心
未经制造商明确核准的变更或修改可能会使您丧失由联邦通信委员会授予的操作本产品的权利。
×:表示该有毒有害物质至少存在於该部件的某一均质材料中, 是因为目前业界还没有成熟的可替代技术, 以致含量虽然超出《电子信 息产品中有毒有害物质的限量要求标准》规定的限量要求;但仍然符合欧盟 RoHS 指令所容许的豁外条款及电池指令的要求.
LCD Monitor Quick Setup Guide
操作条件
本设备符合 FCC 条例第 15 部分的要求。操作该设备应符合以下两个条件:(1) 本设备不能造成有 害干扰,(2) 此设备必须接受任何收到的干扰,包括可能造成意外操作的干扰。
注意:加拿大用户
此 B 类数字设备符合加拿大 ICES-003 标准。
Remarque à l’intention des utilisateurs canadiens
宏碁电子信息产品中可能含有的有毒或有害物质的名称及含量于以下表格中。
显示器(液晶及 CRT)
零部件名称
有毒有害物质或元素
金属结构件 塑料结构件 电路板组件* 液晶显示屏 / 灯管 CRT 显示屏 / 灯管 电源模块 电源线 外部信号连接线 喇叭
铅(Pb) 汞(Hg)
X
O
O
O
X
O
X
X
X
O
X
O
O
O
X
O
X
• 䇗ᭈᬊ㒓ⱘᮍԡ㕂DŽ • ࡴ䆒ᬊᴎП䯈ⱘ䎱行DŽ • ᇚ䆒䖲ࠄϢᬊᴎϡৠϔϾ⬉䏃ϞⱘᦦᑻЁDŽ • 䆶㒣䫔ଚ᳝㒣偠ⱘ᮴㒓⬉ˋ⬉㾚ᡔᴃҎਬҹᇏ∖ᐂࡽDŽ
Acer宏基显示器与底座装拆后的建议

Acer宏基显示器与底座装拆后的建议
一、简要说明
本人使用该显示器多年,一直没有拆卸。
从网上找了很多方法,都不是很有效。
包括用拳头砸,但不易掌握力度,反而易对显示器造成破坏。
二、使用方法
后来就用厚板小刀找到连接的卡头,橇松了一侧,最后强力取出。
三、建议
取出后对显示器底座的连接部位,做了一些改动。
1.两个卡子,掰掉了一个。
只留一个,便于安装和固定,估计全拆了,显示器装到底座上易松动;
2.原较紧的两处配合部位,用小刀削除了较厚的一层,配合变为松配合。
注意削平即可,稍微留高一点。
以免太松,没办法固定。
3.以下是一些照片。
四、照片说明
1.底座正面
2.底座底部
3.去除后的显示器底部结构
4.显示器安装结构
5.过紧配合部位过紧配合
6.削薄配合部位
7.整体卡子图
8.两个卡子清晰位置图
9.卡子局部放大
10.已掰掉一个卡子
11.卡子去除后比较图
完结。
供各位参考。
常见户外广告机LCD显示屏的安装方法
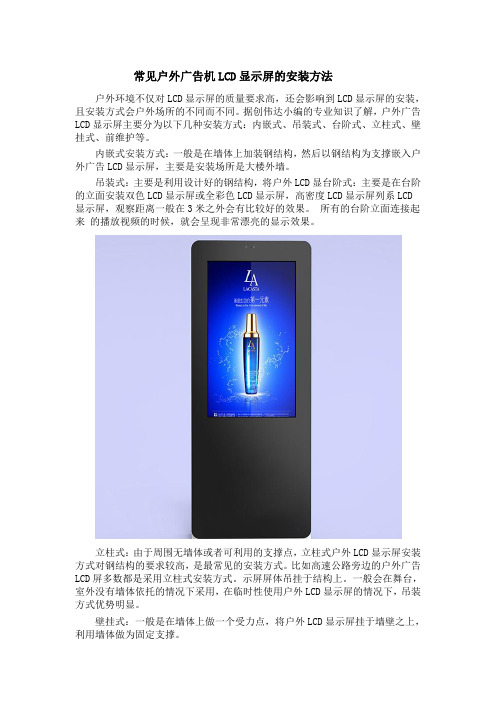
常见户外广告机LCD显示屏的安装方法户外环境不仅对LCD显示屏的质量要求高,还会影响到LCD显示屏的安装,且安装方式会户外场所的不同而不同。
据创伟达小编的专业知识了解,户外广告LCD显示屏主要分为以下几种安装方式:内嵌式、吊装式、台阶式、立柱式、壁挂式、前维护等。
内嵌式安装方式:一般是在墙体上加装钢结构,然后以钢结构为支撑嵌入户外广告LCD显示屏,主要是安装场所是大楼外墙。
吊装式:主要是利用设计好的钢结构,将户外LCD显台阶式:主要是在台阶的立面安装双色LCD显示屏或全彩色LCD显示屏,高密度LCD显示屏列系LCD显示屏,观察距离一般在3米之外会有比较好的效果。
所有的台阶立面连接起来的播放视频的时候,就会呈现非常漂亮的显示效果。
立柱式:由于周围无墙体或者可利用的支撑点,立柱式户外LCD显示屏安装方式对钢结构的要求较高,是最常见的安装方式。
比如高速公路旁边的户外广告LCD屏多数都是采用立柱式安装方式。
示屏屏体吊挂于结构上。
一般会在舞台,室外没有墙体依托的情况下采用,在临时性使用户外LCD显示屏的情况下,吊装方式优势明显。
壁挂式:一般是在墙体上做一个受力点,将户外LCD显示屏挂于墙壁之上,利用墙体做为固定支撑。
前维护式:安装方式最大的特点就是维护,更换配件十分方便,维修人员可以直接从户外LCD显示屏前方将屏体打开,进行操作。
深圳市创伟达电子科技是一家专注于全户外液晶显示系统的研发、生产、销售于一体的高新技术型企业。
产品主要有户外液晶广告机、户外充电桩广告机、智能公交电子站牌,电子阅报栏、行人闯红灯显示屏等。
创伟达电子科技竭诚为广大新老客户提供优质的产品和服务,热忱欢迎新老客户来厂参观指导。
来源:。
英国Acer LCD显示器快速启动指南(QSG)说明书

Acer LCD Monitor Quick Start Guide (QSG)Important safety instructionsPlease read the following instructions carefully.1. To clean the LCD monitor screen: Be sure that your monitor is electrically rated to operate with the AC power available in yourlocation.• Turn off the LCD monitor and unplug the power cord.• Spray a non-solvent cleaning solution onto a rag and clean the screen gently.2. Do not place the LCD monitor near a window. Exposing the monitor to rain, moisture or sunlight can severely damage it.3. Do not apply pressure to the LCD screen. Excessive pressure may cause permanent damage to the display.4. Do not remove the cover or attempt to service this unit yourself. An authorized technician should perform servicing of any nature.5. Store the LCD monitor in a room with a temperature of -20° to 60°C (-4° to 140°F). Storing the LCD monitor outside this rangemay result in permanent damage.6. Immediately unplug your monitor and call an authorized technician if any of the following circumstances occur:• Monitor-to-PC signal cable is frayed or damaged.• Liquid spills onto the LCD monitor or the monitor is exposed to rain.• The LCD monitor or case is damaged.Package contentsAttaching the monitor to the base1. Remove the monitor base from the packaging and place it on a stable and level workspace.2. Remove the monitor from the packaging.3. Align the release button at the buttom of the monitor with the corresponding slot at the bottom of the base. A clicking soundsignifies that the monitor has been securely attached to the base.Connecting Your Monitor to a Computer1. Turn off your monitor and unplug your computer’s power cord.2. 2-1 Connect Video Cablea. Make sure both the monitor and computer are switched off.b. Connect the VGA video cable to the computer.2-2 DVI Cable (Optional, only Dual-Input Model)a. Make sure both the monitor and computer are powered-OFF.b. Connect the DVI cable to the computer.2-3 HDMI Cable (Optional, only HDMI-Input Model)a. Make sure both the monitor and computer are powered-OFF.b. Connect the HDMI cable to the computer.3. Connect the Audio Cable. (Only Audio-Input Model) (Optional)4. Connect one end of the adapter to the monitor and the other end to aproperly grounded, AC outlet.5. Plug the power cords of your computer and your monitor into a nearbyelectrical outlet.External ControlsRegulations and safety noticesNotice: Shielded cablesAll connections to other computing devices must be made using shielded cables to maintain compliance with EMC regulations.Notice: Peripheral devicesOnly peripherals (input/output devices, terminals, printers, etc.) certified to comply with the Class B limits may be attached to this equipment. Operation with non-certified peripherals is likely to result in interference to radio and TV reception.CautionChanges or modifications not expressly approved by the manufacturer could void the user authority, which is granted by the Federal Communications Commission, to operate this product.Disposal of Waste Equipment by Users in Private Household in the European UnionThis symbol on the product or on its packaging indicates that this product must not be disposed of with your other household waste. Instead, it is your responsibility to dispose of your waste equipment by handing it over to a designated collection point for the recycling of waste electrical and electronic equipment. The separate collection and recycling of your waste equipment at the time of disposal will help to conserve natural resources and ensure that it is recycled in a manner that protects human health and the environment. For more information about where you can drop off your waste equipment for recycling, please contact your local city office, your household waste disposal service or the shop where you purchased the product.In order to prevent damage to the monitor, do not lift the monitor by its base.FCC noticesThis device has been tested and found to comply with the limits for a Class B digital device pursuant to Part 15 of the FCC rules. These limits are designed to provide reasonable protection against harmful interference in a residential installation. This device generates, uses, and can radiate radio frequency energy and, if not installed and used in accordance with the instructions, may cause harmful Interference to radio communications. However, there is no guarantee that interference will not occur in a particular installation. If this device does cause harmful interference to radio or television reception, which can be determined by turning the device off and on, the user is encouraged to try to correct the interference by one or more of the following measures:• Reorient or relocate the receiving antenna.• Increase the separation between the device and receiver.• Connect the device into an outlet on a circuit different from that to which the receiver is connected.• Consult the dealer or an experienced radio/television technician for help.CE declaration of conformityHereby, Acer Inc., declares that this LCD monitor is in compliance with the essential requirements and other relevantprovisions of EMC Directive 2014/30/EU, Low Voltage Directive 2014/35/EU, and RoHS Directive 2011/65/EU and Directive 2009/125/EC with regard to establishing a framework for the setting of ecodesign requirements for energy-related product.Operation conditionsThis device complies with Part 15 of the FCC Rules. Operation is subject to the following two conditions: (1) this device may not cause harmful interference, and (2) this device must accept any interference received, including interference that may cause undesired operation.Notice: Canadian usersThis Class B digital apparatus complies with Canadian ICES-003. Remarque a I’intention des utilisateurs canadiens Cet appareil numerique de la classe B est conforme a la norme NMB-003 du Canada.。
宏基星锐4750G笔记本更换屏幕

宏基星锐4750G笔记本更换屏幕一不小心,屏幕碎了!
去售后说是人为原因,要自己掏钱,700多,伤不起啊!还不如自己动手。
淘宝上自己买一块屏幕
一块14寸的LED液晶屏幕不到300
最开始要先把电池下下来,带电操作很危险的,高压灯管产生的电压好像有几千伏,然后再拆机。
首先,拆笔记本的B面,把表面的几个垫子挖出来后就见到螺丝了
不知道是不是宏基偷工减料,这面只有2个螺丝,我找了很久才确定只有两个螺丝。
然后就用指甲或平的螺丝刀撬开就可以了
这是下了B面的样子
然后把摄像头的插头拔掉
下掉把固定屏幕框固定在A面的两根铁架上的螺丝
把屏幕放下
屏幕放下后可以看到屏幕背面有屏线(黄色),和高压灯管插头(白色)
高压灯管插头
拔掉高压灯管插头
拔掉屏线,屏线上面有一层胶布,撕开就能拔出来
拔下来的屏线
接下来把屏幕从固定框上取下
下侧面的四个螺丝就可以取下屏幕
取下来的屏幕
然后把新屏幕换上,同样的过程换好了,开机测试一下
OK了,都没用问题,然后原路返回
装好了,再开机试一下
好了,一切都没用问题。
在换的过程里,再B面是花了最多时间的,因为是第一次嘛,所以都比较小心。
下的时候小心一点,不要把转轴那里的卡扣弄断了。
还要记得先把电池下下来。
整个过程就是这样,也没有特别难的地方,以后可以自己换屏幕了!。
电子显示屏安装方案

电子显示屏安装方案背景电子显示屏广泛应用于室内和室外场所,用于展示广告、信息和其他多媒体内容。
为了确保电子显示屏能够正常运行并充分发挥其功能,正确的安装方案至关重要。
本文档旨在提供一份电子显示屏安装方案,以帮助您正确、高效地安装电子显示屏。
安装步骤步骤一:场地选择和准备1. 确定电子显示屏的安装位置,包括室内或室外、墙面或支架等。
2. 检查安装位置的结构和空间是否能够承载和适应电子显示屏的尺寸和重量。
3. 清理安装位置,确保表面干净、平整,并确保周边没有杂物和障碍物。
步骤二:电源和电线接入1. 确保供电电源符合电子显示屏的要求,并且安装位置附近有便于接入电源的插座。
2. 选择合适的电源线,确保其质量和电流承载能力。
将电源线从电源接口连接到电子显示屏的电源接口。
步骤三:安装支架或墙面固定1. 如果需要安装支架,选择合适的支架类型,并根据制造商的指南进行安装。
2. 如果需要将电子显示屏固定在墙面上,使用合适的固定装置,如螺栓和支架来固定。
步骤四:连接信号源1. 确定电子显示屏的信号源,如电脑、DVD播放器或其他多媒体设备。
2. 使用适当的连接线将信号源与电子显示屏连接起来,并确保连接稳固。
步骤五:测试和调整1. 完成以上安装步骤后,首先将电子显示屏开启并测试其功能是否正常。
2. 如有需要,根据实际的使用情况对电子显示屏进行调整,如调整亮度、对比度等参数。
注意事项- 在进行电子显示屏安装过程中,请确保按照制造商的指南和规定进行操作。
- 如果对电子显示屏安装有任何疑问或困难,建议咨询专业人士或制造商的技术支持。
- 在安装过程中,注意安全事项,确保不会造成人员伤害或设备损坏。
结论通过按照上述步骤进行电子显示屏的安装,您将能够顺利安装并正确使用电子显示屏。
请始终确保按照制造商的指南和建议进行操作,并妥善处理任何电线和电源连接以确保安全。
如果需要,随时咨询专业人士获得帮助和支持。
触摸屏显示器的安装说明
触摸屏显示器的安装说明触摸屏显示器的安装说明触摸屏显示器是一种方便用户进行操作的设备。
在使用触摸屏显示器之前,需要正确地安装它。
本文将为您详细介绍触摸屏显示器的安装步骤和注意事项。
第一步:准备工作在开始安装触摸屏显示器之前,需要做一些准备工作。
首先,确保您拥有适配触摸屏的计算机系统,包括主机、操作系统以及相关驱动程序。
其次,将触摸屏的包装打开,检查是否有任何物品损坏并确保包含所有所需的配件和线缆。
第二步:连接电源将触摸屏显示器的电源线插入电源插座,并确认电源开关处于关闭状态。
然后,将显示器的电源线插入触摸屏显示器的电源接口。
最后,将另一端的电源线插入计算机主机的电源接口。
第三步:信号线连接将触摸屏显示器的信号线插头插入计算机主机的对应接口。
确保插头插入牢固,并紧固螺丝以防止松动。
接下来,将触摸屏显示器的USB线插头插入计算机主机的USB接口。
同样地,确保插头插入稳固,并紧固螺丝以保证连接的牢固性。
第四步:固定底座根据您的需要,选择适当的位置放置触摸屏显示器,并将其底座固定在桌面或其他平稳的表面上。
确保底座稳固且平衡,以避免显示器的晃动或倾斜。
第五步:驱动安装在正式使用触摸屏显示器之前,您需要安装相关的驱动程序。
通过连接计算机与互联网,下载并安装适用于您的操作系统的驱动程序。
根据驱动程序安装向导的指示进行操作,并在安装完成后重新启动计算机。
第六步:调整显示设置启动计算机后,进入操作系统,并打开控制面板。
选择显示设置,确保操作系统正确识别并显示触摸屏显示器。
在需要的情况下,进行屏幕分辨率和方向的调整,以适应您的使用需求。
第七步:功能测试在完成以上所有步骤后,您可以进行功能测试以确保触摸屏显示器的正常工作。
通过轻触屏幕,尝试进行点击、滑动等操作,观察屏幕是否正确响应。
如果发现任何问题,您可以检查连接是否正确、驱动是否安装完整,或者联系销售商或售后服务。
注意事项:- 在安装触摸屏显示器时,请务必断开计算机主机的电源,以避免触摸屏和电脑之间的电气连接。
CAREL pCOxs 说明书

1
pCOxs manual -cod.+030220345-rel.1.0-18.03.03
目录
简介 1. 总体特性..................................................................................... 4
1.1 pCOxs..................................................................................... 4 1.2 程序..................................................................................... 4 2. 硬件结构..................................................................................... 5 2.1 设备和附件代码............................................................................ 7 2.2 输入/输出说明............................................................................. 9 3. 用户手操作器................................................................................. 10 3.1 LCD显示屏对比度的调节..................................................................... 10 3.2 墙壁安装或面板安装4×20LCD显示屏.......................................................... 10 3.3 墙壁安装或面板安装LED显示屏............................................................... 10 3.4 墙壁安装或面板安装LCD图形显示屏........................................................... 10 3.5 面板安装4×20LCD显示屏.................................................................... 11 3.6 面板安装LCD图形显示屏..................................................................... 11 3.7 3个数码LED显示,32×72..................................................................... 11 3.8 pCO手操器的按键........................................................................... 11 3.9 图形显示屏字符的特性和功能................................................................ 12 4. 安装................................ 14 4.1 pCOxs的安装固定........................................................................... 14 4.2 所用电源.................................................................................. 14 4.3 安装条件.................................................................................. 14 4.4 模拟量输入连接............................................................................ 15 4.5 开关量输出连接............................................................................ 17 4.6 0/10V模拟量输出连接....................................................................... 17 4.7 PWM模拟量输出连接......................................................................... 17 4.8 开关输出连接.............................................................................. 18 4.9 用户手操器的安装.......................................................................... 18 4.10 安装用于图形显示手操器的程序存储器EPROM.................................................. 19 5. pLAN局域网................................................................................... 20 5.1 设置pCO1地址.............................................................................. 21 5.2 设置手操器地址............................................................................ 21 5.3 专用和共用手操器.......................................................................... 21 5.4 pLAN电气连接.............................................................................. 22 5.5 在pLAN局域网中远距离安装手操器............................................................ 24 5.6 plAN局域网的技术说明...................................................................... 26 6. MP 总线网.................................................................................... 26 7. 可选卡....................................................................................... 27 7.1 用于维护和监视用的RS485串行卡............................................................. 27 7.2 用于是Modem管理的RS232串行卡.............................................................. 27 7.3 时钟卡.................................................................................... 28 7.4 用于4×20LCD显示屏或6个LED显示屏的串行打印卡.............................................. 28 7.5 用于图形显示器的串行打印卡,PCOSERPRN0..................................................... 28
电脑显示器怎么安装

电脑显示器怎么安装
推荐文章
开机显示器黑屏电源灯亮一下又灭怎么回事热度:飞利浦电脑显示器怎么调节亮度热度:电脑显示器休眠后怎么被唤醒热度: aoc显示器调屏幕亮度的方法步骤热度:电脑显示器怎样调色差热度:你们知道怎么安装电脑的显示器吗,下面是店铺带来的关于电脑显示器怎么安装的内容,欢迎阅读!
电脑显示器怎么安装?
拿到新的显示器,首选检查外包装有无破损,如果破损严重,那么内部的配件有可能损坏。
此时不要轻易签收,要检查过确保无误再签收。
打开包装,将显示器取出。
将保护泡沫缓缓拿开,取出配件放在平整或柔软的地方,仔细核对配件的完整性。
一般由显示屏、支架、底座。
三部分组成。
将支架插入底座,并翻转,拧紧底座的螺丝。
固定好支架。
将显示屏接口对准支架上端卡口,插入支架并固定好位置。
将VGA视频线与电脑主机连接。
同时电源线与电源插座连接。
开机测试,如果显示器显示正常,你可以自由调节支架的角度使得显示角度符合你的使用习惯。
整个安装完成就可以愉快的使用了。
常见户外LCD显示屏的安装方法

常见户外LCD显示屏的安装方法
常见户外LCD显示屏的安装方法
户外环境不仅对LCD显示屏的质量要求高,还会影响到LCD显示屏的安装,且安装方式会户外场所的不同而不同。
下面是店铺收集整理的常见户外LCD显示屏的安装方法,希望对大家有帮助~~
常见户外LCD显示屏的安装方法
工具/原料
LCD显示器
方法/步骤
内嵌式安装方式:一般是在墙体上加装钢结构,然后以钢结构为支撑嵌入户外广告LCD显示屏,主要是安装场所是大楼外墙。
吊装式:主要是利用设计好的钢结构,将户外LCD显示屏屏体吊挂于结构上。
一般会在舞台,室外没有墙体依托的情况下采用,在临时性使用户外LCD显示屏的情况下,吊装方式优势明显。
台阶式:主要是在台阶的立面安装双色LCD显示屏或全彩色LCD 显示屏,高密度LCD显示屏列系LCD显示屏,观察距离一般在3米之外会有比较好的效果。
所有的台阶立面连接起来的播放视频的时候,就会呈现非常漂亮的显示效果。
立柱式:由于周围无墙体或者可利用的支撑点,立柱式户外LCD 显示屏安装方式对钢结构的要求较高,是最常见的安装方式。
比如高速公路旁边的户外广告LCD屏多数都是采用立柱式安装方式。
壁挂式:一般是在墙体上做一个受力点,将户外LCD显示屏挂于墙壁之上,利用墙体做为固定支撑。
前维护式:安装方式最大的特点就是维护,更换配件十分方便,维修人员可以直接从户外LCD显示屏前方将屏体打开,进行操作。
液晶显示器怎么安装
液晶显示器怎么安装LED显示屏的安装方式有镶嵌式、落地式、悬挂式、壁挂式、支撑式、支柱式等,很多人买了LED显示器但是不知道怎么安装,为此店铺为大家整理推荐了相关的知识,希望大家喜欢。
液晶显示器安装的方法把DVI显示卡插于主板的AGP插槽,安装好该卡的驱动程序;将数据采集卡插于空的PCI插槽;用DVI电缆线把数据采集卡与显示卡连接在一起;把控制线与串口(Rs232)相连(可选);用1条网线与接收卡相连;显示驱动卡与集线板用50P扁平线一一对应连接好;检查连接无误即可进行设置或上电调试。
户外显示屏注意事项(1) 显示屏安装在户外,经常日晒雨淋,风吹尘盖,工作环境恶劣。
电子设备被淋湿或严重受潮会引起短路甚至起火,引发故障甚至火灾,造成损失。
(2) 显示屏可能会受到雷电引起的强电强磁袭击。
(3) 环境温度变化极大。
显示屏工作时本身就要产生一定的热量,如果环境温度过高而散热又不良,集成电路可能工作不正常,甚至被烧毁,从而使显示系统无法正常工作。
(4) 受众面宽,视距要求远、视野要求广;环境光变化大,特别是可能受到阳光直射。
针对以上特殊要求,户外显示屏必须做到:(1) 屏体及屏体与建筑的结合部必须严格防水防漏;屏体要有良好的排水措施,一旦发生积水能顺利排放。
(2) 在显示屏及建筑物上安装避雷装置。
显示屏主体和外壳保持良好接地,接地电阻小于3欧姆,使雷电引起的大电流及时泄放。
(3) 安装通风设备降温,使屏体内部温度在-10℃~40℃之间。
屏体背后上方安装轴流风机,排出热量。
(4) 选用工作温度在-40℃~80℃之间的工业级集成电路芯片,防止冬季温度过低使显示屏不能启动。
(5) 为了保证在环境光强烈的情况下远距离可视,必须选用超高亮度发光二极管。
(6) 显示介质选用新型广视角管,视角宽阔,色彩纯正,一致协调寿命超过10万小时。
显示介质的外封装为目前最流行的带遮沿方形筒体,硅胶密封,无金属化装配;其外型精致美观,坚固耐用,具有防阳光直射、防尘、防水、防高温、防电路短路“五防”特点。
笔记本外接显示器方法教程.doc
笔记本外接显示器方法教程方法步骤如下:笔记本外接显显示器支持液晶显示器与液晶电视,这里我们以笔记本外接液晶显示器为例。
1、首先将液晶显示器接上电源,然后将显示器数据线与笔记本电脑上的VGA接口相连接即可。
注意:有些液晶显示器有开关,需要将显示器打开,然后进行下一步操作;2、使用组合快捷键Fn+F3键切换一下即可将液晶显示器点亮了。
说明:不同笔记本显示器切换快捷键是不一样的,比如联想笔记本通常是Fn+F3切屏、惠普笔记本则是FN+F4、东芝笔记本则是FN+F5组合快捷键,总之一般的是Fn+F1-f4吧,大家可以试试。
实在找不到切换组合键,请往下看。
3、通常这个时候,液晶显示器和笔记本显示器两个都是亮着的。
下面我们要做的是将笔记本屏幕关闭,以便省电,当然你也可以不进行以下操作。
在电脑桌面上点右键选在属性。
在设置选项卡下面找到显示设置项。
在下拉列表里选择第二项即插即用显示器。
然后确保下面的两项全部勾选上。
然后点应用。
之后再选择第一项(多个显示器)的那项(显卡不同上面的描述信息会有所不同),确保这两项都已经取消。
之后点确定就可以了。
这时候笔记本的屏幕应该已经点灭了。
另外由于采用的是大屏显示器,分辨率建议调高一些,以免显示画面不够清晰。
补充:显示屏常见故障分析一、电脑硬件故障引起的黑屏故障由电脑硬件故障引起的黑屏故障又可分为以下两大类:1、电脑主机故障引起的黑屏故障a、主机电源引起的故障主机电源损坏或主机电源质量不好引起的黑屏故障很常见。
例如,当添加了一些新设备之后,显示器便出现了黑屏故障,排除了硬件质量及兼容性问题之后电源的质量不好动力不足是故障的主要起因,更换大动率质优电源或使用稳压电源是解决这类故障的最好办法。
b、配件质量引起的故障电脑配件质量不佳或损坏,是引起显示器黑屏故障的主要成因。
如内存,显示卡,主板、CPU等出现问题肯定可能引起黑屏故障的出现。
其故障表现为显示器灯呈橘黄色,此时可用替换法更换下显示卡,内存、CPU,主板等部件试试,这是最简便、快捷的解决办法。
- 1、下载文档前请自行甄别文档内容的完整性,平台不提供额外的编辑、内容补充、找答案等附加服务。
- 2、"仅部分预览"的文档,不可在线预览部分如存在完整性等问题,可反馈申请退款(可完整预览的文档不适用该条件!)。
- 3、如文档侵犯您的权益,请联系客服反馈,我们会尽快为您处理(人工客服工作时间:9:00-18:30)。
在打开或卸下机盖时存在危险电压或其它风险,因此请勿自行维修本产品。委托专业 服务人员进行维修。 发生下列情形时,应从墙壁插座上拔掉本产品的电源线插头,然后交由合格的服务人 员进行维修:
• 电源线或插头损坏或磨损 • 液体溅入产品中 • 产品受到雨淋或溅水 • 产品曾经掉落,或机壳已经损坏 • 产品性能有明显的改变,表明需要进行维修 • 遵照使用说明进行操作,但产品工作不正常
EMC Directive 2004/108/EC as attested by conformity with the following harmonized standards:
-. EN55022, AS/NZS CISPR22 Class B.
-. EN55024
-. EN61000-3-2, Class D -. EN61000-3-3
注意: 只应调整操作说明中介绍的那些控制,因为其它控制调整不当 可能会导致损坏,而且经常会需要合格的专业技师去多做许多额外的 工作才能将产品恢复至正常状态。
潜在爆炸环境
在潜在爆炸性区域中,应关闭本装置的电源,并遵循所有标示和指导说明。潜在爆炸 性区域包括通常会要求您关闭车辆引擎的地方。在这些区域中,火花可能导致爆炸或 火灾,造成人身伤害甚至死亡。在服务站气泵附近关闭设备电源。在油库、储油点、 配油点以及化工厂或爆破区域等地点,应遵循相关的无线设备使用规定。潜在爆炸性 区域一般但不一定总是有标示。这些区域包括船甲板下方、化学品运送或存储设施、 使用液化石油气 (如丙烷或丁烷)的车辆、以及气体中包含化学品或谷粒、灰尘或 金属粉末等的区域。
关于您的安全和舒适的信息
安全注意事项
请仔细阅读这些说明。妥善保管本文档,供以后参考。务必遵守标示在产品上的警告 标示与说明。
清洁显示器
清洁显示器时,请严格按照这些指导说明进行操作。
• 务必在清洁前拔掉显示器电源线。 • 使用软布擦拭屏幕和机壳的正面及侧面。
便捷性
确保电源插座尽量靠近设备操作员,并且便于插拔电源线。当需要断开设备电源时, 务必从电源插座上拔掉电源线。
闪烁现象会消失。
• 根据所使用的桌面图案,屏幕亮度有可能略微不均匀。 • LCD 屏幕的有效像素数量达到 99.99% 或以上。它可能包含 0.01% 或以下的坏
点 (如缺少像素或像素常亮)。
• 由于 LCD 屏幕本身的特性,若长时间显示一个图像,则该图像在切换图像后可
能残留在屏幕上。在此情况下,可以通过切换图像或关闭电源数小时来缓慢地 恢复屏幕。
超过分支电路额定值的 80%。若使用电源板,负载不得超过电源板输入额定值 的 80%。
• 本产品的电源线配备三相接地插头。此插头只应插入接地型电源插座。在插入
电源线插头前确保电源插座已正确接地。不要将插头插入未接地的电源插座。 有关的详细信息,请与电工联系。
警告!接地插片是一项安全特性。使用未正确接地的电源插座可能导 致触电和 / 或伤害。
v
注意:接地插片还提供良好的保护,防止附近其它电气设备产生的意 外噪音干扰本产品的运行。
• 本产品只应使用随机附带的电源线套件。如需更换电源线套件,请确保新电源
线符合下列要求:可分离型, UL 列表 /CSA 认证, SPT-2 型,额定值最低 7 A 125 V, VDE 核准或与其等同,最大长度 4.6 米 (15 英尺)。
显示屏
• 使显示屏保持清洁。 • 使头部高于显示屏上边缘,确保观看显示屏中间位置时视线向下。 • 将显示屏亮度和 / 或对比度调整至合适的水平,确保图片和文字清晰。 • 通过以下方式消除眩光和反光:
• 放置显示器时,使其侧面面向窗户或光源 • 使用窗帘或遮光物等减弱室内光线 • 使用工作灯 • 改变显示屏的视角 • 使用防眩光滤光器 • 使用显示屏遮光板,如放置在显示屏正面上端的一片纸板 • 避免将显示屏调整至不佳的视角。 • 避免长时间注视明亮光源,如打开的窗户。
Acer 液晶显示器用户指南
产品型号: ________________________________ 产品序号: ________________________________ 购买日期: ________________________________ 购买地点: ________________________________
• 麻木,或者灼痛或麻刺感觉 • 疼痛、酸痛或触痛 • 痛苦、肿胀或抽动 • 僵硬或不灵活 • 冰凉或脆弱
若有这些症状或者因使用计算机而出现其它重复或持续的不舒适和 / 或疼痛,请立即 就医并通知所在公司的健康和安全部门。 下面一节介绍与舒适使用计算机相关的一些提示。
找到舒适区
通过调整显示器视角、使用脚凳、升高座椅高度等实现最舒适的姿势,从而找到舒适 区。遵循下列提示:
关于汞的建议
针对包含 LCD/CRT 显示器或显示屏的投影机或电子产品: 本产品内部的灯泡含有汞,因此必须根据当地、州或联邦的法律进行回收或废弃处 理。有关的详细信息,请与 Electronic Industries Alliance (美国电子工业协会)联 系,网址是 。有关灯管废弃的信息,请访问 。
Acer 和 Acer 标识为宏碁股份有限公司的注册商标。本出版物中所用之其它公司之产品名称及商标 仅供说明之用,并皆为各公司之所属商标。
iii
关于 LCD 显示器的特别注意事项
下列情况对于 LCD 显示器来说是正常现象,并非故障。
• 由于荧光灯本身特性,开始使用时屏幕可能闪烁。关闭电源开关然后重新开机,
Acer LCD 显示器
用户手册
版权 © 2010 宏碁股份有限公司 保留所有权利 Acer 液晶显示器用户指南 初版发行日期:2010 年 3 月
本出版物的内容将定期变动,恕不另行通知。更改的内容将会补充到本出版物,且会在本手册发行 新版本时予以付梓印刷。本公司不做任何明示或默许担保,包括本手册内容的适售性或符合特定使 用目的,本公司将一律否认。 在下列预留的空白处,记录下型号、序列号、购买日期及购买地点。型号及序列号可以在电脑外贴 的标签上找到。与电脑元件相关的资料应包括序列号、型号及购买信息。 未经宏碁股份有限公司书面同意,不得对本出版物的任何部分以任何方式,包含电子、机械、复 制、翻录或其它的方式,进行复制、重制或传播。
Contact Person: Mr. Easy Lai, E-mail: easy_lai@ And,
Acer Europe SA Via Cantonale, Centro Galleria 2 6928 Manno Switzerland
Hereby declare that: Product: Trade Name: Model Number: SKU Number:
养成良好的工作习惯
养成以下工作习惯有助于更轻松地使用计算机和提高效率:
• 经常休息一下。 • 做一些伸展运动。 • 经常呼吸新鲜空气。 • 经常运动和保持身体健康。
Acer Incorporated
8F, 88, Sec. 1, Hsin Tai Wu Rd., Hsichih Taipei Hsien 221, Taiwan
经销商或当地电力公司。
• 请勿将任何物品放置于电源线上。请勿将本产品放置于会有人踩踏电源线的地
方。
• 若使用电源延长线,应确保与其相连的设备的总安培数不超过该电源延长线的
安培数。并且也要请您确认所有产品所插入的墙上插座的总安培数也未超过保 险丝的总安培数。
• 不要插入过多的设备,否则会导致电源插座、电源板过载。系统整体负载不得
• 避免长时间保持一个固定姿势 • 避免向前倾和 / 或向后靠 • 经常站起来四处走走,减轻腿部肌肉疲劳
viii
视力保护
长时间用眼、佩戴不合适的眼镜或隐形眼镜、眩光、室内光照太强、屏幕聚焦不佳、 字体太小、显示对比度低等都容易导致眼睛疲劳。以下小节提供一些有助于减轻眼睛 疲劳的建议。
眼睛
• 经常休息眼睛。 • 将视线从显示器移开,看看远方,使眼睛定期休息一下。 • 经常眨眼,以避免眼睛干涩。
Low Voltage Directive 2006/95/EC as attested by conformity with the following harmonized standard:
会导致严重损坏。
• 开槽和开口用于通风目的,以确保本产品可靠地运行并防止过热。切勿堵塞或
盖住这些开口。请勿将本产品放置于床上、沙发、毛毯或其它类似物体的表面, 以保持通风口的畅通。除非能提供良好的通风环境,否则请勿将本产品放置在 靠近暖气机、电热器或以内置方式来安装。
• 请勿将任何类型的物体从机箱的槽缝中推入本产品,否则可能会碰触到危险的
LCD Monitor Acer V193HQV V193HQVxxxxxx ( “x” = 0~9, a ~ z, or A ~ Z)
Is compliant with the essential requirements and other relevant provisions of the following EC directives, and that all the necessary steps have been taken and are in force to assure that production units of the same product will continue comply with the requirements.
LCD 像素声明
LCD 单元在生产时采用高精度制造技术。但是,偶尔会有一些像素不亮或者是黑点或 红点。这并不影响录制的图像,也不管理功能:
• 若在 15 分钟内用户不进行任何操作,则激活显示器的睡眠模式。 • 若在 30 分钟内用户不进行任何操作,则激活计算机的睡眠模式。 • 按电源按钮可以从睡眠模式 “唤醒”计算机。
