使用easyui 的doCellTip 方法
easyui的使用
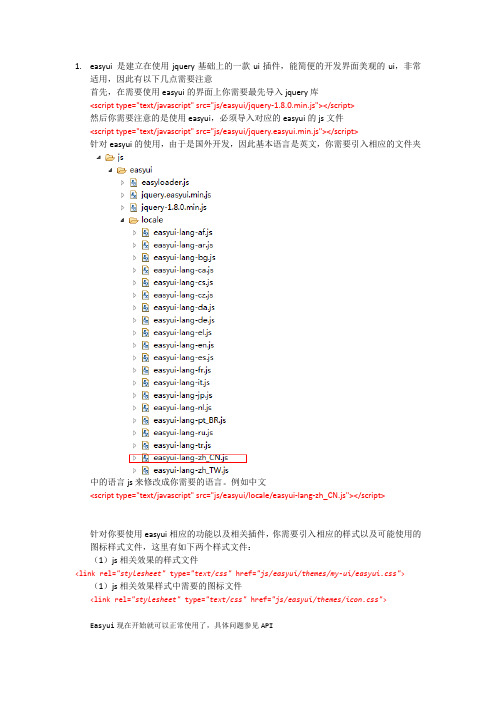
1.easyui是建立在使用jquery基础上的一款ui插件,能简便的开发界面美观的ui,非常适用,因此有以下几点需要注意首先,在需要使用easyui的界面上你需要最先导入jquery库<script type="text/javascript" src="js/easyui/jquery-1.8.0.min.js"></script>然后你需要注意的是使用easyui,必须导入对应的easyui的js文件<script type="text/javascript" src="js/easyui/jquery.easyui.min.js"></script>针对easyui的使用,由于是国外开发,因此基本语言是英文,你需要引入相应的文件夹中的语言js来修改成你需要的语言。
例如中文<script type="text/javascript" src="js/easyui/locale/easyui-lang-zh_CN.js"></script>针对你要使用easyui相应的功能以及相关插件,你需要引入相应的样式以及可能使用的图标样式文件,这里有如下两个样式文件:(1)js相关效果的样式文件<link rel="stylesheet" type="text/css"href="js/easyui/themes/my-ui/easyui.css"> (1)js相关效果样式中需要的图标文件<link rel="stylesheet" type="text/css"href="js/easyui/themes/icon.css">Easyui现在开始就可以正常使用了,具体问题参见API。
jQueryEasyUI菜单与按钮详解

jQueryEasyUI菜单与按钮详解EasyUI 简介easyui是⼀种基于jQuery的⽤户界⾯插件集合。
easyui为创建现代化,互动,JavaScript应⽤程序,提供必要的功能。
使⽤easyui你不需要写很多代码,你只需要通过编写⼀些简单HTML标记,就可以定义⽤户界⾯。
easyui是个完美⽀持HTML5⽹页的完整框架。
easyui节省您⽹页开发的时间和规模。
easyui很简单但功能强⼤的。
代码如下:<html><head><meta http-equiv="Content-Type" content="text/html; charset=utf-8"><title>5、easyui 菜单与按钮</title><link rel="stylesheet" type="text/css" href="../../../ui/jquery-easyui-1.4.5/themes/default/easyui.css"><link rel="stylesheet" type="text/css" href="../../../ui/jquery-easyui-1.4.5/themes/icon.css"><link rel="stylesheet" type="text/css" href="../../../ui/jquery-easyui-1.4.5/themes/color.css"><script src="../../../ui/jquery-easyui-1.4.5/jquery.min.js"></script><script src="../../../ui/jquery-easyui-1.4.5/jquery.easyui.min.js"></script><script src="../../../ui/jquery-easyui-1.4.5/locale/easyui-lang-zh_CN.js"></script><script src="../../../js/crud/bus_pubuser.js"></script><script>$(function(){$(document).bind('contextmenu',function(e){$('#mm').menu('show', {left : e.pageY,top : e.pageX});return false;});});</script><script>$(function(){$(".dsbtn").linkbutton('disable');});</script></head><body><!--开始创建简单的菜单--><!--菜单默认是不显⽰的需要在javascript中调⽤显⽰--><div id="mm" class="easyui-menu" style="width: 150px;height: 120px;"><div>新建</div><div><span>打开</span><div style="width:150px;height: 120px;"><div>Word</div><div>Excel</div><div>PowerPoint</div></div></div><div data-options="iconCls:'icon-save'">保存</div><div class="menu-sep"></div><div>退出</div></div><!--结束创建简单的菜单--><!--开始创建链接按钮(Link Button)--><!--链接按钮(Link Button)实则是使⽤ <a> 元素来创建的。
EasyUI使用教程
EasyUI使用教程
使用EasyUI必须导入其js以及css等.
jquery-easyui-1.3.5.zip
1.(l)list界面
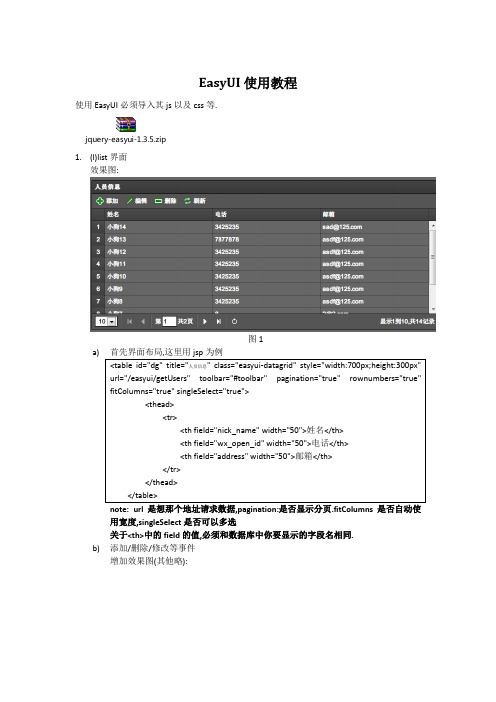
效果图:
图1
a)
note: url是想那个地址请求数据,pagination:是否显示分页.fitColumns是否自动使
用宽度,singleSelect是否可以多选
关于<th>中的field的值,必须和数据库中你要显示的字段名相同.
b)添加/删除/修改等事件
增加效果图(其他略):
图2
这样即可
c)分页:效果同上上图
图3
其中pagiination=”true”设置有分页.实现分页的js代码为:
note:开始时,点击分页栏中的刷新按钮不管用,一看忘记了实现onRefresh方法.具体
剩下的方法看文档: /documentation/index.php
在线demo: /demo/main/index.php
d)
e)
f)
2.初始化菜单导航栏:
开始时,采用直接在jsp页面中添加代码的方式,但是为了以后配置的方便,改成了读取
那么通过js读取出来,动态添加到导航菜单中,js:
里面有个addTab(tabId,title,url)的方法,他的作用是在主MainFrame中添加tab
然后就可以了.
还有些双击关闭等功能:参考实例代码.
3.累死了,先回去睡觉去.
4. d
5. d
6.dd
7.。
jqueryeasyui使用总结 (1)

jQuery EasyUI 使用总结1概述本文档内容包括easyui的引入和easyui的使用实践,编写该文档的目的,其一是为了下次再使用easyui的时候,有章可循,提高开发效率;其次记录使用过程中遇到的一些关键的问题,供自己和其他的同学参考。
2EasyUI的引入说明Jquery库引用EasyUI中自带了Jquery的库,版本是V2.0.0,请注意该版本不一定适用于你的项目场景,关于JqueryV2.0.0对IE浏览器的支持也是每一个开发人员需要注意的。
Jquery V2.0.0支持IE9+。
最新的不一定是最好的,有时候,请果断更换你的jquery版本。
还有一点注意的是,项目中通常不会只有一个地方使用jqeury,使用easy ui 时,使用项目中统一的jquey版本库,也不失为一种好的方案。
关于easyui包目录结构调整说明通常从jquery-easyui官网中下载下来的包,是一个相当完整的包:其目录结构如下:其中:➢demo目录是easyui使用示例;➢locale目录是国际化支持;➢src目录是部分easyui插件的源码;➢plugins目录是easyui使用的插件;➢themes目录包含多套easyui可使用的主题。
通常在项目中使用的话,demo目录、src目录可以不用,locale可以去除没用的js库,主题如果只使用默认的主题,也可以去除不用的主题。
项目中,清理后的easyui目录结构参考如下:其中extends目录是项目中,基于easyui框架做的一些扩展。
使用easyui需要引用的js和css这次项目中主要为了使用easyui的datagrid控件,才引入了easyui框架。
由于不同的模块都会使用的easyui,所以把easyui相关的js和css统一放到了editInclude.jsp页面中,editInclude.jsp页面的内容如下:<%@ page contentType="text/html; charset=gbk" language="java" %><%String webContext = request.getContextPath();%><link rel="stylesheet" type="text/css"href="<%=webContext %>/js/jquery-easyui/themes/gray/easyui.css"><link rel="stylesheet" type="text/css"href="<%=webContext %>/js/jquery-easyui/themes/icon.css"><script type="text/javascript"src="<%=webContext %>/js/jquery/jquery-1.7.2.min.js"></script><script type="text/javascript"src="<%=webContext %>/js/jquery-easyui/jquery.easyui.min.js"></script ><script type="text/javascript"src="<%=webContext %>/js/jquery-easyui/locale/easyui-lang-zh_CN.js">< /script><script type="text/javascript"src="<%=webContext %>/js/jquery-easyui/extends/easyui.formatter.js">< /script><script type="text/javascript"src="<%=webContext %>/js/jquery-easyui/extends/easyui.edit.js"></scri pt>Js和css文件说明:➢easyui.css是easyui框架的主样式;➢icon.css是easyui中用到的图标的样式;➢jquery-1.7.2.min.js是easyui使用的基础;➢jquery.easyui.min.js是easyui的核心javascript库;➢easyui-lang-zh_CN.js是easyui对中文的国际化支持;➢easyui.formatter.js和easyui.edit.js是项目中使用到的两个扩展js库。
easypoi cellstyle 用法

easypoi cellstyle 用法在使用 EasyPoi 进行 Excel 文件处理时,CellStyle 是一项重要的功能。
CellStyle 可以通过应用不同的样式来设置 Excel 表格中的单元格外观,包括字体、背景色、边框等。
使用 EasyPoi 进行 CellStyle 的使用非常简单。
以下是一些常见的 CellStyle 用法示例:1. 设置单元格文字样式:可以使用CellStyle 的setFont 方法来设置单元格中文字的样式,如字体、颜色、大小等。
2. 设置单元格背景色:可以使用 CellStyle 的 setFillForegroundColor 方法来设置单元格的背景色。
3. 设置单元格边框:可以使用 CellStyle 的 setBorderBottom、setBorderTop、setBorderLeft、setBorderRight 方法来设置单元格的边框样式。
4. 设置单元格对齐方式:可以使用 CellStyle 的 setAlignment 方法来设置单元格中文字的对齐方式,如水平居中、垂直居中等。
5. 设置单元格自动换行:如果单元格中的内容过长,可以设置自动换行,以保证内容完整显示。
以上仅是 CellStyle 的一些常用用法示例,EasyPoi 还提供了更多灵活的选项,可以根据实际需求进行设置。
总结:通过 EasyPoi 中的 CellStyle 功能,我们可以轻松地设置 Excel 表格中单元格的样式,丰富了数据展示的形式。
无论是定制化的需求还是简单的样式设置,EasyPoi 都能满足我们的需求,并且使用简单方便。
希望本文的介绍能够帮助到您在使用 EasyPoi 进行 Excel 处理时的相关工作。
EasyUI datagrid使用介绍
System.Text.StringBuilder colJson = new System.Text.StringBuilder();
rowJson.Append("{");
for (int i = 0; i < colLen; i++)
int.TryParse(context.Request["CategoryId"], out categoryId);
int.TryParse(context.Request["GoodsStatus"], out goodsStatus);
var goodsQueryParamter = new GoodsQueryParamter();
decimal.TryParse(context.Request["PriceLeft"], out priceLeft);
decimal.TryParse(context.Request["PriceRight"], out priceRight);
}
},
{field:'showprice',title:'商品价格',width:80,align:'right',
styler:function(value,row,index){
if (value < 20){
JQuery EasyUI的datagrid的使用方式总结
第一步:添加样式和js脚本在前台添加展示数据表格的table元素
例如:
<div>
<table id="tt" style="width: 700px;" title="标题,可以使用代码进行初始化,也可以使用这种属性的方式" iconcls="icon-edit">
easyui案例
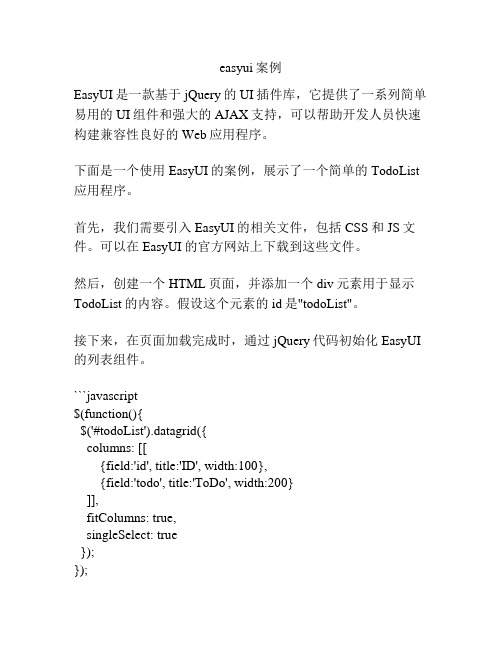
easyui案例EasyUI是一款基于jQuery的UI插件库,它提供了一系列简单易用的UI组件和强大的AJAX支持,可以帮助开发人员快速构建兼容性良好的Web应用程序。
下面是一个使用EasyUI的案例,展示了一个简单的TodoList 应用程序。
首先,我们需要引入EasyUI的相关文件,包括CSS和JS文件。
可以在EasyUI的官方网站上下载到这些文件。
然后,创建一个HTML页面,并添加一个div元素用于显示TodoList的内容。
假设这个元素的id是"todoList"。
接下来,在页面加载完成时,通过jQuery代码初始化EasyUI 的列表组件。
```javascript$(function(){$('#todoList').datagrid({columns: [[{field:'id', title:'ID', width:100},{field:'todo', title:'ToDo', width:200}]],fitColumns: true,singleSelect: true});});在初始化列表组件时,我们定义了两个列,一个是ID列,另一个是待办事项列。
此外,我们还设置了fitColumns为true,表示让列表自适应父容器的宽度;singleSelect为true,则表示只能选中一行。
接下来,我们需要添加输入框和按钮,用于添加待办事项。
```html<div><input id="todoInput" class="easyui-textbox"style="width:200px;"><a href="javascript:void(0)" class="easyui-linkbutton"onclick="addTodo()">Add</a></div>```在按钮的onclick事件中,调用addTodo函数来添加待办事项。
EasyUI组件使用
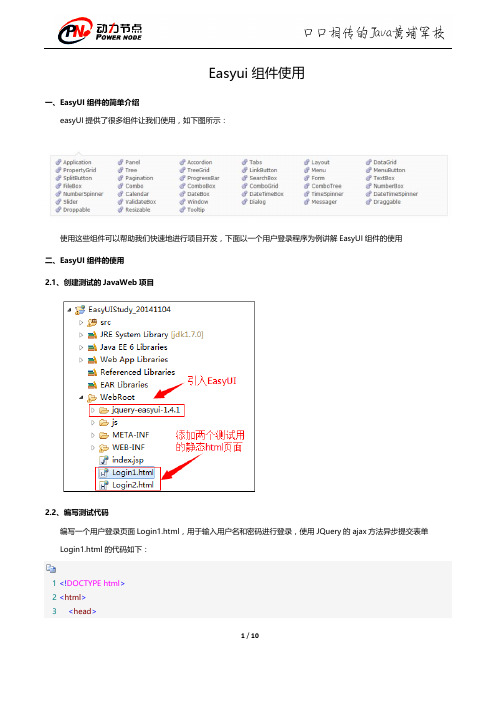
Easyui组件使用一、EasyUI组件的简单介绍easyUI提供了很多组件让我们使用,如下图所示:使用这些组件可以帮助我们快速地进行项目开发,下面以一个用户登录程序为例讲解EasyUI组件的使用二、EasyUI组件的使用2.1、创建测试的JavaWeb项目2.2、编写测试代码编写一个用户登录页面Login1.html,用于输入用户名和密码进行登录,使用JQuery的ajax方法异步提交表单Login1.html的代码如下:1<!DOCTYPE html>2<html>3<head>4<title>EasyUI组件使用范例</title>5<meta http-equiv="content-type" content="text/html; charset=UTF-8">6<!-- 引入JQuery -->7<script type="text/javascript" src="jquery-easyui-1.4.1/jquery.min.js"></script>8<!-- 引入EasyUI -->9<script type="text/javascript" src="jquery-easyui-1.4.1/jquery.easyui.min.js"></script>10<!-- 引入EasyUI的中文国际化js,让EasyUI支持中文-->11<script type="text/javascript" src="jquery-easyui-1.4.1/locale/easyui-lang-zh_CN.js"></script> 12<!-- 引入EasyUI的样式文件-->13<link rel="stylesheet" href="jquery-easyui-1.4.1/themes/default/easyui.css" type="text/css"/> 14<!-- 引入EasyUI的图标样式文件-->15<link rel="stylesheet" href="jquery-easyui-1.4.1/themes/icon.css" type="text/css"/>16<script type="text/javascript" src="js/Utils.js"></script>17<script type="text/javascript">18$(function(){19//(g_contextPath);20//(g_basePath);21//页面加载完成之后创建登录的dialog22$('#loginAndRegisterForm').dialog({23title: '用户登录',24width: 240,25height: 150,26closable: false,//设置dialog不允许被关闭27cache: false,28modal: true,29buttons:[30{31text:'登录',32iconCls: 'icon-ok',33width:70,34height:30,35handler:function(){36//(g_contextPath+'/servlet/LoginHandleServlet'); 37//(g_basePath+'/servlet/LoginHandleServlet');38//($('#loginForm').serialize());//在火狐中打印的结果:userName=gacl&userPwd=12339loginHandle();//处理用户登录40}41},42{43text:'重置',44iconCls: 'icon-ok',45width:70,46height:30,47handler:function(){48doReset('loginForm');49}50}51]5253});5455/*重置form表单*/56function doReset(formId){57$(':input','#'+formId)58 .not(':button, :submit, :reset, :hidden')59 .val('')60 .removeAttr('checked')61 .removeAttr('selected');62}6364/*处理用户登录*/65function loginHandle(){66$.ajax({67//url:g_contextPath+'/servlet/LoginHandleServlet',68url:g_basePath+'/servlet/LoginHandleServlet',//url表示服务器端处理用户登录的URL地址69/*data:{70//data表示要提交到服务器端的数据,通常的写法71"userName":$("#userName").val(),72"userPwd":$("#userPwd").val()73},*/74//data表示要提交到服务器端的数据,更加简洁的写法75data:$('#loginForm').serialize(),//serialize()方法的作用是将form表单中的内容序列化成字符串76cahe:false,77/*78用dataType来指明服务器端返回的数据格式是一个json字符串,客户端接收到返回的json字符串之后,79Jquery会自动把这个json字符串转换成一个Json对象80*/81dataType:'json',82success:function(r){83//此时的r已经是经过Jquery处理过之后的Json对象了84//(r.msg);85if(r && r.success){86//调用dialog的close方法关闭dialog87$('#loginAndRegisterForm').dialog('close');88$.messager.show({89title:'消息',90msg:r.msg91});92//登录成功后跳转到系统首页93//window.location.replace(g_basePath+'/index.jsp');94//window.location.href = g_basePath+'/index.jsp';95}else{96$.messager.alert('消息',r.msg);97}98}99});100}101});102</script>103104</head>105106<body>107孤傲苍狼108<div id="loginAndRegisterForm">109<form method="post" id="loginForm">110<table>111<tr>112<th style="text-align:left;">113用户名:114</th>115<td>116<!-- class="easyui-textbox"表示使用EasyUI的textbox组件-->117<input type="text" id="userName" style="width:150px;" name="userName" class="easyui-textbox"/>118</td>119</tr>120<tr>121<th style="text-align:left;">122密码:123</th>124<td>125<input type="password" id="userPwd" style="width:150px;" name="userPwd" class="easyui-textbox"/>126</td>127</tr>128</table>129</form>130</div>131</body>132</html>Login1.html中用到了一个Utils.js,Utils.js中有两个方法:getBasePath和getContextPath,分别用于获取Web应用的basePath和contextPath,获取Web应用的basePath和contextPath的目的就是为了在提交form表单到指定的Sevlet中进行处理时拼凑出处理请求的Servlet的绝对路径例如:url:g_contextPath+'/servlet/LoginHandleServlet'url:g_basePath+'/servlet/LoginHandleServlet'这样无论Servlet如何映射url-pattern,都可以正确找到该ServletUtils.js代码如下:1//立即执行的js2 (function() {3//获取contextPath4var contextPath = getContextPath();5//获取basePath6var basePath = getBasePath();7//将获取到contextPath和basePath分别赋值给window对象的g_contextPath属性和g_basePath属性8window.g_contextPath = contextPath;9window.g_basePath = basePath;10 })();1112/**13* @author 孤傲苍狼14* 获得项目根路径,等价于jsp页面中15* <%16String basePath =request.getScheme()+"://"+request.getServerName()+":"+request.getServerPort()+path+"/"; 17%>18* 使用方法:getBasePath();19* @returns 项目的根路径20*21*/22function getBasePath() {23var curWwwPath = window.document.location.href;24var pathName = window.document.location.pathname;25var pos = curWwwPath.indexOf(pathName);26var localhostPath = curWwwPath.substring(0, pos);27var projectName = pathName.substring(0, pathName.substr(1).indexOf('/') + 1);28return (localhostPath + projectName);29 }3031/**32* @author 孤傲苍狼33* 获取Web应用的contextPath,等价于jsp页面中34* <%35String path = request.getContextPath();36%>37* 使用方法:getContextPath();38* @returns /项目名称(/EasyUIStudy_20141104)39*/40function getContextPath() {41return window.document.location.pathname.substring(0,window.document.location.pathname.indexOf('\/', 1));42 };处理用户登录请求的Servlet的LoginHandleServlet代码如下:1package me.gacl.web.controller;23import java.io.IOException;45import javax.servlet.ServletException;6import javax.servlet.http.HttpServlet;7import javax.servlet.http.HttpServletRequest;8import javax.servlet.http.HttpServletResponse;910import com.alibaba.fastjson.JSON;1112import me.gacl.custom.model.Json;1314public class LoginHandleServlet extends HttpServlet {1516public void doGet(HttpServletRequest request, HttpServletResponse response)17throws ServletException, IOException {18//服务器端使用UTF-8编码将响应内容输出到客户端19response.setCharacterEncoding("UTF-8");20//通知客户端浏览器以UTF-8编码显示内容,避免产生中文乱码问题21response.setHeader("content-type", "text/html;charset=UTF-8");22String userName = request.getParameter("userName");23String userPwd = request.getParameter("userPwd");24Json json = new Json();25if (userName.equals("gacl") && userPwd.equals("123")) {26json.setMsg("登录成功");27json.setSuccess(true);28}else {29json.setMsg("用户名或密码错误,登录失败!");30json.setSuccess(false);31}32//使用alibaba(阿里巴巴)的fastJson工具类将Json对象转换成一个json字符串33String jsonStr = JSON.toJSONString(json);34//将json字符串作为响应内容输出到客户端浏览器。
easyui使用总结
1概述本文档内容包括easyui的引入和easyui的使用实践,编写该文档的目的,其一是为了下次再使用easyui的时候,有章可循,提高开发效率;其次记录使用过程中遇到的一些关键的问题,供自己和其他的同学参考。
2EasyUI的引入说明Jquery库引用EasyUI中自带了Jquery的库,版本是V2.0.0,请注意该版本不一定适用于你的项目场景,关于JqueryV2.0.0对IE浏览器的支持也是每一个开发人员需要注意的。
Jquery V2.0.0支持IE9+。
最新的不一定是最好的,有时候,请果断更换你的jquery版本。
还有一点注意的是,项目中通常不会只有一个地方使用jqeury,使用easy ui 时,使用项目中统一的jquey版本库,也不失为一种好的方案。
关于easyui包目录结构调整说明通常从jquery-easyui官网中下载下来的包,是一个相当完整的包:其目录结构如下:其中:demo目录是easyui使用示例;locale目录是国际化支持;src目录是部分easyui插件的源码;plugins目录是easyui使用的插件;themes目录包含多套easyui可使用的主题。
通常在项目中使用的话,demo目录、src目录可以不用,locale可以去除没用的js库,主题如果只使用默认的主题,也可以去除不用的主题。
项目中,清理后的easyui目录结构参考如下:其中extends目录是项目中,基于easyui框架做的一些扩展。
使用easyui需要引用的js和css这次项目中主要为了使用easyui的datagrid控件,才引入了easyui框架。
由于不同的模块都会使用的easyui,所以把easyui相关的js和css统一放到了editInclude.jsp页面中,editInclude.jsp页面的内容如下:<%@ page contentType="text/html; charset=gbk" language="java" %><%String webContext = request.getContextPath();%><link rel="stylesheet" type="text/css"href="<%=webContext %>/js/jquery-easyui/themes/gray/easyui.css"><link rel="stylesheet" type="text/css"href="<%=webContext %>/js/jquery-easyui/themes/icon.css"><script type="text/javascript"src="<%=webContext %>/js/jquery/jquery-1.7.2.min.js"></script><script type="text/javascript"src="<%=webContext %>/js/jquery-easyui/jquery.easyui.min.js"></script ><script type="text/javascript"src="<%=webContext %>/js/jquery-easyui/locale/easyui-lang-zh_CN.js">< /script><script type="text/javascript"src="<%=webContext %>/js/jquery-easyui/extends/easyui.formatter.js">< /script><script type="text/javascript"src="<%=webContext %>/js/jquery-easyui/extends/easyui.edit.js"></scri pt>Js和css文件说明:easyui.css是easyui框架的主样式;icon.css是easyui中用到的图标的样式;jquery-1.7.2.min.js是easyui使用的基础;jquery.easyui.min.js是easyui的核心javascript库;easyui-lang-zh_CN.js是easyui对中文的国际化支持;easyui.formatter.js和easyui.edit.js是项目中使用到的两个扩展js库。
Easyui笔记 (1)
Easyui笔记Form组件:1.Form1.1 创建表单创建一个简单的HTML表单:<form id="ff"method="post"><div><label for="name">Name:</label><input class="easyui-validatebox"type="text"name="name"data-options="required:true"/></div><div><label for="email">Email:</label><input class="easyui-validatebox"type="text"name="email"data-options="validType:'email'"/></div>...</form>让表单一ajax方式提交:$('#ff').form({url:...,onSubmit: function(){// do some check// return false to prevent submit;},success:function(data){alert(data)}});// submit the form$('#ff').submit();提交动作:// call 'submit' method of form plugin to submit the form$('#ff').form('submit', {url:...,onSubmit: function(){// do some check// return false to prevent submit;},success:function(data){alert(data)}});提交额外的参数:$('#ff').form('submit', {url:...,onSubmit: function(param){param.p1 = 'value1';param.p2 = 'value2';}});1.2 处理表单的提交提交一个ajax表单很简单。
JqueryEasyui对话框组件Dialog使用详解(14)

JqueryEasyui对话框组件Dialog使⽤详解(14)Dialog对话框组件依赖于Window(窗⼝)组件、linkbutton 组件加载⽅式Class加载<div class="easyui-dialog"title="弹出框"data-options="iconCls:'icon-add',resizable:true,modal:true"style="width: 400px;height: 200px;">弹出框内容</div>JS调⽤加载<div id="box">弹出框内容</div><div id="tt"><a href="#" class="easyui-linkbutton"data-options="iconCls:'icon-edit',plain:true">编辑</a><a href="#" class="easyui-linkbutton"data-options="iconCls:'icon-help',plain:true">帮助</a></div><script>$(function () {$('#box').dialog({width : 400,height : 200,title : '弹出框标题',modal : true,// 是否显⽰可折叠按钮collapsible : false,// 是否显⽰最⼩化按钮minimizable : false,// 是否显⽰最⼤化按钮maximizable : false,// 是否可以改变对话框窗⼝⼤⼩resizable : false,// 设置对话框窗⼝顶部⼯具栏//buttons : '#tt',toolbar : [{text : '编辑',iconCls : 'icon-edit',handler : function () {alert('edit');},}, {}],// 对话框窗⼝底部按钮buttons : [{text : '保存',iconCls : 'icon-ok',handler : function () {alert('save');}},{}]})});</script>属性列表窗⼝属性扩展⾃ Window(⾯板),窗⼝新增或重新定义的属性如下Dialog 是继承⾃ Window 组件的,所以 Window 组件和 Panel 组件均可⽤事件列表窗⼝的事件完整继承⾃ Window(⾯板)。
easyui datagrid 调用函数

easyui datagrid 调用函数在使用easyui datagrid组件时,经常会遇到需要在特定时机调用函数的情况,比如在加载数据完成后进行一些处理,或者在用户进行操作时触发一些功能。
这时就需要使用easyui datagrid的调用函数功能来实现。
1. 使用datagrid的onLoadSuccess事件在easyui datagrid加载数据完成后,会触发onLoadSuccess事件,我们可以通过该事件来调用我们需要的函数。
```javascript$('#dg').datagrid({url: 'data.json',onLoadSuccess: function(data){// 在数据加载完成后调用的函数doSomething();}});```在上面的例子中,当datagrid加载数据完成后,会调用名为doSomething的函数来处理一些逻辑。
这样就实现了在数据加载完成后调用函数的效果。
2. 手动调用函数除了依赖事件来触发函数调用,我们也可以手动调用函数来实现需要的功能。
```javascriptfunction doSomething(){// 这里是需要执行的逻辑}// 手动调用函数doSomething();```在上面的例子中,我们直接调用了名为doSomething的函数,这样就实现了手动调用函数的效果。
这种方式适用于需要在多个地方调用同一个函数的情况。
3. 利用datagrid的方法来调用函数除了上面两种方式,我们还可以利用easyui datagrid提供的方法来调用函数。
我们可以通过datagrid的getSelected方法来获取当前选中的行,然后再调用相应的函数来处理数据。
```javascript$('#dg').datagrid('getSelected', function(row){// 获取当前选中的行数据后调用的函数doSomething(row);});```在上面的例子中,我们通过调用datagrid的getSelected方法来获取当前选中的行数据,并且将其作为参数传递给doSomething函数来进行处理。
EasyUI中datagrid控件的使用设置多行表头(两行或多行)
EasyUI中datagrid控件的使⽤设置多⾏表头(两⾏或多⾏)EasyUI中的datagrid控件⼗分强⼤,能⽣成各种复杂的报表,现在因为项⽬需要,需要⽣成⼀个表头两⾏的表,找了⼀些说明⽂档,以下⽤⼀个实例来说明⼀下:第⼀种⽅法:1 $('#divData').datagrid({2 border : 2,3 nowrap : false,4 fit : true,5 url: '<%=request.getContextPath()%>/report/showreport.action',6 frozenColumns: [[7 { title: '区域名称', field: 'regionname', width: 80, sortable: true}8 ]],9 columns: [10 [{"title":"学⽣","colspan":2},11 {"title":"成绩","colspan":3}],12 [13 {"field":"config_gender1","title":"⼥⽣","rowspan":1},14 {"field":"config_gender2","title":"男⽣","rowspan":1},15 {"field":"config_datatype0","title":"语⽂","rowspan":1},16 {"field":"config_datatype1","title":"数学","rowspan":1},17 {"field":"config_datatype2","title":"英语","rowspan":1}]],18 rownumbers: true19 });第⼆种⽅法:1 $("#divValueTable").datagrid({2 url: '@Url.Action("DataList", "Report")',3 queryParams: {4 "targetID": '1234',5 "OrgID": orgid,6 "FactTime": Year,78 }, //请求数据时发送的参数9 autowidth: true,// ⾃动宽度10 iconCls: 'icon-save',11 striped: true,12 height: 600,13 nowrap: false,14 singleSelect: true,15 fitColumns: true,16 rownumbers: true, //是否加⾏号17 pagination: false, //是否显式分页18 pageSize: 10, //页容量,必须和pageList对应起来,否则会报错19 pageNumber: 1, //默认显⽰第⼏页20 pageList: [10, 20, 30],//分页中下拉选项的数值21 frozenColumns: [],22 columns: [[23 {24 title: "操作",field:"Operate",width:100,align:"center",rowspan:2,resizeable:false,formatter:function(value,row) {25try {27return "<a href=\"javascript:void(0)\" onclick='Edit(\"" + row.FactID + "\")'>编辑</a>";29 }30catch (e)31 { }32 }33 },34 {35 title: "季度", order: 2, width: 150, align: "center",colspan:33637 },38 {39 title: "上报机构", order: 3, field: "OrgID", width: 150, align: "center", rowspan: 2, resizeable: false42 },43 {44 title: "备注",order:5,field:"Remark",width:80,align:"center",rowspan:2,resizeable:false,formatter:function(value) {45return (value == null ? "" : value).overflow(10);46 }47 }48 ],49 [50 {51 title: "1⽉", order: 6, field: "SubmitID", width: 50, align: "center", resizeable: false52 },53 {54 title: "2⽉", order: 6, field: "SubmitID", width:50, align: "center", resizeable: false55 }56 , {57 title: "3⽉", order: 6, field: "SubmitID", width: 50, align: "center", resizeable: false58 }59 ]6061 ]62 });这样设置,表头也是两⾏显⽰.frozenColumns: []⾥边写⼊要锁定的列,这些列将被冻结,就像Excel中的锁定表头⼀样,锁定后该内容将不会随着滚动条的移动⽽变动位置.fitColumns: true 该属性是设置列的宽度(个⼈经验,⾮官⽅说法:设置为false后,datagrid的宽度将会随着你设置的每列的宽度⾃定累加,如果加起来的数达到2048px,在页⾯中会⾃动显⽰⽔平滚动条,如果该值为true,datagrid的宽度将会随着页⾯的宽度⽽设第⼆种⽅法的显⽰效果:。
servlet easyui-datagrid应用实例
EasyUI是一种基于jQuery的UI插件集合,它包含了很多常用的UI组件,如DataGrid、Dialog、Menu等。
以下是一个使用Servlet和EasyUI-DataGrid的简单应用实例:首先,你需要在你的web.xml文件中配置Servlet:xml复制代码<web-app><servlet><servlet-name>DataServlet</servlet-name><servlet-class>com.example.DataServlet</servlet-class></servlet><servlet-mapping><servlet-name>DataServlet</servlet-name><url-pattern>/data</url-pattern></servlet-mapping></web-app>然后,创建Servlet类DataServlet.java:java复制代码import java.io.IOException;import java.io.PrintWriter;import javax.servlet.ServletException;import javax.servlet.http.HttpServlet;import javax.servlet.http.HttpServletRequest;import javax.servlet.http.HttpServletResponse;public class DataServlet extends HttpServlet {protected void doGet(HttpServletRequest request,HttpServletResponse response)throws ServletException, IOException {response.setContentType("application/json");PrintWriter out = response.getWriter();out.println("[{\"name\":\"John\", \"age\":30, \"city\":\"NewYork\"}," +"{\"name\":\"Mary\", \"age\":20, \"city\":\"Chicago\"}," +"{\"name\":\"Steve\", \"age\":25, \"city\":\"San Francisco\"}]");}}这个Servlet会返回一个JSON格式的数据,用于填充EasyUI-DataGrid。
jQuery EasyUI中文帮助手册
1. <input id="ss"></input>
2. <div id="mm" style="width:120px">
3.
<div name="all" iconCls="icon-ok">All News</div>
4.
<div name="sports">Sports News</div>
描述 预定义模块。 预定义多语言。
默认值
easyui 根目录,必须以'/'结 base(很目录) string(字符串)
尾。
theme(主题名 称)
'themes'目录中的主题的 string(字符串)
名称。
css(层叠样式 表)
boolean(布尔 型)
定义是否在加载模块的同 时加载 css 文件。
所有插件
jQuery EasyUI 中文帮助手册
一、 基本(Base)
1、 语法解析(parser) 使用方法
1. $.parser.parse();
// 解析所有的页面
2. $.parser.parse('#cc'); // 解析特定的代码
属性
名称
类型
描述
默认值
$.parser.auto boolean(布尔型) 定义是否自动解析 easyui 组件。 true
Page
afterPageText(输入框之后 的文本)
string(字符 串)
在输入框之后显示的符 号。
easyUI学习使用入门教程
简介easyui是一种基于jQuery的用户界面插件集合。
easyui为创建现代化,互动,JavaScript应用程序,提供必要的功能。
使用easyui你不需要写很多代码,你只需要通过编写一些简单HTML标记,就可以定义用户界面。
easyui是个完美支持HTML5网页的完整框架。
easyui节省您网页开发的时间和规模。
easyui很简单但功能强大的。
官网/目录说明jquery-easyui-1.5.1.zip 开发开源完整包jquery-easyui-EDT-1.4.5-build1.rar 含中文APIdemo 示例locale 国际化信息文件(默认英文提示信息)plugins 框架功能js文件src 源码themes 主题样式(N套主题 Icons 图标文件)easyloader.js 核心加载器(加载plugins 功能js)jquery-1.8.0.min.js jquery开发js文件jquery.easyui.min.js easy ui 框架功能js合集jquery.easyui.min.js == easyloader.js + plugins/*在页面中使用 EasyUI引入四个文件<!-- 引入easy ui --><link rel="stylesheet" type="text/css"href="${pageContext.request.contextPath}/js/easyui/themes/default/easyui.css"> <link rel="stylesheet" type="text/css"href="${pageContext.request.contextPath}/js/easyui/themes/icon.css"><script type="text/javascript"src="${pageContext.request.contextPath}/js/easyui/jquery-1.8.3.js"></script> <script type="text/javascript"src="${pageContext.request.contextPath}/js/easyui/jquery.easyui.min.js"></scrip t>EaysUI的申明方式兼容Html51. 直接在HTML 声明组件。
easyui-dialog 实例

easyui-dialog 实例EasyUI 是一个基于jQuery 的框架,集成了各种插件,包括一个名为Dialog 的对话框插件。
以下是一个简单的EasyUI Dialog 的实例:首先,确保你已经在你的项目中引入了jQuery 和EasyUI 的相关资源。
然后,你可以使用以下代码来创建一个对话框:html复制代码<div id="dd" title="My Dialog" style="width:300px;height:400px"class=easyui-dialogdata-options="iconCls:'icon-save',resizable:true,modal:true">Dialog Content</div>以上代码中,id="dd"是这个对话框的唯一标识符,title="My Dialog"是对话框的标题,style="width:300px;height:400px"是对话框的初始大小,class=easyui-dialog是这个元素是一个EasyUI Dialog 的声明。
data-options="iconCls:'icon-save',resizable:true,modal:true"是这个对话框的一些配置选项,包括图标、是否可以改变大小以及是否模态。
然后,你可以使用以下JavaScript 代码来初始化这个对话框:javascript复制代码$(function(){$("#dd").dialog({title:'My Dialog',iconCls:'icon-save',width:300,height:400,resizable:true,modal:true});});以上代码中,$("#dd")是选择器,选取了id 为"dd" 的元素,.dialog({...})是初始化对话框的函数,其中的参数对应于data-options中的内容。
jqueryezUI双击行记录弹窗查看明细的实现方法

jqueryezUI双击⾏记录弹窗查看明细的实现⽅法第⼀步:给DataGrid绑定onDblClickRow事件;<table title="" id="dataTable" class="easyui-datagrid" style="height: 500px;" data-options="url: '/ajaxget.aspx?_t='+new Date().getTime()+'&_action=SVNGetHandler.GetSearchPageData&searchType=&keyword=*',method: 'get',rownumbers: true,singleSelect:true,border:0,idField: 'Id',columns:[[{field:'ProjectId',title:'项⽬Id',width:30,align:'left'},{field:'ProjectName',title:'项⽬名称',width:150,align:'left'},{field:'ProjectNum',title:'项⽬编号',width:100,align:'left'}]],toolbar:'#myToolbar',pagination:true,fitColumns: true,pageSize:20,onDblClickRow:onDblClickRow"></table>第⼆步:编写⾏双击事件//⾏双击事件function onDblClickRow() {var item = $('#dataTable').datagrid("getSelected");if (item != null) {editId = item.Id;var html = "";html += "项⽬名称:" + item.ProjectName + "<br/>";html += "项⽬编号:" + item.ProjectNum + "<br/>";html += "<br/>";show(item.ProjectName + " 项⽬详情", html);}}第三步:弹出窗⼝显⽰详细信息:<div id="details" style="padding: 10px;line-height:20px;font-size:12px"></div>function show(title, msg) {$('#details').html("<div id=\"output\" style=\"width:99%;height:96%;border:0\">" + msg + "</div>");$('#details').dialog({title: title,width: 800,height: 400,iconCls: 'icon-custom-eye',closed: false,cache: false,modal: true});}以上这篇jquery ezUI 双击⾏记录弹窗查看明细的实现⽅法就是⼩编分享给⼤家的全部内容了,希望能给⼤家⼀个参考,也希望⼤家多多⽀持。
jQueryEasyuiDataGrid点击某个单元格即进入编辑状态焦点移开后保存数据

/// 最近一次使用编辑行 一切正常 ///<summary> ///初始化数据容器 ///</summary> function InitGrid(){ var lastIndex; $("#grid").datagrid({ url:'', loadMsg:'数据加载中,请稍后......', border:false, fitColumns:true, remoteSort:false, onDblClickRow:function(rowIndex,rowData){ lastIndex=rowIndex; $("#grid").datagrid('endEdit',rowIndex); $("#grid").datagrid('beginEdit',rowIndex); var oldordering = rowData.ordering; $("input.val(oldordering).bind("blur",function(evt){ setOrder($(this).val(),eval("rowData."+actid)); $("#grid").datagrid('endEdit',lastIndex); }).bind("keypress",function(evt){ if(evt.keyCode==13){ setOrder($(this).val(),eval("rowData."+actid)); $("#grid").datagrid('endEdit',lastIndex); } }).focus(); lastIndex=rowIndex; }, frozenColumns:[[ {field:'ck',checkbox:true} ]], toolbar:[ {text:'刷新',iconCls:'icon-reload',handler:function(){ Reload(); }}, {text:'添加',iconCls:'icon-add',handler:add}, {text:'编辑',iconCls:'icon-edit',handler:edit}, {text:'删除',iconCls:'icon-cut',handler:del}, {text:'清选',iconCls:'icon-undo',handler:function(){ $("#grid").datagrid("clearSelections"); }} ], columns:[[ {field:actid,title:'序号',width:17,align:'center',sortable:true,sorter:sortId}, {field:'jobName',title:'招骋职位',width:40,align:'center',sortable:true}, {field:'jobKind',title:'类型',width:60,align:'center',sortable:true}, {field:'requireNum',title:'人数',width:12,align:'center',sortable:true}, {field:'email',title:'邮箱',width:34,align:'center',sortable:true}, {field:'ordering',title:'排序',width:10,align:'center',sortable:true,editor:{type:'numberbox'}}, {field:'lastTime',title:'截止时间',width:40,align:'center',sortable:true}, {field:'act',title:'操作',width:40,align:'center',formatter:act} ]] }); }
