蓝普播放软件操作说明书
LED播放器软件使用说明书
LED播放器软件使用说明书目录:第一章:软件介绍第二章:操作指南一节:安装与卸载二节:LED播放器界面三节:菜单功能详解第三章:几项重要设置一节:体育比分设置二节:定时播放设置三节:后台播放四节:软件设置和用户设置五节:远程控制设置第四章:节目组成一节:节目组成和制作区域第五章:制作节目文件一节:新建节目二节:制作图文节目三节:制作文本节目四节:制作单行文本节目五节:制作静止文本节目六节:制作表格节目七节:制作计时节目八节:制作数据库节目九节:制作VCD/DVD节目十节:制作外部程序节目十一节:制作视频输入节目十二节:制作日期/时间节目第六章:注意事项和常见问题与解答第一章软件介绍LED播放器是我公司自主研发的适用于各LED显示屏节目编辑播放的一款软件。
使用简单,易学。
功能全面。
可以播放多种文件,文本,WORD,EXCEL,各种格式图片文件,视频文件。
多种时间显示模式。
适用win98/2000/xp计算机操作系统。
第二章操作指南第一节.安装与卸载2.1.1.将公司附带产品的光盘放入计算机光驱,会弹出软件安装界面。
如图1-1。
拖动鼠标选择并双击led播放器安装程序(注:LED播放器安装程序里包含LED控制卡驱动程序)。
按照安装提示步骤操作完成并重起电脑。
安装成功后计算机桌面和开始—程序—LED显示屏,出现此图标。
双击此图标打开LED 播放器。
卸载软件,卸载的时候从新运行本软件的安装程序,在安装向导里出现3个选项为:第一个自动安装,第二个修复,第三个卸载。
鼠标点击卸载会自动删除本软件的所有程序。
也可以在控制面版中选择[添加/删除程序]快速卸载。
第二节.LED播放器操作界面2.2.1.打开播放器会出现两个组合部分,播放窗口为黑色区域是LED大屏幕显示区域。
第2部分为操作控制窗口如图示2-1。
2.2.2.操作控制窗口由控制工具菜单和节目编辑信息区域组成如图示2-2.。
在图示红线上面部分是控制工具菜单,在红线下面部分是节目编辑信息区域。
音乐播放器使用说明书
音乐播放器使用说明书欢迎使用我们的音乐播放器!以下将详细介绍如何正确操作和使用该播放器,以便您尽快熟悉并享受音乐的美妙。
1. 音乐播放器简介我们的音乐播放器是一款功能强大、操作简单的多媒体设备,可播放各种格式的音乐文件。
其内置高保真音质解码芯片,展现出最佳的音乐享受。
2. 开机与关机在开始操作之前,确保音乐播放器已经充电完毕或已连接到电源。
长按电源按钮,直到屏幕亮起表示设备开机成功。
要关机,可以再次长按电源按钮,直到屏幕关闭,并确保将播放器断开与电源连接。
3. 音乐文件的导入将音乐文件导入播放器有两种方法:- 方法一:通过电脑连接a) 使用USB数据线连接电脑和音乐播放器。
b) 电脑识别到设备后,将音乐文件拖放到设备的音乐文件夹中。
c) 完成导入后,断开电脑与播放器的连接,即可拔掉数据线。
- 方法二:使用内置存储卡a) 将内置存储卡取出,插入读卡器中,然后将读卡器插入电脑。
b) 将音乐文件拖放到存储卡的音乐文件夹中。
c) 将存储卡重新插入音乐播放器。
4. 播放音乐在成功导入音乐文件后,您可以按以下步骤播放音乐:a) 从主界面上选择“音乐”选项。
b) 使用导航按钮选择欲播放的音乐文件,并按下确认按钮。
c) 音乐将开始播放,屏幕上将显示音乐的详细信息,如歌曲名、艺术家等。
5. 调整音量和音效- 调整音量:使用音量加减按钮可以增加或减少播放器的音量。
通过频率等按钮可以选择不同的音效模式,以便您根据个人喜好进行调整。
- 耳机模式:若您想通过耳机聆听音乐,可以将耳机插入音频插孔上,并确保音量适中,以免对听力造成伤害。
6. 播放模式和列表播放器提供多种播放模式和列表功能,以满足您的个性化需求。
您可以通过操作按钮或者触摸屏幕进行选择和切换。
7. 电池使用与充电播放器内置的锂电池能够提供长时间的续航能力。
当播放器的电量低于正常工作电压时,您可以通过将播放器连接到电源或电脑来进行充电,同时屏幕上将显示当前电池电量。
Colorlight A35 联网播放器 使用说明书.pdf
A35联网播放器安全事项在使用设备前,请先阅读所有需要注意的安全事项以确保产品的安全和正确使用!1.请勿开盖。
为防止人身事故的发生,非本公司技术人员请勿拆开设备上盖。
2.请使用制造商认可的电源及配件用品。
本产品电源支持DC 5V-12V电源输入,请使用本产品随包装所附电源线或者使用符合标准的电源线材。
3.避免各功能接口接触到其他带电物体。
本产品为电子产品,功能接口接触到其他带电物体可能会造成电路元器件的损坏,从而影响产品的正常使用。
4.远离易燃易爆等危险品。
远离易燃易爆物品,不要在易燃易爆的环境下操作使用本产品!5.本产品不支持防水设计,请勿直接接触液体或在潮湿的环境中使用。
安全保护措施1.在所有的A35联网播放器的安装程序中,请遵循安全细则,避免造成自身伤害以及设备损坏。
2.A35联网播放器WiFi热点默认打开,如需使用必须修改WiFi热点默认密码,若没有修改过默认密码,必须关闭WiFi热点功能。
拆箱和检验开箱后,请对照内附的装箱清单进行清点,如发现配件不全,请及时联系相应的销售人员。
接口说明快速入门用户只需要简单3步,即可掌握A35播放器的基本使用方法。
第一步:正确连接播放器与LED显示屏第二步:配置播放器参数第三步:编辑和发布节目注:1.详细配置方式,请参考下一个章节的内容。
2.需要使用的配套软件,用户可以在我司官网:【服务支持】→【下载专区】进行下载。
详细设置步骤第一步:正确连接播放器与LED显示屏第二步:配置播放器参数播放器的参数,主要包括2个方面:1.屏幕分辨率:一般设置为LED显示屏的分辨率。
2.网络参数:根据客户实际使用场景进行配置。
•单机播放:无需配置•局域网模式:根据实际需要,配置LAN、WiFi、WiFi热点,任选其一•云联网模式:根据实际需要,配置LAN、WiFi、4G,任选其一1.设置屏幕分辨率打开PlayerMaster软件,点击右上角的图标,选择【软件设置】,再选择【局域网模式】。
LG 网络蓝光光盘播放器用户指南说明书
Please read this manual carefully before operating your set and retain it for future reference.OWNER’S MANUALNetwork Blu-ray Disc™ PlayerMODELSBD550P/NO : MFL64940425CAUTION RISK OF ELECTRIC SHOCKDO NOT OPENCAUTION: TO REDUCE THE RISK OF ELECTRIC SHOCK DO NOT REMOVE COVER (OR BACK) NO USER-SERVICEABLE PARTS INSIDE REFER SERVICING TO QUALIFIED SERVICE PERSONNEL.CAUTION:To ensure proper use of this product, please read this owner’s manual carefully and retain it for future reference. Shall the unit require maintenance,1Safety Information6Contents 1Safety Information3 Cautions and Warnings2Preparation8 Introduction 8 About the “” Symbol Display8Symbols Used in this Manual8 Supplied Accesorries 9 Playable Discs 10 File compatibility 10 Regional Code10 AVCHD (Advanced VideoCodec High Defi nition)10 Certain System Requirements 11 Compatibility Notes 12 Remote control 13 Front panel 13 Rear panel3Installation14 Connecting to Your TV 14 HDMI Connection15 What is SIMPLINK?16 Component VideoConnection 16 Video/Audio (Left/Right)Connection 17 Resolution Setting 18 Connecting to an Amplifi er18 Connecting to an Amplifi ervia HDMI Output19 Connecting to an Amplifi er via Digital Audio Output 19 Connecting to an Amplifi er via 2 Channel Audio Output20 Connecting to your Home Network20 Network connection21 Wired Network Setup23USB device connection23 Playback content in theUSB device 24 S ettings24 Adjust the Setup Settings25 [DISPLAY] Menu 26 [LANGUAGE] Menu 27 [AUDI O ] Menu 28 [L O CK] Menu 29 [NETW O RK] Menu 30 [O THERS] Menu2 Preparation IntroductionAbout the “” Symbol Display “” may appear on your TV display during3Installation Connecting to Your TV Make one of the following connections,Use U/u to select [DISPLAY] option thenpress i to move to the second level.Use U/u to select the [Resolution] option then press ENTER () to move to the third level.5. Use U/u to select the desired resolutionthen press ENTER () to confi rm yourselection.PC PCUse U/u/I/i to select the IP mode between [Dynamic] and [Static]. Normally, select [Dynamic] to allocate an IP address automatically.Select the [USB] option using I/i, and press ENTER ().Select a fi le using U/u/I/i, and press PLAY or ENTER () to play the fi le.Withdraw the USB device carefully.Use I/i to select the [Setup] and press ENTER (). The [Setup] menu appears. Use U/u to select the fi rst setup option, and press i to move to the second level.5. Use U/u to select a desired setting, andpress ENTER () to confi rm your selection.[DISPLAY] MenuTV Aspect RatioSelect a TV aspect ratio option according to your TV type.[LANGUAGE] Menu[AUDIO] Menu[LOCK] Menu[NETWORK] Menu[OTHERS] Menu4OperationGeneral PlaybackPlaying Discs1. Press Z (OPEN/CLOSE), and place a disc onThis step is needed only when a disc and aUSB device is connected simultaneously inthis unit.Select a fi le using U/u/I/i, and press B(PLAY) or ENTER () to play the fi le.NOTE2. Press u to highlight a marker number. UseI/i to select a marked scene that youwant to delete. 2. Press I/i to skip the playback 15 secondsforward or backward. You can select apoint that you want to skip by pressing and holding I/i button.Method 21. On the content list, press INFO/DISPLAY (to display the option menu.2. Use U/u to select the [View Change]option.3. Press ENTER () to change the content listview.– current title number/total number of titlesChapter – current chapter number/total number of chaptersTime – elapsed playing time/total playback timeAudio – selected audio language or channelSubtitle – selected subtitle/u/I/i to adjust the [Picture Mode] options.Select [Default] option then press ENTER ) to reset the all video adjustments.Select [Movie] using I/i, and press ENTER ().Select a fi le using U/u/I/i, and press B (PLAY) or ENTER () to play the fi le.NOTEYou can use various playback functions. Refer to pages 31-38.Unfi nalized DVD VR format discs may not be played in this player.Some DVD-VR discs are made with CPRM data by DVD RECORDER. This unit cannot support these kinds of discs.What is CPRM?CPRM is a copy protection system (with scramble system) only allowing the recording of ‘copy once’broadcast programs. CPRM stands for Content Protection for Recordable Media.Select [Photo] using I/i, and press ENTER ().Select [Disc] or [USB] option using I/i, and press ENTER ().This step is needed only when a disc and a USB device is connected simultaneously on this unit.Select a fi le using U/u/I/i, and press ENTER () to view the photo.Select [Photo] using I/i, and press ENTER ().Select [Disc] or [USB] option using I/i, and press ENTER ().Select a fi le using U/u/I/i, and press ENTER () to view the photo.Press INFO/DISPLAY () to display the option menu.Use U/u to select [Music Select] option, and press ENTER () to display the [Music Select] menu.Select a folder and press ENTER () to display the lower directory.Select and press ENTER () to display the upper directory.Use i to select [OK], and press ENTER ( to complete music selection.Select [Music] using I/i, and press ENTER ().Select the [Disc] or [USB] option using I/ and press ENTER ().This step is needed only when a disc and a USB device is connected simultaneously on this unit.Select a music fi le or audio track usingU/u/I/i, and press ENTER () to play the music.If you want to create a new folder, useU/u/I/i to select [New Folder] and press ENTER ().Enter a folder name using virtual keyboard, and press ENTER () while [OK] is selected. Use U/u/I/i to select [OK], and press ENTER () to start Audio CD recording.If you want to stop in progressing Audio CD recording, press ENTER () while [Cancel] is highlighted.A message appears when Audio CD recording is completed. Press ENTER() to check the music fi le created in theThe activation code appears on the screen. Note the activation code.You need to log into your account.5. Enter the activation code, and click[Activate] icon.After you activate your player, you’re readyto add movies & TV episodes to your instant Queue. You can then use your player’sremote to browse your instant Queue andto select and watch titles on your TV.For questions regarding the Netfl ixservice please visit:fl /helpor call 1-866-579-71133. Find a movie or TV episode you want towatch, and mouse over the [Play] icon toreveal additional option.4. Click [Add to Instant Queue] to add to yourQueue.5. Repeat step 4 to add more movies & TVepisodes to your instant Queue.Enter your e-mail address for the activationon the virtual keyboard, and press ENTER An e-mail will be sent to your e-mailaddress for the activation.After you submit your e-mail, you will receive an activation e-mail from Vudu to that e-mail address. Click on the activation URL in the e-mail to activate VUDU.。
LED PlayerN3软件说明书
目录第一章概述 (2)第二章安装与卸载 (2)第三章使用详解 (2)第四章图片显示 (11)第五章文字显示 (13)第六章时间显示 (15)第七章正计时显示 (17)第八章模拟时钟显示 (18)第九章表格显示 (20)第十章动画显示 (21)附录中有网线制做图和控制卡搜索IP使用说明第一章概述1.1 功能特点《LED Player》是本公司专为LED显示屏设计的一套功能强大,使用方便,简单易学的节目制作、播放软件,支持多种文件格式:文本文件,图片文件(BMP..),动画文件(SWF/Gif)。
2.2 运行环境◆操作系统中英文Windows/2000/NT/XP◆硬件配置CPU: 奔腾600MHz以上内存:128M◆相关软件OFFICE2000--如需WORD文件必须安装第二章安装与卸载2.1 安装《LED Player》软件安装很简单,操作如下:将灰LED Player播放软件的安装光盘插入电脑光驱,即可显示LED Player播放软件的安装文件,双击LED Player,即可实现轻松安装。
《LED Player》软件安装成功后,在【开始】/【程序】里将出现“LED软件”程序组,然后进入该程序组下的“LED Player”,单击即可运行,如图所示,同时,桌面上也出现“LED Player”快捷方式:如右图所示,双击它同样可以启动程序。
第三章使用详解3.1 节目组成每块显示屏由一个或多个节目页组成。
节目页是用来显示用户所要播放的文本、图片、动画等内容。
区域窗口有十一种:图文窗、文本窗、单行文本窗、静止文本窗、时间窗、正计时窗、倒计时窗、模拟时钟窗、表格窗、动画窗、温度窗。
图文窗:可以播放各种文字、图片、动画、表格等几十种文件。
文本窗:用于快速输入简短文字,例如通知等文字。
单行文本窗:用于播放单行文本,例如通知、广告等文字。
时间窗:用于显示数字时间。
计时窗:用于计时,支持正、倒计时显示。
模拟时钟窗:用于显示模拟时钟。
音频播放器使用指南
音频播放器使用指南随着科技的发展,音频播放器已成为我们日常生活中不可或缺的一部分。
它可以用于放松身心、学习语言、享受音乐等多种场合。
本文将为您提供一份音频播放器使用指南,帮助您充分了解和使用这一便捷的工具。
一、基本操作1. 打开音频播放器:在电脑或手机上点击音频播放器的图标,或者通过点击相应的快捷键可以快速启动。
2. 导入音频文件:点击“导入”按钮或直接将音频文件拖拽到播放器窗口中,即可将音频文件加入播放列表。
3. 播放音频:选择您想要播放的音频文件,并点击“播放”按钮,音频将立即开始播放。
您还可以使用快捷键(如空格键)来控制播放和暂停。
4. 调整音量:通过滑动音量调节器或按键增加或减少音量,以便根据您的喜好和环境需求来调整最佳音量。
5. 跳转到指定位置:音频播放器通常支持在音频文件中跳转到指定的时间点。
您可以通过拖动进度条或输入具体时间来完成跳转。
二、高级功能1. 创建播放列表:如果您有多个音频文件需要播放,可以创建播放列表以便管理和切换不同的音频。
在音频播放器窗口中找到“播放列表”选项,并点击“添加”按钮来创建新的播放列表。
2. 重复模式:音频播放器通常提供多种重复模式,例如单曲循环、列表循环和随机播放。
根据您的需求,在播放器界面中选择适合您的循环模式。
3. 均衡器调节:一些音频播放器还提供内置的均衡器功能,以便您根据自己的喜好和音频特点来调节音频的音质效果。
您可以通过拖动滑块或选择预设均衡器设置来进行调整。
4. 书签功能:如果您需要中断当前的音频播放,音频播放器通常提供书签功能,可以将您当前的播放位置标记,以便下次继续从该位置开始播放。
5. 增强音频体验:一些音频播放器还集成了各种音效增强功能,例如环绕音效、均衡器调节、音频增益等,以提供更加沉浸式的音频体验。
三、常见问题解答1. 如何解决播放不流畅的问题?如果您的音频播放器在播放过程中出现卡顿或者声音不流畅的情况,可以尝试关闭其他程序或者调低音频质量设置来解决。
LG BD660 蓝光播放机 用户手册说明书
和电器电源线引出部位。若要断开电源,请拔 出电源线插头。安装本产品时,确保电源插头 使用方便。
按照制造商的使用说明进行安装。机壳上的槽
和开孔供通风之用,以确保产品能够可靠工作
并防止内部过热。请不要将此产品放置在床
上、沙发上、地毯或其它类似物品上,以免堵
住通风孔。此产品不能采用内置式安装,如安
yy 为了达到最佳的播放质量,此设备要求 光碟和录制必须符合专门的技术标准。
yy 预先录制的 DVD 被自动设定为这些标 准。 可录制光碟格式有许多不同类 型(包括含有 MP3 或 WMA 文件的 CD-R),需要具备特定的前提条件才能 确保兼容的播放。
yy 用户应注意,若要从互联网下载 MP3/ WMA 文件和音乐,您需要获得许可。本 公司不负责此类许可。您可以从版权所 有者那里获得下载 MP3 文件的许可。
将会其播放和模拟信号输出等操作加以限制。 只有多制式彩色电视机可以接收本播放器输出
根据您购买此产品的时间,此产品在操作和限 的所有信号。
制方面会有所不同。这是因为此产品生产后, yy 如果您的电视机采用 PAL 彩色制式,播放以
AACS 可能会采用和/或更改这些限制。
NTSC 制式录制的光碟或视频内容时,您只
部件如需维修,请联系专业维修人员。
备后用。如机器需要维修,请联系授权的服务 中心。使用非本手册指定的遥控器、调节器或 功能可能导致辐射的危险。为了避免直接暴露 在激光中,请不要打开外壳。打开时会产生激
三角形内的闪电箭头符号警示用 户,产品外壳存在未绝缘的危险
光辐射。请勿直视此光线。 电源线注意事项
电压,会产生对人身造成电击的 多数电器都建议使用专用电路;
打开电视机,以在屏幕上显示正常图像。
LG BP430 蓝光播放机 用户手册说明书
开始
10 开始
开始
遥控器
• • • • • • •a• • • • • • • • • • • • •d• • • • • •
1
1 (电源): 打开或关闭播放 彩色(R、G、Y、B)按钮:
器。
用来浏览 BD-ROM 菜单。 这些
B (开/关仓): 打开和关闭光 菜单也被用作特定菜单的快捷
12 cm 光碟)
音频 CD (8 cm / 12 cm 光碟)
CD-R/RW (8 cm / 12 cm 光碟)
注意
–
小心
–
符号
e
y u i
r
o y u i
r
说明 yy 诸如影片之类可购买或租借的光碟。 yy “蓝光 3D”光碟和“蓝光 3D ONLY”光碟 yy 以 BDAV 格式录制的 BD-R/RE 光碟。 yy 包含电影、音乐或图片文件的 BD-R/RE 光
2 连接
12 连接到电视机 13 – 什么是 SIMPLINK? 13 – 分辨率设置 14 连接到功放机 15 – 通过高清输出连接到功放机 15 – 通过数字音频输出连接到功放机 16 连接到家庭网络 16 – 有线网络连接 16 – 有线网络设置
3 系统设置
19 初始设置 20 设置 20 – 调整设置 20 – [网络] 菜单 21 – [显示] 菜单 23 – [语言] 菜单 23 – [音频] 菜单 25 – [锁定] 菜单 26 – [其它] 菜单
yy 根据录制软件和封盘方式,某些光碟 (CD-R/RW、DVD±R/RW 或者 BD-R/RE) 可能无法在本设备上播放。
yy 使用由个人电脑和 DVD 或 CD 刻录机刻 录的 BD-R/RE、DVD±R/RW 和 CD-R/RW 光碟时,如果碟片受损或变脏,或者播 放器光头上有脏物或湿气凝结,则可能 无法播放这些碟片。
飛利浦藍光光碟 DVD播放機 BDP1300 說明書说明书
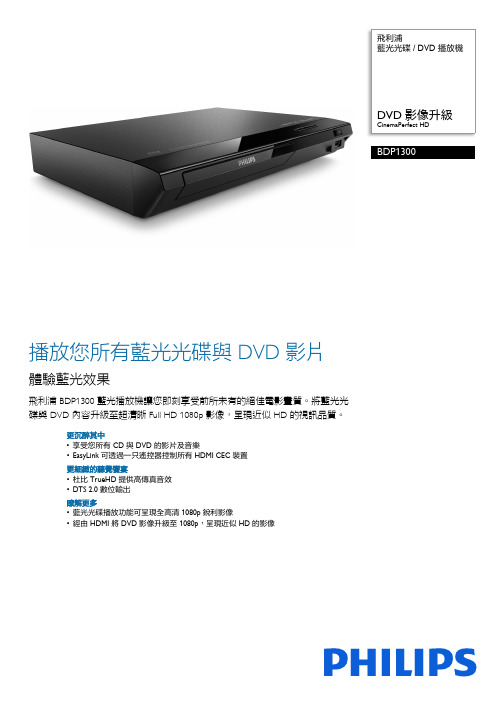
飛利浦藍光光碟/ DVD 播放機CinemaPerfect HDBDP1300播放您所有藍光光碟與 DVD 影片體驗藍光效果飛利浦 BDP1300 藍光播放機讓您即刻享受前所未有的絕佳電影畫質。
將藍光光碟與 DVD 內容升級至超清晰 Full HD 1080p 影像,呈現近似 HD 的視訊品質。
更沉醉其中•享受您所有 CD 與 DVD 的影片及音樂•EasyLink 可透過一只遙控器控制所有 HDMI CEC 裝置更細緻的聽覺饗宴•杜比 TrueHD 提供高傳真音效•DTS 2.0 數位輸出瞭解更多•藍光光碟播放功能可呈現全高清 1080p 銳利影像•經由 HDMI 將 DVD 影像升級至 1080p,呈現近似 HD 的影像享受影片與音樂享受您所有 CD 與 DVD 的影片及音樂藍光光碟播放藍光光碟的容量可承載高畫質資料,解析度達 1920 x 1080 的圖片能提供完整的高畫質影像。
細節完整呈現,畫面栩栩如生,動作更順暢,影像也更清晰。
藍光也提供了未經壓縮的環境音效 - 因此您的聲音體驗將真實得令人難以置信。
藍光光碟龐大的儲存容量也可以搭載許多互動功能。
您可在播放功能及其他如快顯功能表之類的功能間順暢地導覽,將您的家庭娛樂帶到全新的境界。
杜比TrueHD杜比 TrueHD 可完整呈現藍光光碟最細緻之音效。
而音效再生技術可媲美錄音大師,讓您聽見原創者最初的音效呈現。
杜比 TrueHD 能豐富您高解析度的娛樂體驗。
DVD影像升級HDMI 1080p 可提供畫質清晰的影像。
現在您可用高解析度來欣賞標準解析度的 DVD 電影 - 讓您享受更多細節及更栩栩如生的畫面。
循序掃描 (表示為 1080p 中的 p) 會消除螢幕上一行行的線條,確保影像清晰度。
更棒的是,HDMI 可經由直接數位連線傳送未經壓縮的數位 HD 影像以及數位音訊頻道,不必轉換至類比訊號,因此畫質與音質皆臻於完美,毫無雜訊。
EasyLinkEasyLink 讓您透過一只遙控器,便能控制多種裝置,像是 DVD 播放機、藍光播放機、SoundBar 揚聲器、家庭劇院和電視等。
LG BP420 蓝光播放机 用户手册说明书 (2)
2 连接
15 连接到电视机 15 – 高清连接 16 – 什么是 SIMPLINK? 16 – 视频/音频(左/右)连接 17 – 分辨率设置 18 连接到功放机 18 – 通过高清输出连接到功放机 19 – 通过数字音频输出连接到功放机 19 – 通过 2 声道音频输出连接到功放机 20 连接到家庭网络 20 – 有线网络连接 20 – 有线网络设置 23 USB 设备连接 23 – 播放 USB 设备内容
yy 根据录制软件和封盘方式,某些光碟 (CD-R/RW、DVD±R/RW 或者 BD-R/RE) 可能无法在本设备上播放。
yy 使用由个人电脑和 DVD 或 CD 刻录机刻 录的 BD-R/RE、DVD±R/RW 和 CD-R/RW 光碟时,如果碟片受损或变脏,或者播 放器光头上有脏物或湿气凝结,则可能 无法播放这些碟片。
yy 多制式彩色电视机根据输入信号自动切换彩 色制式。如果彩色制式不自动切换,关闭再 打开电视机,以在屏幕上显示正常图像。
yy 即使以 NTSC 彩色制式录制的光碟可以正常 显示在电视机上,也不一定能够正确录制在 您的录像机上。
>>小心
yy 长时间观看 3D 内容可能导致头晕或疲 劳。
yy 不建议体弱人士、儿童和孕妇以 3D 模 式观看电影。
yy 用户应注意,若要从互联网下载 MP3/ WMA 文件和音乐,您需要获得许可。本 公司不负责此类许可。您可以从版权所 有者那里获得下载 MP3 文件的许可。
yy 在格式化可擦写光碟时,要使光碟与 LG 播放器兼容,您必须将光碟的格式 选项设为 [Mastered]。当将此选项设 为 Live System 时,您将不能在 LG 播 放器上使用此光碟。(Mastered/Live File System:用于 Windows Vista 的 磁盘格式系统)
蓝立方+ AQ-BC-5UBT '隐藏在背后' 媒体播放器用户手册说明书
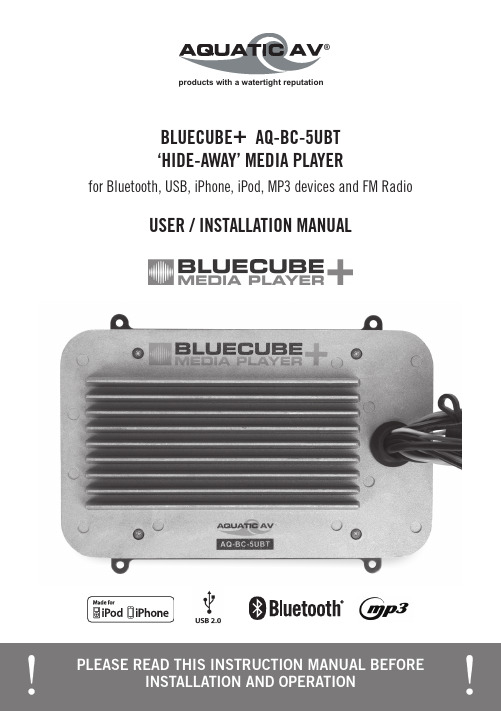
products with a watertight reputation®USER / INSTALLATION MANUALPLEASE READ THIS INSTRUCTION MANUAL BEFORE BLUECUBE + AQ-BC-5UBT‘HIDE-AWAY’ MEDIA PLAYERfor Bluetooth, USB, iPhone, iPod, MP3 devices and FM Radio1 Getting Started ...........................................................................................................1.1 Contents...............................................................................................................1.2 C onnections..........................................................................................................1.3 12-pin Harness Connection..................................................................................1.4 Mounting the BlueCube+ Media Player.................................................................1.5 Power On..............................................................................................................1.6 Remote Control Battery Install..............................................................................1.7 Remote Control Synchronizing..............................................................................2 Location of Controls ...................................................................................................2.1 Wireless Handheld Remote Control.......................................................................2.2 Wired Remote Control...........................................................................................3 Listening to Devices ...................................................................................................3.1 Listening via USB................................................................................................3.1.1 iPhone & iPod Search.....................................................................................3.1.2 Device Charging............................................................................................3.1.3 iPhone & iPod Compatible Models.................................................................3.2 Listening via Bluetooth.........................................................................................3.2.1 Pair with Bluetooth Device.............................................................................3.2.2 Listening via Bluetooth Device.......................................................................3.3 Listening via Auxiliary Input.................................................................................3.4 Adjust Volume Level..............................................................................................4 Listening to FM Radio .................................................................................................4.1 Enter FM Radio Mode...........................................................................................4.2 Scan or Seek FM Radio Channels..........................................................................4.3 Saving Radio Channel to Memory.........................................................................4.4 Listening to Saved Radio Memory.........................................................................4.5 Switch between US and European FM Modes........................................................4.6 Adjust Volume Level..............................................................................................5 Additional Features ....................................................................................................5.1 External 12V Trigger..............................................................................................5.2 Connecting Multiple Amplifiers or High Current Draw Lighting Systems....................6 Specifications & Dimensions ......................................................................................6.1 Specifications.......................................................................................................6.2 D imensions...........................................................................................................7 Warranty Information . (3)33445556667777888888999999910101011111112Table of Contents BlueCube+ Media Player AQ-BC-5UBT• AQ-BC-5UBT BlueCube+ Media Player• 2-Way RF Waterproof Remote Control (AQ-RFBC-5UBT)• Wiring Harness (AQ-UNH-2)• Four (4) Stainless Steel Mounting Screws• One (1) CR2450 Battery• Owner’s Manual 1.1 Contents1. 12-pin Watertight HarnessThe 12-pin harness supplies power and ground connections to the BlueCube+ Media Player and four (4) speaker channel output connections from the BlueCube+ Media Player.Do not cut or modify the 12-pin harness on the unit side or warranty will be void.2. FM Radio Antenna JackConnect antenna (AQ-ANT-1 sold separately) to female antenna receptacle. For best FM performance make sure the antenna is extended to the highest achievable position.3. Auxiliary Outputs - RearAllows external amplifiers to be connected to power additional speakers.4. Auxiliary Outputs - FrontAllows external amplifiers to be connected to power additional speakers.5. Auxiliary InputsConnect to a portable audio player through the AUX IN cable on the back of the DigitalMedia Box.6. 12V DC External TriggerAllows for an external light or relay to be triggered (350mA max load).7. USB ConnectorConnect a USB device play music.8. Wired Remote 8-pin DIN CableConnect to wired Remote Control.1.2 Connections 12FM Radio Antenna Jack12-pin Watertight Harness 3Auxiliary Outputs (RCA)External 12V DC Trigger wire (brown)5Auxiliary Inputs (RCA)64Auxiliary Outputs (RCA)7USB Connector8Wired Remote 8-pin DIN CableThe AQ-BC-5UBT includes the universal harness AQ-UNH-2 in order to connect the BlueCube+ to power and speakers.All open wire connections should be soldered and protected against water and dust for best long term performance.1.3 12-pin Harness Connection 1. Make sure the outside surface is clean andclear of debris.2. The BlueCube+ Media Player has four (4)mounting screws. Drive the screws using ascrew driver. Make sure screws are snug and donot over tighten.1.4 Mounting the BlueCube+ Media Player+12V DC (4)or damage may occur to the BlueCube+Media Player.Power Antenna (7)No lower than a 2 Ohm load should be usedor damage may occur to the BlueCube Media Player.Make sure the polarity of speakers areconnected correctly.(White/strip)(Yellow color)(Red color)Remove the RF wireless remote control from the BlueCube+ Media Player box. Unscrew the waterproof cap on the back of the remote control. Place the CR2450 battery in the RF remote control and replace the water/dust proof cap.When the battery is installed, the remote control LCD should be solid and bright without any flickering.1.6 Remote Control Battery InstallThe AQ-BC-5UBT requires +12V DC to both the red and yellow wires. When both of these wires have power the AQ-BC-5UBT is powered on and is indicated by a red LED on the harness grom-met of the stereo.In a spa application this requires the red and yellow wires to be jumped together and then con-nected to the +12VDC output of the power source. In this set up the AQ-BC-5UBT will always be on, with a very low current draw when idle.In a boat, ATV or other application requiring power from a battery, the yellow wire (constantpower) should be connected to the battery, and the red wire connected to the ignition or a switch. For detailed instructions you can check out our online video:‘How to wire your Aquatic AV stereo system’/support/videos1.5 Power On The remote should already be paired from the factory, but if you need to re synchronize the remote follow the steps below.1. Press the POWER button on the remote control to turn on the remote.2. The LCD will become illuminated and read ‘NO LINK’.3. Press and hold the MODE button for 5 – 10 seconds.4. Once the remote has been paired, the LCD will display one of the audio modes (FM, USB, BT AUDIO).1.7 Remote Control SynchronizingFor any additional remote controls, you will also need to activate/synchronize those remote con-trols by following the steps above.If the pairing process is not effective, check the battery voltage of the remote. If above 3V DC refer to section 1.5 above top make sure the battery is installed correctly. If battery voltage is below 3V DC replace the battery.If the LCD displays “NO LINK” in any mode, this means the remote is out of reception range or not paired correctly. Move the remote closer to the unit and try again.If you lose your remote control and buy a new remote control, please follow the above to pair remote control.Location of ControlsBlueCube+ Media Player AQ-BC-5UBTAlways ensure to connect and disconnect your media player with dry hands!When specified USB devices are connected to the USB input the device battery will charge.3.1.2 Device Charging3. Press (PLAY/PAUSE) To select the desired search mode.4. Use and (Volume UP/DOWN) to scroll through your media in the selected search mode.5. Once you find the desired media press (PLAY/PAUSE) to make your selection. If your section is a song it will begin to play, if you select a playlist, artist, album, genre, composer or audio book, the songs in the selected folder will be visible. Press (PLAY/PAUSE) to play the desired song within the folder.2. Attach your device to the female USB socket the BlueCube+ Media Player using the appropriate USB adaptor. The AQ-USB-1 USB input socket/extension is available (sold3. Press (MODE) on the remote control to select USB mode.4. Press to Play/Pause.1. Switch on your Bluetooth device.2. Select ‘AQUATIC AV’ from the list of available devices to pair (no password is needed).3.2.1 Pair with Bluetooth DeviceIAP Bluetooth connectivity allows device information, such as song, playlist and album titles, to be streamed wirelessly and viewable on the remote control.3.2 Listening via Bluetooth2. Press (VOLUME DOWN) once to reduce the volume.3. Press and hold either or and the BlueCube+ Media Player will increase or decreaseaudio volume continuously.3.2.2 Listening via Bluetooth Device1. Bluetooth mode will be activated once a Bluetooth device is paired.2. Play the song from device and the sound will play through the BlueCube+ Media Player.3. Press (PLAY/PAUSE) to play/pause the song.5. Track and volume can be controlled directly from your Bluetooth device, remote control ordoor controls.3.3 Listening via Auxiliary InputOnly one Auxiliary input (RCA) can be used at any one time.3.1.3 iPhone & iPod Compatible ModelsIf this is the first time you listen to FM radio, the default frequency will be 87.5MHz, as shown on the remote LCD.FM radio is only available when you are in the FM Radio mode.4.2 Scan or Seek FM Radio Channels1. Press (FAST REWIND) or (FAST FORWARD) to seek another station.2. Press and hold either (FAST REWIND) or (FAST FORWARD) for manual tuning backor forward.2. Press (VOLUME DOWN) once to reduce the volume.3. Press and hold either or and the BlueCube+ Media Player will increase or decrease audio volume continuously.mode.3. The remote will display ‘AREA USA’ or ‘AREA EUR’ depending on which tuning mode is 5. Press (PLAY/PAUSE) to select the desired tuning mode.6. Once you switch modes it will default to the FM station stored in ‘PRESET’.US mode will increase and decrease the FM frequency in steps of 0.1 MHz, e.g. 88.5, 88.6,88.7 MHz. EUR mode will increase and decrease the FM frequency in steps of 0.05 MHz, e.g. 88.25, 88.30, 88.35 MHz.When in Seek mode and European FM tuning mode, all frequency steps will be visible.Aquatic AV understands the need for more flexible remote applications. With the BlueCube+ Me-dia Player Aquatic AV has provided an independent 12V ‘accessory’ trigger, activated from the RF wireless remote. This could activate any 12V based device like 12V lights or 12V motors.5.1 External 12V TriggerLoad on External Trigger should not exceed 350mA.Aquatic AV strongly recommend you speak to our technical service staff or your local Aquatic AV dealer if you are considering using this feature.with multiple amplifiers. The AQ-BC-5UBT remote andtrigger wire provide 350mV. While this enough to powera single amplifier, complex systems with multiple ampli-fiers will require a SPST relay.Position 30: requires 12VDC from the main powersource (12V battery, power supply etc). This should bethe same power source that is powering your stereo.Position 85: this is where you connect your ground fromyour power source (12V battery, power supply, etc.) Thisshould be the same ground reference as your stereo.Position 86: position 86 is triggered 12V, and is sent when your stereo is powered on.For Aquatic AV stereos position 86 can be connected to either the blue remote wire in the harness or the brown 12V trigger on the rear of the unit. The differences are below:Blue (recommended): The blue (remote wire) provides a 12VDC output when the stereo is pow-ered on. Meaning as soon as the stereo is powered on the blue wire sends 12VDC through the relay powering on the amplifier.Brown: the brown (12V Trigger) provides 12VDC output when it is triggered via the lightning bolt icon on the faceplate or handheld remote. This setup is more advantageous is a more com-plex system with several zones, as it gives you control of when an amp is on or off.Position 87: this is the 12VDC output that you will provide 12VDC to the remote turn on to the amplifiers in your system.input (fused)Additional FeaturesBlueCube+ Media Player AQ-BC-5UBTMediaSupported media....................................Device charging......................................Device control........................................InputsUSB......................................................Auxiliary................................................OutputsPre-Out..................................................FM RadioFM /Euro frequencies...............................Power Output voltage @ 2 Ohm.........................Output voltage @ 4 Ohm.........................Operation voltage....................................Max current draw....................................Standby current draw..............................Multi-Environment CertificationsWaterproof / Dustproof............................Conformal PCB coating...........................UV protection.........................................Salt/Fog protection.................................Stainless Steel mountings.......................A2DP & IAP Bluetooth/USB/iPod/iPhone/MP3/FM/AUXvia USBvia RF Remote Control or WIred Remote ControlUSB 2.01x stereo pair RCA input2x stereo pair RCA (4V)3Yes4x 72W4x 45W9.6V - 14.4V DC7A6mAYes IP65 (Remote Control rated IP66)Yes500 hours stable, ASTM D4329 compliant500 hours stable, ASTM B117 compliantYes6.1 Specifications 6.2 DimensionsSpecifications & DimensionsBlueCube+ Media Player AQ-BC-5UBTWarranty Information BlueCube+ Media Player AQ-BC-5UBTAquatic AV offers a limited warranty of our products on the following terms:Length of warranty2 years on audio systems, electronics, speakers, and accessories (receipt required).CoverageThis warranty covers only the original purchaser of a Aquatic AV product purchased from an authorized Aquatic AV dealer in the United States. In order to receive service, the purchaser must provide Aquatic AV with a copy of the receipt stating the customer name, dealer name, product purchased and date of purchase.Defective productsProducts found to be defective during the warranty period will be repaired or replaced (with a product deemed to be equivalent) at Aquatic AV’s discretion.What is not coveredDamage caused by accident, abuse, improper operations, theft. Any cost or expense related to the removal or reinstallation of product. Service performed by anyone other than an authorized Aquatic AV service center. Any product with the serial number or tamper labels defaced, altered, or removed. Subsequent damage to other components. Any product not purchased from an au-thorized Aquatic AV dealer.Limit on implied warrantiesAny implied warranties including warranties of fitness for use and merchantability are limited in duration to the period of the express warranty set forth above. Some states do not allow limita-tions on the length of an implied warranty, so this limitation may not apply. No person is author-ized to assume for Aquatic AV any other liability in connection with the sale of the product.How to obtain serviceYou must obtain a return material authorization number (RMA) to return any product to Aquatic AV. You are responsible for shipping charges of returned products to Aquatic AV.Please record the model and serial number[s] of your equipment in the space provided below as your permanent record and will assist us with your factory warranty coverage. These numbers can be found on the rear of the BlueCube+ Media Player.FCC Statement BlueCube+ Media Player AQ-BC-5UBT FCC ID:MADE IN CHINAThis device complies with Part 15 of the FCC Rules. Operation is subject to the following two conditions: (1) this device may not cause harmful interference, and (2) this devicemust accept any interference received, including interference that may cause undesired operation.NOTE:The equipment has been tested and found to comply with the limits for a Class B digital device, pursuant to Part 15 of the FCC Rules. These limits are designed to providereasonable protection against harmful interference in a residential installation. Thisequipment generates, uses and can radiate radio frequency energy and, if not installedand used in accordance with the instructions, may cause harmful interference to radiocommunications. However, there is no guarantee that interference will not occur in aparticular installation.If this equipment does cause harmful interference to radio or television reception, which can be determined by turning the equipment off and on, the user is encouraged to try to correct the interference by one or more of the following measures:• Reorient or relocate the receiving antenna.• Increase the separation between the equipment and receiver.• Consult the dealer or an experienced radio/TV technician for help.The manufacturer is not responsible for any radio or TV interference caused by unauthorized modifications to this equipment. Such modifications could void the user authority to operate the equipment.iPhone, iPod and iPod Touch are trademarks of Apple Inc., registered in the U.S. and other countries.Made for iPod and Made for iPhone mean that an electronic accessory has been designed to connect specifically to iPod or iPhone respectively, and has been certified by the developer to meet Apple performance standards. Apple is not responsible for the operation of this device or its compliance with safety and regulatory standards. Please note that the use of this accessory with iPod or iPhone may affect wireless performance.Product design and specification subject to change without notice. E&OE.Doc V3.1E-mail:******************US & Canada:187****2782International: +1 408 559 1668 Fax: +1 408 559 0125 Aquatic AV282 Kinney Drive San Jose, CA 95112, USA ®。
蓝光播放器使用指南
蓝光播放器使用指南随着科技的不断发展,蓝光技术已经用于大量的电影制作和影像存储。
为了能够高品质地观赏这些蓝光影片,我们需要一款高性能的蓝光播放器。
本文将为大家详细介绍蓝光播放器的使用指南,帮助您更好地享受高清蓝光影片。
一、准备工作在使用蓝光播放器之前,您需要确保以下几点:1. 一台配置良好的电脑或者蓝光播放器设备,支持蓝光光盘的读取和播放。
2. 一台高分辨率的显示器或者电视,以确保能够呈现蓝光影片的高清画质。
3. 一张正版的蓝光光盘或者蓝光影片的下载文件,以便在播放器中进行播放。
二、安装与设置1. 将蓝光播放器软件或者硬件设备与电脑或电视连接。
确保连接线稳固牢固,并按照说明书正确安装软件驱动。
2. 打开播放器软件或者硬件设备,并进行基本的系统设置。
您可以选择语言、音频输出、字幕等选项,根据个人喜好进行调整。
三、蓝光影片播放1. 插入蓝光光盘或选择本地存储蓝光影片文件。
2. 打开软件播放器,点击“播放”按钮开始播放影片。
您也可以选择“切换到全屏”模式以获得更佳的观影体验。
3. 在播放过程中,您可以使用播放器的控制面板进行暂停、快进、快退、调整音量等操作。
掌握这些基本的控制功能,能够更好地掌握影片的节奏和内容。
四、优化播放效果1. 调整显示效果:根据个人偏好和观影环境,您可以在播放器的设置中进行画质调整。
一般来说,适度提高亮度、对比度和饱和度可以让画面更生动清晰。
2. 优化音效:如果您拥有音频设备,比如音箱或者耳机,通过调整音频输出设置,您可以获得更加立体且震撼的音效,提升观影体验。
3. 升级播放器软件:不断升级播放器软件可以确保您拥有最新的功能和性能优化。
五、注意事项1. 版权保护:遵守著作权法,尊重版权。
请勿复制、传播或销售未经授权的蓝光影片,以维护影视产业的正常发展。
2. 存储光盘:定期清洁蓝光光盘,并妥善存放,避免刮擦和损坏。
3. 防止劣质光盘:尽量选择正版光盘或者安全可靠的在线购买和下载途径,以避免劣质光盘给您的播放器和电脑带来损害。
Philips GoGear 播放器快速入门指南说明书
Qué más necesitará?Cable USBCD-ROM Guía de inicio rápidoPC AuricularesQuick start guideEl reproductor se cargará al conectarlo al ordenador.Dos tercios VacíaSugerencia Cuando las baterías estén casi vacías, parpadeará la pantalla de poca carga de batería. El reproductor se apagará en menos de 60 segundos. El reproductor guardará todos los ajustes y las grabaciones no finalizadas antes de apagarse.4En la opción Convertir a: de la parte inferior de la pantalla, seleccioneactual; el contenido se guardará directamente en el reproductor conectado. Pulse Agregar medio para seleccionar los archivos de vídeo que desea transferir Arrastre y coloque los archivos de vídeo desde elcuadro que se muestra.Pulse Convertir.Si es necesario, los archivos se convertirán primero a un formato que el reproductor pueda reproducir. El proceso de conversión lleva su tiempo, tenga paciencia.Se transferirán todos los archivos convertidos al reproductor.Navegación a través del menúDesde el menú raíz, seleccione para acceder al modo radio.En el menú principal, seleccione >en el menú Radio .El reproductor buscará las emisoras con mayor potencia, para posteriormente guardarlas, hasta unReproducir una emisora de radio presintonizada y sintonizar la emisora Desde el menú Radio , seleccionepara explorar y seleccionar las emisoras preseleccionadas.En el menú principal, seleccione .Comenzar grabación de vozdonde XXX es el número de grabación que se generará de forma automática). Puede localizar este archivo bajo >Reproducción de grabacionesEn el menú principal, seleccione >Seleccione la grabación que desea escuchar.Solución de problemas¿Cómo restauro mi reproductor?Inserte un objeto puntiagudo en el orificio de restauración, situado en la parte inferior del reproductor. Mantenga pulsado hasta que el reproductor se apague.Si ninguna de los consejos anteriores resuelve su problema, es posible que tenga que utilizar el Administrador de dispositivos para recuperar el reproductor:Cumpla con la normativa local y no deseche los productos antiguos con los desechos domésticos. El desecho correcto del producto antiguo ayudará a evitar consecuencias negativas para el medioambiente y la salud humana.36。
WinAmp使用手册
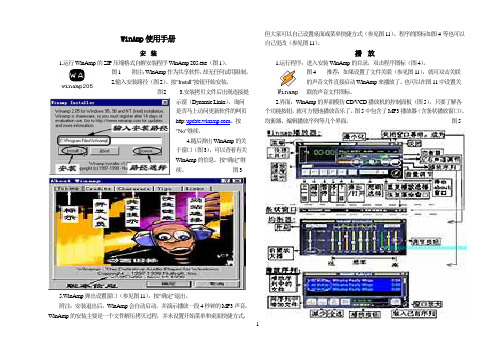
WinAmp使用手册安装1.运行WinAmp的ZIP压缩格式自解安装程序WinAmp 205.exe(图1)。
图1 附注:WinAmp作为共享软件,却无任何试用限制。
2.输入安装路径(图2)。
按“Install”按钮开始安装。
图2 3.安装拷贝文件后出现连接提示窗(Dynamic Links),询问是否马上访问更新软件的网页http: 。
按“No”继续。
4.随后弹出WinAmp的关于窗口(图3),可以查看有关WinAmp的信息。
按“确定”继续。
图35.WinAmp弹出设置窗口(参见图11),按“确定”退出。
附注:安装退出后,WinAmp会自动启动,并演示播放一段4秒钟的MP3声音。
WinAmp的安装主要是一个文件解压拷贝过程,并未设置开始菜单和桌面快捷方式,但大家可以自己设置桌面或菜单快捷方式(参见图11)。
程序的图标如图4等也可以自己更改(参见图11)。
播放1.运行程序:进入安装WinAmp的目录,双击程序图标(图4)。
图4 推荐:如果设置了文件关联(参见图11),就可双击关联的声音文件直接启动WinAmp来播放了。
也可以在图11中设置关联的声音文件图标。
2.界面:WinAmp的界面模仿CD/VCD播放机的控制面板(图5),只要了解各个功能按钮,就可方便地播放音乐了。
图5中包含了MP3播放器(含条状播放窗口)、均衡器、编辑播放序列等几个界面。
图512附注:运行程序,一般只出现标准播放器界面。
如要打开均衡器、播放序列或条状播放器界面,可点击图5所示的功能按钮或打开菜单选择(参见图10)。
启动WinAmp 后的界面将与上次关闭时的界面相同。
另外,在界面的快捷工具栏中有五个字母,点击字母可以快捷地实现某项功能:“O”弹出“Option”设置菜单;“A”播放器界面显示在其它应用窗口的最前面;“I”显示当前播放的音乐文件信息;“D”将播放器界面放大一倍;“V”弹出“V isualization”界面外观设置菜单。
LED播放器软件使用说明书

LED播放器软件使用说明书目录:第一章:软件介绍第二章:操作指南一节:安装与卸载二节:LED播放器界面三节:菜单功能详解第三章:几项重要设置一节:体育比分设置二节:定时播放设置三节:后台播放四节:软件设置和用户设置五节:远程控制设置第四章:节目组成一节:节目组成和制作区域第五章:制作节目文件一节:新建节目二节:制作图文节目三节:制作文本节目四节:制作单行文本节目五节:制作静止文本节目六节:制作表格节目七节:制作计时节目八节:制作数据库节目九节:制作VCD/DVD节目十节:制作外部程序节目十一节:制作视频输入节目十二节:制作日期/时间节目第六章:注意事项和常见问题与解答第一章软件介绍LED播放器是我公司自主研发的适用于各LED显示屏节目编辑播放的一款软件。
使用简单,易学。
功能全面。
可以播放多种文件,文本,WORD,EXCEL,各种格式图片文件,视频文件。
多种时间显示模式。
适用win98/2000/xp计算机操作系统。
第二章操作指南第一节.安装与卸载2.1.1.将公司附带产品的光盘放入计算机光驱,会弹出软件安装界面。
如图1-1。
拖动鼠标选择并双击led播放器安装程序(注:LED播放器安装程序里包含LED控制卡驱动程序)。
按照安装提示步骤操作完成并重起电脑。
安装成功后计算机桌面和开始—程序—LED显示屏,出现此图标。
双击此图标打开LED 播放器。
卸载软件,卸载的时候从新运行本软件的安装程序,在安装向导里出现3个选项为:第一个自动安装,第二个修复,第三个卸载。
鼠标点击卸载会自动删除本软件的所有程序。
也可以在控制面版中选择[添加/删除程序]快速卸载。
第二节.LED播放器操作界面2.2.1.打开播放器会出现两个组合部分,播放窗口为黑色区域是LED大屏幕显示区域。
第2部分为操作控制窗口如图示2-1。
2.2.2.操作控制窗口由控制工具菜单和节目编辑信息区域组成如图示2-2.。
在图示红线上面部分是控制工具菜单,在红线下面部分是节目编辑信息区域。
NBplayer远程传输应用软件使用说明书
NBPLAYER远程传输软件使用说明书北京蓝色星际软件技术发展有限公司目录1.软件功能简介 (4)2.功能区详细介绍 (4)2.1 基本界面 (4)2.2 下拉式菜单 (4)2.2.1 系统设置 (5)2.2.1.1 设备信息设置 (5)2.2.1.2 (8)2.2.1.3 用户管理 (8)2.2.1.4 系统参数 (9)2.2.1.5 日志管理 (10)2.2.1.6 退出系统 (12)2.2.1.7 (12)2.2.2 网络巡视 (12)2.2.3 报警管理 (12)2.2.3.1 设置报警类型 (12)2.2.3.2 警情接收 (12)2.2.3.3 停止接收 (12)2.2.3.4 警情管理 (13)2.2.4 手动录像 (13)2.2.4.1 开始录像 (13)2.2.4.2 停止录像 (14)2.2.5 前端配置 (14)2.2.5.1 编码器配置 (14)2.2.5.2 网络配置 (15)2.2.5.3 1604内网配置 (15)2.2.6 录像机巡检 (16)2.2.6.1 巡检设置 (16)2.2.6.2 手动巡检 (17)2.2.6.3 开始自动巡检 (17)2.2.6.4 停止自动巡检 (17)2.2.6.5 巡检日志 (17)2.2.7 录像机同步 (18)2.2.7.1 录像机同步设置 (18)2.2.7.2 开始自动同步 (19)2.2.7.3 停止自动同步 (19)2.3 上方工具栏 (19)2.3.1 登陆按钮 (19)2.3.2 退出按钮 (20)2.3.3 添加设备按钮 (20)2.3.4 播放文件按钮 (20)2.3.5 一个播放窗口按钮 (20)2.3.6 四个播放窗口按钮 (21)2.3.7 九个播放窗口按钮 (21)2.3.8 放大当前播放窗口按钮 (21)2.3.9 缩小当前播放窗口按钮 (21)2.3.10 停止传输按钮 (22)2.3.11 抓图按钮 (22)2.3.12 系统退出按钮 (22)2.4 工作任务栏 (22)2.4.1 系统设置 (22)2.4.2 1604E网络操作 (23)2.4.2.1 1604E网络操作 (23)2.4.2.2 录像机控制操作 (25)2.4.2.3 巡视操作 (25)2.4.2.4 1604E流量统计 (25)2.5 状态栏 (26)2.6 右键菜单 (26)2.6.1 控制面板 (26)2.6.2 语音开关 (27)2.6.3 全屏显示开关 (27)2.6.4 录像机巡视开关 (27)2.6.5 图像操作 (27)2.6.6 云台操作 (28)3.全功能操作基本流程说明 (28)3.1 登陆 (28)3.2 设置用户 (29)3.3 设置系统连接远程1604EN的基本信息 (30)3.4 连接1604EN (31)3.5 系统参数设置 (34)3.6 拍照功能 (34)3.7 1604EN控制录像机 (34)3.8 1604EN轮巡 (35)3.9 1604EN报警管理 (35)3.10 1604EN巡检 (36)3.11 录像机时间同步 (38)3.12 日志管理 (38)3.13 系统退出 (39)注意事项 (39)1.软件功能简介本软件为1604EN附属软件,可以通过1604EN远程观看现场图像、上传报警、巡检录像机的状态、实现录像机的轮巡、同步录像机的时钟、配置视频及网络参数,并通过模拟硬盘录像机的按键操作,实现远程控制。
Q96系列MP3用户使用手册
纽曼超清王 Q96 系列用户手册VM 161.1您好:感谢您选用本公司生产的超清王MP3播放器!为了使您尽快轻松自如地操作您的超清王MP3播放器,我们随机配备了内容详尽的用户手册,您可以获取有关产品介绍、使用方法等方面的知识。
使用您的MP3播放器之前,请仔细阅读我们随机提供的所有资料,以便您能更好地使用该产品。
在编写本手册时我们非常认真和严谨,希望能给您提供完备可靠的信息,然而难免有错误和疏漏之处,请您给予谅解并由衷地欢迎您批评和指正。
如果您在使用该产品的过程中发现什么问题,请及时拨打我们的服务热线,感谢您的支持和合作!请随时备份您的数据资料到您的台式(笔记本)计算机上。
本公司对于因软件、硬件的误操作、产品维修、电池更换或其它意外情况所引起的个人数据资料的丢失和损坏不负任何责任,也不对由此而造成的其它间接损失负责。
同时我们无法控制用户对本手册可能造成的误解,因此,本公司将不对在使用本手册过程中可能出现的意外损失负责,并不对因使用该产品而引起的第三方索赔负责。
本手册中的信息如有变更,恕不另行通知。
本手册信息受到版权保护,其任何部分未经本公司事先书面许可,不准以任何方式影印和复制。
本公司保留对本手册、三包凭证及其相关资料的最终解释权。
企业执行标准:Q/YK 001-2005企业标准备案:QB/440304L2666-20051功能说明²炫彩屏幕:2.4英寸26万色QVGA高清TFT真彩液晶屏;²视频播放:高清晰立体声AVI视频播放,画质清晰流畅;²多重任务:实现音乐、娱乐同步运行,边听音乐边看电子书或玩游戏;²精美外观:不锈钢外型设计、手感舒适;²音乐播放:支持MP3、WMA等音乐播放;内置扬声器,立体声外放;²立体音效:可做到真正的用户自定EQ音效,提供3D音效;²歌词同步:歌名、歌手及歌词同步显示;让您随时随地体验卡拉OK;²数码录音:内置高清晰麦克风,优质录音和普通录音供你选择;²数码复读:A-B数码复读功能;外语学习更轻松;²资源管理:强大的资料管理器,可实现文件浏览、播放、删除等功能;²图片浏览:高清晰JPEG图像浏览,图片随身行;²文本阅读:TXT电子书,独特的书签功能,随时轻松阅读;²休闲娱乐:提供俄罗斯方块游戏供您娱乐;²定时关机:可设置睡眠关机时间帮助您节省电量,使用起来倍感方便;²可扩存储:支持Micro SD卡,可FR扩展存储空间;²高速接口:USB2.0高速接口,读写迅捷。
- 1、下载文档前请自行甄别文档内容的完整性,平台不提供额外的编辑、内容补充、找答案等附加服务。
- 2、"仅部分预览"的文档,不可在线预览部分如存在完整性等问题,可反馈申请退款(可完整预览的文档不适用该条件!)。
- 3、如文档侵犯您的权益,请联系客服反馈,我们会尽快为您处理(人工客服工作时间:9:00-18:30)。
- 1 -LED电子显示屏LED 显示系统播放器L S P Pro 2.0使用手册目录第一章概述 (4)1.1 功能特点 (4)1.2功能特色 (4)1.3 软件运行环境 (4)第二章安装与卸载 (6)2.1 安装 (6)2.2 卸载 (7)第三章使用详解 (8)3.1 节目组成 (8)3.2 窗口界面介绍 (8)3.2.1 播放窗 (9)3.2.2控制窗 (9)3.3 功能介绍 (10)3.3.1 文件菜单 (10)3.3.2 控制菜单 (11)3.3.3设置菜单 (13)第四章节目制作流程 (14)4.1 第一步:设定播放窗的大小 (14)4.2 第二步:新建节目 (16)4.3 第三步:设定节目选项 (17)4.4 第四步:新建图文窗和时钟窗 (17)4.5 第五步:设定图文窗窗口选项 (18)- 2 -4.5.1 <文本文件> (20)4.5.2 <WORD文件> (21)4.5.3 <图片文件> (23)4.5.4 <视频文件> (23)4.6 第六步:设定时钟窗窗口选项 (24)4.6.1 位置 (24)4.6.2 整体 (24)4.6.3 时/分/秒设置 (26)4.7 第七步:播放 (26)第五章常见问题 (27)- 3 -第一章概述1.1 功能特点《LED显示系统播放器》是专为LED显示屏设计的一款功能强大,使用方便,简单易学的节目播放软件。
支持多种文件格式:文本文件WORD文件;图片文件(BMP/JPG/GIF/PCX/…);动画文件(MPG/MPEG/VOD/A VI/VCD/RM/ ASF…)。
1.2功能特色真正实现同一窗口下的双视频播放;播放WORD文件时可实现全文本字符转换,把原文本的黑色字符转为白色,并保留所有的其他颜色字符,正确显示WORD文档中包含的图像、图形、表格等多种对象和格式。
1.3 软件运行环境◆操作系统中英文Windows98/ME/2000/XP◆硬件配置CPU:奔腾300MHz以上- 4 -内存:64M以上显卡:ATI 7000以上显卡◆相关软件DriectX 9.0风暴影音播放器OFFICE2000/XP/2003- 5 -第二章安装与卸载2.1 安装《LED显示系统播放器》安装非常简单,操作如下:将《LED显示系统播放器》的安装光盘插入电脑光驱,即可弹出安装界面(如果不弹出,选中该光盘后用鼠标双击该光盘),选择“安装LED显示系统播放器”,开始安装《LED显示系统播放器》软件安装向导(如图2.1-1所示),按照屏幕提示进行操作即可。
图2.1-1《LED显示系统播放器》软件安装成功后,在【开始】- 6 -/【程序】里将出现LED播放程序组,然后进入该程序组下的“LSPPro2”,单击即可运行;同时桌面上也出现LSPPro2快捷方式:如右图所示:,双击它同样可以启动程序。
2.2 卸载进入WINDOWS控制面板下的“添加或删除程序”项,找到LSPPro2程序项,然后单击此项(如图2.2-1所示)。
图2.2-1单击右边的删除按钮,按照WINDOWS的提示即可删除所有文件、程序组和快捷方式。
- 7 -第三章使用详解3.1 节目组成播放文件由一个或多个节目组成。
节目是播放文件的主要构件,可以有多个,各个节目之间按顺序播放。
节目由一个或多个节目窗组成。
节目窗是用来显示用户所要播放的文本、图片、动画、多媒体片断等内容。
节目窗有两种:图文窗和时钟窗。
图文窗:可以播放各种文字、图片、动画、表格、视频等几十种文件和文字。
时钟窗:用于显示日期和时间。
3.2 窗口界面介绍《LED显示系统播放器》软件的运行界面(如图3.2-1所示):共有两个窗口组成:播放窗和控制窗。
- 8 -图3.2-13.2.1 播放窗播放窗(即LED屏上所显示的内容)是用来显示用户说要播放的文本、图片、动画、多媒体片断等内容。
此处的内容和LED屏幕上所显示的内容是同步的。
3.2.2控制窗控制窗是用来控制播放区的位置、大小及所要播放的内容。
控制窗包含菜单条和工具条以及编辑控件,带编辑的控制窗(如图3.2.2-1):- 9 -图3.2.2-1菜单条:包含文件、控制、工具、设置、调试(厂家专用)、帮助六个子菜单;工具条:是菜单功能的快速操作。
编辑控件:分为两个部分,左半为节目选项,显示节目及子窗口信息;右半为控制选项,控制节目的播放特级、背景、时间等。
3.3 功能介绍包含文件、控制、设置(厂家专用)、帮助四个子菜单。
3.3.1 文件菜单:包含新建、打开、保存、另存为、重新打开、- 10 -退出。
新建:用于新建一个LED播放文件;打开:用于打开以前编辑好的一个LED播放文件;保存:用于保存当前的LED播放文件;另存为:用于把当前的LED播放文件保存为新的LED播放文件;退出:退出《LED显示系统播放器》软件。
3.3.2 控制菜单:包含播放、停止、后台播放、自动播放当前节目。
播放:用于播放当前的LED文件;停止:停止当前正在播放的LED文件;后台播放:在Windows98/XP系统下才能实现本功能,之前还要先进行以下设置再启动本软件才能实现:在桌面空白处点击右键,出现设置菜单,点击“属性”弹出显卡设置窗口,然后点击进入设置项目窗口下(如图3.3.2-1)。
激活监视器“2”,选择图框下“将Windows桌面扩展到该显示器上”,然后按“应用”按钮,再确定。
这样就完成了设置,可以实现后台播出了。
这时启动本软件点击“后台播放”功能,则播放窗口会移到扩展窗口下,再次点击则回到当前窗口,从而实现后台播放功能。
- 11 -图3.3.2-1取消后台播放:自动播放当前节目文件:用户在编辑好自己的播放文件并保存自己的播放文件后,点击此项目使之前面打上小钩,在用户关掉《LED显示系统播放器》并重新启动《LED显示系统播放器》后,《LED显示系统播放器》会自动的播放在软件播放之前保存的播放文件。
- 12 -3.3.3设置菜单:包含控制器类型、显示屏设置、锁定窗口位置和大小。
控制器类型:选择正在操作的计算机控制的是双色显示屏还是全色显示屏;显示屏设置:调节显示屏的大小、坐标、色彩、亮度、计算机和显示屏控制器通讯的接口等选项。
需要注意:“控制器类型”选项中选择的显示屏类型不同,此设置中出现的设置程序也不同,双色显示屏和全色显示屏都有各自的显示屏设置,需要客户先在控制器类型中设置好再使用该选项;锁定窗口位置和大小:不选择此项,用户可以用鼠标点击播放窗口拖动来改变播放位置,或者可以用鼠标拖动播放窗口的边缘来改变播放窗口的大小。
选择此项以后以上功能失效,播放窗口将定在当前的位置上。
- 13 -第四章节目制作流程4.1 第一步:设定播放窗的大小在编排显示屏播放节目之前用户需要首先设定显示屏的大小、类型和显示屏在计算机显示器上面对应的区域。
用户首先点击【设置】/【控制器类型】,在弹出的窗口中先选择控制器的类型{如图 4.1-1},如果用户安装的是双基色显示屏,选择“双色显示屏控制器”选项,如果是全彩显示屏,用户则选择“全色显示屏控制器”选项,然后点击“确定”按钮退出。
图4.1-1选择好了控制器的类型以后,用户再点击【设置】中的第二个选项【显示屏设置】(如图4.1-2),此窗口分为“基本设- 14 -- 15 -置”和“显示屏色彩”两个子窗口。
.图4.1-2在“基本设置”窗口中先将客户安装的显示屏的大小参数填入到“屏幕宽度”和“屏幕高度”两个位置,确定显示屏控制器所配的串口通讯线已经和正在操作的计算机的串口相连,然后将“通讯端口”设置正确。
点击【获取】按钮,此时鼠标将带领着和显示屏所对应在显示器上大小相同的窗口移动,用户可以根据自己的需要选择显示屏所对应的显示器的位置,鼠标移动到该位置后双击鼠标即可,这时播放器的播放窗口会自动的跑到该位置上去。
在控制栏中点击“清屏”,显示屏将没有任何显示,点击“锁屏”,显示屏将停留在当前的显示画面上。
在“显示器色彩”中主要是对显示屏的Gamma 值和亮度进行微调,注意:Gamma值建议客户保持默认值。
本说明以双色显示屏控制器进行说明,全色显示屏控制器中还有对显示屏的红、绿、蓝的色彩亮度分别进行调节,操作方式与调节亮度的方式相同。
在设置完以上两个功能项后,用户点击第三个选项【锁定窗口位置和大小】,这样鼠标就不能改变窗口的位置和大小,用户就可以在自己设置的播放窗口排列自己的播放节目了。
4.2 第二步:新建节目节目是播放文件的基本元素。
如图(4.2-1)。
图(4.2-1)点击新节目按钮,然后在弹出来的窗口直接点击确定即可,用户也可以自己为该节目命名。
播放文件中可以包含任意- 16 -多节目,删除节目可用删除节目按钮,移动节目顺序可使用移动按钮、,不同节目里面有不同的文件播放窗,文件播放窗里面的播放文件也可以使用上移、下移来改变播放的顺序。
4.3 第三步:设定节目选项当新建节目项或者选中节目项,即可设置节目选项,节目选项有播放时间,背景色等设定选项(如图4.3-1)。
图4.3-14.4 第四步:新建图文窗和时钟窗节目还只是一个框架,他可以包含任意多个图文窗和时钟窗(时钟窗通常在一个节目中只放置一个),各个图文窗可同时播放不同的文字、图片、表格、动画、视频等;时钟窗主要- 17 -使用户可以设置不同格式的时间。
点击新建节目按钮后弹出节目选择菜单(图4.4-1),下面分别对两种窗口进行说明。
(图4.4-1)图文窗:是最重要的窗口,所支持的文件都在该窗口中播出,该窗口中可添加任意多的文件,所支持的文件种类有数十种之多。
包含文本文件(TXT)、EXCEL文件、WORD文件(DOC/RTF)、所有图片文件(BMP/JPG/GIF/PCX/WMF…)、所有的媒体文件(A VI/MPEG/WMV/ASF/MP4…)、VCD文件(DAT)、DVD文件(VOD)Flash文件(SWF)、Realpaly文件(RM)。
时钟窗:包含显示模拟时钟和数字时钟。
4.5 第五步:设定图文窗窗口选项所有的图文窗都有共同的选项如图(图4.5-1),- 18 -(图4.5-1)窗口的名称、边框颜色、位置、宽度、锁定大小等,供用户对图文窗在节目中的外部特性进行设定。
其中图文窗窗口的高度、宽度和坐标等选项,用户也可以在播放窗口中直接用鼠标点击拖动即可改变。
可以在图文窗下放入所要播放的文件(如图4-5-2),- 19 -(如图4-5-2)用户选择不同的文件,在文件选项窗里会出现相应的设置选项,方便用户设置该播放文件的特级方式、背景图,播放速度等。
文件选项窗主要有多种类型,下面分别予以说明。
4.5.1 <文本文件>选项见图(4.5.1-1),可选择背景色、背景图、背景图显示方式、播放方式、文字效果、轮廓色、速度、停留、字体等选项。
