三星固态硬盘840EVO120GB在XP系统下安装教程
WINDOWS XP系统安装步骤
WINDOWS XP系统安装步骤一、设置光驱启动1、找一张带启动功能的WINDOWS XP安装光盘放入光驱中。
2、重新启动计算机,并在开机自检时按F2键进入CMOS设置。
3、选择Advanced CMOS Setup(高级COMS设置)项,按Enter键进入。
4、移动↑、↓移动到Boot Device Priority(启动设备顺序设置),并按Enter键进入。
5、移动↑、↓移动到1ST(即第1启动设备,2nd、3rd、4th表示第2、第3、第4启动设备)并按Enter键进入。
6、移动↑、↓移动到CD/DVD,并Enter键设置成功。
说明:此项进入后主要有4个选择项,分别表示:Disable:禁止,IDE-0:从硬盘启动,Floopy:1.44MB 3 1/2:从3.25英寸1.44MB软盘启动,CD/DVD:从普通光驱或者DVD光驱启动。
7、按F10键并按“Y”字母保存设置,保存后电脑会重新启动。
提示:不同的主板有不同的设置,但大部分是如此。
对于一些与此设置不同的主板,请参考主板说明书。
二、安装XP的步骤现在,以安装Windows XP原版操作系统为例说明安装步骤。
电脑重新启动自检完成后,会在屏幕的最底下或最上面出现:BOOT FROM CD字样,表示电脑将从光驱启动。
后面则会出现“Press qny key to boot from CD”(意思是按任意键将从光驱启动)的提示,时间点从1-5点依次增加,表示等待5秒钟,如果在这5秒钟之内按下任意一键,则从光盘启动进入XP的安装,如果超过5秒钟,则从硬盘启动进入原来已安装好的系统。
重要说明:★安装XP总共有3次的重新启动过程:1、第一次即设置光盘启动;2、第二次是安装程序从光盘上复制了系统安装文件;3、第三次则是所有必须的系统文件和应用程序已复制到电脑上,安装基本完成,保存好设置后的重新启动。
★如果在第一次重新启动后将光盘启动设置回硬盘启动或其它设备启动的话,就不再出现BOOT FROM CD字样,如果没有,则还会出现,请在最后2次的重新启动时不要在5秒内按任意键,否则又进行重复重制文件的过程。
如何为新买的固态硬盘安装windows系统
如何为新买的固态硬盘安装windows系统高科技发展日新月异,电子产品的更新迭代的速度堪比神马快车。
PC电脑能做的绝大部分,现在的智能手机也能做了,甚至手机的功能还要丰富得多,地图导航能带路痴到处飞,不想做饭可以上网点个快餐,还可以指纹支付。
人们使用电脑的频率已大大降低,特别是40岁以上的中老年人,对网络游戏不感冒,除了偶尔用电脑编辑一下word文档、ppt文档,一年也不见打开电脑几次。
电脑上年纪了难免会变慢,买个新的又觉得浪费,那能不能用很少的钱升级下旧机器,以求它再多焕发几年的青春呢?答案是可以的,方法不外乎两个:加大内存条和加装固态硬盘。
固态硬盘的读写速度一般要比普通机械硬盘快好几倍,对旧电脑提升所起的作用尤为明显,今天我在此跟大家分享电脑加装固态硬盘的过程。
大体操作顺序:准备好小螺丝刀,两个u盘→制作pe启动盘→把操作系统压缩至u盘→拆机装新硬盘→bios设置→pe环境重装系统为了充分利用时间,应提前做下载好老毛桃或大白菜(制作pe启动),和windows系统文件。
做好所有准备工作【预先准备】:两个u盘、一把小型十字螺丝刀,买一个“笔记本光驱位硬盘托架”。
一个u盘拿来做pe启动,一个存放系统映像文件。
硬盘托架主要是用来装载旧的机械硬盘,因为固态硬盘需要占用笔记本旧硬盘的接口位置,希望继续使用旧硬盘的话,只能把读取光碟的光驱拆下来,用托架把旧硬盘放置于光驱位置。
在淘宝上搜“硬盘托架”,大概10多块钱就能买到。
如果日后有读取光碟的需要,可以买一个“USB光驱”,在拼多多上30多块就有了,我也买了一个,很不错。
【用u盘制作pe启动盘】用u盘制作pe系统的软件不止一款,大白菜、老毛桃都很多人用,可以放心去它们的官网下载。
用它们制作U盘启动也是极其简单,点击一键制作就可以了。
整个过程大约10多分钟吧。
因为需要格式化,所以尽量用闲置无用的u盘来做启动盘,或者把多余的手机储存卡插在读卡器上充当u盘也可以。
windowsXP硬盘安装详细图解WIN安装教程
windows XP 硬盘安装详细图解WIN安装教程,WIN动画。
1、先备份系统盘上自己的资料,比如我的文档里自己的东西,收藏夹里的收藏,下载的资料要移动到别的分区里,主板、声卡、显卡、网卡、拨号程序,要先准备好,也可以用驱动精灵先备份下来,详细方法参阅驱动程序的备份与恢复,拨号设置也要先记下来。
(XP自带很多驱动,旧的机器会自动识别安装,这样能够识别安装驱动的不备份也没有关系了)。
2、下载安装文件一般是压缩包,要解包到别的分区。
如果你还没有准备,可以到这个页面里下载,下载以后可以用WINRAR解压,把下载下来的ISO文件用Winrar解压或者用虚拟光驱把里面的i386目录文件提取出来,复制到非系统盘,比如:F盘,建立一个文件夹解压到这里。
当然如果是局域网,从别的机子上复制过来一个也可以,查找序列号文件,记下来备用。
如果是集成免序列号的版本或者是GHOST版本也要先弄明白了才好往下进行。
3、软盘、光盘等启动DOS系统,比较简单的办法是下载虚拟软盘启动,或者MAXDOS,或者矮人DOS工具箱,解包以后运行添加到启动菜单里做成双启动,重启选择进入DOS。
详细操作过程请参阅如何进入DOS 。
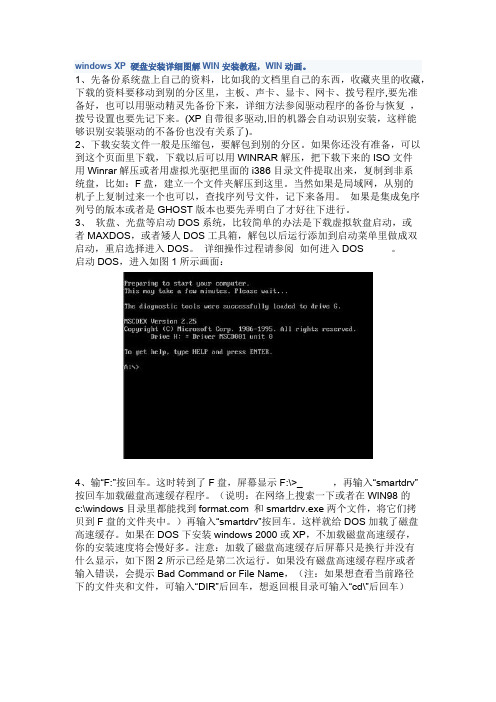
启动DOS,进入如图1所示画面:4、输“F:”按回车。
这时转到了F盘,屏幕显示F:\>_ ,再输入“smartdrv”按回车加载磁盘高速缓存程序。
(说明:在网络上搜索一下或者在WIN98的c:\windows目录里都能找到 和smartdrv.exe两个文件,将它们拷贝到F盘的文件夹中。
)再输入“smartdrv”按回车。
这样就给DOS加载了磁盘高速缓存。
如果在DOS下安装windows 2000或XP,不加载磁盘高速缓存,你的安装速度将会慢好多。
注意:加载了磁盘高速缓存后屏幕只是换行并没有什么显示,如下图2所示已经是第二次运行。
如果没有磁盘高速缓存程序或者输入错误,会提示Bad Command or File Name,(注:如果想查看当前路径下的文件夹和文件,可输入“DIR”后回车,想返回根目录可输入“cd\”后回车)5、格式化C盘特别提醒:此操作过程为FAT32格式操作过程步骤。
系统装ssd固态硬盘教程
系统装ssd固态硬盘教程系统安装SSD固态硬盘教程固态硬盘(SSD)是一种用于存储数据的新型硬盘,相比传统的机械硬盘,它具有更快的读写速度、更高的稳定性和更低的能耗。
因此,很多用户都希望将自己的电脑或笔记本升级为SSD固态硬盘。
本文将为大家介绍系统安装SSD固态硬盘的详细步骤。
第一步:购买SSD固态硬盘在安装SSD固态硬盘之前,首先需要购买一块适用于自己电脑的SSD固态硬盘。
选择时,可以考虑容量、品牌和价格等因素,同时要确保其与电脑的接口类型兼容。
第二步:备份数据在安装SSD固态硬盘之前,为了保证数据的安全,建议对电脑中的重要数据进行备份。
可以将数据复制到外部存储设备中,如移动硬盘或云存储。
第三步:关闭电脑,并确保安全在安装SSD固态硬盘之前,务必先关闭电脑,并拔掉插头。
在操作之前,也要确保自己的身体和手部是干燥的,以避免静电对硬盘的损坏。
第四步:打开电脑机箱使用螺丝刀或扳手打开电脑机箱,然后找到原有的机械硬盘。
通常,机械硬盘位于电脑的固定支架上,需要将其拆卸下来。
第五步:安装SSD固态硬盘将SSD固态硬盘插入电脑硬盘位,并使用螺丝进行固定。
确保连接口与插槽对齐,并轻轻按下固态硬盘,直到固定牢固。
第六步:连接数据线使用SATA数据线将SSD固态硬盘与电脑主板连接起来。
确保连接口与插槽对齐,并稳固插入。
第七步:关闭电脑机箱将SSD固态硬盘连接完成后,再次检查连接是否牢固。
如果确定无误,将电脑机箱盖放回原位,并用螺丝刀或扳手将其固定。
第八步:重新启动电脑重新插上电脑的电源插头,并启动电脑。
待电脑启动后,进入系统,可以通过“我的电脑”或“此电脑”查看新安装的SSD固态硬盘是否被正确识别。
第九步:迁移系统或重新安装系统如果你希望将系统迁移到新的SSD固态硬盘上,可以使用一些专门的工具软件来实现,如Windows系统自带的“系统映像备份与恢复”功能或第三方工具。
如果你希望重新安装系统,可以通过U盘或光盘安装系统,并在安装过程中选择新的SSD固态硬盘作为安装目标。
电脑怎么重装系统xp重装系统xp教程

电脑怎么重装系统xp重装系统xp教程
有很多用户不知道怎么怎么重装电脑xp系统,那么下面就让小编为大家介绍一下重装系统xp教程,有需要的朋友一起来看看吧。
重装系统xp教程:
第一步、首先需要下载一键重装系统工具,出现软件主界面,点击“立即重装系统”进入下一步;
第二步、软件自动检测电脑软硬件环境以及电脑网络连通状态,完成后点击下一步按钮
第三步、进入资料备份界面,通过勾选可以选择对“我的文档”、“收藏夹”、“桌面文件”进行备份,备份资料会保存到自动生成的“XBGhost/资料备份”目录内,此目录会根据电脑磁盘中最大剩余空间容量作为文件、系统的备份以及下载的系统自动产生;
第四步、进入系统下载列表界面,根据需求以及电脑配置情况选择适合你的系统版本,点击右边的“安装此系统”;
第五步、软件开始下载你所选定的系统Ghost,从界面上可以清晰明了地观察到各种数据。
小白系统提供高达10多兆每秒的瞬时下载速度,当然根据每个用户终端的网络带宽不同会有很大差异,请大家在下载过程中耐心等待;
第六步、下载完成后弹出是否重启安装,点击“立即重启”,电脑将自动进行安装;
以上则是小编为大家介绍重装系统xp教程,希望对大家有所帮助。
U盘装机教程大全:
U盘装xp系统图文教程:>>点击查看
U盘装win7系统图文教程:>>点击查看
U盘装win8系统图文教程:>>点击查看
U盘装win10系统图文教程:>>点击查看。
图解固态硬盘如何安装系统
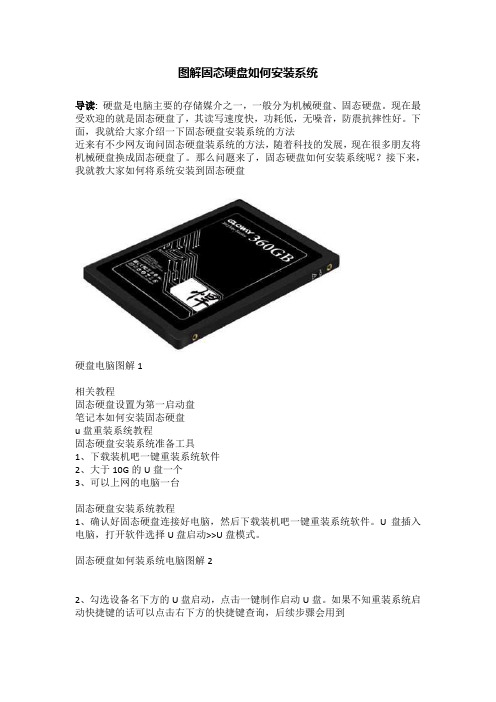
图解固态硬盘如何安装系统导读:硬盘是电脑主要的存储媒介之一,一般分为机械硬盘、固态硬盘。
现在最受欢迎的就是固态硬盘了,其读写速度快,功耗低,无噪音,防震抗摔性好。
下面,我就给大家介绍一下固态硬盘安装系统的方法近来有不少网友询问固态硬盘装系统的方法,随着科技的发展,现在很多朋友将机械硬盘换成固态硬盘了。
那么问题来了,固态硬盘如何安装系统呢?接下来,我就教大家如何将系统安装到固态硬盘硬盘电脑图解1相关教程固态硬盘设置为第一启动盘笔记本如何安装固态硬盘u盘重装系统教程固态硬盘安装系统准备工具1、下载装机吧一键重装系统软件2、大于10G的U盘一个3、可以上网的电脑一台固态硬盘安装系统教程1、确认好固态硬盘连接好电脑,然后下载装机吧一键重装系统软件。
U盘插入电脑,打开软件选择U盘启动>>U盘模式。
固态硬盘如何装系统电脑图解22、勾选设备名下方的U盘启动,点击一键制作启动U盘。
如果不知重装系统启动快捷键的话可以点击右下方的快捷键查询,后续步骤会用到装系统电脑图解33、出现备份U盘数据提示,有重要数据就赶紧备份一下,没有就直接点击确定,然后选择UEFI/BIOS双启动装系统电脑图解45、选择好后点击下载系统且制作U盘,注意一下左下角的U盘启动快捷键固态硬盘装系统电脑图解56、等待U盘启动盘的制作成功硬盘电脑图解67、重启电脑,然后立即不停的点击U盘启动热键,进入启动选择菜单,选择U 盘选项进入装系统电脑图解78、进入PE选择界面,选择02新机型,回车装系统电脑图解89、选择64位PE,回车固态硬盘如何装系统电脑图解910、进入PE系统后自动弹出装机吧装机工具,将其关闭,打开PE桌面的分区工具,选择固态硬盘,点击上方的快速分区固态硬盘装系统电脑图解1011、出现快速分区窗口,选择MBR分区,分区数目根据固态硬盘大小自己选择,然后选择4K对齐,就是4096扇区。
完成后点击确定,将其关闭固态硬盘装系统电脑图解1112、然后打开装机吧装机工具,选择需要安装的系统,目标分区选择固态硬盘的主分区,点击安装系统就可以等待系统的安装了。
三星 850 EVO SSD 安装指南说明书
DISCLAIMERSAMSUNG ELECTRONICS RESERVES THE RIGHT TO CHANGE PRODUCTS, INFORMATION AND SPECIFICATIONS WITHOUT NOTICE.Products and specifications discussed herein are for reference purposes only. All information discussed herein may change without notice and is provided on an “AS IS” basis, without warranties of any kind. This document and all information discussed herein remain the sole and exclusive property of Samsung Electronics. No license of any patent, copyright, mask work, trademark or any other intellectual property right is granted by one party to the other party under this document, by implication, estoppels or otherwise. Samsung products are not intended for use in life support, critical care, medical, safety equipment, or similar applications where product failure could result in loss of life or personal or physical harm, or any military or defense application, or any governmental procurement to which special terms or provisions may apply. For updates or additional information about Samsung products, contact your nearest Samsung office. All brand names, trademarks and registered trademarks belong to their respective owners.COPYRIGHT © 2023This material is copyrighted by Samsung Electronics. Any unauthorized reproductions, use or disclosure of this material, or any part thereof, is strictly prohibited and is a violation under copyright law.TRADEMARKS & SERVICE MARKSThe Samsung Logo is the trademark of Samsung Electronics. Adobe is a trademark and Adobe Acrobat is a registered trademark of Adobe Systems Incorporated. All other company and product names may be trademarks of the respective companies with which they are associated.For more information, please visit /magicianRevision History1.IntroductionNew Samsung Magician 7Experience the new user-friendly GUI of Samsung Magician. Try our new features and enhanced functions for better user experience. Samsung Magician provides an integrated convenient solution for SSD with advanced capabilities.Samsung Magician software is developed and distributed exclusively for users of Samsung Solid Sate Drives (SSDs).New FeaturesNew Samsung Magician features a number of improvements over the previous versions.- New features include:•LED Setting – added to control LED color and mod using LED Setting.•Data Migration – added to clone your data to Samsung SSD using Data Migration.2.Requirements and Support System RequirementsSupported Features by modelThere are some limitations that exist depending on the type of storage and model.RAPID mode RequirementsDriver Support1)SATA2)NVMe1)Samsung Magician does not require internet connection to run. However, the internet connection isrequired to get updates for the latest Firmware, Feature modules or application and to authenticate the SSDs.2)If you delete some files of New Samsung Magician without internet connection, some features likecertification or configuration may not work properly and cause limitations in use of New Samsung Magician.3)The SSD should not be disconnected from the system while FW Update, Benchmarking, Secure Erase,Over Provisioning, Data Security, PSID Revert, Diagnostic scan, Performance Optimization or RAPID features are in progress. Doing so could result in data corruption.4)All parallel operations should be terminated before executing Diagnostic scan, PerformanceOptimization or Benchmarking features.5)Data corruption may result if the user terminates the Magician application abnormally whileBenchmarking, FW Update, Secure Erase, Diagnostic scan, Over Provisioning, Data Security, PSID Revert or RAPID features are in progress.6)There is always the risk of data loss when updating SSD firmware. It is imperative that the user backup any important data before performing a firmware update.7)If there are some system issues for Magician to perform functions, System Compatibility inInformation tab will provide guide to fix the issues.8)If Samsung Magician is under a proxy network environment, it may not provide the full functionalitysuch as firmware update.9)In order for Samsung Magician to function properly, the time of the PC needs to be correctly set.3.General LimitationsOverall1)Magician does not work with SSDs connected via the SCSI controller interface.2)Only MBR and GPT partition types are supported. Magician may not work with other partition types.3)Magician shows only volumes mounted with letter.4)Magician will not work on SSDs that are locked with a user password.5)The user may need to manually refresh for Magician to accurately reflect all connected/removeddisks.6)RAID on mode in SATA configuration is not supported by Samsung Magician and USB bootablesolution.7)If you are using any custom storage driver, then Magician may not work properly. Please always usethe latest storage driver or Microsoft driver.8)In Windows 7, the Samsung NVMe Driver is required for Magician to fully support Samsung’s NVMedevice.9)In Windows 7, the GUI of the Samsung Magician application may not seem normal intermittently.10)In the case of the function where the progress time is displayed – Performance benchmark,Diagnostic scan, and Performance optimization, changing the system time during the functionexecution may cause the elapsed time to not appear normally.11)Magician is signed using SHA-2 to provide a safer service. Windows updates or patches may berequired to use Magician in Windows 7.12)Depending on the resolution or ratio setting of your display, bottom and right side of SamsungMagician may be out of screen.13)For the performance benchmark record that was performed in the previous version of Magician 7.0,some values may be marked as Unknown.14)Magician might have compatibility issues with a certain IRST Driver.15)When RAPID is activated, Restore point warning message is only available in English.16)If Magician gets connected to or disconnected from the PSSD while performing some feature,Magician may not work properly.17)If you try changing the name of security enabled PSSD T1 / T3, the name won’t be changed withoutadditional guidance when the wrong password is entered.18)For Windows 8.1, update is required in order of KB2919442, KB2919355, and KB2999226.19)For Windows 8.1 with update, KB2999226 update is required.20)Magician icon may appear unchanged until the icon is updated by the system.21)It may take up to a few seconds for to installer to start.22)It may take time to move from one screen to the next screen in installer.23)Connecting through remote connection will dismiss forcefully magician notification window inwindows 11.24)Upon abnormal termination of data migration, it may take time to restore the migration function.Performance Benchmark1)Benchmarking may not work with some removable storage devices.2)Performance Benchmark may get timed-out on ASMedia controllers if the driver does not handlemulti thread operations (IOs)Performance Optimization1)Performance Optimization supports only the NTFS file system.2) Magician does not support TRIM operation for Standard Performance Optimization onWindows 8 and above, as they support native TRIM.Diagnostic Scan1)Short scan supports only the NTFS file system.2)If the device is locked, both short scan and full scan are not supported.3)When performing Short scan, secure sufficient space of 5GB or more.4)Samsung NVMe driver v3.3 is required to use SMART Self-test in 970 EVO Plus.NVMe Driver is not required from later released models. (980, 980 PRO Series, 990 Series, etc) PSID Revert1)SSD supporting PSID Revert is 860 EVO 860 EVO M.2, 860 EVO MSATA, 860 PRO, 860 QVO, 970 EVOPlus, 870 QVO, 870 EVO, 980, 980 PRO, 980 PRO with Heatsink, PSSD T7, PSSD T7 Touch, PSSD T7 Shield.2)The PSID Revert function can release the encrypted drive using the PSID of the label. Afterperforming PSID Revert, all data on the drive is deleted.Secure Erase & Linux Bootable Solution1)While making a bootable solution for Secure Erase, please make sure the Device Manager window isclosed.2)In some of the PCs, Bootable Solution may not work properly as expected because of compatibilityissue.3)The Bootable solution is not compatible with pure SCSI or SATA NVIDIA/LSI/AMD chipset drivers.4)AHCI or ATA mode must be enabled in the BIOS during PC boot up.5)The Bootable solution may hang if the SSD is removed on PCs that do not support the hot plug feature(e.g. ICH5/6 chipsets).6)The Bootable solution will not work with devices attached via SATA 6Gbps (SATA III) operating inIDE mode.7)Secure Erase may not work on systems where SECURITY FREEZE LOCK is issued by the BIOS.Encrypted Drive1)Class 0, TCG Opal and Encrypted Drive cannot be enabled simultaneously. Only one mode can beenabled at a time and all other modes must be disabled.2)Security mode (Class 0, TCG/Opal or Encrypted Drive) must be disabled (unlocked) before removingand installing onto another PC.Over Provisioning1)Over Provisioning only supports NTFS and raw (Unformatted) partitions.2)Over Provisioning does not support dynamic disks or disks that require ‘Chkdsk’ operation.3)Magician cannot guarantee that Over Provisioning scans disk’s partition layout properly, if partitioninformation had been changed during scanning.4)Over Provisioning may fail, even though enough free space is available, if your system suffers fromcluster misalignment.5)If user cannot span or shrink volume size through disk management of OS administration tool, it ispossible not to work dynamic over-provisioning properly.6)Windows ‘Disk Partition Service’ and ‘Virtual disk Service’ should not be disabled in order to performOver Provisioning.7)Over Provisioning can only be performed on the last accessible partition (NTFS or raw)8)If a device with more than 4TB applied to the MBR partition is used, the function may not operatenormally.LED Setting1)Depending on the status of the SSD, LED setting may not be possible.Security Setting1)Finding my password is unavailable on Samsung Magician.2)Up to four fingerprints can be registered on Samsung MagicianData Migration1)Data Migration supports the Windows operating systems listed in the System Requirement only.2)Data Migration supports the Samsung SSDs listed in the System Requirement only. OEM storagedevices provided through a computer manufacturer or supplied through another channel are not supported.3)Data Migration can only clone a Source Drive on which an operating system has been installed. Itcannot clone a drive without an operating system installed on it.4)When the Source Drive has two or more volumes (e.g. volumes to which drive letters, such as C:, D:, orE:, are assigned), Data Migration can clone the C: volume on which an operating system is installed and two more volumes. The System Reserved Partition, which is created automatically duringWindows installation, is cloned automatically.5)The OEM Partition, which is created by the computer manufacturer when shipped from the factory, isnot cloned. However, it will be automatically cloned if the computer manufacturer is Samsung and SRS (Samsung Recovery Solution) 5, SRS 6, or SRS 7 has been installed. (Versions lower than SRS 5 are not supported.)6)After cloning the Source Drive to the Target Drive, their data sizes may differ by a few gigabytes. Thisis normal. During cloning, Data Migration does not copy virtual memory (page files, hibernation files, etc.) automatically created and managed by the operating system.7)Data Migration cannot clone encrypted drives. In order to clone an encrypted drive, you must removeits password first.8)If the motherboard chipset drivers are not up to date when cloning, Data Migration may not functionproperly.9)If you have multiple operating systems installed on your computer (e.g. Windows 7 installed on the C:volume and Windows 8 installed on the D: volume), then the cloned drive may not function properly in some cases.10)If the Source Drive is damaged (e.g. it has bad sectors), then the cloned drive may not functionproperly.11)Before attempting to clone a drive using Data Migration, it is recommended that you close all openprograms and allocate sufficient memory first.12)If you have instant recovery software installed on your computer, then Data Migration may notfunction properly.13)If the Source Drive has been converted to a dynamic disk, then Data Migration may not functionproperly.14)If a portable device (e.g. an external USB device) is connected to the Target Drive for cloning,then Data Migration may not function properly because of the USB adapter.15)If the OS version installed in the original drive does not support the GPT partition and when it isduplicated in a drive exceeding 2TB, the MBR partition type will be applied to the duplicated drive. As MBR does not support large drives, the space exceeding 2TB will remain unallocated.16)In order to use Data Migration in Samsung Portable SSD, Security Mode should be disabled.17)Portable SSDs support Data Migration only on systems with Windows 8 or higher version.Firmware Update1)PC will be shut down automatically after firmware update (Magician counts down 20 seconds beforeshutdown).2)Firmware Update may fail on Samsung brand SSDs connected to AMD Controller. Please retry usingdefault SATA AHCI controller (Microsoft drivers).Settings1)When booting the PC, users can decide whether to auto run Samsung Magician. If auto run is turnedoff, updates cannot be received in real time.2)The device scan proceeds immediately after the language is changed.3)Scaling size varies depending on the resolution.4.RAPID mode Limitations1)RAPID mode accelerates only one SSD even though user has several Samsung SSDs (870 QVO, 870EVO, 860 QVO, 860 EVO, 860 PRO, 850 PRO, 850 EVO, 850, 750 EVO, 840 EVO, and 840 PROregardless of form factor).2)If there are two identical SSDs connected, RAPID mode may accelerate the incorrect SSD.3)RAID Mode sets is not supported as an accelerated drive.4)After uninstalling RAPID mode, if the system is restored to a prior state in which RAPID mode wasinstalled, RAPID mode will be started in a disabled state.5)NVIDIA Storage controller is not supported.6)During RAPID mode Enable/Disable operation: Do not disconnect the target SSD, Do not kill theapplication.7)If fast startup is enabled on windows 8, 8.1 and 10 machines, RAPID mode enable/disable requiressystem restart. Shutdown followed by turning-on the power will not activate RAPID modeenable/disable. By default fast startup is enabled.8)Flush command of operating system and/or application may cause variation in performance whenRAPID mode is enabled.9)Sometimes on AMD PC with AMD and ASMedia storage controllers it was found that the IOs takes alonger time to complete. In such cases if Rapid was enabled, it may get automatically disabled due to such IO errors. It may display "Rapid is in inactive state". User has to reboot the PC to enable the Rapid back.10)If multiple iterations of Read and Write are performed, RAPID mode may become inactive due tosystem internal errors on some of the AMD / ASMedia Controller or Driver.11)RAPID mode can't be guaranteed on the target SSD with non-NTFS file system.12)I f user deletes some files on RAPID folder, RAPID may not be uninstalled properly.13)If the msiexec.exe is either unstable or corrupted, RAPID mode enable fails with the error message“The Windows Installer service failed to start. Start the Windows Installer service manually, upgrade the Windows Installer service, and check if the last updated or installed program in Windows was successful. If the problem persists, contact the A/S center.”The issue can be fixed by:- Unregister and reregister Windows Installer service / MSI service.♦On the Start menu, click Run.♦In the Open box, type “msiexec /unreg”. And then press ENTER.♦On the Start menu, click Run♦In the Open box, type “msiexec /regserver”. And then press ENTER.♦Try enabling RAPID mode again.If RAPID mode does not enable, follow the steps below.- Updating Windows Installer♦If your Windows Installer is not the latest version, corrupted or msiexec is missing, please install the latest version of Windows Installer, then tryenabling RAPID mode again.- If none of the above procedures work, we recommend reinstalling Windows.Operational Check of RAPID modeRAPID mode starts its operation 45 seconds after OS booting. Please make sure the increased size of non-paged pool using “task manager → performance → memory tab” to ensure it is fully operational.* Before RAPID mode enabling* After RAPID mode enablingMar 2023/magician Design and contents of this manual are subject to change without notice.©2023 Samsung Electronics, Co., Ltd. All rights reserved.。
固态硬盘安装教程详细步骤
固态硬盘安装教程详细步骤许多朋友都喜欢用固态硬盘,无论性能还是存储读取速度,都比同等级机械硬盘高,但是要使用固态硬盘就要安装,那么固态硬盘要怎么安装呢?不清楚的朋友来看看以下文章吧!如何安装SSD硬盘,步骤如下:第一步:1、在机箱内找出安装SSD的线材,首先是SSD的电源输入接口,这个是由电脑的电源引出的线材。
P4字样并没有特别的含义,只是标注这是电源提供的第四个此类接口。
形状是扁嘴形2、接着是SSD硬盘的数据输入输出接口,SATA线,宽度比硬盘电源线要短很多,比较小同样是扁口3、安装一块金士顿SSD,型号SSDNow V100 128G,标称读写性能为250/220 MB/S4、线材对准SSD尾部相应的接口,基本上很难搞错,因为接口都是专用的,弄错了是插不进去的5、将电源和数据线接驳在对应的SSD接口位置上后,安装就基本算完成了第二步:1、放进机箱,把侧板盖上,就算完成了,最后我们要安装操作系统。
安装之前先开机根据屏幕提示按键盘上相应的键进入到BIOS界面,如图7所示:2、选择图上这项,设备启动设定3、再点第一项,进入下面的界面第三步:1、系统安装完成后,重启两次电脑,利用软件检测下SSD的基本信息2、使用CrystalDiskMark软件测试性能,一切正常,与金士顿产品标注的性能水准一3、测试SSD的性能,对文件进行复制和压缩,解压出一个Office2021的文件所用时间,不到20秒,文件大小为900MB补充:硬盘常见故障:一、系统不认硬盘二、硬盘无法读写或不能辨认三、系统无法启动。
系统无法启动基于以下四种原因:1. 主引导程序损坏2. 分区表损坏3. 分区有效位错误4. DOS引导文件损坏正确使用方法:一、保持电脑工作环境清洁二、养成正确关机的习惯三、正确移动硬盘,注意防震开机时硬盘无法自举,系统不认硬盘相关阅读:固态硬盘保养技巧一、不要使用碎片整理碎片整理是对付机械硬盘变慢的一个好方法,但对于固态硬盘来说这完全就是一种“折磨”。
Windows.XP系统安装教程
Windows XP系统安装教程一、准备工作:1.准备好Windows XP Professional简体中文版安装光盘,并检查光驱是否支持自启动。
2.可能的情况下,在运行安装程序前用磁盘扫描程序扫描所有硬盘检查硬盘错误并进行修复,否则安装程序运行时如检查到有硬盘错误即会很麻烦。
3.用纸张记录安装文件的产品密匙(安装序列号)。
4.可能的情况下,用驱动程序备份工具(如:驱动精灵)将原Windows XP下的所有驱动程序备份到硬盘上(如∶F:\Drive)。
最好能记下主板、网卡、显卡等主要硬件的型号及生产厂家,预先下载驱动程序备用。
5.如果你想在安装过程中格式化C盘或D盘(建议安装过程中格式化C盘),请备份C盘或D盘有用的数据。
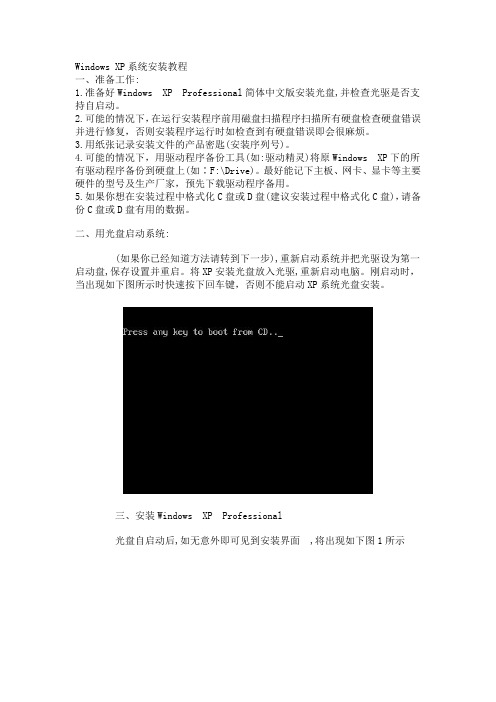
二、用光盘启动系统:(如果你已经知道方法请转到下一步),重新启动系统并把光驱设为第一启动盘,保存设置并重启。
将XP安装光盘放入光驱,重新启动电脑。
刚启动时,当出现如下图所示时快速按下回车键,否则不能启动XP系统光盘安装。
三、安装Windows XP Professional光盘自启动后,如无意外即可见到安装界面 ,将出现如下图1所示图1全中文提示,“要现在安装Windows XP,请按ENTER”,按回车键后,出现如下图2所示图2许可协议,这里没有选择的余地,按“F8”后如下图3图3这里用“向下或向上”方向键选择安装系统所用的分区,如果你已格式化C 盘请选择C分区,选择好分区后按“Enter”键回车,出现下图4所示图4这里对所选分区可以进行格式化,从而转换文件系统格,或保存现有文件系统,有多种选择的余地,但要注意的是NTFS格式可节约磁盘空间提高安全性和减小磁盘碎片但同时存在很多问题:DOS和98/Me下看不到NTFS格式的分区,在这里选“用FAT文件系统格式化磁盘分区(快),按“Enter”键回车,出现下图5所示图5格式化C盘的警告,按F键将准备格式化c盘,出现下图6所示图6由于所选分区C的空间大于2048M(即2G),FAT文件系统不支持大于2048M 的磁盘分区,所以安装程序会用FAT32文件系统格式对C盘进行格式化,按“Enter”键回车,出现下图7所示图7图7中正在格式化C分区;只有用光盘启动或安装启动软盘启动XP安装程序,才能在安装过程中提供格式化分区选项;如果用MS-DOS启动盘启动进入DOS 下,运行i386\winnt进行安装XP时,安装XP时没有格式化分区选项。
固态硬盘无损系统重装
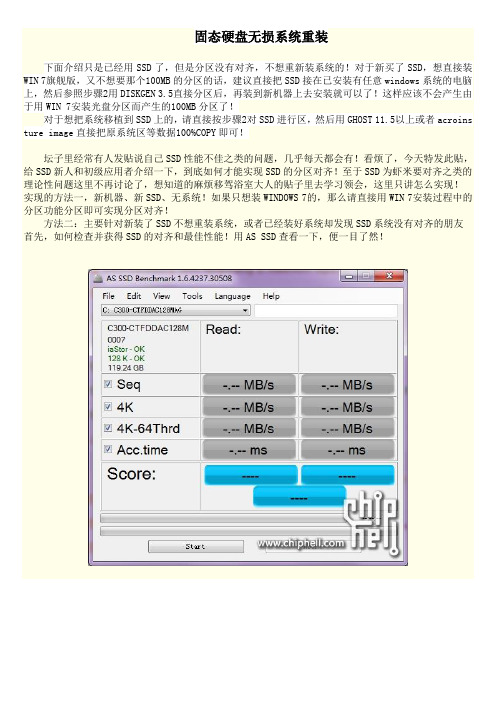
固态硬盘无损系统重装下面介绍只是已经用SSD了,但是分区没有对齐,不想重新装系统的!对于新买了SSD,想直接装WIN 7旗舰版,又不想要那个100MB的分区的话,建议直接把SSD接在已安装有任意windows系统的电脑上,然后参照步骤2用DISKGEN 3.5直接分区后,再装到新机器上去安装就可以了!这样应该不会产生由于用WIN 7安装光盘分区而产生的100MB分区了!对于想把系统移植到SSD上的,请直接按步骤2对SSD进行区,然后用GHOST 11.5以上或者acroins ture image直接把原系统区等数据100%COPY即可!坛子里经常有人发贴说自己SSD性能不佳之类的问题,几乎每天都会有!看烦了,今天特发此贴,给SSD新人和初级应用者介绍一下,到底如何才能实现SSD的分区对齐!至于SSD为虾米要对齐之类的理论性问题这里不再讨论了,想知道的麻烦移驾浴室大人的贴子里去学习领会,这里只讲怎么实现!实现的方法一,新机器、新SSD、无系统!如果只想装WINDOWS 7的,那么请直接用WIN 7安装过程中的分区功能分区即可实现分区对齐!方法二:主要针对新装了SSD不想重装系统,或者已经装好系统却发现SSD系统没有对齐的朋友首先,如何检查并获得SSD的对齐和最佳性能!用AS SSD查看一下,便一目了然!从上述图中可以看出,不管你的SSD接在哪个接口,要获得最佳性能,也就是出现两个OK的话,一是要正确安装各个接口的SATA/ACHI/RAID驱动,也就是每张图示中上方的那个OK咯啦!然后更加关键的就是SSD的各个分区要对齐,由于手头上的SSD分区都对齐了,所以只能用一个作下载盘的笔记本硬盘做示例!大家可以看到,下面那个带“XXK-OK”的字样就是指分区对齐了,那么恭喜你,后面的就不需要看的!如果是“XXK-BAD”,那您还是耐住性子继续往下看吧!之所以要写这段文字,关键在于对于那些装了系统不想重装,而且只有一个硬盘,或者已经在SSD里装好系统的朋友!对于想像机械硬盘中的系统移植到SSD中去的,请只看步骤2和步骤4步骤1:下PE,用GHOST 11.5把系统区之类的在其他硬盘(U盘)之类的存储上先成生镜像!对于已经有GHOST镜像文件的朋友请跳过此步骤!记住,为了保证SSD后期的对齐,请务必选用GHOST11.5,然后在出现的界面中依次选择“Local -Partition-To Image”在弹出的对话窗口“Select loacl source driver by clicking on the drive number”中选中你要镜像的那个系统区所在的硬盘后,点击“OK”在弹出的对话窗口“Select source partition(s) from Baskc drive:X”选中你的系统所在的分区,然后点“OK”在弹出的对话窗“File name to copy image to”中选中你要将镜像文件备份到的目录和文件夹,并给镜像文件命名后,点击“Save”。
xp系统安装教程之硬盘安装xp系统图解教程

硬盘安装Ghost xp系统图解教程(不用光盘重装系统)
这种方法必备条件:
1.当前系统可以进入并且可以运行一些必要软件。
2.有解压软件,或其他类似的软件将*.iso光盘镜像文件解压或提取出来。
先下载一个ghost版的XP操作系统,现在我随便拿个系统做演示,先下载操作系统.
最好下载在D盘或E盘根目录下,下载好后文件为ISO文件,所以我们要先把它全部解压出来(千万别把文件放在C盘),如图1.
图1
解压之后得到如图2的文件,然后运行“onekey”
运行“onekey”就会出现下面的界面,一般就是默认就可以了,然后点“确定”
按上面的操作后就会出现以下的界面,当然我们要点“是”
图4
按操作点“是”以后,马上会自动重启计算机,等重启以后基本算是安装完成了,后面我们就不用管了。
因为我们的系统都是全自动安装。
不用我们任何操作!
为方便大家可以把安装截图给大家看一下!
图5 接下来就还原系统镜像了
图6 系统镜像还原完成,重启进入系统安装
系统安装完成,再次重启,全新的系统已经装好,是不是很简单呢。
详解XP系统安装步骤
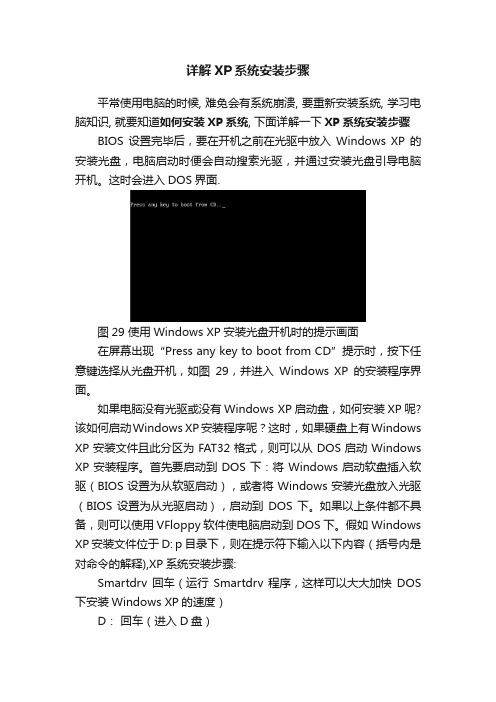
详解XP系统安装步骤平常使用电脑的时候, 难免会有系统崩溃, 要重新安装系统, 学习电脑知识, 就要知道如何安装XP系统, 下面详解一下XP系统安装步骤BIOS设置完毕后,要在开机之前在光驱中放入Windows XP的安装光盘,电脑启动时便会自动搜索光驱,并通过安装光盘引导电脑开机。
这时会进入DOS界面.图29 使用Windows XP安装光盘开机时的提示画面在屏幕出现“Press any key to boot from CD”提示时,按下任意键选择从光盘开机,如图29,并进入Windows XP的安装程序界面。
如果电脑没有光驱或没有Windows XP启动盘,如何安装XP呢? 该如何启动Windows XP安装程序呢?这时,如果硬盘上有Windows XP安装文件且此分区为FAT32格式,则可以从DOS启动Windows XP安装程序。
首先要启动到DOS下:将Windows启动软盘插入软驱(BIOS设置为从软驱启动),或者将Windows安装光盘放入光驱(BIOS设置为从光驱启动),启动到DOS下。
如果以上条件都不具备,则可以使用VFloppy软件使电脑启动到DOS下。
假如 Windows XP安装文件位于D: p目录下,则在提示符下输入以下内容(括号内是对命令的解释),XP系统安装步骤:Smartdrv 回车(运行Smartdrv程序,这样可以大大加快DOS 下安装Windows XP的速度)D:回车(进入D盘)CD XP 回车(进入XP目)CD i386 回车(进入I386目录)Winnt 回车(启动Windows XP安装程序)进入Windows XP安装程序后(图30),按下Enter键立即开始安装Windows XP。
图30 选择现在安装Windows XP按下F8键,同意Windows XP许可协议,如图31。
图31 同意Windows XP许可协议此后Windows XP安装程序会搜索以前版本的Windows系统,系统安装步骤中会发现已有Windows系统时将会给出提示,要你选择修复或者全新安装。
