MICRO USB 5S B 型牛角型DIP6.6
CommScope 优灵-U 低损耗 OM5 双面双通道光纤连接器说明书
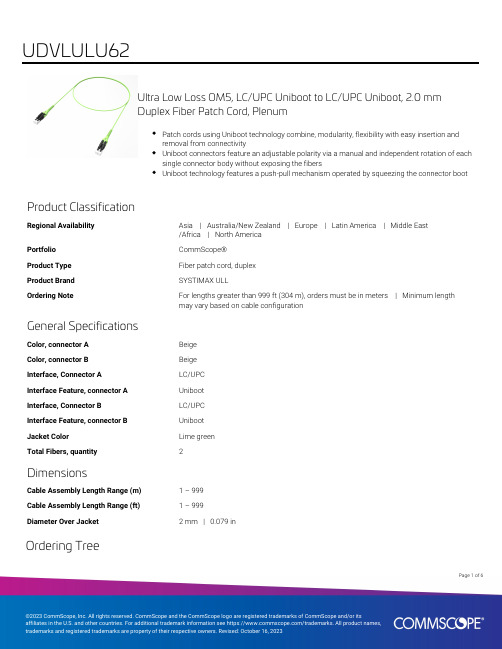
Ultra Low Loss OM5, LC/UPC Uniboot to LC/UPC Uniboot, 2.0 mmDuplex Fiber Patch Cord, PlenumPatch cords using Uniboot technology combine, modularity, flexibility with easy insertion andremoval from connectivityUniboot connectors feature an adjustable polarity via a manual and independent rotation of eachsingle connector body without exposing the fibersUniboot technology features a push-pull mechanism operated by squeezing the connector bootProduct ClassificationRegional Availability Asia | Australia/New Zealand | Europe | Latin America | Middle East/Africa | North AmericaPortfolio CommScope®Product Type Fiber patch cord, duplexProduct Brand SYSTIMAX ULLOrdering Note For lengths greater than 999 ft (304 m), orders must be in meters | Minimum lengthmay vary based on cable configurationGeneral SpecificationsColor, connector A BeigeColor, connector B BeigeInterface, Connector A LC/UPCInterface Feature, connector A UnibootInterface, Connector B LC/UPCInterface Feature, connector B UnibootJacket Color Lime greenTotal Fibers, quantity2DimensionsCable Assembly Length Range (m) 1 – 999Cable Assembly Length Range (ft) 1 – 999Diameter Over Jacket 2 mm | 0.079 inOrdering Tree16Page ofMechanical SpecificationsCable Retention Strength, maximum11.24 lb @ 0 ° | 4.40 lb @ 90 °Optical SpecificationsFiber Mode MultimodeFiber Type OM5, LazrSPEED®Insertion Loss, maximum0.15 dBReturn Loss, minimum35 dBEnvironmental SpecificationsOperating Temperature-10 °C to +60 °C (+14 °F to +140 °F)Environmental Space PlenumRegulatory Compliance/CertificationsAgency ClassificationCHINA-ROHS Above maximum concentration valueISO 9001:2015Designed, manufactured and/or distributed under this quality management system ROHS Compliant/ExemptedUK-ROHSCompliant/ExemptedIncluded Products760251109P-002-MP-5G-F20LM/LTS–Fiber indoor cable, LazrSPEED® Plenum Light Duty Interconnect Cordage, 2 fiber, MultimodeOM5, Feet jacket marking, Lime green jacket color860658162– 2.0 mm LC Uniboot GEN 1.5, Lime GreenPage of26Page of 36Fiber indoor cable, LazrSPEED® Plenum Light Duty InterconnectCordage, 2 fiber, Multimode OM5, Feet jacket marking, Lime green jacket colorProduct ClassificationRegional AvailabilityAsia | Australia/New Zealand | Latin America | Middle East/Africa | North America PortfolioCommScope®Product TypeFiber indoor cable Product Series P-MPGeneral SpecificationsCable TypeMPO trunk cable Construction TypeNon-armored Subunit TypeGel-free Jacket ColorLime green Jacket MarkingFeet Total Fiber Count 2DimensionsDiameter Over Jacket 2 mm | 0.079 inRepresentative ImageMechanical SpecificationsMinimum Bend Radius, loaded38 mm | 1.496 inMinimum Bend Radius, unloaded16 mm | 0.63 inTensile Load, long term, maximum20 N | 4.496 lbfTensile Load, short term, maximum67 N | 15.062 lbfCompression 4 N/mm | 22.841 lb/inCompression Test Method FOTP-41 | IEC 60794-1 E3Flex300 cyclesFlex Test Method FOTP-104 | IEC 60794-1 E6Impact0.74 N-m | 6.55 in lbImpact Test Method FOTP-25 | IEC 60794-1 E4Strain See long and short term tensile loadsStrain Test Method FOTP-33 | IEC 60794-1 E1Twist10 cyclesTwist Test Method FOTP-85 | IEC 60794-1 E7Vertical Rise, maximum500 m | 1,640.42 ftOptical SpecificationsFiber Type OM5, LazrSPEED® wideband | OM5, LazrSPEED® widebandEnvironmental SpecificationsInstallation temperature0 °C to +70 °C (+32 °F to +158 °F)Operating Temperature0 °C to +70 °C (+32 °F to +158 °F)Storage Temperature-40 °C to +70 °C (-40 °F to +158 °F)Cable Qualification Standards ANSI/ICEA S-83-596 | Telcordia GR-409Environmental Space PlenumFlame Test Listing NEC OFNP (ETL) and c(ETL)Flame Test Method NFPA 130 | NFPA 262Environmental Test SpecificationsHeat Age0 °C to +85 °C (+32 °F to +185 °F)Heat Age Test Method IEC 60794-1 F9Low High Bend0 °C to +70 °C (+32 °F to +158 °F)46Page ofLow High Bend Test Method FOTP-37 | IEC 60794-1 E11Temperature Cycle0 °C to +70 °C (+32 °F to +158 °F)Temperature Cycle Test Method FOTP-3 | IEC 60794-1 F1Packaging and WeightsCable weight 3.2 kg/km | 2.15 lb/kft* FootnotesOperating Temperature Specification applicable to non-terminated bulk fiber cable56Page of860658162Page of 662.0 mm LC Uniboot GEN 1.5, Lime GreenProduct ClassificationRegional AvailabilityAsia | Australia/New Zealand | EMEA | Latin America | North America Product Type Fiber connector bootGeneral SpecificationsColor Lime greenDimensionsCompatible Cable Diameter 2 mm | 0.079 inPackaging and WeightsPackaging Type BagRegulatory Compliance/CertificationsAgencyClassification CHINA-ROHSBelow maximum concentration value REACH-SVHCCompliant as per SVHC revision on /ProductCompliance ROHSCompliant UK-ROHSCompliant。
Molex 0502128000 微型锁扣母端子 2.00mm 间距、锡(Sn)镀层、24-30 A

Twisted Wire
This document was generated on 09/29/2022
PLEASE CHECK FOR LATEST PART INFORMATION
Series image - Reference only
EU ELV Compliant
EU RoHS
China RoHS
Compliant
REACH SVHC
Not Contained Per -
D(2022)4187-DC (10
June 2022)
Halogen-Free
Status
Low-Halogen
Crimp Terminals 50212 Automotive, Signal, Wire-to-Board Yes Micro-Latch Wire-to-Board Connector System 502128100 (Loose) DuraClik, Mi II, Micro-Latch, Sherlock Crimp Terminals 800753644625
Micro-Latch Wire-to-Board Connector System 2.00mm Pitch, Micro-Latch Female Crimp Terminal, Tin (Sn) Plating, 24-30 AWG, Reel
Documents: 3D Model (PDF) 3D Model Drawing (PDF) Product Specification 510650000-PS-000 (PDF) Product Specification 510651000-PS-000 (PDF) Product Specification PS-51089-001-001 (PDF) Product Specification PS-51089-005-001 (PDF) Product Specification PS-51090-003-001 (PDF) Product Specification PS-51090-004-001 (PDF) Product Specification PS-51090-005-001 (PDF) Product Specification PS-51090-009-001 (PDF) Product Specification PS-51090-016-001 (PDF) Product Specification PS-51090-017-001 (PDF) Product Specification PS-51090-018-001 (PDF)
818000157 (USS RF插座,III代,H0.85mm,四焊脚, 外壳镀银)_E(2)

5.2 Salt spray(盐雾试验) 5.3 Solder-ability(可焊性)
temperature:35℃ concentration:5% duration:48 hours
温度:35℃ 浓度:5% 持续时间:48 hours More than 95% of the dipped surface shall be wet. 吃锡面积 95%以上
3.3.1 Inner Contact(内导体)
3.3.2 Outer Contact(外导体)
3.4 VSWR(电压驻波比)
≦3GHz1.3 max源自3.4.1Test Method(测试方法):
NA
500 MΩ 200V AC for 1 minute
Initial(初始): After(测试后): Initial(初始): After(测试后):
6 cycles in each X-Y-Z axis
加速度735m/s2,持续时间11 ms,波型为半正弦波,3个轴向各6个循环
4.3 Vibration(振动)
Frequency:10~100Hz, half amplitude: 1.5mm, acceleration: 59m/s2. 3 mutually perpendicular direction,5 cycles in each direction 频率:10~100Hz,单向幅度 1.5mm,加速度:59m/s2,3 个轴向各 5 个循 环
ECT
Electric Connector Technology CO.,LTD
深圳市电连精密技术有限公司
Product Specification DOC. No.: 651-0157-01 Rev.: E
usb标准接口尺寸
usb标准接口尺寸USB(Universal Serial Bus)是一种用于连接计算机及外部设备的通用串行总线标准。
USB接口已经成为现代电子设备中最为常见的接口标准之一,它的普及和应用给人们的生活带来了极大的便利。
而USB接口的尺寸标准也是使用中需要了解的重要信息之一。
首先,我们需要了解USB接口的尺寸标准是指其物理尺寸的规范。
USB接口的尺寸标准主要包括连接器的尺寸和插口的尺寸。
在制定USB接口的尺寸标准时,主要考虑到设备的连接稳定性、插拔方便性以及适用范围等因素,以确保USB接口能够在各种设备中得到广泛应用。
根据USB接口的不同类型,其尺寸标准也有所区别。
目前,最常见的USB接口类型包括USB-A、USB-B、Micro USB和USB-C等。
其中,USB-A接口是最为常见的一种,其尺寸标准为长12mm,宽4.5mm,高3.5mm。
而USB-B接口的尺寸标准为长11mm,宽3.5mm,高3.5mm。
Micro USB接口的尺寸标准为长7mm,宽1.8mm,高3.6mm。
而USB-C接口的尺寸标准为长8.4mm,宽2.6mm,高2.6mm。
通过了解这些尺寸标准,我们可以更好地选择和使用USB接口设备。
除了连接器的尺寸标准外,USB接口的插口尺寸也是需要了解的重要信息。
USB插口的尺寸标准主要包括插孔的尺寸和排列方式。
在制定USB插口的尺寸标准时,主要考虑到连接稳定性、插拔方便性以及兼容性等因素。
目前,USB接口的插口尺寸标准已经得到了统一规范,以确保各种设备之间的互联互通。
总的来说,USB接口的尺寸标准是非常重要的,它直接影响着设备的连接稳定性和使用便捷性。
通过了解USB接口的尺寸标准,我们可以更好地选择和使用USB接口设备,同时也能够更好地保护设备的接口部分,延长设备的使用寿命。
在未来,随着科技的不断发展和进步,USB接口的尺寸标准可能会继续得到更新和完善。
我们需要不断关注最新的USB接口标准,以便更好地适应新的科技发展趋势。
Micro USB座的用料、工艺要求

一、统一选用牛角型 Micro USB 座,可靠性高。插拔寿命测试需达到 3000 次以上;如图一
图一
二、Micro USB 选用插孔焊接,确保与 PCB 的连接强度;如图二
三、Micro USB 靠近针脚的两个脚加 靠近针脚的两个脚加焊盘来焊接,极大增强焊接强度;如图二 如图二
四、Micro USB 固定焊接的 PCB 是大面积覆铜,确保不会强力拔插下起铜皮;如图二 是大面积覆铜,确保不会强力拔插下起铜皮
图二
五、PCB 板此位置要加焊盘,过回流焊时可达到 Micro USB 金属壳体与 PCB 板焊接在一
MICRO USB 母座规格书

Measure force necessary to mate
assemblies at maximum rate of 12.5mm (or
0.492”) per minute.
5.3.2
EIA 364-13
1).Initial : 10N min
Shall be measured with TENSION GAUGE 2).After test: 8̚20N
18 total shock
5.3.5
EIA 364-28
Random Vibration
Test Condition V Test Letter A
No discontinuities of 1 s or longer duration when mated USB connectors are subjected to 5.35 Gs RMS. 15 minutes in each of three mutually perpendicular planes.
2.3 Operation Temperature Range: -30ć to +80ć
2.4 Storage Temperature Range: -30ć to +85ć
2.5 Operation Relative Humidity: 95 % Maximum (non-condensing)
1).No discontinuities of 1m sec or longer
duration 2).Shall meet visual requirement, show no physical damage.
This document and information contained herein are the property of Keyu Plastic Hardware CO.,LTD copies are issued in strict confidence and shall not be reproduced or copied, or used as the basic of manufacture or sale of apparatus without permission
Micro usb OTG数据线制作

由于USB HOST线可以使得很多智能手机支持连接鼠标、键盘、硬盘、U盘、MP3、USB 游戏手柄、USB HUB、USB网卡、USB打印机、手机、USB SIM手机卡读卡器等一堆设备,好处多多,但是我的夏新E850标配是没有这根线的,在友人网参考了hoho2002的USB HOST线制作方法,自己不免想动手制作一根。
首先看下Micro usb接口的定义,如图:
Micro 端USB端
只要短接Micro usb 端的GND和ID铜片就可以了,红色部分,用电烙铁点上一小点焊锡就好,其他按对应的颜色接。
注意:Micro端的空端和白线端是一层的,也就是焊接的地方是两层,一层是2根焊接点,从左到右,面对自己,分别是空端和白线,二层是3根焊接点,面对自己,从左到右分别是红、绿、黑。
USB母头端,面对自己,从左到右,黑、绿、白、红。
焊接时要小心,焊好后可以用AB胶封住焊接端,干后很牢固的。
见效果图:。
标准usb插头尺寸
标准usb插头尺寸USB(Universal Serial Bus)是一种用于连接计算机与外部设备的通用接口标准。
在现代生活中,USB接口已经成为了各种设备的标配,无论是电脑、手机、平板还是其他电子设备,都离不开USB接口的支持。
而USB插头作为USB接口的一部分,其尺寸标准对于设备的兼容性和稳定性至关重要。
本文将对标准USB插头尺寸进行详细介绍,以便读者更好地了解和应用。
首先,我们来看一下标准USB插头的尺寸。
根据USB-IF(USB Implementers Forum)发布的规范,USB插头分为Type A、Type B、Micro-USB和Type-C四种类型。
其中,Type A插头是最常见的USB插头,尺寸为12mm × 4.5mm,而Type B插头尺寸稍大一些,为11mm × 8.5mm。
Micro-USB插头是一种较小尺寸的插头,尺寸为6.85mm × 1.8mm。
而Type-C插头是最新的USB插头标准,尺寸为8.4mm × 2.6mm。
这些尺寸标准的制定,旨在实现不同设备之间的互连互通,提高设备的兼容性和便利性。
其次,我们需要了解的是USB插头的接口类型。
除了尺寸标准外,USB插头还分为母头和公头两种接口类型。
母头是指插座式接口,通常安装在设备上,而公头是指插针式接口,通常用于连接线缆。
这两种接口类型在USB设备的连接和使用中起着至关重要的作用,用户在使用USB设备时需要根据设备的接口类型选择合适的插头,以确保设备能够正常连接和传输数据。
除了尺寸和接口类型外,USB插头的材质和制作工艺也对其性能产生重要影响。
优质的USB插头应该采用耐磨耐腐蚀的金属材质制作,表面应经过精细的抛光处理,插头与插座之间的接触部分应具有良好的导电性能,以确保数据传输的稳定和可靠。
此外,USB插头的制作工艺也需要严格把控,确保每个插头的尺寸和形状都符合标准要求,避免因尺寸不准确而导致设备连接困难或数据传输不畅的问题。
度小钮说明书范文

度小钮说明书范文
一、产品介绍
智能温度小钮是一款专为温度测量而设计的智能终端设备,拥有远程
传输温度等功能,让您可以轻松实时查看现场的温度状况。
智能温度小钮
采用精密测温模块、WiFi模块、高精度温度传感器组成,具备精准测量、数据安全、集群控制等功能。
机器自带锂电池充电功能,可长时间使用,
可以满足室内外温度测量的需求。
二、产品特性
1、节能:采用精密测温模块和高精度温度传感器,可以准确检测温度;
2、安全:采用WiFi模块,可实现远程控制,数据传输安全可靠;
3、灵活:支持集群控制,可以根据不同的场景需求调整温度;
4、耐用:机器自带锂电池充电功能,可长时间使用,智能温度小钮
还具备良好的防水和防尘性能,使用寿命长,可靠性高。
三、产品操作
1、安装:智能温度小钮可以自由安装在室内、室外墙面、柜子上方、地面上等位置;
2、连接:将智能温度小钮连接到Wi-Fi网络,将智能温度小钮连接
到手机,可以实现远程控制温度;
3、调试:根据现场需要调整温度范围,也可以根据集群整体温度调
整各个小钮的温度;
4、查看:可以随时查看场景温度感知状况。
魏德米勒工具产品目录

KT8 16 / 6 16 / 6 16 / 6 8
最大切断能力(铝导线) 多股硬导线(最大导线截面积) 多股硬导线(最大导线直径) 单股硬导线
数据线/电话线/控制线 最大导线直径
工具参数 长/宽/高 重量 信息
mm2/AWG(kcmil) mm mm2
16 / 6 8 16
mm 8
mm 165 / 65 / 25 g 180 工具处于闭和状态
工具样本切断工具剥线工具压接工具螺丝刀自动化机器管状端头及工具套装电缆断线工具kta2电缆断线工具ktfa4电缆断线工具kta5电缆断线工具kta6剥线工具stripaxb2剥线工具multistripax剥线工具am16amf610b4管状端头压接工具pzhexc5管状端头压接工具pzrotoc7剥线工具am25am35b6剥线工具minidurostripaxb3压接工具stripaxplus25c4工具产品总揽水晶插头压接工具c20大型端头压接工具mtrc21电动扭矩螺丝刀d2带有切断功能的螺丝刀swiftysetd5vde绝缘螺丝刀d6普通螺丝刀d8手动扭矩螺丝刀d11电缆接头扳手d14自动断线机器ccme2自动剥线机器powerstrippere3工具产品总揽预绝缘端头压接工具cti带塑料套的管状端头f3不带塑料套的管状端头f11预绝缘端头f13工具套装f15工具套装f16工具产品总揽自动剥线和压接机器crimpfix25e4切断工具a2a2a3a4a4a5a5a6a7a7a8a8ktkt12kt20ktf25ktf36kt45rkt55kt80wawktzqvtsld导轨切割工具a9a9a9a10a10slicerslicer1kcuttyscissor2kscissor1ka1a2切断工具型号数量订货号切断质量高技术参数最大切断能力铜导线单股硬导线最大导线截面积mmawgkcmil多股硬导线最大导线截面积mmawgkcmil多股软导线最大导线截面积mmawgkcmil多股软导线多股硬导线最大导线直径mm最大切断能力铝导线多股硬导线最大导线截面积mmawgkcmil多股硬导线最大导线直径mm单股硬导线mm数据线电话线控制线最大导线直径mm工具参数mm重量信息订货信息信息附件信息kt切断时不会发生错位最大可切割直径为8mm铜导线和铝导线
采购清单及相关要求

采购清单及相关要求(一)采购清单注:1、采购清单中,如果在技术参数或配置中标明了品牌或产地,则仅供参考,并非指定,投标人可以选用替代的方案,但这种替代整体上要优于或相当于招标文件的相关要求。
2、为鼓励不同品牌的充分竞争,如某设备的某技术参数或要求属于个别品牌专有,则该技术参数及要求不具有限制性,投标人可对该参数或要求进行适当调整,并应当说明调整的理由,且该调整须经评委会审核认可。
3、投标人对招标人提供的采购清单应完全响应或调整后的参数、要求要满足招标文件相关要求,如果后期施工过程中发现个别设备(材料)名称及技术参数不符合招标人使用需求的,招标人有权要求投标人按照招标文件中采购清单的设备(材料)名称及技术参数供货,该部分设备(材料)差价不予调整。
4、若上传图纸中部分数据或参数与采购清单不一致的,报价时以采购清单为准。
(二)技术要求1、所投货物须(包括零部件)为全新的、未使用过的原装正品。
提交货物的技术参数和配置应与招标文件的要求及其投标文件的技术响应表(如果被评委会接受的话)相一致。
若招标文件及投标文件中无相应说明,则以国家有关部门最新颁布的相应标准及规范为准。
投标人对技术参数的响应情况需提供相关技术证明文件(第三方检测报告或产品彩页或产品使用说明书或厂家官网截图等)予以证明。
2、投标人提供的相关技术证明文件中关于同一技术参数的表述与检测报告不一致时,以检测报告为准。
3、所投货物国家有相关强制性要求及节能环保要求的,则必须符合国家相关强制性要求及节能环保要求。
4、中标人在项目实施过程中,进场单位和人员的资质、资格须符合国家、省、市有关规定。
施工期间中标人所发生的或中标人施工场地内发生的或中标人原因造成的安全事故,均应由中标人负责按有关规定处理善后事宜,并承担给招标人造成的损失。
5、技术支持5.1中标人应向招标人提供全方位及时而有效的技术支持和服务。
5.2中标人负责供货、安装调试、施工、试运行及配合验收。
连接线分类

一、看图了解机仪器端口:
RCA端口
HDMI端口
S端子端口
以太网端口
DB端口
光纤端口 音箱端口
二、识别连接线
USB3.0 HDMI S 端子 光纤 DVI 跳线 SCART USB2.0 音视频
品种繁多 各有特色
三、机仪器与机仪器之间的传输
液晶 显示器
HDMI 连接线
DVD
摄像机
IEEE 1394 连接线
PIN位 信号名称 1 VBUS 2 3 4
DD+ GND
描述
Power "+"
信号传输
Power "-"
USB 2.0 PIN位定义
USB 3.0 A Type PIN位定义 PIN位 信号名称 描述 Power "+" 1 VBUS 2 D信号传输 3 D+ 4 GND Power "-" StaA_SSRX5 信号接收 StaA_SSRX+ 6 GND GND_DRAIN 7 8 StaA_SSTX信号发射 StaA_SSTX+ 9
PIN位 1 2 3 4 5 6 7 8 9
DB 9P PIN位定义 信号名称 描述 DCD 载波检测 RXD 接收数据 TXD 发送数据 DTR 数据终端 GND SG(GND) 数据准备 DSR 请求发送 RTS CTS 清除发送 RI 振铃指示 DB 25P PIN位定义 PIN位 信号名称 描述 STROBE 1 选通 2~9 DATA0-DATA7 数据发与收 ACKNLG 10 确认 11 BUSY 忙 12 PE 缺纸 13 选择 SLCT 14 自动换行 AUTO FEED 15 ERROR 错误 16 INIT 初始化 17 SLCT IN 选择输入 GND GND 18~25
深圳市骏晔科技有限公司 W11 外置吸盘天线说明书

W11SPECIFICATIONShenzhen DreamLNK Technology Co.,Ltd.深圳市骏晔科技有限公司Shenzhen DreamLNK Technology Co., Ltd.2400-2500MHz(吸盘)天线产品规格书客户频段2400MHz~2500MHz线材名称版本A1客户料号骏晔料号W11骏晔编号R F设计 James wang 射频经理Knight Ai结构设计结构经理技术总监日期2019-06-24客户确认:装配是否符合贵司要求:□OK □NG目录封面 (1)目录 (2)一、产品图片 (3)二、产品参数 (3)三、S11数据................................................................................. (4)四、产品结构图 (5)五、环境可靠性实验报告 (6)六、连接器BOM表 (6)七、联系方式........................................................ ..... (7)一、产品图片二、产品参数产品测试参数产品名称(Name)外置吸盘天线产品型号(Model Type)W11电性能指标(Electrical Specifications)频率范围(Frenquency Range) 2400-2500 MHz 极化方式(Polarization)垂直输入阻抗(Impedance)50 Ω辐射方向全向驻波比(VSWR)≦1.3 功率容量(Power) 50W增益(Gain) 5dBi 带宽(Bandwidth 135/46MHz机械指标(Mechanical Specifications)尺寸(Dimensions) 260±1mm吸盘颜色(Radome Color)黑色连接器型号(Connector) SMA公针引线长度(Cable Length)3000±1mm 吸盘材料Radome Material ABS工作温度(Working Temperature)-40℃-+85℃存放温度(Limit Temperature)-40℃-+85℃三、S11(VSWR、Return loss 、Smith)数据四、结构图纸说明:天线设计过程中需要结合产品外形结构,射频模块信号输入输出接口的位置,以及产品内部的干扰源的位置来决定弹簧天线的摆放位置,角度,离铺地的间距,离PCB基板的高度等。
diy一个袖珍usb电烙铁,户外使用太方便了

diy一个袖珍usb电烙铁,户外使用太
方便了
《DIY 一个袖珍USB电烙铁——户外使用太方便了》
一、准备材料
1. USB线材:用于连接电源,一个普通
2.4A充电线最佳;
2. 烙铁头:此次DIY主要选择78KIT烙铁头;
3. 电烙铁芯:可搜索定制或者购买市面上现成的电烙铁芯,电压24V;
4. USB口插头:用于将烙铁头引线连接到电源;
5. 烙铁把手:可选择市面上现成的,也可以装饰性DIY;
6. 热熔胶:一种又称做“烙铁胶”的热封胶,用于加固烙铁头和线材的固定。
二、安装步骤
1. 安装烙铁头:将电烙铁头放入把手中,再用热熔胶固定好;
2. 连接电源:将USB线材连接到电烙铁芯,再用USB口插头把电源线引到外面;
3. 电源测试:将USB线材连接到电源,判断是否接通。
三、DIY的好处
1. 尺寸小巧:袖珍USB电烙铁设计小巧轻便,不但方便户外使用,它尺寸小巧,放置在办公室里
也不占空间;
2. 节能环保:采用USB接口电源,比较节能,比较环保,而且还可以提高工作效率;
3. 价格实惠:DIY出来的袖珍USB电烙铁不仅便宜耐用,还可以自己DIY出属于自己风格的配件,更多大家创新余地。
四、总结
DIY袖珍USB电烙铁可以说是一种生活必备知识,
因为它方便了我们的户外活动,减少了到处寻找烙铁的麻烦,而且使用USB接口电源更是非常节能环保,而且获得自己DIY装饰性的把手更是个大好处,所以DIY一个袖珍USB电烙铁带给我们的便捷性和实惠性是无与伦比的,大家一起动手DIY吧!。
12 x 12 SMD 触摸开关 B3FS-4 商品说明书

12x 12SMD Tactile Switch11212Surface-mounting Switches with 12x 12mm size•Surface-mounting device of B3F-4series.•Distinctive snapping action and extended mechanical and electrical service life.•Available in embossed taping packages for automatic mounting.•B32series Keycaps are available for the projected plunger models•RoHSCompliantNote:Order in multiples of the minimum order unit.Switches are not sold individually.Specifications■Characteristics■Operating Characteristics2B3FS-4Note:1.Unless otherwise specified,all units are in millimeters and a tolerance of ±0.4mm applies to all dimensions.2.T erminal numbers are not indicated on this switch.With the switch turned over so that the logo mark “OMRON”is visible on the upper part of the rear side of the switch base,the terminal on the right of the logo mark isnumbered “1”and that on the bottom right is “3.”Accordingly,two terminals on the left side are numbered “2”and “4”respectively.B3FS-4002P B3FS-4005PB3FS-4052PB3FS-4055P(BOTTOM VIEW)PCB Pad (Example)(Top View)Terminal Arrangement/Internal Connection(TopView)PCB Pad (Example)(Top View)Terminal Arrangement/Internal Connection(Top View)B3FS-43Be sure to read the precautions common to all T actile Switches,contained in the T echnical User’s Guide,“T actile Switches,T echnical Information”for correct use.■Precautions for Correct UseSolderingGeneral PrecautionsBefore soldering the Switch on a multilayer PCB,test to confirm that soldering can be performed properly.Otherwise the Switch may be deformed by the soldering heat on the pattern or lands of the multilayer PCB.Do not solder the Switch more than twice,including rectificationsoldering.An interval of five minutes is required between the first and the second soldering,or it may result in melting housing and deterioration of operating characteristics.Reflow Soldering (Surface Mounting)Solder the terminals within the heating curve shown in the following diagram.Note:The above heating curve applies if the PCB thickness is 1.6mm.The peak temperature may vary depending on the reflow bath used.Confirm the conditions beforehand.Do not use an automatic soldering bath for surface-mounted Switches.The soldering gas or flux may enter the Switch and damage the Switch's plunger operation.Manual SolderingSoldering temperature:350degC max.at the tip of the soldering iron Soldering time:3s max.for a 1.6-mm thick,single-side PCB Before soldering the Switch on a PCB,make sure that there is no unnecessary space between the Switch and the PCB.WashingThis switch cannot be washed.Doing so will cause the washing agent,together with flux or dust particles on the PCB,to enter the Switch,resulting in malfunction.PCBsIf the PCBs are separated after mounting the Switch,particles from the PCBs may enter the Switch.If PCB particles or foreign particles from the surrounding environment,workbench,containers,or stacked PCBs become attached to the Switch,contact failure may result.RoHS CompliantThe "RoHS Compliant"designation indicates that the listed models do not contain the six hazardous substances covered by the RoHS Directive.Reference:The following standards are used to determine compliance for the six substances.Lead:1,000ppm max.Mercury:1,000ppm max.Cadmium:100ppm max.Hexavalent chromium:1,000ppm max.PBB:1,000ppm max.PBDE:1,000ppm max.Packaging Specifications for EmbossedTapingT e m p e r t u r e (°C )T T B3FS-4002P B3FS-4005PB3FS-4052P B3FS-4055P4B3FS-4OMRON ELECTRONIC COMPONENTS LLC847-882-2288。
Superlux舒伯乐E U USB CONDENSER MICROPHONE使用说明书

E UUSB CONDENSER MICROPHONE简中文详见P.15www .superlux .com .tw保固务Made in chinaSuperlux 舒伯乐针对在符合使用手册上所载明之使用方法,给予自购买日期起一年的所有材质及制造质量的保证期限。
此保证期限将依据在不同国家或地区而有所调整。
请联络当地的经销商以或得更多的信息。
在有效期限内,若发现任何材质或生产质量,或是任何功能无法正常使用,Superlux 将进行维修或更换零件。
此保证条款只针对经由Superlux 所授权的代理商或经销商所卖出的产品,然而以下的状况将不在保证条款内:由于意外、错误的使用、不正当的使用、自行修改或维修,运送过程中造成的损害,不遵守说明书上所载明之使用方法、未经由Superlux 所授权的公司执行维修的动作,由非授权的经销商所提出的要求,或任何Superlux 产品其上的序号贴纸巳经无法辨识或巳经修改或被移除者。
Superlux 产品的维修只能由原厂所授权的维修中心或是授权的代理商或经销商为之。
未经授权的维修、保养或修改将无法获取相关的保证,并且排除在保证条款之外。
在保证条款下的维修保证,必须在提出当地授权代理商或经销商的销货收据下,才能获得保障。
而且必须在提出采买日期才能决定你的Superlux 产品是否在保证期限内。
要获得原厂授权的维修保固,请联络业经授权的代理商、经销商或经由电邮***********************.tw 与我们联络。
本产品符合 FCC 法规B 类型第15章的规范。
在满足以下两个条件才允许操作本产品:(1)本产品不会产生干扰,并且(2)本产品必须能够接受接收到的包括可能导致装置意外操作的任何干扰。
适合使用的场所为家庭或办公室。
国际行销和业务中国地区行销和业务********************.tw ***********************.tw******************************.tw ********************.tw+886-2-26931323System Requirements USBUSB 1.1 or 2.0, poweredRAM64MB RAM (minimum )Operating SystemMicrosoft Windows 2000 Professional EditionMicrosoft Windows 10Microsoft Windows 7Microsoft Windows XP Home/Professional Edition (service pack 1.0 or later, or use the USB audio driver update from Microsoft)Microsoft Windows Vista™ Business Edition Apple Computer Mac OS X 10.0 or later EditionApple Computer Mac OS X 10.1 or later Edition P/N: LB10E205U0102 2016 JULSAFETY PRECAUTIONSWARNINGCAUTION3Safety symbols-“WARNING” AND “CAUTION”- and messages described below are used in this manual to prevent bodily injury and property damage which could result from mishandling. Before operating your product, read this manual first and understand the safety symbols and messages so you are thoroughly aware of the potential safety hazards.WARNING: Indicates a potentially hazardous situation which, if mishandled, could result in death or serious personal injury.CAUTION: Indicates a potentially hazardous situation which, if mishandled, could result in moderate or minor personal injury, and/or property damage.Do not expose the unit to rain or an environment where it may be splashed by water or otherliquids, as doing so may result in fire or electric shock.Do not attempt to modify this product. Doing so could result in personal injury and/or productfailure. Do not subject to extreme force and do not pull on the cable or failures may result. Keep the device dry and avoid exposure to extreme temperatures and humidity.2GENERAL DESCRIPTIONFEATURESSmooth, flat frequency response Plug in and start recording, no drivers required Up to 16 bit / 48 kHz sampling Powered by USB power, no external power required Headphone output and volume control Includes pivoting stand mount, threaded adapter, and USB cable The E205U is a high quality condenser microphone with an advanced A/D and USB interface which gives you digital recording capabilities instantly with no external digital interface or software driver required. It is USB compatible with Mac, Windows, and most DAW software programs, including GarageBand. The E205U offers premium quality audio recording with ease and mobility, and with its pivoting stand mount and 9.8 ft. (3-meter) USB cable, the E205U is a valuable kit for any project studio.LAYOUTout connector: 1/8-inch (3.5mm)studio monitors.USB indicator : When it is lit up , it means the USB connection is done and E 205U get the power from USB interface .USB connector : E 205U involves a USB B -type connector , and it is allowed to connect to any device with USB interface .54Unit: mm/inchThrough optional table stand HM 6, You may put the E 205U on a table and do recording .ON A STANDBy using a microphone stand , the E 205U can be mounted on it for recording .CONNECTIONSA separated 3-meter cable with USB A -type connector allowed to be connected to a computer with USB port . Note : Make sure to use a powered USB prot .ON A TABLEUSB ConnectorMOUNTING cØ38 (Ø1.5”)QUICK START1. You can position the E 205U on an optional stand by using included accessories .2. Be sure to position the side of grille net to the sound source and keep the Superlux logo and LED indicator face thedirection of sound source.3. Plug the B type connector of the included USB cable into the USB socket on the bottom of the E 205U .4. Now , plug the other end of the USB cable into an available powered USB port on your computer .Note : Be sure to check the USB audio device driver setup for Windows and Mac OS to confirm your computer has recognized the E 205U .5. Next , launch your DAW , turn down the main output level and select the E 205U for the input .6. Set up a mono record track in your DAW .7. Now , setup the level of the E 205U and there are few ways to do this depending on your computer system . You can setthe microphone 's input level in the Sound playback in Windows or in the Sound dialog box in the System Preferences if you are using the MAC OS .8. Set level of the microphone by raising the Input level control in your DAW or system to about half way up .9. Next, put on your headphones that is connected to the headphone output of E205U, position the E205U to the soundsource then adjust the volume control until you reach a comfortable listening level.Now , follow the instructions of your DAW software to enable the track for recording and you 're ready to record .Note : if the microphone level of E 205U are too loud or not enough , please check your DAW software or refer to Troubleshooting page in this manual to adjust the level in Windows and Mac computer system :76USB AUDIO DEVICE DRIVERWindows Operating SystemsIf you encounter problems, make sure the driver was properly installed.From the Control Panel , open Sounds and Audio Devices .In the Audio tab , look for Superlux E205U in the drop -down menus for Sound playback and Sound recording.superlux E205UMACINTOSH OSX OPERATING SYSTEMSOpen the Sound Preference window from System Preferences . Select Superlux E205U from both the Input and Output tabs .98Superlux E205USuperlux E205UUSBNote : Garage Band users :open Garage Band before plugging in the microphone to automatically select the USB device .2. Now click the checkbox in the column in Setup .Thru Audio /MIDI Superlux E205USuperlux E205UUsing the Direct Monitor1.To turn direct monitoring on or off , open the Setup utility located in the folder inside the Applications folder .Audio /MIDI Utility 1110TROUBLESHOOTINGSPECIFICATIONSNote: specifications are subject to change.ACCESSORIES FURNISHEDOPTIONAL ITEMSHM 56 spider shockmount1312HM85 pivotingstand mountLIMITED W ARRANTYE205UUSB电容麦克风Contact UsMarketing and salesSuperlux,T aiwan+886-2-26931323sales@,tw ********************.tw Manufacturing&logisticsSuperlux EnterpriseDevelopment(Shanghai)Co., Superlux Enterprise warrants all materials and workmanship under use as instructed by the user’s manual of this product for a period of one year from the original date of purchase. Warranty period might be different by each area. Please contact your local dealer for more information. If any defects are found in the materials or workmanship or if the product fails to function properly during the applicable warranty period, Superlux Enterprise, at its option, will repair or replace the product. This warranty applies only to equipment sold and delivered by Superlux Enterprise’s authorized distributors or dealers. However, thefollowing are not covered:Damage caused by accident, misuse, abuse, product modification or neglect; damage occurring during shipment; damage resulting from failure to follow instructions contained in your Instruction manual; damage resulting from the performance of repairs by someone not authorized by Superlux; claims based upon any misrepresentations by the seller; any Superlux product on which the serial number has been defaced, modified or removed.Service and repairs of Superlux products are to be performed only at a factory-authorized facility or authorized distributors or dealers. Unauthorized service, repairs, or modification will void this warranty. To obtain repairs under warranty, you must have a copy of your sales receipt from the authorized Superlux dealer where you purchased the product. It is necessary to establish purchase date and determine whether your Superlux product is within the warranty period. To obtain factory authorized service, please contactauthorizeddistributors,***********************************.tw.THIS DEVICE COMPLIES WITH PART 15 OF THE FCC RULES CLASS B. OPERATION IS SUBJECT TO THE FOLLOWING TWO CONDITIONS: (1) THIS DEVICE MUST NOT CAUSE HARMFUL INTERFERENCE, AND (2) THIS DEVICE MUST ACCEPT ANY INTERFERENCE RECEIVED INCLUDING INTERFERENCE THAT MAY CAUSE UNDESIRED OPERATION. SUITABLE FOR HOME OR OFFICE USE.系统要求USBUSB 1.1 或 2.0,含5V供电内存64MB 内存(最低要求)操作系统Microsoft Windows 2000 专业中文版Microsoft Windows 10Microsoft Windows 7Microsoft Windows XP 家庭/专业中文版(Service Pack 1.0 或以上版本,或使用 Microsoft 的 USB 音频驱动更新)Microsoft Windows Vista™ 企业中文版Apple Computer Mac OS X 10.0 或以上中文版Apple Computer Mac OS X 10.1 或以上中文版(对于 Mac OS X 10.0 中文版,不适用即插即用功能)1514Made in china P/N: LB10E205U0102 2012 Dec安全事项“警告”和“小心”的标志及以下的讯息,是用来提醒使用者避免不正确使用下,可能导致的伤害与后果。
波士顿家用电器 MSM6 手机电饭煲辅助器操作说明书
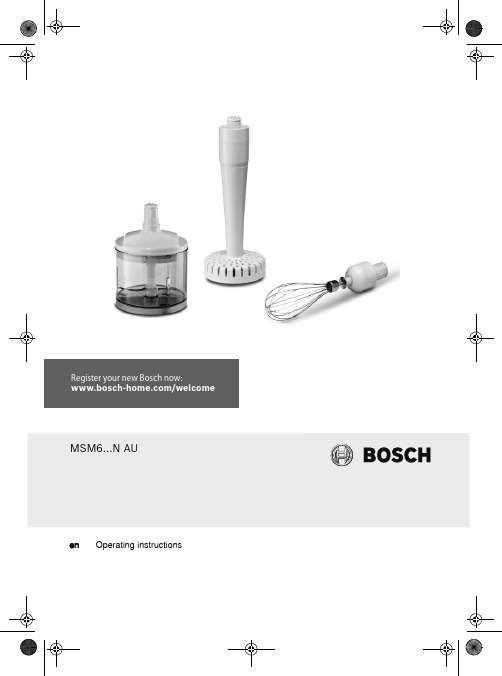
enOperating instructionsMSM6...N AUFor your safetyThis accessory is designed for the hand blender MSM6... .Follow the operating instructions for the hand blender.The accessories are suitable only for the use described in these instructions.,Safety instructions for this applianceRisk of injury from sharp blades/rotating drive!Never grip the blade in the universal cutter.Take hold of the universal cutter blade by the plastic handle only. Never clean the blades with bare hands. Use a brush.Important!Do not attach or remove accessories until the appliance is at a stand-still.Never use the hand blender/blender foot in the universal cutter.The universal cutter is not microwave-safe.Never immerse the attachment of the universal cutter in liquids and do not clean under flowing water or in the dishwasher.Never insert the whisk or masher attachment into the base unit without the gear attachment.Never use the masher attachment in a pan over direct heat.Do not strike the masher attachment on hard edges (pan, bowl). Never immerse the gear attachment in liquids and do not clean under flowing water or in the dishwasher.Before use, read these instructions carefully in order to become familiar with important safety and operating instructions for this appliance.Please keep the operating instructions in a safe place. If passing on the appliance to a third party, always include the operating instructions. Universal cutterPlease fold out the illustrated pages.Fig.1Universal cutter2Blade3Attachment4Lid A universal cutter can be ordered from customer service (order no. 657247). OperationThe universal cutter is suitable for cutting meat, hard cheese, onions, herbs, garlic, fruit, vegetables, nuts, almonds.With the universal cutter use the appliance at full power to prepare honey spread (according to the recipe see Fig. ).Always observe the maximum quantities and processing times in the table (Fig. ). Warning!The universal cutter must be completely assembled before use.en2Robert Bosch Hausgeräte GmbHCaution!Before cutting meat, remove gristle, bones and sinews.The universal cutter is not suitable for cutting very hard items (coffee beans, radishes, nutmeg) and frozen food (fruit, etc.).Fig.●Place the universal cutter on a smooth,clean work surface and press.●Insert the blade.●Add food.Warning!Blade must sit straight in the universal cutter so that the attachment sits correctly (Fig.= -3).●Place the attachment on the universalcutter and rotate in a clockwise direction until it “clicks” into position.●Place the base unit on the attachmentand lock into position.●Insert the mains plug.●Hold the base unit and universal cutterfirmly and switch on the appliance (Turbo speed).●Release the On button after processing. After using the appliance●Remove mains plug.●Press the release buttons and removethe base unit from the attachment.●Rotate the attachment in an anti-clockwise direction and remove from the universal cutter.●Take hold of the blade by the plastichandle and take out.●Place the lid on the universal cutter tokeep in the processed ingredients. CleaningWarning!Never immerse the attachment of the uni-versal cutter in liquids and do not clean under flowing water or in the dishwasher.●Universal cutter and blade aredishwasher-proof.●Wipe the attachment with a damp clothonly.WhiskPlease fold out the illustrated pages.Fig.5Gear attachment for whisk6WhiskA whisk can be ordered from customer service (order no. 657379).OperationThe whisk is suitable for whipping cream, beating egg whites and milk froth (from hot (max. 70 °C) and cold milk (max. 8 °C))Risk of scalding!receptacle for blending. Hot milk may splash and scald you.Fig.●Put ingredients into the blender jug.●Place the gear attachment on the baseunit and lock into position.●Insert the whisk into the gear attachmentand lock into position.Warning!Never insert the whisk into the base unit without the gear attachment (Fig.= -3).●Set required speed using the speedcontrol (if fitted) (recommendation:high speed).●Grip base unit and blender jug and pressrequired On button.●Release the On button after processing. After using the appliance●Remove mains plug.●Press the release buttons and removethe base unit from the gear attachment.●Remove the whisk from the gearattachment.CleaningWarning!Never immerse the gear attachment in liquids and do not clean under flowing water or in the dishwasher.●The whisk can be cleaned in thedishwasher.●Wipe the gear attachment with a dampcloth only.enRobert Bosch Hausgeräte GmbH3Masher attachmentPlease fold out the illustrated pages.Fig.7Gear attachment for masher attachment 8Masher attachment9Masher paddleOperationThe masher attachment is suitable for mashing boiled potatoes and for mashing other suitable foods (e.g. cooked pulses, cooked fruit and vegetables).Warning!Risk of damaging the masher attachment.–Never use the masher attachment in a pan over direct heat.–Do not strike the masher attachment on hard edges (pan, bowl).–Do not process hard or raw ingredients, e.g.coffee beans, chocolate.–Always work with cooked ingredients.–Chop up large ingredients (e.g. potatoes) in smaller pieces beforehand.Fig.●Place cooked food in a suitable recep-tacle. The receptacle should be maxi-mum two-thirds full!●Place the gear attachment on the baseunit and lock into position.●Insert masher attachment into the gearattachment and fix in position by turning it clockwise.●Insert masher attachment into the foodwhichis to be processed.●Hold base unit and receptacle firmly andswitch on appliance (turbo speed).●Move masher attachment up and downuntil the puree has reached the required consistency.●Release the On button after processing. After using the appliance●Remove mains plug.●Press the release buttons and removethe base unit from the gear attachment.●Remove masher attachment from thegear attachment by turning it anti-clockwise.CleaningWarning!Never immerse the gear attachment in liquids and do not clean under flowing water or in the dishwasher.Tips:–To remove mashed food, use a dough scraper or plastic spoon.Never remove food by knocking masher attachment on a hard edge!–If processing e.g. carrots and red cabbage, the plastic parts will becomediscoloured by a red film which can beremoved with a few drops of cooking oil.●Wipe the gear attachment with a dampcloth only.●Preferably clean the masher attachmentimmediately after use.Doing so prevents residue from drying on.Put a little lukewarm water and washing-up liquid in a suitable receptacle.Immerse masher attachment in the water and switch on appliance for approx.10seconds.●The masher paddle can be detachedeasily (turn clockwise) if the gearattachment is still attached to the masher attachment.●Masher attachment and masher paddlecan be washed in the dishwasher.●After cleaning the masher paddle, alwayscheck that there is no residue in theinterlock opening. Remove any residuewith a wooden stick (e.g. toothpick).●Assemble by turning the masher paddleanti-clockwise.Application exampleMashed potatoes1 kg of boiled potatoes0.15 l warm milk50 g soft butter●Place ingredients in a suitable receptacleand process with the masher attachment for approx. 1 minute.●Finally, add salt, pepper, nutmeg and,according to taste, a pinch of cinnamon.enSubject to alterations.4Robert Bosch Hausgeräte GmbHBosch Home Appliance Group P .O. Box 83 01 01D-81701 Munich GermanyBeratung und Reparaturauftrag bei StörungenD 0911 / 70 440 040 A 0810 / 550 511CH 0848 840 040Die Kontaktdaten aller Länder finden Sie im beiliegenden Kundenservice-Verzeichnis.80010068418001006841 (9409)en。
