ImageCompress
ImageMagick命令使用文档

1.convert命令识别这些选项。
Click on an option to get more details about how that option works.点击一个选项,该选项获取有关如何运作的更多细节。
Option选项Description描述Option-adaptive-blur geometry 自适应,模糊几何adaptively blur pixels; decrease effect near edges自适应模糊像素;靠近边缘下跌的因素-adaptive-blur geometry-adaptive-resize geometry 自适应,几何调整adaptively resize image with data dependent triangulation.自适应地调整数据依赖三角网的形象。
-adaptive-resize geometry-adaptive-sharpen geometry 自适应,提升几何adaptively sharpen pixels; increase effect near edges自适应提升像素;增加近边缘效应-adaptive-sharpen geometry-adjoin -毗连join images into a single multi-image file加入到一个单一的多图像的图像文件-adjoin-affine matrix 仿射矩阵affine transform matrix仿射变换矩阵-affine matrix-alpha -αon, activate, off, deactivate, set, opaque, copy", transparent, extract, backgroun d, or shape the alpha channel上,启动,关闭,停用,设置,不透明,复制“,透明,提取,背景,或形状的Alpha通道-alpha-annotate geometry text - 几何文字注释annotate the image with text图片与文字注解-annotate geometry text-antialias -反锯齿remove pixel-aliasing删除像素走样-antialias-append 后缀append an image sequence附加一个图像序列-append-authenticate value 进行身份验证的价值decipher image with this password这个密码破译图片-authenticate value-auto-gamma 全自动-γautomagically adjust gamma level of image自动将影像调整伽玛水平-auto-gamma-auto-level 全自动级automagically adjust color levels of image自动的调整图像色彩层次-auto-level-auto-orient 包括汽车,东方automagically orient image自动的东方形象-auto-orient-background color ,背景颜色background color背景颜色-background color-bench iterations 工作台迭代measure performance测量性能-bench iterations-bias value 偏置价值add bias when convolving an image加偏压时的图像卷积-bias value-black-threshold value 黑,阈值force all pixels below the threshold into black力低于阈值的所有像素为黑色 -black-threshold value-blue-primary point 蓝小学点chromaticity blue primary point蓝色的主色点-blue-primary point-blue-shift factor 蓝移因子simulate a scene at nighttime in the moonlight模拟夜间在月光下一个场景 -blue-shift factor-blur geometry ,模糊几何reduce image noise and reduce detail levels降低图像噪声,减少细节层次-blur geometry-border geometry 边界几何surround image with a border of color环绕图片的颜色边框-border geometry-bordercolor color - bordercolor 颜色border color边框颜色-bordercolor color-brightness-contrast geometry 亮度,对比度几何improve brightness / contrast of the image提高亮度/对比度的图像-brightness-contrast geometry-caption string 字幕字符串assign a caption to an image指定标题图像-caption string-cdl filename - CDL的文件名color correct with a color decision list正确的颜色与颜色决定列表-cdl filename-channel type 通道型apply option to select image channels适用选项来选择图片频道-channel type-charcoal radius 炭半径simulate a charcoal drawing模拟素描-charcoal radius-chop geometry 劈几何remove pixels from the image interior从图像中删除内部像素-chop geometry-clamp 钳restrict colors from 0 to the quantum depth限制从0到量子色深度-clamp-clip 夹clip along the first path from the 8BIM profile夹沿着从8BIM配置第一个路径 -clip-clip-mask filename 剪辑掩模文件名associate clip mask with the image影像剪辑与副面具-clip-mask filename-clip-path id 剪辑路径编号clip along a named path from the 8BIM profile剪辑沿着从8BIM配置命名的道路-clip-path id-clone index ,克隆指数clone an image克隆一个图像-clone index-clut ,查找表apply a color lookup table to the image申请一个颜色查找表中的形象-clut-contrast-stretch geometry 对比度拉伸几何improve the contrast in an image by `stretching' the range of intensity value改善图像对比度的`延伸'的强度值范围-contrast-stretch geometry-coalesce -凝聚merge a sequence of images合并的图像序列-coalesce-colorize value -上色价值colorize the image with the fill color与上色填充颜色的图像-colorize value-color-matrix matrix 彩色矩阵矩阵apply color correction to the image.应用颜色校正的图像。
图像压缩方法综述

* 2006-06-09收到,2006-10-10改回**安晓东,女,1967年生,北京理工大学博士研究生,研究方向:计算机应用。
文章编号:1003-5850(2006)12-0024-03图 像 压 缩 方 法 综 述A Summarization of Image Compression Methodology安晓东1,2 陈 静3(1北京理工大学 北京 100081) (2山西省人事考试中心 太原 030006) (3中北大学 太原 030051)【摘 要】图像压缩是图像处理的重要组成部分,随着科学技术的不断进步,压缩方法也在不断涌现。
论述了各个常用图像压缩方法的算法及应用情况,着重研究了预测编码和分形压缩方法。
有机结合所介绍的压缩算法能解决很多图像处理问题,介绍的图像压缩方法也可供研究人员参考。
【关键词】图像压缩,预测编码,分形压缩中图分类号:T P 391.41文献标识码:AABSTRACT Image co mpr ession is t he impor tant part of im age pr ocessing.Wit h the dev elo pm ent of science and technolog y,mor e and mo re compr essing m et hods have come for th .T his paper discusses many com mon imag e compr ession alg or ithms and it's a pplica-tio n,fo cuses o n the pr edictive enco ding and fr act al co mpressio n methods.It can so lv e lots of image pr o cessing pro blems by these methods,w hich may g iv e a hand to other resear cher s.KEYWORDS imag e co mpression ,pr edictiv e co ding ,fr actal compressio n 众所周知,在开发多媒体应用系统时,遇到的最大障碍是对多媒体信息巨大数据量所进行的采集、存储、处理和传输。
静态图像压缩JPEG2000标准
4) JPEG2000能方便的实现对码流的随机存取与处理,保证位错误的鲁棒性。
5) JPEG2000支持所谓的感兴趣区域特性,你可以任意指定图像上你感兴趣区域的压缩质量,还可以选择指定的部份先解压缩,这样我们就可以很方便的突出图片中的重点进行浏览。
(3)JPEG2000图片的压缩
目前有很多公司、机构提供了JPEG2000的压缩工具及编解码器。主要有LuraWave SmartCompress Freeware for Windows、Elecard Wavelet Image Compressor等。其中以LuraTech的LuraWave SmartCompress 及相应编码器生成的LuraWave(lwf)格式最有名。
2. JPEG2000标准
随着多媒体应用领域的激增,传统JPEG压缩技术已无法满足人们对多媒体图像资料的要求。因此,更高压缩率以及更多新功能的新一代静态图像压缩技术 JPEG 2000 随之诞生。
JPEG2000标准同样由JPEG 组织负责制定。自1997年3月开始筹划,于2000年3月出台。其标准号为ISO 15444。
(1)JPEG标准的组成部分
JPEG标准包括基于DPCM(差分脉冲编码调制)的无损压缩编码,基于DCT(离散余弦变换)和Fuffman编码的有损压缩算法两个部分。前者不会产生失真,但压缩比很小;后一种算法进行图像压缩信息虽有损失,但压缩比可以很大,例如压缩20倍左右时,人眼基本上看不出失真。目前我们对JPEG标准的应用主要是步骤
JPEG算法操作可分成以下三个基本步骤:
1) 通过离散余弦变换(DCT)去除数据冗余。
2) 使用量化表对DCT系数进行量化,量化表是根据人类视觉系统和压缩图像类型的特点进行优化的量化系数矩阵。
imageconversion 用法

imageconversion 用法
图像转换使用方法
图像转换是一种将图像文件从一种格式转换为另一种格式的技术。
这种技术可
以帮助用户在不同设备和平台之间共享和使用图像。
下面是图像转换的几种常见用法:
1. 格式转换:最常见的用法是将图像从一种格式转换为另一种格式。
例如,将PNG图像转换为JPEG格式,或将BMP图像转换为GIF格式。
这样做是为了适应
不同的需求,比如在网页上显示图像或将图像用于打印。
2. 图像大小调整:图像转换还可以用于调整图像的大小。
用户可以根据需要将
图像缩小或放大。
这对于在网页上显示图像时确保加载速度或在打印时保持良好的打印质量非常有用。
3. 旋转和翻转:图像转换还可以帮助用户旋转或翻转图像。
这对于调整图像的
方向或镜像效果非常有用。
用户可以将图像按顺时针或逆时针方向旋转90度、180度或270度,也可以水平或垂直翻转图像。
4. 图像压缩:有时候,图像文件的大小可能太大,不适合通过电子邮件或在线
共享。
图像转换可以帮助用户压缩图像文件的大小,以便更轻松地共享和传输。
通过减少图像的质量或使用更高效的压缩算法,用户可以将图像文件的大小大大减小,同时保持较好的图像质量。
总之,图像转换是一个非常实用的技术,可用于更好地管理和处理图像文件。
无论是在个人使用中还是在商业中,了解和掌握图像转换的用法将有助于提高工作效率和满足不同的需求。
外文翻译--利用离散余弦变换进行图像压缩

中文4500字Image Compression Using the Discrete Cosine TransformAbstractThe discrete cosine transform (DCT) is a technique for converting a signal into elementary frequency components. It is widely used in image compression. Here we develop some simple functions to compute the DCT and to compress images.These functions illustrate the power of Mathematica in the prototyping of image processing algorithms.The rapid growth of digital imaging applications, including desktop publishing, multimedia, teleconferencing, and high-definition television (HDTV) has increased the need for effective and standardized image compression techniques. Among the emerging standards are JPEG, for compression of still images [Wallace 1991]; MPEG, for compression of motion video [Puri 1992]; and CCITT H.261 (also known as Px64), for compression of video telephony and teleconferencing.All three of these standards employ a basic technique known as the discrete cosine transform (DCT). Developed by Ahmed, Natarajan, and Rao [1974], the DCT is a close relative of the discrete Fourier transform (DFT). Its application to image compression was pioneered by Chen and Pratt [1984]. In this article, I will develop some simple functions to compute the DCT and show how it is used for image compression. We have used these functions in our laboratory to explore methods of optimizing image compression for the human viewer, using information about the human visual system [Watson 1993]. The goal of this paper is to illustrate the use of Mathematica in image processing and to provide the reader with the basic tools for further exploration of this subject.The One-Dimensional Discrete Cosine TransformThe discrete cosine transform of a list of n real numbers s(x), x = 0, ..., n-1, is the list of length n given by:s(u)=1(21) ()cos2n xx u s xnπ==+∑u=0,…nwhere 1/2()2C u-=for u=0=1 otherwiseEach element of the transformed list S(u) is the inner (dot) product of the inputlist s(x) and basis vector. The constant factors are chosen so that the basis vectors are orthogonal and normalized. The eight basis vectors for n = 8 are shown in Figure 1. The DCT can be writthe product of a vector (the input list) and the n x n orthogonal matrix whose rows are the vectors. This matrix, for n = 8, can be computed as follows:DCTMatrix =Table[ If k==0,Sqrt[1/8],Sqrt[2/8] Cos[Pi (2j+1) k/16] ],{k,0,7},{j,0,7}] // N;We can check that the matrix is orthogonal:DCTMatrix . Transpose[DCTMatrix] // Chop // MatrixForm1. 0 0 0 0 0 0 00 1. 0 0 0 0 0 00 0 1. 0 0 0 0 00 0 0 1. 0 0 0 00 0 0 0 1. 0 0 00 0 0 0 0 1. 0 00 0 0 0 0 0 1. 00 0 0 0 0 0 0 1.Each basis vector corresponds to a sinusoid of a certain frequency:Show[GraphicsArray[Partition[ListPlot[#, PlotRange -> {-.5, .5}, PlotJoined -> True,DisplayFunction -> Identity]&/@ DCTMatrix, 2] ]];Figure 1. The eight basis vectors for the discrete cosine transform of length eight.The list s(x) can be recovered from its transform S(u) by applying the inverse cosine transform(IDCT):() s x=1(21)()()cos2nux uC u s Unπ==+∑x=0,…,nwhere 1/2()2C u-=for u=0=1 otherwiseThis equation expresses s as a linear combination of the basis vectors. The coefficients are the elements of the transform S, which may be regarded as reflecting the amount of each frequency present in the inputs.We generate a list of random numbers to serve as a test input:input1 = Table[Random[Real, {-1, 1}], {8}]{0.203056, 0.980407, 0.35312, -0.106651, 0.0399382, 0.871475, -0.648355, 0.501067}The DCT is computed by matrix multiplication:output1 = DCTMatrix . input1{0.775716, 0.3727, 0.185299, 0.0121461, -0.325, -0.993021, 0.559794, -0.625127}As noted above, the DCT is closely related to the discrete Fourier transform (DFT). In fact, it is possible to compute the DCT via the DFT (see [Jain 1989, p. 152]): First create a new list by extracting the even elements, followed by the reversed oddelements. Then multiply the DFT of this re-ordered list by so-called "twiddle factors"and take the real part. We can carry out this process for n = 8 using Mathematica's DFT function.DCTTwiddleFactors = N @ Join[{1},Table[Sqrt[2] Exp[-I Pi k /16], {k, 7}]]{1., 1.38704 - 0.275899 I, 1.30656 - 0.541196 I, 1.17588 - 0.785695 I, 1. - 1. I, 0.785695 - 1.17588 I, 0.541196 - 1.30656 I, 0.275899 - 1.38704 I}The function to compute the DCT of a list of length n = 8 is then:DCT[list_] := Re[ DCTTwiddleFactors *InverseFourier[N[list[[{1, 3, 5, 7, 8, 6, 4, 2}]]]]]Note that we use the function InverseFourier to implement what is usually in engineering called the forward DFT. Likewise, we use Fourier to implement what is usually called the inverse DFT. The function N is used to convert integers to reals because (in Version 2.2) Fourier and InverseFourier are not evaluated numerically when their arguments are all integers. The special case of a list of zeros needs to be handled separately by overloading the functions, since N of the integer 0 is an integer and not a real.Unprotect[Fourier, InverseFourier];Fourier[x:{0 ..}]:= x;InverseFourier[x:{0 ..}]:= x;Protect[Fourier, InverseFourier];We apply DCT to our test input and compare it to the earlier result computed by matrix multiplication. To compare the results, we subtract them and apply the Chop function to suppress values very close to zero:DCT[input1]{0.775716, 0.3727, 0.185299, 0.0121461, -0.325, -0.993021, 0.559794, -0.625127}% - output1 // Chop{0, 0, 0, 0, 0, 0, 0, 0}The inverse DCT can be computed by multiplication with the inverse of the DCT matrix. We illustrate this with our previous example:Inverse[DCTMatrix] . output1{0.203056, 0.980407, 0.35312, -0.106651, 0.0399382, 0.871475, -0.648355, 0.501067}% - input1 // Chop{0, 0, 0, 0, 0, 0, 0, 0}As you might expect, the IDCT can also be computed via the inverse DFT. The "twiddle factors" are the complex conjugates of the DCT factors and the reordering is applied at the end rather than the beginning:IDCTTwiddleFactors = Conjugate[DCTTwiddleFactors]{1., 1.38704 + 0.275899 I, 1.30656 + 0.541196 I, 1.17588 + 0.785695 I, 1. + 1. I, 0.785695 + 1.17588 I, 0.541196 + 1.30656 I, 0.275899 + 1.38704 I}IDCT[list_] := Re[Fourier[IDCTTwiddleFactors list] ][[{1, 8, 2, 7, 3, 6, 4, 5}]]For example:IDCT[DCT[input1]] - input1 // Chop{0, 0, 0, 0, 0, 0, 0, 0}The Two-Dimensional DCTThe one-dimensional DCT is useful in processing one-dimensional signals such as speech waveforms. For analysis of two-dimensional (2D) signals such as images, we need a 2D version of the DCT. For an n x m matrix s, the 2D DCT is computed in a simple way: The 1D DCT is applied to each row of s and then to each column of theresult. Thus, the transform of s is given by1100(21)(21)(,)()()(,)cos cos 22m n y x x u y u S u v u C v s x y n m ππ====++=∑∑ u=0,…nv=0,…mwhere 1/2()2C u -= for u=0=1 otherwiseSince the 2D DCT can be computed by applying 1D transforms separately to the rows and columns, we say that the 2D DCT is separable in the two dimensions.As in the one-dimensional case, each element S(u, v) of the transform is the inner product of the input and a basis function, but in this case, the basis functions are n x m matrices. Each two-dimensional basis matrix is the outer product of two of the one-dimensional basis vectors. For n = m = 8, the following expression creates an 8 x 8 array of the 8 x 8 basis matrices, a tensor with dimensions {8, 8, 8, 8}:DCTTensor = Array[Outer[Times, DCTMatrix[[#1]], DCTMatrix[[#2]]]&, {8, 8}];Each basis matrix can be thought of as an image. The 64 basis images in the array are shown in Figure 2.The package GraphicsImage.m, included in the electronic supplement, contains the functions GraphicsImage and ShowImage to create and display a graphics object from a given matrix. GraphicsImage uses the built-in function Raster to translate a matrix into an array of gray cells. The matrix elements are scaled so that the imagespans the full range of graylevels. An optional second argument specifies a range of values to occupy the full grayscale; values outside the range are clipped. The function ShowImage displays the graphics object using Show.<< GraphicsImage.mShow[GraphicsArray[Map[GraphicsImage[#, {-.25, .25}]&,Reverse[DCTTensor], {2}] ]];Figure 2. The 8 x 8 array of basis images for the two-dimensional discrete cosinetransform.Each basis matrix is characterized by a horizontal and a vertical spatial frequency. The matrices shown here are arranged left to right and bottom to top in order of increasing frequencies.To illustrate the 2D transform, we apply it to an 8 x 8 image of the letter A:ShowImage[ input2 ={{0, 1, 0, 0, 0, 1, 0, 0}, {0, 1, 0, 0, 0, 1, 0, 0},{0, 1, 1, 1, 1, 1, 0, 0}, {0, 1, 0, 0, 0, 1, 0, 0},{0, 0, 1, 0, 1, 0, 0, 0}, {0, 0, 1, 0, 1, 0, 0, 0},{0, 0, 1, 0, 1, 0, 0, 0}, {0, 0, 0, 1, 0, 0, 0, 0}}]As in the 1D case, it is possible to express the 2D DCT as an array of inner products (a tensor contraction):output2 = Array[(Plus @@ Flatten[DCTTensor[[#1, #2]] input2])&,{8, 8}];ShowImage[output2]The pixels in this DCT image describe the proportion of each two-dimensional basis function present in the input image. The pixels are arranged as above, with horizontal and vertical frequency increasing from left to right and bottom to top, respectively. The brightest pixel in the lower left corner is known as the DC term, with frequency {0, 0}. It is the average of the pixels in the input, and is typically the largest coefficient in the DCT of "natural" images.An inverse 2D IDCT can also be computed in terms of DCT Tensor; we leave this as an exercise for the reader.Since the two-dimensional DCT is separable, we can extend our function DCT to the case of two-dimensional input as follows:DCT[array_?MatrixQ] :=Transpose[DCT /@ Transpose[DCT /@ array] ]This function assumes that its input is an 8 x 8 matrix. It takes the 1D DCT of each row, transposes the result, takes the DCT of each new row, and transposes again. This function is more efficient than computing the tensor contraction shown above, since it exploits the built-in function InverseFourier.We compare the result of this function to that obtained using contraction of tensors :DCT[input2] - output2 // Chop // Abs // Max 0The definition of the inverse 2D DCT is straightforward:IDCT[array_?MatrixQ] :=Transpose[IDCT /@ Transpose[IDCT /@ array] ]As an example, we invert the transform of the letter A:ShowImage[Chop[IDCT[output2]]];As noted earlier, the components of the DCT output indicate the magnitude of image components at various 2D spatial frequencies. To illustrate, we can set the last row and column of the DCT of the letter A equal to zero:output2[[8]] = Table[0, {8}];Do[output2[[i, 8]] = 0, {i, 8}];Now take the inverse transform:ShowImage[Chop[IDCT[output2]]];The result is a blurred letter A: the highest horizontal and vertical frequencies have been removed. This is easiest to see when the image is reduced in size so that individual pixels are not as visible.QuantizationDCT-based image compression relies on two techniques to reduce the data required to represent the image. The first is quantization of the image's DCT coefficients; the second is entropy coding of the quantized coefficients. Quantizationis the process of reducing the number of possible values of a quantity, thereby reducing the number of bits needed to represent it. Entropy coding is a technique for representing the quantized data as compactly as possible. We will develop functions to quantize images and to calculate the level of compression provided by different degrees of quantization. We will not implement the entropy coding required to create a compressed image file.A simple example of quantization is the rounding of reals into integers. To represent a real number between 0 and 7 to some specified precision takes many bits. Rounding the number to the nearest integer gives a quantity that can be represented by just three bits.x = Random[Real, {0, 7}] 2.78452Round[x] 3In this process, we reduce the number of possible values of the quantity (and thus the number of bits needed to represent it) at the cost of losing information. A "finer" quantization, that allows more values and loses less information, can be obtained by dividing the number by a weight factor before rounding:w = 1/4;Round[x/w] 11Taking a larger value for the weight gives a "coarser" quantization.Dequantization, which maps the quantized value back into its original range (but not its original precision) is acheived by multiplying the value by the weight: w * % // N 2.75The quantization error is the change in a quantity after quantization and dequantization. The largest possible quantization error is half the value of the quantization weight.In the JPEG image compression standard, each DCT coefficient is quantized using a weight that depends on the frequencies for that coefficient. The coefficients in each 8 x 8 block are divided by a corresponding entry of an 8 x 8 quantization matrix, and the result is rounded to the nearest integer.In general, higher spatial frequencies are less visible to the human eye than low frequencies. Therefore, the quantization factors are usually chosen to be larger for the higher frequencies. The following quantization matrix is widely used for monochrome images and for the luminance component of a color image. It is given in the JPEG standards documents, yet is not part of the standard, so we call it the "de facto"matrix:qLum ={{16, 11, 10, 16, 24, 40, 51, 61},{12, 12, 14, 19, 26, 58, 60, 55},{14, 13, 16, 24, 40, 57, 69, 56},{14, 17, 22, 29, 51, 87, 80, 62},{18, 22, 37, 56, 68,109,103, 77},{24, 35, 55, 64, 81,104,113, 92},{49, 64, 78, 87,103,121,120,101},{72, 92, 95, 98,112,100,103, 99}};Displaying the matrix as a grayscale image shows the dependence of the quantization factors on the frequencies:ShowImage[qLum];To implement the quantization process, we must partition the transformed image into 8 x 8 blocks:BlockImage[image_, blocksize_:{8, 8}] :=Partition[image, blocksize] /;And @@ IntegerQ /@ (Dimensions[image]/blocksize)The function UnBlockImage reassembles the blocks into a single image:UnBlockImage[blocks_] :=Partition[ Flatten[Transpose[blocks, {1, 3, 2}]],{Times @@ Dimensions[blocks][[{2, 4}]]}]For example:Table[i + 8(j-1), {j, 4}, {i, 6}] // MatrixForm1 2 3 4 5 69 10 11 12 13 1417 18 19 20 21 2225 26 27 28 29 30BlockImage[%, {2, 3}] // MatrixForm1 2 3 4 5 69 10 11 12 13 1417 18 19 20 21 2225 26 27 28 29 30UnBlockImage[%] // MatrixForm1 2 3 4 5 69 10 11 12 13 1417 18 19 20 21 2225 26 27 28 29 30Our quantization function blocks the image, divides each block (element-by-element) by the quantization matrix, reassembles the blocks, and then rounds the entries to the nearest integer:DCTQ[image_, qMatrix_] := Map[(#/qMatrix)&,BlockImage[image, Dimensions[qMatrix]], {2}] // UnBlockImage // Round The dequantization function blocks the matrix, multiplies each block by the quantization factors, and reassembles the matrix:IDCTQ[image_, qMatrix_] :=Map[(# qMatrix)&,BlockImage[image, Dimensions[qMatrix]], {2}] // UnBlockImageTo show the effect of quantization, we will transform, quantize, and reconstruct our image of the shuttle using the quantization matrix introduced above: qshuttle = shuttle //DCT // DCTQ[#, qLum]& // IDCTQ[#, qLum]& // IDCT;For comparison, we show the original image together with the quantized version: Show[GraphicsArray[GraphicsImage[#, {0, 255}]& /@ {shuttle, qshuttle}]];Note that some artifacts are visible, particularly around high-contrast edges. Inthe next section, we will compare the visual effects and the amount of compression obtained from different degrees of quantization.EntropyTo measure how much compression is obtained from a quantization matrix, we use a famous theorem of Claude Shannon [Shannon and Weaver 1949]. The theorem states that for a sequence of symbols with no correlations beyond first order, no code can be devised to represent the sequence that uses fewer bits per symbol than the first-order entropy, which is given by2log ()i i ih p p =-∑where p is the relative frequency of the ith symbol.To compute the first-order entropy of a list of numbers, we use the function Frequencies, from the standard package Statistics`DataManipulation`. This function computes the relative frequencies of elements in a list:(shac poisson) In[1]:= (7/12/94 at 8:58:26 AM)Frequencies[list_List] := Map[{Count[list, #], #}&, Union[list]]Characters["mississippi"]{m, i, s, s, i, s, s, i, p, p, i}Frequencies[%]{{4, i}, {1, m}, {2, p}, {4, s}}Calculating the first-order entropy is straightforward:Entropy[list_] := - Plus @@ N[# Log[2, #]]& @(First[Transpose[Frequencies[list]]]/Length[list])For example, the entropy of a list of four distinct symbols is 2, so 2 bits are required to code each symbol:Entropy[{"a", "b", "c", "d"}]2.Similarly, 1.82307 bits are required for this longer list with four symbols:Entropy[Characters["mississippi"]] 1.82307A list with more symbols and fewer repetitions requires more bits per symbol: Entropy[Characters["california"]]2.92193The appearance of fractional bits may be puzzling to some readers, since we think of a bit as a minimal, indivisible unit of information. Fractional bits are a natural outcome of the use of what are called "variable word-length" codes. Consider an image containing 63 pixels with a greylevel of 255, and one pixel with a graylevel of 0. If we employed a code which used a symbol of length 1 bit to represent 255, and a symbol of length 2 bits to represent 0, then we would need 65 bits to represent the image, or in terms of the average bit-rate, 65/64 = 1.0156 bits/pixel. The entropy ascalculated above is a lower bound on this average bit-rate.The compression ratio is another frequently used measure of how effectively an image has been compressed. It is simply the ratio of the size of the image file before and after compression. It is equal to the ratio of bit-rates, in bits/pixel, before and after compression. Since the initial bit-rateis usually 8 bits/pixel,and the entropy is our estimate of the compressed bit-rate, the compression ratio is estimated by 8/entropy.We will use the following function to examine the effects of quantization:f[image_, qMatrix_] :={Entropy[Flatten[#]], IDCT[IDCTQ[#, qMatrix]]}& @DCTQ[DCT[image], qMatrix]This function transforms and quantizes an image, computes the entropy, and dequantizes and reconstructs the image. It returns the entropy and the resulting image.A simple way to experiment with different degrees of quantization is to divide the "de facto" matrix qLum by a scalar and look at the results for various values of this parameter:test = f[shuttle, qLum/#]& /@ {1/4, 1/2, 1, 4};Here are the reconstructed images and the corresponding entropies:Show[GraphicsArray[ Partition[Apply[ShowImage[#2, {0, 255}, PlotLabel -> #1,DisplayFunction -> Identity]&, test, 1], 2] ] ]利用离散余弦变换进行图像压缩摘要离散的余弦变换(DCT)是一种将信号转变成初始频率成分的技术。
JAVA将任意图片文件压缩成想要的图片类型与大小
本文由我司收集整编,推荐下载,如有疑问,请与我司联系JAVA 将任意图片文件压缩成想要的图片类型与大小2012/11/06 0 二话不说,直接贴出代码:import java.awt.Image;import java.awt.image.BufferedImage;import java.io.File;import java.io.IOException;import javax.imageio.ImageIO;public class imageTest {//测试方法public static void main(String[] args){//定义源文件File sourcefile = new File( D:\\qwe.png //定义压缩后的文件名File newFile = new File( D:\\xx.png try { imageCompress(sourcefile,newFile, 1028, 800, png } catch (IOException e) {e.printStackTrace();}}/** * 生成缩略图* @param sourceFile 源始文件路径*@param destFile 目标文件路径* @param destWidth 目标文件宽度* @param destHeight 目标文件高度* @return flag 是否写入成功* @throws IOException*/public static boolean imageCompress(File sourceFile, File destFile,int destWidth,int destHeight,String imageTpye) throws IOException{//保存源文件图像Image srcImage = null;//保存目标文件图像BufferedImage tagImage = null;//判断目标文件图像是否绘制成功boolean flag = false;//判断图片文件是否存在以及是否为文件类型if(sourceFile.exists() sourceFile.isFile()){//读取图片文件属性srcImage = ImageIO.read(sourceFile);//生成目标缩略图tagImage = new BufferedImage(destWidth,destHeight,BufferedImage.TYPE_INT_RGB);//根据目标图片的大小绘制目标图片tagImage.getGraphics().drawImage(srcImage,0,0,destWidth,destHeight,null);flag = ImageIO.write(tagImage, imageTpye, destFile);}else{flag = false;} return flag; }}tips:感谢大家的阅读,本文由我司收集整编。
如何备份整个硬盘?

如何备份整个硬盘?利用Ghost可以把整个硬盘的内容(连同分区)备份到一个映像文件当中。
该操作需要电脑中安装有两块或两块以上的硬盘驱动器。
将整个硬盘备份为映像文件的操作步骤如下所述。
第1步,使用Ghost启动软盘启动电脑,然后输入Ghost命令并按回车键。
第2步,打开Ghost程序主界面。
用鼠标依次指向“local(本机)”→“Disk (磁盘)”菜单命令,然后单击“To Image(备份到映像文件)”选项。
第3步,在打开的“Select local source drive by clicking on the drive number(选择本机源驱动器并单击相应的驱动器序号)”对话框中,单击选中需要备份的驱动器作为源驱动器(即运行正常的系统所在的驱动器),并单击OK 按钮。
第4步,打开“File name to Copy image to(生成的映像文件存储位置)”对话框。
单击“look in(查找)”路径框右侧的下拉三角按钮,在路径列表中单击选中用于保存映像文件的分区。
然后单击“File name(文件名)”编辑框输入映像文件名称(如DiskBak),并单击Save按钮。
小提示:在选择映像文件不能将映像文件保存在源驱动器中。
第5步,在打开的“Compress Image(压缩映像)”对话框中选择合适的压缩模式,Ghost提供了“No(不压缩)”、“Fast(快速)”和“High(高压缩)”3种模式。
本例中选择高压缩模式,单击High按钮。
第6步,在随后打开的提示框中会要求再次确认操作的正确性。
单击Yes 按钮即可开始备份。
备份过程需要一段时间,完成后单击Continue按钮继续。
注意事项小提示:完成备份操作后,建议校验生成映像文件的完整性和中途可能发生的错误。
这一操作可通过执行“Local(本机)”→“Check(检查)”命令来实现。
本文由U大师整理发布:/。
JPEG2000-图像压缩的新革命

JPEG2000——图像压缩的新革命顾爱军摘要:随著多媒体应用领域的扩展,新一代的静态影像压缩技术JPEG 2000应运而生。
JPEG 2000比JPEG有着更好的压缩下的表现,本文从JPEG 2000的原理、JPEG 2000与JPEG 的比较、应用产品、研究方向和未来展望等几方面对JPEG 2000进行了阐述。
JPEG 全名为 Joint Photographic Experts Group,它是一个在国际标准组织(ISO)下从事静态影像压缩标准制定的委员会。
它制定出了第一套国标静态影像压缩标准:ISO 10918-1,就是我们俗称的 JPEG。
由於JPEG优良的品质,使得它在短短的几年内就获得极大的成功,目前网站上大部分的图像都是采用JPEG的压缩标准。
然而,随著多媒体应用领域的扩展,传统JPEG压缩技术已无法满足人们对多媒体影像资料的要求。
因此,更高压缩率以及更多新功能的新一代静态影像压缩技术 JPEG 2000 就应运而生了。
JPEG 2000,正式名称为 "ISO 15444" ,同样是由JPEG 组织负责制定的。
自1997年三月开始筹划,但这几年间,在算法选取问题上耽误了不少时间。
2000年 3 月的东京的一个会议上,可能是由于数字照相机厂商们施加压力,规定基本编码系统的最终协议草案提前出台, JPEG2000 正式诞生。
一、JPEG2000的原理:JPEG 2000 与传统 JPEG 最大的不同,在于它放弃了 JPEG 所采用的以离散馀弦转换(Discrete Cosine Transform) 为主的区块编码方式,而改为采用以小波转换(Wavelet transform) 为主的多解析编码方式。
简单原理如下:JPEG2000的编码、解码框图:编码过程如下:(1)将有多个颜色分量组成的图像分解成单一颜色分量的图像。
分量之间存在一定的相关性,通过分解相关的分量变换,可减少数据问的冗余度,提高压缩效率;(2)分量图像被分解成大小统一的矩形片——图像片。
数字图像处理论文中英文对照资料外文翻译文献
第 1 页中英文对照资料外文翻译文献原 文To image edge examination algorithm researchAbstract :Digital image processing took a relative quite young discipline,is following the computer technology rapid development, day by day obtains th widespread application.The edge took the image one kind of basic characteristic,in the pattern recognition, the image division, the image intensification as well as the image compression and so on in the domain has a more widesp application.Image edge detection method many and varied, in which based on brightness algorithm, is studies the time to be most long, the theory develo the maturest method, it mainly is through some difference operator, calculates its gradient based on image brightness the change, thus examines the edge, mainlyhas Robert, Laplacian, Sobel, Canny, operators and so on LOG 。
iOS开发之image图片压缩及压缩成指定大小的两种方法

iOS开发之image图⽚压缩及压缩成指定⼤⼩的两种⽅法///压缩图⽚+ (NSData *)imageCompressToData:(UIImage *)image{NSData *data=UIImageJPEGRepresentation(image, 1.0);if (data.length>300*1024) {if (data.length>1024*1024) {//1M以及以上data=UIImageJPEGRepresentation(image, 0.1);}else if (data.length>512*1024) {//0.5M-1Mdata=UIImageJPEGRepresentation(image, 0.5);}else if (data.length>300*1024) {//0.25M-0.5Mdata=UIImageJPEGRepresentation(image, 0.9);}}return data;}ps:下⾯看下 iOS中图⽚压缩成指定的⼤⼩iOS中,我们为了节省内存,需要对图⽚来进⾏处理,来优化程序,提⾼程序的效率,下⾯是⼀个根据⾃⼰的要求来重新设置图⽚的⼤⼩:⼀、压缩图⽚有两种⽅式,第⼀种是压缩图⽚的⼤⼩,重新⽣成图⽚的尺⼨:如下/*** 压缩图⽚到指定尺⼨⼤⼩** @param image 原始图⽚* @param size ⽬标⼤⼩** @return ⽣成图⽚*/-(UIImage *)compressOriginalImage:(UIImage *)image toSize:(CGSize)size{UIImage * resultImage = image;UIGraphicsBeginImageContext(size);[resultImage drawInRect:CGRectMake(00, 0, size.width, size.height)];UIGraphicsEndImageContext();return image;}⼆、第⼆种是修改图⽚的⽂件⼤⼩:如下/*** 压缩图⽚到指定⽂件⼤⼩** @param image ⽬标图⽚* @param size ⽬标⼤⼩(最⼤值)** @return 返回的图⽚⽂件*/- (NSData *)compressOriginalImage:(UIImage *)image toMaxDataSizeKBytes:(CGFloat)size{NSData * data = UIImageJPEGRepresentation(image, 1.0);CGFloat dataKBytes = data.length/1000.0;CGFloat maxQuality = 0.9f;CGFloat lastData = dataKBytes;while (dataKBytes > size && maxQuality > 0.01f) {maxQuality = maxQuality - 0.01f;data = UIImageJPEGRepresentation(image, maxQuality);dataKBytes = data.length / 1000.0;if (lastData == dataKBytes) {break;}else{lastData = dataKBytes;}}return data;}这是压缩图⽚的两种⽅式。
imageconversion的压缩极限

imageconversion的压缩极限图像压缩是一种常见的图像处理技术,它可以通过减少图像文件的大小来节省存储空间和传输带宽。
图像压缩的目标是在尽可能减少文件大小的同时保持图像质量。
然而,图像压缩也有其极限,即压缩后图像质量的损失和压缩比的限制。
我们来了解一下图像压缩的基本原理。
图像压缩可以分为有损压缩和无损压缩两种类型。
有损压缩是指在压缩过程中会丢失一些图像细节,从而导致压缩后的图像与原始图像存在一定的差异。
无损压缩则是在不丢失任何图像细节的情况下减小文件大小。
这两种压缩方法各有优劣,根据不同的应用需求可以选择合适的压缩方法。
在图像压缩的过程中,有几个关键的参数需要考虑,其中之一是压缩比。
压缩比是指压缩后的文件大小与原始文件大小之间的比值。
压缩比越高,文件大小减小的越多,但图像质量的损失也会相应增加。
因此,压缩比往往是图像压缩的一个重要指标。
然而,图像压缩的压缩比也有其限制。
随着压缩比的增加,图像质量的损失会越来越明显,直到达到一个极限。
超过这个极限,继续增加压缩比将导致图像质量的严重损坏,使图像变得模糊、失真或无法识别。
因此,压缩极限是指在保持图像质量可接受的前提下,能够达到的最大压缩比。
要达到更高的压缩比,可以采用一些图像压缩算法。
常见的图像压缩算法包括JPEG、PNG和GIF等。
JPEG是一种有损压缩算法,适用于压缩彩色照片和图像。
PNG是一种无损压缩算法,适用于压缩图像中的文本和线条等具有清晰边缘的图像。
GIF是一种基于索引的无损压缩算法,适用于压缩动态图像和简单的图形图像。
除了压缩算法,图像压缩还可以通过调整一些参数来实现更高的压缩比。
例如,可以调整图像的分辨率、色彩模式和压缩质量等参数。
降低图像的分辨率可以减小文件大小,但同时也会降低图像的清晰度。
调整色彩模式可以减少颜色的数量,从而减小文件大小,但会导致颜色的变化或丢失。
调整压缩质量可以控制图像压缩的程度,但过高的压缩质量可能会导致图像质量的明显下降。
image-process使用方法

image-process使用方法1. 介绍image-process(图像处理)是一种基于计算机技术的图像处理方法,广泛应用于数字摄影、医学影像、人工智能等领域。
本文将对image-process的使用方法进行深入探讨,以帮助读者更好地理解和应用这一技术。
2. 图像处理的基本概念图像处理是指利用计算机对图像进行处理和分析的技术。
它主要包括图像获取、预处理、特征提取和图像识别等步骤。
在图像处理中,常用的工具包括OpenCV、PIL、Matplotlib等,这些工具提供了丰富的图像处理函数和算法,可用于实现图像的滤波、边缘检测、分割、特征提取等操作。
3. 图像处理的应用领域图像处理技术在许多领域都有着重要的应用价值。
在数字摄影领域,图像处理可以用于图像增强、去噪、图像融合等操作,从而提高图像的质量和清晰度。
在医学影像领域,图像处理可以帮助医生对影像进行分析和诊断,提高疾病的诊断准确度。
在人工智能领域,图像处理可以用于目标检测、图像识别、图像分割等任务,为机器学习和深度学习提供数据支持。
4. 图像处理的基本方法图像处理的基本方法包括线性滤波、非线性滤波、边缘检测、图像分割、特征提取和图像识别等。
其中,线性滤波包括均值滤波、高斯滤波等,用于去除图像中的噪声和平滑图像。
非线性滤波包括中值滤波、双边滤波等,能够更好地保留图像的细节信息。
边缘检测可以帮助找出图像中的边缘信息,用于物体检测和识别。
图像分割可以将图像分成若干个区域,用于识别和分析不同的物体。
特征提取和图像识别则是更高级的图像处理方法,用于从图像中提取特征信息,并对物体进行识别和分类。
5. image-process的使用方法在使用image-process进行图像处理时,首先需要导入相应的图像处理库,如OpenCV或PIL。
可以利用这些库提供的函数和算法对图像进行处理和分析。
可以利用OpenCV进行图像的读取、显示、保存等操作,同时还可以利用OpenCV进行图像的滤波、边缘检测、图像分割等高级处理操作。
python批量压缩图像的完整步骤

python批量压缩图像的完整步骤⽬录背景解决⽅案操作步骤要求步骤附:批量将图⽚的⼤⼩设置为指定⼤⼩写在后⾯背景今天在⼯作中,同事遇到⼀个上传图⽚的问题:系统要求的图⽚⼤⼩不能超过512KB。
但是同事⼜有很多照⽚。
这要是每⼀个照⽚都⽤ps压缩的话,那岂不是很崩溃。
于是我写了⼀个脚本,可以批量压缩图⽚到指定⼤⼩。
直接造福同事、提⾼同事的⼯作效率。
解决⽅案其实也不⽤卖关⼦了,就是使⽤python的pillow包就可以对图⽚进⾏压缩,如果⼀个图⽚已经压缩到指定⼤⼩了,那就停⽌压缩,如果没有达到指定⼤⼩,那就对压缩后的图⽚再进⾏压缩,直到压缩到⾃定范围内。
可是为什么不在⽹上找代码呢?我也是找过,但是发现很多代码质量参差不齐,都达不到我想要的效果,⽽且很不优雅。
于是我随⼿就写了⼀个代码,不仅仅代码写的简单,⽽且逻辑清楚,最后为了效率,我还做了⼀个并⾏,同时使⽤10个进程处理。
说实话,那可是真的飞快。
操作步骤要求默认是使⽤的是Anaconda的环境。
将所有要压缩的图⽚都放在⼀个⽂件夹下,然后每个图⽚的格式只能是下⾯三种:png,jpg, jpeg。
如果是PNG也不⾏。
因为PNG是png的⼤写。
代码中设置的图像的压缩后的⼤⼩是512KB,那么你可以设置代码中的target_size为500,只要⽐512KB⼩就⾏了。
然后把我的代码从GitHub上下载下来。
代码链接为:https:///yuanzhoulvpi2017/tiny_python/blob/main/image_compression/ic.py步骤我这⾥把所有图⽚都放在了⼀个⽂件夹⾥⾯,⽂件夹名称为历史截图。
然后我的这个历史截图和ic.py代码都放在了little_code⽂件夹中。
在little_code⽂件夹下,打开终端。
直接运⾏的脚本:python ic.py xxx_⽂件夹等待⼀会,就会将整个⽂件夹下的所有图⽚都转化好了。
完整代码:如果上不去GitHub的话,我直接把代码放在这⾥,保存为⼀个python⽂件即可。
Visual lossless image compression
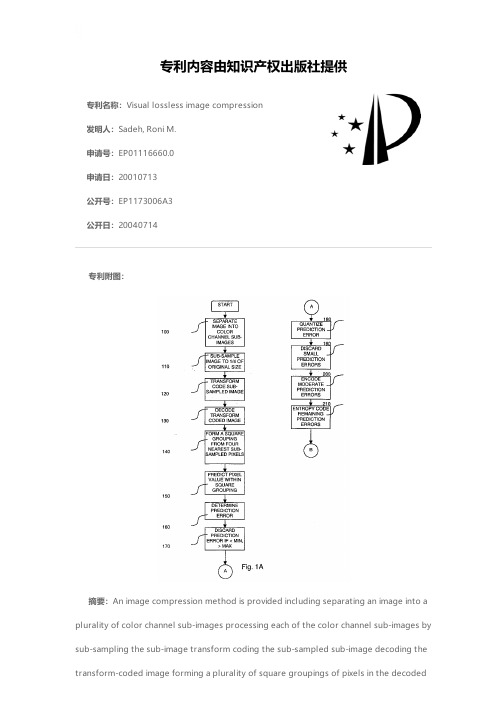
专利名称:Visual lossless image compression发明人:Sadeh, Roni M.申请号:EP01116660.0申请日:20010713公开号:EP1173006A3公开日:20040714专利内容由知识产权出版社提供专利附图:摘要:An image compression method is provided including separating an image into a plurality of color channel sub-images processing each of the color channel sub-images by sub-sampling the sub-image transform coding the sub-sampled sub-image decoding the transform-coded image forming a plurality of square groupings of pixels in the decodedimage predicting a value for a pixel within each of the x-shaped groupings determining a prediction error for each predicted pixel value within each of the square groupings coding the prediction error forming a plurality of at least partly diamond-shaped groupings of pixels in the decoded image predicting a value for a pixel within each of the diamond-shaped groupings and combining each of the processed color channel sub-images with the coded prediction errors, thereby forming a compressed image.申请人:Parthusceva Ltd.地址:5 Shenkar St. Herzlia 46120 IL国籍:IL代理机构:VOSSIUS & PARTNER更多信息请下载全文后查看。
基于引导滤波的高动态红外图像压缩算法
第51卷 第2期 激光与红外Vol.51,No.2 2021年2月 LASER & INFRAREDFebruary,2021 文章编号:1001 5078(2021)02 0250 07·图像与信号处理·基于引导滤波的高动态红外图像压缩算法汪 璇1,赵金博2,刘智嘉3,高旭辉2,夏寅辉2(1 湖北大学知行学院计算机与信息工程学院,湖北武汉430011;2 北京波谱华光科技有限公司,北京100015;3 华北光电技术研究所,北京100015)摘 要:非制冷红外机芯的原始图像位宽为14Bit,虽然相对于8Bit红外图像来说,14Bit红外原始图像具有灰度动态范围更广、灵敏度更高、包含细节信息更多的优点,但是由于普通显示设备能够显示的最大灰度范围为8Bit,所以需要对14Bit原始图像进行压缩,以满足常规显示设备显示及后端图像处理的需求。
若压缩算法性能不佳,在图像压缩过程中可能会丢失大量的细节信息,直接影响成像质量。
本文提出了一种基于引导滤波的压缩和显示算法,该算法首先利用引导滤波对图像进行分层,根据不同图层的特点和在合成图像中的作用,分别进行增强和降噪处理,使合成图片具有良好的显示效果。
通过与常用算法的仿真对比实验,以及对视觉效果和定量评价参数两个方面的实验结果分析,本文所提出算法在压缩和图像处理的性能表现上均获得一定程度的提升。
关键词:红外;高动态;引导滤波;分层中图分类号:TP391 41 文献标识码:A DOI:10.3969/j.issn.1001 5078.2021.02.021HighdynamicinfraredimagecompressionalgorithmbasedonguidedfilteringWANGXuan1,ZHAOJin bo2,LIUZhi jia2,GAOXu hui2,XIAYin hui2(1.CollegeofComputerandInformationEngineeringofZhiXingCollege,HubeiUniversity,Wuhan430011,China;2.BeijingBopOpto ElectronicsTechnologyCo.,Ltd.,Beijing100015,China;3.NorthChinaResearchInstituteofElectro Optics,Beijing100015,China)Abstract:TheoriginalimageofuncooledinfraredmovementhasaBitwidthof14Bit.Comparedwiththe8Bitinfraredimage,the14Bitinfraredoriginalimagehastheadvantagesofwidergraydynamicrange,highersensitivityandmoredetailedinformation.However,becausethemaximumgrayrangethatordinarydisplayequipmentcanmakeis8Bit,itisnecessarytocompressthe14Bitoriginalimagetomeettherequirementsofconventionaldisplayequipmentandback endimageprocessingrequirements.Iftheperformanceofthecompressionalgorithmispoor,alotofdetailsmaybelostintheprocessofimagecompression,whichdirectlyaffectstheimagequality.Inthispaper,acompressionanddisplayalgorithmbasedonguidedfilterisproposed.Firstly,guidedfilterisusedtolayertheimage.Accordingtothecharacteristicsofdifferentlayersandtheroleinthesyntheticimage,theenhancementandnoisereductionarecarriedoutrespectively,sothatthesyntheticimagehasagooddisplayeffect.Bycomparingthesimulationresultswithcommonalgorithms,andanalyzingtheexperimentalresultsofvisualeffectandquantitativeevaluationparameters,itisprovedthatthealgorithmproposedinthispaperhasacertainimprovementintheoverallperformance.Keywords:infrared;highdynamic;guidedfiltering;delamination作者简介:汪 璇(1984-),女,硕士,讲师,主要研究方向为信号处理。
基于Hi3516D的图像采集压缩系统的设计

Keywords: image acquisition;image compress;Hi3516D;AR0230CS;H.264;Linux
随着时代的发展,视频监控技术已经广泛应用
2 系统硬件电路设计
2.1
ARM 硬件设计
Hi3516D 是 海 思 开 发 的 一 款 专 业 高 端 SOC 芯
片,定位于高清 IPCamera 产品应用,拥有先进低功耗
AR0230CS 为敏感元件,器件布局与 Hi3516D 需相隔
较大距离,避免集中散热。
2.3
电源硬件电路设计
该设计获取外部 5 V 直流输入供电、内部两级
25 fps,记录一小时需 25 GB 的存储资源。若同等情
况下记录 1080P 视频,则需约 1.22 T 的容量,普通的
存储设备难以满足要求。而且在一些特殊领域,例
如航天航空、无人机等,存储资源和传输链路带宽是
无法完全满足要求的,必须要将图像数据经过压缩
基金项目:青年科学基金项目(51705477)
优性能 ARM、高动态 CMOS 图像传感器的图像采集压缩系统。硬件设计中,采用集成 H.264 压缩硬
核的 Hi3516D 作为核心处理器、HiSPi 接口的 AR0230CS 图像传感器作为图像捕获前端、高效率的
DC/DC 双路电源 MP2122 作为系统电源模块、百兆以太网作为图像数据的输出接口;软件设计中,
H.264 compression core is used as the core processor,the AR0230CS image sensor with HiSPi interface
pil ccitt压缩方式
pil ccitt压缩方式PIL CCITT压缩方式CCITT(国际电信和电报咨询委员会)是一个国际标准组织,提供了一种用于传输和处理数字图像的压缩算法。
在PIL(Python Imaging Library)中,我们可以使用CCITT压缩方式来对图像进行压缩和解压缩操作。
CCITT压缩方式是一种无损压缩算法,主要用于二值图像(即黑白图像)。
它采用了一种称为“绝对编码”的方法,将相邻的像素点进行编码,减少了存储和传输所需的数据量。
CCITT压缩方式广泛应用于传真机、扫描仪和其他需要对二值图像进行压缩的设备和应用程序中。
在PIL中,我们可以使用`Image`模块的`compress`方法来对图像进行CCITT压缩。
下面是使用CCITT压缩方式对图像进行压缩和解压缩的示例代码:```pythonfrom PIL import Image# 压缩图像image = Image.open('input.png')compressed_image = press('CCITT')# 保存压缩后的图像compressed_image.save('compressed_image.tif')# 解压缩图像decompressed_image = Image.open('compressed_image.tif') decompressed_image.save('output.png')```在上述代码中,我们首先打开原始图像,然后使用`compress`方法将图像压缩为CCITT格式。
压缩后的图像可以保存为TIFF格式。
接下来,我们再次打开压缩后的图像,并将其保存为PNG格式,实现了对图像的解压缩操作。
CCITT压缩方式可以显著减少图像的存储空间和传输带宽,同时保持图像的质量不变。
这使得CCITT成为处理二值图像的首选压缩方式。
JPEG2000图像压缩算法在Android平台的应用

JPEG2000图像压缩算法在Android平台的应用季通明;鲍胜利【摘要】Focusing on the problem that the JPEG image compression algorithm widely used in the Android platform has high distortion rate,the JPEG2000 image compression algorithm was proposed as a new compression alternative algorithm.The Peak Signal-to-Noise Ratio (PSNR) value,Mean Structural SIMilarity (MSSIM) value and image information entropy of the proposed algorithm were compared with the JPEG algorithm and the JPEG2000 algorithm by using the compression ratio of the image as the control variable and Android 5.0 as the experimental environment.In the course of the experiment,with the increase of image compression ratio,compared with the JPEG algorithm,the PSNR value of the JPEG2000 algorithm increased more sharply when compression ratio exceeded 1.5,and the fluctuation range of the MSSIM value and the image information entropy were smaller when compression ratio exceeded 6.The experimental results show that the JPEG2000 image compression algorithm is better than the JPEG image compression algorithm in the mobile platform with the increase of the image compression ratio.%针对目前Android平台中广泛使用的JPEG图像压缩算法存在图像高压缩比情况下失真度高的问题,提出引入JPEG2000图像压缩算法作为新的压缩替代算法.利用Android 5.0作为实验环境,通过将图像的压缩比作为控制变量,比较JPEG算法和JPEG2000算法在相同压缩比条件下,进行同比压缩后所产生实验图像数据的峰值信噪比(PSNR)值、平均结构相似度(MSSIM)值和图像信息熵.在实验过程中,随着图像压缩比的增加,JPEG2000算法相对于JPEG算法:当压缩比超过1.5后,PSNR值不会急剧增加;当压缩比超过6后,MSSIM值和图像信息熵的波动范围会更小.实验结果表明,在移动平台中,随着图像压缩比的增大,JPEG2000图像压缩算法的压缩效果将明显优于JPEG图像压缩算法.【期刊名称】《计算机应用》【年(卷),期】2017(037)0z2【总页数】4页(P203-206)【关键词】JPEG2000图像压缩算法;Android;峰值信噪比;平均结构相似度;图像信息熵【作者】季通明;鲍胜利【作者单位】中国科学院成都计算机应用研究所,成都610041;中国科学院大学,北京101400;中国科学院成都计算机应用研究所,成都610041【正文语种】中文【中图分类】TP311.56基于Android系统的移动设备主要以智能手机、平板电脑为主,在日常生产生活中,极具普及性。
iOS图片压缩方法

iOS图⽚压缩⽅法更多图⽚处理⽅法见图⽚组件iOS 图⽚压缩⽅法两种图⽚压缩⽅法两种压缩图⽚的⽅法:压缩图⽚质量(Quality),压缩图⽚尺⼨(Size)。
压缩图⽚质量NSData *data = UIImageJPEGRepresentation(image, compression);UIImage *resultImage = [UIImage imageWithData:data];通过 UIImage 和 NSData 的相互转化,减⼩ JPEG 图⽚的质量来压缩图⽚。
UIImageJPEGRepresentation:: 第⼆个参数 compression 取值0.0~1.0,值越⼩表⽰图⽚质量越低,图⽚⽂件⾃然越⼩。
压缩图⽚尺⼨UIGraphicsBeginImageContext(size);[image drawInRect:CGRectMake(0, 0, size.width, size.height)];resultImage = UIGraphicsGetImageFromCurrentImageContext();UIGraphicsEndImageContext();给定所需的图⽚尺⼨ size,resultImage 即为原图 image 绘制为 size ⼤⼩的图⽚。
压缩图⽚使图⽚⽂件⼩于指定⼤⼩如果对图⽚清晰度要求不⾼,要求图⽚的上传、下载速度快的话,上传图⽚前需要压缩图⽚。
压缩到什么程度要看具体情况,但⼀般会设定⼀个图⽚⽂件最⼤值,例如 100 KB。
可以⽤上诉两种⽅法来压缩图⽚。
假设图⽚转化来的 NSData 对象为 data,通过data.length即可得到图⽚的字节⼤⼩。
压缩图⽚质量⽐较容易想到的⽅法是,通过循环来逐渐减⼩图⽚质量,直到图⽚稍⼩于指定⼤⼩(maxLength)。
+ (UIImage *)compressImageQuality:(UIImage *)image toByte:(NSInteger)maxLength {CGFloat compression = 1;NSData *data = UIImageJPEGRepresentation(image, compression);while (data.length > maxLength && compression > 0) {compression -= 0.02;data = UIImageJPEGRepresentation(image, compression); // When compression less than a value, this code dose not work}UIImage *resultImage = [UIImage imageWithData:data];return resultImage;}这样循环次数多,效率低,耗时长。
- 1、下载文档前请自行甄别文档内容的完整性,平台不提供额外的编辑、内容补充、找答案等附加服务。
- 2、"仅部分预览"的文档,不可在线预览部分如存在完整性等问题,可反馈申请退款(可完整预览的文档不适用该条件!)。
- 3、如文档侵犯您的权益,请联系客服反馈,我们会尽快为您处理(人工客服工作时间:9:00-18:30)。
return ImageScale(file,
maxWidth,maxHeight,targetPath,true);
}
/**
* 生成压缩后的图片,等比压缩
*
BufferedImage mBufferedImage = new BufferedImage(imageWidth,
imageHeight, BufferedImage.TYPE_INT_RGB);
Graphics2D g2 = mBufferedImage.createGraphics();
* @param toFileName 生成目标文件的路径
* @param isCut 生成的文件是否要裁剪
* @return
*/
private static File ImageScale(File srcFile, int maxWidth,
int maxHeight, String toFileName, boolean isCut) {
mBufferedImage = cOp.filter(mBufferedImage, null);
File midFile = new File(toFileName);
FileOutputStream out = new FileOutputStream(midFile);
import javax.imageio.ImageReader;
import javax.imageio.stream.ImageInputStream;
import com.sun.image.codec.jpeg.JPEGCodec;
import com.sun.image.codec.jpeg.JPEGEncodeParam;
int y = (imageHeight - maxHeight) / 2;
cut(midFile, 0, y, maxWidth, maxHeight,toFileName);
}
return midFile;
}else{
return midFile;
*/
private static void cut(File file, int x, int y, int width,
int height, String subpath) throws IOException {
FileInputStream is = null;
ImageInputStream iis = null;
g2.drawImage(image, 0, 0, imageWidth, imageHeight, Cg2.dispose();
float[] kernelData2 = { -0.125f, -0.125f, -0.125f, -0.125f, 2,
package mon.util;
import java.awt.Color;
import java.awt.Graphics2D;
import java.awt.Image;
import java.awt.Rectangle;
import java.awt.image.BufferedImage;
* @param file
* @param maxWidth 图片的宽的最大值
* @param maxHeight 固定图片的高的最大值
* @param targetPath 生成的固定图片路径
* @return 返回生成后的图片文件
*/
public static File GenerateScaleImage(File file,int maxWidth,int maxHeight,String targetPath){
// 压缩质量
param.setQuality(0.9f, true);
encoder.setJPEGEncodeParam(param);
encoder.encode(mBufferedImage);
out.close();
if (isCut) {
return ImageScale(file,
maxWidth,maxHeight,targetPath,false);
}
/**
* 生成图片
* @param srcFile
* @param maxWidth
* @param maxHeight
if(imageWidth>maxWidth || imageHeight>maxHeight){
float scale = 0.0f;
if (isCut) {
scale=getBigRatio(imageWidth, imageHeight, maxWidth, maxHeight);
try {
Image image = ImageIO.read(srcFile);
int imageWidth = image.getWidth(null);
int imageHeight = image.getHeight(null);
-0.125f, -0.125f, -0.125f, -0.125f };
Kernel kernel = new Kernel(3, 3, kernelData2);
ConvolveOp cOp = new ConvolveOp(kernel, ConvolveOp.EDGE_NO_OP, null);
// 获取图片流
iis = ImageIO.createImageInputStream(is);
/*******************************************************************
* <p>
* iis:读取源.true:只向前搜索
JPEGImageEncoder encoder = JPEGCodec.createJPEGEncoder(out);
JPEGEncodeParam param = encoder
.getDefaultJPEGEncodeParam(mBufferedImage);
import java.io.FileOutputStream;
import java.io.IOException;
import java.util.Iterator;
import javax.imageio.ImageIO;
import javax.imageio.ImageReadParam;
}
image = image.getScaledInstance(imageWidth, imageHeight,
Image.SCALE_AREA_AVERAGING);
// Make a BufferedImage from the Image.
* </p>
* .将它标记为 ‘只向前搜索’。 此设置意味着包含在输入源中的图像将只按顺序读取,可能允许 reader
* 避免缓存包含与以前已经读取的图像关联的数据的那些输入部分。
*/
reader.setInput(iis, true);
/**
import com.sun.image.codec.jpeg.JPEGImageEncoder;
/**
* 图片压缩与裁剪
*/
public class ImageCompress {
/**
* 生成固定大小的图片,先压压缩,压缩后图片若不合格,再裁剪
*
* @param file
* 参数:formatName - 包含非正式格式名称 . (例如 "jpeg" 或 "gif")等 。
*/
Iterator<ImageReader> it = ImageIO
.getImageReadersByFormatName("jpg");
ImageReader reader = it.next();
if (maxWidth < imageWidth) {
int x = (imageWidth - maxWidth) / 2;
cut(midFile, x, 0, maxWidth, maxHeight,toFileName);
}
if (maxHeight < imageHeight) {
import java.awt.image.ConvolveOp;
import java.awt.image.Kernel;
import java.io.File;
import java.io.FileInputStream;
import java.io.FileNotFoundException;
}
} catch (FileNotFoundException fnf) {
fnf.printStackTrace();
return null;
} catch (IOException ioe) {
ioe.printStackTrace();
return null;
* <p>
* 描述如何对流进行解码的类
* <p>
* .用于指定如何在输入时从 Java Image I/O 框架的上下文中的流转换一幅图像或一组图像。用于特定图像格式的插件 将从其
