BBS麦克风GS(智能)功能说明
Windows 10麦克风设置方法
Windows 10麦克风设置方法Windows 10操作系统为用户提供了方便的麦克风配置功能,能够确保使用麦克风时音频输入的质量和准确性。
本文将介绍一些使用Windows 10的麦克风设置方法,帮助用户优化其设备的声音输入。
要设置Windows 10的麦克风,首先需要打开系统的“设置”菜单。
点击任务栏上的“开始”按钮,然后点击菜单中的“设置”图标。
在“设置”菜单中,找到并点击“系统”选项。
在“系统”选项中,点击左侧菜单中的“声音”选项。
在“声音”设置页面中,向下滚动找到“输入”部分,这里是音频输入设置的地方。
在“输入”部分,可以看到麦克风的名称,并能够检测到当前麦克风设备的音量水平。
用户可以点击“设备属性”链接来进一步自定义麦克风的设置。
点击“设备属性”链接后,将打开麦克风属性页面。
在这里,用户可以设置不同麦克风功能的选项,例如音频增益、静音开关和环境噪音抑制等。
用户可以根据需要自行调整这些选项,以达到最佳的麦克风体验。
除了麦克风属性页面,Windows 10还提供了高级麦克风设置的选项。
用户可以点击“附加设备设置”链接来访问这些选项。
在“附加设备设置”页面中,用户可以设置一些高级功能,例如立体声混音和传播回声抑制。
这些设置可以根据用户的需要进行自定义。
在进行麦克风设置时,用户还可以通过音频测试来确认声音输入的质量。
在“声音”设置页面的“输入”部分,可以看到一个名为“测试麦克风”的选项。
点击“测试麦克风”按钮后,系统将通过麦克风输入进行测试并播放返回的音频。
用户可以通过此测试来确保麦克风设备正常工作,并且音频输入的质量良好。
除了上述的系统设置方法,用户还可以使用第三方音频软件来进行麦克风设置。
这些软件通常提供更多的选项和功能,能够更好地满足用户的需求。
常见的第三方音频软件包括Adobe Audition和Audacity 等。
总结一下,对于Windows 10用户来说,麦克风的设置非常简单。
通过系统设置菜单中的“声音”选项,用户可以轻松地调整麦克风的音频输入设置。
网络麦克风操作说明
网络麦克风操作说明
一、分区广播功能
1、点击切换键,在屏幕上切换到分区广播,点击选择。
2、屏幕显示“按数字键点击呼出”提示。
3、各数字键代表
当按下数字键,显示屏会提示相迎键对应的车间或系列名称。
4、选择好数字键,点击呼出,可进行人工语音广播。
5、人工广播完毕,点击退出,关闭麦克风送音功能。
二、对点广布功能
1、点击切换键,在屏幕上切换到对点广播,点击选择。
2、屏幕显示“按数字键输入设备号”提示。
3、各设备号对应工区名称
输入相应数字,点击选择健,屏幕上显示“数字,”点击呼出,可对相应工区进行人工广播。
也可进行多选,即输入数字点击选择键,再输入数字点击选择健,屏幕上显示“数字,数字,…”在点击呼出,可对多个工区进行广播。
4、人工广播完毕,点击退出,关闭麦克风送音功能。
麦克风使用方法
麦克风使用方法
麦克风是一种常见的音频设备,被广泛应用于语音录制、语音识别、语音通信等领域。
正确使用麦克风可以有效提高音频质量,让声音更加清晰、自然。
下面将介绍麦克风的使用方法,帮助您更好地使用这一设备。
首先,当您使用麦克风进行语音录制时,需要注意环境的安静程度。
尽量选择在安静的地方进行录制,避免噪音干扰。
同时,要保持麦克风与口鼻的距离适中,通常建议距离在5-10厘米左右,这样可以保证录制的声音清晰、不模糊。
其次,如果您需要进行语音识别或语音通信,可以根据实际情况选择合适的麦克风类型。
有线麦克风和无线麦克风是常见的两种类型,可以根据使用场景和个人喜好进行选择。
同时,还需要留意麦克风的指向性,不同的麦克风有不同的指向性,选择合适的指向性可以更好地捕捉声音。
另外,麦克风的放置位置也是需要注意的。
在进行语音录制或语音识别时,要将麦克风放置在合适的位置,使其能够捕捉到清晰的声音。
同时,要避免将麦克风放置在会产生共振或回声的位置,
这样可以有效避免录制或通信过程中出现的杂音问题。
最后,使用完麦克风后,要及时进行清洁和保养。
定期清洁麦
克风的话筒和过滤网,保持其清洁干净,可以有效提高录制和通信
的声音质量,延长麦克风的使用寿命。
总的来说,正确使用麦克风可以提高语音录制、语音识别和语
音通信的效果。
在选择麦克风、使用麦克风时,要注意环境、距离、指向性和放置位置等因素,保持麦克风的清洁和保养,可以让麦克
风始终保持良好的工作状态,为您的语音工作提供更好的支持。
希
望以上内容对您有所帮助,谢谢阅读!。
智能麦克风 SmartMyk 用户指南 1.0说明书
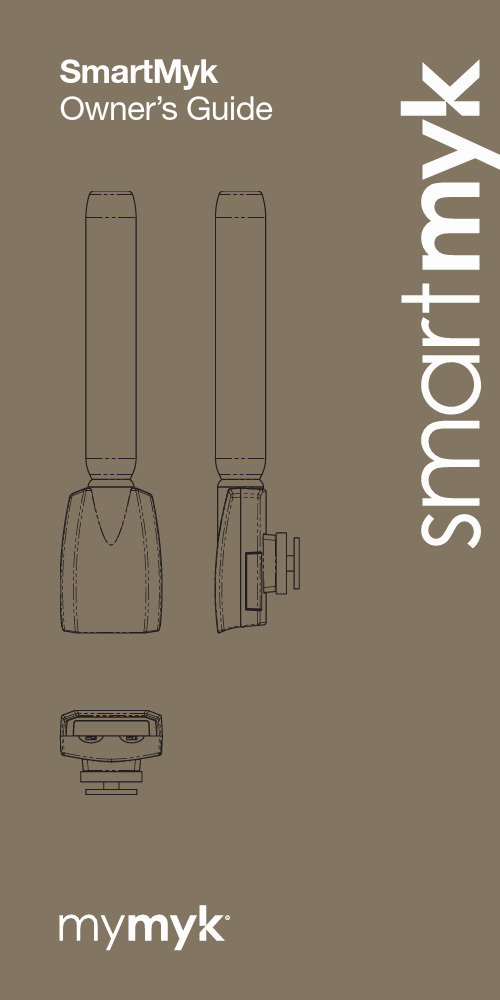
1.0The mechanicsThe microphone is manufactured from polycarbon ABS, ensuring strength and resilience even in extreme temperatures. The barrel of the microphone houses the metal resistance tube and the microphone capsule.The fully integrated shock mount system is made of TPE synthetic rubber which is weather resistant. This is built into the body of the microphone casing.The electronic switches are also weather resistant. The cold shoeand camera attachment systemis manufactured with high quality stainless steel. 2.0The electronicsThere are two switches on the rear panel of the microphone. On the right is the power switch marked 1 (ON) and 0 (OFF).On the left is the amplifier gain switch. The amplifier in the microphone has a three position gain control. The centre position is the normal setting where the amplifier provides a direct signalto the camera. Moving the switch to the left-hand side position boosts the signal by +15dB. This is used with cameras that have an adjustable gain control and where it is preferable to have increased gain at the input ofthe camera to reduce noise from the cameras amplifier. The right position selects a gain reduction off -15db. This is used when the recorded source is either extremely loud or an external device is being used for recording. Located between the switches is a battery status indicator, which flashes red to indicate that the amplifieris switched on and is in use. The microphone will not operate without the power switch being selected to ON. To maximise the battery life itis recommended to switch off the amplifier when the microphone is not in use.The team at My Myk Pty Ltd in Sydney Australia would like to thank you for choosing the SmartMyk DSLR/Video camera microphone.SmartMyk has been designed for use with any DSLR or video camera that is fitted with a flash shoe adaptor, more commonly known as a hot shoe or cold shoe. Although the microphone was designed as a solution for DSLR cameras, it works plugged into any audio source.SmartMyk |Owner’s Guide3.0The capsuleA Super Cardioid back electret capsule with extremely good directional properties enhanced with the assistance of the resistant tube.The manner in which the microphone has been tuned with the tube makes it an ideal microphone for recording dialog, as it has a very clear and unmuddied frequency response. The capsule is tuned to minimise low frequency sounds such as traffic rumble.The batteryThe battery can be found located in the drawer on the side of the microphone electronic housing. By opening the door and pulling out the tray in a horizontal motion, the battery is revealed and can be easily removed by simply pushing it out from the tray. The battery should be placed in the battery holder with the + sign on the battery facing downward. The battery is a standard 2032 button cell battery readily available in most supermarkets. The battery will offer over 300 hours of continuous use.4.0The foam windsockThe windsock is manufactured from reticulated polyurethane foam. The sock is designed to minimize light wind noise; however in high wind situations it is recommended that a fluffy wind protector be fitted. These are available from many third party suppliers. The outer size of the wind sock is 22mm in diameter and 120 mm in length. 5.0The cableThe cable utilizes a 3.5 TRS gold plated connector which will plug into the microphone input of most DSLR and domestic video cameras. If your camera requires a different input plug there are many adaptors available on the market. The cable is 150mm in length which can be extended using any 3.5mm extension cable.6.0Attaching the microphone tothe cameraThe microphone is fitted to the camera by attaching it to the cold shoe adaptor, usually found locatedon the top of the viewfinder section. Carefully unscrew the knurled discon the thread under the microphone. Position the square metal plate onthe bottom of the metal thread intothe cold shoe (Flashgun Adaptor) and tighten the knurled disc down onto the camera to secure the microphone to the body of the camera. Next take the 3.5mm plug on the end of the audio cable and connect the microphone into the microphone input socket on the camera. This socket is usually located behind a rubberized flap on the side of the camera body.For suggestions on how to optimise SmartMyk, please visit our web site .More informationFor more information on any of our products, including warranty information, please visit 。
BBS操作讲解

导频信号、防止干扰 AF:声音信号
微调:784.200调节至784.280 这种调法就叫微调,有效 调节串频、断频问题。
RF:手持连接主机信号
13
70平方以内为3档
100平方以内为4档
四 级 功 率
拒绝断频、串频
注意:不同型号手持调试的方法不一样,注意看手持尾部的说明、如上图
1.分清楚上下 2.按住下键两秒
3.出现如图所示、进行档位调节
5
断 频 、 串 频
B
A
如图:A手持776.840 B手持776.920
断 频 、 串 频
A
如图:A手持776.840 B手持关掉
无线麦克风BBS
最美的声音就是我态度
为了使广大客户更多的了解
使用和操作BBS产品 更深层次的清楚BBS
特授此课件、解决问题、解决短板认知、携手共进、共创美好明天
目 录
1 2 3 4
四级功率 自动静音 主机பைடு நூலகம்作 注意事项
四 级 功 率
拒绝断频、串频
房间小档位小、房间大档位大(特指手咪发射功率) 30平方以内为1档 50平方以内为2档
方法二 方法一
给你两个选择 兄弟你有脚气 1.离我远点 、干扰到我了 2.把频点调开 776.840 745.000 776.920 二十号包间
一号包间
二号包间
解:将所有话筒关闭,当接收机显示面板 上有RF、电池(BAT)、AF显示时,此时接收 机接收到的信号即为干扰信号
方法1.把频点微调(见第13页微调方法) 2.如上图方法一把频点调开 3.如上图方法二把频点调到离的远的房间
自 动 静 音
三秒静音、智能断电
拒绝杂音、拒绝电量浪费
BBS麦克风GS(智能)功能说明
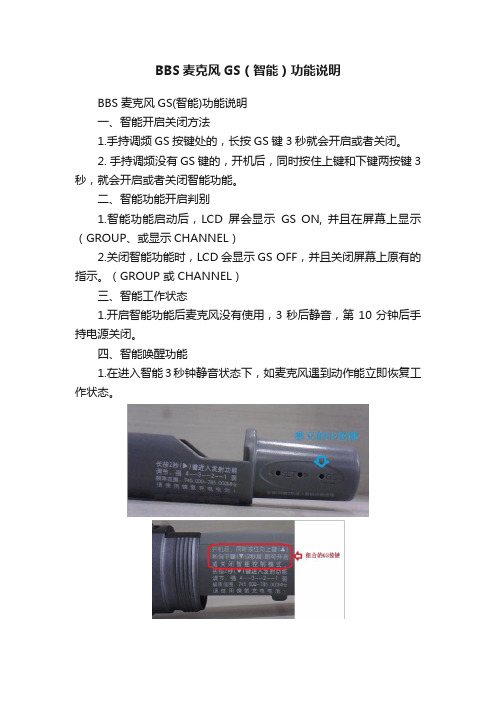
BBS麦克风GS(智能)功能说明
BBS麦克风GS(智能)功能说明
一、智能开启关闭方法
1.手持调频GS按键处的,长按GS键3秒就会开启或者关闭。
2. 手持调频没有GS键的,开机后,同时按住上键和下键两按键3秒,就会开启或者关闭智能功能。
二、智能功能开启判别
1.智能功能启动后,LCD屏会显示GS ON, 并且在屏幕上显示(GROUP、或显示CHANNEL)
2.关闭智能功能时,LCD会显示GS OFF,并且关闭屏幕上原有的指示。
(GROUP 或CHANNEL)
三、智能工作状态
1.开启智能功能后麦克风没有使用,3秒后静音,第10分钟后手持电源关闭。
四、智能唤醒功能
1.在进入智能3秒钟静音状态下,如麦克风遇到动作能立即恢复工作状态。
Shure PGA48 狭窄类麦克风用户指南说明书
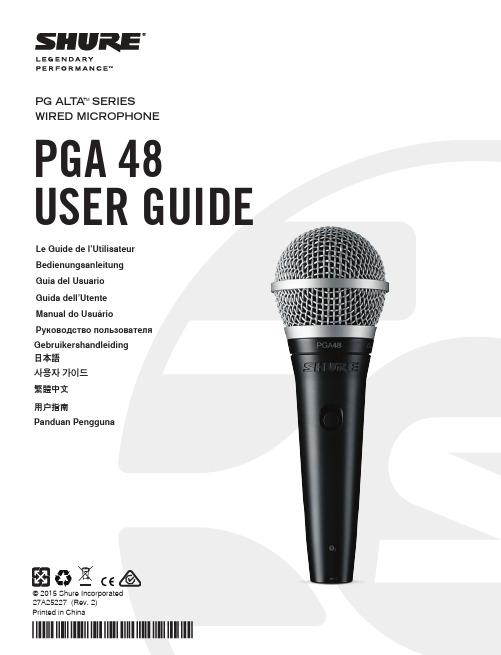
© 2015 Shure Incorporated 27A25227 (Rev. 2)WIRED MICROPHONEPGA 48USER GUIDELe Guide de l’UtilisateurGuia del UsuarioGuida dell’UtenteРуководство пользователяBedienungsanleitung日本語繁體中文用户指南Manual do UsuárioGebruikershandleiding사용자 가이드Panduan PenggunaPG AL TA SERIESTM Printed in China2PGA48Proximity Effect Directional microphones progressively boost bass frequencies as the microphone is placed in closer proximity to the source. This phenomenon, known as proximity effect, can be used to create a warmer, more powerful sound.PG Alta Microphones Congratulations on the purchase of a new Shure PG Alta series microphone. The PG Alta series delivers professional quality audio at an affordable price, with solutions for capturing nearly any source, including voice, acoustic instruments, drums, and amplified electric instruments. Suitable for live and studio applications, PG Alta microphones are built to last, and meet the same rigorous quality testing standards that make all Shure products trustworthy and reliable. • Do not cover any part of the microphone grille with your hand, as this will adversely affect microphone performance.• Aim the microphone toward the desired sound source (such as the talker, singer, or instrument) and away from unwanted sources.• Place the microphone as close as practical to the desired sound source.• Work close to the microphone for extra bass response.• Use only one microphone to pick up a single sound source.• For better gain before feedback, use fewer microphones.• Keep the distance between microphones at least three times the distance from each microphone to its source (“three to one rule”).• Place microphones as far as possible from reflective surfaces.• Add a windscreen when using the microphone outdoors.• Avoid excessive handling to minimize pickup of mechanical noise and vibration.On/Off SwitchAvoiding Pickup of Unwanted Sound SourcesPlace the microphone so that unwanted sound sources, such as monitors and loudspeakers, are directly behind it. To minimize feedback and ensure optimum rejection of unwanted sound, always test microphone placement before a performance.Recommended Loudspeaker Locations for Cardioid Microphones3Sensitivity at 1 kHz, open circuit voltage -53.5 dBV/Pa¹ (2.10 mV)Polarity Positive pressure on diaphragm produces positive voltage on pin 2 with respect to pin 3Weight 300 g (10.58 oz.)Switch On/Off Switch Connector Three-pin professional audio (XLR), male Environmental Conditions Operating Temperature -20° to 165°F (-29° to 74°C)Relative Humidity 0 to 95%1 Pa=94 dB SPL Optional Accessories and Replacement Parts Microphone Clip for SM58, SM57, SM87A, Beta 87A, Beta 87C, PGA57, PGA58, PGA48, PGA81 Microphone Clip for SM58, SM57, SM87A, Beta 87A, Beta 87C, PGA57, PGA58, PGA48, PGA81 A25D 5/8" to 3/8" Thread Adapter 31A18567.6 m (25 ft.) Cable (XLR-XLR)C25J 25 foot (7.5m) Triple-Flex ®Microphone XLR Cable with chrome connectors C25F PGA48 Replacement Grille RPMP48GTypical Frequency Response1000 Hz Typical Polar PatternCertificationsThis product meets the Essential Requirements of all relevant European directives and is eligible for CE marking. The CE Declaration of Conformity can be obtained from: /europe/complianceAuthorized European representative:Shure Europe GmbH Headquarters Europe, Middle East & Africa Department: EMEA ApprovalJakob-Dieffenbacher-Str. 1275031 Eppingen, Germany Phone: 49-7262-92 49 0Fax: 49-7262-92 49 11 4Email:*************。
Shure WH30 电容式头戴麦克风用户指南说明书
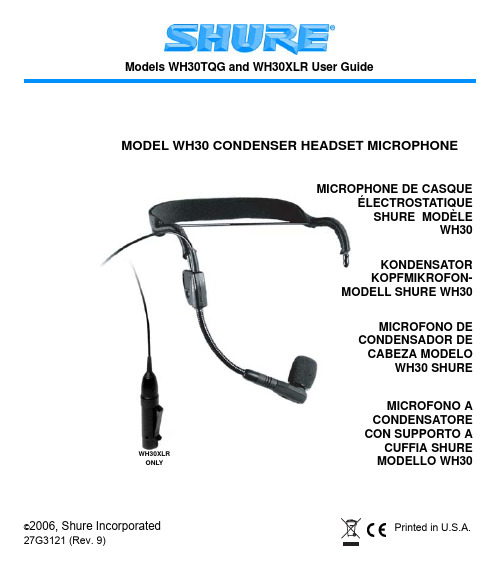
©2006, Shure Incorporated 27G3121 (Rev. 9)Printed in U.S.A.Models WH30TQG and WH30XLR User GuideWH30XLRONLYMODEL WH30 CONDENSER HEADSET MICROPHONEMICROFONO ACONDENSATORECON SUPPORTO ACUFFIA SHUREMODELLO WH30MICROFONO DECONDENSADOR DECABEZA MODELOWH30 SHUREKONDENSATORKOPFMIKROFON-MODELL SHURE WH30MICROPHONE DE CASQUEÉLECTROSTATIQUESHURE MODÈLEWH30INTRODUCTIONThe Shure Model WH30 is a light yet rugged headset microphone. Designed for vocalists and instrument-playing vocalists, the WH30 utilizes a high quality electret-condenser car-tridge suitable for all applications where mobility, comfort, low microphone-visibility, and high sound quality are required. Because of its cardioid (unidirectional) pickup pattern, the WH30 provides isolation from extraneous sound sources and high gain-before-feedback. The wireframe and gooseneck adjust to any head size and shape. An integrated elastic headband comfortably pads and secures the headset. The WH30 is supplied with two snap-on windscreens, clothing clip, storage bag and cable-management device. FEATURES•Smooth, natural frequency response comparable to professional condenser hand-held microphones•Lightweight wireframe and headband adjust for a secure, comfortable fit•Extra-strong, small-diameter microphone cable resists breakage•Moisture-proof cartridge housing•Sturdy gooseneck-boom holds mic securely in place•lsolation shock mount for reduced handling noise•Matte black finish for low visibility•High input clipping level helps avoid overload distortion•Low self-noise and high sound pressure level capability•Reliable at temperature and humidity extremesMODEL VARIATIONS•WH30TQG: For wireless use, the WH30TQG has a 1.2m (4 ft.) high-flex cable anda mini TA4F connector for direct connection to Shure body pack transmitters.Note: For information about use with Shure W10BT or other transmitters without a mini TA4F connector, contact Shure Customer Service).•WH30XLR: For wired applications, the WH30XLR is supplied with a 1.2m (4 ft.) hi-flex cable and high quality mic preamplifier (RPM420) with a three pin XLR con-nector. The RPM420 preamplifier requires phantom power from any 11 - 52 V source.2MICROPHONE PARTSThe WH30 consists of the following parts (see Figure 1).WH30 HEADSET MICROPHONE PARTSFIGURE 1COLLAPSIBLE MICROPHONE BOOMThe WH30 headset features a collapsible boom for shipment and storage. Before wearing the headset, unfold the boom by rotating it away from the wireframe until it snaps into place. Refold for storage or transportation.3WEARING THE HEADSETPlace the headset wireframe around your head so that the elastic headband band lay hor-izontally across the back of your head and the ends of the wireframe fit over your ears. You may position the elastic headband either above or below the wireframe for the great-est comfort and stability. The blue “SHURE” logo should face outward (see Figure 2).POSITIONING THE MICROPHONE For maximum gain-before-feedback, position the microphone and boom so that the mi-crophone is within 13 mm (1/2 inch) of the right corner of your mouth (see Figure 3). Thiswill also help minimize breath noise or “popping”.WEARING THE HEADSET FIGURE 2POSITIONING THE MICROPHONE FIGURE 35ADJUSTING THE HEADSET•If the headset feels loose or uncomfortable, carefully bend the sides of the wire-frame to make it tighter or looser (see Figure 4A). The angle of the wireframe ear-pieces may also need adjustment (see Figure 4B).ADJUSTING THE WIREFRAME FIGURE 4•Adjust the tension of the elastic headband across the back of the head by sliding it up or down the ends of the wireframe (see Figure 5).ADJUSTING THE ELASTIC HEADBANDFIGURE 5USING THE CABLE RETAINER AND CLOTHING CLIPUse the cable retainer on the wire frame of the headset to position the microphone cable as desired. The supplied spring-loaded clothing clip secures the microphone cable to the user's clothing to help avoid entanglement.CONNECTING THE WH30 TO A SOUND SYSTEMWireless Applications (WH30TQG)1.Connect the mini TA4F connector from the WH30 to a wireless microphone trans-mitter such as the Shure T1 bodypack transmitter.2.See the user guide for your wireless transmitter and receiver system for adjustinggain and other parameters.Wired Applications (WH30XLR)Connect the output of the RPM420 preamplifier to an input channel of a mixing or record-ing console. Most consoles will provide phantom power to the RMP420 preamplifier. If phantom power is unavailable, use a separate phantom power supply such as the Shure PS1A.WASHING THE ELASTIC HEADBANDWhen necessary, remove and wash the elastic headband according to these steps.1.Remove the microphone cable retainer from the wireframe.2.Slide the elastic headband off the wireframe.3.Wash the headband in mild, soapy water and rinse it in clean water.4.Allow the headband to air-dry thoroughly.5.Slide the headband around the wireframe to its original position. Reattach the cablewith the plastic retainer.WASHING THE FOAM WINDSCREENThe foam windscreen protects the WH30's microphone element from dirt and moisture. When necessary, it can be removed and cleaned in a mild soapy water solution.I mportant: Never clean the windscreen with any liquid solution without firstremoving the windscreen from the microphone boom.1.Hold the windscreen loosely by the plastic retaining ring at its base.2.Gently pull the windscreen away from microphone. The plastic retaining ring willexpand to allow the windscreen to slip off the microphone. If necessary, you can expand the ring manually with a small screwdriver as you pull the windscreen.3.Immerse the windscreen in mild soapy water and gently squeeze it several times.64.Rinse the windscreen in clean water and dry it with a clean cloth or paper towel.Allow it to air-dry thoroughly.5.When the windscreen is dry, slide it over the WH30 microphone until the retain-ing ring snaps into place.CERTIFICATIONWH30XLR : Conforms to European EMC Directive 89/336/EEC, and is eligible to bear the CE marking. Meets applicable tests and performance criteria in European standard EN 55103 (1996) parts 1 and 2, for residential (E1) and light industrial (E2) environments.WH30TQG: Conforms to European EMC Directive 89/33/EEC, and is eligible to bear the CE marking. Meets EMC require-ments as an ancillary device per EN 300 445 (1996)REPLACEMENT PARTSCable Connector (for WH30TQG only)..........................................................WA330 Connector Belt Clip (for WH30XLR only)...................................................RK200BC Elastic Headband........................................................................................80A505B Wireframe, Headband, Boom Hinge, Boom, Shock Mount,Cartridge Housing and Cable...............................................................RPM520 Preamplifier Assembly.................................................................................RPM420 Black Windscreens (2) and Clothing Clip................................................90WP13717SPECIFICATIONS WH30TQG WH30XLRType Condenser, electret bias Condenser, electret bias withintegrated preamplifier Frequency Response40 to 20,000 Hz (See Figure 6)Polar Pattern Unidirectional (cardioid) (see Figure 7)Output Impedance (at 1kHz)2400 ΩRated 150 Ω (actual) (Toleratesloads as low as 150 Ω withreduced clipping level)Output Level(at 1 kHz; 0 dB = 1 V/Pascal)–55.5 dB (1.7 mV)–54.5 dB (1.9 mV)Signal to noise ratio (ref.A-weighted noise)63.0 dB at 94 dB SPL (IEC 651)Output Clipping Level (at 1000 Hz)–22 dBV (0.08 V) 2.5KΩ Load: –8 dBV (0.4V)1 KΩ Load: –8 dBV (0.4V)Maximum SPL130 dB 2.5KΩ Load: 142 dB1 KΩ Load: 142 dB Dynamic Range (max. SPL toA-weighted noise level)99 dB111 dBOutput Noise (equivalent SPL)31 dB (typical, A-weighted)Recommended Operating Voltage 5 VDC(pin 2 to pins 3 and 4)11-52 VDC Phantom powerPolarity Positive sound pressure ondiaphragm produces positivevoltage on pins 3 and 4 relative topin 1 (ground) on the mini TA4Fconnector.Positive sound pressure on the diaphragm produces positive voltage on pin 2 relative to pin 3 of preamplifier output connector.Environmental Conditions Operating Temperature –7° to 49° C (20° to 120° F)Storage Temperature –29° to 74° C (–20° to 165° F)Humidity: 0 to 95% (operating or storage)Cable 1.2 m (4 ft.) two-conductor, shieldedCable Connector mini TA4F XLRNet Weight Headset: 65 g (2.3 oz)Headset and cord: 60 g (2.1 oz)Preamplifier: 99 g (3.5 oz)89FIGURE 6TYPICAL WH30 POLAR PATTERNSFIGURE 710WIRING DIAGRAMS WH30 WIRING DIAGRAMSFIGURE 84748SHURE Incorporated United States, Canada, Latin America, Caribbean:5800 W. Touhy Avenue, Niles, IL 60714-4608, U.S.A.Phone: 847-600-2000 U.S. Fax: 847-600-1212 Intl Fax: 847-600-6446Europe, Middle East, Africa:Shure Europe GmbH, Phone: 49-7131-72140 Fax: 49-7131-721414Asia, Pacific:Shure Asia Limited, Phone: 852-2893-4290 Fax: 852-2893-4055TRADE MARK NOTICES: The stylized Shure logo and the Word “Shure” are registered trademark of Shure Incorporated in the United States. “Teflon” is a registered trademark of E.I. duPont de Nemours and Company in the United States.。
sE X1 S 电子麦克风说明书
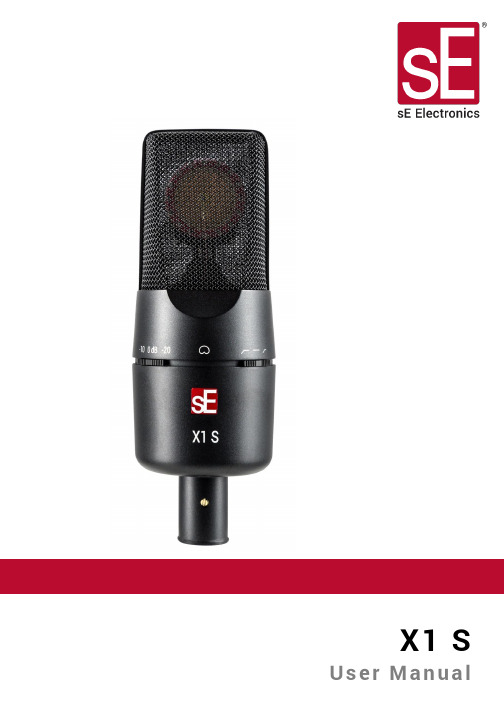
X1 SUser Manual - EN Thank youWe would like to thank you cordially for choosing this sE microphone! This manual contains some important instructions for setting up and operating your new equipment. Please take a few minutes to read the instructions below carefully. We hope you will enjoy working with it as much as we enjoyed designing and building it for you.Most Sincerely,Your sE TeamBrief DescriptionThe X1 S is a high-quality condenser microphone intended for a wide range of studio applications, from vocals to drums to acoustic instruments and beyond. Thanks to its custom design and hand-crafted 1” true condenser capsule, it delivers pristine sound quality and an even, well-balanced frequency response.The electronics and the switchable attenuation pads ensure a high dynamic range, with high sound pressure level (SPL) handling capability and extremely low-noise components. The switchable low cut filters eliminate rumble or footfall noise, and can also compensate for an excess of bass frequencies caused by the proximity effect. This enables the X1 S to close-mic many instruments including electric guitar speaker cabinets, brass instruments and drums. Reliable operation even in demanding on-stage applications in difficult environments is ensured by the roadworthy all-metal design, robust construction, and high quality manufacturing standards. What’s in the boxYour packaging should contain the follow items. If anything is missing, please contact your sE Electronics dealer and let them know.∙X1 S microphone∙microphone stand clip∙thread adapterControlsThe X1 S features a switch for the attenuation pads and a switch for the low-cut filters. Attenuation SwitchThe Attenuation Switch is located on the front-left side ofthe microphone. When switched on, the incoming signal isreduced by either 10 or 20 dB for capturing of loudinstruments and/or close-miking without distortion. Usingthe switch also helps prevent overloading the input stage ofrecording interfaces, mixing desks and microphonepreamps.Low-Cut SwitchThe Low-Cut Switch is located on the front-right side of themicrophone, and inserts a low-cut filter at 80Hz (leftposition) or 160Hz (right position). The switch’s centerposition removes the filter for a flat frequency response.Wind noise, plosives, footfall noise or rumble might affectthe recorded signal, so enabling the low-cut filters reducessuch unwanted noise and prevents distortion. Additionally,the low-cut filters also minimize the proximity effect whenrecording sound sources at a very short distance.PoweringTo ensure proper operation, the microphone requires a phantom power source providing 48 Voltsaccording to IEC 61938.Risk of damageDo not connect the microphone to any power supply other than aphantom power source (input with phantom power or external IECstandard phantom power supply) with a floating connector, using abalanced cable with studio grade connectors to IEC 268-12 only. Thisis the only way to ensure safe and reliable operation.Safety and maintenanceRisk of damagePlease make sure that the piece of equipment to which yourmicrophone will be connected fulfils the safety regulations enforced inyour country and is fitted with a ground lead.Cleaning the microphoneAfter every use, clean the microphone with a dry, soft cloth tissue and store it in a solid case or a zipper pouch.Technical SpecificationsCapsule Hand-crafted 1“ true condenser capsulePolar patterns CardioidFrequency range 20 – 20,000 HzSensitivity 30 mV/Pa (-30.5 dBV)Max. SPL (0.5% THD) 140 / 150 / 160dB SPL(0/10/20 dB Attenuation pad)Equivalent noise level 9 dB(A)Dynamic range 131 / 141 / 151 dB (0/10/20 dB Attenuation pad)Signal-to-noise ratio 85 dBLow cut filter 80 / 160Hz, 6 dB/Oct, switchableAttenuation pad 10 / 20 dB, switchablePowering 48 Volts according to IEC 61938Electrical Impedance 125 OhmsRecommended load impedance >1k OhmsCurrent consumption 6 mAConnectivity 3-pin male XLR connectorDimensions Diameter: 58 mm (2.28 in.) Length 169 mm (6.65 in.)Weight 440 g (15.52 oz.)Frequency response Polar PatternSupportIn case you are experiencing any problems or have any questions regarding your sE product, please contact your dealer first for the fastest and more direct service. If an authorized service is required, it will be arranged by that dealer: /dealersIf you still have difficulties with support or assistance, please do not hesitate to contact us directly: /contact-usLastly, remember to register your new gear to extend your warranty to a full three years: /registrationContactFeel free to contact us:sE Electronics International, Inc. PO Box 1049 *************************6 Beach RoadTiburonCA 94920 USAOur international distributors & sales representatives: /contact-us This product conforms to the standards listed in the Declaration of Conformity. Please contact us if you want to order a free copy of the Declaration of Conformity. Technical data subject to change without notice.Bedienungsanleitung - DE DankeWir möchten uns bei Dir herzlich bedanken, dass Du Dich für ein Mikrofon von sE Electronics entschieden hast. Diese Bedienungsanleitung beinhaltet wichtige Hinweise zur Inbetriebnahme und zur Anwendung des Produkts. Bitte nimm Dir daher kurz Zeit, diese Anleitung durchzulesen. Wir hoffen, dass Du mit dem Produkt genauso viel Spaß haben wirst, wie wir bei der Entwicklung sowie der sorgfältigen, händischen Fertigung mit viel Liebe zum Detail.Herzliche Grüße,Dein sE TeamKurzbeschreibungDas X1 S ist ein qualitativ hochwertiges Kondensatormikrofon, dass sich für eine Vielzahl an Studioanwendungen eignet –von Gesang über akustische Instrumente bis hin zu Schlagzeug. Dank der handgefertigten Großmembrankapsel in …echter“ Kondensatortechnik und der hochwertigen Elektronik bietet es unverfälschte Klangqualität und einen geradlinigen, sehr ausgewogenen Frequenzgang.Die mit hochwertigen, diskreten Bauelementen aufgebaute elektronische Schaltung und das schaltbare Vorabschwächungsfilter ermöglichen einen hohen Dynamikbereich, garantieren die saubere Verarbeitung von sehr hohen Schalldrücken und bieten ein geringes Eigenrauschen. Das schaltbare Hochpassfilter unterdrückt niederfrequenten Störschall (zB Trittschall, Rumpel- oder Windgeräusche) und kompensiert die bei geringen Mikrofonierungsabständen auftretende Bassanhebung durch den Nahbesprechungseffekt. Dies ermöglicht auch die Nahfeld-Mikrofonierung von vielen Instrumenten wie zB elektrische Gitarren, Blechblasinstrumente und Schlagzeug.Hohe Zuverlässigkeit auch im anspruchsvollen Bühneneinsatz wird durch die robuste Konstruktion aus Metall und die hohen Produktionsstandards gewährleistet.LieferumfangBitte kontrolliere gleich nach dem Öffnen den Inhalt der Verpackung. Falls sie nicht vollständig ist, kontaktiere bitte Deinen sE Electronics Händler. Folgende Komponenten sollten enthalten sein: ∙X1 S Mikrofon∙Mikrofonhalterung∙GewindeadapterBedienelementeDas X1 S besitzt je einen Schalter für das Vorabschwächungsfilter und den Hochpassfilter. VorabschwächungsfilterDer Schalter für das Vorabschwächungfilter befindet sich auf derlinken Seite des Mikrofons. Ist er aktiviert, schwächt er das Signalvon um 10 oder 20 dB ab, um die Aufnahme von lautenInstrumenten bzw. Nahfeldmikrofonierung ohne Verzerrungen zuermöglichen. Die Verwendung des Abschwächungsfilters verhindertauch die Übersteuerung von Eingangsstufen von Audiointerfaces, Mischpulten und Mikrofonvorverstärkern.HochpassfilterDer Schalter für das Hochpassfilter befindet sich auf derrechten Seite des Mikrofons. Windgeräusche, Popplaute,Trittschall oder Rumpelgeräusche beeinträchtigenmöglicherweise das Aufnahmesignal. Durch Betätigung desSchalters werden derartige Störsignale und darausresultierende Verzerrungen verringert. In der linken Positionsetzt das Filter bei 80Hz ein, in der rechten bei 160Hz.Zusätzlich verringert der Hochpassfilter die bei geringenMikrofonierungsabständen auftretende Bassanhebungdurch den Nahbesprechungseffekt.StromversorgungFür eine einwandfreie Funktion wird eine Phantomspeisung mit 48V gemäß IEC 61938 benötigt.BeschädigungsgefahrSchließe das Mikrofon nur an geeignete Quellen (Eingang mitPhantomspeisung oder externe Speisung mit Phantomspeisung gemäßIEC Standard) mit erdfreien Anschluss und verwende ein symmetrischesKabel mit Studiosteckverbinden IEC 268-12. Nur so kann eineeinwandfreie Funktion gewährleistet werden.Sicherheit und PflegeBeschädigungsgefahrBitte stelle sicher, dass die an das Mikrofon angeschlossenen Geräte diegültigen Sicherheitsbestimmungen erfüllen und mit einerSicherheitserdung verbunden sind.Reinigung des MikrofonsWir empfehlen das Mikrofon nach jedem Gebrauch mit einem trockenen, fusselfreien Tuch zu reinigen und es in einem soliden Koffer oder einemMikrofonetui aufzubewahren. Technische DatenKapsel 1“ KondensatorkapselRichtcharakteristik NiereÜbertragungsbereich 20 – 20.000 HzEmpfindlichkeit 30 mV/Pa (-30,5 dBV)Max. Schalldruck(0,5% Klirrfaktor) 140 / 150 / 160 dB SPL (0/10/20 dB Abschwächungsfilter)Ersatzgeräuschpegel 9 dB(A)Dynamikbereich 131 / 141 / 151 dB (0/10/20 dB Abschwächungsfilter)Signal-Rausch-Verhältnis 85 dB(A)Hochpassfilter 80 / 160Hz, 6 dB/Okt, schaltbarAbschwächungsfilter 10 / 20 dB, schaltbarSpannungsversorgung 48 Volt gemäß IEC 61938Stromaufnahme 6,0 mAAusgangsimpedanz 125 OhmEmpfohlene Lastimpedanz >1kOhmAnschluss 3poliger XLR Anschluss männlichAbmessungen Durchmesser: 58 mm (2,28 in.) Länge 169 mm (6,65 in.)Gewicht 440 g (15,52 oz.)Frequenzgang PolardiagramKundenserviceFalls Du zu Deinem sE Mikrofon Fragen hast oder damit Probleme auftreten sollten, wende Dich für eine möglichst rasche Abwicklung bitte direkt an den Händler. Wenn eine technische Unterstützung erforderlich ist, wird diese durch den Händler angefordert: /dealersSollten dennoch Probleme beim Kundenservice auftreten, wende Dich bitte direkt an uns: /contact-usAbschließend möchten wir Dich an die 3-Jahres-Garantie von sE Electronics erinnern. Bitte registriere Dich dazu hier:/registrationKontaktSo kannst Du mit uns direkten Kontakt aufnehmen:sE Electronics International, Inc. PO Box 1049 *************************6 Beach RoadTiburonCA 94920 USAUnsere internationalen Distributoren und Handelsvertreter:/contact-usDieses Produkt entspricht den in der Konformitätserklärung angegebenen Normen. Du kannst die Konformitätserklärung gerne bei uns kostenlos anfordern.Technische Änderungen vorbehalten.使用手册 - CN 致谢非常感谢您购买我们sE的这款麦克风! 这本使用手册包含了一些如何安装和操作您的新麦克风的使用说明。
bbs话筒gs111说明书
bbs话筒gs111说明书bbs话筒gs111说明书:一、手持开关机1、将两节5号电池装入手持并拧紧网头(注意电池负极朝下,电池装反将损坏手持),向上推开关打开手持,此时电源指示灯亮,手持进入开机状态。
如果电源指示灯闪烁表示电池已耗尽,请更换电池再开机。
2、向下推开关电源指示灯熄灭,手持关机。
长时间不使用话筒请将电池取出。
二、接收机连接与开关机(专业)1、将音频连接线一头插接收机音频输出2另一头插到用户的音频设备(如功放、前级等)。
将12V开关电源插入220V交流插座,输出直流12V插入接收机DCIN,蓝色电源指示灯亮,接收机进入开机状态。
2、按住电源键一秒可以开启和关闭接收机电源。
3、断电后重新通电主机将自动进入开机状态,此时无需再按电源键开机。
三、接收机与电脑的连接与开关机(个人)1、将USB连接线两头分别插入电脑和接收机的USB接口。
蓝色电源指示灯,接收机进入开机状态。
电脑自动把音频输入输出设备切换成接收机。
(首次使用接收机的时候,电脑会自动安装驱动,电脑会依次出现图3所示的画面,直到硬件安装成功)2、将音频连接线一头插接收机音频输出1另一头插到用户的桌面音响输入端。
3、此时接收机将自动成为酷我k歌或QQ等者其他应用软件的音频输入输出设备。
(如果不能使用请参见疑难解答)4、按住电源键一秒可以开启和关闭接收机电源。
5、断电后重新通电主机将自动进入开机状态,此时无需再按电源键开机。
四、对码1、接收机开机后按功能键进入A通道对码状态,电源指示灯和A通道的射频指示灯亮,此时A通道可以对码,再按功能键进入B 通道对码状态,电源指示灯和B通道射频指示灯亮,此时B通道可以对码。
再按功能键又将切换到A通道,如此循环。
2、按照上一步将接收机切换到需要对码的通道,再按电源键,该通道射频指示灯闪烁,此时打开任意一支手持,接收机将自动与手持实现连接,连接成功后该通道射频指示灯和音频指示灯同时亮起一秒。
说明这个通道的手持对码成功,即可使用。
bbsu222gs使用说明书
bbsu222gs使用说明书
摘要:
1.产品简介
2.安装与设置
3.使用方法
4.注意事项
5.维护与保养
正文:
1.产品简介
bbsu222gs 是一款功能强大、易于使用的知识类写作助手,旨在帮助用户提高写作效率和质量。
本产品适用于各类写作场景,如学术论文、报告、散文等,能够辅助用户进行文献查找、资料整合、文字润色等工作。
2.安装与设置
在开始使用bbsu222gs 之前,请确保您的设备满足以下系统要求:操作系统为Windows 或MacOS,内存至少2GB,硬盘空间至少10GB。
安装步骤如下:
1) 下载并运行安装程序;
2) 按照安装向导的提示进行操作;
3) 安装完成后,启动bbsu222gs 并按照提示进行设置,如选择语言、设置默认文件夹等。
3.使用方法
bbsu222gs 主要分为以下几个功能模块:
1) 文献查找:用户可以在此处输入关键词,系统将自动检索相关文献并提供链接;
2) 资料整合:用户可以将检索到的文献资料导入到此处,系统将自动进行分类和整理;
3) 文字润色:用户可以将写作内容粘贴到此处,系统将自动检查并修改拼写、语法等错误;
4) 模板库:用户可以在此处选择合适的写作模板,如论文格式、报告结构等,系统将自动生成相应的文档框架。
4.注意事项
在使用bbsu222gs 时,请注意以下几点:
1) 文献资料请确保遵循版权法规,切勿抄袭或剽窃他人成果;
2) 文字润色功能仅供参考,请用户在使用时结合自身需求进行修改;
3) 模板库中的模板仅供参考,用户可以根据实际需求进行修改和调整。
Sennheiser e 914 麦克风说明书
e 914 Instruction manualDelivery includesDelivery includes• e 914• MZQ 800 microphone clamp • MZW 64 windshield • pouch • quick guide •safety guideThe microphone head is not compatible with the K6 powering module.Product overview1. Sound inlet basket2. XLR-3 connector3. Adjusting the sensitivity4. Adjusting the bass filterInstallationInstallationAttaching the microphoneScrew the microphone clamp to a stand.Place the microphone with its back end into the microphone clamp.Orient the microphone together with the microphone clamp.Connecting the microphoneConnect the XLR-3 socket of the microphone cable (optional accessories) to the XLR-3 socket of the microphone.Using the windshieldPlace the MZW 64 (optional accessories) windshield over the microphone head.OperationPositioning the microphone: Drums / PercussionsAttention: When closing the hi-hat, a strong air current is created on the edge. If the microphone is positioned too close to the edge, interfering noise due to the air current can occur.It is vital to observe the following notes:mentaryA Position the microphone a few centimetres above the outer edge of the hi-hataiming down. If necessary, remove unwanted low-frequency signal portions by highpass filtering.B Good starting position for live miking applications. If the overhead microphones areonly used for picking up the cymbals, unwanted signal portions can be attenuatedby high pass filtering.In order to prevent interference due to crosstalk between adjacent sound sources, try to position the microphone so that the interfering sound source is located in the angle area of the highest can-cellation of the microphone (approx. 180°, see polar diagram).Positioning the monitor loudspeakersTo prevent feedback and crosstalk, postion your monitor loudspeakers in the angle area of the highest cancellation of the microphone (approx. 180°).Sensitivity and bass filterThe e 914 is equipped with a three-position sensitivity switch and a bass filter switch.Adjusting the sensitivityThe microphone sensitvity can remain unchanged (0) or be reduced by 10 dB or 20 dB. The latter is recommended when there is a risk that the microphone or subsequent microphone input is overmo-dulated, e.g. due to high sound pressure levels from drums, brass instruments, etc.We recommend that you mute the corresponding microphone channel on the mixing consolebefore connecting and disconnecting the microphone cable, switching on and off the phantom powering or setting the switches (see figure above).Adjusting the bass filterThe e 914 has been designed for an extended low-frequency bass response. With certain live or close instrument miking applications, an over-emphasis of the low frequencies can occur. This can be compensated for by the 6 dB/octave roll-off filter. The cut-off filter reduces low-frequency wind noise by 18 dB/octave.Cleaning and maintaining the e 914Cleaning and maintaining the e 914CAUTIONLIQUIDS CAN DAMAGE THE ELECTRONICS OF THE PRODUCT!Liquids entering the housing of the product can cause a short-circuit and damage the electronics.Keep all liquids away from the product.Do not use any solvents or cleansing agents.Disconnect the products from the power supply system and remove rechargeable batteries and batteries before you begin cleaning.Clean all products only with a soft, dry cloth.SpecificationsSpecificationsTransducer principle pre-polarised condenser microphone Frequency response 20 - 20,000 Hz Pick-up patterncardioidSensitivity (free field, no load) with pre-attenuation 7 mV/Pa2.3 mV/Pa / 0.7 mV/Pa Nominal impedance (at 1 kHz)100 ΩMin. terminating impedance 1 kΩMax. sound pressure level (at 1 kHz)137/147/157 dB SPL (depending on pre-attenua-tion)Equivalent noise levelA-weighted (DIN IEC 651) CCIR-weighted (CCIR 468-3)19 dB 30 dBPre-attenuation 0 dB, -10 dB, -20 dB Bass filterlinearroll-off 130 Hz, 6 dB/oct.cut-off 85 Hz, 18 dB/oct.Phantom powering 48 V / 2.2 mA Connector XLR-3Dimensions ⌀ 24 x 157 mm Weight198 gPolar pattern30°0°180°150°120°60°90°0510152025dB30°0°180°150°120°60°90°125 Hz 250 Hz 500 Hz 1,000 Hz 2,000 Hz 4,000 Hz8,000 Hz 16,000 HzFrequency responseflat roll offcut off501002005001,0002,0005,00010,00020,000H z0- 10- 20dBOverview of applications Connector assignmentBALANCEDOverview of applicationsPrimary applicationSecondary application。
BBS掌中宝系列Q1
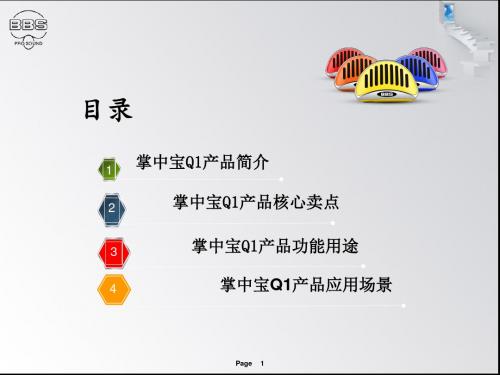
开机状态下,停放三秒,即进入静音模式,减少噪音让耳朵 更舒服。
2 、智能唤醒
开机状态下,静置6分钟以内即刻自动唤醒,优化操作倍轻松。
3 、智能关机
开机状态下,智能静音8分钟后,设备自动关机,解决待机耗电难 题。
Page 10
2.2、核心卖点三:高能动圈式拾音器,实时监听,尽享HIFI音效;
Page 28
Thank You!
Page 29
采用人体工学弧形设计,在保证外观精美的同时,手感更出 彩,根据个人声音特点,能多维度捕捉纤细音质。配备单一 指向性音头,让声音更立体丰富。
2 、环保材质,健康安全
掌中宝Q1有着极其严格的选材标准,所选材料均属环保材质, 并经过层层把关,充分保护您和您的家人、朋友的健康和安 全!
Page 9
2.2、核心卖点二:智能控制,智能静音,智能唤醒,智能静音;
推广广告语 K歌神器 告别声音干涩 让您万众瞩目!
Page 3
1.2、按键解析
Page 4
1.3、技术参数
性能参数
单体:动圈式 拾音器:内置导音静噪技术,抗干扰,音色高保真,精准拾音 灵敏度:-52.5dB(2.4mV/Pa)+-3dB 信噪比:>50dB(A计权,1kHz,pa) 指向性:超心形 电池容量:1100mAh高性能锂离子 充电标准:USB充电接口5V 500MA 持续K歌:6小时持久续航约,1100mAh聚合物理电 充电时间:3小时充满 麦克风音量:0-30级 背景音量:0-30级 演唱模式:1-6级 混响参数:REV-7级
1 、高能动圈式拾音,实时监听
掌中宝Q1采用心型指向设计,内置导音静噪技术,能精准拾 音。而特有的智能降噪技术,能最大化消除环境噪声,抗干 扰力强,使声音还原度高。K歌实时监听,耳返无延时。
Stereo Sound System (LS, GS) 操作指南说明书
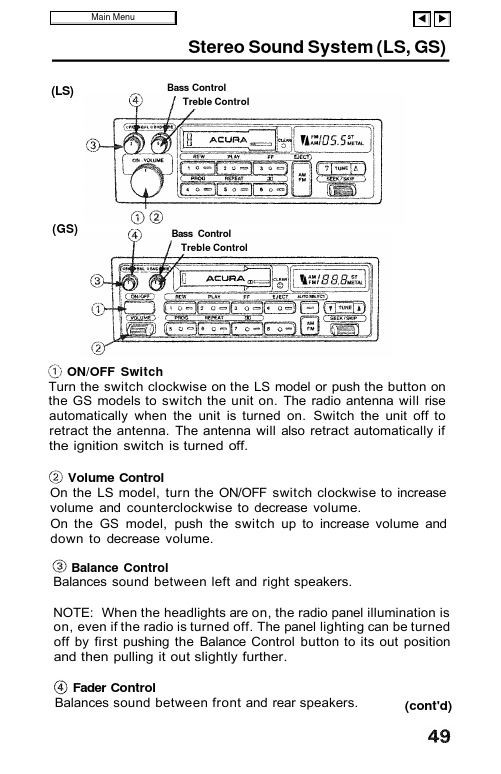
Stereo Sound System (LS, GS)(LS) Bass Control(GS)ON/OFF SwitchTurn the switch clockwise on the LS model or push the button on the GS models to switch the unit on. The radio antenna will rise automatically when the unit is turned on. Switch the unit off to retract the antenna. The antenna will also retract automatically ifthe ignition switch is turned off.Volume ControlOn the LS model, turn the ON/OFF switch clockwise to increase volume and counterclockwise to decrease volume.On the GS model, push the switch up to increase volume anddown to decrease volume.Balance ControlBalances sound between left and right speakers.NOTE: When the headlights are on, the radio panel illumination is on, even if the radio is turned off. The panel lighting can be turned off by first pushing the Balance Control button to its out positionand then pulling it out slightly further.Fader ControlBalances sound between front and rear speakers.(cont'd)Treble ControlBass ControlTreble ControlStereo Sound System (cont'd)Radio Operation (GS)FrequencyAM/FM Band SelectorPush to select AM or FM band. The corresponding band indicatorwill light.Manual Tuning Push the button to tune to a lower frequency station.Push the button to tune to a higher frequency station.NOTE: if you hold either button for more than half a second, thetuning frequency will count up or down rapidly.Seek TuningEach time you push this button up or down, the tuner will automatically seek the next higher or lower frequency station.(LS) DisplayFrequencyDisplayPreset Station1. Make sure the Band Selector is on the band you want... AM orFM. Then, find the station you want by Manual Tuning or Seek Tuning,2. Press and hold one of the Preset Buttons.3. in a few seconds, a beep will sound and the light in the buttonwill come on. The station is now preset in the memory. You may preset 1AM and 1 FM station per button (total, 6 of each on the LS model and 8 of each on the GS model).4. You can tune to a preset station by pushing its correspondingpreset button.NOTE: On the GS model, the Auto Select Button must be off before the Preset Station Selection can be used.Auto Select Button (GS only)if you are visiting a new broadcast area, you can quickly enter into memory the stronger stations in that area by simply pushing the Auto Select Button. The radio will then automatically scan both the AM and FM bands and temporarily memorize up to eight sta-tions in each. With Auto Select Button on, these stations can then be tuned by pushing the preset buttons. Manually-preset stations remain memorized for use when you return to your normal broad-cast area, but are only selectable with the Auto Select Button off.Stereo IndicatorThis lights up when a FM broadcast in stereo is being received. ft will flash when the signal strength diminishes. If it flashes, good stereo reception cannot be expected. Stereo reception is available only for FM stereo broadcasts, not for AM stereo broadcasts.(cont'd)Stereo Sound System (cont'd)Tape Operation Tape Direction IndicatorWith the cassette inserted "A " side up, the indicator ( ) will be displayed when the "A" side is playing; the indicator ( ) will be displayed when the "B" side is playing.Program Selector (PROG)Push to change the direction of tape play.Auto Reverse Feature: The tape direction automatically reverses when the end of the tape is reached in play or FF mode and plays the other side.(GS)(LS)Fast Forward/Rewind (FF/REW)Note which Tape Direction Indicator is displayed, then push the appropriate button to rapidly wind the tape in the same direction (FF) or in the opposite direction (REW),Play (PLAY)Push the PLAY button (indicator on) to resume tape play and stop rewind or fast forward operation.Repeat Button (REPEAT)Push the REPEAT button (indicator on) to return to the beginning of a song or section of programming and repeat its play. Push the button again (indicator off) to cancel the repeat function and resume normal play.Dolby® Noise Reduction ( )Push when playing tapes recorded in Dolby (the Dolby NR in-dicator will light). Push again when playing tapes not recorded in Dolby. Use of the wrong setting will affect high frequency response.NOTE:The Dolby NR circuit will not operate during radio reception.Dolby noise reduction system manufactured under license fromDolby Laboratories Licensing Corporation. "Dolby" and the double-D symbol are trademarks of Dolby Laboratories Licens-ing Corporation.Skip ButtonThe circuit senses silent passages between songs or programs on a tape. Push upward to automatically advance to the beginning of the next song, or downward to return to the beginning of the song just played.NOTE; Tapes that contain short silent passages between songs, a high level of noise between songs, or silent passages within a song may not be suitable for this function.Metal Indicator (METAL)Most metal or CrO2 cassettes are coded with slots on their back edge. If such a cassette is inserted, the player will detect the slots and automatically switch to the proper equalization for full enjoy-ment of metal/CrO2 tapes. The indicator light will go on when cod-ed cassettes are played.(cont'd)Stereo Sound System (cont'd)Eject (EJECT)Push this button to stop and eject the tape.Ignition Key-OFF Eject: The cassette being played will be automatically ejected when the ignition or the unit is turned off. NOTE: When one side of the tape ends, "Auto-Reverse" will automatically begin playing the other side, therefore, you must push the eject button to stop or remove the tape,CLEAN indicator LightAfter 50 hours of cassette tape play, the light will come on as a reminder to clean the tape heads. If the light comes on and the tape heads were not cleaned at the recommended 30 hours of usage (see maintenance section below), they should be cleaned immediately. To reset, push the indicator until the light goes off. MaintenanceThe head in the cassette tape player can pick up dirt or tape deposits each time a cassette is played. The result is low or "mud-dy" sound from one or both channels, as if the treble tone control were turned all the way down. To prevent this, you should periodically clean the head with a commercially available cleaning cassette.As preventive maintenance, clean the head about every 30 hours of use. If you wait until the head becomes very dirty (noticeably poor sound), it may not be possible to remove all deposits with a simple cleaning cassette.The use of 120 minutes tapes is not recommended. CAUTION: Storing cassettes out of their cases, or touching the magnetic tape with your fingers will increase the amount of dirt that gets to the tape head. Using low-quality "off-brand" tape will increase the amount of tape deposits that get on the head. Both of these practices may eventually lead to damage of the head and playing mechanism.Gasoline For proper operation of your car's emission controls, your engine is designed to use unleaded fuel only.CAUTION: Using leaded or even low-lead gasoline could damage some of your emission controls, and also void their coverage under the emission controls warranty.Use gasoline from pumps labeled unleaded, with a pump octane number of 86 or higher. The pump octane number is an average of the Research (R) octane and Motor (M) octane numbers. Use of a lower octane gasoline can cause persistent, heavy "spark knock"(a metallic rapping noise), which can lead to engine damage if severe.CAUTION: If you notice steady spark knock while holding a steady speed on a level road, try changing brands of gasoline. Ifthe spark knock persists, consult your Acura dealer. Failure to do so is considered misuse, and misuse is not covered under the New Car Warranty.Occasionally you may notice light spark knock while accelerating or driving up hills. This is no cause for concern, it simply means your engine is running at its most economical.Gasoline Containing Alcoholif you decide to use a gasoline containing alcohol ("gasohol"), be sure its octane rating is at least as high as that recommended for unleaded gasoline. There are two types of "gasohol": that containing ethanol, and that containing methanol. Do not use gasohol that contains more than 10% ethanol. Do not use gasoline containing methanol (methyl or wood alcohol) that does not also contain cosolvents and corrosion inhibitors for methanol. Never use gasoline containing more than 5% methanol, even if it has cosolvents and corrosion inhibitors.(cont'd)Gasoline (cont'd)NOTE:Fuel system damage or vehicle performance problems resultingfrom the use of such fuels is not covered under the new car war-ranties. The Acura Automobile Division cannot endorse the use of fuels containing methanol since evidence of their suitability is as yet incomplete.Before purchasing fuel from an unfamiliar station, try to confirmwhether the fuel contains alcohol, of what kind, and how much.If you notice any undesirable operating symptoms after using a gasoline that contains alcohol; or one that you think contains alcohol, switch to an unleaded gasoline as recommended on page 55.Operation In Foreign CountriesIn order to comply with U.S. Federal Emissions Regulations, you must use unleaded fuels of the recommended octane rating. These fuels may not be available in other countries. If you intend taking your car outside the U.S. or Canada, write to the Acura Automobile Division (stating the year and model of your car) at the address below for information regarding modifications you may need to have done.Acura Automobile DivisionCustomer Relations Office.American Honda Motor Co., Inc.100 W. Alondra Blvd.,Gardena, CA 90247-0805。
麦克风使用说明书
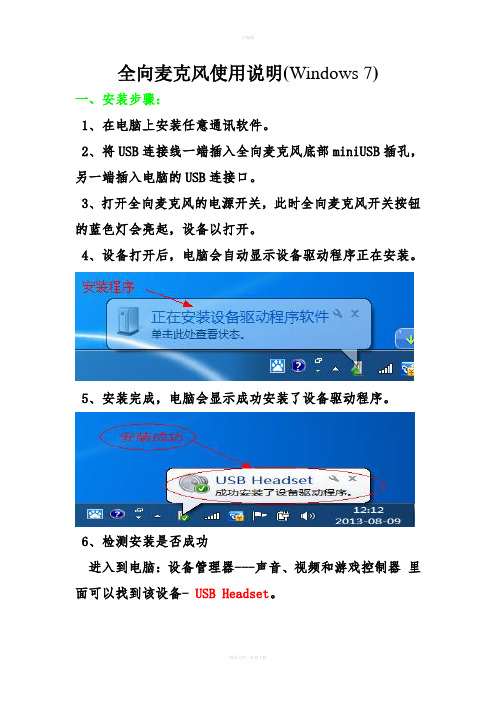
全向麦克风使用说明(Windows 7)
一、安装步骤:
1、在电脑上安装任意通讯软件。
2、将USB连接线一端插入全向麦克风底部miniUSB插孔,另一端插入电脑的USB连接口。
3、打开全向麦克风的电源开关,此时全向麦克风开关按钮的蓝色灯会亮起,设备以打开。
4、设备打开后,电脑会自动显示设备驱动程序正在安装。
5、安装完成,电脑会显示成功安装了设备驱动程序。
6、检测安装是否成功
进入到电脑:设备管理器---声音、视频和游戏控制器里面可以找到该设备- USB Headset。
二、设备启用及属性
1、设备启用
进入控制面板
下一步
下一步:启用USB Headset 设备扬声器,点击确定
下一步:启用录音,点击确定
2、属性
扬声器-音量设置
话筒音量设置
.。
麦克风说明书

T H E S O U N T H A T C R E A T E S L E G E N D SP/N 048524Princeton112Plus Type: PR 290Princeton 112 Plus Owner’s ManualThe Fender PRINCETON 112 Plus amplifier presents the player with the best value of any channel switching amplifier in its price class. Besides the basic complement of VOLUME, TREBLE and BASS controls in the NORMAL channel, the DRIVE channel offers completely independent tone controls including Fender’s exclusive “CONTOUR”control. This control provides midrange “tone shaping” that will continuously vary your sound from smooth and bluesy to a punchy honk, or all the way to 10 for the ultimate heavy metal overdrive! The DRIVE channel also incorporates Fender’s innovative 11 smooth clipping” circuit. This circuit concept is designed to simulate the way tubes clip and produce the overdrive distortion sound so popular with musicians today.In addition to convenient features like All Front Panel Mounted Controls and Jacks, the PRINCETON 112 Plus offers exclusiveexclusive multiplexed footswitch circuitry for selecting the DRIVE channel and for activating the lush internal reverb circuitry. Remote switching is accomplished by connecting the optional two-button footswitch to the FOOTSWITCH jack with a standard mono guitar or speaker cable. Also included are PREAMP OUTPUT and POWER AMP INPUT jacks that allow for a variety of external effects connection schemes and amplifier slaving configurations. The HEADPHONES jack automatically mutes the speaker in addition to driving Stereo or Mono headphones.The built in quality of a Fender amplifier is the result of over four decades of dedication in the combined skills of research and development by our engineers and musicians.That is why we proudly say ... FENDER, The Sound That Creates Legends.Standard Strat / General Purpose / Any Pick-Up CombinationAggression / Any Guitar / Bridge PickupStrat Blues / Neck or Middle Pickup -Chunk Rhythm / Bridge PickupEdge Tone / Any Guitar / Any PickupPrinceton 112 Plus Front Panel FunctionsM. REVERB - Adjusts the amount of reverb signal mixedwith the original dry signal for both the Normal and Drive Channels. N.FOOTSWITCH -Plug in connection for the optionalfootswitch to select between the Normal and Drive Channels and to switch the Reverb on and off. For proper operation of the footswitch, the DRIVE SELECT switch (item K) should be out. NOTE: Any good quality patch cable will work with the remote footswitch,however, a speaker grade cord is preferable to a coax guitar cable if it is availability.O.PREAMP OUT -This jack provides an unbalancedoutput signal from the preamp and can be used in conjunction with the POWER AMP IN jack (item P) as a patch point for effects units (i.e. as an effects loop). This signal can also be used to feed recording and sound reinforcement mixers. Additionally it can drive another amplifier as a slave by connecting a standard guitar cable from the PREAMP OUT jack of the master amplifier to the POWER AMP IN jack of the slave.P .POWER AMP IN -This unbalanced jack inputs signal directly to the power amp. It automatically disconnects the preamp signal when used. This is useful when using the effects loop option or when using the PRINCETON 112 Plus as a slave amplifier.Q.HEADPHONES -This jack provides an output tostandard stereo or mono headphones for private listening. NOTE: Use of this jack automatically disables the main speaker. CAUTION: Prolonged listening at high levels may be hazardous to yourhearing! This jack can also be used as an unbalanced line output, which is post effects loop, by using either a stereo or mono 1/4 inch phone plug connection.R.POWER SWITCH -This switch turns the AC power ONand OFF . When the switch is OFF the amplifier is completely shut down.LINE CORD -This amplifier is equipped with agrounding type supply cord to reduce the possibility of shock hazard. Be sure to connect it to a grounded receptacle. DO NOT ALTER THE AC PLUG.A.INPUT -A high impedance, high sensitivity plug-inconnection for instruments.B.VOLUME -Adjusts the overall loudness of the NormalChannel.C.NORMAL CHANNEL INDICATOR -This LED isilluminated when the Normal Channel is active.D.TREBLE -Adjusts the amount of boost or cut in thehigh frequency range of the Normal Channel.E.BASS -Adjusts the amount of boost or cut in the lowfrequency range of the Normal Channel.F . GAIN - Adjusts the amount of preamp amplification in theDrive Channel. Cleaner sound is achieved at lower gain settings; high gain settings will produce more sustain and distortion. This control works in conjunction with the DRIVE VOLUME control (item L) to set the overall loudness of the Drive Channel.G.DRIVE CHANNEL INDICATOR -This LED is illuminatedwhen the Drive Channel is active.H. CONTOUR - Adjusts the overall tone quality of the DriveChannel without affecting the signal level. Low CONTOUR settings will provide emphasis in the midrange frequencies whereas a higher setting will notch the midrange to produce sounds characteristics of most “metal” music.I.TREBLE -Adjusts the amount of boost or cut in the high frequency range of the Drive Channel.J.BASS -Adjusts the amount of boost or cut in the lowfrequency range of the Drive Channel.K. DRIVE SELECT - Activates the Drive Channel. NOTE:This switch disables the optional Channel Select Footswitch and the Normal Channel controls.L.VOLUME -Adjusts the overall loudness of the DriveChannel.Princeton 112 Plus SpecificationsPART NUMBER:120V VERSION: 22-6704230V VERSION: 22-6764INPUT IMPEDANCE:Greater than 1 MΩNOMINAL INPUT LEVEL:100 mvPOWER OUTPUT:65 Watts R. M.S.RATED LOAD IMPEDANCE:8ΩEFFECTS LOOP:Nominal Level--10 dBVOutput Impedance-1k.ΩInput Impedance 16kΩPOWER REQUIREMENTS:100V VERSION: 100V AC 50/60 Hz., 180W120V VERSION: 120V AC 60 Hz., 180W230V VERSION: 230V AC 50 Hz., 180W240V VERSION: 240V AC 50 Hz., 180WSPEAKER COMPLEMENT:One 8ΩSpecial Design 12” Speaker (P/N 025923)DIMENSIONS:Height: 16-1/2” (41.9cm)Width: 18-5/8” (47.3cm)Depth: 9” (22.9cm)WEIGHT:28 lbs. (12.7kg)ACCESSORIES:Remote Dual Footswitch -order Fender P/N 002-8122-000Amplifier Cover -order Fender P/N 002-9883-000 WARNING:NO USER SERVICEABLE PARTS INSIDE,REFER SERVICING TO QUALIFIEDPERSONNEL ONLY.DO NOT EXPOSE THIS EQUIPMENTTO RAIN OR MOISTURE.THIS EQUIPMENT MUST BE EARTHED.A PRODUCT OF:FENDER MUSICAL INSTRUMENTS CORP.,CORONA, CA 91720。
bbsa3无线话筒说明书
bbsa3无线话筒说明书
1、系统连接。
可调频率无线话筒通过无线话筒接收主机,接收其声音信号,接收主机使用音频线与功放设备连接,音响与功放之间通过音频线连接,各设备连接上市电插座,这样,一套简单的音响系统就连接完成了。
2、打开无线话筒和接收主机的电源开关,无线话筒与接收主机的显示屏分别显示当前各自的信道和频率。
正常情况下,有些无线话筒和接收主机的电源开关打开后,无线话筒接收主机通过红外扫描自动对频的功能,自动与无线话筒当前的频率和信道匹配。
3、如果无线话筒与无经话筒接收主机已自动对频,就不需要手动来调频了。
若无线话筒与无线接收主机没有自动对频,就需要通过手动调节无线话筒或无话筒接收主机来实现二者的对频。
无线话筒显示屏显示出来的频率是多少,就把无线话筒接收主机面板上的频率调节按钮把其频率调到多少,二者频率一致后,无线话筒接收主机就可以接收无线话筒传送过来的声音信号了。
4、无线话筒的调频工作已完成。
下来打开手持话筒盖子,将话筒的红外接收对准接收机,1-2秒之后就可同步成功,并可以开始使用了。
操作十分简单便捷。
- 1、下载文档前请自行甄别文档内容的完整性,平台不提供额外的编辑、内容补充、找答案等附加服务。
- 2、"仅部分预览"的文档,不可在线预览部分如存在完整性等问题,可反馈申请退款(可完整预览的文档不适用该条件!)。
- 3、如文档侵犯您的权益,请联系客服反馈,我们会尽快为您处理(人工客服工作时间:9:00-18:30)。
BBS麦克风GS(智能)功能说明
一、智能开启关闭方法
1.手持调频GS按键处的,长按GS键3秒就会开启或者关闭。
2. 手持调频没有GS键的,开机后,同时按住上键和下键两按键3秒,就会开启或者关闭智能功能。
二、智能功能开启判别
1.智能功能启动后,LCD屏会显示GS ON, 并且在屏幕上显示(GROUP、或显示CHANNEL)
2.关闭智能功能时,LCD会显示GS OFF,并且关闭屏幕上原有的指示。
(GROUP 或CHANNEL)
三、智能工作状态
1.开启智能功能后麦克风没有使用,3秒后静音,第10分钟后手持电源关闭。
四、智能唤醒功能
1.在进入智能3秒钟静音状态下,如麦克风遇到动作能立即恢复工作状态。
