安装配置centos下的GLPI系统
GLPI和OCSNG安装整合文档

测试整理者: LT环境: CentOS 6.0 ,其它环境应该大同小异一.安装OCSNG# tar zxvf OCSNG_UNIX_SERVER-2.0.1.tar.gz# cd OCSNG_UNIX_SERVER-2.0.1# ./setup.sh然后一路回车即可,比较可能出现的错误就是perl模块缺失.按下面的方法安装perl模块: ***************perl模块安装********************1.首先安装ExtUtils-MakeMaker:wget /CPAN/authors/id/M/MS/MSTROUT/ExtUtils-MakeMaker-6.59.tar.gz tar zxvf ExtUtils-MakeMaker-6.59.tar.gzperl Makefile.PLmake(如果提示: No rule to make target `/usr/lib/perl5/CORE/config.h,need by Makefile'的错误,是因为perl安装不完整导致,解决办法: yum install perl-devel)make install2.然后安装CPAN:[root@fc9 ]#wget /CPAN/authors/id/A/AN/ANDK/CPAN-1.9800.tar.gz [root@fc9 ]# tar -zxvf CPAN-1.9205.tar.gz[root@fc9 ]# cd CPAN-1.9205[root@fc9 CPAN-1.9205]# perl Makefile.PL[root@fc9 CPAN-1.9205]# make[root@fc9 CPAN-1.9205]# make install3. 最后终于可以安装缺失模块了:[root@fc9 CPAN-1.9205]#perl -MCPAN -e shell(这边如果提示:Can't locate Time/HiRes.pm in @INC…错误,安装yum install perl-Time-HiRes) cpan>install DBIcpan>install DBD::mysqlcpan>install Apache::DBIcpan>….(模块是否存在,可以用# perldoc [模块名] 检测)********************perl模块安装完成***************************其中有一个选项需注意:Where to copy Administration Server static files for PHP Web Console [/usr/share/ocsinventory-reports] ? /usr/local/apache2/htdocs/ 这里要输入的你web根目录路径看到如下信息,则安装完成:DON'T FORGET TO RESTART APACHE DAEMON !Enjoy OCS Inventory NG ;-)接着到DB里面创建一个默认的数据库ocsweb和ocs账号:mysql> create database ocsweb;mysql> grant all on ocsweb.* to 'ocs'@'%' identified by 'ocs';mysql> flush privileges;然后在地址栏输入http://yourserverip/ocsreports/install.php开始页面安装按自己的实际情况输入上面的内容,一般就左后HostName不一样,本机的话,直接localhost. OK,不出错的话,出现下面的页面:一.安装GLPI1.创建一个glpi数据库和glpi账号(因为测试,建库都比较随便,好习惯的话,要设置好数据库的默认编码等属性):mysql> create database glpi;mysql> grant all on glpi.* to 'glpi'@'%' identified by 'glpi';mysql> flush privileges;2.安装glpi:# tar zxvf glpi-0.80.4.tar.gz –C /usr/local/apache2/htdocs/# chown -R daemon.daemon /usr/local/apache2/htdocs/glpi/3.地址栏输入http://yourserverip/glpi开始配置,过程很简单,不做讲解了.4.完成后会提示你几种权限的账号, 输入账号glpi和用户名glpi 就可以登录管理员号了.二.O CSNG和GLPI的整合重点来了,那就是OCSNG和GLPI的整合.1.不管怎样,重启下apache2.选择设置—常规3.选择资产清单,激活OCSNG 选择是4.接着就自动进入了5.这边点击localhost ,进入如下画面,更新下数据库.(点击更新,在下面可以看到有没有连接成功)6.另外一些配置根据需要开启7.在工具->OCSNG选项中选择添加新计算机的导入.导入后就可以在计算机中查看了.。
Centos 6 安装部署GLPI资产管理软件
Centos 6.10 安装部署GLPI资产管理软件GLPI是法语Gestionnaire libre de parc informatique的缩写,是一款历史悠久的资产管理软件;GLPI提供功能全面的IT资源管理接口,可以用来建立数据库全面管理IT的电脑,显示器,服务器,打印机,网络设备,电话,甚至硒鼓和墨盒等。
提供Helpdesk用户支持平台;联系人,合同,合作商,以及文档的管理;提供资源预定,知识库的管理等功能。
•OS:CentOS 6.10 64bit•GLPI版本:9.3.3•MySQL版本:5.6一、关闭selinux和iptables[root@localhost ~]# service iptables stop 关闭防火墙[root@localhost ~]# chkconfig iptables off 开机禁用防火墙[root@localhost ~]# vim /etc/sysconfig/networkNETWORKING=yesHOSTNAME=GLPI[root@localhost ~]# getenforce 查看SElinux状态[root@localhost ~]# vi /etc/selinux/config 编辑将SELINUX=enforcing改为SELINUX=disabled 设置后需要重启才能生效二、配置yum源[root@glpi ~]# rpm -Uvh http://ftp.iij.ad.jp/pub/linux/fedora/epel/epel-release-latest-6.noarch.rpm [root@glpi ~]# rpm -Uvh /enterprise/remi-release-6.rpm三、安装PHP、安装Apache、一些依赖[root@glpi ~]# yum -y install php-imap php-ldap php-gd[root@glpi ~]# yum -y install --enablerepo=remi --enablerepo=remi-php56 php php-opcachephp-devel php-mbstring php-mcrypt php-mysqlnd php-phpuni-PHPUnit php-pecl-xdebugphp-pecl-xhprof3.安装Apache和一些依赖[root@glpi ~]# yum -y install gcc gcc-c++ gcc-g77 flex bison autoconf automake bzip2-develzlib-devel ncurses-devel libjpeg-devel libpng-devel libtiff-devel freetype-devel pam-devel openssl-devel libxml2-devel gettext-devel pcre-devel httpd四、安装并且启动mysq 5.6及初始化数据库信息[root@glpi ~]# rpm -ivh /yum/mysql-5.6-community/el/6/x86_64/mysql-community-release-el6-5.noarch.rpm[root@glpi ~]# yum install -y mysql-community-server[root@glpi ~]# service mysqld start[root@glpi ~]# /sbin/chkconfig mysqld on 或chkconfig --levels 235 mysqld on [root@glpi ~]# mysql_secure_installation 初始化数据库信息注意:在Enter current passwdord for root处,我们直接敲回车键即可。
glpi手册说明

1.前言本文档介绍了如何安装和使用GLPI应用程序。
这个指南的目的是给该应用程序作为GLPI用户和管理员指南的概述。
每个部分可以独立,即使逻辑的原因,我们建议彻底阅读本文档。
2.摘要安装和使用有效GLPI(免费的IT帮助台和资产管理)。
解决方案免费开源的IT资产管理和服务支持,GLPI是通过Web浏览器用来管理所有的资产管理问题,提供一个应用程序:硬件和软件组件的库存管理以及用户支持的管理。
3.入门GLPI开始使用GLPI。
你需要知道的一切开始使用GLPI本节介绍GLPI安装,使用GLPI和用例的快速启动。
安装GLPI3.1安装指南。
你需要的一切知道安装一个舒适和宁静的GLPI。
本节介绍GLPI的安装先决条件,然后GLPI的安装。
3.1.1先决条件先决条件安装GLPI。
GLPI使用了以下技术:PHP的语言的MySQL数据库的HTML网页CSS样式表CSV格式,PDF格式和SLK的出口数据AJAX的界面的动态元素SVG和PNG图像和图形3.1.1.1Web服务器的先决条件Web服务器的性能需要运行GLPI。
Web服务器的性能需要运行GLPI。
Web服务器GLPI需要一个Web服务器支持PHP,如:阿帕奇2或更高版本()微软的IIS()。
PHPGLPI需要PHP版本5.3或以上()。
需要的PHP扩展下面的PHP扩展所必需的应用程序的正常运行:JSON:格式支持JSON的结构化数据mbstring的:多字节字符链管理MySQL的:与数据库的连接会议:会议支持用户PHP扩展可选,但建议下面的扩展应用所需的可选功能:CLI:从自动操作命令行使用PHP卷曲:CAS认证DOMXML:CAS认证GD:图像生成IMAP:邮件服务器使用取票或用户身份验证LDAP:用于验证外部目录OpenSSL:已加密的通信PHP配置PHP配置文件(php.ini中)应修改为包含以下变量:memory_limit的=64M; //最小值file_uploads=上;max_execution_time仅仅=600; //可选,但不是强制性的的register_globals=关闭; //可选,但不是强制性的magic_quotes_sybase=关闭;session.auto_start=关闭;e_trans_sid=0; //可选,但不是强制性的3.1.1.2数据库服务器的先决条件数据库服务器的性能需要运行GLPI。
CTO版开源资产管理软件OCSBGLPI安装配置
开源资产管理软件OCS+GLPI安装配置一、环境与所需安装包系统环境Centos 5.5OCS中文包下载ServerClient (windows)GLPI安装包手动下载以下模块Digest-SHA1-2.02参考文章和使用到的网址提示* 需要注意的地方都用红色标出来了二、安装与配置配置LAMP环境#yum install -y httpd mysql mysql-server php-mysql#service mysqld start#service httpd start#chkconfig mysqld on#chkconfig httpd on安装Digest-SHA1-2.02# cd Digest-SHA1-2.02#perl Makefile.PL#make test#make#make installApache需要手动装的模块:Apache-DBI#cd Apache-DBI-1.06#perl Makefile.PL#make test#make#make install修改mysql root密码,#mysqladmin -u root password '123456'配置开发环境#yum install -y gcc gcc-c++ glibc-devel glibc-headers autoconf automake bzip2-devel zlib-devel ncurses-devel libjpeg-devel libpng-devel libtiff-devel freetype-devel pam-devel openssl-devel libXpm libX11 libxml2-devel gettext-devel pcre-devel mysql mysql-server httpd php php-devel php-gd php-pecl-zip php-mysql php-devel php-pear php-imap php-ldap php-odbc php-xml php-xmlrpc mod_perl配置Perl 环境#yum install –y perl mod_perl#yum install perl-XML-Simple perl-Compress-Zlib perl-DBI perl-DBD-MySQL perl-Net-IPprel需要手动安装的模块:SOAP-Lite 和XML-Entities#cd SOAP-Lite-0.69#perl Makefile.PL#make#make test#make install#cd XML-Entities#perl Makefile.PL#make#make test#make install安装OCSNG#sh setup.sh1,脚本一路回车即可,如有错误请检查所有Perl模块是否都安装好其中有一个选项需注意:Where to copy Administration Server static files for PHP Web Console[/usr/share/ocsinventory-reports] /var/www/html/ 回车 :选择web文件存放的路径, 2,提示如下信息证明已经安装成功DON'T FORGET TO RESTART APACHE DAEMON !Enjoy OCS Inventory NG ;-)3,在地址栏输入输入mysql用户密码如果本机的mysql地址是localhost,接下来OCS会创建OCSweb库创建好后回到页面用默认admin/admin进入.安装window客户端1.手工安装客户端运行OcsAgentSetup.exe 安装即可,服务器地址填入OCSNG服务器地址,端口默认是80, 之后在OCS中就可以看到客户端机器的数据了如没有看到数据,运行Ocs_contact.exe 手工采集安装OCSNG_LINUX_AGENT客户端安装所需要的模块#yum install -y perl-XML-Simple perl-Compress-Zlib perl-Net-IP perl-Net-SSLeay perl-Crypt-SSLeay perl-XML-SAX perl-XML-LibXML下载OCSNG_LINUX_AGENT# cd /opt/src/OCSNG_LINUX_AGENT_1.1.2# cp ipdiscover /usr/sbin/ipdisconver# perl Makefile.PL//若make的时候提示需要安装或升级某些模块,请根据提示安装升级。
CentOS下各种服务配置
CentOS服务配置校时服务:1、安装NTP校时包yum install ntp2、更新时间ntpdate (ntp网络授时组织的中国授时源)3、写入BIOShwclock –w4、查看是否更新成功date5、定时更新,将任务添加到crontab文件中vi /etc/crontab例如5分钟更新一次,添加如下内容:5* * * * root /sbin/ntpdate centos下使用如下命令手动同步服务器时间ntpdate 或ntpdate ntp.api.bz出现“the NTP socket is in use, exiting”错误。
造成该原因是系统ntpd服务器正在运行中,可以通过ps aux | grep ntpd 查看,如果还是要手动同步时间,就必须先停止该服务,命令为:service ntpd stop然后再通过ntpdate 即可手动同步时间了。
另外注意,如果想把它加入到crontab中,最好把ntpdate命令的完整路径带上,即/usr/sbin/ntpdate ,否则可能在某些版本的linux中不会被执行,同时用chkconfig把ntpd修改成不是自动运行的状态。
防火墙配置:1、开启端口(以80端口为例)vi /etc/sysconfig/iptables 打开配置文件加入如下语句:-A INPUT -p tcp -m state -state NEW -m tcp -dport 80 -j ACCEPTservice iptables restart 重启防火墙,修改完成2、关闭端口vi /etc/sysconfig/iptables 打开配置文件加入如下语句:-A INPUT -p tcp -m state -state NEW -m tcp -dport 80 -j DROP service iptables restart 重启防火墙,修改完成3、查看端口状态service iptables status4、关闭防火墙service iptables stop5、重启防火墙service iptables restart6、永久性关闭防火墙chkconfig iptables off永久性关闭后开启防火墙chkconfig iptables on一些软件的默认端口:ftp用到端口20 21ssh 端口22http端口80telnet端口23rsync端口873svn 端口3690pop3端口110smtp端口25dns端口53MySQL端口3306nfs端口111远程桌面3389Tomcat 8080PostGreSQL 5432Oracle 1521 5500关闭selinux:vi /etc/selinux/config#SELINUX=enforcing#SELINUXTYPE=targeted增加一句: SELINUX=disabled:wq #保存退出shutdown -r now #重启系统IP配置:配置文件在:/etc/sysconfig/network-scripts/ifcfg-eth0中(设置前先对此文件进行备份:cp ifcfg-eth0 ifcfg-eth0.bak)配置文件大致如下:DEVICE=eth0TYPE=EthernetUUID=29c83a68-14e2-4a4d-acb2-6f467273f465ONBOOT=yesNM_CONTROLLED=yesBOOTPROTO=noneHWADDR=00:0C:29:3B:19:8BIPADDR=192.168.50.64 IPPREFIX=16GATEW AY=192.168.0.254 网关DNS1=61.147.37.1 DNSDEFROUTE=yesIPV4_FAILURE_FATAL=yesIPV6INIT=noNAME="System eth0"设置完成后重启网卡:service network restartSSH服务:1、安装ssh服务:yum install openssh2、配置文件路径:/etc/ssh/sshd_configPermmitRootLogin yesUseDNS no3、启动服务:service sshd start设置程序开机自启动:1、把启动程序的命令添加到/etc/rc.d/rc.local文件中比如下面的是设置开机启动httpd:#!/bin/sh## This script will be executed *after* all the other init scripts.# You can put your own initialization stuff in here if you don't# want to do the full Sys V style init stuff./usr/local/apache/bin/apachectl starttouch /var/lock/subsys/local2、把写好的启动脚本添加到目录/etc/rc.d/init.d/,然后使用命令chkconfig设置开机启动。
GLPI+OCS-Inventory-NG资源管理系统安装手册
GLPI+OCS Inventory-NG资源管理系统2010年7月14日9:12GLPI+OCS Inventory NG资源管理系统 Linux环境:centos5.5(32bit)撰写人:uchen日期:2010/7/14 JinhuaBlog: 目录一:介绍二:OCS服务器端server安装三:OCS-web管理配置四:OCS客户端agent安装五:GLPI安装配置一:介绍GLPI是法语Gestionnaire libre de parc informatique的缩写,翻译过来应该是开源IT和资产管理软件,在法国等欧洲国家和地区应用广泛并取得了很好的用户口碑。
但在中国了解和应用的人并不多。
GLPI是一个信息资源管理器,提供功能全面的IT资源管理接口,你可以用它来建立数据库全面管理IT的电脑,显示器,服务器,打印机,网络设备,电话,甚至硒鼓和墨盒等。
提供Helpdesk用户支持平台;联系人,合同,合作商,以及文档的管理;提供资源预定,知识库的管理等功能。
OCS Inventory-NG(Open Computer and Software Inventory Next Generation)是一款开源的用于帮助网络或系统管理员来跟踪网络中计算机配置与软件安装情况的应用程序。
收集到硬件和系统信息请查看:/index.php?page=features。
二:服务器端安装1.安装lamp[root@ocs ~]# yum install -y gcc gcc-c++ glibc-devel glibc-headers autoconf automake bzip2-devel zlib-devel ncurses-devel libjpeg-devel libpng-devel libtiff-devel freetype-devel pam-devel openssl-devel libXpm libX11 libxml2-devel gettext-devel pcre-devel mysql mysql-server httpd php php-devel php-gd php-pecl-zip php-mysql php-devel php-pear php-imap php-ldap php-odbc php-xml php-xmlrpc mod_perl2.修改配置文件修改apache配置[root@ocs ~]# vi /etc/http/conf/httpd.conf# 添加如下二行AddType application/x-httpd-php .phpAddType application/x-httpd-php-source .phps# 定位至DirectoryIndex index.html修改为:DirectoryIndex index.php index.html[root@ocs ~]# chown -R apache.apache /var/www/html[root@ocs ~]# service httpd restart修改mysql配置[root@ocs ~]# mv /etc/f /etc/f.bak[root@ocs ~]# cp/usr/share/mysql/f /etc/f[root@ocs ~]# service mysqld start[root@ocs ~]# /usr/bin/mysqladmin -u root password 'passwd' //设置mysql数据库root用户密码为passwd3.安装所需要的模块o Perl module XML::Simple version 2.12 or higher.o Perl module Compress::Zlib version 1.33 or higher.o Perl module DBI version 1.40 or higher.o Perl module DBD::Mysql version 2.9004 or higher.o Perl module Apache::DBI version 0.93 or higher.o Perl module Net::IP version 1.21 or higher.o Perl module SOAP::Lite version 0.66 or higher (optional)o Perl module XML::Entities version 0.03or highero Perl module XML::SAX version 0.15 or highero Perl module Apache2::SOAP version 0.73 or higher[root@ocs ~]# yum install -y perl-XML-Simple perl-Compress-Zlib perl-DBI perl-DBD-MySQL perl-Apache-DBI perl-Net-IP perl-SOAP-Lite perl-XML-Entities perl-XML-SAX perl-Apache2-SOAP*:-)如果有个别模块不能用yum安装,请手动下载tar包安装。
Centos 搭建glpi
Centos 搭建 glpi https:///glpi-project/glpi/releases glpi 下载地址Installer GLPI sur Ubuntu 9.10 (Karmic Koala)Documentation ré digé e par Aurel Je pars du principequevotre Ubuntu (9.10) estconfiguré ecorrectement et fonctionnelle. Vousdevezaussi savoir que sous Ubuntu votre «utilisateur »a le droit de tout faire via la commande «sudo» (dansnotrecasajouter des packages). Avant de commencer l'installation, vé rifiezvos sources et sielles ne sont pas complè tes, ajouter universe et multiverse dans le fichier « /etc/apt/sources.list »en plus des sources main et restricted. Saisissez la commande apt-get update dansune console (vousdevrezê tre root ouutiliser la commande sudo) pour mettre à jour vos sources. aurel@ubuntu:~$ sudo apt-get update Password: ou root@ubunu:~# apt-get update Exemple de mon fichier sources.list : deb /ubuntu/ karmic main restricted multiverse universe deb /ubuntu/ karmic-updates main restricted multiverse universe deb /ubuntu karmic-security main restricted multiverse universe En faisantcetteopé ration, vousvousdonnez la possibilité d'installer de nouveaux packages. Vouspouvezvousré fé rer àl'article sur Ubuntu 5.04 sivouspré fé rez faire une installation graphique car je vaisvousexpliquer comment installer les packages en ligne decommande àl'aided'APTmais ne vousinquié tez pas c'est simple et rapide. Comme GLPI estprogramméen PHP ilestné cessaired'installer le module Apache 2 permettant de l'interpré ter.Installation des diffé rentsserveursApache & PHPPour installer Apache 2 et PHP ouvrezune console et connectezvous en root àl'aide de la commande sudo -s : aurel@ubuntu:~$ sudo -s Password: (saisissezvotre mot de passeutilisateur) Maintenantquevousê tesconnectéen root, vousallezpouvoireffectuer les opé rationssuivantes : root@ubuntu:~# apt-get install apache2 libapache2-mod-php5 php5 php5-mysqlphp5-gd Installer les dé pendancesrequises par cespaquetsafinqu'ilspuissentfonctionnercorrectement. apache2 :serveur web Apache en version 2 libapache2-mod-php5 : module permettant àApache 2 de comprendre le PHP php5 :Langage PHP php5-mysql, php5-ldap, php5-imap, php5-curl : module(s) permettant la prise en charge de divers é lé ments par PHP comme MySQL, IMAP, LDAP, etc.MySQLPour installer MySQL, installez le paquet «mysql-server-5.0 » . root@ubuntu:~# apt-get install mysql-server-5.0Configuration des diffé rents servicesVousn'avez pas besoin de configurer Apache, par contre, vousallez devoir cré er la base de donné es «glpidb »ainsiquel'utilisateur « glpiuser »qui en aura la gestion.Configurer MySQLA la fin de l'installation du serveur MYSQL, un é crandevraitapparaî treestvous demander de saisir un mot de passe pour le compte superutilisateur (root) MySQL. Entrez en un et saisissez le unedeuxiè mefois pour vé rifierquevousavezbiensaisideuxfois le mê me. Maintenantquevotreserveur MySQL estsé curisé(un minimum), cré ez la base de donné es «glpidb »ainsiquel'utilisateur «glpiuser »et donnez-lui les bons droits afinqu'ilpuissegé rercettemê me base. root@ubuntu:~# mysql -u root -p mysql> create database glpidb; mysql> grant all privileges on glpidb.* to glpiuser@localhost identified by 'glpi'; mysql> quit create database…⇒cré e la base glpidb ⇒cré el'utilisateurglpiuser et luidonnetousgrant all privileges…les droits sur la base glpidbConfigurer PHPMemory_limitVé rifier àl'aide de la commande ci-dessousque le mé moirealloué e aux scripts PHP est au moinsé gale à64 Mio : root@ubuntu:~# grep -imemory_limit /etc/php5/apache2/php.ini memory_limit = 16M ; Maximum amount of memory a script may consume (16MB) ; If this parameter is set to Off, then memory leaks will not be shown (on ; keeping them in memory. La valeur par dé fautest de 16 Mio ce qui n'est pas suffisant et vousdevrez modifier cettevaleur et la remplacer par 64 voir 128. Pourmodifier la valeuré diter le fichiersusmentionnéet remplacez 16 par la nouvelle valeur. N'oubliez pas qu'Apachedoitê treredé marrépour que les modifications soientprisent en compte: root@ubuntu:~# /etc/init.d/apache2 restartExtension MySQLPour quevotre PHP puisse se connecter et utiliserune base MySQL vé rifierbienque la ligne extension=mysql.so soitbiendé commenté edans le fichier /etc/php5/conf.d/mysql.ini: root@ubuntu:~# grep -i mysql.so /etc/php5/conf.d/mysql.ini extension=mysql.so Si la lignecontenant extension=mysql.so estcommenté ecommedansl'exe mple ci-dessus, é diter le fichier et enlevez le «# »en dé but de ligne. Pour queces modifications deviennent effectives, redé marrer le serveur Apache. root@ubuntu:~# /etc/init.d/apache2 restartInstallation et configuration de GLPICommencer par té lé charger la derniè re version stable de GLPI, pour se faire, cliquersurce lien. Unefoisdé compressé e, vousdevrez modifier le proprié taire des sous-ré pertoire et des fichiersinclusdans le ré pertoire glpi afinqu'ilspuissentê tremodifié s par votreserveur Apache. root@ubuntu:~# tar -xvzf glpi-0.72.3.tar.gz -C /var/www/ root@ubuntu:~# chown -R www-data /var/www/glpitar -xvzf … -C:cettecommandedé compressel'archive glpi dans leré pertoire /var/www.chown -R www-data /var/www/glpi: chown change le proprié taire duré pertoire glpi et de ses sous ré pertoires y compris les fichiers. Le nouveau proprié tairedevient www-data (Apache).Pour vous connecter àGLPI utiliservotrenavigateur et taper cette URL : http://localhost/glpi ou http://127.0.0.1 ce qui revient au mê meoualorsvotre IP locale (ex: http://192.168.0.1/glpi). Pour avoirune idé e de cequevouspouvez faire avec GLPI n'oubliez pas de consulter cette documentation.AidePour ce qui ne saurait pas quoi mettredans les champs suivants voilà un peud'aide… Mysql server:mettezlocalhostoualorsl'adresse de votreserveurde bases de donné es Mysql user:mettez le nom de l'utilisateur qui aura la gestion dela base (glpiuserdansl'exemple) Mysql pass:mettez le mot de passe de cemê meutilisateur(glpidansl'exemple) N'oubliezpasque par dé fautc'est le compte «glpi »qui estadministrateur et qu'ilestpré fé rable de le changer voir au minimum de changer de mot de passe (glpi par dé faut) pour des raisons é videntes de sé curité .。
ubuntu 12.10 GLPI最新版安装
Ubuntu 12.10 +GLPI 0.84.3(最新版)前言:ubuntu 12.0的修改版(第三次修改),望与大家一起共同进步!今天偶然需要用到GLPI,按照原来的步骤发现最后OCS的那个步骤没有了,决定再次做一份最新版,方便大家学习使用,目前的最新版2013.12.30说明:本文共分五步:1、安装支持模块2、安装OCS服务端(linux)3、安装GLPI4、安装OCS插件(最新更改,官方取消原有的OCS mode)5、测试一、安装支持模块老样子update 和upgrade# apt-get install libapache2-mod-php5# apt-get install php5-cli# apt-get install php5-common# apt-get install php5-cgi# apt-get install mysql-server //会要求输入数据库密码,用户是root(这个在下面会用到)# apt-get install php5-mysql# apt-get install build-essential# apt-get install libapache2-mod-perl2# apt-get install php5-gd# apt-get install libxml-simple-perl# apt-get install libcompress-raw-zlib-perl# apt-get install libdbi-perl# apt-get install libdbd-mysql-perl# apt-get install libapache-dbi-perl# apt-get install php-pear# apt-get install php5-dev# apt-get install libnet-ip-perl# apt-get install libsoap-lite-perl# apt-get install libyaml-perl# apt-get install libmysqlclient-dev(你也可以这样来#apt-get install libapache2-mod-php5 php5-cli php5-common ......)到此为止,模块安装结束二、安装OCSOCS服务端还是要安装1、下载OCS服务端#wget https:///136538282/OCSNG_UNIX_SERVER-2.1rc1.tar.gz //最新版服务端,你可以在linux中通过上述方式下载(https:///136709722/OCSNG-Windows-Agent-2.1RC1.zip//这是最新版windows客户端,你可以通过windows平台下载,测试的时候会用到)2、开始安装# tar zxvf OCSNG_UNIX_SERVER-2.1rc1.tar.gz //这是解压#cd OCSNG_UNIX_SERVER-2.1rc1 //进入目录#sh setup.sh //开始安装,会有一系列的选项,除了我下面列出来的其余的一律默认回车3、安装完成后,在windows浏览器下输入http://主机的IP/ocsreports/root /1234564、再次刷新浏览器,就可以看到下图,这个地方默认admin/admin5、安装完成到此OCS服务端(linux)安装完成三、安装GLPI下载地址:https:///attachments/download/1615/glpi-0.84.3.tar.gz #tar zxvf glpi-0.84.3.tar.gz //解压#mv glpi/ /var/www/#cd /var/www#chown –R www-data:www-data glpi在浏览器输入http://主机IP/glpi/1、选择中文(界面改观了一点)2、“接受条款”3、“安装”4、继续5、输入数据库的root密码(123456)6、选择ocsweb7、glpi/glpi帐号和密码,其它的可以进入查看到此GLPI安装完成四、安装OCS插件最新版的已经改成插件模式,下载插件,继续看下面/wiki/doku.php?id=en:plugins(官方插件安装教程)1、登录到GLPI系统,默认的密码上面已经告诉我们了2、“设置”—“插件”3、点击“查看插件目录”4、界面往下拉,找到“OCS INVENTORY NG”,点击它5、点击“TELECHARGER”6、下载它(这个界面难不成是redmine?)下载连接是:https:///attachments/download/1564/glpi-ocsinventoryng-1.0.2.tar.gz7、解压,剪切到“/var/www/glpi/plugins/”#tar zxvf glpi-ocsinventoryng-1.0.2.tar.gz#mv ocsinventoryng/ /var/www/glpi/plugins/8、再次刷新下浏览器,或者重新进入插件页就可以看到刚刚上传的插件,点击“安装”9、安装后,别忘记“启用”10、“启用”后也并非完事,因为还需要我们去配置它,看下图,多了“插件”这个标签,点击“OCS Inventory NG”11、感觉又回到熟悉的地方了,呵呵,填入下列内容(默认没有),小白注意了,如果你是按我的步骤来的,那么就是按我下面的这样写12、添加成功,点击“localhost”13、继续我们熟悉的步骤,我们要选择我们想看哪些东西,“插件”—“OCS Inventory NG”,“导入选项”和“常规信息”,自己选想要看哪些内容,在下图的地方,希望看到的选“是”就行了,别忘了页面最下放的“保存”14、之前说过的,如果客户端选择使用“导入选项”—“OCS词典”,那么将看不到客户端安装的软件,这个版本我没有试,各位自行尝试五、测试客户端下载页上面已经给出,下载后开始安装,也不多说废话了,只把需要改的步骤贴出来,看下图1、下图,填入服务器的IP(小红框),然后下一步2、按照自己的要求选1、//enable verbose log:启用详细日志2、//do not scan for installed software:不扫描已安装的软件3、//never ask for TAG:忽略标签4、//do not register service - agent must be launched manually:不注册服务- 代理必须手动启动5、//do not register systray applet to automatically start:不注册系统托盘小程序自动启动6、//immediately launch inventory:立刻启动库存3、让它直接运行吧4、“插件”—“OCS Inventory NG”,选择“添加新计算机的导入”5、下图中看到了我电脑的信息,点击“导入”(一开始不显示,我等了有一会,后来把服务端给重启了,再等了一会才看到,不知道是不是有检测时间间隔,还是其它问题,在这里就不追究了)6、导入成功7、“资产”—“电脑”8、上面的信息都有,很不错9、如果导入的电脑不在了,要去ocsreports页面把PC删除,在GLPI页面好像删不了,反正我是没有找到删除的方法。
centos操作系统安装配置详解
CentOS操作系统安装配置作者:传媒学院 08现教1班 2010-7-29一.系统环境部署及调整1.检查系统是否正常# more /var/log/messages(检查有无系统级错误信息)# dmesg (检查硬件设备是否有错误信息)# ifconfig(检查网卡设置是否正确)# ping (检查网络是否正常)2.关闭不需要的服务# ntsysv以下仅列出需要启动的服务,未列出的服务一律关闭:atdcrondirqbalancemicrocode_ctlnetworksendmailsshdsyslog3.重新启动系统# init 64.使用yum程序安装所需软件包(以下为标准的RPM包名称)# yum install ntp vim-enhanced gcc gcc-c++ flex bison autoconf automake bzip2-devel ncurses-devel libjpeg-devel libpng-devel libtiff-devel freetype-devel pam-devel kernel5.定时校正服务器时钟,定时与中国国家授时中心授时服务器同步# crontab -e加入一行:*/30 * * * * ntpdate 210.72.145.446.源代码编译安装所需包(1) GD2# cd /usr/local/src# wget /releases/oldreleases/gd-2.0.35.tar.gz# tar xzvf gd-2.0.35.tar.gz# cd gd-2.0.35# ./configure --prefix=/usr/local/gd2# make 编译# make install 这是安装(2) LibXML2# cd /usr/local/src#wget /pub/gnome/sources/libxml2/2.6/libxml2-2.6.30.tar.gz # tar xzvf libxml2-2.6.30.tar.gz# cd libxml2-2.6.30# ./configure --prefix=/usr/local/libxml2# make# make install(3) Apache 日志截断程序# cd /usr/local/src# wget /download/cronolog-1.6.2.tar.gz# tar xzvf cronolog-1.6.2.tar.gz# cd cronolog-1.6.2# ./configure –prefix=/usr/local/cronolog# make# make install8.升级OpenSSL和OpenSSH# cd /usr/local/src# wget /source/openssl-0.9.8e.tar.gz# wget /openssh/portable/openssh-4.6p1.tar.gz # tar xzvf openssl-0.9.8e.tar.gz# cd openssl-0.9.8e# ./config --prefix=/usr/local/openssl# make# make test# make install# cd ..# tar xzvf openssh-4.6p1.tar.gz# cd openssh-4.6p1# ./configure\"--prefix=/usr" \"--with-pam" \"--with-zlib" \"--sysconfdir=/etc/ssh" \"--with-ssl-dir=/usr/local/openssl" \"--with-md5-passwords"# make# make install(1)禁用 SSH V1 协议找到:#Protocol 2,1改为:Protocol 2(2)禁止root直接登录此处先建立一个普通系统用户:# useradd username# passwd username找到:#PermitRootLogin yes改为:PermitRootLogin no(3)禁用服务器端GSSAPI找到以下两行,并将它们注释:GSSAPIAuthentication yesGSSAPICleanupCredentials yes(4)禁用 DNS 名称解析找到:#UseDNS yeas改为:UseDNS no(5)禁用客户端 GSSAPI# vi /etc/ssh/ssh_config找到:GSSAPIAuthentication yes将这行注释掉。
Centos环境下Postgresql安装配置及环境变量配置技巧
Centos环境下Postgresql安装配置及环境变量配置技巧⽬录1、yum安装2、从源码安装(推荐)3、配置数据库1、yum安装进去postgresql官⽹下载界⾯选择操作系统选择系统版本,平台信息等会出现具体的安装步骤拷贝脚本,⾃动执⾏并创建了数据库实例上⾯的创建数据库实例sudo /usr/pgsql-13/bin/postgresql-13-setup initdb允许开机⾃启动postgresql数据库sudo systemctl enable postgresql-13操作系统的服务管理命令启动数据库sudo systemctl start postgresql-13停⽌数据库命令sudo systemctl stop postgresql-13查看数据库状态命令sudo systemctl status postgresql-13可选安装contrib包,contrib包中包含了⼀些插件和⼯具 yum install postgresql12-contrib切换⽤户为postgres su - postgres连接数据库 psql推出数据库 \q2、从源码安装(推荐)2、选择合适的版本3、选择合适的压缩包下载,⼀般来说bz2 格式的压缩包体积较⼩3、编译以及安装4、解压安装包tar -xvf postgresql-13.tar.gz5、进⼊⽬录cd postgresql-136、编译安装命令./configure --prefix=/usr/local/pgsql13 --with-perl --with-pythonmakemake install命令解析--prefix=/usr/local/pgsq13 确定其安装⽬录--with-perl 加上改选项可以使⽤perl语法的PL/Perl 过程语⾔来编写⾃定义函数。
使⽤该选项需要先安装perl包,在ubantu或者Debian下名称为libperl-dev--with-python 加上改选项可以使⽤python语法的Py/Python 过程语⾔来编写⾃定义函数。
OCS Inventory NG and GLPI installation 说明书
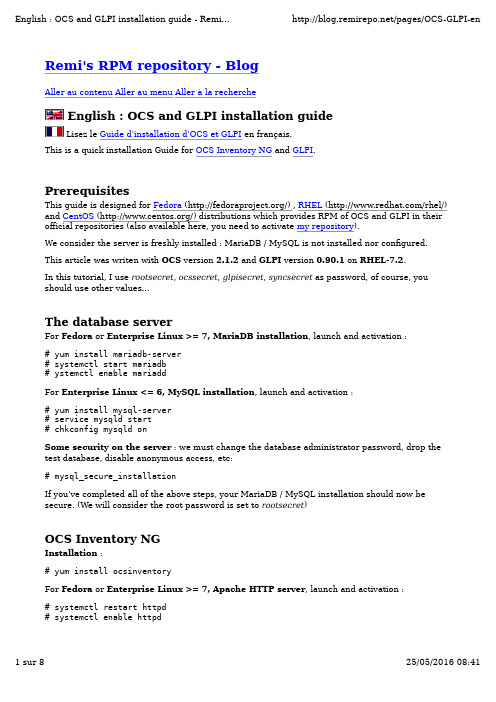
For Enterprise Linux <= 6, Apache HTTP server, launch and activation :# service httpd restart# chkconfig httpd onConfiguration and database schema creation :Connect to http://localhost/ocsreports/install.php (http://localhost/ocsreports/install.php) (must be modified if you are connected to the server from another computer).Step 1 : enter the MariaDB / MySQL administrator login and password, then Send.Step 2 : schema creation. If all is ok (must be true using the RPM), clic on SendStep 3 : installation final step. write somewhere the account created (admin/admin) and clic on Click here to enter OCS-NG GUI.Step 4 : choose your language (using the flag on the right top)Step 5 : connect to the application (admin/admin)Congratulations. You have OCS installed !Some required configuration options : open the pipe wrench / Configuration / Config and then the Server tabs:LOGLEVEL = On (really usefull when you encounter an issue)PROLOG_FREQ = 24 (time between 2 inventory)AUTO_DUPLICATE_LVL = crtieria used to detect that 2 computers are the same (I useModel + Serial + Mac Address).TRACE_DELETED = On (required by GLPI).SESSION_VALIDITY_TIME = 600.Changing the application admin password is also really a good idea (don't forget it) : use the "key" icon on the right top.During the installation step a new database ocsweb is created and a MariaDB / MySQL account ocs with a default password = ocs, which is really not secure.We need to change the MariaDB / MySQL password :# mysql -uroot -prootsecretMariaDB> UPDATE er SET Password = PASSWORD('ocssecret') WHERE User = 'ocs'; MariaDB> FLUSH PRIVILEGES;MariaDB> exitAnd to update the configuration file with this new password :In the /etc/httpd/conf.d/ocsinventory-server.conf file (arround line 29) :PerlSetVar OCS_DB_PWD ocssecretIn the /etc/ocsinventory/ocsinventory-reports/dbconfig.inc.php file :$_SESSION["PSWD_BASE"]="ocssecret"Tell apache to reload his configuration for perl module to read the new parameter value:# service httpd reloadFirst computerTo test the inventory feature, we are going to install the inventory agent on a first computer. Of course it will be on our server.# yum install ocsinventory-agentNow, send the inventory:# ocsinventory-agent --nolocal --server=localhostIf all is ok, your server should be in the computer list in OCS.You can enable the automatic inventory of this computer, edit the /etc/sysconfig/ocsinventory-agent:OCSMODE[0]=cronOCSSERVER[0]=http://localhost/ocsinventoryGLPITo start, we are going to create the database schema and the MariaDB / MySQL accounts for GLPI. Using the administrator (root) account is really a bad idea. The glpi account will be used by the application, and the synchro account for the synchronizaton process (to read the ocsweb database from glpi with only minimum rights).N.B. in this example, the synchro user rights are reduce to the minimal. In the case you want to use some special plugins (uninstall p.e.), full right are required.# mysql -uroot -prootsecretMariaDB> CREATE USER 'glpi'@'%' IDENTIFIED BY 'glpisecret';MariaDB> GRANT USAGE ON *.* TO 'glpi'@'%' IDENTIFIED BY 'glpisecret';MariaDB> CREATE DATABASE IF NOT EXISTS `glpi` ;MariaDB> GRANT ALL PRIVILEGES ON `glpi`.* TO 'glpi'@'%';MariaDB> CREATE USER 'synchro'@'%' IDENTIFIED BY 'syncsecret';MariaDB> GRANT USAGE ON *.* TO 'synchro'@'%' IDENTIFIED BY 'syncsecret';MariaDB> GRANT SELECT ON `ocsweb`.* TO 'synchro'@'%';MariaDB> GRANT DELETE ON `ocsweb`.`deleted_equiv` TO 'synchro'@'%';MariaDB> GRANT UPDATE (`CHECKSUM`) ON `ocsweb`.`hardware` TO 'synchro'@'%'; MariaDB> FLUSH PRIVILEGES;MariaDB> exitInstallation :# yum install glpi# service httpd reloadDatabase schema creation and configurationConnect to the application : http://localhost/glpi/ (http://localhost/glpi/) it will launch theconfiguration wizard.select your language and : OK.read and accept the license (GPL) : Continuestart the installation : Installationstep 0 : prerequisites check (must be ok with the RPM, including SELinux) : Continuestep 1 : enter the database connexion parameters (localhost / glpi / glpisecret) : Continue step 2 : select the glpi database and Continuestep 3 : write somewhere the adminstrateur login and password (glpi/glpi) et Continuestep 4 : also write the other account informations : Use GLPIAuthentificate yourself with the new account : glpi/glpiCongratulations (again) : you have GLPI installed !SecurityBy default, after installation, access to the installation assistant is only allowed from the computer where GLPI is installed. If this message is displayed:Restricted area.Only local access allowed.Check your configuration or contact your administrator.you have to allow access from your computer in the /etc/httpd/conf.d/glpi.conf (see the comments).Remind to keep this secured.OCSNG mode configurationOCS Inventory NG plugin activation :Menu Setup / PluginsOCS Inventory NG => InstallOCS Inventory NG => EnableServer Configuration :Menu Tools / OCS Inventory NGOpen configuration (monkey wrench icon) => OCSNG ServersCreate a new server (+ icon)Name: My OCS ServerOCSweb host: localhostName of the OCS database: ocswebOCSweb database user: synchroOCSweb user password: syncsecretActive: yesSynchronisation method: standardDatabase in UTF8: yesAddOn the test tab:You must get the Connection to OCS database successful message.Now, we must configure the informations that will be imported from OCS to GLPI. Here is a few examples :Import options tab:Monitors : Unit import on Serial numberLogiciels : Unit ImportUse the software dictionary of OCS: NoNumber of computers to synchronize using the cron: 0 (we are going to use anothersolution)General informations tab:Computers : Yes for all that you are interested by.Components : Yes for what you want.etc, etc (you should notice that a lot of behavior are configurable)PostCheck :Menu Tools / OCS Inventory NGImport new computersIn the displayed list, you should see your server (on which we have installed the agent). You can import it and check retrieved information.Automatic OCSNG synchronization - standard modeMenu Setup / Automatic actionsOpen the ocsng actionRun frequency: 5 minutes (a small value is prefered, to get quickly new inventories andavoid a huge waiting queue)Status: scheduledRun mode: CLI (managed by system, already configured by the RPM installation)SaveAutomatic OCSNG synchronization - standard modeI advice against this mode, which give no benefit on standard mode (the old optimisation is broken since GLPI 0.85)ConclusionWe have configured one of the best inventory and asset management solution in a few minutes (probably the best, as it is OpenSource (/wiki/Opensource) )You can now continue to deploy the inventory agent on your other computers, it's available for most OS.Take also some time to read the official documentation to be able to tune your configuration to fully suite your need:OCS Documentation (/)GLPI Documentation (/wiki/doku.php?id=en:welcome)Don't forget than OpenSource (/wiki/Opensource) projects exists thanks to their community and to their users contributions. So when you'll have seen what OCS and GLPI can do for you, don't forget to do something for this projects:OCS NG donations (/index.php?page=donate)Contribute to GLPI (/spip.php?article52&lang=en) Comments and supportOf course, comments on this guide are welcome and could be posted here. For support questions, please, use each application official forums:OCS Forums (/)GLPI Forums (/forum/)Forum - Les RPM de Remi (/) for questions about this tutorial or the RPM.Don't forget to read and to respect forum usage rules.Publié le vendredi 24 octobre 2008 par RemiCommentaires1. Le jeudi 5 février 2009, 15:16 par adrianexcellent documentation, thanks alot2. Le jeudi 26 février 2009, 09:40 par simVery good documentation because it has some focus on secure configuration of ocs and glpi!But I fail in the glpi setup when I want to connect to the Mysql db with the glpi user I set up in the console. It allways says access denied. What am I doing wrong, any clue?3. Le mercredi 25 mars 2009, 19:30 par Marc SzaboHi Remi,This is a great site, a lot of good information.I'm in the process of evaluating this product, and I've been able to successfully install the OCS Inventory Server and some ocsinventory-agents for Linux and so far so good. I've been able to use your repository to accomplish this without installing any compilers.But, now I would like to install the ocsinventory-agent on some Solaris systems. We don't want to install compillers on these systems either (they're on the DMZ). Do you have any Solaris *.pkg files already created somewhere that I can just pull them down, for Solaris 8, Solaris 9 and Solaris 10 SPARC systems?Thank you in advance for your help.Marc.4. Le mercredi 25 mars 2009, 19:38 par Remi (/)@Marc Szabo you probably should ask on the OCS Forum.I know than Gonéri (the main agent maintainer) have some Aix and Solaris standalone build(but finding buld machine is quiet difficult)And you can find there information about building such a standalone agent you can deploy on your DMZ servers.+5. Le mardi 28 avril 2009, 09:37 par Michael (/)This is really really very useful!6. Le mercredi 23 septembre 2009, 11:19 par TalindocheFirst of all thx for the detailed documentation.Just one additional stuff:If the DB is not the localhost, but a different serverChange on: ocsinventory-server.confPerlSetEnv OCS_DB_HOST <db host name>RegardsTalindo7. Le samedi 7 novembre 2009, 17:56 par Rick Melendez (.mx)Hello RemiI was implement this system on ubuntu and other version of centos so we wasn´t anyproblem with you repo (a lot of tanks), now i use a virtual host on apache on my new server, but puts in the client this error :HTTP SERVER: Creating CInternetSession to get inventory parameters...OK.HTTP SERVER: Getting HTTP Connection to server xxx.xxx.xxx.xxx port 80 using noauthentication...OK.HTTP SERVER: Sending prolog query...ERROR: HTTP status code 500HTTP SERVER: Closing HTTP connectionWMI Disconnect: Disconnected from WMI namespace.Writing last inventory state not required.Execution duration: 00:00:01.Really i dont know why i cant send the query to the data base but i tink the possible cause is the configuration of virtual host. I really apreciate you help if you can.Tanks for you time.8. Le samedi 7 novembre 2009, 18:00 par Remi (/)@Rick, comment are not the best place for such question/support, please use ForumsinsteadOCS Forums (/)Forums - Les RPM de Remi (/) for questions about thistutorial or the RPM.+P.S. I will remove this post in a few days...9. Le lundi 9 novembre 2009, 15:51 par Rick Melendez (.mx)Hey a lots of tanks by this guide, i was response today my self about my question you need only leave permission to files to write.TANKS Again!!10. Le dimanche 22 novembre 2009, 18:31 par Jens (http://www.hagel-it.de)Thanks for this. I just tried to use the plugin. It was confusing that there is a built-in ocsimport but one should use the plugin. So thanks for the wiiting.11. Le mardi 19 janvier 2010, 23:30 par Vox ()Your documentation and rpms rock, saved me bunches of hours of messing with stuff, thanks lots :)12. Le vendredi 26 février 2010, 10:57 par kartook (http://www.kartook)I am kind a new to this .But i like to use in my environment .We have server but i am notinstalled that .I love to learn how to install the OCS and Glpi and all .my technical background pretty muchon windows not in linux .HeyCan you update this things like just i need to copy and paste the words in to my browser.Also like to have one Video how to install and how to configure MySql and .if you share the video that would be great to learn like me fellowThanks in advanceK~13. Le vendredi 26 février 2010, 12:35 par kartook (http://www.kartook)GUys i will upload the installation Vodei as soon as i can .iam done first installation ..for you all i will provide the Video ..Hey Author you rock mankeep in touch14. Le mercredi 7 juillet 2010, 23:12 par tuxloveryour guide is very appreciated. Grazie!15. Le mardi 10 août 2010, 14:04 par XaximI stopped at step: yum install ocsinventory.The result was as follows:yum install ocsinventoryLoaded pugins: fastestmirrorLoading mirror speeds from cached hostfileSetting up Install ProcessNo package ocsinventory available.Nothing to doAnd then I get the prompt back again...What is going wrong?Thanks in advance.16. Le mardi 10 août 2010, 14:15 par Remi (/)@Xaxim : restart reading.Especially the first line of "Prerequisites"+17. Le lundi 14 mars 2011, 13:24 par Oliver (http://www.flexbyte.de)Saved me a lot of time. Many Thanks!Propulsé par Dotclear。
centos双线双IP全配置(图解)
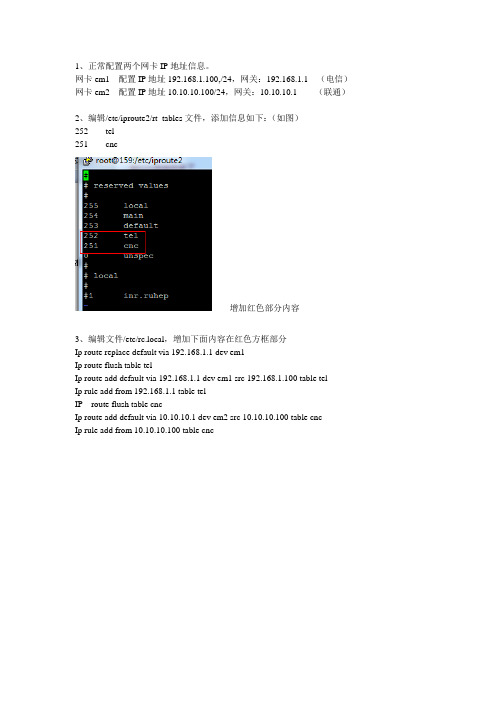
1、正常配置两个网卡IP地址信息。
网卡em1 配置IP地址192.168.1.100,/24,网关:192.168.1.1 (电信)网卡em2 配置IP地址10.10.10.100/24,网关:10.10.10.1 (联通)
2、编辑/etc/iproute2/rt_tables文件,添加信息如下:(如图)
252 tel
251 cnc
增加红色部分内容
3、编辑文件/etc/rc.local,增加下面内容在红色方框部分
Ip route replace default via 192.168.1.1 dev em1
Ip route flush table tel
Ip route add default via 192.168.1.1 dev em1 src 192.168.1.100 table tel
Ip rule add from 192.168.1.1 table tel
IP route flush table cnc
Ip route add default via 10.10.10.1 dev em2 src 10.10.10.100 table cnc
Ip rule add from 10.10.10.100 table cnc
(绿色涂抹是网关,蓝色涂抹是IP地址)
4、reboot,重启电脑即可。
注:有的时候这样做了,可能只能从服务器ping外网是可以通的,但是外网ping服务器不通,或者ssh不能连接服务器,这时候要关闭selinux即可。
GLPI资产管理系统
GLPI资产管理系统系统:Linux5.5(32bit)IP:10.80.11.205撰写人:hx10日期:2010/7/5 hangzhouBlog: /hx101.安装lampyum -y install gccgcc-c++ gcc-g77 flex bison autoconfautomake bzip2-develzlib-develncurses-devellibjpeg-devellibpng-devellibtiff-develfreetype-devel pam-developenssl-devel libxml2-devel gettext-develpcre-develmysqlmysql-server httpdphpphp-mysqlphp-gdphp-imapphp-ldapphp-odbcphp-pear php-xml php-xmlrpc2.设置mysql的root密码servicemysqld start/usr/bin/mysql -uroot -pmysql>use mysql;mysql>update user set password=PASSWORD("user123")where user="root"; //set password of user "root" with ""mysql>create database glpi;mysql>GRANT SELECT,INSERT,UPDATE,DELETE,CREATE,DROP ON glpi.* TO'glpiuser'@'localhost' IDENTIFIED BY 'zjhcsoft';mysql>flush privileges;mysql>\q3.安装json和glpicd /usr/local/srcwget https:///attachments/download/597/glpi-0.72.4.tar.gz tar -zxvf glpi-0.72.4.tar.gz -C /var/www/htmlchown -R apache:apache /var/www/htmlcd /usr/local/srcpecl download jsonpear install json-1.2.1.tgz然后编辑配置文件vim /etc/php.d/json.ini; php-json package - /package/json extension=json.so重启apache服务servicehttpd restart测试json是否安装成功# php -r 'var_dump(function_exists("json_encode"));' 如果返回信息为bool(true)说明安装成功。
CTO版开源资产管理软件OCSBGLPI安装配置

C T O版开源资产管理软件O C S B G L P I安装配置Revised on July 13, 2021 at 16:25 pm开源资产管理软件OCS+GLPI安装配置一、环境与所需安装包系统环境Centos 5.5OCS中文包下载ServerClient windowsGLPI安装包手动下载以下模块Digest-SHA1-2.02参考文章和使用到的网址提示* 需要注意的地方都用红色标出来了二、安装与配置配置LAMP环境#yum install -y httpd mysql mysql-server php-mysql#service mysqld start#service httpd start#chkconfig mysqld on#chkconfig httpd on安装Digest-SHA1-2.02# cd Digest-SHA1-2.02#perl Makefile.PL#make test#make#make installApache需要手动装的模块:Apache-DBI#cd Apache-DBI-1.06#perl Makefile.PL#make test#make#make install修改mysql root密码;#mysqladmin -u root password '123456'配置开发环境#yum install -y gcc gcc-c++ glibc-devel glibc-headers autoconf automake bzip2-devel zlib-devel ncurses-devel libjpeg-devel libpng-devel libtiff-devel freetype-devel pam-devel openssl-devel libXpm libX11 libxml2-devel gettext-devel pcre-devel mysql mysql-server httpd php php-devel php-gd php-pecl-zip php-mysql php-devel php-pear php-imap php-ldap php-odbc php-xml php-xmlrpc mod_perl配置Perl 环境#yum install –y perl mod_perl#yum install perl-XML-Simple perl-Compress-Zlib perl-DBI perl-DBD-MySQL perl-Net-IPprel需要手动安装的模块:SOAP-Lite 和XML-Entities#cd SOAP-Lite-0.69#perl Makefile.PL#make#make test#make install#cd XML-Entities#perl Makefile.PL#make#make test#make install安装OCSNG#sh setup.sh1;脚本一路回车即可;如有错误请检查所有Perl模块是否都安装好其中有一个选项需注意:Where to copy Administration Server static files for PHP Web Console /usr/share/ocsinventory-reports /var//html/ 回车 :选择web文件存放的路径;2;提示如下信息证明已经安装成功DON'T FORGET TO RESTART APACHE DAEMONEnjoy OCS Inventory NG ;-3;在地址栏输入输入mysql用户密码如果本机的mysql地址是localhost;接下来OCS会创建OCSweb库创建好后回到页面用默认admin/admin进入.安装window客户端1.手工安装客户端运行OcsAgentSetup.exe 安装即可;服务器地址填入OCSNG服务器地址;端口默认是80; 之后在OCS中就可以看到客户端机器的数据了如没有看到数据;运行Ocs_contact.exe 手工采集安装OCSNG_LINUX_AGENT客户端安装所需要的模块#yum install -y perl-XML-Simple perl-Compress-Zlib perl-Net-IP perl-Net-SSLeay perl-Crypt-SSLeay perl-XML-SAX perl-XML-LibXML下载OCSNG_LINUX_AGENT# cd /opt/src/OCSNG_LINUX_AGENT_1.1.2# cp ipdiscover /usr/sbin/ipdisconver# perl Makefile.PL//若make的时候提示需要安装或升级某些模块;请根据提示安装升级..# make# make installDo you want to configure the agentPlease enter 'y' or 'n'> y 直接回车Where do you want to write the configuration file0 -> /etc/ocsinventory1 -> /usr/local/etc/ocsinventory2 -> /etc/ocsinventory-agent> 2 //选择配置文件存放目录Do you want to create the directory /etc/ocsinventory-agentPlease enter 'y' or 'n'> y 直接回车info The config file will be written in /etc/ocsinventory/ocsinventory-agent.cfg;输入ocsinventory-server的ip地址Do you need credential for the server You probably don'tPlease enter 'y' or 'n'> n 直接回车 //是否需要证书Do you want to apply an administrative tag on this machinePlease enter 'y' or 'n'> y 直接回车 //该服务器是否使用管理标签tag> Nginx-web //这个会显示在web管理控制界面中ocsinventory agent presents: /usr/bin/ocsinventory-agentDo yo want to install the cron task in /etc/cron.dPlease enter 'y' or 'n'> y 直接回车 //是否添加计划任务Where do you want the agent to store its files You probably don't need to change it> /var/lib/ocsinventory-agent 直接回车//选择存放agent文件目录;请根据自己的情况做修改;我们这里选择默认;即存放在/var/lib/ocsinventory-agent目录下Do you want to create the /var/lib/ocsinventory-agent directoryPlease enter 'y' or 'n'> y 直接回车//是否想要创建/var/lib/ocsinventory-agent目录;当然先y;直接回车New settings written Thank you for using OCS InventoryShould I remove the old linux_agentPlease enter 'y' or 'n'> n 直接回车//是否要删除旧版本的linux客户端代理;我们这里选择默认;直接回车Do you want to use OCS-Inventory software deployment featurePlease enter 'y' or 'n'> y 直接回车//是否使用软件部署功能;选择y;直接回车Do you want to send an inventory of this machinePlease enter 'y' or 'n'> y 直接回车//是否是发送这台计算机的清单;选择y;直接回车info Accountinfo file doesn't exist. I create an empty one.-> Success//当你看到这里;恭喜你;你已经成功的将该计算机的清单发送到服务器:-再登录web管理界面;可以查看到;以下信息:用红框标出来的;就是刚刚安装agent的客户端;看到tag一栏是显示Nginx-web就是安装过程中的tag> 这里输入的标签内容..配置OCS+GLPI准备2个包: json和php-mbstring安装:#yum install php-mbstringcd json-1.2.1phpize./configuremakemake installecho "extension=json.so" >> /etc/php.ini # 这一句根据自己的环境执行#service httpd restart安装GLPI# cp -a glpi /var//html/# chown -R apache:apache /var//html/glpi/让GLPI支持中文配置GLPI:在serverip/glpi 进行配置1;环境检测2;选择语言3;输入数据库帐号4;创建新的glpi数据库5;完成默认的管理用户为glpi/glpi设置GLPI的OCS方式1.点击 ->设定->常规->存货清单选择激活OCSNG方式 :是2.进入 ->设定->OCSNG方式->localhost中;在通用选项中填入mysql帐号3.在导入选项中都开启;其中use the OCSNG software dictionary 不要开启;会导致不能同步OCS软件库;机器上看不到软件4.在 General informations 中开启所有选项5.在 Link里开启所有选项6.在工具->OCSNG选项中选择添加新计算机的导入.6.配置域账号登录7.设置AD。
最简部署OCS Inventory NG+GLPI

启 用 Remi 源 配 置 文 件 分 别 修 改 这 几 个 配 置 文 件 :
Vi /etc/yum.repos.d/ remi.repo 修 改 remi、remi— php55、remi—php56模 块
vi /etc/yum.repos. d/remi—php72.repo 修 改 remi—php72模 块
关 闭 “请 停 止 防 火 墙 开 机 自 启 动 ”:
s Y s t e in c t 1 s t o P firewa1 1d.service
sYstemc tl d i sab 1 e firewal 1d.service
重 启 下服 务 器 添 加 “remi” 和 “ocsng yum仓 库 ” 安 装 最 新 的 Remi源 自动 安 装 文 件 : h t t p :/ / r P m s . f am i 1 1 e c o 1 1 e t.c o m/ e n t e r p r i s e /r e m i—
提 供 Helpdesk 户 支 持 平
台 ;联 系 人 、合 同 、合 作 商 ,以
及 文 档 的 管 理 ;提 供 资 源 预 定 、知 识 库 的 管 理 等 功 能 。
图 1“软 件 ”选 择 “服 务 器 和 图 形 界 面 ”
、w' ̄.36qm曲t ci”1]2m 薹 57
:
I nv en t O rY — j跟 踪 网络 中计 算机 配 置与 软 件 安 装 情 况 ,GLPI是 开 源 IT和 安 装 LAMP
i
N G ( O P e n 资 产 管 理 软 件 ,本 丈 则 基 于 两 者 提 供 了一 种 非 常 简单 高效 (1 i n u x +
CentOS.系统安装配置图解教程详细图文
CentOS 系统安装配置图解教程(详细图文)点评:截止目前CentOS 最新版本为CentOS ,下面介绍CentOS 的具体安装配置过程,需要的朋友可以参考下。
说明:截止目前CentOS 最新版本为CentOS ,下面介绍CentOS 的具体安装配置过程服务器相关设置如下:操作系统:CentOS 64位DNS:备注:CentOS 系统镜像有32位和64位两个版本,生产服务器如果是大内存(4G以上内存)建议安装64位版本附:CentOS 下载地址32位:64位:1、CentOS 系统镜像有两个,安装系统只用到第一个镜,即(32位)或者(64位),第二个镜像是系统自带软件安装包;2、安装CentOS 系统的计算机内存必须等于或者大于628M(最小内存628M),才能启用图形安装模式;3、CentOS 文本安装模式不支持自定义分区,建议使用图形安装模式安装;4、CentOS 的系统安装方式分为:图形安装模式和文本安装模式;5、CentOS 的系统运行方式分为:带图形界面、可以用鼠标操作的图形化方式和不带图形界面、直接用命令行操作的文本方式(具体的系统运行方式,可以在系统安装的过程中自定义选择);一、安装CentOS用光盘成功引导系统,会出现下面的界面界面说明:Install or upgrade an existing system 安装或升级现有的系统install system with basic video driver 安装过程中采用基本的显卡驱动Rescue installed system 进入系统修复模式Boot from local drive 退出安装从硬盘启动Memory test 内存检测这里选择第一项,安装或升级现有的系统,回车。
出现是否对CD媒体进行测试的提问,这里选择“Skip”跳过测试。
出现下面的界面Next选择语言为:English(English)房.主备.域名1、hostname2、vi /etc/sysconfig/network #编辑配置文件HOSTNAME=:wq! #保存退出3、vi /etc/hosts #编辑配置文件localhost:wq! #保存退出shutdown -r now #重启系统四、增加swap分区在确定了服务器所需要使用的内存后,需要增加1024M的swap空间具体操作:1、dd if=/dev/zero of=/tmp/swap bs=1M count=1024M #创建1024M的文件块2、mkswap /tmp/swap #创建swap文件3、swapon /tmp/swap #激活swap文件4、swapon –s #查看swap5、修改/etc/fstab文件,增加以下内容,让系统引导时自动启动vi /etc/fstab #在最后添加下面代码/tmp/swap swap swap default 0 0:wq!??#保存退出至此,CentOS 系统安装配置完成。
资产管理系统GLPI的安装
资产管理系统GLPI的安装2010-07-05 16:20:31标签:休闲资产管理系统 GLPI职场原创作品,允许转载,转载时请务必以超链接形式标明文章原始出处、作者信息和本声明。
否则将追究法律责任。
/44326/344181GLPI资产管理系统系统:Linux5.5(32bit)IP:10.80.11.205撰写人:hx10日期:2010/7/5 hangzhouBlog: /hx101.安装lampyum -y install gcc gcc-c++ gcc-g77 flex bison autoconf automake bzip2-develzlib-devel ncurses-devel libjpeg-devel libpng-devel libtiff-devel freetype-devel pam-devel openssl-devel libxml2-devel gettext-devel pcre-devel mysql mysql-server httpd php php-mysql php-gd php-imap php-ldap php-odbc php-pear php-xml php-xmlrpc2.设置mysql的root密码service mysqld start/usr/bin/mysql -uroot -pmysql>use mysql;mysql>update user set password=PASSWORD("")where user="root"; //set password of user "root" with ""mysql>create database glpi;mysql>GRANT SELECT,INSERT,UPDATE,DELETE,CREATE,DROP ON glpi.* TO'glpiuser'@'localhost' IDENTIFIED BY 'zjhcsoft';mysql>flush privileges;mysql>\q3.安装json和glpicd /usr/local/srcwget https:///attachments/download/597/glpi-0.72.4.tar.gztar -zxvf glpi-0.72.4.tar.gz -C /var/www/htmlchown -R apache:apache /var/www/htmlcd /usr/local/srcpecl download jsonpear install json-1.2.1.tgz然后编辑配置文件vim /etc/php.d/json.ini; php-json package - /package/jsonextension=json.so重启apache服务service httpd restart测试json是否安装成功# php -r 'var_dump(function_exists("json_encode"));' 如果返回信息为bool(true)说明安装成功。
- 1、下载文档前请自行甄别文档内容的完整性,平台不提供额外的编辑、内容补充、找答案等附加服务。
- 2、"仅部分预览"的文档,不可在线预览部分如存在完整性等问题,可反馈申请退款(可完整预览的文档不适用该条件!)。
- 3、如文档侵犯您的权益,请联系客服反馈,我们会尽快为您处理(人工客服工作时间:9:00-18:30)。
GLPI安装配置GLPI 是一款开源的很优秀的IT资源管理方面的helpdesk 平台。
安装环境为ESX version:VMware 4.1.0 Build 260247点击‘vmware vsphere client’连接上esx server.新建一台虚拟服务器,用来安装centos系统。
我用的是5.2版。
将此虚拟机power on后,点击将此虚拟机窗口以小窗口的方式显示。
点击,从本地或者server上加载iso系统安装镜像文件。
PS:可以使用winscp登录上esx server 的系统,将镜像文件拷贝到系统文件夹vmimages里。
启动安装界面选择English , ok选择American patternSkip点击next.选择“Create custom layout”, 然后next.选中硬盘区域后,点击New在“File System Type”,选择“SW AP”, 在Size 输入“4096”, 点击ok.选择剩下空间, “Mount Point” 选“/boot”, “ext3”. size 里输入“100”, 选择“Force to be a primary partition”, 点击ok.再次新建, “Mount Point”选择“/var”, “File System type” 选择“ext3”. Size输入“8192”, 点击ok.再次新建, “Mount Point” 手动输入“/s oft”, “File System type”选择“ext3”. 选择“Fill to maximum allowable size”将剩余空间全部分配。
点击ok.选择“The GRUB boot loader will installed on …”,选择“Use a boot loader password”, 点击“Change password”. 输入密码: “”, 确认密码, 点击ok 然后“Next”.选择“Enable IPv4 support”, 选择Manual configuration.在IP Address 输入“10.130.4.12”, (Netmask) “255.255.0.0”, 取消“Enable IPv6 support”, 点击ok.Set the hostname “Manually” “glpi.selena”, 在gateway 处设置“10.130.1.1”, primary DNS “” Secondary DNS “”. 点击Next.选择时区Nantong, 选择“System clock uses UTC”, 点击Next.输入root用户密码: “***” 然后确认. 点击Next.选择选项“Desktop –Gnome”, 也可选择“Customize now”, 点击Next.安装即可。
安装完成后,进入系统。
Open Terminal[root@localhost ]yum -y update 做系统更新yum -y install httpd php mysql mysql-server php-mysql httpd-manual mod_ssl mod_perl mod _auth_mysql php-mcrypt php-gd php-xml php-mbstring php-ldap php-pear php-xmlrpc mysql-connector-odbc mysql-devel libdbi-dbd-mysql(一句话就OK 了)[root@glpi ~]# yum install gcc make[root@glpi ~]# service httpd start 启动apache[root@glpi ~]# service mysqld start 启动mysql[root@glpi ~]# chkconfig httpd on 设置自动启动[root@glpi ~]# chkconfig mysqld on设置自动启动[root@glpi ~]# pecl download json 下载jsonWARNING: channel "" has updated its protocols, use "channel-update " to updatedownloading json-1.2.1.tgz ...Starting to download json-1.2.1.tgz (17,780 bytes)......done: 17,780 bytesFile /root/json-1.2.1.tgz downloaded[root@glpi ~]# pear install json-1.2.1.tgz 安装json[root@glpi ~]# vi /etc/php.d/json.ini输入; php-json package - /package/jsonextension=json.so[root@glpi ~]# php -r 'var_dump(function_exists("json_encode"));'得到bool(true)说明json已经ok[root@glpi ~]# /etc/init.d/httpd stopStopping httpd: [ OK ][root@glpi ~]# /etc/init.d/httpd startStarting httpd: [ OK ][root@glpi glpi]# cd /var/www/html/glpi[root@glpi glpi]# lsajax COPYING.txt front install locales pics script.js CHANGELOG.txt css inc lib login.php plugins scriptsconfig files index.php LISEZMOI.txt logout.php README.txt[root@glpi glpi]# chmod -R 777 config 将文件夹config权限设置为可读写[root@glpi glpi]# chmod -R 777 files将文件夹files权限设置为可读写[root@glpi glpi]# ls -ltotal 232drwxr-xr-x 2 root root 12288 Jan 18 22:04 ajax-rw-r--r-- 1 root root 64 Jan 18 22:04 CHANGELOG.txtdrwxrwxrwx 2 root root 4096 Jan 18 22:04 config-rw-r--r-- 1 root root 18004 Jan 18 22:04 COPYING.txtdrwxr-xr-x 2 root root 4096 Jan 18 22:04 cssdrwxrwxrwx 12 root root 4096 Jan 18 22:04 filesdrwxr-xr-x 2 root root 20480 Jan 18 22:04 frontdrwxr-xr-x 2 root root 16384 Jan 18 22:04 inc-rw-r--r-- 1 root root 5763 Jan 18 22:04 index.phpdrwxr-xr-x 3 root root 4096 Jan 18 22:04 installdrwxr-xr-x 12 root root 4096 Jan 18 22:04 lib-rw-r--r-- 1 root root 145 Jan 18 22:04 LISEZMOI.txtdrwxr-xr-x 2 root root 4096 Jan 18 22:04 locales-rw-r--r-- 1 root root 3284 Jan 18 22:04 login.php-rw-r--r-- 1 root root 2411 Jan 18 22:04 logout.phpdrwxr-xr-x 4 root root 4096 Jan 18 22:04 picsdrwxr-xr-x 2 root root 4096 Jan 18 22:04 plugins-rw-r--r-- 1 root root 122 Jan 18 22:04 README.txt-rw-r--r-- 1 root root 10350 Jan 18 22:04 script.jsdrwxr-xr-x 2 root root 4096 Jan 18 22:04 scripts-rw-r--r-- 1 root root 3624 Jan 18 22:04 status.php[root@glpi ~]# mysqladmin -u root password '**'将mysql 管理员密码设置为selenaadmin开始GLPI安装访问http://10.130.4.12/glpi/During the first connection, a step by step installation starts. The interface is user friendly, you must just enter the required informations.Preliminary stepsA- Choose your favorite language.Just choose your favorite langage and click to « OK »B- Install or Update.You want to do a fresh install, so click on « Install ».C- Compatibility checks to use GLPIThis step verifies that all requirements are ojk for the installtion of GLPI. If something is wrong, you cannot continur the installtion. An error message will appear that explain you what to do to correct the problem.If all is ok, you can click on « continue ».Installation stepsStep 1 : Configuration of the access to the database server.You must enter in a form all the informations needed to connect to MySQL.« Mysql server » is the hostname where is your database server. For example: localhost« Mysql user » is the username you use to connect to the server. Root« Mysql pass » is the password of the username This field can be empty if your user have no password (No comment will be done here on the security of such a user).***Then, you must to click on « continue ».Two cases now:Your parameters are rights. So, you access to the next step.Your parameters are wrongs. So, an error message is displayed, you must to click on back to modify your parameters and retry.Step 2 : Choose or create the database.The access to the database is ok. You mustr to create or choose the database that GLPI will use.创建一个glpi数据库Two possibilities:You want to use an existing database to store the GLPI tables:Select this database and click on continue to initialize this database.You want to create a new database to store the GLPI tables:For this case, you must to have the rights to create a new database on the server.Select « create a new database ». Enter the name of the database that you want to create in the text field. Click on continue in order to initialize the database.Step 3 : Temporary step and explanations :This stage informs you that the database is initialized with the default values. Some informations are given to you on these values. Read this information attentively and click on « continue ».Step 4 : This stage indicates that the installation of GLPI is now finished, a summary is displayed. Read these informations attentively and click on "use GLPI" to perform your first connection with the application.End of the installationIn case of error (of the kind: you forgot your own access to GLPI...), to start again this procedure of installation, it is necessary to use your software ftp (for example) and to erase the following file: config/config_db.phpFor security reasons you must to set the read right to config/config_db.php only to the web service user. Example : chmod 400 config/config_db.phpUse your browser to get the root of GLPI: http://yourserver/glpi/ (by default) to start again the procedure of configuration then (actually, it is the absence of file "config_db.php" which causes the launching of this procedure).。
