WYSIWG R19安装说明
视频服务器的安装及使用说明
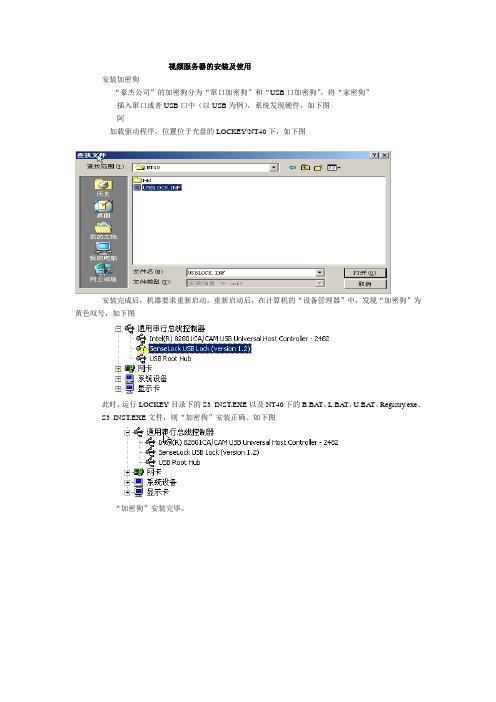
视频服务器的安装及使用安装加密狗“豪杰公司”的加密狗分为“窜口加密狗”和“USB口加密狗”,将“家密狗”插入窜口或者USB口中(以USB为例),系统发现硬件,如下图阿加载驱动程序,位置位于光盘的LOCKEY\NT40下,如下图安装完成后,机器要求重新启动,重新启动后,在计算机的“设备管理器”中,发现“加密狗”为黄色叹号,如下图此时,运行LOCKEY目录下的S3_INST.EXE以及NT40下的B.BA T、L.BA T、U.BAT、Registry.exe、S3_INST.EXE文件,则“加密狗”安装正确。
如下图“加密狗”安装完毕。
打开光盘上的datasvr文件夹,运行videosvr.exe程序。
将“加密狗”上的五组安装号分别填入“用户ID”和“键码值”中,下一步拷贝程序视频服务器配置在“常用信息”“视频服务器”中填入视频服务器的IP地址、端口号(端口号不可以和此服务器上已经使用的端口号冲突------即未使用的端口)、标识默认即可。
其中“视频服务器”的IP地址和端口要与WEB服务器使用说明的第二章系统初始化---〉第一节添加视频服务器的内容一致。
“WEB服务器”的配置见WEB服务器的安装中的设置:虚拟目录信息视频服务器安装完成。
如果需要安装多台视频服务器,将datasvr文件分别在不同的服务器上作安装,即可。
视频服务器配置说明开始---〉程序---〉豪杰视频点播系统----〉视频服务器配置工具在“常用信息”中,填写“视频服务器”和“WEB服务器”的基本信息,此信息一定要正确,否则“视频服务器”是无法正确运行的。
见“视频服务器安装”的“视频服务器配置”在“访问控制”中共有4个功能选项,分别是视频服务器对所有用户都不再认证视频服务器请求调度的方法免请求调度的文件类型(如*.ASF,).A VI)免请求调度的文件最大值(字节)视频服务器对所有用户都不再认证,指的是视频服务器不再进行二次认证,认证的信息包括用户名、用户密码、文件类型、文件名等。
服务器端安装文档[ENOVIA V5R19_WINDOWS]
![服务器端安装文档[ENOVIA V5R19_WINDOWS]](https://img.taocdn.com/s3/m/2445612a0066f5335a8121a7.png)
文档控制文档更新记录文档审核记录目录文档控制 (1)目录 (2)1安装要求 (4)1.1服务器和操作系统要求 (4)1.2安装介质 (4)1.3数据库等相关软件 (4)1.4相关软件许可 (4)2系统安装前准备 (5)2.1创建管理员用户 (5)2.2LUM客户端安装 (7)2.3安装J AVA (12)2.4DB2V8.2.2的安装 (14)2.5创建数据库 (24)3ENOVIA VPM V5R18安装 (30)3.1安装VPM (30)4安装ENOVIA DB (39)4.1安装ENOVIA数据库 (39)5S ERVICE P ACK 06安装 (46)6设置电子仓库 (49)6.1准备工作 (49)6.2设置电子仓库 (51)7测试安装 (57)8备份数据库 (59)1 安装要求1.1 服务器和操作系统要求Windows XP Professional 和XP补丁(WindowsXP-KB926255-x86-CHS,WindowsInstaller-KB893803-v2-x86)或者是Windows Server 2003 standard Edition或者是Windows Server 2003 Enterprise Edition 。
安装LCA Server 的服务器上要有不低于8.1版本的DirectX;管理员的权限。
1.2 安装介质ENOVIA LCA V5R19ENOVIA CATIA V5R19ENOVIA VPM Navigator V5R19Service Pack……1.3 数据库等相关软件jdk-6u2-windows-i586-p及以上版本Lum 4.6.8DB2 V8.21.4 相关软件许可对于需要许可证的软件,需要在LUM中正确配置,包括ENOVIA和CAA的许可证。
2 系统安装前准备2.1创建管理员用户在操作系统上,创建两个本地管理员级别的用户ev5adm和db2adm,分别用来运行LCA和DB2。
Hog 3PC与Wysiwyg连接教程

Hog 3PC与Wysiwyg连接教程一、软件安装:1.从飞猪网站:/support/Hog3PCSoftwareDownloads.shtml下载最新版本的Hog 3PC控台模拟软件,如:Hog3PC-Win32-golden_2-2-1-1775.zip。
2.从飞猪网站:/support/hog3/downloads/archive/wyg/VisualizerConnectivity.shtml下载最新版本的Hog 3PC控台与wysiwyg连接软件,如:HogConnect_2-2-1-1775.zip。
3.用Baidu找wysiwyg软件并下载,注意下载包内应包括破解补丁和破解说明。
4.安装Hog 3PC、连接器和wysiwyg,并按破解说明对wysiwyg进行破解。
二、设置IP地址:1.在启动软件以前先确保你的电脑有正常的网络连接,已经连接到网络上或是已经与网络交换机连接,如果你的网络连接没有启用或显示已断开,你将无法使用Hog 3PC软件。
首先从桌面上点击图标启动Hog 3PC软件,如果你的电脑安装了防火墙,注意要将你的电脑防火墙关闭或是让Hog 3PC进程通过防火墙,在Hog 3PC软件的启动菜单中点击按钮打开控制面板,再点击Network标签,然后从右边的下拉列表中选择你的网卡,并在下面设置IP地址,这里的IP地址必须与你电脑网络连接的IP地址相同,最后记得勾选Use this Adapter for show,再点击Apply来应用更改,如下图所示:三、配灯:1.按上图设置好IP以后,开始新建show文件,新建完成后开始配灯,这个过程比较复杂,在这里我就不再详述,要求有一定飞猪控台使用基础才能完成,详见飞猪控台操作手册。
四、设置Wysiwyg软件:1.从桌面上启动Wysiwyg软件,飞猪连接器软件同时启动,如图所示:启动起来以后,从Wysiwyg软件里点击Basic Theatre来创建一个基本的剧场,如图:基本的剧场建立完成后,点击底部红线内标签转换视图模式,再点击中间工具栏上红线内的按钮打开设备浏览窗口,然后从设备浏览窗口找到你要配的灯,这里的灯必须和Hog 3PC里配的灯完全相同,找到灯后点右键,选Insert,在剧场舞台上的蓝色线上挂灯,灯的数量也必须和Hog 3PC里配的灯完全相同。
163安装说明
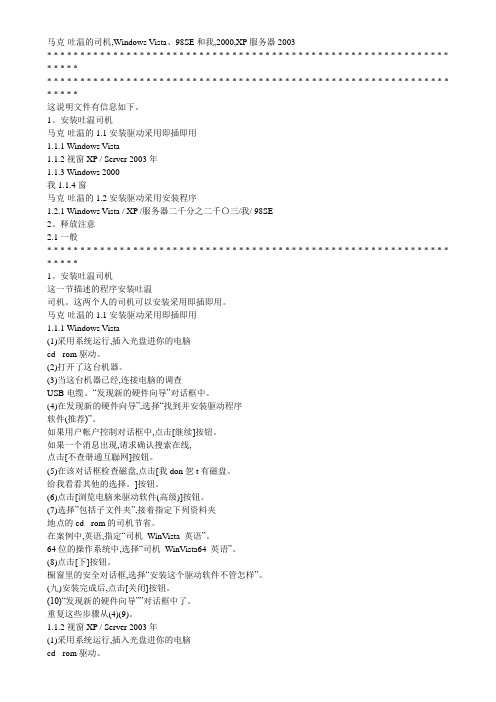
马克·吐温的司机,Windows Vista、98SE和我,2000,XP服务器2003* * * * * * * * * * * * * * * * * * * * * * * * * * * * * * * * * * * * * * * * * * * * * * * * * * * * * * * * * * * * * * * * * ** * * * * * * * * * * * * * * * * * * * * * * * * * * * * * * * * * * * * * * * * * * * * * * * * * * * * * * * * * * * * * * * * *这说明文件有信息如下。
1。
安装吐温司机马克·吐温的1.1安装驱动采用即插即用1.1.1 Windows V ista1.1.2视窗XP / Server 2003年1.1.3 Windows 2000我1.1.4窗马克·吐温的1.2安装驱动采用安装程序1.2.1 Windows V ista / XP /服务器二千分之二千〇三/我/ 98SE2。
释放注意2.1一般* * * * * * * * * * * * * * * * * * * * * * * * * * * * * * * * * * * * * * * * * * * * * * * * * * * * * * * * * * * * * * * * * *1。
安装吐温司机这一节描述的程序安装吐温司机。
这两个人的司机可以安装采用即插即用。
马克·吐温的1.1安装驱动采用即插即用1.1.1 Windows V ista(1)采用系统运行,插入光盘进你的电脑cd - rom驱动。
(2)打开了这台机器。
(3)当这台机器已经,连接电脑的调查USB电缆。
“发现新的硬件向导”对话框中。
(4)在发现新的硬件向导”,选择“找到并安装驱动程序软件(推荐)”。
Windows10下mysql8.0.19winx64安装教程及修改初始密码
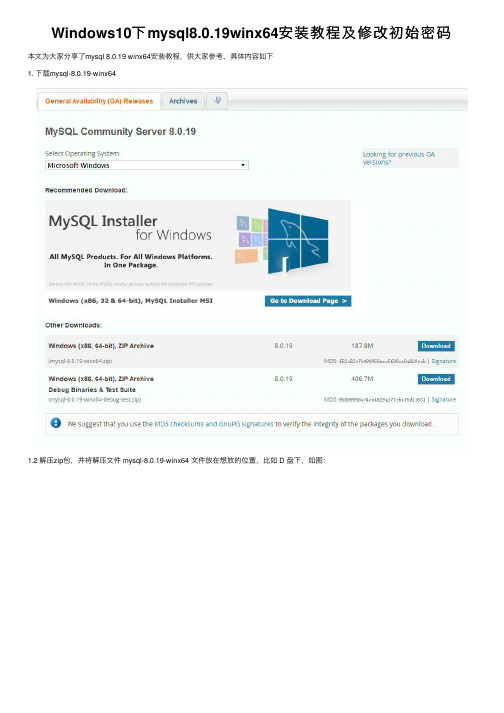
Windows10下mysql8.0.19winx64安装教程及修改初始密码本⽂为⼤家分享了mysql 8.0.19 winx64安装教程,供⼤家参考,具体内容如下1. 下载mysql-8.0.19-winx641.2 解压zip包,并将解压⽂件 mysql-8.0.19-winx64 ⽂件放在想放的位置,⽐如 D 盘下,如图:1.3 配置环境变量(⽬的是为了避免在CMD窗⼝下操作时反复切换路径)在Path下添加 D:\mysql-8.0.19-winx64\bin环境变量设置好之后,以后重新打开CMD或者Windows Powershell,就可直接输⼊mysql登陆了,⽽不⽤再切换到mysql的bin⽬录再执⾏指令了。
1.4 ⽆需编写my.ini配置⽂件(注意)现在新版的mysql安装好之后已经没有my.ini(或my-default.ini)⽂件了。
⽽且我们也不需要额外的⾃⼰添加,因为添加了之后有可能会导致⽆法启动mysql的情况,本⼈已试过。
因为之前⽹上很多的博客教程都会说要添加my.ini(或my-default.ini)⽂件,但是我们现在不需要添加了。
2. MySQL的初始化及服务安装2.1 按“win”键打开开始菜单,在搜索框中输⼊“cmd”,在搜索结果中选中“命令提⽰符”程序,右键选择“以管理员⾝份运⾏”2.2 初始化⽤管理员权限打开CMD或者Windows Powershell使⽤命令:mysqld --initialize --console使⽤CMD命令操作后如下:C:\Windows\system32>D:\Python\mysql-8.0.12-winx64\bin\mysqld --initialize --console2018-09-13T14:36:55.758742Z 0 [System] [MY-013169] [Server] D:\Python\mysql-8.0.12-winx64\bin\mysqld (mysqld 8.0.12) initializing of server in progress as process 3104 2018-09-13T14:37:12.072904Z 5 [Note] [MY-010454] [Server] A temporary **password is generated for root@localhost: `4P!w2fqBruGi`**2018-09-13T14:37:23.274980Z 0 [System] [MY-013170] [Server] D:\Python\mysql-8.0.12-winx64\bin\mysqld (mysqld 8.0.12) initializing of server has completed记录下密码,这⾥的密码是4P!w2fqBruGi,密码是随机⽣成的每个⼈都不⼀样,此处⽣成的密码在后⾯修改密码时要⽤。
镜像版安装详细步骤及图解(极品飞车9)
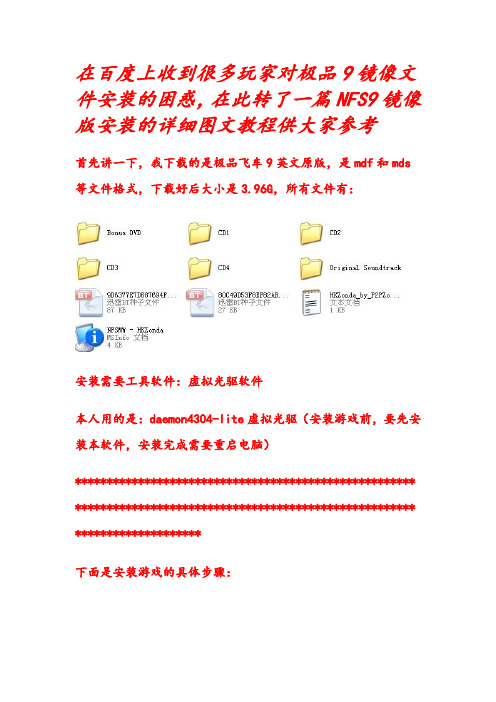
在百度上收到很多玩家对极品9镜像文件安装的困惑,在此转了一篇NFS9镜像版安装的详细图文教程供大家参考首先讲一下,我下载的是极品飞车9英文原版,是mdf和mds 等文件格式,下载好后大小是3.96G,所有文件有:安装需要工具软件:虚拟光驱软件本人用的是:daemon4304-lite虚拟光驱(安装游戏前,要先安装本软件,安装完成需要重启电脑)****************************************************** ****************************************************** ********************下面是安装游戏的具体步骤:1、打开cd1文件夹,然后双击里面的mdf或mds文件,虚拟光驱会自动加载镜像(但是用虚拟光驱加载镜像的方法不止一种)。
2、在我的电脑里打开虚拟光驱:3、打开后,就看到了cd1中的所有文件,双击里面的autorun,开始安装4、打开autorun后,弹出安装界面,点击install,开始安装5、在要求序列号的界面输入序列号:如果您购买的正版cd,那序列号就在上面,直接输入即可;如果是非正版用户,可以通过其它途径取得序列号,但此序列号仅仅能完成极品飞车9的安装而已,不能通过EA联网,进行网战。
输入序列号后,点击Next(下一步)6、点击Yes,同意协议7、为游戏选择安装路径,可以默认在C盘,也可以点击第二个(用户自定义),更改到其它盘——推荐然后点击Next,下一步8、选择注册EA与否,点击第一个“以后注册”;购买正版CD的用户可以选择第二个“现在注册”。
9、选择是否注册后,就开始自动安装了:10、cd1的文件用完后,会提示插入cd2,这时,只需要像上面上面载入cd1的文件一样,双击cd2文件夹中的mdf或mds文件即可自动载入,然后点击确定,游戏会继续自动安装和cd4同理:11、最后有提示“请插入cd1”,双击cd1里面的mdf或mds文件,载入》确定即可12、点击finish完成安装:.默认选择了第二项“Launch Need for Speed? Most Wanted(开始游戏)”,如果选择了这一项,点击finish后,就会立即运行极品飞车9;当然,也可以取消第二项的选择而手动开始游戏。
WYSIWYG快速入门指南
2012-3-28快速入门指南WYG快速入门指南 | NewleapWysiwyg快速入门指南序言这本手册是作为WYSIWYG 的现有基本功能的一个介绍,它可以使你快速上手来熟悉这个程序。
推荐你使用这个手册的同时运行Quick Start Tutorial(快速上手训练)。
这个快速上手训练同时提供视频与音频教学,通过这13节课程可以帮助你很快提升。
这个教程包含这个训练音频部分的文字版本,还有一些插图。
它同样也包含一些训练中没有的附加信息(例如在视频训练中没有第 13 节的课程)。
文本惯例以下是这本手册的文本惯例:菜单与菜单命令以粗体字形式显现,英文后面的括号内为中文翻译,反之相同。
例如,“从 Library (资料库)菜单,选择Browse Library (浏览资料库)。
”用户界面部件比如按钮,工具,快捷方式,与对话框以粗斜体字显现。
例如,“要画一个台阶,单击这个draw 工具条上的ri s e r工具。
”键盘键全显示为大写字母。
例如,“按下这个TAB键以输入这个隐藏坐标。
”参考手册(即详细版的原版手册)的内容以斜体字型显示。
例如,“有关渲染的附加信息,请参考参考手册。
第一节-了解用户界面内容简介在这一节你将学习到WYSIWYG 用户界面的基本部件知识。
步骤 1-起动W YSI WYG起动WYSI W YG1. 从 WYSIWYG 欢迎窗口选择一个文件打开。
你可以选择打开一个现有的文件或者创建一个新文件。
欢迎窗口左边显示的是一个模板文件的列表,而右边显示的是最近使用的文件列表。
结果:显示出这个 WYSIWYG 主窗口。
步骤2-Mode(模式)按钮顶部这些按钮是模式按钮。
根据你购买的 WYSIWYG 版本的不同,以下这些模式按钮可能有一些出入。
CAD -在这个模式你可以画出所有你想要的画面。
Da t a -在这个模式你所有的项目信息将会以电子数据表格的方式显示出来。
Design -这个模式允许你调整灯光效果,组成静态的灯光场景并生成渲染图。
WYSIWYGR19专业舞台灯光音响设计软件简介
WYSIWYGR19专业舞台灯光音响设计软件简介第一篇:WYSIWYG R19专业舞台灯光音响设计软件简介WYSIWYG R19专业舞台灯光音响设计软件简介WYSIWYG R19是为灯光从业人员设计一款三维灯光设计软件。
用户可以方便的模拟真实的灯光场面。
通过以太网/DMX灯光控制台或者离线控制器都可以控制您所模拟灯光的场景,使用WYSIWYG Perform 的用户可以实时的看到灯光场景的精确效果。
它生成的场景图片和设备配置及其他工作表格为灯光设计师、设计助理、灯光操作人员及维修人员提供必须的参考依据。
系统优点1、能模拟真实的现场。
我们可以根据演出场所的实际大小尺寸生成演出现场,并安装各类设备,模拟一个完整的灯光现场。
2、通过控制系统,控制模拟灯光现场的效果。
我们可以应用控制设备或离线软件配置灯光通道进行灯光控制,并实时的在屏幕上看到演出灯光效果。
3、只要通过布置现场设备配置即可得到你所需要的所有灯光资料。
当你布置好一个模拟的现场后,系统便会自动产生现场控制和维护的所有数据,如灯位图、通道表、配接表、灯具统计表、模拟效果图等等,为现场操作提供参考依据4、设计不受空间的限制。
使用了WYSIWYG Perform,设计者无需在演出现场指挥,在家就可以完成所有的灯光设计,包括灯具布置、场景布置、灯光设计、灯光控制等等。
5、在现场实时控制时,能实时显示控制效果及设备的运行情况。
6、支持多种文件格式的导入、导出。
我们可以应用现成的文件将原设计导入WYSIWYG Perform进行灯光设计,导出成需要的文件格式。
7、借助CSP实现动画设计。
系统功能WYSIWYG Perform提供了用户强大的设计功能,主要分为CAD、DATA、DESIGN、PRES、LIVE五个部分,下面我们就WYSIWYG Perform的强大功能作一介绍:一、CAD1、根据剧场或演出场所的实际大小,模拟真实的演出场所。
在设定演出场所时,可任意输入演出场所的实际大小尺寸。
WYSIWYG新手教程

WYSIWYG 新手教程章节目录01.用户面板简介02.创建布景03.定义悬挂位置04.悬挂并对焦灯具05.修改灯具的属性06.创建、修改并打印报表07.创建、修改并打印制图08.构建灯具场景09.预演节目10.渲染11.帮助第一节-用户面板简介•启动WYSIWYG•新建或打开一个现有的制图•WYSIWYG的工作区•WYSIWYG的工作区动画1•WYSIWYG的工作区动画2•WYSIWYG的工作区动画3•版面操作动画•物品库选项工具栏•快捷方式工具栏•快捷方式工具栏动画•选择你的工具栏•选择你的工具栏动画•状态栏与命令编辑栏•保存启动WYSIWYG •在你安装完成WYG后,在你的桌面上会出现几个图标。
你可以使用它们启动WYG。
我们通常可以拖动主程序图标到这个任务栏上并删除其它的图标。
这个由你自己取舍。
你可以通过点击一个图标或开始菜单来启动程序。
当我们想要启动WYG的附属程序-如MINI控台时,也可以参考以上方法来启动。
•使用这个方法:开始菜单→所有程序→WYSIWYG 。
新建或打开一个现有的制图•要打开一个文件有以下几种方式:你可以使用热键,这个“文件”菜单,“> open existing plot”命令或者从最近打开的制图列表中选择一个文档。
•同样的规则也适用于新建一个文档。
•你可以从几个模版文件中选择一个或点击这个“ >create a newplot” 命令。
注:此幻灯片中所有操作步骤中用到的菜单、按钮等皆为参照汉化版程序中的翻译。
快捷方式栏模式软件注册等级版面工具栏状态栏WYSIWYG的工作区WYSIWYG工作区动画1WYSIWYG工作区动画2WYSIWYG工作区动画3版面操作动画附件库项目色片灯泡物品库选项工具条灯具桁架符号图案片透镜点击一个标题以访问一类快捷方式直接点击或右击选择插入以插入项目到制图中快捷方式栏直接双击或右击选择插入以插入项目到制图中快捷方式栏动画选择你的工具栏在任一工具栏上右击以选择想要显示的工具栏选择你的工具栏动画此处提示你下一步的操作。
(完整版)U9V1.0安装说明

一、U9 V1.0安装说明作者:杨XX、裴XX1.1.产品安装1.1.1.先决条件用户只需安装Windows操作系统、windows installer 3.1或其后续版本及Microsoft .NET Framework 2.0即可正常运行安装程序。
1.1.2.系统环境检测安装程序目前支持以下三种安装:1:U9集中部署版2:U9报表服务器3:U9数据库服务器安装程序在用户选择安装类型后将检测是否安装必须的程序或补丁。
不同的安装版本检测对象有所不同,具体情况如下表所示:U9集中部署版U9报表服务器U9数据库服务器Windows 2003及其Service Pack 2或更高版本是是是Internet Explorer 7.0或更高版本是否否Microsoft SQL Server 2005及Service Pack 2 否是是Microsoft Office 2007或更高版本是否否Microsoft .NET Framework 3.0或更高版本是否否系统补丁NDP20-KB922770-X86是是否系统补丁NDP20-KB916002-x86 是否否安装程序将在用户在用户选择安装类型后检测上述程序或补丁的安装情况:哪些已经安装,哪些没有安装。
只有当所有条件得到满足时安装程序才能继续运行。
1.1.3.安装的实现安装过程如下所示(数据库服务器安装过程为例):1、带有U9 Logo的欢迎界面2、“最终用户许可协议”界面,用户只有在选择“接受《许可协议中的条款》”之后才可以继续运行安装程序。
3、自定义界面:告诉用户进行安装需要多少磁盘空间,帮助用户确认当前各个磁盘的总空间、可用空间、所需空间、差异空间等情况。
允许用户改变应用程序安装位置。
4、显示当前安装进程界面5、提示安装完成界面:用户可以在各个界面之间进行回退操作以改变选择。
1.1.4.修复和卸载功能安装程序应具有修复功能,如果已安装的产品受到损坏(例如不小心删除了某些文件),可以通过重新运行安装程序进行自动检测缺少了哪些文件并进行修复。
WAS、HTTPServer、Plugin安装和升级
WAS、HTTPServer、Plugin安装和升级V 0.1审稿组目录1 概述 (4)1.1 目的 (4)1.2 应用范围 (4)1.3 业务利益 (4)1.4 主要风险 (5)1.5 主要应对 (5)1.6 发布方和审批 (5)1.6.1 联系人 (5)1.7 术语表 (5)1.8 使用设备及介质名称 (5)2 Was,http的整体架构 (6)2.1 Was,http的整体架构说明 (6)2.2 Was、http安装相关参数说明 (7)3 was安装 (8)4 HTTP安装 (14)5 WAS 、HTTP更新 (18)5.1 更新W AS (18)5.2 更新HTTP (27)5.3 更新plugins (29)6 附录 (30)7 签收 (31)1概述上海圆通速递(物流)有限公司(以下简称为圆通速递)成立于2000年5月28日,经过十年的发展,目前公司已拥有8个管理区、52个转运中心、4800余个配送网点、5万余名员工,服务范围覆盖国内1200余个城市。
同时公司也开通了港澳台、中东和东南亚专线服务。
根据公司战略发展规划和长远奋斗目标,圆通速递将通过三至五年的努力,圆通将发展成为国内大型的、具有较强竞争力的网络型快递企业,实现业务收入跨入百亿企业行列,名列中国快递行业前三甲;并通过五至十年的努力,相应的条件成熟后,争取成功上市,使圆通成为具有国际较大影响力的快递跨国集团公司。
为了提高公司运营能力,公司决定分两期重新开发和部署核心业务系统。
而本次核心业务系统所采用的应用程序是采用WebSphere+HTTP的方式1.1目的本文档的目的记录在redhat linux AS 5.5的基础之上安装和更新websphere 、Http,pluglind的操作过程,帮助维护人员在参照该文档能在redhat linux AS 5.5的基础之上重新安装和更新websphere 、Http,pluglin应用程序1.2应用范围本文档的应用范围为数据中心核心业务系统,机架式服务器和刀片服务器上面安装websphere 、Http,pluglin应用程序1.3业务利益通过websphere 、Http,pluglin的实施,明确记录websphere 、Http,pluglin安装步骤。
WYSIWYG_Web_Builde入门教程
WYSIWYG Web Builder是一个网页制作工具,不用编程,通过拖拽式操作, 以所见即所得的方式快速制作网页。
相对于DW等专业工具,它更加轻量级,整个安装文件大小仅为8.76M。
你既可以制作传统PC端网页,也可以制作RWD自适应网页,还可以使用jquery mobile设计手机APP。
它包含丰富的网页组件以及智能的一个网页布局系统:1.网页基本元素:文字,图片,视频,表格,,表单2.样式多样的导航菜单,幻灯片,jquery ui元素,现成的javascript特效3.以php驱动的CMS以及用户登录管理模块,和数据库紧密结合。
4.适应多种设备的页面设计5.jquery mobile 界面设计6................它还具有强大的扩展特性,通过海量插件实现更多酷炫功能。
用WYSIWYG Web Builder制作属于自己的第一个网页1.我们要清楚希望制作的网页的效果是怎样的。
在这里我们需要的效果如下:DEMO演示:小猩猩幼儿园2.制作这个网页,我们需要额外的一些素材:背景图片,视频文件之类的本教程素材下载:images3.确定我们这个网页的布局。
我们现在的布局采用整体上为固定宽度的单列多行布局:头部---容--底部。
每一部分所占据的宽度、高度我们都要做到心里有数,比我我们现在各个部分的宽高准备如下:头部:宽:1600 px 高120+36px (banner+导航层,导航层中包含了菜单高度36px 宽度1000px)容:宽度1000px 高度:图片轮换高度350px+侧边栏导航高度540px+家育共建高度260px+20px(预留空间)底部:宽度1000px 高度100px制作属于自己的第一个网页之二页面布局首先我们要对当前页面的基本信息进行设置:标题,宽度,页面居中显示,高度可以不设置,软件会自动扩展高度。
工作区--右键--page properties然后,我们放置layer对象进行布局:wysiwyg 布局的原理有两种:table 或者CSS,由于table布局已经几乎被淘汰,所以软件默认采用div css 布局,实现方式是一个wysiwyg web builder 的layer对象,一个layer 对象就是一个网页DIV块(也称为DIV容器),就像是一个可以装东西的盒子那样,我们在里面放置网页元素。
Wolf Grill模块安装指南说明书
INSTALLATION GUIDE Grill ModuleImportant NoteTo ensure the safe and efficient use of Wolf equipment,please take note of the following types of highlighted information throughout this guide:IMPORTANT NOTE highlights information that is especially important.CAUTION signals a situation where minor injury or product damage may occur if instructions are not followed.WARNING states a hazard that may cause serious injury or death if precautions are not followed.ContentsWolf Grill Module .............................3Grill Module Specifications .....................4Grill Module Installation ........................8Service Information (10)Features and specifications are subject to change at any time without notice.Visit /specs for the most up-to-date information.IMPORTANT NOTE:Throughout this guide,dimensions in parentheses are millimeters unless otherwise specified.Wolf Grill Module3/specsGrill Module InstallationIMPORTANT NOTE:Installation of the Wolf electric grill Array module must be completed by a qualified installer.Read this entire installation guide prior to installation andsave for the local inspector’s reference.The homeownershould keep this installation guide for future reference.This appliance must be installed in accordance withNational Electrical Codes,as well as all state,municipaland local codes.The correct voltage,frequency andamperage must be supplied to the appliance from a dedi-cated,grounded circuit which is protected by a properlysized circuit breaker or time delay fuse.The propervoltage,frequency and amperage ratings are listed on theproduct rating plate.Record the model and serial numbers before installingthe grill module.Both numbers are listed on the productrating plate,located on the underside of the module.Refer to the illustration below.Location of rating plate.Overall DimensionsGRILL MODULEInstallation SpecificationsIMPORTANT NOTE:Installation of the Wolf electric grill module must meet minimum clearance requirements shown in the installation illustration on page 6.The Wolf grill module is intended for indoor use.It isdesigned to fit a standard 24"(610)deep base cabinet with 25"(635)deep countertop.Before making the countertop cut-out,verify that the module will clear the side walls of the base cabinet.It is recommended that you use a Wolf cooktop ventilation hood,pro hood or hood liner with the grill module.Refer to the Wolf design guide.IMPORTANT NOTE:Wolf does not recommend the use of downdraft ventilation with the grill module.Failure to locate the grill module without the proper clearances will result in a fire hazard./specsIMPORTANT NOTE:This appliance must be installed in accordance with National Electrical Codes,as well as all state,municipal and local codes.The correct voltage,frequency and amperage must be supplied to the appliance from a dedicated,grounded circuit which is protected by a properly sized circuit breaker or time delay fuse.The proper voltage,frequency and amperage ratings are listed on the product rating plate located on the under-side of the module.Refer to the illustration on page 3.The complete appliance must be properly grounded at all times when electrical power is applied.Do not ground the appliance with the neutral (white)house supply wire.A separate ground wire must be utilized.If aluminum house supply wiring is utilized,splice the appliance copper wire to the aluminum house wiring using special connectors designed and agency certified for joining copper and aluminum.Follow the connector manufacturer’s recommended procedure carefully.Improper connection can result in a fire hazard!Electrical RequirementsVerify that power is disconnected from the electrical box before proceeding.The Wolf electric grill module requires a separate,grounded 3-wire electrical supply with its own circuit breaker.Locate the electrical supply within the shaded area shown in the installation illustration on the following page.MODEL IG15/S•Power supply:240/208V AC,60Hz,20amp service.•Max connected load:2.8kW at 240V,2.1kW at 208V.The grill module is provided with a 4'(1.2m)flexible3-wire conduit that makes a connection to a junction box.The conduit consists of two insulated hot lead conductors and one insulated ground conductor.IMPORTANT NOTE:You must follow all National Electrical Code regulations.In addition,be aware of local codes and ordinances when installing your service.For electrical installation,attach the conductors to the residence wiring in accordance with National Electrical Codes and all state,provincial,municipal and local codes.The wiring diagram covering the control circuit is located inside the module control box.Installation SpecificationsGRILL MODULEFRONT VIEWSIDE VIEW *Minimum clearance from cooktop cut-out to combustible materials up to 18"(457)above countertop.NOTE:Application shown allows for installation of two 15"(381)modules side by side./specsInstallation SpecificationsMULTIPLE COOKTOP INSTALLATIONIf the grill module is to be used in combination withadditional cooktops or modules with a filler strip,refer tothe chart below for the countertop cut-out width.Thedimensions are derived by adding an additional11/4"(32)for each additional unit,to give you the total countertopcut-out width.Dimensions include the filler strip.When multiple cooktops are installed side by side,eachunit must have its own separate,recommended electricalcircuit.When two or more cooktops or modules are installedtogether,an integrated module filler strip is recommended.The filler strip and other accessories are available throughyour authorized Wolf dealer.For local dealer information,visit the find a showroom section of our website,.IMPORTANT NOTE:Review specific installation instruc-tions for product to product capabilities.Install the ModuleRemove the grill module from its shipping carton and discard packing materials.Lower the grill module into the countertop cut-out opening.Center the module in the opening and check that the front edge of unit is parallel to the front edge of the countertop.Check that all minimum clearances are met. Using a pencil,outline the rear edge of the module frame on the countertop.Remove the module from the opening.IMPORTANT NOTE:When repositioning the module in the countertop opening,lift the entire unit up from the opening to prevent scratching the countertop.Apply the foam strip,included in the hardware package,to the underside of the module frame.Refer to the illustra-tion below.Reinsert the grill module into the countertop opening. Align the rear edge of the module frame with the pencil line and check that it is parallel to the front edge of the countertop.Lift the entire module to make adjustments.To attach the brackets to the sides of the module,insert the clip into the rectangular punchout in the pan and push down.Install the clamping screw into the bracket and tighten until the screw contacts the underside of the coun-tertop.Do not overtighten screws.Refer to the illustration below.IMPORTANT NOTE:Do not seal the grill module to the countertop.It must be removed if service is necessary.Foam strip.Installation brackets./specsBefore OperatingRead the entire Wolf grill module use&care guide included with the unit.It contains important safety,opera-tion,service and warranty information.Before operating,clean the grill module thoroughly with hot water and a mild detergent.Rinse and dry with a soft cloth.This removes any residual oil and grease left on the surface from the manufacturing process.Refer to care recommendations in the use&care guide.Module RemovalIMPORTANT NOTE:Removal of the grill module should only be performed by Wolf factory certified service.If removing the grill module is necessary for cleaning or service,first disconnect the electrical supply.Remove the mounting brackets on each side of module and remove. To reinstall,follow the steps on the previous page.The grill module must be disconnected from the electrical supply before removal.Service Information10Service InformationIf service is necessary,maintain the quality built into your grill module by contacting Wolf factory certified service.For the name and number of Wolf factory certified service nearest you,check the contact &support section of our website, or call Wolf customer care at 800-222-7820.When calling for service,you will need the model andserial numbers of the grill module.Both numbers are listed on the product rating plate located on the underside of the module.Refer to the illustration below for the location of the rating plate.IMPORTANT NOTE:Installation and service must be performed by a qualified installer or service agency.Warranty service must be performed by Wolf factory certified service.TroubleshootingIMPORTANT NOTE:If the grill module does not operate properly,follow these troubleshooting steps:•Verify that electrical power is being supplied to the module.•Check the electrical connections to ensure that the installation has been completed correctly.•Follow troubleshooting procedures outlined in the Wolf grill module use &care guide.•If the module still does not operate properly,contact Wolf factory certified service.Do not attempt to repair the module yourself.Wolf is not responsible for service required to correct a faulty installation.Location of rating plate.The information and images in this guide are the copyright property of Wolf Appliance,Inc.Neither this guide nor any information or images contained herein may be copied or used in whole or in part without the express written permission of Wolf Appliance,Inc.©Wolf Appliance,Inc.all rights reserved.Wolf,Wolf&Design,Wolf Gourmet,W&Design and the color red as applied to knobs are registered trademarks and service marks of Wolf Appliance,Inc. Sub-Zero,Sub-Zero&Design,Dual Refrigeration,Constant Care and The Living Kitchen are registered trademarks and service marks of Sub-Zero,Inc. (collectively,the“Company Marks.”)All other trademarks or registered trademarks are property of their respective owners in the United States and other countries.WOLF APPLIANCE,INC.P.O.BOX44848MADISON,800.222.7820817487REV-A3/2011。
solidedge19安装与配置
Solid edge安装与配置指导一、安装主要程序1、放入DVD安装光盘,会自动运行出现下面的安装界面。
可以如图选择:2、如果机器上没有安装过.NET框架则会出现此安装界面,直接按照提示向下进行直至.NET框架安装完成4、点击界面上的“完成”,系统开始安装SOLIDEDGE5、按照提示下一步,出现此界面。
如图设置很快系统安装完成。
6、点击完成后,关闭这些界面。
此时先不要点击桌面上的SOLIDEDGE图标开始运行7、把你购买的软件许可文件selicense.dat拷贝到你安装SOLIDEDGE目录下的program目录下覆盖原文件即可。
然后即可打开使用SOLIDEDG了。
二安装其他模块1、在安装界面上点击第二项按钮。
进入其他产品的选择安装步骤。
2、选择“Standard Parts”按钮,依次进行标准件配置管理器与标准件库、管道库的的安装。
3、根据提示选择安装位置、要在安装的标准等依次安装完毕。
注意管道库和机械库安装界面为英文,在安装过程中如下选择简体中文版,安装后程序界面为中文界面。
4、标准件服务器的安装要求每台机器都安装才能调用标准件。
而机械库和管道库建议安装在作为文件服务器的机器上。
由于这两个库仅GB部分就可能占用近1.5G左右的磁盘空间,所以为方便管理不建议其他机器都安装。
5、标准件库安装结束后,接下来进行配置。
在开始菜单上的程序下找到SolidEdgeV19—Standard Parts—配置向导。
6、在出现的界面上进行设置。
7、机械库的配置在开始菜单上的程序下找到SolidEdgeV19—Standard Parts—管理员打开。
在出现的界面上我们发现零件的数量很少,只有几百个。
这是由于我们还没有添加UGS提交的标准件的缘故。
8、点击,出现如图界面。
选择添加自交付数据库。
9、如上图2所示,点击浏览,会出现下面的两个文件。
ML的为机械库,PL的为管道库。
10、在这我们选择机械库文件,然后点击下一步。
ANSYS19安装详细教程
For personal use only in study and research; not for commercial use一、安装前准备1、安装工具:1)、@n3y3.Pr0duct3.I9.0.Win64:软件主体安装程序2)、360压缩(挂载镜像文件,解压必要文件)3)、魔方清理大师v3.7.7.0 单文件版绿色免费版:系统文件清理工具(针对卸载残留)2、系统校验:(windows 7 旗舰版)1)、用户计算机名:打开C:\Users确认用户名为全英状态,ANSYS对中文不支持;若含有中文文件名“公用”,则可在“搜索程序和文件中”(如图1)输入“desktop.ini”(如图2),右键点击“属性”(如图3),更改名称为“desktop_”,确定,然后删除“公用”文件,删除前可备份内容,未尝试重命名,如有大神可指教。
图1 图2 图31.setup:开始安装(截面以18.0为例);特别注意:本经验仅需安装ANSYS Product,不需要单独的许可证文件以及生成器,所以请勿安装Install ANSYS License Manager,因为有的教程和下载来的文件里面包含许可证,需要安装许可证文件管理,这里不做详细介绍;2.7接下来开始安装过程,第三步尤为关键;setup_1:点击同意,然后下一步;3.8setup_2:输入安装地址(本次安装以默认路径为例,用户也可根据自己计算机情况安装在其他盘位置),然后下一步;4.9setup_3:输入localhost,不要输自己电脑名;然后下一步;5.10setup_4:接下来开始安装,本次安装按照系统默认选择的工具,也可根据需要自己选择,然后下一步;6.11setup_5:勾选skip(这一步是为了与其他CAD产品相关联,可跳过,在安装完成之后再去关联,参看其他教程),然后下一步;7.12setup_6:接下来就是安装过程,请耐心等待13 setup_7:安装完成100%;去掉勾选(不重要);退出安装界面即可;至此安装完成,接下来为破解过程;14破解:仅需替换相应文件到指定文件夹即可在下载好的文件夹里找到_SolidSQUAD_\Crack with local license (server setup is not needed),拷贝里面\Shared Files\Licensing文件夹到安装目录合并替换原始文件(在选择安装时安装的目录)破解成功,接下来在安装程序中查找启动项,发送到桌面快捷方式即可END注意事项在安装的第三步:输入localhost,不要输自己电脑名;切记For personal use only in study and research; not for commercial use.Nur für den persönlichen für Studien, Forschung, zu kommerziellen Zwecken verwendet werden.Pour l 'étude et la recherche uniquement à des fins personnelles; pas à des fins commerciales.толькодля людей, которые используются для обучения, исследований и не должны использоваться в коммерческих целях.以下无正文For personal use only in study and research; not for commercial use.Nur für den persönlichen für Studien, Forschung, zu kommerziellen Zwecken verwendet werden.Pour l 'étude et la recherche uniquement à des fins personnelles; pas à des fins commerciales.толькодля людей, которые используются для обучения, исследований и не должны использоваться в коммерческих целях.以下无正文For personal use only in study and research; not for commercial use。
