PCS7 V8.2-410-5H安装及调试总结
PCS7 V8.2亚太中文版安装及调试总结(工程师培训)

首先新建文件夹,对文件夹进行共享设置,如下:
此权限里一定要有SIMATIC HMI,并且要完全控制权限。
也可使用PCS7安装盘中的SIMATIC TIGHTS对共享文件夹自动设定共享权限,如下:
插入CD1,选择如下:
点击下一步,直到安装完成,内部都按照默认选项即可。然后对软件授权,如下
6ES7658-2AA28-0CA0
OS software single station ASIA(PO100)
6ES7658-2XA00-0XB0
RUNTIME LICENSE OS(PO100)
其中RUNTIME LICENSE OS(PO100)授权U盘不能拔,软件运行需要一直插在PC站上。
3.设置共享选项
4.将使用的网卡设定为第一位置
5.取消网卡(网络和共享中心设置)、显示器(电源选项里设置)的节能设置
6.关闭防火墙
7.安装office2010
8.安装pcs7 v8.2(订货号:6ES7658-4XX28-0CT8),包含两张CD
8.1安装工程师站
先插入CD1,选择如下:
下一步直到安装成功,然后安装需要安装相关补丁,如下:
从STEP7中将变量导入WINCC需要对变量插旗(S7_m_c, true),如下:
如果需要在HMI上做趋势图,需要再设置S7_archive, shortterm,如下:
报警记录变量需要手动从变量记录里复制过来,可以批量复制。
编程方式和STEP7+WINCC一样。
12.创建ES站,右键插入PC站点
对PCS7 进行授权,分别为
PCS7_V8.2安装步骤_Installation_Steps_2210
8https:///cs/cn/zh/view/109742665C o p y r i g h t S i e m e n s A G C o p y r i g h t y e a r A l l r i g h t s r e s e r v e d目录1安装软件准备 .................................................................................................... 4 1.1 PCS 7 V8.2软件的操作系统要求 ....................................................... 4 1.2 安装Office 软件 (5)2 硬件需求........................................................................................................... 6 3软件安装及设置 ................................................................................................ 7 3.1 系统分区需求 ..................................................................................... 7 3.2 安装操作系统和Microsoft Internet Explorer ........................................ 7 3.3 安装微软补丁包 ................................................................................. 7 3.4 安装杀毒软件 ..................................................................................... 7 3.5 安装消息队列服务和信息服务IIS ....................................................... 7 3.6 安装.NET Framework ...................................................................... 10 3.6.1 Windows 7或Windows Server 2008................................................ 10 3.6.2 Windows 10 或 Windows Server 2012 ............................................ 10 3.7 操作系统设置 ................................................................................... 12 3.7.1 计算机名 .......................................................................................... 12 3.7.2 用户名和密码 ................................................................................... 12 3.7.3 禁用Windows 特性 .......................................................................... 12 3.7.4 Windows 电源选项 ........................................................................... 14 3.7.5 Windows 时间 .................................................................................. 14 3.8 安装PCS 7系统 .............................................................................. 15 3.9 网络适配器设置 ............................................................................... 21 3.9.1 禁止网络适配器的节能选项 .............................................................. 21 3.9.2 SIMATIC Shell 设置 ......................................................................... 21 3.9.3 终端总线设置 .. (22)C o p y r i g h t S i e m e n s A G C o p y r i g h t y e a r A l l r i g h t s r e s e r v e dC o p y r i g h t © S i e m e n s A G C o p y r i g h t y e a r A l l r i g h t s r e s e r v e d1安装软件准备1.1PCS 7 V8.2软件的操作系统要求∙ Windows 7 Professional SP1 (64-Bit) ∙ Windows 7 Ultimate/Enterprise SP1 (32-Bit) ∙ Windows 7 Ultimate/Enterprise SP1 (64-Bit) ∙ Windows 10 Enterprise 2015 LTSB (64-Bit)∙ Windows Server 2008 R2 SP1 Standard Edition (64-Bit) ∙ Windows Server 2012 R2 Update Standard Edition (64-Bit) 注1:均为英文版操作系统注2:使用Windows 10 Enterprise 2015 LTSB 的注意事项 ∙ 推荐安装Windows 10更新(KB3156387)链接:https:///en-US/kb/3156387 ∙ 不支持冗余终端总线(Intel Teaming )对于SOFTNET-IE RNA 冗余终端总线,更新至SOFTNET-IE RNA V14 链接:https:///cs/ww/en/view/109739786 对于以上的操作系统,并不是适用于所有的PCS 7选件包,具体的匹配关系如表1-1。
PCS7—PID调节分析与控制
PCS7—PID调节分析与控制腈纶厂聚合装置生产控制系统于2013年8月更新为德国西门子公司PCS7过程控制系统。
该控制系统采用二台控制站,其功能:AS-400H控制站按照“热备份”模式(无扰动、出现故障自动切换)的冗余原理运行。
根据这个原理,只要没有故障,两个子CPU都是激活的。
如果发生故障,备用的控制器全面接管过程控制。
确保了无扰动切换、快速可靠的数据交换。
两台控制器保持:同样的用户程序、同样的数据块、过程映像区和同样的内部数据,如定时器、计数器、内存位等。
这就确保了两个控制器始终都是最新更新的,以便当一个控制器发生故障时另一个可以接管控制。
此系统控制台设有CRT显示屏幕可以读取和调节每一个控制回路的数据,输入PID最佳值,达到工艺过程中被调参数的稳定性。
标签:热备份;CPU;数据块;过程映像1 自动调节PID模式一个完整的自动控制回路是由调节对象,测量装置,调节器及调节阀这四大部分组成。
(如图1)图1中,被调参数即指在工艺过程中,为达到某一目的而需要稳定或重新调优的具体的某一调节对象,如氧化剂进料量,脱单塔真空度等,在某一干扰作用如管线后路背压变化,机泵出口阀门开度变化情况下,可能会出现波动,偏离原参数值,使整个自动控制回路平衡被破坏,需通过自动控制回路的自动调节作用重新建立新的平衡。
图1中的测量元件把被测参数的测量值通过变送器转换成特定信号输送至调节器的比较机构,和原设定值进行比较,得出一个偏差就是被调参数测量值,减去仪表原设定值。
有正偏差和负偏差两种,偏差作为调节器的输入信号。
由于偏差的输入,调节器的输出信号即偏差大于零时,调节器输出增加,当偏差小于零时调节器输出信号减小;当偏差小于零时,输出信号增加。
调节器的作用方向根据工艺需要人为设定,具体设定方法按实际生产需要而定。
当调节器将输出信号输送至调节阀后,调节阀的执行机构即开始动作,将调节器输出过来的电信号转换成风压信号,并使调节阀阀位发生变化。
PCS7安装步骤

PCS7安装步骤PCS7的安装步骤PCS7的安装PCS7的安装有如下要点:1. WINDOWS安装如下组件:(1) 消息队列(2) IIS只要安装的操作系统正常, 不需要操作系统的光盘, 直接进行安装就可以了.2. 安装SQL2005 INCLUDE SP1 FOR WINCC V63. 安装SIEMENS MS SP&TOOLS 20074. 根据需要安装PCS7的有关组件5. 安装WINCC PROAGENT V6.0 SP4对了,忘了说了,XP装好以后,需要安装IE7及XP SP3补丁,后再安装SQL,然后再安装SQL SP1补丁。
please install the microsoft SQL Native Client Patch from the Separately supplied DVD-ROM "MS Service Pack&Tool"是怎么回事?这是我在安装PCS7 7.0时出现的,请求各位解答一下呀!--------------------------------------------------------------------------------新手上路,请多关照!系统是xp2专业版,安装完操作系统后,安消息列队。
在安1 楼说的安。
1.安装完操作系统后,需要安装SQL2005;安装完SQL2005后需要安装"MS Service Pack&T ool"这张光盘中的SQL 2005 SP1。
然后再安装PCS7 7.0就可以了。
那是SQL的补丁!就好比XP需要装SP3补丁一样!对了,忘了说了,XP装好以后,需要安装IE7及XP SP3补丁,后再安装SQL,然后再安装SQL SP1补丁。
现在又出现一个问题了,就是我装好WINCC FEXIBLE2008后,它自带有你们楼上所说的SQL的补丁,也就是SQL的补丁已经打上,这样就已经满足了装PCS7 7。
PCS7_V8.2的CFC的常用功能与操作(工程师培训)
PCS7_V8.2的CFC的常用功能与操作调用在线帮助信息 (1)互联到地址 (1)互连两个块 (2)为CFC中调用的功能块进行设置 (2)为CFC中调用的功能块的 I/O进行设置 (3)显示隐藏的 I/O (5)切换 CFC 视图 (5)CFC的运行组顺序 (5)CFC编译和下载 (7)CFC编译/下载的选项设置 (8)CFC 测试 (9)对FB进行使能/禁用 (10)对IO值进行取反 (11)为IO数据设置OS变量归档 (12)回读(Read back) (13)块清理与块更新 (14)交叉索引(Cross Reference) (14)调用在线帮助信息选择CFC 图表任意位置单击F1,调出CFC帮助选择具体的功能块,例如一个APL库功能块,单击F1 键,将调出该库(如APL)的帮助文件互联到地址可以为CFC中的功能块关联的实际的IO地址、M区地址、DB块地址。
选中IO右键->Interconnection to Address,如果为数据定义了符号名并且数据格式与IO匹配,则自动出现在下拉列表中。
否则需要手动输入绝对地址。
互联的数据可以是简单数据类型或结构体类型,不支持指针访问。
互连两个块先选择一个块的输出,然后再选择另一个块的输入,将这两个参数进行互连。
在进行互连时,无需考虑选择的顺序。
要在两个图表之间建立互连,则需打开这两个图表。
然后单击一个图中的输出,再单击另一个图中的输入(选择顺序可不同)。
为CFC中调用的功能块进行设置双击功能块进行属性设置。
为CFC中调用的功能块的 I/O进行设置•双击 I/O进行参数设置,不同IO的属性内容可能不同。
对于结构体格式的I/O,将弹出“选择结构元素”(Select Structure Element) 窗口;双击所需子元素,将弹出“属性 - 输入/输出”(Properties - Input/Output) 窗口。
•也可以通过功能块的IO属性卡进行统一设置。
PCS7安装指南

1.1.1参考2:乐电项目PCS7安装手册1.1.1.1 安装前的注意事项:1.备份原先的所有系统2.将服务器中归档纪录拷贝出来,供以后恢复,冗余的两台机子内的归档都要拷贝出来3.拷贝服务器内项目中的画面文件夹的内容4.拷贝客户机内项目中的画面文件夹的内容5.将还原工段的服务器内的授权重新导回软盘中6.将SC-LIB库拷贝出来7.将BCM库拷贝出来8.将工程师站的最新项目归档后拷贝出来9.将还原工程师站E盘新建文件夹2内的内容拷贝出来10.将工程师站内D盘.E盘所有的文件拷贝出来11.所有机子目前的分区大小不要改变12.所以机子的计算机名和IP地址纪录下来1.1.1.2 服务器的安装1.安装前的备份a)ghostC盘,并拷贝到其它存储介质(GhoststepA)b)拷贝D盘、E盘至其它存储介质c)导出授权回软盘2.插入驱动盘安装驱动a)选择服务器操作系统安装b)选择server2003servicePack2(第一个)c)磁盘阵列设置时选择“跳过安装”(注意不需要手动配置RAID1)d)选择系统盘大小为20G,格式为NTFS3.安装WindowsServer2003SP2标准英文版a)用户名统一设置为Administrator,密码是SIEMENSb)检查电源设置中,服务器硬盘,需要待机,一直处于工作状态(默认应该使一直处于工作状态)。
c)在语言设置中安装东亚语言d)控制面板中区域与语言设置全部设置为中国。
e)安装消息队列,如下图:f)关闭防火墙g)找出PCS7软件中的MSServicePacks&Tools英文版的盘,把有关Sever的补丁都打一下,包括:windowsserver2003SP2,Securitypath-win2003,MUIpath-win2003sp2h)重新启动计算机i)ghost纯净windows系统(GhoststepB)4.安装SQLa)安装SQLb)选择packageinstalltion和默认目录c)选择defaultpasswordd)在MSServicePacks&Tools盘中安装SQL补丁:Hotfix-SQLServer2005SP1e)重新启动计算机f)ghost系统(GhoststepC)5.安装PCS7V7.0SP2中文版软件a)选择packageinstalltion和默认目录b)选择OSSerer进行安装c)注意系统会显示确认安装的软件内容如下:1)OS:winccv6.2SP2HF71120MB2)SFCVisualizationV7.0SP1HF425MB3)PCS7FACEPLATESV7.0SP2HF2110MB4)SIMATICNETPC-softwareV6.4296MB5)系统注册软件6.使用Wincc将WINCC的语言设置为中文。
PCS7过程控制系统学习总结(郭岗2013.12.02)

现有阶段老区工控软件的使用情况
梯形图用到开点闭点与实际现场的一些电器设 备比较接近,看图理解更容易一些。对于没有编 写过程序的电器维护人员简单易懂,上手方便。 编写相应的程序块,互相调用程序块,实现对现 场设备的控制。 画面通过建立链接S7驱动,建相应的变量,在 画面编辑器中设定与变量的链接,根据变量实际 值与期望来判断,通过在画面设定,控制现场设 备。
现有阶段的PCS7的使用情况
现在老区高炉高炉的PCS7只是在老区0#、4#高炉本 体中应用,只能达到耳熟不能详的尴尬情况。遇到有 些故障有时会感到头大,有种赶鸭子上架的感觉,只 能根据工作的经验和工艺的流程去排除故障,其中加 大了维护工作的难度。总结维护人员对PCS7陌生的主 要原因有以下几点: 1. 未经过系统的培训 2. 对PCS7软件编程方法陌生 3. 使用PCS7频率太少 4. 操作人从来不看相关报警 5. 现用PCS7为英文版维护人员对英文不熟悉
民用交换机 (双绞线)
CP1623 AS1 AS2 AS3
Sysbus ISO或TCP/IP
工 业 交 换机()
一个多站系统
学习培训之后对PCS7的了解
对站的理解 1、AS站 S系统(标准系统) H 系统(冗余系统) FH系统 (安全冗余)CPU必须是冗余+安全认证 西 门子是安全与非安全系统结合最好的供应商(黄色的是 安全模块) 2、OS站 分单用户系统和多用户系统 OS sever:12台或12对 OS sever按不同功能:OS/route control server, Batch/archive server, maintenance station server OS client:每个服务器可以带32个client(没有操作 功能) ,client上还可以装web server/openPCS
PLC控制系统施安装与调试

PLC控制系统施安装与调试盘柜安装→布线、结线→编程及摸拟调试→现场调试。
1、盘柜安装通常情况下,PLC控制系统的主体单元(CPU、存储器、输入模块、输出模块等)都装于控制柜或控制箱中,对于这些控制柜或控制箱的安装施工应严格参照《电气装置安装工程盘柜及二次回路结线施工及验收规范》GB5017--92中关于盘柜安装的要求执行。
2、布线、结线PLC系统布线、结线除应满足GB50171-92中关于二次回路结线的要求外,还应特别注意:①信号回路的控制电缆应采用屏蔽电缆且屏蔽层应按设计要求的接地方式正确接地。
②强、弱电回路严禁使用同一根电缆,并应分别成束分开排列。
③多股软铜芯线结线端头必须搪锡或用接线端子压接。
3、编程及其摸拟调试①首先熟悉被控对象;然后确定硬件配置,设计外部接线图;再设计梯形图程序;最后写出控制程序输入PLC,逐条检查,改正输入错误。
②P LC上的有关发光二极管来显示,一般不用接P LC实际的负载(如接触器、电磁阀等),实际的反馈信号(如限位开关的接通)可以根据功能表图,在适当的时候用开关或按钮等摸拟。
③如果程序中某些定时器或计数器的设定值过大,为了缩短调试时间,可以在调试时将它们减小,摸拟调试结束后再写入实际设定值。
4、现场调试完成上述工作后,将PLC安装到控制现场,进行联机总调试,并及时解决调试时发现的软件和硬件方面的问题。
根据实际运行的要求,还可以通过修改程序某些设定值来改变某些工艺参数,如温度、压力、流量等,从而使系统能准确控制,满足工艺要求,直到生产出满意的产品。
5、PLC控制系统施工注意事项PLC对恶劣环境适应能力很强,无需采取特殊措施就可直接用于工业现场,但是如果环境过于恶劣,电磁干扰特别强烈,或安装使用不当,都不能保证PLC的正常安全运行,施工中应重点考虑以下问题。
①工作环境a、PLC要求环境温度在-10-50℃之间,因此安装时应尽量避开热源,四周应通风散热良好;为保证绝缘性能,空气相对湿度一般应小于90%;同时还应远离强烈的振动源,施工时可以用减振橡胶来减轻柜内外的振动;另外如果空气中有较浓的的粉尘、腐蚀性气体和盐雾,在温度允许时可以将PLC封闭。
PCS7-V8.2-410-5H安装及调试总结

PCS7-V8.2-410-5H安装及调试总结PCS7 V8.2亚太中⽂版安装及调试总结1.安装专业版或旗舰版win7 32位或64位,⼯程师站和操作员站系统和软件尽量⼀致,计算机名称在安装PCS7后不可更改,如要更改计算机名称,需使⽤PCS7安装盘重新安装,⼯程师站和操作员站⽤户名和密码要⼀致,具体设置见下⾯详细内容。
2.安装IIS和MSMQ3.设置共享选项4.将使⽤的⽹卡设定为第⼀位置5.取消⽹卡(⽹络和共享中⼼设置)、显⽰器(电源选项⾥设置)的节能设置6.关闭防⽕墙7.安装office20108.安装pcs7 v8.2(订货号:6ES7658-4XX28-0CT8),包含两张CD8.1安装⼯程师站先插⼊CD1,选择如下:下⼀步直到安装成功,然后安装需要安装相关补丁,如下:对PCS7 进⾏授权,分别为6ES7 833-1CC02-0YA5 SIMATIC S7 F Systems V6.16ES7651-5AA28-0CA0 ES Single Station ASIA(AS/OS:PO250)6ES7653-2BA00-0XB5 Runtime License AS(PO100)其中ES Single Station ASIA(AS/OS:PO250)为硬件狗,U盘必须⼀直插在PC 站上。
授权后的显⽰为:说明:西门⼦授权U盘,如果带指⽰灯的就必须⼀直插在电脑上才能运⾏软件,不带灯的授权后可以拔去U盘。
另根据需要安装特⽤的补丁程序,如341通讯⽤的PTP和驱动程序等。
8.2安装操作员站插⼊CD1,选择如下:点击下⼀步,直到安装完成,内部都按照默认选项即可。
然后对软件授权,如下6ES7658-2AA28-0CAOS software single station ASIA(PO100)6ES7658-2XA00-0XBRUNTIME LICENSE OS(PO100)其中RUNTIME LICENSE OS(PO100)授权U 盘不能拔,软件运⾏需要⼀直插在PC 站上。
同步控制模块类型SIMATIC PCS 7 V8.2 用户指南说明书

S i e m e n s A G 2016 A l l r i g h t s r e s e r v e dLegal informationWarning notice systemThis manual contains notices you have to observe in order to ensure your personal safety, as well as to prevent damage to property. The notices referring to your personal safety are highlighted in the manual by a safety alert symbol, notices referring only to property damage have no safety alert symbol. These notices shown below are graded according to the degree of danger.DANGERIndicates that death or severe personal injury will result if proper precautions are not taken.WARNINGIndicates that death or severe personal injury may result if proper precautions are not taken.CAUTIONIndicates that minor personal injury can result if proper precautions are not taken.If more than one degree of danger is present, the warning notice representing the highest degree of danger will be used. A notice warning of injury to persons with a safety alert symbol may also include a warning relating to property damage.Qualified PersonnelThe product/system described in this documentation may be operated only by personnel qualified for the specific task in accordance with the relevantdocumentation, in particular its warning notices and safety instructions. Qualified personnel are those who, based on their training and experience, are capable of identifying risks and avoiding potential hazards when working with these products/systems.Proper use of Siemens productsNote the following:WARNINGSiemens products may only be used for the applications described in the catalog and in the relevant technical documentation. If products and components from other manufacturers are used, these must be recommended or approved by Siemens. Proper transport, storage, installation, assembly, commissioning,operation and maintenance are required to ensure that the products operate safely and without any problems. The permissible ambient conditions must be complied with. The information in the relevant documentation must be observed.TrademarksAll names identified by ® are registered trademarks of Siemens AG. The remaining trademarks in this publication may be trademarks whose use by third parties for their own purposes could violate the rights of the owner.S i e m e n s A G 2016 A l l r i g h t s r e s e r v e dDisclaimer of LiabilityWe have reviewed the contents of this publication to ensure consistency with the hardware and software described. Since variance cannot be precluded entirely, we cannot guarantee full consistency. However, the information in this publication is reviewed regularly and any necessary corrections are included in subsequent editions.Security informationSiemens provides products and solutions with industrial security functions that support the secure operation of plants, systems, machines and networks.In order to protect plants, systems, machines and networks against cyber threats, it is necessary to implement – and continuously maintain – a holistic, state-of-the-art industrial security concept. Siemens’ products and solutions only form one elemen t of such a concept.Customer is responsible to prevent unauthorized access to its plants, systems, machines and networks. Systems, machines and components should only be connected to the enterprise network or the internet if and to the extent necessary and with appropriate security measures (e.g. use of firewalls and network segmentation) in place.Additionally, Siemens’ guidance on appropriate security measures should be taken into account. For more information about industrial security, please visit /industrialsecurity .Siemens’ products and solutions undergo continuous development to make them more secure. Siemens strongly recommends to apply product updates as soon as available and to always use the latest product versions. Use of product versions that are no longer supported, and failure to apply latest updates may increase customer’s exposure to cyber threats.To stay informed about product updates, subscribe to the Siemens Industrial Security RSS Feed under /industrialsecurity .Table of contentsS i e m e n s A G 2016 A l l r i g h t s r e s e r v e dTable of contentsLegal information ......................................................................................................... 2 1Synchronizing control module types .............................................................. 5 1.1 Introduction ........................................................................................... 5 1.2 Synchronizing control module types .................................................... 6 2Synchronization behavior (9)2.1 Editing objects in assigned CFC ........................................................ 10 2.2 Changing objects in the technological connections ........................... 11 2.3 Changing values or interconnections ................................................. 13 2.4 Changes to properties and attributes . (14)3 Comparison function "Installation position" ................................................ 234 Comparison function “With graphic coordinates” ...................................... 26 5Appendix .......................................................................................................... 27 5.1 Related literature ................................................................................ 27 5.2 History (27)© S i e m e n s A G 2016 A l l r i g h t s r e s e r v e d1Synchronizing control module typesThis document describes how to synchronize control module types in a SIMATIC PCS 7 Engineering System.1.1IntroductionAs of SIMATIC PCS 7 V8.0 there is a type concept available, consisting of the following elements ∙ Control module (CM) ∙Control module type (CMT)CMs can be synchronized with their CMTs. This means that blocks,interconnections, connectors, and messages can be added or removed in an existing and already instantiated CMT. These changes can be passed on to the existing CM.A CMT or a CM is composed of the conventional CFC part (1) and the technological connections (2).21© S i e m e n s A G 2016 A l l r i g h t s r e s e r v e d1.2 Synchronizing control module typesEven when there are already one or more instances (CM) of a CMT in the project, changes can still be made to the CMT and transmitted to the existing instances.NoteParameters and signals are not matched (synchronized) if ∙ attribute "S7_mc" = true∙ they are present in the Technical connections ∙ they are interconnected externallyProcedure1. Start synchronization in the plant view of the project from shortcut menu "PlantTypes > Synchronize..."S i e m e n s A G 2016 A l l r i g h t s r e s e r v e d2. All the CMTs that are available in the master data library are displayed in the"Synchronize Plant Types" dialog. Choose the changed CMT that you want to synchronize.3. Click the "Synchronize" button to start the comparison between the project (A)and the master data library (B).The detailed result of the comparison is displayed automatically in dialog box "Data transfer - Synchronize templates".4. For each instance, you can exclude from synchronization control modules,blocks, signals, parameters and messages that you do not want to compare by clearing the check box. 5. "Synchronize templates" synchronizes the changes from the CMT (master datalibrary) to the CM/CMs (project). Example 1: Instance-specific interconnectionS i e m e n s A G 2016 A l l r i g h t s r e s e r v e dExample 2: Block in Tech.IOFB in instance (CFCpart)FB in type (Tech.IO)© S i e m e n s A G 2016 A l l r i g h t s r e s e r v e d2 Synchronization behaviorThe synchronization behavior depends on the following criteria: ∙ Type of change (parameter, value, interconnection, …) ∙ Place of change (type or instance) ∙Attributes of the changed parameters – Green > Parameters are in the technological connections – S7_m_c > OS relevant parameters –MiscellaneousThe following generally applies for the synchronization behavior when inserting new objects (FB and/or FC): ∙When synchronizing to the CM, if the newly inserted objects in CMT are placed in the main sequence group, they are inserted directly behind the same predecessor blocks that are also available in the CMT.∙The installation pointer in the CM is ignored and remains unchanged.Deviations from this rule are described below.S i e m e n s A G 2016 A l l r i g h t s r e s e r v e dExplanation: The examples are to be read as follows:2.1 Editing objects in assigned CFCAdd block or chart-in-chartRemove block or chart-in-chartChange run sequenceS i e m e n s A G 2016 A l l r i g h t s r e s e r v e dNoteRestrictions:If an object is newly created in the CMT and set to the first position in a separate runtime group, then the new object has been incorrectly installed after synchronization.If an object is newly created in CMT, marked as Optional, and set to any position in a separate runtime group, then the object has been incorrectly installed when activating the variant in the CM.You must check the installation positions in the instances and adapt them if necessary.2.2 Changing objects in the technological connectionsAdd a block/chart-in-chart in the technological connectionsRemove block/chart-in-chart from the technological connectionsAllocate "Optional" attribute to an existing object in the technological connectionsS i e m e n s A G 2016 A l l r i g h t s r e s e r v e dDrag an object that is present in CMT to technological connections and assign "Optional" attributeRemove "Optional" attribute from an object in the technological connectionsAdd a signal/parameter in the technological connectionsRemove signal/parameter from the technological connectionsS i e m e n s A G 2016 A l l r i g h t s r e s e r v e d2.3 Changing values or interconnectionsAdd interconnection between CM (process tag)Change the value of an input parameterAdd internal interconnectionRemove internal interconnectionS i e m e n s A G 2016 A l l r i g h t s r e s e r v e d2.4 Changes to properties and attributesBlock comment and block groupS i e m e n s A G 2016 A l l r i g h t s r e s e r v e dChanging an "Identifier"S i e m e n s A G 2016 A l l r i g h t s r e s e r v e dChange Text 0 or Text 1S i e m e n s A G 2016 A l l r i g h t s r e s e r v e dChange unitsS i e m e n s A G 2016 A l l r i g h t s r e s e r v e d"Visible" or "Hidden" attributeChange "Can be operated and monitored"S i e m e n s A G 2016 A l l r i g h t s r e s e r v e dChange "block icon"S i e m e n s A G 2016 A l l r i g h t s r e s e r v e dChange "MES relevant" or "read back allowed"S i e m e n s A G 2016 A l l r i g h t s r e s e r v e dChange "Operator authorization level"S i e m e n s A G 2016 A l l r i g h t s r e s e r v e dChange message classS i e m e n s A G 2016 A l l r i g h t s r e s e r v e d3Comparison function "Installation position"1. Start synchronization in the plant view of the project from shortcut menu"Plant Types > Synchronize..." 2. Choose the CMT you want to synchronize 3. Activate the check box "with run sequence" 4. Start the synchronization5. Select the table view6. Select only the differencesDisplay the differencesTable viewS i e m e n s A G 2016 A l l r i g h t s r e s e r v e d7. Right-click on a folder in the table view and select the "Display Node Contents”command. This makes all the corresponding changes visible.External comparison and analysisIf you want to compare and analyze the information externally, proceed as follows: 1. Click on the printer icon (at the top left) to highlight all the visible content 2. Copy it with "Ctrl + C"3. Open Excel and paste the copied contents with "Ctrl + V"In the synchronization dialog box, you will see the "Predecessor for the insertion position" for each object in the CM and CMT.S i e m e n s A G 2016 A l l r i g h t s r e s e r v e d4. Using the shortcut menu of an insertion position you can open the CM andCMT in-parallel and edit the insertion position manually.Example with Excel:4 Comparison function “With graphic coordinates”S i e m e n s A G 2016 A l l r i g h t s r e s e r v e d4Comparison function “With graphic coordinates”1. Start synchronization in the plant view of the project from shortcut menu"Plant Types > Synchronize..." 2. Choose the CMT you want to synchronize 3. Activate the check box "with run sequence" 4. Start the synchronization5. If the block positions in the CMT have changed, the differences between theinstance and the CMT are displayed6. By synchronizing the blocks in the instances will be moved to the samecoordinates as in the CMT5 AppendixS i e m e n s A G 2016 A l l r i g h t s r e s e r v e d5Appendix5.1Related literature5.2 History。
PCS7 V8.2 入门指南

4 组态硬件和网络..................................................................................................................................15
4.1
组态硬件.........................................................................................................................15
Siemens AG Division Process Industries and Drives Postfach 48 48 90026 NÜRNBERG 德国
A5E36186405-AA Ⓟ 03/2016 本公司保留更改的权利
Copyright © Siemens AG 2016. 保留所有权利
4.4 4.4.1
在 NetPro 中执行保存和编译操作...................................................................................24 在 NetPro 中保存和编译组态..........................................................................................24
警告 表示如果不采取相应的小心措施,可能导致死亡或者严重的人身伤害。
小心 表示如果不采取相应的小心措施,可能导致轻微的人身伤害。
注意 表示如果不采取相应的小心措施,可能导致财产损失。
PCS7_V8.2安装步骤_Installation_Steps_2210

8https:///cs/cn/zh/view/109742665C o p y r i g h t S i e m e n s A G C o p y r i g h t y e a r A l l r i g h t s r e s e r v e d目录1安装软件准备 .................................................................................................... 4 1.1 PCS 7 V8.2软件的操作系统要求 ....................................................... 4 1.2 安装Office 软件 (5)2 硬件需求........................................................................................................... 6 3软件安装及设置 ................................................................................................ 7 3.1 系统分区需求 ..................................................................................... 7 3.2 安装操作系统和Microsoft Internet Explorer ........................................ 7 3.3 安装微软补丁包 ................................................................................. 7 3.4 安装杀毒软件 ..................................................................................... 7 3.5 安装消息队列服务和信息服务IIS ....................................................... 7 3.6 安装.NET Framework ...................................................................... 10 3.6.1 Windows 7或Windows Server 2008................................................ 10 3.6.2 Windows 10 或 Windows Server 2012 ............................................ 10 3.7 操作系统设置 ................................................................................... 12 3.7.1 计算机名 .......................................................................................... 12 3.7.2 用户名和密码 ................................................................................... 12 3.7.3 禁用Windows 特性 .......................................................................... 12 3.7.4 Windows 电源选项 ........................................................................... 14 3.7.5 Windows 时间 .................................................................................. 14 3.8 安装PCS 7系统 .............................................................................. 15 3.9 网络适配器设置 ............................................................................... 21 3.9.1 禁止网络适配器的节能选项 .............................................................. 21 3.9.2 SIMATIC Shell 设置 ......................................................................... 21 3.9.3 终端总线设置 .. (22)C o p y r i g h t S i e m e n s A G C o p y r i g h t y e a r A l l r i g h t s r e s e r v e dC o p y r i g h t © S i e m e n s A G C o p y r i g h t y e a r A l l r i g h t s r e s e r v e d1安装软件准备1.1PCS 7 V8.2软件的操作系统要求∙ Windows 7 Professional SP1 (64-Bit) ∙ Windows 7 Ultimate/Enterprise SP1 (32-Bit) ∙ Windows 7 Ultimate/Enterprise SP1 (64-Bit) ∙ Windows 10 Enterprise 2015 LTSB (64-Bit)∙ Windows Server 2008 R2 SP1 Standard Edition (64-Bit) ∙ Windows Server 2012 R2 Update Standard Edition (64-Bit) 注1:均为英文版操作系统注2:使用Windows 10 Enterprise 2015 LTSB 的注意事项 ∙ 推荐安装Windows 10更新(KB3156387)链接:https:///en-US/kb/3156387 ∙ 不支持冗余终端总线(Intel Teaming )对于SOFTNET-IE RNA 冗余终端总线,更新至SOFTNET-IE RNA V14 链接:https:///cs/ww/en/view/109739786 对于以上的操作系统,并不是适用于所有的PCS 7选件包,具体的匹配关系如表1-1。
SIMATIC PCS 7 CPU 410-5H 处理器手册说明书

150 mA; DP interface 90 mA; At the DP interface
10 W
450 MHz; Multi-processor system
100 ... approx. 2 600, adjustable with System Expansion Card
Battery Backup battery ● Backup current, typ. ● Backup current, max. ● Backup time, max.
● Feeding of external backup voltage to CPU
CPU processing times for bit operations, typ. for word operations, typ. for fixed point arithmetic, typ. for floating point arithmetic, typ. average processing time of PCS 7 typicals Process tasks, max.
Power loss Power loss, typ.
Processor CPU speed
Memory PCS 7 process objects Work memory ● integrated ● integrated (for program) ● integrated (for data) ● expandable Load memory ● integrated RAM, max. ● expandable RAM Backup ● present ● with battery ● without battery
PCS7_S7-410H系列CPU通用信息介绍
PCS7_S7-410H系列CPU通用信息介绍在现代工业的各个领域,要求拥有一种能够满足经济、环保、节能的高度自动化系统,同时,具有冗余及故障安全功能的可编程控制器是针对最高等级的控制需求。
H(高可靠性)系统:通过将发生中断的单元自动切换到备用单元的方法实现系统的不中断工作,H系统通过部件的冗余实现系统的高可靠性。
F(故障安全)系统:通过将发生中断的系统切换到安全状态(通常为停车)来避免造成对生命、环境和原材料的破坏。
FH或HF(故障安全和高可靠性)系统:通过将发生故障的通道关闭,保证系统无扰动运行。
S7-410H是西门子S7-400家族的高端系列。
只有该系列产品可以实现硬件冗余自动化方案,并可满足故障安全功能和冗余双重需求。
因此,S7-410H在工厂自动化的关键性设备,特别是过程行业DCS和SIS系统有着广泛的应用。
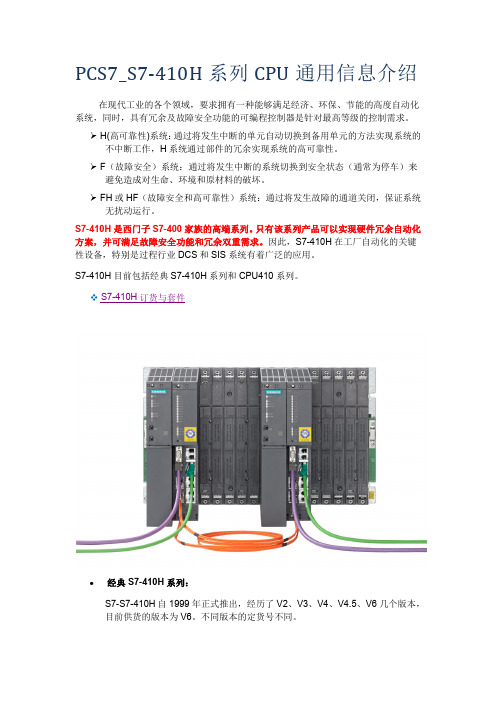
S7-410H目前包括经典S7-410H系列和CPU410系列。
S7-410H订货与套件经典S7-410H系列:S7-S7-410H自1999年正式推出,经历了V2、V3、V4、V4.5、V6几个版本,目前供货的版本为V6。
不同版本的定货号不同。
S7-410H 共有S7-412H 、S7-414H 、S7-416H 和S7-417H 四个产品,适用于从中小型OEM 到大型DCS 控制器的各种自动化方案。
既可以单站使用也可以冗余配置。
CPU410H 系列:自2013年起,西门子在经典S7-410H 的设计基础之上,推出了与PCS7系统平台配合应用的新一代CPU410-5H 。
目前共经历了V8、V8.1两个版本。
CPU410的订货号永远惟一,为选型、备件带来便利。
该CPU 的硬件性能与经典系列中的最高版本S7-417H 基本一致,但提供更丰富的端口和完善的功能。
用户可以根据实际需求为CPU 410配置合适的SEC 卡进行不同规模项目的开发,无需顾虑CPU 的容量,也无需选购存储卡。
针对亚太市场,还有经济型的CPU410Smart 系列。
PCS7详细安装方法
PCS7详细安装方法目录PCS7详细安装方法 (1)目录 (1)ES/OS站安装 (2)安装Windows XP操作系统 (2)安装IE6.0 (4)安装Windows补丁 (4)安装SQL Server 2005 for WinCC V6.2 (5)安装PCS7 7.0 SP1 (5)转换系统语言 (5)PCS7脚本安装 (5)安装西门子PCS7软件授权 (6)安装其他软件 (9)计算机恢复 (9)安装PCS7的具体步骤 (9)ES/OS站安装ES/OS站采用IBM通用商务机,集成Intel(R) GMA3100图形控制器,集成Mavell Yukon 88E8056 PCI-E Gigabit Enthernet 1000Mb自适应以太网卡,这两个设备的驱动程序可从IBM网站上下载(/cn)。
以下指示全新的不带操作系统的计算机的安装步骤。
安装Windows XP操作系统找到Windows XP Professional SP2英文版安装光盘,放入光驱中,开机时选择从光驱启动,进入安装程序。
在安装过程中需要对硬盘进行分区,一般建立三个分区,C盘为系统盘,D盘为工作区,E盘为备份区,可根据硬盘大小作适当调整,一般建议C盘可适当大一点。
分区完成后将两个区都格式化成NTFS格式,然后选择在C盘中安装Windows XP系统,后面按照提示操作即可。
安装完成后将光盘中I386文件夹拷贝C盘根目录下,以备安装驱动和其他程序时需要Windows XP安装程序的文件。
Windows XP安装完成后,需要安装网卡和显卡的驱动程序。
显卡驱动正确安装后,打开Control Panel→Display→Settings,将Screen area调整到1680 by 1050 pixels,将Colors设置为True Color (32 bit)。
显示设置最好将设备管理器中所有的硬件驱动都安装好。
察看硬件驱动情况的方法如下:Control Panel→System Restore→Hardware→Device Manager设备管理器界面如果出现了黄色的问号,代表了计算机中相应的硬件没有安装好驱动,设备的驱动程序可从IBM网站上下载(/cn)。
- 1、下载文档前请自行甄别文档内容的完整性,平台不提供额外的编辑、内容补充、找答案等附加服务。
- 2、"仅部分预览"的文档,不可在线预览部分如存在完整性等问题,可反馈申请退款(可完整预览的文档不适用该条件!)。
- 3、如文档侵犯您的权益,请联系客服反馈,我们会尽快为您处理(人工客服工作时间:9:00-18:30)。
PCS7V8.2亚太中文版安装及调试总结
1.安装专业版或旗舰版win732位或64位,工程师站和操作员站系统和软件尽量一致,计算机名
称在安装PCS7后不可更改,如要更改计算机名称,需使用PCS7安装盘重新安装,工程师站和操作员站用户名和密码要一致,具体设置见下面详细内容。
2.安装IIS和MSMQ
3.设置共享选项
4.将使用的网卡设定为第一位置
5.取消网卡(网络和共享中心设置)、显示器(电源选项里设置)的节能设置
其中
9.
10.1使用新建项目向导,
10.2选择CPU选项包;
10.3层级深度默认3,AS对象全选,OS对象选择PCS7OS,单站系统;
10.4选择路径及名称,完成建立。
11.建立归档变量(注意,插旗属性设置时字母区分大小写)
从STEP7中将变量导入WINCC需要对变量插旗(S7_m_c,true),如下:
如果需要在HMI上做趋势图,需要再设置S7_archive,shortterm,如下:
报警记录变量需要手动从变量记录里复制过来,可以批量复制。
编程方式和STEP7+WINCC一样。
12.创建ES站,右键插入PC站点
组态,添加WINCCAppl.,如果使用普通以太网卡,添加最高版本IEGeneral,并分配MAC地址。
在OS上右键编译,默认选项,一直点下一步,直到完成
在OS站上右键打开对象,会打开WINCC组态环境
可以对WINCC进行组态编程。
使用PCS7编程时,编译后系统会自动产生很多画面,直接套用即可;
可在工厂视图对画面结构进行调整或修改,编译后会自动更新WINCC画面管理树种画面的结构,
如下:
13.创建OS站,右键插入PC站点
组态,添加WINCCAppl.Ref.,如果使用普通以太网卡,添加最高版本IEGeneral,并分配MAC地
址。
根据项目配置相应数量的OS站即可。
如本项目为CPU是410-5H,1台工程师站,3台操作员站,网络图如下:
14.在OS
15.
17.--程。
