CppHTP5e_09
ue5渲染 源码编译
ue5渲染源码编译
Unreal Engine 5(UE5)的渲染系统源码编译涉及到多个步骤,下面是一个大致的指南:
1. 获取UE5源代码
首先,你需要从Epic Games的官方网站或者GitHub上获取UE5的源代码。
2. 安装依赖项
编译UE5需要一系列的依赖项,包括CMake、Visual Studio(或其他的C++ IDE)、Python等。
确保你的系统已经安装了这些工具。
3. 初始化引擎
在UE5的源代码目录下,运行init.bat(Windows)或init.sh (Linux/macOS)来初始化引擎。
4. 配置项目设置
在UE5的源代码目录下,找到UE5.sln文件并打开它。
在Visual Studio中,你可以修改项目设置,例如配置你的构建目标(Debug、Release等)和平台(Windows、Linux、macOS等)。
5. 编译引擎
在Visual Studio中,选择“生成”菜单,然后选择“生成解决方案”或者直接按F7来开始编译过程。
这将会编译整个引擎,包括渲染系统。
6. 运行和测试
编译完成后,你可以运行UE5的编辑器来测试你的渲染代码。
在编辑器中创建一个新的项目,然后在这个项目中编写和测试你的渲染代码。
7. 调试和优化
如果遇到问题,你可以使用Visual Studio的调试工具来调试你的渲染代码。
你还可以使用性能分析器来优化你的代码。
注意:这是一个简化的指南,具体步骤可能会根据你使用的开发环境和配置有所不同。
如果你遇到任何问题,可以参考Epic Games 提供的官方文档,或者在开发者社区中寻求帮助。
C Free 5程序调试方法

C Free 5.0 程序的单步调试创建一份新的代码文件可直接点击“文件”下的白色图标,或点击“文件”选择“新建”,或按快捷键“Ctrl + N”(C Free 5.0默认情况下新建的代码文件为.cpp 格式,可在“工具”、“环境选项”、“新建文件类型”中更改,C语言标准格式为.c 格式)基于实例的C程序调试介绍一、查看变量的内容# include <stdio.h>int main(int argc, char* argv[]){int i;int sum;sum=0;for(i=1;i<=10;i++)sum=sum+i;printf("sum=%d",sum);return 0;}第一步,打开C Free 5.0,输入上面的代码。
第二步,把光标移到“sum=0;”这一行,按F10它的作用是设一个断点,程序运行到这里时,会停下来。
也就是说,接下来,程序必须通过按F7键单步运行了。
第三步:按F9 (开始调试)我们发现有一箭头停留在这句语句上,它指示程序停留的位置,而箭头所在的语句(“sum=0;”)还没有执行。
事实上,我们可以通过看一下内存变量sum的内容来验证。
方法是这样的:打开“调试”下的“监视”,或者按快捷键“Alt + 3”。
在“监视”的空白处点击鼠标右键,选择“添加监视”。
输入需要监视的变量名,这里输入为sum这时我们可以在监视窗口中看到sum的内容不为0,而是一个随机的值。
第四步,我们按一下F7(进入),我们发现sum的内容变为0了。
这说明“sum=0;”这句语句被执行了。
我们还可以用同样的方法看一下i的内容。
只需要鼠标点第六步,一步一步地按F7,我们可以发现在单步执行for循环语句的时候i和sum的内容在不断变化。
当退出循环时,我们发现i的内容为11(因为变量i的内容为11,i<=10这个条件不满足,所以程序退出循环)。
附带提一下,当程序已经执行了“sum=0;”这一句语句后,如果我们直接把光标移到“printf("sum=%d",sum);”,然后按Ctrl+ F8,我们可以直接把上面的for循环都执行了,而不必一步一步地按F7。
高质量DXT压缩使用CUDA技术(2009年)说明书

March 2009High Quality DXT Compression using OpenCL for CUDAIgnacio Castaño*******************Document Change HistoryVersion Date Responsible Reason for Change0.1 02/01/2007 Ignacio Castaño First draft0.2 19/03/2009 Timo Stich OpenCL versionAbstractDXT is a fixed ratio compression format designed for real-time hardware decompression of textures. While it’s also possible to encode DXT textures in real-time, the quality of the resulting images is far from the optimal. In this white paper we will overview a more expensivecompression algorithm that produces high quality results and we will see how to implement it using CUDA to obtain much higher performance than the equivalent CPU implementation.MotivationWith the increasing number of assets and texture size in recent games, the time required to process those assets is growing dramatically. DXT texture compression takes a large portion of this time. High quality DXT compression algorithms are very expensive and while there are faster alternatives [1][9], the resulting quality of those simplified methods is not very high. The brute force nature of these compression algorithms makes them suitable to be parallelized and adapted to the GPU. Cheaper compression algorithms have already been implemented [2] on the GPU using traditional GPGPU approaches. However, with the traditional GPGPU programming model it’s not possible to implement more complex algorithms where threads need to share data and synchronize.How Does It Work?In this paper we will see how to use CUDA to implement a high quality DXT1 texturecompression algorithm in parallel. The algorithm that we have chosen is the cluster fit algorithm as described by Simon Brown [3]. We will first provide a brief overview of the algorithm and then we will describe how did we parallelize and implement it in CUDA.DXT1 FormatDXT1 is a fixed ratio compression scheme that partitions the image into 4x4 blocks. Each block is encoded with two 16 bit colors in RGB 5-6-5 format and a 4x4 bitmap with 2 bits per pixel. Figure 1 shows the layout of the block.Figure 1. DXT1 block layoutThe block colors are reconstructed by interpolating one or two additional colors between the given ones and indexing these and the original colors with the bitmap bits. The number of interpolated colors is chosen depending on whether the value of ‘Color 0’ is lower or greater than ‘Color 1’.BitmapColorsThe total size of the block is 64 bits. That means that this scheme achieves a 6:1 compression ratio. For more details on the DXT1 format see the specification of the OpenGL S3TCextension [4].Cluster FitIn general, finding the best two points that minimize the error of a DXT encoded block is a highly discontinuous optimization problem. However, if we assume that the indices of the block are known the problem becomes a linear optimization problem instead: minimize the distance from each color of the block to the corresponding color of the palette.Unfortunately, the indices are not known in advance. We would have to test them all to find the best solution. Simon Brown [3] suggested pruning the search space by considering only the indices that preserve the order of the points along the least squares line.Doing that allows us to reduce the number of indices for which we have to optimize theendpoints. Simon Brown provided a library [5] that implements this algorithm. We use thislibrary as a reference to compare the correctness and performance of our CUDAimplementation.The next section goes over the implementation details.OpenCL ImplementationPartitioning the ProblemWe have chosen to use a single work group to compress each 4x4 color block. Work items that process a single block need to cooperate with each other, but DXT blocks are independent and do not need synchronization or communication. For this reason the number of workgroups is equal to the number of blocks in the image.We also parameterize the problem so that we can change the number of work items per block to determine what configuration provides better performance. For now, we will just say that the number of work items is N and later we will discuss what the best configuration is.During the first part of the algorithm, only 16 work items out of N are active. These work items start reading the input colors and loading them to local memory.Finding the best fit lineTo find a line that best approximates a set of points is a well known regression problem. The colors of the block form a cloud of points in 3D space. This can be solved by computing the largest eigenvector of the covariance matrix. This vector gives us the direction of the line.Each element of the covariance matrix is just the sum of the products of different colorcomponents. We implement these sums using parallel reductions.Once we have the covariance matrix we just need to compute its first eigenvector. We haven’t found an efficient way of doing this step in parallel. Instead, we use a very cheap sequential method that doesn’t add much to the overall execution time of the group.Since we only need the dominant eigenvector, we can compute it directly using the Power Method [6]. This method is an iterative method that returns the largest eigenvector and only requires a single matrix vector product per iteration. Our tests indicate that in most cases 8iterations are more than enough to obtain an accurate result.Once we have the direction of the best fit line we project the colors onto it and sort them along the line using brute force parallel sort. This is achieved by comparing all the elements against each other as follows:cmp[tid] = (values[0] < values[tid]);cmp[tid] += (values[1] < values[tid]);cmp[tid] += (values[2] < values[tid]);cmp[tid] += (values[3] < values[tid]);cmp[tid] += (values[4] < values[tid]);cmp[tid] += (values[5] < values[tid]);cmp[tid] += (values[6] < values[tid]);cmp[tid] += (values[7] < values[tid]);cmp[tid] += (values[8] < values[tid]);cmp[tid] += (values[9] < values[tid]);cmp[tid] += (values[10] < values[tid]);cmp[tid] += (values[11] < values[tid]);cmp[tid] += (values[12] < values[tid]);cmp[tid] += (values[13] < values[tid]);cmp[tid] += (values[14] < values[tid]);cmp[tid] += (values[15] < values[tid]);The result of this search is an index array that references the sorted values. However, this algorithm has a flaw, if two colors are equal or are projected to the same location of the line, the indices of these two colors will end up with the same value. We solve this problem comparing all the indices against each other and incrementing one of them if they are equal:if (tid > 0 && cmp[tid] == cmp[0]) ++cmp[tid];if (tid > 1 && cmp[tid] == cmp[1]) ++cmp[tid];if (tid > 2 && cmp[tid] == cmp[2]) ++cmp[tid];if (tid > 3 && cmp[tid] == cmp[3]) ++cmp[tid];if (tid > 4 && cmp[tid] == cmp[4]) ++cmp[tid];if (tid > 5 && cmp[tid] == cmp[5]) ++cmp[tid];if (tid > 6 && cmp[tid] == cmp[6]) ++cmp[tid];if (tid > 7 && cmp[tid] == cmp[7]) ++cmp[tid];if (tid > 8 && cmp[tid] == cmp[8]) ++cmp[tid];if (tid > 9 && cmp[tid] == cmp[9]) ++cmp[tid];if (tid > 10 && cmp[tid] == cmp[10]) ++cmp[tid];if (tid > 11 && cmp[tid] == cmp[11]) ++cmp[tid];if (tid > 12 && cmp[tid] == cmp[12]) ++cmp[tid];if (tid > 13 && cmp[tid] == cmp[13]) ++cmp[tid];if (tid > 14 && cmp[tid] == cmp[14]) ++cmp[tid];During all these steps only 16 work items are being used. For this reason, it’s not necessary to synchronize them. All computations are done in parallel and at the same time step, because 16 is less than the warp size on NVIDIA GPUs.Index evaluationAll the possible ways in which colors can be clustered while preserving the order on the line are known in advance and for each clustering there’s a corresponding index. For 4 clusters there are 975 indices that need to be tested, while for 3 clusters there are only 151. We pre-compute these indices and store them in global memory.We have to test all these indices and determine which one produces the lowest error. In general there are indices than work items. So, we partition the total number of indices by the number of work items and each work item loops over the set of indices assigned to it. It’s tempting to store the indices in constant memory, but since indices are used only once for each work group, and since each work item accesses a different element, coalesced global memory loads perform better than constant loads.Solving the Least Squares ProblemFor each index we have to solve an optimization problem. We have to find the two end points that produce the lowest error. For each input color we know what index it’s assigned to it, so we have 16 equations like this:i i i x b a =+βαWhere {}i i βα, are {}0,1, {}32,31, {}21,21, {}31,32 or {}1,0 depending on the index and the interpolation mode. We look for the colors a and b that minimize the least square error of these equations. The solution of that least squares problem is the following:∑∑⋅∑∑∑∑= −i i i i i ii i i i x x b a βαββαβαα122 Note: The matrix inverse is constant for each index set, but it’s cheaper to compute it everytime on the kernel than to load it from global memory. That’s not the case of the CPU implementation.Computing the ErrorOnce we have a potential solution we have to compute its error. However, colors aren’t stored with full precision in the DXT block, so we have to quantize them to 5-6-5 to estimate the error accurately. In addition to that, we also have to take in mind that the hardware expands thequantized color components to 8 bits replicating the highest bits on the lower part of the byte as follows:R = (R << 3) | (R >> 2); G = (G << 2) | (G >> 4); B = (B << 3) | (B >> 2);Converting the floating point colors to integers, clamping, bit expanding and converting them back to float can be time consuming. Instead of that, we clamp the color components, round the floats to integers and approximate the bit expansion using a multiplication. We found the factors that produce the lowest error using an offline optimization that minimized the average error.r = round(clamp(r,0.0f,1.0f) * 31.0f); g = round(clamp(g,0.0f,1.0f) * 63.0f); b = round(clamp(b,0.0f,1.0f) * 31.0f); r *= 0.03227752766457f; g *= 0.01583151765563f; b *= 0.03227752766457f;Our experiment show that in most cases the approximation produces the same solution as the accurate solution.Selecting the Best SolutionFinally, each work item has evaluated the error of a few indices and has a candidate solution.To determine which work item has the solution that produces the lowest error, we store the errors in local memory and use a parallel reduction to find the minimum. The winning work item writes the endpoints and indices of the DXT block back to global memory.Implementation DetailsThe source code is divided into the following files:•DXTCompression.cl: This file contains OpenCL implementation of the algorithm described here.•permutations.h: This file contains the code used to precompute the indices.dds.h: This file contains the DDS file header definition. PerformanceWe have measured the performance of the algorithm on different GPUs and CPUscompressing the standard Lena. The design of the algorithm makes it insensitive to the actual content of the image. So, the performance depends only on the size of the image.Figure 2. Standard picture used for our tests.As shown in Table 1, the GPU compressor is at least 10x faster than our best CPUimplementation. The version of the compressor that runs on the CPU uses a SSE2 optimized implementation of the cluster fit algorithm. This implementation pre-computes the factors that are necessary to solve the least squares problem, while the GPU implementation computes them on the fly. Without this CPU optimization the difference between the CPU and GPU version is even larger.Table 1. Performance ResultsImage TeslaC1060 Geforce8800 GTXIntel Core 2X6800AMD Athlon64 DualCore 4400Lena512x51283.35 ms 208.69 ms 563.0 ms 1,251.0 msWe also experimented with different number of work-items, and as indicated in Table 2 we found out that it performed better with the minimum number.Table 2. Number of Work Items64 128 25654.66 ms 86.39 ms 96.13 msThe reason why the algorithm runs faster with a low number of work items is because during the first and last sections of the code only a small subset of work items is active.A future improvement would be to reorganize the code to eliminate or minimize these stagesof the algorithm. This could be achieved by loading multiple color blocks and processing them in parallel inside of the same work group.ConclusionWe have shown how it is possible to use OpenCL to implement an existing CPU algorithm in parallel to run on the GPU, and obtain an order of magnitude performance improvement. We hope this will encourage developers to attempt to accelerate other computationally-intensive offline processing using the GPU.High Quality DXT Compression using CUDAMarch 2009 9References[1] “Real-Time DXT Compression”, J.M.P. van Waveren. /cd/ids/developer/asmo-na/eng/324337.htm[2] “Compressing Dynamically Generated Textures on the GPU”, Oskar Alexandersson, Christoffer Gurell, Tomas Akenine-Möller. http://graphics.cs.lth.se/research/papers/gputc2006/[3] “DXT Compression Techniques”, Simon Brown. /?article=dxt[4] “OpenGL S3TC extension spec”, Pat Brown. /registry/specs/EXT/texture_compression_s3tc.txt[5] “Squish – DXT Compression Library”, Simon Brown. /?code=squish[6] “Eigenvalues and Eigenvectors”, Dr. E. Garcia. /information-retrieval-tutorial/matrix-tutorial-3-eigenvalues-eigenvectors.html[7] “An Experimental Analysis of Parallel Sorting Algorithms”, Guy E. Blelloch, C. Greg Plaxton, Charles E. Leiserson, Stephen J. Smith /blelloch98experimental.html[8] “NVIDIA CUDA Compute Unified Device Architecture Programming Guide”.[9] NVIDIA OpenGL SDK 10 “Compress DXT” sample /SDK/10/opengl/samples.html#compress_DXTNVIDIA Corporation2701 San Tomas ExpresswaySanta Clara, CA 95050 NoticeALL NVIDIA DESIGN SPECIFICATIONS, REFERENCE BOARDS, FILES, DRAWINGS, DIAGNOSTICS, LISTS, AND OTHER DOCUMENTS (TOGETHER AND SEPARATELY, “MATERIALS”) ARE BEING PROVIDED “AS IS.” NVIDIA MAKES NO WARRANTIES, EXPRESSED, IMPLIED, STATUTORY, OR OTHERWISE WITH RESPECT TO THE MATERIALS, AND EXPRESSLY DISCLAIMS ALL IMPLIED WARRANTIES OF NONINFRINGEMENT,MERCHANTABILITY, AND FITNESS FOR A PARTICULAR PURPOSE.Information furnished is believed to be accurate and reliable. However, NVIDIA Corporation assumes no responsibility for the consequences of use of such information or for any infringement of patents or otherrights of third parties that may result from its use. No license is granted by implication or otherwise under any patent or patent rights of NVIDIA Corporation. Specifications mentioned in this publication are subject to change without notice. This publication supersedes and replaces all information previously supplied. NVIDIA Corporation products are not authorized for use as critical components in life support devices or systems without express written approval of NVIDIA Corporation.TrademarksNVIDIA, the NVIDIA logo, GeForce, and NVIDIA Quadro are trademarks or registeredtrademarks of NVIDIA Corporation in the United States and other countries. Other company and product names may be trademarks of the respective companies with which they are associated. Copyright© 2009 NVIDIA Corporation. All rights reserved.。
ic200cpue05编程
ic200cpue05编程IC200CPUE05是一款常见的工业控制器,被广泛应用于自动化控制系统中。
它具有高性能、可靠性强的特点,可以实现多种控制和通信功能。
本文将详细介绍IC200CPUE05的编程方法及其在工业控制中的应用。
IC200CPUE05是一款基于PLC(可编程逻辑控制器)的控制器,它采用了Modbus通信协议,具备高速处理能力和丰富的输入输出接口。
该控制器可以通过编程实现对不同设备的自动控制,实现生产线的自动化操作。
编程IC200CPUE05的方法主要有两种:Ladder Diagram(梯形图)和Structured Text(结构化文本)。
梯形图是一种图形化的编程语言,类似于电气原理图,由多个横向排列的梯形图组成,每个梯形图由多个逻辑元件组成,如开关、继电器等。
而结构化文本是一种基于文本的编程语言,类似于常见的编程语言,使用类似于C语言的语法进行编程。
在IC200CPUE05的编程中,首先需要对控制器进行初始化设置,包括通信设置、输入输出设置等。
然后,根据实际需求编写程序逻辑,通过逻辑元件的组合和连接实现对设备的控制。
编写程序过程中,可以使用不同的逻辑元件,如逻辑运算符、定时器、计数器等,来实现不同的控制逻辑。
除了基本的控制逻辑外,IC200CPUE05还支持多种通信协议,如Modbus、Profibus等,可以实现与其他设备的数据交换。
通过这些通信协议,IC200CPUE05可以与其他设备进行数据传输和控制指令的交换,实现多设备间的协同工作。
在实际工业控制中,IC200CPUE05的应用非常广泛。
它可以用于自动化生产线的控制,实现对设备的精确控制和自动化操作。
例如,可以通过IC200CPUE05实现对输送带的控制,实现物料的自动装卸和传送。
另外,IC200CPUE05还可以用于环境监测系统的控制,实现对温度、湿度等参数的实时监测和控制。
IC200CPUE05是一款性能强大的工业控制器,具备高速处理能力和丰富的输入输出接口。
源码安装H2OHttp服务端程序到Ubuntu服务器

源码安装H2OHttp服务端程序到Ubuntu服务器⾸先安装全家桶apt install -y build-essential zlib1g-dev libpcre3 libpcre3-dev unzip cmake libncurses5-dev libpam0g-dev bison libboost-dev libssl-dev openssl g++ libxml2-dev libcurl3-openssl-dev libpng-dev libfreetype6-dev libfreetype6-dev这个包有时候会安装失败apt install -y libpng12-dev添加账户:groupadd wwwuseradd -s/sbin/nologin -M -g www www下载安装包:解压:tar zxf v2.2.2.tar.gz配置安装⽬录:cmake . -DCMAKE_INSTALL_PREFIX=/usr/local/h2o -DWITH_BUNDLED_SSL=on编译安装:make -j8make install配置⽂件:vim /home/etc/h2o.cf1 access-log: /tmp/h2o.log2 error-log: /tmp/h2o.err3 pid-file: /tmp/h2o.pid4 max-connections: 5125 file.send-gzip: ON6 tcp-fastopen: 37 user: www8 file.index: [ 'index.php', 'index.html' ]9 file.mime.addtypes:10 text/html: .html .htm .shtml11 text/css: .css12 text/xml: .xml13 image/gif: .gif14 image/jpeg: .jpeg .jpg15 application/javascript: .js16 application/atom+xml: .atom17 application/rss+xml: .rss1819 text/mathml: .mml20 text/plain: .txt21 text/vnd.sun.j2me.app-descriptor: .jad22 text/vnd.wap.wml: .wml23 text/x-component: .htc2425 image/png: .png26 image/tiff: .tif .tiff27 image/vnd.wap.wbmp: .wbmp28 image/x-icon: .ico29 image/x-jng: .jng30 image/x-ms-bmp: .bmp31 image/svg+xml: .svg .svgz32 image/webp: .webp3334 application/font-woff: .woff35 application/java-archive: .jar .war .ear36 application/json: .json37 application/mac-binhex40: .hqx38 application/msword: .doc39 application/pdf: .pdf40 application/postscript: .ps .eps .ai41 application/rtf: .rtf42 application/vnd.apple.mpegurl: .m3u843 application/vnd.ms-excel: .xls44 application/vnd.ms-fontobject: .eot45 application/vnd.ms-powerpoint: .ppt46 application/vnd.wap.wmlc: .wmlc47 application/vnd.google-earth.kml+xml: .kml48 application/vnd.google-earth.kmz: .kmz49 application/x-7z-compressed: .7z50 application/x-cocoa: .cco51 application/x-java-archive-diff: .jardiff52 application/x-java-jnlp-file: .jnlp53 application/x-makeself: .run54 application/x-perl: .pl .pm55 application/x-pilot: .prc .pdb56 application/x-rar-compressed: .rar57 application/x-redhat-package-manager: .rpm58 application/x-sea: .sea59 application/x-shockwave-flash: .swf60 application/x-stuffit: .sit61 application/x-tcl: .tcl .tk62 application/x-x509-ca-cert: .der .pem .crt63 application/x-xpinstall: .xpi64 application/xhtml+xml: .xhtml65 application/xspf+xml: .xspf66 application/zip: .zip6768 application/octet-stream: .bin .exe .dll69 application/octet-stream: .deb70 application/octet-stream: .dmg71 application/octet-stream: .iso .img72 application/octet-stream: .msi .msp .msm7374 application/vnd.openxmlformats-officedocument.wordprocessingml.document: .docx75 application/vnd.openxmlformats-officedocument.spreadsheetml.sheet: .xlsx76 application/vnd.openxmlformats-officedocument.presentationml.presentation: .pptx7778 audio/midi: .mid .midi .kar79 audio/mpeg: .mp380 audio/ogg: .ogg81 audio/x-m4a: .m4a82 audio/x-realaudio: .ra8384 video/3gpp: .3gpp .3gp85 video/mp2t: .ts86 video/mp4: .mp487 video/mpeg: .mpeg .mpg88 video/quicktime: .mov89 video/webm: .webm90 video/x-flv: .flv91 video/x-m4v: .m4v92 video/x-mng: .mng93 video/x-ms-asf: .asx .asf94 video/x-ms-wmv: .wmv95 video/x-msvideo: .avi9697 hosts:98 "域名:端⼝":99 #header.add: "strict-transport-security: max-age=39420000; includesubdomains; preload"100 header.add: "X-Frame-Options: SAMEORIGIN"101 header.add: "X-Content-Type-Options: nosniff"102 header.add: "X-XSS-Protection: 1; mode=block"103 listen:104 port: 端⼝105 #ssl:106 #certificate-file: /home/wwwroot/ssl/.crt107 #key-file: /home/wwwroot/ssl/.key108 #dh-file: /home/wwwroot/ssl/dhparam4096.pem109 #minimum-version: TLSv1.1110 #cipher-preference: server111 #cipher-suite: CHACHA20 EECDH+ECDSA+AESGCM EECDH+aRSA+AESGCM EECDH+ECDSA+SHA384 EECDH+ECDSA+SHA256 EECDH+aRSA+SHA384 EECDH+aRSA+SHA256 EECDH+aRSA+RC4 EECDH EDH+aRSA !aNULL !e 112 paths:113 /:114 file.dir: /home/wwwroot/domain/115 redirect:116 url: /index.php/117 internal: YES118 status: 307119 file.custom-handler:120 extension: .php121 fastcgi.connect:122 port: /tmp/php-fpm.sock123 type: unix配置服务:vim /usr/lib/systemd/system/h2o.service1[Unit]2 Description=h2o optimized HTTP server3 After=network.target remote-fs.target nss-lookup.target45[Service]6 PIDFile=/tmp/h2o.pid7 ExecStart=/usr/local/bin/h2o/bin/h2o -c /home/etc/h2o.cf &8 ExecReload=/usr/bin/kill -HUP $MAINPID9 LimitNOFILE=infinity1011[Install]12 WantedBy=multi-user.targetsystemctl enable h2osystemctl start h2osystemctl status h2o关于服务配置的细节:。
NI PXIe-7868R R Series Reconfigurable I O 模块(AI、AO

GETTING STARTED GUIDENI PXIe-7868RR Series Reconfigurable I/O Module (AI, AO, DIO) for PXI Express, 6 AI, 18 AO, 48 DIO, 1 MS/s AIO, 512 MB DRAM,Kintex-7 325T FPGAThis document describes how to begin using the NI PXIe-7868R.Safety GuidelinesCaution Do not operate the NI PXIe-7868R in a manner not specified in thisdocument. Product misuse can result in a hazard. You can compromise the safetyprotection built into the product if the product is damaged in any way. If the productis damaged, return it to NI for repair.Caution This icon denotes a caution, which advises you to consult documentationwhere this symbol is marked.Electromagnetic Compatibility GuidelinesThis product was tested and complies with the regulatory requirements and limits for electromagnetic compatibility (EMC) stated in the product specifications. These requirements and limits provide reasonable protection against harmful interference when the product is operated in the intended operational electromagnetic environment.This product is intended for use in industrial locations. However, harmful interference may occur in some installations, when the product is connected to a peripheral device or test object, or if the product is used in residential or commercial areas. To minimize interference with radio and television reception and prevent unacceptable performance degradation, install and use this product in strict accordance with the instructions in the product documentation.Furthermore, any changes or modifications to the product not expressly approved by National Instruments could void your authority to operate it under your local regulatory rules.Caution To ensure the specified EMC performance, operate this product only withshielded cables and accessories.Caution To ensure the specified EMC performance, the length of all I/O cablesmust be no longer than 3 m (10 ft).Preparing the EnvironmentEnsure that the environment in which you are using the NI PXIe-7868R meets the following specifications.0 °C to 55 °COperating temperature(IEC 60068-2-1, IEC 60068-2-2)Operating humidity (IEC 60068-2-56)10% RH to 90% RH, noncondensing Pollution degree2Maximum altitude2,000 mIndoor use only.Note Refer to the device specifications on /manuals for completespecifications.2| | NI PXIe-7868R Getting Started GuideUnpacking the KitCaution To prevent electrostatic discharge (ESD) from damaging the device,ground yourself using a grounding strap or by holding a grounded object, such asyour computer chassis.1.Touch the antistatic package to a metal part of the computer chassis.2.Remove the device from the package and inspect the device for loose components or anyother sign of damage.Caution Never touch the exposed pins of connectors.Note Do not install a device if it appears damaged in any way.3.Unpack any other items and documentation from the kit.Store the device in the antistatic package when the device is not in use.Verifying the Kit ContentsVerify that the following items are included in the NI PXIe-7868R kit.Figure 1. NI PXIe-7868R Kit Contents1.Hardware2.NI-RIO Media3.Getting Started GuideNI PXIe-7868R Getting Started Guide | © National Instruments| 3Installing Software on the Host ComputerBefore using the NI PXIe-7868R, you must install the following application software and device drivers on the host computer.bVIEW 2017 or laterbVIEW Real-Time Module 2017 or later1bVIEW FPGA Module 2017 or later4.NI R Series Multifunction RIO Device Drivers July 2017 or laterVisit /info and enter the Info Code softwareversion for minimum software support information.Installing the NI PXIe-7868RCaution To prevent damage to the NI PXIe-7868R caused by ESD orcontamination, handle the module using the edges or the metal bracket.1.Ensure the AC power source is connected to the chassis before installing the module.The AC power cord grounds the chassis and protects it from electrical damage while you install the module.2.Power off the chassis.3.Inspect the slot pins on the chassis backplane for any bends or damage prior toinstallation. Do not install a module if the backplane is damaged.4.Remove the black plastic covers from all the captive screws on the module front panel.5.Identify a supported slot in the chassis. The following figure shows the symbols thatindicate the slot types.Figure 2. Chassis Compatibility Symbols1.PXI Express System Controller Slot2.PXI Peripheral Slot3.PXI Express Hybrid Peripheral Slot4.PXI Express System Timing Slot5.PXI Express Peripheral SlotNI PXIe-7868R modules can be placed in PXI Express peripheral slots, PXI Express hybrid peripheral slots, or PXI Express system timing slots.6.Touch any metal part of the chassis to discharge static electricity.1LabVIEW Real Time Module is only required when the R Series board is used in a chassis where the PXIe Controller is running a real-time operating system.4| | NI PXIe-7868R Getting Started Guide7.Place the module edges into the module guides at the top and bottom of the chassis. Slide the module into the slot until it is fully inserted.Figure 3. Module Installation1.Chassis2.System Controller3.Hardware Module4.Front-Panel Mounting Screws5.Module Guides6.Power Switch8.Secure the module front panel to the chassis using the front-panel mounting screws.Note Tightening the top and bottom mounting screws increases mechanicalstability and also electrically connects the front panel to the chassis, which can improve the signal quality and electromagnetic performance.9.Cover all empty slots using EMC filler panels or fill using slot blockers to maximize cooling air flow, depending on your application.10.Power on the chassis.Verifying Hardware Installation for Host TargetsYou can verify that the system recognizes the NI PXIe-7868R by using Measurement &Automation Explorer (MAX).unch MAX by navigating to Start »All Programs »National Instruments »MAX or byclicking the MAX desktop icon.2.Expand Devices and Interfaces .3.Verify that the device appears under Devices and Interfaces .If the device does not appear, press <F5> to refresh the view in MAX. If the device does not appear after refreshing the view, visit /support for troubleshooting information.NI PXIe-7868R Getting Started Guide | © National Instruments | 5Verifying Hardware Installation for RemoteT argetsYou can verify that the system recognizes the NI PXIe-7868R by using Measurement & Automation Explorer (MAX).unch MAX on the host computer.2.Expand Remote Targets in the configuration tree and locate your system.3.Install LabVIEW Real-Time Module 2017 and NI RIO Device Drivers July 2017 or lateron your Remote Target.a)Refer to the Installing Software on the Host Computer section for information aboutinstalling software on the host.b)Refer to the PXI Express Controllers User Manual at /manuals forinformation on installing software on the target.4.Under Remote Targets, find and expand Devices and Interfaces.If the device does not appear, press <F5> to refresh the view in MAX. If the device does not appear after refreshing the view, visit /support for troubleshooting information. Connecting the NI PXIe-7868RNI recommends using the following cables and accessories with the NI PXIe-7868R:6| | NI PXIe-7868R Getting Started GuideNote The SCB-68A DIP switches must be set for Direct Feedthrough mode for use with R Series devices. Visit /info and enter the Info Code scb68acables for more information on the SCB-68A accessory.Note NI is not liable for connections that exceed any of the maximum ratings of input or output signals on the NI PXIe-7868R and on the computer chassis. Refer to the NI PXIe-7868R Specifications, available at /info for the maximum input and output ratings for each signal.NI PXIe-7868R Getting Started Guide | © National Instruments| 7PinoutCONNECTOR 0(RMIO)CONNECTOR 2(RAO)CONNECTOR 1(RDIO)Table 2. NI PXIe-7868R Signal Descriptions8 | | NI PXIe-7868R Getting Started GuideTable 2. NI PXIe-7868R Signal Descriptions (Continued)The NI PXIe-7868R is protected from overvoltage and overcurrent conditions.Note Refer to the NI PXIe-7868R Specifications, available at /manuals formore information.Note The pinout label on the lid of the SCB-68A accessory is incompatible withthe NI PXIe-7868R. Refer to the NI 78xxR Pinout Labels for the SCB-68A, availableat /manuals for the compatible pinout labels.NI PXIe-7868R Getting Started Guide | © National Instruments| 9Where to Go NextWorldwide Support and ServicesThe NI website is your complete resource for technical support. At /support, you have access to everything from troubleshooting and application development self-help resources to email and phone assistance from NI Application Engineers.Visit /services for NI Factory Installation Services, repairs, extended warranty, and other services.Visit /register to register your NI product. Product registration facilitates technical support and ensures that you receive important information updates from NI.A Declaration of Conformity (DoC) is our claim of compliance with the Council of the European Communities using the manufacturer’s declaration of conformity. This system affords the user protection for electromagnetic compatibility (EMC) and product safety. You can obtain the DoC for your product by visiting /certification. If your product supports calibration, you can obtain the calibration certificate for your product at /calibration. 10| | NI PXIe-7868R Getting Started GuideNI corporate headquarters is located at 11500 North Mopac Expressway, Austin, Texas, 78759-3504. NI also has offices located around the world. For telephone support in the United States, create your service request at /support or dial 1 866 ASK MYNI (275 6964). For telephone support outside the United States, visit the Worldwide Offices section of / niglobal to access the branch office websites, which provide up-to-date contact information, support phone numbers, email addresses, and current events.NI PXIe-7868R Getting Started Guide | © National Instruments| 11Information is subject to change without notice. Refer to the NI T rademarks and Logo Guidelines at /trademarks for information on NI trademarks. Other product and company names mentioned herein are trademarks or trade names of their respective companies. For patents covering NI products/technology, refer to the appropriate location: Help»Patents in your software, the patents.txt file on your media, or the National Instruments Patent Notice at /patents. Y ou can find information about end-user license agreements (EULAs) and third-party legal notices in the readme file for your NI product. Refer to the Export Compliance Information at /legal/export-compliance for the NI global trade compliance policy and how to obtain relevant HTS codes, ECCNs, and other import/export data. NI MAKES NO EXPRESS OR IMPLIED WARRANTIES AS TO THE ACCURACY OF THE INFORMA TION CONTAINED HEREIN AND SHALL NOT BE LIABLE FOR ANY ERRORS. U.S. Government Customers: The data contained in this manual was developed at private expense and is subject to the applicable limited rights and restricted data rights as set forth in FAR 52.227-14, DFAR 252.227-7014, and DFAR 252.227-7015.© 2017 National Instruments. All rights reserved.378036B-01July 5, 2017。
chromium-109 源码编译

一、介绍chromium-109源码chromium是一个开源的网页浏览器项目,由Google主导开发。
chromium-109是chromium项目的一个具体版本,其源码可以通过开源方式获取并编译。
编译chromium-109源码可以让开发者深入了解浏览器内部结构,修改源码以定制化自己的浏览器,或者进行性能优化等操作。
二、准备工作1. 确认编译环境编译chromium-109源码需要在Linux系统下进行,因此需要确认自己的系统是否符合要求。
建议使用Ubuntu或者Debian等常见的Linux发行版。
2. 安装必要的软件包在开始编译之前,需要安装一系列必要的软件包,包括git、depot_tools、Clang、Ninja、CMake等。
这些软件包是编译chromium-109源码的基础工具,确保其正常安装并配置好相关环境变量。
3. 下载chromium-109源码通过git工具可以从chromium冠方仓库下载最新的chromium-109源码。
可以选择下载release版本的源码,也可以从开发分支获取最新的代码。
三、编译chromium-109源码1. 配置编译参数在进行编译之前,需要针对自己的需求配置一些编译参数。
可以选择是否开启调试模式,是否进行符号表的优化,是否开启特定的功能模块等等。
2. 开始编译使用Ninja工具进行编译。
Ninja是一个快速、并行构建系统,适合用于大型项目的编译。
在编译过程中可以查看编译日志,以便及时发现问题并进行调试。
3. 完成编译编译完成后,将会在指定的目录下生成可执行文件。
这个文件就是我们自己编译的chromium-109浏览器,可以进行自定义的测试和使用。
四、常见问题解决1. 编译过程中出现了错误在编译过程中可能会遇到各种各样的错误,比如依赖库缺失、环境变量设置不正确等等。
这时可以通过查看编译日志和相关文档来解决问题,或者在开发社区中询问其他开发者的意见。
DIY09客户端安装使用说明书

DIY09客户端安装使用说明书(v1.1)2009年12月30日文档信息变更记录目录1. DIY09系统体系................................................................................... 错误!未定义书签。
2.DIY09客户端功能简介........................................................................ 错误!未定义书签。
3. DIY09客户端使用环境....................................................................... 错误!未定义书签。
4. DIY09客户端安装包........................................................................... 错误!未定义书签。
5. DIY09客户端安装步骤....................................................................... 错误!未定义书签。
6. A&Q ...................................................................................................... 错误!未定义书签。
1. DIY09系统体系如上图所示,DIY09版是企业应用移动信息化接入的平台,DIY 09版主要包括两大部分构成:移动侧的企信通DIY09版统一运营服务平台、DIY09客户端。
其中客户端包括API 开发包集(含短信、彩信、wappush 和白名单API )、客户侧配置Portal 、客户侧通讯管理模块。
本文档主要介绍如何在企业侧使用客户端,通讯过程如图:DIY09客户端系统企业侧移动管理侧DIY09管理平台通信网关如图2.1DIY09通讯全景图API2.DIY09客户端功能简介⏹API开发包集:包括短信API、彩信API、WappushAPI和白名单API;⏹配置Portal:对短信网关参数、彩信网关参数、DIY09平台参数和上行路由配置信息进行配置;⏹通讯管理模块:作为API与短彩信网关之间的通讯管理模块存在,对上行信息进行路由、下行流量控制以及与短信网关、彩信网关进行通讯;3. DIY09客户端使用环境硬件环境: 2G内存、120G硬盘、双核CPU编译环境:JDK1.5.0及以上支持操作系统:Windows2003Server、WindowsXP、Linux4. DIY09客户端安装包用户可以在DIY09管理平台进行下载。
ue5源码解析
ue5源码解析摘要:1.UE5简介2.源码结构解析3.关键技术分析4.实践应用与优化建议正文:一、UE5简介Unreal Engine 5(简称UE5)是Epic Games开发的一款顶级游戏引擎,继UE4之后的最新版本。
UE5于2021年5月正式发布,为游戏开发者提供了诸多创新功能和技术,受到了广泛关注。
UE5的核心目标是提高开发效率,降低开发成本,同时为玩家带来更加逼真的游戏体验。
二、源码结构解析1.模块划分:UE5将源码划分为多个模块,包括核心模块、渲染模块、物理模块、动画模块等。
这种模块化设计让开发者能够更加高效地组织代码,便于协同开发和后期维护。
2.编程语言:UE5支持C++和蓝图两种编程语言。
C++用于实现底层逻辑和核心功能,蓝图则是一种可视化编程语言,适用于快速搭建游戏逻辑和界面。
3.数据结构:UE5引入了一些新的数据结构,如图论数据结构、四叉树(Quadtree)等。
这些数据结构有助于提高游戏的性能和空间利用率,降低内存开销。
三、关键技术分析1.渲染技术:UE5的渲染引擎采用Nanite虚拟化微多边形几何技术,可以让游戏场景中的物体表现出更加细腻的细节。
此外,UE5还引入了全局光照技术Lumen,实现了实时光照效果,提升了游戏画面的真实感。
2.物理引擎:UE5采用了全新的物理引擎,提高了碰撞检测和力学模拟的准确性。
这对于开发具有丰富互动元素的的游戏具有重要意义。
3.动画技术:UE5的动画系统升级为基于肌肉系统的动画生成,使得角色动画更加自然、流畅。
同时,UE5还支持面部捕捉技术,让角色的面部表情更加真实。
4.引擎优化:UE5在引擎优化方面做了很多努力,如动态分支渲染、视锥剔除等技术,有效提升了游戏的性能表现。
四、实践应用与优化建议1.在开发过程中,开发者应充分利用UE5提供的模块化和组件化功能,提高代码的重用性和可维护性。
2.根据项目需求,合理选择编程语言和数据结构,以提高游戏性能和内存利用率。
C++ How to program cpphtp4_PPT_02
• Program control
– Specifies the order in which statements are executed
2003 Prentice Hall, Inc. All rights reserved.
5
2.3
• Pseudocode
Pseudocode
– Artificial, informal language used to develop algorithms – Similar to everyday English
If student’s grade is greater than or equal to 60 Print “Passed”
– If the condition is true
• Print statement executed, program continues to next statement
2003 Prentice Hall, Inc. All rights reserved.
10
2.5
if Selection Structure
• Translation into C++
If student’s grade is greater than or equal to 60 Print “Passed” if ( grade >= 60 ) cout << "Passed";
1
Chapter 2 - Control Structures
Outline 2.1 2.2 2.3 2.4 2.5 2.6 2.7 2.8 2.9 2.10 2.11 2.12 2.13 2.14 2.15 Introduction Algorithms Pseudocode Control Structures if Selection Structure if/else Selection Structure while Repetition Structure Formulating Algorithms: Case Study 1 (Counter-Controlled Repetition) Formulating Algorithms with Top-Down, Stepwise Refinement: Case Study 2 (Sentinel-Controlled Repetition) Formulating Algorithms with Top-Down, Stepwise Refinement: Case Study 3 (Nested Control Structures) Assignment Operators Increment and Decrement Operators Essentials of Counter-Controlled Repetition for Repetition Structure Examples Using the for Structure
b59开核教程

b59开核教程首先,我要强调一点,文中不要有标题相同的文字。
现在,我们来开始本篇核教程,关于b59开。
b59开是一种流行的编程语言,广泛应用于各种领域,尤其在软件开发和数据分析方面。
它的特点是简洁、高效,并且易于学习和使用。
要使用b59开进行编程,首先需要安装b59开的开发环境。
你可以从官方网站上下载最新版本的安装包,然后按照提示进行安装。
安装完成后,你就可以开始编写b59开程序了。
在编写b59开程序之前,我们需要了解一些基本的语法规则。
b59开的语法类似于其他编程语言,具有变量、函数、条件语句、循环等基本的语法结构。
首先,让我们来了解一下变量的定义和使用。
在b59开中,你可以使用关键字"var"来定义一个变量,并赋予它一个初始值。
例如,你可以这样定义一个整数变量:var num = 10;接下来,我们可以使用这个变量进行一些操作,例如打印出它的值:print(num);在b59开中,你可以使用print函数来输出信息到控制台上。
除了变量,b59开还支持各种数据类型,包括整数、浮点数、字符串等。
你可以根据需要选择合适的数据类型。
此外,b59开还提供了丰富的函数库,可以帮助你完成各种常见的任务,例如数学计算、文件操作等。
在编写b59开程序时,你还需要注意代码的可读性和模块化。
合理的代码结构可以提高程序的可维护性和可扩展性。
最后,我想提醒你的是,学习编程需要不断的练习和实践。
只有通过实践,你才能真正掌握b59开的编程技巧。
希望这篇教程对你有所帮助,祝你在b59开的学习和实践中取得成功!。
C-free5.0安装到注册

软件介绍C-Free是一款支持多种编译器的专业化C/C++集成开发环境(IDE)。
利用本软件,使用者可以轻松地编辑、编译、连接、运行、调试C/C++程序。
C-Free中集成了C/C++代码解析器,能够实时解析代码,并且在编写的过程中给出智能的提示。
C-Free提供了对目前业界主流C/C++编译器的支持,你可以在C-Free中轻松切换编译器。
可定制的快捷键、外部工具以及外部帮助文档,使你在编写代码时得心应手。
完善的工程/工程组管理使你能够方便的管理自己的代码。
主要包含如下特性:1支持多编译器,可以配置添加其他编译器;目前支持的编译器类型:(1) MinGW 2.95/3.x/4.x/5.0(2) Cygwin(3) Borland C++ Compiler(4) Microsoft C++ Compiler(5) Intel C++ Compiler(6) Lcc-Win32(7) Open Watcom C/C++(8) Digital Mars C/C++(9) Ch Interpreter2增强的C/C++语法加亮器,(可加亮函数名,类型名,常量名等);3增强的智能输入功能;4可添加语言加亮器,支持其他编程语言;5可添加工程类型,可定制其他的工程向导;6完善的代码定位功能(查找声明、实现和引用);7代码完成功能和函数参数提示功能;8能够列出代码文件中包含的所有符号(函数、类/结构、变量等);9大量可定制的功能:可定制快捷键可定制外部工具可定制帮助(可支持Windows帮助、Html帮助和在线帮助);10彩色、带语法加亮打印功能;11在调试时显示控制台窗口;12工程转化功能,可将其他类型的工程转化为C-Free格式的工程,并在C-Free中打开。
总之:5.0专业版比要比免费版4.0的功能要强得多。
废话少说,说点有用的。
下面说怎么拥有它:1.在官网下载最新版的C-free 5.0 /(官网是最安全的下载方式)2.找到下载的软件,双击安装。
ekho8.6编译

ekho8.6编译
通常情况下,编译一个软件或程序需要以下步骤:
1. 获取源代码,你需要获得"ekho8.6"的源代码,通常这可以
在软件的官方网站或开发者提供的资源中找到。
2. 安装编译工具,你需要安装适当的编译工具,比如gcc、make等,以及相关的开发库和依赖项。
3. 配置,在终端中进入源代码的目录,运行"./configure"命令,它会检查你的系统环境并生成Makefile。
4. 编译,运行"make"命令,这将根据Makefile编译源代码生
成可执行文件。
5. 安装,运行"make install"命令,这将把可执行文件和相关
的资源文件安装到系统目录中。
需要注意的是,不同的软件可能有不同的编译方法和依赖关系,因此在编译前最好查阅软件的官方文档或者开发者提供的指南。
另
外,编译过程中可能会遇到各种错误和警告,需要根据具体情况进行调试和解决。
总之,编译软件需要一定的技术和经验,如果你不确定如何进行,建议寻求相关领域的专业人士的帮助。
树莓pico win编译

树莓pico win编译
1. 安装软件:安装Clion、gcc-arm-none-eabi、pico-example、pico-sdk和cmake等软件。
2. 配置环境:将安装的软件路径添加到系统环境变量中,并将pico-sdk文件夹添加到环境变量中。
3. 打开Clion:打开Clion,在文件夹中找到pico-examples文件夹。
4. 编译项目:在pico-examples文件夹下,创建一个新文件夹build,并在该文件夹下进入命令行。
在命令行中输入cmake -G"MinGW Makefiles"..,然后按Enter键。
5. 生成Makefile文件:完成上述步骤后,系统将自动生成Makefile文件。
6. 编译项目:在命令行中输入cmake --build .命令,按Enter键后,Clion会自动开始编译项目,生成uf2文件。
7. 测试程序:将生成的uf2文件通过树莓派Pico的烧录器烧录到设备上,然后在设备上测试程序是否正常工作。
需要注意的是,树莓派Pico的Win编译需要先安装好相关软件,并按照以上步骤进行操作。
编译fcitx5-qt解决qt5-6不能输入中文的问题
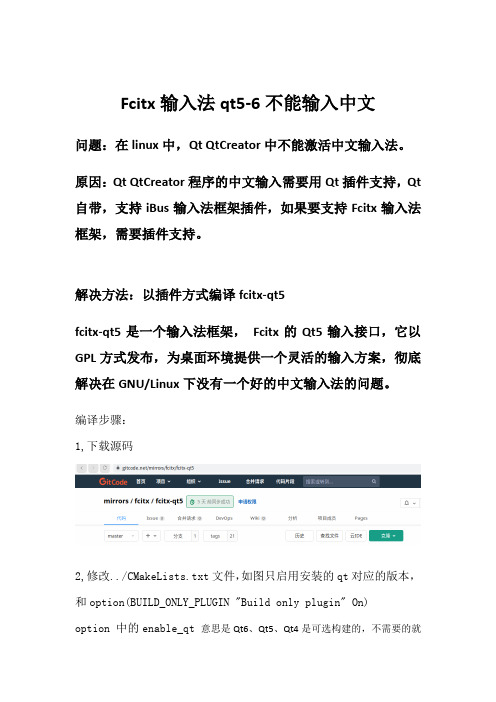
Fcitx输入法qt5-6不能输入中文问题:在linux中,Qt QtCreator中不能激活中文输入法。
原因:Qt QtCreator程序的中文输入需要用Qt插件支持,Qt 自带,支持iBus输入法框架插件,如果要支持Fcitx输入法框架,需要插件支持。
解决方法:以插件方式编译fcitx-qt5fcitx-qt5是一个输入法框架,Fcitx的Qt5输入接口,它以GPL方式发布,为桌面环境提供一个灵活的输入方案,彻底解决在GNU/Linux下没有一个好的中文输入法的问题。
编译步骤:1,下载源码2,修改../CMakeLists.txt文件,如图只启用安装的qt对应的版本,和option(BUILD_ONLY_PLUGIN "Build only plugin" On)option 中的enable_qt 意思是Qt6、Qt5、Qt4是可选构建的,不需要的就把它改成OFF,3,进入目录创建build文件夹并进入,在build文件夹中执行cmake 命令cmake ../4,编译make -j45,复制插件库文件到qt QtCreator的插件目录中cp -av qt5/platforminputcontext/libfcitx5platforminputcontextplugin.so /home/Qt5.12.8/Tools/QtCreator/lib/Qt/plugins/platforminputcontexts 打开qt即可使用中文了。
cmake过程中碰到的问题1,Could not find a package configuration file provided by "ECM"解决方法:sudo apt install extra-cmake-modules2,Could not find a package configuration file provided by "Fcitx5Utils"解决方法sudo apt install libfcitx5utils-dev3,Could NOT find Gettext (missing: GETTEXT_MSGMERGE_EXECUTABLE解决方法:sudo apt install gettext4,qmake: could noet nffind a QT installation of ‘’解决方法:原因是,使用的qmake不是qt安装的qmake,增加qt的环境变量,解决问题。
ue5编码格式
ue5编码格式
Unreal Engine 5(UE5)是一款用于游戏开发和虚拟世界制作的引擎,它通常不涉及特定的编码格式,而是用于创建和运行游戏的游戏引擎。
然而,UE5 支持多种编程语言和文件格式,以实现游戏的功能和内容。
以下是 Unreal Engine 5 中常见的编程语言和文件格式:
1. C++编程:Unreal Engine 使用C++作为主要的编程语言,您可以使用C++来编写游戏的逻辑和功能,包括游戏的交互、物理、AI等方面。
2. 蓝图脚本:UE5还提供了蓝图脚本系统,允许无需编写代码的情况下创建游戏逻辑。
蓝图脚本是一种视觉编程语言,非常适合快速原型制作和游戏设计。
3. 材质和着色器:UE5 使用自定义的材质和着色器语言来定义游戏中的材质和图形效果。
4. 虚幻蓝印:UE5支持创建蓝印,这是一种数据驱动的方式来定义游戏对象和角色的属性。
5. 3D模型文件格式:UE5支持导入多种3D模型文件格式,如FBX、OBJ、DAE等,以创建游戏中的三维对象。
6. 纹理和贴图文件格式:游戏中的纹理和贴图通常以格式如PNG、JPEG、TGA等储存。
7. 声音文件格式:UE5支持导入和播放各种声音文件格式,如WAV、MP3、OGG等。
8. 动画文件格式:动画通常以文件格式如FBX、ALEMBIC等导入到UE5中。
Unreal Engine 5 支持这些文件格式和编程语言,以便游戏开发人员能够创建复杂的虚拟世界和游戏。
开发人员可以根据需要选择适当的编程语言和文件格式,并使用Unreal Engine的工具和资源来构建游戏。
UE5提供了广泛的文档和教程,以帮助开发人员更好地使用其功能和资源。
open5gs源码编译
open5gs源码编译摘要:1.open5gs源码编译简介2.编译环境准备3.源码获取与安装依赖4.编译open5gs5.编译过程中可能遇到的问题及解决方法6.总结正文:open5gs是一个开源的5G核心网(5GC)实现项目,许多开发者通过学习该项目来深入了解5G核心网的技术。
在开始学习之前,我们需要先掌握如何编译open5gs源码。
本文将详细介绍open5gs源码编译的整个过程,以及在编译过程中可能遇到的问题及解决方法。
首先,我们需要准备一个合适的编译环境。
open5gs支持多种操作系统,如Linux、macOS和Windows。
为了确保编译过程顺利进行,建议使用Ubuntu 18.04或更高版本的Linux发行版。
此外,安装GCC 7.3或更高版本的编译器以及OpenJDK 11或更高版本的Java运行时环境也是必要的。
接下来,我们需要获取open5gs源码并安装依赖。
可以通过GitHub或者GitLab克隆open5gs代码库,然后进入源码目录,执行以下命令安装依赖:```./scripts/bootstrap.sh```这将安装open5gs所需的所有依赖库。
需要注意的是,由于open5gs依赖众多库,编译环境需要具备一定的硬件性能,如较快的CPU和足够的内存。
在安装依赖之后,我们可以开始编译open5gs。
执行以下命令:```./scripts/build.sh```编译过程可能需要一些时间,具体取决于您的硬件性能。
在编译过程中,如果遇到问题,可以查阅open5gs项目的文档或寻求社区支持。
在编译完成后,您可以在open5gs的“build”目录下找到编译后的文件。
此时,您可以开始学习open5gs的文档,了解5G核心网的技术细节。
总之,open5gs源码编译是一个相对复杂的过程,需要一定的技术基础和硬件支持。
YC09CC++编译器、Web浏览器内核介绍
YC09CC++编译器、Web浏览器内核介绍⾃2007年5⽉⾸次推出YC编译浏览器以来,近两年过去了。
这期间YC⼀直在发展和完善。
其中C/C++编译器可以⽣成优化的原⽣代码,有兴趣者可将YC⽣成的代码与其它商⽤编译器⽣成的代码⽐较⼀下,看谁的质量⾼,⾼在哪⾥。
两年来,浏览器内核只花了不到半年时间,因此以后的任务是彻低完善浏览器内核。
YC的⽬标是成为流⾏的可开发任何软件的⼯具,并且在浏览器⼤战中占有⼀席之地。
从今年起, YC将⽤年份命名,今年的YC叫YC09。
下⾯简要介绍YC09的部分特有功能,符合国际标准的功能暂不介绍。
本版中附带了⼤量源代码。
tinix 微型操作系统源代码(tinix.cpp 作者于渊)lua 5.1.2 源代码ruby 1.8.6 源代码basic 源代码flash4.0 播放器源代码llinux 0.11 起动部分源代码(其它部分需花不少时间来移植到YC,有兴趣者可做这个⼯作)mpeg 解码器源代码(mpg.cpp 作者不详)mpeg 编码器源代码(mpge.cpp 作者不详)三维游戏引擎源代码(OpenGL)(sword.cpp 作者WWBOSS)赛车游戏源代码raceX.cpp(作者不详)中国象棋源代码(作者陶善⽂)五⼦棋源代码(作者不详)俄罗斯⽅块源代码(作者不详)三维台球(OpenGL)源代码(作者不详)射击、爆炸游戏(OpenGL)源代码(作者不详)UFO游戏源代码(作者不详)……这些软件均能⽤YC09⽣成执⾏代码。
在此向这些软件之作者深表谢意。
安装后主⽬录YC09下的⼦⽬录为⽰例⽂件,均可删除。
yc09.exe 包含⽰例的安装程序1. 定义代码的位YC可编译16、32和64位的汇编代码,可编译32位C/C++与汇编的混合代码。
只需⽤YC⽽不⽤其它编程⼯具就可以开发16、32、64位的任何软件,如16、32、64位的操作系统(见⽰例 tinix.cpp, linux011.cpp, setup26.cpp)。
ue5源码解析
ue5源码解析UE5(Unreal Engine 5)是一款由Epic Games开发的游戏引擎,它在游戏开发领域具有广泛的应用。
UE5的源码是开放的,这意味着开发者可以深入了解引擎的内部实现,并根据自己的需求进行定制和优化。
UE5源码解析是指对UE5引擎源代码进行逐行分析和解读,以便更好地理解引擎的工作原理和实现细节。
这对于想要深入学习游戏引擎开发的开发者来说是非常有价值的。
首先,UE5源码解析可以帮助开发者了解引擎的整体架构。
UE5是一个庞大而复杂的系统,由许多模块和子系统组成。
通过分析源码,开发者可以了解这些模块和子系统之间的关系,以及它们是如何协同工作的。
这对于开发者在使用引擎进行游戏开发时,能够更好地理解和利用引擎的各种功能和特性。
其次,UE5源码解析可以帮助开发者学习高效的编程技巧和优化策略。
UE5源码是由经验丰富的开发者编写的,其中包含了许多高效的算法和优化技巧。
通过仔细研究源码,开发者可以学习到这些技巧,并将其应用到自己的项目中,以提高代码的性能和效率。
此外,UE5源码解析还可以帮助开发者解决问题和调试代码。
在开发过程中,开发者经常会遇到各种各样的问题,比如性能问题、崩溃问题等。
通过分析源码,开发者可以更好地理解引擎的内部工作原理,从而更容易地找到问题的根源,并进行相应的修复和优化。
最后,UE5源码解析还可以帮助开发者扩展引擎的功能和特性。
UE5源码是开放的,这意味着开发者可以根据自己的需求进行定制和扩展。
通过分析源码,开发者可以了解引擎的扩展接口和机制,从而能够更好地进行功能的添加和修改。
总之,UE5源码解析对于游戏引擎开发者来说是非常有价值的。
通过深入研究源码,开发者可以更好地理解引擎的工作原理和实现细节,学习高效的编程技巧和优化策略,解决问题和调试代码,以及扩展引擎的功能和特性。
这将有助于开发者更好地利用UE5引擎进行游戏开发,并提高开发效率和游戏质量。
- 1、下载文档前请自行甄别文档内容的完整性,平台不提供额外的编辑、内容补充、找答案等附加服务。
- 2、"仅部分预览"的文档,不可在线预览部分如存在完整性等问题,可反馈申请退款(可完整预览的文档不适用该条件!)。
- 3、如文档侵犯您的权益,请联系客服反馈,我们会尽快为您处理(人工客服工作时间:9:00-18:30)。
– If the header has been included previously
• Name is defined already and the header file is not included again
– Prevents multiple-definition errors – Example
8
Outline
#ifndef determines whether a name is defined Time.h
9 // Time class definition 10 class Time 11 {
(1 of 1)) Preprocessor directive #define defines a name (e.g., TIME_H
• #ifndef – ―if not defined‖ – Skip this code if it has been included already • #define – Define a name so this code will not be included again • #endif
2006 Pearson Education, Inc. All rights reserved.
5
9.1 Introduction
• Integrated Time class case study • Preprocessor wrapper • Three types of ―handles‖ on an object
2006 Pearson Education, Inc. All rights reserved.
12
Good Programming Practice 9.2
Use the name of the header file in upper case with the period replaced by an underscore in the #ifndef and #define preprocessor directives of a header file.
directive #endif marks the end of the code that should not be included multiple times
2006 Pearson Education, Inc. All rights reserved.
9
Good Programming Practice 9.1
• #ifndef TIME_H #define TIME_H … // code #endif
2006 Pearson Education, Inc. All rights reserved.
1 2 3 4 5 6 7 8
// Fig. 9.1: Time.h // Declaration of class Time. // Member functions are defined in Time.cpp // prevent multiple inclusions of header file #ifndef TIME_H Preprocessor directive #define TIME_H
10
Software Engineering Observation 9.1
Each element of a class should have private visibility unless it can be proven that the element needs public visibility. This is another example of the principle of least privilege.
For clarity and readability, use each access specifier only once in a class definition. Place public members first, where they are easy to locate.
2006 Pearson Education, Inc. All rights reserved.
2006 Pearson Education, Inc. All rights reserved.
11
Error-Prevention Tip 9.1
Use #ifndef, #define and #endif preprocessor directives to form a preprocessor wrapper that prevents header files from being included more than once in a program.
1
9
Classes: A Deeper Look, Part 1
2006 Pearson Education, Inc. All rights reserved.
2
My object all sublime I shall achieve in time.
— W. S. Gilbert
Is it a world to hide virtues in?
12 public: 13 Time(); // constructor 14 void setTime( int, int, int ); // set hour, minute and second 15 void printUniversal(); // print time in universal-time format 16 void printStandard(); // print time in standard-time format 17 private: 18 int hour; // 0 - 23 (24-hour clock format) 19 int minute; // 0 - 59 20 int second; // 0 - 59 21 }; // end class Time 22 23 #endif Preprocessor
2006 Pearson Education, Inc. All rights reserved.
1 2 3 4 5 6 7 8 9
// Fig. 9.2: Time.cpp // Member-function definitions for class Time. #include <iostream> using std::cout; #include <iomanip> using std::l; using std::setw;
— William Shakespeare
Don’t be “consistent,” but be simply true.
— Oliver Wendell Holmes, Jr.
This above all: to thine own self be true.
— William Shakespeare
2006 Pearson Education, Inc. All rights reserved.
3
OBJECTIVES
In this chapter you will learn: How to use a preprocessor wrapper to prevent multiple definition errors caused by including more than one copy of a header file in a source-code file. To understand class scope and accessing class members via the name of an object, a reference to an object or a pointer to an object. To define constructors with default arguments. How destructors are used to perform "termination housekeeping" on an object before it is destroyed. When constructors and destructors are called and the order in which they are called. The logic errors that may occur when a public member function of a class returns a reference to private data. To assign the data members of one object to those of another object by default memberwise assignment.
13
Outline
Time.cpp
(1 of 2)
10 #include "Time.h" // include definition of class Time from Time.h 11 12 // Time constructor initializes each data member to zero. 13 // Ensures all Time objects start in a consistent state. 14 Time::Time() 15 { 16 18 19 // set new Time value using universal time; ensure that 20 // the data remains consistent by setting invalid values to zero 21 void Time::setTime( int h, int m, int s ) 22 { 23 24 25 hour = ( h >= 0 && h < 24 ) ? h : 0; // validate hour minute = ( m >= 0 && m < 60 ) ? m : 0; // validate minute second = ( s >= 0 && s < 60 ) ? s : 0; // validate second hour = minute = second = 0; 17 } // end Time constructor
