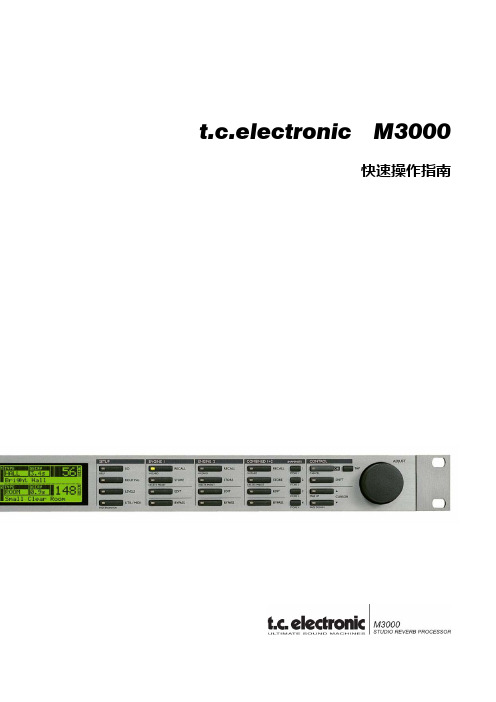
t.c.electronic C300 快速操作指南
开局-C300-开局文档-详细说明-现场Word版
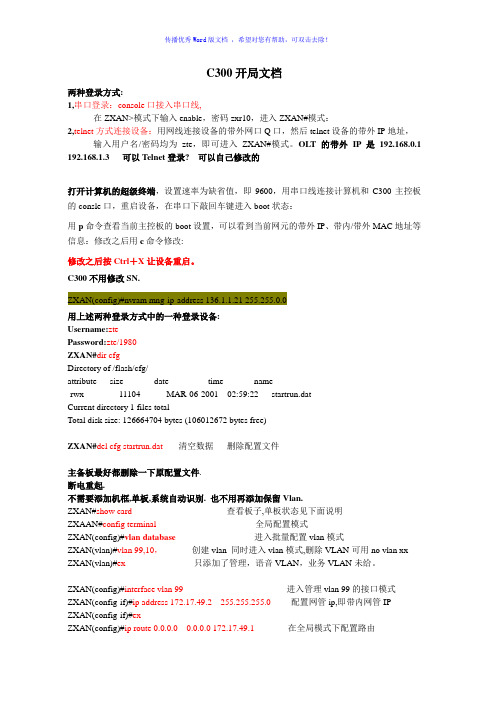
C300开局文档两种登录方式:1,串口登录:console口接入串口线,在ZXAN>模式下输入enable,密码zxr10,进入ZXAN#模式:2,telnet方式连接设备:用网线连接设备的带外网口Q口,然后telnet设备的带外IP地址,输入用户名/密码均为zte,即可进入ZXAN#模式。
OLT的带外IP是192.168.0.1 192.168.1.3 可以Telnet登录? 可以自己修改的打开计算机的超级终端,设置速率为缺省值,即9600,用串口线连接计算机和C300主控板的consle口,重启设备,在串口下敲回车键进入boot状态:用p命令查看当前主控板的boot设置,可以看到当前网元的带外IP、带内/带外MAC地址等信息:修改之后用c命令修改:修改之后按Ctrl+X让设备重启。
C300不用修改SN.ZXAN(config)#nvram mng-ip-address 136.1.1.21 255.255.0.0用上述两种登录方式中的一种登录设备:Username:ztePassword:zte/1980ZXAN#dir cfgDirectory of /flash/cfg/attribute size date time name-rwx 11104 MAR-06-2001 02:59:22 startrun.datCurrent directory 1 files totalTotal disk size: 126664704 bytes (106012672 bytes free)ZXAN#del cfg startrun.dat---- 清空数据删除配置文件主备板最好都删除一下原配置文件.断电重起.不需要添加机框,单板,系统自动识别. 也不用再添加保留Vlan.ZXAN#show card----查看板子,单板状态见下面说明ZXAAN#config terminal----全局配置模式ZXAN(config)#vlan database---进入批量配置vlan模式ZXAN(vlan)#vlan 99,10,----创建vlan 同时进入vlan模式,删除VLAN可用no vlan xx ZXAN(vlan)#ex ----只添加了管理,语音VLAN,业务VLAN未给。
t.c.electronic M-One XL 快速操作指南
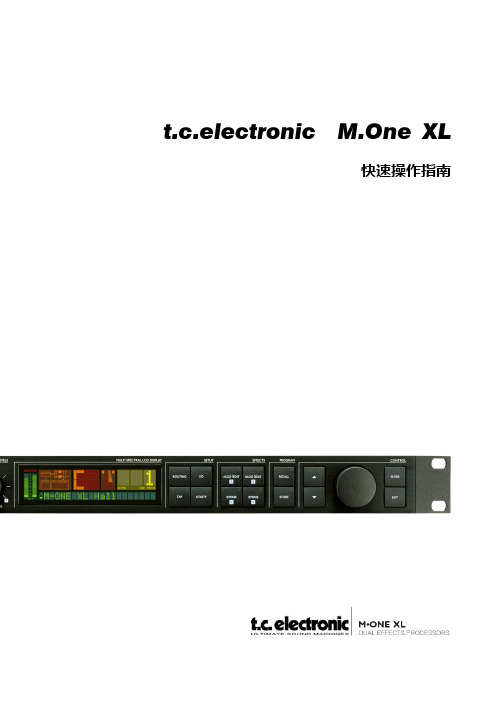
t.c.electronic M.One XL快速操作指南一.前面板相关英文的解释1.POWER ‐ 电源开关2.LEVELS ‐ 电平IN LEVEL ‐ 输入电平:主要调节调音台输出至效果器的电平,在显示屏上有数字电平峰值表,当输入信号过大,超过0dB时,红灯亮起,发生声压级过载现象。
MIX ‐ 混合比:当调至极左的时候为干声,此时无效果,当调至极右的时候为最大比例的湿声效果(混合比例为100%)。
EFFECT BAL ‐ 效果平衡:调节引擎1(如:延时效果)和引擎2(如:混响效果)效果平衡作用,当调至12点位置的时候两个引擎效果电平相等。
3.SETUP ‐ 设置ROUTING ‐ 路径:设置引擎的路径分配。
选项有:DUAL S/R(双发送/返回)、PARALLEL(并行,左右声道混合输入输出)、PAR/SER(并行/串行)、SERIAL(串行)、STEREO‐LINKED(连锁立体声)、DUAL MONO (双单声道)。
I/O ‐ 输入/输出:设定输入输出的基本参数 。
包含有Input(输入信号的选择)、Clock(时钟,用来选择输入信号的采样频率)、Out Range(输出范围)、Out Level(输出电平)、Dig In Gain(设置数字输入电平,只影响数字输入信号)、Dither(高频颤抖噪声,只与数字输出有关)。
TAP – 节拍键:此键可根据音乐的节拍设定延时效果。
Tap Time(延时时间,可用转轮改变延时时间,也可根据音乐的节奏双击TAP键改变延时时间)、Tap SubDiv(细分节拍,细分由M.ONE如何响应敲击的速度来决定) 、Tap Func(节拍功能,设定节拍控制对哪个引擎有效)、MIDI Sync(MIDI 同步)。
UTILITY 实用设置:设置本机的MIDI、系统专用ID、路径锁定、直通方式、踏板功能和显示视图方式等参数。
4.EFFECTS ‐ 效果ALGO/EDIT 1+2:按下此键确定编辑显示和当前所选引擎的效果变化显示。
t.c.electronic D-TWO 快速操作指南

t.c.electronic D-TWO快速操作指南一.前面板相关英文的解释1.POWER ‐ 电源开关2.LEVELS ‐ 电平IN LEVEL ‐ 输入电平:主要调节调音台输出至延时器的电平,在显示屏上有数字电平峰值表,当输入信号过大,超过0dB时,红灯亮起,发生声压级过载现象。
MIX ‐ 混合比:当调至极左的时候为干声,此时无效果,当调至极右的时候为最大比例的湿声效果(混合比例为100%)。
3.MULTI SPECTRAL LCD DISPLAY ‐ 多参数LCD显示屏显示延时器调整参数、预置编号、预置名称、输入电平表等。
4.DELAY&FEEDBACK ‐ 延时和反馈比DELAY/TAP ‐ 延时/节拍键,此键有两个主要功能:z当DELAY 键LED 亮时DELAY 轮正在转动修改延时时间。
z当此键被敲击后,D.TWO 将在最后两下敲击间测量时间,并根据所选细分计算延时时间。
FEEDBACK/RHYTHM – 反馈比/节奏,它有三个主要功能:z当LED 亮时,DELAY轮正在修改反馈电平或百分比。
z当此键被按下并按住时DELAY 轮可以修改重复的次数。
z最多可以敲入10 拍的节奏模式。
DELAY&FEEDBACK 轮:根据所选内容设置延时时间或反馈。
5.EFFECTS ‐ 效果SPATIAL键:有/无空间功能。
双击此键进入空间参数。
FILTER键:有/无滤波器功能。
双击此键进入Hi(高)和Lo(低)切滤波器参数。
CHORUS键:有/无合唱功能。
双击此键进入合唱参数。
REVERSE键:有/无反向延时功能。
双击此键进入反向延时参数。
DYNAMIC键:有/无动态延时功能。
双此该键进入动态延时参数。
PINGPONG键:有/无乒乓延时功能。
双击此键进入乒乓延时参数。
6.FUNCTIONS ‐ 功能EDIT 键:按下此键进入常规编辑表。
所有预置处理参数全在此。
用上下箭头键选择参数。
RECALL键:按下此键进入选择调用菜单。
C300基本操作ppt课件
业务开通-基本业务
7. 配置VLAN的业务端口。 ZXAN(config)#interface epon-onu_1/7/8:1 ZXAN(config-if)#switchport vlan 100 tag ZXAN(config-if)#exit 8. 进入ONU远程管理模式,配置ONU以太网端口
1
ZXA10 C300操作概述 ZXA10 C300 系统配置 ZXA10 C300 物理配置 ZXA10 C300业务开通 网管开通步骤(基本业务)
2
概述
ZXA10 C300的操作主要包括系统配置、 物理配置、业务开通、协议配置
系统配置:主要介绍如何对C300进行管理、 配置
物理配置:开通C300时,需要对它的物理硬 件进行配置,包括机架、机框、单板等
24
业务开通-基本业务
4. 进入EPON-OLT接口模式,通过MAC地址认 证ONU。
ZXAN(config)#interface epon-olt_1/7/8 ZXAN(config-if)#onu 1 type ZTE-F820 mac
0019.c600.0011 ZXAN(config-if)#exit 5. 进入EPON-ONU接口模式,启用接口的认证
ቤተ መጻሕፍቲ ባይዱ
1
15
ETGOC
8
INSERVICE
1
1 10
SCXL
10
OFFLINE
21
ZXA10 C300操作概述 ZXA10 C300 系统配置 ZXA10 C300 物理配置 ZXA10 C300业务开通 网管开通步骤(基本业务)
22
业务开通-基本业务
规划
23
业务开通-基本业务
T.C_electronicM300数字效果器中文操作手册
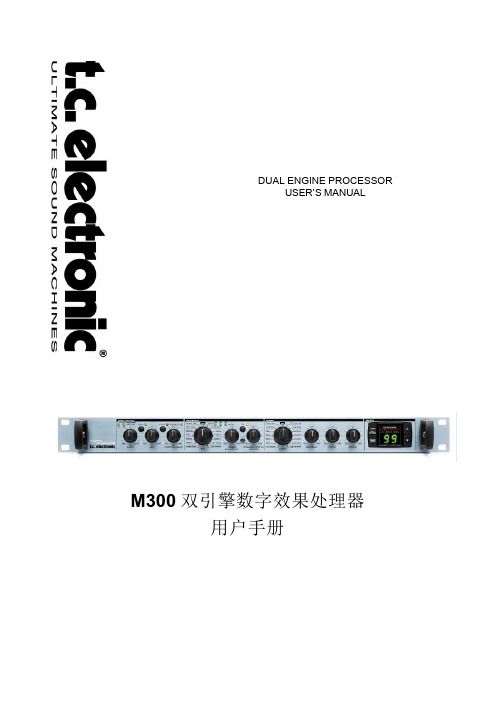
串联方式
双发送/返回方式
串联方式(Serial Routing) 开关置在 OUT 位置。 ——按串联连接利用两个效果器。
4
导言
恭喜你购买了 TC Electronic M300 双引擎处理器。 M300 是一款极容易使用的双引擎效果处理器,毫不妥协的高质量和值得骄傲的奉献给用户的买得起的 价格。 M300 具有顶级质量的效果性能又拥有直观的用户接口,我们确信你不仅现在而且将来都会喜爱上 M300!该 M300 竟是如此的易于使用,以致令你感到这本手册几乎是多余的,特别是对前面板自身而言。
延时时间变化范围是 250 毫秒到 1000 毫秒。 注意 山谷回声延时类型具有较短的变化范围,因 为山谷回声延时类型由大自然引发,因此是较短 的延时。
TIMING Knob as AMOUNT/DRIVE Control (定时旋钮用作总量/驱动控制) 适用于压缩器和去咝声的算法(用“*”号标记) 这个旋钮有两个不同的功能: DE-ESS:AMOUNT (总量) Compressor:Drive (驱动)
2
快速启动——假如你真的不想等待 假若你真的不想等待而想立即听到你的新型 M300 双效果处理器的海量效果,请你执行下述快速设置指 南中的几个步骤: l 拆开 M300 的包装箱同时检查是否由于运输造成了设置损坏。 l 请阅读安全指导说明。 l 用几分钟时间经由 作一下在线注册或提交注册卡。在线注册的用户将会收到
BYPASS Knob & LED(旁通旋钮和 LED)
t.c.electronic MOne XL 快速操作指南概要
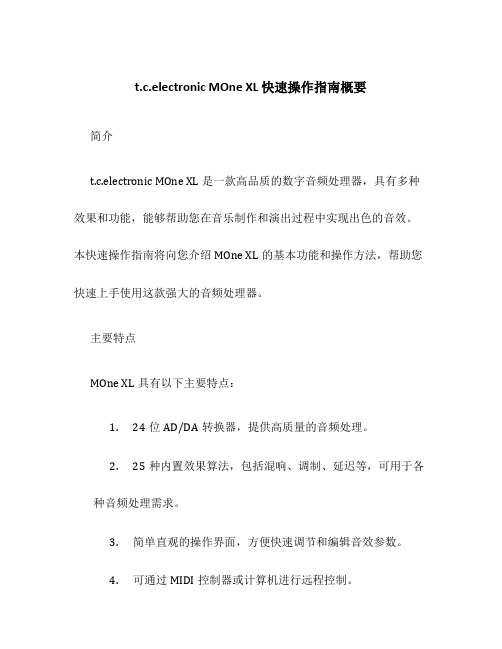
t.c.electronic MOne XL 快速操作指南概要简介t.c.electronic MOne XL 是一款高品质的数字音频处理器,具有多种效果和功能,能够帮助您在音乐制作和演出过程中实现出色的音效。
本快速操作指南将向您介绍MOne XL的基本功能和操作方法,帮助您快速上手使用这款强大的音频处理器。
主要特点MOne XL具有以下主要特点:1.24位AD/DA转换器,提供高质量的音频处理。
2.25种内置效果算法,包括混响、调制、延迟等,可用于各种音频处理需求。
3.简单直观的操作界面,方便快速调节和编辑音效参数。
4.可通过MIDI控制器或计算机进行远程控制。
5.多种输入和输出选项,满足不同音频设备的连接需求。
快速设置接下来,我们将向您展示如何快速设置并开始使用MOne XL。
1.首先,将MOne XL连接到音频设备。
您可以选择使用MOne XL的模拟输入和输出,或者通过数字接口连接到计算机或音频接口设备。
2.打开MOne XL的电源,并确保音频设备的输入和输出设置正确。
3.现在您可以开始调节MOne XL的参数了。
参数调节MOne XL提供了多种参数调节选项,以满足您的音频处理需求。
下面是一些常用的参数调节方法:1. 选择音频效果MOne XL内置了25种音频效果算法,您可以通过旋钮或按键来选择所需的效果。
例如,按下“Reverb”按钮可以选择混响效果。
2. 调节效果参数一旦选择了所需的音频效果,您可以通过旋钮或菜单来调节不同的参数。
例如,您可以使用旋钮来调节混响的深度、尺寸和混合度等参数。
3. 存储和召回预设MOne XL还提供了存储和召回预设的功能。
通过按下“Store”按钮,您可以将当前的参数设置保存为一个预设。
而通过按下“Recall”按钮,您可以从预设库中召回已保存的预设。
4. 远程控制如果您希望通过MIDI控制器或计算机远程控制MOne XL,您可以将其与相应的设备进行连接,并在MOne XL菜单中选择相应的远程控制模式。
博计电子负载3300c使用说明书

t.c.electronic M3000 快速操作指南_2011.06
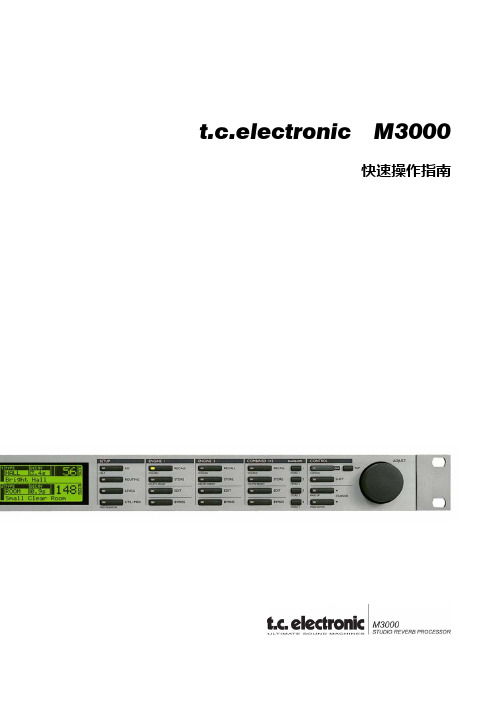
t.c c.ele ectro onic M3快速操3000操作指南南一. 前面1. 电源开按住此键2. PC ‐CA将预置复3. SETUPI/O ‐ 输ROUTIN LEVELS UTIL/M面板相关英开关键保持1秒以ARD 存储卡复制到存储卡P ‐ 设置 输入、输出设NG ‐ 路径(T ‐ 电平(AUT IDI ‐多功能英文的解释:以上可以关闭卡槽 卡内,或将预设置(HELP ‐ TUNER ‐ 调谐TO LEVEL ‐ 自能/MIDI (MID :闭设备。
预置从存储卡帮助功能,谐,需要用S 自动电平调节I MONITOR‐卡内复制到设需要用SHIFT SHIFT 键切换节,需要用S MIDI监控,设备内。
T 键切换)换)SHIFT 键切换需要用SHIF ) FT 键切换)4.ENGIINE 1 ‐ 引擎1RECALL ‐ 效果调用(WIZARD ‐ 效果快速查询,需要用SHIFT键切换)STORE ‐ 效果存储(DELETE PRESET ‐ 删除预设置,需要用SHIFT键切换) EDIT ‐ 效果编辑BYPASS ‐ 效果旁路5.ENGIINE 2 ‐ 引擎2RECALL‐ 效果调用(WIZARD ‐ 效果快速查询,需要用SHIFT键切换)STORE ‐ 效果存储(DELETE PRESET ‐ 删除预置,需要用SHIFT键切换) EDIT ‐ 效果编辑BYPASS ‐ 效果旁路BINED 1+2 ‐ 组合引擎1和2RECALL ‐ 效果调用(WIZARD ‐ 效果快速查询,需要用SHIFT键切换)STORE ‐ 效果存储(DELETE PRESET ‐ 删除预设置,需要用SHIFT键切换) EDIT ‐ 效果编辑BYPASS ‐ 效果旁路7.SNAPSHOTS ‐ 快照存储或快速存储STORE 1 ‐ 快速存储1STORE 2 ‐ 快速存储2STORE 3 ‐ 快速存储3STORE 4 ‐ 快速存储48.CONTROL ‐ 控制部分OK ‐ 确认控制(CANCEL ‐ 取消控制,需要用SHIFT键切换) SHIFT ‐ 主控功能及蓝色二级功能切换键CURSOR ‐ 找寻PAGE UP ‐ 向上翻页PAGE DOWN ‐ 向下翻页TAP ‐ 节拍键ADJUST ‐ 数据轮二. 有关单击ROUTINt.c.electronic关t.c.elect NG (路径)键c M3000共tronic M 键进行路径的共有6种路径M3000的6的选择。
t.c.electronic M2000 快速操作指南
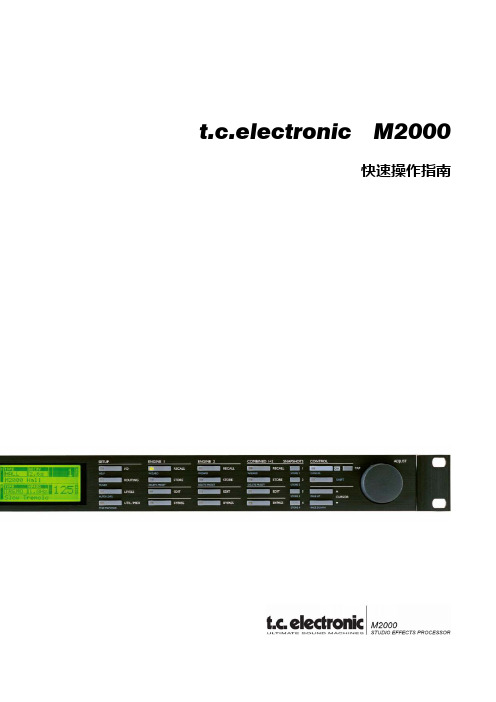
t.c.electronic M2000快速操作指南一.前面板相关英文的解释:1.电源开关按住此键保持1秒以上可以关闭设备。
2.PC‐CARD存储卡槽将预置复制到存储卡内,或将预置从存储卡内复制到设备内。
3.SETUP ‐ 设置I/O ‐ 输入、输出设置(HELP ‐ 帮助功能,需要用SHIFT键切换)ROUTING ‐ 路径(TUNER ‐ 调谐,需要用SHIFT键切换)LEVELS ‐ 电平(AUTO LEVEL ‐ 自动电平调节,需要用SHIFT键切换)UTIL/MIDI ‐ 多功能/MIDI(MIDI MONITOR ‐ MIDI监控,需要用SHIFT键切换)4.ENGIINE 1 ‐ 引擎1RECALL ‐ 效果调用(WIZARD ‐ 效果快速查询,需要用SHIFT键切换)STORE ‐ 效果存储(DELETE PRESET ‐ 删除预设置,需要用SHIFT键切换) EDIT ‐ 效果编辑BYPASS ‐ 效果旁路5.ENGIINE 2 ‐ 引擎2RECALL‐ 效果调用(WIZARD ‐ 效果快速查询,需要用SHIFT键切换)STORE ‐ 效果存储(DELETE PRESET ‐ 删除预置,需要用SHIFT键切换) EDIT ‐ 效果编辑BYPASS ‐ 效果旁路BINED 1+2 ‐ 组合引擎1和2RECALL ‐ 效果调用(WIZARD ‐ 效果快速查询,需要用SHIFT键切换)STORE ‐ 效果存储(DELETE PRESET ‐ 删除预设置,需要用SHIFT键切换) EDIT ‐ 效果编辑BYPASS ‐ 效果旁路7.SNAPSHOTS ‐ 快照存储或快速存储STORE 1 ‐ 快速存储1STORE 2 ‐ 快速存储2STORE 3 ‐ 快速存储3STORE 4 ‐ 快速存储48.CONTROL ‐ 控制部分OK ‐ 确认控制(CANCEL ‐ 取消控制,需要用SHIFT键切换) SHIFT ‐ 主控功能及蓝色二级功能切换键CURSOR ‐ 找寻PAGE UP ‐ 向上翻页PAGE DOWN ‐ 向下翻页TAP ‐ 节拍键ADJUST ‐ 数据轮二.有关t.c.electronic M2000的6种路径单击ROUTING(路径)键进行路径的选择。
广州三升多媒体麦声音响使用说明
广州三升多媒体麦声音响使用说明系统组成:1、PA系统:PA系统负责场厅内观众区域的扩声,由音箱、功放及音箱控制器组成。
PA系统又可细分为主扩声系统和环绕扩声系统。
A、主观众区域扩声系统包括主席台扩声音箱TANNOY V3004只,TANNOY TA 1400功放2台:超底音音箱TANNOY IQ18E2只,TANNOYTA 1000功放2台:音箱控制器TANNOYTDX2 2台:中置音箱TANNOY V3002台,TANNOY TA 1400功放1台:舞台返听音箱TANNOY V12 2台,TANNOYTA 1000 1台.B、环绕扩声包括TANNOY V88台,TANNOY TA 10002台。
C、前区补声包括TANNOY V12 2台,TANNOY TA 10002台。
2、MONITOR监听系统:MONITOR监听系统负责为操作人员、表演人、重要观众(贵宾等)提供清晰准确的扩声°MONITOR监听系统可分为控制室监听系统、主席台监听系统、场地吊装监听系统及场地内流动监听系统。
控制室监听系统包括TANNOY 5A有源监听音箱2只,AKGK66监听耳机1副。
3、调音台:调音台在扩声系统中占有重要地位。
调音台英语称“MIX”为混合的意思,因此调音台在扩声系统中是将前级音源混合后再分配给不同的扩声系统,混合/分配是其主要的功能”本套扩声系统中有扩声及流动(监听)两张调音台,扩声调音台用于扩声、控制室监听、场地吊装监听使用:流动(监听)调音台用于场地内流动监听及主席台监听使用。
A、扩声调音台包括ALLEN&&HEATH GL2800-40 1台。
4、音源系统:音源系统包括系统前级中的音源播放设备及拾音设备。
A、音源播放设备包括DVD机1台:卡座/CD一体机2台:MD1台。
B、拾音设备包括AKG WMS400/D880无线手持话筒2套::AKGWMS406C407无线话筒/领夹2只:TANNOY鹅颈电容会议话筒8 支:TANNOY TDM27对讲话筒2只。
t.c.electronic M3000 快速操作指南
t.c.electronic M3000快速操作指南一.前面板相关英文的解释:1.电源开关按住此键保持1秒以上可以关闭设备。
2.PC‐CARD存储卡槽将预置复制到存储卡内,或将预置从存储卡内复制到设备内。
3.SETUP ‐ 设置I/O ‐ 输入、输出设置(HELP ‐ 帮助功能,需要用SHIFT键切换)ROUTING ‐ 路径(TUNER ‐ 调谐,需要用SHIFT键切换)LEVELS ‐ 电平(AUTO LEVEL ‐ 自动电平调节,需要用SHIFT键切换)UTIL/MIDI ‐ 多功能/MIDI(MIDI MONITOR ‐ MIDI监控,需要用SHIFT键切换)4.ENGIINE 1 ‐ 引擎1RECALL ‐ 效果调用(WIZARD ‐ 效果快速查询,需要用SHIFT键切换)STORE ‐ 效果存储(DELETE PRESET ‐ 删除预设置,需要用SHIFT键切换) EDIT ‐ 效果编辑BYPASS ‐ 效果旁路5.ENGIINE 2 ‐ 引擎2RECALL‐ 效果调用(WIZARD ‐ 效果快速查询,需要用SHIFT键切换)STORE ‐ 效果存储(DELETE PRESET ‐ 删除预置,需要用SHIFT键切换) EDIT ‐ 效果编辑BYPASS ‐ 效果旁路BINED 1+2 ‐ 组合引擎1和2RECALL ‐ 效果调用(WIZARD ‐ 效果快速查询,需要用SHIFT键切换)STORE ‐ 效果存储(DELETE PRESET ‐ 删除预设置,需要用SHIFT键切换) EDIT ‐ 效果编辑BYPASS ‐ 效果旁路7.SNAPSHOTS ‐ 快照存储或快速存储STORE 1 ‐ 快速存储1STORE 2 ‐ 快速存储2STORE 3 ‐ 快速存储3STORE 4 ‐ 快速存储48.CONTROL ‐ 控制部分OK ‐ 确认控制(CANCEL ‐ 取消控制,需要用SHIFT键切换) SHIFT ‐ 主控功能及蓝色二级功能切换键CURSOR ‐ 找寻PAGE UP ‐ 向上翻页PAGE DOWN ‐ 向下翻页TAP ‐ 节拍键ADJUST ‐ 数据轮二.有关t.c.electronic M3000的6种路径 单击ROUTING(路径)键进行路径的选择。
LG-C300用户指南说明书

EarpieceSend keyDials a phone number and answers a call.In standby mode: Shows the history of calls.Alpha numeric keysI n standby mode: Input numbers to dial Hold down - I nternational calls- C onnect voice mail centre to - S peed dials- H old the key dow n to go Silent mode In editing mode: Enter numbers & charactersConfirm key / OK keySelects menu options and confirms actions.•••••LG-C300 User GuideSome of the content of this manual may differ from your phone depending on the software of the phone or your service provider.P/N: MMBB0392917(1.0)CallingMaking a CallMake sure your phone is on.Y ou can use the keypad. To delete a digit press the back arrow.Press to begin the call. T o end the call, press .TIP! To enter + when making an international call, press and hold 0.Making a call from your ContactsIt’s easy to call anyone whose number you have stored in your Phonebook.Press Menu to open the main menu. Select Phonebook .Using the keypad, enter the first letter of the contact you want to call and scroll to the Phonebook .Press to begin the call.1 2 3 4 1 2 3 Answering and rejecting a callWhen your phone rings, press Accept or press to answer the call.While your phone is ringing you can press Silent to mute the ringing. This is useful if you have forgotten to change your profile to silent for a meeting.Press or select Reject in order to reject an incoming call.NOTE: In call when speaker is activated, the speaker icon is displayed with red colour cross, when the speaker isdeactivated speaker icon is displayed without red colour cross.Speed dialingYou can assign a speed dial number to a contact you call frequently.Viewing your Call HistoryYou can only check the log of missed, received and dialed calls if the network supports Calling Line Identification (CLI) within the service area.Changing the call settingsYou can set call-specific functions. Press Menu , select Settings and choose Call .Call divert - Choose whether to divert your calls.Call barring - Select which calls you would like to be barred.Call waiting - Be alerted when you have a call waiting.Fixed dial numbers - Choose a list of numbers that can be called from your phone.Excuse messageCall reject settings - Select Off or On and choose to reject all calls, those from specific groups, contacts, unregistered numbers (those not in your list of contacts) or those with no caller ID.Send my number - Choose whether your number will be displayed when you call someone. (Depends on your network provider.)Auto redial - Allows you to set the auto redial function when a call attempt has failed.••••••••Minute minder - Determines whether to sound a tone every 1 minute when you are in the call.Bluetooth answer mode - Choose how to answer a call when using a Bluetooth headset. Select Hands-free or Handset .Save new number - Selecting this option will save numbers that are not already in your contacts upon ending the call.Call costs - View the charges applied to your last call or all calls. This service is network dependent, some operators are unable to support this.CameraTaking a quick photoP ress Menu and select Camera and Camera .W hen the camera has focused on your subject, select the Capture icon on the bottom-centre of the screen and press OK to take a photo.••••1 2 MusicMP3 PlayerYour LG-C300 has a built-in music player so you can play all your favourite music.NOTE:• B efore using music player, you will need to transfer music file onto your phone.• M usic player supports codec types as follows: MP3, WMA, AAC. Music player does not necessarily support all features and variations of file formats.To access the music player, press Menu and select Music and select MP3 player . From here you can access to:Recently played - View all of the songs you have playedrecently.All songs - Contains all of the songs you have on yourphone.My Playlists - Contains all playlists you have created.Artists - Allows you to view all tracks sorted by artist.••••Albums - Allows you to view all tracks sorted by album.Genres - Allows you to view all tracks sorted by genre.Shuffle all songs - Allows you to play all of the songs in random order.E-MailSending an email using your new accountTo send/receive an email, you should set up an email account.P ress Menu , select E-Mail and choose the account you want to use.C hoose Write e-mail and a new email window will open. W rite a subject line then press OK .E nter your message using the keypad.FM Radio Listening to the Radio Press Menu and select Music , then choose FM radio . S elect the channel number of the station you would liketo listen to.•••1 2 3 4 1 2 NOTE: If you are in an area with bad radio reception, you may have difficulty listening to the radio.It is recommended that you insert headphones into the hands-free connector when listening to the radio to ensure good radio reception.WebAccessing the webYou can launch the WAP browser and access the homepage of the activated profile on web settings. You can also manually enter a URL address and access the associated WAP page.P ress Menu and select O2 Home .T o go straight to the browser home page, select Home . Alternately, select Enter address and type in the URL, followed by Connect.NOTE: You will incur extra cost by connecting to these services and downloading content. Check data charges with your network provider.1 2 MessagingYour LG-C300 includes functions related to SMS (ShortMessage Service), MMS (Multimedia Message Service) as well as the network’s service messages. To use these functions, press Menu and select Messaging .Sending a messageP ress Menu , select Messaging and choose Write message . A new message editor will open. Message editor combines SMS and MMS in one intuitive mode that is easy to switch between. The default setting of the message editor is SMS mode.E nter your message using the keypad. See Entering text on the right for more information on how to enter text.S elect Options and choose Insert to add an Image, Video, Sound, Template, Emoticon, Name & Number, New slide, Subject or More (Business card/Schedule/Memo/Task/My business card).Choose Send to .C hoose a contact from the list of contacts or enter the phone number.1 2 3 4 5 6 Select Send .WARNING: Image, Sound, Video, New slide, Subject, Business card, Schedule or My business card is added to the message editor, it will be automatically converted to MMS mode and you will be charged accordingly.Entering textYou can enter alphanumeric characters using the phone’s keypad. For example, storing names in contacts, writing a message and creating scheduling events in the calendar all require entering text.The following text input methods are available in the phone: Abc mode, and 123 mode.NOTE: Some fields may allow only one input mode (e.g. telephone number in contact fields).Changing your text message settingsPress Menu , select Messaging , then choose Settings and Text message . You can make changes to:7 Text message centre - Enter the details for your message centre.Delivery report - Choose to receive confirmation that your message have been delivered.Validity period - Choose how long your messages are stored at the message centre.Message types - Convert your text into Voice, Fax, X.400 or Email .Character encoding - Choose how your characters are encoded. This affects the size of your message and therefore data costs.Send long text as - Choose whether to send your message as Multiple SMS or MMS when you enter a text longer than 2 pages in the message field.Changing your multimedia message settingsPress Menu , select Messaging , then choose Settings and Multimedia message . You can make changes to:Retrieval mode - Choose to automatically or manually download multimedia messages depending on whether•••••••Voice recoderUse your Voice recorder to record voice memos or other sounds.Sending a voice recordingOnce you have finished recording, select Options .Using your calculatorP ress Menu and select More , then choose Calculator . P ress the numeric keys to input numbers.Using the stopwatch1 P ress Menu and select More , then choose Stopwatch .2 Select Start to begin the timer.Converting Units1 P ress Menu and select More , then choose Unit converter .2 C hoose whether you would like to convert Currency , Area , Length , Weight , Temperature , Volume or Velocity .1 2 Adding a city to your World clock1 P ress Menu and select More , then choose World clock .2 T o find out the time of specific city, press Options and select New city .SettingsChanging your profilesP ress Menu and select Settings .S elect Profiles and then choose the profile you want to edit.S elect Options and choose Personalise .Y ou can change all of the tones, its volumes and alert options from here.1 2 3 4 you are at home or roaming.Delivery report - Choose to request or allow a delivery report.Read reply - Choose to request or allow a read reply.Priority - Choose the priority level of your multimedia message.Validity period - Choose how long your message is stored at the message centre.Slide duration - Choose how long your slides appear on screen.Creation mode - Allows you to select the contents type supported by MMS.Delivery time - Configures the delivery time of message to the recipient. The multimedia message centre will deliver the message after the delivery time.Multi msg centre - Allows you to configure networkinformation such as the multimedia service centre and the internet profile to send a multimedia message.••••••••MoreSetting your AlarmFinally you can set the snooze interval at 5, 10, 20, 30 minutes, 1 hour or off.Adding an event to your calendarSelect the date you would like to add an event to. You can choose a date either by scrolling to it using the navigation keys or by selecting Options and Go to date in order to enter a date.Adding an item to your task listYou can edit an item by selecting it, pressing Options and Edit . Confirm your amends by selecting Done .Adding a memoYou can lock the memo. Press Option and select Lock for the private memo to protect privacy.Date finderDate finder is a handy tool to help you calculate what the date will be once a certain number of days have passed.After taking a photoYour captured photo will appear on the screen. The image name is shown on the bottom top of the screen with five icons on the bottom side.Album - View the pictures and videos you have taken in your Album.Send - Send the photo as Message , as an Email or via Bluetooth .New - Take another photo straight away.Set as - Use the image as Wallpaper, as a Contact image, or in your Start up image or Shut down image.Delete - Delete the photo you have just taken. The viewfinder will reappear.Video CameraShooting a quick videoP ress Menu and select Camera and choose Video Camera . The video camera’s viewfinder will appear on screen. F ocus the camera on what to record.•••••1 2 S elect the Rec. icon on the bottom-centre of the screen and press OK to take a video. Rec will appear at the bottom of the viewfinder. Press again to stop recording.After you’ve shot your videoA still image representing your captured video will appear on screen.After recording a video clip, you can check the menu as follow:Album - View the pictures and videos you have taken in your Album.Play - Play the file.New - Press to shoot another video straight away.Send - Send the video as Message , as an Email or via Bluetooth .Delete - Delete the video you have just made. The viewfinder will reappear.3 •••••Getting to Know Your PhoneInstalling the SIM Card and Charging the BatteryInstalling the SIM CardWhen you subscribe to a cellular network, you are provided with a plug-in SIM card loaded with your subscription details, such as your PIN, any optional services available and many others.Important! › T he plug-in SIM card can be easily damaged by scratches or bending, so be careful when handling, inserting orremoving the card. Keep all SIM cards out of the reach of small children.Illustrations Open the battery cover Remove the battery Insert your SIM Insert your battery Close the battery coverCharge your battery› I f the phone won’t turn on, or if the display freezes or doesn’t respond, follow the instructions for installing the battery again.1 2 3 4 5 6 WARNING: Do not remove the battery when the phone is switched on, as this may damage the phone.Disposal of your old appliance 1. W hen this crossed-out wheeled bin symbol is attached to a product it means the product is covered by the European Directive 2002/96/EC.2. A ll electrical and electronic products should be disposed of separately from the municipal waste stream via designated collection facilities appointed by the government or the local authorities.3. T he correct disposal of your old appliance will help prevent potential negative consequences for the environment and human health.4. F or more detailed information about disposal of your old appliance, please contact your city office, waste disposal service or the shop where you purchased the product.Soft keys (Left soft key / Right soft key)These keys perform the function Indicated in the bottom of the display.Main LCDEnd keySwitch on/off (hold down)End or reject a call.•••Navigation key In standby mode : B riefly : Mp3 player B riefly : CameraB riefly : Toolbar when it was set. (Menu > Settings > Display > Homescreen > Display Items)In menu: Scroll up & down.••Side keys I n standby mode : Controls the ring volume. D uring a call: Earpiece volume adjustment D uring playing MP3 music: Audio volume adjustment•••Charger/USB cable connectorTIP: Please ensure the phone is powered on , external memory card is inserted and in idle mode before connecting the USB cable for Mass Storage.HeadsetBattery packCamera lensBattery coverSIM card holder123456Bluetooth QD ID B016671。
四方C300变频器说明书

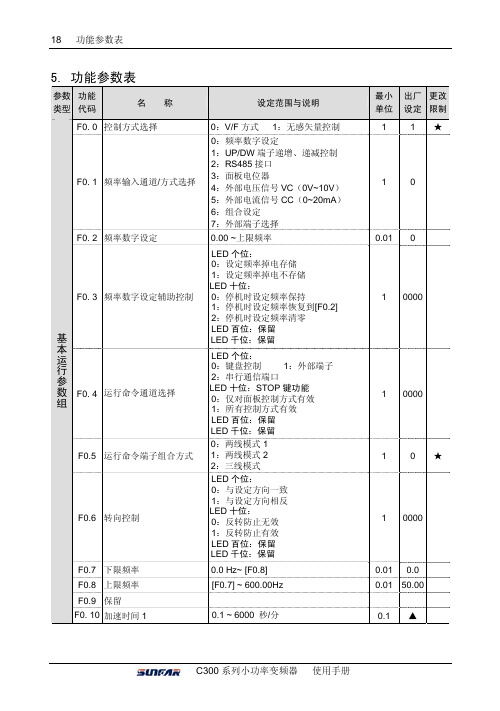
6.详细功能说明6.1 基本运行参数组0:V/F 控制用于速度控制精度、低频力矩等性能要求不高的可变速驱动场合。
1:无传感器矢量控制 用于高性能可变速驱动场合。
说明: 1. 矢量控制方式时需要使用负载电机的一些基本参数,变频器内部存储有与变频器容量相对应的4极电机的典型参数,这些参数为变频器的出厂设置。
2.当实际匹配电机与典型配置不同时,请重新根据匹配电机的铭牌数据更新内部参数[F1.15] ~ [F1.18]。
并通过自动调谐过程获取其它必需参数(参见参数[F1.20]自测定功能说明)。
3.当不能获得电机的铭牌数据时([F1.15]~[F1.18]),建议用户使用V/F 控制方式。
需要驱动多台电机时,请选择V/F 控制方式。
用于选择变频器运行频率的设定通道/方式。
0: 频率数字设定变频器的设定频率由参数[F0.2]设定。
在常态监控式下,可通过操作面板的 键直接修改。
1: UP/DW 端子递增、递减控制运行频率由外部端子UP/DW 设定(UP/DW 控制端子由参数[F3.0]~[F3.3]选择)。
当UP 功能端子有效,则运行频率上升;当DW 功能端子有效,则运行频率下降;当此两端子同时有效或断开,运行频率维持不变。
UP/DW 端子修改频率的速率由参数[F4.23]设定。
2: RS485接口通过串行通信RS485接口接收上位机或主机的频率设定指令。
3: 面板电位器运行频率由操作面板上的电位器设定。
4: 外部电压信号VC由外部电压信号VC (0.0~10.0V )来设定运行频率,相关特性参照参数[F2.0]和[F2.1]的说明。
5:外部电流信号CC由外部电流信号CC(0.0~20.0mA)来设定运行频率,相关特性参照参数[F2.2]和[F2.3]的说明。
6: 组合给定运行频率由各设定通道的线性组合设定,组合方式由参数[F2.8]确定。
7: 外部端子选择通过外部多功能端子确定频率输入通道(功能端子的选择由参数[F3.0]~[F3.3]确定)。
tc electronic flashback delay 用户手册说明书
手册 – 2014-05-14目录 重要安全说明 3注意 4维修 4警告 4 EMC / EMI 4图形符号说明 5开始之前 6关于本手册 7获得支持 7关于本踏板 8 Flashback Delay 9真实直通 9 TonePrint 10什么是 TonePrints? 11将 TonePrints 通过 TonePrint 软件传送到踏板 11使用 TonePrint Editor 编辑 TonePrints 12设置 13准备 (14)设置 (14)演奏吧! 14输入,输出和控件 15电源 / 切换效果器的开关 16脚钉开关 16音频输入和输出 17效果器控件 17延迟类型 18使用 Looper 19维修 20更新固件 21更换电池 21在真实直通到缓冲直通模式间切换 22 Kill-dry 开关 22常见问题 23关于 TonePrint 踏板的常见问题 24链接 25 TonePrint 资源 26支持资源 26 TC Electronic 在 (26)技术规格 27重要安全说明 1. 阅读这些说明。
2. 保存这些说明。
3. 注意所有警告。
4. 遵照所有说明。
5. 不要在靠近水的地方使用本设备。
6. 只能用干布清洁。
7. 不要遮挡任何通风孔。
按照制造商的说明进行安装。
8. 请不要在散热器、 热风器、 炉灶或其它能产生热量的设备(包括功放)等热源附近安装使用本设备。
9. 请勿破坏极性插头或接地型插头的安全设施。
极性插头有两个插片,其中一个比另一个宽。
接地型插头有两个插片,另外还有一个接地插片。
极性插头的宽插片和接地型插头的接地插片为您提供安全保障。
如果提供的插头无法插入您使用的插座,请咨询电工,更换其他的插座。
10. 防止电源线被踩踏或挤压,特别是在插拔插头和插座时注意不要损坏插头和插座连接处的电源线。
11. 仅使用制造商指定的附件/配件。
12. 仅使用制造商指定的或与设备一同出售的推车、支架、 三角架或桌子。
TEC TEC Electronic Cash Register MA-305-200 操作手册说明
• 5-
\
E01-1''
15. Daily Operation Flow .. ..... ...... ................ 27
16. Setting Preparation of Each Key and Transaction Entries . 28
Cashier Sign ON & Sign OFF ...................................... . 28 Receipt-issue/Non-issue Selection ................................... . 29 Clearing Errors, or Clearing Wrong Declaration Key or Wrong Numeric Entries .... . 30 Department Keys ...................................... ·......... . 31
Displaying the Time ... ·...........•.•...•.....•...•.•..... , • . • . . . . 21
Printing Time and Date . . . . . . . . . . . . . . . . . . . . . . . . . . . . . • . . . . . . . . • . • . . . 21
Ust of Keys . . . . . . . . . . . . . . . . . . . . . . . . . . . . . • • • . . • • . • • . . . • • . . . . . . . . 23 Key Installation Setting ...........................••. .- . • . • • . . . . • • • . 24 Blank Keyboard Sketch (for your planning aid) . • • • . . . • • . . . . . . . . . . . . . . . . . . 25
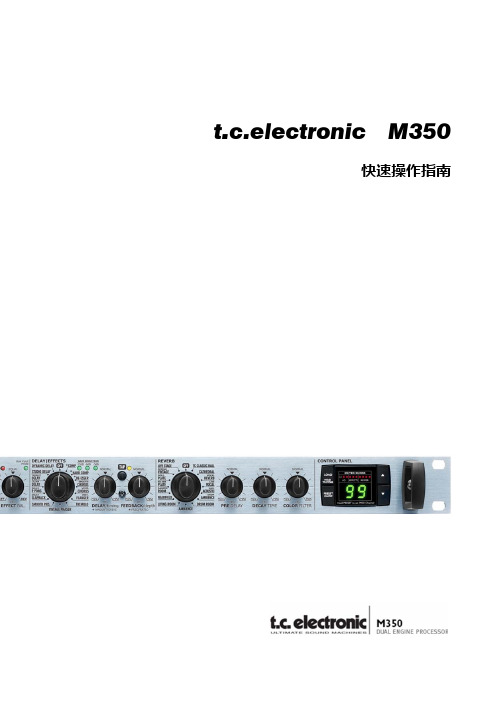
t.c.electronic M350 快速操作指南_2011.06
此旋钮向左转反馈系数最 小,向右转反馈系数最大
8. 将前面板的 REVERB(混响效果选择器)调整至 TC Classic Hall(TC 经典大厅)这样可增加
人声的丰满度减少过多的混响声,配合前面的多重效果选择器中的 DELAY(延时效果)可 创造出一个优美动听的卡拉 OK 效果。
例。
此旋钮向左转余音 效果最小,向右转 余音效果最大。
11. 我们将前面板的 COLOR(染色效果旋钮)调整至 12 点位置,此旋钮能控制混响效果的深
沉和轻 快明亮。
此旋钮向左转染色效 果深沉,向右转染色 效果效果轻快明亮。
12. 当所有功能键及旋钮都设置完成后,就要存储我们调整好的效果。
第二步:按此键 5 秒后数字灯将 停止闪动此时效果储存完毕,当 我们想调用我们存储的效果的时 候,只需要用上下键调整至我们 存储的位置然后在按一次此键。 第一步:先按此键,此时右边的 数字灯会闪动,然后用旁边的上 下健选择您要选择的储存位置。
以上操作方法,仅供用户快速、简便的使用 t.c.electronic M350 双引擎数字效果器,想了解更多 t.c.electronic M350 双引擎数字效果器的资料,请参阅设备包装内的中文用户手册或与我们联系。
‐‐‐‐‐‐‐‐‐‐‐‐‐‐‐‐‐‐‐‐‐‐‐‐‐‐‐‐‐‐‐‐‐‐‐‐‐‐‐‐‐‐‐‐‐‐‐‐‐‐‐‐‐‐‐‐‐‐‐‐‐‐‐‐‐‐‐‐‐‐‐‐‐‐‐‐‐‐‐‐‐‐‐‐‐‐‐‐‐‐‐‐‐‐‐‐‐‐‐‐‐‐‐‐‐‐‐‐‐‐‐‐‐‐‐‐‐‐‐‐‐‐‐‐‐‐‐‐‐‐‐‐
11. PRE DELAY ‐ 预延时
控制选 中混响中的相对预延时量。
12. DECAY ‐ 衰减
控制选 中混响中相对应的余音效果。
四方C300变频器说明书
有效)
3:自定义 V/F 曲线
F1. 1 转矩提升
0.0~20.0(%)
F1. 2 转矩提升方式 接 下 F1. 3 基本运行频率 页 F1. 4 最大输出电压
F1. 5 V/F 频率 3 F1. 6 V/F 电压 3 F1. 7 V/F 频率 2 F1. 8 V/F 电压 2
0:手动 1:自动 5.00~上限频率 200~500V 100~250V [F1.7] ~ [F1.3] [F1.8] ~ 100.0(%) [F1.9] ~ [F1.5] [F1.10] ~ [F1.6]
LED 个位: 0:键盘控制 1:外部端子 2:串行通信端口 LED 十位:STOP 键功能 0:仅对面板控制方式有效 1:所有控制方式有效 LED 百位:保留 LED 千位:保留
0:两线模式 1 1:两线模式 2 2:三线模式
LED 个位: 0:与设定方向一致 1:与设定方向相反 LED 十位: 0:反转防止无效 1:反转防止有效 LED 百位:保留 LED 千位:保留
设定范围与说明
0:V/F 方式 1:无感矢量控制
0:频率数字设定 1:UP/DW 端子递增、递减控制 2:RS485 接口 3:面板电位器 4:外部电压信号 VC(0V~10V) 5:外部电流信号 CC(0~20mA) 6:组合设定 7:外部端子选择
0.00 ~上限频率
LED 个位: 0:设定频率掉电存储 1:设定频率掉电不存储 LED 十位: 0:停机时设定频率保持 1:停机时设定频率恢复到[F0.2] 2:停机时设定频率清零 LED 百位:保留 LED 千位:保留
1 ▲★ 0.01 ▲ ★
1
0★
1 0001 0.01 0.30 ★
1 0010
SENTRONIC AGUVX-300 用户操作指南说明书
U V X -300L u m i n e s c e n c e s e n s o rOperating InstructionsCAUTIONS AND WARNINGSCAUTION: The discrete output must not be connected to outputs from other sensors (i.e. outputs from multiple sensors must not be connected in parallel). Parallel connections maydamage sensor output circuitry.IMPORTANT:This product is an accessory or part of a system. Always read and follow the manufacturer’s instructions for the equipment before connecting this product. Comply with all applicable codes and safety regulations. Failure to do so may result in damage, injury or death.Langue Française Attention:La LED UV rayonne la lumière UV intense lors du fonctionnement.N'examinez pas directement la lumière UV lors du fonctionnement de dispositif.Ceci peut être nocif aux yeux, même pour la brève période due à la lumière UV intense.Si le visionnement de la lumière UV est nécessaire, employez svp les verres filtrés UV pour éviter des dommages d'oeil par la lumière UV.Évitez l'exposition directe d'oeil à la lumière UV.Subsistance hors de l'extension des enfants.CERTIFICATIONS: CE, CSA, ULPRODUCT OVERVIEWThe UVX 300 sensor effectively detects UV luminescent materials and markers. The modulated UV light source in the UVX 300 is directed toward a target and the visible light, resulting from the fluorescence of the material, is reflected back to the sensor. When the reflected light level exceeds the threshold the discrete output changes state. Due to the fast response of the sensor, it is suitable for use in high-speed applications. The 50mm lens accessory allows for very small spot size for fine resolution applications. The sensor provides both an analog and a discrete output. The analog output signal has a 0 to 5 V range with 20mV resolution. A PLC or a computer can be used to process the analog output and monitor the status of the discrete output signal.The UVX 300 is a reliable, compact sensor with long range sensing capabilities. Two seven segment displays provide visual representation of the relative intensity from 00 to 50. Easy two step sensitivity, and 3 LED intensity settings provide for flexible operation over wide range of distances and materials.SpecificationsUV light source 370nm UV LED, min.100,000 hoursLED Intensity 3 levels (low, medium and high)Relative Intensity Display Range 00 to 50Sensitivity X1, X10Detection Range Up to 36 inches (900mm)Switching Frequency 6 kHzBrightness level Two 7 segment digitsBrightness threshold Two 7 segment digitsAnalog Output 0 – 5 V (20mV resolution)Digital Output Auto-Detect PNP / NPNExtend Output Pulse 0 - 90 mS (10 steps)Output Function NO/NC selectableOn/Off Delay <200 uSSecurity Remote LOCK / UN-LOCKPower indicator Green LEDDetect indicator Red LEDProgramming indicator Yellow LEDSecurity Remote LOCK / UN-LOCKData retention EEPROM non—volatile memoryDimensions 2.0”(51mm) x 2.4”(61mm) x 0.9”(23mm)Weight 0.21 lbs. (95 g)Supply Voltage 10…24 VDCOperating Current 60 mAShort Circuit Protection Yes (Outputs)Overload / Reverse Polarity Protection Yes (Supply Voltage)Operating temperature -20°…50°CStorage temperature -20°C…70°CHousing Metal alloyMechanical protection IP65 NOT FOR PRESURE WASHDOWNQUICKSTART GUIDE1.The display range is 00 through 50. The decimal points indicate the LED intensity level. The REDLED above the display indicates that the intensity level exceeds the threshold setting.2.Connect cable to power supply observing correct polarity. Reference wiring diagram.3.NOTE: The remote lock input, pin 5 on the connector (yellow wire), must be left unconnected orpulled to ground to allow operation of keys on sensor.4.Apply power; sensor will initialize and perform its power up sequence.5.The relative intensity will be displayed. By aiming the sensor away from any objects the display willindicate 00. Aim the sensor at your target or a white piece of paper and the display will indicate an intensity measurement. Move the target further away from the sensor to decrease the intensity level.6.Press and release either key located below the display to view the current threshold setting. Whilethe current threshold is shown on the display, press the + or – key to increase or decrease the setting, then wait several seconds for the sensor to return to the normal intensity display mode.er programmable parameters are discussed in detail in the following sections. OPERATIONPower upUpon power up, the sensor initializes by turning on all segments on the display and sequencing through red, yellow and green on the status LED located above the display.Intensity display modeDuring normal operation the sensor display will indicate the relative intensity of a target within the viewing area. The range of the relative intensity display is 00 through 50. The decimal points on the display indicate the LED output intensity. No decimal points indicate low, one decimal point indicates medium and two decimal points indicate high intensity.ThresholdWhen the relative intensity level exceeds the threshold setting the red status LED will turn on and the discrete output will activate, indicating detection of the target. When the relative intensity level drops below the threshold (as determined by the hysteresis setting), the red LED will extinguish and the discrete output will de-activate. The threshold setting allows the user to select the detection level.The default setting is 15.While the current threshold is shown on the display, press the + or – key to increase or decrease the setting, then wait several seconds for the sensor to return to the normal intensity display mode. Local LockThe local lock feature allows the sensor to be locked out, preventing adjustments by unauthorized personnel. To lock the sensor, press the P/- and T/+ buttons for 3 seconds until LL is displayed. To un-lock the sensor, press the T/+ and P/- for 3 seconds until LL is not displayed. While the sensor is locked, pressing either P/- or T/+ will result in LL (L ocal L ock) indication on the display.Programmable ParametersAll adjustments made to these parameters are stored in memory and are retained when power is removed. To enter programming mode press and hold the P/- key for several seconds, the LED intensity setting will be displayed. Press and release the P/- key to scroll through the various settings. Press and release the T/+ key to change a particular setting. Press and hold the P/-for several seconds to return to the normal intensity display mode. The user programmable items are described below.LED Intensity Level (U)The LED intensity is indicated on the display as U1, U2 and U3 for low, medium and high intensity.Press and release the T/+ key to toggle through the 3 intensity levels.The default setting is U2, medium intensity.Hysteresis Level (H)The hysteresis setting is indicated by H0 through H9. The hysteresis level is how far below the threshold the signal must fall to de-activate or un-detect. The hysteresis can be set from 0 to 9. For example, if the threshold is set at 25 and the intensity exceeds 25, the sensor will detect and activate its output. With the hysteresis set to 5, the signal must drop to 20 to un-detect. This feature is useful in cases where there may be variation within a target that might cause the intensity to drop below the threshold slightly; the hysteresis allows the output to remain activated until the level drops significantly. Press and release the T/+ key to change the hysteresis setting. The default setting is2.Discrete Output ConfigurationThis setting allows the user to select either normal open (no) or normally closed (nc) configuration.The normally open configuration de-activates the output during normal un-detect operation, and activates the output upon detect. The normally closed configuration activates the output during normal un-detect operation, and de-activates the output upon detect. Press and release the T/+ key to toggle through the selections. Default is normally open.Extend Output Pulse (P)This feature allows extending the minimum length of time that the discrete output remains active following target detection. The sensor response can be in the 100uS (microsecond) range, i.e. a target can move through the sensing range in 100uS and the discrete output would active for only that duration. A slower acquisition system (PLC) may not sample its inputs at a fast enough rate to capture the signal. The discrete output pulse can be extended from 0 to 90mS (milliseconds) in 10 mS increments as indicated by P0 though P9 on the display. Press and release the T/+ key to toggle through the selections.Null Offset (nu)NOTE: Always perform the null function when installing or removing optional lens or changing LED intensities.The null feature allows the sensor to be “zeroed”. For example, when the target is not in view and there is a background that causes a reading above zero, the null feature allows this level to be subtracted out, allowing the display to indicate 00. Press and hold the T/+ key to null the sensor.The display will flash the value that is being subtracted. To set the sensor back to a true zero, aim the sensor away from any target and repeat the null process.Gain Adjustment (r)To change the gain setting press and release the T/+ key to toggle through the selections. R1 indicates a gain of 1; R2 indicates a gain of 10. The selected gain is stored in memory and is retained when power is removed. After changing the gain setting always perform the null offset (nu) to re-zero the sensor.Teach FunctionThe teach function allows the user to set the threshold by placing a representative target located at the required distance and allowing the sensor to determine the optimum LED intensity and setting of the threshold level.1.Press and hold the T/+ key for several seconds until the yellow led flashes.2.Place the target at the appropriate distance from the sensor and press the P/- key. Thedisplay will flash 3 times and the sensor will adjust the LED intensity level to achievereasonable signal level. The green LED will flash.3.Remove the target and press the P/- key. The display will flash 3 times.4.Exit the teach function and return to the normal operating mode by Pressing the T/+ key forseveral seconds.When in the teach mode the LED flashes constantly, yellow, green or red. Yellow indicates that the sensor is ready to be taught the Detect level. Green indicates that the sensor is ready to be taught the Undetect level. Red indicates that the last attempt to teach resulted in an error. If the error occurred during the teaching of the Detect level then the signal intensity was less than 01. If the error occurred during the teaching of the Undetect level, then the signal intensity was greater than or equal to the threshold level. In either case, repeat the teach function to properly set the levels.Output SignalsDiscrete OutputThe discrete output is a PNP/NPN configuration allowing the user to provide a load on this output that is either pulled high to VDC or low to ground. The sensor monitors this level and automatically determines whether to operate the PNP/NPN driver. This output is typically connected to a PLC.The output remains active as long as the intensity level exceeds the threshold, in high-speed applications it may be useful to use the Extend Output Pulse feature to lengthen the signal duration to meet acquisition requirements of the PLC.CAUTION: The discrete output must not be connected to outputs from other sensors (i.e. outputs from multiple sensors must not be connected in parallel). Parallel connections maydamage sensor output circuitry.Analog OutputThe analog output is 0-5V with 20mV resolution (8-bit). Any standard analog input channel typically available on a PLC may monitor this output. The analog output signal is useful in applications where simply triggering on the threshold is insufficient. For example, constant real-time monitoring of intensity in process allows minor fluctuations or trends to be detected permitting corrective action to be taken.Remote Lock/Unlock InputThe remote lock feature allows the user to lock out the local controls (keys) to prevent operators from making unauthorized adjustments. This signal line must be connected to VDC to lock the sensor. This line may be left unconnected if the lock feature is not used. While the sensor is locked, pressing either P/- or T/+ will result in rL (r emote L ock) indication on the display.Spot size tableDisplay IndicatorsIndicatorsGreen LED Red LED DetectYellow LEDGreen LED blinking Red LED blinkingYellow LED blinkingDisplay decimal pointsNone illuminated LED low intensity One illuminated LED medium intensity Two illuminated LED high intensityM12 connector pin assignmentsOrdering informationUVX 300 Luminescence sensorAccessoriesUVX 300-L50UVX300-BRKT UVX 300-C50mm focal lens Bracket 5 meter cable with M125-pin connector Mounting UVX-300-L50 Focal lensThe focal lens is mounted by screwing the collar into the sensors standard lens collar. An anti—vibration material is present on the focal lens threads. If necessary, use soft cloth with pliers to remove.Caution:The UVX 300 L50 extends0.015” beyond the back surface of the UVX 300Note:In some cases it may be necessaryto mount the UVX 300 to a flatsurface. If using the UVX 300 L50in this type of installation pleaseorder the UVX spacer pictured tothe right to prevent damaging theUVX 300 L50.UVX Spacer Dimensional DetailsSensor I/O ConnectionsUVX-300 Operating Instructions 11 Document no. 10010104 Rev 1.5Warranty 056 222 38 18*********************SEN TRONIC AG。
- 1、下载文档前请自行甄别文档内容的完整性,平台不提供额外的编辑、内容补充、找答案等附加服务。
- 2、"仅部分预览"的文档,不可在线预览部分如存在完整性等问题,可反馈申请退款(可完整预览的文档不适用该条件!)。
- 3、如文档侵犯您的权益,请联系客服反馈,我们会尽快为您处理(人工客服工作时间:9:00-18:30)。
t.c.electronic C300
快速操作指南
一.前面板相关英文的解释
1.routing ‐ 路径模式选择
dual mono ‐ 双单声道:两个引擎100%独立工作,可以看成两台独立的单声道处理设备。
Stereo|Serial ‐ 立体声|串行:这种模式可以适用于多种不同的应用:
¾单声道串联:只使用左声道输入和左声道输出,C300的工作状态为两个单声道处理模块的串接。
¾立体声串联:将一对立体声信号送至左/右输入,两个串联的引擎将变成两个立体声处理模块。
¾立体声:将引擎2的mix旋钮转至bypass(直通)状态,只使用引擎1作为一个立体声处理模块。
2.engine 1 ‐ 引擎 1
这里可选择:去咝声、去哼声、军鼓、通鼓、打击乐、钢琴/键盘、钢管、木吉他、电吉他、贝斯、语言、合唱、男声、女声、通用压缩预置。
3.metering ‐ 电平表
¾输入表(i/p):指示输入端的信号电平,模拟/数字,单位是dBFS。
¾衰减表(damp):指示信号被衰减的电平,单位是dB。
4.thresh – 门限LED指示灯
在多频段压缩模式时,这个LED指示灯有两个含义:输入信号电平大于所设置的门限
输入信号启动了峰值限制器 在噪声门/扩展器模式时:LED灯熄灭=信号超过门限值
LED灯亮起=信号低于门限值
5.threshold ‐ 阈值
为所选的预置设置门限。
根据所处理信号的电平进行门限的设定。
门限设置的越低,启动的时间越早。
6.radio ‐ 比例
为所选的引擎预置设定比例(压缩/扩展)。
7.mackup/release – 补偿/恢复时间
在压缩的预置下,这个旋钮设置补偿增益,恢复时间已在预置中定义,无需设置。
在噪声门/扩展器的预置下,这个旋钮用来调节恢复时间。
8.mix / amount ‐ 混合/衰减量
在压缩的预置下, 该旋钮控制非压缩和压缩信号之间的比例,当旋钮位于0%时,该引擎旁通。
在噪声门/扩展器模式下,该旋钮控制衰减的最大量。
二.C300与调音台的连接
1.Instert模式
2.立体声/串联模式
三.C300作为压限器使用时的操作方法
当C300作为压限器使用时,我们首先要将功能选择键拨到comp/lim的位置。
如图示:
1.C300
放和音箱)
第一步:正确连接 ‐‐ 要将C300。
第二步:在routing(路径)1个通道的参数就可以获得2个(L/R
第三步:将engine 1和engine 2的程序选择旋钮拨至composite
第四步:将threshold(阈值)旋钮调整在‐18dB至‐20dB之间。
第五步:将ratio(压缩比)旋钮设置在8至inf.(无穷大)之间,具体位置根据现场需要选定。
第六步:将makeup/release(输出增益)及mix/amount(混合比例选择)旋钮调整至中间12点位置。
2.在人声中使用C300:压限器可以控制人声,使人声音量平衡。
第一步:将C300 Insert(插入)到调音台的相应的人声输入通道中。
第二步:在routing(路径)中选择dual mono,这样就可以获得2个可以分别调整的人声压限引擎了。
第三步:将engine 1或engine 2的旋钮根据需要分别调至speech(演讲)、female vocal(男声)、male vocal (女声)、voc.choir(合唱)、de‐rssl1、de‐rssl2(去嘶声1/2)这些人声预置模式。
第四步:将threshold(阈值)在‐18dB至‐20dB之间根据需要进行选择;ratio(压缩比)建议调至3:1;
makeup|release(输出增益)调至12点位置;mix|amount(混合软硬拐点选择)调至12点位置。
3.在乐器中使用C300:压缩限制器可以控制乐器音量的平衡。
比如电贝司,乐手在拨弦和
击弦时所发出的音量响度会有很大差别,通过压缩限制器的调节会有效控制它的音量的平衡。
压缩限制器在针对乐器的使用中,可以产生对乐器有益的效果声。
例如:在对小军鼓的处理中,使用很短的启动时间和较长的恢复时间,产生声音头尾倒错的声音(反转声reverse),使得小军鼓的打击节奏更加明显。
第一步:将C300 Insert(插入)到调音台相应的乐器输入通道中。
第二步:在routing(路径)中选择dual mono,这样就可以获得2个可以分别调整的乐器压限引擎了。
第三步:将engine 1或engine 2的旋钮分别放在所需要乐器预置场景上,在此以bass guitar来举例。
第四步:将threshold(阈值)在‐21dB至‐24dB范围内选择;ratio(压缩比)调至2:1;makelp|release (输出增益)调至12点位置;mix|amount(混合比例选择)调至12点位置。
四.C300作为噪声门使用时的操作方法
当C300作为噪声门使用时,我们首先要将功能选择键拨到gate/exp的位置。
如图示:
1.在系统中使用。
第二步:在2个(L/R
第三步:将
第四步:将threshold(阈值)旋钮调整在‐40dB至‐60dB之间。
第五步:将ratio(压缩比)旋钮设置在8至inf.(无穷大)之间,具体位置根据现场需要选定。
第六步:将makeup/release(输出增益)及mix/amount(混合比例选择)旋钮调整至中间12点位置。
2.C300可以作为会议话筒自动混音台使用,通过设定扩展阈值门限,来实现控制话筒的开
启或关闭,当话筒所拾取的信号电平超过此阈值门限的时候,话筒被开启,当话筒所拾取的信号电平没有超过此阈值门限的时候话筒被关闭。
第一步:将C300 Insert(插入)到调音台相应的会议话筒输入通道中。
第二步:在routing(路径)中选择dual mono,这样就可以获得2个可以分别调整的会议话筒扩展引擎了。
第三步:将engine 1或engine 2的旋钮调至speech(演讲)。
第四步:将threshold(阈值)在‐18dB至‐20dB之间根据需要进行选择;ratio(压缩比)建议调至3:1;
makeup|release(输出增益)调至12点位置;mix|amount(混合软硬拐点选择)调至12点位置。
3.C300用于乐器时:可以有效地控制乐器(尤其是架子鼓DRUMS)信号的噪声或串音,
下面我们以TOM/TOM鼓举例。
第一步:将C300 Insert(插入)到调音台相应的乐器输入通道中。
第二步:在routing(路径)中选择dual mono,这样就可以获得2个可以分别调整的乐器噪声门(扩展)引擎了。
第三步:将engine 1或engine 2的旋钮调至所需要的乐器预置位置,这里以toms dm举例。
第四步:将threshold(阈值)在‐45dB至‐55dB范围内选择;ratio(压缩比)调至5:1;makelp|release (输出增益)调至12点位置;mix|amount(混合比例选择)调至12点位置。
四.C300在系统中作为压限器/噪声门混合使用时
第一步:正确连接 ‐‐ 要将C300串联到音频系统中(最好连接在功放或音频处理器前,均衡器后)。
第二步:将引擎1选择comp/lim位置,将引擎2选择gate|exp位置;反之亦可。
如图示:
第四步:将engine 1和engine 2的程序选择旋钮拨至composite(通用)的位置。
第五步:将选择为comp/lim(压限)的引擎的threshold (压限阈值)旋钮调整在‐18dB至‐ 21dB之间;将ratio (压缩比)调整在‐8至inf.(无穷大)之间根据需要进行选择;将makeup/ release(输出增益)调至(12点位置);将mix/amount(混合软硬拐点选择)调至12点位置。
第六步:将选择为gate/exp(噪声门))的引擎的threshold(门限阈值)在‐40dB至‐60dB 之间根据需要进行选择调整;将ratio(扩展比)旋钮调整在8至inf.(无穷大)之间根据现场需要进行选定。
第七步:将makeup/release(输出增益)及mix/amount(混合比例选择)旋钮调整至中间12点位置。
五.C300预置库介绍。
