全能助手 EPSON Stylus CX6900F应用方案
e事通投影仪使用方法

感谢您选择我们的产品,使用前请仔细阅读产品使用手册. 本产品如有功能或操作上的改动,本公司将不会提前通知,如在使用过程中有疑问,请登陆本公司网站或直接与我们联系,我们将竭诚为您服务.01功能简述• DLP投影显示技术,分辨率854X480• 采用高效LED RGB三色投影光源,使用寿命在20,000小时以上• 安卓4.0操作系统•采用高清LCD显示及电容式触摸屏•支持WIFI及3G无线上网•支持USB或者无线(2.4G)鼠标键盘•手机通话功能•OFFICE文档编辑处理及演示•500万像素摄像头随投、随拍、随摄• 支持HDMI信号输入,可接高清DVD、机顶盒、智能手机、笔记本电脑、多媒体播放器等外围媒体设备显示• 内置高品质全频域扬声器.• 投影亮度高,投出显示尺寸为20~250英寸• OTG功能,直接读取U盘、移动硬盘及TF卡,内置8GB存储空间• 支持1080P高清视频播放• 支持多国语言02注意事项• 未接电源播放时,本机处于低亮度模式,亮度将会降低30%。
• 请勿在高温、潮湿和多尘的环境中使用或存放• 谨访摔落或被硬物碰撞本产品,以免导致系统或部件损坏而不能正常使用•为了避免瞬间过大音量对耳朵的冲击,接耳机前,请预先将声音调到适当大小再连接• 本机采用内置的7.4V聚合物电池,可反复充电,第一次使用本机时请先将电量全部用完再充电8小时,如此反复2次以上,延长电池寿命。
(注:本机不能配用其他型号的充电器,否则如有烧毁本机,本公司概不负责,如需要本机的原装充电器请联络本公司的相关部门)• 由于产品的损坏、维修或其他原因造成内存数据丢失的本公司不负任何责任,请遵守本手册进行规范操作。
• 请勿自行拆卸本机,不要使用酒精、稀释剂或其他化学物品擦洗机身。
• 在使用过程中,机身外壳温度体感有点偏高,即光机发光所产生的热量,属于正常现象。
• 不要堵塞散热孔,以便更好地将机身内热量排出,如果发现内置风扇不转,请不要再开机,尽快返厂维修以免损坏光机。
更多的应用功能
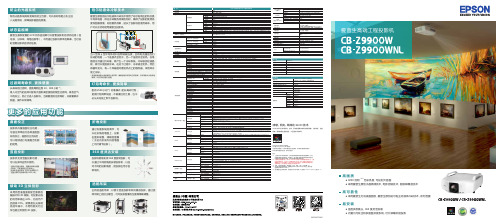
防尘的光路系统新的光路系统具有更高的防尘性能,可以很好地阻止灰尘进 入光路系统,保障投影画面的质量。
状态监视屏爱普生最新配置的 LCD 状态监视屏可以查看投影机的状态信息(信 号源、分辨率、网络信息等)。
不用通过投影机菜单及屏幕,也可实 时查看投影机的状态信息。
珀尔贴液体冷却技术爱普生原创的珀尔贴液体冷却技术使用了珀尔贴效应的热交换 半导体电路,保证冷却散热效果的同时,确保了投影的使用亮 度和图像质量。
好的散热效果,延长了投影机的使用寿命,用 户可以无忧地使用爱普生投影机。
过 滤 网 寿命长,更 换 便 捷长寿命的过滤网,更换周期达到 10,000 小时 *5。
吸入冷空气的进风口配有大面积高密度的褶皱型过滤网,吸收空气 中的灰尘,防止它进入投影机。
当需要更换过滤网时,只需要移开 侧盖,操作非常简单。
更多的应用功能曲面校正投影机内置曲面校正功能, 可通过菜单进行各种曲面图 形的校正,曲面校正完成后, 可以继续进行内置融合功能 的使用。
竖直投影投影机支持竖直投影功能, 可以在多种应用中使用。
* 投影机竖直投影时,需要使用单独销售 的吊架,不能直接直立在物体上;* 投影机竖直投影时,进风口面需要向下; * 竖直投影灯泡的寿命是 1000 小时。
当 n 型和 p 型半导体材料在两端被连接,会有电流通过他们 形成的电路,一个连接点会变冷,另一个连接点会发热。
在电 路的冷点通过冷却液,就产生一个冷却系统。
冷却液流经液晶 板,就可以使面板冷却。
在这个过程中,冷却液会变热,然后 再循环变冷。
有一个风扇面对着发热点上的散热器,采用风冷 使之冷却。
* 液晶面板配备水晶玻璃防尘保护罩,确保面板冷却的均匀和效果,冷却效果从外框传给 玻璃,从而冷却到整个面板。
灯 泡 寿命长,更 换 简 单配有 2500 小时 *1(标准模式)的长寿命灯泡, 更换灯泡简单快速,不需要任何工具,也不 必从天花板上卸下投影机。
折角投影通过内置系统的调节,可 以在折角的墙面上,投影 出图形规整、清晰的图像 (无论内折或外折的墙面 上均可调节投影)。
爱普生Epson CX6900F多功能一体机
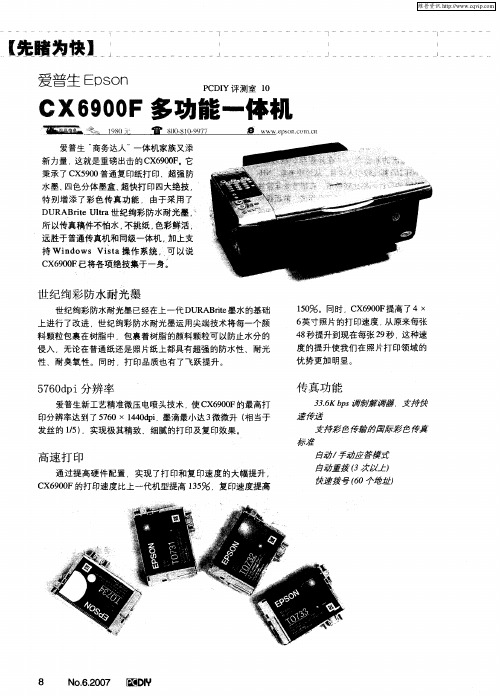
描分辨率高达 10 2 0×20 d i 4 0 p ,最大扫描范 围 26 1mm ×2 7 9mm,更针对不同用户 ,特
别设 定全 自动 、家庭 、专业 三种扫描模式 .
让 您轻松完成高质量扫描 。
独立分体墨盒
持 Wid wsVit 操 作系统 ,可 以说 n o sa C 90 X6 0F已将各项绝技集于一身 。
世 纪绚彩 防水耐光墨
世纪绚彩防水耐光墨 已经在上一代 D A re UR B i 墨水 的基础 t 上进 行了改进 ,世 纪绚彩 防水耐光墨运用尖端技术将每一个颜 10 5 %。同时 ,C 6 0 F 高了 4× X 90 提
总的来说 , po X60 F是一个功能全 面的高端 个人 E snC 9 0
用户或 中小企业的打 印输 出解决方案 . 和传统的低 端激 光打 印机相比 , po X60 F不但可 以在相似的成本下完成高 E snC 9 0
质量的打 印工作 ,而且还拥有更加丰 富的功能 ,机器价格与
其 它同类产品相比也 只在 伯仲 之间。 功能 的附加除了节省了
并预览扫描效果
专业模式 : 自由设定专业 扫描设置 , 可
并预览扫描效果 除此 之外 ,产 品的易用性也得到 了很 大 的提 高 。 与市 场 上 同类 机 型 相 比 , C 6 0 F的面板按钮数 目更少 . X 90 独立的功能 键 ,更易于用户使用。大家看面板 的图片就
可 以看 出些 端 倪 。
责 任编 辑
王 晶
信箱
p dye i r malo I c i dt @g i m . o . c
一 —~ 一 一 —— — — 一 — — —— 一
滚筒洗衣机使用与安装说明书-美诺

58 58 59 60 60 60 62 63 63
3
目录
______________________________________________________________________________________________________________________________________________
中断程序......................................................... 38 添加或取出衣物................................................... 39 衣物护理标签符号................................................. 40 洗涤剂........................................................... 41 正确的洗涤剂..................................................... 41 水质软化片....................................................... 41 配给量辅助用具................................................... 41 衣物柔顺剂或液态粉浆............................................. 41 Miele 建议洗涤产品................................................ 42 按照(EU)1015/2010 指令建议的洗涤剂............................. 43 清洁与保养....................................................... 清洁滚筒(除菌信息)............................................. 外壳与面板....................................................... 清洗............................................................. 清洁进水口过滤器................................................. 45 45 45 45 47
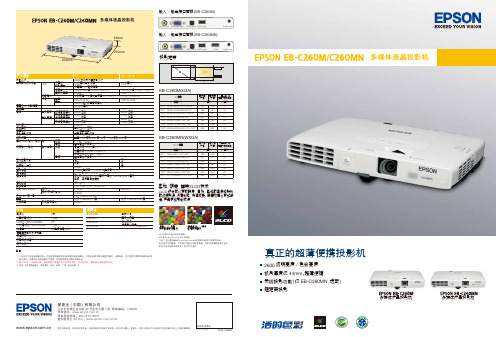
爱普生 EB-C260M C260MN 超薄便携投影机使用说明书
EVS101008BZ图片仅供参考,外观以实物为准。
本说明若有任何细节之更改,恕不另行通知。
爱普生(中国)有限公司在法律许可的范围内对以上内容有解释权。
爱普生(中国)有限公司北京市东城区金宝街89号金宝大厦7层 邮政编码:100005详情登陆: 服务导购热线:400-810-9977查询爱普生4S 中心:/4s经销商盖章处2012年4月版真正的超薄便携投影机EB-C260MN(WXGA)EB-C260M(XGA)(EB-C260M)输入/输出接口面板(EB-C260MN)输入/输出接口面板投影距离292mm210mm44mm附件3米1.8米3米1.8米AA 型碱性电池x2电源线计算机电缆线USB 线(EB-C260MN )USB 电缆线(EB-C260M )遥控器爱普生投影机软件光盘便携软包密码保护标签用户手册备用灯泡空气过滤器无线网卡快速无线连接USB KEY选配件ELPLP65ELPAF31ELPAP07ELPAP08Video InputUSB(Type B)USB(Type A)Computer InputAudio InputVideo Input USB(Type B)USB(Type A)Computer Input Audio InputHDMI 多媒体液晶投影机多媒体液晶投影机多媒体液晶投影机使用3LCD 液晶技术制造的投影机使用单片DLP 技术制造的投影机3LCD 技术可以获取明度、自然、柔和的图像和锐利的视频影像。
没有彩虹、色溢现象,眼睛观看也更加舒适,产品更加节能环保。
柔和、明亮、鲜艳3LCD 技术2600流明亮度/色彩亮度机身厚度仅44mm ,超薄便携无线投影功能(仅EB-C260MN,选配)短距离投影备注:*1 上述时间为非承诺保修时间。
灯泡亮度将随使用时间的增加而逐渐降低。
灯泡实际使用寿命受使用模式、环境条件、用户使用习惯等因素影响会有 很大差别。
投影机在低亮度模式下使用,灯泡使用寿命会得到有效延长。
华硕 笔记本电脑 用户手册说明书

目录版权和商标声明 ............................................................................................................1-4修订 ..............................................................................................................................1-4FCC-B 频道干扰声明....................................................................................................1-5FCC 规定......................................................................................................................1-5CE 规定 ........................................................................................................................1-6电池规范 .......................................................................................................................1-6WEEE 声明...................................................................................................................1-6化学物质法规................................................................................................................1-7升级和保修 ..................................................................................................................1-7购买备件 .......................................................................................................................1-7安全指南 .......................................................................................................................1-8产品中有害物质的名称及含量.....................................................................................1-10MSI 特殊功能 .............................................................................................................1-11简介 ...............................................................................................2-1打开包装 .......................................................................................................................2-2产品检视 .......................................................................................................................2-3顶盖开启检视图 .......................................................................................................2-3前端检视图 ..............................................................................................................2-5右端检视图 ..............................................................................................................2-6左端检视图 ..............................................................................................................2-7后端检视图 ..............................................................................................................2-8底部检视图 ..............................................................................................................2-9如何使用键盘..............................................................................................................2-11Windows 键 ...........................................................................................................2-11快速启动按键.........................................................................................................2-12开启或关闭触摸板..................................................................................................2-13进入睡眠模式.........................................................................................................2-13切换显示器 ............................................................................................................2-13使用多个监视器 .....................................................................................................2-13调整显示器的亮度 .................................................................................................2-14调整扬声器的音量..................................................................................................2-14调整键盘背光 LED 灯的亮度(选择性配置) ........................................................2-14应用程序:True Color (选择性配置) ......................................................................2-15产品规格 .....................................................................................................................2-16使用者手册如何使用入门 .................................................................................3-1开始使用笔记本电脑 .....................................................................................................3-2如何舒适地使用笔记本电脑 ..........................................................................................3-3如何使用电源供应器 .....................................................................................................3-4电源适配器 ..............................................................................................................3-4电池 .........................................................................................................................3-4如何在 Windows 10 下设置一个电源计划设定 .............................................................3-6选择或自定义电源计划 ............................................................................................3-6创建自己的电源计划 ................................................................................................3-9如何使用触摸板 .........................................................................................................3-11了解一般硬盘和固态硬盘............................................................................................3-12了解 M.2 固态硬盘插槽...............................................................................................3-12如何连接 Internet........................................................................................................3-13无线网络 ................................................................................................................3-13有线网络 ................................................................................................................3-15如何设置蓝牙连接.......................................................................................................3-20开启蓝牙连接.........................................................................................................3-20如何连接外部装置.......................................................................................................3-23视频:如何使用 RAID 功能 ........................................................................................3-24如何在 BIOS 中选择 Boot Mode.................................................................................3-25视频:如何在 MSI 笔记本电脑上恢复 Windows 10 操作系统.....................................3-26视频:如何使用 MSI 一键安装 ..................................................................................3-27版权和商标声明Copyright © 微星科技股份有限公司所有。
爱普生CX6900F一体机中文操作手册

====
==== ==== ====
==== ==== ==== ====
==== ==== ====
==== ==== ====
==== ====
==== ==== ==== ==== ====
!"#$%&' !"#$%&'()*+, (800-810-9977) !"#$%&'()*+,-. !"#$% !"#$%&'() !"#$%&'()*+,-./0123
!"#$
!"#
!
!"#$
= = =
!"#$%&'
!"#$ KKKKKKKKKKKKKKKKKKKKKKKKKKKKKKKKKKKKKKKKKKKKKKKKKKKKK N !"#$%& !" KKKKKKKKKKKKKKKKKKKKKKKKKKKKKKKKKKKKKKKKKKKKKKKKKKKKKKKKK P !"# KKKKKKKKKKKKKKKKKKKKKKKKKKKKKKKKKKKKKKKKKKKKKKKKKKKKKKK Q !"# KKKKKKKKKKKKKKKKKKKKKKKKKKKKKKKKKKKKKKKKKKKKKKKKKKKKKKK Q !"#$ !"#$%& KKKKKKKKKKKKKKKKKKKKKKKKKKKKKKKKKKKKKKKKKKKKKKKK !"# KKKKKKKKKKKKKKKKKKKKKKKKKKKKKKKKKKKKKKKKKKKKKKKKKKKKKK ! KKKKKKKKKKKKKKKKKKKKKKKKKKKKKKKKKKKKKKKKKKKKKKKKKKKKKKKKKK ! KKKKKKKKKKKKKKKKKKKKKKKKKKKKKKKKKKKKKKKKKKKKKKKKKKKKKKKKKK !" ==== ==== !" KKKKKKKKKKKKKKKKKKKKKKKKKKKKKKKKKKKKKKKKKKKKKKKKKKKKKKKKK NR !" KKKKKKKKKKKKKKKKKKKKKKKKKKKKKKKKKKKKKKKKKKKKKKKKKKKKKKKKK NR !"#$%& KKKKKKKKKKKKKKKKKKKKKKKKKKKKKKKKKKKKKKKKKKKKK NT ! KKKKKKKKKKKKKKKKKKKKKKKKKKKKKKKKKKKKKKKKKKKKKKKKKKKKKKKKKKK NT ! KKKKKKKKKKKKKKKKKKKKKKKKKKKKKKKKKKKKKKKKKKKKKKKKKKKKKKKKKKK NU !"#$% !" KKKKKKKKKKKKKKKKKKKKKKKKKKKKKKKKKKKKKKKKKKKKKKKKKKKKKKKKK NV ! KKKKKKKKKKKKKKKKKKKKKKKKKKKKKKKKKKKKKKKKKKKKKKKKKKKKKKKKKKK ON !"#$%&'() KKKKKKKKKKKKKKKKKKKKKKKKKKKKKKKKKKKKKKKKKKK ON !"#$%& !"# KKKKKKKKKKKKKKKKKKKKKKKKKKKKKKKKKKKKKKKKKKKKKKKKKKKKKKK OP !" KKKKKKKKKKKKKKKKKKKKKKKKKKKKKKKKKKKKKKKKKKKKKKKKKKKKKKKKK OP ! KKKKKKKKKKKKKKKKKKKKKKKKKKKKKKKKKKKKKKKKKKKKKKKKKKKKKKKKKKK OQ !"#$% KKKKKKKKKKKKKKKKKKKKKKKKKKKKKKKKKKKKKKKKKKKKKKKKKKK OS !" KKKKKKKKKKKKKKKKKKKKKKKKKKKKKKKKKKKKKKKKKKKKKKKKKKKKKKKKK OT !" KKKKKKKKKKKKKKKKKKKKKKKKKKKKKKKKKKKKKKKKKKKKKKKKKKKKKKKKK OU !" KKKKKKKKKKKKKKKKKKKKKKKKKKKKKKKKKKKKKKKKKKKKKKKKKKKKKKKKK OU ! ==== ==== ==== ! KKKKKKKKKKKKKKKKKKKKKKKKKKKKKKKKKKKKKKKKKKKKKKKKKKKKKKKKKKK OV !"#$ KKKKKKKKKKKKKKKKKKKKKKKKKKKKKKKKKKKKKKKKKKKKKKKKKKKKK PM ! KKKKKKKKKKKKKKKKKKKKKKKKKKKKKKKKKKKKKKKKKKKKKKKKKKKKKKKKKKK PO !"# KKKKKKKKKKKKKKKKKKKKKKKKKKKKKKKKKKKKKKKKKKKKKKKKKKKKKKKKKKK PP T T NO NP
爱普生墨仓式专业数码印花机 SureColor F9380 说明书
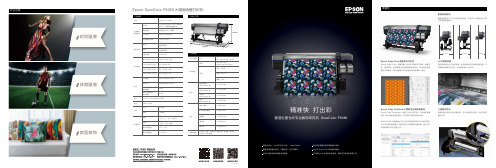
精准快 打出彩Epson Edge Print 爱普生RIP软件爱普生重新设计了打印机的硬件结构,令其可以方便的适合打印工作或者运输状态。
更紧凑的结构LED照明系统行业应用家居装饰时尚服装体育服装型号SureColor F9380主要部件技术参数打印头双PrecisionCoreTM TFP微压电打印头 (智能墨滴变换技术)喷嘴设置每种颜色1440个喷嘴打印方向双向打印\单向打印本机最高分辨率720x1440 dpi墨水系统墨水爱普生“活的色彩DS”热转印墨水颜色青色、洋红色、黄色、高浓度黑色墨水容量3000ml/色打印速度360x720dpi 1 pass 108.6平方米/小时720x720dpi 2 pass60平方米/小时720x720dpi 3 pass44.1平方米/小时720x720dpi 4 pass29.9 平方米/小时介质介质幅宽300-1626mm(64in.)卷纸尺寸卷纸最大外径250mm本机可承载最大卷纸重量45kg本机可容纳最大纸张厚度1 mm接口USB 2.0, 100/1000MB 以太网语言ESC/P raster内存主机512MB网络128MB环境条件温度运行:15°C - 35°C(20°C - 30°C推荐)湿度运行:20% - 80%(40% - 60%推荐)墨水保存温度 15℃-25℃墨水运输温度 5℃-35℃产品参数914mm收纸器搓纸轮进纸器高稳定性爱普生半色调技术将决定在喷墨中使用大中小墨滴的比例(即VSDT技术)以及墨滴的离散排布算法。
最终,可精确将连续色调的图像进行数字化,减少画面的颗粒感。
爱普生微羽化技术降低打印横纹现象,应用在了所有的打印模式上。
是依靠一个算法故意分散墨点的排布,来弥补进纸误差,消除打印横纹现象。
分散墨点的程度在高质量打印模式中更大,高质量模式下,打印横纹现象效果最不明显。
喷头保护装置可以有效地避免打印头和起皱的介质表面发生刮擦,从而避免打印头的物理损伤和用户的宕机时间。
三星多功能一体机用户指南说明书

1.簡介主要優勢6功能(依機型)8好用資訊10關於此使用者指南11安全資訊12機器總覽17控制面板概覽20開啟機器21瞭解 LED 22顯示螢幕與有用的按鈕25瞭解快顯鍵盤29安裝驅動程式31重新安裝驅動程式34網路環境37存取網路設定38透過網路安裝驅動程式45無線網路設定(選用)51準備原稿64裝入原稿65選擇列印媒體68將紙張裝入紙匣中69在特殊紙材上列印73設定紙張大小與類型78輸出位置79印表機驅動程式功能81基本列印82開啟列印喜好設定84特殊列印功能91使用直接列印公用程式98變更預設列印設定100將您的機器設定為預設機器101列印到檔案(PRN)102 Mac 列印103 Linux 列印105 Unix 列印107瞭解影印畫面110基本影印112快速影印114 ID 卡片影印115使用特殊影印功能117使用程式設定122瞭解掃描方法125掃描並透過電子郵件傳送126透過 SMB/FTP 掃描與傳送129掃描並傳送到您的電腦133掃描並傳送到 USB/共用資料夾134變更掃描功能設定136使用程式設定139使用啟用 TWAIN 的軟體掃描140利用 Samsung Easy Document Creator 掃描141 MAC 掃描142 Linux 掃描143準備傳真145透過電腦發送傳真146瞭解傳真畫面148發送傳真150接收傳真155調整文件設定157列印傳真報告159使用程式設定160從控制面板設定通訊錄163從 SyncThru™ Web Service 設定通訊錄16710.透過行動裝置使用機器支援的行動應用程式 185Mopria™ 187AirPrint189Samsung Cloud Print 191Google Cloud Print™194關於 SmarThru Workflow197瞭解 SmarThru Workflow 畫面 198工作表單建立畫面 199瞭解共用資料夾畫面 200使用共用資料夾 201瞭解儲存的文件畫面203在 Stored Document 中儲存文件 204瞭解 USB 畫面 205關於 USB 記憶體裝置 206從 USB 記憶體裝置列印207掃描至 USB 記憶體裝置209功能表總覽 212機器設定217存取管理工具237SyncThru™ Web Service 238Easy Capture Manager 244Samsung AnyWeb Print 245Easy Eco Driver246使用 Samsung Easy Document Creator 247使用 Samsung Printer Center 248使用 Samsung Easy Printer Manager 251使用 Samsung 印表機狀態 253使用 Samsung Printer Experience255訂購耗材與配件262可用的耗材263可用的配件264可用的維護零件265儲存碳粉匣266搖勻碳粉267更換碳粉匣269更換廢碳粉盒272安裝配件274監視耗材壽命279清潔印表機280移動和儲存機器的秘訣285避免卡紙的秘訣287清除卡紙288瞭解螢幕訊息302送紙問題307電源與纜線連接問題308列印問題309列印品質問題312影印問題319掃描問題320傳真問題321作業系統問題323規格328法規資訊339著作權3501.簡介這些是機器的主要元件:•主要優勢6•功能(依機型)8•好用資訊10•關於此使用者指南11•安全資訊12•機器總覽17•控制面板概覽20•開啟機器21•瞭解 LED22•顯示螢幕與有用的按鈕25•瞭解快顯鍵盤29友善的環境介面•此機器支援「環保」功能以節省碳粉和紙張(請參閱第 88 頁上的「環保標籤」)。
SD6900 非隔离LED照明驱动芯片说明书
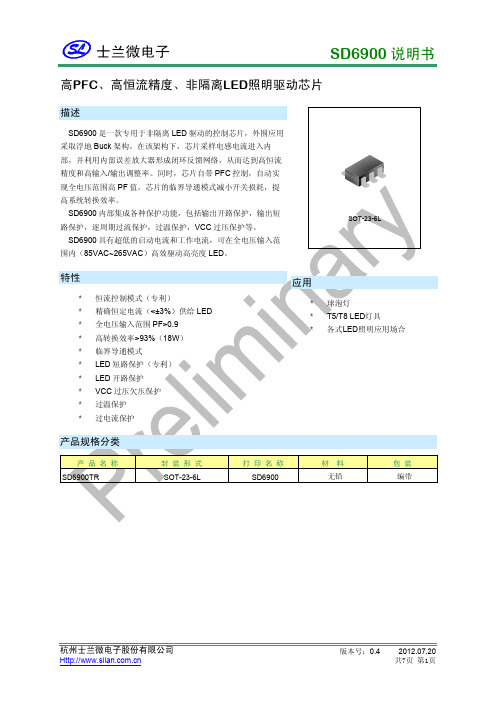
高PFC、高恒流精度、非隔离LED照明驱动芯片内部框图极限参数参 数符 号参 数 范 围电源电压V CC 0~25反馈电压V ZCD -0.7~6.5采样端电压V CS -6.5~6.5 端电压V -0.3~6.5 端电压 -0.3~16 结温范围 -40~125 存储温度范围 -65~150电气参数(除非特别说明,V,T=25C)amb参数名称符号测试条件最小值工作电压启动后10 18 20 UVLO VH --UVLO VL --启动电流启动前,CC=15V -- 2 --I启动后,无开关波形-- 640 --调高-- 4 --参数名称符号测试条件最小值典型值最大值单位ZCD过压检测延时-- 600 -- ns ZCD过零检测VL -- 0.1 -- V ZCD过零检测VH -- 0.3 -- V ZCD短路检测电压ZCD SL-- 0.5 -- V ZCD短路计时器-- 448 -- T 运放部分跨导放大器输入基准电压CS REF-- 200 -- mV跨导放大器跨导Gm -- 135 -- μA/V COMP高钳位电压-- 3.5 -- V COMP低钳位电压软启动期间-- 1.5 -- V CS峰值保护电压软启动结束-- 800 -- mV CS短路检测电压-- 100 -- mV CS短路计时器-- 192 -- T 控制时间参数最大导通时间T ON,MAX-- 25 -- μs最小导通时间T ON,MIN-- 0.4 -- μs最大关断时间T OFF,MAX-- 38 -- μs最小关断时间T OFF,MIN-- 3.2 -- μs最大开关频率F MAX-- 100 -- KHz栅极驱动输出低电平V OL V CC=18V,I O=-20mA -- -- 0.8 V 输出高电平V OH V CC=18V,I O=20mA 10 -- -- V 高电平钳位电压V OH_CLAMP-- 15 -- V输出上升时间T R V CC=18V,C L=1nF -- 180 -- ns 输出下降时间T F V CC=18V,C L=1nF -- 60 -- ns 温度特性过温保护T SD-- 150 -- °C过温解除-- 130 -- °C 过温保护延时-- 80 -- μs管脚排列图管脚描述管脚编号管脚名称I/O 功能描述电源POWER1 VCC地2 GND GND驱动输出,外接功率管栅极3 DR O4 ZCD I 过零检测输入5 COMP O 跨导放大器输出,外接一积分电容到地。
森兰SB200系列变频器使用手册V1.3
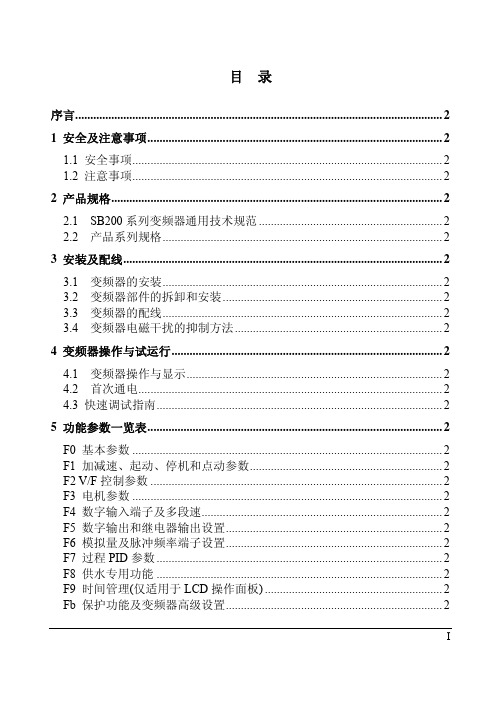
FC 键盘操作及显示设置................................................................................... 2 FF 通讯参数 ....................................................................................................... 2 Fn 厂家参数 ....................................................................................................... 2 FP 故障记录 ....................................................................................................... 2 FU 数据监视....................................................................................................... 2
3 安装及配线.......................................................................................................... 2
3.1 变频器的安装............................................................................................. 2 3.2 变频器部件的拆卸和安装......................................................................... 2 3.3 变频器的配线............................................................................................. 2 3.4 变频器电磁干扰的抑制方法..................................................................... 2
爱普生 STYLUS CX9300F 系列 说明书

■ 當複印、列印、或掃描時,請勿打開掃描 單元。
■ 請勿觸碰產品內部的白色排線。
■ 請勿在本產品上噴灑任何液體。
■ 千萬不要在本產品的內部或周圍使用具有 易燃氣體的噴霧劑產品。這麼做,可能會 引起火災。
從數位相機列印
使用 PictBridge 或 USB DIRECT-PRINT ............ 26
更換墨水卡匣
注意事項.................................... 27 取出和安裝墨水卡匣.................. 27
維護
檢查墨水卡匣存量..................... 30 檢查及清潔印字頭..................... 30 校正印字頭................................ 31
使用手冊
- 適用於單機操作 -
繁體中文
介紹
重要的安全操作說明.................... 3 儲存在記憶體中的個人資料......... 4
控制面板功能
控制面板...................................... 5
處理紙張和原稿
處理紙張...................................... 8 處理原稿...................................... 9
當閱讀操作說明時,請遵守以下的指導方針:
w 警告:務必小心遵守以免身體受傷。
c 注意:務必遵守以免損害您的設備。
桓诗-EPSON Stylus Pro 7800和9800产品参数说明书
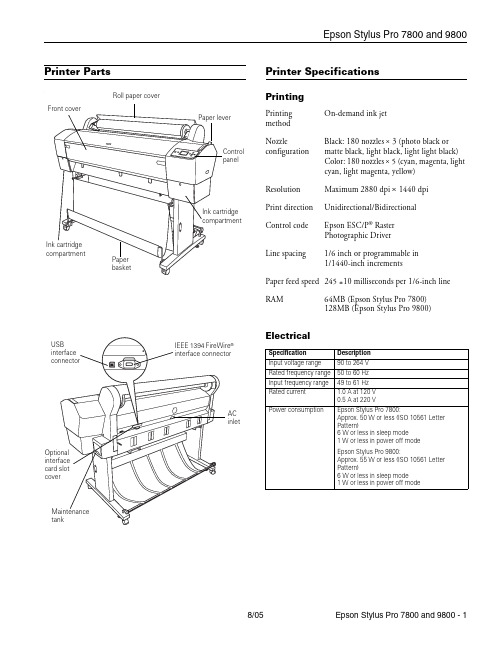
Printer PartsPrinter SpecificationsPrintingElectrical®AC inletRoll paper coverPrinting method On-demand ink jetNozzleconfigurationBlack: 180 nozzles × 3 (photo black or matte black, light black, light light black)Color: 180 nozzles × 5 (cyan, magenta, light cyan, light magenta, yellow)ResolutionMaximum 2880 dpi × 1440 dpi Print direction Unidirectional/Bidirectional Control code Epson ESC/P ® Raster Photographic Driver Line spacing1/6 inch or programmable in 1/1440-inch incrementsPaper feed speed 245 ±10 milliseconds per 1/6-inch line RAM64MB (Epson Stylus Pro 7800)128MB (Epson Stylus Pro 9800)Specification Description Input voltage range 90 to 264 V Rated frequency range 50 to 60 Hz Input frequency range 49 to 61 Hz Rated current1.0 A at 120 V 0.5 A at 220 VPower consumptionEpson Stylus Pro 7800:Approx. 50 W or less (ISO 10561 Letter Pattern)6 W or less in sleep mode 1 W or less in power off modeEpson Stylus Pro 9800:Approx. 55 W or less (ISO 10561 Letter Pattern)6 W or less in sleep mode 1 W or less in power off modeMechanicalEnvironmentalPaperThe allowable paper dimensions are shown below: Notes:❏Poor quality paper may reduce print quality and cause paper jams and other problems. If you encounter problems, switch to ahigher grade of paper.❏Avoid touching the printable surface with bare hands.Fingerprints may affect print quality. Handle media by the edges or use cotton gloves.❏If paper is curled or folded, flatten it before loading. Keep unused media in its original packaging and store it in a cool, dry place.❏Store sheet media on a flat surface.❏Unload roll paper from the paper path when not in use to prevent curling.Safety ApprovalsInk CartridgesDriversMacintosh® Operating System OS X 10.3.9 or later, Windows Windows 2000 or XP. Raster drivers are standard. Interfaces❏USB 1.1 and 2.0 compatible, recommended cable length up to 10 feet (3 meters)❏IEEE-1394 FireWire, recommended cable length up to10 feet (3 meters)In addition, a Type B expansion slot is available for installing the EpsonNet Ethernet™ network card (10/100 BaseTX).Dimensions Epson Stylus Pro 7800:Width: 47.12 inches (1178 mm)Depth: 20.04 inches (501 mm)Height: 22.4 inches (560 mm)Epson Stylus Pro 9800:Width: 68.08 inches (1702 mm)Depth: 27.12 inches (678 mm)Height: 47.84 inches (1196 mm)Weight (without ink cartridges)Epson Stylus Pro 7800: 131 lb (59 kg) Epson Stylus Pro 9800: 198 lb (40 kg) Stand: 23.1 lb (90 kg)Temperature Operation: 50 to 95 °F (10 to 35 °C)Storage:–4 to 104 °F (–20 to 40 °C)1 month at 104 °F (40 °C)Print qualityguarantee: 59 to 77 °F (15 to 25 °C)Humidity (without condensation)Operation: 20 to 80% RH Storage: 20 to 85% RH (stored inshipping container) Print qualityguarantee: 40 to 60% RH Optimaloperation: 35 to 45% RHRoll paper Cut sheetsEpson Stylus Pro 78008 to 24 in.(203 to 610mm) wideletter size up to 24 in.wideEpson Stylus Pro 98008 to 44 in.(203 to 1118mm) wideletter size up to 44 in.wideMaximum external roll diameter 2 in. core: 4 in. (103 mm)3 in. core: 6 in. (150 mm)—Thickness 3.15 to 19.7 mil(0.8 to 0.5 mm)3.15 to 59 mil(0.8 to 1.5mm)Safety standards UL 60950, CSA 22.2 No. 60950EMC FCC Part 15 Subpart B, Class B,CSA C108.8 Class BCartridge life2years from production date if unopened;within 6 months after opening package.Temperature Storage–22 to 104°F (–30 to 40°C);(uninstalled): 1 month at 104°F (40°C)Storage –4 to 104°F (–20 to 40°C);(installed): 1 month at 104°F (40°C)Capacity110 or 220 mlConsumables and AccessoriesInk CartridgesWhen you install the printer’s first ink cartridges, it takes about 10 minutes to initialize the printer. Do not interrrupt this process by turning off the printer, opening the front cover, or releasing the paper lever, or the printer will have to re-initialize. In that case, there may not be enough ink left in the original cartridges and you may have to replace them with new ones.Use the following UltraChrome K3™ Epson ink cartridges before the expiration date on the package:* A new printer can be initially charged with matte black ink instead of the standard photo black, or you can change the ink later using the Black Ink Conversion Kit included with your printer. Changing black ink uses about 20% of your ink and maintenance tank, and should beperformed infrequently.User-Replaceable PartsYou can order these user-replaceable parts:OptionsThe following optional equipment and warranties are available:*Must be purchased within 12 months of printer purchase. Control PanelSlot no.Cartridge110 ml220 ml1Light Light Black T562900T5639002Light Magenta T562600T5636003Light Cyan T562500T5635004Light Black T562700T5637005Photo Black T562100T563100Matte Black*T566800T5678006Cyan T562200T5632007Magenta T562300T5633008Yellow T562400T563400Part Part number Relacement Ink Maintenance Tank C12C890191Replacement Printer Cutter Blade (replaces the printer’s built-in cutter)C12C815291Part Part numberAutomatic Take-up Reel System (9800 only)C12C815251Replacement 44-inch Take-up Reel Core (9800 only)C815121EpsonNet Internal 10/100 BaseTX (Ethernet) Type-BPrint Server (interface card)C12C824341Paper Roller Spindle (Normal Tension) — 2- or 3-inchEpson Stylus Pro 7800Epson Stylus Pro 9800C12C811161C12C811151Paper Roller Spindle (High Tension) — 2- or 3-inchEpson Stylus Pro 7800Epson Stylus Pro 9800C12C811155C12C811152Manual Media Cutting System (for thick media)Epson Stylus Pro 7800Epson Stylus Pro 9800C12C815231C815182Replacement Manual Cutting Blade (for Manual MediaCutting System)C815192Extended warranties*1-year2-yearEPP7898B1EPP7898B2seconds tocancel a printjob or resetthe printer.seconds tocut roll paperafter printing.buttonHold for 3secondsto cleanthe printhead.Control Panel MenusBoldface indicates the default setting. Press the Menu r button to access the menus and the arrow buttons to navigate.Menu Item Settings/ExplanationPRINTER SETUP ROLL PAPER COUNTERROLL PAPER LENGTHROLL LENGTH ALERT Available only if REMAINING PPR SETUP is enabled in Maintenance ModePLATEN GAP STANDARD, NARROW,WIDE, WIDER, WIDESTPAGE LINE ON, OFFINTERFACE AUTO, USB, IEEE 1394,OPTIONAL I/F CARDCODE PAGE PC437, PC850ROLL PAPER MARGIN DEFAULT,TOP/BOTTOM15mm,TOP 35/BOTTOM15mm,15mm, 3mmPAPER SIZE CHECK ON, OFFPAPER SKEW CHECK ON, OFFTIME OUT OFF, 30sec, 60sec,180sec, 300secCUTTER ADJUSTMENT EXECUTEREFRESH MARGIN ON, OFFAUTO NOZZLE CHECK ON, OFFAUTO CLEANING ON, OFFQUIET CUT ON, OFFINITIALIZE SETTINGS Restores defaultsettingsTEST PRINT NOZZLE CHECK Shows clogged nozzlesSTATUS CHECK Ink and paper remainingand status of partsJOB INFORMATION Ink and paper used forthe last 10 jobsCUSTOM PAPER Registered paperconfigurationinformationPRINTER STATUS VERSION Current firmware versionPRINTABLE PAGES For the ink remaining ineach cartridgeINK LEVEL E*****F for each colorMAINTENANCE TANK E*****FUSAGE COUNT Ink in milliliters, paper insquare centimetersCLEAR USAGE COUNT EXECUTEPRINTERSTATUS(continued)JOB HISTORY Ink used in milliliters,and paper in squarecentimeters, for eachsaved jobTOTAL PRINTS Number of pages printedSERVICE LIFE E*****F for CUTTER,CR MOTOR (carriage)PF MOTOR (paper feed)HEAD UNIT (print head)CLEANING UNITPRESSURE MOTORCUSTOM PAPER PAPER NUMBER STANDARD,NO. (1 to 10)PLATEN GAP STANDARD, NARROW,WIDE, WIDERTHICKNESS PATTERN PRINTTHICKNESS NUMBER 1 to 15CUT METHOD STANDARD,THIN PAPER, THICKPAPER FAST, THICKPAPER SLOWPAPER FEED ADJUST–0.70% to 0.70%DRYING TIME0. 0 sec. to 10.0 sec.PAPER SUCTION STANDARD, –1, –2, –3,–4M/W ADJUSTMENT STANDARD, 1, 2MAINTENANCE CUTTERREPLACEMENTEXECUTEBK INK CHANGE EXECUTEPOWER CLEANING EXECUTECLOCK SETTING EXECUTECONTRASTADJUSTMENT–20 to +20HEADALIGNMENTPAPER THICKNESS STANDARD, 0.1 mm to1.5 mmALIGNMENTAUTO UNI-D, BI-D 2-COLOR,BI-D ALL, BI-D #1,BI-D #2, BI-D #3MANUAL UNI-D, BI-D 2-COLOR,BI-D ALLMenu Item Settings/ExplanationPrinting a Status SheetThe status sheet shows some of the current default settings, the amount of ink remaining in each cartridge, the page count, and the status of the cutter blade, maintenance tank, and other printer parts.Note: You can replace the ink cartridges, cutter blade, and maintenance tank yourself. Other parts need to be replaced by an authorized Epson service technician.1.Make sure paper is loaded in the printer.2.Press the Menu button.3.Press the d button to highlight TEST PRINT, then pressMenu.4.Press d to highlight STATUS SHEET, then press Menu.You see PRINT.5.Press to start printing.The amount of ink left or the component life is indicated asfollows:E*****F= 100–81% of ink or service life remainingE****F= 80–61%E***F= 60–41%E**F = 40–21%E*F= 20–11%%= less than 10% of ink or service life remainingReplacing an Ink CartridgeThe easiest way of checking ink levels is from the controlpanel LCD display. The numbers below the ink icons on theLCD display correspond to the 8 ink cartridge slots on theprinter. The icons show the percentage of ink remaining asfollows:When the red B ink light is flashing (andINK LOW appearson the LCD display), the indicated cartridge is almost out ofink. Make sure you have a replacement cartridge. When thelight stays on and INK OUT is displayed, the cartridge isempty. You must replace the cartridge before you cancontinue printing.See page 3 for information on selecting the correctreplacement cartridges. Before you start, make sure the printeris turned on. Then follow these steps to replace an inkcartridge:1.Note the color of the cartridge that is low or empty. This is3.4.5.Make sure the replacementcartridge is the correct color,and remove it from itspackage.6.Gently shake the cartridgebefore installing it.7.8.9.Close the ink compartment cover(s).Once the cartridge is installed, the printer returns to its READY state. Paper Type and BandingBanding can be caused by several problems, such as clogged print head nozzles or a misaligned print head. It can also be caused by using a paper that is not defined in the Epson printer driver or in a third-party RIP. To correct this problem, make sure you select the correct paper type in the driver.If your paper type is not defined, use the printer’s menu system to create a custom paper type. See “Optimizing the Settings for Your Paper” in the Printer Guide.Checking and Cleaning the Print Head If your printed image shows a color shift or horizontal lines, you should check the print head to see if any nozzles are clogged or deflected. If necessary, the printer will automatically run a cleaning cycle to clear the nozzles.1.Press the Menu button.2.Press the d button until TEST PRINT is highlighted, thenpress Menu. NOZZLE CHECK is selected.3.Press Menu, then press to start printing the nozzle checkpattern.The nozzle check pattern is printed and automatically read. If the printer finds clogged nozzles, it runs a cleaning cycle. Note: You can clean the print head manually by pressing and holding the Menu button. You also can check the print head and turn on the Auto Cleaning feature using your printer utility software.Running a Power Cleaning CycleYou can run a power cleaning cycle from the printer’s control panel if the normal cleaning process is not sufficient to clear the nozzles. However, the power cycle uses a larger quantity of ink, so it is recommended only as a last resort.The cartridges need to be at least 50% full to use power cleaning. You may need to replace a low cartridge to run the cleaning cycle. If the waste ink tank is nearly full, you may need to replace it. After running the cleaning cycle, you can reinsert the old cartridge.1.Print a nozzle check to make sure the print head needscleaning, as described above.2.Make sure the printer is ready and the red B ink light on theprinter’s LCD display is not on or flashing.3.Press the Menu button.4.Press the d button until MAINTENANCE is highlighted,then press Menu.5.Press the d button until PWR CLEANING is highlighted,then press Menu . Press Menu again, then press to start the power cleaning.6.Follow the instructions on the LCD display to raise or lowerthe ink levers.7.When cleaning is finished and the Pause light stopsflashing, print the nozzle check again to confirm that the head is clean.For effective cleaning, always run a nozzle check between cycles.If the pattern is still missing segments or has deflections after a power cleaning cycle, turn the printer off and leave it overnight. Then clean the print head again the following morning with regular cleaning cycles. If you still see no improvement, contact Epson for assistance.Aligning the Print HeadAligning the print head is the most important thing you can do to ensure the best print quality. If banding appears on your prints, if they look grainy or blurry, or you see misregistration or “ghosting,” you may need to align the print head. Although you can align the print head using the printer utility software, it’s also easy to align from the control panel. This will do the most thorough job in the shortest time, and it’s all automatic.If you haven’t already done so, it’s a good idea to run a nozzle check before aligning the print head (see page 6). This ensures that the print head alignment patterns print correctly.Follow these steps to align the print head using the control panel:1.Make sure the printer is turned on. Then load EpsonEnhanced Matte, Doubleweight Matte, Premium Luster Photo paper, or the paper that came with the printer. 2.Press the Menu button.3.Press thed button until HEAD ALIGNMENT ishighlighted, then press Menu. PAPER THICKNESS is highlighted. 4.Press Menu . The STANDARD setting is selected by default.This is the correct thickness setting for most Epson papers.5.Pressto save the setting.6.Press l , then press d to highlight ALIGNMENT .7.Press the Menu button to highlight AUTO , then pressMenu again. UNI-D (uni-directional) is highlighted. This is the type of alignment to start with.8.Press thebutton to start the alignment process.Each head alignment takes about 7 minutes. The printer’s white beam sensor reads the alignment pattern and adjusts the printer automatically. Make sure you don’t open the front cover or turn off the printer during this process.9.When the uni-directional alignment is finished, press the dbutton until BI-D 2-COLOR is highlighted. Then press the button to start the bi-directional black alignment process.10.When the bi-directional black alignment is finished, pressthe d button until BI-D ALL is highlighted. Then press the button to start the alignment process. 11.When done, press the Pause button to exit headalignment mode. If you want to verify or fine-tune the automatic alignment process, you can perform a manual head alignment. See your electronic Reference Guide for instructions.Replacing the Cutter BladeIf you notice that your paper isn’t cut cleanly, the cutter blade may need to be replaced. For a list of media that are not recommended for use with the cutter, see the Printer Guide .You can check the status of your cutter by printing a status sheet. See page 5 for instructions. You can obtain a new cutter blade from Epson (part number C12C815291).Removing the Old Blade1.Press the Menu button.2.Press the d button until MAINTENANCE is highlighted,then press Menu .3.Press Menu again to select CUTTER REPLACEMENT .4.Press the button. The print head moves to thereplacement position. OPEN FRONT COVER TO SEE CUTTER REPLACEMENT LABEL is displayed. 5.Open the front cover.Installing the New Cutter Blade6.When SEE LABEL TO REPLACE CUTTER appears on theReplacing the Maintenance TankThe maintenance tank stores ink that gets flushed from the system during the initial ink charge and manual and automatic print head cleaning. When the tank is almost full, the message MAINTENANCE TANK NEAR FULL appears on the LCD display. When the tank is completely full, the printer stops working and MAINTENANCE TANK FULL appears on the LCD.You can check how much space remains in the maintenance tank by viewing its indicator on the control panel, shown below. You can also check its status by printing a status sheet (see page 5).*The Epson Stylus Pro 9800 has two maintenance tank indicators.The icons show the percentage of space remaining in the tank as follows:The Epson Stylus Pro 7800 has one maintenance tank (on the right side), and the 9800 has two (one on either side). Replacement tanks are available from Epson (part numberC12C890191).The printer will not print if one of the maintenance tanks is full. On the Epson Stylus Pro 9800, the right tank is used more than the left. To maximize tank life, you can switch the tanks when the right tank reaches approximately 50%. Follow these steps to replace the tank:1.Make sure the printer is not printing or performing anyother operations (READY or PAPER OUT should appear on the LCD display).2.If you have the Epson Stylus Pro 9800, check the LCDdisplay to determine which tank needs to be replaced (left or right).3.Grasp the handle at the bottom of the tank (on the side ofthe printer) and gently pull out the maintenance tank.Caution: Be careful not to spill ink from the maintenance tankwhen removing it. Hold it upright at all times and dispose of itcarefully.4.Place the used tank in the plastic bag included with the newtank.5.Insert the new tank.Updating the Driver and FirmwareTo ensure that you have the most up-to-date firmware and driver for your new printer, please visit . Choose your printer and click Drivers & Downloads to see if there are any updates posted. Check back regularly to maintain compatibility with existing and future applications. When your printer is set up and your software is installed, run the EPSON LFP Remote Panel to check your printer’s firmware ROM version and update it if necessary. Related DocumentationCPD-20271Epson Stylus Pro 7800 and 9800 PrinterGuideCPD-20272Epson Stylus Pro 7800 and 9800 QuickReference GuideCPD-20270Epson Stylus Pro 7800 and 9800CD-ROM with electronic Reference Guide。
FI-6800产品说明书
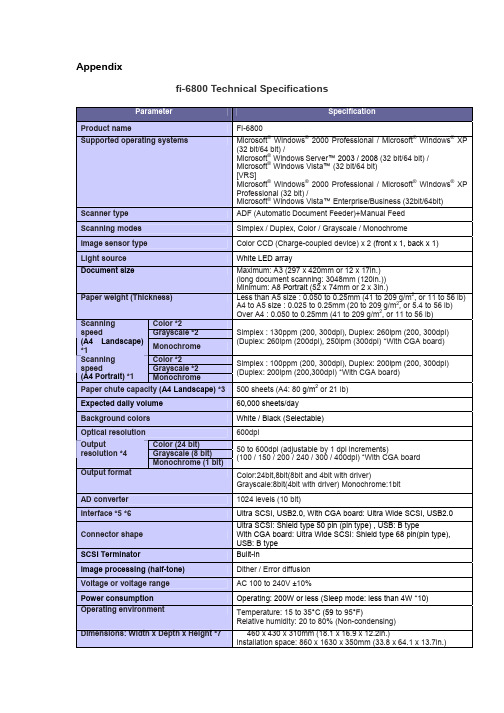
Appendixfi-6800 Technical SpecificationsProduct nameFI-6800 Supported operating systems Microsoft ® Windows ® 2000 Professional / Microsoft ® Windows ® XP(32 bit/64 bit) /Microsoft ® Windows Server ™ 2003 / 2008 (32 bit/64 bit) / Microsoft ® Windows Vista ™ (32 bit/64 bit)[VRS]Microsoft ® Windows ® 2000 Professional / Microsoft ® Windows ® XPProfessional (32 bit) / Microsoft ® Windows Vista™ Enterprise/Business (32bit/64bit)Scanner typeADF (Automatic Document Feeder)+Manual Feed Scanning modesSimplex / Duplex, Color / Grayscale / Monochrome Image sensor typeColor CCD (Charge-coupled device) x 2 (front x 1, back x 1) Light sourceWhite LED array Document sizeMaximum: A3 (297 x 420mm or 12 x 17in.) (long document scanning: 3048mm (120in.)) Minimum: A8 Portrait (52 x 74mm or 2 x 3in.) Paper weight (Thickness)Less than A5 size : 0.050 to 0.25mm (41 to 209 g/m 2, or 11 to 56 lb) A4 to A5 size : 0.025 to 0.25mm (20 to 209 g/m 2, or 5.4 to 56 lb) Over A4 : 0.050 to 0.25mm (41 to 209 g/m 2, or 11 to 56 lb) Color *2Grayscale *2Scanning speed (A4 Landscape) *1Monochrome Simplex : 130ppm (200, 300dpi), Duplex: 260ipm (200, 300dpi) (Duplex: 260ipm (200dpi), 250ipm (300dpi) *With CGA board) Color *2 Grayscale *2Scanningspeed (A4 Portrait) *1 MonochromeSimplex : 100ppm (200, 300dpi), Duplex: 200ipm (200, 300dpi) (Duplex: 200ipm (200,300dpi) *With CGA board) Paper chute capacity (A4 Landscape) *3500 sheets (A4: 80 g/m 2 or 21 lb) Expected daily volume60,000 sheets/day Background colorsWhite / Black (Selectable) Optical resolution600dpi Color (24 bit) Grayscale (8 bit) Outputresolution *4Monochrome (1 bit) 50 to 600dpi (adjustable by 1 dpi increments) (100 / 150 / 200 / 240 / 300 / 400dpi) *With CGA board Output format Color:24bit,8bit(8bit and 4bit with driver)Grayscale:8bit(4bit with driver) Monochrome:1bitAD converter 1024 levels (10 bit)Interface *5 *6 Ultra SCSI, USB2.0, With CGA board : Ultra Wide SCSI, USB2.0Connector shape Ultra SCSI : Shield type 50 pin (pin type) , USB: B typeWith CGA board : Ultra Wide SCSI : Shield type 68 pin(pin type),USB: B typeSCSI Terminator Built-inImage processing (half-tone) Dither / Error diffusionVoltage or voltage range AC 100 to 240V ±10%Power consumption Operating: 200W or less (Sleep mode: less than 4W *10)Operating environment Temperature: 15 to 35°C (59 to 95°F )Relative humidity: 20 to 80% (Non-condensing)Dimensions: Width x Depth x Height *7460 x 430 x 310mm (18.1 x 16.9 x 12.2in.)Installation space: 860 x 1630 x 350mm (33.8 x 64.1 x 13.7in.)Weight 32kgIncluded software / drivers TWAIN, ISIS™, ScandAll PRO, Adobe® Acrobat®, QuickScan™ ProDemo,Image processing software (Trial), Kofax® VRS Professional, Scan toMicrosoft SharePointEnvironmental compatibility *8 ENERGY STAR®, and RoHSMulti-feed detection Yes (Standard) ultrasonic multi-feed defection sensorOthersLong paperscanning *93048 mm (120in.)Included items AC cable, USB cable, Setup DVD-ROM, Adobe® Acrobat®DVD-ROM,QuickScan™ Pro brochure*1 Actual scanning speeds are affected by data transmission and software processing times.*2 JPEG compressed figures.*3 Maximum capacity varies, depending upon paper weight.*4 Maximum output resolutions may vary, depending upon the size of the area being scanned andwhether the scanner is scanning in simplex or duplex.*5 You cannot use both SCSI and USB 2.0 interfaces at the same time.*6 You cannot connect multiple computers to the scanner using each type of interface cables at the sametime.*7 Excluding the ADF hopper.*8 PFU Limited, a Fujitsu company, has determined that this product meets RoHS requirements(2005/95/EC).*9 Capable of scanning documents that exceed A3 size in length. For long page scanning with standardI/F: Documents that exceed 432mm (17in.) are limited to 400dpi for lengths up to 863mm (34in.). Documents between 863mm and 3,048mm (120in.) in length are limited to 300dpi. Multi-image documents up 432mm in length are limited to 400dpi. For long page scanning with VRS: Documentsthat exceed 432mm (17in.) are limited to 300dpi for lengths up to 1,778mm (70in.). Documentsbetween 1,778mm and 3,048mm (120in.) in length are limited to 200dpi. Documents that exceed432mm can be scanned under any resolution for lengths up to 1,016mm (70in.) when used with ISIS.*10 Without CGA board interface.■OptionsPost Imprinter(Front side)(FI-680PRF)PA03575-D201Post Imprinter(Back side) (FI-680PRB) PA03575-D203The imprinter option enables users to print information on original documentsfor document management purposes. While the FI-680PRF (post imprinter)prints information on the front of documents, the FI-680PRB (post imprinter)prints information on the reverse-side of documents after they have beenscanned. Although both the FI-680PRF and the FI-680PRB may be attachedto the same scanner unit, both imprinters cannot be used simultaneously.■ConsumablesPick Roller PA03575-K011Lifetime: Every 600,000 sheets or one year. These rollers feed documents into the scanner.Separator Roller PA03575-K012Lifetime: Every 600,000 sheets or one year.These rollers feed documents through the scanner.Brake Roller PA03575-K013Lifetime: Every 600,000 sheets or one year.These rollers separate documents as they are being fed into the scanner.Print Cartridge CA00050-0262 Lifetime: 4,000,000 charactersFI-680PRF and FI-680PRB print head。
建立家庭办公模式——Epson cx6900F一体机

多时间处理生活和工作的协调问题 ; 另一方面给 自己的生 活也带来很多影 响; 此外 , 以前使用 的普通打 印机在 打印
大 量 文档 后 会 出现 墨 量 的 明 显 减 少 ,而且 打 印 时 间较 长 、 速 度慢 、 觉效 果 不 好 。 ” 视
这样 的新 型办 公设备 ,采 用 了四色 分体 式墨 盒和
扫描很 多文献和参考资料 ,之前我使 用的普通 打印机 , 只 能完成打 印任务 , 不能实现 、 印、 复 扫描 、 传真等其他 办公
程 序 , 我 的 工 作 带 来很 多不 方 便 , 方 面 , 总 是 花 费 很 给 一 她
加之该产品的低能耗表现符合 中标认证 中心 的 “ 打 印机 /打印机传真一体机节能认证技术要求 , 这也成为它 在全新 的办公一体化 输出设备 中最具 品牌特 性和吸引力
生 活 一 体 化 需 求 的最 佳 选择 。
让其处于 待机状态 。我们发现 , 台机器 的待机和 关闭时 这
都 比以前 的打 印机 明 显 省 电的 多 。据 说 这 台 C 9 0 X60 F的 低 能 耗还 通过 了 中 国节 能认 证 , 起 来 每年 可 以 给我 们 节 算 省 几 百 元 电费 ! ” 多 用 户可 能 不 知 道 , X 9 0 很 C 6 0 F的 用 电
近 年 来 , 随着 人 们生 活节 奏 的 不 断 加快 和 社 会 竞 争
而且令我 吃惊 的是 : 打印一本 近百 页论 文后墨量没有 明显
减少 。 此 外 , X6 0 F的 节 能 效 果 也 让 张 女 士 津 津 乐 道 : C 90 “ 不 管 是 我 们 以前 使 用 打 印机 , 是 现 在 用 的 一 体 机 , 常 还 常
爱普生CX6900评测

书山有路勤为径;学海无涯苦作舟
爱普生CX6900评测
CX6900F是爱普生首款加入“彩色传真”功能的一体机产品,可以满
足更多用户的需求。
在最常用的打印应用中,CX6900F拥有一项“独门绝技”:四种颜料墨都具有极好的防水能力(其它品牌的一体机都只有黑色
才防水),这一特性对那些经常打印重要彩色文档的商务人士来说格外重要。
爱普生STYLUS系列一体机所用的“世纪绚彩防水耐光墨”在上一代DURABrite墨水的基础上进行了改进,它运用尖端技术将每一个颜料颗粒
包裹在树脂中,包裹着树脂的颜料颗粒可以防止水分的侵入,无论在普通
纸还是照片纸上都具有超强的防水性、耐光性、耐臭氧性。
同时,打印品
质也有了飞跃提升。
作为一款多功能一体机,控制面板的易用性至关重要,为了让用户能
够自如的使用需要的功能,爱普生的工程师究竟是如何安排CX6900F控制面板的键位设计呢?下面就让我们来介绍一下. 我们可以人为的把CX6900F的控制面板从上至下划分为三个区域。
最上面的第一个区域包括电源键、维护键、单行黑白LED液晶屏、三个备选任务键(复印、存储卡、传真)。
这三个备选任务都是可以脱离PC直接完成的,配合显示屏用户可以快速准确的完成需要的操作,而且选中的任务还会发出绿光进行突出显示。
当你偶尔发现打印出现条纹、偏色等现象时,按一下“维护”键,
CX6900F就会自动完成打印头校准或清洗任务。
令人高兴的是,所有按键的旁边都辅以中英文双语标注,甚至还带有图示。
在三个任务键的上方,
还有菜单索引,单击即可在菜单中切换,令用户的操作更为简单快捷。
专注下一代成长,为了孩子。
埃森普 BrightLink 710Ui WUXGA 3LCD 互动激光显示器说明书
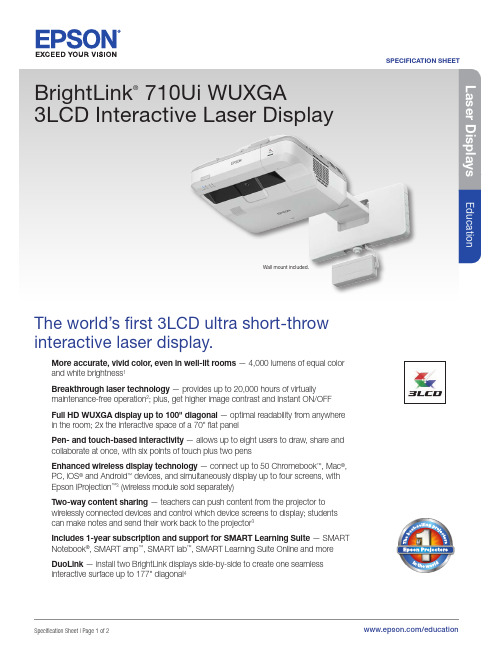
EducationSPECIFICATION SHEETBrightLink ®710Ui WUXGA 3LCD Interactive Laser DisplayThe world’s first 3LCD ultra short-throw interactive laser display.More accurate, vivid color, even in well-lit rooms — 4,000 lumens of equal color and white brightness 1Breakthrough laser technology — provides up to 20,000 hours of virtually maintenance-free operation 2; plus, get higher image contrast and Instant ON/OFF Wall mount included.Specification Sheet | Page 2 of 2Epson America, Inc.3840 Kilroy Airport Way, Long Beach, CA 90806Epson Canada Limited185 Renfrew Drive, Markham, Ontario L3R 6G3 www.epson.ca20,000 hours (Normal)30,000 hours (Extended)Projection LensType Manual focus F-number 1.6Focal Length 4.2 mmThrow Ratio Range (16:10) 0.22 – 0.37, (4:3) 0.33 – 0.44, (16:9) 0.27 – 0.37Zoom Ratio Digital zoom: 1.0 – 1.35xOtherDisplay Performance NTSC: 480 lines PAL: 576 lines (Depends on observation of the multi-burst pattern)Input Signal NTSC/NTSC4.43/PAL/M-PAL/N-PAL/PAL60/SECAM Speaker 16 W monauralOperating Temperature 32 ˚ to 113 ˚F (0 ˚ to 45 ˚C) Power Supply Voltage 100 – 240 V ±10%, 50/60 Hz Power Consumption ECO Mode: 348 W Normal Mode: 448 WStandby (Communication On): 2.0 W Standby (Communication Off): 0.3 W Fan NoiseQuiet Mode: 27 dB Normal Mode: 38 dBSecurity Kensington lock provision, security anchor bar, password-protect functionInteractivityInteractive Technology Infrared, 850 nmInteractive Area (Image Size) 70" – 100" diagonal (16:10, WUXGA)Calibration Method Automatic or ManualInteractive Connectivity USB cable for non-networkedInteractive Software Requirements Epson Easy Interactive Driver (Mac and PC — required for DuoLink); Windows and Linux: driver not required Mac: Mac OS X 10.7/10.8/10.9/10.10/10.11/macOS 10.12.x Epson Easy Interactive Tools for Windows and Mac System Compatibility Microsoft ® Windows Vista SP2 (All editions except for Starter), Windows 8/8.1, Windows 10, Windows 7 SP1 (All editions except for Starter)mac OS ™ 10.7/10.8/10.9/10.10/10.11/macOS 10.12.x, UBUNTU 15.10, 16.04 L TX, 16.10, 17.04Gestures Requires Windows 7 or later, or or Mac OS 10.7 or laterSMART Notebook RequirementsSupported Operating Systems Windows 7 SP1, Windows 8/8.1, Windows 10, Mac OS X 10.9, 10.10, 10.11 Minimum Processor Intel ® Core 2 Duo Minimum RAM 2GB (4GB for UHD displays)Minimum Hard Disk Space 3GB (Windows); 3GB (Mac)Interactive Input DeviceType of Interactive Input Device Digital penInteractive Pen Functions Mouse Functions (left and right click), Electronic pen, LED battery status indicatorInteractive Pen Power AA battery, rechargeableCompatible Pen Battery Types Eneloop ® batteries (included), Manganese dry cell, alkaline dry cellInteractive Pen Dimensions 6.3" x 0.94" (diameter) Interactive Pen Weight 1.1 oz (without battery)Dimensions (W x D x H)19.5" x 17.3" x 6.8" Weight 24.7 lbOperating Distance 19.7 ft (6 m)Eco FeaturesEnergy-efficient 3LCD light engine Recyclable product 5Epson America, Inc. is a SmartWay ® Transport Partner 6SupportService Programs 3-year projector limited warranty, Epson Road Service program, PrivateLine ® dedicated toll-free supportWhat’s in the BoxBrightLink 710Ui ultra short-throw interactive laser display, wall mount, mount template sheet, installation manual, finger-touch module, touch module mounting bracket, touch module cable, Quick Start Guide, power cable, USB A/B cable, electronic user manual, projector remote control, two (2) interactive pens, two (2) AA batteries (for interactive pens) plus battery charger, two (2) AA batteries (for remote), SMART Learning Suite redemption codeOrdering InformationBrightLink 710Ui V11H877022 Air Filter V13H134A43 PowerLite ® Pilot ™ 2 (ELPCB02) V12H614020 Active Speakers (ELPSP02) V12H467020 Wireless 802.11b/g/n LAN Unit (ELPAP10) V12H731P02 100" Whiteboard V12H831000 Interactive Pen A (orange) V12H773010 Interactive Pen B (blue) V12H774010Replacement Pen Tips (hard/Teflon ®) V12H775010 Replacement Pen Tips (soft/felt) V12H776010 Ultra Short-throw Wall Mount (ELPMB53) V12H902020Specifications and terms are subject to change without notice. EPSON and PowerLite are registered trademarks, EPSON Exceed Your Vision is a registered logomark and Better Products for a Better Future and Epson iProjection are trademarks of Seiko Epson Corporation. BrightLink and PrivateLine are registered trademarks, Pilot is a trademark and Epson Connection is a service mark of Epson America, Inc. iPad, iPod, Mac, macOS and OS X are trademarks of Apple, Inc., registered in the U.S. and other countries. Android and Chromebook are trademarks of Google Inc. Microsoft, Windows and Windows Vista are either registered trademarks or trademarks of Microsoft Corporation in the United States and/or other countries. SmartWay is a registered trademark of the U.S. Environmental Protection Agency. All other product and brand names are trademarks and/or registered trademarks of their respective companies. Epson disclaims any and all rights in these marks. Copyright 2019 Epson America, Inc. Com-SS-Oct-13 CPD-54463R2 1/191 Color brightness (color light output) and white brightness (white light output) will vary depending on usage conditions. Color light output measured in accordance with IDMS 15.4; white light output measured in accordance with ISO 21118. |2 20,000 hours is the estimated projector life when used in Normal Mode. Actual hours may vary depending on mode and usage environment. The projector comes with a 3-year limited warranty. |3 For wireless functionality, including via the Epson iProjection App, the projector must be configured on a network, either through the Ethernet port on the projector (check model specifications for availability) or via a wireless connection. Check your owner’s manual to determine if a wireless LAN module must be purchased separately to enable a wireless connection. Not all Epson projectors are able to be networked. The Epson iProjection App does not support all files and formats. See for details. |4 Requires Easy Interactive Driver. Certain functionality is only available through Epson Interactive T ools (EIT) software. For a list of supported operating systems, visit |5 For convenient and reasonable recycling options, visit /recycle |6 SmartWay is an innovative partnership of the U.S. Environmental Protection Agency that reduces greenhouse gases and other air pollutants and improves fuel efficiency.Learn more about how our products can empower your institution. Visit us at /foreducation/educationContact:。
喷墨一体机引爆SMB之战

喷墨一体机引爆SMB之战SMB(全称Small and Medium Businesses,中小企业)自2002年至今,一直是厂商和媒体谈论的热点中的热点。
中小企业这支中国经济的生力军,数量庞大而朝气蓬勃,虽然他们的购买力远远低于大企业,但是庞大的数量不容小窥。
这对于苦于寻找新市场的IT厂商而言,无疑是一个具有巨大吸引力的市场。
在我平时的采访中,类似于“得SMB 市场得天下”、“SMB是IT再次腾飞的契机”之类的话不绝于耳。
在2007年的春天,爱普生、惠普、兄弟等厂商都不约而同地推出了专门面向SMB市场的喷墨一体机,引爆了2007年喷墨一体机的“SMB之战”。
对于一触即发的商务一体机市场,爱普生、惠普、兄弟等厂商虎视眈眈,纷纷开始将优势兵力集结于此。
3月23日,爱普生推出stylus CX6900F喷墨多功能一体机。
作为爱普生第一款具有传真功能的多功能一体机,stylus CX6900F号称自己集合了打印、复印、扫描、传真、疾速输出、适用多介质、分休墨盒、超强防水以及支持Windows Vista 九大特点于一身,明确而高调地定位于商用输出领域。
4月5日,在商用喷墨打印领域耕耘多年的惠普全球同步发布了其商用喷墨打印机新产品,其中包括2台多功能一体机和2台喷墨打印机,从而使自己具有了一条业界最为完善的商用喷墨打印产品线。
这些新品专为预算有限、具有更高要求并且有多种不同需求的商务用户设计。
兄弟公司的喷墨多功能一体机产品均定位于商用领域,具有较为丰富的产品可供用户选择,本次我们收到的3款产品也是其最新发布的。
这些商用喷墨一体机产品的纷繁沓至,让2007年的低端商用打印订市场一下子充满了剑拔弩张的火约味,也从侧面向我们验证厂低端商用市场对喷墨一体机的旺盛需求。
最近,有一条不属于喷墨一体机的信息能让我们看到价格的玄机:佳能在它的官方网站上公布,其新发布的最低价彩色喷墨打印机PIXMAiP1880的价格已降到了388元,而日锁定了入门级商业用户,喷墨一体机不断下降的价格是不言而喻。
埃森培森 Stylus Pro11880 打印引擎技术特性说明书

Nozzle Configuration Color and Monochrome
360 nozzles x 9
Droplet Technology
Smallest droplet size
3.5 picoliters
Variable Droplet Technology can produce up to three
different droplet sizes per print line
Resolution 2880 x 1440 dpi; 1440 x 720 dpi; 720 x 720 dpi; 720 x 360 dpi; 360 x 360 dpi; 360 x 180 dpi
Print Engine SpeedA 16" x 20" prints from 0:50 to 7:39 – Standard is 3:09 20"x 30" prints from 1:24 to 13:24 – Standard is 6:19 40"x 60" prints from 4:08 to 42:10 – Standard is 19:45
Relative humidity
20 to 80%
Operating
40 to 50%
Recommended storage 5 to 85% (no condensation)
Safety Approval Safety standards EMI
FCC Part 15 Subpart B Class A CAN/CSA –CEI/IEC CISPR 22 AS/NZS CISPR 22 Class A
Top and bottom edges can be automatically cut to any length when printing on roll media
