eclipse集成jetty开发maven web项目(超简单)
MAVEN工程创建步骤(eclipse+maven命令行)
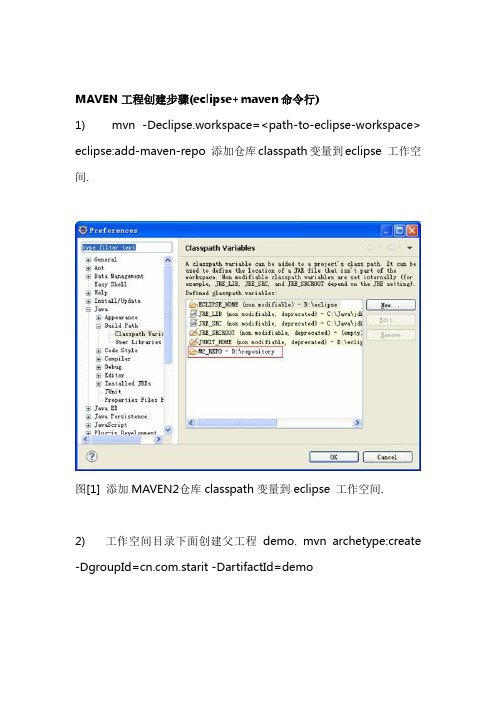
MAVEN工程创建步骤(eclipse+maven命令行)1)mvn -Declipse.workspace=<path-to-eclipse-workspace> eclipse:add-maven-repo 添加仓库classpath变量到eclipse 工作空间.图[1] 添加MAVEN2仓库classpath变量到eclipse 工作空间.2)工作空间目录下面创建父工程demo. mvn archetype:create -DgroupId=.starit -DartifactId=demo如果是web工程: mvn archetype:create -DgroupId=.starit -DartifactId=demo-web-DarchetypeArtifactId=maven-archetype-webapp3)demo目录下mvn eclipse:eclipse 使生成eclipse项目.如果只想用工程的jar依赖,去掉eclipse的工程依赖:mvn eclipse:eclipse eProjectReferences=false 下载源码并关联class: mvn -DdownloadSources=true -DdownloadJavadocs=trueeclipse:eclipse4)demo目录下新建.cvsignore文件,内容为target.settings.classpath.project.wtpmoduleslogslogdb*.sqlite5)eclipse导入项目文件夹.6) 此时如果是web工程,是没有java目录的,于是new -> Folder新建src/main/java和src/test/java目录.再次mvn eclipse:eclipse 之后就是一个标准的maven项目结构了.7)推荐使用jetty作为web容器来开发web模块,这样以普通java项目的启动方式来运行web程序.参考附1.8) 至此提交CVS.9) 导出依赖jar : mvn dependency:copy-dependencies -DoutputDirectory=lib -DincludeScope=compile或者配置plugin导出jar<plugin><groupId>org.apache.maven.plugins</groupId><artifactId>maven-dependency-plugin</artifactId><executions><execution><id>copy</id><phase>package</phase><goals><goal>copy-dependencies</goal></goals><configuration><outputDirectory>${project.build.directory}/lib</outputDirecto ry></configuration></execution></executions></plugin>/***********导出jar*************/10)导出jar,源码,并跳过测试:mvn source:jar install -Dmaven.test.skip=true或者配置plugin跳过测试<plugin><groupId>org.apache.maven.plugins</groupId><artifactId>maven-surefire-plugin</artifactId><configuration><skipT ests>true</skipT ests></configuration></plugin>11)查看依赖关系: mvn dependency:tree12)下载源码并关联class: mvn -DdownloadSources=true-DdownloadJavadocs=true eclipse:eclipse13) 配置plugin导出带mainclass 和classpath的jar <plugin><groupId>org.apache.maven.plugins</groupId> <artifactId>maven-jar-plugin</artifactId><configuration><archive><manifest><addClasspath>true</addClasspath><classpathPrefix>lib/</classpathPrefix><mainClass>JettyMain</mainClass></manifest></archive></configuration></plugin>附1:maven工程使用嵌入式jetty容器-------------------------pom.xml<dependency><groupId>org.eclipse.jetty.aggregate</groupId> <artifactId>jetty-all</artifactId><version>8.1.2.v20120308</version><scope>provided</scope></dependency><dependency><groupId>org.eclipse.jetty</groupId><artifactId>jetty-jsp-2.1</artifactId><version>7.5.4.v20111024</version><scope>provided</scope></dependency><dependency><groupId>org.mortbay.jetty</groupId><artifactId>jsp-2.1-glassfish</artifactId><version>2.1.v20100127</version><scope>provided</scope></dependency>-----------------------JettyMainimport org.eclipse.jetty.server.Server;import org.eclipse.jetty.util.resource.Resource; import org.eclipse.jetty.webapp.WebAppContext; import org.eclipse.jetty.xml.XmlConfiguration;public class Main {public static void main(String[] args) throws Exception { Resource fileserver_xml = Resource.newSystemResource("fileserver.xml");XmlConfiguration configuration = new XmlConfiguration(fileserver_xml.getInputStream());Server server = (Server)configuration.configure();WebAppContext context = new WebAppContext();context.setDescriptor("src/main/webapp/WEB-INF/web.xml");context.setDefaultsDescriptor("webdefault.xml");context.setResourceBase("src/main/webapp");context.setContextPath("/");context.setParentLoaderPriority(true);//useful when configed login-config tag in web.xmlHashLoginService dummyLoginService = new HashLoginService("TEST-SECURITY-REALM");context.getSecurityHandler().setLoginService(dummyLoginServi ce);server.setHandler(context);server.start();server.join();}}------------------------------fileserver.xml<?xml version="1.0"?><!DOCTYPE Configure PUBLIC "-//Jetty//Configure//EN" "/jetty/configure.dtd"><Configure id="FileServer" class="org.eclipse.jetty.server.Server"><Call name="addConnector"><Arg><Newclass="org.eclipse.jetty.server.nio.SelectChannelConnector"><Set name="port">8080</Set></New></Arg></Call><Set name="handler"><New class="org.eclipse.jetty.server.handler.HandlerList"><Set name="handlers"><Array type="org.eclipse.jetty.server.Handler"><Item><Newclass="org.eclipse.jetty.server.handler.ResourceHandler"> <Set name="directoriesListed">true</Set><Set name="welcomeFiles"><Array type="String"><Item>index.html</Item></Array></Set><Set name="resourceBase">.</Set></New></Item><Item><Newclass="org.eclipse.jetty.server.handler.DefaultHandler"> </New></Item></Array></Set></New></Set></Configure>------------------------------------webdefault.xml(useFileMapped Buffer->false)<?xml version="1.0" encoding="ISO-8859-1"?><!--========================================= ============================ --><!-- This file contains the default descriptor for web applications. --><!-- - - - - - - - - - - - - - - - - - - - - - - - - - - - - - - - - - - - --> <!-- The intent of this descriptor is to include jetty specific or common --><!-- configuration for all webapps. If a context has a webdefault.xml --><!-- descriptor, it is applied before the contexts own web.xml file --><!----><!-- A context may be assigned a default descriptor by: --><!-- + Calling WebApplicationContext.setDefaultsDescriptor --><!-- + Passed an arg to addWebApplications--><!----><!-- This file is used both as the resource within the jetty.jar (which is --><!-- used as the default if no explicit defaults descriptor is set) and it --><!-- is copied to the etc directory of the Jetty distro and explicitly --><!-- by the jetty.xml file. --><!----><!--========================================= ============================ --><web-appxmlns="/xml/ns/javaee"xmlns:xsi="/2001/XMLSchema-instance" xsi:schemaLocation="/xml/ns/javaee /xml/ns/javaee/web-app_2_5.xsd" metadata-complete="true"version="2.5"><description>Default web.xml file.This file is applied to a Web application before it's own WEB_INF/web.xml file</description><!--========================================= =========================== --><!-- Removes static references to beans from javax.el.BeanELResolver to --><!-- ensure webapp classloader can be released on undeploy --><!--========================================= =========================== --><listener><listener-class>org.eclipse.jetty.servlet.listener.ELContextCleaner </listener-class></listener><!--========================================= =========================== --><!-- Removes static cache of Methods from java.beans.Introspector to --><!-- ensure webapp classloader can be released on undeploy --><!--========================================= =========================== --><listener><listener-class>org.eclipse.jetty.servlet.listener.IntrospectorClea ner</listener-class></listener><!--========================================= =========================== --><!-- Context params to control Session Cookies --><!-- - - - - - - - - - - - - - - - - - - - - - - - - - - - - - - - - - - --> <!--UNCOMMENT TO ACTIVATE <context-param> <param-name>org.eclipse.jetty.servlet.SessionDomain</param-name> <param-value>127.0.0.1</param-value> </context-param> <context-param><param-name>org.eclipse.jetty.servlet.SessionPath</param-na me> <param-value>/</param-value> </context-param> <context-param><param-name>org.eclipse.jetty.servlet.MaxAge</param-name> <param-value>-1</param-value> </context-param>--><!--========================================= =========================== --><!-- The default servlet. --><!-- This servlet, normally mapped to /, provides the handling for static --><!-- content, OPTIONS and TRACE methods for the context. --><!-- The following initParameters are supported: --><!--* acceptRanges If true, range requests and responses are* supported** dirAllowed If true, directory listings are returned if no* welcome file is found. Else 403 Forbidden.** welcomeServlets If true, attempt to dispatch to welcome files* that are servlets, but only after no matching static* resources could be found. If false, then a welcome* file must exist on disk. If "exact", then exact* servlet matches are supported without an existing file.* Default is true.** This must be false if you want directory listings,* but have index.jsp in your welcome file list.** redirectWelcome If true, welcome files are redirected rather than* forwarded to.** gzip If set to true, then static content will be served as* gzip content encoded if a matchingresource is* found ending with ".gz"** resourceBase Set to replace the context resource base ** resourceCache If set, this is a context attribute name, which the servlet* will use to look for a shared ResourceCache instance.** relativeResourceBase* Set with a pathname relative to the base of the* servlet context root. Useful for only serving static content out* of only specific subdirectories.** aliases If T rue, aliases of resources are allowed (eg. symbolic* links and caps variations). May bypass security constraints.** maxCacheSize The maximum total size of the cache or 0 for no cache.* maxCachedFileSize The maximum size of a file to cache* maxCachedFiles The maximum number of files to cache ** useFileMappedBuffer* If set to true, it will use mapped file buffer to serve static content* when using NIO connector. Setting this value to false means that* a direct buffer will be used instead of a mapped file buffer.* By default, this is set to true.** cacheControl If set, all static content will have this value set as the cache-control* header.--><!-- - - - - - - - - - - - - - - - - - - - - - - - - - - - - - - - - - - --> <servlet><servlet-name>default</servlet-name><servlet-class>org.eclipse.jetty.servlet.DefaultServlet</servlet-cl ass><init-param><param-name>aliases</param-name><param-value>false</param-value></init-param><init-param><param-name>acceptRanges</param-name><param-value>true</param-value></init-param><init-param><param-name>dirAllowed</param-name><param-value>true</param-value></init-param><init-param><param-name>welcomeServlets</param-name><param-value>false</param-value></init-param><init-param><param-name>redirectWelcome</param-name><param-value>false</param-value></init-param><init-param><param-name>maxCacheSize</param-name><param-value>256000000</param-value></init-param><init-param><param-name>maxCachedFileSize</param-name> <param-value>200000000</param-value></init-param><init-param><param-name>maxCachedFiles</param-name><param-value>2048</param-value></init-param><init-param><param-name>gzip</param-name><param-value>true</param-value></init-param><init-param><param-name>useFileMappedBuffer</param-name> <param-value>false</param-value></init-param><!--<init-param><param-name>resourceCache</param-name><param-value>resourceCache</param-value></init-param>--><!--<init-param><param-name>cacheControl</param-name><param-value>max-age=3600,public</param-value> </init-param>--><load-on-startup>0</load-on-startup></servlet><servlet-mapping><servlet-name>default</servlet-name><url-pattern>/</url-pattern></servlet-mapping><!--========================================= =========================== --><!-- JSP Servlet --><!-- This is the jasper JSP servlet from the jakarta project --><!-- - - - - - - - - - - - - - - - - - - - - - - - - - - - - - - - - - - --> <!-- The JSP page compiler and execution servlet, which is the mechanism --><!-- used by Glassfish to support JSP pages. T raditionally, this servlet --><!-- is mapped to URL patterh "*.jsp". This servlet supports the --><!-- following initialization parameters (default values are in square --><!-- brackets): --><!----><!-- checkInterval If development is false and reloading is true, --><!-- background compiles are enabled. checkInterval --><!-- is the time in seconds between checks to see --><!-- if a JSP page needs to be recompiled. [300] --><!----><!-- compiler Which compiler Ant should use to compile JSP --><!-- pages. See the Ant documenation for more --><!-- information. [javac] --><!----><!-- classdebuginfo Should the class file be compiled with --><!-- debugging information? [true] --><!----><!-- classpath What class path should I use while compiling --><!-- generated servlets? [Created dynamically --><!-- based on the current web application] --><!-- Set to ? to make the container explicitly set --><!-- this parameter. --><!----><!-- development Is Jasper used in development mode (will check --><!-- for JSP modification on every access)? [true] --><!----><!-- enablePooling Determines whether tag handler pooling is -->--><!----><!-- fork Tell Ant to fork compiles of JSP pages so that --><!-- a separate JVM is used for JSP page compiles --><!-- from the one T omcat is running in. [true] --><!----><!-- ieClassId The class-id value to be sent to Internet --><!-- Explorer when using <jsp:plugin> tags. --><!--[clsid:8AD9C840-044E-11D1-B3E9-00805F499D93] --><!----><!-- javaEncoding Java file encoding to use for generating java -->--><!----><!-- keepgenerated Should we keep the generated Java source code --><!-- for each page instead of deleting it? [true] --><!----><!-- logVerbosityLevel The level of detailed messages to be produced --><!-- by this servlet. Increasing levels cause the --><!-- generation of more messages. Valid values are --><!-- FATAL, ERROR, WARNING, INFORMATION, and DEBUG. --><!-- [WARNING] --><!----><!-- mappedfile Should we generate static content with one --><!-- print statement per input line, to ease --><!-- debugging? [false] --><!----><!----><!-- reloading Should Jasper check for modified JSPs? [true] --><!----><!-- suppressSmap Should the generation of SMAP info for JSR45 --><!-- debugging be suppressed? [false] --><!----><!-- dumpSmap Should the SMAP info for JSR45 debugging be --><!-- dumped to a file? [false] --><!-- False if suppressSmap is true --><!----><!-- scratchdir What scratch directory should we use when --><!-- compiling JSP pages? [default work directory --><!-- for the current web application] --><!----><!-- tagpoolMaxSize The maximum tag handler pool size [5] --><!----><!-- xpoweredBy Determines whether X-Powered-By response --><!-- header is added by generated servlet [false] --><!----><!-- If you wish to use Jikes to compile JSP pages: --><!-- Set the init parameter "compiler" to "jikes". Define --><!-- the property "piler.emacs=true" when starting Jetty --><!-- to cause Jikes to emit error messages in a format compatible with --><!-- Jasper. --><!-- If you get an error reporting that jikes can't use UTF-8 encoding, --><!-- try setting the init parameter "javaEncoding" to "ISO-8859-1". --><!-- - - - - - - - - - - - - - - - - - - - - - - - - - - - - - - - - - - --> <servletid="jsp"><servlet-name>jsp</servlet-name><servlet-class>org.apache.jasper.servlet.JspServlet</servlet-clas s><init-param><param-name>logVerbosityLevel</param-name><param-value>DEBUG</param-value></init-param><init-param><param-name>fork</param-name><param-value>false</param-value></init-param><init-param><param-name>xpoweredBy</param-name><param-value>false</param-value></init-param><!--<init-param><param-name>classpath</param-name><param-value>?</param-value></init-param>--><load-on-startup>0</load-on-startup></servlet><servlet-mapping><servlet-name>jsp</servlet-name><url-pattern>*.jsp</url-pattern><url-pattern>*.jspf</url-pattern><url-pattern>*.jspx</url-pattern><url-pattern>*.xsp</url-pattern><url-pattern>*.JSP</url-pattern><url-pattern>*.JSPF</url-pattern><url-pattern>*.JSPX</url-pattern><url-pattern>*.XSP</url-pattern></servlet-mapping><!--========================================= =========================== --><!-- Dynamic Servlet Invoker. --><!-- This servlet invokes anonymous servlets that have not been defined --><!-- in the web.xml or by other means. The first element of the pathInfo --><!-- of a request passed to the envoker is treated as a servlet name for --><!-- an existing servlet, or as a class name of a new servlet. --><!-- This servlet is normally mapped to /servlet/* --><!-- This servlet support the following initParams: --><!----><!-- nonContextServlets If false, the invoker can only load --><!-- servlets from the contexts classloader. --><!-- This is false by default and setting this --><!-- to true may have security implications. --><!----><!-- verbose If true, log dynamic loads --><!----><!-- * All other parameters are copied to the --><!-- each dynamic servlet as init parameters --><!-- - - - - - - - - - - - - - - - - - - - - - - - - - - - - - - - - - - --> <!--Uncomment for dynamic invocation <servlet> <servlet-name>invoker</servlet-name><servlet-class>org.eclipse.jetty.servlet.Invoker</servlet-class> <init-param> <param-name>verbose</param-name> <param-value>false</param-value> </init-param> <init-param><param-name>nonContextServlets</param-name><param-value>false</param-value> </init-param> <init-param><param-name>dynamicParam</param-name><param-value>anyValue</param-value> </init-param> <load-on-startup>0</load-on-startup> </servlet><servlet-mapping> <servlet-name>invoker</servlet-name> <url-pattern>/servlet/*</url-pattern> </servlet-mapping> --><!--========================================= =========================== --><session-config><session-timeout>30</session-timeout></session-config><!--========================================= =========================== --><!-- Default MIME mappings --><!-- The default MIME mappings are provided by the mime.properties --><!-- resource in the org.eclipse.jetty.server.jar file. Additional or modified --><!-- mappings may be specified here --><!-- - - - - - - - - - - - - - - - - - - - - - - - - - - - - - - - - - - --> <!-- UNCOMMENT TO ACTIVATE<mime-mapping><extension>mysuffix</extension><mime-type>mymime/type</mime-type></mime-mapping>--><!--========================================= =========================== --><welcome-file-list><welcome-file>index.html</welcome-file><welcome-file>index.htm</welcome-file><welcome-file>index.jsp</welcome-file></welcome-file-list><!--========================================= =========================== --><locale-encoding-mapping-list><locale-encoding-mapping><locale>ar</locale><encoding>ISO-8859-6</encoding></locale-encoding-mapping><locale-encoding-mapping><locale>be</locale><encoding>ISO-8859-5</encoding></locale-encoding-mapping><locale-encoding-mapping><locale>bg</locale><encoding>ISO-8859-5</encoding></locale-encoding-mapping><locale-encoding-mapping><locale>ca</locale><encoding>ISO-8859-1</encoding></locale-encoding-mapping><locale-encoding-mapping><locale>cs</locale><encoding>ISO-8859-2</encoding> </locale-encoding-mapping><locale-encoding-mapping><locale>da</locale><encoding>ISO-8859-1</encoding> </locale-encoding-mapping><locale-encoding-mapping><locale>de</locale><encoding>ISO-8859-1</encoding> </locale-encoding-mapping><locale-encoding-mapping><locale>el</locale><encoding>ISO-8859-7</encoding> </locale-encoding-mapping><locale-encoding-mapping><locale>en</locale><encoding>ISO-8859-1</encoding> </locale-encoding-mapping><locale-encoding-mapping><locale>es</locale><encoding>ISO-8859-1</encoding> </locale-encoding-mapping><locale-encoding-mapping><locale>et</locale><encoding>ISO-8859-1</encoding> </locale-encoding-mapping><locale-encoding-mapping><locale>fi</locale><encoding>ISO-8859-1</encoding> </locale-encoding-mapping><locale-encoding-mapping><locale>fr</locale><encoding>ISO-8859-1</encoding> </locale-encoding-mapping><locale-encoding-mapping><locale>hr</locale><encoding>ISO-8859-2</encoding> </locale-encoding-mapping><locale-encoding-mapping><locale>hu</locale><encoding>ISO-8859-2</encoding></locale-encoding-mapping><locale-encoding-mapping><locale>is</locale><encoding>ISO-8859-1</encoding> </locale-encoding-mapping><locale-encoding-mapping><locale>it</locale><encoding>ISO-8859-1</encoding> </locale-encoding-mapping><locale-encoding-mapping><locale>iw</locale><encoding>ISO-8859-8</encoding> </locale-encoding-mapping><locale-encoding-mapping><locale>ja</locale><encoding>Shift_JIS</encoding></locale-encoding-mapping><locale-encoding-mapping><locale>ko</locale><encoding>EUC-KR</encoding></locale-encoding-mapping><locale-encoding-mapping><locale>lt</locale><encoding>ISO-8859-2</encoding> </locale-encoding-mapping><locale-encoding-mapping><locale>lv</locale><encoding>ISO-8859-2</encoding> </locale-encoding-mapping><locale-encoding-mapping><locale>mk</locale><encoding>ISO-8859-5</encoding> </locale-encoding-mapping><locale-encoding-mapping><locale>nl</locale><encoding>ISO-8859-1</encoding> </locale-encoding-mapping><locale-encoding-mapping><locale>no</locale><encoding>ISO-8859-1</encoding> </locale-encoding-mapping><locale-encoding-mapping><locale>pl</locale><encoding>ISO-8859-2</encoding></locale-encoding-mapping><locale-encoding-mapping><locale>pt</locale><encoding>ISO-8859-1</encoding> </locale-encoding-mapping><locale-encoding-mapping><locale>ro</locale><encoding>ISO-8859-2</encoding> </locale-encoding-mapping><locale-encoding-mapping><locale>ru</locale><encoding>ISO-8859-5</encoding> </locale-encoding-mapping><locale-encoding-mapping><locale>sh</locale><encoding>ISO-8859-5</encoding> </locale-encoding-mapping><locale-encoding-mapping><locale>sk</locale><encoding>ISO-8859-2</encoding> </locale-encoding-mapping><locale-encoding-mapping><locale>sl</locale><encoding>ISO-8859-2</encoding> </locale-encoding-mapping><locale-encoding-mapping><locale>sq</locale><encoding>ISO-8859-2</encoding> </locale-encoding-mapping><locale-encoding-mapping><locale>sr</locale><encoding>ISO-8859-5</encoding> </locale-encoding-mapping><locale-encoding-mapping><locale>sv</locale><encoding>ISO-8859-1</encoding> </locale-encoding-mapping><locale-encoding-mapping><locale>tr</locale><encoding>ISO-8859-9</encoding> </locale-encoding-mapping><locale-encoding-mapping><locale>uk</locale><encoding>ISO-8859-5</encoding>。
eclipse中MAVEN的安装和创建web项目

下载并安装maven,以及在eclipse中配置并使用maven。
需要学会创建一个maven工程并在eclipse 中通过maven成功打包。
(可以尝试将刚刚做完的bbs项目改成maven工程)1.Maven的安装:1.下载maven3.3.3的bin,在apache官方网站可以下载。
2.载下来之后,解压,找个路径放进去,把bin的位置设在环境变量里,新建环境变量MAVEN_HOME3.在PATH里加入maven的bin的路径4.本地仓库的安装,修改maven目录下的setting.xml文件5.新建一个项目,主要是书写pom.xml文件6.maven作用是在不同的模块之间有效的管理项目2.依赖包的查询:2.1 所有的依赖都是通过坐标来进行存储的(GAV--><groupId>er</groupId><artifactId>user-core</artifactId><version>0.0.1-SNAPSHOT</version>)2.2 m2eclipse的安装选择help -->install new software,然后点击Add,添加名称和路径。
最后下载。
3:遇到的问题:①:Dynamic Web project转成Maven项目在项目上右键Configure--->没有出现convert to Maven project解决方法:右键项目,maven -- > 点击“Enable Dependency Management”弹出creat new POM的提示选择框,注意Packaging选择war此时一个maven项目构建完成。
参考:1、新建Dynamic Web Project1、File -> New -> Other。
在New窗口中选择Web下的Dynamic Web Project。
eclipse创建maven java项目的方法与步骤
eclipse创建maven java项目的方法与步骤在Eclipse中创建Maven项目是一种相对简单的过程。
以下是创建Maven Java项目的基本步骤:前提条件:确保你的Eclipse已经安装了Maven插件。
你可以通过Eclipse Marketplace安装"Maven Integration for Eclipse"插件,或者使用Eclipse自带的"Help" -> "Eclipse Marketplace" -> "Search" 中搜索"Maven" 来安装。
创建Maven项目的步骤:1. 打开Eclipse IDE。
2. 选择菜单栏中的"File" -> "New" -> "Other"。
3. 在弹出的对话框中,展开"Maven" 文件夹,然后选择"Maven Project"。
点击"Next"。
4. 在下一个对话框中,确保"Create a simple project" 处于选中状态,然后点击"Next"。
5. 在"Group Id" 和"Artifact Id" 字段中输入你的项目的组织和项目名称。
这两个字段通常用来唯一标识一个Maven项目。
点击"Finish"。
6. Eclipse会提示你是否要切换到Maven的"Java EE Perspective",选择"Yes"。
7. 现在,Eclipse将使用Maven Archetype创建项目结构。
你可以选择不同的Archetype,比如"maven-archetype-quickstart" 用于创建一个简单的Java项目。
配合m2eclipse创建多模块maven web项目
配合m2eclipse创建一个标准的maven web项目转自/blog/972914在左边项目区点击右键--> New --> Other --> 找到maven(或者直接输入maven) -->选择Maven Project如下图点击Next会出现很多Archetype.都是对应不同需求的maven模板.我们选择maven-archetype-webapp一个基于web的模板.点击Next输入groupId和artifactIdgroupId随便填写就是了不过最好是填写公司或者组织名称. artifactId可以认为他是项目名,所以你填写的就是项目名.创建成功后我们会得到如下图所示的项目结构但是这个并不是默认的maven项目的标准结构.我们需要进行一些改动.1.在项目下创建一个Source Folder.Folder Name:src/main/java如下图所示(当然,还可以添加用于junit测试的src/test/java和src/test/resources 不过在此就不添加了.)2.在webapp根目录下创建一个叫resources的Folder.用于以后装JS,CSS等静态文件.3.删除index.jsp4.在src/main/java中创建3个包(maven标准推荐是3层包结构)5.如果装的JDK是1.6的,更改JRE System Libary为1.6版本的.这样.一个标准的maven web项目创建成功.如何启动项目?很多人都在问创建了项目后如何启动项目?如何启动服务器?其实很简单.邮件点击tomcat如上图.点击Add or Remove..将你需要启动的项目add到右边.点确定后项目就部署到tomcat了.还有一个更简单的方法.直接把项目拖到tomcat上启动就OK.如果不能把项目放入tomcat,请检查自己的maven项目是否是web项目.maven项目其实还有用mvn pulgin来启动项目.如maven-jetty或maven-tomcat等.这些就是maven的知识点了,在此不做过多赘言.感兴趣的朋友可以自己去找相关的知识.如何使用eclipse创建Maven工程及其子模块/zhqshx/article/details/72869141,首先创建一个父类工程子模块继承父类工程并在父类工程的pom.xml文件中定义引入的jar及其版本号子模块可以引用2 创建子模块3 创建server 模块主要存放配置文件不包括源代码创建工程完成。
eclipse创建maven java项目的方法与步骤
eclipse创建maven java项目的方法与步骤摘要:1.安装Eclipse和Maven2.创建Maven项目3.创建Java类4.编写Java代码5.运行Java程序6.添加依赖库7.编译和部署项目正文:Eclipse是一款功能强大的Java集成开发环境(IDE),而Maven是一个项目构建工具,可以帮助我们管理Java项目的依赖、编译和部署。
以下是在Eclipse中创建Maven Java项目的详细步骤:1.安装Eclipse和Maven:首先,从官方网站下载并安装Eclipse IDE。
安装完成后,打开Eclipse。
接着,在Eclipse中安装Maven插件。
打开Eclipse的“Help”菜单,选择“Install New Software”,然后添加以下Maven插件:- Maven Integration for Eclipse- Maven Repository Manager2.创建Maven项目:在Eclipse中,创建一个Maven项目非常简单。
点击“File” >“New” > “Maven Project”,填写项目信息,如groupId、artifactId和version。
完成后,点击“Finish”。
3.创建Java类:在Maven项目中,右键点击“src/main/java”目录,选择“New” > “Class”。
填写类名、包名和父类名,点击“Finish”。
4.编写Java代码:在创建的Java类中,编写代码。
例如,编写一个简单的“HelloWorld”程序:```javapublic class HelloWorld {public static void main(String[] args) {System.out.println("Hello, World!");}}```5.运行Java程序:保存代码后,右键点击Java类,选择“Run As” > “Java Application”。
eclipse集成maven使用教程
Maven使用教程
一.E clipse中的maven安装
1.1.获取maven
从服务器中获取项目组提前提供好的maven软件(apache-maven-2.2.1),例如放到本地D:\apache-maven-2.2.1目录下。
1.2.安装maven
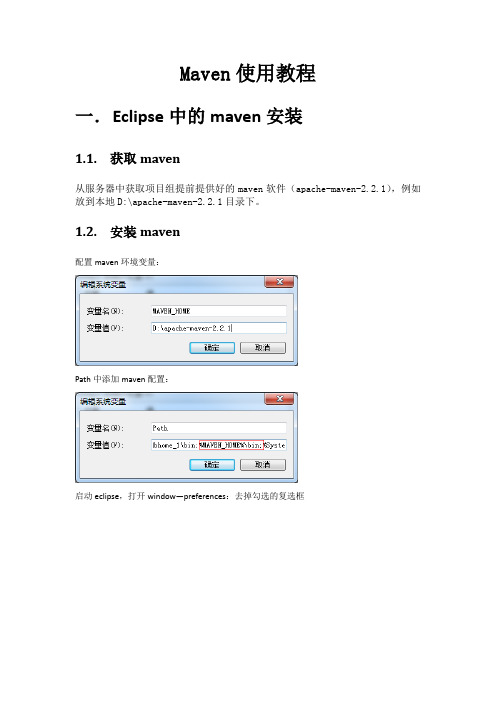
配置maven环境变量:
Path中添加maven配置:
启动eclipse,打开window—preferences:去掉勾选的复选框
Eclipse使用apache-maven-2.2.1:
点击添加,指定apache-maven-2.2.1目录,选中新加入的maven。
添加eclipse资源连接:
点击new:
其中location中按照自己的路径修改c:\Users\songjc路径到此eclipse安装maven完成
二.E clipse中的maven使用
1.1.导入maven工程
进入eclipse功能菜单:file import
点击next,选择maven工程所在的工作空间,并选中要导入的maven工程,点击finish:
Maven工程导入成功:
1.2.编译maven工程
工程点击右键,菜单中有maven和run as,
其中经常使用的为run as中的maven install,编译工程,可以在console中查看编译过程:
如上图说明编译成功,并在target目录中生成相关包:
到此说明maven和eclipse结合成功
对Maven深入研究可以参考文档:《Maven权威指南》。
整理eclipse创建Maven项目的过程供大家参考
整理eclipse创建Maven项目的过程供大家参考Maven是一个项目管理工具,它包含了一个项目对象模型(Project Object Model),一组标准集合,一个项目生命周期(Project Lifecycle),一个依赖管理系统(Dependency Management System),和用来运行定义在生命周期阶段(phase)中插件(plugin)目标(goal)的逻辑。
当你使用Maven的时候,你用一个明确定义的项目对象模型来描述你的项目,然后Maven可以应用横切的逻辑,这些逻辑来自一组共享的(或者自定义的)插件。
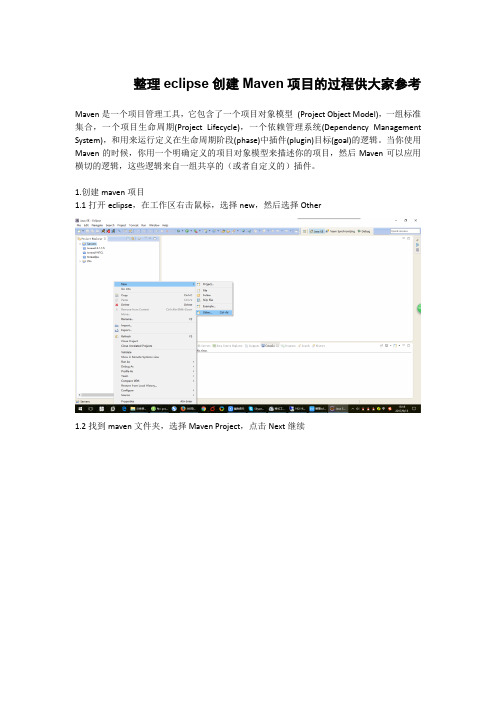
1.创建maven项目1.1打开eclipse,在工作区右击鼠标,选择new,然后选择Other1.2找到maven文件夹,选择Maven Project,点击Next继续1.3继续点击Next1.4选中maven-archetype-webapp这一行1.5Group Id和Artifact Id都填入RedisWebServer,Package填入com.java,package可以不写,是它默认帮你新建一个包,不写没关系,点击Finish2.下面新建好的项目结构,默认有一个src/main/resources的目录,我们再新建一个src/main/java的目录3.鼠标右击项目,选中最下面的Properties4.看到src/main/java和src/test/java 是missing状态,把这两个Remove掉5.点击create new folder,新建src/main/java和src/test/java6.修改web.xml内容删除<!DOCTYPE web-app PUBLIC"-//Sun Microsystems, Inc.//DTD Web Application 2.3//EN" "/dtd/web-app_2_3.dtd">添加<?xml version="1.0" encoding="UTF-8" standalone="no"?><!DOCTYPE html PUBLIC "-//W3C//DTD XHTML 1.0 Strict//EN" "/2002/xmlspec/dtd/2.10/xmlspec.dtd">7.设置Maven启动方式8.启动项目,访问首页,看看是否成功。
web项目嵌入Jetty运行的两种方式(Jetty插件和自制Jetty服务器)

web项⽬嵌⼊Jetty运⾏的两种⽅式(Jetty插件和⾃制Jetty服务器) 在开发Java web项⽬时候,可以在项⽬中嵌⼊Jetty服务的⽅式来运⾏web程序。
由于最近开发web项⽬,⾃⼰使⽤的是⽐较旧的eclipse不⽀持导⼊tomcat来运⾏项⽬,于是就学习了下使⽤项⽬中Jetty来运⾏项⽬。
采⽤Jetty Plugin 在pom⽂件中引⼊Jetty Plugin配置即可:<properties><project.build.sourceEncoding>UTF-8</project.build.sourceEncoding></properties><build><plugins><plugin><groupId>org.apache.maven.plugins</groupId><artifactId>maven-compiler-plugin</artifactId><version>3.1</version><configuration><source>1.7</source><target>1.7</target><encoding>${project.build.sourceEncoding}</encoding></configuration></plugin><plugin><groupId>org.mortbay.jetty</groupId><artifactId>jetty-maven-plugin</artifactId><version>8.1.15.v20140411</version><configuration><webAppSourceDirectory>src/main/webapp</webAppSourceDirectory><scanIntervalSeconds>10</scanIntervalSeconds><webAppConfig><contextPath>/web</contextPath> //你⾃⼰的⼯程名称</webAppConfig><connectors><connector implementation="org.eclipse.jetty.server.nio.SelectChannelConnector"><port>8080</port><maxIdleTime>60000</maxIdleTime></connector></connectors><contextHandlers><contextHandler implementation="org.eclipse.jetty.webapp.WebAppContext"><resourceBase>${project.parent.basedir}/src/main/webapp</resourceBase><contextPath>/web</contextPath></contextHandler></contextHandlers></configuration></plugin></plugins></build>运⾏时候只要maven build->输⼊jetty:run即可。
使用eclipse开发web程序的步骤

使用eclipse开发web程序的步骤使用Eclipse开发Web程序的步骤一、安装Eclipse我们需要下载并安装Eclipse集成开发环境。
可以从Eclipse官网下载适用于Web开发的Eclipse版本,然后按照安装向导进行安装。
二、安装Java开发工具包(JDK)在使用Eclipse开发Web程序之前,必须先安装Java开发工具包(JDK)。
可以从Oracle官网下载适用于自己操作系统的JDK版本,并按照安装向导进行安装。
三、创建Web项目打开Eclipse后,点击菜单栏的“File”->“New”->“Project”,在弹出的对话框中选择“Web”->“Dynamic Web Project”,填写项目名称和目标运行环境,点击“Finish”按钮完成项目创建。
四、配置Web服务器在Eclipse中,我们可以选择不同的Web服务器作为项目的运行环境。
点击“Servers”视图中的“No servers are available. Click this link to create a new server...”链接,然后选择适用于自己的Web服务器并按照向导进行配置。
五、编写Java代码在Eclipse中,可以使用Java语言来编写Web程序的业务逻辑和功能。
在Web项目的“src”目录下,可以创建Java包和类文件,然后在类文件中编写相应的Java代码。
六、编写HTML/CSS/JavaScript代码Web程序通常需要使用HTML、CSS和JavaScript来实现页面的展示和交互。
在Web项目的“WebContent”目录下,可以创建HTML、CSS和JavaScript文件,并编写相应的代码。
七、配置Web项目在Web项目中,我们通常需要对一些配置文件进行设置,以满足项目的需求。
比如,可以在“WebContent/WEB-INF”目录下创建“web.xml”文件,对项目的Servlet、过滤器、监听器等进行配置。
Eclipse+maven+jetty开发Tapestry5实例

Eclipse+maven+jetty开发Tapestry5实例第一个实例,描述开发一个简单的Tapestry5实例,本例是在eclipse+maven+jetty环境下开发,关于eclipse+maven+jetty环境搭建,参见eclipse+maven+jetty开发环境搭建启动eclipse,新建maven工程,如图:点击next,输入工程名,如MyTapestry5点击next,Description选择war,然后选中需要构建的目录结构(Project layout)点击next可以添加项目需要使用的jar包,也可以点击Finish,后续再添加项目使用的jar 包,我们点击Finish,项目创建完成,目录结构如下图:关于maven项目目录结构描述请查看相关资料,在此不做描述添加项目需要使用的jar包,右键点击项目名称,选择Maven->Add Dependency,如图:由于是构建Tapestry项目,需要使用Tapestry核心包,添加Tapestry croe包,在Query里面输入Tapestry,eclipse会查询出所有的Tapestry包,我们选择tapestry-croe-5.05.jar,如图:点击ok,eclipse会将tapestry-core-5.0.5使用到的包都添加到项目里面,点击eclipse的Package Explorer,打开Maven Dependencies,会看到已经添加到项目里面的包,如图:若本地库没有Tapetstry5相应的包,maven会到远程的官方库下载到本地;添加WEB-INF目录,右键点击webapp->new->Folder,如下图:输入目录名:WEB-INF,如下图:在WEB-INF目录下添加web.xml文件,邮件点击WEB-INF->new->File,如下图:输入文件名web.xml,如下图:编辑web.xml文件,文件内容可以参考官方网web.xml文件的样例,路径:/tapestry5/tapestry-core/guide/conf.html拷贝官方网内容,做修改org.mytapestry5为pages包之前的包路径,该路径务必确保正确WEB-INF目录下创建Test1.html文件,如图:在main/java目录下创建org.mytapestry5.pages包,然后添加Test1.java类package org.mytapestry5.pages;public class Test1 {public String getPageContent() {return"my first Tapestry5 Application";}}启动jetty,浏览我们第一个Tapestry5页面配置jetty启动,如:配置Jetty home,webapp root di,如下图:Jetty home为jetty的安装目录Webapp root di 选择src/main/webapp,选中Enable NCSA logging,点击run打开ie,地址输入:http://localhost:8080/Test1,不要输入为http://localhost:8080/Test1.html 否则会报错我们就会看到Tapestry5第一个页面到此,第一个eclipse+maven+jetty开发的Tapestry5实例完成。
Eclipse maven jetty
maven jetty eclipse run stop debug 调试java web项目2010-04-12 15:41Maven 摆在眼前最明显的优点就是对peoject的jar包的的管理。
当然Maven的优点远远不止这些。
在Eclipse下,可以使用m2eclipse加快对Maven project的开发。
这几天对Maven的web项目进行调试的时候,发现对已经运行的web项目无法关闭,只能在在任务管理器中结束进程。
这就郁闷了,网上找了找,也顺便总结了一下。
Start》》》》》》》》》》》》》》》》》》》》步骤1。
如何启动web项目,进行调试:1.1我采用的是jetty容器。
首先要在pom.xml中配置plugin<!-- jetty插件 --><plugin><groupId>org.mortbay.jetty</groupId><artifactId>maven-jetty-plugin</artifactId></plugin>1.2下面配置一个外部工具来运行jetty。
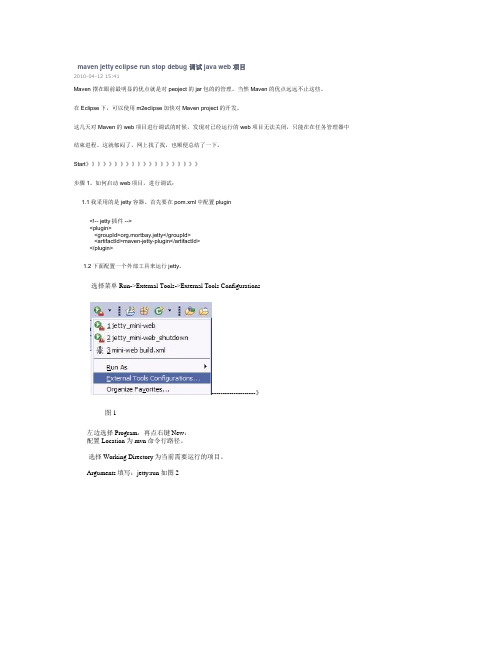
选择菜单Run->External Tools->External Tools Configurations--------------------》图1左边选择Program,再点右键New:配置Location为mvn命令行路径。
选择Working Directory为当前需要运行的项目。
Arguments填写:jetty:run 如图2图2进过如此操作之后,点击run,或者点图3图3便可运行该项目。
但此时也仅仅是运行项目,还没达到debug的要求。
2.对web项目进行debug调试,2.1在点击图2中的Environment选择项,新增一个,Environment varibles。
加入MAVEN_OPTS变量,值为-Xdebug -Xnoagent piler=NONE -Xrunjdwp:transport=dt_socket,address=4000,server=y,suspend=n 2.2下面进行debug运行配置,点击Debug->Debug Configuration在配置中选择相应的project,端口要设置为与MAVEN_OPTS变量中的address=4000相同。
用Eclipse创建一个简单的MavenJavaWeb项目
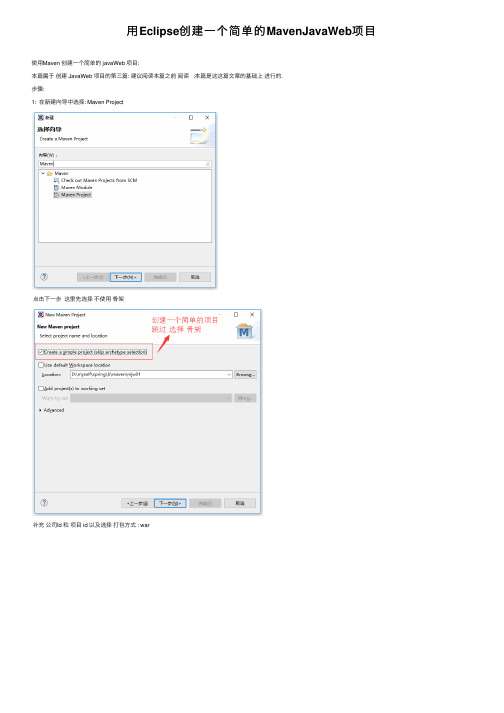
⽤Eclipse创建⼀个简单的MavenJavaWeb项⽬使⽤Maven 创建⼀个简单的 javaWeb 项⽬:本篇属于创建 JavaWeb 项⽬的第三篇: 建议阅读本篇之前阅读 ;本篇是这这篇⽂章的基础上进⾏的.步骤:1: 在新建向导中选择: Maven Project点击下⼀步这⾥先选择不使⽤⾻架补充公司Id 和项⽬ id 以及选择打包⽅式 : war点击完成后的项⽬框架:先看⼀下项⽬属性: 右击属性: 选择 web deployment Assmbly 先查看⼀下项⽬部署路径:这时候发现报错了 : 点进去看看报什么错:web.xml is missing and <failOnMissingWebXml> is set to true :意思是: web.xml 缺失了; 但是 failOnMissingWebXml 被设置是 true ;这个错误有两种解决⽅案: ⼀种是把缺失的web.xml 给补回来; ⼀种是设置 <failOnMissingWebXml> 为 false⼀个web项⽬必定少不了 web.xml 所以咱们的解决⽅案就是把缺失的web.xml 给补回来.怎样补回来? 就是把⽬前的项⽬转换成动态的web项⽬就Ok 了;右击属性后选择项⽬构⾯: 做这⼀步⽬的是把项⽬转换成为动态web项⽬: 把丢失的web.xml给补回来;1; 第⼀步先选择 JDK 版本和 javaScrpit 版本 : 点击应⽤和确定2: 再次点击属性项⽬构⾯选择 Dynamic Web Module : 如果tomcat 版本是 7.0 则选 3.0 ; tomcat 8/8+ 选 3.1 ; tomcat 6/6- 选 3.0- ;下⾯还有⼀个进⼀步配置: 询问要不要创建⾃动⽣成 web.xml 这⾥最好选择要不然还得⾃⼰⼿动创建;点击确定之后再看⼀下项⽬结构:1:多了⼀块: webContent2: 不报错了; webContent ⽬录下⾯是不是有 web.xml ⽂件;3: 如果你的没有出现 webContent ⽬录 ;⼀定要上⾯的步骤;先选择JDK和 Javascript 版本确定之后再选择 dynamic web module 版本 ; 因为 dynamic web module 是依赖于 JDK 版本的;此时再看⼀下项⽬部署路径:右击属性: web dployment Assembly :是不是发现项⽬部署路径变化了? 之前的webapp 路径是不是没有了? 猜⼀下这说明什么?1: webapp 和 webContent 是起相同作⽤的只保留⼀个就OK了; ⼀般都是保留 webapp (我个⼈觉得⼀⽅⾯原因是这样的⽬录结构看着更顺眼吧)所以下⼀步的⼯作就是1: 修该项⽬结构⽬录(webapp 和 webContent 只保留⼀个,⼀般都是保留 webapp); 2:修改web deployment assembly 中的部署路径;将 webContent ⽬录下⾯的内容拷贝⾄ webapp下⾯;并删除 webContent ⽬录;配置web deployment 路径 :先删除test 和 webContent ⽬录;再添加:选择 webapp⽬录再看⼀下完成后的⽬录结构: 如果 pom.xml 报错; 把⾥⾯的pom.xml 剪贴再粘贴⼀下就OK了;⾄此项⽬的结构⽬录算是搭建好了;接下来修改 pom.xml⽂件: 这⾥贴出我的 pom.xml⽂件;<project xmlns="/POM/4.0.0" xmlns:xsi="/2001/XMLSchema-instance" xsi:schemaLocation="/POM/4.0.0 /xsd/maven-4.0.0.xsd"> <modelVersion>4.0.0</modelVersion><groupId>com.etoak</groupId><artifactId>mjw01</artifactId><version>0.0.1-SNAPSHOT</version><packaging>war</packaging><dependencies><dependency><groupId>junit</groupId><artifactId>junit</artifactId><version>4.12</version><scope>test</scope></dependency><!-- javaEE --><dependency><groupId>javax</groupId><artifactId>javaee-api</artifactId><version>7.0</version></dependency><dependency><groupId>javax</groupId><artifactId>javaee-web-api</artifactId><version>7.0</version></dependency><!-- servlet start --><dependency><groupId>javax.servlet</groupId><artifactId>javax.servlet-api</artifactId><version>3.1.0</version></dependency><dependency><groupId>javax.servlet</groupId><artifactId>jstl</artifactId><version>1.2</version></dependency><!-- servlet end --></dependencies><build><plugins><plugin><groupId>org.apache.maven.plugins</groupId><artifactId>maven-compiler-plugin</artifactId><version>3.6.1</version><configuration><skipTests>true</skipTests><source>1.8</source><target>1.8</target></configuration></plugin></plugins><finalName>mjw01</finalName> <!-- 这⾥是项⽬名 --></build></project>再接下来再webapp 下⾯新建⼀个index.jsp 页⾯ ( 注意不能建到 WEB-IBF ⽬录下⾯ , 因为这个⽬录下⾯的⽂件是不能通过地址栏的路径直接访问到的;)最后就剩测试了 ;来输⼊在浏览器地址栏输⼊项⽬路径试试 : http://http://localhost:8080/mjw01/是不是 OK了?。
Eclipse+maven+jetty环境配置

Eclipse+maven+jetty开发环境搭建版本描述:Eclipse 3.2.2Jetty 5.1.14Maven 2.0.7Jdk 1.5以上,本例是在jdk1.50版本测试通过Jetty配置过程Jetty官方下载地址:/jetty/jetty-5.1.x/jetty-5.1.14.tgz,tagz用winrar可以解开;Jetty下载后,解压到本地目录,如c:\ jetty-5.1.14,在eclipse中会用到该目录;Maven配置过程Maven官方下载地址:/dyn/closer.cgi/maven/binaries/maven-2.0.7-bin.zipMaven下载后,解压到本地目录,如:c:\ maven-2.0.7,配置maven环境变量M2_HOME,如图:,在path中添加bin目录,如图:启动cmd,输入mvn –version,回车,可以看到maven版本,如图:说明maven安装正确;关于maven的使用,请参考网上资料,在此处不做描述,其中有一点需要说明;maven的配置文件有2个,一个是全局配置文件,在maven的安装目录下conf/settings.xml,另一个是用户级别的配置文件,对于windows xp来说一般在C:\Documents and Settings\%username%\.m2下,其中%username%为操作系统登录用户名。
若C:\Documents and Settings\%username%\.m2下面没有setting.xml文件,可以将conf/setting.xml拷贝到.m2目录下;在配置文件中,有一项配置本地资源库的位置,默认为C:\Documents and Settings\%username%\.m2\ repository,默认配置不是很合适,如修改本地资源库保存路径为maven安装目录下,修改setting.xml文件,<settings>下找到localRepository标签,默认为注释掉的,在该注释段之外添加<localRepository>C:/maven-2.0.7/repository</localRepository>,为本地资源库保存位置,需要手动在mavne安装目录下创建repository目录;到此,jetty与maven环境搭建完毕,关于maven构建本地库过程不在这里描述,网上大把资料;下面介绍eclipse中配置mven与jetty过程Eclipse搭建maven与jetty过程下载安装eclipse过程不做描述了,网上大把的资料,若不熟悉的,请在网上找资料启动eclipse,Help->Software Updates->Find and Install,如图:出现Feature Updates 界面,选择Search for new features to install,如下图点击next,显示Update sites to visit界面,如下图我们需要新建立jetty与maven的插件更新站点,点击New Romote Site,输入name:jettyURL:/updates/显示如下图:相同过程建立maven更新站点,过程如下图:/update/选中需要更新的站点,点击Finish,出现如下图:Eclipse会查询到更新的插件,如下图:打开jety前面的加号,选择合适的版本,本版本更新只有一个,如下图:点击next,选中I accept th terms in the license agreement,如下图:点击next,显示如下图:点击finish,eclipse开始下载jetty插件的jar包,显示如下图:下载完成后,显示如下图:点击Install All,eclipse开始安装插件,安装完成后,需要重新启动eclipse,显示如下图:Eclipse重新启动后,相同过程,选择Help->Software Updates->Find and Install,接着选择Search for new features to install,打开maven前面的加号,选择合适的版本,Eclipse3.2.2版本的maven插件也只有一个,选中点击next,eclipse开始下载maven插件,该插件有15490K,下载比较慢下载完成后,显示如下:点击Install All,执行安装重新启动eclipse后,点击run可以看到jetty安装成功,如下图jety web图标点击Window->Preferences,如下图:可以看到maven安装成功,如下图:首次点击maven时,eclipse会根据配置的M2_HOME寻找本地资源库位置,若setting.xml 文件内本地资源库位置做了修改,eclipse会使用修改过的路径,若没做修改,会使用默认的路径,即.m2目录下的repository到此eclipse+jetty+maven开发环境搭建完成。
用Eclipse创建一个简单的web项目(图文教程)

⽤Eclipse创建⼀个简单的web项⽬(图⽂教程)Eclipse neon 汉化版 ;1、右击新建 --> 选择动态Web项⽬2、填写项⽬名项⽬位置 ; 选择 Dynamic web module version 和 tomcat version ; 点击完成即可创建项⽬;2、1:项⽬名称:2、2:项⽬位置:2、3: Dynamic Web Module Version 和 Tomacat Version 之间有版本上的匹配关系: 匹配关系如下图3、创建成功后的项⽬结构:4、在创建好项⽬结构之后先查看⼀下项⽬的属性:4、1:查看项⽬的路径(此处是路径是什么路径? 猜⼀下.); 项⽬位置, (此处位置是什么位置? 猜⼀下) ; 项⽬编码 : utf-8 ;4、2:查看项⽬构⾯: (发现红⾊⽅框内的版本了没? 猜⼀下他们跟什么有关系? )4、3 项⽬部署: Web Deployment Assembly ( web部署集成 ) 这个主要是配置 web的部署⽬录的 ; (这个部署⽬录会影响什么 ? 猜⼀下!)4、4 Java编译器: 这个如果跟你设定的JDK版本不⼀致的话,会导致你的项⽬编译不通过.4、5 Java 构建路径 : (猜⼀下构建路径是啥意思? 再猜⼀下它会影响啥? 如果猜不出来,点击下图箭头指⽰的添加⽂件夹, 点开之后打开⽬录结构 ,相信你就会明⽩了 );这就是第4步需要去了解上⾯那⼏个属性是什么意思.这样才能更好理解整个项⽬结构,⽽且如果启动后出现 404 等等路径问题 , 你的答案或许就在上⾯的某⼀个配置中;5 、在 WebContent ⽬录下⾯新建⼀个页⾯ index.jsp (也就是说:与 web-Info 是同⼀个⽬录级别的) (注意:位置必须是在WebContent ⽬录下猜⼀下为什么?)index.jsp 这个名字可以随便起;在index.jsp ⾥⾯输⼊ helloWorld !此时的⽬录结构:6、部署运⾏ web项⽬:6、1 选择服务器我的是 tomcat 97、点击完成即可运⾏:此时控制台信息: 说明 tomcat 已经启动完成了.8、浏览器地址栏输⼊地址: localhost:8080/web02/ (注意: 此处的地址只到了项⽬地址,没有写页⾯地址,也能访问,猜⼀下为什么? 如果在添加⼀个welcome.jsp 页⾯, 还能直接输⼊项⽬地址还可以直接访问index.jsp了么? 可以⾃⼰尝试⼀下. 然后再猜⼀下为什么?)页⾯上已经显⽰出 Hello World !恭喜成功创建⼀个简单的web 页⾯ .以上这篇⽤Eclipse 创建⼀个简单的web项⽬(图⽂教程)就是⼩编分享给⼤家的全部内容了,希望能给⼤家⼀个参考,也希望⼤家多多⽀持。
使用Eclipse构建Maven的Web项目用jetty启动

一、直接建立Maven项目方法1,建立Maven项目接下来使用Eclipse的maven构建一个web项目,以构建SpringMVC项目为例:1.1 选择建立Maven Project选择File -> New -> Other,在New窗口中选择Maven -> Maven Project。
点击newxt。
1.2 选择项目路径Use default Workspace location默认工作空间。
1.3 选择项目类型在Artifact Id中选择maven-archetype-webapp1.4 输入Group ID和 Artifact ID,以及PackageGroup ID一般写大项目名称。
Artifact ID是子项目名称。
例如Spring的web包,Group ID:org.springframework,artifactId:spring-web。
Package是默认给你建一个包,不写也可以。
1.5 刚建立好后的文件结构如下图如果这里显示的内容多,一般是Filters设置的问题。
或perspective为JavaEE模式,改成Java模式就可以了。
2,配置项目接下来就需要更改好多配置了。
2.1 添加Source文件夹接下来需要添加src/main/java,src/test/java ,src/test/resources三个文件夹。
右键项目根目录点击New -> Source Folder,建出这三个文件夹。
注意不是建普通的Folder,而是Source Folder。
2.2 更改class路径右键项目,Java Build Path -> Source下面应该有4个文件夹。
src/main/java,src/main /resources,src/test/java ,src/test/resources。
双击每个文件夹的Output folder,选择路径。
eclipse中创建多模块mavenweb项目

eclipse中创建多模块mavenweb项⽬本⽂讲述在eclipse中创建分模块maven web项⽬。
暂时将⼀个项⽬分为controller;service;dao以及⽗类模块四部分。
1.创建⽗类模块。
创建⼀个简单的maven project打包类型设置为pom。
创建⼀个web模块。
选中six-roo项⽬右键new maven module将maven web 项⽬转成eclipse ⽀持的web 项⽬具体步骤见下⾯⽂章/HanShisi/p/5523998.html按照上述⽅法创建service 模块,six-service这⾥的打包类型默认选择jar就可以。
此时的⽬录结构如下图同理建出six-dao此处不再赘述。
在此讲下现在项⽬的结构。
six-root作为项⽬的⽗级项⽬,⽽six-web,six-service,six-dao作为其下的⼦模块,也可称之为⼦项⽬。
在⽗级项⽬的pom⽂件中引⼊项⽬需要的依赖。
各级⼦项⽬,引⼊其需要的⼦项⽬的依赖。
如:six-web需要依赖six-service所以在six-web项⽬的pom⽂件中有如下依赖配置。
同时 six-service需要依赖six-dao所以在six-service的pom配置⽂件中应添加对six-dao的依赖。
在此不再赘述。
此处需要注意,如果需要项⽬其它普通web项⽬⼀样在本地tomcat下部署、运⾏、测试,则还需要做如下操作。
选中需要的⼦项⽬,加⼊进来。
如此部署运⾏则和其它web项⽬⼀样了。
这⾥多提⼀点,如果是导⼊已存在的maven项⽬特别是web项⽬,⽽且也是eclipse识别的web项⽬的情况下,需注意导⼊后是否加⼊了maven的依赖。
如图。
详解eclipse创建maven项目实现动态web工程完整示例

详解eclipse创建maven项⽬实现动态web⼯程完整⽰例本⽂介绍了eclipse创建maven项⽬实现动态web⼯程完整⽰例,分享给⼤家。
具体如下:需求表均同springmvc案例此处只是使⽤maven注意,以下所有需要建⽴在你的eclipse等已经集成配置好了maven了,说⽩了就是新建项⽬的时候已经可以找到maven了没有的话需要安装maven1.新建maven项⽬,如果不在上⾯,请到other⾥⾯去找⼀下2,进⼊maven项⽬之后,点击next选择webapp之后 next输⼊两个id package可以不写,是它默认帮你新建⼀个包,不写没关系会⽣成⼀个这样⽬录的项⽬2,配置maven⾸先新建⼏个⽂件夹2.1 添加Source⽂件夹接下来需要添加src/main/javasrc/test/javasrc/test/resources三个⽂件夹右键项⽬根⽬录点击New -> Source Folder,建出这三个⽂件夹。
注意不是建普通的Folder,⽽是Source Folder。
项⽬或者⽂件加上右键 new sourceFolder,正常情况下是没有问题的如果出现了下⾯的这情况,其实是真的存在的只是我们看不到项⽬右键属性切换成这样⼦就好了设置好了之后发现java就已经有了继续新建其他的⼏个还没有的新建之后就这样⼦了2.2 更改class路径右键项⽬,Java Build Path -> Source下⾯应该有4个⽂件夹。
src/main/java,src/main/resources,src/test/java ,src/test/resources。
双击每个⽂件夹的Output folder,选择路径。
src/main/java,src/main/resources,选择target/classes;src/test/java ,src/test/resources, 选择target/test-classes;选上Allow output folders for source folders.(如果没有选上的话)此处还可以更改显⽰顺序此处还可以更改jdk右键属性 project Facets想要切换成3.0发现报错这是因为新建项⽬的时候⽤了maven-artchetype-webapp由于这个catalog⽐较⽼,⽤的servlet还是2.3的<?xml version="1.0" encoding="UTF-8"?><web-app version="3.0"xmlns="/xml/ns/javaee"xmlns:xsi="/2001/XMLSchema-instance"xsi:schemaLocation="/xml/ns/javaee/xml/ns/javaee/web-app_3_0.xsd"><display-name>Archetype Created Web Application</display-name> </web-app>-------------org.eclipse.jdt.core.prefs修改成-------修改成重新打开属性 project Facets,看到这个地⽅已经修改成3.0; 勾选上tomcat项⽬⼯程创建完成new ⼀个server启动之后看看有⽆报错,⽬前没有运⾏⼀下,测试没问题,⾄此maven web项⽬创建完成以上就是本⽂的全部内容,希望对⼤家的学习有所帮助,也希望⼤家多多⽀持。
Maven实战(3)Eclipse构建Maven项目

1. 安装m2eclipse插件要用Eclipse构建Maven项目,我们需要先安装meeclipse插件点击eclipse菜单栏Help->Eclipse Marketplace搜索到插件Maven Integration for Eclipse 并点击安装即可,如下图:安装成成之后我们在Eclipse菜单栏中点击File->New->Other,在弹出的对话框中会看到如下图所示:2. 构建Maven项目以eclipse3.6为例1)创建简单Maven项目点击Eclipse菜单栏File->New->Ohter->Maven得到如下图所示对话框选中Maven Project并点击Next,到下一个对话框继续点击Next得到如下对话框如图示操作,选择maven-archetype-quickstart,点击Next按图示填写好groupId, artfactId,version等信息,点击Finish。
由此我们成功创建了一个简单的Maven项目,项目结构如图所示2)创建Maven web项目操作跟创建简单Maven项目类似,点击Eclipse菜单File->New->Other->Maven->Maven Project在选择maven-archetype的界面进行如下操作:点击Next,填写好相应的groupId,artifactId,version等信息,点击Finish 得到的Maven web项目结构如下图所示:右击项目,点击Properties->Project Facets如上图可以看到项目为web2.3 java1.5 当然我们也可以改成我们所需要的版本,打开xml 文件my-app-web/.settings/mon.project.facet.core.xml,进行修改即可:3)导入Maven项目在Eclipse project explorer中右击,在弹出框中选择import,得到如下图所示:(file -> import )选择Existing Maven Projects,并点击Next,得到如下图所示对话框:选择一个已经创建好的Maven项目,并点击Finish。
用Maven和Jetty开发调试WEB应用程序

用Maven和Jetty开发调试WEB应用程序前提正确安装Maven,eclipse,m2eclipse插件创建Maven工程在Select an ArcheType对话框选择maven-archetype-webapp接下来输入GroupId,ArtifactId,Version等,点击Finish,一个空的webapp工程就创建好了。
进入项目的属性页面,选择Java Build Path单元的Source标签,可以看到Maven创建的resources目录的属性。
注意Excluded:**,表示resources目录下的资源不会编译到target下,选中该项,点击Remove 按钮,清除该项目。
同时也取消Allow output folders for sorce folders选项。
一般来说,在resources目录下是项目的配置文件,比如struts的配置文件,spring的配置文件,log4j的配置文件等。
如果这些配置文件不编译到target目录下,在使用Jetty进行开发时,spring就读不到配置。
接下来就按正常开发WEB应用程序一样进行配置和代码的编写。
需要注意的是,在web.xml 里配置log4j和spring的bean配置文件时,要使用classpath来指向配置文件。
使用Jetty调试要使用Jetty来进行调试,只需要在pom.xml里添加jetty的plugin即可了方便,也可以在eclipse里配置在Run Configurations设置里,选中Maven Build单元,右键弹出菜单,选择new,在Name,Base directory,Goals里分别输入相应的内容,点击Apply即可保存。
其中Goals输入jetty:run和jetty:stop即可。
环境eclipse版本Maven版本操作系统。
- 1、下载文档前请自行甄别文档内容的完整性,平台不提供额外的编辑、内容补充、找答案等附加服务。
- 2、"仅部分预览"的文档,不可在线预览部分如存在完整性等问题,可反馈申请退款(可完整预览的文档不适用该条件!)。
- 3、如文档侵犯您的权益,请联系客服反馈,我们会尽快为您处理(人工客服工作时间:9:00-18:30)。
最近一个项目是使用maven开发的运行在jetty容器里的项目,现将一些想法总结如下:
1、eclipse有强大的插件支持,第一想到的是安装jetty插件,从官网下载并安装,发现好像没有多大作用。
2、因为使用了maven,在原来的pom文件里也有相应的插件。
索性就直接使用命令行执行:
mvn clean jetty:run
启动容器正常,项目运行正常。
[html]
< plugin>
<groupId>org.mortbay.jetty</groupId>
<artifactId>jetty-maven-plugin</artifactId>
<version>7.1.6.v20100715</version>
<configuration>
<webApp>${basedir}/target/webmail</webApp>
<scanIntervalSeconds>10</scanIntervalSeconds>
<webAppConfig>
<contextPath>/myproject</contextPath>
</webAppConfig>
<connectors>
<connector implementation="org.eclipse.jetty.server.nio.SelectChannelConnector">
<port>8080</port>
<maxIdleTime>60000</maxIdleTime>
</connector>
</connectors>
<contextHandlers>
<contextHandler implementation="org.eclipse.jetty.webapp.WebAppContext">
<resourceBase>${project.parent.basedir}/myproject-static/src/main/webapp</resourceBase>
<contextPath>/myproject-static</contextPath>
</contextHandler>
</contextHandlers>
</configuration>
</plugin>
</plugins>
因此就直接在eclipse里面配置run as --> maven build,见下图:
点击运行时完全正常。
4、卸载eclipse的jetty插件时,运行也正常。
故总结如下:
因为maven与jetty集成工作已经做得非常好,所以。
在使用eclipse开发maven项目,集成jetty插件不需要额外操作,只在指定maven的 goals 就可以了。
