COMP5553 - Advanced Computer Graphics
谁是资源管理器的最佳替代者?

谁是资源管理器的最佳替代者?作者:来源:《电脑爱好者》2008年第19期岁月如梭,世代变迁,多年来系统自带的资源管理器已经不堪重负,自觉功能简单,效率不高,难以满足人们的需求,准备不日退役。
但国不可一日无君,系统也不能没有资源管理器。
于是特邀CFAN研究院为其选择接班人。
之前经过网络海选,有七大高手入选,但能替代系统资源管理器的只能有一个,到底谁才是最佳替代者呢?今天的大选将由您来揭晓答案,我们拭目以待。
勿容置疑的测试平台本次我们选用了接近大众电脑的硬件平台,配置单如下:CPU:Intel T1400 @ 1.73GHz,主板芯片组:Intel GM965,内存:1.5GB,显卡:GMAX3100,软件环境上使用安装了所有补丁的Windows XP pro SP3。
史上最强大的评测队伍本次评测更加注重了参与性和互动性,由《电脑爱好者》软件编辑、CFAN论坛网友(/thread-771340-1-1.html)、CFAN资深作者共同完成。
实用为主的评测理念秉承实用为主的理念,我们选用了用户平时使用中的实例作为测试项目,抛弃了与资源管理器的本质作用关系不大的测试,测试结果由大家决定,我们为你准备了打分表,根据测试得分最高的就是最适合你的。
参与测试的七大高手Xplorer2 Pro V1.7.1.4FinalTotal Commander 7.04aMDIE Ver3.0RC6QTTabBar_1.2.2.1Explorer++ Alpha 2BBlean 1.16AB Commander 6.93才艺展示:Xplorer2界面上跟资源管理器相似,但有两个窗口,在窗口和窗口之间可以直接进行操作(见图1)。
并且在Xplorer2界面的上面有各个分区的盘符图标,单击图标后就可以直接进入该分区。
Total Commander也有两个窗口界面,可以在两个窗口中对文件进行操作(见图2)。
值得一提的是,Total Commander提供快捷键操作,用键盘的效率要比鼠标快上很多。
alienware外星人笔记本诊断和错误代码.doc
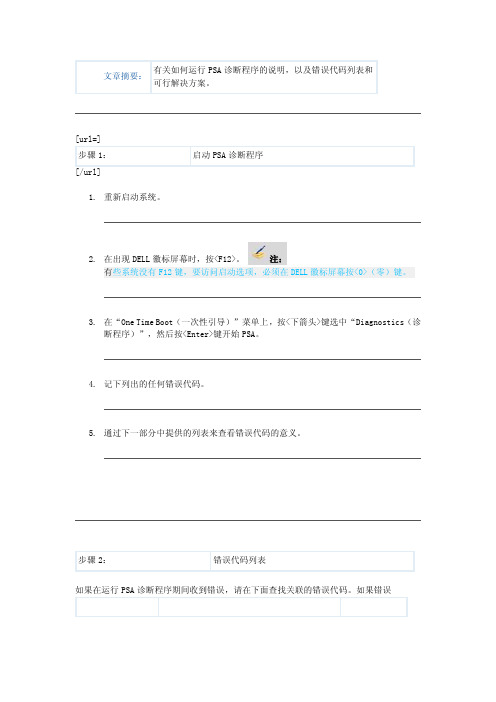
文章摘要:有关如何运行PSA诊断程序的说明,以及错误代码列表和可行解决方案。
[url=]步骤1:启动PSA诊断程序[/url]1.重新启动系统。
2.在出现DELL徽标屏幕时,按<F12>。
注:有些系统没有F12键,要访问启动选项,必须在DELL徽标屏幕按<0>(零)键。
3.在“One Time Boot(一次性引导)”菜单上,按<下箭头>键选中“Diagnostics(诊断程序)”,然后按<Enter>键开始PSA。
4.记下列出的任何错误代码。
5.通过下一部分中提供的列表来查看错误代码的意义。
步骤2:错误代码列表如果在运行PSA诊断程序期间收到错误,请在下面查找关联的错误代码。
如果错误警告:警告:∙[url=]内存[/url]对以下错误代码卸下并重新安装内存:∙1000-0122∙1000-0123∙2000-0123有关如何卸下和更换内存的说明,请参阅服务手册。
重新安装内存后,请重新运行诊断程序,如果您再次收到相同的错误代码,请与我们联系。
[url=]硬盘[/url]对以下错误代码卸下并重新安装硬盘:∙1000-0141∙2000-0141∙1000-0142∙2000-0142∙1000-0143∙2000-0143∙1000-0144∙2000-0144∙1000-0145∙2000-0145∙1000-0146∙2000-0146∙2000-0151有关如何卸下和更换硬盘的说明,请参阅服务手册。
如果使用的是台式计算机,请确保卸下并重新安装硬盘的电缆。
重新安装硬盘后,请重新运行诊断程序,如果您再次收到相同的错误代码,请与我们联系。
从实用程序分区运行驱动器自检(DST)(也称为32位诊断程序),以确定之前的错误是否已纠正。
如果实用程序分区的DST未指示驱动器故障,则我们认为错误已纠正,不需要更换驱动器。
∙1000-0146∙2000-0146有关如何运行戴尔32位诊断程序的说明,请单击此处。
惠普全系列
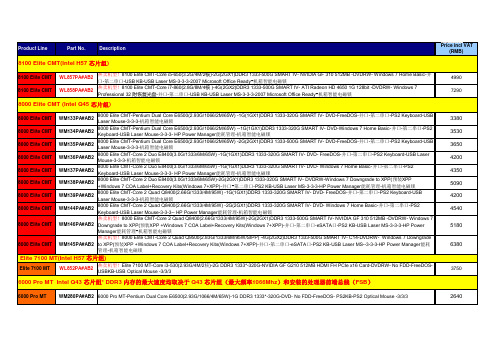
3380 3530 3650 4200 4350 5090 4200 4540 5180
8000 Elite CMT
WM145PA#AB2
6380
Elite 7100 MT(Intel H57 芯片组) 芯片组
Elite 7100 MT WL852PA#AB2 3750
6000 Pro MT Intel Q43 芯片组 DDR3 内存的最大速度均取决于 Q43 芯片组(最大频率 芯片组* 芯片组(最大频率1066Mhz)和安装的处理器前端总线(FSB) )和安装的处理器前端总线( )
2980 3350 3800
6005 Pro MT (AMD 785G 芯片组 芯片组)
6005 Pro MT 6005 Pro MT 6005 Pro MT WL851PA#AB2 6005 Pro MT-Athlon II X2 B24(3.0G/2M/65W)-1G DDR3 1333-320G-DVD- No FDD-FreeDOS- PS2KB-PS2 Optical Mouse -3/3/3 CTO CTO 6005 Pro MT-Phenom II X2 B55(3.0G/7M/80W)-2G DDR3 1333-320G-DVD- No FDD-FreeDOS- PS2KB-PS2 Optical Mouse -3/3/3 6005 Pro MT-Phenom II X4 B95(3.0G/8M/95W)-2G DDR3 1333-320G-NVIDIA GF 310 DP SH x16 512MB显卡-DVDRW- No FDD-Windows 7 Home BasicPS2KB-PS2 光电Mouse -3/3/3-22in1 Media Card Reader-并口-MS Office Ready 2007(60天试用)-HP Power Manager能耗管理
华硕主板P5GC-MX说明书
目錄內容
安全性須知....................................................................................................................6 電氣方面的安全性...........................................................................................6 操作方面的安全性...........................................................................................6
關於這本用戶手冊......................................................................................................7 用戶手冊的編排方式.......................................................................................7 提示符號 ...........................................................................................................8 跳線帽及圖標說明...........................................................................................8 哪裡可以找到更多的產品信息....................................................................8 代理商查詢.........................................................................................................9
联想产品报价表计算机

丹棱县超越电脑服务部联想产品报价表:计算机
联想产品报价表:笔记本
联想产品报价表:打印机、一体机
联想产品报价表:投影机
联想产品报价表:防火墙
联想产品报价表:服务器
HP产品报价表:计算机
HP产品报价表:笔记本
HP产品报价表:服务器
HP产品报价表:打印机、一体机
DELL产品报价表:计算机
DELL产品报价表:笔记本
DELL产品报价表:服务器
SONY产品报价表:笔记本
SONY产品报价表:数码照相机
SONY产品报价表:数码摄像机
SONY产品报价表:投影机
IBM产品报价表:服务器
施乐产品报价表:复印机
东芝产品报价表:复印机
理光产品报价表:复印机
理光产品报价表:速印机。
NVIDIA Tesla C2050 计算处理器安装指南说明书

TESLA™ C2050 COMPUTING PROCESSORINSTALLATION GUIDETESLA C2050 INSTALLATION GUIDE NVIDIA Tesla C2050TABLE OF CONTENTSIntroduction 1 About This Guide 1 Minimum System Requirements 2Unpacking 3 Equipment 3Hardware Installation 5 Before You Begin 5 Tesla C2050 Installation 5 Driver Installation 9 Windows Installation 9 Control Panel Set Up 14 Linux Installation 16 Verifying Linux Installation 19References and Resources 21 Getting Driver Updates 21 Registration, Support and Warranty 23 Registering Your Tesla C2050 Computing Board 23 Warranty and Support 23Compliance and Certifi cations 251 INTRODUCTION01The NVIDIA® Tesla™ C2050 Computing Processor transforms your workstation to a personal supercomputer by off ering unprecedented computing capabilities at 1/10th the cost of a conventional CPU-only workstation. The NVIDIA Tesla C2050 Computing Processor supports“must have” features for technical and enterprise computing, including C++ support, ECC memory for uncompromised accuracy and scalability, and7X the double precision performance comparedto Tesla 10-series GPU computing products.About This GuideThis installation guide discusses the installation and confi guration ofthe Tesla C2050 Computing Processor.2INTRODUCTION01Minimum System RequirementsPrior to unpacking your new Tesla C2050, confi rm that your systemmeets all the system requirements for a smooth installation.>Operating System●Microsoft Windows XP, Vista, Windows 7 (32-bit or 64-bit)●Linux 32-bit and 64-bit on:●Redhat Enterprise Linux 3.x, 4.x, 5.x●SUSE Linux Enterprise Desktop 11 and 10●OpenSUSE 11.1, 11.0, 10.3, 10.2, 10.1●Fedora 10, 9, 8, 7●Ubuntu 9.04, 8.10, 8.04, 7.10, 7.04>Processor●Intel Pentium 4 or Xeon processor or higher●AMD Athlon processor or higher>RAM● 1 GB minimum, 4 GB recommended per Tesla C2050>Graphics●Single DVI-I Dual Link>PCI Express Slot●PCI Express x16 slot, Gen2 recommended but not required>Power Consumption●247 W maximum power consumption●Power supply in the workstation typically need to have one 8-pinpower connector and one 6-pin power connector. Certain powersupplies may only need to have one 8-pin power connector. (Pleasecheck with your system vendor for the power supply specifi cations)3UNPACKING Be sure to inspect each piece of equipment. If anything is missing or damaged, contact your supplier.EquipmentThe following equipment is included in the Tesla C2050 box.Installation CDContains this fi le (installation guide) and all thenecessary drivers to enable the Tesla C2050. To keepyour drivers current, visit to downloadthe latest drivers.Quick Start GuideContains basic hardware and software installationinstructions. Read carefully, and refer to theInstallation Guide on the CD for full installation instructions and troubleshooting.WELCOME Registration CardRegister to gain priority access to online and phone support. Take time to follow the instructions onthis card to register your product to take advantage ofcustomer support and warranty.024UNPACKING Tesla C2050 GPU Computing Processor Installs into the PCI Express x16 slot in your computer.connectorSLIPower connectorsTesla C2050 Computing Processor025 HARDWARE INSTALLATIONS03Installing the Tesla C2050 hardware involves opening up your computer.Note: All hardware must be installed prior to installation ofthe drivers.Before You BeginIf you have an NVIDIA graphics solution, either as a discrete card oras on-board graphics on your motherboard, you will need to uninstallthe NVIDIA graphics software driver before installing your Tesla card.Note: This does not apply to Linux based systems. It onlyapplies to Windows based systems.Tesla C2050 InstallationA computer system with an available PCI Express ×16 slot is requiredfor the Tesla C2050. For the best system bandwidth between the host processor and the Tesla C2050, it is recommended (but not required)that the Tesla C2050 be installed in a PCI Express ×16 Gen2 slot.Because there are so many diff erent computer systems on themarket, the installation procedure for the Tesla C2050 can vary from system to system. Use the following instructions as a guideline and consult the documentation for clarifi cation of computer specifi c procedures.6HARDWARE INSTALLATIONS03Note: It is important that all power to the computer beremoved (unplugged) before you install the computing board.You must also discharge your body’s static electricity beforehandling sensitive components. Simply touch a groundedsurface before beginning.Note: To simplify reconnections, label cables as they aredisconnected.1 Turn off your computer and monitor and disconnect the power cord atthe outlet or at the back of your system (depending on the system).2 Open your computer chassis (refer to your system documentationfor details).3 Remove the slot bracket for the two adjacent slots, if they are stillcovered. The Tesla C2050 computing board is a dual-slot board andwill take up two (2) slots. Save any hardware (such as screws) to useto anchor the Tesla C2050 computing board after it is seated properly.rail installation.HARDWARE INSTALLATIONS 74 Connect the 8-pin power connector and the 6-pin power connector fromthe power supply to the 8-pin and 6-pin power connectors on the board. If the power supply is capable, one 8-pin power connector may be suffi cient. (Please check with your power supply vendor).5 Reinstall the computer cover and any cables that were removed earlier.Note: If you are using one 8-pin power connector, you must ensure that the power supply can drive enough power through the 8-pinsto the power connector.6-pin power connectorsConnect one (1) 6-pin PCI Expresspower connector on the edge of theboardConnect one (1) 8-pinPCI Express power connectoron the edge of the board8HARDWARE INSTALLATIONS 039 DRIVER INSTALLATION04This section contains the instructions toinstall the software drivers within a Windows environment or within a Linux environment.Windows InstallationThe required software for the Tesla C2050 includes the CUDA drivers, which should also serve as the driver for the NVIDIA discrete or on-board graphics processor. While driver installation may be carried out using the enclosed installation CD, it is recommended that the customer download the most recent drivers available at .Note: Use only drivers that are designated to supportTesla C2050. Not all NVIDIA graphics drivers support theTesla C2050.10DRIVER INSTALLATION04 1 Power up your computer2 Click Cancel each time the Windows Found New Hardware Wizard windowdisplays. It will display one or more times.3 Insert the installation CD for the drivers included in the Tesla C2050package. Follow instructions in the installer package.4 Right-click on the CD driver and select AutoPlay or explore thefi les on the CD and double click Launch.exe if it does not begin toauto play.DRIVER INSTALLATION11 5 Click Install Latest Driver from the Tesla C2050 Software screen.6 On the NVIDIA driver download site, select Tesla C2050 product and theappropriate OS for your system.7 Click Run and follow directions.8 Select I accept the terms of the license agreement.9 Click Next.12DRIVER INSTALLATION0410 Click Next when the Welcome to the InstallShield Wizardwindow displays.11 Click Continue Anyway when the Hardware Installation warning windowdisplays.This warning tells you that the drivers you are about to install havenot passed the windows logo testing (WHQL). WHQL is a Microsofttesting procedure that is required before Microsoft approves thesoftware. Clicking Continue Anyway will not harm your system.DRIVER INSTALLATION1312 Select Yes, I want to restart my computer now.13 Click Finish to complete the installation and restart your system.14DRIVER INSTALLATION Control Panel Setup1 Select Standard or Advanced views depending on your preference for the Control Panel view selection. The Advanced view allows the user to select and modify application profi les through the control panel.2 Select Do not enable SLI technology Confi guration settings are application-dependent so you will need to confi gure SLI afterthe Tesla C2050 software has been installed and you hve verifi ed proper operation. Visit for applicationconfi guration information.Once you have the computing board installed and verify it isfunctioning, you can customize setting for your particularapplication. Visit for information particular toyour application.04DRIVER INSTALLATION15Verifying Windows InstallationIt is recommended that you verify your installation by going to theNVIDIA Control Panel and verifying that the boards have beeninstalled correctly and are recognized by the drivers.Use the following procedure to verify the installation of the boards:1 Go to Start > Control Panel.2 Select NVIDIA Control Panel.3 Go to Help > System Info in the menu bar4 Select Display tab.5 Highlight the Tesla C2050 in the list of componenets.16DRIVER INSTALLATION04Linux InstallationWhile driver installation may be carried out using the enclosed installationCD, it is recommended that the customer download the most recent driversavailable at Before you begin the installation, you should exit the X server andclose all OpenGL applications (it is possible that some OpenGLapplications persist even after the X server has stopped). You shouldalso set the default run level on your system such that it will boot to aVGA console and not directly to X. Doing so will make it easier torecover if there is a problem during the installation process.1 Download the 32-bit or 64-bit Linux driver (the driver will have asimilar naming convention as.NVIDIA-Linux-x86-100.14.11-pkg1.runor NVIDIA-Linux-x86_64-100.14.11-pkg2.run).2 Change to the directory containing the downloaded fi le.3 Run as root the NVIDIA-Linux*.run fi le downloaded in Step 1.As the root user you can run the following executables:cd download_directoryNVIDIA-Linux-x86-xxx-xx-xx.run or NVIDIA-Linux-x86_64-xxx-xx-xx.runThe NVIDIA-Linux*.run fi le is a self-extracting archive. Whenexecuted, it extracts the content of the archive and runs the containednvidia-installer utility, which provides an interactive interface to walkyou through the installation.nvidia-installer will also install itself to /usr/bin/nvidia-installerwhich may be used at some later time to uninstall drivers, autodownload updated drivers, etc.DRIVER INSTALLATION17 4 Select Accept to accept the License Agreement.5 Select Yes if a warning window displays indicating that there aredrivers already installed. Selecting Yes tells the installation processto overwrite the previously installed drivers.18DRIVER INSTALLATION 6 Select Yes when the Kernel Interface window displays.When the installer is run, it will determine if it has a precompiledkernel interface for the kernel you are running. If it does not have one, it will check if there is one on the NVIDIA FTP site and download it.7 Select OK to compile a kernel interface.If a kernel interface cannot be downloaded, either because the FTP site cannot be reached or because one is not provided, the installer will check your system for the required kernel sources and compile the interface for you. You must have the source code for your kernel installed for compilation to work. On most systems this means that you will need to locate and install the correct kernel source, kernelheaders or kernel development package.04DRIVER INSTALLATION19 Linking of the kernel interface (in the case that the interfacedownloaded or compiled at installation) required you to have a linkerinstalled on your system. The linker, usually /usr/bin/ld, is part of thebinutils package. If a precompiled kernel interface is not found, youmust install a linker prior to installing the NVIDIA driver.8 Run nvidia-xconfi g utility.nvidia-xconfi g will fi nd the X confi guration fi le and modify it to use the NVIDIA X driver. In most cases, you can answer Yes when the installerasks if it should run it. If you need to reconfi gure your X server later,you can run nvidia-xconfi g again from a terminal. nvidia-xconfi g willmake a backup copy of your confi guration fi le before modifying it.9 Installation is complete.Note: The X server must be restarted for any changes to itsconfi guration fi le to take eff ect.More information about nvidia-xconfi g can be found in thenvidia-xconfi g manual page by running:% man nvidia-xconfi gVerifying Linux Installation1 Run nvidia-settings to displays the Server Settings window.2 Verify here that the installation is correct and working.20DRIVER INSTALLATION 0421 REFERENCES AND RESOURCESGetting Driver UpdatesDuring NVIDIA software installation, the installation wizard providesan option to check for updated software online. You can alsodownload software updates by visiting: .22REFERENCES AND RESOURCES 0523 REGISTRATION, WARRANTY, AND SUPPORTRegistering Your Tesla C2050 Computing Board Registering your Tesla C2050 computing board, gives you priorityaccess to the NVIDIA Customer Care support center. Once you have completed registration, you will be given a user ID and passwordfor online customer care. You can also elect to receive automaticnotifi cation of special promotions and software updates throughemail to ensure that your Tesla C2050 computing board continues to operate optimally.Warranty and SupportThe Tesla C2050 is covered by a 36 month warranty.For support, visit the Customer Care Center at / support. The Web site off ers access to a broad range of product information.2425>Bureau of Standards, Metrology, and Inspection (BSMI)>C-Tick>China Compulsory Certifi cation (CCC)>Conformité Européenne (CE)>Federal Communications Commission (FCC) - Class B>Interference-Causing Equipment Standard (ICES)>Ministry of Information and Communication (MIC)>Underwriters Laboratories (UL, CUL)>Voluntary Control Council for Interference (VCCI)26NoticeALL NVIDIA DESIGN SPECIFICATIONS, REFERENCE BOARDS, FILES,DRAWINGS, DIAGNOSTICS, LISTS, AND OTHER DOCUMENTS (TOGETHER ANDSEPARATELY, “MATERIALS”) ARE BEING PROVIDED “AS IS.” NVIDIA MAKES NOWARRANTIES, EXPRESSED, IMPLIED, STATUTORY, OR OTHERWISE WITH RESPECTTO THE MATERIALS, AND EXPRESSLY DISCLAIMS ALL IMPLIED WARRANTIESOF NONINFRINGEMENT, MERCHANTABILITY, AND FITNESS FOR A PARTICULARPURPOSE.Information furnished is believed to be accurate and reliable. However, NVIDIACorporation assumes no responsibility for the consequences of use of suchinformation or for any infringement of patents or other rights of third parties thatmay result from its use. No license is granted by implication or otherwise underany patent or patent rights of NVIDIA Corporation. Specifi cations mentioned in thispublication are subject to change without notice. This publication supersedes andreplaces all information previously supplied. NVIDIA Corporation products are notauthorized for use as critical components in life support devices or systems withoutexpress written approval of NVIDIA Corporation.TrademarksNVIDIA and the NVIDIA logo are trademarks or registered trademarks of NVIDIACorporation in the United States and other countries. Other company and productnames may be trademarks of the respective companies with which they areassociated.Copyright© 2010 NVIDIA Corporation. All rights reserved.。
NEC SX-Aurora TSUBASA 向量计算机说明书
Introduction of SX-Aurora TSUBASA for ISC21 -PCIe card type vector computer-June 30th, 2021NEC CorporationAgenda1.Features of SX-Aurora TSUBASA2.World famous HPC Centers utilizing SX-Aurora TSUBASA3.Announcement of two new functions and card business4.Value of Vector Engine5.RoadmapOver35years experience for High Sustained PerformanceFeatures of SX-Aurora TSUBASADownsizing of super computer realized by NEC’s Technology.(Traditional Super Computer )High Memory BandwidthEase of UseFlexibilityVector technology makes it possible to process multiple and huge data at a time with high memory bandwidth.No specialized knowledge is required, AP can be executed only after e C/C++/Fortran to program.Customer can choose a system which meets their needs. From server type to card specification are all optional,NEC help customer to maximize the cost performance, to fit all market requirement.Tower TypeRack TypeDownsize!Vector EngineVector Engine High Memory Bandwidth◆Vector technology is packed into a PCI card.⏹Vector processor (8/10 cores)⏹1.53TB/s memory bandwidth⏹48GB memory⏹2.45-3.07TF performance (double precision)4.91-6.14TF performance (single precision)⏹A variety of execution modes⏹Standard programming with Fortran/C/C⏹Power consumption < 300 WArchitecture of SX-Aurora TSUBASA⏹SX-Aurora TSUBASA = VH + VE⏹Linux + standard language (Fortran/C/C++)⏹Enjoy high performance with easy programmingSoftware⏹Linux OS⏹Fortran/C/C++ →Standard language ⏹Automatic vectorization compilerInterconnect⏹InfiniBand for MPI⏹VE-VE direct communication supportHardware⏹VH(Standard x86 server) + Vector EngineApplicationVector Engine(VE)x86 server (VH)Linux OSPCIeSX-Aurora TSUBASAArchitectureEasyprogramming(standard language)Automatic vectorization compilerEnjoy high Performance!Ease of UseLineup of SX-Aurora TSUBASAVector Engine supports wide range from desk-side to large-scale Data Centers. Selling Vector Engine card was started from November, 2020.Data Center Model(Water-Cooling)Rackmount ModelEdge ModelData Center Model Huge processing in Data CentersRackmount ModelSimulation of manufacturing industry, e of AI / big dataEdge ModelSimulation of mid-sized manufacturing industry, etc. Laboratory desk-side1VE4VE8VE8VEVector EngineApplication Set Model,Embedded System, Cloud serviceVector EngineVector EngineApplication acceleration Embedded useCloud service engineFlexibilityTrusted and Chose by World Famous HPC CentersNIFS : Fusion ScienceNational Institute for Fusion ScienceTohoku university : Academic : Weather / ClimateJAMSTEC : Earth Science Osaka university :AcademicCybermedia CenterWeather ClimateⒸJAMSTECPerformance of large-scale computer systemJAMSTEC Earth Simulator is ranked in TOP10 in the latest HPCG ranking.High Byte/Flops and high performance single core => High execution efficiencyRankCores HPCG [TFlop/s]Rpeak [TFlop/s]Execution efficiencyHPCGHPLSystemVendor11Fugaku Fujitsu 7,630,84816,004.50537,212.00 2.98%22Summit IBM 2,414,5922,925.75200,794.88 1.46%35Perlmutter HPE706,3041,905.4489,794.48 2.12%43SierraIBM / NVIDIA / Mellanox 1,572,4801,795.67125,712.00 1.43%56SeleneNvidia555,5201,622.5179,215.00 2.05%68JUWELS BoosterModule Atos 449,2801,275.3670,980.00 1.80%711Dammam-7HPE 672,520881.4055,423.56 1.59%89HPC5Dell EMC 669,760860.3251,720.76 1.66%913Wisteria/BDEC-01Fujitsu 368,640817.5825,952.26 3.15%1040Earth Simulator -SX-Aurora TSUBASA NEC 43,776747.8013,447.99 5.56%1125TOKI-SORA Fujitsu 276,480614.2219,464.20 3.16%1216TrinityCray/HPE 979,072546.1241,461.15 1.32%1355Plasma Simulator NEC 34,560529.1610,510.66 5.03%1414Marconi-100IBM 347,776498.4329,354.00 1.70%1515Piz DaintCray/HPE387,872496.9827,154.301.83%NIFSⒸJAMSTECJAMSTECJob can be deployed on-premise and burst to the cloud computing systemautomatically on NQSV infrastructure when the demand for computing power spikes.NEC Network Queuing System V (NQSV) supports Cloud Bursting●Use the cloud resources on the same UI as on-premise as jobs are submitted to Cloud system on bursting policy●Reduce the cost for cloud usage by allocating computing resource only as needed ●Select Cloud bursting “yes” or “no” per a job on the user side●Enable/disable Cloud Bursting function at any time by system administratorJob scheduler Submit jobComputing nodeOn-premise system Cloud systemIPsec VPNNFS serverCloud portalOn-premiss QueueuserJobJobSelect Cloud Bursting “yes” or “no ” and submit a job $ qsub -q OnPre -l cloud=yesDecide jobs submitted to cloud system based on bursting policyCloud controllerPolicy controllerBoot cloud instance on cloud systemCloudOn-premise systemNEC LLVM-IR Vectorizer released in June, 2021Add automatic vectorization feature for VE into clang/flang*1/your compilers and create assembler source file including vectorized loops.LLVM-IR Vectorizer●Includes vectorizer and code generator for VE.●Inputs LLVM-IR from memory or an IR-file and outputsan assembler source code for VE.●Applies automatic vectorization to LLVM-IR.●Has APIs to support compiler directive.●Provides runtime library including vector mathematicalfunctions (sin, cos etc.)●Will support flang and MLIR.●Will be enhanced to create execution file in 4Q CY21.Front-end(clang / flang / etc.)LLVM(Modules to create LLVM-IR)LLVM-IR Vectorizer VE Vectorizer VE code generatorSource file・Assembler source file including vectorized loops・Execution file(planned in 4Q CY21)Your compilerLLVM-IRNEC Software Development Kit for Vector Engine ・C/C++ Compiler ・Fortran Compiler ・Binutils ・NEC Numeric Library Collection ・NEC Parallel Debugger ・Tuning ToolPaid SWFree of chargeOSSYou can build your own compiler having vectorization feature for VE!You will enjoy vector computing power without additional SW license fee in the end of this year!*1 will be supported in Q1 CY22.https://www.hpc.nec/forums/topic?id=pA1cPw>>>>>Downsizing>>>>>Future of NEC ‘s Vector Supercomputer BusinessDevelop new markets by downsizing vector supercomputers and selling Vector Engine card through partner sales.Disaster prevention and mitigationProduction E-commerce transportation Health Care Cyber SecurityTsunami forecast Weather forecast Fluid analysis Structural analysisDirect SalesPartner SalesAI analysisChemical analysis Plant control Malware detection Seismic applications Financial risk analysisPresentStart card businessLast year NEC announced starting PCIe card selling through system integrators as NEC partnershttps:///en/press/202011/global_20201119_01.htmlPartnerNECLarge scaleSmall and Medium-sizedEnterprisesNew/Volume zoneSupercomputercenterLarge-sizedEnterprisesManufacturingElectromagneticFluidStatisticalGeophysicalGeneticEnergyTelecomFinancialWeatherserviceProgress ofanalysis/scienceStructural Simulation(HPC)AI/BigDataAnalyticsLogistic RetailValue of Vector EngineNEC’s Vector technology can invent new Social Values-as the key to accelerate HPC + AI/Big Data AnalyticsWeatherClimateMeteorology■EPYC Rome 7542: EPYC Rome 7542 32 cores/socket, 2.9GHz. 2 sockets per node ■SX-Aurora TSUBASA: VE10AE x8 / VH (single socket Rome)■ICON-ART:Status as of 2019 for ICON-ARTPower efficiency ratioPower Efficiency■Power supply limitation is one of the big limiting factor of each system size■Aurora contributes to accelerate meteorology codes within the power limitation■For the major meteorology codes, Aurora provides 2-7x higher sustained performance with same power consumptionWeather serviceCFD (FDL3DI, developed by US-AFRL)■Power consumption: 530W/EPYC node(measured), 1,020W/(VH+2x VE10B)(measured), 530W/Xeon(assumption) ■SX-Aurora TSUBASA provides higher performance, and much higher power efficiency than the x86 systems ■Customer’s satisfaction with minimum effort for vector tuning without special program languageManufacturingThe below performance evaluations were conducted at US Naval Research Lab.S u s t a i n e d p e r f o r m a n c e r a t i o n o r m a l i z e d t o E P Y CP e r f o r m a n c e p e r w a t t r a t i o n o r m a l i z e d t o E P Y CPower efficiency ratio on 1node and 2x VE10BSustained performance on 1node and 2x VE10B■FDL3DI:High-Order Schemes for Navier-Stokes Equations■Xeon 8260:Xeon Cascadelake 8260 24 cores/socket, 2.4GHz, 2 sockets per node ■EPYC 7702:EPYC Rome 7702 64 cores/socket, 2.0GHz. 2 sockets per node ■SX-Aurora TSUBASA: 2x VE10B / VH (dual socket Xeon)STAC-A2TM benchmark https:///news/NEC210422■Large Greeks BM:Computation of Greeks on American options using Longstaff-Schwartz to price the options in the presence of early exercise with large data size ■DGX A100:8x NVIDIA A100 SXM4 40GiB GPUs per node (https:///news/NEC210422)■Xeon 8380:Xeon Platinum 8380 40 cores/socket, 2.3GHz, 2 sockets per node (https:///INTC210315)■Xeon 9242:Xeon Platinum 9242 48 cores/socket, 2.3GHz, 2 sockets per node (https:///INTC190903) ■SX-Aurora TSUBASA:8x VE20B / Vector Host (dual socket Xeon) (https:///NEC210422)■STAC-A2 is the technology benchmark standard based on financial market risk analysis.■Compared to the previous best results for single-server solutions, this (SUT ID: NEC210422) solution was:・79%faster in the cold time for the large Greeks benchmark (STAC-A2.β2.GREEKS.10-100k-1260.TIME.COLD vs. SUT ID INTC210315)・18%faster in the warm time for the large Greeks benchmark (STAC-A2.β2.GREEKS.10-100k-1260.TIME.WARM vs. SUT ID NVDA200909)x1.79x2.07*The above charts illustrate the SKUs with the best reported results from each hardware classification as of May 12. 2021.Posted May 12, 2021x2.12x1.18FinancialElectromagnetic field analysis (OpenFDTD) http://www.e-em.co.jp/OpenFDTD/E x e c u t i o n t i m e (s )PEC* board is placed on dielectric block.Monopole antenna stands on the center of PEC board.*PEC: perfect conductorx5.0fasterPerformance on 1node and 1VE■OpenFDTD:Simulator to analyze electromagnetic field with FDTD, which is provided as free software by EEM ■BM data:benchmark500 (# of cell: 500x500x500)■Xeon 6148:Xeon Skylake 6148 24 cores/socket, 2.4GHz, 2 sockets per node ■SX-Aurora TSUBASA: VE10B x1 / VH (dual socket Xeon)*Simulation data provided by EEMSimulation problem■Telecom carriers simulate electromagnetic field and electromagnetic wave propagation for research and development of array antenna for 5G mobile communication. FDTD is one of method for their simulations.■SX-Aurora TSUBASA provides 5x higher performance than Xeon on OpenFDTD simulator.■FDTD algorithm is suitable for vector operation, SX-Aurora TSUBASA will contribute to other developments such as automotive millimeter-wave radar, wireless LAN, transmission tower, etc.TelecomAI/ML on SX-Aurora TSUBASAAI/ML that requires memory performance can be well accelerated Provide frameworks for easy utilizationMemory performanceComputation performancezGeneral purpose CPULSTM(Long short term memory)Data FrameGPUStatisticalMachine LearningMLP(multi Layer Perceptron)Vector EngineFrovedisCNN(Convolutional Neural Network)Machine Learning performanceK-meansCPU GPUVE 100(Memory Error)Linear SVMCPU GPUVE 100Elapsed Time (Relative values, CPU=100)* Data: LIBSVM Data: Rcv1, Type: Sparse , Size: 1.2GB* Data: PASCAL Challenge 2008, epsilon, Type: Dense , Size: 2.1GB84timesfaster1.2152timesfaster0.78.5(Memory Error)Logistic RegressionCPU GPUVE 100263timesfaster0.4Elapsed Time (Relative values, CPU=100)* Data: Extreme Classification-Dataset3, Type: Sparse , Size: 1.2GBBenchmarking environment ⏹HardwareCPU: 2x Intel Xeon Gold 6126 (Skylake)VE: Type 20B GPU: A100 40GB⏹Softwarescikit-learn: 0.23.2Frovedis: 0.9.8RAPIDS: 0.17* GPU BM codes were tuned for V100, and executed Financial/Retail◆Supported algorithms:Frovedis supported algorithmsImplemented with Frovedis Core and Matrix Library⏹Supports both dense and sparse data => Sparse data support is important in large scale machine learning ▌We will support more!https:///frovedis/frovedis●Linear model•Logistic Regression•Multinominal Logistic Regression•Linear Regression•Linear SVM●ALS●K-means●Preprocessing•SVD, PCA ●Word2vec ●Factorization Machines ●Decision Tree ●Naive Byes ●DBSCAN ●Graph algorithms •Shortest Path, PageRank, Connected Components ●Frequent Pattern Mining ●Spectral Clustering ●Hierarchical Clustering ●Latent Dirichlet Allocation ●Random Forest ●Gradient Boosting Decision Tree (GBDT)Background of multi-architecture system -towards Heterogeneous Computing-Architecture is selected according to characteristics of each of applications.One of trends in HPC system is hybrid, composed of a variety types of processors.Scientific calculationReal-time transaction GeneralSpecial•Recommendation •Demand prediction •Fraud detection •Weather forecast •Aerodynamic analysis •Collision analysis •Self-driving •Checking goods •Cancer diagnosis •Financial transaction •Face recognition •Industrial robot •Financial portfolio •Shift schedule •Delivery planningCombinatorial optimization Statistical processing Image recognition AISC/FPGA Vector Engine GPGPU x86Quantum annealing4th generation Earth Simulator systemMPI communication on multi-architectural supercomputer Higher performance by allocating appropriate resources with MPI communication between CPU, GPU and Vector Engine nodes.P PGPU GPU PCIe switchPCIe switch File System Vector Engine-accelerated nodesGPU-accelerated nodes 5,472x VE 684node InfiniBandHDR 200G, DragonFly+64x A100 GPU 8node 61PB Luster 1.3 PB all-flash LusterCPU nodes 2x AMD EPYC 77421,440x CPU 720node P GPU accelerated nodes Vector Engine accelerated nodes P https:///uploads/harvester/VirtualBooths/13396/NKBNOCXO-PDF-1-412693%285%29.pdfP: Process 2x AMD EPYC 7742AMD EPYC 7742A test benchmark execution was successful on JAMSTEC Earth Simulator!Vector Engine 3.0■Targeting the largest memory bandwidth ■Inheriting and improving VE/VH architecture ■Higher Flops per processor ■Improved memory subsystem including cache ■Accelerating short vector, and scalar operations ■Adding instructions for AI/ML ■Maintaining high power efficiency■Heterogeneous computing enhancement ■LLVM-IR Vectorizer(C/C++, Fortran) for VE30■Virtual machine supportVE10VE10EVE20VE302+TB/s memory bandwidth 8C/2.45TF 1.22TB/s 8C/2.45TF 1.35TB/s10C/3.07TF 1.53TB/s2019202020212022M e m o r y b a n d w i d t h / V E VE10VE308C/2.45TF 1.22TB/s memory bandwidth8C/2.45TF 1.35TB/s memory bandwidth 10C/3.07TF 1.5TB/s memory bandwidth 2+TB/s memory bandwidth 20232024VE40VE502++TB/s memory bandwidth VE10E VE20VE20 RoadmapFind more information on our websiteAurora Web Forum http://www.hpc.nec SX-Aurora TSUBASA Website/en/global/solutions/hpc/sx/index.htmlNEC ISC21 websiteLatest updatesManual, documents Bulletin board Hardware and software overviewSupported applications***********Webinar Jun 09:00 -12:00-CESTTechnical articleshttps:///en/global/solutions/hpc/event/isc21/index.html。
多图详解修改BIOS激活联想XPVISTA_AWARDBIOS教程之超静123加移花
多图详解修改BIOS激活联想XP/VISTA之超静123加移花---- AWARD BIOS篇By siwind 2008-12-28merrydw@, QQ:35949934版本内容时间作者siwind 1.0 初稿 2008-12-28目录一前言 (2)二原理篇 (2)2.1 AWARD BIOS 的内存映射 (2)2.2 WINDOWS的激活机制 (2)三工具篇 (3)四实战篇 (4)4.1 前期准备 (4)4.2 查看BIOS的构成并释放出ACPI模块 (5)4.3 将SLIC表加入到BIOS中并写入XP激活码 (6)4.3.1 加入SLIC之超静1 (6)4.3.2 加入SLIC之超静2 (10)4.3.3 加入SLIC之超静3 (并加入XP激活码) (12)4.3.3.1 超静3的注意事项: (19)4.3.4 加入XP激活码 (19)4.3.4.1 加入普通的OEMXP的激活码 (19)4.3.4.2 加入DELL XP的激活码 (20)4.3.5 SLIC物理地址小结 (20)4.4 在ACPI模块中加入SLIC地址 (21)4.4.1 修改ACPITBL.BIN (21)4.4.2 用CBROM替换新的ACPITBL.BIN回BIOS文件中: (23)4.5 移花接木 (24)4.6 刷新BIOS后的验证 (29)五后记篇 (30)5.1 LOGO的修改 (30)六参考资料 (30)一 前言本修改方法参照了网络上各高手们的修改的原理和方法后,试验而成。
本修改方法基于 AWARD的BIOS,一般后缀名为 .BIN。
故下面的介绍仅适用于AWARD的 BIOS修改。
二 原理篇2.1 AWARD BIOS 的内存映射在WINDOWS系统的内存高端会形成原始BIOS的镜像(全部或者部分)。
如果你的BIOS是 1MB 的,那这段镜像和你的BIOS 完全一样。
如果你的BIOS是 512KB 的,那这段镜像就是你的 512KB的空位 + 512KB的BIOS =1MB。
office2013的标准系统硬件要求

Office 2013 的标准系统硬件要求组件Office 2013 要求计算机和处理器1 GHz 或更快的 x86 或 x64 位处理器(采用 SSE2 指令集)内存(RAM)1 GB RAM(32 位);2 GB RAM(64 位)硬盘 3.0 GB 可用空间显示器图形硬件加速需要 DirectX10 显卡和 1024 x 576 或更高分辨率的监视器操作系统Office 2013 在 32 位和 64 位版本的 Microsoft Windows 操作系统上运行。
在 64 位版本的 Windows 操作系统上运行 32 位 Office 2013 时,程序会在 Windows 操作系统的 32 位层运行。
有关详细信息,请参阅64 位 Office 2013 版本。
以下是可以运行 Office 2013 32 位和 64 位程序的支持 Windows 操作系统。
下列 Windows 操作系统支持 Office 2013 32 位产品:∙Windows Server 2008 R2(64 位)*∙Windows 7(32 位或 64 位)∙Windows Server 2012(64 位)**∙Windows 8(32 位或 64 位)只有下列 Windows 操作系统支持 Office 2013 64 位产品:∙Windows Server 2008 R2(64 位)*∙Windows 7(64 位)∙Windows Server 2012(64 位)**∙Windows 8(64 位)*Windows Server 2008 R2 仅在 64 位体系结构中可用**Windows Server 2012 仅在 64 位体系结构中可用注意:不支持并行安装 32 位和 64 位版本的 Office。
例如,不支持将Office 2010 32 位与 Office 2013 64 位并行安装,也不支持将 Excel 2010 64 位与 Visio 2013 32 位并行安装。
Dell E173FP 平面彩色顯示器使用指南说明书

目錄: Dell™ E173FP 平面彩色顯示器使用指南前言簡介設定使用方式排疑解難規格表附錄本文件內的資訊如有改變,恕不另行通知。
© 2004 Dell Inc. 保留所有版權。
本文件在未獲 Dell Inc. 書面同意之前,嚴禁以任何方式複製。
本文件中所使用的商標:Dell及DELL標誌為 Dell Inc. 的商標;Microsoft、Windows及Windows NT均為 Microsoft Corporation 的註冊商標;VESA為 Video Electronics Standards Association 的註冊商標;IBM為 International Business Machines Corporation 的註冊商標;Adobe為 Adobe Systems Incorporated 的商標,該商標在某些地區註冊。
身為 ENERGY STAR Partner 一份子,Dell Inc. 確定此產品在能源效率上符合 ENERGY STAR 的標準。
本文件中所使用的其他商標及商品名稱係指擁有該標記及名稱或其產品權利者。
Dell Inc. 並無冒犯各商標及商品名稱所有人權益之意圖。
第一版:2005年 1月概述 • 圖片概述恭喜您購買 Dell E173FP 平面彩色顯示器。
E173FP 採用 17 inch (43.18cm) 主動式矩陣 TFT LCD,以高達 1280 x 1024 像素的解析度,顯示銳利鮮豔的文字與圖形影像。
這款主動式TFT LCD顯示器最適合用於文字處理、E-Mail、式算表格以及網路瀏覽。
Dell E173FP 為各種類型的使用者而設計,包括家用、小型辦公室、以及企業環境。
希望能以經濟的價格,獲得優異品質與可靠性的使用者,將能肯定 Dell E173FP 所提供的價值。
有關更多資訊,請參閱規格表章節。
圖片下列鏈結顯示顯示器與其元件的不同照片。
AMD加速处理器列表

AMD加速处理器列表AMD Accelerated Processing Unit (APU)前称AMD Fusion,整合CPU和GPU。
目录•1 时程表•2 桌上型平台和笔电平台o 2.1 第一代AMD APU,基于AMD 10h(K10、K12/12h)▪ 2.1.1 Llanoo 2.2 第二代AMD APU,基于AMD Piledriver架构▪ 2.2.1 Trinity▪ 2.2.2 Richlando 2.3 第三代AMD APU,基于AMD Jagaur架构▪ 2.3.1 Kabinio 2.4 第四代AMD APU,基于AMD Steamroller架构▪ 2.4.1 Kaverio 2.5 第六代 AMD APU,基于 AMD Excavator 架构▪ 2.5.1 'Carrizo' (2015, 28 nm)o 2.6 第七代 AMD APU,基于 AMD Excavator 架构▪ 2.6.1 'Bristol Ridge' (2016, 28 nm)o 2.7 'Raven Ridge' (2017)•3 服务器核心o 3.1 Opteron X1100-series 'Kyoto' (28nm)o 3.2 Opteron X2100系列 'Kyoto' (2013, 28 nm)o 3.3 Opteron X3000系列 (2017, 28 nm) [26]•4 低功耗核心o 4.1 基于AMD Bobcat架构▪ 4.1.1 Brazos: 'Desna', 'Ontario', 'Zacate' (2011, 40nm)▪ 4.1.2 Brazos 2.0: 'Ontario', 'Zacate' (2012, 40 nm) ▪ 4.1.3 Brazos-T: 'Hondo' (2012, 40 nm)o 4.2 基于AMD Jagaur架构▪ 4.2.1 Temash▪ 4.2.2 Kabinio 4.3 第五代AMD APU 'Beema', 'Mullins',基于PUMA 核心 (2014, 28 nm)▪ 4.3.1 Mullins▪ 4.3.2 Beemao 4.4 'Carrizo-L' (2015, 28 nm)o 4.5 'Stoney Ridge' (2016,28nm)•5 嵌入式核心o 5.1 G系列▪ 5.1.1 Brazos: 'Ontario' and 'Zacate' (2011, 40 nm) ▪ 5.1.2 'Kabini' (2013, 28 nm)▪ 5.1.3 'Steppe Eagle' (2014, SoC,28nm)▪ 5.1.4 'Crowned Eagle' (2014, SoC,28nm)▪ 5.1.5 I家族: 'Brown Falcon' (2016, SoC,28nm)▪ 5.1.6 J家族: 'Prairie Falcon' (2016, SoC,28nm)▪ 5.1.7 LX家族 (2016, SoC,28nm)o 5.2 R系列▪ 5.2.1 Comal: 'Trinity' (2012, 32 nm)▪ 5.2.2 'Bald Eagle' (2014,28nm)▪ 5.2.3 'Merlin Falcon' (2015, SoC,28nm)•6 另见•7 备注•8 参考资料•9 外部链接时程表代号状态型号制程TDP 核心Radeon coresOntario 已发售C-30, C-50,C-60,C-7040nmbulk9W 1-2 Bobcat 80Zacate 已发售E-240, E-350,E-45040nmbulk18W 1-2 Bobcat 80Llano 已发售A6-3670, A8-3850等32nmSOI35W~100W2-4 K-10/Stars160~400Wichita 原定2012年上半年产品计划被取消28nmbulk~9W 1-2 Bobcat --Krishna 原定2012年上半年产品计划被取消28nmbulk~18W 2-4 Bobcat --Trinity 已发售A10-5800K 等32nmSOI17W~100W2-4Piledrivers128~384Richland 已发售A10-6800K 等32nmSOI17W~100W2-4Piledrivers128~384Kaveri 已发售A10-7850K等28nmSOI15W~95W2-4Steamrollers256~512Kabini 已发售Athlon5350 ,Sempron3850 等28nmSOI9~25W 2-4 Jaguar 128Beema 已发售A6 6410 ,A46310 等28nmSOI15W 2-4 Puma 128Mullins 已发售A10 Micro6700T , 等28nmSOI15W 2-4 Puma 128Carrizo 已发售Athlon X4 835,84528nmSOI 45W~65W2-4Excavator--Bristol Ridge 已出货A10-9700 等28nmSOI35W~65W2-4Excavator256~512桌上型平台和笔电平台第一代AMD APU,基于AMD 10h(K10、K12/12h)第一款Fusion处理器代号为“Swift”,最早将用于代号为“Shrike”笔记型电脑平台。
电脑硬件检测软件

.AIDA32这是一个综合性的系统检测分析工具,功能强大,易于上手。
它可以详细的显示出PC每一个方面的信息。
支持上千种(3400+)主板,支持上百种(360+)显卡,支持对并口/串口/U##这些PNP设备的检测,支持对各式各样的处理器的侦测。
目前AIDA32已经有多语言的支持并且加入了病毒检测功能。
AIDA32拥有数十种测试项目,主要包括CPU、主板、内存、传感器、GPU、显示器、多媒体、逻辑驱动器、光驱、ASPI、SMART、网络、DirectX、基准测试等等,支持的平台包括了Intel、AMD、VIA、nVIDIA、SIS等。
注意:AIDA32有一个小BUG,它显示的nVIDIA的FX系列GPU的核心频率为其2D频率,目前还不能正确显示其3D频率。
/tools/tweak/AIDA323935.zip2.SiSoftware Sandra 2004这是一套功能强大的系统分析评测工具,拥有超过30种以上的测试项目,主要包括有CPU、Drives、CD-ROM/DVD、Memory、SCSI、APM/ACPI、鼠标、键盘、网络、主板、打印机等。
全面支持当前各种VIA、ALI芯片组和Pentium 4、AMD DDR平台。
/tools/twe...ra2004_9.89.zip3.HWiNFO32电脑硬件检测软件。
它主要可以显示出处理器、主板芯片组、PCMCIA接口、BIOS版本、内存等信息,另外HWiNFO还提供了对处理器、硬盘以及CD-ROM的性能测试功能。
每个月都要出现许多我们知道或者不知道的电脑硬件,因此建议大家要经常下载这款测试软件的新版本。
/tools/tweak/hw32_141.exe二、CPU检测1.检测CPU是否被REMARK(1)Intel Processor Frequency ID UtilityIntel Processor Frequency ID Utility是芯片业老大Intel发布的一款检测自家CPU的工具,权威性不容置疑。
CodeWarrior Development Studio for MPC55xx MPC56xx
CodeWarrior Development Studiofor MPC55xx/MPC56xx Microcontrollers,version 2.xx — Quick StartSYSTEM REQUIREMENTSHardware PC with 1.4 GHz Pentium®-compatible processor(1.8 GHz recommended)1GB RAM (2 GB recommended)CD-ROM drive (for installation)USB port (for communication with target hardware)Ethernet port (for network communication)2nd Ethernet port (optional, but recommended forcommunication with target hardware)Operating System Microsoft® Windows® XPWindows Vista™, 32-bit or 64-bit editionWindows 7, 32-bit or 64-bit editionDisk Space 1 GB free hard disk space (2 GB recommended),400 MB of which must be on Windows system disk This document explains how to install this CodeWarrior product and how to use the IDE to create and build an MPC55xx/MPC56xx project.1.Install the CodeWarrior software.a.Insert the CodeWarrior Development Studio installation CD in theCD drive of your PC — the CodeWarrior setup menu appears.NOTE If auto-install is disabled, run Launch.exe manually. This program is in the root directory of the installation CD.CodeWarrior Installation Menu b.Click the Launch the installer option to start the install wizard — the installation menu appears.c.Follow the wizard instructions to install the CodeWarrior software and theP&E ICDPPCNEXUS™ Starter Edition debugger. When the installation finishes, the Installation Complete page appears.d.In this page, check Yes , check for program updates .e.Click Finish — the CodeWarrior Updater window appears.2.Check for software updates.a.In the CodeWarrior Updater window, click Next — the updater checks fornewer versions of the CodeWarrior products currently on your PC.b.If updates are available, follow the on-screen instructions to downloadand install them.c.Click Finish — the updater exits and software installation is complete.1.Create a project.a.From the Windows taskbar, click start — the start menu appears.b.From this menu, select Programs > Freescale CodeWarrior >CW for MPC55xx, MPC56xx 2.xx > CodeWarrior IDE — the Startup dialog box appears.Creating and Building a ProjectStartup Dialog Boxc.From the Startup dialog box, click Create New Project — the NewProject Wizard starts and displays the microcontrollers derivative page.The list below explains the purpose of each of the other Startup dialog box options:–Load Example Project — Displays a list of "cookbook" example projects and creates a new project based on the example you select.–Load Previous Project — Displays a list of recently used projects and opens the one you select.–Start Using CodeWarrior — Lets you use the CodeWarrior IDE's main window.Microcontroller Derivative Paged.From the microcontroller derivative page, select the MPC55xx/MPC56xxmicrocontroller derivative on your target board.e.Click Next — the languages and libraries page appears.NOTE If you selected a multicore device (such as the MPC5514E or the MPC5643L), the multicore configuration page appearsinstead of the languages and libraries page. In this case, referto Targeting MPC55xx-MPC56xx Microcontrollers.pdf forinstructions. This document is in the layout here:installDir\Help\PDF.Languages and Libraries Pagef.In the Project name text box, type the name of the new project.g.In the Location text box, type the path in which to create this project.Alternatively, click Set to display a dialog box with which to selectthis path.h.Check the C checkbox.i.Uncheck the Use size optimized MSL libraries checkbox.j.Check the Use unsigned chars checkbox.k.Uncheck the Use VLE checkbox.l.Click Next — the PC-lint page appears.NOTE If OSEKTurbo is installed, the OSEK page appears. Refer to the targeting manual for instructions that explain how to fill inthis page.PC-lint Pagem.Select No.n.Click Next — the floating-point format support page appears.Floating-Point Format Support Pageo.Select Software.p.Click Finish — the wizard creates a project according to you specifications and displays it in a project window.Project Window2.Build the project.a.From the project window toolbar, click Make — the IDE compiles theproject’s source code and links the resulting object code into anELF-format executable file.Make Buttone the debugger of your choice to run and debug the executable file. NOTE This CodeWarrior product includes a source code debugger and flash programmer from P&E Micro. For instructions thatexplain how to use these tools, refer to theP&E ICDPPCNEXUS Quick Start Guide.Congratulations!You have installed your CodeWarrior software, created an MPC55xx/MPC56xx project, and built this project.NOTE If you obtained this product as part of a CodeWarriorDevelopment Suite, you now have a 30-day evaluation license.To obtain your permanent license, follow the registration andactivation instructions in the CodeWarrior Development SuiteQuick Start.If you have the Special Edition of this product, you do not haveto register because you have a permanent, but feature-limitedlicense. This license lets you develop projects that generatebinaries up to 128 KB in size. To upgrade, you must purchasethe CodeWarrior Development Suite - Professional Edition. Formore information, go to:/CodeWarriorSuites.Freescale, the Freescale logo, and CodeWarrior are trademarks of Freescale Semiconductor, Inc., Reg. U.S. Pat. & Tm. Off. The Power Architecture and word marks and the Power and logos and related marks are trademarks and service marks licensed by . All other product or service names are the property of their respective owners.© 2007-2012 Freescale Semiconductor, Inc.Information in this document is provided solely to enable system and software implementers to use Freescale Semiconductor products. There are no express or implied copyright licenses granted hereunder to design or fabricate any integrated circuits or integrated circuits based on the information in this document.Freescale Semiconductor reserves the right to make changes without further notice to any products herein. Freescale Semiconductor makes no warranty, representation or guarantee regarding the suitability of its products for any particular purpose, nor does Freescale Semiconductor assume any liability arising out of the application or use of any product or circuit, and specifically disclaims any and all liability, including without limitation consequential or incidental damages. “Typical” parameters that may be provided in Freescale Semiconductor data sheets and/or specifications can and do vary in different applications and actual performance may vary over time. All operating parameters, including “Typicals”, must be validated for each customer application by customer's technical experts. Freescale Semiconductor does not convey any license under its patent rights nor the rights of others. Freescale Semiconductor products are not designed, intended, or authorized for use as components in systems intended for surgical implant into the body, or other applications intended to support or sustain life, or for any other application in which the failure of the Freescale Semiconductor product could create a situation where personal injury or death may occur. Should Buyer purchase or use Freescale Semiconductor products for any such unintended or unauthorized application, Buyer shall indemnify and hold Freescale Semiconductor and its officers, employees, subsidiaries, affiliates, and distributors harmless against all claims, costs, damages, and expenses, and reasonable attorney fees arising out of, directly or indirectly, any claim of personal injury or death associated with such unintended or unauthorized use, even if such claim alleges that Freescale Semiconductor was negligent regarding the design or manufacture of the part.How to Contact UsCorporate Headquarters Freescale Semiconductor, Inc. 6501 William Cannon Drive West Austin, Texas 78735U.S.A.World Wide Web /codewarrior Technical Support /supportRevised: 9 February 201210Freescale, the Freescale logo and CodeWarrior are trademarks of Freescale Semiconductor, Inc., Reg. U.S. Pat. & Tm. Off.All other product or service names are the property of their respective owners. © 2010-2012 Freescale Semiconductor, Inc. 926-76773 Rev J。
迪布韦电子UltraGraph PRO FBQ6200HD FBQ3102HD FBQ1502HD高

ULTRAGRAPH PROFBQ6200HD/FBQ3102HD/FBQ1502HDHigh-Definition 31-Band and 15-Band Stereo Graphic Equalizer with FBQ Feedback Detection SystemV 1.0保修条款法律声明带有此标志的终端设备具有强大的电流, 存在触电危险。
仅限使用带有 ¼'' TS 或扭锁式插头的高品质专业扬声器线。
所有的安装或调整均须由合格的专业人员进行。
此标志提醒您, 产品内存在未绝缘的危险电压, 有触电危险。
此标志提醒您查阅所附的重要的使用及维修说明。
请阅读有关手册。
小心为避免触电危险, 请勿打开机顶盖 (或背面挡板)。
设备内没有可供用户维修使用的部件。
请将维修事项交由合格的专业人员进行。
小心为避免着火或触电危险, 请勿将此设备置于雨淋或潮湿中。
此设备也不可受液体滴溅, 盛有液体的容器也不可置于其上, 如花瓶等。
小心维修说明仅是给合格的专业维修人员使用的。
为避免触电危险, 除了使用说明书提到的以外, 请勿进行任何其它维修。
所有维修均须由合格的专业人员进行。
1. 请阅读这些说明。
2. 请妥善保存这些说明。
3. 请注意所有的警示。
4. 请遵守所有的说明。
5. 请勿在靠近水的地方使用本产品。
6. 请用干布清洁本产品。
7.请勿堵塞通风口。
安装本产品时请遵照厂家的说明。
8. 请勿将本产品安装在热源附近,如 暖 气 片, 炉子或其它产生热量的设备 ( 包 括功放器)。
9. 请勿移除极性插头或接地插头的安全装置。
接地插头是由两个插塞接点及一个接地头构成。
若随货提供的插头不适合您的插座, 请找电工更换一个合适的插座。
10. 妥善保护电源线, 使其不被践踏或刺破, 尤其注意电源插头、多用途插座及设备连接处。
11. 请只使用厂家指定的附属设备和配 件。
12. 请只使用厂家指定的或随货销售的手推车, 架子, 三 角架, 支架和桌子。
power up activity book 3答案

power up activity book 3答案笔记本电脑的电源管理方式可以分为三种:(1)自定电源。
这种方式可以根据用户实际需要自由设置,它是针对特定的情况而设计的。
(2)可自定义选项。
这种方式也能设置电脑所需要的模式,从而控制笔记本电脑是否处于工作状态。
(3)不带电源(或充电宝标有电源键或 Life键不会启动)的笔记本电脑需要使用什么电源管理方式?一、自定义电源自定义电源是最简单的电源管理方式,它主要适用于需要经常对笔记本电脑进行系统升级或者更新的机型,因此相对于其他电源管理方式具有更强的灵活性和更多的选择空间。
自定义电池管理模式最简单粗暴的就是让笔记本电脑自适应电压、电流、时间等参数,从而实现了对笔记本电源管理更合理的要求,同时也可以方便地进行升级和更换。
在打开了 Boot Build设置界面之后可以看到各种电池管理功能选项,如自定义电压、电流、时间等参数,这些参数对笔记本电脑产生不同的影响。
根据自己的需求来对电池进行调整很重要。
比如很多朋友都会担心过热而影响电池寿命,这是完全不可能存在的做法。
如果你不担心过热对电池造成损害,那就选择 Boot Build设置界面去设置使用方法吧:当你开启 Boot Build设置时,屏幕上会出现 Boot Build 选项图标,点击进去之后会弹出一个小窗口提示你选择“运行 Boot Build设置”,此时默认就是打开 Boot Build并开启自定义电源功能了。
1、设置的参数是可以自定义的,通过“打开电池状态”来确定电池。
设置设置菜单里一共有4种,分别是“状态”、“电流”和“时间”。
其中“状态”和“电压”两种都是只能设置电池状态的参数,并且不能调整。
“状态”选项里面有两种不同的电池容量级别,分别是10 A和10 B,在自定义选项中可以选择其中1种电池类型并进行调整,后剩余电量为0%或者20%;1种电池类型下可以对电池电压、电流等参数单独进行调整。
2、如果是比较老的笔记本电脑,那就可以根据自己的使用习惯和需求来进行更改了。
笔记本电脑运行ps需要什么配置要求

笔记本电脑运行ps需要什么配置要求随着信息技术的飞速发展和大数据时代的到来,图形图像处理技术逐渐成为人们工作和生活的组成部分,而在众多的图像处理软件中,PHOTOSHOP以其超强的功能和不可抗拒的魅力深受各类设计者和图像艺术爱好者的青睐。
那么,在笔记本电脑运行ps需要什么配置呢?笔记本电脑运行ps需要什么配置Photoshop这个软件比较占内存建议1G以上内存,再就是显卡,独立的最好,集成的也行,你要是专门用来作图用显示器最好也大一点显卡自然也要求高一点,CPU双核最好一般的2GHz以上就够了。
photoshop的配置要求:PowerPC?? G3、G4 或 G5 处理器Mac OS X 10.2.4 版到 10.3 版,带有 Java 运行时环境 1.4.1192MB RAM(推荐使用 256MB)320MB 可用硬盘空间配有 16 位彩色或更高级视频卡的彩色显示器1,024x768 或更高的显示器分辨率CD-ROM 驱动器系统要求Mac OS X 10.2.8—10.3.8Windows 2000 SP4Windows XP SP1或SP2在此小编也给大家科普一下ps的历史吧。
1992年,Kai Krause在1992年发布了Kai's Power工具,使Photoshop的可视化界面更加丰富。
1993年,Adobe开发了支持Windows版本的Photoshop,代号为Brimstone,而Mac版本为Merlin。
这个版本增加了Palettes 和16-bit文件支持。
2.5版本主要特性通常被公认为支持Windows。
1994年,Photoshop 3.0正式发布,代号是 Tiger Mountain,而全新的图层功能也在这个版本中崭露头角。
这个功能具有革命性的创意:允许用户在不同视觉层面中处理图片,然后合并压制成一张图片。
该版本的重要新功能是Layer,Mac版本在9月发行,而Windows版本在11月发行。
山建计算机组装与维护 选修课答案- 于宽老师
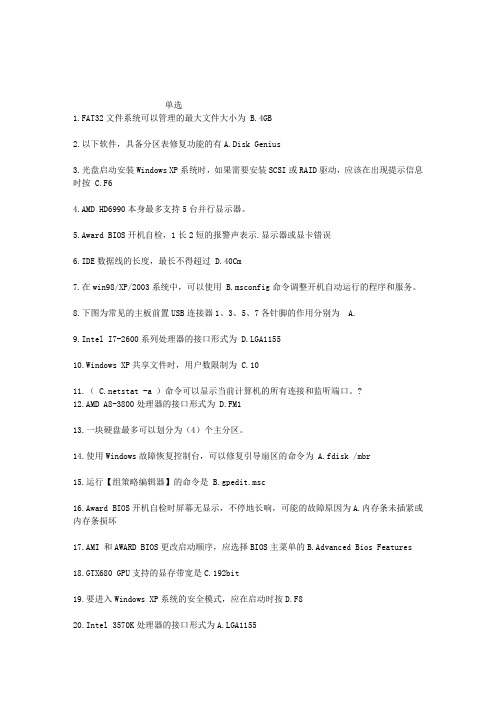
单选1.FAT32文件系统可以管理的最大文件大小为 B.4GB2.以下软件,具备分区表修复功能的有A.Disk Genius3.光盘启动安装Windows XP系统时,如果需要安装SCSI或RAID驱动,应该在出现提示信息时按 C.F64.AMD HD6990本身最多支持5台并行显示器。
5.Award BIOS开机自检,1长2短的报警声表示.显示器或显卡错误6.IDE数据线的长度,最长不得超过 D.40Cm7.在win98/XP/2003系统中,可以使用 B.msconfig命令调整开机自动运行的程序和服务。
8.下图为常见的主板前置USB连接器1、3、5、7各针脚的作用分别为 A.9.Intel I7-2600系列处理器的接口形式为 D.LGA115510.Windows XP共享文件时,用户数限制为 C.1011.( stat -a )命令可以显示当前计算机的所有连接和监听端口。
?12.AMD A8-3800处理器的接口形式为 D.FM113.一块硬盘最多可以划分为(4)个主分区。
14.使用Windows故障恢复控制台,可以修复引导扇区的命令为 A.fdisk /mbr15.运行【组策略编辑器】的命令是 B.gpedit.msc16.Award BIOS开机自检时屏幕无显示,不停地长响,可能的故障原因为A.内存条未插紧或内存条损坏17.AMI 和AWARD BIOS更改启动顺序,应选择BIOS主菜单的B.Advanced Bios Features18.GTX680 GPU支持的显存带宽是C.192bit19.要进入Windows XP系统的安全模式,应在启动时按D.F820.Intel 3570K处理器的接口形式为A.LGA1155Intel Core 2 Quad系列CPU是(4)核心CPU。
文件系统可以管理的最大文件大小为(4g)。
要进入Windows XP系统的安全模式,应在启动时按(F8)键。
- 1、下载文档前请自行甄别文档内容的完整性,平台不提供额外的编辑、内容补充、找答案等附加服务。
- 2、"仅部分预览"的文档,不可在线预览部分如存在完整性等问题,可反馈申请退款(可完整预览的文档不适用该条件!)。
- 3、如文档侵犯您的权益,请联系客服反馈,我们会尽快为您处理(人工客服工作时间:9:00-18:30)。
Subject Description Form
Subject Code COMP 5553
Subject Title Advanced Computer Graphics
Credit Value 3
Level 5
Pre-requisite/Exclusion Prerequisite: COMP5514 Computer Image Generation and
Applications
Objectives The objectives of this subject are to:
1.provide the students with the knowledge of the advanced
graphics hardware;
2.expose students to the advanced graphics modelling and
rendering techniques; and
3.discuss key issues and concepts in computer-assisted
animation.
Intended Learning
Outcomes
Upon completion of the subject, students will be able to:
a)identify the performance characteristics of advanced computer
graphics pipeline;
b)distinguish between generic computer architecture and support
for high performance graphics;
c)use surface and object modelling techniques to build 3D
models;
d)understand rendering techniques for high performance
graphics; and
e)understand computer animation and 3D motion synthesis.
Subject Synopsis/ Indicative Syllabus ∙Advanced Raster Graphics Architecture: Standard graphics pipeline, introduction to multiprocessing, pipeline front-end
architecture, parallel front-end architecture, multiprocessor
rasterization architecture, image-parallel rasterization, object-parallel rasterization, hybrid-parallel rasterization, enhanced
display capabilities.
∙Advanced Modeling Techniques: Procedural models, fractal models, rule-based models, particle systems, volume rendering special models for natural and synthetic objects.
∙Computer-Assisted Animation: Animation languages, methods of controlling animation, basic rules of animation,
problems peculiar to animation.
Teaching/Learning Methodology 39 hours of class activities including - lecture, tutorial, lab, workshop seminar where applicable
Assessment Methods in
Alignment with Intended Learning Outcomes Specific Assessment
Methods/Tasks
%
weighting
Intended subject
learning outcomes
to be assessed
a b c d e
Assignments, Tests &
Projects 55
✓✓✓✓✓
Final Examination 45 ✓✓✓✓Total 100
Student study effort expected Class Contact:
Class activities (lecture, tutorial, lab) 39 hours Other student study effort:
Assignments, Quizzes, Projects, Exams 65 hours Total student study effort 104 hours
Reading list and references (1).Wolfgang Engel, 2006, ShaderX5: Advanced Rendering
Techniques, Charles River Media,
(2).Hearns, D. and Baker, P. 2004. Computer Graphics with
OpenGL, Prentice-Hall.
(3).Alan Watt and Fabio Policarpo 2001. 3D Games Real-Time
Rendering and Software Technology, Addison Wesley. (4).Carey, R. and Bell, G. The Annotated VRML 2.0 Regerence
Manual.
(5).Hartman, J. and Wernecke, J. 1996. The VRML 2.0
Handbook, Building Moving Works, Reading, Mass., SGI and Addison-Wesley.
ACM SIGGRAPH Computer Graphics Journal
ACM Transaction on Graphics Journal
IEEE Computer Graphics and Applications Journal.。