1-Intro-to-HW-Solaris-Strategy-n-Value
Solaris命令

第一章Solaris系统发展 (6)第二章OBP命令 (8)2.1 环境变量 (8)2.1.1 scsi-init-id? SCSI通道的初始化ID (8)2.1.2 local-mac-address? (8)2.1.3 input-device 输入设备 (8)2.1.4 output-device输出设备 (8)2.1.5 auto-boot? 系统是否自动启动? (9)2.1.6 boot-device 启动设备 (9)2.1.7 boot-file 启动文件 (9)2.1.8 diag-device诊断设备 (9)2.1.9 security-mode 安全模式 (9)2.1.10 security-password 安全模式的口令 (9)2.1.11 diag-switch? 是否打开诊断模式 (9)2.1.12 diag-level 诊断级别 (10)2.2 修改环境变量 (10)2.3 设备别名 (10)2.4 设置设备别名 (11)2.4.1 devalias 显示和临时设置设备别名 (11)2.4.2 nvalias 显示和永久设置设备别名 (11)2.4.3 nvunalias 取消设备别名 (11)2.5 检测设备 (11)2.5.1 show-devs 显示所有设备 (11)2.5.2 probe-scsi-all 检测SCSI通道及设备 (11)2.5.3 probe-fc-all 检测光纤通道及设备 (12)2.5.4 probe-ide-all 检测IDE设备 (12)2.6 启动设备 (12)2.6.1 boot cdrom (12)2.6.2 boot disk (12)2.6.3 boot net (13)第三章系统命令集 (13)3.1 文件管理 (13)3.1.1 ls显示文件列表(list) (13)3.1.2 pwd 显示当前工作目录(print work dir) (14)3.1.3 cd 改变工作目录(change direcotory) (14)3.1.4 mkdir 创建新目录(make directory) (15)3.1.5 rmdir 删除目录(remove directory) (15)3.1.6 rm 删除文件或目录(remove) (15)3.1.7 mv 移动/更名文件(move) (15)3.1.8 cp 复制文件(copy) (16)3.1.9 ln 链接文件(link) (16)3.1.10 du 查看磁盘使用量(disk usage) (16)3.1.11 find 查找文件 (17)3.1.12 mkfile 创建文件 (17)3.1.13 touch 访问文件 (17)3.1.14 file 查看文件类型 (17)3.1.15 vi 编辑文件 (18)3.2 检查及配置系统信息 (18)3.2.1 prtdiag 显示系统配置 (18)3.2.2 dmesg 显示系统启动信息 (20)3.2.3 uname 显示系统版本 (20)3.2.4 hostname 显示主机名 (20)3.2.5 hostid 显示主机号 (21)3.2.6 sysdef 显示系统驱动及内核变量 (21)3.2.7 isainfo 判断系统运行模式 (22)3.2.8 date 显示/修改日期 (22)3.2.9 time 显示命令执行时间 (22)3.2.10 sys-unconfig 重配置系统 (23)3.3 网络管理及服务 (23)3.3.1 ifconfig 配置网络 (23)3.3.2 ping 探测网络 (24)3.3.3 route 定义路由 (25)3.3.4 netstat 显示网络信息 (25)3.3.5 traceroute 追踪网络路径 (26)3.3.6 ndd TCP/IP参数调整 (26)3.3.7 snoop 查看以太网信息 (26)3.3.8 telnet 远程连接 (26)3.3.9 ftp 远程获取文件 (27)3.3.10 rlogin远程登录 (27)3.3.11 rsh 远程执行 (27)3.3.12 XDMCP 广播协议 (28)3.3.13 DNS客户端 (28)3.3.14 Telnet/SSH/FTP/rlogin/rsh服务 (28)3.3.15 DHCP服务 (29)3.3.16 WWW服务 (29)3.3.17 Email服务 (29)3.4 用户管理 (29)3.4.1 用户基础知识 (29)3.4.2 添加删除用户和组 (30)3.4.3 修改访问权限 (30)3.4.4 显示当前用户信息 (31)3.5 硬盘设备管理及文件系统管理 (32)3.5.1 format (32)3.5.2 lofiadm (32)3.5.3 newfs 创建文件系统 (33)3.5.4 fsck 检查文件系统一致性 (33)3.5.5 mount 挂接文件系统 (33)3.5.6 /etc/vfstab 自动挂接文件系统 (33)3.5.7 df 显示文件系统使用 (34)3.5.8 umount 卸载文件系统 (34)3.5.9 网络文件系统 (34)3.5.10 autofs 自动挂接 (35)3.5.11 HSFS文件系统 (35)3.5.12 PCFS文件系统 (35)3.5.13 文件系统开机挂接 (35)3.5.14 devfsadm (36)3.5.15 cfgadm/luxadm (36)3.5.16 其他命令fstyp/prtvtoc/fmthard (37)3.6 进程及启动管理 (38)3.6.1 ps 显示系统进程 (38)3.6.2 pfiles 查看进程相关信息 (39)3.6.3 kill/pkill 关闭系统进程 (39)3.6.4 系统关机命令 (39)3.7 软件包管理 (40)3.7.1 pkgadd 软件包安装 (40)3.7.2 pkginfo 软件包信息 (40)3.7.3 pkgchk 检查软件包 (40)3.7.4 pkgrm 软件包卸载 (40)3.7.5 prodreg 产品管理 (41)3.8 性能管理 (41)3.8.1 vmstat 显示CPU,内存使用总况 (41)3.8.2 mpstat 显示多CPU,内存使用状况 (41)3.8.3 iostat 显示设备访问效率 (41)3.8.4 prsinfo 显示可用CPU (42)3.8.5 psradm CPU使能 (42)3.8.6 prstat 类似于TOP (43)3.8.7 sar 系统性能总结 (43)3.8.8 nsfstat 网络文件系统性能 (43)3.9 文件系统备份及恢复 (43)3.9.1 ufsdump (44)3.9.2 tar (44)3.9.3 cpio (44)3.9.4 dd (44)3.10 文件压缩 (44)3.10.1 compress/uncompress/zcat (45)3.10.2 gzip/gunzip (45)3.11 系统环境变量 (45)3.11.1 PA TH (45)3.11.2 MANPA TH (45)3.11.3 DISPLAY (46)3.11.4 LD_LIBRARY_PA TH (46)3.12 系统内核变量文件 (46)3.12.1共享内存/信号量 (46)3.12.2 文件描述字 (47)3.13 图形显示 (47)3.13.1 图形分辨率 (47)3.13.2 双屏设置 (48)3.13.3 Motif版本说明 (48)3.14 配置多路径 (48)3.14.1 光纤设备多路径 (48)3.15 其他 (49)3.15.1 dos2unix (49)3.15.2 tr (49)第四章系统安装默认配置 (49)4.1 IP设置 (49)4.2 系统分区 (49)4.3 口令设置 (50)4.4 修改设置 (50)4.5 加装语言包 (50)第五章Solaris10增补 (50)5.1 smf命令集 (50)5.1.1 svcs 显示所有可用服务 (50)5.1.2 svcadm 控制服务 (51)5.1.3 svccfg 修改服务配置 (51)5.2 分区命令集 (51)5.2.1 zonecfg 配置分区 (51)5.2.2 zoneadm 管理分区 (51)5.3 ZFS文件系统 (51)5.4 BrandZ的安装和设置 (52)第六章机柜与电源的论述 (54)6.1 冗余电源说明 (54)6.2 SunFire机柜 (55)6.3 Rack900/1000 (56)第七章常用电源标准 (56)7.1 32A电源标准 (56)7.2 16A电源标准 (56)7.3 10A电源标准 (58)前言在前几年我曾经写过一个Solaris入门培训,当时的目的仅仅是为了培训公司内部的员工。
Solaris操作系统简介

Solaris 简介
Solaris是一种计算机操作系统,它是由Sun Microsystems公司生产的,它是基于Intel 和Sparc处理器的一种操作系统。SUN公司一直掌握着大型UNIX工作站市场,随着90年代 Internet的发展,SPARC/Solaris系统也被广泛地应用于Web站点上。Sun主要强调自己系统 的稳定性,它的设计是面向网络的。它的高可用性指的是如果有了问题此系统不用停机即可 修改错误。它的稳定性甚至可以和IBM十分著名的MVS大型机操作系统一样,每个可能出错 的环节都进行了检查。此操作系统也提供了远程控制的功能。它是为网络计算而设计的,作 为第一个也是最成功的一个网络服务器系统,它在网络功能上花费了不少功夫;在网络安全 方面它支持IPsec,Kerberos,AMI和智能卡。SUN为Solaris提供了三个扩展: Easy Access Server:是用于为同时运行了Windows NT系统的企业级服务器而设计的; Enterprise Server:是为可靠商业运行环境而设计的,支持集簇功能; Internet Service Provider (ISP) Server:这就是一个典型的网站服务器; 因为SUN开发了独立于平台的JAVA语言,因此在所有的操作系统中均包括JAVA虚拟机和 JDK,Solaris代替了SunOS,后者在许多SUN的机器上仍然在使用。
2.5.3 光盘驱动器 光盘不需要volcheck命令支持,退出光盘可以用eject cdrom来实现。 如果光盘不能自动mount,或者卷管理器不可用,可以用以下命令实现: - mkdir /tmp/cdrom - mount -F hsfs /dev/dsk/c0t6d0s0 /tmp/cdrom - (Work with CD mounted on /tmp/cdrom) - umount /tmp/cdrom - eject /dev/dsk/c0t6d0s0 2.5.4 可擦写光盘驱动器 在solaris8下可以使用可擦写光盘,这是solaris 8下的一个工具,可以刻录iso的镜像, 可以用mkisofs命令来将solaris系统做成镜像文件。 例子: #! /bin/sh # ./nfscd <PARAMETER1> <PARAMETER2> # PARAMETER1 = Application ID # PARAMETER2 = from where # # ./nfscd SunNetManager /net/center2000/export/pkg/SUNWsnm # set Umask umask 022 # Remove old image rm /data/disk.img # Create image mkisofs -A $1 -d -l -L -o /data/disk.img -P "Sun Microsystems" -p "Solaris SPARC" -r -R -J -V "$1" -v $2 # Burn cdrw -i /data/disk.img (我没有试过,如果有尝试成功的朋友可以共享以下) 2.5.5 USB存储设备 现在很多新的设备都有USB的接口,所以很多USB的存储设备可以在sun的机器上使用。
Solaris10安装和基本配置
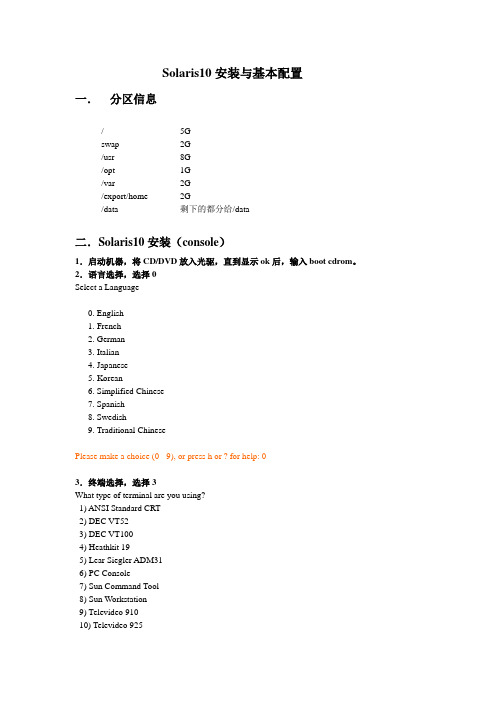
Solaris10安装与基本配置一.分区信息/ 5Gswap 2G/usr 8G/opt 1G/var 2G/export/home 2G/data 剩下的都分给/data二.Solaris10安装(console)1.启动机器,将CD/DVD放入光驱,直到显示ok后,输入boot cdrom。
2.语言选择,选择0Select a Language0. English1. French2. German3. Italian4. Japanese5. Korean6. Simplified Chinese7. Spanish8. Swedish9. Traditional ChinesePlease make a choice (0 - 9), or press h or ? for help: 03.终端选择,选择3What type of terminal are you using?1) ANSI Standard CRT2) DEC VT523) DEC VT1004) Heathkit 195) Lear Siegler ADM316) PC Console7) Sun Command Tool8) Sun Workstation9) Televideo 91010) Televideo 92511) Wyse Model 5012) X Terminal Emulator (xterms)13) OtherType the number of your choice and press Return:34.信息提示,F2继续Completing system identification...in.rdisc: No interfaces up- The Solaris Installation Program ---------------------------------------------The Solaris installation program is divided into a series of short sections where you'll be prompted to provide information for the installation. At the end of each section, you'll be able to change the selections you've made before continuing.About navigation...- The mouse cannot be used- If your keyboard does not have function keys, or they do notrespond, press ESC; the legend at the bottom of the screenwill change to show the ESC keys to use for navigation.-------------------------------------------------------------------------------- F2_Continue F6_Help5.开始配置系统信息,F2继续- Identify This System ---------------------------------------------------------On the next screens, you must identify this system as networked ornon-networked, and set the default time zone and date/time.If this system is networked, the software will try to find the information it needs to identify your system; you will be prompted to supply any information it cannot find.> To begin identifying this system, press F2.-------------------------------------------------------------------------------- F2_Continue F6_Help6.网络连接设置,是否连接网络,选择Y es,F2继续- Network Connectivity ---------------------------------------------------------Specify Yes if the system is connected to the network by one of the Solaris or vendor network/communication Ethernet cards that are supported on the Solaris CD. See your hardware documentation for the current list of supported cards.Specify No if the system is connected to a network/communication card that is not supported on the Solaris CD, and follow the instructions listed under Help.Networked---------[X] Yes[ ] No-------------------------------------------------------------------------------- F2_Continue F6_Help7.选择要配置网络接口,下面是有两块网卡的情况,F2继续- Configure Multiple Network Interfaces ----------------------------------------Multiple network interfaces have been detected on this system. Specify all of the network interfaces you want to configure.Note: You must choose at least one interface to configure.Network interfaces------------------[X] eri0[ ] hme0-------------------------------------------------------------------------------- F2_Continue F6_Help8.选择主网络接口,F2继续- Primary Network Interface ----------------------------------------------------On this screen you must specify which of the following network adapters is the system's primary network interface. Usually the correct choice is the lowest number. However, do not guess; ask your system administrator if you're not sure.> To make a selection, use the arrow keys to highlight the option andpress Return to mark it [X].Primary network interface-------------------------[X] eri0[ ] hme0-------------------------------------------------------------------------------- F2_Continue F6_Help9.开始配置主网络接口,DHCP配置,选择No,F2继续- DHCP for eri0 ----------------------------------------------------------------Specify whether or not this network interface should use DHCP to configure itself. Choose Yes if DHCP is to be used, or No if the network interface is to be configured manually.NOTE: DHCP support will not be enabled, if selected, until after the system reboots.Use DHCP for eri0-----------------[ ] Yes[X] No-------------------------------------------------------------------------------- F2_Continue F6_Help10.Host Name配置,输入rsdns-mn1,F2继续- Host Name for eri0 -----------------------------------------------------------Enter the host name which identifies this system on the network. The name must be unique within your domain; creating a duplicate host name will cause problems on the network after you install Solaris.A host name must have at least one character; it can contain letters,digits, and minus signs (-).Host name for eri0 rsdns-mn1-------------------------------------------------------------------------------- F2_Continue F6_Help11.配置IP地址,输入完后F2继续- IP Address for eri0 ----------------------------------------------------------Enter the Internet Protocol (IP) address for this network interface. Itmust be unique and follow your site's address conventions, or asystem/network failure could result.IP addresses contain four sets of numbers separated by periods (for example 129.200.9.1).IP address for eri0 192.168.0.112-------------------------------------------------------------------------------- F2_Continue F6_Help12.选择子网系统,选择Yes,F2继续- Subnet for eri0 --------------------------------------------------------------On this screen you must specify whether this system is part of a subnet. If you specify incorrectly, the system will have problems communicating on the network after you reboot.> To make a selection, use the arrow keys to highlight the option andpress Return to mark it [X].System part of a subnet-----------------------[X] Yes[ ] No-------------------------------------------------------------------------------- F2_Continue F6_Help13.配置子网掩码,如果使用默认的,F2继续- Netmask for eri0 -------------------------------------------------------------On this screen you must specify the netmask of your subnet. A default netmask is shown; do not accept the default unless you are sure it iscorrect for your subnet. A netmask must contain four sets of numbers separated by periods (for example 255.255.255.0).Netmask for eri0 255.255.255.0--------------------------------------------------------------------------------F2_Continue F6_Help14.IPv6安装,选择No,F2之后需要等待一下- IPv6 for eri0 ----------------------------------------------------------------Specify whether or not you want to enable IPv6, the next generation Internet Protocol, on this network interface. Enabling IPv6 will have no effect ifthis machine is not on a network that provides IPv6 service. IPv4 servicewill not be affected if IPv6 is enabled.> To make a selection, use the arrow keys to highlight the option andpress Return to mark it [X].Enable IPv6 for eri0--------------------[ ] Yes[X] No--------------------------------------------------------------------------------F2_Continue F6_Help15.配置路由信息,可以选择None,也可以是Specify one指定一个,F2继续- Set the Default Route for eri0 -----------------------------------------------To specify the default route, you can let the software try to detect oneupon reboot, you can specify the IP address of the router, or you can choose None. Choose None if you do not have a router on your subnet.> To make a selection, use the arrow keys to select your choice and pressReturn to mark it [X].Default Route for eri0--------------------------[ ] Detect one upon reboot[X] Specify one[ ] None--------------------------------------------------------------------------------F2_Continue F6_Help16.如果上一步选择Specify one,输入路由地址,F2继续- Default Route IP Address for eri0 --------------------------------------------Enter the IP address of the default route. This entry will be placed in the/etc/defaultrouter file and will be the default route after you reboot(example 129.146.89.225).Router IP Address for eri0 192.168.0.1--------------------------------------------------------------------------------F2_Continue F6_Help17.显示主网卡配置信息,想变更按F4,否则F2继续- Confirm Information for eri0 -------------------------------------------------> Confirm the following information. If it is correct, press F2;to change any information, press F4.Networked: YesPrimary network interface: eri0Secondary network interfaces: hme0Use DHCP: NoHost name: rsdns-mn1IP address: 192.168.0.112System part of a subnet: YesNetmask: 255.255.255.0Enable IPv6: NoDefault Route: Specify oneRouter IP Address: 192.168.0.1--------------------------------------------------------------------------------F2_Continue F4_Change F6_Help18.如果有第二块网卡,接下来要进行第二块网卡的配置,过程与第一块相同,配置结果如下,如果没有跳转到步骤22- Confirm Information for hme0 -------------------------------------------------> Confirm the following information. If it is correct, press F2;to change any information, press F4.Use DHCP: NoHost name: rsdns-mn1IP address: 192.168.0.113System part of a subnet: YesNetmask: 255.255.255.0Enable IPv6: NoDefault Route: Specify oneRouter IP Address: 192.168.0.1-------------------------------------------------------------------------------- F2_Continue F4_Change F6_Help19.一些错误提示,F2即可从新配置- System Identification Error --------------------------------------------------The hostname rsdns-mn1 is already specified for interface eri0. Please enter a different hostname.> Press F2 to dismiss this message.-------------------------------------------------------------------------------- F2_OK F6_Help20.如果有第二块网卡,也可以选择先不配置,选No,F2继续- Network Connectivity for hme0 ------------------------------------------------Specify Yes if you would like to specify the network parameters for this network interface.Specify No if this interface is not connected to the network.Networked---------[ ] Yes[X] No-------------------------------------------------------------------------------- F2_Continue F6_Help21.信息确认,F2继续- Confirm Information for hme0 -------------------------------------------------> Confirm the following information. If it is correct, press F2;to change any information, press F4.Networked: No-------------------------------------------------------------------------------- Esc-2_Continue Esc-4_Change Esc-6_Help22.选择安全机制,选择No,F2继续- Configure Security Policy: ---------------------------------------------------Specify Yes if the system will use the Kerberos security mechanism.Specify No if this system will use standard UNIX security.Configure Kerberos Security---------------------------[ ] Yes[X] No-------------------------------------------------------------------------------- Esc-2_Continue Esc-6_Help23.信息确认,F2继续- Confirm Information ----------------------------------------------------------> Confirm the following information. If it is correct, press F2;to change any information, press F4.Configure Kerberos Security: No-------------------------------------------------------------------------------- Esc-2_Continue Esc-4_Change Esc-6_Help24.名字服务安装,选择None,F2继续- Name Service -----------------------------------------------------------------On this screen you must provide name service information. Select the name service that will be used by this system, or None if your system will either not use a name service at all, or if it will use a name service not listed here.> To make a selection, use the arrow keys to highlight the optionand press Return to mark it [X].Name service------------[ ] NIS+[ ] NIS[ ] DNS[ ] LDAP[X] None-------------------------------------------------------------------------------- Esc-2_Continue Esc-6_Help25.信息确认,F2继续- Confirm Information ----------------------------------------------------------> Confirm the following information. If it is correct, press F2;to change any information, press F4.Name service: None-------------------------------------------------------------------------------- Esc-2_Continue Esc-4_Change Esc-6_Help26.选择时区,选择Asia,F2继续- Time Zone --------------------------------------------------------------------On this screen you must specify your default time zone. You can specify a time zone in three ways: select one of the continents or oceans from the list, select other - offset from GMT, or other - specify time zone file.> To make a selection, use the arrow keys to highlight the option andpress Return to mark it [X].Continents and Oceans----------------------------------- [ ] Africa| [ ] Americas| [ ] Antarctica| [ ] Arctic Ocean| [X] Asia| [ ] Atlantic Ocean| [ ] Australia| [ ] Europev [ ] Indian Ocean-------------------------------------------------------------------------------- Esc-2_Continue Esc-6_Help27.选择国家或地域,选择China,F2继续- Country or Region ------------------------------------------------------------> To make a selection, use the arrow keys to highlight the option and press Return to mark it [X].Countries and Regions------------------------^ [ ] Bhutan| [ ] Brunei| [ ] Cambodia| [X] China| [ ] Cyprus| [ ] East Timor| [ ] Georgia| [ ] Hong Kong| [ ] India| [ ] Indonesia| [ ] Iran| [ ] Iraqv [ ] Israel-------------------------------------------------------------------------------- Esc-2_Continue Esc-6_Help28.配置时间和日期,F2继续- Date and Time ----------------------------------------------------------------> Accept the default date and time or enternew values.Date and time: 2007-06-14 13:21Year (4 digits) : 2007Month (1-12) : 06Day (1-31) : 14Hour (0-23) : 13Minute (0-59) : 33-------------------------------------------------------------------------------- Esc-2_Continue Esc-6_Help29.信息确认,F2继续- Confirm Information ----------------------------------------------------------> Confirm the following information. If it is correct, press F2;to change any information, press F4.Time zone: PRCDate and time: 2007-06-14 13:33:00-------------------------------------------------------------------------------- Esc-2_Continue Esc-4_Change Esc-6_Help30.Root口令配置,输入两遍后,F2继续- Root Password ----------------------------------------------------------------Please enter the root password for this system.The root password may contain alphanumeric and special characters. For security, the password will not be displayed on the screen as you type it.> If you do not want a root password, leave both entries blank.Root password: ********Root password: ********> Press F2 to go to the next screen.-------------------------------------------------------------------------------- Esc-2_Continue Esc-6_Help31.一些系统运行信息,不用理会,会自动转到步骤32System identification is completed.System identification complete.Starting Solaris installation program...Executing JumpStart preinstall phase...Searching for SolStart directory...Checking rules.ok file...Using begin script: install_beginUsing finish script: patch_finishExecuting SolStart preinstall phase...Executing begin script "install_begin"...Begin script install_begin execution completed.32.选择安装模式,F2_Standard继续- Solaris Interactive Installation ---------------------------------------------On the following screens, you can accept the defaults or you can customizehow Solaris software will be installed by:- Selecting the type of Solaris software to install- Selecting disks to hold software you've selected- Selecting unbundled products to be installed with Solaris- Specifying how file systems are laid out on the disksAfter completing these tasks, a summary of your selections (called aprofile) will be displayed.There are two ways to install your Solaris software:- "Standard" installs your system from a standard Solaris Distribution.Selecting "Standard" allows you to choose between initial installand upgrade, if your system is upgradable.- "Flash" installs your system from one or more Flash Archives.--------------------------------------------------------------------------------F2_Standard F4_Flash F5_Exit F6_Help33.是否自动弹出CD/DVD,选择Automatically eject CD/DVD,F2继续- Eject a CD/DVD Automatically? ------------------------------------------------During the installation of Solaris software, you may be using one or moreCDs/DVDs. You can choose to have the system eject each CD/DVD automatically after it is installed or you can choose to manually eject each CD/DVD.[X] Automatically eject CD/DVD[ ] Manually eject CD/DVD--------------------------------------------------------------------------------F2_Continue F3_Go Back F5_Exit34.安装完成后是否自动重新引导系统,选择Auto Reboot,F2继续- Reboot After Installation? ---------------------------------------------------After Solaris software is installed, the system must be rebooted. You canchoose to have the system automatically reboot, or you can choose tomanually reboot the system if you want to run scripts or do othercustomizations before the reboot. You can manually reboot a system by usingthe reboot(1M) command.[X] Auto Reboot[ ] Manual Reboot--------------------------------------------------------------------------------F2_Continue F3_Go Back F5_Exit35.系统初始化,不需要手工干预,自动转到步骤36- Initializing -----------------------------------------------------------------The system is being initialized.36.License确认,F2_Accept License继续- License ----------------------------------------------------------------------^ AGREEMENT. IF YOU HA VE SEPARA TEL Y AGREED TO LICENSE TERMS| ("MASTER TERMS") FOR YOUR LICENSE TO THIS SOFTWARE, THEN SECTIONS| 1-6 OF THIS AGREEMENT ("SUPPLEMENTAL LICENSE TERMS") SHALL| SUPPLEMENT AND SUPERSEDE THE MASTER TERMS IN RELATION TO THIS | SOFTWARE.|| 1. Definitions.|| (a) "Entitlement" means the collective set of applicable documents| authorized by Sun evidencing your obligation to pay associated fees| (if any) for the license, associated Services, and the authorized| scope of use of Software under this Agreement.|| (b) "Licensed Unit" means the unit of measure by which your use of| Software and/or Service is licensed, as described in your Entitlement.|| (c) "Permitted Use" means the licensed Software use(s) authorized in| this Agreement as specified in your Entitlement. The Permitted Usev for any bundled Sun software not specified in your Entitlement will--------------------------------------------------------------------------------F2_Accept License F5_Exit37.选择字符集,下面是选择了所有中文字符集,F2继续- Select Geographic Regions ----------------------------------------------------Select the geographic regions for which support should be installed.[ ] Japanese UTF-8 (ja_JP.UTF-8)[ ] Korean EUC[ ] Korean UTF-8[X] Simplified Chinese EUC[X] Simplified Chinese GB18030[X] Simplified Chinese GBK[X] Simplified Chinese UTF-8[ ] Thai TIS620[ ] Thai UTF-8[X] Traditional Chinese (Hong Kong) BIG5+HKSCS[X] Traditional Chinese (Hong Kong) UTF-8[X] Traditional Chinese BIG5[X] Traditional Chinese EUC[X] Traditional Chinese UTF-8> [ ] Eastern Europe> [ ] Northern EuropeLocale is selected. Press Return to deselect--------------------------------------------------------------------------------F2_Continue F3_Go Back F5_Exit F6_Help38.选择系统语言环境,选择POSIXC,F2继续- Select System Locale ---------------------------------------------------------Select the initial locale to be used after the system has been installed.[X] POSIX C ( C )Asia[ ] Simplified Chinese EUC ( zh )[ ] Simplified Chinese GB18030 ( zh_CN.GB18030 )[ ] Simplified Chinese GBK ( zh.GBK )[ ] Simplified Chinese UTF-8 ( zh.UTF-8 )[ ] Traditional Chinese (Hong Kong) BIG5+HKSCS ( zh_HK.BIG5HK ) [ ] Traditional Chinese (Hong Kong) UTF-8 ( zh_HK.UTF-8 )[ ] Traditional Chinese BIG5 ( zh_TW.BIG5 )[ ] Traditional Chinese EUC ( zh_TW )[ ] Traditional Chinese UTF-8 ( zh_TW.UTF-8 )--------------------------------------------------------------------------------F2_Continue F3_Go Back F5_Exit F6_Help39.选择产品,选择Solaris Software Companion,F2继续- Select Products --------------------------------------------------------------Select the products you would like to install.> [ ] Solaris 10 Extra Value Software................. 0.00 MB> [ ] Solaris 10 Documentation........................ 0.00 MB> [ ] Java Enterprise System.......................... 0.00 MB> [X] Solaris Software Companion...................... 1798.83 MBPress Return to show components--------------------------------------------------------------------------------F2_Continue F3_Go Back F4_Product Info F5_Exit F6_Help40.附加产品选择,选择None,F2继续- Additional Products ----------------------------------------------------------To scan for additional products, select the location you wish to scan.Products found at the selected location that are in a Web Start Readyinstall form will be added to the Products list.Web Start Ready product scan location:[X] None[ ] CD/DVD[ ] Network File System--------------------------------------------------------------------------------F2_Continue F3_Go Back F5_Exit41.选择软件,选择Entire Distribution plus OEM support,F2继续- Select Software --------------------------------------------------------------Select the Solaris software to install on the system.NOTE: After selecting a software group, you can add or remove software by customizing it. However, this requires understanding of software dependencies and how Solaris software is packaged.[X] Entire Distribution plus OEM support ....... 8413.00 MB[ ] Entire Distribution ........................ 8368.00 MB[ ] Developer System Support ................... 8231.00 MB[ ] End User System Support .................... 7140.00 MB[ ] Core System Support ........................ 3464.00 MB[ ] Reduced Networking Core System Support ..... 3422.00 MB--------------------------------------------------------------------------------F2_Continue F3_Go Back F4_Customize F5_Exit F6_Help42.选择硬盘,F2继续- Select Disks -----------------------------------------------------------------On this screen you must select the disks for installing Solaris software.Start by looking at the Suggested Minimum field; this value is theapproximate space needed to install the software you've selected. Keepselecting disks until the Total Selected value exceeds the Suggested Minimumvalue.NOTE: ** denotes current boot diskDisk Device Available Space===================================================================== [X] c1t0d0 34730 MB (F4 to edit)Total Selected: 34730 MBSuggested Minimum: 6716 MB--------------------------------------------------------------------------------F2_Continue F3_Go Back F4_Edit F5_Exit F6_Help43.格式化,F2继续- Preserve Data? ---------------------------------------------------------------Do you want to preserve existing data? At least one of the disks you'veselected for installing Solaris software has file systems or unnamed slicesthat you may want to save.--------------------------------------------------------------------------------F2_Continue F3_Go Back F4_Preserve F5_Exit F6_Help44.是否采用自动文件系统布局,选择F4_Manual Layout(手动)- Automatically Layout File Systems? -------------------------------------------Do you want to use auto-layout to automatically layout file systems?Manually laying out file systems requires advanced system administrationskills.--------------------------------------------------------------------------------F2_Auto Layout F3_Go Back F4_Manual Layout F5_Exit F6_Help45.文件系统和磁盘布局,选择F4_Customize(手动配置)- File System and Disk Layout --------------------------------------------------The summary below is your current file system and disk layout, based on theinformation you've supplied.NOTE: If you choose to customize, you should understand file systems, theirintended purpose on the disk, and how changing them may affect the operationof the system.File sys/Mnt point Disk/Slice Size====================================================================== overlap c1t0d0s2 34730 MB--------------------------------------------------------------------------------F2_Continue F3_Go Back F4_Customize F5_Exit F6_Help46.按照分区信息手工配置文件系统及磁盘大小,F2继续- Customize Disk: c1t0d0 -------------------------------------------------------Entry: Recommended: MB Minimum: MB====================================================================== Slice Mount Point Size (MB)0 \ 01 02 overlap 347303 04 05 06 07 0======================================================================Capacity: 34730 MBAllocated: 0 MBFree: 34730 MB--------------------------------------------------------------------------------F2_OK F4_Options F5_Cancel F6_Help47.最终的分区结果显示,F2继续- File System and Disk Layout --------------------------------------------------The summary below is your current file system and disk layout, based on theinformation you've supplied.NOTE: If you choose to customize, you should understand file systems, theirintended purpose on the disk, and how changing them may affect the operationof the system.File sys/Mnt point Disk/Slice Size====================================================================== / c1t0d0s0 5000 MB swap c1t0d0s1 2048 MB overlap c1t0d0s2 34730 MB /usr c1t0d0s3 8001 MB /opt c1t0d0s4 1024 MB /var c1t0d0s5 2048 MB /export/home c1t0d0s6 2048 MB/data c1t0d0s7 14559 MB--------------------------------------------------------------------------------F2_Continue F3_Go Back F4_Customize F5_Exit F6_Help48.信息提示,F2继续- Warning ----------------------------------------------------------------------Review your file systems. The list below shows the recommended Solaris filesystems with their Minimum and Suggested space. If your file systems arebelow the Minimum, there might not be enough file system space to installSolaris software.NOTE: Some file systems may include other file systems. For example, (/)root might include /var.File System Minimum Suggested Configured-------------------------------------------------------------/ 144.00 MB 168.00 MB 5000.00 MB/opt 2124.00 MB 2497.00 MB 1024.00 MB/usr 3687.00 MB 4337.00 MB 8001.00 MB/usr/openwin 657.07 MB 772.89 MB 0.00 MB/var 113.00 MB 133.00 MB 2048.00 MB--------------------------------------------------------------------------------F2_OK F5_Cancel49.挂载远程文件系统,F2继续- Mount Remote File Systems? ---------------------------------------------------Do you want to mount software from a remote file server? This may benecessary if you had to remove software because of disk space problems.--------------------------------------------------------------------------------F2_Continue F3_Go Back F4_Remote Mounts F5_Exit F6_Help50.显示安装配置信息,想更改按F4,否则F2开始安装- Profile ----------------------------------------------------------------------The information shown below is your profile for installing Solaris software.It reflects the choices you've made on previous screens.======================================================================- Installation Option: Initial| Boot Device: c1t0d0| Client Services: None|| Locales: Simplified Chinese EUC| Simplified Chinese GB18030| Simplified Chinese GBK| Simplified Chinese UTF-8| Traditional Chinese (Hong Kong) BIG| Traditional Chinese (Hong Kong) UTF| Traditional Chinese BIG5| Traditional Chinese EUC| Traditional Chinese UTF-8v System Locale: C ( C )。
solaris系统日常维护命令
solaris系统日常维护命令solaris系统日常维护命令(一)一、 Cluster操作命令:1、 scstat -i检查公共网络的状态2、 ccp clustername启动gui控制台3、 click cconsole. crlogin. ctelnet启动管理界面4、 scsetupcli的管理界面5、 showrev -p显示 Sun Cluster 修补程序信息6、 scinstall -pv显示Sun Cluster 发行版本号以及所有Sun Cluster 软件包的版本信息7、 scrgadm –p显示为群集schost 配置的资源类型(RT Name)、资源组(RG Name) 和资源(RS Name)8、 scstat -p群集组件状态信息9、 scconf -p群集配置,10、 sccheck检查配置11、 scshutdown -g0 -y关闭整个cluster 到ok 态12、 boot单系统启动,接着将分配配额13、 scstat -n#验证引导节点时未发生错误,而且节点现在处于联机状态。
scstat(1M) 命令报告节点状态。
-D 列出磁盘设备组的配置14、 scswitch -S -h nodelist-S 从指定的节点中清空所有的设备服务和资源组。
-h nodelist 指定从中切换资源组和设备组的节点。
15、 scswitch -F -D disk-device-group-F 使磁盘设备组脱机。
-D disk-device-group 指定要脱机的设备组。
16、 pnmstat -l检验该NAFO 组的状态17、 scstat –g资源组oracle及其所有资源状态18、 scstat –D磁盘资源ipasdg状态19、 vxdg listvolume状态20、资源组切换命令把C网数据库资源组切换到hnappscswitch -z -g c-ora-rg -h hnapp把C网数据库资源组切换到hnorascswitch -z -g c-ora-rg -h hnora#把c网应用资源组切换到hngorascswitch -z -g c-app-rg -h hngora#把c网应用资源组切换到hnapproot@hnapp # scswitch -z -g c-app-rg -h hnapp #把G网应用资源组切换到hnapproot@hngora # scswitch -z -g g-app-rg -h hnapp#把G网应用资源组切换到hngoraroot@hngora # scswitch -z -g g-app-rg -h hngora #把G网数据库资源组切换到hngoraroot@hngora # scswitch -z -g g-ora-rg -h hngora21、启动/关闭资源组的资源启动G网数据库资源及监控功能# scswitch -e -j g-ora-server-rs# scswitch -e -j g-ora-lsnr-rs# scswitch -e –M –j g-ora-server-rs# scswitch -e –M –j g-ora-lsnr-rs关闭资源# scswitch -n -j g-ora-server-rs# scswitch -n -j g-ora-lsnr-rs# scswitch -n -j g-ora-server-rs# scswitch -n -j g-ora-lsnr-rs22、启动/关闭/重启资源组# scrgadm –Z –g test-ora-rg/ scswitch –F/-R –g test-ora-rg23、 scswitch –Z –g oracle启动资源组oracle24、 pnmstat -p查看NAFO情况。
Solaris系统管理员手册

S o l a r i s系统管理员手册目录第 1 章、前言..........................................................................................................................1.1 认识超级用户状态....................................................................................................1.1.1 成为超级用户〔 su〕........................................................................................1.1.2 退出超级用户状态...........................................................................................1.1.3 以 root 注册.......................................................................................................1.2 与用户通讯.................................................................................................................1.2.1 在注册时显示系统专用信息...........................................................................1.2.2 将信息发送给单个用户...................................................................................发送一个短信息给一个单独的用户..................................................................将作为一个文件的信息发给个别用户..............................................................1.2.3 将信息发送给一个系统或网络中的所适用户...............................................1.2.4 经过电子邮件发送信息...................................................................................1.3 启动和关闭系统.........................................................................................................1.3.1 选择 init 状态....................................................................................................查察系统运行级..................................................................................................使用掉电状态,运行级0...................................................................................使用系统管理员状态,运行级1.......................................................................使用多用户状态,运行级2...............................................................................使用远程资源共享状态,运行级3...................................................................使用取代多用户状态,运行级4.......................................................................使用交互重引导状态,运行级5.......................................................................使用重引导状态,运行级6...............................................................................使用单用户状态,运行级s 或 S.......................................................................改变运行级..........................................................................................................1.3.2 选择所用的关闭命令.....................................................................................................................................................................................................................和 init ...............................................................................................................................................................................................................................................................................................................................................................................1.3.3 引导系统 ..........................................................................................................引导到多用户状态 ..............................................................................................引导到单用户状态 ..............................................................................................交互式引导 ..........................................................................................................查察引导信息 ......................................................................................................增加新的硬件后引导系统..................................................................................退回引导进度 ......................................................................................................1.3.4 关闭系统 ...........................................................................................................关闭一个多用户系统 ..........................................................................................关闭系统:可选方式 ..........................................................................................1.4 监察进度 .....................................................................................................................1.4.1 ps 命令报告的内容 ...........................................................................................1.4.3 杀死进度 ...........................................................................................................1.5 根本管理工具 .............................................................................................................1.5.1 经常使用的命令...............................................................................................在文件系统中搬动 ..............................................................................................查察在文件系统中所处的地址..........................................................................改变目录 ..............................................................................................................查察文件的相关信息 ..........................................................................................显示文件信息 ......................................................................................................查找一个文件 ......................................................................................................查察一个文件的种类 ..........................................................................................查察文件中的信息 ..............................................................................................查找文件中的字符串 ..........................................................................................查察文件 ..............................................................................................................阅读文件 ..............................................................................................................查察文件尾 ..........................................................................................................查察文件头 ..........................................................................................................改变文件的全部权和赞同权..............................................................................改变文件组 ..........................................................................................................设置或显示系统环境 ..........................................................................................定义 Bourne 和 Korn shell 环境变量 .................................................................定义 C shell 环境变量 ........................................................................................显示环境变量的设置 ..........................................................................................使用 PATH 变量 .................................................................................................设置 Bourne 和 Korn shell 路径 .........................................................................设置 C shell 路径 ................................................................................................1.5.2 使用管理工具 ...................................................................................................第 2 章、根本 OS 命令 ...........................................................................................................2.1 查找用户信息 .............................................................................................................2.1.1 确定系统中有谁注册.......................................................................................使用 who 命令 .....................................................................................................使用 finger 命令 ..................................................................................................使用 rusers - 1 命令 ..........................................................................................使用 whodo 命令 .................................................................................................2.1.2 检查用户的用户号和组号(id 命令 ) .................................................................2.2 查寻环境信息 .............................................................................................................2.3 创立和编写文件 .........................................................................................................2.3.1 使用 cat 命令 .....................................................................................................2.3.2 使用 touch 命令 ................................................................................................2.3.3 文件拷贝〔 cp〕或更名〔 mv〕 ......................................................................2.3.4 文本编写器的使用...........................................................................................2.3.5 vi 的使用 ...........................................................................................................2.4 命令组合及输出重新定向.........................................................................................2.4.1 在同一命令行里键入多个命令.......................................................................2.4.2 输出重新定向 (<>) ............................................................................................2.4.3 组合命令 (|) ........................................................................................................2.5.1 显示手册〔 man〕 ............................................................................................2.5.2 找命令节号〔 whatis、man〕 ..........................................................................2.6 查阅磁盘信息 .............................................................................................................2.6.1 显示磁盘空间的信息〔 df -k〕 ....................................................................2.6.2 鉴识某文件系统可否为当地文件系统〔df〕 ................................................2.6.3 找出某各种类已安装的文件系统〔df -F 〕....................................................第 3 章、设备管理 ..................................................................................................................3.1 磁带的使用 .................................................................................................................3.1.1 磁带设备的命名习惯.......................................................................................使用缺省密度规定驱动器号..............................................................................为磁带机指定密度 ..............................................................................................指定 "不倒带 "选项 ..............................................................................................不同样磁带控制器和介质的设备名缩写..............................................................英寸卷绕式非 SCSI 内接 (Rack mounted)磁带机 .............................................英寸 SCSI 盒式和 1/2 英寸前部装入的卷绕式磁带机....................................螺线扫描磁带机 ..................................................................................................3.1.2 读写磁带的命令...............................................................................................拉紧磁带 ..............................................................................................................倒带 ......................................................................................................................列出磁带机状态 ..................................................................................................3.2 磁带与软盘操作 ........................................................................................................3.2.1 tar 命令 ..............................................................................................................向磁带写文件 (tar) ...............................................................................................列出磁带上的文件 (tar) .......................................................................................向磁带上增加文件 (tar) .......................................................................................从磁带中析取文件 (tar) .......................................................................................命令 ............................................................................................................................将某目录下的全部文件拷入磁带(cpio) ............................................................列出磁带上的文件 (cpio) ....................................................................................析取磁带上全部文件 (cpio) ................................................................................自磁带中析取个别文件 (cpio) ............................................................................软盘的使用 ..........................................................................................................3.2.3 软驱设备名 .......................................................................................................文件系统的软盘........................................................................................................格式化 ufs 软盘 ...................................................................................................自软驱中取出软盘 ..............................................................................................将 ufs 文件拷入单张格式化过软盘...................................................................列出软盘上的文件 ..............................................................................................向一个格式化好的软盘上附加文件(tar) ...........................................................从软盘上拷出文件 (tar) .......................................................................................自软盘上拷出 bar 格式的文件 (cpio) .................................................................3.2.5 使用多张软盘存档...........................................................................................在软盘上创立一个ufs 文件系统 (newfs /dev/rdiskette)....................................文件系统的软盘........................................................................................................格式化 pcfs(DOS)文件系统软盘 .......................................................................卸掉 pcfs 软盘 .....................................................................................................3.3 硬盘命名管理 .............................................................................................................3.3.1 硬盘命名习惯 ...................................................................................................带有总线控制器的硬盘的使用..........................................................................带有直接驱动器的硬盘的使用..........................................................................3.3.2 检查硬盘使用情况...........................................................................................3.3.3 检查硬盘信息 (Prtvtoc) .....................................................................................将文件存档 ..........................................................................................................将硬盘上文件拷出 ..............................................................................................修复坏块 ..............................................................................................................重新格式化硬盘 ..................................................................................................换下旧硬盘 ..........................................................................................................参加错误表对硬盘进行格式化、分区及标志..................................................重建文件系统 (newfs)..........................................................................................在临时安装点安装文件系统(mount) .................................................................向文件系统转储文件 (ufsrestore) .......................................................................自临时装入点拆卸文件系统(umount)其方法以下 : ..........................................检查文件系统的不一致性(fsck) ........................................................................对恢复文件系统做0 级备份 ..............................................................................在永久安装点安装文件系统(mount) .................................................................第 4 章、文件系统管理 ..........................................................................................................4.1 文件系统种类 .............................................................................................................4.1.1 磁盘文件系统 ...................................................................................................4.1.2 网络文件系统 ...................................................................................................4.1.3 伪文件系统 .......................................................................................................临时文件系统 (tmpfs) ..........................................................................................循环文件系统 (lofs) .............................................................................................进度文件系统 (procfs) .........................................................................................其他伪文件系统 ..................................................................................................缺省的文件系统 .......................................................................................4.3 虚假文件系统表 (/etc/vfstab) ......................................................................................4.3.1 文件系统表项的建立......................................................................................4.4 文件管理命令 .............................................................................................................4.4.1 一般命令语法规那么...........................................................................................4.4.2 一般文件系统命令和特别文件系统命令手册...............................................4.4.3 利用文件系统命令确定文件系统种类...........................................................4.4.4 文件系统种类 ...................................................................................................4.5 怎样使文件系统有效..........................................................................................4.5.1 安装与拆卸 .......................................................................................................安装与拆卸文件系统命令..................................................................................查找已安装的文件系统......................................................................................安装 /etc/vfstab 文件中的全部文件系统............................................................安装特定种类的文件系统..................................................................................安装单个文件系统〔 mount〕 ...........................................................................拆卸全部的远程文件系统〔umountall -F nfs〕 ...............................................拆卸个其他文件系统 (umount) ...........................................................................自动安装程序 ...................................................................................................共享效劳器文件 ...............................................................................................检查文件系统的数据一致性 (fsck) ............................................................................决定文件系统可否需检测 ...............................................................................以交互方式检测文件系统 ...............................................................................备份和恢复文件系统 .................................................................................................用 QIC-150 盒式磁带备份文件系统 (ufsdump)...............................................实现增量备份 ......................................................................................................恢复备份文件系统 ...........................................................................................决定使用哪一备份带 ..........................................................................................恢复全部备份 ......................................................................................................交互式恢复文件 ..................................................................................................从备份带中恢复单个文件 ( ufsrestore) ..............................................................第 5 章、管理网络效劳 ..........................................................................................................检查远程系统状态 .....................................................................................................确定一个远程系统已运行了多长时间 ...........................................................确定一个远程系统可否在运行 (ping\rup\rpcinfo-p) .......................................注册到一个远程系统 (rlogin) .....................................................................................系统之间传达文件 (rcp、ftp) .....................................................................................使用 RCP 命令 ..................................................................................................使用文件传达程序 (ftp) ....................................................................................第 6 章、管理用户帐号和用户组 ..........................................................................................6.1 增加和管理用户帐号 .................................................................................................6.1.1 增加用户帐号 ...................................................................................................编写 Passwd数据库 ............................................................................................定义用户组 ..........................................................................................................建立主目录 (home director).................................................................................自动安装目录 ......................................................................................................用 nfs 安装主目录 ...............................................................................................定义初化文件 ......................................................................................................建立用户的邮件帐号 ..........................................................................................建立口令 ..............................................................................................................6.1.2 管理用户帐号 ...................................................................................................改正用户帐号 ......................................................................................................取消用户帐号 ......................................................................................................冻结用户帐号 ......................................................................................................6.2 设置和管理用户组 .....................................................................................................6.2.1 设置 Group 数据库中的域值...........................................................................设置组名 (Group Name)域 ..................................................................................设置 Group ID 域 ................................................................................................设置成员表域 ......................................................................................................6.2.2 建立缺省的 UNIX 用户组 ...............................................................................6.2.3 建立新的组 .......................................................................................................6.2.4 改正或删除用户组...........................................................................................改正某个组 ..........................................................................................................删除某个组 ..........................................................................................................第 7 章、 UNIX 的 shell 命令 .................................................................................................7.1 各种 shell 的公共命令 ...............................................................................................设置某种缺省 shell ...........................................................................................在命令行中改变 shell 种类 (sh,csh,ksh).....................................................从 shell 讲解器中退出 (exit) .............................................................................去除一个 shell 窗口 (clear) ...............................................................................7.2 标准 shell ....................................................................................................................标准 shell 的初始文件 ......................................................................................定义标准 shell 的环境变量 ..............................................................................7.3 C shell..........................................................................................................................的初始文件 ................................................................................................................环境变量的定义 ........................................................................................................建立 C shell 的别名 ..........................................................................................设置 C shell 的历史功能 ..................................................................................使用 C shell 历史功能 ......................................................................................设置 C shell 的退格键 (stty erase).....................................................................新命令的嵌入 ...................................................................................................历史命令的编写........................................................................................................7.4 Korn shell ....................................................................................................................的初始化文件 ............................................................................................................的选择项 ....................................................................................................................创立 Korn shell 的别名 .....................................................................................用 Korn shell 的联机编写器编写命令 .............................................................设置 Korn shell 的历史 .....................................................................................显示 Korn shell 的历史命令 .............................................................................使用 Korn shell 的历史命令 .............................................................................编写 Korn shell 的历史命令 .............................................................................第 8 章、管理系统 ..................................................................................................................8.1 显示系统专有信息 .....................................................................................................确定主机 ID 号〔 sysdef -h〕 ...........................................................................确定硬件种类 (uname -m).................................................................................确定办理机种类 (uname -p)..............................................................................确定 OS 版本号〔 uname -r〕 ..........................................................................显示系统配置信息 (prtconf) .............................................................................确定系统已经运行了多长时间 .......................................................................确定系统的日期和时间〔 date〕 .....................................................................设置系统的日期和时间 ...................................................................................改变系统的时区〔 /etc/TIMEZONE 〕 ............................................................8.2 配置附加的交换空间〔 mkfile ,swap〕 ..................................................................8.3 创立一个当地邮件别名〔 /etc/mail/aliases〕 ...........................................................第 9 章、文件存取问题解析 ..................................................................................................9.1 诊断与查找路径相关的问题 ....................................................................................显示当前查找路径 ...........................................................................................为 Bourne 和 Korn shells 设置路径 .................................................................和 Korn shell 的初始化文件 ......................................................................................。
Oracle Solaris Cluster系统管理指南说明书
Oracle®Solaris Cluster系统管理指南文件号码E232322011年5月,修订版A版权所有©2000,2011,Oracle和/或其附属公司。
保留所有权利。
本软件和相关文档是根据许可证协议提供的,该许可证协议中规定了关于使用和公开本软件和相关文档的各种限制,并受知识产权法的保护。
除非在许可证协议中明确许可或适用法律明确授权,否则不得以任何形式、任何方式使用、拷贝、复制、翻译、广播、修改、授权、传播、分发、展示、执行、发布或显示本软件和相关文档的任何部分。
除非法律要求实现互操作,否则严禁对本软件进行逆向工程设计、反汇编或反编译。
此文档所含信息可能随时被修改,恕不另行通知,我们不保证该信息没有错误。
如果贵方发现任何问题,请书面通知我们。
如果将本软件或相关文档交付给美国政府,或者交付给以美国政府名义获得许可证的任何机构,必须符合以下规定:ERNMENT RIGHTS Programs,software,databases,and related documentation and technical data delivered to ernment customers are "commercial computer software"or"commercial technical data"pursuant to the applicable Federal Acquisition Regulation and agency-specific supplemental regulations.As such,the use,duplication,disclosure,modification,and adaptation shall be subject to the restrictions and license terms set forth in the applicable Government contract,and,to the extent applicable by the terms of the Government contract,the additional rights set forth in FAR52.227-19,Commercial Computer Software License(December2007).Oracle America,Inc.,500Oracle Parkway,Redwood City,CA94065.本软件或硬件是为了在各种信息管理应用领域内的一般使用而开发的。
Sun Solaris可调参数 说明书

Sun Microsystems,Inc.4150Network CircleSanta Clara,CA95054U.S.A.文件号码819–7063–102006年10月版权所有2006Sun Microsystems,Inc.4150Network Circle,Santa Clara,CA95054U.S.A.保留所有权利。
对于本文档中介绍的产品,Sun Microsystems,Inc.对其所涉及的技术拥有相关的知识产权。
需特别指出的是(但不局限于此),这些知识产权可能包含一项或多项美国专利,或在美国和其他国家/地区申请的待批专利。
美国政府权利-商业软件。
政府用户应遵循Sun Microsystems,Inc.的标准许可协议,以及FAR(Federal Acquisition Regulations,即“联邦政府采购法规”)的适用条款及其补充条款。
本发行版可能包含由第三方开发的内容。
本产品的某些部分可能是从Berkeley BSD系统衍生出来的,并获得了加利福尼亚大学的许可。
UNIX是X/Open Company,Ltd.在美国和其他国家/地区独家许可的注册商标。
Sun、Sun Microsystems、Sun徽标、Solaris徽标、Java咖啡杯徽标、、Java和Solaris是Sun Microsystems,Inc.在美国和其他国家/地区的商标或注册商标。
所有SPARC商标的使用均已获得许可,它们是SPARC International,Inc.在美国和其他国家/地区的商标或注册商标。
标有SPARC商标的产品均基于由Sun Microsystems,Inc.开发的体系结构。
OPEN LOOK和Sun TM图形用户界面是Sun Microsystems,Inc.为其用户和许可证持有者开发的。
Sun感谢Xerox在研究和开发可视或图形用户界面的概念方面为计算机行业所做的开拓性贡献。
Solaris系统vi命令详解

Solaris系统vi命令详解进入vi的命令vi filename :打开或新建文件,并将光标置于第一行首vi +n filename :打开文件,并将光标置于第n行首vi + filename :打开文件,并将光标置于最后一行首vi +/pattern filename:打开文件,并将光标置于第一个与pattern匹配的串处vi -r filename :在上次正用vi编辑时发生系统崩溃,恢复filenamevi filename....filename :打开多个文件,依次进行编辑移动光标类命令h :光标左移一个字符l :光标右移一个字符space:光标右移一个字符Backspace:光标左移一个字符k或Ctrl+p:光标上移一行j或Ctrl+n :光标下移一行Enter :光标下移一行w或W :光标右移一个字至字首b或B :光标左移一个字至字首e或E :光标右移一个字至字尾) :光标移至句尾( :光标移至句首}:光标移至段落开头{:光标移至段落结尾nG:光标移至第n行首n+:光标下移n行n-:光标上移n行n$:光标移至第n行尾H :光标移至屏幕顶行M :光标移至屏幕中间行L :光标移至屏幕最后行0:(注意是数字零)光标移至当前行首$:光标移至当前行尾屏幕翻滚类命令Ctrl+u:向文件首翻半屏Ctrl+d:向文件尾翻半屏Ctrl+f:向文件尾翻一屏Ctrl+b;向文件首翻一屏nz:将第n行滚至屏幕顶部,不指定n时将当前行滚至屏幕顶部。
插入文本类命令i :在光标前I :在当前行首a:光标后A:在当前行尾o:在当前行之下新开一行O:在当前行之上新开一行r:替换当前字符R:替换当前字符及其后的字符,直至按ESC键s:从当前光标位置处开始,以输入的文本替代指定数目的字符S:删除指定数目的行,并以所输入文本代替之ncw或nCW:修改指定数目的字nCC:修改指定数目的行删除命令ndw或ndW:删除光标处开始及其后的n-1个字do:删至行首d$:删至行尾ndd:删除当前行及其后n-1行x或X:删除一个字符,x删除光标后的,而X删除光标前的Ctrl+u:删除输入方式下所输入的文本搜索及替换命令/pattern:从光标开始处向文件尾搜索patternpattern:从光标开始处向文件首搜索patternn:在同一方向重复上一次搜索命令N:在反方向上重复上一次搜索命令:s/p1/p2/g:将当前行中所有p1均用p2替代:n1,n2s/p1/p2/g:将第n1至n2行中所有p1均用p2替代:g/p1/s//p2/g:将文件中所有p1均用p2替换选项设置all:列出所有选项设置情况term:设置终端类型ignorance:在搜索中忽略大小写list:显示制表位(Ctrl+I)和行尾标志($)number:显示行号report:显示由面向行的命令修改过的数目terse:显示简短的警告信息warn:在转到别的文件时若没保存当前文件则显示NO write信息nomagic:允许在搜索模式中,使用前面不带“\”的特殊字符nowrapscan:禁止vi在搜索到达文件两端时,又从另一端开始mesg:允许vi显示其他用户用write写到自己终端上的信息最后行方式命令:n1,n2 co n3:将n1行到n2行之间的内容拷贝到第n3行下:n1,n2 m n3:将n1行到n2行之间的内容移至到第n3行下:n1,n2 d :将n1行到n2行之间的内容删除:w :保存当前文件:e filename:打开文件filename进行编辑:x:保存当前文件并退出:q:退出vi:q!:不保存文件并退出vi:!command:执行shell命令command:n1,n2 w!command:将文件中n1行至n2行的内容作为command的输入并执行之,若不指定n1,n2,则表示将整个文件内容作为command的输入:r!command:将命令command的输出结果放到当前行寄存器操作"?nyy:将当前行及其下n行的内容保存到寄存器?中,其中?为一个字母,n为一个数字"?nyw:将当前行及其下n个字保存到寄存器?中,其中?为一个字母,n为一个数字"?nyl:将当前行及其下n个字符保存到寄存器?中,其中?为一个字母,n为一个数字"?p:取出寄存器?中的内容并将其放到光标位置处。
Solaris系统管理员指南说明书

简体中文Solaris系统管理员指南Sun Microsystems,Inc.4150Network CircleSanta Clara,CA95054U.S.A.部件号码:816–0674–102002年5月版权所有2002Sun Microsystems,Inc.4150Network Circle,Santa Clara,CA95054U.S.A.保留所有权利。
本产品或文档受版权保护,其使用、复制、发行和反编译均受许可证限制。
未经Sun及其授权者的事先书面许可,不得以任何形式、任何手段复制本产品及其文档的任何部分。
包括字体技术在内的第三方软件受Sun供应商的版权保护和许可证限制。
本产品的某些部分可能是从Berkeley BSD系统衍生出来的,并获得了加利福尼亚大学的许可。
UNIX是通过X/Open Company,Ltd.在美国和其他国家/地区独家获得许可的注册商标。
Sun、Sun Microsystems、Sun徽标、SunSoft、SunDocs、SunExpress、以及Solaris是Sun Microsystems公司在美国和其他国家/地区的商标、注册商标或服务标志。
所有SPARC商标均按许可证使用,它们是SPARC International,Inc.在美国和其他国家/地区的商标或注册商标。
带有SPARC商标的产品均以Sun Microsystems,Inc.开发的体系结构为基础。
OPEN LOOK和Sun™图形用户界面是Sun Microsystems,Inc.为其用户和许可证持有者开发的。
Sun对Xerox在为计算机行业研究和开发可视图形用户界面概念方面所做的开拓性工作表示感谢。
Sun已从Xerox获得了对Xerox图形用户界面的非独占性许可证,该许可证还适用于执行OPEN LOOK GUI和在其他方面遵守Sun书面许可协议的Sun许可证持有者。
限制权利:美国政府对本产品的使用、复制或公开受到下述文件限制:FAR52.227–14(g)(2)(6/87)和FAR52.227–19(6/87),或DFAR252.227–7015(b) (6/95)和DFAR227.7202–3(a)。
Solaris常用工具命令简介

-c clist character。选择由clist中的列数所指定的字符。clist的值是一个或多个用逗号分隔
的列数和/或以连字号分隔的列范围。
-d dchar delimeter。当用户使用-f选项来从输入中选择字段时,使用dchar作为字段的分隔符。
缺省的分隔符是TAB字符。
-f flist field。选择由flist中的字段数目给出的以TAB分隔的字段。flist的值是一个或多个用逗号分隔的列数和/或以连字号分隔的列范围。
% passwd =>执行後将会出现下列讯息
ChangingNISpassword for user on ice.
Old password: ______ =>输入旧密码
New password: ______ =>输入新密码(最好6-8字,英文字母与数字混合)
Retype new password: ______ =>再输入一次密码
(+/-)n指明计算单元和方向。
-b block。以块进行计算。
-c characters。以字节(字符)进行计算。
-l lines。以行进行计算。
-r reverse。从用户指定处开始逆序显示行。缺省时该选项将逆序显示整个文件。
Example:
tail–20 file1显示文件的后20行
tail file1显示文件的后10行
==========
执行格式:mkdir directory-name
Exmaple:
mkdir dir1建立一新目录dir1。
Mkdir–p dir1/dir2/dir3建深层目录
7、删除目录
========
执行格式:rmdir directory-name或rm directory-name
Solaris命令表

rm
rm [-fr]<filename>
OR
rm [-fr]<directory_name>
删除文件
-f不进行用户请求直接进行删除
-r删除指定目录的内容,包括子目录及
目录自身
rmdir
rmdir<directory>
删除空目录
setenv
setnv variablename <valur>
设置环境变量
chown
chown<userid><file or directory>
改变文件的所有者(超级用户才有权限)
compress
compress<filename>
对文件进行压缩
cp
cp [-ipr]<file1><file2>
复制文件1到文件2
-i对当前存在的文件进行重写
-p保留文件的权限以及修改日期
将文件1的名字定义到文件2或将文件1移动到路径2下面
passwd
passwd
更改密码
ping
ping<hostname>
检查主机名字在网络上是否有效
ps
ps -ef
显示进程的状态将会输出:
进程的所有者
进程的id以及上一个进程的id
开始的日期和时间
进程的名称
进程完成的时间
进程的开始点
pstat
pstat
ipcrm
ipcrm [options]
删除信息的排序设置或id的占有空间
kill
kill [–signal number]<process id>
Solaris_常用命令

quota 命令 (2001-05-01 15:40:36)限制每个用户可以使用硬盘空间的大小quota:显示用户硬盘限额和使用情况。
edquota :为每个用户设定硬盘限额。
quotaon:启动文件系统硬盘限额服务quotaoff :关闭文件系统硬盘限额服务repquota :显示当前硬盘限额状态硬限制是指对资源节点和数据块的绝对限制,在任何情况下都不允许用户超过这个限制;而软限制是指用户可以在一定时间范围内(默认时为一周,在/usr/include/sys/fs/ufs_quota.h文件中设置)超过软限制的额度,在硬限制的范围内继续申请资源,同时系统会在用户登录时给出警告信息和仍可继续申请资源剩余时间。
如果达到时间期限,用户的硬盘使用仍超过软限制的额度,则系统将不允许用户再申请硬盘资源。
首先在限制的文件系统的根目录下建立名为quotas的文件,该文件的所有者应是root,其它用户不可对它进行写操作touch quota;chmod 644 quotas编辑/etc/vfstab文件,找到要进行硬盘限额服务的文件系统,并将mount option字段的值设为rq,存盘退出。
#edquota username系统生成:fs /export/home1 blocks (soft = 0, hard = 0) inodes (soft = 0, hard = 0)fs字段表明使用硬盘限额的文件系统,为/export/home1block和inodes表明用户可以使用的硬盘千字节数和I节点数,即用户可使用的硬盘空间和可建立的文件数soft和hard提及的软限制和硬限制note:如果我们分配给用户的硬盘限额都相同,我们可以使用"-p" 参数而不用为每个用户都编辑一个文件edquota -p reference-username username用quotaon来启动服务:在root权限下输入#quotaon /export/home1查看各个用户的当前使用情况:#repquota /export/home1取消硬盘限额服务#quotaoff限额的一致性进行检查#quotacheck() 进入【UNIX论坛】ifconfig命令 (2001-05-01 15:41:01)用于查看和更改网络接口的地址和参数$ifconfig -alo0: flags=849 mtu 8232inet 127.0.0.1 netmask ff000000hme0: flags=863 mtu 1500inet 211.101.149.11 netmask ffffff00 broadcast 211.101.149.255ether 8:0:20:a7:4d:21系统会显示网络接口的名称,接口的状态(up or down),接口的IP地址和掩码等信息更改网络接口的IP地址:#ifconfig hme0 down#ifconfig hme0 211.101.149.233 netmask 255.255.255.0 up首先,使用down命令参数把网络接口hme0的服务暂时停止,然后再用ifconfig命令给接口分配新的IP地址和掩码,并启动网络接口服务也可以通过改变文件/etc/hosts中的IP地址的值并重新启动系统来更改机器的IP地址。
solaris常见命令包含注释

solaris常见命令包含注释solaris常见命令包含注释(收集)差别概览(click)命令区别(click)安装区别(本贴)软件管理(本贴)系统管理(click)设备管理(click)安全和加固(click)监视和性能(click)备份恢复故障诊断1.默认shellsolaris的默认shell是Bourne shell,名为/bin/sh2.文件系统标准的solaris文件系统格式是UFS,还可以使用VxFS,QFS,从Solaris 10 u2版开始,还可以使用ZFS。
3.文件系统目录布局而Solaris的/proc目录仅包含进程信息,不能从/proc目录获取系统信息或调整内核变量,但Solaris使用/platform目录,这个目录包含平台特定的信息和应用,Linux没有与Solaris的/platform对应的目录。
3.命令为了保持对System V,BSD,GNU软件的兼容性,除了常规的/bin(/usr/bin)和/sbin(/usr/sbin)目录外,Solaris还使用了一些扩展的命令目录,这些目录如下所示:/usr/openwin/bin/usr/dt/bin/usr/sfw/bin/opt/sfw/binusr/xpg4/binusr/ccs/bin/usr/ucb其中:/usr/bin 标准的System V命令/usr/ucb 传统的BSD命令有些命令在这两个目录中都有,但用法可能不同,比如basename df du echo expr fastbootfasthalt file from groups install ldlint ln lpc lpq lpr lprmlptest ls mkstr printenv ps rusagesed shutdown stty sum test touchtr tset users vipw whereis whoami免费软件的部署Linux和Solaris相同,这些GNU的命令在Solaris中通常都以g字母开头,比如gtarSystem V和BSD中有两个目录包含免费软件:/usr/sfw/bin和/opt/sfw/bin。
Oracle GlassFish Server 3.1.2 参考手册说明书

Oracle GlassFish ServerReference ManualRelease 3.1.2E24938-01February 2012This reference manual describes administration commands and utility commands that are available with Oracle GlassFish Server 3.1.2. This reference manual also describes concepts that are related to GlassFish Server administration. The available options, arguments, and operands for each command are provided in accordance with standard rules of command syntax, along with availability attributes, diagnostic information, and cross-references to other manual pages and reference material with relevant information. This reference manual is for all users of Oracle GlassFish Server.Oracle GlassFish Server Reference Manual, Release 3.1.2E24938-01Copyright © 2012, Oracle and/or its affiliates. All rights reserved.This software and related documentation are provided under a license agreement containing restrictions on use and disclosure and are protected by intellectual property laws. Except as expressly permitted in your license agreement or allowed by law, you may not use, copy, reproduce, translate, broadcast, modify, license, transmit, distribute, exhibit, perform, publish, or display any part, in any form, or by any means. Reverse engineering, disassembly, or decompilation of this software, unless required by law for interoperability, is prohibited.The information contained herein is subject to change without notice and is not warranted to be error-free. If you find any errors, please report them to us in writing.If this is software or related documentation that is delivered to the U.S. Government or anyone licensing it on behalf of the U.S. Government, the following notice is applicable:U.S. GOVERNMENT RIGHTS Programs, software, databases, and related documentation and technical data delivered to U.S. Government customers are "commercial computer software" or "commercial technical data" pursuant to the applicable Federal Acquisition Regulation and agency-specific supplemental regulations. As such, the use, duplication, disclosure, modification, and adaptation shall be subject to the restrictions and license terms set forth in the applicable Government contract, and, to the extent applicable by the terms of the Government contract, the additional rights set forth in FAR 52.227-19, Commercial Computer Software License (December 2007). Oracle America, Inc., 500 Oracle Parkway, Redwood City, CA 94065.This software or hardware is developed for general use in a variety of information management applications. It is not developed or intended for use in any inherently dangerous applications, including applications that may create a risk of personal injury. If you use this software or hardware in dangerous applications, then you shall be responsible to take all appropriate fail-safe, backup, redundancy, and other measures to ensure its safe use. Oracle Corporation and its affiliates disclaim any liability for any damages caused by use of this software or hardware in dangerous applications.Oracle and Java are registered trademarks of Oracle and/or its affiliates. Other names may be trademarks of their respective owners.Intel and Intel Xeon are trademarks or registered trademarks of Intel Corporation. All SPARC trademarks are used under license and are trademarks or registered trademarks of SPARC International, Inc. AMD, Opteron, the AMD logo, and the AMD Opteron logo are trademarks or registered trademarks of Advanced Micro Devices. UNIX is a registered trademark of The Open Group.This software or hardware and documentation may provide access to or information on content, products, and services from third parties. Oracle Corporation and its affiliates are not responsible for and expressly disclaim all warranties of any kind with respect to third-party content, products, and services. Oracle Corporation and its affiliates will not be responsible for any loss, costs, or damages incurred due to your access to or use of third-party content, products, or services.Contents Preface (xv)1Oracle GlassFish Server 3.1.2 Section 1: asadmin Utility Subcommands add-library................................................................................................................................................. 1-3 add-resources............................................................................................................................................. 1-3 apply-http-lb-changes............................................................................................................................. 1-3 backup-domain......................................................................................................................................... 1-3 change-admin-password......................................................................................................................... 1-3 change-master-broker.............................................................................................................................. 1-3 change-master-password......................................................................................................................... 1-3 collect-log-files.......................................................................................................................................... 1-3 configure-jms-cluster............................................................................................................................... 1-3 configure-lb-weight................................................................................................................................. 1-3 configure-ldap-for-admin....................................................................................................................... 1-3 copy-config................................................................................................................................................ 1-3 create-admin-object.................................................................................................................................. 1-3 create-application-ref............................................................................................................................... 1-3 create-audit-module................................................................................................................................. 1-3 create-auth-realm...................................................................................................................................... 1-3 create-backup-config............................................................................................................................... 1-3 create-cluster.............................................................................................................................................. 1-3 create-connector-connection-pool......................................................................................................... 1-3 create-connector-resource........................................................................................................................ 1-3 create-connector-security-map............................................................................................................... 1-3 create-connector-work-security-map.................................................................................................... 1-3 create-custom-resource............................................................................................................................ 1-3 create-domain............................................................................................................................................ 1-3 create-file-user........................................................................................................................................... 1-3 create-http.................................................................................................................................................. 1-3 create-http-health-checker...................................................................................................................... 1-3 create-http-lb............................................................................................................................................. 1-3 create-http-lb-config................................................................................................................................ 1-3 create-http-lb-ref....................................................................................................................................... 1-3 create-http-listener................................................................................................................................... 1-3 create-http-redirect................................................................................................................................... 1-3 create-iiop-listener................................................................................................................................... 1-3iiicreate-instance........................................................................................................................................... 1-3 create-jacc-provider.................................................................................................................................. 1-3 create-javamail-resource......................................................................................................................... 1-3 create-jdbc-connection-pool................................................................................................................... 1-3 create-jdbc-resource................................................................................................................................. 1-3 create-jmsdest............................................................................................................................................ 1-3 create-jms-host.......................................................................................................................................... 1-3 create-jms-resource................................................................................................................................... 1-3 create-jndi-resource.................................................................................................................................. 1-3 create-jvm-options.................................................................................................................................... 1-3 create-lifecycle-module........................................................................................................................... 1-3 create-local-instance................................................................................................................................. 1-3 create-message-security-provider.......................................................................................................... 1-3 create-network-listener........................................................................................................................... 1-3 create-node-config.................................................................................................................................... 1-3 create-node-dcom..................................................................................................................................... 1-3 create-node-ssh......................................................................................................................................... 1-3 create-password-alias............................................................................................................................... 1-3 create-profiler............................................................................................................................................ 1-3 create-protocol........................................................................................................................................... 1-3 create-protocol-filter................................................................................................................................ 1-3 create-protocol-finder.............................................................................................................................. 1-3 create-resource-adapter-config............................................................................................................... 1-3 create-resource-ref.................................................................................................................................... 1-3 create-schedule.......................................................................................................................................... 1-3 create-service............................................................................................................................................. 1-3 create-ssl..................................................................................................................................................... 1-3 create-system-properties......................................................................................................................... 1-3 create-threadpool...................................................................................................................................... 1-3 create-transport......................................................................................................................................... 1-3 create-virtual-server................................................................................................................................. 1-3 delete-admin-object................................................................................................................................. 1-3 delete-application-ref.............................................................................................................................. 1-3 delete-audit-module................................................................................................................................. 1-3 delete-auth-realm..................................................................................................................................... 1-3 delete-backup-config............................................................................................................................... 1-3 delete-cluster............................................................................................................................................. 1-3 delete-config.............................................................................................................................................. 1-3 delete-connector-connection-pool......................................................................................................... 1-3 delete-connector-resource....................................................................................................................... 1-3 delete-connector-security-map............................................................................................................... 1-3 delete-connector-work-security-map.................................................................................................... 1-3 delete-custom-resource............................................................................................................................ 1-3 delete-domain........................................................................................................................................... 1-3 delete-file-user.......................................................................................................................................... 1-3 delete-http.................................................................................................................................................. 1-3 delete-http-health-checker...................................................................................................................... 1-3 ivdelete-http-lb............................................................................................................................................. 1-3 delete-http-lb-config................................................................................................................................ 1-3 delete-http-lb-ref...................................................................................................................................... 1-3 delete-http-listener................................................................................................................................... 1-3 delete-http-redirect................................................................................................................................... 1-3 delete-iiop-listener................................................................................................................................... 1-3 delete-instance.......................................................................................................................................... 1-3 delete-jacc-provider................................................................................................................................. 1-3 delete-javamail-resource......................................................................................................................... 1-3 delete-jdbc-connection-pool................................................................................................................... 1-3 delete-jdbc-resource................................................................................................................................. 1-3 delete-jmsdest........................................................................................................................................... 1-3 delete-jms-host.......................................................................................................................................... 1-3 delete-jms-resource.................................................................................................................................. 1-3 delete-jndi-resource................................................................................................................................. 1-3 delete-jvm-options................................................................................................................................... 1-3 delete-lifecycle-module........................................................................................................................... 1-3 delete-local-instance................................................................................................................................ 1-3 delete-message-security-provider......................................................................................................... 1-3 delete-network-listener........................................................................................................................... 1-3 delete-node-config................................................................................................................................... 1-3 delete-node-dcom..................................................................................................................................... 1-3 delete-node-ssh......................................................................................................................................... 1-3 delete-password-alias.............................................................................................................................. 1-3 delete-profiler........................................................................................................................................... 1-3 delete-protocol.......................................................................................................................................... 1-3 delete-protocol-filter................................................................................................................................ 1-3 delete-protocol-finder.............................................................................................................................. 1-3 delete-resource-adapter-config.............................................................................................................. 1-3 delete-resource-ref.................................................................................................................................... 1-3 delete-schedule......................................................................................................................................... 1-3 delete-ssl..................................................................................................................................................... 1-3 delete-system-property............................................................................................................................ 1-3 delete-threadpool..................................................................................................................................... 1-3 delete-transport......................................................................................................................................... 1-3 delete-virtual-server................................................................................................................................. 1-3 deploy......................................................................................................................................................... 1-3 deploydir.................................................................................................................................................... 1-3 disable......................................................................................................................................................... 1-3 disable-backup-config............................................................................................................................. 1-3 disable-http-lb-application..................................................................................................................... 1-3 disable-http-lb-server.............................................................................................................................. 1-3 disable-monitoring................................................................................................................................... 1-3 disable-secure-admin............................................................................................................................... 1-3 disable-secure-admin-internal-user...................................................................................................... 1-3 disable-secure-admin-principal............................................................................................................. 1-3 enable.......................................................................................................................................................... 1-3venable-backup-config.............................................................................................................................. 1-3 enable-http-lb-application...................................................................................................................... 1-3 enable-http-lb-server............................................................................................................................... 1-3 enable-monitoring.................................................................................................................................... 1-3 enable-secure-admin................................................................................................................................ 1-3 enable-secure-admin-internal-user....................................................................................................... 1-3 enable-secure-admin-principal.............................................................................................................. 1-3 export.......................................................................................................................................................... 1-3 export-http-lb-config............................................................................................................................... 1-3 export-sync-bundle.................................................................................................................................. 1-3 flush-connection-pool............................................................................................................................. 1-3 flush-jmsdest............................................................................................................................................. 1-3 freeze-transaction-service....................................................................................................................... 1-3 generate-jvm-report................................................................................................................................. 1-3 get................................................................................................................................................................ 1-3 get-client-stubs.......................................................................................................................................... 1-3 get-health................................................................................................................................................... 1-3 import-sync-bundle................................................................................................................................. 1-3 install-node................................................................................................................................................ 1-3 install-node-dcom..................................................................................................................................... 1-3 install-node-ssh......................................................................................................................................... 1-3 jms-ping..................................................................................................................................................... 1-3 list................................................................................................................................................................ 1-3 list-admin-objects..................................................................................................................................... 1-3 list-application-refs.................................................................................................................................. 1-3 list-applications........................................................................................................................................ 1-3 list-audit-modules.................................................................................................................................... 1-3 list-auth-realms......................................................................................................................................... 1-3 list-backup-configs................................................................................................................................... 1-3 list-backups............................................................................................................................................... 1-3 list-clusters................................................................................................................................................. 1-3 list-commands........................................................................................................................................... 1-3 list-components......................................................................................................................................... 1-3 list-configs................................................................................................................................................. 1-3 list-connector-connection-pools............................................................................................................ 1-3 list-connector-resources........................................................................................................................... 1-3 list-connector-security-maps.................................................................................................................. 1-3 list-connector-work-security-maps....................................................................................................... 1-3 list-containers............................................................................................................................................ 1-3 list-custom-resources............................................................................................................................... 1-3 list-domains............................................................................................................................................... 1-3 list-file-groups........................................................................................................................................... 1-3 list-file-users.............................................................................................................................................. 1-3 list-http-lb-configs................................................................................................................................... 1-3 list-http-lbs................................................................................................................................................ 1-3 list-http-listeners...................................................................................................................................... 1-3 list-iiop-listeners....................................................................................................................................... 1-3 vi。
Oracle Solaris 11.2 用户指南说明书
Oracle Solaris 11.2Frequently Asked QuestionsIntroductionOracle Solaris 11 is a complete, integrated and open platform engineered for large-scale enterprise cloud environments. It combines OpenStack, no compromise virtualization, powerful application driven Software Defined Networking, and agile, secure and compliant application deployment with a proven enterprise-class OS, all in a single, supported cloud offering.What’s New in Oracle Solaris 11.2Oracle Solaris 11.2 introduces many new features that enhance its capabilities as an overall cloud infrastructure solution, including the inclusion of OpenStack cloud controller software.• Centralized cloud management: OpenStack has been integrated into Oracle Solaris 11.2 providing acomprehensive self-service environment for managingcompute, network and storage resources in the data center.Integrated into all the core foundations of Oracle Solaris 11, including Oracle Solaris Zones, Elastic Virtual Switchnetworking, and the Oracle Solaris ZFS filesystem, you no longer need to compromise on mission critical capabilities and can expect an enterprise ready OpenStack distribution courtesy of Oracle.• Proven, zero overhead virtualization: Oracle Solaris Zones are at the heart of OpenStack compute, providing zero overhead virtual environments. A new capability ofOracle Solaris Zones, called Oracle Solaris Kernel Zones, introduce OS independence and isolation allowingadministrators to run multiple versions of Oracle Solariswithin a single system.• Application driven Software Defined Networking: Oracle Solaris 11.2 introduces a number of new software defined networking capabilities including powerful Elastic VirtualSwitching allowing administrators to control their virtualnetworks within the OS itself and across network hardware in the data centre leveraging fabric intelligence whenavailable. Applications can drive their service levelagreements across all layers of the software and hardware stack with powerful new application flows.• Error free lifecycle management: Oracle Solaris 11.2 continues the enhancements around software lifecyclemanagement helping to reduce the biggest cost tobusinesses, human error. Firmware management isincluded in the existing package management utilities,helping administrators to always have correct firmwarewhen updating systems. With enhanced support forcompliance monitoring and reporting, administrators canreduce the risks across their entire cloud infrastructure.• Flexible data management at scale: Data management is critical with the move towards cloud computing and theopportunity of big data. With exploding requirements, Oracle Solaris ZFS remains at the heart of simple, efficient, flexible and scalable data management through data compression, hybrid data storage and encryption.Frequently Asked QuestionsGeneral InformationQ: Where can I download Oracle Solaris 11?A: O racle Solaris 11 can be downloaded from the Oracle Technology Network (OTN) at the following location:/technetwork/server-storage/solaris11/downloads/Q: Where can I log issues relating to Oracle Solaris 11?A: C ustomers who have an active support agreement with Oracle can log issues in My Oracle Support which can be found at the following location:/Q: Where can I find out more information about Oracle Solaris 11?A: V isit the Oracle Solaris 11 pages on Oracle Technology Network:/technetwork/server-storage/solaris11/Q: Can I order Oracle Solaris 11 pre-installed on Oracle hardware products?A: Y es. Oracle Solaris 11 may be factory pre-installed at the time of order at no additional cost. Please check theavailable operating system configurations when ordering. System RequirementsQ: What architectures are supported with Oracle Solaris 11?A: Oracle Solaris 11 is supported on SPARC and x86.Q: Is Oracle Solaris 11 only available on Oracle based hardware?A: N o. Oracle Solaris 11 can be installed on both Oracle hardware and hardware from third party vendors asdetailed in the Oracle Solaris OS: Hardware CompatibilityList that can be found at the following location:/webfolder/technetwork/hcl/Q: What hardware and software are required to run Oracle Solaris Kernel Zones?A: O racle Solaris Kernel Zones have specific requirements on newer hardware and firmware as detailed in the followingproduct documentation:K WWS GRFV RUDFOH FRP FG ( B KWPO ( JQZRL KWPOQ: What languages are supported on Oracle Solaris 11?A: O racle Solaris 11 includes support for over 200 different locales. Translated messages include Japanese, Simplified Chinese, Traditional Chinese, Korean, French, German,Italian, Spanish and Brazilian Portuguese.InstallationQ: How do I choose which Oracle Solaris 11 ISO image to download and install?A: O racle Solaris 11 provides a number of installation options for different environments and customer scenarios, frominitial evaluation of the operating system, to single andmulti-node system provisioning. See the followingquestions for more details on each installation mediaoption.Q: What is the Oracle Solaris 11 Media?A: T he Oracle Solaris 11 Live Media, available only for x86 based systems, provides customers with an opportunity to explore a complete Oracle Solaris environment without the requirement of installing it onto a system by loading theoperating system into RAM. Once evaluated, customerscan start a graphical installer to install the operatingsystem. The graphical installer installs a fixed selection of software with minimal configuration, including a full desktop environment.Q: What is the Oracle Solaris 11 Interactive Text Install?A: T he Oracle Solaris 11 Interactive Text Install, available for SPARC and x86 based systems, provides a text orconsole-based installation most suitable for serversystems. The text installer installs a fixed selection ofsoftware with a greater level of configuration than theOracle Solaris 11 Live Media, but does not include adesktop environment (the required packages can easily be added later, if desired).Q: What is the Oracle Solaris 11 Automated Installer media?A: T he Oracle Solaris 11 Automated Installer media, available for SPARC and x86 based systems, provides anautomated ‘hands-free’ network installation for individualclients without requiring an existing Automated Installerserver. Administrators can boot this image and connectdirectly to an IPS package repository to install theirsystems.Q: What options are available to install Oracle Solaris 11 without access to a CD or DVD drive?A: O racle Solaris 11 can be installed through the network using an Oracle Solaris 11 Automated Installer server, or directly using USB bootable media.Q: How do I install a USB image onto a flash drive?A: I f you have an existing Oracle Solaris 11 system installed, use the usbcopy(1) utility. If you do not have such asystem then you can use the dd(1) utility on mostcommon platforms.On Oracle Solaris 11, follow these steps:Disable the HAL service.# svcadm disable -t halInsert the flash drive and locate the appropriate device.# rmformatCopy the image.# dd if=<path_to_b> \of=/dev/rdsk/<device> bs=16kEnable the HAL service again.# svcadm enable halOn MacOSX, follow these steps:# diskutil listIdentify the drive, /dev/diskN where N is the disknumber.# diskutil unmountDisk /dev/diskN# dd if=<path_to_b> of=dev/diskN \ bs=16kOn Linux, insert the flash drive and locate the appropriate device.# dmesg | tailThen copy the image using dd(1) as above.Q: Does Oracle Solaris 11 install on laptops?A: Y es. Oracle Solaris 11 installs onto many different laptop configurations. Check out the Oracle Solaris OS: Hardware Compatibility List to see a full list of supported systems:/webfolder/technetwork/hcl/index.htmlIf your laptop is not listed, Oracle VM VirtualBox canprovide a virtualized environment in which to run OracleSolaris 11 or other virtualization options from third partyvendors.Q: Can I install Oracle Solaris 11 into a virtual environment?A: Y es. Oracle Solaris 11 is a supported guest operating system on Oracle VM Server for SPARC, Oracle VMServer for x86, and Oracle VM VirtualBox. Oracle Solaris11 is known to work on a number of other third partyvirtualization offerings from vendors including VMware,Windows, and Red Hat.Q: How can I customize my Oracle Solaris 11 installation?A: O racle Solaris 11 installations can be customized using a number of administrative commands, including thepackage management utilities. You can learn more about administrative customization by reading the Oracle Solaris11.2 product documentation:/pls/topic/lookup?ctx=solaris11Q: Can I get an Oracle Solaris 11 Media Pack?A: Media Packs are only orderable from MOS. Log in, select "Contact Us", and "Software & OS Media Requests"http VXSSRUW RUDFOH FRPSystem UpdateQ: Can I update my systems from Oracle Solaris 11.1 to Oracle Solaris 11.2?A: Y es. Systems installed with Oracle Solaris 11.1 can be updated to Oracle Solaris 11.2 using the integrated IPSsoftware management tools. Refer to the Oracle Solaris11.2 Release Notes before attempting this update:/pls/topic/lookup?ctx=solaris11Q: Can I upgrade to Oracle Solaris 11 from Oracle Solaris 10?A: T here is no direct upgrade path from Oracle Solaris 10.Customers wishing to upgrade to Oracle Solaris 11 must either install a system from scratch, or consider the use of Oracle Solaris 10 Zones running on Oracle Solaris 11 and take advantage of built-in physical-to-virtual and virtual-to-virtual migration tools.Application SupportQ: How do I find out which applications are certified on Oracle Solaris 11?A: Y ou can view the latest list of certified applications on Oracle Solaris 11 by visiting the Oracle Partner Networkblog:/partnertechYou can also visit the Oracle Partner Network to see the“Oracle Solaris Ready” partners:/technetwork/server-storage/solaris11/partners-1544236.htmlOracle Solaris Ready recognizes qualifying OPN memberswho are developing and supporting their softwareapplications on the latest major releases of Oracle Solaris11. These partners can be viewed by application or bypartner nameQ: Will I need to recertify my application on Oracle Solaris11.2?A: N o. Applications certified for Oracle Solaris 11 do not need to be recertified when updating to Oracle Solaris 11.2 orlater updates. This is due to the Oracle Solaris BinaryCompatibility Guarantee:/us/products/servers-storage/solaris/solaris-guarantee-program-1426902.pdfThis guarantee ensures applications running on earlierversions of Oracle Solaris can be run on future versions of Oracle Solaris.Q: How can I package my application for Oracle Solaris 11?A: Y ou can learn more about packaging your application using IPS by checking out the Packaging and DeliveringSoftware with IPS Developer Guide:/pls/topic/lookup?ctx=solaris11&id=P KDEVQ: What recommendations are there for deploying applications on Oracle Solaris 11 and future updates?A: T hanks to the Oracle Solaris Binary Compatibility Guarantee, applications running on earlier versions ofOracle Solaris can be run on Oracle Solaris 11 and allfuture updates without being recompiled.To create new applications, or to move existingapplications to Oracle Solaris 11 from other platforms, the use of Oracle Solaris Studio is recommended as thecompiler of choice. Oracle Solaris Studio provides acomprehensive C, C++, and Fortran tool suite for OracleSolaris that accelerates the development of scalable,secure and reliable enterprise applications.During the development and deployment of applications on the Oracle Solaris platform, it is recommended thatcustomers consider the use of native OS virtualizationusing Oracle Solaris Zones. This virtualization technology provides a rapid provisioning environment with zero over-head helping to streamline the application deploymentprocess. You can learn more about Oracle Solarisvirtualization by looking at the Oracle Solaris 11Virtualization Technology Spotlight:/technetwork/server-storage/solaris11/technologies/Q: Where can I download Oracle Solaris Studio?A: O racle Solaris Studio is available for download at no cost from the Oracle Technology Network:/technetwork/server-storage/solarisstudio/Q: Does Oracle Solaris Cluster run on Oracle Solaris 11.2?A: Y es. Oracle Solaris Cluster 4.2 is supported on Oracle Solaris 11.2More InformationA: How can I get more news about Oracle Solaris 11?Q: Catch the latest news and information from our social media sites:Blogs:/solarisFacebook:ZZZ IDFHERRN FRP RUDFOHVRODULVLinkedIn:/groups/Oracle-Solaris-Insider-3951282YouTube:/oraclesolarisA: W hat training courses or certification programs are available for Oracle Solaris 11?Q: An extensive set of training courses and certification programs are available from Oracle University. A list of training courses can be found here:/technetwork/server-storage/solaris11/training/index.htmlOracle Corporation, World Headquarters Worldwide Inquiries500 Oracle Parkway Phone: +1.650.506.7000Redwood Shores, CA 94065, USA Fax: +1.650.506.7200C O N N E C T W I T H U S/solaris/oraclesolaris/orcl_solaris/solarisCopyright © 2014, Oracle and/or its affiliates. All rights reserved. This document is provided for information purposes only, and thecontents hereof are subject to change without notice. This document is not warranted to be error-free, nor subject to any otherwarranties or conditions, whether expressed orally or implied in law, including implied warranties and conditions of merchantability orfitness for a particular purpose. We specifically disclaim any liability with respect to this document, and no contractual obligations areformed either directly or indirectly by this document. This document may not be reproduced or transmitted in any form or by anymeans, electronic or mechanical, for any purpose, without our prior written permission.Oracle and Java are registered trademarks of Oracle and/or its affiliates. Other names may be trademarks of their respective owners.Intel and Intel Xeon are trademarks or registered trademarks of Intel Corporation. All SPARC trademarks are used under license andare trademarks or registered trademarks of SPARC International, Inc. AMD, Opteron, the AMD logo, and the AMD Opteron logo aretrademarks or registered trademarks of Advanced Micro Devices. UNIX is a registered trademark of The Open Group. 07/14。
Solaris系统管理命令及相关技术中英文对照Unix系统-电脑资料
Solaris系统管理命令及相关技术中英文对照Unix系统-电脑资料Solaris 系统管理命令及相关技术中英文对照Solaris 系统管理命令及相关技术中英文对照A ----------------------------------------------------------------------------------- ab2admin—对AnswerBook2进行管理的命令行界面ab2cd—从Documentation CD中Solaris 系统管理命令及相关技术中英文对照Solaris 系统管理命令及相关技术中英文对照A-----------------------------------------------------------------------------------ab2admin—对AnswerBook2进行管理的命令行界面ab2cd—从Documentation CD中运行AnswerBook2服务器ab2regsvr—向联合域名服务注册AnswerBook2文档服务器a clearcase/" target="_blank" >ccept、reject—接受或拒绝打印请求acct—对计数及各种计数命令的概述acctcms—进程计数命令acctcon、acctcon1、acctcon2—连接时间计数acc td isk—将计数数据转换为计数记录总数acctdusg—通过登录信息计算磁盘资源的消耗acctmerg—合并或添加总体计数文件accton—在已有文件中追加进程计数记录acctprc、acctprc1、acctprc2—进程计数acctsh、chargefee、ckpacct、dodisk、lastlogin、monacct、nulladm、prctmp、prdaily、prtacct、shutacct、startup、turnacct—进行计数的shell过程acctwtmp—将utmpx记录写入文件adbgen—生成adb脚本add_drv—在系统中增加一个新的设备驱动器add_install_client—从网络安装中添加或删除客户的脚本add_to_install_server—从附加的Solaris CD中将脚本复制到现有的网络安装服务器addbadsec—映射出错误磁盘块admintool—通过图形用户界面进行系统管理afbconfig、SUNWafb_config—配置AFB图形加速器aliasadm—处理NIS+别名映射allocate—设备分配amiserv—A MI密钥服务器answerbook2_admin—AnswerBook2 GUI管理工具arp—地址解析的显示与控制aset—控制或限制对系统文件和目录的访问aset.restore—恢复ASET所影响的文件系统aspppd、aspppls—异步PPP链接管理程序aspppls—异步PPP链接管理程序audit—控制审计守护进程的行为auditconfig—审计配置auditd—控制审计追踪文件的生成与定位auditreduce—从审计追踪文件中合并和选择审计追踪记录audit_startup—审计子系统初始化脚本auditstat—显示内核审计统计audit_warn—审计守护进程警告脚本automount—安装自动挂接点automountd—挂接/摘除守护进程autofsautopush—配置一个自动压入的STREAMS模块列表B-----------------------------------------------------------------------------------bdconfig—配置按钮和拨号流boot—启动系统内核或者一个独立程序bootparamd—引导参数服务器bsmconv、bsmunconv—启用或者禁用BSMbusstat—报告与总线有关的性能统计C-----------------------------------------------------------------------------------cachefslog—对CacheFS进行记录cachefspack—将文件和文件系统压缩到高速缓存中cachefsstat—对CacheFS进行统计cachefswssize—测定高速缓存文件的工作集合的大小captoinfo—将termcap描述转换为terminfo描述cfgadm—配置管理cfgadm_ac—对EXX00内存进行系统管理cfgadm_pci—对PCI热插入进行配置管理的命令cfgadm_scsi—SCSI硬件专用的cfgadm命令cfgadm_sysctrl—对EX00系统板进行管理cfsadmin—管理CacheFS进行文件系统高速缓存时所使用的磁盘空间cg14config—配置SX/CG14图形加速器设备chargefee—计数的shell过程check-hostname—检测sendmail是否能够测定系统的完全合格主机名check-permissions—检测邮件重新路由的权限check—对JumpStart规则文件中的规则进行校验的脚本chown—改变所有者chroot—修改命令的root目录ckpacct—定期检测/var/adm/pacct长度的计数命令clear_locks—清除NFS客户所持有的锁clinfo—显示分组信息closewtmp—将一个非法读取进程的记录放入/var/adm/wtmpx 文件c lr i、dcopy—清除信息节点comsat—Biff服务器consadm—指定或者显示辅助控制台设备conv_lp—转换LP的配置conv_lpd—转换LPD的配置coreadm—对核心文件进行管理cpustat—通过CPU性能计数对系统行为进行嗫?crash—检测系统映像cron—时钟守护进程cvcd—虚拟控制台守护进程D-----------------------------------------------------------------------------------dcopy—清除信息节点dd—转换与复制文件deallocate—设备的卸配devattr—显示设备属性devconfig—配置设备属性devfree—从独占使用中释放设备devfsadm—对/dev和/devices进行管理的命令devfseventd—devfsadmd的内核事件通知守护进程devinfo—打印特定于设备的信息devlinks—为各种设备和伪设备添加/dev项devnm—设备名devreserv—为独占使用预留设备df—显示闲置的磁盘块和文件数df_ufs—报告UFS文件系统上的闲置磁盘空间dfmounts—显示被挂接的资源信息dfmounts_nfs—显示被挂接的NFS资源信息dfshares—列举远程或本地系统中可用的资源dfshares_nfs—列举远程系统可用的NFS资源dhcpagent—客户DHCP的守护进程dhcpconfig—对DHCP服务进行管理的命令dhcpmgr—管理DHCP服务的图形界面dhtadm—对DHCP配置表进行管理的命令disks—为附加到系统的硬盘创建/dev项diskscan—执行表面分析dispadmin—进程调度管理dmesg—收集系统诊断消息,形成错误日志dmi_cmd—DMI命令行界面的命令dmiget—命令行方式的DMI的获取命令dminfo—报告设备映射文件中某设备项的相关信息dmispd—Sun Solstice Enterprise 的DMI服务提供商dodisk—由时钟守护进程调用的shell过程,可执行磁盘计数功能domainname—显示或者设置当前域名dr_daemon—Enterprise 10000 的动态重配守护进程drvconfig—配置/devices目录du—对磁盘使用情况进行汇总dumpadm—对操作系统的崩溃转储进行配置E-----------------------------------------------------------------------------------edquota—为UFS文件系统编辑用户配额eeprom—EEPROM的显示和装载命令F-----------------------------------------------------------------------------------fbconfig—帧缓冲的配置命令fdetach—将名字与基于STREAMS的文件描述符分离fdisk—创建或者修改固定磁盘分区表ff—为文件系统列举文件名和统计信息ff_ufs—为UFS文件系统列举文件名和统计ffbconfig—对FFB图形加速器进行配置fingerd—远程用户信息服务器firmware—可引导的固件程序和固件命令fmthard—填充硬盘的卷目录表fncheck—检测FNS数据与NIS+数据之间的一致性fncopy—复制FNS环境fncreate—创建FNS环境fncreate_fs—创建FNS文件系统的环境fncreate_printer—在FNS名字空间中创建新打印机fndestroy—破坏FNS环境fnselect—为FNS初始化环境选择一个特定的命名服务fnsypd—更新NIS主服务器上的FNS环境format—磁盘的分区与维护命令fsck—检测和修复文件系统fsck_cachefs—为CacheFS缓存的数据进行完整性检测fsck_s5fs—文件系统的一致性检测和交互式修复fsck_udfs—文件系统的一致性检测和交互式修复fsck_ufs—文件系统的一致性检测和交互式修复fsdb—文件系统调试器fsdb_udfs—UDFS文件系统调试器fsdb_ufs—UFS文件系统调试器fsirand—安装随机的信息节点编号生成器fstyp—测定文件系统的类型ftpd—文件传输协议服务器fuser—通过文件或者文件结构标识进程fwtmp、wtmpfix—对连接计数记录进行处理G-----------------------------------------------------------------------------------gencc—创建cc命令的前端getdev—分类列举设备getdgrp—列举包含了匹配设备的设备组getent—从管理数据库中获取表项gettable—从主机中获取DoD Internet格式的主机表getty—设置终端类型、模式、速度和行规范getvol—对设备的可达性进行校验GFXconfig—配置PGX32(Raptor GFX)图形加速器goupadd—在系统中添加或创建新组定义groupdel—从系统中删除组定义groupmod—修改系统中的组定义grpck—口令和组文件的检测程序gsscred—添加、删除、列举gsscred表项gssd—为内核RPC产生和验证GSS-AIP标记H-----------------------------------------------------------------------------------halt、poweroff—关闭处理器hostconfig—配置系统的主机参数htable—转换DoD Internet格式的主机表I-----------------------------------------------------------------------------------id—返回用户标识ifconfig—配置网络接口参数sat、comsat—Biff服务器in.dhcpd—DHCP服务器in.fingerd、fingerd—远程用户信息服务器in.ftpd、ftpd—文件传输协议服务器in.lpd—BSD打印协议适配器d、named—Internet域名服务器in.ndpd—IPv6的自动配置守护进程in.rarpd、rarpd—DARPA逆向地址解析协议服务器in.rdisc、rdisc—发现网络路由守护进程in.rexecd、rexecd—远程执行服务器in.ripngd—IPv6的网络路由守护进程in.rlogind、rlogind—远程登录服务器in.routed、routed—网络路由守护进程in.rshd、rshd—远程shell服务器in.rwhod、rwhod—系统状态服务器in.talkd、talkd—talk程序服务器in.telnetd、telnetd—DARPA TELNET协议服务器in.tftpd、tftpd—Internet平凡文件传输协议服务器in.tnamed、tnamed—DARPA平凡名字服务器in.uucpd、uucpd—UUCP服务器inetd—Internet服务守护进程infocmp—比较或打印terminfo描述init、telinit—进程控制的初始化init.wbem—启动和停止CIM引导管理程序install—安装命令install_scripts—Solaris软件的安装脚本installboot—在磁盘分区中安装引导块installf—向软件安装数据库中添加文件Intro、intro—对维护命令及应用程序的介绍iostat—报告I/O统计ipsecconf—配置系统范围的IPsec策略ipseckey—手工操作IPsec的SA数据库K-----------------------------------------------------------------------------------kadb—内核调试器kdmconfig—配置或卸配键盘、显示器和鼠标选项kerbd—为内核RPC生成和校验Kerberos票据kernel—包括基本操作系统服务在内的UNIX系统可执行文件keyserv—存储加密私钥的服务器killall—杀死所有活跃的进程ktkt_warnd—Kerberos警告守护进程kstat—显示内核统计信息L-----------------------------------------------------------------------------------labelit—为文件系统列举或者提供标签labelit_hsfs—为HSFS文件系统列举或者提供标签labelit_udfs—为UDF文件系统列举或者提供标签labelit_ufs—为UFS文件系统列举或者提供标签lastlogin—显示每个人员所登录的最后日期ldap_cachemgr—为NIS查找缓存的服务器和客户信息LDAP守护进程ldapclient、ldap_gen_profile—对LDAP客户机进行初始化或者创建LDAP客户配置文件的LDIFlink、unlink—链接或者取消链接文件和目录list_devices—列举可分配的设备listdgrp—列举设备组的成员listen—网络监听守护进程llc2_loop—为测试驱动器、适配器和网络回送诊断lockd—网络锁定守护进程lockfs—修改或者报告文件系统锁lockstat—报告内核锁的统计信息lofiadm—通过lofi管理可用作磁块设备的文件logins—列举用户和系统的登录信息lpadmin—配置LP打印服务lpfilter—管理LP打印服务所使用的过滤器lpforms—管理LP打印服务所使用的格式lpget—获取打印配置lpmove—移动打印请求lpsched—启动LP打印服务lpset—在/etc/printers.conf或FNS中设置打印配置lpshut—停止LP打印服务lpsystem—向打印服务注册远程系统lpusers—设置打印队列的优先级luxadm—SENA、RSM和SSA子系统的管理程序M-----------------------------------------------------------------------------------m64config—配置M64图形加速器mail.local—将邮件存入邮件箱makedbm—创建dbm文件,或者从dbm文件得到文本文件makemap—为sendmail创建数据库映射mibiisa—Sun SUMP代理mk—从源代码重建二进制系统和命令mkfifo—创建FIFO专用文件mkfile—创建一个文件mkfs—构造文件系统mkfs_pcfs—构造FAT文件系统mkfs_udfs—构造UDFS文件系统mkfs_ufs—构造UFS文件系统mknod—创建专用文件modify_install_server—在现有网络安装服务器上取代miniroot 的脚本modinfo—显示所装载的内核模块信息modload—装载内核模块modunload—卸载模块mofcomp—将MOF文件编译为CIM类monacct—每月调用计数程序monitor—SPARC系统的PROM监控器mount、umount—挂接或摘除文件系统和远程资源mountall、umountall—挂接、摘除多个文件系统mount_cachefs—挂接CacheFS文件系统mountd—接收NFS挂接请求和NFS访问的服务器mount_hsfs—挂接HSFS文件系统mount_nfs—挂接远程的NFS资源mount_pcfs—挂接PCFS文件系统mount_s5fs—挂接s5文件系统mount_tmpfs—挂接tmpfs文件系统mount_udfs—挂接UDFS文件系统mount_ufs—挂接UFS文件系统mount_xmemfs—挂接xmemfs文件系统mpstat—报告每个处理器的统计信息msgid—生成消息IDmvdir—移动目录N-----------------------------------------------------------------------------------named-bootconf—将配置文件转换为适用于Bind 8.1的格式named-xfer—支持入站区域传送的辅助代理named—Internet域服务器ncheck—生成路径名与i编号的映射列表ncheck_ufs—为UFS文件系统生成路径名与i编号的映射列表ndd—获取和设置驱动器的配置参数netstat—显示网络状态newfs—构造新的UFS文件系统newkey—在publickey数据库中创建新的Diffie-Hellman密钥对nfsd—NFS守护进程nfslogd—NFS的日志记录守护进程nis_cachemgr—对NIS+服务器的位置信息进行高速缓存的NIS+命令nfsstat—显示NFS统计信息nisaddcred—创建NIS+证书nisaddent—从相应的/etc文件或者NIS映射中创建NIS+表nisauthconf—NIS+的安全性配置nisbackup—备份NIS+目录nisclient—为NIS+实体初始化NIS+证书nisd—NIS+服务的守护进程nisd_resolv—NIS+服务的守护进程nisinit—NIS+客户和服务器的初始化命令nislog—显示NIS+事务日志的内容nispasswdd—NIS+口令更新的守护进程nisping—向NIS+服务器发送pingnispopulate—填充NIS+域中的NIS+表nisprefadm—为NIS+客户设置服务器优先级别的NIS+命令nisrestore—恢复NIS+目录的备份nisserver—创建NIS+服务器nissetup—初始化NIS+域nisshowcache—打印共享高速缓存文件的NIS+命令nisstat—报告NIS+服务器的统计信息nisupdkeys—更新NIS+目录中的公钥nisadmin—对网络监听服务进行管理nscd—名字服务的高速缓存守护进程nslookup—交互式查询名字服务器nstest—DNS测试shellnsupdate—更新DNS名字服务器ntpdate—使用NTP设置本地的日期和时间 731ntpq—标准NTP查询程序 733ntptrace—沿着NTP主机链追溯到其主控时间资源 739nulladm—采用664模式创建文件名,确保其所有者和组为adm O-----------------------------------------------------------------------------------obpsym—OpenBoot固件的内核符号调试ocfserv—OCF 服务器P-----------------------------------------------------------------------------------parse_dynamic_clustertoc—基于动态项对clustertoc文件进行语法分析passmgmt—对口令文件进行管理patchadd—将补丁包应用于Solaris系统patchrm—删除补丁包并恢复以前保存的文件pbind—控制和查询进程与处理器之间的绑定pcmciad—PCMCIA用户守护进程pfinstall—对安装配置文件进行测试pgxconfig、GFXconfig—配置PGX32(Raptor GFX)图形加速器ping—向网络主机发送ICMP(ICMP6) ECHO_REQUEST包pkgadd—将软件包传给系统pkgask—将答复信息存储在请求脚本中pkgchk—检测软件包安装的准确性pkgrm—从系统中删除软件包pmadm—对端口监控器进行管理pmconfig—对电源管理系统进行配置pntadm—DHCP网络表的管理命令ports—为串行线创建/dev和inittab项powerd—电源管理的守护进程poweroff—停止处理器praudit—打印审计追踪文件的内容prctmp、prdaily、prtacct—打印各种计数文件printmgr—在网络中管理打印机的图形用户界面prstat—报告活跃进程的统计信息prtconf—打印系统的配置信息prtdiag—显示系统的诊断信息prtvtoc—报告关于磁盘几何以及分区信息psradm—修改处理器的操作状态psrinfo—显示处理器的相关信息psrset—创建和管理处理器集合putdev—编辑设备表putdgrp—编辑设备组表pwck、grpck—口令/组文件的检测程序pwconv—使用/etc/passwd中的信息安装和更新/etc/shadow Q-----------------------------------------------------------------------------------quot—汇总系统文件的所有权信息quota—显示用户在UFS文件系统中的磁盘配额和使用情况quotacheck—UFS文件系统配额的一致性检测程序quotaon、quotaoff—打开或者关闭UFS文件系统的配额R-----------------------------------------------------------------------------------rarpd—DARPA逆向地址解析协议服务器rdate—从远程主机设置系统日期rdisc—探测网络路由器的守护进程re-preinstall—在系统上安装JumpStart软件reboot—重新启动操作系统reject—拒绝打印请求rem_drv—从系统中删除设备驱动器removef—从软件数据库中删除文件repquota—为UFS文件系统进行配额汇总restricted_shell—受限的shell命令接收器rexd—基于RPC的远程执行服务器rexecd—远程执行服务器rlogind—远程登录服务器rm_install_client—从网络安装中删除客户的脚本rmmount—用于CD-ROM和软盘的可移动介质挂接程序rmt—远程磁带协议模块roleadd—管理新的角色帐号roledel—删除角色的登录rolemod—修改现有的角色帐号route—对路由表进行手工处理routed—网络路由的守护进程rpc.bootparamd、bootparamd—引导参数服务器rpc.nisd、nisd—NIS+服务的守护进程rpc.nisd_resolv、nisd_resolv—NIS+服务的守护进程rpc.nispasswdd、nispasswdd—NIS+口令更新的守护进程rpc.rexd、rexd—基于RPC的远程执行服务器rpc.rstatd、rstatd—内核统计服务器rpc.rusersd、rusersd—网络用户的名字服务器rpc.rwalld、rwalld—网络rwall服务器rpc.sprayd、sprayd—Spray服务器rpc.yppasswdd、yppasswdd—修改NIS口令文件的服务器rpc.ypupdated、ypupdated—修改NIS信息的服务器rpcbind—统一地址到RPC程序编号的映射rpcinfo—报告RPC信息rpld—IA网络引导的RPL服务器rquotad—远程配额服务器rsh—受限的shellrshd—远程shell服务器rstatd—内核统计服务器rtc—对所有的实时钟和GMT标记进行管理runacct—进行每日计数rusersd—网络用户的名字服务器rwall—写给网络中的所有用户rwalld—网络rwall服务器rwhod—系统状态服务器S-----------------------------------------------------------------------------------sa1、sa2、sadc—系统行为报告信息包sac—服务访问控制器sacadm—对服务访问控制器进行管理sadc—报告系统行为的信息包sadmind—分布式系统管理的守护进程saf—服务访问程序 888sar、sar1、sac2、sadc—报告系统行为的包savecore—保存操作系统的崩溃转储sendmail—在Internet上发送邮件server_upgrade—为异质OS服务器的客户进行升级setmnt—建立挂接表setuname—修改系统信息setup_install_server—从Solaris CD到磁盘的复制脚本share—允许远程挂接时使用本地资源share_nfs—允许远程挂接时使用NFS文件系统shareall、unshareall—共享或者取消共享多个资源showmount—显示所有的远程挂接showrev—显示机器和软件的修正信息shutacct—在系统关机时关闭进程计数shutdown—关闭系统或者改变系统状态slpd—服务定位协议守护进程smartcard—配置和管理智能卡smrsh—sendmail的受限shellsnmpdx—Sun Solstice Enterprise Master AgentsnmpXdmid—Sun Solstice Enterprise的SNMP-DMI映射snoop—捕获并检查网络包soconfig—配置套接字所使用的传输提供商soladdapp—将应用程序添加到Solstice应用程序注册表中soldelapp—从Solstice应用程序注册表中删除应用程序solstice—通过图形用户界面访问系统管理工具spray—Spray信息包sprayd—Spray服务器ssaadm—SPARCstorage 队列和SPARCstorage RSM磁盘系统的管理程序startup—在启动时打开进程计数statd—网络状态监控器strace—打印STREAMS追踪消息strclean—STREAMS错误记录器的清除程序strerr—STREAMS错误记录器守护进程sttydefs—为TTY端口维护行设置并寻找序列su—成为超级用户或者另一个用户sulogin—访问单用户模式suninstall—安装Solaris操作环境swap—交换管理界面swmtool—安装、升级和删除软件包sxconfig—为SX视频子系统配置连续内存sync—更新超块syncinit—设置串行线接口的操作参数syncloop—同步线性回送的测试程序syncstat—从同步串行链接中报告驱动器统计信息sys-unconfig—取消系统的一个配置sysdef—输出系统定义sysidconfig—执行或定义系统配置程序sysidtool、sysidnet、sysidns、sysidsys、sysidroot、sysidp—系统配置syslogd—记录系统消息T-----------------------------------------------------------------------------------talkd—talk程序的服务器tapes—为磁带设备创建/devtaskstat—打印ASET任务的状态tcxconfig—配置S24(TCX)帧缓冲telinit—进程控制的初始化telnetd—DARPA TELNET协议服务器tftpd—Internet平凡文件传输协议服务器tic—terminfo编译器tnamed—DARPA平凡命名服务器traceroute—打印信息包到达网络主机的路由ttyadm—对特定端口监控器的信息进行格式化并输出ttymon—终端端口的监控器tunefs—调谐现有的文件系统turnacct—打开或关闭进程计数U-----------------------------------------------------------------------------------uadmin—管理控制ufsdump—文件系统的增量转储ufsrestore—文件系统的增量恢复umount—摘除文件系统以及远程资源umountall—摘除多个文件系统unlink—取消文件和目录的连接unshare—不允许远程系统挂接本地资源unshare_nfs—不允许远程系统挂接本地的NFS文件系统unshareall—取消所有资源的共享useradd—管理系统中的新用户登录或新角色userdel—从系统中删除用户登录usermod—修改系统中的用户登录或角色信息utmp2wtmp—在runacct所生成的文件/var/adm/wtmpx中创建新项utmpd—utmpx监控守护进程uucheck—检测UUCP目录和许可文件uucico—UUCP系统的文件传输程序uucleanup—清除UUCP假脱机目录uucpd—UUCP服务器uusched—UUCP文件传输程序的调度程序Uutry、uutry—尝试在调试模式中联系远程系统uuxqt—执行远程命令请求V-----------------------------------------------------------------------------------vmstat—报告虚拟内存的统计volcopy—创建文件系统的映像拷贝volcopy_ufs—创建UFS文件系统的映像拷贝vold—对CD-ROM和软盘设备进行管理的卷管理守护进程W-----------------------------------------------------------------------------------wall—写给所有的用户wbemadmin—启动Sun WBEM用户管理程序wbemlogviewer—启动WBEM日志查看程序whodo—报告谁在做什么wtmpfix—处理连接计数记录X-----------------------------------------------------------------------------------xntpd—网络时间协议的守护进程xntpdc—专用的NTP查询程序Y-----------------------------------------------------------------------------------ypbind—NIS绑定进程ypinit—创建NIS客户ypmake—重建NIS数据库yppasswdd—修改NIS口令文件的服务器yppoll—返回NIS服务器主机上的当前NIS映射版本yppush—强制传播一个已修改的NIS映射ypserv、ypxfrd—NIS服务器以及绑定进程ypset—指向特定服务器上的ypbindypstart、ypstop—启动和停止NIS服务ypupdated—修改NIS信息的服务器ypxfr、ypxfr_1perday、ypxfr_1perhour、ypxfr_2perday—从NIS服务器向主机传送NIS映射ypxfrd—NIS服务器与绑定进程Z-----------------------------------------------------------------------------------zdump—时区转储器zic—时区编译器。
solaris用户命令中英文对照参考-14页word资料
solaris用户命令中英文对照参考A----------------------------------------------------------------------------------------acctcom--查找和打印进程统计文档adb--通用调试器addbid--创建或扩展书目数据库admin,scci-admin--创建和管理SCCI历史文档aedplot--各种绘图仪的图像过滤器alias,unalias--创建和删除假名answerbook2--联机文档系统appletviewer--浏览Java小程式apropos--通过关键字查找命令ar--维护可移植档案和库arch--显示当前主机的体系结构as--汇编器asa--将FORTRAN回车控制输出转换成可打印的格式at, batch--以后执行命令atoplot--各种绘图仪的图像过滤器atq--显示在指定时间运行的排队的作业atrm--删除由at或batch假脱机的作业audioconvert--转换音频文档格式audioplay--播放音频文档audiorecord--录制音频文档awk--模式扫描和处理语言B----------------------------------------------------------------------------------------banner--制作告示basename, dirname--显示路径名部分batch--以后执行命令bc--二进制计算器bdiff--比较大文档bfs--扫描大文档bg--控制进程执行bgplot--各种绘图仪的图像过滤器biff--通知收到邮件消息break, continue--外壳内置函数,用以中断循环C----------------------------------------------------------------------------------------cal--显示日历calendar--提醒服务cancel--取消打印请求case, switch, select--从操作列表进行选择的内置函数cat--连接并显示文档cc--C 编译器cd,chdir, pushd, popd, dirs--改变工作目录cdc, sccs-cdc--改变SCCS增量更改的增量更改说明chdir--改变工作目录checheq--排版数学测试checknr--检查nroff和troff输入文档的错误chgrp--改变文档组任何权chkey--改变用户的安全RPC密钥对chmod--改变文档的权限模式chown--改变文档任何权cksum--写文档校验和及尺寸clear--清除终端屏幕cmp--比较两个文档col--反向换行过滤器com, sccs-comb--组合SCCS增量更改comm--选择或丢弃两个文档中相同的行command--执行简单的命令compress, uncompress, zcat--压缩、解压缩文档或显示扩展文档continue, break--外壳内置函数cp--拷贝文档cpio--拷进和拷出文档档案cpp--C语言预处理器corntab--用户表文档,按年代顺序排列crtplot--各种绘图仪的图像过滤器crypt--加密或解密文档csh--带有类C语法的外壳命令解释器csplit--在上下文的基础上拆分文档ct --登录到远程终端ctags--创建一个标记文档,以和ex和vi一起使用cu--调用另一个UNIX系统cut--剪切文档每行中选择的字段D----------------------------------------------------------------------------------------date--写日期和时间dc--桌面计算器delta, sccs-delta--对SCCS文档生成增量更改deroff--删除nroff/troff, tbl和eqn结构df--报告空闲磁盘块和文档的数量dhcpinfo--显示通过DHCP收到的参数值diff--逐行显示两个文本文档之间的不同diff3--比较3个文档之间的差别diffmk--标记troff输入文档的版本之间的差别dircmp--目录比较dirname--提供路径名称部分dirs--更改工作目录dis--目标代码反汇编程式disable--禁用LP打印机dispgid--显示任何合法组名称列表dispuid--显示任何合法用户名称的列表dos2unix--将DOS格式的文本文档转换为ISO格式download--下载主机上驻留的PostScript字体dpost--PostScript打印机的troff后处理器du--汇总磁盘的使用dumbplot--各种绘图仪的图像过滤器dump--为外壳脚本转储目标文档的选定部分dumpcs--显示当前地区的代码集表dumpkeys--转储键盘转换表E----------------------------------------------------------------------------------------echo--将参数写到标准输出ed, red--文本编辑器edit--文本编辑器(ex的变体,用于临时用户)egrep--用完整的正则表达式搜索某个模式的文档eject--从驱动器中弹出光盘或磁盘之类的媒体elfdump--转储目标文档的选定部分enable, disable--启用/禁用LP打印机env--为命令调用配置环境eqn, neqn, checkeq--排版数学测试eval--执行其他命令的外壳内置函数ex--基于显示的文本编辑器exec, eval, source--执行其他命令的外壳内置函数exit, return, goto--让外壳忽略他的步骤顺序的外壳内置函数expand, unexpand--将制表符展开为空格符,或反过来export--外壳内置环境变量函数exportfs--将exprotfs选项转换为共享/非共享命令expr--计算表达式exstr--从源文档中提取字符串F----------------------------------------------------------------------------------------factor--得到数字的素因子false--提供真值fastboot, fasthalt--不检查磁盘而重现启动/暂停系统fc--处理命令历史列表fdformat--格式化磁盘或PCMCIA存储卡fg--控制进程执行fgrep--在文档中搜索固定字符串file--确定文档类型filesync--同步常规、目录或特别文档find--查找文档finger--显示关于本地和远程用户的信息fmt--简单文本格式化程式fmtmsg--在标准错误或系统控制台上显示消息fnattr--更新和检查和FNS命名对象有关的属性fnbind--将引用绑定在FNS名称上fnlist--显示FNS上下文中的名称和引用绑定fnlookup--显示绑定在FNS名称上的引用fnrename--重新命名FNS名称的绑定fnsearch--搜索有特定属性的FNS对象fnunbind--从FNS名称中解除引用的绑定fold--折叠行的过滤器for,foreach,repeat--内置重复函数from--显示新到达的邮件消息的日期和发件人ftp--文档传输程式function--定义外壳函数的外壳内置命令G----------------------------------------------------------------------------------------gcore--获取运行进程的核心映像gencat--创建格式化的消息目录genmsg--从源文档中抽取消息来生成消息源文档get, sccs-get--检索SCCS文档的版本getconf--获取配置值getfacl--显示任意文档的信息getopt--分析命令选项getoptcvt--转换到getopts来分析命令选项getopts--分析实用程式选项gettext--从消息数据库中检索文本字符串gigiplot--各种绘图仪的图像过滤器glob--展开词列表的外壳内置函数goto--外壳内置函数gprof--显示调用图像配置文档数据graph--画图像grep--在文档中搜索一种模式groups--打印用户组的成员grpck--密码/组文档检查程式H----------------------------------------------------------------------------------------hash,rehash,unhash,hashstat--计算目录内容的内部哈希表hashcheck,hashmake--报告拼写错误hashstat--计算目录内容的内部哈希表head--显示文档的前几行help,sccs-help--寻求关于SCCS错误或警告消息的帮助history, fc--处理命令历史列表hostid--打印当前主机的数字标识符hostname--配置或打印当前主机系统名hp7221plot, hpplot--各种绘图仪的图像过滤器I----------------------------------------------------------------------------------------iAPX286,i286,i386,i486,i860--获取处理器类型真值iconv--代码集转换实用程式if,test--条件判断implot--各种绘图仪的图像过滤器indxbib--生成书目数据库的倒序索引install--安装命令Intro, intro--命令及应用程式介绍ipcrm--删除消息队列、信号量集或共享的内存IDipcs--报告进程间通信机制状态isainfo--描述指令集结构isalist--显示这个平台的本机指令集J----------------------------------------------------------------------------------------jar--Java归档工具javac--Java编译器javadoc--Java API文档生成器javah--C头文档和占位文档生成器javald--创建Java应用程式包装javap--Java类文档反汇编程式jdb--Java调试器jobs, fg, bg, stop, notify--控制进程执行join--关系数据库运算符jre--Java运行阶段解释器jsh--标准和作业控制外壳及命令解释器K----------------------------------------------------------------------------------------kbd--键盘命令kdestroy--消除Kerberos证实书Kerberos--介绍Kerberos安全系统keylogin--使用keyserv解密并存储密钥keylogout--用keyserv删除存储的密钥kill--结束进程或对进程发信号kinit--Kerberos登录命令klist--列出当前持有的Kerberos证实书ksh,rksh--korn外壳,一个标准的/限制的命令和编程语言ksrvtgt--使用服务密钥获取并存储Kerberos授权证实书L----------------------------------------------------------------------------------------last--显示注册和注销信息lastcomm--按相反的顺序显示最近执行的命令ld--目标文档的链接编辑器ldapadd--ldap条目添加和修改工具ldapdelete--ldap删除条目工具ldapmodify, ldapadd--ldap条目添加和修改工具ldapmodrdn--ldap修改条目RDN工具ldapsearch--ldap搜索工具ldd--列出可执行文档或共享对象的动态从属关系ld.so.1--动态对象的运行阶段链接程式let--用于计算一个或多个算术表达式的外壳内置函数lex--为词汇任务生成程式limit,ulimit,unlimit--配置或获取可用系统资源的限制line--读一行lint--C程式验证器listusers--列出用户登录信息ln--生成文档的硬链接或符号链接loadfont--显示或改变X86显示卡字体信息loadkeys, dumpkeys--加载或转储键盘转换表locale--获取地区特定的信息localedef--定义地区环境logger--向系统日志中添加条目login--登录到系统中logname--返回用户的登录名logout--外壳内置函数,从登录会话中退出look--在系统目录中查找字词或在存储列表中查找行lookbib--在书目数据库中查找引用lorder--查找目标或库档案的顺序关系lp--提出打印请求lpc--行式打印机控制程式lpq--显示打印队列的内容lpr--提交BSD打印请求lprm--从打印队列中删除打印请求lpstat--显示关于打印服务状态的信息lptest--生成行式打印机脉动模式ls--列出目录的内容M----------------------------------------------------------------------------------------m4--宏处理器mach--显示当前主机的处理器类型machid--获取处理器类型的真值mail, rmail--读取邮件或向用户发送邮件mailcompat--为Solaris邮箱提供兼容性mailq--打印邮件队列mailstats--打印Sendmail收集的统计信息mailx, mail, Mail--交互式消息处理系统make--维护、更新和重新生成相关程式和文档makekey--创建加密密钥man--查找并显示参考手册页mconnect--连接到SMTP邮件服务器套接字mcs--控制目标文档的注释节mesg--允许或拒绝消息mkdir--生成目录mkmsgs--创建gettxt使用的消息文档mkstr--通过传送C源文档消息来创建错误消息文档more, page--在文本文档中浏览或翻页msgfmt--从消息文档中创建消息目标fnlookup--显示绑定在FNS名称上的引用fnrename--重新命名FNS名称的绑定fnsearch--搜索有特定属性的FNS对象fnunbind--从FNS名称中解除引用的绑定fold--折叠行的过滤器for,foreach,repeat--内置重复函数from--显示新到达的邮件消息的日期和发件人ftp--文档传输程式function--定义外壳函数的外壳内置命令G----------------------------------------------------------------------------------------gcore--获取运行进程的核心映像gencat--创建格式化的消息目录genmsg--从源文档中抽取消息来生成消息源文档get, sccs-get--检索SCCS文档的版本getconf--获取配置值getfacl--显示任意文档的信息getopt--分析命令选项getoptcvt--转换到getopts来分析命令选项getopts--分析实用程式选项gettext--从消息数据库中检索文本字符串gigiplot--各种绘图仪的图像过滤器glob--展开词列表的外壳内置函数goto--外壳内置函数gprof--显示调用图像配置文档数据graph--画图像grep--在文档中搜索一种模式groups--打印用户组的成员grpck--密码/组文档检查程式H----------------------------------------------------------------------------------------hash,rehash,unhash,hashstat--计算目录内容的内部哈希表hashcheck,hashmake--报告拼写错误hashstat--计算目录内容的内部哈希表head--显示文档的前几行help,sccs-help--寻求关于SCCS错误或警告消息的帮助history, fc--处理命令历史列表hostid--打印当前主机的数字标识符hostname--配置或打印当前主机系统名hp7221plot, hpplot--各种绘图仪的图像过滤器I----------------------------------------------------------------------------------------iAPX286,i286,i386,i486,i860--获取处理器类型真值iconv--代码集转换实用程式if,test--条件判断implot--各种绘图仪的图像过滤器indxbib--生成书目数据库的倒序索引install--安装命令Intro, intro--命令及应用程式介绍ipcrm--删除消息队列、信号量集或共享的内存IDipcs--报告进程间通信机制状态isainfo--描述指令集结构isalist--显示这个平台的本机指令集J----------------------------------------------------------------------------------------jar--Java归档工具javac--Java编译器javadoc--Java API文档生成器javah--C头文档和占位文档生成器javald--创建Java应用程式包装javap--Java类文档反汇编程式jdb--Java调试器jobs, fg, bg, stop, notify--控制进程执行join--关系数据库运算符jre--Java运行阶段解释器jsh--标准和作业控制外壳及命令解释器K----------------------------------------------------------------------------------------kbd--键盘命令kdestroy--消除Kerberos证实书Kerberos--介绍Kerberos安全系统keylogin--使用keyserv解密并存储密钥keylogout--用keyserv删除存储的密钥kill--结束进程或对进程发信号kinit--Kerberos登录命令klist--列出当前持有的Kerberos证实书ksh,rksh--korn外壳,一个标准的/限制的命令和编程语言ksrvtgt--使用服务密钥获取并存储Kerberos授权证实书L----------------------------------------------------------------------------------------last--显示注册和注销信息lastcomm--按相反的顺序显示最近执行的命令ld--目标文档的链接编辑器ldapadd--ldap条目添加和修改工具ldapdelete--ldap删除条目工具ldapmodify, ldapadd--ldap条目添加和修改工具ldapmodrdn--ldap修改条目RDN工具ldapsearch--ldap搜索工具ldd--列出可执行文档或共享对象的动态从属关系ld.so.1--动态对象的运行阶段链接程式let--用于计算一个或多个算术表达式的外壳内置函数lex--为词汇任务生成程式limit,ulimit,unlimit--配置或获取可用系统资源的限制line--读一行lint--C程式验证器listusers--列出用户登录信息ln--生成文档的硬链接或符号链接loadfont--显示或改变X86显示卡字体信息loadkeys, dumpkeys--加载或转储键盘转换表locale--获取地区特定的信息localedef--定义地区环境logger--向系统日志中添加条目login--登录到系统中logname--返回用户的登录名logout--外壳内置函数,从登录会话中退出look--在系统目录中查找字词或在存储列表中查找行lookbib--在书目数据库中查找引用lorder--查找目标或库档案的顺序关系lp--提出打印请求lpc--行式打印机控制程式lpq--显示打印队列的内容lpr--提交BSD打印请求lprm--从打印队列中删除打印请求lpstat--显示关于打印服务状态的信息lptest--生成行式打印机脉动模式ls--列出目录的内容M----------------------------------------------------------------------------------------m4--宏处理器mach--显示当前主机的处理器类型machid--获取处理器类型的真值mail, rmail--读取邮件或向用户发送邮件mailcompat--为Solaris邮箱提供兼容性mailq--打印邮件队列mailstats--打印Sendmail收集的统计信息mailx, mail, Mail--交互式消息处理系统make--维护、更新和重新生成相关程式和文档makekey--创建加密密钥man--查找并显示参考手册页mconnect--连接到SMTP邮件服务器套接字mcs--控制目标文档的注释节mesg--允许或拒绝消息mkdir--生成目录mkmsgs--创建gettxt使用的消息文档mkstr--通过传送C源文档消息来创建错误消息文档more, page--在文本文档中浏览或翻页msgfmt--从消息文档中创建消息目标sccs-prs,prs--显示SCCS历史文档中指定的部分sccs-prt,prt--显示SCCS文档的增量更改表信息sccs-rmdel,rmdel--删除SCCS文档中的增量更改sccs-sact,sact--显示SCCS的编辑活动状态sccs-sccsdiff,sccsdiff--比较同一个SCCS文档的两个版本sccs-unget,unget--撤销前一次对SCCS文档的Getsccs-val,val--验证SCCS文档script--记录终端会话sdiff--并排显示两个文档之间的不同之处sed--流编辑器select--外壳内置函数,从操作列表中做出选择serialver--显示序列号版本set,unset,setenv,unsetenv,export--外壳环境变量内置函数setfacl--修改一个或多个文档的访问控制表(ACL)settime--改变文档的访问和修改时间sh,jsh--标准的作业控制外壳和命令解释器shell_builtins--外壳命令解释器内置函数shift--外壳内置函数,移动外壳的参数列表或字段分隔的字列表shutdown--在指定的时间关闭系统size--显示目标文档节的字节数sleep--在一段时间内暂停执行smart2cfg--Compaq Smart-2 EISA/PCI和Smart-2SL PCI 阵列控制器ioctl命令soelim--解析和消除nroff或troff输入中的.so请求solregis--Solaris用户注册sort--对文本文档进行排序、合并或检查顺序sortbib--对书目数据库进行排序sotruss--跟踪共享库的过程调用source--外壳内置函数,能够执行其他命令sparc--得到处理器类型真值spell,haskmake,spellin,hashcheck--显示拼写错误spline--内插光滑曲线split--将文档拆分成数据片srchtxt--显示消息数据库的内容,或在消息数据库中搜索字符串stop--控制进程的执行strchg,strconf--改变或查询流配置strings--查找目标文档或二进制文档中可显示的字符串strip--从目标文档中去除符号表、调试信息和行号信息stty--配置终端的选项sum--显示文档的校验和连同块数sun--得到处理器类型真值suspend--外壳内置函数,能够使当前外壳停止switch--外壳内置函数,从操作列表中选择一种symorder--重新排列一列符号sysvV-make--维护、更新和重新生成程式组T----------------------------------------------------------------------------------------t300, t200s, t4014, t450--各种绘图仪的图像过滤器tabs--配置终端上的制表符tail--查看文档的最后部分talk--和其他用户交谈tar--创建磁带档案连同添加或提取文档tbl--为nroff或troff配置表的格式tcopy--拷贝磁带tee--复制标准输出tek--各种绘图仪的图像过滤器telnet--使用TELNET协议连到远程系统的用户界面test--判断条件tftp--普通文档传输程式time--计算简单命令的时间times--外壳内置函数,用于报告当前外壳的使用时间timex--计算命令的时间;报告进程数据和系统活动tip--连接到远程系统tnfdump--把二进制TNF文档转换为ASCII文档tnfxtract--把内核探查输出提取到跟踪文档中touch--更改文档的访问时间和修改时间tplot, t300, t300s, t4014, t450, tek, ver--各种绘图仪的终端输出的图像过滤器tput--初始化终端或查询terminfo数据库tr--转换字符trap, onintr--外壳内置函数,用于响应硬件信号troff--排版或配置文档格式true, false--提供真值truss--跟踪系统调用和信号tset, reset--建立或恢复终端特性tsort--拓扑排序tty--返回用户的终端名type--写出命令类型的说明typeset, whence--外壳内置的命令,用于获得/配置外壳变量和函数的属性及值U----------------------------------------------------------------------------------------u3b, u3b2, u3b5, u3b15, u370--获得处理器类型真值ucblinks--为SunOS 4.x的兼容性添加/dev项ul--给终端显示的文本加下划线ulimit, unlimit--配置或获得系统资源的外壳限制umask--获得或配置文档模式创建掩码unalias--删除命令的别名uname--打印当前系统名uncompress--解压或显示展开的文档unexpand--把空格字符转换为制表符unget--撤销以前获得的SCCS文档unhash--计算目录的内部哈希表目录unifdef--从C源程式中解析和删除ifdef行uniq--报告或过滤出文档中的重复行units--将以标准单位表达的数量转换为其他单位unix2dos--把文本文档由ISO格式转换为DOS格式unlimit--配置或获取外壳系统资源的限制unpack--解压和展开文档unset, unsetenv--外壳内置函数,确定环境变量特性until--外壳内置函数,在条件为真时执行操作unzip--列出、测试和提取Zip档案中的压缩文档uptime--显示系统运行的时间users--显示登录用户的压缩列表uucp, uulog, uuname--UNIX到UNIX系统文档复制uuencode, undecode--对二进制文档编码或解码uuglist--打印可用服务等级的列表uulog, uuname--UNIX到UNIX的系统复制uupick--公共的UNIX到UNIX的文档复制uustat--uucp状态查询和作业控制uuto, uupick--公共的UNIX到UNIX系统文档的复制uux--UNIX到UNIX的系统命令的执行V----------------------------------------------------------------------------------------vacation--自动答复邮件val--验证SCCS文档vax--获取处理器类型真值vc--版本控制vedit--面向屏幕的、基于ex的可视显示编辑器ver--各种绘图仪的图像过滤器vgrind--配置程式列表的格式vi, view, vedit--面向屏幕的、基于ex的可视显示编辑器view--面向屏幕的、基于ex的可视显示编辑器vipw--编辑密码文档volcancel--取消对当前驱动器中不存在的可卸载媒体的请求volcheck--检查驱动器中volmissing--提示用户,请求的卷并不在光驱或磁盘驱动器中volrmmount--调用rmmount来安装或卸载媒体vplot--各种绘图仪的图像过滤器W----------------------------------------------------------------------------------------w--显示系统用户信息wait--等待进程完成wc--显示文档中的行、单词连同字符的数目what--从文档中提取SCCS版本信息whatis--显示有关命令的一行摘要信息whence--外壳内置函数,以获得/配置外壳变量和函数属性及数值whereis--找到一个命令的二进制文档、源文档和帮助页文档which--显示一个命令在用户路径中的位置while外壳内置函数,执行条件操作who--显示用户名whoami--显示有效的当前用户whocalls--报告对特定过程的调用whoisInternet--用户名目录服务write--向其他用户发送一个消息X----------------------------------------------------------------------------------------xargs --将一个命令的标准输出转换为另一个命令的参数xgettxt--从C程式提取xgettxt调用字符串xstrt--从C程式提取字符串Y----------------------------------------------------------------------------------------yacc--另一个编译器ypcat--显示NIS数据库中的值ypmatch--显示NIS映射中的键值ypasswd--更改NIS数据库中的网络密码ypwhich--返回映射主机的NIS服务器的名称Z----------------------------------------------------------------------------------------zcat--压缩、解压文档或显示展开后的文档zipinfo--列出有关zip档案的周详信息。
Solaris系统管理员手册
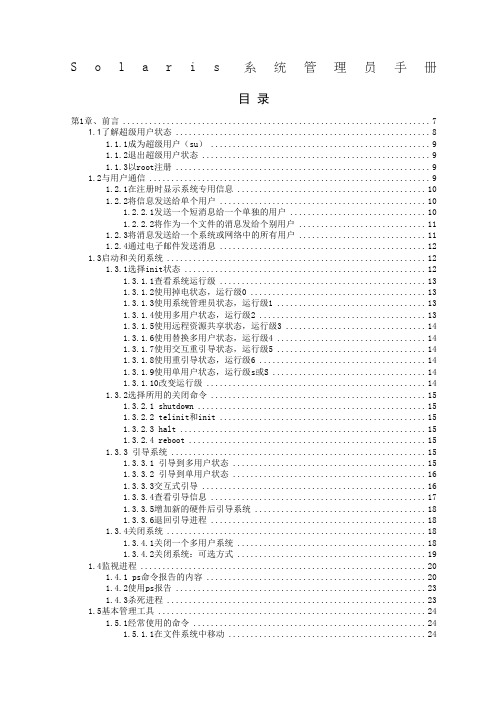
S o l a r i s系统管理员手册目录第1章、前言 (7)1.1了解超级用户状态 (8)1.1.1成为超级用户(su) (9)1.1.2退出超级用户状态 (9)1.1.3以root注册 (9)1.2与用户通信 (9)1.2.1在注册时显示系统专用信息 (10)1.2.2将信息发送给单个用户 (10)1.2.2.1发送一个短消息给一个单独的用户 (10)1.2.2.2将作为一个文件的消息发给个别用户 (11)1.2.3将消息发送给一个系统或网络中的所有用户 (11)1.2.4通过电子邮件发送消息 (12)1.3启动和关闭系统 (12)1.3.1选择init状态 (12)1.3.1.1查看系统运行级 (13)1.3.1.2使用掉电状态,运行级0 (13)1.3.1.3使用系统管理员状态,运行级1 (13)1.3.1.4使用多用户状态,运行级2 (13)1.3.1.5使用远程资源共享状态,运行级3 (14)1.3.1.6使用替换多用户状态,运行级4 (14)1.3.1.7使用交互重引导状态,运行级5 (14)1.3.1.8使用重引导状态,运行级6 (14)1.3.1.9使用单用户状态,运行级s或S (14)1.3.1.10改变运行级 (14)1.3.2选择所用的关闭命令 (15)1.3.2.1 shutdown (15)1.3.2.2 telinit和init (15)1.3.2.3 halt (15)1.3.2.4 reboot (15)1.3.3 引导系统 (15)1.3.3.1 引导到多用户状态 (15)1.3.3.2 引导到单用户状态 (16)1.3.3.3交互式引导 (16)1.3.3.4查看引导信息 (17)1.3.3.5增加新的硬件后引导系统 (18)1.3.3.6退回引导进程 (18)1.3.4关闭系统 (18)1.3.4.1关闭一个多用户系统 (18)1.3.4.2关闭系统:可选方式 (19)1.4监视进程 (20)1.4.1 ps命令报告的内容 (20)1.4.2使用ps报告 (23)1.4.3杀死进程 (23)1.5基本管理工具 (24)1.5.1经常使用的命令 (24)1.5.1.1在文件系统中移动 (24)1.5.1.2查看在文件系统中所处的位置 (24)1.5.1.3改变目录 (25)1.5.1.4查看文件的有关信息 (25)1.5.1.5显示文件信息 (25)1.5.1.6查找一个文件 (25)1.5.1.7查看一个文件的类型 (26)1.5.1.8查看文件中的信息 (27)1.5.1.9查找文件中的字符串 (27)1.5.1.10查看文件 (27)1.5.1.11浏览文件 (27)1.5.1.12查看文件尾 (28)1.5.1.13查看文件头 (29)1.5.1.14改变文件的所有权和许可权 (29)1.5.1.15改变文件组 (31)1.5.1.16设置或显示系统环境 (31)1.5.1.17定义Bourne和Korn shell环境变量 (32)1.5.1.18定义C shell环境变量 (32)1.5.1.19显示环境变量的设置 (32)1.5.1.20使用PATH变量 (33)1.5.1.21设置Bourne和Korn shell路径 (33)1.5.1.22设置C shell路径 (33)1.5.2使用管理工具 (33)第2章、基本OS命令 (34)2.1查找用户信息 (34)2.1.1确定系统中有谁注册 (34)2.1.1.1使用who命令 (34)2.1.1.2使用finger命令 (34)2.1.1.3使用rusers -1命令 (34)2.1.1.4使用whodo命令 (35)2.1.2检查用户的用户号和组号(id命令) (35)2.2查寻环境信息 (36)2.3创建和编辑文件 (36)2.3.1使用cat命令 (36)2.3.2使用touch命令 (37)2.3.3文件拷贝(cp)或改名(mv) (37)2.3.4文本编辑器的使用 (37)2.3.5 vi的使用 (38)2.4命令组合及输出重新定向 (39)2.4.1在同一命令行里键入多个命令 (39)2.4.2输出重新定向(<>) (39)2.4.3组合命令(|) (39)2.5使用手册 (40)2.5.1显示手册(man) (40)2.5.2找命令节号(whatis、man) (40)2.6查阅磁盘信息 (41)2.6.1显示磁盘空间的信息(df -k) (41)2.6.2判别某文件系统是否为本地文件系统(df) (41)2.6.3找出某种类型已安装的文件系统(df -F) (42)第3章、设备管理 (43)3.1磁带的使用 (43)3.1.1磁带设备的命名习惯 (43)3.1.1.1使用缺省密度规定驱动器号 (44)3.1.1.2为磁带机指定密度 (44)3.1.1.3指定"不倒带"选项 (45)3.1.1.4不同磁带控制器和介质的设备名缩写 (45)3.1.1.5 1/2英寸卷绕式非SCSI内接(Rack mounted)磁带机 (45)3.1.1.6 1/4英寸SCSI盒式和1/2英寸前部装入的卷绕式磁带机 (46)3.1.1.7 螺线扫描磁带机 (46)3.1.2读写磁带的命令 (46)3.1.2.1拉紧磁带 (46)3.1.2.2倒带 (47)3.1.2.3列出磁带机状态 (47)3.2 磁带与软盘操作 (47)3.2.1 tar命令 (47)3.2.1.1向磁带写文件(tar) (47)3.2.1.2列出磁带上的文件(tar) (48)3.2.1.3向磁带上增加文件(tar) (48)3.2.1.4从磁带中析取文件(tar) (49)3.2.2cpio命令 (50)3.2.2.1将某目录下的所有文件拷入磁带(cpio) (50)3.2.2.2列出磁带上的文件(cpio) (50)3.2.2.3析取磁带上所有文件(cpio) (51)3.2.2.4自磁带中析取个别文件(cpio) (51)3.2.2.5软盘的使用 (51)3.2.3软驱设备名 (52)3.2.4ufs文件系统的软盘 (52)3.2.4.1格式化ufs软盘 (52)3.2.4.2自软驱中取出软盘 (52)3.2.4.3将ufs文件拷入单张格式化过软盘 (52)3.2.4.4列出软盘上的文件 (53)3.2.4.5向一个格式化好的软盘上附加文件(tar) (53)3.2.4.6从软盘上拷出文件(tar) (54)3.2.4.7自软盘上拷出bar格式的文件(cpio) (54)3.2.5使用多张软盘存档 (54)3.2.5.1在软盘上创建一个ufs文件系统(newfs /dev/rdiskette) (55)3.2.6pcfs(DOS)文件系统的软盘 (55)3.2.6.1 格式化pcfs(DOS)文件系统软盘 (55)3.2.6.2安装pcfs软盘 (55)3.2.6.3卸下pcfs软盘 (56)3.3硬盘命名管理 (56)3.3.1硬盘命名习惯 (56)3.3.1.1带有总线控制器的硬盘的使用 (56)3.3.1.2带有直接驱动器的硬盘的使用 (57)3.3.2检查硬盘使用状况 (58)3.3.3检查硬盘信息(Prtvtoc) (58)3.3.3.1将文件存档 (60)3.3.3.2将硬盘上文件拷出 (60)3.3.3.3修复坏块 (60)3.3.3.4重新格式化硬盘 (60)3.3.3.5换下旧硬盘 (60)3.3.3.6加入错误表对硬盘进行格式化、分区及标记 (60)3.3.3.7重建文件系统(newfs) (62)3.3.3.8在临时安装点安装文件系统(mount) (63)3.3.3.9向文件系统转储文件(ufsrestore) (63)3.3.3.10自临时装入点拆卸文件系统(umount)其方法如下: (63)3.3.3.11检查文件系统的不一致性(fsck) (64)3.3.3.12对恢复文件系统做0级备份 (64)3.3.3.13在永久安装点安装文件系统(mount) (64)第4章、文件系统管理 (65)4.1文件系统类型 (65)4.1.1磁盘文件系统 (65)4.1.2网络文件系统 (66)4.1.3伪文件系统 (66)4.1.3.1临时文件系统(tmpfs) (66)4.1.3.2循环文件系统(lofs) (67)4.1.3.3进程文件系统(procfs) (67)4.1.3.4别的伪文件系统 (68)4.2 SunOS 5.x缺省的文件系统 (68)4.3虚拟文件系统表(/etc/vfstab) (68)4.3.1 文件系统表项的建立 (70)4.4文件管理命令 (71)4.4.1普通命令语法规则 (71)4.4.2普通文件系统命令和特别文件系统命令手册 (72)4.4.3利用文件系统命令确定文件系统类型 (72)4.4.4文件系统类型 (73)4.5如何使文件系统有效 (74)4.5.1安装与拆卸 (74)4.5.1.1安装与拆卸文件系统命令 (75)4.5.1.2查找已安装的文件系统 (75)4.5.1.3安装/etc/vfstab文件中的全部文件系统 (76)4.5.1.4安装特定类型的文件系统 (76)4.5.1.5安装单个文件系统(mount) (76)4.5.1.6拆卸所有的远程文件系统(umountall -F nfs) (77)4.5.1.7拆卸个别的文件系统(umount) (77)4.5.2自动安装程序 (78)4.5.3共享服务器文件 (78)4.6检查文件系统的数据一致性(fsck) (79)4.6.1决定文件系统是否需检测 (79)4.6.2以交互方式检测文件系统 (80)4.7备份和恢复文件系统 (80)4.7.1用QIC-150盒式磁带备份文件系统(ufsdump) (81)4.7.1.1实现增量备份 (82)4.7.2恢复备份文件系统 (82)4.7.2.1决定使用哪一备份带 (83)4.7.2.2恢复全部备份 (83)4.7.2.3交互式恢复文件 (84)4.7.2.4从备份带中恢复单个文件( ufsrestore) (86)第5章、管理网络服务 (87)5.1检查远程系统状态 (87)5.1.1确定一个远程系统已运行了多长时间 (87)5.1.2确定一个远程系统是否在运行(ping\rup\rpcinfo-p) (87)5.2注册到一个远程系统(rlogin) (89)5.3系统之间传送文件(rcp、ftp) (89)5.3.1使用RCP命令 (89)5.3.2使用文件传送程序(ftp) (90)第6章、管理用户帐号和用户组 (92)6.1增加和管理用户帐号 (92)6.1.1增加用户帐号 (92)6.1.1.1编辑Passwd数据库 (92)6.1.1.2定义用户组 (94)6.1.1.3建立主目录(home director) (95)6.1.1.4自动安装目录 (97)6.1.1.5用nfs安装主目录 (98)6.1.1.7定义初化文件 (98)6.1.1.8建立用户的邮件帐号 (102)6.1.1.9建立口令 (102)6.1.2管理用户帐号 (103)6.1.2.1修改用户帐号 (103)6.1.2.2取消用户帐号 (103)6.1.2.3冻结用户帐号 (103)6.2设置和管理用户组 (103)6.2.1设置Group数据库中的域值 (104)6.2.1.1设置组名(Group Name)域 (104)6.2.1.2设置Group ID域 (104)6.2.1.3设置成员表域 (105)6.2.2建立缺省的UNIX用户组 (105)6.2.3建立新的组 (105)6.2.4修改或删除用户组 (106)6.2.4.1修改某个组 (106)6.2.4.2删除某个组 (106)第7章、UNIX的shell命令 (107)7.1各种shell的公共命令 (107)7.1.1设置某种缺省shell (107)7.1.2在命令行中改变shell类型(sh,csh,ksh) (108)7.1.3从shell解释器中退出(exit) (108)7.1.4清除一个shell窗口(clear) (108)7.2标准shell (108)7.2.1标准shell的初始文件 (109)7.2.2定义标准shell的环境变量 (109)7.3 C shell (109)7.3.1C shell的初始文件 (109)7.3.2C shell环境变量的定义 (109)7.3.3建立C shell的别名 (109)7.3.4设置C shell的历史功能 (110)7.3.5使用C shell历史功能 (110)7.3.6设置C shell的退格键(stty erase) (112)7.3.7新命令的嵌入 (112)7.3.8Cshell历史命令的编辑 (113)7.4 Korn shell (113)7.4.1Korn shell的初始化文件 (113)7.4.2Korn shell的选择项 (114)7.4.3创建Korn shell的别名 (116)7.4.4用Korn shell的联机编辑器编辑命令 (117)7.4.5设置Korn shell的历史 (117)7.4.6显示Korn shell的历史命令 (118)7.4.7使用Korn shell的历史命令 (118)7.4.8编辑Korn shell的历史命令 (119)第8章、管理系统 (120)8.1显示系统专有信息 (120)8.1.1确定主机ID号(sysdef -h) (120)8.1.2确定硬件类型(uname -m) (120)8.1.3确定处理机类型(uname -p) (120)8.1.4确定OS版本号(uname -r) (120)8.1.5显示系统配置信息(prtconf) (121)8.1.6确定系统已经运行了多长时间 (122)8.1.7确定系统的日期和时间(date) (122)8.1.8设置系统的日期和时间 (122)8.1.9改变系统的时区(/etc/TIMEZONE) (123)8.2配置附加的交换空间(mkfile,swap) (124)8.3创建一个本地邮件别名(/etc/mail/aliases) (125)第9章、文件存取问题分析 (127)9.1 诊断与查找路径有关的问题 (127)9.1.1显示当前查找路径 (127)9.1.2为Bourne和Korn shells设置路径 (127)9.1.3Source Bourne和Korn shell的初始化文件 (127)9.1.4为C shell设置路径 (128)9.1.5Source C shell初始化文件 (128)9.1.6检查当前的查找路径 (128)9.1.7执行一个命令 (128)9.2分析与权限和所有权有关的问题 (128)9.2.1改变文件的所有权 (129)9.2.2改变文件的权限 (129)9.2.3改变文件组的所有权 (130)第1章、前言本手册主要供Solaris系统管理员使用,所提供的内容包含SUN OS操作系统系统的安装、环境的建立及重要文件的创建,以及系统管理员在网络系统环境下如何建立、维护、管理网络系统下的工作环境,还包括系统管理的日常使用命令、主要命令、文件的索引等。
solaris命令详解

SOLARIS操作系统常用命令1、man <要查的命令名字> 42、ls 相当于DOS的dir 43、clear 相当于DOS的cls,清除屏幕上的内容 54、mkdir <目录名> 相当于DOS的md,新建一个目录 55、cd <目录名> 56、rm <文件名> 57、cp <源文件> <目的文件> 58、mv <源文件> <目的文件> 69、pwd 列出当前所在的目录位置 610、more <文件名> 查看文件的内容 611、chmod 改变文件或目录的读、写、执行的允许权限 712、chown 改变文件或目录的所有权 713、chgrp 改变文件或目录的工作组所有权 814、date 相当于DOS的date 815、su <用户名> 916、passwd 更改用户口令 917、exit 退出终端操作 918、shutdown 超级用户root才有权执行,关闭Solaris操作系统 919、find 搜索指定目录下要找的文件,找到后给出文件的路径 920、vi 1021、echo 显示环境变量用 2022、ping 测试网络通断情况。
2023、ftp 本地工作站与远端工作站之间文件传输 2124、telnet ip_address 远程登录命令,在工作站和PC机中都有 2225、ps 查看系统的进程 2226、kill 杀掉操作系统中的进程 2327、tar 把多个文件或目录打包成一个文件,或者把已经打包的文件展开 2328、compress 把文件压缩成后缀为.Z的压缩文件 2329、uncompress 把后缀为.Z的压缩文件解压缩 2330、df -k 查看各文件系统剩余的空间,-k说明单位是千字节(kb) 23SOLARIS操作系统常用命令SOLARIS操作系统中区分大小写字母,要注意输入系统的字符的大小写是正确的.在图形界面的CDE环境下,用鼠标的左键可以选定终端中的一个单词或一行字符,用鼠标的中键可以把选定的内容复制到光标当前的位置,十分方便.1、man <要查的命令名字>给出要查命令所有选项的含义,以及命令的详细说明.2、ls 相当于DOS的dir它的常用选项有-l(显示文件的详细信息),-a(显示包括隐含文件在内),-R(recursive,显示子目录中所有的文件和子目录),-t(依照文件最后修改时间的顺序列出文件名).例如:ls 列出目前目录下的文件名。
- 1、下载文档前请自行甄别文档内容的完整性,平台不提供额外的编辑、内容补充、找答案等附加服务。
- 2、"仅部分预览"的文档,不可在线预览部分如存在完整性等问题,可反馈申请退款(可完整预览的文档不适用该条件!)。
- 3、如文档侵犯您的权益,请联系客服反馈,我们会尽快为您处理(人工客服工作时间:9:00-18:30)。
* Number of unique applications shipping that support Solaris 10 (no double counting across architectures) †Data as of November 2009, except for SUSE Linux Enterprise Server as of June 2009
Sun Fire X4170 M2 Server Sun Fire X2270 M2 Server
Sun Fire X4800 Server Sun Fire X4470 Server Sun Fire X4270 M2 Server
12
Solaris is on both x86 (Intel) and SPARC w/ virtualization DNA
Single-Source Code Base:
Binary Compatibility Guarantee:
Application Compatibility Guarantee:
Performance Optimization:
19
OS Market Adoption
Shipping Applications by Platform Leading Enterprise OS
•
•
Reliable, Interoperable Data Management – Always On
ZFS w/ Flash Optimization, Dedup, Compression, Encryption,...
•
•
Scalable, Virtualized Networking – Assest Utilization
15
The Operating Systems : Key Territory IT Challenge
16
Oracle Solaris for SPARC Server Industry Leading Values
17
Oracle Solaris Differentiators
•
•
Multi-Dimensional Scalability - Performance
Solaris
For SPARC (SunLDoM)
Solaris Linux
Windows
For x86
SPARC
x86 / x64
Sun Fire X4800
Sun Fire X4470
14
<Insert Picture Here>
Oracle Solaris 11 Differentiation and Biz value
• SPARC Line – T & M Series
M5000 SPARC T3-4 SPARC T3-2 SPARC T3-1 SPARC T3-1B Blade for Blade 6000 M3000 M400 0
M80 00
M9000
• X86 (Intel) Line – X Series
5ห้องสมุดไป่ตู้
Complete. Open. Integrated.
6
Complete. Open. Integrated.
• Oracle Solaris • Oracle Unbreakable Linux
• Oracle VM Server • Oracle Solaris Containers • Oracle Virtual Desktop Infrastructure • Oracle VM VirtualBox
Oracle Solaris 11 Roadmap
26
Oracle Solaris Roadmap
More to Come
"Oracle is committed to continued development and support of Solaris. The potential synergy between Oracle software and Solaris is obvious.”
3
<Insert Picture Here>
Introduction to Oracle Hardware , OS Strategy and the Solaris Differentiation
4
For Hands-on Labs / Ready to use VM
• Solaris 11 for Developer Vbox appliance • /technetwork/articles/serversstorage-dev/vms11expstudio-howto-401051.html • Other Labs and demos be on • /display/solaris/Hands+on+Labs
If it Must Work, It Runs on SOLARIS
1
<Insert Picture Here>
Oracle Solaris 11 ISV Adoption Workshop
ISV Engineering / . Nickie Chan /
Workshop Agenda
1. Intro to Oracle HW , Solaris Biz values, EoF/Roadmap 2. What‟s new in Solaris – Generic Overview 3. Streamline the Application Development Process – Oracle Studio 4. Solaris 11 Packaging and Install 5. Solaris Compatibility pre-flight Checker 6. Solaris 11 Zone and Networking Virtualization 7. ZFS and data management in Solaris 11 8. Solaris 11 Security enhancement 9. Solaris RAS model with FMA / SMF 10. Simplify App Testing& Systems observatory with Solaris DTrace
Safe update with new IPS, P2V/V2V for upgrade
•
•
SW Lifecycle Management – Manage Complexity
Familiarity with Linux administration
© 2011 Oracle Corporation - Proprietary and Confidential
23
Strong ISV and Oracle Collaboration
Strong ISV & Oracle collaboration
• Collaborative relationships to make applications work best on Solaris • Help ISVs deploy on SPARC & x86 with source code compatibility • Onsite engineering resources at major ISV partners for testing and validation • Joint projects with ISVs – configuration guides, white papers, and best practices • Joint problem resolution activities speeds time to discover issue root cause
18
Investment Protection and Platform Choice
Platform Support:
Oracle Hardware Compatibility List (HCL) with 3500+ systems Solaris is developed and maintained as a single-source code base Oracle/Sun has maintained binary compatibility for 15+ yrs, since Solaris 2.6 in 1996. between x86 and SPARC, Solaris Source Code Application Guarantee Program. The Solaris kernel, libraries, Oracle JVM and Oracle Studio Compiler toolsets are optimized for both x86 and SPARC.
Operating Systems
Premier Support for
12% of net hardware transaction
• Covers a complete Sun System including Hardware, Solaris, Oracle Enterprise Linux, and Oracle VM) • 2 hour onsite response 24x7 for P1 issues.*
VNICs, QoS, efficient drivers
•