SynologyDiskStationDS1813快速安装指引
Syno_QIG_DS415+_快速安装指南
快速安装指南目录第 1 章:开始进行之前的准备包装内容3 Synology DiskStation 概观4安全须知5第 2 章:硬件安装安装硬盘所需的工具和零件6安装硬盘6启动您的 DiskStation 8第 3 章:为 DiskStation 安装 DSM使用 Web Assistant 来安装 DSM 9更多信息9附录 A:产品规格附录 B: LED 指示灯表Synology_QIG_DS415+_201408041开始进行之前的准备感谢您购买 Synology 产品!在您开始设置 DiskStation 前,请先检查包装盒内容来确认是否已收到下列项目。
此外,使用前请仔细阅读以下安全须知,避免让自己或 DiskStation 遭受损伤。
包装内容交流电源适配器 x 1RJ-45 网络线 x 2适用于 2.5 吋硬盘的螺丝 x 18概观Synology DiskStation安全须知请勿将产品放置在直接受阳光曝晒或靠近化学药剂的场所。
并确保其所在环境恒定的温度与湿度。
请确保正确的一面朝上,勿将产品倒置。
请勿放置于任何液体附近。
进行清洁前,请先拔除电源线。
请使用湿纸巾擦拭。
请勿使用化学或喷雾式清洁剂来进行清洁。
请勿将设备置于手推车或任何不稳定的表面上,以避免掉落而损毁。
与此产品连接的线路以及设备必须提供稳定的电量。
请确认是否供应稳定的电量以确保装置运作正常。
若要完全断开装置的电流,请确认所有电源线皆从插座拔除。
请更换正确的电池类型并适当处理旧电池,以避免发生爆炸的危险。
2安装硬盘所需的工具和零件• 螺丝刀(仅用于 2.5 吋硬盘)• 至少一颗 3.5 吋或 2.5 吋 SATA 硬盘(请参见 来查询兼容的硬盘型号。
)安装硬盘1从前面板卸下硬盘插槽盖。
2向上推动卡榫并拉动把手,将硬盘托盘取出。
硬件安装3 将硬盘置于硬盘托盘中。
•对于 3.5 吋硬盘:卸下硬盘托盘侧面的紧固板。
将硬盘置于托盘上,再插入紧固板来固定硬盘。
蜗牛星际NAS安装黑群晖V洗白+免U盘引导启动
蜗牛星际NAS安装黑群晖V洗白+免U盘引导启动蜗牛星际N A S安装黑群晖V洗白+免U盘引导启动Company number【1089WT-1898YT-1W8CB-9UUT-92108】准备工作硬件准备:U盘*1(能装下PE与引导文件即可);显示器*1(VGA或HDMI接口);鼠标*1(USB接口)键盘*1(USB接口,没有的话PE里也能用软键盘应急)软件工具:黑群晖工具获取器V1.0(下载引导文件与对应版本系统)>>?DiskImg(将引导文件镜像写入内置SSD)>>??提取码:xhwgDiskGenius(分区管理工具,PE版)>>?Notepad++(文本编辑器)>>?SynologyAssistant(群晖助手,用于装系统)>>?微PE工具箱(选用其他顺手的亦可)>>?打包下载:??;提取码:u6ag一、制作PE盘1、将U盘插入电脑,运行PE盘制作工具,右下角选择“安装PE 到U盘”2、如图设置,点击“立即安装进U盘”3、PE盘制作工具生成了两个分区,EFI为PE引导分区,“微PE 工具箱”为文件区,将黑群晖引导镜像(img)、DiskImg、DiskGenius(PE 版)放入U盘内。
二、引导文件写入SSD1、将制作好的PEU盘插入蜗牛星际背部USB接口,通电开机,并按F7选择PEU盘启动(BIOSLOGO画面按DEL进入BIOS设置,按F7选择启动设备)。
2、使用DiskGenius,将自带16GSSD内所有分区删除并保存。
3、启动DiskImg,驱动器选择机器内置SSD,浏览选择镜像写入(路径、文件名不能有任何中文字符)。
4、写入完成后,使用DiskGenius(PE自带版本太旧了,一定要用复制进去的DiskGenius),浏览系统内置SSD引导分区文件(ESP),将grub.cfg文件复制到U盘(之后洗白要用)。
群晖DS1515+快速安装指南
快速安装指南目录第 1 章:开始进行之前的准备包装内容3 Synology DiskStation 概观4安全须知5第 2 章:硬件安装安装硬盘所需的工具和零件6安装硬盘6启动您的 DiskStation 9为 DiskStation 加装内存模块10更换散热风扇12第 3 章:为 DiskStation 安装 DSM使用 Web Assistant 来安装 DSM 14更多信息14附录 A:产品规格附录 B: LED 指示灯表Synology_QIG_DS1515+_20140904开始进行之前的准备1感谢您购买 Synology 产品!在您开始设置 DiskStation 前,请先检查包装盒内容来确认是否已收到下列项目。
此外,使用前请仔细阅读以下安全须知,避免让自己或 DiskStation 遭受损伤。
包装内容RJ-45 网络线 x 2概观Synology DiskStation安全须知请勿将产品放置在直接受阳光曝晒或靠近化学药剂的场所。
并确保其所在环境恒定的温度与湿度。
请确保正确的一面朝上,勿将产品倒置。
请勿放置于任何液体附近。
进行清洁前,请先拔除电源线。
请使用湿纸巾擦拭。
请勿使用化学或喷雾式清洁剂来进行清洁。
请勿将设备置于手推车或任何不稳定的表面上,以避免掉落而损毁。
与此产品连接的线路以及设备必须提供稳定的电量。
请确认是否供应稳定的电量以确保装置运作正常。
若要完全断开装置的电流,请确认所有电源线皆从插座拔除。
请更换正确的电池类型并适当处理旧电池,以避免发生爆炸的危险。
安装硬盘所需的工具和零件• 螺丝刀(仅用于 2.5 吋硬盘)• 至少一颗 3.5 吋或 2.5 吋 SATA 硬盘(请参见 来查询兼容的硬盘型号。
)安装硬盘1按下硬盘托架的下半部来弹出把手。
2请按照下图指示的方向拉开硬盘托架的把手并将托架取出。
硬件安装23 将硬盘置于硬盘托盘中。
•对于 3.5 吋硬盘:卸下硬盘托盘侧面的紧固板。
黑群晖DSM安装教程及详细配置黑群晖DSM安装教程及详细配置
⿊群晖DSM安装教程及详细配置⿊群晖DSM安装教程及详细配置为什么要安装⿊群晖先说说什么是 NAS 服务器,简单来说就是⼀个⽹络存储器,你可以存放⾳乐、视频、⽂件等,⽅便地从各个设备进⾏访问。
⽽群晖的Synology DSM,就是⼀个⾮常优秀的 NAS 服务器。
NAS 百度百科NAS(Network Attached Storage:⽹络附属存储)按字⾯简单说就是连接在⽹络上,具备资料存储功能的装置,因此也称为“⽹络存储器”。
它是⼀种专⽤数据存储服务器。
是啊,群晖官⽅的不⾹吗,可以⽅便地远程访问,也不需要折腾,买来了加上硬盘就可直接使⽤,但是看看价格 2000-4000 不等,再单独购买⼏个 T 的硬盘,算了算了。
⿊群晖,或者说 “民间版” 群晖(Synology DSM),普通的 PC 上就可以安装,⾃由 DIY,⽽且硬件要求不⾼(⽼旧主机、蜗⽜星际,PVE、ESXI 虚拟机等都可安装),官⽅的政策也很宽松,安装不算复杂,配合内⽹穿透也能⽅便地远程控制访问(配合 OpenWRT 软路由),⿊群晖也是⼀个完美的存在。
有了 NAS 之后,才体会到⽂件存储的⽅便、快捷。
我可以使⽤ NAS 存放喜欢的视频、⾳乐⽽不占本地硬盘的空间,可以多设备⽅便地获取这些⽂件,可以远程访问家⾥的 NAS ⽂件,远程关机、远程唤醒(远程唤醒需 OpenWRT 软路由),可以将 NAS 作为下载服务器,挂载⼀下即可下载,等等。
最重要的是群晖的 DSM ⾥⾯⼤量套件,⽽且个平台客户端齐全,可以 Web 访问等。
但是安装需要了解基本的电脑知识(如 Bios、U 盘启动、⼀点⽹络基础等),遇到问题可以⽹上查询都可解决。
这⾥多次提到内⽹穿透,详细的下篇博客再说,不知道可忽略,简单地说就是外⽹访问家⾥的服务,当然有公⽹ IP 的可忽略。
我的硬件⿊群晖安装设备:CS-B Q87 华硕主板 + i5 4690CPU+8G 威刚内存 + 5T 机械硬盘(希捷 4T+2*500G),另外配⼀个 U 盘(8G ⾜够)⽤作系统引导我的⿊群晖硬件,加电源、机箱价格约为 1800 元,除了 CPU 其它全新,当然⼀台⽼主机、旧笔记本都可以安装。
黑群晖二合一安装教程
星际蜗牛2合1引导安装洗白教程
(适用于星际蜗牛系列或带SSD的各种兼容组装机)
1.准备U盘一个,装好PE系统,详细教程请网上百度。
2.下载好2合1引导系统,请注意要安装的型号,如918、3617,下载正确的系统,不同型号的洗白码不能通用。
3.复制工具和系统到U盘里,进入U盘的PE系统,打开PE里的diskgenius 软件,右键删除SSD内的所有分区,左上角保存退出。
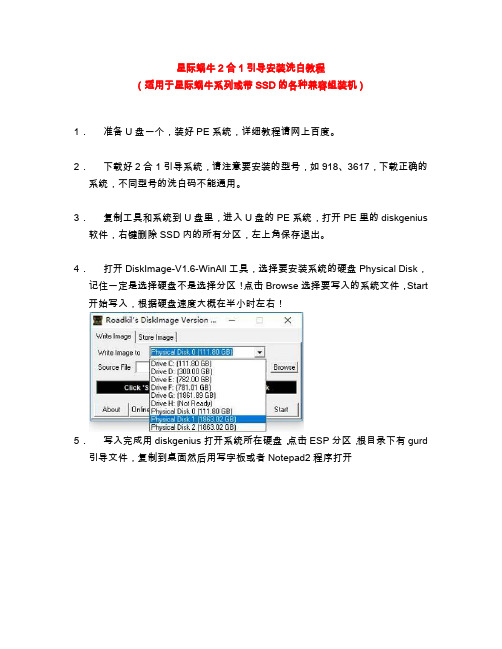
4.打开DiskImage-V1.6-WinAll工具,选择要安装系统的硬盘Physical Disk,记住一定是选择硬盘不是选择分区!点击Browse选择要写入的系统文件,Start 开始写入,根据硬盘速度大概在半小时左右!
5.写入完成用diskgenius打开系统所在硬盘,点击ESP分区,根目录下有gurd 引导文件,复制到桌面然后用写字板或者Notepad2程序打开
6.修改完成后重启出现这个界面表示已经安装完成。
7.用另一台同网段的电脑安装Synology Assistant软件,搜索即可发现机器,右键联机即可进入NAS。
PS:传统安装方式同理,区别在于写完引导后需要在Synology Assistant软件上搜索安装对应的系统!。
黑群晖物理机安装教程
物理机安装黑群晖教程
下面是安装系统
自备硬件:电脑,路由器(建议用1000M的),硬盘,网线两条,显示器+键盘(用一小会)
物理机连线:第一块硬盘,一定安装在SATA0这个接口上,
连接显示器与键盘与路由器
1,电脑是安装群晖助手
2,开启物理机
2.1先选择第二项,然后选择第一项(一定)
3.运行群群助手
如没有搜索到,请检查网线是否连接好,电脑的IPV4设置为自动获取,
安装过程中,黑群晖会自动重启,然后自动关机,电脑倒数完成后即可开机,
4,开机让黑群晖默认下去
如果不出现上图,而出现下图的,请重做引导盘
重做完启动盘后,开机默认下去即可以,
再次使用群晖助手
精品文档资料,适用于企业管理从业者,供大家参考,提高大家的办公效率。
精品文档资料,适用于企业管理从业者,供大家参考,提高大家的办公效率。
Synology DS1821+ 硬體安裝指南说明书

硬體安裝指南目錄第 1 章:開始進行之前的準備包裝內容物3 Synology DS1821+ 概觀4系統狀態及 LED 指示燈5其他 LED 指示燈6產品規格7零組件8選購配件8安全須知9第 2 章:硬體安裝安裝元件所需的工具和零件10安裝硬碟10啟動 Synology NAS 12為 Synology NAS 加裝記憶體模組13加裝 M.2 NVMe SSD 至 Synology NAS 15加裝網路介面卡16第 3 章:系統維護更換系統風扇17第 4 章:為 Synology NAS 安裝 DSM從 Web Assistant 安裝 DSM 20更多資訊20 Synology_HIG_DS1821+_20200828開始進行之前的準備1感謝您購買此 Synology 產品!在開始設定全新的 Synology NAS 前,請檢查包裝內容物,確認是否已收到下列項。
目。
另外,請確認您已仔細閱讀安全須知,以避免傷及自身或毀損 Synology NAS包裝內容物RJ-45 網路線 x 2Synology DS1821+概觀67191613817151211141034521系統狀態及 LED 指示燈系統模式及定義種系統模式,以下將說明各系統模式及其定義:Synology NAS 有 7指示燈來辨識系統模式,請參閱下表以了解詳細資訊。
您可以透過電源及 STATUS LED請參閱以下範例以更加了解系統模式間的轉換:• 已開機,但尚未安裝 DSM:電源關閉 > 正在開機 > DSM 未就緒• 已開機,且已安裝 DSM:電源關閉 > 正在開機 > DSM 未就緒 > DSM 已就緒• 進入休眠模式,再從休眠模式喚醒:DSM 已就緒 > 休眠 > DSM 已就緒• 將 Synology NAS 關機:DSM 已就緒 > 正在關機 > 電源關閉• 電力中斷 (已連接不斷電系統):DSM 已就緒 > DSM 未就緒 (因發生電力中斷,DSM 進入安全模式) > 正在關機 > 電源關閉 > 正在開機 (電力恢復, DSM 重新啟動) > DSM 未就緒 > DSM 已就緒其他 LED指示燈產品規格注意:產品規格如有變更恕不另行通知,所有資訊以官方網站公告為準:。
群晖5.0官方电子说明书(1)(7)
第 5 章:管理存储空间
存储卷和硬盘组 ..................................................................................................................................................................... 22 修复存储卷或硬盘组 ............................................................................................................................................................. 24 更改 RAID 类型...................................................................................................................................................................... 24 扩充存储卷或硬盘组 ............................................................................................................................................................. 25 Data Scrubbing ...................................................................................................................................................................... 26 SSD TRIM .............................................................................................................................................................................. 26 iSCSI Target 和 LUN ............................................................................................................................................................ 26 管理硬盘 ................................................................................................................................................................................. 27 SSD 缓存 ................................................................................................................................................................................ 27 Hot Spare ............................................................................................................................................................................... 27
ISA安装升级配置和操作手册centos系统安装
服务器RAID配置1.1超微服务器RAID方法超微服务器主板集成raid功能,但只支持raid1的设定1.1.1BIOS配置Main Serial ATA-》SATA controller Mode Option:SATA Controller mode Option:EhancedSATA RAID CodeBase:Adaptec重启1.1.2主板RAID卡设置按ctrl +大写‘A’即ctrl+ shift+a进入Array Configuration Utility设置Main Menu -》Configure Driver根据帮助提示,按INS键,加入两个硬盘,按“Enter”保存-》Y确认Main Menu -》Create Array,加入上面添加的那两块硬盘进入Array Propertites,按“Enter”,选择不同属性,F1可用选择帮助选择RAID-1(mirror)方式Stripe option选择:quick initaizing,快速初始化如果选择clear就是低格清零,很慢。
选择完成按“Done”。
1.2Dell/IBM 服务器RAID方法Dell/IBM等品牌服务器多设有raid卡,由于是硬raid,因此不需要手动设定,但raid 级别需根据raid卡而定,公司常用的DELL-R710型号需要通过配置页面手工设置,具体配置方法为:开机按F10进入配置界面:选择USC设置,选择语言和键盘,设置语言为中文选择RAID配置:RAID级别设置为RAID1:2操作系统安装配置2.1Centos系统安装以安装centos5.5为例,共有两个版本:64位和32位,安装时请注意区分版本。
2.1.1系统安装步骤系统版本:CentOS 5.5 64位将镜像刻成光盘,设置BIOS将CDROM设置为第一启动(超微服务器默认光盘启动)启动画面:通过提示,按ENTER进入图形安装模式。
检测安装媒介,这里选Skip,跳过。
蜗牛星际NAS安装黑群晖V6.2.1+洗白+免U盘引导启动
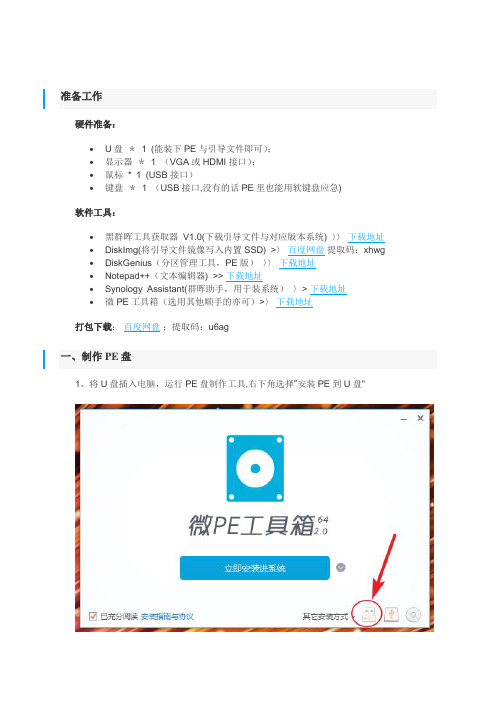
准备工作硬件准备:•U盘*1 (能装下PE与引导文件即可);•显示器*1 (VGA或HDMI接口);•鼠标* 1 (USB接口)•键盘*1 (USB接口,没有的话PE里也能用软键盘应急) 软件工具:•黑群晖工具获取器V1.0(下载引导文件与对应版本系统) 〉〉下载地址•DiskImg(将引导文件镜像写入内置SSD) >〉百度网盘提取码:xhwg •DiskGenius(分区管理工具,PE版)〉〉下载地址•Notepad++(文本编辑器) >> 下载地址•Synology Assistant(群晖助手,用于装系统)〉> 下载地址•微PE工具箱(选用其他顺手的亦可)>〉下载地址打包下载:百度网盘;提取码:u6ag一、制作PE盘1、将U盘插入电脑,运行PE盘制作工具,右下角选择“安装PE到U盘"2、如图设置,点击“立即安装进U盘”3、PE盘制作工具生成了两个分区,EFI为PE引导分区,“微PE工具箱”为文件区,将黑群晖引导镜像(img)、DiskImg、DiskGenius(PE版)放入U盘内。
二、引导文件写入SSD1、将制作好的PE U盘插入蜗牛星际背部USB接口,通电开机,并按F7选择PE U盘启动(BIOS LOGO画面按DEL进入BIOS设置,按F7选择启动设备).2、使用DiskGenius,将自带16G SSD内所有分区删除并保存。
3、启动DiskImg ,驱动器选择机器内置SSD,浏览选择镜像写入(路径、文件名不能有任何中文字符)。
4、写入完成后,使用DiskGenius(PE自带版本太旧了,一定要用复制进去的DiskGenius),浏览系统内置SSD引导分区文件(ESP),将grub.cfg文件复制到U盘(之后洗白要用).5、设备关机,拔出U盘。
三、安装DSM至NAS主机1、NAS主机安装储存盘,NAS主机连接网线并启动主机(成功的话屏幕会显示Happy Hacking) 。
群晖DS212J安装说明书_chs
从 Windows 安装
1 将安装光盘放入计算机,然后从自动运行的选单中选择开始。依照屏幕上的指示来完成设置流程。
2 这样会在您的计算机上安装并开启 Synology Assistant。该程序会在局域网络上搜索并找到您的 DiskStation ( 其 状态应为 DSM 未安装)。双击您的 DiskStation 来开始安装。
针对 2.5 吋硬盘: a 将硬盘放入 2.5 吋硬盘架 (Type C,需另外购买),然后锁紧 2.5 吋螺丝来固定硬盘。
6Leabharlann b 将 2.5 吋硬盘架滑入硬盘插槽并推入至底,使硬盘接上 SATA 接头。使用附上的螺丝来固定硬盘架。
3 重复上述步骤来安装您准备好的另一颗硬盘。 4 硬盘位置的排序如下。
切勿将 Synology 产品放置在不稳定的推车、台子或桌面上以免产品滑落而损害。
与本产品所连接的线路和设备必须能提供本产品正常的电量以确保其运作正常。
若要完全消除设备上的电流,请确认所有的电源线皆已从插座上拔除。
5
第 1 章:事前须知
章
第 2 章:
硬件安装
2
节
安装硬盘所需的工具和零件
一支螺丝起子 至少一颗 3.5 吋或 2.5 吋 SATA 硬盘(请参访 网站取得兼容的硬盘清单。)
4 请依照「从 Windows 安装」一节之步骤 2 至步骤 4 的指示完成安装。
从 Linux 安装
Linux 版本的 Synology Assistant 以 Ubuntu 8 和 9 为最佳运行环境。您仍然可以在其他版本的 Linux 上试用此版 本的 Synology Assistant。
安装并运行 Synology Assistant
群晖DS215J 使用说明书
快速安装指南目录第 1 章:开始进行之前的准备包装内容3 Synology DiskStation 概观4安全须知5第 2 章:硬件安装安装硬盘所需的工具和零件6安装硬盘6启动您的 DiskStation 8第 3 章:为 DiskStation 安装 DSM使用 Web Assistant 来安装 DSM 9更多信息9附录 A:产品规格附录 B: LED 指示灯表Synology_QIG_DS215j_20140820开始进行之前的准备1感谢您购买 Synology 产品!在您开始设置 DiskStation 前,请先检查包装盒内容来确认是否已收到下列项目。
此外,使用前请仔细阅读以下安全须知,避免让自己或 DiskStation 遭受损伤。
包装内容交流电源适配器 x 1RJ-45 网络线 x 1用于固定硬盘的螺丝 x 10Synology DiskStation概观安全须知请勿将产品放置在直接受阳光曝晒或靠近化学药剂的场所。
并确保其所在环境恒定的温度与湿度。
请确保正确的一面朝上,勿将产品倒置。
请勿放置于任何液体附近。
进行清洁前,请先拔除电源线。
请使用湿纸巾擦拭。
请勿使用化学或喷雾式清洁剂来进行清洁。
请勿将设备置于手推车或任何不稳定的表面上,以避免掉落而损毁。
与此产品连接的线路以及设备必须提供稳定的电量。
请确认是否供应稳定的电量以确保装置运作正常。
若要完全断开装置的电流,请确认所有电源线皆从插座拔除。
请更换正确的电池类型并适当处理旧电池,以避免发生爆炸的危险。
安装硬盘所需的工具和零件• 一支螺丝刀• 至少一颗 3.5 吋或 2.5 吋 SATA 硬盘(请参见 来查询兼容的硬盘型号。
)安装硬盘1 请按下图指示的方向推开上方机壳。
提起上方机壳并放在一边。
2 安装硬盘:• 对于 3.5 吋硬盘: 将硬盘插入硬盘插槽,并将其推入直至与 SATA 接头稳固连接。
请使用提供的螺丝来固定硬盘。
• 对于 2.5 吋硬盘:a 将硬盘放入 2.5 吋硬盘托架(C 型、单独出售),然后将用来固定 2.5吋硬盘的螺丝锁紧以固定硬盘。
群晖引导制作方法
群晖引导制作方法群晖是一款非常受欢迎的NAS(Network Attached Storage)系统,它提供了强大的存储、备份、共享和远程访问功能。
如果您希望了解关于群晖引导制作方法的详细信息,请看下面的中文描述:1. 群晖引导制作方法是指在一个新硬盘(或者U盘)上安装群晖操作系统的过程。
2. 对于NAS服务器的初始设置和配置,群晖引导制作非常重要。
3. 在制作群晖引导的过程中,您需要准备好一个空的U盘或者一个未分区的硬盘。
4. 您需要从群晖官方网站下载适用于您硬件型号的DSM(DiskStation Manager)操作系统镜像文件。
5. 然后,您需要下载适用于您硬件型号的引导工具,如Jun's Loader。
6. 将U盘或者硬盘连接到您的电脑上,并使用引导工具来将DSM镜像文件写入到U盘或者硬盘上。
7. 完成上述步骤后,您需要进入您的NAS服务器的BIOS设置,并将引导设备设置为U 盘或者硬盘。
8. 重启NAS服务器,并在引导过程中按照屏幕提示进行操作,以完成群晖系统的安装和初始化设置。
9. 制作群晖引导时需要格外小心,确保选择正确的DSM镜像文件以及适用于您硬件型号的引导工具。
10. 在制作群晖引导时,您还需要注意U盘或者硬盘的格式化和写入过程,确保没有误操作导致数据丢失。
11. 在完成引导制作后,您可能需要在群晖系统中进行更多的设置和配置,例如创建存储卷、共享文件夹、设置用户权限等。
12. 制作群晖引导的过程可能因不同的硬件型号而有所差异,因此建议在制作之前查阅详细的硬件兼容列表和制作教程。
13. 制作好群晖引导后,您可以通过网络访问群晖系统的管理界面,进行进一步的系统配置和管理。
14. 群晖引导的成功与否对后续的NAS服务器使用和功能实现至关重要,因此制作过程需要一丝不苟地执行。
15. 在制作群晖引导时,您也可以查阅群晖官方网站上的手册和支持文档,以获取更多的帮助和指导。
16. 请确保您的电脑和网络环境稳定,以免在制作群晖引导的过程中发生意外中断和数据损坏。
Synology DiskStation DS2419+硬件安装指南说明书
Hardware Installation GuideTable of ContentsChapter 1: Before You StartPackage Contents 3 Synology DiskStation at a Glance 4 Safety Instructions 5 Chapter 2: Hardware SetupTools and Parts for Drive Installation 6 Install Drives 6 Start Up Your DiskStation 9 Add a RAM Module on DiskStation 10 Add a Network Interface Card 13 Replace System Fan 16 Chapter 3: Install DSM on DiskStationInstall DSM with Web Assistant 17 Learn More 17 Appendix A: SpecificationsAppendix B: LED Indicator TableSynology_HIG_DS2419+_20180419Before You Start1Thank you for purchasing this Synology product! Before setting up your new DiskStation, please check thepackage contents to verify that you have received the items below. Also, make sure to read the safety instructionscarefully to avoid harming yourself or damaging your DiskStation.RJ-45 LAN cable x 2Synology DiskStation at a Glance1 For more information about Synology Expansion Unit supported by your DiskStation, please visit .Safety InstructionsKeep away from direct sunlight and away from chemicals. Make sure the environment does notexperience abrupt changes in temperature or humidity.Place the product right side up at all times.Do not place near any liquids.Before cleaning, unplug the power cord. Wipe with damp paper towels. Do not use chemical oraerosol cleaners.To prevent the unit from falling over, do not place on carts or any unstable surfaces.The power cord must plug in to the correct supply voltage. Make sure that the supplied AC voltage iscorrect and stable.To remove all electrical current from the device, ensure that all power cords are disconnected fromthe power source.Risk of explosion if battery is replaced with an incorrect type. Dispose of used batteries appropriately.Tools and Parts for Drive Installation• A screwdriver (only for 2.5” drives)• At least one 3.5” or 2.5” SATA drive (please visit for compatible drive models.)Install Drives1Press the right part of the drive tray to pop out the handle.2Pull the drive tray handle in the direction as indicated below to remove the drive tray.Hardware Setup23 Load drives in the drive trays.• For 3.5” drives: Remove the fastening panels from the sides of the drive tray. Place the drive in the drive tray. Then insert the fastening panels to secure the drive in place.• For 2.5” drives: Remove the fastening panels from the sides of the drive tray and store them in a safe place. Place the drive in the blue area (shown below) of the drive tray. Turn the tray upside down and tighten the screws to secure the drive in place.4 Insert the loaded drive tray into the empty drive bay.5 Press the handle in flush with the front panel to hold the drive tray in place.6 Insert the drive tray key into the drive tray lock, turn the key clockwise (to the “-” position) to lock the handle of the drive tray, and then remove the key.7 Repeat the steps above to assemble the other drives you have prepared.8 Drives are numbered as shown below.Start Up Your DiskStation1 Use the LAN cable to connect the DiskStation to your switch, router or hub.2 Connect one end of the AC power cord to the power port of the DiskStation, and the other to the power outlet.3 Press the power button.Congratulations! Your DiskStation is now online and detectable from a network computer.Add a RAM Module on DiskStationThe optional Synology DDR4 RAM module is designed for DiskStation memory expansion. Follow the steps below to install, check, or remove a RAM module on your DiskStation.To install the RAM module:1 Press and hold the power button until you hear a beep sound to shut down your DiskStation. Disconnect all cables from your DiskStation to prevent any possible damage.2 Remove the side panel:a Remove the 2 screws on the back of DiskStation.b Pull the side panel. Place the side panel to the side.3 Insert the new RAM module in the slot:a Align the notch on the gold edge of the module with the notch in the memory slot. Then tilt the card andinsert the module into the slot. Make sure the module is properly inserted.b Push the RAM module with moderate pressure into the memory slot until you hear a click.4 Replace the side panel. Replace and tighten the 2 screws you removed in step 2-a.To make sure DiskStation recognizes the new memory capacity:1 Install DiskStation Manager (DSM). (See the next chapter for more information.)2 Log in to DSM as admin or a user belonging to the administrators group.3 Check Total Physical Memory in Control Panel > Info Center.If your DiskStation fails to either recognize the memory or start up successfully, confirm that the memory has been properly installed.To remove the RAM Module:1 Follow step 1 to 3 of the "To install the RAM module" section to shut down your DiskStation, disconnect the cables, and then remove the bottom lid.2 Push the levers on both sides of the memory module outwards. The module will be released from the slot.3 Hold the memory module by its notches and remove it from the slot.4 Replace the side panel. Replace and tighten the screws you removed in the initial step.Add a Network Interface CardYour DiskStation has a PCI Express expansion slot which allows you to install 10GbE or Gigabit network interface card for LAN port expansion.1 You need to replace the long bracket (suited for PC) of your network interface card with a short bracket before installing the card into your DiskStation.To replace a long bracket with a short one:1 Remove the2 screws from the long bracket of your network interface card, and then remove the bracket.2 Replace the long bracket with a short one, and tighten the 2 screws to secure the short bracket.To install a network interface card:1 Press and hold the power button until you hear a beep sound to shut down your DiskStation. Disconnect all cables from your DiskStation to prevent any possible damage.2 Remove the 2 screws on the top of the back panel, and then pull the top cover in the direction as illustrated below.3 Remove the PCIe expansion slot shield:a Reposition your DiskStation so that the top will be facing your body, with drive trays on the right side.b Pull the clip above the PCIe expansion slot shield in the direction as illustrated below.c Remove the shield.4 Install the network interface card:a Align the card’s connectors with the PCIe expansion slot.b Use two fingers with firm, even pressure to push down on the card and the bracket.c Push back the clip to secure the newly inserted card.5 Replace the top cover, and then replace and tighten the 2 screws you removed in Step 2.Replace System FanYour DiskStation will play beep sounds if either of the system fans is not working. Follow the steps below to replace the malfunctioning fan module with a good one.To replace the system fan module:1 Shut down your DiskStation. Disconnect all cables connected to your DiskStation to prevent any possible damages.2 Pull the 6 push pins that secure the fan module.3 Pull out the malfunctioning fan module to remove it from your DiskStation.4 Install the new fan module:a Install the new module with the power connector at the bottom, so that it can be properly put onto thechassis.b Make sure that all 6 push pins on the new module are pulled outwards before the module is placed into yourDiskStation, and then press the push pins back into place to secure the fan module.Install DSM on DiskStation3After hardware setup is finished, please install DiskStation Manager (DSM) – Synology’s browser-basedoperating system – on your DiskStation.Install DSM with Web AssistantYour DiskStation comes with a built-in tool called Web Assistant that helps you download the latest version ofDSM from the Internet and install it on your DiskStation. To use Web Assistant, please follow the steps below.1 Power on the DiskStation.2 Open a web browser on a computer connected to the same network as the DiskStation.3 Enter either of the following into the address bar of your browser:a b diskstation:50004 Web Assistant will be launched in your web browser. It will search for and find the DiskStation within the local.network. The status of the DiskStation should be Not Installed Array5 Click Connectto start the setup process and follow the onscreen instructions.6 If you accidentally leave the installation process before it is finished, login to the DSM as admin (defaultadministrative account name) with the password left blank.Learn MoreCongratulations! Your DiskStation is now ready for action. For more information or online resources about your DiskStation, please visit .Specifications• Line voltage: 100V to 240V AC• Frequency: 50/60Hz• Operating Temperature: 32 to 104˚F (0 to 40˚C)• Storage Temperature: -5 to 140˚F (-20 to 60˚C)• Relative Humidity: 5% to 95% RH Note: Model specifications are subject to change without notice. Please refer to for the latest information.LED Indicator TableNote: Model specifications are subject to change without notice. Please refer to for the latest information.。
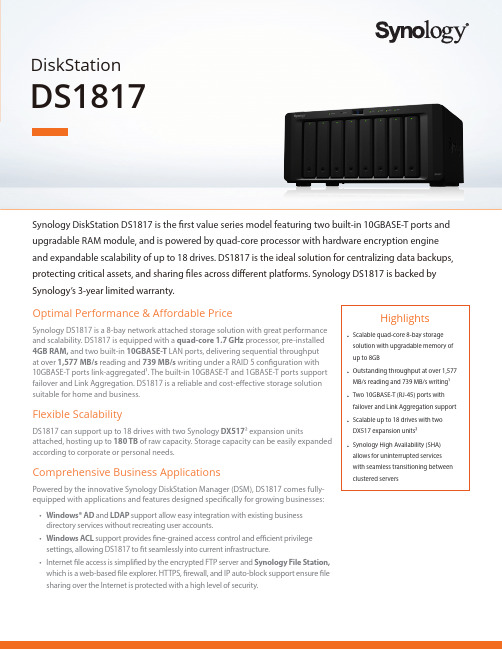
Synology DiskStation DS1817 8驱盘网络附加存储设备说明书
Synology DiskStation DS1817 is the first value series model featuring two built-in 10GBASE-T ports and upgradable RAM module, and is powered by quad-core processor with hardware encryption engine and expandable scalability of up to 18 drives. DS 1817 is the ideal solution for centralizing data backups, protecting critical assets, and sharing files across different platforms. Synology DS1817 is backed by Synology’s 3-year limited warranty.DiskStationDS1817Highlights• Scalable quad-core 8-bay storage solution with upgradable memory of up to 8GB• Outstanding throughput at over 1,577 MB/s reading and 739 MB/s writing1 • Two 10GBASE-T (RJ-45) ports with failover and Link Aggregation support • Scalable up to 18 drives with two DX517 expansion units2• Synology High Availability (SHA) allows for uninterrupted services with seamless transitioning between clustered serversOptimal Performance & Affordable PriceSynology DS1817 is a 8-bay network attached storage solution with great performance and scalability. DS1817 is equipped with a quad-core 1.7 GHz processor, pre-installed 4GB RAM, and two built-in 10GBASE-T LAN ports, delivering sequential throughput at over 1,577 MB/s reading and 739 MB/s writing under a RAID 5 configuration with 10GBASE-T ports link-aggregated1. The built-in 10GBASE-T and 1GBASE-T ports support failover and Link Aggregation. DS1817 is a reliable and cost-effective storage solution suitable for home and business.Flexible ScalabilityDS1817 can supp ort up to 18 drives with two Synology DX5172 expansion unitsattached, hosting up to 180 TB of raw capacity. Storage capacity can be easily expanded according to corporate or personal needs.Comprehensive Business ApplicationsPowered by the innovative Synology DiskStation Manager (DSM), DS1817 comes fully-equipped with applications and features designed specifically for growing businesses:• Windows® AD and LDAP support allow easy integration with existing business directory services without recreating user accounts.• Windows ACL support provides fine-grained access control and efficient privilege settings, allowing DS1817 to fit seamlessly into current infrastructure.• Internet file access is simplified by the encrypted FTP server and Synology File Station, which is a web-based file explorer. HTTPS, firewall, and IP auto-block support ensure file sharing over the Internet is protected with a high level of security.Virtualization ReadyDS1817 provides seamless storage solutions for virtualization environments, including VMware, Citrix, Hyper-V, and OpenStack. With VMware vSphere 6 and VAAI integration certified, DS1817 helps offload specific storage operations and optimizes computation power for unparalleled performance and efficiency in VMware environments. As the centralized storage of a virtual environment, DS1817 enables virtual machine migration, allowing movement from server to server whilst eliminating service downtime and disruption to users. Windows Offloaded Data Transfer (ODX)and Synology Advanced LUN support greatly improve the efficiency of massive data transfer and migration. With OpenStack support, DS1817 can be used as a block-based storage component for servers complying with the Cinder API.Effective Synchronization & Backup SolutionDS1817 can serve as a centralized backup destination, making it easy to create a personal private cloud. Cloud Sync keeps your Dropbox, Google Drive, Microsoft OneDrive, Baidu, and Box storages in sync with DS1817 at home. Cloud Station Suite allows you to sync files among multiple devices, including Windows PC, Mac, Linux, and Android/iOS tablets and phones, effortlessly keeping everything up-to-date.With block-level incremental backup and cross-version deduplication, Synology Hyper Backup provides multi-version backup with optimized storage utilization and allows data to be backed up to multiple destinations, including local shared folders, external hard drives, network shared folders, rsync servers, and public cloud services.24/7 Smart Security SolutionFeaturing user-friendly video management tools and an intuitive desktop-like interface, Synology Surveillance Station is a reliable private-security solution that can support multiple IP cameras connected to DS1817. Surveillance Station features optimized live view together with streamlined real-time monitoring. Its powerful analytics, such as motion detection and alert notification, allow you to stay informed of any suspicious act ivity with triggers sent via SMS, e-mail, and DS cam mobile application. Reliability & AvailabilityThe 10GBASE-T and 1GBASE-T LAN ports of DS1817 support failover and Link Aggregation, and the LAN ports are resilient against unexpected network or cable failure. Hot swappable drives minimize system downtime by allowing simplified and rapid drive replacement.Uninterrupted availability is a critical goal for all businesses. Synology High Availability (SHA) ensures seamless transition between clustered servers in the event of unexpected disasters and ensures that your services remain online.Optional 5-year warranty3 is available in select regions.Effective Sync & Backup Solution Synology DS1817 can serve as a centralized backup destination, allowing you to back up files from multiple devicesvia Cloud Station Backup.Reliability, Availability & Disaster RecoveryHigh Availability Manager ensures a seamless transition between clustered servers in the event of server failure withminimal impact on businesses.Hardware OverviewTechnical SpecificationsHardwareCPUAnnapurna Labs Alpine AL-314 quad-core 1.7GHz Hardware encryption engine YesMemory4 GB DDR3L (expandable up to 8 GB)Compatible drive type 8 x 3.5" or 2.5" SATA SSD / HDD (drives not included)External port • 2 x USB 3.0 port • 2 x eSATA port Size (HxWxD)157 x 340 x 233 mm Weight 5.31 kgLAN• 2 x 1GbE (RJ-45)• 2 x 10GBASE-T (RJ-45) Wake on LAN/WAN Yes Scheduled power on/off YesSystem fan2 (120 x 120 x 25 mm)AC input power voltage 100V to 240V AC Power frequency 50/60Hz, single phase Operating temperature 5°C to 40°C (40°F to 104°F)Storage temperature -20°C to 60°C (-5°F to 140°F)Relative humidity5% to 95% RH Maximum operating altitude3,048 m (10,000 ft)1Status indicator 2Alert indicator 3Power button 4LAN indicator5Drive status indicator 6Drive tray 7Power port 8Kensington Security Slot 9USB 3.0 port 10eSATA port 11Fan1210GbE RJ-45 port131GbE RJ-45 port14RESET button14General DSM SpecificationNetworking protocol SMB, AFP , NFS, FTP , WebDAV, CalDAV, iSCSI, Telnet, SSH, SNMP , VPN (PPTP , OpenVPN ™ , L2TP)File system• Internal: ext4• External: ext4, ext3, FAT, NTFS, HFS + (read only), exFAT 4Supported RAID typeSynology Hybrid RAID (SHR), Basic, JBOD, RAID 0, RAID 1, RAID 5, RAID 6, RAID 10Storage management• Maximum single volume size: 108 TB • Maximum internal volume: 256• Maximum iSCSI target: 32• Maximum iSCSI LUN: 256• iSCSI LUN clone/snapshot supportSSD cache SSD read-write cache supportFile sharing capability• Maximum local user account: 2,048• Maximum local group: 256• Maximum shared folder: 256•Maximum concurrent SMB/NFS/AFP/FTP connection: 1,024Privilege Windows Access Control List (ACL), application privilegesDirectory service Windows ® AD integration: Domain users login via SMB/NFS/AFP/FTP/File Station, LDAP integration Virtualization VMware vSphere® 6, Microsoft Hyper-V® , Citrix®, OpenStack®Security Firewall, encryption shared folder, SMB encryption, FTP over SSL/TLS, SFTP , rsync over SSH, login auto block, Let's Encrypt support, HTTPS (customizable cipher suite)Supported client Windows 7 onwards, Mac OS X ® 10.10 onwardsSupported browser Chrome ®, Firefox ®, Internet Explorer ® 9 onwards, Safari ® 8 onwards; Safari (iOS 7 onwards), Chrome (Android™ 4.0 onwards) on tabletsInterface languagePackages and ApplicationsFile Station Virtual drives, remote folders, Windows ACL editor, compressing/extracting archived files, bandwidth control for specific users/groups, creating sharing links, transfer logsFTP Server Bandwidth control for TCP connections, custom FTP passive port range, anonymous FTP , FTP SSL/TLS and SFTP protocol, boot over the network with TFTP and PXE support, transfer logs Universal Search Offer global search into applications and filesHyper BackupSupport local backup, network backup, and data backup to public clouds Active Backup for Server Centralize data backup for Windows and Linux servers without client installation Backup toolsDSM configuration backup, macOS Time Machine support, Cloud Station Backup Shared folder sync - maximum task number: 4Cloud Station SuiteSync data between multiple platforms by installing the client utilities on Windows, Mac, Linux, Android and iOS devices, while retaining up to 32 historical versions of filesMaximum concurrent file transfer: 1,024Cloud SyncOne or two-way synchronization with public cloud storage providers including Amazon Drive, Amazon S3-compatible storage, Baidu cloud, Box, Dropbox, Google Cloud Storage, Google Drive, hubiC, MegaDisk, Microsoft OneDrive, OpenStack Swift-compatible storage, WebDAV servers, Yandex DiskSurveillance Station Maximum IP camera: 30 (total of 900 FPS at 720p, H.264) (including two free camera licenses; additional cameras require the purchasing of additional licenses)High Availability Manager Reduce service downtime by setting up two identical NAS into one high-availability cluster VPN Server Maximum connection: 15, supported VPN protocol: PPTP , OpenVPN™, L2TP/IPSec Mail Server Supported Mail Server protocol: POP3, SMTP , IMAP , support LDAP/AD accountMail Station Webmail interface for Mail Server to receive emails from multiple POP3 mailboxes, customizable SMTP server Collaboration Suite • Chat maximum user: 150• Office maximum user: 150, maximum simultaneous editing user: 40• Calendar: support CalDAV and access via mobile devicesNote Station Rich-text note organization and versioning, encryption, sharing, media embedding and attachmentsStorage Analyzer Volume and quota usage, total size of files, volume usage and trends based on past usage, size of shared folders, largest/most/least frequently modified filesSecurity AdvisorMalware detection/removal, user account/password, network, system-related security scanEnglish, Deutsch, Français, Italiano, Español, Dansk, Norsk, Svensk, Nederlands, Русский, Polski, Magyar, Português do Brasil, Português Europeu, Türkçe, Český,SYNOLOGY INC.Synology is dedicated to taking full advantage of the latest technologies to bring businesses and home users reliable and affordable ways to centralize data storage, simplify data backup, share and sync files across different platforms, and access data on-the-go. Synology aims to deliver products with forward-thinking features and the best in class customer services.Copyright © 2017, Synology Inc. All rights reserved. Synology, the Synology logo are trademarks or registered trademarks of Synology Inc. Other product and company names mentioned herein may be trademarks of their respective companies. Synology may make changes to specification and product descriptions at anytime, without notice.DS1817-2017-ENU-REV001Headqu artersSynology Inc. 3F-3, No. 106, Chang An W. Rd., Taipei, Taiwan Tel: +886 2 2552 1814 Fax: +886 2 2552 1824ChinaSynology Shanghai 200070, Room 516, No. 638 Hengfeng Rd., Zhabei Dist. Shanghai, ChinaUnited KingdomSynology UK Ltd.Unit C, Denbigh WestBusiness Park, Third AvenueBletchley, Milton KeynesMK1 1DH, UKTel: +44 1908 366380GermanySynology GmbHGrafenberger Allee125 40237 DüsseldorfDeutschlandTel: +49 211 9666 9666North & South AmericaSynology America Corp.3535 Factoria Blvd SE #200Bellevue, WA 98006, USATel: +1 425 818 1587FranceSynology France SARL39 rue Louis Blanc, 92400Courbevoie, FranceTel: +33 147 176288Antivirus Essential Full system scan, scheduled scan, white list customization, virus definition auto updateDownload Station Supported download protocols: BT, HTTP, FTP, NZB, eMule, Thunder, FlashGet, QQDL Maximum concurrent download task: 50Web Station Virtual host (up to 30 websites), PHP/MariaDB®, third-party application supportOther package Video Station, Photo Station, Audio Station, DNS Server, RADIUS Server, iTunes® Server, Log Center, third-party packages available on Package CenteriOS/Android™ application DS audio, DS cam, DS cloud, DS file, DS finder, DS get, DS note, DS photo, DS video Windows Phone® application DS audio, DS file, DS finder, DS get, DS photo, DS videoEnvironment and PackagingEnvironment safety RoHS compliantPackage content • DS1817 main unit x 1• Quick Installation Guide x 1• Accessory pack x 1• AC power cord x 1• RJ-45 LAN cable x 2Optional accessories • 4GB (RAM1600DDR3-4G)• Synology Expansion Unit DX517• Synology VS360HD• Surveillance Device License PackWarranty 3 years*Model specifications are subject to change without notice. Please refer to for the latest information.1. Performance figures may vary depending on environment, usage, and configuration.2. DS1817 supports up to two Synology DX517, sold separately.3. 5 year warranty is available as an optional bundle with EW201, 2-year Extended Warranty service add-on. Visit https:///en-global/products/Extended_Warrantyfor more information on availability.4. exFAT Access is purchased separately in Package Center.。
黑群晖6.1.7安装详细教程
黑群晖6.1.7安装详细教程--------------------------------------------------------------------------------------------------------以下为黑群晖常规安装方式黑群晖6.1.7 物理机安装详细教程群晖简介准备资源(所有软件资源已打包免费下载,下载地址)1.U盘一枚,注意改U盘需要永久插电脑上作为引导,1G+足以;2.引导文件下载3.系统资源下载DS3617xs版本6.1.7-15284 pat文件https:///download/DSM/release/6.1.7/1528 4/DSM_RS3617xs_15284.patDS3615xs版本6.1.7-15284 pat文件https:///download/DSM/release/6.1.7/1528 4/DSM_DS3615xs_15284.pat4.适合运行NAS的设备如HP的 MicroServer Gen8 Gen10 等等U盘制作步骤摘要•1.芯片无忧/芯片精灵用于获取U盘VID、PID•2.OSFMount 用于修改引导映像synoboot.img 内的启动盘VID、PID以及网卡MAC地址•3.Win32DiskImager 用于把修改好的引导映像synoboot.img 写入到U盘中插入U盘,开启'芯片无忧'或者芯片精灵软件(Windows10中该软件运行速度较慢请等待不要操作,如操作了会提示停止运行)U盘信息读取保存记录下VID PID确保你已经准备好synoboot.img引导映像;打开OSFMount (OSFMount本站提供是安装版请确保已安装)点击Mount new点击Mount new参照设置特别注意 Read-only drvie(只读模式不能打勾)确认无误点击OK这时候多出一个虚拟驱动器虚拟驱动器进入驱动器目录/grub/ 找到grub.cfg文件使用Notepad++(推荐)或者记事本打开grub.cfg文件使用Notepad++代码如下复制 set vid=0x0DD8 //修改 0DD8 为你U盘的VID 保留前面的0xset pid=0x0C00 //修改 0C00 为你U盘的PID 保留前面的0x set sn=C7LWN09761 //此处为序列号如你有的洗白需求的话可修改set mac1=00113207DCBD //此处为网卡MAC修改为和你NAS 一致的MAC 洗白的话需要001132开头需要该硬件MAC提示:初步安装仅仅需要PID和VID设置对就ok,SN/MAC是用来洗白用的,的有对应的号,如果没有则不管洗白群晖就配合SN和MAC的组合修改完成点击保存!修改完成点击保存!返回到OSFMount软件点击Dismount all& Exit点击Dismount all& Exit点击“是” 确认这里synoboot.img映像已经修改完成,这时候需要把synoboot.img映像写入到U盘中打开Win32DiskImager软件打开Win32DiskImager软件等待写入完成引导U盘就制作好了开始安装安装需要用到软件:群晖助手(Synology Assistant)点击下载windows版 MAC版自行官网下载把制作好引导的U盘插入NAS机器为更好的保护硬盘,先不连接硬盘只插入引导U盘如BIOS没有设置USB设备优先引导的请前往设置和你操作的电脑同一局域网插好网线开机!开机稍等一会儿没什么问题应该到了以下界面开机并不是卡了是已经好了!注意!打开群晖助手(Synology Assistant) 点击搜索看到了如下结果!打开群晖助手(Synology Assistant)到此说明引导正常!那么就先关机因为无法操作软关机且无硬盘可以直接长按开关关机,然后把硬盘装好再开机,继续!再次开机后打开群晖助手(Synology Assistant) 点击搜索看到了上面的结果!双击该服务器浏览器自动弹出双击该服务器稍等片刻点击设置点击设置注意:如果这里的设置为灰色,请尝试直接用群晖助手安装系统。
纯新手向:群晖(NAS)的安装、使用详尽介绍

纯新手向:群晖(NAS)的安装、使用详尽介绍本文将分为几个目录来进行:1、大概介绍2、硬件组装3、系统安装4、端口映射5、远程下载6、视频播放7、综合使用(cloud、photo、file、note等)8、综合问答----------------------------------------------------------------------------------------------------------------------------NAS(Network Attached Storage:网络附属存储)按字面简单说就是连接在网络上,具备资料存储功能的装置,因此也称为“网络存储器”。
它是一种专用数据存储服务器。
它以数据为中心,将存储设备与服务器彻底分离,集中管理数据,从而释放带宽、提高性能、降低总拥有成本、保护投资。
其成本远远低于使用服务器存储,而效率却远远高于后者。
目前国际著名的NAS企业有Netapp、EMC、OUO等。
以上,来自百度百科复制的资料,如果用比较人类的话来说一次NAS,其实也就是一台电脑,功能性比较局限的电脑,通过特定的系统完成大家的一些文件(相片)储存,影音存储的需求,并通过外部软件来完成读取(播放)。
例如来说:(云)储存?有个好东西要放起来?在外现了一个好资源(番号?),家里网络空着也是浪费,下载吧。
躺在沙发上电视播放硬盘内的大片:又或是用平板、手机之类的躺在床上看下回来的电影?还是看些漫画?还是说你有很多东西需要移动存储?又或有更多的玩法?•2#月亮上梦游•2015-9-12 19:54:54本帖最后由月亮上梦游于 2015-9-12 21:18 编辑以上是我感觉对于NAS来说,大家最常用到的一些功能了。
NAS其实就是以上所说的功能的汇集体,他是一个网络存储服务。
可以通过路由器加移动硬盘搭成简易的服务(卡,慢),可以购买专业公司开发的(系统)完成,可以自己用一些普通的电脑配件通过一些灰色手段(其实就是非法)去使用专业公司系统。
Synology DS211j DS211 快速安装指南说明书
DiskStationDS211j, DS211Quick Installation Guide Document ID: Synology_QIG_2bayCL_20101028SAFETY INSTRUCTIONSPlease read these safety instructions carefully before use, and keepthis manual in a safe place for your future reference.PACKAGE CONTENTSBefore you begin, please check the package contents to verify thatInstallationCD2M RJ-45 LAN cable AC power cordAssembling KitINSTALL HARD DISKSDisk Station requires at least one 3.5” or 2.5” SATA hard disk forinstallation. Refer to the following steps for details:Warning! If you use a hard disk with data on it to install,system will format the hard disk and erase all data in somecases. Please back up the data if you need it in the future.1. Place the Disk Station horizontally on a desk. The rear panelshould be facing you.2. Push the upper case forward to slide it open. Lift the upper caseand set it aside.3. Follow the steps below to install the hard disk:a.If you are using a 3.5” hard disk, slide the hard disk into thehard disk bay and push it all the way back until it is connected to the SATA connector. Secure the hard disk with the 4 hard disk screws provided.b.If you are using a 2.5” hard disk, place the hard disk on the2.5” Disk Holder and tighten the 3 screws on the sides. Youwill need to purchase the 2.5” Disk Holder (Type C)separately.Slide the 2.5” Disk Holder into the hard disk bay and push it all the way back until it is connected to the SATA connector.Secure the Disk Holder with the 2 hard disk screws provided.4. Repeat step 3 to install the second hard disk.5. Slide the upper case back to its position.6. Secure the case with the 2 case screws provided.TURN ON SERVER1. Connect the AC power adapter to the server and plug in the ACpower cord to the power outlet.2. Use the LAN cable to connect the server to yourswitch/router/hub.3. Press the power button on the front panel to power up theserver. Wait for the POWER LED to be constant blue.INSTALL SYSTEM SOFTWAREWindows User1. Insert the installation CD to your computer.2. Choose Start on the autorun menu.3. Follow the on-screen instructions to complete the setupprocess.Note: If you choose One-Click Setup, the admin password willbe blank.Mac User1. Insert the installation CD to your computer.2. Double click on the CD-Rom Drive thumbnail.3. Double click MacOSX.4. Double click SYNOLOGY-Assistant.dmg.5. Double click on the automatically generated thumbnailSYNOLOGY-Assistant.dmg on the desktop.6. Double click Synology Assistant to run the Setup Wizard.7. Click Browse to select the “.pat” installation file in the install ationCD.8. Follow the on-screen instructions to complete the setupprocess.Note: If you choose One-Click Setup, the admin password willbe blank.CONGRATULATIONS!Server has been set up. Refer to the User’s Guide in the installationCD for advanced settings and management.For more information or online resources, please visit.。
- 1、下载文档前请自行甄别文档内容的完整性,平台不提供额外的编辑、内容补充、找答案等附加服务。
- 2、"仅部分预览"的文档,不可在线预览部分如存在完整性等问题,可反馈申请退款(可完整预览的文档不适用该条件!)。
- 3、如文档侵犯您的权益,请联系客服反馈,我们会尽快为您处理(人工客服工作时间:9:00-18:30)。
快速安装指南Synology_QIG_18Bay_20130321目录章节 1:开始之前包装内容 (3)Synology DiskStation 概观 (4)安全须知 (5)章节 2:硬件设置安装硬盘所需的工具和零件 (6)安装硬盘 (6)启动您的 DiskStation (9)为 DiskStation 加装内存模块 (10)更换散热风扇 (12)章节 3:为 DiskStation 安装 DSM使用 Web Assistant安装 DSM (14)更多信息 (14)附录 A:技术规格附录 B:LED 指示表1 开始之前在您开始设置 DiskStation 前,请检查包装内容来确认是否已收到下列项目。
在使用前,请先仔细阅读安全须知,避免让 DiskStation 遭受损毁。
包装内容RJ-45 网线 x 2Synology DiskStation 概观-----1更多 DiskStation 支持之 Synology 扩充设备的相关信息,请参访。
安全须知2 硬件设置安装硬盘所需的工具和零件▪螺丝刀▪至少一颗 3.5 吋或 2.5 吋 SATA 硬盘(请访问取得兼容的硬盘列表。
)安装硬盘1 请将硬盘托盘钥匙插入硬盘托盘锁,以逆时钟方向旋转钥匙来解锁硬盘托盘的把手,然后取下钥匙。
2 按下硬盘托盘的下半部来弹出把手。
3 请按照下图指示的方向拉开硬盘托盘的把手,然后取出硬盘托盘。
4 将硬盘装在硬盘驱动器托架中。
▪对于 3.5 吋硬盘:从硬盘托盘的侧面卸下紧固板。
将硬盘装在硬盘驱动器托盘中。
然后插入紧固板来固定硬盘。
▪对于 2.5 吋硬盘:从硬盘托盘的侧面卸下紧固板。
将硬盘放入硬盘托盘的蓝色区域(如下所示),将托盘翻面,然后锁紧螺丝来固定硬盘。
5 将装好的硬盘托盘放入空的硬盘插槽。
6 按下把手使其与前面板齐平,藉此固定硬盘托盘。
7 将硬盘托盘钥匙插入硬盘托盘锁,以顺时钟方向旋转钥匙(至“I” 位)来锁住硬盘托盘的把手,然后取下钥匙。
8 请重复上述步骤来安装其他硬盘。
9 硬盘位置的排序如下。
启动您的 DiskStation1 请使用网线来连接交换器/路由器/集线器至 DiskStation。
2 将电源线的一端连接至 DiskStation 的电源端口,并连接另一端至电源插座。
3 按住电源按钮来开启您的 DiskStation。
现在您的 DiskStation 处于在线状态,并可从网络计算机中检测到。
为 DiskStation 加装内存模块可选的 Synology 内存模块 2GB(DDR3)专为扩充 DiskStation 的内存而设计。
请按以下步骤安装、检查或移除DiskStation 上的内存模块。
若要安装内存模块:1 请关闭 DiskStation。
拔下 DiskStation 上面的所有接线,藉此避免可能发生的损害。
2 松开固定机器顶盖的 6 颗螺丝。
并拉出机壳并将其放置一旁。
3 将新内存模块插入插槽中:a 将模块金属边缘上的缺口对准较下方内存插槽的的缺口。
b 斜放内存并将其推入插槽中。
请确定已将托盘完全推入。
c 使用两根手指,牢固且平均地向下按压内存模块。
当内存正确插入时,您应该会听到卡答一声。
4 请将顶盖装回。
装回上盖,并锁紧您在步骤 2 中取下的 6 颗螺丝。
5 重新连接在步骤 1 中卸下的线缆,然后按住电源按钮来开启 DiskStation。
若要确保 DiskStation 是否可识别新的内存容量:1 请安装 DiskStation Manager(DSM)。
(参阅以下章节以了解更多信息。
)2 以admin(或属于administrators群组的用户)身份登录 DSM。
3 在主菜单 > 系统信息中查看总内存大小。
DS1813+4,096 MB如果您的 DiskStation 无法识别内存或是无法正常启动,请确认已正确安装内存。
若要移除内存模块:1 请按照“若要安装内存模块”的步骤 1 和2 关闭 DiskStation,并断开线缆,然后卸下顶盖。
2 向外推出内存模块两侧的退出杆来松开内存插槽中的模块。
3 握住内存模块的缺口并将其从插槽中卸下。
4 请将顶盖装回。
装回顶盖,并锁紧您在步骤 2 中取下的螺丝。
5 重新连接在步骤 1 中卸下的线缆,然后按住电源按钮来开启 DiskStation。
更换散热风扇如果有任何一个散热风扇无法运作,DiskStation 将发出哔声。
请按以下步骤以可用风扇更换故障风扇。
若要更换散热风扇:1 请关闭 DiskStation。
拔下 DiskStation 上面的所有接线,藉此避免可能发生的损害。
2 风扇编号如下:3 松开用来固定风扇面板的4 颗螺丝。
4 卸下故障风扇:a 将风扇面板从 DiskStation 中拉出。
b 从风扇插座底部附近的接头上断开 2 条风扇线缆的连接,然后卸下风扇面板。
c 松开用来固定故障风扇的 4 颗螺丝,然后卸下风扇。
5 安装新风扇:a 以可用风扇更换故障风扇(通过位于右下角风扇中的风扇线缆),然后锁紧 4 颗螺丝来固定新风扇。
b 将 2 条风扇线缆连接到风扇插座底部附近的接头,然后更换风扇面板。
6 装回上盖,并锁紧您在步骤 2 中取下的 4 颗螺丝。
7 重新连接在步骤 1 中卸下的线缆,然后按住电源按钮来开启 DiskStation。
3 为 DiskStation 安装 DSMSynology DiskStation Manager(DSM)是一个基于浏览器的操作系统,提供各项访问和管理 SynologyDiskStation 的工具。
完成安装后,您就能够登录 DSM 并开始享受 Synology DiskStation 的所有功能。
请按照下列步骤来操作来开始运行 DSM。
使用 Web Assistant安装 DSM您的 Synology DiskStation 配备了 Web Assistant,它是一项基于浏览器的安装工具,能够帮助您下载、配置和安装最新版本的 Synology DiskStation Manager(DSM)。
使用 Web Assistant 安装 DSM 之前,请先检查以下内容:▪您的计算机与 Synology DiskStation 必须连接到相同的本地网络。
▪为下载最新版本的 DSM,在安装过程中必须有 Internet 连接。
确认后,请按照下列步骤来操作:1 开启 Synology DiskStation 电源。
2 打开计算机上的网页浏览器并进入。
3 Web Assistant 可在本地网络中找到您的 Synology DiskStation。
您的 DiskStation 状态应为未安装。
4 单击连接可开始设置。
按照屏幕上的指示来完成设置流程。
更多信息恭喜!您现在可以立即管理并享受 Synology DiskStation 的所有功能。
更多有关特定功能的信息,请参阅DSM 帮助或参见中的在线资源来了解。
技术规格LED 指示表SYNOLOGY, INC.最终用户许可协议重要须知– 请认真阅读:此最终用户许可协议("EULA") 是您(个人或单一实体)与SYNOLOGY, INC. 公司及其子公司,包括SYNOLOGY AMERICAN CORP与SYNOLOGY UK LTD.(统称“SYNOLOGY”)之间就任何SYNOLOGY 软件以及在中下载的或SYNOLOGY 产品(统称“产品”)中随附或安装的任何相关的固件、媒体、打印的材料和“在线”或电子文档(统称“软件”)所签订的法定协议。
打开包含软件的包装、在产品上安装SYNOLOGY 之前未预先安装的软件或使用包含预先安装的软件的产品即表示您同意受本EULA 条款的约束。
如果您不同意本EULA 的条款,不要打开产品包装盒、安装软件或使用包含软件的产品。
您可以根据转销商的适用退款政策将产品退还给您购买该产品的转销商请求退款。
第 1 条. 有限软件许可根据本EULA 的条款和条件,Synology 授予您有限、非独占、不可转让、个人的许可来安装、运行和使用只与您授权使用的产品相关的一份软件复本。
第2 条. 文档您可以复制和使用软件提供的任何文档的适当复件数;前提是这些复件只能用于内部业务目的,不能再次出版或发布(以复印件或电子形式)给第三方。
第3 条. 备份您可以复制适当的软件复件数用于备份或存档。
第 4 条. 更新 Synology 为您提供的或Synology 网站(“网站”)中用于更新和补充原始软件的任何软件受本EULA 约束,除非有提供这些更新或补充的附加许可条款,在这种情况下,软件将受这些附加条款约束。
第5 条. 许可限制第1 条中规定的许可适用范围仅限于您已经订购或付款的产品,规定陈述了您对软件的所有权利。
Synology 保留在本EULA 中未明确授权给您的所有权利。
在不限制上述规定的前提下,您不能授权或允许任何第三方:(a) 出于与产品相关之外的其他目的使用软件;(b) 在任何商业主持或服务机构环境中许可、发布、出租、租赁、出借、转让、分配或处理软件或使用软件;(c) 进行反向工程、反编译、反汇编或试图破解软件源代码或揭露与软件相关的任何商业机密,除非适用法律明确允许上述活动(尽管有此项限制);(d) 改编、修改、改动、翻译或创作软件的任何衍生作品;(e) 删除、改动或隐藏产品上的版权声明或其他所有权声明;或(f) 规避或试图规避Synology 采用的方法来控制对产品或软件的组件、特征或功能的访问。
第6 条. 开放源码软件可能包含依据GNU 通用公共许可证(“GPL 组件”)授权给Synology 的组件,当前可在/licenses/gpl.html 网站中获取该许可证。
当本EULA 与GPL 的要求在关于GPL 组件的使用方面发生抵触时,GPL 的条款将作为唯一约束GPL 组件的条款,在这种情况下,您同意在使用这些组件时受GPL 约束。
第7 条. 审查 Synology 拥有审查您是否遵守本EULA 条款的权利。
您同意授予Synology 对设施、装置、账簿、记录和文档的检查权力以及尽量与Synology 合作以便进行此类审查。
第8 条. 所有权该软件是Synology 和其许可方的宝贵财产,受版权和其他知识产权法律与条约的保护。
Synology 或其许可方拥有软件的所有权利、所有权和利益以及软件的所有版权和其他知识产权权利。
第9 条. 有限担保 Synology 担保距离您(a) 在不包含预先安装的软件的产品上安装软件或(b) 使用包含预先安装了软件的产品的九十(90) 天内(“担保期”),如适用,软件将基本上符合Synology 发布的(如果有)或在网站中规定的软件规范。
