Windows2008下配置cisco radius server
思科与微软2008 IAS radius 服务器AAA认证
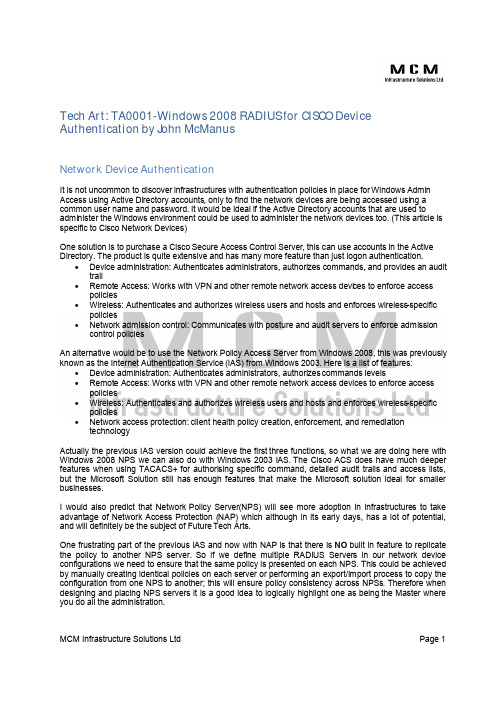
MCM Infrastructure Solutions LtdPage 1Tech Art:TA0001-Windows 2008 RADIUS for CISCO DeviceAuthentication by John McManusNetwork Device AuthenticationIt is not uncommon to discover infrastructures with authentication policies in place for Windows Admin Access using Active Directory accounts, only to find the network devices are being accessed using a common user name and password.It would be ideal if the Active Directory accounts that are used to administer the Windows environment could be used to administer the network devices too.(This article is specific to Cisco Network Devices)One solution is to purchase a Cisco Secure Access Control Server, this can use accounts in the Active Directory.The product is quite extensive and has many more feature than just logon authentication.•Device administration: Authenticates administrators, authorizes commands, and provides an audit trail•Remote Access: Works with VPN and other remote network access devi c es to enforce access policies•Wireless: Authenticates and authorizes wireless users and hosts and enforces wireless -specific policies•Network admission control: Communicates with posture and audit servers to enforce admission control policiesAn alternative would be to use the Network Policy Access Server from Windows 2008, this was previously known as the Internet Authentication Service (IAS)from Windows 2003. Here is a list of features:•Device administration: Authenticates administrators, authorizes commands levels•Remote Access: Works with VPN and other remote network access devices to enforce access policies•Wireless: Authenticates and authorizes wireless users and hosts and enforces wireless -specific policies•Network access protection: client health policy creation,enforcement, and remediation technologyActually the previous IAS version could achieve the first three functions, so what we are doing here with Windows 2008 NPS we can also do with Windows 2003 IAS.The Cisco ACS does have much deeper features when using TACACS+for authorising specific command, detailed audit trails and access lists, but the Microsoft Solution still has enough features that make the Microsoft solution ideal for smaller businesses.I would also predict that Network Policy Server(NPS)will see more adoption in infrastructures to take advantage of Network Access Protection (NAP)which although in its early days, has a lot of potential, and will definitely be the subject of Future Tech Arts.One frustrating part of the previous IAS and now with NAP is that there is NO built in feature to replicate the policy to another NPS server. So if we define multiple RADIUS Servers in our network device configurations we need to ensure that the same policy is presented on each NPS. This could be achieved by manually creating identical policies on each server or performing an export/import process to copy the configuration from one NPS to another;this will ensure policy consistency across NPSs. Therefore when designing and placing NPS servers it is a good idea to logically highlight one as being the Master where you do all the administration.MCM Infrastructure Solutions LtdPage 2Command to export the configurationCommand to import the configurationOne solution I have implemented in the past is to run a scheduled task that exports the policy from the “master” server and copies the output to each of the “slave” servers, the slave server then has a scheduled task which imports the policy.TIP : For Working with multiple NPS servers with common policies•Logically identify a “Master” NPS server and make all policy updates here.Rationale•By making changes in the same place these change can be knowingly exported from the “Master” server and imported to other NPS server ensuring consistent policies across NPS server.That enough background lets configure NPS for Cisco Device authentication.OverviewThe RADIUS server can be installed on an Active Directory Domain controller or on a Windows Server in the domain. Windows 2003Enterprise Edition was required to support more that 50 radius clients, I have been unable to find if there are any such limitations with the Windows 2008 SKUs.Each device must be configured as a RADIUS client in the NPS, the RADIUS Key must match the key specified on the remote access device.In NPS you have the option of automatically generating the key. To transfer the key to the Cisco device I recommend copying it into notepad, then when y ou are doing the Cisco part;copy and paste into the configuration, using this method you can create multiple clients in NPS and paste all their keys into notepad without having to jump between NPS and the Cisco Terminal Session. Always destroy the notepad file once the Cisco configuration has been completed.A remote access policy should then be created to allow specified usersTIP: To provide added security between the Cisco devices and the RADIUS server:•The shared secret key should be at least 22 characters long and consist of a random sequence of upper and lower case letters, numbers, andpunctuation. This will ensure maximum protection of the key.Luckly now the NPS will generate a secret key longer than 22 characters.•Each client should be configured with a different key.Note: The authentication mechanism is limited to PAP for Cisco device which is unencrypted; however RADIUS will encrypt the password over the network to the RADIUS server. This is why a strong key is required.Steps RequiredSo what needs to be done to get the NPS to provide logon authentication and access control for Cisco Devices.MCM Infrastructure Solutions LtdPage 3The basic steps•Install the Network Policy and Access Service Role •Register in Active Directory •Configure the RADIUS Client Settings •Configure the Access policy •Configure the Cisco DeviceInstall the Network Policy and Access Service Role•From the Initial Configuration Task Windows ->Click Add a Role•Select the “Network Policy and Access Server Role”•Select the Role Service “Network Policy Server” –This is all that is require to provide RADIUS authentication for our Cisco devicesRegister in Active Directory•Once the Role has been configured then we can continue with the NPS configuration.You can find the NPS console underadministrative tools•Right Click NPS (local) and Select Register in Active DirectoryConfigure the RADIUS Client Settings•In the RADIUS Client and Server Folder Right Click RADIUS Client and Select NewRADIUS Client•Enter Friendly Name and IP address of the Cisco Device•Select Cisco as the RADIUS Vendor•Click Generate to make a unique RADIUS key (make sure you copy this somewhereyou can access it later to paste into theCisco Device)Note:There is no message authenticator available on Cisco Routers at the time of writing.The Cisco network devices are not NAP Capable at the time of writing.TIP: Using a standard name format for the device will allow you to use wildcard matching in the policy to identify the device.MCM Infrastructure Solutions LtdPage 4Configure the Access policy•Right Click the Network policy and Select New •Enter a Policy Name (Leave as unspecified)•Enter a Windows Group Condition –Enter the name of the group from AD who should have access •Enter a Client Friendly Name as a Condition –Enter the name of the RADIUSClient (we can use wild cards here so“CISCO–R?” would match multiple RADUISClients•Enter a NAS-Port-Type as a condition –Select Virtual (VPN)•Specify Access Granted in Specify Access Permissions•Configure Authentication Method as PAP•You can select No when asked if you want to look up the help file.•There are no setting necessary in the “Configure Constraint”TIP-To see which policy has been match you can check out the log file, located in c:\windows\system32\log. Information is also logged in Security Event Log:Source=Microsoft Security Auditing, Task Category=Network Policy Server•“Configure Settings”–Here is where we setup the access level•Remove Frame-Protocol PPP •Remove Service-Type Framed •Select Vendor SpecificMCM Infrastructure Solutions LtdPage 5•Now Add Cisco Vendor Attribute AV=Pair •Add Attribute Shell:priv-lvl=15You should now end up with something like thisTip –Which commands can be accessedYou could create another group and grant them access to level1 show command, so you have read-only type access to devices. This is achieved by changing shell:priv-lvl=?? To the appropriate level.Configure the Cisco DeviceThe device in the following example is a Cisco router, and only the key lines are shownMCM Infrastructure Solutions LtdPage 601: Switch to Access Authentication, Authorisation and Accounting new command set02: configure a radius group “RADIUS_AUTH” to logical group RADIUS Servers03: specify primary RADIUS server as part of “RADIUS_AUTH”04: specify backup RADIUS server as part of “RADIUS_AUTH”05: define “networkaccess” as a logical name to apply logon and enable access to06: allow RADIUS_AUTH users access to exec mode07:specifies the interface RADIUS uses as the source.08: specify secret key for primary RADIUS server09: specify secret key for backup RADIUS server10: modify the telnet access11: set the time out for the login session12:assign networkaccess from 05: for Login accessNow we can logon to the Cisco Device via telnet using your Active Directo ry account name.SummaryConfiguring RADIUS authentication for Cisco Devices against Active Directory does not require a large investment in new infrastructure. There are some very simple steps that can be performed to allow Active Directory accounts to be used for accessing the network infrastructure components.The article also provides a first look at the Windows 2008 NPS which no doubt has some interesting potential for the future with Windows 2008.There are additional video clips showing how to configure NPS for RADIUS authentication with Cisco Devices MCM Infrastructure Solutions Technical Articles -/TechArt/Technical%20Articles.htm。
windows 下建立radius服务器安装步骤
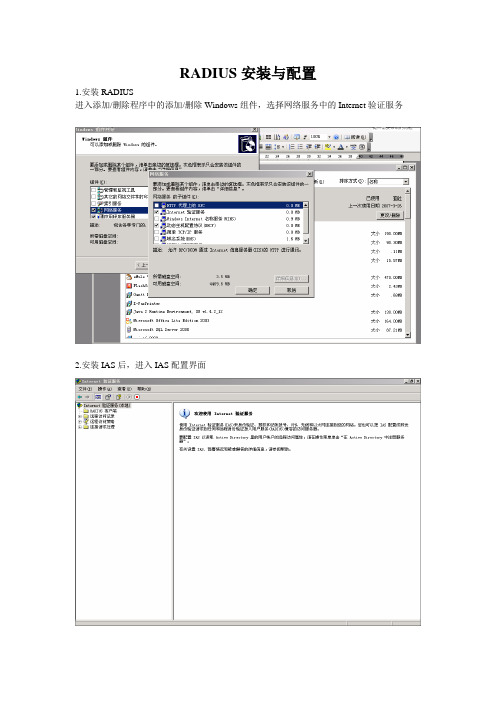
RADIUS安装与配置1.安装RADIUS进入添加/删除程序中的添加/删除Windows组件,选择网络服务中的Internet验证服务2.安装IAS后,进入IAS配置界面3.右键点击RADIUS客户端,选择新建RADIUS客户端。
客户端地址为验证交换机的管理地址,点击下一步。
4.选择RADIUS Standard,共享机密为交换机中所配置的key。
点击完成。
5.右键点击远程访问策略,单击新建远程访问策略。
6.为策略取一个名字,点击下一步7.选择以太网,点击下一步8.选择用户,点击下一步1.使用MD5质询,点击下一步,并完成。
2.在右面板中右键点击所新建的策略,选择属性。
3.点击添加,选择Day-And-Time-Restrictions4.选择添加,选择允许,单击确定。
5.删除NAS-Port-Type匹配”Ethernet”,并选择授予访问权限6.单击编辑配置文件,选择高级-------添加选择添加[64]Tunnel-Type:VLAN[65]Tunnel-Medium-Type:802[81]Tunnel-Pvt-Group-ID:VLAN ID7.单击确定8.右键点击连接请求策略,选择新建连接请求策略9.选择自定义策略,并为该策略取个名字10.策略状况选择添加Day-And-Time-Restrictions,配置方法同上。
然后一直下一步并完成。
20.添加远程登录用户。
在本地用户和组中新建一个用户。
11.右键点击新建的用户,进入属性,选择隶属于,删除默认的USERS组21.点击拨入,设置为允许访问12.IAS配置完成。
13.VRV EDP Agent认证成功。
利用windows server 2008 NPS实现802.1X认证

利用windows server 2008 NPS实现802.1X认证目录1、Windows server 2008安装配置AD (1)2、Windows server 2008安装配置CA (18)3、Windows server 2008安装配置NPS组件 (27)3.1、安装NPS组件 (27)3.2、配置Radius客户端 (31)3.3、配置NAP策略 (33)4、802.1x认证过程 (38)4.1、PC证书安装 (38)4.2、交换机配置 (40)4.3、本地连接属性配置 (40)5、NPS支持IPv6 (41)1、Windows server 2008安装配置AD活动目录(Active Directory)是面向Windows Standard Server、Windows Enterprise Server 以及Windows Datacenter Server的目录服务。
Active Directory不能运行在Windows Web Server上,但是可以通过它对运行Windows Web Server的计算机进行管理。
使得WINDOWS 2000以上服务器系统与Internet上的各项服务和协议更加联系紧密,因为它对目录的命名方式成功地与”域名“的命名方式一致,然后通过DNS进行解析,使得与在Internet上通过WINS 解析取得一致的效果。
下面将演示Windows server 2008活动目录安装与配置的安装方法。
登录Windows server 2008,开始-管理工具-服务器管理器-角色—打开添加角色向导。
选择“添加角色”出现如下图所示:在弹出的对话框中点击“下一步”:在弹出的对话框中选择“Active Directory 域服务”(如果有关联组件没有安装,会提示需要安装关联组件,选择“是”即可),点击下一步如图所示:在弹出的对话框中出现相关Active Directory 域服务相关简介这里面会介绍安装及配置以及相关注意事项,点击下一步如图所示:点击“安装”,如图:安装成功之后,点击“关闭”。
WindowsServer搭建radius认证服务器
WindowsServer搭建radius认证服务器radius简介RADIUS(Remote Authentication Dial-In User Server,远程认证拨号⽤户服务)是⼀种分布式的、C/S架构的信息交互协议,能包含⽹络不受未授权访问的⼲扰,常应⽤在既要求较⾼安全性、⼜允许远程⽤户访问的各种⽹络环境中。
协议定义了基于UDP(User Datagram Protocol)的RADIUS报⽂格式及其传输机制,并规定UDP端⼝1812、1813分别作为认证、计费端⼝。
如果是思科设备:认证和授权端⼝为UDP1645,计费端⼝1646.RADIUS最初仅是针对拨号⽤户的AAA协议,后来随着⽤户接⼊⽅式的多样化发展,RADIUS也适应多种⽤户接⼊⽅式,如以太⽹接⼊等。
它通过认证授权来提供接⼊服务,通过计费来收集、记录⽤户对⽹络资源的使⽤。
环境信息本⽂为之前搭建记录,使⽤了WinServer2016作为AD,安装了NPS功能作为radius认证服务器,radius客户端为UniFi AP。
策略需求为限定某个⽤户组只能连接AP指定的SSID。
需要部署CA和NPS服务器证书,缺少证书从事件查看器中会看到报错:“客户端不能⾝份验证,因为可扩展的⾝份验证协议(EAP)不能被服务器处理”。
设置⽹络策略服务器NPSWin+R运⾏输⼊mmc,打开Microsoft管理控制台(MMC),添加NPS管理单元。
配置radius客户端添加所⽤radius客户端(UniFi AP),填写友好名称与地址,和共享机密。
配置策略连接请求策略:可以使⽤默认的“所有⽤户使⽤ Windows ⾝份验证”策略,如果有特殊需求可以新建⾃定义策略。
⽹络策略:1. 新建策略-输⼊策略名称。
2. 添加条件-可以指定⽤户组、⽇期和时间限制、连接属性等,我需要根据⽤户组来限定可连接的SSID,所以条件只加了⽤户组。
3. 指定访问权限-已授予访问权限。
windows2008 radius安装步骤
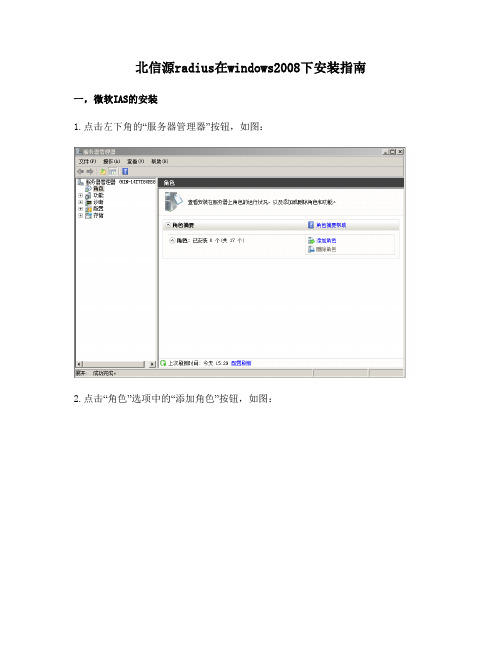
北信源radius在windows2008下安装指南一,微软IAS的安装1.点击左下角的“服务器管理器”按钮,如图:2.点击“角色”选项中的“添加角色”按钮,如图:3.点击“下一步”按钮,勾选“web服务器(IIS)”,如图:4.点击“下一步”按钮,如图:5.点击“下一步”按钮,勾选“应用程序开发”,如图:6.点击“下一步”按钮,如图:8.点击“功能”选项中的“添加功能”按钮,如图:9.勾选“.NET Framework 3.5.1 功能”,并安装。
如图:10.选中“Web 服务器(IIS)”选项,右键单击选择“添加角色服务”,如图:11.勾选“IIS 6 管理兼容性”和“IIS 可承载Web核心”选项,并安装。
安装VRVRadius服务器,安装成功以后用IE游览器访问:“服务器IP/radius”,如图:登录页面出现后输入用户名密码,默认用户名:admin 密码:123456。
登录后可做修改。
登录后可创建管理员账号和权限分配,可根据向导或者自行进行配置和管理操作。
登陆管理员账号进入管理配置界面。
管理平台首页1、部门设置:部门是采用了相同认证方式的用户群。
一般情况下,同部门的人员采用相同的认证策略。
部门设置界面可进行添加部门,删除部门,查询部门,编辑部门等操作,并以列表方式显示,清晰明了,方便管理员查看和操作(就是对同一批人执行相同的认证)。
2、用户设置这里指的用户,是保存在数据库中的用户,认证时,服务器将发起认证的用户名和保存在数据库中的用户名进行比较从而进行下一步认证。
在用户设置界面,可进行添加用户,删除用户,查询用户,批量导入用户和列设置等操作。
在高级查询中,可根据用户的不同属性进行查询(就是之前IAS中需要新建的用户)。
3、认证日志用户每发起一次认证请求,系统便会记录一条认证信息,如果用户认证失败,系统会给出失败原因。
在认证日志界面,以列表形式直观显示用户认证时间,所属部门,认证类型,认证结果,认证设备等,方便管理员对用户认证信息的查看(在列设置中,可根据需求选择显示在列表中的项目)。
WindowsServer2008iSCSIMPIO设定
用WS 2008内置工具建立iSCSI多路径传输利用Windows内建工具,建立可靠、弹性、高效率的iSCSI多路径传输微软在Windows Server 2008中直接内建了iSCSI Initiator软体,可方便使用者存取iSCSI储存区域网路(SAN),省下另外下载iSCSI Initiator的麻烦。
不过在一些进阶功能上,Windows Server 2008内建iSCSI Initiator的设定方式,与早先版本Windows 不同。
特别是在MPIO多重路径I/O(Multi-Path Input/Output)的设定上,有着较大的差异。
MPIO可允许1个iSCSI Initiator透过多个Session登入同1个iSCSI Target设备,以便利用多张网路卡或iSCSI HBA启用负载平衡与故障失效切换机制,构成更可靠、效率更高的资料传输路径。
微软MPIO功能可在Windows 2000 Server、Server 2003与Server 2008上运作。
当用户为Windows 2000 Server与Server 2003安装微软i Initiator 版时,可选择一并安装微软MPIO功能所需的核心元件、、与与装置特定模组(Device Specific Module,DSM)。
(在Windows XP与2000 Professinal下安装微软iSCSI Initiator时,无法选择安装MPIO支援选项,所以只能在Server版Windows上使用)只要iSCSI目标设备支援MPIO,则使用者在Initiator端在登入iSCSI目标装置时勾选启用多重路径、进入进阶选项设定两端点IP位址,然后在Initiator目标页面点选Details,进入对话框后再点选MPIO页面选择负载平衡模式,就完成了MPIO设定。
但在Server 2008上,设定程序便有所不同。
Server 2008的iSCSI MPIO设定Server 2008的iSCSI Initiator虽然内建在系统中,但MPIO功能并非是预设开启,相关元件也没有预先安装到系统上,因此使用者必须先安装MPIO核心档案与DSM,接下来才能在Initiator中启用MPIO功能。
windows下建立radius服务器安装步骤
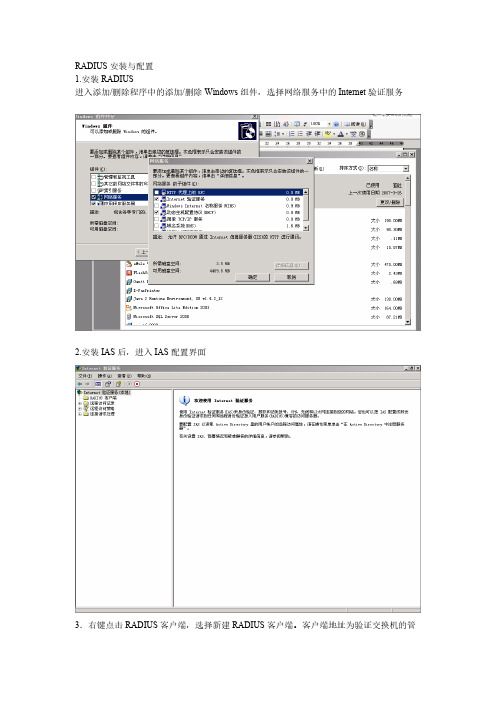
RADIUS安装与配置1.安装RADIUS进入添加/删除程序中的添加/删除Windows组件,选择网络服务中的Internet验证服务2.安装IAS后,进入IAS配置界面3.右键点击RADIUS客户端,选择新建RADIUS客户端。
客户端地址为验证交换机的管理地址,点击下一步。
4.选择RADIUS Standard,共享机密为交换机中所配置的key。
点击完成。
5.右键点击远程访问策略,单击新建远程访问策略。
6.为策略取一个名字,点击下一步7.选择以太网,点击下一步8.选择用户,点击下一步1.使用MD5质询,点击下一步,并完成。
2.在右面板中右键点击所新建的策略,选择属性。
3.点击添加,选择Day-And-Time-Restrictions4.选择添加,选择允许,单击确定。
5.删除NAS-Port-Type匹配”Ethernet”,并选择授予访问权限6.单击编辑配置文件,选择高级-------添加选择添加[64]Tunnel-Type:VLAN[65]Tunnel-Medium-Type:802[81]Tunnel-Pvt-Group-ID:VLAN ID7.单击确定8.右键点击连接请求策略,选择新建连接请求策略9.选择自定义策略,并为该策略取个名字10.策略状况选择添加Day-And-Time-Restrictions,配置方法同上。
然后一直下一步并完成。
20.添加远程登录用户。
在本地用户和组中新建一个用户。
11.右键点击新建的用户,进入属性,选择隶属于,删除默认的USERS组21.点击拨入,设置为允许访问12.IAS配置完成。
13.VRV EDP Agent认证成功。
利用微软2008搭建Radius服务器

利用微软NAP架设AAA802.1X功能目的:实现利用WINDOWS2008的NAP组件来实现客户端的802.1X的认证,认证的凭证为AD域内的用户名和密码。
1.搭建AD服务器。
1.1过程略,但要提到注意的一点,当在2008上输入DCPROMO建立AD时候,有时会弹出提示administrator账号密码不符合要求,进行不下去,见图即使是本地的Administrator有了复杂性密码,之后进行此步骤的时候也会弹出,那么解决方法是:在命令提示符下键入net user Administrator密码/passwordreq:yes例:成功以后既可成功实现下一步了。
此时该服务器是一台AD和DNS服务器了。
下一步需要建立的就是证书服务器,IIS和策略服务器了。
安装证书服务器的目的是因为用了EAP加密,所以必须在Radius服务器以及客户端安装证书,网络设备就没必要安装证书了.注:2008中服务器的添加并不是添加组件,而是在服务器管理器中添加相应的角色。
2.添加角色—证书服务器和IIS2.1打开服务器管理器选择添加角色2.2选择证书服务器和IIS全部默认即可安装完成之后在服务器管理器的角色界面会有显示:2.3配置证书服务器和IIS2.3.1安装好证书服务器和IIS之后,在IE输入HTTP://IP/certsrv,用户名和密码为域的用户名和密码.2.3.2登陆成功的界面-点击申请证书2.3.3用户证书2.3.4报错—报错的原因是需要用HTTPS来访问并申请证书.2.3.5这时我们返回web管理器依次为:开始-管理工具-IIS管理器我们可以看见有一个Certsrv的web站点,这就是证书服务器的地址,我们现在的任务就是要将这个站点绑定成443,让他用HTTPS来访问.2.3.6绑定443端口(右键默认站点-编辑绑定)2.3.7添加一个443端口2.3.8点击默认站点里面的Certsrv,右面的浏览*443(HTTPS)2.3.9点击继续浏览此网站(不推荐)2.4.0用了HTTPS访问之后就可以顺利的申请证书了.2.4.1点击安装此证书,大功告成!2.4.2另外还有一件事,就是要在域中授权这个CA.依次为开始—管理工具—certicification authority,然后右键证书颁发机构,选择在AD中授权此CA.2.4.3客户端申请证书也要用HTTPS申请,和服务器申请的过程是一样的.当然域内的客户机如果想用802.1X认证就必须要有一个证书,并且安装.AD,CA,IIS都已经安装完成,并配置好了,下面我们开始安装配置RADIUS.3.1添加角色—网络策略和访问服务(NPS)3.2选择网络策略服务器安装安装成功角色内又多出了网络策略和访问服务3.3配置Radius服务3.3.1在AD域内添加用户并加到一个组里面,目的是让这个组可以通过NPS网络策略来访问网络.如图,我们创建了一个名为lt的帐户,帐户属性-拨入-将”通过NPS网络策略访问控制”的勾打上,并且隶属于lts组.lts组也是新建的.3.3.2配置NAP依次为开始–管理工具-网络策略服务器选择网络访问保护,点击”配置NAP”选择”IEEE802.1X(有线)”,点击下一步添加radius客户端,这里的客户端是指网络设备,我写的是SWITCH,IP192.168.5.1密钥:cisco配置访问客户端的条件,添加计算机组或者用户组,用于过滤访问客户端,点击”添加用户”.若不添加任何用户组或者计算机组,直接点击下一步,则允许所有用户和计算机访问.点确定之后会有一个报错:无所谓,直接关闭,确定即可.然后下一步.上面的证书就是刚申请的证书,点击下面的安全密码.此实验我们并没有用到动态的VLAN分配,所以直接下一步.添加认证方式:依次为-策略-网络策略-双击”NAP802.1X(有线)符合”.选择”约束—身份验证方法-添加”将EAP-PEAP添加进EAP的类型里面.再配置”NAP802.1x(有线)不符合””NAP802.1x(有线)不支持NAP”和以上的方法相同.都是将EAP-PEAP添加进EAP类型里面.4.1配置网络设备Switch#sh runBuilding configuration...Current configuration:1936bytes!version12.2no service padservice timestamps debug uptimeservice timestamps log uptimeno service password-encryption!hostname Switch!!aaa new-modelaaa authentication login default localaaa authentication login yx noneaaa authentication dot1x default group radius aaa authorization network default group radius !aaa session-id commonsystem mtu routing1500vtp domain vtp mode transparentip subnet-zeroip routingno ip domain-lookup!!!!dot1x system-auth-controlno file verify autospanning-tree mode pvstspanning-tree extend system-id!vlan internal allocation policy ascending!interface GigabitEthernet0/1!interface GigabitEthernet0/2!interface GigabitEthernet0/3!interface GigabitEthernet0/4!interface GigabitEthernet0/5switchport mode accessdot1x pae authenticatordot1x port-control autospanning-tree portfast!interface Vlan1ip address192.168.5.1255.255.255.0!ip classlessip http server!radius-server host192.168.5.100auth-port1812acct-port1813key cisco radius-server source-ports1645-1646radius-server vsa send authentication!control-plane!!line con0logging synchronouslogin authentication yxline vty515!End5.1客户端配置启用客户端802.1x服务启动Network Access Protection Agent服务启动Wired AutoConfig服务。
Windows 2008 Server搭建Radius服务器
Windows 2008 Server搭建Radius服务器的方法在实际使用环境中,TP-LINK无线控制器TL-AC1000使用外部服务器进行Portal远程认证时,需搭建相应认证服务器。
本文通过具体配置实例,指导使用Windows 2008 Server搭建Radius服务器实现Portal远程认证。
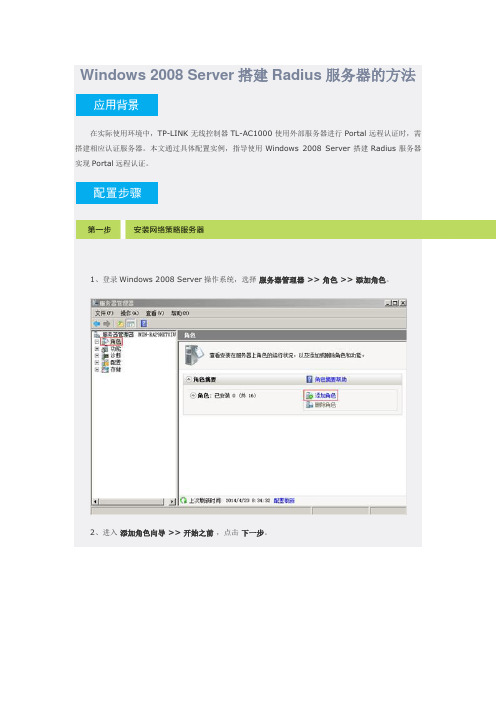
1、登录Windows 2008 Server操作系统,选择服务器管理器 >> 角色 >> 添加角色。
2、进入添加角色向导>> 开始之前,点击下一步。
3、进入服务器角色,勾选网络策略和访问服务,点击下一步。
4、进入网络策略和访问服务,点击下一步。
5、进入角色服务,勾选网络策略服务器,点击下一步。
6、进入确认,点击安装。
7、安装完毕,点击关闭。
1、进入开始 >> 管理工具 >> 计算机管理,选择本地用户和组 >> 用户,右击选择新用户。
2、添加用户名、密码(本例为customer、customer),点击创建。
3、右击新建的用户,选择属性 >> 拨入,网络访问权限选择为允许访问,点击应用>> 确定。
3、右击组,选择新建组,设置组名(本例为portal),在成员选项中点击添加。
4、选择用户,将添加的用户(customer)添加到该组中,点击创建。
1、进入开始 >> 管理工具 >> 网络策略服务器,选择用于拨号或VPN连接的RADIUS服务器,点击配置VPN或拨号。
2、选择拨号连接,点击下一步。
3、进入指定拨号或VPN服务器,在RADIUS客户端选项中点击添加。
4、在地址(IP或DNS)一栏中输入AC无线控制器的IP地址,设定共享机密,点击确定 >> 下一步。
注意:此处“共享机密”需同AC中的“共享密钥”相同。
5、进入配置身份验证方法,勾选MS-CHAP、MS-CHAP2 两种加密方式,点击下一步。
微软Windows2008ADNPS配合无线控制器采肞EAP认证无线客户端的配置
微软Windows2008 AD+NPS配合无线控制器采肞EAP认证无线客户端的配置微软Windows2008 AD+NPS配合无线控制器采用PEAP认证无线客户端的配置(1)思科无线控制器支持外置Radius接口,采用思科ACS 做为Radius来认证无线客户端只是一种应用形式。
很多客户已经部署了微软的Windows 2003/2008服务器并希望通过微软的架构实现Radius功能。
这是可行的,例如Windows 2003 AD + IAS即可实现标准Radius的功能,当然现在更多的用户采用了Windows 2008服务器,在Windows 2008服务器上IAS演进为NPS(Network Policy Server)。
关于配置Windows 2003 AD + IAS的说明CCO上已经有文档详细讲述。
请参考:- PEAP Under Unified Wireless Networks with Microsoft Internet Authentication Service (IAS)/en/US/partner/products/ps6366/products_configuration_example09186a0080921f67.shtmlCisco - Airespace VSAs on MS IAS Radius Server Configuration Example/en/US/partner/tech/tk722/tk809/technologies_configuration_example09186a008082d5b5.shtmlNPS在配置界面上不同于IAS,那么如何配置NPS来对无线客户端进行认证呢?下面通过图示来讲解如何配置Windows2008 AD+NPS配合无线控制器采用PEAP来认证无线客户端。
主要配置步骤如下:- 配置无线控制器- 安装Windows 2008服务器及其组件(生成证书)- 配置AD用户和组;- 定义NPS策略- 定义高级策略:基于身份的动态分配VLAN的配置- 配置客户端- 验证配置无线控制器本文不做描述安装Windows 2008服务器及其组件安装Windows 2008的过程这里不做描述,安装好服务器后设置静态IP地址和网关。
配置网络准入Windows Server for Radius Atuhentication
Published2020-07-21Network Configuration ExampleConfiguring Windows Server2008for Radius AuthenticationiiJuniper Networks,Inc.1133Innovation WaySunnyvale,California94089USA408-745-2000Juniper Networks,the Juniper Networks logo,Juniper,and Junos are registered trademarks of Juniper Networks,Inc.inthe United States and other countries.All other trademarks,service marks,registered marks,or registered service marksare the property of their respective owners.Juniper Networks assumes no responsibility for any inaccuracies in this document.Juniper Networks reserves the rightto change,modify,transfer,or otherwise revise this publication without notice.Network Configuration Example Configuring Windows Server2008for Radius AuthenticationCopyright©2020Juniper Networks,Inc.All rights reserved.The information in this document is current as of the date on the title page.YEAR2000NOTICEJuniper Networks hardware and software products are Year2000compliant.Junos OS has no known time-relatedlimitations through the year2038.However,the NTP application is known to have some difficulty in the year2036.END USER LICENSE AGREEMENTThe Juniper Networks product that is the subject of this technical documentation consists of(or is intended for use with)Juniper Networks e of such software is subject to the terms and conditions of the End User License Agreement (“EULA”)posted at https:///support/eula/.By downloading,installing or using such software,youagree to the terms and conditions of that EULA.Table of ContentsExample:How to Configure Windows Server 2008for RadiusAuthentication1Overview of Radius Authentication on Windows Server 2008Example |5About This Network Configuration Example |5Use Case Overview |5Need for a Radius Server |5Radius Server Benefits |6Technical Overview |6Understanding Radius Servers |7Server Network Topology |7How to Configure Windows Server 2008for Radius Authentication |8Requirements |8Overview |8Topology |10Configure Windows Server 2008for Radius Authentication |10iii1C HAPTERExample:How to Configure Windows Server2008for Radius AuthenticationOverview of Radius Authentication on Windows Server2008Example|5How to Configure Windows Server2008for Radius Authentication|8Overview of Radius Authentication on Windows Server2008ExampleIN THIS SECTIONAbout This Network Configuration Example|5Use Case Overview|5Technical Overview|6About This Network Configuration ExampleThis network configuration example(NCE)describes how to configure Windows Server2008to authenticate users by using EX Series switches for Protected Extensible Authentication Protocol(PEAP)authentication.A Radius server is very flexible and secure.It uses complex authentication methods such as LDAP,NTLM,and Kerberos to authenticate users.It uses a central database to secure wired or wireless networks and provides centralized Authentication,Authorization,and Accounting(AAA or Triple A)management for users.The use case shows how to deploy Network Policy Server(NPS)as the Radius server for an EX4300switch. Use Case OverviewNeed for a Radius ServerA Radius server maintains user profile information,authenticates and authorizes when a user tries toconnect to the network.It ensures a secure wired or wireless network.It efficiently manages dial-in access to various Points-Of-Presence(POPs)across its network and provides a centralized AAA management.A Radius server provides more functionality than other authentication protocols.All two-factorauthentication vendors and VPN providers support Radius servers.Radius servers are very simple and easy to manage.To activate the Radius server,all you need is the IP address of each network device anda shared secret.To authenticate and communicate with users,Radius server uses Extensible Authentication Protocol(EAP). PEAP is the authentication protocol that a Radius server uses to authenticate users by using credentials such as username and password.Radius servers use Splitting Authorization and Authentication method to ensure data security.For more information about the Radius server and authentication workflow,see802.1X and RADIUS AccountingRadius Server BenefitsThe Radius server provides the following benefits:•Active Directory—Offers complex authentication methods such as LDAP,NTLM,and Kerberos.These authentication methods make sure that when a device tries to authenticate users,it requires valid credentials within Active Directory.•Central database—Uses a central database to secure wired or wireless networks and to authenticate users instead of using a pre-shared key.•AAA—Provides centralized AAA management.This makes the system incredibly flexible,and can perform authentication and authorization against any user directory source.This flexibility combined with a wealth of supported authentication protocols and a variety of client integration has kept Radius in high demand.•Secure authentication methods—Provides a variety of secure authentication methods,that can leverage username or password,PKI certificates,or a combination of both.Based on the results of the authentication and authorization,Radius helps to provide access to the appropriate network gear or networks.When you use Radius with802.1x,control over access is strong and powerful.•Secure directory services—Provides a way to couple Radius with directory services to create a layer of security for wireless networks.Technical OverviewIN THIS SECTIONUnderstanding Radius Servers|7Server Network Topology|7Understanding Radius ServersRadius servers manage all authenticationand use Extensible Authentication Protocol (EAP)to communicate with users.Most popular are:•Protected EAP (PEAP)–Authenticates using a username and password.•EAP-TLS -Authenticate wireless users.Radius servers show a certificate to users so that they can verify and confirm that they are communicating with the correct Radius server.Server Network TopologyRadius architecture makes the network infrastructure secure for wired or wireless users.It uses EAP to authenticate users by using credentials such as username and password.Figure 1:Radius Server Network TopologyRadius ServerPEAP AuthenticatorUserRELATED DOCUMENTATIONHow to Configure Windows Server 2008for Radius Authentication |87How to Configure Windows Server2008for Radius AuthenticationIN THIS SECTIONRequirements|8Overview|8Configure Windows Server2008for Radius Authentication|10RequirementsThis configuration example uses the following devices:•Windows2008R2as the Radius server.•One EX4300switch as the authenticator.Software version:Junos OS Release18.4R2-S3.•One laptop or PC running Windows10or MAC OS as the user.OverviewUse this NCE to configure Windows Server2008to authenticate users by using the EX Series switches for PEAP authentication.To configure Windows Server2008for radius authentication,you must:1.Configure the server:a.Change the computer name and IP address.b.Configure Active Directory Domain Services(ADDS)and add DNS server as the domain controller.ADDS stores information about users,computers,and other devices on the network.ADDS helps administrators to securely manage this information and facilitates resource sharing and collaboration between users.ADDS is also required for directory-enabled applications such as Microsoft Exchange Server and for other Windows Server technologies such as Group Policy.To ensure that you can log on to the network in case of a server outage,we recommend that you install at least two domain controllers for a domain.ADDS requires a DNS server on the network.If you have not installed a DNS server,you areprompted to install the DNS server role on the server.c.Configure Active Directory Certificate Services.When the user tries to connect to the network,the RADIUS server sends a certificate to the user for self authentication.To prevent users from receiving fake certificates and to ensure authenticity of the certificate and the Radius server,you should configure the server as a root Certificate Authority (CA).This allows the server to generate a computer certificate and client certificates.d.Install Network Policy Server(NPS).NPS is the Radius server that ensures the health and security of your network.NPS allows you to create and enforce organization-wide network access policies for client health,connection request authentication,and connection request authorization.With NPS,you can also enable Network Access Protection(NAP),which is a client health policy creation,enforcement,and remedialtechnology.2.Create certificates.These certificates are digital credentials that connect to wireless networks,protect data,establish identity,and perform network and data security related tasks.The Radius server sends these certificates to the users to verify and ensure that they are communicating with the correct Radius server.3.Configure NPS for EAP authetication.This enables NPS to authenticate users in the Active Directory.4.Add Radius Authenticator details.Radius clients allow you to specify the network access servers that provide access to your network.5.Create network policies for users.Network policies allow you to designate who is authorized to connect to the network and thecircumstances under which they can or cannot connect.6.Add wireless users to the active directory.7.Export root CA from the server.8.Import root CA to Windows7.9.Configure EX switch for the10.Select the dot1x authentication the user device to trigger the dot1x authentication withthe NPS server.TopologyIn this example,EX Series switch acts as an authenticator and Windows server with NPS acts as the Radius server.Figure 2on page 10shows the physical topology and the IP addressing scheme used in this example.Figure 2:Radius Authentication Topologyge-0/0/46Radius Server Configure Windows Server 2008for Radius AuthenticationOverviewThis section shows how to configure Windows Server 2008for Radius authentication by using NPS.Configure the ServerIN THIS SECTIONConfigure Computer Name and IP Address |11Configure ADDS |11Add DNS Server as Domain Controller |1110Configure Active Directory Certificate Services|12Install NPS|13Use this section to configure the Windows Server2008.Configure Computer Name and IP AddressStep-by-Step Procedure1.On Windows Server2008,click Start>Computer,right-click on Computer,and select Properties.2.Click Change settings.The Computer Name/Domain Changes page opens.3.Enter the computer name in the Computer name field.4.Select Workgroup and enter the workgroup name in the Workgroup field.5.Click OK to save the settings.Configure ADDSStep-by-Step Procedure1.On Windows Server2008,click Start>Administrative Tools>Server Manager.The Server Managerpage opens.2.From the left navigation bar,click Roles>Add Roles and follow the Add Roles Wizard.3.On the Before You Begin page,click Next.4.On the Select Server Roles page,select Active Directory Domain Services and click Next.5.On the Active Directory Domain Services page,click Next.6.On the Confirmation Installation Selections page,click Install.7.Click Close.The Active Directory Domain Services is installed.Add DNS Server as Domain ControllerStep-by-Step Procedure1.On Windows Server2008,click Start,type dcpromo,press Enter,and follow the Active DirectoryDomain Services Installation Wizard.2.From the left navigation bar,click Roles>Add Roles and follow the Add Roles Wizard.3.Deselect the Use advanced mode installation check-box and click Next.4.On the Select Server Roles page,select Active Directory Domain Services and click Next.5.On the Active Directory Domain Services page,click Next.6.Click Next.7.Select Create a new domain in a new forest and click Next.8.Enter the domain name in the FQDN of the forest root domain field and click Next.9.From the Forest functional level drop-down list,select Windows Server2008R2and click Next.10.Select DNS server and click Next.11.Click Yes to continue.12.Click Next.13.Enter a password in the Password field,re-enter the password in the Confirm password field,and clickNext.Setting a password allows you to restore your Active Directory.14.Click Next.Installation begins and it takes a few minutes time to complete the installation.15.Click Finish.16.Click Restart Now to restart the server for the changes to take effect.Configure Active Directory Certificate ServicesStep-by-Step Procedure1.On the Windows Server2008,click Start>Administrative Tools>Server Manager.The Server Managerpage opens.2.From the left navigation bar,click Roles>Add Roles and follow the Add Roles Wizard.3.On the Before You Begin page,click Next.4.On the Select Server Roles page,select Active Directory Certificate Services and click Next.5.On the Introduction to Active Directory Certificate Services page,click Next.6.On the Select Role Services page,select Certification Authority and click Next.7.On the Specify Setup Type page,select Enterprise and click Next.8.On the Specify CA Type page,select Root CA and click Next.9.On the Set Up Private Key page,select Create a new private key and click Next.10.On the Configure Cryptography for CA page,click Next.11.On the Configure CA Name page,enter the CA name in the Common name for this CA field,enter thename suffix in the Distinguished name suffix field,and click Next.On this page,click Next to use the computer name and domain name as the default CA name.12.On the Set Validity Period page,select the validity period from the Select validity period for thecertificate generated for this CA field and click Next.The default validity period for the root CA certificate is5years.13.On the Configure Certificate Database page,click Next.14.On the Web Server(IIS)page,click Next.15.On the Select Role Services page,click Next.16.On the Confirmation Installation Selections page,click Install.17.Click Close.The Active Directory Certificate Services and Web Server(IIS)are installed.Install NPSStep-by-Step Procedure1.On Windows Server2008,click Start>Administrative Tools>Server Manager.The Server Managerpage opens.2.From the left navigation bar,click Roles>Add Roles and follow the Add Roles Wizard.3.On the Before You Begin page,click Next.4.On the Select Server Roles page,select Network Policy and Access Services and click Next.5.On the Select Role Services page,select Network Policy Server and click Next.6.On the Confirmation Installation Selections page,click Install.7.Click Close.The NPS is installed.Create CertificatesUse this section to create certificates.Step-by-Step Procedure1.On Windows Server2008,click Start,type mmc,and press Enter.The Console1page opens.2.From the File menu,select Add/Remove Snap-in.3.On the Add/Remove Snap-in page,under Available snap-ins,select Certificates,click Add,and clickOK.4.On the Certificates snap-in page,select Computer account and click Next.5.On the Select Computer page,select Local computer and click Finish.6.On the Add/Remove Snap-in page,click OK.The Console1page opens.7.On the left navigation bar,under Console Root>Certificates>Personal,select Certificates to see allavailable computer certificates.The Intended Purposes tab on the right side space lists the Client Authentication,Server Authentication certificate.If you do not see the certificate listed under the Intended Purposes tab,you can create a certificate.To create a certificate,right-click on the white space and select All Tasks>Request New Certificate.If you do not see a certificate under Selected snap-ins,you can create a certificate:a.On the Add/Remove Snap-in page,under Selected snap-ins,right-click and select All Tasks>RequestNew Certificate.b.On the Certificate Enrollment page,click Next.c.Under Select Certificate Enrollment Policy,select Active Directory Enrollment Policy and clickNext.d.Click Finish.Certificate installation is complete.Configure NPS for EAP AuthenticationUse this section to configure NPS for EAP authentication.Step-by-Step Procedure1.On Windows Server2008,click Start>Administrative Tools>Network Policy Server.The NetworkPolicy Server page opens.2.Click NPS(Local)and select Register Server in Active Directory.3.Click OK.4.Click OK.Add Radius Authenticator DetailsUse this section to add the IP address and the shared secret that are configured on the EX4300switch. Step-by-Step Procedure1.On Windows Server2008,click Start>Administrative Tools>Network Policy Server.The NetworkPolicy Server page opens.2.Click NPS(Local),expand RADIUS Clients and Servers,right-click on RADIUS Clients,and select New.3.On the New RADIUS Client page,under Settings,enter a name in the Friendly name field and IP orDNS address in the Address field.Enter a password in the Shared secret field and re-enter the password in the Confirm shared secret field.The Radius client is added.Create Network Policies for UsersUse this section to create network policies for users.Step-by-Step Procedure1.On Windows Server2008,click Start>Administrative Tools>Network Policy Server.The NetworkPolicy Server page opens.2.Click NPS(Local),expand Policies,right-click on Network Policies,and select New.3.On the New Network Policy page,enter a policy name in the Policy name field,select Type of networkaccess server,select Unspecified from the drop-down list,and click Next.4.On the Specify Conditions page,click Next.5.On the Specify Access Permission page,select Access granted and click Next.6.On the Configure Authentication Methods page,under EAP Types,click Add.7.On the Add EAP page,under Authentication methods,select Microsoft:Protected EAP(PEAP),andclick OK.8.Under EAP Types,select Microsoft:Protected EAP(PEAP),click Edit,and click Next.9.On the Edit Protected EAP Properties page,select the certificate from the Certificate Issued drop-downlist,select the required certificate,and click OK.10.On the Configure Authentication Methods page,click Next.11.On the Configure Constraints page,under Constraints,select Idle Timeout,and click Next.12.On the Configure Settings page,under Settings>RADIUS Attributes,select Standard,and click Next.13.Click Finish.The policy for user is created.Add Users to the Active DirectoryUse this section to add users to the active directory.Step-by-Step Procedure1.On Windows Server2008,click Start>Administrative Tools>Active Directory Users and Computers.The Active Directory Users and Computers page opens.2.Under Active Directory Users and Computers>Domain-name,right-click on Users,and select New>User.3.Enter username and password.4.Create user and click ers are added to the active directory.Export CA Root Certificate from the serverUse this section to export CA root certificate from the server.Step-by-Step Procedure1.On Windows Server2008,click Start,type mmc,and press Enter.The Console1page opens.2.From the File menu,select Add/Remove Snap-in.3.On the Add/Remove Snap-in page,under Available snap-ins,select Certificates,click Add,and clickOK.4.On the Certificates snap-in page,select Computer account and click Next.5.On the Select Computer page,select Local computer>Trusted Root Certification Authorities>Certificates.On the right-side space,your root CA certificate is listed.6.Right-click on your root CA certificate and select All Tasks>Export.Follow the Certificate ExportWizard and click Next.7.On the Export Private Key page,select No,do not export the private key and click Next.8.Select the DER encoded binary X.509(CER)file format and click Next.9.Choose a folder and file name and click Next and click Finish to complete the export.10.Copy the certificate that you have exported to a USB drive or any other storage device and transferthe certificate to your Windows client.Import CA Root Certificate to Windows7Use this section to import CA root certificate to Windows7.Step-by-Step Procedure1.Double-click on the certificate file that you exported on your Windows7computer and click InstallCertificate.2.Click Next.3.Select the Trusted Root Certification Authorities tab and click Import.4.In the Certificate Import Wizard,click Finish.A security warning message is displayed that you areabout to trust a new root certificate.Click Yes to continue.The CA root certificate is imported on Windows7.5.Add this certificate in the Windows registry.a.On Windows Server2008,click Start,type cmd,and press Ctrl+Shift+Enter.A command promptwith administrative rights opens.b.Enter Desktop>certutil-f-enterprise-addstore NTAuth<certificate-name>Configure EX Switch for the Authenticator RoleUse this section to configure EX switch as an authenticator.User facing interfaces should be enabled for dot1x.The device being authenticated must be reachable by the RADIUS server so that EAP frames can be processed.Step-by-Step Procedure1.Configure the EX switch:user@host# set access radius-server server-ip port1812secret secret-passworduser@host# set access profile dot1x authentication-order radiususer@host# set access profile dot1x radius authentication-server192.0.2.1/24user@host# set protocols dot1x authenticator interface ge-0/0/46supplicant single user@host# set interfaces ge-0/0/0unit0family inet address192.0.2.1/242.Verify the configuration:user@host# run show dot1x interfaceFor example:root@EX4300# run show dot1x interface802.1X Information:Interface Role State MAC address User ge-0/0/22.0 Authenticator Authenticated 38:C9:86:23:7E:48 DAVIDroot@jtac-ex2300-24t-r2001# run show dot1x interface detailge-0/0/22.0Role: AuthenticatorAdministrative state: AutoSupplicant mode: SingleNumber of retries: 3Quiet period: 60 secondsTransmit period: 2 secondsMac Radius: DisabledMac Radius Restrict: DisabledReauthentication: EnabledReauthentication interval: 3600 secondsSupplicant timeout: 45 secondsServer timeout: 30 secondsMaximum EAPOL requests: 2Guest VLAN member: server-failNumber of connected supplicants: 1Supplicant: DAVID, 38:C9:86:23:7E:48Operational state: AuthenticatedBackend Authentication state: IdleAuthentication method: RadiusAuthenticated VLAN: DOT1X-CLIENTSession Reauth interval: 3600 secondsReauthentication due in 3562 secondsEapol-Block: Not In EffectDomain: DataEnable dot1x client for Dot1xStep-by-Step Procedure1.On the user device,click Start,type services.msc,and press Enter.The Wired AutoConfig page opens.2.Right-click on Wired AutoConfig and select Properties.The Wired AutoConfig Properties page opens.3.From the Startup type drop-down list,select Automatic,click Start,and click OK.4.On the user device,click Start>Control Panel.5.Double click on Network and Sharing Center and click Change adapter settings.6.Right-click on Local Area Connection and select Properties.The Local Area Connection Propertiespage opens.7.Click Authentication tab and complete the following:a.Select the Enable IEEE802.1x authentication check-box.b.From the Choose a network authentication method drop-down list,select Microsoft ProtectedEAP(PEAP).c.Click Settings.The Protected EAP Properties page opens.d.Select the Verify the server’s identity by validating the certificate check-box,select Securedpassword(EAP-MSCHAP v2)from the Select Authentication Method drop-down list,and click Configure.If this is a Domain Computer,select the Automatically use my Windows logon name and password (and domain if any)check-box.e.Click OK to return to the Ethernet Properties page and click Settings.f.Click OK to return to the Ethernet Properties page and click Additional Settings.g.Select the Specify authentication mode check-box and select User authentication from the Useror computer authentication drop-down list.Click OK.8.Click OK on the Ethernet Properties page to finish the dotx configuration.You are now ready to connectto the network using PEAP.21RELATED DOCUMENTATIONOverview of Radius Authentication on Windows Server2008Example|5。
windows server 2008 sstp 配置向导
配置向导: SSTP远程访问配置Microsoft CorporationPublished: December 2007摘要SSTP是一个新的形式的VPN隧道,他的特点是可以通过阻止PPTP和L2TP通信的防火墙. SSTP 提供了一种机制,封装ppp通信通过SSL隧道的HTTPS协议. 使用PPP支持强大的认证方式,例如EAP-TLS. 使用HTTPS流量可以通过TCP的443端口, 这个端口通常用来WEB访问. SSL 提供传输层的的安全,如强密钥协商、加密和完整性检查.这个文档提供详细的信息关于你怎么使用三台计算机进行一个测试实验,包括配置和测试Windows Server® 2008 和Windows Vista® with Service Pack 1 (SP1)VPN远程访问.这个说明文档将带着你通过SSTP连接的需求的每一步配置..Copyright informationThis document supports a preliminary release of a software product that may be changed substantially prior to final commercial release, and is the confidential and proprietary information of Microsoft Corporation. It is disclosed pursuant to a non-disclosure agreement between the recipient and Microsoft. This document is provided for informational purposes only and Microsoft makes no warranties, either express or implied, in this document. information in this document, including URL and other internet Web site references, is subject to change without notice. The entire risk of the use or the results from the use of this document remains with the user. Unless otherwise noted, the example companies, organizations, products, domain names, e-mail addresses, logos, people, places, and events depicted herein are fictitious, and no association with any real company, organization, product, domain name, e-mail address, logo, person, place, or event is intended or should be inferred. Complying with all applicable copyright laws is the responsibility of the user. Without limiting the rights in copyright, no part of this document may be reproduced, stored in or introduced into a retrieval system, or transmitted in any form or by any means (electronic, mechanical, photocopying, recording, or otherwise), or for any purpose, without the express written permission of Microsoft Corporation.Microsoft may have patents, patent applications, trademarks, copyrights, or other intellectual property rights covering subject matter in this document. Except as expressly provided in any written license agreement from Microsoft, the furnishing of this document does not give you any license to these patents, trademarks, copyrights, or other intellectual property.© 2007 Microsoft Corporation. All rights reserved.Microsoft, MS-DOS, Windows, Windows NT, and Windows Server are either registered trademarks or trademarks of Microsoft Corporation in United States and/or other countries.All other trademarks are property of their respective owners.目录配置向导: SSTP远程访问配置 (5)SSTP ..................................................................................................... 错误!未定义书签。
Windows server 2008 AD + RADIUS + 802.1X认证配置
Windows server 2008 AD + RADIUS + 802.1X认证配置Iowa[破[一路下一步直到安装至此证书服务安装完成,然后给这台服务器申请证书,如下一、RADIUS安装与配置二、802.1x配置1.2960交换机配置交换机全局配置:Switch(config)#aaa new-model //开启AAA认证Switch(config)#aaa authentication dot1x default group radius //dot1x采用radius认证Switch(config)# radius-server host 192.168.6.200 auth-port 1812 acct-port 1813 key 123456 //指定radius服务器的IP地址、端口号及与radius服务器通讯的密钥为123456配置radius服务器时需要用到此密钥Switch(config)#dot1x system-auth-control //全局启用dot1x认证交换机接口配置:Switch(config)#interface FastEthernet0/1 //进入1号接口Switch(config-if)#switchport mode access //指定接口为access类型,只有此模式下的端口才支持802.1xSwitch(config-if)#authentication port-control auto //接口启用dot1x认证,并指定接口认证控制模式为自动Switch(config-if)#dot1x pae authenticator //设定这个接口为802.1x认证接口(即弹出提示用户输入用户密码的窗口,并负责将用户输入的用户密码传给radius服务器进行认证)Switch(config-if)#spanning-tree portfast //加快认证的速度,可选Switch(config-if)#authentication host-mode multi-auth //指定该接口的认证模式为多用户认证(即该接口下接交换机时要启用这个模式,可选)Switch(config-if)#authentication violation protect //当身份验证失败时将此端口至于受保护的模式(可选)Switch(config)#interface vlan 1 //进入vlan1虚拟接口Switch(config-if)#ip address 192.168.6.200 255.255.255.0 //配置交换机的管理地址(即和radius服务器通讯的IP地址)此地址在配置radius服务器时要用到2.华为5600交换机配置全局配置:[Quidway]dot1x //全局开启dot1x认证[Quidway] dot1x authentication-method eap md5-challenge //指定dot1x采用的认证方法[Quidway]radius scheme 802.1x //定义radius认证服务器802.1x的相关属性[Quidway-radius-802.1x]server-type standard //定义radius服务采用标准形式[Quidway-radius-802.1x] primary authentication 192.168.6.200 //指定认证服务器的地址[Quidway-radius-802.1x] key authentication 123456 //指定认证与认证服务器通讯的密钥[Quidway-radius-802.1x]user-name-format without-domain //定义登陆用户名的格式[Quidway]domain 802.1x //定义802.1x域的相关属性[Quidway-isp-802.1x]scheme radius-scheme 802.1x //应用上面定于的radius服务器802.1x [Quidway-isp-802.1x]accounting optional //设置审计为可选[Quidway]domain default enable 802.1x //设定默认域采用802.1x域接口配置:[Quidway]interface g 1/0/12 //进入12号接口[Quidway-GigabitEthernet1/0/12]port link-type access //指定端口模式为access[Quidway-GigabitEthernet1/0/12]dot1x //开启dot1x认证[Quidway-GigabitEthernet1/0/12]dot1x port-control auto //端口控制采用自动模式[Quidway-GigabitEthernet1/0/12]dot1x port-method macbased//采用基于mac地址的认证三、PC机配置(win7)此过程可能需要输入域管理员的账密,输入即可(一般为administrator)然后会弹出确认框,点击是,然后重新打开浏览器申请证书更改本地连接属性时会弹出需要域管理员的权限才可以修改属性,输入域管理员的账密即可(一般为administrator)。
Windows2008Server搭建Radius服务器的方法
Windows 2008 Server搭建Radius服务器的⽅法 在实际使⽤环境中,TP-LINK⽆线控制器TL-AC1000使⽤外部服务器进⾏Portal远程认证时,需搭建相应认证服务器。
下⾯是店铺整理的⼀些关于Windows 2008 Server搭建Radius服务器实现Portal远程认证的相关资料,供你参考。
Windows 2008 Server搭建Radius服务器实现Portal远程认证的⽅法: 1、登录Windows 2008 Server操作系统,选择服务器管理器 >> ⾓⾊ >> 添加⾓⾊。
2、进⼊添加⾓⾊向导 >> 开始之前,点击下⼀步。
3、进⼊服务器⾓⾊,勾选⽹络策略和访问服务,点击下⼀步。
4、进⼊⽹络策略和访问服务,点击下⼀步。
5、进⼊⾓⾊服务,勾选⽹络策略服务器,点击下⼀步。
6、进⼊确认,点击安装。
7、安装完毕,点击关闭。
1、进⼊开始 >> 管理⼯具 >> 计算机管理,选择本地⽤户和组 >> ⽤户,右击选择新⽤户。
2、添加⽤户名、密码(本例为customer、customer),点击创建。
3、右击新建的⽤户,选择属性 >> 拨⼊,⽹络访问权限选择为允许访问,点击应⽤>> 确定。
3、右击组,选择新建组,设置组名(本例为portal),在成员选项中点击添加。
4、选择⽤户,将添加的⽤户(customer)添加到该组中,点击创建。
1、进⼊开始 >> 管理⼯具 >> ⽹络策略服务器,选择⽤于拨号或连接的RADIUS服务器,点击配置或拨号。
2、选择拨号连接,点击下⼀步。
3、进⼊指定拨号或服务器,在RADIUS客户端选项中点击添加。
4、在地址(IP或DNS)⼀栏中输⼊AC⽆线控制器的IP地址,设定共享机密,点击确定 >> 下⼀步。
Cisco交换机基础命令+WinServer08R2多网卡配置链路聚合
Cisco交换机基础命令+WinServer08R2多⽹卡配置链路聚合最近捣⿎服务器链路集合需要配置交换机…以前没弄过交换机,现学现卖…⼀般交换机是⽀持telnet的,配置好ip可以直接telnet,当然如果没配的话就要⽤串⼝了,串⼝要选择Serial…还好我们万能的 putty 都⽀持,⽤⼀个⼯具就OK了,当然你也可以选择 Secure CRT…登录后输⼊密码,然后就需要第⼀个命令:enable //进⼊特权模式补充下密码的修改,来⾃:特权模式密码修改:Route>enableRoute#config terminalRoute(config)#enable secret CISCO ----设置加密密码为"CISCO"(若把"secret"改为"password"则为⽂明显⽰,在show running-config中可以清楚的看出两者的区别)Route(config)#exit删除特权模式密码:Route>enableRoute#config terminalRoute(config)#no enable secret CISCORoute(config)#exit修改登录密码:Console⼝:(这个是设置进⼊路由器的密码)Route>enableRoute#config terminalRoute(config)#line console 0 ----进⼊console⼝模式Route(config-line)#password CISCO ----设置密码为"CISCO"(若要加密密码可在之前:service pass-encryption启⽤路由器密码保护-但是在Boson Netsim环境下没有找到这个命令⼤家知道的可以讨论下) Route(config-line)#login ---- 登⼊时加密Route(config-line)#exitaux⼝:Route>enableRoute#config terminalRoute(config)#line aux 0 ----进⼊aux⼝模式Route(config-line)#password CISCO ----设置密码为"CISCO"(若要加密密码可在之前:service pass-encryption启⽤路由器密码保护)Route(config-line)#login ---- 登⼊时加密Route(config-line)#exitvty(telnet远程登陆⼝):Route>enableRoute#config terminalRoute(config)#line vty 0 4 ----进⼊telnet远程登陆⼝模式(0 4 允许5个⽤户)Route(config-line)#password CISCO ----设置密码为"CISCO"(若要加密密码可在之前:service pass-encryption启⽤路由器密码保护)Route(config-line)#login ---- 登⼊时加密Route(config-line)#exit继续接着上⾯进⼊特权模式,进⼊特权模式后就能⼲什么东西了,不过⼀般应该先看下交换机的信息:show run //show running-config如果我们需要看端⼝的配置信息,那么需要:show run inter 端⼝名 //show run interface端⼝名要看某个端⼝的当前状态信息是:show inter 端⼝名 //show interface端⼝名⽐如我这⾥是 show interfaces gigabitEthernet1/0/45,简写成show inter g1/0/45 就可以(我是多个交换机堆叠,所以要交换机名+端⼝)在这⾥我们可以看到这个端⼝的⼯作⽅式是全双⼯我们可以修改端⼝的⼯作⽅式(全双⼯、半双⼯、⾃动)Switch#conf tSwitch(config)#inter g1/0/45Switch(config-if)#deluplex auto full/half/auto修改后:如果需要关闭某端⼝:Switch#conf tSwitch(config)#inter g1/0/45Switch(config-if)#shutdown开启的话是Switch(config-if)#no shutdown设定端⼝的vlan:Switch#conf tSwitch(config)#inter g1/0/45Switch(config-if)#switchport access vlan 999设置vlan为999下⾯还是回归这次的正题,做链路集合⾸先,我们需要在交换机上建port-channel(注意port-channel貌似最⼤只允许48,另外不能重复…)Switch#conf tSwitch(config)#inter port-channel 21Switch(config-if)#switchport mode accessSwitch(config-if)#switchport access vlan 123Switch(config-if)#description test port channel看下设置结果:然后我们需要设置端⼝的channel-group,把端⼝加到port-channel中Switch#conf tSwitch(config)#inter g1/0/43Switch(config-if)#channel-group 21 mode onSwitch(config-if)#description test group然后依次把端⼝加进来,结果(我测试只加了两个):最后别忘了⽤ wr 写⼊配置⽂件,不然重启就失效了…dir下看看⽂件⽇期是否正确然后交换机的设置就完成了,下⾯就需要设置服务器,我在⽤的是server08 r2,联想的服务器⽤的⽹卡是Inter I350先更新⽹卡驱动,就可以看到选项卡⾥有了“分组”我们新建分组,选择⽹卡⽀持多种类型,根据需要进⾏选择然后把两个⽹卡插上⽹线插好,搞定收⼯…:。
如何配置Windows 2008 Server IP路由
如何配置Windows 2008 Server IP路由2010-01-27 16:42在Windows Server 2008中,网络、路由和远程访问都发生了改变。
OSPF(开放最短路径优先, Open Shortest Path First )已经不再是Windows Server 2008的一部分,原本以为OSPF应该算是最好的动态路由协议,不过事实上99.9%的Windows Server管理员都未曾使用过OSPF,可见它的价值并不大。
那么移除OSPF后,我们还剩下哪些组件呢?1)静态路由;2)RIPV2动态路由。
让我们来仔细看看这两个的运行方式。
静态路由or动态路由?选择静态路由还是动态路由?对于管理员来说,这确实是一个难题。
当然,不管你选择哪种方式,网络都将被路由到正确的网络上。
使用静态路由方式,你必须在Windows Server上为每个将被该服务器路由的网络设置目录。
也就是说,对于运行Windows sever的简单网络来说,路由两个网络间的通信流量时,静态路由是“无脑的”,你还需要配置两个简单的“Route add”命令。
另一方面,如果想要Windows Server 2008为25个网络进行路由或者与使用RIP的Cisco网络交换路径的话,最好还是选择动态路由。
显然,你不会想手动为这25个网络进行配置,也不可能提供RIP所能提供的动态功能。
说到这里,那么动态路由到底能提供什么功能呢?如下所示:·通过从其他RIP路由器上读取网络从而自动添加网络的功能;·当其他RIP相邻路由器删除某些路径时,能够自动从路由目录删除该路径的功能;·根据路由数据选择最佳路径的功能;·当Windows Server路由系统需要添加一些静态路径时,减少windows server路由系统配置的功能。
那么如何在Windows Server 2008中如何配置静态路由和动态路由呢?Windows Server 2008静态路由Windows Server中的静态路由已经不是什么新鲜事了,这几年我们一直在使用路径(Route)命令。
- 1、下载文档前请自行甄别文档内容的完整性,平台不提供额外的编辑、内容补充、找答案等附加服务。
- 2、"仅部分预览"的文档,不可在线预览部分如存在完整性等问题,可反馈申请退款(可完整预览的文档不适用该条件!)。
- 3、如文档侵犯您的权益,请联系客服反馈,我们会尽快为您处理(人工客服工作时间:9:00-18:30)。
Windows2008下配置cisco radius server
配置环境:
Windows2008
域环境
域管理员帐户登陆
基本步骤:
∙ Install the Network Policy and Access Service Role
∙ Register in Active Directory
∙ Configure the RADIUS Client Settings
∙ Configure the Access policy
∙ Configure the Cisco Device
Install the Network Policy and Access Service Role
∙ From the Initial Configuration Task Windows ->Click Add a Role
∙ Select the “Network Policy and Access Server Role”
∙ Select the Role Service “Network Policy Server” – This is all that is require to provide RADIUS authentication for our Cisco devices
Register in Active Directory
∙ Once the Role has been configured then we can continue with the NPS configuration.
You can find the NPS console under administrative tools
∙ Right Click NPS (local) and Select Register in Active Directory
Configure the RADIUS Client Settings
∙ In the RADIUS Client and Server Folder Right Click RADIUS Client and Select New RADIUS Client
∙ Enter Friendly Name and IP address of the Cisco Device
∙ Select Cisco as the RADIUS Vendor
∙ Click Generate to make a unique RADIUS key (make sure you copy this somewhere you can access it later to paste into the Cisco Device)
Configure the Access policy
∙ Right Click the Network policy and Select New
∙ Enter a Policy Name (Leave as unspecified)
∙ Enter a Windows Group Condition – Enter the name of the group from AD who should have access
∙ Enter a Client Friendly Name as a Condition – Enter the name of the RADIUS Client (we can use wild cards here so “CISCO–R?” would match multiple RADU IS Clients
∙ Enter a NAS-Port-Type as a condition –Select Virtual (VPN)
∙ Specify Access Granted in Specify Access Permissions
∙ Configure Authentication Method as PAP
∙ You can select No when asked if you want to look up the help file.
∙ There are no sett ing necessary in the “Configure Constraint”
“Configure Settings” – Here is where we setup the access level ∙ Remove Frame-Protocol PPP
∙ Remove Service-Type Framed
∙ Select Vendor Specific
∙ Now Add Cisco Vendor Attribute AV=Pair
∙ Add Attribute Shell:priv-lvl=15
You should now end up with something like this
Configure the Cisco Device
The device in the following example is a Cisco router, and only the key lines are shown
Username XXX secret XXXXXX
aaa new-model
aaa group server radius RADIUS_AUTH
server a.a.a.a auth-port 1812 acct-port 1813
server b.b.b.b auth-port 1812 acct-port 1813
aaa authentication login networkaccess group RADIUS_AUTH local
aaa authorization exec default group RADIUS_AUTH none
ip radius source-interface g0/48
radius-server host a.a.a.a auth-port 1812 acct-port 1813 key XXXXX
radius-server host b.b.b.b auth-port 1812 acct-port 1813 key XXXXX
line vty 0 15
exec-time 15 0
login authentication networkaccess
privilege level 15
01:定义一个本地用户,如果radius服务器失效,可以用来登陆
02: Switch to Access Authentication, Authorisation and Accounting new command set 03: configure a radius group “RADIUS_AUTH” to logical group RADIUS Servers
04: specify primary RADIUS server as part of “RADIUS_AUTH”
05: specify backup RADIUS server as part of “RADIUS_AUTH”
06: define “networkaccess” as a logical name to apply logon and local access to
07: allow RADIUS_AUTH users access to exec mode,计费可以不用
08:specifies the interface RADIUS uses as the source.
09: specify secret key for primary RADIUS server
10: specify secret key for backup RADIUS server
11: modify the telnet access
12: set the time out for the login session
13:assign networkaccess from 05: for Login access
14:设置登陆权限,为了可以不用输入enable密码。
