3G USB Modem的WEB配置方法(推荐)_丘子隽
学会3G无线上网卡设置让你不再?-电脑资料

学会3G无线上网卡设置让你不再?-电脑资料想要感受无线上网的乐趣吗?想要成为时尚的无线达人吗?怎么??澹炕共换?3G无线上网卡设置?赶快准备好你的无线上网卡,跟着笔者一起来学习如何配置吧,看完此文,你也不再是一只不会设置网卡的菜鸟啦!3G无线上网卡设置的前期准备1、在PC上安装客户端软件,。
取下EVDO终端设备卡的后盖,并将UIM卡插入EVDO终端设备卡(确保您所使用的卡能完全嵌入)。
EVDO终端设备卡通过USB插口连接PC。
安装程序自动运行,并弹出欢迎界面,遵照具体的提示信息完成安装向导。
1、插入EVDO终端卡后,系统自动弹出欢迎界面,点击是,然后单击下一步;2、点击,单击下一步启动安装程序。
此过程根据您的电脑不同,可能会持续几分钟,请耐心等待。
3G无线上网卡设置安装使用1、双击图标2、登陆无线宽带客户端,进入无线宽带客户端主界面。
3、您可根据网络信号强度,选择三种链接方式中的任意一种进行拨号连接。
点击网络连接操作按钮,接下来的具体步骤如下:3G无线上网卡设置好后无线宽带(WLAN)的接入点击中的连接按钮,使用无线宽带(WLAN)接入时需注意以下几点:一是,您使用电脑中内置或外置的WLAN设备,通过无线宽带客户端自动搜索到无线宽带(WLAN)网络(是以ChinaNet(注意大小写)为名的无线宽带网络),电脑资料《学会3G无线上网卡设置让你不再?》(https://www.)。
在客户办理无线宽带时开通无线宽带(WLAN)功能。
二是,客户端软件上配置了无线宽带(WLAN)接入帐号和密码(如果事先没有配置,连接过程中将提示用户设置)。
WLAN接入账号和密码设置方式如下:客户启动无线宽带客户端,选择设置菜单->选择上网账号设置->选择无线宽带(WLAN)账号设置,然后输入正确的账号名和密码,开户省选择辽宁,点击保存按钮,即可完成设置。
如下图所示:连接成功后,如要断开,请返回拨号连接主界面或在网络状态界面单击断开。
Mdmbvu中国联通3G手机上网设置方法
生命中,不断地有人离开或进入。
于是,看见的,看不见的;记住的,遗忘了。
生命中,不断地有得到和失落。
于是,看不见的,看见了;遗忘的,记住了。
然而,看不见的,是不是就等于不存在?记住的,是不是永远不会消失?中国联通3G手机上网设置方法一、诺基亚系列1、3G业务internet接入点设置菜单—设置—手机设置—连接—接入点连接名称:“3gnet”数据承载方式:“分组数据”连接点名称:“3gnet”用户名:“无”提示输入密码:“否”密码:“无”签定:“安全”主页:“无”点屏幕左下角“选项”,选择“高级设置”网络类型“IPV4”手机IP地址“自动”域名服务器“自动”代理服务器地址“无”代理端口号码“无”2、3G业务wap接入点设置菜单—设置—手机设置—连接—接入点连接名称:“3gwap”数据承载方式:“分组数据”连接点名称:“3gwap”用户名:“无”提示输入密码:“否”密码:“无”签定:“安全”主页:“无”点屏幕左下角“选项”,选择“高级设置”网络类型“IPV4”手机IP地址“自动”域名服务器“自动”代理服务器地址“10.0.0.172”代理端口号码“80”3、3G业务彩信接入点设置菜单—设置—手机设置—连接—接入点连接名称:“3gmms”数据承载方式:“分组数据”连接点名称:“3gwap”用户名:“无”提示输入密码:“否”密码:“无”签定:“安全”主页:“.c n”点屏幕左下角“选项”,选择“高级设置”网络类型“IPV4”手机IP地址“自动”域名服务器“自动”代理服务器地址“10.0.0.172”代理端口号码“80”4、接入点连接方式设置菜单—网络—选项—设置接入点“总是询问”5、创建internet书签设置菜单—网络—选项—书签管理器—新增书签名称:“google”地址:“”接入点:“默认”用户名:“无”密码:“无”6、创建wap书签设置菜单—网络—选项—书签管理器—新增书签名称:“ wap baidu”地址:“[url=http://***/]http://***”接入点:“默认”用户名:“无”密码:“无”7、登录3G门户设置:接入点设置完成(3gwap)菜单—应用程序—影音工具—realplayer点屏幕左下角“选项”,选择设置,选择流媒体,选择网络默认接入点:“3gwap”在线时间:“无限制”最低UDP端口:“6970”最高UDP端口:“32000”点屏幕左下角“选项”,选择高级设置GPRS宽带:“28.14kbit/s”EGPRS宽带:“84.42kbit/s”UMTS宽带:“1.34 Mbit/s”WLAN宽带:“3.01 Mbit/s”返回主菜单—网络—选项—书签管理器—新增书签名称:“3G门户”地址:“.c n”接入点:“3gwap”用户名:“无”密码:“无”点屏幕左下角“选项”,选择设置,选择标准接入点:“总是询问”主页:“书签”缩略图:“开”历史记录:“开”安全警告:“显示”Java/ECMA脚本:“启动”点屏幕右下角返回,进入“书签”,选择“3G门户”,选择“联通3G门户”8、3G门户手机电视观看方法通过以上方式进入“联通3G门户”,选择右下方“手机电视”,下翻至“直拨”,选择“CCTV1”,点“播放”,进入下一页面,下翻至多频道,选择订购方式,点击“订购”,如已订购,订购项为“退订”,订购后可直接观看所选择频道。
3G模块APN设置指引
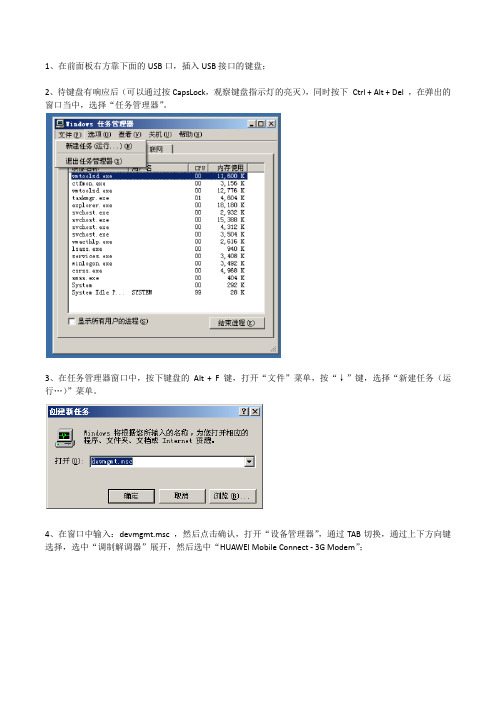
1、在前面板右方靠下面的USB口,插入USB接口的键盘;
2、待键盘有响应后(可以通过按CapsLock,观察键盘指示灯的亮灭),同时按下Ctrl + Alt + Del ,在弹出的窗口当中,选择“任务管理器”。
3、在任务管理器窗口中,按下键盘的Alt + F 键,打开“文件”菜单,按“↓”键,选择“新建任务(运行…)”菜单。
4、在窗口中输入:devmgmt.msc ,然后点击确认,打开“设备管理器”,通过TAB切换,通过上下方向键选择,选中“调制解调器”展开,然后选中“HUAWEI Mobile Connect - 3G Modem”;
5、打开右键菜单,选中“属性”,打开属性页;
6、在属性页中,选中“高级”,在“额外的初始化命令”中,输入以下命令:at+cgdcont=1,"ip","3gnet"
7、点击“确定”保存设置。
8、重启设备,观察右上角的连接情况。
H3C MSR路由器 使用3G USB Modem上网的配置方法

MSR使用3G USB Modem上网的配置方法Q:MSR使用3G USB Modem上网,如何配置?A:1安装SIM卡将SIM卡正确放入USB Modem中,SIM卡的缺口方向一定要与卡槽的缺口方向对应上。
2安装USB Modem将已经安装好SIM卡的USB Modem插入路由器的USB接口。
3配置路由器通过Console接口登录到路由器上,或者通过telnet登录到路由器上。
登录后可以对路由器进行配置,配置步骤如下:1)打开modem的呼出权限:先查看Cellular0/0对应的TTY接口,通过命令display user-interface 可以看到Cellular0/0对应的TTY接口。
下面的举例是在MSR30-20上的执行结果,可以看到这款设备中Cellular0/0对应的接口TTY接口号是13。
<H3C>display user-interfaceIdx Type Tx/Rx Modem Privi Auth Int+ 0 CON 0 9600 - 3 N -13 TTY 13 9600 inout 0 N Cellular0/0177 AUX 0 9600 - 0 P -178 VTY 0 - 1 A -179 VTY 1 - 1 A -180 VTY 2 - 1 A -181 VTY 3 - 1 A -182 VTY 4 - 1 A -UI(s) not in async mode -or- with no hardware support:1-12 14-176+ : Current UI is active.F : Current UI is active and work in async mode.Idx : Absolute index of UIs.Type : Type and relative index of UIs.Privi: The privilege of UIs.Auth : The authentication mode of UIs.Int : The physical location of UIs.A : Authentication use AAA.L : Authentication use local database.N : Current UI need not authentication.P : Authentication use current UI's password.在tty13接口下配置Modem呼出权限:user-interface tty 13modem call-out2)配置拨号参数,对于TD-SCDMA和WCDMA拨号串是“*99#”,对于CDMA2000拨号串是“#777”,下面的配置以TD-SCDMA为例;拨号对端需要进行chap 验证,用户名:admin,密码:admin。
Audio Embedder 3GSDI EXT-CU-LAN设置指南说明书
Audio Embedder 3GSDI Setup GuideMatrix Controller*Preferred1. Make sure to keep these instructions after reading them.2. Follow all instructions and warnings.3. Do not use this product near water.4. Clean only with a dry cloth.5. Do not block any ventilation openings. Install in accordance with the manufacturer’sinstructions.6. Do not install or place this product near any heat sources such as radiators, heatregisters, stoves, or other apparatus (including amplifiers) that produce heat.7. Do not defeat the safety purpose of the polarized or grounding-type plug. A polarizedplug has two blades with one wider than the other. A grounding type plug has twoblades and a third grounding prong. The wide blade or the third prong are provided for your safety. If the provided plug does not fit into your outlet, consult an electrician for replacement of the obsolete outlet.8. Protect the power cord from being walked on or pinched particularly at plugs,convenience receptacles, and the point where they exit from the apparatus.9. Only use attachments/accessories specified by the manufacturer.10. To reduce the risk of electric shock and/or damage to this product, never handle ortouch this unit or power cord if your hands are wet or damp. Do not expose thisproduct to rain or moisture.11. Unplug this apparatus during lightning storms or when unused for long periods of time.12. Refer all servicing to qualified service personnel. Servicing is required when theapparatus has been damaged in any way, such as power-supply cord or plug isdamaged, liquid has been spilled or objects have fallen into the apparatus,the apparatus has been exposed to rain or moisture, does not operate normally,or has been dropped.13. Batteries that may be included with this product and/or accessories should never beexposed to open flame or excessive heat. Always dispose of used batteriesaccording to the instructions.Gefen warrants the equipment it manufactures to be free from defects in material and workmanship.If equipment fails because of such defects and Gefen is notified within two (2) years from the date of shipment, Gefen will, at its option, repair or replace the equipment, provided that the equipment has not been subjected to mechanical, electrical, or other abuse or modifications. Equipment that fails under conditions other than those covered will be repaired at the current price of parts and labor in effect at the time of repair. Such repairs are warranted for ninety (90) days from the day of reshipment to the Buyer.This warranty is in lieu of all other warranties expressed or implied, including without limitation, any implied warranty or merchantability or fitness for any particular purpose, all of which are expressly disclaimed.1. Proof of sale may be required in order to claim warranty.2. Customers outside the US are responsible for shipping charges to and from Gefen.3. Copper cables are limited to a 30 day warranty and cables must be in their originalcondition.The information in this manual has been carefully checked and is believed to be accurate. However, Gefen assumes no responsibility for any inaccuracies that may be containedin this manual. In no event will Gefen be liable for direct, indirect, special, incidental, or consequential damages resulting from any defect or omission in this manual, even if advised of the possibility of such damages. The technical information contained herein regarding the features and specifications is subject to change without notice.For the latest warranty coverage information, refer to the Warranty and Return Policy under the Support section of the Gefen Web site at .Technical Support(818) 772-9100 (800) 545-69008:00 AM to 5:00 PM Monday - Friday, Pacific TimeFax(818) 772-9120Email*****************WebMailing AddressGefen, LLCc/o Customer Service20600 Nordhoff St.Chatsworth, CA 91311Product RegistrationRegister your product here: /kvm/Registry/Registration.jsp• The Gefen Syner-G™ Software Suite is a free downloadable application from Gefen that provides network configuration assistance and automatic download and installation firmware upgrades for this product. Always make sure that the MatrixController is running the latest firmware.Download the application here:/synerg/Matrix Controller is a trademark of Gefen, LLC.© 2015 Gefen, LLC. All Rights Reserved. All trademarks are the property of their respective owners.Gefen, LLC reserves the right to make changes in the hardware, packaging, and any accompanying documentationwithout prior written notice.This product uses UL or CE listed power supplies.PbFeatures• Detects, configures, and controls all Gefen Video and KVM over IP products• Built-in web server allows access from any web-enabled device, including phones, tablets, and PCs• Two Ethernet ports with independent IP and MAC Addresses allow segregation of Video/KVM LAN and control LAN, and help provide separate security layers foradministrators and end-users• Seamless integration with Gefen Syner-G™ software allows for quick installation and configuration on a network• Automatic assignment of IP addresses for all Gefen Video and KVM over IP devices on a network• Front panel control push-buttons/display, handheld IR remote, and web server interface allow easy and convenient end-user operation• Automation control system interface via Telnet and UDP• POE (Power Over Ethernet) on LAN 1 port eliminates the need for an external power supply• Password-protected independent user and administrative access• Easy to read 2 line/20 characters per line Liquid Crystal Display• System Configuration Upload/Download function• Plug-and-Play installation with little to no set-up• Locking power supply connector• 2U tall rack-mountable enclosure, detachable rack ears included• Slanted front panel for ergonomic push-button access and display visibility when placed on a tablePacking ListThe Matrix Controller ships with the items listed below. If any of these items are not present in the box when you first open it, immediately contact your dealer or Gefen.• 1 x Matrix Controller• 1 x IR Remote Control Unit• 1 x 5V DC Power Supply• 1 x Rack Ears• 6 x Rubber Feet• 4 x Machine Screws• 1 x Quick-Start GuideThis page left intentionally blankBefore You Begin (ix)Installation & Configuration (1)Unit Configuration (5)Creating Users (10)Creating Groups (12)Adding Users to Groups (16)Routing (18)Specifications (21)• You should have a managed gigabit switch with 8K (or greater) jumbo-frame capability.• This Setup Guide uses the Matrix Controller in Combined network mode. The Auto Assign feature will be used to automatically configure all devices for use with theMatrix Controller.• The “discovery” feature, used by the Matrix Controller is reliant on a proprietary network broadcast protocol that is used for identification. Broadcast packets andaccess using ports 53334 and 53335 is required for this feature to work.• The Gefen Video-over-IP product line is compatible with a wide variety of data switches:a. For simple installations, the Netgear GS724T / GS748T / GS748TPS (PoEversion) are low-cost 24-port or 48-port Gigabit Smart Switches that meet all ofthe requirements. They have two SFP ports that can be equipped with fiber SFPmodules for greater distances.b. For cascaded or extended switch architecture, more than 1 Gigabit bandwidthmay be required between switches. For these situations, the Netgear PROSAFEGS728TXS Gigabit Stackable Smart Switch offers four 10-Gigabit SFP uplinkports for expanded bandwidth between switches.c. Other Gigabit managed switches, such as the Cisco Small Business SG300 orSG500X (“X” indicates 10G SFP uplink port) switches may also be used;however, configuration will be up to the user• In order to properly manage the video traffic, two default settings on the switches need to be changed:1. “Jumbo Frames” need to be enabled.2. “IGMP Snooping” needs to be enabled.To do this on the Netgear GS7xxT-series switches:1. Login to the switch with a Web browser.2. Under the “Switching” tab, select “Ports” and then “Port Configuration”.3. Check the “All” checkbox, and set “Maximum Frame Size” to “9216”.4. Click “Apply” to save the settings.5. Still under “Switching”, select “Multicast”, “IGMP Snooping”, and then “IGMPSnooping Configuration”.6. Enable “IGMP Snooping Status”.7. Disable “Validate IGMP IP Header”.8. Click “Apply” to save the settings.9. Go to “IGMP Snooping VLAN Configuration”.10. Enter “1” under “VLAN ID”.11. Enable “Fast Leave Admin Mode” and “Query Mode”.12. Click “Apply” to save the settings.Before You Begin• For the Cisco SG300 or SG500X series switches:1. Login to the switch with a Web browser.2. Go to “Admin” > “Port Management” > “Port Settings”.3. Select “Enable Jumbo Frames”.4. Click “Apply” to save the setting.5. Go to “Multicast” > “Properties”.6. Enable “Bridge Multicast filtering”.7. Click “Apply” to save the setting.8. Go to “Multicast” > “IGMP Snooping”.9. Enable “IGMP Snooping”.10. Click “Apply” to save the setting.2. Connect a shielded CAT-5e (or better) Ethernet cable from the LAN 1 port on theMatrix Controller to the same network where the Gefen Video over IP units are connected.LAN2LAN 1 port4.Alternatively, if LAN Port #1 is connected to a PoE Switch (Such as Netgear ProSafe GS748TPS), a separate power connection is not required. 5.The Matrix Controller will begin the initialization process. This will take a few moments.LAN POE5V DC 12Power receptacle9.The login page to the Matrix Controller will be displayed.10. Type admin (case-sensitive) in both the Username and Password fields, then clickthe Login button.►►►2. Click the Select All button to select all discovered devices under the Input andOutput list. Any time a device is selected from either list, it will be highlighted in red, as shown below.4.The following message box will be displayed:As described in the message box, this process will take several minutes to complete. The Gefen Video over IP units may reboot multiple times during the procedure.The Web interface will not be available during this process. DO NOT attempt to refresh the page during the process.5. Click the OK button to continue.6.The following message box will be displayed and will disappear when the process has completed:7.Provide a unique description for each input and output device. Make sure the descriptions are meaningful (e.g. “Blu-ray”, “Samsung 65”, etc.). This step is highly recommended and will provide easy management of devices, particularly in large-scale setups.To change the description of an input or output unit, do the following:a.Click on the desired unit, from the Input or Output list, to select it. In this example, we will begin by selecting the input device. For clarity, we will be working with only one input and one output.b.When selected, the device will be highlighted in red.Important Do not use special characters, such as double-quotes (“), asterisks (*), etc., in any text field. Only these special characters are supported:(space), underscore (_), hyphen (-), and period (.).d.The Edit Device dialog box will be displayed.g.The processing message box will be displayed and after a few seconds, the device description will be updated.h.Repeat steps a - g for each device under both the Input and Output list.Important Before continuing, verify that all units have an IP address that is within the specified range. Each input device should have a unique Channel number.Each output device should have a unique ID number.2.Click the Add User button.3.Click the Add new group button to view the Add new group dialog.4.Enter the name of the group in the Name field.Associated Outputs list.4.Click the desired user (s) to be assigned to the selected group .6.The selected users (admin, front panel, john, and kayla) are now members of this group .3. Click to select an input from the Inputs list. To deselect the input, click on it again.Only one input can be selected at a time. If the selected input is already routed to one or more outputs, the outputs will be highlighted in orange, as shown below:6. The processing message box will be displayed, while the new routing process takeseffect. This message box will disappear when the routing process is complete.b. Select the desired input. Only one input can be selected at a time. Select additional outputs, as desired.c.Click the Route button.a b c InformationRouting can also be performed using Matrix View mode. Refer to the User Manual for more information on this feature.*Preferred。
3G网卡移植
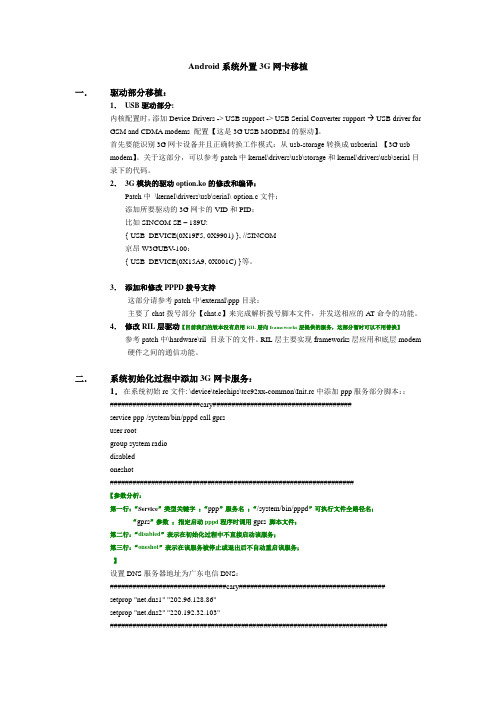
Android系统外置3G网卡移植一.驱动部分移植:1.USB驱动部分:内核配置时,添加Device Drivers -> USB support -> USB Serial Converter support USB driver forGSM and CDMA modems 配置【这是3G USB MODEM的驱动】。
首先要能识别3G网卡设备并且正确转换工作模式:从usb-storage转换成usbserial 【3G usbmodem】。
关于这部分,可以参考patch中kernel\drivers\usb\storage和kernel\drivers\usb\serial目录下的代码。
2.3G模块的驱动option.ko的修改和编译:Patch中\kernel\drivers\usb\serial\option.c文件:添加所要驱动的3G网卡的VID和PID:比如SINCOM SE – 189U:{ USB_DEVICE(0X19F5, 0X9901) }, //SINCOM京昂W3GUBV-100:{ USB_DEVICE(0X15A9, 0X001C) }等。
3.添加和修改PPPD拨号支持这部分请参考patch中\external\ppp目录:主要了chat拨号部分【chat.c】来完成解析拨号脚本文件,并发送相应的A T命令的功能。
4.修改RIL层驱动【目前我们的版本没有启用RIL层向frameworks层提供的服务,这部分暂时可以不用替换】参考patch中\hardware\ril 目录下的文件。
RIL层主要实现frameworks层应用和底层modem硬件之间的通信功能。
二.系统初始化过程中添加3G网卡服务:1.在系统初始rc文件: \device\telechips\tcc92xx-common\Init.rc中添加ppp服务部分脚本::########################cary#####################################service ppp /system/bin/pppd call gprsuser rootgroup system radiodisabledoneshot#################################################################【参数分析:第一行:“Service”类型关键字;“ppp”服务名;“/system/bin/pppd”可执行文件全路径名;“gprs”参数;指定启动pppd程序时调用gprs脚本文件;第二行:“disabled”表示在初始化过程中不直接启动该服务;第三行:“oneshot”表示在该服务被停止或退出后不自动重启该服务;】设置DNS服务器地址为广东电信DNS:###############################cary#######################################setprop "net.dns1" "202.96.128.86"setprop "net.dns2" "220.192.32.103"##########################################################################2.添加拨号脚本gprs :\system\core\rootdir\etc\ppp\peers\ gprs 如下connect 'chat -v "" "AT" "" "ATDT#777 CONNECT"' user CARD password CARD/dev/ttyUSB2 # sincom se 189-u 上网卡modem设备端口115200nodetachcrtsctsdebugusepeerdnsdefaultroute3.拷贝\system\core\rootdir\etc\ppp目录下的配置文件到系统的system\etc\ppp目录下;4.检测到ppp连接建立并成功获取IP地址和DNS地址后,设置系统属性供上层调用【\external\ppp\pppd\ipcp.c】;检测到ppp连接断开后,设置系统属性【\external\ppp\pppd\main.c】。
MTKGmodem配置

M T K平台m o d e m配置先从modem配置表里了解一下每一个文件夹对应哪个频段的配置其他没有标记的,目前我们是用不到的,也不要去修改里面的参数。
打开每一个需要修改的文件夹,可以看到三个子文件夹,类似下图:我们只需要修改上面框选里面的文件夹里面的选项即可。
进入到文件夹里面,发现有好几个文件,我们只需要修改下面标红的两个就可以了,一般都是**_mipi.h和**_rf.h文件各个文件夹里面文件详细说明如下图:了解了上面文件说明后,下面开始讲具体参数配置。
一、mmll_rfUSID配置以及修改由于我们目前使用到的SKY的PA和开关,所以他们两个的USID是一样的,出厂默认都是OxF,按照常理来讲,由于PA和开关挂在不同的MIPI通路上,是不会有地址冲突的问题,但是目前MT6735平台存在弱4G信号下,切不回2G通话,也就是有时候打不进来电话,所以需要将这两个设备的USID改成不一样,修改PA和开关都可以,下面示例修改PA的USID。
首先打开SKY77643的规格书,找到这个位置稍后将会用到里面的ProductID和ManufacturerID然后在mmll_rf文件夹里面打开这两个文件夹在mml1_custom_mipi.c文件里面找到这个位置,按照上面的描述修改相应的值后面的newUSID可以修改为0x1~0xE之间的一个,在mml1_custom_mipi.h文件里面对应修改就可以了,由于我们修改的是PA,所以在portsel下面需要选取MIPI_PORT0,如果是开关的话,就需要对应修改为MIPI_PORT1。
至于在这里选取修改的USID是PA0还是PA1,ASM0还是ASM1,可以从后面的文件里面看出来。
比如在4G里面的lte_custom_mipi.c文件里面,可以看到在TPC这里会有一个USID的调用。
这里可以看到,在同一个文件里面对同一个PA可能会有两个USID的调用,主要因为这个modem沿用了phase-1设计的模板,很多东西没有和phase-2设计选用的PA对应上来,我们目前的设计中,FDD和TDD已经做到一个PA里面去了,所以USID应该是要一致的,所以我们后来把所有用到PA1的地方全部改为了PA0。
3G无线接入网的优化流程分析
3G无线接入网的优化流程分析前言随着移动通信技术的不断发展,3G无线接入网已经被广泛应用于各行各业。
然而,在使用过程中,用户常常会遇到网络不畅、信号不稳定等问题。
为了解决这些问题,需要进行优化和改进。
本文将介绍3G无线接入网优化的流程分析,以帮助用户更好地使用网络。
优化流程分析1. 网络建设网络建设是3G无线接入网优化的重要环节。
首先需要进行现场勘察,确定通信塔的位置、高度、方向等关键因素。
其次需要选择合适的设备,如基站、天线、传输设备等,保证网络的稳定和快速。
2. 技术优化在网络建设完成后,需要进行技术优化,以提升网络信号质量和稳定性。
具体优化措施如下:•频率优化:优化频段使用,避免频段冲突,提升网络容量。
•功率优化:调整功率分布,保证网络覆盖范围和信号强度。
•上/下行带宽优化:根据用户的实际需求,合理分配上/下行带宽资源,提升网络传输速度。
•QoS优化:设置合适的服务质量参数,保证网络稳定和可靠。
3. 故障排除即使网络建设和技术优化已经完成,依然会出现故障。
在此时,需要进行故障排除,以恢复网络的正常运行。
具体方法如下:•故障定位:通过网络监控工具、告警系统等手段,迅速定位故障点。
•故障分析:分析故障的原因、性质和影响,制定对应的解决方案。
•故障处理:根据解决方案,及时处理故障,保证网络稳定和可靠。
结语综上所述,3G无线接入网优化的流程分析包括网络建设、技术优化和故障排除三个方面。
只有不断完善这些环节,才能够保证网络的稳定、可靠和高效,为用户带来更好的通信体验。
华为上网卡安装步骤

查看短信
查看收件箱中的短信,操作如下: 1. 进入“收件箱”界面,查找到您想要阅读的短信。 2. 单击左键,右下方窗口显示发件人的姓名、号码,短信内容和接收时间。 3. 单击右键,可以对短信进行如下操作: ������ 发送:发送短信给发件人。 ������ 回复:进入“回复”界面,重新编辑短信并发送给发件人。 ������ 转发:将当前短信转发给其他人。 ������ 保存号码:进入“新增联系人”界面,输入其他信息后,保存发件人。 ������ 删除:删除当前短信。 ������ 清空:删除收件箱中所有短信。 说明: ������ 可按住<Shift>或<Ctrl> 键,用鼠标选择多条短信;或者按 <Ctrl + A>键选 择当前列表中的所有短信。 ������ 从收件箱中删除的短信保存在垃圾箱中。 ������ 您一次只能转发一条短信。 您还可以通过短信列表区上方的快捷图标进行操作: ������ :回复当前短信。 ������ :转发当前短信。 ������ :删除当前短信。
发件箱
发件箱中保存已发送的短信,包括发送成功和发送 失败的短信。 进入发件箱,操作如下: 1. 单击 ,打开“短信”窗口。 2. 选择“本地 > 发件箱”页签,进入发件箱界面。 说明: 具体操作,请参考收件箱。
草稿箱、收藏夹、垃圾箱和报告箱 草稿箱中可保存短信草稿。 收藏夹中可存放您的重要短信。 垃圾箱保存已经从本地信箱删除的短信。 报告箱中可保存短信发送后的状态报告。 说明: ������ 具体操作,请参考收件箱。 ������ 如果删除垃圾箱中的短信,短信将被永久删除, 请谨慎操作。
Nhomakorabea分组管理 新建组 您可以在本地电话簿中创建群组,对联系人进行分组管理。 1. 在导航栏中,右键单击“本地”标签,选择“新建组”。 2. 输入组名。 说明: ������ 组名不能为空;组名不能重复。 ������ 您只能对本地电话簿中的联系人记录进行分组管理。 修改组名 1. 选择需要修改的组。 2. 在导航栏中,右键单击需要重命名的组,选择“重命名组”。 3. 输入新的组名。 说明: 不能重命名“本地”缺省组和UIM。
手机及数据线做modem实现电脑上网--图文详细

手机及数据线做modem实现电脑上网首先要求手机的USB支持数据传真(也就是支持modem),这里我以MOTO手机(MOTO的很多手机支持这个功能)为例做个讲解:先安装摩托万能驱动(网上找,几乎每个摩托论坛都有),安装好后,手机USB 设为MODEM模式(设置方法:主菜单-设置-USB模式-modem),插上电脑,此时电脑会自动给它安装驱动,不会有什么提示,如果你没装万能驱动电脑才会提示要你指定驱动所在目录。
几十秒后驱动装好了,电脑此时会给手机充电!所名驱动正常了!查看详情:鼠标右键点(我的电脑)选(属性)点(硬件)选(设备管理),这里面就是你电脑所有硬件的驱动情况了,在调制解调器那肯定有个motorolausbmodem,鼠标左键双击它,会弹出它的属性。
点(高级),在(额外的初始化命令)里填入at+cgdcont=1,"ip","cmwap"。
他是强制使用CMWAP接入的命令,确定保存!第二步:现在来建一个拨号服务:鼠标左键点:(开始)-(所有程序)-(附件)-(通讯)-(新建连接向导)-弹出界面选(下一步)-选连接到internet选(下一步)-选手动设置我的连接选(下一步)-选用拨号调制解调器连接选(下一步)-ISP名称随便你比如填GPRS选(下一步)-电话号码填*99#(注意:一定要填这个)选(下一步)-什么都不填直接选(下一步)-在(在我的桌面添加一个到此连接的快捷方式)前打个钩-(完成)此时会在桌面多处你刚建的连接了,如图二,直接鼠标左键双击它,弹出如图3界面,点(拨号),稍等几秒就会在电脑屏幕右下角显示115.2kbps的网速了,现在你可以直接打开QQ,填好QQ号和密码后点(设置)网络类型选(HTTP代理)地址填:10.0.0.172端口填:80点(登陆)如无意外,QQ很快就登陆上去了!现在说说开网页,由于移动限制电脑借用GPRS上网的,他们在代理服务器加了一道网关,就是检测你的浏览器类型,而浏览器开网页时是先发送请球和自身的信息给服务器,在等服务器返回网页等数据的,而你的电脑浏览器经过移动网关时它们检测到不是手机的就不发送出去,所以开不了网页!我们可以通过修改浏览器(电脑的IE)的注册表信息来骗过移动,就是把IE的识别信息改成OPNWAE,这是大部分手机的浏览器识别信息,移动不可能不让通行!但是修改注册表很麻烦,而且对于以后用宽带有引响,所以我不推荐修改,也不发表修改教程了!直接用opera浏览器还好。
中国电信3g无线上网卡如何设置24页PPT

16、云无心以出岫,鸟倦飞而知还。 17、童孺纵行歌,斑白欢游诣。 18、福不虚至,祸不易来。 19、久在樊笼里,复得返自然。 20、羁鸟恋旧林,池鱼思故渊。
56、书不仅是生活,而且是现在、过 去和未 来文化 生活的 源泉。 ——库 法耶夫 57、生命不可能有两次,但许多人连一 次也不 善于度 过。— —吕凯 特 58、问渠哪得清如许,为有源头活水来 。—— 朱熹 59、我的努力求学没有得到别的好处, 只不过 是愈来 愈发觉 自己的 无知。 ——笛 卡儿
拉ห้องสมุดไป่ตู้
60、生活的道路一旦选定,就要勇敢地 走到底 ,决不 回头。 ——左
联通3G手机上网设置方法详细

联通3G手机上网设置方法详细中国联通3G手机上网设置方法一、诺基亚系列1、3G业务internet接入点设置菜单—设置—手机设置—连接—接入点连接名称:“3gnet”数据承载方式:“分组数据”连接点名称:“3gnet”用户名:“无”提示输入密码:“否”密码:“无”签定:“安全”主页:“无”点屏幕左下角“选项”,选择“高级设置”网络类型“IPV4”手机IP地址“自动”域名服务器“自动”代理服务器地址“无”代理端口号码“无”2、3G业务wap接入点设置菜单—设置—手机设置—连接—接入点连接名称:“3gwap”数据承载方式:“分组数据”连接点名称:“3gwap”用户名:“无”提示输入密码:“否”密码:“无”签定:“安全”主页:“无”点屏幕左下角“选项”,选择“高级设置”网络类型“IPV4”手机IP地址“自动”域名服务器“自动”代理服务器地址“10.0.0.172”代理端口号码“80”3、3G业务彩信接入点设置菜单—设置—手机设置—连接—接入点连接名称:“3gmms”数据承载方式:“分组数据”连接点名称:“3gwap”用户名:“无”提示输入密码:“否”密码:“无”签定:“安全”主页:“.c n”点屏幕左下角“选项”,选择“高级设置”网络类型“IPV4”手机IP地址“自动”域名服务器“自动”代理服务器地址“10.0.0.172”代理端口号码“80”4、接入点连接方式设置菜单—网络—选项—设置接入点“总是询问”5、创建internet书签设置菜单—网络—选项—书签管理器—新增书签名称:“google”地址:“”接入点:“默认”用户名:“无”密码:“无”6、创建wap书签设置菜单—网络—选项—书签管理器—新增书签名称:“ wap baidu”地址:“[url=http://***/]http://***bai ”接入点:“默认”用户名:“无”密码:“无”7、登录3G门户设置:接入点设置完成(3gwap)菜单—应用程序—影音工具—realplayer点屏幕左下角“选项”,选择设置,选择流媒体,选择网络默认接入点:“3gwap”在线时间:“无限制”最低UDP端口:“6970”最高UDP端口:“32000”点屏幕左下角“选项”,选择高级设置GPRS宽带:“28.14kbit/s”EGPRS宽带:“84.42kbit/s”UMTS宽带:“1.34 Mbit/s”WLAN宽带:“3.01 Mbit/s”返回主菜单—网络—选项—书签管理器—新增书签名称:“3G门户”地址:“.c n”接入点:“3gwap”用户名:“无”密码:“无”点屏幕左下角“选项”,选择设置,选择标准接入点:“总是询问”主页:“书签”缩略图:“开”历史记录:“开”安全警告:“显示”Java/ECMA脚本:“启动”点屏幕右下角返回,进入“书签”,选择“3G门户”,选择“联通3G门户”8、3G门户手机电视观看方法通过以上方式进入“联通3G门户”,选择右下方“手机电视”,下翻至“直拨”,选择“CCTV1”,点“播放”,进入下一页面,下翻至多频道,选择订购方式,点击“订购”,如已订购,订购项为“退订”,订购后可直接观看所选择频道。
电脑连接3G手机上网攻略
电脑连接3G手机上网攻略在这里您需要先确定您的3G手机是否具备Modem功能,这点您可以在手机说明书或手机厂商官方网站里找到答案。
目前绝多数3G手机都具备Modem功能。
简单的说它就是把手机模拟成一个“猫”来使,对于那些老网虫来说应该不陌生。
另外,我们还需要有一根数据线或是采用蓝牙功能把手机与电脑连接起来。
最后我们还需要有手机的驱动程序和相应的管理软件。
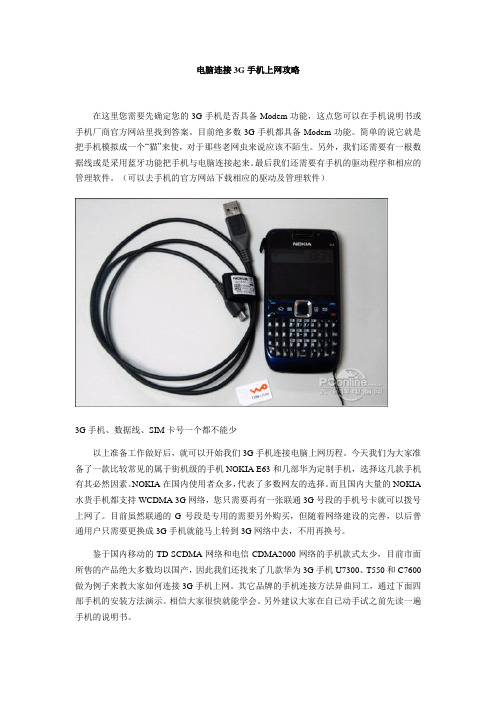
(可以去手机的官方网站下载相应的驱动及管理软件)3G手机、数据线、SIM卡号一个都不能少以上准备工作做好后,就可以开始我们3G手机连接电脑上网历程。
今天我们为大家准备了一款比较常见的属于街机级的手机NOKIA E63和几部华为定制手机,选择这几款手机有其必然因素。
NOKIA在国内使用者众多,代表了多数网友的选择。
而且国内大量的NOKIA 水货手机都支持WCDMA 3G网络,您只需要再有一张联通3G号段的手机号卡就可以拨号上网了。
目前虽然联通的G号段是专用的需要另外购买,但随着网络建设的完善,以后普通用户只需要更换成3G手机就能马上转到3G网络中去,不用再换号。
鉴于国内移动的TD-SCDMA网络和电信CDMA2000网络的手机款式太少,目前市面所售的产品绝大多数均以国产,因此我们还找来了几款华为3G手机U7300、T550和C7600做为例子来教大家如何连接3G手机上网。
其它品牌的手机连接方法异曲同工,通过下面四部手机的安装方法演示。
相信大家很快就能学会。
另外建议大家在自已动手试之前先读一遍手机的说明书。
NOKIA系列手机的连接方法诺基亚E63 网购实价诺基亚为我们提供了一个很好的软件“NOKIA PC 套件”大家只需要在NOKIA官方网站下载自已手机相应版本的套件即可。
“NOKIA PC 套件”里面已经包含了手机的驱动,数据线驱动等等所有需要用到的文件,安装它就能一次性解决全部问题。
(建议大家不要用手机光盘里的PC套件,它比较旧,还是在网站下载一个最新的吧)NOKIA系列手机的PC套件先安装“NOKIA PC 套件”,再把手机与电脑用数据线连接好,这个时候手机屏幕上会弹出一个对话框,询问您是将手机做一个U盘使,还是做别的应用,这里我们要选择“将PC 联接至互联网”。
铁塔3G and 4G Modem安装和调试指导
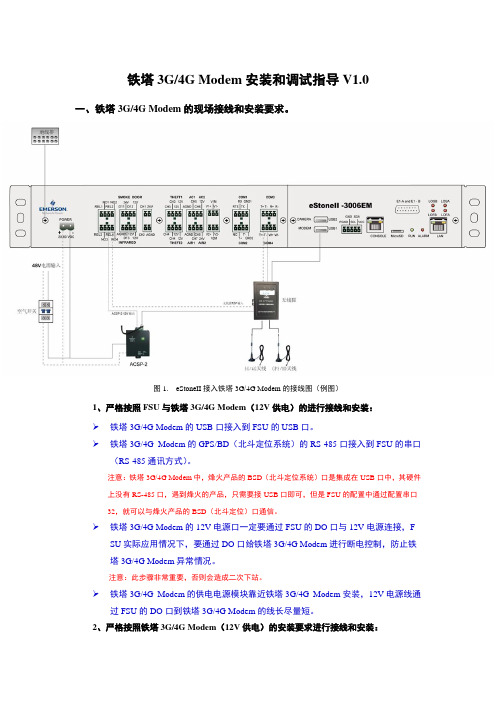
铁塔3G/4G Modem安装和调试指导V1.0一、铁塔3G/4G Modem的现场接线和安装要求。
图1.eStoneII接入铁塔3G/4G Modem的接线图(例图)1、严格按照FSU与铁塔3G/4G Modem(12V供电)的进行接线和安装:铁塔3G/4G Modem的USB口接入到FSU的USB口。
铁塔3G/4G Modem的GPS/BD(北斗定位系统)的RS-485口接入到FSU的串口(RS-485通讯方式)。
注意:铁塔3G/4G Modem中,烽火产品的BSD(北斗定位系统)口是集成在USB口中,其硬件上没有RS-485口,遇到烽火的产品,只需要接USB口即可,但是FSU的配置中通过配置串口32,就可以与烽火产品的BSD(北斗定位)口通信。
铁塔3G/4G Modem的12V电源口一定要通过FSU的DO口与12V电源连接,F SU实际应用情况下,要通过DO口给铁塔3G/4G Modem进行断电控制,防止铁塔3G/4G Modem异常情况。
注意:此步骤非常重要,否则会造成二次下站。
铁塔3G/4G Modem的供电电源模块靠近铁塔3G/4G Modem安装,12V电源线通过FSU的DO口到铁塔3G/4G Modem的线长尽量短。
2、严格按照铁塔3G/4G Modem(12V供电)的安装要求进行接线和安装:铁塔3G/4G Modem的SIM卡卡座,在插入SIM卡时,要注意对准SIM卡的卡槽和SIM卡的插入方向。
注意:SIM卡插入时,一定要按照SIM指示方向插入,否则会造成SIM卡识别问题。
SIM卡插入时,一定要对准插槽,否则SIM卡很容易掉到产品里面,造成SIM卡无法取出。
铁塔3G/4G Modem的3G/4G天线和BSD(北斗定位系统)的天线与铁塔3G/4G Modem的天线接口一定要拧紧,否则会造成天线接触性问题,影响铁塔3G/4GModem自动找网时的信号质量,且天线的放置位置很重要,最好找信号比较好的地方进行放置。
黑莓9670S版成功写号手编
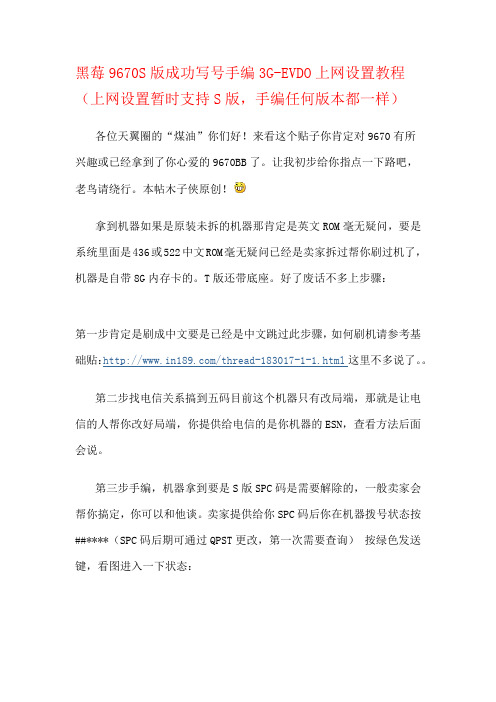
黑莓9670S版成功写号手编3G-EVDO上网设置教程(上网设置暂时支持S版,手编任何版本都一样)各位天翼圈的“煤油”你们好!来看这个贴子你肯定对9670有所兴趣或已经拿到了你心爱的9670BB了。
让我初步给你指点一下路吧,老鸟请绕行。
本帖木子侠原创!拿到机器如果是原装未拆的机器那肯定是英文ROM毫无疑问,要是系统里面是436或522中文ROM毫无疑问已经是卖家拆过帮你刷过机了,机器是自带8G内存卡的。
T版还带底座。
好了废话不多上步骤:第一步肯定是刷成中文要是已经是中文跳过此步骤,如何刷机请参考基础贴:/thread-183017-1-1.html这里不多说了。
第二步找电信关系搞到五码目前这个机器只有改局端,那就是让电信的人帮你改好局端,你提供给电信的是你机器的ESN,查看方法后面会说。
第三步手编,机器拿到要是S版SPC码是需要解除的,一般卖家会帮你搞定,你可以和他谈。
卖家提供给你SPC码后你在机器拨号状态按##****(SPC码后期可通过QPST更改,第一次需要查询)按绿色发送键,看图进入一下状态:图中的PESN(DEC)和PESN(HEX)这2排数字提供给电信改局端的人,图中的A-KEY填入你的AK码,也可以找电信人帮你关闭鉴权。
下面的SIP USER ID 也可以填写:***************这个帐号是走NET,图中的是WAP可以上电信互联星空,个人喜好,随便你。
图中的blackberry registration ID 必须改成当地SID 要不然你很有可能只能收到短信不能发送短信。
修改方法要按黑莓键,选择Edit BB reg id进入后再按黑莓键选择DELETE先把原来的删除再填入你的当地SID再按黑莓键选择CLOSE就OK了,回到刚才那个手编页面,要是改掉了那就行了。
要是还是原来的那就继续上面操作!全部手编结束后按黑莓键选择SaVe(保存),机器马上会自动重启。
这个操作哪怕不改局端要是你五码正确的话,机器启动好你就可以收到短信和接到电话,但是不可以呼出电话,呼出电话提示是没有开通此项业务。
OpenWrt系统USB接口3G4G网卡适配器驱动指引20150701

2.3.1. lsusb
常用 Linux 系统(或 OpenWrt 系统)内有工具 lsusb 用于查看 USB 设备的 ID 相关信息。带参数 -t 运行 该工具还可以用于查看设备的驱动信息。下图示例演示了查看电脑上设备的 vid 和 pid,其中 id 信息为 “12d1:140c”的是一款 3G 网卡,实际型号为华为 EC122(但 lsusb 输出显示为 E180v)。
工具 usb_modeswitch 还需依赖一系列配置文件才能正常工作。当系统中插入了某款复合设备,
usb_modeswitch 需要根据设备的 vid:pid 找到设备对应的配置。该配置文件的内容,即为切换 USB 设备工作 模式的特殊指令。对应的配置文件不存在的时候,则设备不能完成切换正常工作。如需切换,需要手动建立该 文件,或者从互联网上搜索相关文件并补充到系统中的特定目录。此后 usb_modeswitch 切换工具才能够正常 将目标 USB 网卡切换到期望的工作状态。
4G 网卡驱动相关扩展知识,4G 网卡实现协议则使用文中所述的多种实现。而 3G 网卡主要使用串口设备拨号上 网。
3G Modem特性典型配置案例

MSR系列路由器配置案例内部公开3G Modem特性典型配置案例Hangzhou H3C Technologies Co., Ltd.杭州华三通信技术有限公司All rights reserved版权所有侵权必究3G Modem典型配置案例目录目录1介绍 (2)2使用指南 (2)2.1使用场合 (2)2.2配置指南 (2)2.3注意事项 (2)3DHCP配置举例 (3)3.1组网需求 (3)3.2使用版本 (3)3.33G Modem的普通DCC拨号应用 (4)3.43G Modem作为GigabitEthernet0/1的备份接口 (7)3.5结合NQA保持3G Modem永远建立呼叫。
(10)4相关资料 (13)4.1相关协议和标准 (13)4.2其它相关资料 (13)7/11/2013 版权所有,侵权必究第1页3G Modem特性典型配置案例关键词:3G MODEM、DCC、STANDBY缩略语:1 介绍3G Modem是路由器上支持的一种接口,用于与3G移动通信网络建立数据连接。
它有USB接口类型和SIC卡类型,两种接口功能相似,本文以USB接口的E170 3GModem举例。
USB 3G Modem可以外接接到设备的USB接口上。
USB 3G Modem插入后,系统会动态创建一个USB 3G Modem接口来管理这个插入的USB 3G Modem外接设备。
当USB 3G Modem从USB接口拔出时,系统会动态删除这个USB 3G Modem接口。
2 使用指南2.1 使用场合需要通过3G移动网络接入Internet。
2.2 配置指南1) 如图1所示,将USB 3G Modem插入路由器的USB口。
2) 配置DCC相关命令,配置正确的路由,使感兴趣流量触发3G MODEM拨号建链并正确转发2.3 注意事项1) 3G Modem中已经插入可用的Sim卡,Sim卡如启用pin码认证,先使用手机取消认证功能。
手机USB modem上网指南

手机USB modem GPRS上网指南GPRS即General Packet Radio Service(通用无线分组服务),它是一种基于GSM系统的无线分组交换技术,具有实时在线、高速传输、切换方便等优点。
GPRS 理论上的最高传输速率为171.2Kbps,目前的实际传输速率一般为40Kbps左右,有的已经超过了115Kbps,达到了普通Modem传输速率的两倍。
这种高覆盖率、高速度的无线联网方式实现了我们随时、随地、高速度连入Internet的梦想。
要使用GPRS上网,需要拥有GPRS终端设备,主要是GPRS手机和专用的GPRS Modem。
GPRS Modem的功能单一,价格较贵,而GPRS手机功能多样,既可使用手机的语音功能,又可直接上网,还能作为无线Modem来用,性价比更高一些。
GPRS手机虽然能够直接使用手机上网,但其应用限制很大,小小的手机屏幕决定了它不能干太多的事。
但我们可以把GPRS手机当成无线Modem用,将GPRS手机与电脑连接,通过电脑来使用网络服务,这种上网方式可实现和普通上网方式完全一样的网络应用。
1.硬件要求PC:台式机或笔记本电脑都可以,配置不限。
手机:带modem功能的手机。
就是手机能当作modem使用,这样就可以在电脑上搜索到调制解调器,然后用这个调制解调器拨号上网。
手机卡:开通GPRS上网的卡(不开通怎么上网?)。
一般用动感地带卡,因为这种卡可以开通包月的GPRS功能,资费较便宜。
2.安装手机USB modem2.1 手机USB modem与PC的连接要实现“GPRS手机+电脑”上网,首先必须在手机和电脑之间建立连接,连接的方式主要有两种:数据线连接、蓝牙/红外连接。
这里用的是USB数据线来连接手机上网,用蓝牙来连接上网的话上网速度会被限制的,因为目前蓝牙的传送数据速度比不上USB数据线。
1.数据线连接不同的手机型号数据线是不一样的,一般在随机配件中附送有。
Digi Connect WAN 3G SSL Tunnel配置指南说明书
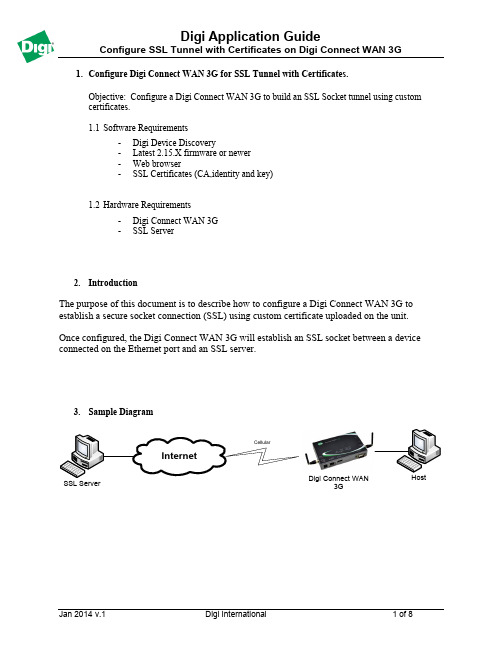
1. Configure Digi Connect WAN 3G for SSL Tunnel with Certificates.Objective: Configure a Digi Connect WAN 3G to build an SSL Socket tunnel using custom certificates.1.1 Software Requirements- Digi Device Discovery- Latest 2.15.X firmware or newer - Web browser-SSL Certificates (CA,identity and key)1.2 Hardware Requirements- Digi Connect WAN 3G -SSL Server2. IntroductionThe purpose of this document is to describe how to configure a Digi Connect WAN 3G to establish a secure socket connection (SSL) using custom certificate uploaded on the unit.Once configured, the Digi Connect WAN 3G will establish an SSL socket between a device connected on the Ethernet port and an SSL server.3. Sample DiagramDigi Connect WAN3GInternetCellularSSL ServerHost4.Installing Custom certificates in the Digi Connect WAN 3GNote: It is possible to create certificates using OpenSSL and the integrated tools. For more information, please visit a)Open a web browser to the IP Address of the Digi Connect Wan 3G or use the DigiDevice Discovery toolb)Navigate to : Administration>X.509 Certificate/Key Management and click on CertificateAuthorities (CAs) / Certificate Revocation Lists (CRLs)c)Navigate to : Upload Certificate Authority Certificates and Certificate Revocation Lists,click the Browse button, select your CA certificate and click Uploadd)The CA certificate should now appear un der “Installed Certificate Authority Certificates”e)Navigate to : Secure Sockets Layer (SSL) / Transport Layer Security (TLS) Certificates,click on “Identity Certificates and Keys, click the Browse button, select your identitycertificate (enter the password in the password field if the certificate is protected by a password) and click Uploadf)Repeat the same steps for the identityg)The Identity Certificates and Keys should now appear under each section5.Configuring the SSL Socket tunnel settingsa)Navigate to : Configuration > Network > Socket Tunnel Settingsb)Configure a new tunnel as follow and click Add.6.TestingFor this test, we will use the available binaries from OpenSSL and setup a listening server. Please visit for more information on installing OpenSSL on your operating system.Make sure to copy the host/server certificates in the openssl\bin directory or any other accessible path.After installation, open a command prompt to the bin directory of OpenSSL, by default:c:\openssl\bin\Configure the OpenSSL Server as follow:C:\OpenSSL-Win32\bin>openssl s_server –accept 4401 –cert certh.pem –key privh.pem –CAfile cacert.pem –debugThe OpenSSL server should now be up and running and in listening mode on port:Loading 'screen' into random state - doneUsing default temp DH parametersUsing default temp ECDH parametersACCEPTOn the Computer/Host connected to the Etherport of the Digi Transport, open a terminal application such as PuTTy and configure the following:Press OpenIf the debug parameter was used, a lot of information should start to be displayed on the screen, which is the certificate exchange. This part will confirm that the tunnel is now established:-----BEGIN SSL SESSION PARAMETERS-----MHUCAQECAgMBBAIALwQgUw78/NisMM/adoQF43wa+ROkx1Bo17Eav4iPrm6IYl0EMMfr2hGQyg4VDaouYLb3cV5ca69kNBnvlDT+ijcOEs83Sscgv4pEY9Y1Shh1QoKQ96EGAgRTFddqogQCAgEspAYEBAEAAAA=-----END SSL SESSION PARAMETERS-----Shared ciphers:AES128-SHA:AES256-SHA:DES-CBC3-SHA:DES-CBC-SHA:DHE-DSS-AES128-SHA:DHE-DSS-AES256-SHA:EDH-DSS-DES-CBC3-SHA:EDH-DSS-DES-CBC-SHACIPHER is AES128-SHAReused session-idSecure Renegotiation IS NOT supportedCheck the Digi Connect Wan 3G Connection status:Sending data in the Terminal/PuTTy Window will appear in the debug window of the OpenSSL serverread from 0x727ff8 [0x73369b] (5 bytes => 5 (0x5))0000 - 17 03 01 ...0005 - <SPACES/NULS>read from 0x727ff8 [0x7336a0] (32 bytes => 32 (0x20))0000 - 4a 6f eb 6e a4 3f 66 8c-19 32 01 54 f7 3a 39 77 Jo.n.?f..2.T.:9w 0010 - 05 4e 6d 79 a5 48 4e b7-4d 9b 6b d1 de de c9 8c .Nmy.HN.M.k (111)Closing the Terminal/PuTTy window will close the OpenSSL Tunnel:read from 0x727ff8 [0x73369b] (5 bytes => 0 (0x0))ERRORshutting down SSLCONNECTION CLOSEDACCEPT。