patran例子Exercise_01_Lin_vs_Nonlin_Cant_Beam
PATRAN常见问题汇总PATRAN常见问题汇总

如何在PATRAN中转换单位?Patran为了给用户提供最大的便利性&开放性,Patran没有定义具体的单位制。
用户使用自己默认的自统一的单位制就可以了。
如果确实需要进行转换的话,利用PA TRAN中的Group→Transform→Scale,可以轻易的将PA TRAN的model在各座标系统间进行转换。
但须注意的是,此一转换只会将座标尺寸加以转换,而外力与边界条件、单元特性与材料常数等资料并未自动加以转换,用户必须特别注意。
(外力及边界条件可利用放大因子[scalefactor]的来快速修正)问如何在Patran中更改背景颜色在Patran界面下,进入到Display主菜单中,选择Color Palette;进入到调色板设置。
在一列颜色列表中,先选定黑色,调整“Lightness”值为1,然后再选定白色,把“Lightness”的值调整为0,然后点击Apply就可以了。
这样的设置能够保证背景和实体的充分显示,能满足截图打印的要求。
文件类型×.db数据库文件,binary×.db.bkup数据库备份文件,binary×.ses.nn会话文件,ASCII×.db.jou日志文件,ASCII×.bdf Nastran输入文件,ASCII*.log也是日志文件,对分析进程的记录,ASCII*.xdb结果数据库文件,ASCII*.op2 是nastran的计算结果文件。
(二进制)×.f04 一般包含nastran运行时的一些系统文件操作的信息*.f06 是结果文件(文本)。
*.MASTER *.dball ??都是中间文件,包含nastran运算时的中间结果,如刚阵、质量阵,以及重启动所需的信息。
print file指的是*.f06文件punch file指的是*.pch文件pro/e导入patran的问题要设置环境变量啊,MSCP_PROE_CMD=你的proe的可执行文件的路径。
Patran基础教程02_图形界面

PAT301, Section 1, September 2010 Copyright 2010 MSC.Software Corporation
S2-20
鼠标选取 (续)
取消选定的元素
同时按下 Ctrl 键和 Shift 键,点击鼠标右键。 使用“-” 拾取图标。 被选中的元素将从数据框中被清除 (如 下面的 Element 7) 当数据框中有多个元素时可以这样做,只有选中的元素才被清除掉。
标左键即可选择该数据框,当数据框被选定时有字符 “I” 出现在数据框中. ● 选择菜单 – 图标菜单可用来过滤选择的元素. ● 拾取列表 – 选择数据框中的字符串 ● 列表处理器 – 解释拾取列表的代码.
PAT301, Section 1, September 2010 Copyright 2010 MSC.Software Corporation
PAT301, Section 1, September 2010 Copyright 2010 MSC.Software Corporation
S2-12
Pantran 窗口中元素指定(续)
● 词表
● 指定– 交互式选取或手动输入元素 ID 的过程. ● 屏幕拾取 – 使用视窗和拾取工具选择元素的过程. ● 选择数据框 – 用于输入数据的窗口 ● 输入焦点 – 放入数据的数据框的指定. 把鼠标光标放于数据框上并点击鼠
PAT301, Section 1, September 2010 Copyright 2010 MSC.Software Corporation
reference菜单下有单个元素和元素集合的选取控制 选项 对于单个元素”Entity”选项,需拾取到元素的一部分才 能选中该元素。对于“Centroid”选项,则最接近光标 位置的元素将被选中。被推荐选中的元素既是默认选 中的元素。 对于矩形/多边形选取,只有完全或部分在图框内的元 素才被选中。默认选项是 “Enclose any …” ,推荐 “Enclose centroid” . 附加的工具用于辅助选取工程, 如 Cycle picking 预选设置是 加亮显示元素或元素标号
PATRANNASTRAN问题集锦

PATRANNASTRAN问题集锦1、PATRAN安装说明以安装目录为E:\MSC\为例做安装说明1)将光盘PATRAN2001R3放入光驱,双击SETUP,出现安装菜单,共需安装3个部分:PATRAN,NASTRAN,HELP VIEWER;先安装PATRAN,双击PATRAN开始安装。
2)安装PATRAN过程中全用默认设置,当要求输入LICENSE时点击NEXT即可,直到安装完成。
3)双击安装菜单中的NASTRAN ,开始NASTRAN 的安装,其中有MSC NASTRAN 和FLEXLM 7.2h License server两个模块,一次只能安装一个,分两次安装完。
安装完后不要重新启动机器。
4)将光盘根目录下的license.dat 文件复制到硬盘中,将属性中的只读去掉,用记事本打开进行编辑:(1)将第一行中的shi4改为本计算机的计算机名称。
(2)将第二行中的目录改为当前机器中MSC.EXE所在的路径,然后将其放到E:\MSC\FLEXLM\I386\中5)双击启动E:\MSC\FLEXLM\I386\中的LMTOOLS文件出现配置界面,选择SERVICE/LICENSE FILE卡片,选择configuration using services,再选择其下的flexlm license server。
选择configure services卡片,将LMGRD.EXE,LICENSE.DAT,LMGRD.LOG文件的路径改为当前机器中的正确路径,其下面的两个选项USE SERVICES和start server at powerup 都选上,然后点击SAVE SERVICE。
6)右击我的电脑-》属性-》高级-》环境变量-》系统变量-》添加变量,添加的变量名字为:MSC_LICENSE_FILE,变量的值为前面license.dat文件的路径。
7)再次启动E:\MSC\FLEXLM\I386\中的LMTOOLS,选择service/license file 卡片,其下面的选择与第5步中相同,再选start/stop/reread 卡片,点击start server。
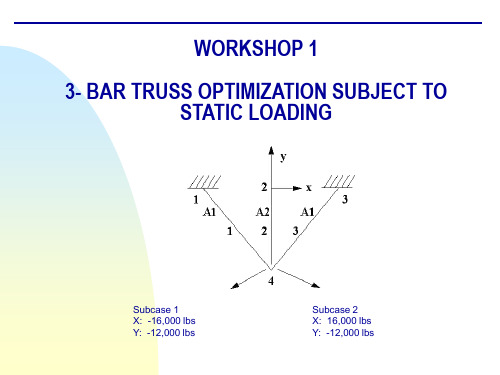
MSC优化Patran实例PPT课件
Step 3. Create New Nodes
a
Create new nodes a. Elements b. Create/Node/Edit c. Deselect Associate with
Geometry d. Enter [-10 0 0] for Node Location
List e. Apply
b c
d
e
z
f
Step 5. Create and Define the Material’s properties
a
Define a material using the specified modulus of elasticity and allowable stresses.
a. Materials b. Create/Isotropic/Manual Input c. Enter alum for Material Name d. Input Properties… e. Enter 10e6 for Elastic Modulus = f. Enter 0.3 for Poisson Ratio = g. Enter 0.1 for Density = h. OK i. Apply
for Node 2 = f. Apply
Repeat steps a – c with: Node 2 for Node 1 = Node 4 for Node 2 = and click Apply. Repeat steps a – c with: Node 3 for Node 1 = Node 4 for Node 2 = and click Apply.
alum with area of 1. 7. Create another 1-D rod with property set named prop_2 and sets its material
patran实例教程6.doc
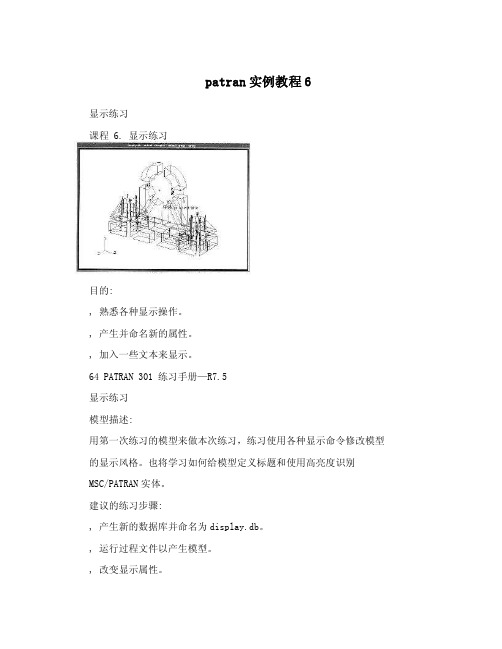
patran实例教程6显示练习课程 6. 显示练习目的:, 熟悉各种显示操作。
, 产生并命名新的属性。
, 加入一些文本来显示。
64 PATRAN 301 练习手册—R7.5显示练习模型描述:用第一次练习的模型来做本次练习,练习使用各种显示命令修改模型的显示风格。
也将学习如何给模型定义标题和使用高亮度识别MSC/PATRAN实体。
建议的练习步骤:, 产生新的数据库并命名为display.db。
, 运行过程文件以产生模型。
, 改变显示属性。
—关闭所有实体标号,打开表面标号,把显示风格改变成Shaded/Flat, 然后返回到Wireframe模式。
—按如下调整几何显示属性。
显示线=0 ,, 参数方向=ON, 弦的容差=1.0检查模型的显示,然后设置—, 弦的容差=0.005, 几何收缩=0.30—加入文本并显示。
产生标题:This is attest title 。
设置字符大小为18, 颜色为红色。
, 用高亮度来识别所显示的不同实体,如识别体19和体23的位置。
练习过程:1 产生新数据库并命名display.dbFile/New DatabaseNew Database Name display.dbOKNew Model PreferenceTolerance DefaultOK65 PATRAN 301 练习手册—R7.5显示练习2. 运行过程文件exercise_1.ses 来建立模型。
File/Session/Play…Play From File exercise_1.sesApply模型产生后,如下图。
3. 关掉表面标号。
Dis play/Entity Color/Label/Render…Entity Types Colors and Labels Surface: Label Apply4. 显示风格变为Shaded/flat, 并改变阴影颜色。
在Entity Color/Label/Render框上。
patran建模步骤 -回复
patran建模步骤-回复Patran建模步骤Patran是一款常用的有限元前后处理软件,用于建立有限元模型、进行前处理工作、对有限元计算结果进行后处理分析。
在进行Patran建模过程中,一般可以分为以下几个步骤。
步骤一:准备工作在进行Patran建模之前,需要准备相关的几何模型和材料数据。
对于复杂的几何模型,可以使用CAD软件绘制,并导入到Patran中;对于简单的几何模型,也可以在Patran中直接建立几何模型。
此外,还需要准备材料的物理性质数据,例如弹性模量、泊松比等。
步骤二:创建几何模型在Patran中创建几何模型的方法有多种,可以通过导入CAD文件、绘制几何形状等方式来实现。
如果是导入CAD文件,可以选择几何模型文件的格式(例如IGES、STEP等),然后按照相关提示导入CAD文件。
如果是在Patran中直接绘制几何模型,可以使用构建几何体的命令(例如点、线、平面、体等)来创建几何形状,并按照设计要求对几何模型进行编辑和变形。
步骤三:创建网格模型在Patran中创建网格模型是进行有限元分析的关键步骤。
网格模型的生成可以通过网格剖分来实现,可以选择不同的网格剖分算法和参数,以获得满足分析要求的网格模型。
在Patran中,可以使用自动剖分命令,也可以使用手动剖分命令来创建网格模型。
自动剖分命令一般适用于简单几何形状,而手动剖分命令适用于复杂几何形状。
在进行网格剖分时,还需要设置网格尺寸、单元类型、局部剖分等参数。
步骤四:定义边界条件在进行有限元分析之前,需要定义边界条件。
边界条件包括加载边界条件和约束边界条件。
加载边界条件是指施加在模型上的外部荷载,例如力、压力、温度等。
约束边界条件是指模型的约束条件,例如支撑、固定、禁止位移等。
在Patran中,可以通过加载定义命令和约束定义命令来分别定义加载边界条件和约束边界条件。
例如,可以选择加载的单元或节点,然后定义加载类型和大小;对于约束条件,可以选择需要约束的节点或边等,然后定义约束类型和大小。
patran动力分析中遇到问题总结

patran动力分析中遇到问题总结第一篇:patran动力分析中遇到问题总结一、Scratch DBset不够用,计算非正常终止f06文件的错误提示(一):*** USER FATAL MESSAGE 1221(GALLOC)THE PARTITION OF THE SCRATCH DBSET USED FOR DMAP-SCRATCH DATABLOCKS IS ER INFORMATION: THE DMAP SCRATCH PARTITION WILL NOT SPILL INTO THE 300-SCRATCH ER ACTION: 1.SET NASTRAN SYSTEM(151)=1, OR 2.INCREASE THE NUMBER OF MEMBERS, AND/OR THEIR MAXIMUM SIZE, FOR THE SCRATCH DBSET ON-THE “INIT” STATEMENT.说明:临时性数据库SCRATCH DBSET 满了,需要扩展该数据库规模以满足存储需求。
而且数据库300-SCRATCH 的空间没有让数据库SCRATCH DBSET共享。
解决方法(一):在rcf文件中添加:SYSTEM(151)=1 使数据库300-SCRATCH的空间能让让数据库SCRATCH DBSET 分享。
若还不能解决此问题,则计算非正常终止,出现 f06文件的错误提示(二):*** USER FATAL MESSAGE 1012(GALLOC)DBSET SCRATCH IS FULL AND TO BE ER ACTION: SEE THE MSC.NASTRAN INSTALLATION AND OPERATIONS GUIDE OR TAN 4893 ON THE MSC.WEB FOR METHOD TO MAKE LARGE DATABASE.说明:临时性数据库DBSET SCRATCH满了,需要扩充该数据库规模以满足存储需求。
patran加载问题

patran加载问题CID Distribute Force实验右图红色的部分为pressure加载粉红色的部分为Distribute Force加载可以看到的是只加载到了几个节点上,现在就是研究这种加载是否是我所想的加载方式。
分布力的单位为N/mm2验证:同时可以看出显示在节点是,虽然加载的实质是加载压强,但是显示的是我的输入值。
Total Force实验蓝色的载荷,为加载在一个FEM上的total force 施加的力为1000N,正方体的边长为1。
该单元的面积为0.25,可见显示为压强。
在之前的图的基础上,有加载元素选择为实体面的加载方式。
先看显示上,FEM面上的压强值变为了1000.同样用的加载方式是total force。
实验:先分析加载在整个面上的total force,在分析一个单元体上的total force。
更新实验:将四者的实验结果对比。
One sectionWholeWhole Section(四个单元是一起选中的),结果与whole相同结果是whole的四倍,结果正确总而言之,total force施加的是总载荷有变形图可以看到,total force 并不是加载在节点上的力,而是作用于面上的力。
最大应力为1060NPressure实验实验为使用Pressure为加载方式,加载的力为1000N。
实验的加载方式:图示为pressure的实验结果,加载pressure都为1000N从这张图可以看到,左侧的pressure的结果是与total force的结果是相同的。
现在探究的就是右侧的pressure是否正确这幅图用force做了一次。
对比force做的图与pressure做的图两者的变形状态是不同的。
Sub1为force做完的结果,sub3为pressure做的结果。
所以前面加载pressure的方式确实是平面压力的概念。
接下来,解决的是,加载的是压力还是压强大小方块加载的pressure都为1000N。
MSC Patran官方案例分享

8.patran官方案例Ⅳ-热-构造运动(en).pdf
9.patran官方案例Ⅳ-赫兹接触问题(en).pdf
MSC Patran官方案例
更新时间:2014-9-2六角网格几何图形(en).pdf
2.patran官方案例Ⅰ-使用列表和多点约束(en).pdf
3.patran官方案例Ⅰ-添加一个图标到工具栏(en).pdf
4.patran官方案例Ⅰ-使用矢量扫描六面体网格生成(en).pdf 5.patran官方案例Ⅰ-添加一个图标来快速提取(en).pdf 6.patran官方案例Ⅰ-质量特性计算(en).pdf
三、patran官方案例Ⅲ
1.patran官方案例Ⅲ-创建框架表面(en).ppt
2.patran官方案例Ⅲ-表面提取实例(en).ppt
3.patran官方案例Ⅲ-附录A(en).ppt
4.patran官方案例Ⅲ-二维网格连杆(en).ppt 5.patran官方案例Ⅲ-Parasolid实体示例(en).ppt 6.patran官方案例Ⅲ-框架表面模型的分析(en).ppt
6.patran官方案例Ⅱ-Exercise_05CAD热分析(en).pdf
7.patran官方案例Ⅱ-Exercise_07烤箱窗设计(en).pdf
8.patran官方案例Ⅱ-Exercise_08温度决定材料性质(en).pdf 9.patran官方案例Ⅱ-Exercise_09混合微电路的热分析(en) .pdf 10.patran官方案例Ⅱ-Exercise_10时间决定边界条件(en).pdf
7.patran官方案例Ⅲ-活塞头分析(en).ppt
8.patran官方案例Ⅲ-锚的材料和网格属性
9.patran官方案例Ⅲ-加筋板(en).ppt
patran操作实例文档
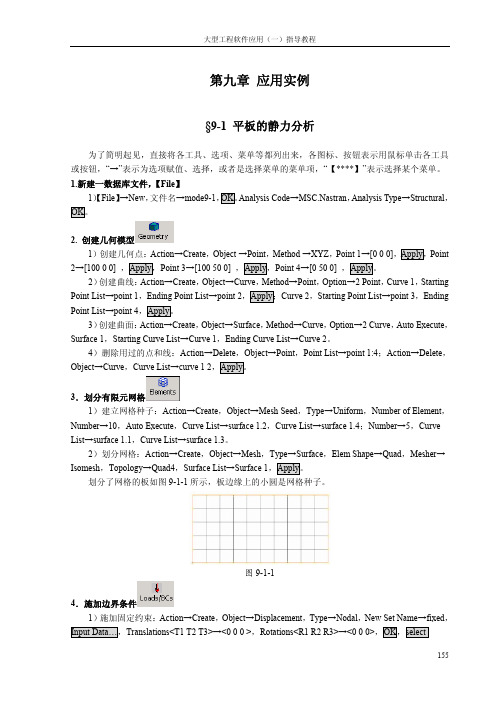
2)读入分析结果:Action→Accese Results,Object→attach XDB,Method→Results Entities,Select Results File…→mode9-1.xdb,OK,Apply。 3.后处理,
各阶模态的频率:在 Select Result Cases ቤተ መጻሕፍቲ ባይዱ,会列出结构的各阶频率,如图所示。
图9-1-2
5.定义各向同性的铝材料 1)定义材料:Action→Create,Object→Isotropic,Method→Manual Input,Material Name→
aluminium,Input Properties…,Constitutive Model→Linear Elastic,Elastic Modulus→70000,Poisson Ratio→0.3,OK,Apply。这里,创建了各向同性的铝材料,手工输入了杨氏模量和泊松比,对于各 向同性材料的静态分析,材料的独立弹性常数只有两个,也不必输入材料的密度值。
8.后处理, 1)显示位移云纹图:Action→Create,Object→Quick Plot,Select Result Cases→Default Static
Subcase,Select Fringe Result→Displacements Translational,Quantity→Magnitude,Apply。此时,平 板模型的位移云纹图就显示出来,如图 9-1-3 所示。
patran静力学分析操作(最新整理)

课程 14. 静态分析的建立目的:⏹回顾建立一个模型的全部必要步骤。
⏹懂得如何用MSC/PATRAN进行静态分析。
模型描述:在本练习中,将建立完整的MSC/PATRAN主框架模型,并用MSC/NASTRAN 进行相应静态分析。
图14-1具有网格控制点的四分之一对称模型。
图14-2表14-1单元类型: 四边形单元Quad8单元总体边界长度: 1.0"材料常数描述:名称: Steel弹性模量,E(psi): 29E6泊松比,ν: 0.30线弹性各向同性材料单元特性:名称: Prop1材料: Stee1厚度: 0.2"分析代码: MSC/NASTRAN分析类型: 完全线性静态分析分析求解参数: 线性静态。
分析翻译器: 文本输出 2(Text Output 2)格式。
分析输出项:位移、单元应力、单元应变能建议的练习步骤:⏹生成新的数据库并命名为Plate_hole.db。
⏹把Tolerance设为Default, Analysis Code设为MSC/NASTRAN。
⏹产生四分之一对称模型,用图14-2和表14-1的数据来划分有限元网格。
⏹等效并优化整个模型,校验是否所有单元的法向方向相同。
⏹根据表14-1定义材料特性和单元特性。
⏹对全部单元的上表面施加不均匀压力Pressure1。
⏹在模型适当位置载加位移边界条件。
把模型上下左右边界的位移约束分别命名为disp_lf, disp_rt, disp_tp和disp_bt。
⏹根据表14-1,为把模型用于分析运行做准备。
练习过程:1.生成新的数据库并命名为Plate_hole.db。
File/New Database...New Database Name Plate_hole.dbOK2.把Tolerance设为Default, Analysis Code设为MSC/NASTRAN。
New Model PreferenceTolerance DefaultAnalysis Code: MSC/NASTRANOK3. 产生四分之一对称模型,用图14-2和表14-1的数据来划分有限元网格。
PATRAN的一些精华小技巧

PATRAN的一些精华小技巧1、在Patran里如何Move 一组Points 的位置, 而不改变这组Points 的ID 编号? Group/Transform/Translate的功能,这样不但编号不会变, 连property跟边界条件都会保留2、Patran如何执行多次Undo?所有Patran的操作步骤, 都记录在最新的一个patran.ses.xx中,如果需要多次undo, 可以刪除最后不需要的步骤指令行,再利用File -> Session -> Play 的方式, 执行改过的patran.ses.xx ,这样可以无限制的undo。
3、Patran中如何定义杆件之间的铰接?用的是rod元素,不需要定义铰接,因为rod元间本身就是以铰接形式连接。
如果用bar或是beam,需在properties里的Pinned DOFs @ Node 1/2定义铰接。
4、Patran 如何把不小心Equivalence的node分开用Utility/FEM-Elements/Separate Elements在equivalence时, 可以將选项切换为"List",只选择特定某些节点作equivalence, 可以避免不小心的失誤。
5、Patran如何將Tri3单元转换为Tri6单元在Patran -> Element -> Modify/Element/Edit , 將Type选项打勾,在Shape中选Tri, New Shape 选Tri6, 最后选取想要改变的Tri3单元,6、Patran 如何定义材料库Patran除了可以直接读取MSC.Mvision的材料材料库外,还可利用执行Session File的方式,直接使用以前已经定义过的材料。
编辑patran.ses.xx,将定义材料的PCL指令剪下,粘贴到另外一个文件中(如mat.ses)。
之后便可直接由Patran的File/ Session/ Play来加入此一材料的定义。
patran错误日志及解决方法

2. USER WARNING MESSAGE 4124 (IFS3P)
THE SPCADD OR MPCADD UNION CONSISTS OF A SINGLE SET 在图中用了 RB3 的 MPC,其中 dependent node (ux,uy,uz), independent(ux,uy,uz,rx,ry,rz),有可 能是这里的问题。不过这个倒不影响计算结果。
^^^ RUN TERMINATED DUE TO EXCESSIVE PIVOT RATIOS IN MATRIX KLL. ^^^ USER ACTION: CONSTRAIN MECHANISMS WITH SPCI OR SUPORTI ENTRIES OR SPECIFY PARAM,BAILOUT,-1 TO CONTINUE THE RUN WITH MECHANISMS. 以前也遇到这种情况,这次遇到后,又在一节点加载了位移约束,就解决了。看来这 种错误主要是由于约束不够,线性方程组无解造成的。 还有可能是没有 equivalence,This should solve your problem or reduce the number of failed ratios.有一次就遇到此情况。
7. 常用材料定义对比表
MAT1 MAT2 MAT3 MAT8 MAT9
isotropic anisotropic(2) orthotropic(3) orthotropic(2) anisotropic(3) • Use a FORCE entry if you want to define a static, concentrated force at a grid point by 一个点的力 specifying a vector. • Use a FORCE1 entry if the direction is determined by a vector connecting two grid points. 两个点的力 • Use a FORCE2 entry if the direction is specified by the cross product of two such vectors. 以上的乘积
PATRAN的一些精华小技巧

PATRAN的一些精华小技巧1、在 Patran里如何Move一组Poin ts 的位置, 而不改变这组 Points的ID 编号? Group/Transf orm/Transl ate的功能,这样不但编号不会变, 连prope rty跟边界条件都会保留2、Patran如何执行多次Undo?所有Patr an的操作步骤, 都记录在最新的一个pa tran.ses.xx中,如果需要多次undo,可以刪除最后不需要的步骤指令行,再利用 File -> Sessio n -> Play 的方式, 执行改过的p atran.ses.xx ,这样可以无限制的und o。
3、Patran中如何定义杆件之间的铰接?用的是rod元素,不需要定义铰接,因为rod元间本身就是以铰接形式连接。
如果用bar或是bea m,需在prop ertie s里的Pi nnedDOFs @ Node 1/2定义铰接。
4、Patran如何把不小心Equiv alenc e的nod e分开用Utilit y/FEM-Elemen ts/Separa te Elemen ts在equiv alenc e时, 可以將选项切换为"List",只选择特定某些节点作e quiva lence, 可以避免不小心的失誤。
5、Patran如何將Tr i3单元转换为Tri6单元在Patra n -> Elemen t -> Modify/Elemen t/Edit , 將Type选项打勾,在Shape中选Tri, New Shape选Tri6,最后选取想要改变的Tr i3单元,6、Patran如何定义材料库Patran除了可以直接读取MS C.Mvisio n的材料材料库外,还可利用执行Sessi on File的方式,直接使用以前已经定义过的材料。
Patran基础教程08_场

Patran基础教程08_场Patran是一个用于有限元分析的预处理器,它提供了一个用户友好的界面,用于构建有限元模型、设置加载和边界条件,并生成输入文件供不同的有限元求解器使用。
场模拟是Patran的一个功能,它允许用户在有限元模型上应用不同类型的荷载和边界条件,并分析其影响。
首先,打开Patran软件并导入一个有限元模型。
然后,选择场模拟选项,进入场模拟界面。
在场模拟界面中,用户可以选择不同类型的荷载和边界条件,并将它们应用于模型。
常见的荷载类型包括压力、力和力矩,可以在图形界面中选择并指定其值。
边界条件可以是支撑、弹簧或固定,也可以在图形界面中选择并指定其参数。
在应用了所需的荷载和边界条件后,可以进行场分析。
选择一个适当的求解器,并设置分析选项,如求解方法、收敛准则和输出文件路径。
然后,启动场分析并等待结果。
一旦分析完成,可以查看和分析结果。
Patran提供了多种结果输出选项,如应力、位移和应变等。
这些结果可以以图形或表格的形式进行可视化,并可以进行进一步的分析和后处理。
总的来说,通过Patran的场模拟功能,用户可以快速且方便地对有限元模型应用不同类型的荷载和边界条件,并分析其影响。
这对于设计和优化工程结构以及预测其响应是非常有帮助的。
在实际工程应用中,场模拟在提高工程效率和减少设计成本方面发挥着重要作用。
此外,Patran还提供了其他功能,如模型导入、网格修复、后处理和结果可视化等。
这些功能的结合使Patran成为一款强大而全面的有限元分析软件。
无论是初学者还是有经验的工程师,都可以利用Patran的各种功能来解决复杂的工程问题。
总结起来,Patran基础教程08_场介绍了如何使用Patran进行场模拟,从导入模型到设定荷载和边界条件,再到进行场分析和结果后处理。
通过学习和掌握这些基础知识,用户可以更好地利用Patran的功能,并解决实际工程中的问题。
patran,PCL学习
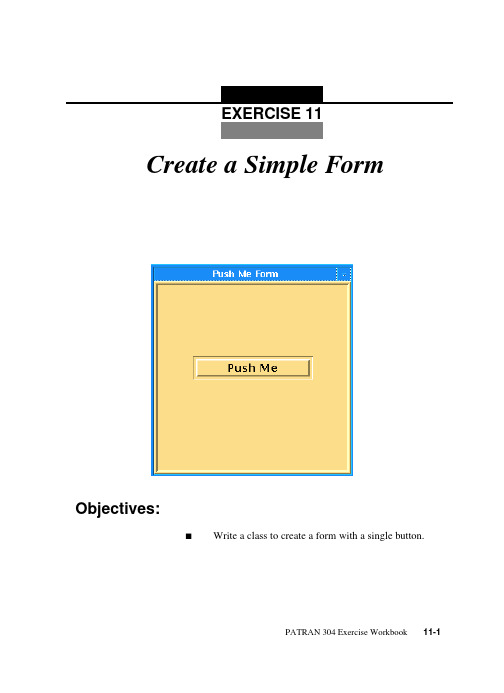
PATRAN 304 Exercise Workbook11-1EXERCISE 11Objectives:sWrite a class to create a form with a single button.Create a Simple Form11-2PATRAN 304 Exercise WorkbookEXERCISE 11Create a New FormPATRAN 304 Exercise Workbook 11-3Exercise Description:This exercise,class push_me,creates a new form called Push Me which contains a single button called Push Me.When pressed the button will execute a function to write a text string to the command window.Files:All the files that used in this exercise are listed below.Each list includes the file,where it originated,and a summary of information of how it relates to the exercise.FileSupplied/CreatedDescriptionexercise_11.templateSuppliedA template file that you may use to fill in the missing PCL calls that should be added to the function.push.pcl CreatedThis file should be created after all the blanks are filled in the exercise_12.template file.p3epilog.pcl CreatedThis file should be created in order to input the proper files into PATRAN upon start up.Exercise Procedure:1.Edit the PCL function in the fileexercise_11.template .Replace the blanks with the appropriate PCL expressions. Rename the file to push_me.pcl when you are done.The dimension parameters used for the example are 5inches from the left and 1inch from the top of the upper left corner of the screen.The form is 2.5inches tall by 2.5inches wide.The button is located 0.5inches form the left and 1inch form the top of the form.The button is 1.5inches wide with default height.When pressed it calls a function to print “You have just programmed your First Form” to the command window.11-4PATRAN 304 Exercise WorkbookYou may also use the template file your instructor will provide for you to add the missing PCL code.2.Compile the function.Type in the command:p3pclcompEnter the command !!input push_me.pcl into the p3compiler.All the error messages and diagnostics will be written in the xterm window.If no errors are found in the function test the function in MSC/PATRAN.3.To test the function create a p3epilog.pcl file in the directory from which you are going to invoke p3. The file should contain:!!input push_me.pcl !!input training.pcl training.init ()4.Start PATRAN, by typing p3,in the directory in which you just created the p3epilog.pcl file.Push Me FormPush Me1.5”2.5”.5”2.5”1.0”EXAMPLEEXERCISE 11Create a New FormPATRAN 304 Exercise Workbook 11-5Pull down the Training menu in the Main Window.Select the Exercise 11option.When the form appears,press the Push Me button.Your form should appear as shown.Press the button,Push Me,which resultsin the following display in the command window:You have just programmed your First Form!!!Sample Solution:/*$$ Use of PCL in creating customized forms/widgets** Purpose:*Create a simple form with a Single button.** Input:*<None>** Output:*<None>** Log:** Notes:**/CLASS push_me/* Variable initialization */CLASSWIDE widget form_id, @push_me_buttonFUNCTION INIT()/** Create the form*//* Insert the values for these parameters */form_id=ui_form_create(@/*callback*/*****1*****@/*x*/*****1*****@/*y*/*****1*****@/*position*/*****1*****@/*width*/*****1*****@/*height*/*****1*****@/*label*/*****1*****@/*iconname*/*****1*****) /** Create the “Push Me” button*/push_me_button = ui_button_create(@/*parent*/*****2*****@/*callback*/*****2*****@/*x*/*****2*****@/*y*/*****2*****@/*width*/*****2*****@/*height*/*****2*****@/*label*/*****2*****@/*labelinside*/*****2*****@/*highlight*/*****2*****) END FUNCTIONFUNCTION DISPLAY()11-6PATRAN 304 Exercise WorkbookEXERCISE 11Create a New FormPATRAN 304 Exercise Workbook 11-7ui_form_display( *****3*****)END FUNCTIONFUNCTION push_me_cb()ui_write(“You have just programmed your First Form!!”)ui_form_hide( *****4*****)END FUNCTION END CLASSE1x e r c i s eWo r k b o o kN304PAA1-8TRNote:Each*1* ““, 5.0, 1.0, “UL”, 2.5, 2.5, “Push Me Form”, ““*2* form_id, “push_me_cb”, 0.5, 1.0, 1.5, 0.0, “Push Me”, TRUE, TRUE*3* “push_me”*4* “push_me”。
patran实例教程10
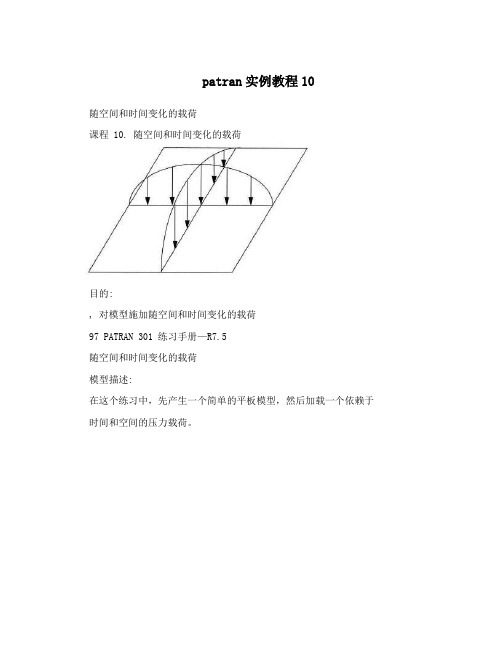
patran实例教程10随空间和时间变化的载荷课程 10. 随空间和时间变化的载荷目的:, 对模型施加随空间和时间变化的载荷97 PATRAN 301 练习手册—R7.5随空间和时间变化的载荷模型描述:在这个练习中,先产生一个简单的平板模型,然后加载一个依赖于时间和空间的压力载荷。
分析代码: MSC/NASTRAN单元类型: Quad4单元总体边长: 1.0压力载荷:P(x,y,z,t)=100sinr(πX/10)sinr(πy/10)cosr(10t)且 0? X ?10; 0? y ?10 ; 0? t ?230次增量;π=3.14159图 10-1建议的练习步骤:, 产生新数据库并命名为Variable_Loads.db。
, 把容差设置为缺省,分析代码设置为MSC/NASTRAN。
, 按图10-1,产生几何模型和有限元网格。
, 产生与时间相关的载荷工况,并命名my_load_case_1。
98 PATRAN 301 练习手册—R7.5随空间和时间变化的载荷 , 定义一个空间表达式并命名为:Pressure_Spatial: 100*sinr(3.14159*’X/10)*sinr(3.14159*’Y/10)。
, 定义一个时间相关表达式,并命名为Pressure_temporal:cosr(10*’t)。
, 通过XY—Plot功能来校验两个表达式。
, 生成压力载荷并命名为Pressure_1,把它包含在时间相关载荷工况my_load_case_1内。
用时间表达式和空间表达式来定义压力变量,并在全部单元的上表面施加这个压力。
, 关闭压力标号,只显示压力矢量。
, 关闭压力矢量,通过绘制压力载荷等高线来校验指定的压力。
练习过程:1(产生新数据库并命名为Variable_Loads.db。
File/New DatabaseNew Database Name Variable_Loads.dbOK2(把容差设置为缺省,分析代码设置为MSC/NASTRAN。
patran实例教程16

patran实例教程16位移结果的后处理课程16. 位移结果的后处理目的:, 通过检查MSC/NASTRAN 模型的变形,评估在生成网格密度和选择单元类型时所做假设的有效性。
, 使用“基本的”和“高级的”的结果后处理框。
185 PATRAN 301 练习手册—R7.5位移结果的后处理模型描述:本练习通过显示位移变形图来检查U形夹(模型同前)的分析结果。
特别是变形图、云图和位移矢量图。
建议的练习步骤:, 生成新的数据库并命名为clevis.db。
, 把Tolerance设为Default, Analysis Code设为MSC/NASTRAN。
, 通过读入MSC/NASTRAN 的Output 2文件 Clevis.op2来输入新的U形夹模型和结果,以便用于本次练习。
, 产生位移结果的变形图。
, 把U形夹模型的原始图关闭。
显示U形夹模型的正等侧(Isometricview)变形图。
用Hidden Line 显示风格来绘出变形图。
, 返回到U形夹模型的缺省视图(Default view),把变形比例因子(Deformation Scale Factor)增大至0.25。
, 产生Y方向的位移云图,重画关闭单元边界后的视图。
, 在U形夹的云图上,产生位移Y向分量矢量图。
把U形夹模型的显示风格改为线框模式。
把矢量比例因子改为0.25,并采用模型的比例长度。
, 关闭结果矢量图和试样色棒。
练习过程:1(生成新的数据库并命名为clevis.db。
File/New Database...New Database Name clevis.db186 PATRAN 301 练习手册—R7.5位移结果的后处理OK2(把Tolerance设为Default, Analysis Code设为MSC/NASTRAN。
New Model PreferenceTolerance Default Analysis Code: MSC/NASTRANOK3. 通过读入MSC/NASTRAN 的Output 2文件 Clevis.op2来输入新的U形夹模型和结果,以便用于本次练习。
patran,初学,入门,自学,实例3

课程 3. 连柄的几何模型目的:⏹从IGES文件中输入几何图。
⏹在MSC/PATRAN(Phase I)产生几何体。
模型描述:本练习,将产生一个由表面构成的连柄几何模型。
首先,输入一个IGES文件,此文件包含一个表面和一些曲线。
曲线将用来定义MSC/PATRAN 中裁剪面。
建议的练习步骤:⏹生成一个新的数据库,并命名为Con_rod.db。
模型近似最大尺寸是3单位,用MSC/NASTRAN作为分析代码。
⏹输入名为Con_rod.igs的IGES文件,关闭除曲线标号外的所有实体标号。
⏹把模型中所有外轮郭曲线链接在一起,成为第一个连续环。
⏹把内部表面的边界线链接成第二个连续环。
⏹用生成的两条环型曲线产生MSC/PATRAN中的表面,并在连柄顶部产生一圆孔。
练习过程:1. 产生一个新的数据库,并命名为Con_rod.db。
模型近似最大尺寸是3单位,用MSC/NASTRAN作为分析代码。
File/New Database…New Database NameNew Model PreferenceTolerance Based on ModelApproximate MaximumModel Dimension:Analysis Code:Analysis Type2.输入名为Con_rod.igs的IGES文件,关闭除曲线标号外的所有实体标号。
File/ImportObject :Source:IGES File:由于IGES格式数据文件的特点,当MSC/PATRAN发现有重复曲线时,将会问你如何处理。
当它问你是否希望产生一条重复曲线(Do you wish to Create a Duplicate Curve?)时,点击Not for All(全部不要)。
如果仅回答No, 则MSC/PATRAN遇到每一条重复线时都会向你提问。
而回答No for All,则MSC/PATRAN不会对每条重复线都向你提问,它告诉MSC/PATRAN不要产生任何一条重复线。
PATRAN问题汇集
开头先讲几句题外话吧,版内的讨论应该是各个层次的,有新手上路的,进阶的,也有一些专题讨论,版主已经整理了一些不错的帖子。
作为我个人来说,学习软件是为了解决工程问题的;否则就成技术支持了。
我想大多数人还是为了解决工程问题需要,才学习的吧。
我们的目的很明确,是希望借助软件去了解一些问题,最终的目的是为了验证产品是否合理。
因此在做cae的人们,我们别舍本求末,了解问题本身是前提。
言归正传总结下这段时间用patran时发现的一些错误提示,本人新手,如表述中有错误,大家指出,不要客气。
(1)提交计算时出现Some elements in the model have no types or properties defined. Do you wish to continue with thetranslation?开始接触时经常出现这个提示,用show-element查看单元时,也看到很多单元没有属性;觉得奇怪,因为属性已经定义给实体的,怎么会没有呢?因为实体和网格没完全关联好,所以某些单元就没有属性了。
特别是经常修改网格后,常出现这种问题。
现在我一般每次划分网格时,直接把属性定义进去;或者在属性里直接赋予给单元,基本就不会有这个错误了。
(2)Please ensure your P3_TRANS.INI or site_setup file correctly points to the solver executable or that you have correctly set the proper environment variables to do the same.Error executing subprogram. Reason (errno) = 2.Nosuch file or directory开始碰到时,也没注意,因为有时候有提示,有时候又没有,可以得到bdf,然后到nastran计算。
- 1、下载文档前请自行甄别文档内容的完整性,平台不提供额外的编辑、内容补充、找答案等附加服务。
- 2、"仅部分预览"的文档,不可在线预览部分如存在完整性等问题,可反馈申请退款(可完整预览的文档不适用该条件!)。
- 3、如文档侵犯您的权益,请联系客服反馈,我们会尽快为您处理(人工客服工作时间:9:00-18:30)。
LESSON 1Linear and Nonlinear Analysis of a Cantilever BeamObjectives:s Small vs. large displacement analysis.s Linear elastic theory.PATRAN 322 Exercise Workbook1-11-2PATRAN 322 Exercise WorkbookLESSON 1Linear and Nonlinear Analysis of BeamPATRAN 322 Exercise Workbook1-31-4PATRAN 322 Exercise WorkbookExercise Procedure:1.Open a new database. Name it tip_loadType p3 in your xterm. The Main Window and Command Window will appear. The viewport (PATRAN’s graphics window) will appear along with a New Model Preference form. The New Model Preference sets all the code specific forms and options inside MSC/PATRAN.In the New Model Preference form set the Analysis Code to MSC/Advanced_FEA.2.Create the model geometry.The surface in Figure 1.1 will appear in your viewport.File/New ...New Database Name:tip_loadOKTolerance:x Based on Model Analysis Code:MSC/ADV ANCED_FEA Analysis Type:Structural OK x Geometry Action: Create Object: Surface Method:XYZ Vector Coordinate List:<100, 2, 0>ApplyLESSON 1Linear and Nonlinear Analysis of BeamPATRAN 322 Exercise Workbook 1-5Figure 1.1 - Surface for the Cantilever Beam3.Create the finite element mesh.Click in the Curve List databox and screen select the bottom edge of the surface.x Finite Elements Action: Create Object: Mesh Seed Type: Uniform Number:8Curve List:pick bottom edge (see Figure 1.2)XY Z1-6PATRAN 322 Exercise WorkbookFigure 1.2 - Mesh Seed LocationNow create a mesh seed for the left edge of the beam 4.Create the model’s finite element mesh. On the Finite Element form change:Number:1Curve List:pick left edge (see Figure 1.2)Action: Create Object: Mesh Type:Surface Element Topology:Quad 4Surface List:Surface 1ApplyXY ZBottom Edge (Surface 1.4)Left Edge (Surface 1.1)LESSON 1Linear and Nonlinear Analysis of BeamPATRAN 322 Exercise Workbook1-75.Now create the material and element properties for the beam. The beam is made of a Linear Elastic material with Young’s modulus of 30.0E6 lb/in 2, with a Poisson’s ratio of 0.3 and a mass density of 0.00074.6.Input the properties of the Cantilever Beam under Properties. The beam will be assigned an incompatible modes element formulation. These elements are designed for conditions where bending is the predominate loading.x Materials Action: Create Object: Isotropic Method: Manual Input Material Name:steelInput Properties...Constitutive Model:Elastic Elastic Modulus:30.0E6Poisson’s Ratio:0.3Density:0.00074Apply Cancel x Properties Action: Create Dimension: 2D Type:2D Solid Property Set Name:beamOptions:Plane StressIncompatible ModesInput Properties...1-8PATRAN 322 Exercise Workbook7.Now apply the loads and boundary conditions. The left end of the beam is fixed in all active degrees of freedom.Figure 1.3 - Fixed end of beamMaterial Name:steel Thickness: 1.0OKSelect Members:Surface 1Add Apply x Loads/BCs Action: Create Object: Displacement Type: Nodal New Set Name:fixedInput Data...Translations:<0, 0 >OKSelect Application Region...Geometry Filter:x GeometrySelect Geometric Entities:see Figure 1.3Add OK ApplySelect points 1:2LESSON 1Linear and Nonlinear Analysis of BeamPATRAN 322 Exercise Workbook 1-98.Next, you will create the point load that totals 6000 lbs at the end of the beam.Figure 1.4 - Free end of beamYour model should now look like the picture shown in Figure 1.5:x Loads/BCs Action: Create Object: Force Type: Nodal New Set Name:tip_loadInput Data...Force:<0, -3000 >OKSelect Application Region...Geometry Filter:x Geometry Select Points:see Figure 1.2Add OK Apply1212Select points 3:41-10PATRAN 322 Exercise WorkbookFigure 1.5 - Beam with applied Loads/BCs9.Your model is now ready for analysis. You will be using the Default Static Step to perform this analysis. The default static step is an analysis step which runs a Linear Static solution on the corresponding Default load case.10.When the analysis job is finished read the results back into PATRAN.11.We will now use MSC/PATRAN to post process the results of the linear static analysis.x Analysis Action: Analyze Object: Entire Model Method: Full Run Job Name:linearApply x Analysis Action: Read Results Object: Result Entities Method: Translate Available Jobs:linear Select Results File...linear.filOk Apply x Results Action:Create121213000.3000.LESSON 1Linear and Nonlinear Analysis of BeamPATRAN 322 Exercise Workbook 1-11Your screen will appear like Figure 1.6:Figure 1.6 - Beam Deformation (scaled)12.The plot that you see is a scaled version of the real deformation. To remove the scaling factor click on the Deformation Attributes icon:Object:Quick PlotSelect Results Case:Default, Step 1, Total Time=0Select Fringe Result:Deformation,Displacement Select Deformation Result:Deformation, DisplacementApplyScale Factor: 1.0ApplyX Y Z 3.00+033.00-31 3.00+039.07+0112 129.07+018.46+017.86+017.25+016.65+016.05+015.44+014.84+014.23+013.63+013.02+012.42+011.81+011.21+016.05+000.default_Fringe :Max 9.07+01 @Nd 9Min 3.00-31 @Nd 1 default_Deformation :Max 9.07+01 @Nd 9XY ZFinally, to see the whole plot, click on the Zoom outicon from thetoolbar.Your model should appear as shown in Figure 1.7:Figure 1.7 - Beam Deformation (actual)Cancel1-12PATRAN 322 Exercise WorkbookLESSON 1Linear and Nonlinear Analysis of BeamPATRAN 322 Exercise Workbook 1-13Linear beam theory predicts the maximum beam deflection in the Y-direction and stress to be:orwhere b = 2 “ and a = 1”The maximum Y deflection of the beam can be taken directly off of the displayed spectrum/range. The largest value should correspond to a magnitude of 99.64, which is in very close agreement with our hand calculation of 100.Linear beam theory assumes plane section remain plane and the deflection is small relative to length of the beam. As can be clearly seen by this analysis, the deflection is very large and this analysis is in violation of the underlying assumptions used for linear beam theory. These results match the linear hand calculations and also show that the small deformation assumption is not valid and therefore, a non-linear,large deformation analysis needs to be performed. In large deformation analysis, the bending and axial stiffness are coupled.Thus, as the cantilever beam deflects, a portion of the load P puts the beam in tension which tends to stiffen the beam in bending (i.e.“geometric stiffness”). Thus, one would expect to see a much smaller deformation in the large deformation analysis as compared to the small deformation analysis. To set up a large deformation analysis,one needs to change the analysis set-up and re-submit the job to MSC/Advanced_FEA.6PL a b ()2-------------U max6000100()34××,306×101()2()3××------------------------------------------------100==U maxPL 3()3EI--------------=σmax M max b×I----------------------=σmax 66000100×,×12()2×---------------------------------------900,000==4PL 3E ab3×------------------1-14PATRAN 322 Exercise WorkbookPart 2 - NonLinear Analysis13.Now set up a Large Displacement Analysis by creating a nonlinear static step. You will use the same default load case and use the default solution parameters and output for the nonlinear static solution.Select nonlinear elastic analysis from the Existing Job Steps listbox.Deselect the Default Static Step step by clicking on it once in the Selected Job Steps listbox. Open another Unix Shell. After the job starts to run, Advanced Finite Element Analysis creates several files that can be used to monitor the job and verify that the analysis has run correctly. The first file is nonlinear.msg . This ASCII file contains Element, Loads & Boundary Conditions, Material Translation, Step Control parameters,Equilibrium and Error information. When the job completes, this file contains an Analysis Summary which summarizes the error and iteration information. Another useful ASCII file is the nonlinear.sta file. This file contains a summary of job information; including step number, number of increments, number of iterations, total time of step, and time of a given increment. These files can be viewed during or after a job has completed using more or tail commands.ie:more nonlinear.stax Analysis Action: Analyze Object: Entire Model Method: Full Run Job Name:nonlinearStep Creation...Job Step Name:nonlinear elastic analysis Solution Types:Nonlinear StaticApply Cancel Step Selection...Apply ApplyLESSON 1Linear and Nonlinear Analysis of BeamPATRAN 322 Exercise Workbook 1-1514.Read in the results of the analysis15.Now we will post process the nonlinear analysis and compare these results to the linear static analysis.x Analysis Action: Read Results Object: Result Entities Method: Translate Available Jobs:nonlinearSelect Results File...nonlinear.filOK Apply x Results Action: CreateObject:Quick PlotSelect Results Case:Default, Step 1, Total Time=0Select Fringe Result:Deformation,Displacement Result Quantity:Y ComponentSelect Deformation Result:Deformation,DisplacementApply1-16PATRAN 322 Exercise WorkbookAs a final step, get the maximum Y deflection from the fringe spectrum/range. Enter that value into the table below. Anotherinteresting post-processing technique is to create an animation by selecting the Animate Results Icon in the Results form.As shown in the results obtained, inclusion of large deformation effects are very important in realistically modeling the physical behavior of the cantilever model.16.Quit out of MSC/PATRANTable 1: Small DeflectionLarge DeflectionMSC/Advanced_FEA Theory-100.0------File/Quit。
