Unity3D常用代码总结
unity3d怎么控制对象移动涉及的知识点
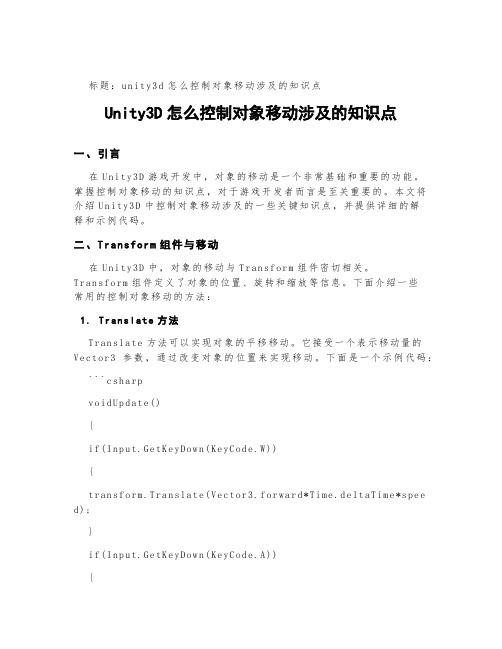
标题:u ni ty3d怎么控制对象移动涉及的知识点Unity3D怎么控制对象移动涉及的知识点一、引言在U ni ty3D游戏开发中,对象的移动是一个非常基础和重要的功能。
掌握控制对象移动的知识点,对于游戏开发者而言是至关重要的。
本文将介绍Un it y3D中控制对象移动涉及的一些关键知识点,并提供详细的解释和示例代码。
二、T r a n s f o r m组件与移动在U ni ty3D中,对象的移动与T ra ns fo r m组件密切相关。
T r an sf or m组件定义了对象的位置、旋转和缩放等信息。
下面介绍一些常用的控制对象移动的方法:1.T r a n s l a t e方法T r an sl at e方法可以实现对象的平移移动。
它接受一个表示移动量的V e ct or3参数,通过改变对象的位置来实现移动。
下面是一个示例代码:```c sh ar pv o id Up da te(){i f(I np ut.G et Ke yDo w n(Ke yC od e.W)){t r an sf or m.Tr an sla t e(Ve ct or3.fo r wa r d*Ti me.d el ta Tim e*s pe e d);}i f(I np ut.G et Ke yDo w n(Ke yC od e.A)){t r an sf or m.Tr an sla t e(Ve ct or3.le ft*T im e.de lt aT im e*s p ee d);}//其他方向的移动代码...}```2.R o t a t e方法R o ta te方法可以实现对象的旋转。
它接受一个表示旋转角度的V e ct or3参数,通过改变对象的旋转来实现旋转效果。
下面是一个示例代码:```c sh ar pv o id Up da te(){i f(I np ut.G et Ke yDo w n(Ke yC od e.Q)){t r an sf or m.Ro ta te(V ec to r3.u p,ro tat e Sp ee d);}i f(I np ut.G et Ke yDo w n(Ke yC od e.E)){t r an sf or m.Ro ta te(V ec to r3.d ow n,rot a te Sp ee d);}//其他方向的旋转代码...}```3.M o v e T o w a r d s方法M o ve To wa rd s方法可以实现对象的线性插值移动。
Unity3D一些比较基本的脚本及组件(C#)

Unity3D⼀些⽐较基本的脚本及组件(C#)通过代码创造图形//创建顶点,创建序列,创建⽹格,然后把⽹格赋给⽹格序列器//draw a trianglevoid Start () {Vector3[] vs = new Vector3[3];vs[0] = new Vector3(0,0,0);vs[1] = new Vector3(1,0,0);vs[2] = new Vector3(0,1,0);int[ts] = new int[3];ts[0] = 0;ts[1] = 1;ts[2] = 2; //要注意顺序,要⽤左⼿系,法线向外,拇指向外Mesh mesh = new Mesh();GetComponet<MeshFilter>().mesh = mesh;mesh.vertices = vs; // vertices⾄⾼点mesh.triangles = ts;}///* */////draw a triangle程序封装代码public GameObject Create Triangle(){GameObject obj = new GameObject(“Triangle”);MeshFilter mf = obj.AddComponet<MeshFilter>();obj.AddComponent<MeshRender>();Mesh mesh = new Mesh();mesh.vertices = nes[]{new Vector3(0,0,0);new Vector3(3,0,0);new Vector3(0,3,0);};mesh.triangles = new[]{0,2,1//不⽤分号,初始化系,直接把初始值放进去};mf.mesh = mesh;return obj;}Camera 的性质与使⽤public CameraClearFlags clearFlags; //clearFlags是相机清除表识public ColorbackgroundColor; //给定他的颜⾊,背景⾊,只有单⾊才起作⽤public int cullingMask; //提出掩码public class chapter6 : MonoBehaviour{public GameObject cube;void Start(){ber = 9; //把cube设置在第9层Camera cam = this.GetComponet<Camera>()’cam.clearFlags = CameraClearFlags.SolidColor;cam.backgroundColor = new Vector3(1,0,0,0); //表⽰设置颜⾊cam.cullingMask = 9; //表⽰第9层的都不会被渲染出来,也就是说cube不会显⽰出来}}//CameraClearFlags是⼀个枚举类型,有以下四个成员:solidColor 表⽰⽤backgroundColor所制定的填充背景skybox 表⽰天空盒,模拟天空效果填充Depth 只是清除深度缓存,保留上⼀帧所使⽤的颜⾊Nothing 不进⾏背景清除,这种情况在游戏和模拟应⽤中⽐较少⽤public bool orthographic;//⽤于读取和设定相机的投影⽅式,如果为true则表⽰是正交投影,否则为透视投影;正交投影可⽤于UI和2D开发public float orthographicSize; //⽤以指定正交投影的视景体的垂直⽅向尺⼨的⼀半public Rect rect; //相机对应的视⾓⼝的位置和⼤⼩,rect以单位化形式制定相机视⼝在屏幕中的位置和⼤⼩,位置⼤⼩取值范围为0~1,满屏为1Camera main = this.gameObject.GetComponet<Camera>();this.gameObject.SetActive(false);Camera cam0 = camGO0.AddComponet<Camera>();cam0.orthographic = true;cam0.transform.position = main.transform.position;cam0.transform.rotation = main.transform. rotation;cam0.orthographicSize = 2.0f; //指物体渲染后显⽰的⼤⼩远近,数值越⼤,相机视⼝越靠近该物体,从⽽该物体显⽰出来的更加⼤cam0.rect = new Rect(0f,0f, 0.5f, 0.5f); //前两个参数是camera的位置,后⾯两个参数设置相机⼤⼩(0.5f,0.5f)表⽰占x轴的⼆分之⼀,y轴的⼆分之⼀,所以总共占渲染窗⼝的四分之⼀Camera cam1 = camGO1.AddComponet<Camera>();cam1.orthographic = true;cam1.transform.position = main.transform.position;cam1.transform.rotation = main.transform. rotation;cam1.orthographicSize = 7.0f;cam1.rect = new Rect(0.5f, 0.5f, 0.5f, 0.5f);}Material,Shader,Texture(材质,着⾊器,纹理)光照、纹理等让物体更加的真实。
Unity 3D 三款游戏完整(入门+进阶必备)代码
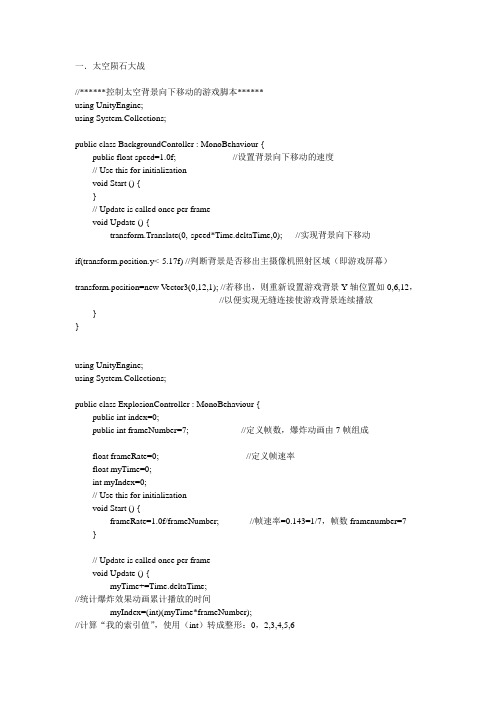
myTime+=Time.deltaTime;
//统计爆炸效果动画累计播放的时间
myIndex=(int)(myTime*frameNumber);
//计算“我的索引值”,使用(int)转成整形:0,2,3,4,5,6
//Debug.Log("(int)(myTime*frameNumber)");
//若当前获得分数大于之前本地保存的最高分
highScore=RockController.score;//保存最高分变量
PlayerPrefs.SetInt("HighScore",RockController.score);//更新最高分
}else
highScore=PlayerPrefs.GetInt("HighScore"); //否则继续保存本地最高分
//Debug.Log((int)(myTime*frameNumber));
index=myIndex%frameNumber;
//除以7求余数得索引:0,2,3,4,5,6
//Debug.Log(myIndex%frameNumber);
renderer.material.mainTextureScale=new Vector2(frameRate,1);
// Use this for initialization
void Start () {
}
// Update is called once per frame
void Update () {
transform.Translate(0,-speed*Time.deltaTime,0); //实现背景向下移动
Unity3D简单的怪物AI代码(C#脚本)
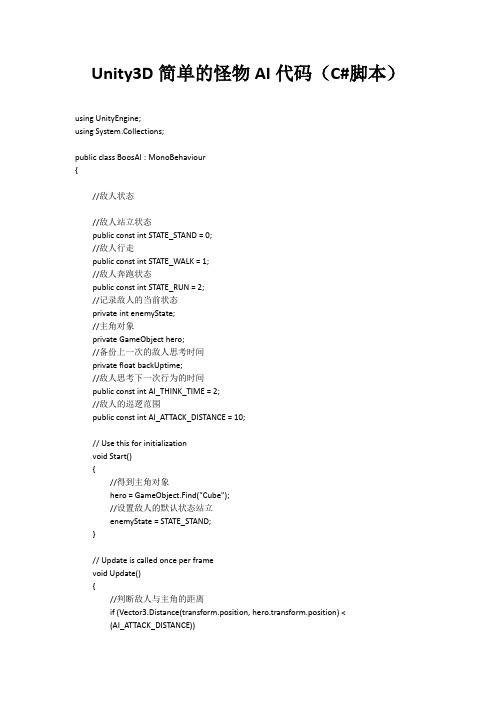
Unity3D简单的怪物AI代码(C#脚本)using UnityEngine;using System.Collections;public class BoosAI : MonoBehaviour{//敌人状态//敌人站立状态public const int STATE_STAND = 0;//敌人行走public const int STATE_WALK = 1;//敌人奔跑状态public const int STATE_RUN = 2;//记录敌人的当前状态private int enemyState;//主角对象private GameObject hero;//备份上一次的敌人思考时间private float backUptime;//敌人思考下一次行为的时间public const int AI_THINK_TIME = 2;//敌人的巡逻范围public const int AI_ATTACK_DISTANCE = 10;// Use this for initializationvoid Start(){//得到主角对象hero = GameObject.Find("Cube");//设置敌人的默认状态站立enemyState = STATE_STAND;}// Update is called once per framevoid Update(){//判断敌人与主角的距离if (Vector3.Distance(transform.position, hero.transform.position) <(AI_ATTACK_DISTANCE)){//敌人进入奔跑状态gameObject.animation.Play("run");enemyState = STATE_RUN;//设计敌人面朝主角方向transform.LookAt(hero.transform);}//敌人进入巡逻状态else{//计算敌人的思考时间if (Time.time - backUptime >= AI_THINK_TIME){//敌人开始思考backUptime = Time.time;//取得0~2之间的随机数int rand = Random.Range(0,2);if (rand == 0){//敌人进入站立状态gameObject.animation.Play("idle");enemyState = STATE_STAND;}else if (rand == 1){//敌人进入站立状态//敌人随机旋转角度Quaternion rotate = Quaternion.Euler(0,Random.Range(1,5) * 90,0);//1秒内完成敌人旋转transform.rotation = Quaternion.Slerp(transform.rotation,rotate,Time.deltaTime * 1000);//播放行走动画gameObject.animation.Play("walk");enemyState = STATE_WALK;}}}switch (enemyState){case STATE_STAND:break;case STATE_WALK://敌人行走transform.Translate(Vector3.forward * Time.deltaTime);break;case STATE_RUN://敌人朝向主角奔跑if (Vector3.Distance(transform.position, hero.transform.position) > 3){transform.Translate(Vector3.forward * Time.deltaTime * 3);}break;}}}。
unity3D学习知识点总结

1.unity简介和安装(x)2.unity基础操作unity窗口界面介绍1.Scene场景编辑窗口(Q、W、E、R、T/按住鼠标右键—旋转视角、按住鼠标右键Q、E、W、S、A、D)2.Game游戏运行窗口(运行按钮,暂停按钮,下一帧画面)3.Hierar chy 场景物体列表窗口(三角符号表示物体间的父子关系)4.Projec t 项目资源列表窗口(与文件夹对应,mete文件,移动尽量在u nity中移动而不是在文件夹中移动,可能报错)5.Inspec tor 属性编辑列表窗口(选中Hier archy物体,出现物体相关属性)6.Console 控制台输出窗口7.其他常用窗口:Layers(层)2by3(显示模式)unity菜单界面介绍1.file 文件菜单2.edit 编辑菜单3.Assets资源菜单4.Gameobject物体资源菜单pon ent 组件菜单6.Window窗口菜单7.Help 帮助菜单Scene与场景漫游1.Scene窗口各项工具Q、W、E、R按住鼠标右键Q、W、E、RPivot物体自己的中心/center所有物体加权之后的中心Global 世界坐标/local自身坐标Textur ed Wite/render Paths显示2D/3D2.快捷键与视角的移动Hierar chy与场景搭建1.Gameobject:基本组件gameobject—>create other2.Gameob ject:灯光组件3.Gameobject:物体组件4.Gameobject:其他组件5.Hierar chy层级关系与应用6.场景搭建案例Projec t与资源管理Inspec tor与游戏组件3.C#语言基础C#的值类型C#的引用类型C#的类型转换C#的逻辑语句C#的集合类型C#的面向对象特性封装、继承、多态Unity协程:和线程的区别:没有异步同步的概念,每一帧都执行(有内容的情况);协程的作用:1)延时(等待)一段时间执行代码;2)等某个操作完成之后再执行后面的代码。
unity3d知识点总结

unity3d知识点总结摘要:一、Unity3D简介与基本概念1.Unity3D发展历程2.Unity3D引擎特点3.基本概念:场景、游戏对象、组件二、Unity3D常用功能与技术1.界面与交互设计2.物理引擎3.动画系统4.网络通信5.音频处理6.图像处理与渲染三、Unity3D开发流程与方法1.项目规划与管理2.模块划分与设计3.编程模式与架构4.代码优化与调试四、Unity3D实战案例与技巧1.经典游戏案例分析2.跨平台发布与兼容性处理3.高效开发工具与插件4.性能优化技巧五、Unity3D未来发展趋势与展望1.行业应用领域2.技术创新与演变3.我国Unity3D发展现状与前景正文:一、Unity3D简介与基本概念Unity3D是一款非常受欢迎的跨平台游戏引擎,其发展历程可以追溯到2005年。
至今,Unity3D已经成为了游戏开发领域的重要力量。
Unity3D引擎具有以下特点:1.跨平台:支持Windows、Mac、Linux、Android、iOS等多种操作系统,便于开发者快速发布作品。
2.强大的图形渲染能力:Unity3D采用C#语言进行编程,结合强大的图形渲染引擎,为开发者提供了丰富的视觉效果。
3.丰富的生态系统:Unity3D拥有庞大的开发者社区,提供了丰富的插件、资产和教程,方便开发者学习和使用。
4.易于上手:Unity3D的操作界面友好,即使是对编程零基础的开发者也能快速上手。
在Unity3D中,基本概念包括场景、游戏对象和组件。
场景是游戏世界的容器,游戏对象是场景中的实体,而组件则是游戏对象的属性或功能。
二、Unity3D常用功能与技术1.界面与交互设计:Unity3D提供了丰富的UI组件,方便开发者设计美观且易于操作的游戏界面。
2.物理引擎:Unity3D内置了NVIDIA PhysX物理引擎,可以模拟真实世界的物理效果,如碰撞、摩擦力和重力等。
3.动画系统:Unity3D支持骨骼动画、面部动画等多种动画形式,为游戏角色赋予生动的表现。
unity代码汇总

父子节点相关的:parent 变量表示Transform的父节点root 表示它的根节点,如果没有父节点,它会返回自己Transform Find(string name) 根据名字查找子节点bool IsChildOf(Transform node) 判断该Transform是否某Transform的子节点void DetachChildren() 解除所有子节点的父子关系1.通过名字找物体GameObject.Find("Player")2.通过名字寻找物体子集transform.FindChild("物体子集名字")3. 显示和隐藏物体gameObject.SetActive(true);4.使用和关闭物体代码gameObject.GetComponent<代码名字>().enable=true;5.按下动画事件if (Input.GetMouseButton(0))按下事件if (Input.GetMouseButtonDown(0))抬起事件if (Input.GetMouseButtonUp(0))6.销毁一样标签的物体GameObject [] objs = GameObject.FindGameObjectsWithTag("标签名");foreach(GameObject obj in objs){Destroy(obj);}7.物体水平匀速移动transform.Translate(-0.1f*Time.deltaTime,0,0);8.<<是除以2,>>是乘以29.位置相关的:5个和位置相关的Vector3类型变量up表示世界坐标的Y轴方向right表示世界坐标的X轴方向forward表示世界坐标的Z轴方向position表示对象在世界坐标系中的位置localPosition表示对象相对父节点变换的坐标位置10.改变物体颜色obj.renderer.material.color=Color.red11. 2个Quaternion类型的变量rotation在世界坐标系中的旋转角度,是一个Quaternion对象(四元数)localRotation相对于父节点的旋转角度12.父子节点相关的:parent变量表示Transform的父节点Transform Find(string name)根据名字查找子节点bool IsChildOf(Transform node)判断该Transform是否某Transform的子节点void DetachChildren()解除所有子节点的父子关系13.鼠标:Input.mousePosition表示鼠标当前的像素位置(坐标系如何?以左下角为原点)接下来这三个函数的参数,0左键,1右键,2中键GetMouseButton对应的键处于按下状态时返回trueGetMouseButtonDown对应的键被按下时返回trueGetMouseButtonUp对应的键弹起时返回true14.OnMouseDown 当鼠标点击到对象的时候回调OnMouseDrag当鼠标拖拽对象时调用,在Ignore Raycast层上无效OnMouseEnter当鼠标进入对象时调用OnMouseExit当鼠标离开对象时调用OnMouseOver当鼠标停留在对象上面时调用OnMouseUpAsButton鼠标在同一个对象上按下,并弹起时调用OnMouseUp跟楼上一样15. gameObject.transform.rotation= new Quaternion (Player.transform.rotation.x, Player.transform.rotation.y, Player.transform.rotation.z, Player.transform.rotation.w);gameObject和Player旋转角度一样!16. 俩个物体之间的距离float Distancefloat Distance = Vector3.Destance(position1,position2);17. 如果玩家和敌人的距离小于10,执行{}代码if( Vector3.Destance(敌人.position,玩家.position)<10f){// 执行相应代码}18.Animation动画01.倒回播放Animation.Rewind();02.停止所有动画Animation.Stop();停止动画Animation.Stop(“动画名字”);03.使用动画循环模式Animation.WropMode= WropMode.loop;04.等待动画播放完成animation.Play(); yiel WaitForSeconds(animation.Clip.Length);05.打印动画长度print(animation["动画名字"].Length);19.数组foreach(Texture2D[] ta in 当前数组){数组长度+=ta.Length;// 加载数组的长度}20.切换关卡的时候,this不移除(this=脚本赋予的对象)DontDestoryOnLoad(this);21.while 是先判断条件,再执行语句。
Unity3D常用代码
} else {
if ((Screen.width / (float)Screen.height) < (screenSize.x / screenSize.y)) {
if (scaleType == ScreenScaleType.Fit) {
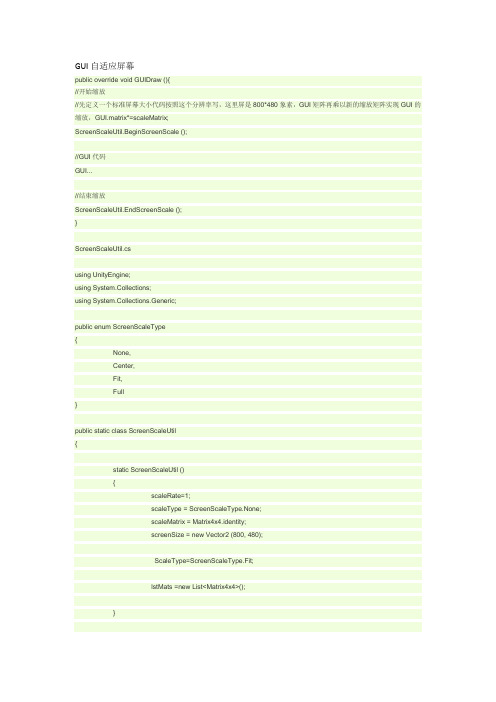
GUI自适应屏幕
public override void GUIDraw (){
//开始缩放
//先定义一个标准屏幕大小代码按照这个分辨率写,这里屏是800*480象素,GUI矩阵再乘以新的缩放矩阵实现GUI的缩放,GUI.matrix*=scaleMatrix;
ScreenScaleUtil.BeginScreenScale ();
}
public static void EndScreenScale(){
if(lstMats.Count<=0)
return;
GUI.matrix=lstMats[lstMats.Count-1];
lstMats.RemoveAt(lstMats.Count-1);
}
}
1 GUI汇总
function OnGUI() {
GUI.matrix*=ScaleMatrix;
}
public static void BeginScreenScale(ScreenScaleType scaleType ){
if(lstMats.Count>0){s.Add(GUI.matrix);
GUI.matrix*=GetScreenScaleMatrix(screenSize,scaleType);
screenSize = new Vector2 (800, 480);
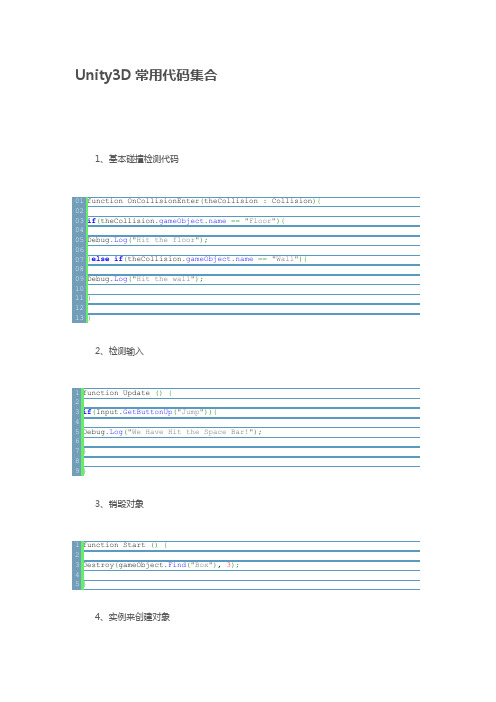
Unity3D常用代码集合
}
}
2、检测输入
function Update(){
if(Input.GetButtonUp("Jump")){
Debug.Log("We Have Hit the Space Bar!");
}
}
3、销毁对象
function Start(){
Destroy(gameObject.Find("Box"),3);
}
建立JAVA,把代码拖入到空GameJect上,然后把Prefab拖入到公共变量上。
5、简易定时器
varmyTimer:float=5.0;
function Update(){
if(myTimer>0){
myTimer-=Time.deltaTime;
}
if(myTimer<=0){
Debug.Log("GAME OVER");
Unity3D常用代码集合
1、基本碰撞检测代码
function OnCollisionEnter(theCollision:Collision){
if(=="Floor"){
Debug.Log("Hit the floor");
}elseif(=="Wall"){
}
}
6、物体在屏幕上移动
varspeed:float=5.0;
function Update(){
transform.Translate(Vector3(0,0,speed)*Time.deltaTime);
unity3d功能脚本大全
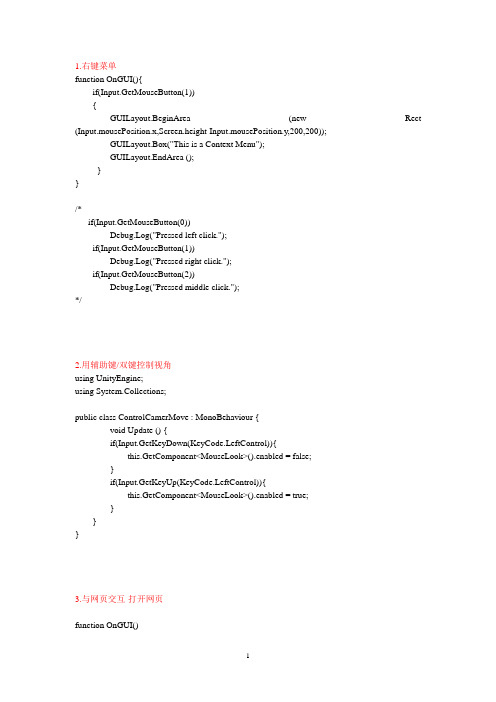
1.右键菜单function OnGUI(){if(Input.GetMouseButton(1)){GUILayout.BeginArea (new Rect (Input.mousePosition.x,Screen.height-Input.mousePosition.y,200,200));GUILayout.Box("This is a Context Menu");GUILayout.EndArea ();}}/*if(Input.GetMouseButton(0))Debug.Log("Pressed left click.");if(Input.GetMouseButton(1))Debug.Log("Pressed right click.");if(Input.GetMouseButton(2))Debug.Log("Pressed middle click.");*/2.用辅助键/双键控制视角using UnityEngine;using System.Collections;public class ControlCamerMove : MonoBehaviour {void Update () {if(Input.GetKeyDown(KeyCode.LeftControl)){this.GetComponent<MouseLook>().enabled = false;}if(Input.GetKeyUp(KeyCode.LeftControl)){this.GetComponent<MouseLook>().enabled = true;}}}3.与网页交互-打开网页function OnGUI()bel("当前场景:"+ Application.loadedLevelName);if(GUILayout.Button("打开网页"))Application.OpenURL("");}4.在unity中播放视频--绘制#pragma strictvar movTexture:MovieTexture;function Start (){movTexture.loop = true;}function OnGUI(){GUI.DrawTexture(new Rect (0,0,Screen.width,Screen.height),movTexture,ScaleMode.StretchToFill);if(GUILayout.Button("播放/继续")){if (!movTexture.isPlaying){movTexture.Play();}}if(GUILayout.Button("暂停播放")){movTexture.Pause();}if(GUILayout.Button("停止播放")){ 贴图movTexture.Stop();}}5.在unity中播放视频--作为plane的材#pragma strictvar movTexture:MovieTexture;function Start (){this.renderer.material.mainTexture = movTexture;movTexture.loop = true;}function OnGUI(){if(GUILayout.Button("播放/继续")){if (!movTexture.isPlaying){movTexture.Play();}}if(GUILayout.Button("暂停播放")){movTexture.Pause();}if(GUILayout.Button("停止播放")){movTexture.Stop();}}6.用材质偏移模拟水流效果using UnityEngine;using System.Collections;public class Whatflow : MonoBehaviour {public float scrollSpeed=3;void Update () {float offset = Time.time*scrollSpeed;renderer.material.SetTextureOffset("_MainTex",new Vector2(0,offset));}}7.从网页上获取一张图片并动态使用var url = "/attachments/images/201011/20101110/20101109_da85542f8635f3c5 b963vil1B8qeeS9O.jpg";function Start () {var www : WWW = new WWW (url);//定义www为WWW类型并且等于被下载的内容。
unity3D代码规范及项目目录结构
unity3D代码规范及项目目录结构Unity3D 是一种用于创建游戏和应用程序的跨平台开发引擎。
为了使团队能够更好地合作开发,提高代码的可读性和可维护性,采用一套统一的代码规范和项目目录结构是很重要的。
下面是关于Unity3D代码规范和项目目录结构的一些建议。
代码规范:1. 命名规范:在Unity3D中的命名应该采用驼峰命名法(CamelCase),并且尽量使用有意义的英文单词来命名。
同时,应该遵循C#语言的命名规范,类名使用大写开头,变量和函数名使用小写开头。
2.注释:在代码中应该加入适当的注释,解释代码的用途和功能。
注释应该是清晰、简洁和易于理解的。
3. 缩进和格式化:代码应该使用适当的缩进和格式化,以增加可读性。
可以使用Tab符号或者空格进行缩进,并且根据约定使用适当的换行符和空格。
4.使用有意义的变量和函数名:变量和函数名应该尽量使用有意义的词汇描述其用途,以便于其他开发人员理解代码逻辑。
5. 使用编码规约工具检查:使用工具如StyleCop或ReSharper来检查代码是否符合规范。
项目目录结构:一个良好的项目目录结构可以使开发人员更好地管理和组织代码文件。
以下是一个常用的Unity3D项目目录结构:1. Assets:该目录下存放所有的资源文件,包括场景文件、模型、纹理、音频等。
按照类型和功能进行分类存放,如Scripts、Textures等。
2. Editor:该目录下存放自定义的Editor脚本,用于自动化和定制开发流程。
3. Plugins:该目录下存放用于Unity3D的插件,如第三方库和工具。
4. Scripts:该目录下存放所有的脚本文件。
按照功能和模块进行分类,如Player、Enemy、UI等。
5. Resources:该目录下存放运行时需要动态加载的资源,如Prefab、材质等。
这些资源可以通过Resources.Load(方法进行加载。
6. Scenes:该目录下存放所有的场景文件。
unity3d 列表的linq用法

unity3d 列表的linq用法LINQ是Language-Integrated Query(语言集成查询)的缩写,它是一种强大的查询语言,用于在数据集合中检索、过滤和操作数据。
在Unity3D中,LINQ可用于操作游戏对象列表、组件列表、组件属性等。
下面将介绍Unity3D中列表的LINQ用法。
在Unity3D中,可以使用LINQ查询游戏对象列表、组件列表等。
以下是一些常见的LINQ用法示例:1. 查询游戏对象列表:```c# GameObject[] gameObjects =GameObject.FindObjectsOfType<GameObject>();IEnumerable<GameObject> filteredObjects =gameObjects.Where(obj => == "MyGameObject"); ```上述代码中,使用`FindObjectsOfType<GameObject>()`方法获取所有游戏对象,并使用LINQ查询过滤出名称等于"MyGameObject"的游戏对象。
2. 查询组件列表:```c# Component[] components =gameObject.GetComponentsInChildren<Component>(); IEnumerable<Component> filteredComponents =components.Where(comp => == "MyComponent"); ```上述代码中,使用`GetComponentsInChildren<Component>()`方法获取指定游戏对象子对象下的所有组件,并使用LINQ查询过滤出名称等于"MyComponent"的组件。
Unity3d 常用代码集
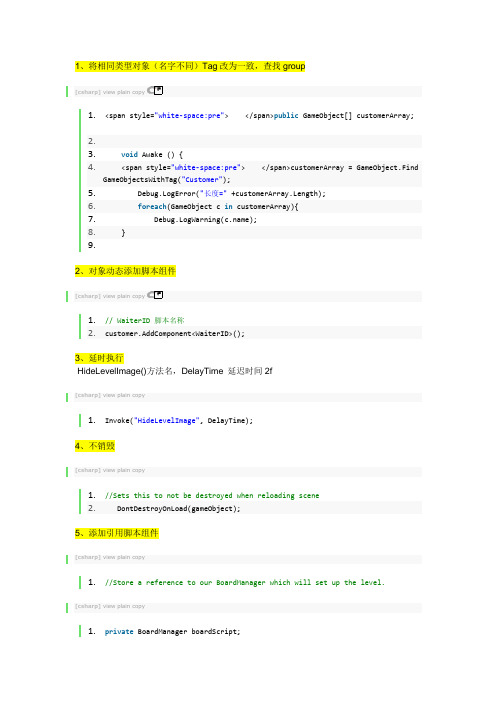
1、将相同类型对象(名字不同)Tag改为一致,查找group[csharp]view plain copy1.<span style="white-space:pre"> </span>public GameObject[] customerArray;2.3.void Awake () {4. <span style="white-space:pre"> </span>customerArray = GameObject.FindGameObjectsWithTag("Customer");5. Debug.LogError("长度=" +customerArray.Length);6.foreach(GameObject c in customerArray){7. Debug.LogWarning();8. }9.2、对象动态添加脚本组件[csharp]view plain copy1.// WaiterID 脚本名称2.customer.AddComponent<WaiterID>();3、延时执行HideLevelImage()方法名,DelayTime 延迟时间2f[csharp]view plain copy1.Invoke("HideLevelImage", DelayTime);4、不销毁[csharp]view plain copy1.//Sets this to not be destroyed when reloading scene2. DontDestroyOnLoad(gameObject);5、添加引用脚本组件[csharp]view plain copy1.//Store a reference to our BoardManager which will set up the level. [csharp]view plain copy1.private BoardManager boardScript;2.void Awake(){3.//Get a component reference to the attached BoardManager script4. boardScript = GetComponent<BoardManager>();5.}6、实例化 Instantiate[csharp]view plain copying UnityEngine;ing System.Collections;3.4.public class Launcher : MonoBehaviour {5.6.public GameObject ballPrefab;7.// Use this for initialization8.void Start () {9.10. }11.12.// Update is called once per frame13.void Update () {14.// 1 : 鼠标右键15.if(Input.GetMouseButtonDown(1)){16. Instantiate(ballPrefab);17. }18. }19.}7、不在camera 视野内,对象销毁[csharp]view plain copy1.<span style="white-space:pre"> </span>// 画面看不到销毁2.void OnBecameInvisible(){3. Destroy(this.gameObject);4. }1、Start() 开始方法;2、Update() 正常更新逻辑,每渲染一帧都会调用3、FixedUpdate() 不受帧率的变化,固定的时间间隔被调用,怎么设置间隔?Edit->Project Setting->time 下面的Fixed timestep4、LateUpdate() 会在每一帧中被调用。
unity3D c#循环
1、100以内的一个整数,它加上100后是一个完全平方数,再加上168又是一个完全平方数,请问该数是多少?1、100以内的一个整数:0--99之间的数值,要用到循环操作For(int i=0;i<100;i++){}2、它加上100后是一个完全平方数:完全平方数(一个数开方之后是一个整数),开方(Mathf.Sqrt()),Mathf.Sqrt(i+100)得出来的数值是个整数3、再加上168又是一个完全平方数:Mathf.Sqrt(i+268)得出来的数值是个整数4、需要一个恒等式来实现完全平方数(Mathf.Sqrt(4)=2 2*2==4)5、if(x*x==i+100 && y*y==i+268)6、打印i,即所求的数值2、定义一个三位数,计算其各位数字之和。
3、一球从100米高度自由落下,每次落地后反跳回原高度的一半;再落下,求它在第10次落地时,共经过多少米?第10次反弹多高?H=h/2Sum=sum+i4、猴子吃桃问题:猴子第一天摘下若干个桃子,当即吃了一半,还不瘾,又多吃了一个第二天早上又将剩下的桃子吃掉一半,又多吃了一个。
以后每天早上都吃了前一天剩下的一半零一个。
到第10天早上想再吃时,见只剩下一个桃子了。
求第一天共摘了多少。
1、最后一天只剩下一个桃子,要求第一天共摘了多少个,需要倒推,倒推9天(循环)For(int i=1;i<=9;i++){ }2、推出通式:1 4 10 221 (1+1)*2 (4+1)*2 (10+1)*2通式:(i+1)*23、求第一天共摘了多少i=(i+1)*25、(不包括2和3)1、从2到A的平方根的范围内For(int i=2;i<=Mathf.Sqrt(A);i++){ }2、没有一个数能整除AIf(A%i!=0){ }3、For(int i=2;i<=Mathf.Sqrt(A);i++){If(A%i!=0){是质数}else{不是质数}}输出的结果是质数和不是质数都有4、设置一个标志位(布尔变量),来区分是否是质数bool b = false;当A%i!=0布尔变量为真,否则为假。
Unity3D脚本:飞行模拟的实现代码
thisRigidbody.AddForceAtPosition(thisTransform.up * -5.0f, forceLeftTailAirfoil.position); 088 089 thisRigidbody.AddForceAtPosition(thisTransform.up * 5.0f, forceRightTailAirfoil.position); 090 091 } 092 093 else if(Input.GetKey(KeyCode.D)) 094 095 { 096 097 // 右翻滚 098 099 thisRigidbody.AddForceAtPosition(thisTransform.up * 5.0f, forceLeftTailAirfoil.position); 100 101 thisRigidbody.AddForceAtPosition(thisTransform.up * -5.0f, forceRightTailAirfoil.position); 102 103 } 104 105 }
Unity3D 脚本:飞行模拟的实现代码
001 #pragma strict 002 003 var box:GameObject; 004 005 private var forceHead:Transform; 006 007 private var forceLeftAirfoil:Transform; 008 009 private var forceRightAirfoil:Transform; 010 011 private var forceLeftTailAirfoil:Transform; 012 013 private var forceRightTailAirfoil:Transform; 014 015 private var thisTransform:Transform; 016 017 private var thisRigidbody:Rigidbody; 018 019 private var _speed:float = 250.0f; 020 021
Unity3D的命令手册
Unity3D的命令手册MR.C编制这本书主要对Unity3D的所有菜单与参数进行了翻译并逐个讲解来帮助大家初步的认识Unity3D的每个命令的作用Unity3D下分8个菜单栏(翻译的不一定准)分别是File(文件)Edit(编辑)Assets(资源)GameObject(游戏对象)Component(组件)Terrain(地形)Window(窗口)Help(帮助)File(文件)------New Scene 新建场景Open Scene 打开场景Save Scene 保存场景Save Scene as…场景另存为…New Project…新建工程文件Open Project…打开工程文件Save Project…保存工程文件Build Settings…建造设置(这里指建造游戏)Build & Run 建造并运行(这里指建造游戏) Exit 退出Edit(编辑)------Undo 撤销Redo 重复Cut 剪切Copy 复制Paste 粘贴Duplicate 复制Delete 删除Frame selected 当前镜头移动到所选的物体前Select All 选择全部Preferences 参数选择Play 播放Pause 暂停,中断Step 步骤Load selection 载入所选Save selection 存储所选Project settings 工程设置Render settings 渲染设置Graphics emulation图形仿真Network emulation 网络仿真Snap settings 对齐设置Assets (资源)-----Reimport 重新导入Create 创建Show in Explorer 在资源管理器中显示Open 打开(打开脚本)Import New Asset...导入新的资源Refresh 刷新Import Package... 导入资源包Export Package... 导出资源包Select Dependencies 选择相关Export ogg file 导出OGG文件Reimport All 重新导入所有Sync VisualStudio Project 同步视觉工作室项目GameObject--------Create Empty 创建一个空的游戏对象(游戏对象) Create Other 创建其他组件Center On Children 子物体归位到父物体中心点Make Parent 创建子父集Clear Parent 取消子父集Apply Changes To Prefab 应用变更为预置Move To View 移动物体到视窗的中心点Align With View 移动物体与视窗对齐Align View to Selected 移动视窗与物体对齐Component(组件)---Mesh 网Particles 粒子Physics 物理Audio 音频Rendering 渲染Miscellaneous 杂项Scripts 脚本Camera-Control 摄像机控制Terrain(地形)-----Create Terrain 创建地形Import Heightmap - Raw... 导入高度图Export Heightmap - Raw... 导出高度图Set Resolution... 设置分辨率Create Lightmap... 创建光影图Mass Place Trees... 批量种植树Flatten Heightmap... 展平高度图Refresh Tree and Detail Prototypes 刷新树及预置细节Window(窗口)------Next Window 下个窗口Previous Window 前窗Layouts 布局Scene 场景窗口Game 游戏窗口Inspector 检视窗口Hierarchy 层次窗口Project 工程窗口Animation 动画窗口 Profiler 探查窗口Asset Server 资源服务器Console 控制台Help(帮助)--------About Unity 关于UnityEnter serial number 输入序列号Unity Manual Unity手册Reference Manual 参考手册Scripting Manual 脚本手册Unity Forum Unity论坛Welcome Screen 欢迎窗口Release Notes 发行说明Report a Problem 问题反馈第一章File(文件)New Scene 新建场景创建一个新的游戏场景Open Scene 打开场景打开一个游戏场景Save Scene 保存场景保存一个游戏场景Save Scene as 场景另存为游戏场景另存为New Project 新建工程文件创建一个新的工程文件Open Project 打开工程文件打开一个工程文件Save Project 保存工程文件保存一个工程文件Build Settings 建造设置导出游戏的设置Build & Run 建造并运行设置并导出游戏Exit退出退出软件这里面我们需要注意的是,创建一个场景与创建一个工程是完全不同的,一个工程文件可以包含多个游戏场景,但场景文件却是唯一的。
Unity3D学习笔记(一):Unity简介、游戏物体、组件和生命周期函数

Unity3D学习笔记(⼀):Unity简介、游戏物体、组件和⽣命周期函数Project(⼯程、项⽬):⼯程是把游戏开发当前所需要的资源归类管理⽤的。
Console控制台:⽇志、报错、调试,右上⾓,消息过滤Assets:资源,存储游戏中⼀切⽤到的资源Library:临时库⽂件ProjectSettings:项⽬设置、项⽬控制Temp:临时⽂件夹UnityPackageManager:资源包⼯程迁移:Assets、ProjectSettings、UnityPackageManager,这三个⽂件夹必须拷贝⾛如果报错,先删掉Library和Temp,再重新打开Unitydependencies关联资源,引⽤资源project⾯板:管理所有项⽬资源和⽂件Inspector:当前选中游戏物体细节程序=数据结构+算法数据结构:存储数据的结构,栈、堆、链List的核⼼是数组,.unity后缀名:场景⽂件.unitypackage后缀名:资源包偏好设置MonoDevelop:微软出品,早年为了实现跨平台(Mac),后来VS2017⽀持Mac组件的概念:将⼀些具有功能性的代码封装起来,封装成⼀个类,当这个类挂到游戏物体⾝上去的时候,就相当于对此类的实例化,变成了具有这个功能的对象实体,那么这个游戏物体也就具有了这个对象所具有的功能。
组件的挂载相当于创建对象,添加功能性的对象。
游戏物体:从表现层来看:场景视图中或者层级视图中能被看到的或者能被选中的都叫游戏物体。
从⾯向对象的⾓度来看:游戏物体是⼀个或者多个组件的集合。
Transform是基本组件,即使GameObject空物体也要有基本组件。
坐标系,朝向,形体,Position:单位⽶Rotation:单位Unity(欧拉⾓,⾓度)和C#(四元素,弧度)右⼿坐标系(数学运算)和左⼿坐标系(⼏何变换):拇指X轴右,⾷指Y轴上,中指Z轴前Scale:单位倍数Reset:重置还原MonoBehaviour:是每个脚本派⽣的类的基类。
unity3d各键值对应代码
unity3d各键值对应代码KeyCode :KeyCode是由Event.keyCode返回的。
这些直接映射到键盘上的物理键。
值对应键Backspace 退格键Delete Delete键Tab TabTab键Clear Clear键Return 回车键Pause 暂停键Escape ESC键Space 空格键Keypad0 ⼩键盘0Keypad1 ⼩键盘1Keypad2 ⼩键盘2Keypad3 ⼩键盘3Keypad4 ⼩键盘4Keypad5 ⼩键盘5Keypad6 ⼩键盘6Keypad7 ⼩键盘7Keypad8 ⼩键盘8Keypad9 ⼩键盘9KeypadPeriod ⼩键盘“.”KeypadDivide ⼩键盘“/”KeypadMultiply⼩键盘“*”KeypadMinus ⼩键盘“-”KeypadPlus ⼩键盘“+”KeypadEnter ⼩键盘“Enter”KeypadEquals ⼩键盘“=”UpArrow ⽅向键上DownArrow ⽅向键下RightArrow ⽅向键右LeftArrow ⽅向键左Insert Insert键Home Home键EndEnd键PageUp PageUp键PageDown PageDown键F1功能键F1F2功能键F2F3功能键F3F4功能键F4F5功能键F5F6功能键F6F7功能键F7F8 功能键F8F9 功能键F9F10 功能键F10F11 功能键F11F12 功能键F12F13 功能键F13F14 功能键F14F15 功能键F15Alpha0 按键0Alpha1 按键1Alpha2 按键2Alpha3 按键3Alpha4 按键4Alpha5 按键5Alpha6 按键6Alpha7 按键7Alpha8 按键7Alpha9 按键9Exclaim ‘!’键DoubleQuote双引号键Hash Hash键Dollar ‘$’键AmpersandAmpersand键Quote 单引号键LeftParen 左括号键RightParen右括号键Asterisk ‘ * ’键Plus ‘ +’键Comma ‘ , ’键Minus ‘ - ’键Period ‘ . ’键Slash ‘ / ’键Colon ‘ : ’键Semicolon‘ ; ’键Less ‘< ‘键Equals ‘ = ‘键Greater ‘ >‘键Question ‘ ? ’键At ‘@’键LeftBracket‘ [ ‘键Backslash ‘ \ ’键RightBracket‘ ] ’键Caret ‘ ^ ’键Underscore‘ _ ’键BackQuote‘ ` ’键A ‘a’键B ‘b’键C ‘c’键D ‘d’键E ‘e’键F ‘f’键G ‘g’键H ‘h’键I ‘i’键J ‘j’键K ‘k’键L ‘l’键M ‘m’键N ‘n’键O ‘o’键P ‘p’键Q ‘q’键R ‘r’键S ‘s’键T ‘t’键U ‘u’键V ‘v’键W ‘w’键X ‘x’键Y ‘y’键Z ‘z’键Numlock Numlock键Capslock ⼤⼩写锁定键ScrollLockScroll Lock键RightShift 右上档键LeftShift 左上档键RightControl右Ctrl键LeftControl左Ctrl键RightAlt 右Alt键LeftAlt 左Alt键LeftApple 左Apple键LeftWindows左Windows键RightApple右Apple键RightWindows右Windows键AltGr Alt Gr键Help Help键Print Print键SysReq Sys Req键Break Break键Mouse0 ⿏标左键Mouse1 ⿏标右键JoystickButton0 ⼿柄按键0JoystickButton1 ⼿柄按键1Joystick1Button0 第⼀个⼿柄按键0 Joystick1Button1 第⼀个⼿柄按键1 Joystick2Button0 第⼆个⼿柄按键0 Joystick3Button0 第三个⼿柄按键0。
unity代码汇总

父子节点相关的:parent 变量表示Transform的父节点root 表示它的根节点,如果没有父节点,它会返回自己Transform Find(string name) 根据名字查找子节点bool IsChildOf(Transform node) 判断该Transform是否某Transform的子节点void DetachChildren() 解除所有子节点的父子关系1.通过名字找物体GameObject.Find("Player")2.通过名字寻找物体子集transform.FindChild("物体子集名字")3. 显示和隐藏物体gameObject.SetActive(true);4.使用和关闭物体代码gameObject.GetComponent<代码名字>().enable=true;5.按下动画事件if (Input.GetMouseButton(0))按下事件if (Input.GetMouseButtonDown(0))抬起事件if (Input.GetMouseButtonUp(0))6.销毁一样标签的物体GameObject [] objs = GameObject.FindGameObjectsWithTag("标签名");foreach(GameObject obj in objs){Destroy(obj);}7.物体水平匀速移动transform.Translate(-0.1f*Time.deltaTime,0,0);8.<<是除以2,>>是乘以29.位置相关的:5个和位置相关的Vector3类型变量up表示世界坐标的Y轴方向right表示世界坐标的X轴方向forward表示世界坐标的Z轴方向position表示对象在世界坐标系中的位置localPosition表示对象相对父节点变换的坐标位置10.改变物体颜色obj.renderer.material.color=Color.red11. 2个Quaternion类型的变量rotation在世界坐标系中的旋转角度,是一个Quaternion对象(四元数)localRotation相对于父节点的旋转角度12.父子节点相关的:parent变量表示Transform的父节点Transform Find(string name)根据名字查找子节点bool IsChildOf(Transform node)判断该Transform是否某Transform的子节点void DetachChildren()解除所有子节点的父子关系13.鼠标:Input.mousePosition表示鼠标当前的像素位置(坐标系如何?以左下角为原点)接下来这三个函数的参数,0左键,1右键,2中键GetMouseButton对应的键处于按下状态时返回trueGetMouseButtonDown对应的键被按下时返回trueGetMouseButtonUp对应的键弹起时返回true14.OnMouseDown 当鼠标点击到对象的时候回调OnMouseDrag当鼠标拖拽对象时调用,在Ignore Raycast层上无效OnMouseEnter当鼠标进入对象时调用OnMouseExit当鼠标离开对象时调用OnMouseOver当鼠标停留在对象上面时调用OnMouseUpAsButton鼠标在同一个对象上按下,并弹起时调用OnMouseUp跟楼上一样15. gameObject.transform.rotation= new Quaternion (Player.transform.rotation.x, Player.transform.rotation.y, Player.transform.rotation.z, Player.transform.rotation.w);gameObject和Player旋转角度一样!16. 俩个物体之间的距离float Distancefloat Distance = Vector3.Destance(position1,position2);17. 如果玩家和敌人的距离小于10,执行{}代码if( Vector3.Destance(敌人.position,玩家.position)<10f){// 执行相应代码}18.Animation动画01.倒回播放Animation.Rewind();02.停止所有动画Animation.Stop();停止动画Animation.Stop(“动画名字”);03.使用动画循环模式Animation.WropMode= WropMode.loop;04.等待动画播放完成animation.Play(); yiel WaitForSeconds(animation.Clip.Length);05.打印动画长度print(animation["动画名字"].Length);19.数组foreach(Texture2D[] ta in 当前数组){数组长度+=ta.Length;// 加载数组的长度}20.切换关卡的时候,this不移除(this=脚本赋予的对象)DontDestoryOnLoad(this);21.while 是先判断条件,再执行语句。
Unity3D常用API之Invoke函数调用

Unity3D常⽤API之Invoke函数调⽤1.⾦钱副本细节完善1.1.宝箱⾃动掉落给宝箱预制体添加刚体组件即可。
1.2.实现按键宝箱批量掉落①将实例化⽣成宝箱的代码单独封装成⼀个函数;②使⽤ for 循环,批量⽣成宝箱。
按⼀次z键就同时实例化出6个物体,演⽰:1.3.宝箱⾃动掉落现在我们是通过按下某键,然后程序调⽤“⽣成宝箱”的函数,来实现功能。
在真正的游戏中,这个“⽣成宝箱”的函数,也是需要由程序⾃动调⽤的。
那么如何实现那??继续往下看2.Invoke 函数2.1.Invoke 函数代码Invoke(string,float):多少秒后执⾏某个函数[只会调⽤⼀次]。
参数说明:String:要执⾏的函数的名称;Float:秒数,倒计时的时间;2.2.InvokeRepeating 函数代码InvokeRepeating(string,float,float):多少秒[第⼆个参数]后执⾏某个函数,并且以后每隔多少秒[第三个参数]都会执⾏该函数⼀次[重复调⽤N次]。
参数说明:String:要执⾏的函数的名称;Float:秒数,准备时间,预热时间;Float:秒数,重复调⽤的间隔时间;演⽰:CancelInvoke():取消这个脚本中所有的 Invoke 调⽤。
2.3.认识Invoke 函数Class 类可以理解成是⼀个“家”,各种各样的函数(⽅法),字段,属性可以理解成是这个“家”的家庭成员。
那么,这三个 Invoke 相关的函数,他们的家在哪⼉?回答:MonoBehaviour类。
我们现在写的脚本,都是默认继承“MonoBehaviour”类的,我们⾃⼰写的脚本类,都是这个“MonoBehaviour”类的⼦类,所以我们可以直接通过写⽅法名的形式,就可以调⽤⽗类中的⽅法。
光标放在MonoBehaviour上,按F12,可以调出这个类的声明;3.⾦钱副本主⾓控制1.主⾓基本控制①创建⼀个 Cube 模型,美化⼀下,作为主⾓(Player);②添加刚体组件,使⽤刚体的 MovePosition 结合按键控制主⾓移动。
- 1、下载文档前请自行甄别文档内容的完整性,平台不提供额外的编辑、内容补充、找答案等附加服务。
- 2、"仅部分预览"的文档,不可在线预览部分如存在完整性等问题,可反馈申请退款(可完整预览的文档不适用该条件!)。
- 3、如文档侵犯您的权益,请联系客服反馈,我们会尽快为您处理(人工客服工作时间:9:00-18:30)。
import System;
import System.Runtime.InteropServices;
@DllImport("user32.dll")
public static function MessageBox(Hwnd : int,text : String,Caption : String,iType : int) : int {};
tempData._iUser.Ceshi2 = "?";
tempData._iUser.Ceshi3 = 0;
tempData._iUser.Ceshi4 = 0;
var writer : StreamWriter;
var t : FileInfo = new FileInfo(_FileLocation+"/"+ _FileName);
GUI.SelectionGrid(Rect(1,201,190,20),2,["Selection","Grid","select3"],3); //10
GUI.HorizontalSlider(Rect(1,221,180,20),3.0,0,10.0); //11
GUI.VerticalScrollbar(Rect(1,241,20,100),3.0,1,0.0,10.0); //12
}
private var c1 : String;
private var c2 : String;
private var c3 : float;
private var c4 : int;
private var _FileLocation : String;
private var _FileName : String = "CeshiData.xml";
var Ceshi2 : String;
var Ceshi3 : float;
var Ceshi4 : int;
}
class UserData
{
public var _iUser : CeshiData = new CeshiData();
function UserData() { }
if(!t.Exists)
{
writer = t.CreateText();
_data = SerializeObject(tempData);
for(i=0;i<10;i++){
writer.WriteLine(_data);
}
writer.Close();
var clampBorderSize = .05; // How much viewport space to leave at the borders when a label is being clamped
var useMainCamera = true; // Use the camera tagged MainCamera
function Awake(){
_Filelocation=Application.dataPath;
}
function Start(){
FirstSave();
}
function FirstSave(){//初始化XML
tempData._iUser.Ceshi1 = "?";
tempData._iUser.Ceshi3 = sc3;
tempData._iUser.Ceshi4 = sc4;
var writer : StreamWriter;
var t : FileInfo = new FileInfo(_FileLocation+"/"+ _FileName);
//13
GUI.BeginScrollView (Rect (200,10,100,100),Vector2.zero, Rect (0, 0, 220, 200));
bel(Rect(0,0,100,20),"I'm a Label");
GUI.EndScrollView();
var offset = Vector3.up; // Units in world space to offset; 1 unit above object by default
var clampToScreen = false; // If true, label will be visible even if object is off screen
thisTransform.position = cam.WorldToViewportPoint(camTransform.TransformPoint(relativePosition + offset));
thisTransform.position = Vector3(Mathf.Clamp(thisTransform.position.x, clampBorderSize, 1.0-clampBorderSize),
function Start () {
thisTransform = transform;
if (useMainCamera)
cam = Camera.main;
else
cam = cameraToUse;
camTransform = cam.transform;
}
}
function Save(sc1 : String,sc2 : String,sc3 : float,sc4 : int){//保存数据到指定的XMl里
tempData._iUser.Ceshi1 = sc1;
tempData._iUser.Ceshi2 = sc2;
import System;
import System.Xml;
import System.Xml.Serialization;
import System.IO;
import System.Text;
class CeshiData{
var Ceshi1 : String;
}
else {
thisTransform.position = cam.WorldToViewportPoint(target.position + offset);
}
}
@script RequireComponent(GUIText)
4 unity3d读取保存xml文件
function Start()
{
MessageBox(0, "API Message Box", "Win32 API", 64) ;
}
function Update () {
}
3 物体标签
var target : Transform; // Object that this label should follow
GUI.RepeatButton(Rect(1,61,120,20),"I'm a RepeatButton"); //4
GUI.TextField(Rect(1,81,100,20),"I'm a TextFielld"); //5
GUI.TextArea(Rect(1,101,100,40),"I'm a TextArea,\nMultiline"); //6
var cameraToUse : Camera; // Only use this if useMainCamera is false
private var cam : Camera;
private var thisTransform : Transform;
private var camTransform : Transform;
var myData : UserData[];
private var tempData : UserData = new UserData();
var i : int = 0;
var GUISkin1 : GUISkin;
var ShowData : int = 0;
_info = r.ReadLine();
_data=_info;
myData[i] = DeserializeObject(_data);
}
r.Close();
}
function OnGUI() {
GUI.skin = GUISkin1;
}
function Load(){//读取保存在XML里的数据
var r : StreamReader = File.OpenText(_FileLocation+"/"+ _FileName);
var _info : String ;
for(i=0;i<10;i++){
if(GUI.Button(Rect(0,0,100,40),"save")){
t.Delete();
writer = t.CreateText();
_data = SerializeObject(tempData);
for(i=0;i<10;i++){
