达摩院开发者手册
开发者参考手册集合说明书
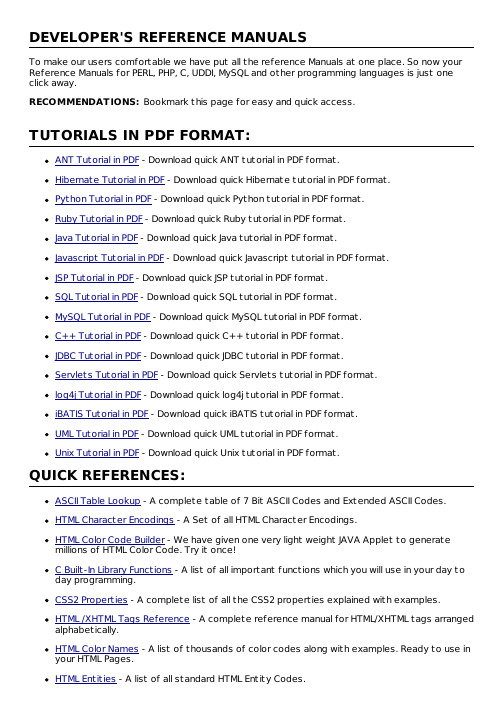
DEVELOPER'S REFERENCE MANUALSTo make our users comfortable we have put all the reference Manuals at one place. So now your Reference Manuals for PERL, PHP, C, UDDI, MySQL and other programming languages is just one click away.RECOMMENDATIONS: Bookmark this page for easy and quick access.TUTORIALS IN PDF FORMAT:ANT Tutorial in PDF - Download quick ANT tutorial in PDF format.Hibernate Tutorial in PDF - Download quick Hibernate tutorial in PDF format.Python Tutorial in PDF - Download quick Python tutorial in PDF format.Ruby Tutorial in PDF - Download quick Ruby tutorial in PDF format.Java Tutorial in PDF - Download quick Java tutorial in PDF format.Javascript Tutorial in PDF - Download quick Javascript tutorial in PDF format.JSP Tutorial in PDF - Download quick JSP tutorial in PDF format.SQL Tutorial in PDF - Download quick SQL tutorial in PDF format.MySQL Tutorial in PDF - Download quick MySQL tutorial in PDF format.C++ Tutorial in PDF - Download quick C++ tutorial in PDF format.JDBC Tutorial in PDF - Download quick JDBC tutorial in PDF format.Servlets Tutorial in PDF - Download quick Servlets tutorial in PDF format.log4j Tutorial in PDF - Download quick log4j tutorial in PDF format.iBATIS Tutorial in PDF - Download quick iBATIS tutorial in PDF format.UML Tutorial in PDF - Download quick UML tutorial in PDF format.Unix Tutorial in PDF - Download quick Unix tutorial in PDF format.QUICK REFERENCES:ASCII Table Lookup - A complete table of 7 Bit ASCII Codes and Extended ASCII Codes.HTML Character Encodings - A Set of all HTML Character Encodings.HTML Color Code Builder - We have given one very light weight JAVA Applet to generatemillions of HTML Color Code. Try it once!C Built-In Library Functions - A list of all important functions which you will use in your day today programming.CSS2 Properties - A complete list of all the CSS2 properties explained with examples.HTML /XHTML Tags Reference - A complete reference manual for HTML/XHTML tags arranged alphabetically.HTML Color Names - A list of thousands of color codes along with examples. Ready to use in your HTML Pages.HTML Entities - A list of all standard HTML Entity Codes.HTML Fonts - A list of HTML Fonts available on Microsoft Windows, Macintosh System and Unix.HTML ASCII Codes - Listing down all the 7-BIT ASCII codes and their equivalent HTML Entity Codes.JavaScript Built-in Function - Listing of all the built-in JavaScript methods.jQuery Quick Guide - Listing of all the jQuery APIs.Language ISO Codes - Language ISO Codes for Windows and Macintosh Systems.MIME Media Types - Complete reference for MIME Media Types.MySQL Useful Functions and Clauses - A comprehensive set of all MySQL functions and Clauses with examples.Rails Quick Reference Guide - A quick reference guide for Rails developers. We have listed out all the important concepts related to Rails.UDDI API References - A complete set of UDDI APIs.Useful UNIX Commands - List of all important UNIX Commands.Perl Functions References - A comprehensive reference manual for Perl Developers. All the Perl functions have been listed out with examples.WML Tags Reference - A complete list of WML tags explained with examples.。
阿里dataworks操作手册

阿里dataworks操作手册一、概述阿里dataworks是阿里巴巴集团推出的一款数据开发与运维一体化的云端数据集成解决方案,为用户提供了完整的数据开发生命周期解决方案,包括数据准备、数据开发、数据质量管理、数据运维和数据安全等功能。
作为阿里巴巴集团内部使用的数据管理评台,dataworks 已经成熟、稳定,并且在多个业务场景中得到了验证。
二、功能概述1.数据准备1.1 数据源管理:支持多种数据源接入,包括关系型数据库、非关系型数据库、Hadoop、文件等,用户可以自主创建数据源连接。
1.2 数据抽取:支持各类数据的抽取和数据同步,包括全量抽取、增量抽取、实时同步等。
1.3 数据准备:支持数据清洗、数据整理、数据归档等数据准备工作。
2.数据开发2.1 数据建模:支持数据模型的设计和管理,包括逻辑数据模型、物理数据模型等。
2.2 数据开发:提供完善的数据开发工具,支持SQL编辑、数据建模、数据计算等功能。
2.3 数据调度:支持数据调度的配置和管理,用户可以设置数据作业的调度周期、依赖关系等。
3.数据质量管理3.1 数据质量监控:提供数据质量监控功能,用户可以实时监控数据质量的情况。
3.2 数据质量评估:支持对数据质量进行评估和分析,用户可以了解数据质量的整体情况。
4.数据运维4.1 运维监控:提供数据运维监控功能,用户可以实时监控数据作业的运行状态。
4.2 运维报警:支持对数据运维情况进行报警,用户可以设置报警规则和接收报警通知。
5.数据安全5.1 数据权限管理:支持数据权限的管理和控制,包括用户权限、角色权限等。
5.2 数据安全审计:提供数据安全审计功能,记录用户操作日志、数据访问日志等。
三、操作手册1.数据源管理1.1 新建数据源1.1.1 登入dataworks控制台,在左侧导航栏选择“数据源”。
1.1.2 点击“新建数据源”,选择数据源类型,填写相应的连接信息。
1.1.3 测试连接,验证数据源连接是否成功。
开发者开发手册

开发者开发手册介绍本开发手册旨在指导开发人员进行应用程序的开发。
它包含了一系列的准则和最佳实践,帮助开发人员提高开发效率并保证代码质量。
开发环境设置在开始开发之前,请确保以下开发环境设置已完成:- 安装适当版本的开发工具,如IDE或文本编辑器。
- 配置相关的开发环境变量。
- 安装任何必要的依赖项和库。
项目结构为了保持项目的组织和可扩展性,在开始开发之前,请确保项目的结构清晰合理。
以下是一个示例项目结构的建议:├── app.py├── config.py├── requirements.txt├── README.md├──/static│ ├── css│ ├── js│ └── img└──/templates编码规范编码规范可以帮助开发人员统一代码风格,提高代码可读性和维护性。
以下是一些常见的编码规范建议:- 使用有意义的变量和函数命名,避免使用缩写或不清晰的命名。
- 为代码添加适当的注释,解释代码用途和意图。
- 遵循一致的缩进规范,如使用4个空格或制表符。
- 每个函数或方法应尽量保持简短,只关注单一功能。
文档化良好的文档化是开发中不可或缺的一部分。
以下是一些建议:- 为项目添加适当的README文件,提供项目的概述、安装说明、使用示例等。
- 为项目中的重要代码块添加注释,解释其功能和用法。
- 在代码中使用文档化字符串,提供函数和方法的用途、参数和返回值的说明。
- 为API和其他公共接口提供详细的文档。
测试测试是确保代码质量和功能正常的重要一环。
以下是一些建议:- 编写单元测试来验证函数和方法的正确性。
- 编写集成测试来验证各个组件的交互是否正常。
- 使用自动化测试框架并进行持续集成,以确保每次代码提交都通过测试。
版本控制使用版本控制可以方便地管理代码历史记录和团队协作。
以下是一些建议:- 使用一个可靠的版本控制系统,如Git。
- 建立合适的分支策略,如主分支、开发分支和特性分支。
- 定期进行代码提交和合并,保持代码库的整洁和可维护性。
Dorado 5 快速入门

Dorado 5 快速入门富浏览器展现中间件快速创建Rich Internet Application的表现层解决方案1.前言 (4)2.简介 (5)3.STUDIO (6)3.1.使用说明 (6)3.2.工程管理 (17)3.2.1.工程管理 (17)3.2.2.系统菜单 (17)4.一个简单的DORADO应用界面 (17)4.1.视图模型简介 (17)4.2.创建DORADO应用 (20)4.2.1.新建工程 (20)4.2.2.数据连接配置 (22)4.2.3.制作dorado JSP (23)5.常用组件应用技巧 (32)5.1.自由表单(A UTO F ORM) (32)5.2.数据表格(D A TA T ABLE) (36)5.3.菜单(M ENU) (53)5.4.树(T REE) (53)5.5.下拉框(D ROP D OWN) (53)5.6.命令(C OMMAND) (53)6.视图模型 (53)6.1.视图模型的状态 (53)6.2.视图模型实现类 (55)6.3.视图模型的上下文(D ORADO C ONTEXT) (56)6.4.视图模型中的JDBC开发 (58)6.4.1.事务管理 (59)6.4.2.异常处理 (60)7.业务逻辑框架整合范例 (61)7.1.S QL D ATASET (61)7.1.1.预定义Sql编程 (62)7.1.2.实现预定义Sql编程的动态性: (63)7.1.3.运行时Sql编程 (64)7.2.存储过程 (65)7.3.J A V A 实体对象 (66)7.3.1.记录集的监听器内部实现 (66)7.3.2.系统的业务对象实现 (67)7.3.3.通过引入第三方框架管理与组织自己业务对象的基础之上实现(如加入Spring,Hibernate) (69)8.数据坞 (71)8.1.数据模块中的D A TASET (71)9.典型界面开发 (83)10.权限管理和PROFILE (83)10.1.P ROFILE使用说明 (83)10.2.P ROFILE文件的定义 (87)10.3.视图模型(V IEW M ODEL)PROFILE的指定 (87)11.文件或BLOB字段的处理 (88)12.发布 (88)12.1.基本原理 (88)12.2.发布方法 (90)12.2.1.dorado studio打包: (90)12.2.2.其他工具打包: (91)13.升级 (91)14.附录 (93)14.1.参考程序光盘说明 (93)14.2.数据库配置说明 (93)1.前言dorado是由BSTEK公司推出的面向J2EE 的新一代Web应用的开发框架,支持AJAX 机制。
达 摩 院 过 去 一 年 做 了 啥 ( 2 0 2 0 )

NIPS综述:阿里3部门联袂为5千人展示人工智能技术作为世界最顶尖的机器学习和神经网络学术会议,NIPS(神经信息处理系统进展大会)在过去的两年敞开大门,邀请工业界的巨头们搭设展台,展示他们在人工智能上的研究和商业成果。
今年是阿里巴巴第二次参加NIPS。
相比去年,今年的阿里巴巴显得底气十足。
过去一年,阿里巴巴在人工智能商业化道路上硕果累累。
7月,阿里巴巴发布了首款智能语音音箱天猫精灵,在双11当天售出了100万台;10月,阿里巴巴在杭州云栖大会上推出了AliGenie语音开放平台,以及AR开放平台;11月,刚刚从乌镇参加完世界互联网大会的马云,在上海的申通地铁上用语音交互的方式购买了一张地铁票,向其构想的城市大脑近了一步。
在学术研究上,阿里巴巴也交了份不错的答题卷。
ACM MM2020会议主办权落户阿里巴巴,使其成为首个获得主办权的中国企业。
城市大脑成为首批入选国家新一代人工智能开放创新平台的人工智能技术服务。
在此前的IJCAI会议上,阿里巴巴有11篇论文入选,CVPR 会议入选4篇、KDD会议入选5篇,ACM MM会议入选3篇。
此次NIPS 大会上,阿里巴巴有两篇论文入选Workshop并进行Oral和Poster 形式报告。
阿里巴巴在人工智能上的光鲜,归功于其底层技术。
在乌镇、在上海,你看不到的研究人员和科学家们,来到了洛杉矶长滩的NIPS 大会上,展示了这些技术孵化的全过程。
阿里巴巴iDST院长金榕、阿里巴巴人工智能实验室的高级专家张硕、阿里巴巴搜索事业部的研究员李欣博士分别开设了迷你研讨会,介绍阿里巴巴在人工智能领域的创新。
iDST:多媒体信息检索和模型压缩如今的阿里巴巴不再只是定位于一家电子商务公司,在除了包括淘宝、天猫等电子商务业务以外,阿里巴巴更着眼于生态系统的建设,囊括数字营销(阿里妈妈)、视频(优酷)、金融科技(蚂蚁金服)、社交媒体(微博)、地图(高德)、物流(菜鸟)等不同的业务。
阿里开发者手册
阿里开发者手册1. 介绍阿里开发者手册是针对阿里巴巴公司的开发者群体编写的一份指导手册。
它提供了完整、详细、全面的技术文档和开发规范,帮助开发者在阿里巴巴的各个领域进行开发工作。
2. 规范与标准阿里开发者手册包含了丰富的规范与标准,涵盖了代码编写、项目管理、性能优化、安全防范等方面的要求。
下面是一些重要的规范与标准:2.1 代码规范•代码的命名规范,包括类名、方法名、变量名等的命名规则。
•代码的注释规范,包括注释的格式、注释的内容等要求。
•代码的缩进和空格规范,包括缩进的字符数、空格的使用等要求。
•代码的排版规范,包括括号的使用、换行的位置等要求。
2.2 项目管理规范•项目的目录结构规范,包括源代码目录、资源文件目录等的组织方式。
•项目的版本管理规范,包括分支管理、提交日志的编写等要求。
•项目的文档编写规范,包括需求文档、设计文档等的格式和内容要求。
•项目的测试规范,包括单元测试、集成测试等的执行方式和结果要求。
2.3 性能优化规范•代码的性能优化规范,包括循环优化、算法优化等方面的要求。
•数据库的性能优化规范,包括索引的使用、SQL语句的优化等要求。
•网络的性能优化规范,包括缓存的使用、CDN的配置等方面的要求。
•前端页面的性能优化规范,包括减少HTTP请求、压缩资源等的要求。
2.4 安全防范规范•代码的安全防范规范,包括输入验证、加密处理等方面的要求。
•网络的安全防范规范,包括防火墙的配置、权限管理等要求。
•数据存储的安全防范规范,包括数据库的加密、备份等方面的要求。
•静态资源的安全防范规范,包括防止恶意篡改、热更新等要求。
3. 使用与贡献阿里开发者手册提供了多种使用方式,方便开发者快速查阅和使用:3.1 在线阅读阿里开发者手册通过网站的形式提供在线阅读功能,开发者可以在任何地方、任何时间查阅相关内容。
3.2 下载使用开发者可以将阿里开发者手册下载到本地,方便离线查阅和使用。
下载的手册包含了完整的内容和相关资源。
vantiq 开发者指导手册
vantiq 开发者指导手册第一章简介Vantiq 是一款全面而强大的开发平台,旨在帮助开发者轻松构建实时、智能且联网的应用程序。
本指导手册将带领您深入了解如何使用Vantiq 平台进行开发工作,并提供了一系列详细的步骤和示例来帮助您快速上手。
第二章安装和配置在开始使用 Vantiq 之前,您需要正确地进行安装和配置。
以下是详细的步骤:1. 下载和安装 Vantiq 客户端。
您可以从 Vantiq 官方网站上找到最新的客户端版本,并按照指示进行安装。
2. 配置 Vantiq 客户端。
在第一次运行客户端时,您需要输入您的帐户信息并进行身份验证。
根据系统提示,填写相关信息以完成配置。
第三章 Vantiq 开发基础在本章中,您将学习 Vantiq 开发的基础知识。
以下是一些关键概念和技术:1. Vantiq 模型:Vantiq 使用模型来表示实时应用程序的结构和组件。
了解如何创建和定义模型是开始 Vantiq 开发的第一步。
2. Vantiq 流程:Vantiq 提供了流程引擎来处理和管理应用程序中的业务流程。
通过学习如何创建和配置流程,您可以更好地掌握应用程序的逻辑和流程控制。
3. Vantiq 数据存储:Vantiq 允许您使用不同的数据存储选项,如关系型数据库或 NoSQL 数据库,来存储和管理应用程序的数据。
了解如何配置和使用数据存储是非常重要的。
第四章 Vantiq 集成Vantiq 平台提供了多种集成选项,以便您能够将应用程序与其他系统进行连接。
以下是一些常见的集成方式:1. API 集成:Vantiq 允许您使用 API 来与其他系统进行通信和数据交换。
您可以学习如何创建和配置 API 对接点,以及如何使用 API 来获取和发送数据。
2. 设备集成:Vantiq 提供了各种设备集成选项,包括传感器、物联网设备等。
通过了解如何配置和管理设备集成,您可以实现实时监测和控制。
3. 第三方应用集成:Vantiq 还支持与第三方应用程序(如CRM、ERP等)的集成。
Tassel5UserGuide中文版

Contributors: Ed Buckler, Terry Casstevens, Peter Bradbury, Zhiwu Zhang, Dallas Kroon, Jeff Glaubitz, Kelly Swarts, Jason Wallace, Fei Lu, Alberto Romero, Cinta Romay, Eli Rodgers-Melnick, Alexander Lipka, Sara Miller, James Harriman, Yogesh Ramdoss, Michael Oak, Karin Holmberg, Natalie Stevens, and Yang Zhang.
3
目录
引言 .................................................................................................................................................. 6 1 入门指南....................................................................................................................................... 7 1.1 执行 TASSEL .................................................................................................................... 8 1.2 开源代码............................................................................................................................ 8 1.3 软件开发工具.................................................................................................................... 8 1.4 图形界面............................................................................................................................ 9 1.5 管道(命令行界面) ...................................................................................................... 10 1.6 GBS 管道 .......................................................................................................................... 10 2 File(文件)菜单 ....................................................................................................................... 10 2.1.1 Save Data Tree(保存数据树) ............................................................................ 10 2.1.2 Open Data Tree(打开数据树)............................................................................ 10 2.1.3 Save Data Tree As…(数据树另存为…) ........................................................... 10 2.1.4 Open Data Tree…(打开数据树…).................................................................... 11 2.1.5 Set Preferences(设置首选项) ............................................................................ 11 3 Data(数据)菜单 ................................................................................................................. 11 3.1 Load(加载) .................................................................................................................. 12 3.1.1 Hapmap ........................................................................................................... 14 3.1.2 3.1.3 3.1.4 HDF5(层次数据格式,版本5) ............................................................... 14 VCF(Variant Call Format 变异体召唤格式) ............................................ 15 Plink ................................................................................................................ 15
Rolls Corporation MO2020se 测试生成器说明书

VCO Input: 1/4" jack for connection to a Voltage Control source which may vary from 1.2 volts to 5 volts dc. This voltage allows for external control of the MO2020se's frequency. THE FREQUENCY CONTROL MUST BESET TO MAXIMUM FOR PROPER OPERATION OF THE VCO CONTROL.
• Frequency range from 20Hz to 24kHz • Balanced XLR, RCA and 1/4" unbalanced Outputs • Sine and Square wave outputs • -30 dB pad for referencing
SPECIFICATIONS: Output Level:
Frequency: Varies the frequency generated by the MO2020se from 20Hz to 24kHz.
PLEASE NOTE: THE FREQUENCY MARKINGS ON THE MO2020 ARE APPROXIMATE AND MAY VARY. FOR ACCURATE FREQUENCY SELECTION, USE A RELIABLE FREQUENCY COUNTER.
Sine Out: Balanced XLR, RCA and 1/4" unbalanced jacks containing the sine wave signal.
EN8F629_v1.3

8.1. CMCON-比较器控制寄存器:(19H).............................................................................................................. 19 8.2. VRCON-参考电压控制寄存器:(99H).......................................................................................................... 20
7.1. T1CON—TIMER1 控制寄存器:(10H)............................................................................................................ 18 7.2. PSTA-电源控制寄存器:(8EH)....................................................................................................................19
JXstar系统开发手册V1.2

JXSTAR 软件开发平台
系统开发手册 V1.0
Tony Tan 官网: QQ 群:169154606
平台开发手册
目录
1. 前台扩展指南 ...........................................................................................................................4 1.1. 文件说明...................................................................................................................4 1.1.1. 文件夹说明...........................................................................................................4 1.1.2. 前台基类说明.......................................................................................................5 1.1.3. 开发工具介绍.......................................................................................................5 1.2. 前台执行机制说明...................................................................................................6 1.2.1. 登录事件加载.......................................................................................................6 1.2.2. 功能页面加载.......................................................................................................6 1.2.3. 按钮事件加载.......................................................................................................7 1.2.4. 页面数据加载.......................................................................................................7 1.3. 前台代码扩展原理...................................................................................................7 1.3.1. 扩展原理...............................................................................................................7 1.4. 常见Grid扩展脚本 ...................................................................................................9 1.4.1. Grid自定义事件 ...................................................................................................9 1.4.2. Grid页面初始化扩展 ......................................................................................... 11 1.4.3. Grid系统事件扩展 ............................................................................................. 11 1.4.4. 数据导入的查询条件扩展.................................................................................12 1.4.5. 下拉选择功能工具栏扩展.................................................................................13 1.4.6. 在表格中添加按钮列.........................................................................................14 1.4.7. 在表格中添加超链接列.....................................................................................15 1.4.8. 在表格中取树形节点数据.................................................................................15 1.4.9. 在树形控件中显示本级复选框.........................................................................16 1.4.10. 在Grid工具中添加“时间段、部门选择”的查询栏......................................16 1.5. 常见Form扩展脚本 ................................................................................................18 1.5.1. Form自定义事件 ................................................................................................18 1.5.2. Form页面初始化扩展 ........................................................................................19 1.5.3. Form系统事件扩展 ............................................................................................21 1.5.4. Form数据加载后扩展 ........................................................................................21 1.5.5. Form取左边树形节点 ........................................................................................22 1.5.6. 自定义事件执行后扩展.....................................................................................22 1.5.7. 无脏数据标志的赋值方法.................................................................................23 1.5.8. Form事件执行后反馈数据到页面 ....................................................................23 1.5.9. Form-SubGrid布局功能开发方法 .....................................................................23
MPLAB Harmony 开发平台用户指南说明书

STANDARD FEATURES•MPLAB® Harmony is a flexible, abstracted, fully integrated firmware development platform for PIC32 microcontrollers•Broad range of Middleware Stack/Libraries, including: USB, TCP/IP, Wi-Fi™, File System, Graphics, Bootloaders, Bluetooth™, Audio, DSP, Math, Cryptography, Drivers, System Services, and more•Over 160 Application Demonstrations with up to 600 application configurations to accelerate applicationdevelopment•Seamlessly integrates third-party solutions (RTOS, Middleware, Drivers, etc.) into the software frame-work•RTOS support, which includes: FreeRTOS™, OPENRTOS, Express Logic Thread X, SEGGER embOS®, Micriμm® μC/OS-II™, Micriμm μC/OS-III™ •Middleware support, which includes: SEGGER emWin®,InterNiche T echnologies, Inc., wolfSSL, and PubNub®•Both free and enabling license terms providedFor a detailed list of features, please visit the MPLAB Harmony Web page at:/harmonyFrom the landing page, scroll down and select the Features tab.DESCRIPTIONMPLAB Harmony is a flexible, abstracted, fully integrated firmware development platform for PIC32 microcontrollers. MPLAB Harmony's modular architec-ture allows drivers and libraries to work together with minimal effort. It is scalable across PIC32 Microchip devices to custom fit customers’ requirements. MPLAB Harmony takes key elements of modular and object oriented design, adding an Operating System Abstraction Layer (OSAL) that provides the flexibility to use a Real-Time Operating System (RTOS) or work without one, and provides a framework of software modules that are easy to use, configurable for your specific needs, and that work together in complete har-mony.In addition, the MPLAB Harmony Configurator (MHC) and code development format allows for maximum reuse and reduces time to PLIANCECompliant with MISRA-C:2012 Mandatory Standards:•MPLAB Harmony Peripheral Libraries•TCP/IP LibraryDEVELOPMENT TOOLS•MPLAB X IDE v4.0 or later is required•MPLAB XC32 C/C++ Compiler v1.44 (ISO 26262)•MPLAB X IDE plug-ins:-MPLAB Harmony Configurator (MHC) v2.04.xx THIRD-PARTY DEVELOPERSMicrochip offers a range of documentation to assist you with the design of your own software offerings for MPLAB® Harmony. These documents, which are pro-vided with the installation Help, are also available for download from the MPLAB Harmony website (see “Download Information” for details).•MPLAB Harmony Overview•MPLAB Harmony Compatibility Guide•MPLAB Harmony Tutorial•MPLAB Harmony Driver Development Guide •MPLAB Harmony Configurator User's Guide •MPLAB Harmony Configurator Developer's Guide •MPLAB Harmony Graphics Composer User's Guide •MPLAB Harmony Test Harness User's Guide•MPLAB Harmony Compatibility Checklist WorksheetSoftwareFrameworkMPLAB HARMONY v2.04ADDITIONSAria User Interface Library:•Improved drawing performance•Added caching and pre-emption options•Updated touch driver for maXTouch support, performance MPLAB Harmony Graphics Composer:•New windows environment, docking, organization •Enhanced asset manager, filtering, graphical displays•Screen edit copy plus paste, zoom External Display Controllers:•SSD1963 – new driver and example using PIC32MK devices•ILI9488 – new drivers for SPI, parallel interfaces, maXTouch Xplained Ultra board•8-bit display buffer for LCCG, new global palette options•Updated GPU library, new application examples for PIC32MZ DA devices•Updated display manager to support above driver templates New Application Examples:•BM64 Bluetooth BLE communication •8-bit palette support with simple motion•External graphics assets from SQI memory and USB MSD•Updates to graphics using GPU in the aria_coffee_maker demonstration•New application example for PIC32MK using SSD1963•New example with multiple language support for the SEGGER emWin Graphics Library•Updated examples showing the 5” WVGA display •Updated audio decoder using FLAC•New application for audio encoding example to USB MSD plus FS•Multiple new graphics and audio application configurations for PIC32MX devices DSP Library:•Added CMSIS Library and support•Revised C Math libraries, updated to include multiple family support Third Party :•Updated WolfSSL with TLS 1.3 supportMPLAB Harmony, including the current release notes and Software License Agreement, is available for download by visiting:/mplabharmonyADDITIONAL RESOURCESMPLAB Harmony TV offers a wide range of getting started and training videos. The video content is available by scrolling to the bottom of the MPLAB Harmony webpage at:/mplabharmony The Microchip Developer Site provides short introductory videos, self-paced training modules, and answers to frequently asked questions./harmony:start。
OmniStudio Developer Edition 开发者指南说明书

B efore You BeginD id you sign up for a special OmniStudio Developer Edition org already? You’ll need one to d o the steps in this guide. Here’s how to request one if this is your first time completing an O mniStudio module:1. S ign up for a f ree Developer Edition org with OmniStudio .2. F ill out the form.a. F or Email, enter an active email address.b. F or Username, enter a username that looks like an email address and isu nique, but it doesn't need to be a valid email account (for example,y****************************).c. A fter you fill out the form, click S ign me up . A confirmation m essage appears.3. W hen you receive the activation email (this might take about 10 minutes), open ita nd click V erify Account .4. C omplete your registration by setting your password and security challenge question.T ip: W rite down your username, password, and login U RL for easy access later.Y ou are logged in to your Developer Edition and you can begin practicing.S et Up Remote Site Settings for FlexCards1. C lick the App Launcher , and then select the O mniStudio A pp.2. C lick the “ G ear ” icon to go to S etup . This opens a new tab.3. R eturn to the previous tab, open the dropdown menu, and select O mniStudioF lexCards .4. C lick W arnings . The Warnings message displays, showing the URLs needed inR emote Site Settings for Lightning web components to work correctly in FlexCards.5. R eturn to the Setup browser tab. In the Q uick Find b ox, search for R emote SiteS ettings a nd click to open it.6. R eturn to the tab with the Warnings message and copy the URL ending inl .7. I n the Remote Site Settings tab, click E dit n ext to the Remote Site ending inl .8. P aste the URL you copied over the URL in the R emote Site URL field, then click S ave .9. C lick R emote Site Settings t o return to the list.10. C lick E dit n ext to the Remote Site ending in v .11. R eturn to the tab with the Warnings message and copy the URL ending inv . Copy the URL.12. P aste the URL you copied over the URL in the R emote Site URL field, then click S ave .13. R eturn to the tab with the Warnings message. Close the modal window and refresht he tab. The W arnings b utton is now gone.U pdate Session Settings1. R eturn to the browser tab with S etup o pen.2. I n the Q uick Find e nter s ession a nd select S ession S ettings .3. S croll up the page and clear the checkbox next to U se Lightning Web Security forL ightning web components . (The checkbox should be b lank.)4. S croll back down and click S ave .D eploy OmniScripts1. F rom the OmniStudio app, open the Object dropdown menu and selectO mniScripts .2. A ctivate the following OmniScripts: t eam/editAccount ,t eam/editContact ,t eam/editCase , and t eam/updateAccountPrimaryContact .Y ou can activate the OmniScript without opening it by first expanding it, clicking thea rrow to the far right of the row with the starter version, and then selectingA ctivate>OK .B uild a FlexCard with External Data R equirements “As a service agent, I'd like to view weather and weather forecast information for thea ccount's location and see alerts of any hazardous weather conditions .”C reate a FlexCard that displays the current weather using a data source outside ofS alesforce. Then add a flyout action to display 5-day weather forecast data in a datatable. P rerequisites●N oneT asks1. C onfigure the Data Source for the Weather Child FlexCard2. A dd and Style an Image Element3. C reate a Child FlexCard with a Datatable for Forecast Data4. C onfigure the Flyout Action for the 5-Day ForecastT ime●25 minsW hat You Will BuildT ask 1: Configure the Data Source for the Weather Child FlexCard1. C reate a child FlexCard for the weather.a. I n the O mniStudio FlexCards t ab, type t eam i n the S earch bar.b. L ocate t eamStarterWeather (version 1) a nd open it. T he data source, image,a nd flyout action have not been completed, but the elements have beens tyled already by the team.c. C lick C lone t o clone and rename the FlexCard.d. R ename it to t eamWeather . Click C lone .2. S elect and configure the data source.a. G o to the S etup panel a nd note O mniScript Support i s selected. This meanst he card can be embedded in an OmniScript.b. S croll to D ATA SOURCE .c. S elect I ntegration Procedures a s the Data Source Type.d. I n the N ame field, select t eam_getWeatherDetails .e. C lick + Add New u nder I nput Map (do this twice) and e n ter the followingv ariables:K ey V alueD ays 5A ccountId {recordId}3. C onfirm the stub weather data is entering your JSON.a. C lick the S ave & Fetch . Go to the JSON tab.b. C onfirm the data has two different nodes: A Forecast node with date,c ondition, Hi/Lo Temp in °F and °C, and a Current node with condition,C ity/State and Temp °F and °C.N OTE: T he FlexCard the team made is set to Fahrenheit. If you prefer usingC elsius, select the T emperature field and change it i n the P roperties p anel.4. T rim the JSON node to only provide the current weather data to the card.a. C lick O K .b. I n the R esult JSON Path field, select [“Current”] .c. C lick S ave & Fetch a gain and verify you only see the C urrent node with thec urrent weather stub data.d. C lick O K .e. T he fields on the canvas are now populated with the stub data.T ask 2: Add and Style an Image Element1. A dd an I mage e lement using a URL.a. S elect the W eather Image b lock in the canvas. It’s above the weather datay ou just populated.b. G o to the B uild p anel and drag an I mage e lement to t he Image block.c. W hile in the P roperties p anel, locate the I mage Source field. Read thet ooltip. Clicking the magnifying glass opens the Image Source window.Y ou can upload an image, select an image from your org’s libraries, or entert he URL of an image. Uploaded images are saved to your org’s library ofd ocuments for reuse.d. C lick the magnifying glass next to the I mage Source field.e. C lick in the field S elect an Image from Content Document .f. S elect w eatherbannerActive (Version:1) f rom the list.g. C lick S ave .h. C hange the image S ize t o L arge .i. C lick P review .T he remaining element in this FlexCard is for the flyout action. Leave this alone for now, y ou’ll come back to it after you create the flyout FlexCard, which is next.W hat You Will BuildT ask 3: Create a Child FlexCard with a Datatable for Forecast Data Y ou’ll now create the child FlexCard to enter in the Flyout field in the teamWeather F lexCard.1. C reate a new child FlexCard.a. I n the O mniStudio FlexCards t ab, type t eam i n the Search bar.b. L ocate t eamStarterWeatherForecast (version 1) a nd open it. The datas ource and data table have not been completed, but the icon has alreadyb een formatted by the team.c. C lick C lone t o clone and rename the FlexCard.d. R ename it to t eamWeatherForecast . Click C lone .2. S elect and configure the data source.a. G o to the S etup p anel and scroll to D ATA SOURCE .b. I n the D ata Source Type field, select I ntegration P rocedures .c. I n the N ame field, select t eam_getWeatherDetails .d. C lick + Add New u nder I nput Map (do this twice) and enter the followingv ariables:K ey V alueD ays 5A ccountId {recordId}e. C lick the S ave & Fetch b utton. Verify the stub data displays in the J SON t ab.Y ou see two nodes: “Forecast” a nd “Current” .f. C lick O k .g. T o trim the data that’s returned to only the forecast, click in the R esult JSONP ath a nd select [“Forecast”] .h. C lick S ave & Fetch a gain and confirm only Forecast data appears. Click O k t or eturn to the FlexCard.3. A dd a D atatable e lement to display the 5-day forecast data.a. S elect the 5-Day Forecast b lock.b. I n the B uild p anel drag a D atatable e lement inside t he 5-Day Forecast block.c. S elect the E dit i con to configure the table.4. C onfigure the D ate a nd H i/Lo Temperature fields in the datatable.a. C hange the T ype o f the date field to D ate . This sets the format of the data toD D-MM-YYYY.b. N ote there are two lines for different HiLoTemp fields: Celsius and Fahrenheit.D iscard the field for the unit you d on’t w ant to use b y clicking the trashcan /b in icon to the right of the line.c. U pdate the F ield Label f or the Hi/Lo Temp field to H i/Lo Temp °F o r H i/LoT emp °C . To display a degree symbol on a Mac, use s hift+option+8 . For a PC,u se ASCII code 0176.N OTE: I f the degree symbol doesn’t display now or in future, try clearing thel abel field and typing it in again, or try inserting a space between the symbola nd C/F, for example, Temp ° F.d. C lick S ave .T he datatable looks like the below when you finish. Don’t worry that you can’ts ee the data populated. The Design view doesn’t show data in a table, butP review does.5. B old the labels in the table header.a. G o to the S tyle p anel and scroll to D ATATABLE . Locate T able Head .b. E nter b old i n the F ont Weight field.c. S croll to A LIGNMENT a nd set T ext Align t o L eft . (This will ensure the headersa nd text in the table are aligned in the same way.)d. P review t he FlexCard. You see the table five times for the 5 days you enteredi n the Input Map. A new FlexCard has R epeat Records e nabled by default.T his means the data loops through records. When you want to display data t hat doesn’t need to be looped through and displayed as a list, disable thisf eature. Datatables already loop over and list multiple records, so disable it.e. R eturn to the D esign m ode and go to the S etup p anel.f. E xpand R epeat Options a nd disable R epeat Records .g. P review a gain. You see just the one datatable now.h. C lick A ctivate .T here is no need to configure P ublish Options , as this is a child FlexCard in t he teamWeather flyout action.T ask 4: Configure the Flyout Action for the 5-Day Forecast1. C onfigure the flyout action.a. R eturn to the t eamWeather F lexCard. Refresh the screen. This will ensure then ew child card is an option for the Action element.b. S elect the A ction e lement and change the E lement Name t o F orecast i nt he P roperties p anel.c. F ill in the fields as follows:P roperty V alue N otesL abel G et 5-Day ForecastI con s tandard:forecastsD isplay as Button U nder D isplay As B utton ✓O utline BrandA ction Type F lyoutF lyout Type C hild CardF lyout t eamWeatherForecast I f the card isn’t visible, c onfirm you activated it a nd refresh the page.O pen Flyout in M odald. G o to the S tyle p anel. Locate the Color field for the Label. Enter #3A6D9D a st he label color.e. S croll to the Icon Color field. Enter #3A6D9D a s the icon color.2. P review the FlexCard to confirm the table appears correctly.a. P review t he FlexCard.b. C lick the G et 5-Day Forecast b utton to view the forecast table. Verify all thefields are populating in the FlexCard.。
Rthingsboard 0.2.7 用户指南说明书

Package‘Rthingsboard’October12,2022Type PackageTitle'ThingsBoard'APIVersion0.2.7Date2022-01-18DescriptionThe goal of'Rthingsboard'is to provide interaction with the API of'ThingsBoard'(<https://thingsboard.io/>),an open-source IoT platform for device management,data collection,processing and visualization. License AGPL-3Encoding UTF-8Imports httr,logger,methods,dplyrSuggests badger,ggplot2,testthatRoxygenNote7.1.2URL https://ddorch.github.io/Rthingsboard/,https:///DDorch/Rthingsboard#readmeBugReports https:///DDorch/Rthingsboard/issuesNeedsCompilation noAuthor David Dorchies[aut,cre](<https:///0000-0002-6595-7984>)Maintainer David Dorchies<***********************>Repository CRANDate/Publication2022-01-1916:42:42UTCR topics documented:Date2EpochMilli (2)EpochMilli2Date (2)ThingsboardApi-class (3)ThingsboardApi_checkToken (4)ThingsboardApi_getKeys (4)12EpochMilli2Date ThingsboardApi_getTelemetry (5)ThingsboardApi_getToken (5)ThingsboardApi_getValues (6)Index7 Date2EpochMilli Convert a date into an epoch in millisecondsDescriptionThis function allows to convert epoch timestamp in seconds to an epoch in millisecondsUsageDate2EpochMilli(ts)##S3method for class POSIXtDate2EpochMilli(ts)##S3method for class numericDate2EpochMilli(ts)Argumentsts a numeric representing an epoch in seconds or a POSIXt dateValuea character of the epoch in millisecondsExamplesDate2EpochMilli(as.numeric(Sys.time()))EpochMilli2Date Convert an epoch in milliseconds into a dateDescriptionConvert an epoch in milliseconds into a dateUsageEpochMilli2Date(x,timezone="GMT")ThingsboardApi-class3 Argumentsx A character or a numeric representing an epoch in millisecondstimezone A character with the time zone used for the conversionValueA POSIXct,the date corresponding to the epochExamplesepoch<-Date2EpochMilli(as.numeric(Sys.time()))EpochMilli2Date(epoch)ThingsboardApi-class Thingboard API ClassDescriptionThingboard API ClassFieldsurl character URL of the’ThingsBoard’IoT platform.publicId character the public ID of the devicetoken character the current tokentokenTimeOut A numeric contains the time out of a token in seconds(default300)tokenEpiration A numeric with the Epoch of the expiration date time of current tokenSee AlsoThe ThingsboardApi class methods:•ThingsboardApi_checkToken for checking and refreshing the token•ThingsboardApi_getToken for getting authorisation token from Thingsboard server for a spe-cific device•ThingsboardApi_getKeys for fetching data keys of an entity•ThingsboardApi_getValues and ThingsboardApi_getTelemetry for fetching telemetry of an entity4ThingsboardApi_getKeys Examplesthinksboard_api=tryCatch({ThingsboardApi(url="http://scada.g-eau.fr",publicId="299cedc0-f3e9-11e8-9dbf-cbc1e37c11e3")},error=function(e){message("An error occured:\n",e)return(FALSE)})ThingsboardApi_checkTokenCheck if the token is timeouted and refresh it if necessaryDescriptionThis method is automatically call by each other methods of the class ThingsboardApi.So,except for debugging purpose,it’s not useful to call directly.ValueNULLThingsboardApi_getKeysFetch data keys for an entityDescriptionFetch data keys for an entityArgumentsentityId character entity IDentityType character(default"DEVICE")DetailsThe description of this operation in API documentation is here:https://thingsboard.io/docs/ user-guide/telemetry/#get-telemetry-keysValueA vector of character with the keys available for the requested device.ThingsboardApi_getTelemetry5 ThingsboardApi_getTelemetryFetch telemetryDescriptionFetch telemetry data of an entity.It uses the following API:https://thingsboard.io/docs/user-guide/telemetry/#get-telemetry-values The method getValues has a strong limitation as the’ThingsBoard’API only send the100lastvalues of each key.The method getTelemetry overcomes this limitation by automatically bycalling getValues in a loop.ArgumentsentityId A character with the entity ID given(See https://thingsboard.io/docs/user-guide/entity-views/)keys Vector of character with the list of keys from which getting the telemetry valuesentityType A character(default"DEVICE")startTs A numeric or a POSIXct representing respectively the epoch or the date of thestart of data extraction periodendTs A numeric or a POSIXct representing respectively the epoch or the date of theend of data extraction periodValueA data.frame with one row per data and3columns:•key:a character with the key•ts:a POSIXct with the timestamp of the data•value:a numeric with the value of the dataThingsboardApi_getTokenGet authorisation token from thingsboard server for a specific deviceDescriptionThis method is automatically called by ThingsboardApi_checkToken,and so by any other methodsof the class ThingsboardApi as needed.Except for debugging purpose,it’s not useful to call directly.ArgumentstimeOut numeric number of second before token timeout(defaultfield tokenTimeOut)6ThingsboardApi_getValuesValueA list with keys’token’and’refreshtoken’ThingsboardApi_getValuesFetch telemetryDescriptionSee ThingsboardApi_getTelemetry.Indexcharacter,2–5data.frame,5Date2EpochMilli,2EpochMilli2Date,2list,6NULL,4numeric,2,3,5POSIXct,3,5POSIXt,2ThingsboardApi,4,5ThingsboardApi(ThingsboardApi-class),3 ThingsboardApi-class,3 ThingsboardApi_checkToken,3,4,5 ThingsboardApi_getKeys,3,4 ThingsboardApi_getTelemetry,3,5,6 ThingsboardApi_getToken,3,5 ThingsboardApi_getValues,3,67。
Kinect开发者指南说明书

Table of ContentsAbout1 Chapter 1: Getting started with kinect2 Remarks2 Examples2 Installation or Setup2 Credits7AboutYou can share this PDF with anyone you feel could benefit from it, downloaded the latest version from: kinectIt is an unofficial and free kinect ebook created for educational purposes. All the content is extracted from Stack Overflow Documentation, which is written by many hardworking individuals at Stack Overflow. It is neither affiliated with Stack Overflow nor official kinect.The content is released under Creative Commons BY-SA, and the list of contributors to each chapter are provided in the credits section at the end of this book. Images may be copyright of their respective owners unless otherwise specified. All trademarks and registered trademarks are the property of their respective company owners.Use the content presented in this book at your own risk; it is not guaranteed to be correct nor accurate, please send your feedback and corrections to ********************Chapter 1: Getting started with kinectRemarksThis section provides an overview of what kinect is, and why a developer might want to use it.It should also mention any large subjects within kinect, and link out to the related topics. Since the Documentation for kinect is new, you may need to create initial versions of those related topics. ExamplesInstallation or SetupDetailed instructions on getting kinect set up or installed.Setting Up a Kinect SensorKinect for Windows 1.5, 1.6, 1.7, 1.8Here are some simple steps to get your Kinect sensor up and running.Step 1: Mount the Sensor on a Stable SurfacePlace the sensor on a stable surface in a location where it will not fall or be struck during use. Here are some other tips.Do not place the Kinect on or in front of a speaker or on a surface that vibrates or makes noise.Keep the Kinect out of direct sunlight.Use the Kinect within its specified operating temperature range of 41 to 95 degrees Fahrenheit (5 to 35 degrees Celsius). If the sensor is exposed to an environment outside of itsprescribed temperature range, turn it off and allow the temperature to stabilize within the specified range before you use the sensor again.Do not tilt a Kinect on its base. Manually tilting the Kinect can damage the sensor. TheKinect tilt angle is controlled by software; see Kinect Explorer - WPF C# Sample for an example.Step 2: Install the Kinect for Windows SDKIf you haven't done so already, download and install the free SDK from the Kinect for Windows download page.If you haven't done so already, download and install the free Developer Toolkit from theKinect for Windows download page.Step 3: Plug in your Kinect sensorConnect the power supply for your Kinect to an external power source.Connect the Kinect to a USB port on your PC and wait for Windows to recognize it.All the drivers, including audio, will load seamlessly.When you install the Kinect for Windows SDK, the installation package includes the Kinect drivers.When the Kinect drivers are installed on a Windows-based PC, a Kinect that is plugged into the PC's USB port appears as a multicomponent USB device.There is a known issue regarding USB host controller compatibility.After loading the drivers, you need to set up your development environment. If you are using Visual Studio, continue with Configuring the Development Environment to help you create your first C# or C++ application.Troubleshooting TipsThe following tips will help you get started using your Kinect:If a non-Microsoft driver for the Kinect is installed on your computer, the Kinect for Windows drivers might not install or function correctly. To fix this, uninstall the non-Microsoft drivers before installing the Kinect for Windows SDK.Connect the power supply for the Kinect to an external power source; if the Kinect has only power from the USB connection, it will be minimally functional and light the LED, but it must be connected to an external power source to be fully functional.No tools are required for calibration of audio and video.Your Kinect should be the only device plugged into a USB hub on your computer. If you have more than one Kinect, connect them to different USB controllers. If 2 hubs are connected tothe same controller, only 1 Kinect can work at a time.The Kinect is protected from overheating by a fan. It is controlled by the sensor's firmware, which turns off the camera at 90 degrees Celsius. There is no software interface forapplications to control the fan.Reasonable lighting, neither extremely dark nor extremely bright, is important for capturing images with the RGB camera. Incandescent, fluorescent, and natural lighting provide no special obstacles, but do not point an intense or constant light source at the camera because this can blind the RGB sensor.The depth sensor functions adequately in typical and reduced lighting, although in near darkness there is increased noise in the signal.The depth sensor reads depth information from reflected light. Objects that are highlyreflective (mirrors and shiny metal) or highly absorptive (fluffy and/or dark materials) may not be registered by the depth sensor as successfully as other objects.SourceLinuxUbuntu/Debian Official packagesStarting from Ubuntu 11.10 (Oneiric) and Debian 7 (Wheezy), Ubuntu and Debian provide official packages of libfreenect. You can install them easily in a console:$ sudo apt-get install freenectIn Ubuntu 12.04 the gspca kernel driver prevent libfreenect from claiming the Kinect device in user-mode. Either remove and blacklist the module$ sudo modprobe -r gspca_kinect$ sudo modprobe -r gspca_main$ echo "blacklist gspca_kinect" |sudo tee -a /etc/modprobe.d/blacklist.confor install a recent versions of libfreenect that can automatically detach the kernel driver by adding Florian Echtler libtisch PPA (see below) with updated libfreenect packages for Ubuntu 12.04.The freenect device is accessible to any user belonging to the group 'plugdev'. By default, a desktop user belongs to the plugdev group but if you need to add them to the group:$ sudo adduser $USER plugdevthen log out and log in again NeuroDebian repositoryIf you want a recent version of libfreenect no matter which version of Debian or Ubuntu you use, backports of the latest release of libfreenect for all supported version of Debian and Ubuntu (namely Ubuntu Lucid(10.04), Maverick (10.10), Natty (11.04), Oneiric (11.10) and Debian Squeeze and Wheezy at the time of writing) are available on NeuroDebian repository . The packages available there are created by the maintainers of the official Debian package and follows the standards of Debian/Ubuntu.To enable the NeuroDebian repository:$ wget -O- /lists/$(lsb_release -cs).us-nh | sudo tee/etc/apt/sources.list.d/neurodebian.sources.list$ sudo apt-key adv --recv-keys --keyserver 2649A5A9$ sudo apt-get updateInstalling libfreenect is the same as before:$ sudo apt-get install freenectMake sure your user belongs to the plugdev group (The default for a desktop user) to access the device without the root privileges. If it is not the case, add them by:$ sudo adduser $USER plugdevand log out and log in again libtisch PPAAn Ubuntu launchpad ppa for Lucid(10.04), Maverick (10.10), Natty (11.04), Oneiric (11.10) and Pangolin (12.04) is available at this link.to use it, open a console and execute:$ sudo add-apt-repository ppa:floe/libtisch$ sudo apt-get updateAfter that, you can use:$ sudo apt-get install libfreenect libfreenect-dev libfreenect-demosThis will install libfreenect, the development headers, and the demo applications.After that, you need to add yourself to the 'video' group and log back in. The package already includes the necessary rules for the udev daemon so that accessing the device will be possible for users in the group video.$ sudo adduser $USER videobe sure to log out and back in. You don't need to reboot, just plug in the kinect device right now (if it was already connected, unplug and plug back in).To start the demo applications use:$ freenect-glviewProblems with accessing deviceIn case of problems, run$ lsusb | grep Xboxwhich should list 3 devices> lsusb | grep Xbox Bus> 001 Device 021: ID 045e:02ae Microsoft Corp. Xbox NUI Camera Bus 001> Device 019: ID 045e:02b0 Microsoft Corp. Xbox NUI Motor Bus 001 Device> 020: ID 045e:02ad Microsoft Corp. Xbox NUI AudioIf they are not present, runecho -1 | sudo tee -a /sys/module/usbcore/parameters/autosuspendand reconnect Kinekt and Kinect Camera should be listedYou find all demo applications starting with the freenect- prefix. Ubuntu Manual InstallQuick copy-paste instructions to get up-and-running instantly:sudo apt-get install git-core cmake libglut3-dev pkg-config build-essential libxmu-dev libxi-dev libusb-1.0-0-devgit clone git:///OpenKinect/libfreenect.gitcd libfreenectmkdir buildcd buildcmake ..makesudo make installsudo ldconfig /usr/local/lib64/sudo freenect-glviewNote: If you getting an error saying apt-get cannot find libglut3, you might be on anewer version of Ubuntu that has freeglut3-* instead of libglut3-*, so your initial apt-getinstall would look like:sudo apt-get install git-core cmake freeglut3-dev pkg-config build-essential libxmu-dev libxi-dev libusb-1.0-0-devTo use Kinect as a non-root user do the following:sudo adduser $USER videoAlso make a file with rules for the Linux device manager:sudo nano /etc/udev/rules.d/51-kinect.rulesCopy and paste:# ATTR{product}=="Xbox NUI Motor"SUBSYSTEM=="usb", ATTR{idVendor}=="045e", ATTR{idProduct}=="02b0", MODE="0666"# ATTR{product}=="Xbox NUI Audio"SUBSYSTEM=="usb", ATTR{idVendor}=="045e", ATTR{idProduct}=="02ad", MODE="0666"# ATTR{product}=="Xbox NUI Camera"SUBSYSTEM=="usb", ATTR{idVendor}=="045e", ATTR{idProduct}=="02ae", MODE="0666"# ATTR{product}=="Xbox NUI Motor"SUBSYSTEM=="usb", ATTR{idVendor}=="045e", ATTR{idProduct}=="02c2", MODE="0666"# ATTR{product}=="Xbox NUI Motor"SUBSYSTEM=="usb", ATTR{idVendor}=="045e", ATTR{idProduct}=="02be", MODE="0666"# ATTR{product}=="Xbox NUI Motor"SUBSYSTEM=="usb", ATTR{idVendor}=="045e", ATTR{idProduct}=="02bf", MODE="0666"Be sure to log out and back in.If you can't access or still need root privileges to use your device: in some cases there might be conflicts between permissions of two drivers installed (libfreenect and primesense). If this is your case, try reinstalling primesense's sensor driver and keep only primesense's rules file/etc/udev/rules.d/55-primesense-usb.rule s, removing the /etc/udev/rules.d/51-kinect.rules file if you created it.Read Getting started with kinect online: https:///kinect/topic/10611/getting-started-with-kinectCredits。
Imazu of Things App用户手册说明书

User Manual-Imazu of Things AppC O N T E N T S1 2 3 4 5 6 7 8 9General Z-Wave InformationSupported Association GroupBasic Command HandlingInteroperabilityZ-Wave ConfigurationDownloading & Creating Account.INSTALLING THE HOST DeviceINSTALLING THE IOT Device -Magnetic SensorINSTALLING THE IPC DeviceGENERAL Z-Wave INFORMATION§Z-Wave Plus TypeüDevice Type : Central ControllerüRole Type : Central Static Controller§Supported Z-Wave Command ClassüCOMMAND_CLASS_ZWAVEPLUS_INFO_V2üCOMMAND_CLASS_TRANSPORT_SERVICE_V2üCOMMAND_CLASS_CRC_16_ENCAPüCOMMAND_CLASS_APPLICATION_STATUSüCOMMAND_CLASS_SUPERVISIONüCOMMAND_CLASS_INCLUSION_CONTROLLERüCOMMAND_CLASS_MULTI_CMDüCOMMAND_CLASS_SECURITYüCOMMAND_CLASS_SECURITY_2üCOMMAND_CLASS_FIRMWARE_UPDATE_MD_V5üCOMMAND_CLASS_NETWORK_MANAGEMENT_BASIC_V2üCOMMAND_CLASS_NETWORK_MANAGEMENT_PROXY_V2üCOMMAND_CLASS_NETWORK_MANAGEMENT_INCLUSION_V2üCOMMAND_CLASS_POWERLEVELüCOMMAND_CLASS_MANUFACTURER_SPECIFIC_V2üCOMMAND_CLASS_VERSION_V2üCOMMAND_CLASS_NETWORK_MANAGEMENT_INSTALLATION_MAINTENANCE üCOMMAND_CLASS_ASSOCIATION_V2üCOMMAND_CLASS_ASSOCIATION_GRP_INFO_V3üCOMMAND_CLASS_DEVICE_RESET_LOCALLY §Control Z-Wave Command Class üCOMMAND_CLASS_BASICüCOMMAND_CLASS_BATTERYüCOMMAND_CLASS_SWITCH_BINARYüCOMMAND_CLASS_SWITCH_MULTILEVELüCOMMAND_CLASS_SENSOR_MULTILEVEL_V5üCOMMAND_CLASS_SECURITYüCOMMAND_CLASS_SECURITY_2üCOMMAND_CLASS_CRC_16_ENCAPüCOMMAND_CLASS_ASSOCIATION_V2üCOMMAND_CLASS_MULTI_CHANNEL_V4üCOMMAND_CLASS_MANUFACTURER_SPECIFIC_V2üCOMMAND_CLASS_NOTIFICATION_V4üCOMMAND_CLASS_WAKE_UP_V2üCOMMAND_CLASS_VERSION_V2üCOMMAND_CLASS_ZWAVEPLUS_INFO§Supported Association GroupsüGroup ID : 1 –Lifeline MAX NODES IN GROUP : 5§Basic Command HandlingüThis equipment can control a device which supports Basic Command Class by sending BASIC OFF[0x00] and ON[0xFF] from the GUI.üThis equipment can receive Basic Command from a device, but it does nothing and just return ACK.§InteroperabilityüThis product can be included and operated in any Z-Wave network with other Z-Wave certified devices from other manufacturers and /or other application's. All non-battery operated nodes within the network will act as repeaters regardless of vendor to increasereliability of the network.üThis product is a security enabled Z-Wave product that is able to use encrypted Z-Wave messages to communicate to other security enabled Z-Wave products.üS2 Security Supported Command Classes§Z-Wave ConfigurationüAssociation group1.Support 1 association group2.Grouping identifier : 1, lifeline3.Maximum number of devices that cat be added to the group: 14.When reset, Device Reset Locally Command Class will send to Lifeline node id.üDevice DetectionAdded device will detect automatically, users can control it and watch information(alarm, battery, meter, etc) via GUI.üMesh NetworkAdded devices will show on device list. All non-battery powered nodes can act as repeaters regardless of manufacturers.üBasic CommandBasic Command is useful in a scene.üReplicationController can transmit protocol replication data automaticallyDOWNLOADING & CREATING ACCOUNT§Installing HT IoT AppHowever, it is currently not available for download and we are getting ready by October.§Creating Account§Sending an authentication mailPlease check to your registered email and verify email.① A verification email is sent to your account.②Click on the Verify Email Button provided withthe email and complete the process.12INSTALLING THE HOST DEVICE§The first registration of your host device.§Registering a Host device.After running the app and sign in, please follow the instruction below for the first registration of your Host device by IoT app.Shows the list of registered Homeway devices on the My Home screen.①Touch the button on the upper left of the1main screen.§Selecting the Host device installation.§Selecting Host device.§Wi-Fi connection.§Installing Host device§Registered Host listINSTALLING THE IOT DEVICE -INCLUSIONInstalling The IOT DeviceCONFIDENTIAL §Registering a IoT device –Inclusion.User can now trigger the device’s node information frame to add to the ht-host Z-Wave network.It is recommended that the user not change the security class settings.§Registering a IoT device –Inclusion.①Touch the “ADD IOT DEVICE” button the IoTdevice screen.12②Then, touch the ‘NEXT’ button.§Registering a IoT device –Inclusion.§Installing IoTdeviceif the registration if successful, display the magnetic sensor on the list of IoT device.①if the registration if successful, Now you canuse. Then, touch the ‘CONFIRM’ button.12②Display detail page for the magnetic sensor.you can check if it is in normal condition with"CONNECT". We are going to update to showmore information in the future.③Then, touch thebutton. You can modifythe sensor name.3INSTALLING THE IOT DEVICE –EXCLUSION§Remove the IoT device –Exclusion.§Registering a IoT device –Exclusion.①Touch the “MODIFY IOT DEVICE” button the IoTdevice screen.②Touch the “REMOVE IOT DEVICE” button the IoT device screen.21§Registering a IoT device –Exclusion.1①Then, touch the ‘NEXT’ button.§example –Magnetic SensorMagnetic Sensor①Open the lid on the magnetic sensor.②Quickly click the black button three times.③Check if the LED of the magnetic sensor is thered blinking rapidly five times.12 3INSTALLING THE IOT DEVICE –REMOVE FAIL NODE§Registering a IoT device –Remove Fail Node§Registering a IoT device –Remove Fail NodeINSTALLING THE IOT DEVICE –REPLACE FAIL NODE§Registering a IoT device –Replace Fail Node①Press the “NEXT” button for replace node. 1②Press the registration button ofthe node to be replaced and waitapproximately 100 seconds.2§Registering a IoT device –Replace Fail NodeINSTALLING THE IOT DEVICE –NETWORK UPDATE§Registering a IoT device –Network Update①Press the “CONFIRM” button. 1②When a network update isstarted, it takes approximately100 seconds..2§Registering a IoT device –Network UpdateINSTALLING THE IOT DEVICE –SET LEARN MODE(INITIATE)§Registering a IoT device –Set Learn ModeTo complete an S2 inclusion, the DSK may need to be entered on the including Controller.Since our design is based on “primary controller”, we recommend that you just use our ht-host as “primary controller”①Press the button. 1②Press the “LEARN MODE”button to start the learn mode. 2§Registering a IoT device –Set Learn Mode①Press the “NEXT” button. 1②Wait for another controller enterthe “Inclusion mode”, about 100seconds.2§Registering a IoT device –Set Learn ModeINSTALLING THE IOT DEVICE –RESET§Registering a IoT device –ResetIf this controller is the primary controller for your network, resetting it will result in the nodes in your network being orphaned and it will be necessary after the reset to exclude and re-include all of the nodes in the network.①Press the“IOT DEVICE RESET”button1②Press “CONFIRM” when there isa pop-up for RESET.2§Registering a IoT device –Reset§Registering a IoT device –Reset②When a Reset is started, ittakes approximately 100seconds.1END。
Adobe ColdFusion 移动应用开发指南说明书
Adobe ColdFusion DocumentationSeptember 20141. Mobile Application Development . . . . . . . . . . . . . . . . . . . . . . . . . . . . . . . . . . . . . . . . . . . . . . . . . . . . . . . . . . . . . . . . . . . . . . . . . . . . . . . . 31.1 Building Mobile Applications . . . . . . . . . . . . . . . . . . . . . . . . . . . . . . . . . . . . . . . . . . . . . . . . . . . . . . . . . . . . . . . . . . . . . . . . . . . . . . . 41.2 Debugging Mobile Applications . . . . . . . . . . . . . . . . . . . . . . . . . . . . . . . . . . . . . . . . . . . . . . . . . . . . . . . . . . . . . . . . . . . . . . . . . . . . . 111.3 Inspecting Mobile Applications . . . . . . . . . . . . . . . . . . . . . . . . . . . . . . . . . . . . . . . . . . . . . . . . . . . . . . . . . . . . . . . . . . . . . . . . . . . . . 211.4 Packaging Mobile Applications . . . . . . . . . . . . . . . . . . . . . . . . . . . . . . . . . . . . . . . . . . . . . . . . . . . . . . . . . . . . . . . . . . . . . . . . . . . . . 261.5 Troubleshooting Mobile Applications . . . . . . . . . . . . . . . . . . . . . . . . . . . . . . . . . . . . . . . . . . . . . . . . . . . . . . . . . . . . . . . . . . . . . . . . 341.6 Device Detection . . . . . . . . . . . . . . . . . . . . . . . . . . . . . . . . . . . . . . . . . . . . . . . . . . . . . . . . . . . . . . . . . . . . . . . . . . . . . . . . . . . . . . . . 371.7 Client-side CFML . . . . . . . . . . . . . . . . . . . . . . . . . . . . . . . . . . . . . . . . . . . . . . . . . . . . . . . . . . . . . . . . . . . . . . . . . . . . . . . . . . . . . . . 441.8 Mobile Templates . . . . . . . . . . . . . . . . . . . . . . . . . . . . . . . . . . . . . . . . . . . . . . . . . . . . . . . . . . . . . . . . . . . . . . . . . . . . . . . . . . . . . . . 451.9 Getting Started Examples . . . . . . . . . . . . . . . . . . . . . . . . . . . . . . . . . . . . . . . . . . . . . . . . . . . . . . . . . . . . . . . . . . . . . . . . . . . . . . . . . 471.9.1 Using the Accelerometer APIs . . . . . . . . . . . . . . . . . . . . . . . . . . . . . . . . . . . . . . . . . . . . . . . . . . . . . . . . . . . . . . . . . . . . . . . . 491.9.2 Using the Audio capture APIs . . . . . . . . . . . . . . . . . . . . . . . . . . . . . . . . . . . . . . . . . . . . . . . . . . . . . . . . . . . . . . . . . . . . . . . . . 501.9.3 Using the Camera APIs . . . . . . . . . . . . . . . . . . . . . . . . . . . . . . . . . . . . . . . . . . . . . . . . . . . . . . . . . . . . . . . . . . . . . . . . . . . . . . 531.9.4 Using the Connection APIs . . . . . . . . . . . . . . . . . . . . . . . . . . . . . . . . . . . . . . . . . . . . . . . . . . . . . . . . . . . . . . . . . . . . . . . . . . . 581.9.5 Using the Contact APIs . . . . . . . . . . . . . . . . . . . . . . . . . . . . . . . . . . . . . . . . . . . . . . . . . . . . . . . . . . . . . . . . . . . . . . . . . . . . . . 601.9.6 Using the Event API . . . . . . . . . . . . . . . . . . . . . . . . . . . . . . . . . . . . . . . . . . . . . . . . . . . . . . . . . . . . . . . . . . . . . . . . . . . . . . . . 631.9.7 Using the File APIs . . . . . . . . . . . . . . . . . . . . . . . . . . . . . . . . . . . . . . . . . . . . . . . . . . . . . . . . . . . . . . . . . . . . . . . . . . . . . . . . . 651.9.8 Using the Geolocation APIs . . . . . . . . . . . . . . . . . . . . . . . . . . . . . . . . . . . . . . . . . . . . . . . . . . . . . . . . . . . . . . . . . . . . . . . . . . 691.9.9 Using the Storage APIs . . . . . . . . . . . . . . . . . . . . . . . . . . . . . . . . . . . . . . . . . . . . . . . . . . . . . . . . . . . . . . . . . . . . . . . . . . . . . . 711.9.10 Using the Video capture APIs . . . . . . . . . . . . . . . . . . . . . . . . . . . . . . . . . . . . . . . . . . . . . . . . . . . . . . . . . . . . . . . . . . . . . . . . 72Mobile Templates template must conform to the standards outlined in .Setting breakpointsTo set breakpoints in your source code right-click in the small left margin in your source code editor and select le Breakpoint. Alternatively, you can also double-click on this position to enable or disable breakpoints.Applications device:1.3.4. Click Window > Open Perspective > Other.. and select ColdFusion Debugging: You can start viewing the variables through the following window:Similarly, you can evaluate expressions:Applications2.Invoke the application URL from the device using the ColdFusion Shell application:1. Click Window > Open Perspective > Other.. and select ColdFusion Debugging:4. Similarly, you can evaluate expressions:5.6.Note: A Weinre inspection server is bundled with the ColdFusion Server. All that you need to dois start the local Weinre Server and start remotely inspecting your applications installed ondevices.Click Start Weinre ServerWhen the Weinre Server gets successfully started, you can see a message containing the Weinre client URL:5. Click Submit ChangesNote that in the case of static files, Weinre inspection will work only if these files are served by the ColdFusion Server. If the static files are served from any other server like Apache or IIS server, the inspection may not work.ImportantNote: If any of the iOS key details are not specified, packaging will not work. Ensure that you specify ALL the details.4. Keep your CFM files and other supporting assets in a separate directory under the web root directory so that you can select just that directory.All the selected files must be present under the Server’s web root directory or under web root’s Important:sub-directories. Also, it is mandatory to have an file in your application.index.cfm PhoneGap mandates its index file to be present in the root folder, because of which ColdFusion has to mandate all the mobile applications developed by ColdFusion Builder should have the index.cfm or index.html in the application root folder.Select the PhoneGap tab.All these properties are automatically populated by ColdFusion Builder. You just need to change theauthor-specific information. Alternatively, you can also load the PhoneGap settings from an external PhoneGap configuration file. See for a sample PhoneGaphttps:///docs/config-xmlconfiguration. If you need to add any other platform-specific attributes, you can add them through by clicking the button. Note that there major changes from PhoneGap version 2.9 to 3.x. If you want to Add Attribute…manually specify a PhoneGap version, you need to understand the changes mentioned inAlso, you need to link the web root path to your project. Click >ColdFusion Project AddColdFusion Server web root directory to a linked alias:2.3. Execute the APK file to start the installationOnce installed, invoke the application from the Applications menu:。
NVIDIA DOCA SDK 开发者指南.pdf_1701842647.0832493说明书

OverviewTable of ContentsChapter 1. Introduction (1)Chapter 2. Installation (2)Chapter 3. API (3)Chapter 4. Samples (4)Chapter 5. Applications (5)Chapter 6. Tools (6)Chapter 7. Services (7)Chapter 1.IntroductionThe NVIDIA DOCA™ SDK enables developers to rapidly create applications and services on top of NVIDIA® BlueField® data processing units (DPUs), leveraging industry-standard APIs. With DOCA, developers can deliver breakthrough networking, security, and storage performance by harnessing the power of NVIDIA's DPUs.This guide walks you through DOCA's developer zone portal which contains all the information about the DOCA toolkit from NVIDIA, providing everything you need to develop DPU-accelerated applications.Chapter 2.InstallationDOCA contains a runtime and development environment for both the host and as part of a BlueField image for the DPU. The full installation instructions for both can be found in the NVIDIA DOCA Installation Guide for Linux.Whether DOCA has been installed on the host or on the DPU, one can find the different DOCA components under the /opt/mellanox/doca directory. These include the traditional SDK-related components (libraries, header files, etc.) as well as the DOCA samples, applications, tools and more, as described in this document.Chapter 3.APIThe DOCA SDK is built around the different DOCA libraries designed to leverage the capabilities of the DPUs. Under the Programming Guides section, one can find a detailed description of each DOCA library, its goals, and API. These guides document DOCA's API, aiming to help developers wishing to develop DOCA-based programs.The API References section holds the Doxygen-generated documentation of DOCA's official API. See NVIDIA DOCA Libraries API Reference Manual.Please note that, as explained in the NVIDIA DOCA gRPC Infrastructure User Guide, some of DOCA's libraries also support a gRPC-based API. More information about these extended programming interfaces can be found in detail in the programming guides of the respective libraries.Chapter 4.SamplesSamples are simple code snippets for achieving basic DOCA-based tasks using DOCA's libraries. It is recommended to review the samples while going over the programming guide of the DOCA library of interest and learning about its API. The samples are designed to show an example implementation of a single feature of a given DOCA library. As such, the samples of a given library should be treated as a direct extension of the programming guide of that library, aiming to provide code snippets to accompany developers wishing to familiarize themselves with the DOCA API.For more information about DOCA samples, refer to NVIDIA DOCA Samples Overview.For a higher-level reference of full DOCA-based programs that make use of multiple DOCA libraries, refer to Applications.Chapter 5.ApplicationsApplications are a higher-level reference code than the samples and demonstrate how a full DOCA-based program can be built. In addition to the supplied source code and compilation definitions, the applications are also shipped in their compiled binary form. This is to allow users an out-of-the-box interaction with DOCA-based programs without the hassle of a developer-oriented compilation process.Many DOCA applications combine the functionality of more than one DOCA library and offer an example implementation for common scenarios of interest to users such as application recognition according to incoming/outgoing traffic, scanning files using the hardware RegEx acceleration, and much more.For more information about DOCA applications, refer to NVIDIA DOCA Applications Overview.Chapter 6.ToolsSome of the DOCA libraries are shipped alongside helper tools for both runtime and development. These tools are often an extension to the library's own API and bridge the gap between the library's expected input format and the input available to the users.An example for one such DOCA tool is the doca_dpi_compiler, responsible for converting Suricata-based rules to their matching .cdo definition files which are then used by the DOCA DPI library.For more information about DOCA tools, refer to NVIDIA DOCA Tools Overview.Chapter 7.ServicesDOCA services are containerized DOCA-based programs that provide an end-to-end solution for a given use case. DOCA services are accessible as part of NVIDIA's container catalog (NGC) from which they can be easily deployed directly to the DPU.For more information about container-based deployment to the DPU, refer to the NVIDIA DOCA Container Deployment Guide.For more information about DOCA services, refer to the NVIDIA DOCA Services Overview.NoticeThis document is provided for information purposes only and shall not be regarded as a warranty of a certain functionality, condition, or quality of a product. NVIDIA Corporation nor any of its direct or indirect subsidiaries and affiliates (collectively: “NVIDIA”) make no representations or warranties, expressed or implied, as to the accuracy or completeness of the information contained in this document and assume no responsibility for any errors contained herein. NVIDIA shall have no liability for the consequences or use of such information or for any infringement of patents or other rights of third parties that may result from its use. This document is not a commitment to develop, release, or deliver any Material (defined below), code, or functionality.NVIDIA reserves the right to make corrections, modifications, enhancements, improvements, and any other changes to this document, at any time without notice. Customer should obtain the latest relevant information before placing orders and should verify that such information is current and complete.NVIDIA products are sold subject to the NVIDIA standard terms and conditions of sale supplied at the time of order acknowledgement, unless otherwise agreed in an individual sales agreement signed by authorized representatives of NVIDIA and customer (“Terms of Sale”). NVIDIA hereby expressly objects to applying any customer general terms and conditions with regards to the purchase of the NVIDIA product referenced in this document. No contractual obligations are formed either directly or indirectly by this document.NVIDIA products are not designed, authorized, or warranted to be suitable for use in medical, military, aircraft, space, or life support equipment, nor in applications where failure or malfunction of the NVIDIA product can reasonably be expected to result in personal injury, death, or property or environmental damage. NVIDIA accepts no liability for inclusion and/or use of NVIDIA products in such equipment or applications and therefore such inclusion and/or use is at customer’s own risk. NVIDIA makes no representation or warranty that products based on this document will be suitable for any specified use. Testing of all parameters of each product is not necessarily performed by NVIDIA. It is customer’s sole responsibility to evaluate and determine the applicability of any information contained in this document, ensure the product is suitable and fit for the application planned by customer, and perform the necessary testing for the application in order to avoid a default of the application or the product. Weaknesses in customer’s product designs may affect the quality and reliability of the NVIDIA product and may result in additional or different conditions and/or requirements beyond those contained in this document. NVIDIA accepts no liability related to any default, damage, costs, or problem which may be based on or attributable to: (i) the use of the NVIDIA product in any manner that is contrary to this document or (ii) customer product designs.No license, either expressed or implied, is granted under any NVIDIA patent right, copyright, or other NVIDIA intellectual property right under this document. Information published by NVIDIA regarding third-party products or services does not constitute a license from NVIDIA to use such products or services or a warranty or endorsement thereof. Use of such information may require a license from a third party under the patents or other intellectual property rights of the third party, or a license from NVIDIA under the patents or other intellectual property rights of NVIDIA.Reproduction of information in this document is permissible only if approved in advance by NVIDIA in writing, reproduced without alteration and in full compliance with all applicable export laws and regulations, and accompanied by all associated conditions, limitations, and notices.THIS DOCUMENT AND ALL NVIDIA DESIGN SPECIFICATIONS, REFERENCE BOARDS, FILES, DRAWINGS, DIAGNOSTICS, LISTS, AND OTHER DOCUMENTS (TOGETHER AND SEPARATELY, “MATERIALS”) ARE BEING PROVIDED “AS IS.” NVIDIA MAKES NO WARRANTIES, EXPRESSED, IMPLIED, STATUTORY, OR OTHERWISE WITH RESPECT TO THE MATERIALS, AND EXPRESSLY DISCLAIMS ALL IMPLIED WARRANTIES OF NONINFRINGEMENT, MERCHANTABILITY, AND FITNESS FOR A PARTICULAR PURPOSE. TO THE EXTENT NOT PROHIBITED BY LAW, IN NO EVENT WILL NVIDIA BE LIABLE FOR ANY DAMAGES, INCLUDING WITHOUT LIMITATION ANY DIRECT, INDIRECT, SPECIAL, INCIDENTAL, PUNITIVE, OR CONSEQUENTIAL DAMAGES, HOWEVER CAUSED AND REGARDLESS OF THE THEORY OF LIABILITY, ARISING OUT OF ANY USE OF THIS DOCUMENT, EVEN IF NVIDIA HAS BEEN ADVISED OF THE POSSIBILITY OF SUCH DAMAGES. Notwithstanding any damages that customer might incur for any reason whatsoever, NVIDIA’s aggregate and cumulative liability towards customer for the products described herein shall be limited in accordance with the Terms of Sale for the product.TrademarksNVIDIA, the NVIDIA logo, and Mellanox are trademarks and/or registered trademarks of Mellanox Technologies Ltd. and/or NVIDIA Corporation in the U.S. and in other countries. The registered trademark Linux® is used pursuant to a sublicense from the Linux Foundation, the exclusive licensee of Linus Torvalds, owner of the mark on a world¬wide basis. Other company and product names may be trademarks of the respective companies with which they are associated.Copyright© 2022 NVIDIA Corporation & affiliates. All rights reserved.NVIDIA Corporation | 2788 San Tomas Expressway, Santa Clara, CA 95051。
AliExpress Magento 2 集成用户手册说明书

User ManualInstallation1- Place the contents of the package in the folder app/code/Vdshop/Aliexpress. 2- Run the following commands in Magento 2 root folder:php bin/magento module:enable Vdshop_Aliexpressphp bin/magento setup:upgrade --keep-generatedphp bin/magento setup:di:compilephp bin/magento setup:static-content:deploy -a adminhtmlphp bin/magento cache:cleanCon gurationAccess the Aliexpress > Con guration menu in order to enter you aliexpress merchant credentials. Click "Install App" to connect to Aliexpress account and authorize the integration.A token will be generated and saved to your Magento module, with an expiration date of 1 month. After that, the button "Install App" can be triggered again to generate a new token.Module usageStatisticsOrders Completed. It shows a grid with completed orders.Cancelled Orders. It shows a grid with cancelled orders.Orders in refund. It shows a grid with returned orders.Application Con gurationReady to Publish in AE. It shows a grid with a list of products ready to upload to Aliexpress.Thumbnail. Image thumbnail of the productName. Product name in AliexpressType. Product type in MagentoCategory. Aliexpress category to which the product belongsSku. Product identi erAttribute Set. Group of Attributes associated to the productPrice. Product price in AliexpressActionEdit. By clicking it the user enters the product edition pageDelete. Used to delete the product from the queue of items ready tosend to AliexpressUpload. Include the selected product/s in the queue of items readyto send to AliexpressProducts in Queue. It shows a grid of products ready to send toAliexpressProducts in AE. It shows a grid with the history of products alreadyuploaded to AliexpressProducts Failted to Upload. Grid with a list of products that couldn't besent to Aliexpress due to some error. It allows to access the product editpage to x the errors before trying the upload again.PromotionsOrders. It shows a grid with the orders purchased in AliexpressID. Order Identi er in MagentoAe Order ID. Order Identi er in AliexpressBuyer Full NameProduct (quantities). List of names from the order products. It showsthe qty between parenthesis.Payment Details. Order GrandtotalCreated At. Order creation dateStatus. Order Status in AliexpressNoti cations. It shows a list of noti cations triggered by the module.Product export owWith the purpose of exporting products to Aliexpress, the following ow will be followed:From Catalog > Products menu, existing products can be edited by clicking in the Edit ActionIn the product edit page, in the eld Categories, the Aliexpress category tree is rendered. The product must be assign to an Aliexpress category. This category has to be a nal child of the Main Category selected in the module con guration. After category selection, the product must be saved.A new tab called "Aliexpress" will appear, showing a form with all the attributes that'll allow the product customization in Aliexpress. After setting values to the Aliexpress attributes, the product must be saved clicking in the Save button.In Aliexpress > Ready to Publish in AE menu, a list of products can be selected by selecting the checkboxes in the left column. By executing the action Export Products to Aliexpress from the upper right dropdown, the list of selected products will be placed in the Queue to upload to Aliexpress. It'salso possible to upload products one by one by clicking the Upload Action.In the Aliexpress > Products in Queue menu item, the queue of products being uploaded is shown. The queue is processed every 1 minute.Once the queue has been processed, the successfully uploaded items will show in the Aliexpress > Products in AE menu.If there has been some problems with the upload in some product, theproduct will be show in the Aliexpress > Products Failed to Upload menu, along with a description of the error.Order importA periodic job is in charge of syncing the orders created in Aliexpress and save them in Magento with the purpose of showing the list of orders to the user.The list of orders can be accesed from the "Ali Express" > "Orders" menu.By selecting one of the items, the order edit page is opened and allows the user to enter the tracking number of the shipment and save the product. It will connect with aliexpress shipping API and will send the tracking number to it.。
MPLAB Harmony v3 软件开发框架说明书

SummaryA unified and powerful content development and delivery environment, MPLAB ® Harmony Software Framework v3 together with MPLAB X Integrated Develop -ment Environment (IDE), enhances your application development experience with a set of optimized peripheral libraries, simplified drivers and modular software downloads.MPLAB Harmony v3 provides a unified platform with flexible choices spanning architectures, performance and application focus. It enables development of ro -bust, interoperable, RTOS-friendly applications with quick and extensive support for third-party software integration. The improved MPLAB Harmony Configurator (MHC), now with a modular download manager, alleviates you from non-differentiating tasks to select and configure all MPLAB Harmony components in a graphical way, including middleware, system services and peripherals.Development ToolsMPLAB ® Harmony v3Unified Software Development Framework for 32-bit MCUs and MPUsC: 100 M: 10 Y: 35 K: 15Key Highlights• Unified Development Platform supports both PIC® and SAM 32-bit microcontrollers and microprocessors•MPLAB Harmony Configurator (MHC) enables easy setup configurators for clock, I/O pin, ADC, interrupt, DMA, MPU, Event, QTouch®, as well as Harmony Graphics Composer and Display Manager• FreeRTOS integration optional available• MPLAB Harmony is delivered via GitHub to streamline ap -plication development:• Optimized peripheral libraries for size and performance • Simplified drivers supporting development at silicon level• Smaller/Modular downloads of software or services•Powerful Middleware• TCP/IP , Wi-Fi ®•TLS (wolfSSL TLS), Crypto • USB Device and Host• Audio and Bluetooth ®: USB Audio, Hardware Codec, Software Codec, BT/BLE• Graphics: MPLAB Harmony Graphics Composer, Screen Designer, Display Manager• Many more: Motor Control, QTouch, Bootloaders, DSP/Math, etc.The Microchip name and logo, the Microchip logo, MPLAB and PIC are registered trademarks of Microchip Technology Incorporated in the U.S.A. and other countries. Arm and Cortex are registered trademarks of Arm Limited (or its subsidiaries) in the EU and other countries. All other trademarks mentioned herein are property of their respective companies. © 2019, Microchip Technology Incorporated. All Rights Reserved. 7/19 DS00003024BTools and Demo ExamplesDevelopment KitsAvailable Resources• MPLAB Harmony v3 Landing Page: https:///mplab/mplab-harmony/mplab-harmony-v3• MPLAB Harmony v3 Device Support: https:///Microchip-MPLAB-Harmony/Micro -chip-MPLAB-Harmony.github.io/wiki/device_support• GitHub MPLAB Harmony v3 WiKi Page: https:///Microchip-MPLAB-Harmony/Microchip-MPLAB-Harmony.github.io/wiki• GitHub MPLAB Harmony v3 User Guide: https://microchip-mplab-harmony.github.io/Complementary Devices• Wireless Connectivity: Wi-Fi, Blue -tooth, BLE, LoRa, IEEE 802.15.4, Sub-G• Wired Connectivity and Interface: CAN Transceivers, Ethernt PHY • Industrial Networking: EtherCAT • CryptoAuthentication Device: ATECC608A, ATSHA204A• Clock and Timing: MEMs Oscillator • Analog: Op Amp, Motor Driver • Power Management: Linear and Switching RegulatorsServices and Third Party• Microchip Training: https:///training/• Third Party Solutions: https:///mplab/mplab-harmony/premium-products/third-party-solutions• ExpressLogic, FreeRTOS, Micrium, Segger and wolfSSL• Integrated Development Environment: IARATSAMC21N-XPRO/ATSAMD21-XPROThe SAMC21N/SAMD21 Xplained Pro Evaluation KitsATSAME54-XPRO/DM320113The SAM E54 Xplained Pro/The SAM E70 Explained Ultra Evaluation KitsDM320007-C/DM320010-CPIC32MZ EF (Connectivity)/PIC32MZ DA (Graphics) Starter KitsDM320104*The Curiosity PIC32MZEF Development Board, including on board Wi-Fi moduleATSAMV71-XULTThe SAM V71 Xplained Ultra evaluation kit is ideal for evaluating and prototyping with the SAM V71, SAM V70, SAM S70 and SAM E70 Arm ® Cortex ®-M7 based microcontrollers.ATSAMA5D2C-XULT*/SAMA5D27-SoM-EK1*The SAMA5D2 Xplained Ultra Evaluation Kit, including eMMC and DDR3/SoM and SiP Evaluation Kit*Harmony support coming soon。
- 1、下载文档前请自行甄别文档内容的完整性,平台不提供额外的编辑、内容补充、找答案等附加服务。
- 2、"仅部分预览"的文档,不可在线预览部分如存在完整性等问题,可反馈申请退款(可完整预览的文档不适用该条件!)。
- 3、如文档侵犯您的权益,请联系客服反馈,我们会尽快为您处理(人工客服工作时间:9:00-18:30)。
以下技术手册内容摘自《深度学习与图像识别:原理与实践》,目标检测章节,如果读者需要系统的学习图像识别,可阅读《深度学习与图像识别:原理与实践》全书。
目标检测本文首先会介绍目标检测的概念,然后介绍一种简化了的目标检测问题——定位+分类以及它存在的问题,最后由浅入深逐步进入到目标检测常用的模型及方法,如Faster R-CNN、SSD 等。
这个过程中会涉及很多细节的概念和知识点。
本文针对SSD 算法给出了PyTorch版的代码,大家也会在这里看到一些细节知识点的实现方法。
学习时,建议先根据顺序把所有检测方法浏览一遍,有一个初步的了解;然后再深入研究SSD 部分的代码,理解其中涉及的很多细节将有助于大家深入理解一些问题。
学习完SSD 之后,再看一遍FasterR-CNN 等方法,把第一遍阅读时缺失的细节补充上去,这样能帮助大家循序渐进地深入了解目标检测算法。
当然,擅长实战的读者可以直接跳到SSD 部分看代码,实战之后再补充理论也不迟。
开始本文内容之前,我们先明确两个定义:(1)定位+分类:对于仅有一个目标的图片,检测出该目标所处的位置以及该目标的类别,如图(a,c)所示。
前言(2)目标检测:对于有多个目标的图片,检测出所有目标所处的位置及其类别,如图(b,d)所示。
我们先从相对简单的定位+分类开始,而后重点介绍目标检测。
学完本章之后你会发现很多图像问题就都可以解了。
(a)原图 (b)原图(c)定位+分类 (d)目标检测检测问题定义[9]目录第一章 定位+分类 6第二章 目标检测 8 2.1 R-CNN 10 2.2 Fast R-CNN 14 2.3 Faster R-CNN 17 2.4 YOLO 21 2.5 SSD 23第三章 目标检测的产业应用实践 25附录 29第一章 定位+分类该问题是分类到目标检测的一个过渡问题,从单纯地图片分类到分类后给出目标所处位置,再到多目标的类别和位置。
接下来,我们看一下定位+分类问题的解法。
(a)分类问题 (b)定位问题图1-1 分类问题vs定位问题[9]分类不用多说,上一章我们以分类为例讲了卷积神经网络。
在定位问题中,则需要模型返回目标所在的外接矩形框,即目标的(x,y,w,h)四元组。
接下来介绍一种比较容易想到的思路,把定位当做回归问题,具体步骤如下:(1)训练(或下载)一个分类模型,例如AlexNet、VGGNet或ResNet;(2)在分类网络最后一个卷积层的特征层(feature map)上添加“regression head”,如图1-2所示;补充说明:神经网络中不同的“head”通常用来训练不同的目标,每个“head”的损失函数和优化方向不同。
如果想让一个网络实现多个功能,通常是在神经网络后面接多个不同功能的“head”。
(3)同时训练“classification head”和“regression head”,为了同时训练分类和定位(定位是回归问题)两个问题,最终损失函数是分类和定位两个“head”产生损失的加权和。
(4)在预测时同时使用分类和回归head得到分类+定位结果。
这里强调一下,第一章 定位+分类 < 7分类预测出的结果就是C个类别,回归预测的结果可能有两种:一种是类别无关,输出4个值;一种是类别相关,输出4*C个值,这要看读者想要哪种结果了。
图1-2 分类+定位网络结构设计[9]第二章 目标检测目标检测需要获取图片中所有目标的位置及其类别,对于图2-1中的3张图而言,当图片中只有一个目标时,“regression head”预测4个值,当图片中有3个目标时,“regression head”预测12个值,那么当图片中有多个目标时,“regression head”要预测多少个值呢?图2-1 使用定位+分类解目标检测存在的问题 [9]这时根据读者已经学过的一些知识,可能会尝试用滑窗的方法来解决,如图2-2所示。
但是,这里有一个问题,我们需要设计大量的不同尺度和长宽比的“滑窗”使它们通过CNN,然而这个计算量是非常巨大的。
有没有什么方法能使得我们快速定位到目标的潜在区域,从而减少大量不必要的计算呢?第二章 目标检测 < 9图2-2 使用滑窗方法做目标检测存在的问题:滑窗的尺寸、大小、位置不同将产生非常大的计算量[9]10 > 第二章 目标检测学者们在这个方向做了很多研究,比较有名的是selective search方法,具体方法这里不做详细说明,感兴趣的读者可以看关于selective search的论文。
大家只要知道这是一种从图片中选出潜在物体候选框(Regions of Interest,ROI)的方法即可。
有了获取ROI的方法,接下来就可以通过分类和合并的方法来获取最终的目标检测结果。
基于这个思路有了下面的R-CNN方法。
2.1 R-CNN下面介绍R-CNN[1]的训练过程,整体训练流程如图2-3所示:图2-3 R-CNN训练过程[9](1)选出潜在目标候选框(ROI)objectness[10], selective search[11], category-independent object proposals[12]等很多论文都讲述了候选框提取的方法,R-CNN使用selective search的方法选出2000个潜在物体候选框。
第二章 目标检测 < 11(2)训练一个好的特征提取器R-CNN的提出者使用卷积神经网络AlexNet提取4096维的特征向量,实际上使用VGGNet/GoogLeNet/ResNet等也都可以。
细心的读者会发现,AlexNet 等网络要求输入的图片尺寸是固定的,而步骤(1)中的ROI尺寸大小不定,这就需要将每个ROI调整到指定尺寸,调整的方法有多种,可参见图2-4,其中(a)是原始ROI图片,(b)是包含上下文的尺寸调整,(c)是不包含上下文的尺寸调整,(d)是尺度缩放。
(a)(b)(c)(d)图2-4 不同压缩方法图示接下来,为了获得一个好的特征提取器,一般会在ImageNet预训练好的模型基础上做调整(因为ImageNet预测的种类较多,特征学习相对完善),唯一的改动就是将ImageNet中的1000个类别的输出改为(C+1)个输出,其中C是真实需要预测的类别个数,1是背景类。
新特征的训练方法是使用随机梯度下降(stochastic gradient descent,即SGD),与前几章介绍的普通神经网络的训练方法相同。
提到训练,就一定要有正样本和负样本,这里先抛出一个用于衡量两个矩形交叠情况的指标:IOU(Intersection Over Union)。
IOU其实就是两个矩形面积的交集除以并集,如图2-5所示。
一般情况下,当IOU>=0.5时,可以认为两个矩形基本相交,所以在这个任务中,假定两个矩形框中,1个矩形代表ROI,另一个代表真实的矩形框,那么当ROI和真实矩形框的IOU>=0.5时则认为是正样本,其余为负样本。
至此,R-CNN的第二步特征提取器可以开始训练了,不过在训练过程中要注意,需要对负样本进行采样,因为训练数据中正样本太少会导致正负样本极度不平衡。
最终在该步得到的是一个卷积神经网络的特征提取器,其特征是一个4096维特征向量。
图2-5 IOU图示(3)训练最终的分类器这里为每个类别单独训练一个SVM分类器。
这里面有个小技巧,SVM的训练也需要选择正负样本,R-CNN的提出者做了一个实验来选择最优IOU阈值,最终仅仅选择真实值的矩形框作为正样本。
注意 正负样本的选择比较有讲究,Fast R-CNN和Faster R-CNN是根据IOU的大小选取正负样本,2.2.3节有详细介绍。
(4)为每个类训练一个回归模型,用来微调ROI与真实矩形框位置和大小的偏差,如图2-6所示。
图2-6 R-CNN中的ROI结果微调[9]下面是所有检测问题都会用到的一块代码:IOU的计算。
def bboxIOU (bboxA, bboxB):A_xmin = bboxA[0]A_ymin = bboxA[1]A_xmax = bboxA[2]A_ymax = bboxA[3]A_width = A_xmax - A_xminA_height = A_ymax - A_yminB_xmin = bboxB[0]B_ymin = bboxB[1]B_xmax = bboxB[2]B_ymax = bboxB[3]B_width = B_xmax - B_xminB_height = B_ymax - B_yminxmin = min(A_xmin, B_xmin)ymin = min(A_ymin, B_ymin)xmax = max(A_xmax, B_xmax)ymax = max(A_ymax, B_ymax)A_width_and = (A_width + B_width) - (xmax - xmin) #宽的交集A_height_and = (A_height + B_height) - (ymax - ymin) #高的交集 if ( A_width_and <= 0.0001 or A_height_and <= 0.0001):return 0area_and = (A_width_and * A_height_and)area_or = (A_width * A_height) + (B_width * B_height)IOU = area_and / (area_or - area_and)return IOU预测阶段有如下几个步骤:(1)同样地,使用selective search方法先选出2000个ROI。
(2)所有ROI调整为特征提取网络所需的输入大小并进行特征提取,得到2000个ROI对应的2000个4096维的特征向量。
(3)将2000个特征向量分别输入到SVM中,得到每个ROI预测的类别。
(4)通过回归网络微调ROI的位置。
(5)最终使用非极大值抑制(Non-Maximum Suppression,NMS)方法对同一个类别的ROI进行合并得到最终检测结果。
NMS的原理是得到每个矩形框的分数(置信度),如果两个矩形框的IOU超过指定阈值,则仅仅保留分数大的那个矩形框。
以上就是R-CNN的全部过程,我们可以从中看出,R-CNN存在的一些问题:●不论是训练还是预测,都需要对selective search出来的2000个ROI全部通过CNN的forward过程来获取特征,这个过程非常慢。
●卷积神经网的特征提取器和用来预测分类的SVM是分开的,也就是特征提取的过程不会因SVM和回归的调整而更新。