git-howto
Git+使用教程

为了简明起见,我们创建两个文件作为练习:
$ echo "Hello world" > hello $ echo "Silly example" > example
我们再用 git-add 命令将这两个文件加入到版本库文件索引当中:
$ git-add hello example
Git 中文教程
● 创建一个属于自己的个人工作分支,以避免对主分支 master 造成太多的干扰,也方便与他人交流协 作。
● 当进行高风险的工作时,创建一个试验性的分支,扔掉一个烂摊子总比收拾一个烂摊子好得多。 ● 合并别人的工作的时候,最好是创建一个临时的分支,关于如何用临时分支合并别人的工作的技巧,
$ git-update-index --add hello example
如果你要将某个文件从 git 的目录跟踪系统中清除出去,同样可以用 git-update-index 命令。例如:
$ git-update-index --force-remove foo.c
Note git-add 可以将某个目录下的所有内容全都纳入内容跟踪之下,例如: git-add ./path/to/
/documents/gittutorcn.htm(第 5/23 页)2008-12-13 13:34:48
Git 中文教程
$ git-checkout robin $ echo "Work, work, workd" >> hello $ git-commit -m "Some workd" -i hello
$ git-checkout master $ echo "Play, play, play" >> hello $ echo "Lots of fun" >> example $ git-commit -m "Some fun" -i hello example
git常用的六个命令
git常用的六个命令
一、git init命令是git常用的基本命令之一,通过该命令可以在当前目录下生成一个新的git的仓库,用于存储你的所有项目文件。
二、git add是git常用的命令之一,通过Git add .或者add后紧跟文件路径,将工作空间的修改添加到暂存区,添加到暂存区的文件,待后面的commit。
三、git commit是git中的常用命令,当我们想要提交更改到仓库时就需要使用此命令,同时也可以了解到每一次更改的内容。
通过git commit -m “说明”,就可以将暂存区里的所有内容提交到仓库里。
四、git status命令可以使我们了解到当前仓库的状况,例如有哪些修改被加入到了暂存区,哪些修改被提交了等等。
在进行git操作时,我们经常会使用到这个命令。
五、git log是git常用命令之一,我们使用这个命令就可以查看所有已经提交的版本信息。
git log命令可以看到我们仓库提交过的所有的历史记录,可以了解到每一次提交的作者,提交时间,以及提交的修改内容等信息。
六、git clone是git中的一项非常重要的功能,使用这个命令,你可以将已经存在的一个项目拷贝下来,并且这个目录独立于原有的仓库。
这样可以让你在本地独自开发自己的项目,而不会影响到原有的项目。
总的来说,git init、git add、git commit、git status、git log以及git clone都是git中最常用,也是最重要的六个命令之一。
他们在我们日常的项目开发中发挥着非常大的作用,熟练掌握这六个命令对于我们使用git进行版本控制是非常有帮助的。
git使用手册

GIT 使用手册1、每天早晨到公司后需要更新代码,防止冲突。
2、Git status 可查看项目所有的文件状态。
(图1)3、新增文件: git add . 代码上传所有的新增文件git add 具体的文件或文件目录多个文件一起add可用空格或者文件夹的目录4 、新增及修改后的git commit -m ‘修改原因’保存到本地仓库GUI 操作如下:(图2)5、Git 每次push提交前先更新代码,idea操作如下:6、更新代码:(图3)7、*************************************************如果出现这两种情况(图4、图5)不要点击Merge和Push,直接push到远程分支上,应该重复第5和6的步骤。
*************************************************(图4)(图5)8、消除第7步上述提示后如下操作:(图6)(图7)(图8)注:图8 已消除了图4的Merge提示。
9、其他git 常见操作git log -p -10 查看最近10次提交记录git reset --hard 版本号回退到指定版本号git fetch 获取最新的版本号(远程已创建新分支,本地看不到分支时使用)git branch -a 查看远程分支git branch 查看本地分支git checkout -b 切换分支9、合并分支操作指南:git checkout v1.0 (待合并分支)git checkout v1.2 (目标分支)然后再v1.2的分支基础上执行mergegit merge v1.0如果没有报错,那就直接提交代码git push origin v1.2如果报错,基本是冲突了:你需要去到提示的文件里把git自动标注的版本冲突注释掉,看你具体需要的功能进行删减然后把冲突的文件git add,和commit。
git命令行使用方法
git命令行使用方法Git是一个流行的版本控制系统,它可以让开发者轻松地跟踪代码更改、合并代码以及管理代码库。
在本文中,我们将介绍如何使用Git命令行来完成常见的Git任务。
1. 安装Git首先,您需要在您的计算机上安装Git。
您可以从Git官方网站上下载适合您操作系统的安装包,并按照安装向导进行安装。
2. 创建一个本地仓库要使用Git,您需要在您的项目中创建一个本地仓库。
您可以在项目目录中打开终端,并使用以下命令来创建一个空的Git仓库。
```git init```3. 添加文件到本地仓库一旦您创建了Git仓库,您可以使用以下命令来将文件添加到仓库中。
```git add <file>```例如,要将名为'index.html'的文件添加到Git仓库中,您可以使用以下命令。
```git add index.html```4. 提交更改一旦您将文件添加到Git仓库中,您需要将更改提交到仓库中。
您可以使用以下命令来提交更改。
```git commit -m 'commit message'```例如,要提交一个带有'Initial commit'消息的更改,您可以使用以下命令。
```git commit -m 'Initial commit'```5. 查看更改历史您可以使用以下命令来查看您的Git仓库中的更改历史。
```git log```这将显示每个提交的SHA-1哈希值、作者、时间戳以及提交消息。
6. 创建分支您可以使用以下命令来创建一个新的分支。
```git branch <branch-name>```例如,要创建名为'feature-branch'的新分支,您可以使用以下命令。
```git branch feature-branch```7. 切换分支要切换到不同的分支,您可以使用以下命令。
git的基本命令
git的基本命令
Git 基本命令:
git init –初始化一个Git仓库
git config –设置Git的配置
git add –将文件添加到版本库
git commit –提交文件到版本库
git status –检查Git的当前状态
git log –显示有关提交的日志信息
git diff –查看提交之间的不同
git show –显示提交的详细信息
git remote –管理远程版本库
git checkout –切换分支或者回退版本
git reset –重置版本库到某个commit
git tag –加标签某个提交
git fetch –从远程仓库获取最新版本
git pull –从远程仓库获取最新版本并自动合并到当前git merge –合并分支到当前分支
git rebase –重新应用已存在的提交
git cherry-pick –选择提交放入当前分支
git blame –检查某行代码是谁提交的
git stash –把当前未完成的工作暂存起来
git revert –恢复版本库到某个commit
git clean - 移除未跟踪的文件
git archive –创建zip/tar文件。
git基本命令
4、版本库管理相关命令
命令 简要说明 git count-objects 显示松散对象的数量和磁盘占用 git filter-branch 版本库重构 git fsck 对象库完整性检查 git fsck-objects* 同义词,等同于 git fsck git gc 版本库存储优化 git index-pack 从打包文件创建对应的索引文件 git lost-found* 过时,请使用 git fsck –lost-found 命令 git pack-objects 从标准输入读入对象ID,打包到文件 git pack-redundant 查找多余的 pack 文件 git pack-refs 将引用打包到 .git/packed-refs 文件中 git prune 从对象库删除过期对象 git prune-packed 将已经打包的松散对象删除 git relink 为本地版本库中相同的对象建立硬连接 git repack 将版本库未打包的松散对象打包 git show-index 读取包的索引文件,显示打包文件中的内容 git unpack-objects 从打包文件释放文件 git verify-pack 校验对象库打包文件
Git基本操作流程
Git基本操作流程技术背景Gitee是⼀款国内的git托管服务,对于国内⽤户较为友好,⽤户可以访问来创建⾃⼰的帐号和项⽬,并托管在Gitee平台上。
既然是git的托管服务,那我们就可以先看看git的⼀些基本⽤法:[dechin@dechin-manjaro ~]$ git --help⽤法:git [--version] [--help] [-C <路径>] [-c <名称>=<取值>][--exec-path[=<路径>]] [--html-path] [--man-path] [--info-path][-p | --paginate | -P | --no-pager] [--no-replace-objects] [--bare][--git-dir=<路径>] [--work-tree=<路径>] [--namespace=<名称>]<命令> [<参数>]这些是各种场合常见的 Git 命令:开始⼀个⼯作区(参见:git help tutorial)clone 克隆仓库到⼀个新⽬录init 创建⼀个空的 Git 仓库或重新初始化⼀个已存在的仓库在当前变更上⼯作(参见:git help everyday)add 添加⽂件内容⾄索引mv 移动或重命名⼀个⽂件、⽬录或符号链接restore 恢复⼯作区⽂件rm 从⼯作区和索引中删除⽂件sparse-checkout 初始化及修改稀疏检出检查历史和状态(参见:git help revisions)bisect 通过⼆分查找定位引⼊ bug 的提交diff 显⽰提交之间、提交和⼯作区之间等的差异grep 输出和模式匹配的⾏log 显⽰提交⽇志show 显⽰各种类型的对象status 显⽰⼯作区状态扩展、标记和调校您的历史记录branch 列出、创建或删除分⽀commit 记录变更到仓库merge 合并两个或更多开发历史rebase 在另⼀个分⽀上重新应⽤提交reset 重置当前 HEAD 到指定状态switch 切换分⽀tag 创建、列出、删除或校验⼀个 GPG 签名的标签对象协同(参见:git help workflows)fetch 从另外⼀个仓库下载对象和引⽤pull 获取并整合另外的仓库或⼀个本地分⽀push 更新远程引⽤和相关的对象命令 'git help -a' 和 'git help -g' 显⽰可⽤的⼦命令和⼀些概念帮助。
git的基本操作

git的基本操作Git是一个非常流行的版本控制系统,它被广泛用于开发人员之间的协作和版本管理。
本文将介绍Git的基本操作,包括如何创建新仓库、如何添加文件、如何提交更改、如何分支和合并等。
一、创建新仓库在使用Git之前,首先需要创建一个新的仓库。
可以在本地计算机上创建一个新的仓库,也可以在GitHub等在线仓库托管服务上创建一个新的仓库。
下面是在本地计算机上创建新仓库的步骤:1. 打开终端或命令行工具,进入要创建仓库的目录。
2. 输入以下命令创建一个新的Git仓库:```git init```3. 如果一切正常,Git将会在当前目录下创建一个名为“.git”的隐藏文件夹,这个文件夹包含了Git仓库的所有信息和配置。
二、添加文件在Git仓库中添加文件非常简单,只需要将要添加的文件放到仓库目录下,然后使用以下命令将其添加到Git仓库中:```git add <filename>```如果要添加多个文件,可以使用通配符:```git add *```三、提交更改在将文件添加到Git仓库后,需要将这些更改提交到仓库中。
提交更改的步骤如下:1. 使用以下命令将更改添加到本地仓库:```git commit -m 'commit message'```2. “commit message”是提交时的注释,可以简要描述所做的更改。
四、分支和合并Git的一个重要功能是能够创建和管理分支。
分支是指从主分支(通常是master分支)中创建的一个独立的代码副本。
在分支中进行的更改不会影响主分支,这使得开发人员可以在不破坏主分支的情况下进行实验和开发。
1. 创建分支使用以下命令可以创建一个新的分支:```git branch <branchname>```“branchname”是新分支的名称。
2. 切换分支使用以下命令可以切换到一个已经存在的分支: ```git checkout <branchname>```3. 合并分支使用以下命令可以将一个分支合并到当前分支中: ```git merge <branchname>```“branchname”是要合并的分支的名称。
git常用语句
git常用语句
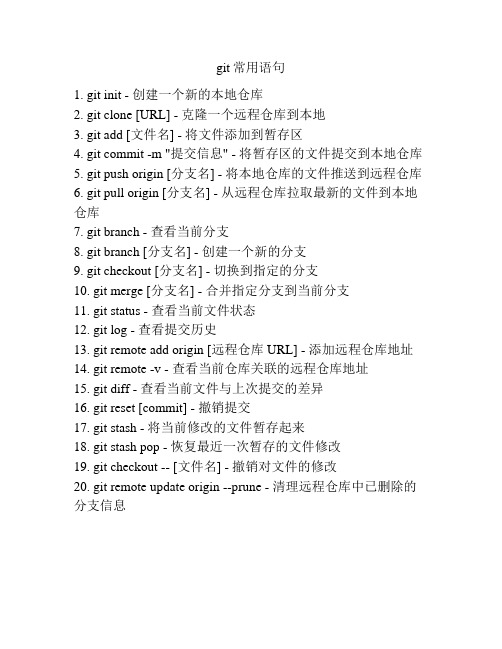
1. git init - 创建一个新的本地仓库
2. git clone [URL] - 克隆一个远程仓库到本地
3. git add [文件名] - 将文件添加到暂存区
4. git commit -m "提交信息" - 将暂存区的文件提交到本地仓库
5. git push origin [分支名] - 将本地仓库的文件推送到远程仓库
6. git pull origin [分支名] - 从远程仓库拉取最新的文件到本地仓库
7. git branch - 查看当前分支
8. git branch [分支名] - 创建一个新的分支
9. git checkout [分支名] - 切换到指定的分支
10. git merge [分支名] - 合并指定分支到当前分支
11. git status - 查看当前文件状态
12. git log - 查看提交历史
13. git remote add origin [远程仓库URL] - 添加远程仓库地址
14. git remote -v - 查看当前仓库关联的远程仓库地址
15. git diff - 查看当前文件与上次提交的差异
16. git reset [commit] - 撤销提交
17. git stash - 将当前修改的文件暂存起来
18. git stash pop - 恢复最近一次暂存的文件修改
19. git checkout -- [文件名] - 撤销对文件的修改
20. git remote update origin --prune - 清理远程仓库中已删除的分支信息。
Git操作详解

Git操作详解,学会Git⼏乎成了开发者的必备技能。
是⽬前最流⾏的,学会是⽬前最流⾏的Git有很多优势,其中之⼀就是远程操作⾮常简便。
本⽂详细介绍5个Git命令,它们的概念和⽤法,理解了这些内容,你就会完全掌握Git远程操作。
git clonegit remotegit fetchgit pullgit push本⽂针对初级⽤户,从最简单的讲起,但是需要读者对Git的基本⽤法有所了解。
同时,本⽂覆盖了上⾯5个命令的⼏乎所有的常⽤⽤法,所以对于熟练⽤户也有参考价值。
⼀、git clone远程操作的第⼀步,通常是从远程主机克隆⼀个版本库,这时就要⽤到git clone命令。
$ git clone <版本库的⽹址>⽐如,克隆jQuery的版本库。
$ git clone https:///jquery/jquery.git该命令会在本地主机⽣成⼀个⽬录,与远程主机的版本库同名。
如果要指定不同的⽬录名,可以将⽬录名作为git clone命令的第⼆个参数。
$ git clone <版本库的⽹址> <本地⽬录名>git clone⽀持多种协议,除了HTTP(s)以外,还⽀持SSH、Git、本地⽂件协议等,下⾯是⼀些例⼦。
$ git clone http[s]:///path/to/repo.git/$ git clone ssh:///path/to/repo.git/$ git clone git:///path/to/repo.git/$ git clone /opt/git/project.git$ git clone file:///opt/git/project.git$ git clone ftp[s]:///path/to/repo.git/$ git clone rsync:///path/to/repo.git/SSH协议还有另⼀种写法。
$ git clone [user@]:path/to/repo.git/通常来说,Git协议下载速度最快,SSH协议⽤于需要⽤户认证的场合。
git 使用方法
git 使用方法
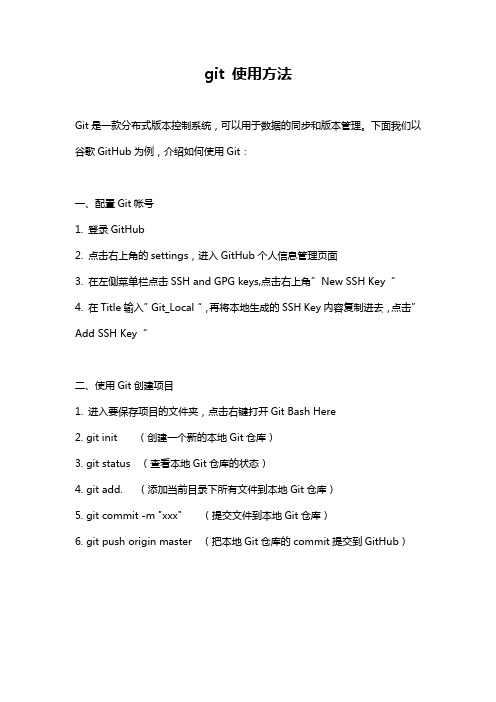
Git是一款分布式版本控制系统,可以用于数据的同步和版本管理。
下面我们以谷歌GitHub为例,介绍如何使用Git:
一、配置Git帐号
1. 登录GitHub
2. 点击右上角的settings,进入GitHub个人信息管理页面
3. 在左侧菜单栏点击SSH and GPG keys,点击右上角”New SSH Key“
4. 在Title输入”Git_Local“,再将本地生成的SSH Key内容复制进去,点击”Add SSH Key“
二、使用Git创建项目
1. 进入要保存项目的文件夹,点击右键打开Git Bash Here
2. git init (创建一个新的本地Git仓库)
3. git status (查看本地Git仓库的状态)
4. git add. (添加当前目录下所有文件到本地Git仓库)
5. git commit -m "xxx" (提交文件到本地Git仓库)
6. git push origin master (把本地Git仓库的commit提交到GitHub)。
Git基本操作命令合集
Git基本操作命令合集平时⾃⼰敲敲代码,使⽤Git命令也渐渐多了起来。
使⽤起来的确很⽅便,今天来分享下Git基本概念和本地代码提交到github上的过程,很简单的,多操作⼏次就会了。
Git定义Git 是⼀个开源的分布式版本控制系统,⽤于敏捷⾼效地处理任何或⼩或⼤的项⽬。
Git 与常⽤的版本控制⼯具 CVS, Subversion 等不同,它采⽤了分布式版本库的⽅式,不必服务器端软件⽀持。
Git 与 SVN 区别1、Git 是分布式的,SVN 不是:这是 Git 和其它⾮分布式的版本控制系统,例如 SVN,CVS 等,最核⼼的区别。
2、Git 把内容按元数据⽅式存储,⽽ SVN 是按⽂件:所有的资源控制系统都是把⽂件的元信息隐藏在⼀个类似 .svn、.cvs 等的⽂件夹⾥。
3、Git 分⽀和 SVN 的分⽀不同:分⽀在 SVN 中⼀点都不特别,其实它就是版本库中的另外⼀个⽬录。
4、Git 没有⼀个全局的版本号,⽽ SVN 有:⽬前为⽌这是跟 SVN 相⽐ Git 缺少的最⼤的⼀个特征。
5、Git 的内容完整性要优于 SVN:Git 的内容存储使⽤的是 SHA-1 哈希算法。
这能确保代码内容的完整性,确保在遇到磁盘故障和⽹络问题时降低对版本库的破坏。
Git安装安装成功后,就可以使⽤命令⾏的git⼯具(已经⾃带了ssh客户端)了,另外还有⼀个图形界⾯的 Git 项⽬管理⼯具。
在开始菜单⾥找到"Git"->"Git Bash",会弹出Git命令窗⼝,你可以在该窗⼝进⾏Git操作。
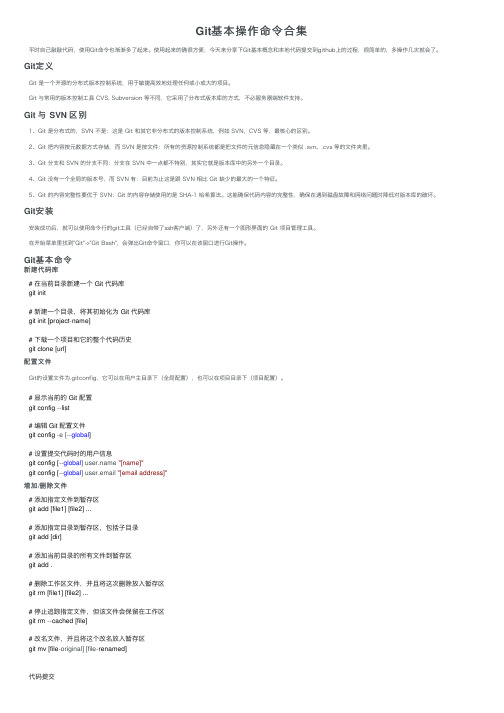
Git基本命令新建代码库# 在当前⽬录新建⼀个 Git 代码库git init# 新建⼀个⽬录,将其初始化为 Git 代码库git init [project-name]# 下载⼀个项⽬和它的整个代码历史git clone [url]配置⽂件Git的设置⽂件为.gitconfig,它可以在⽤户主⽬录下(全局配置),也可以在项⽬⽬录下(项⽬配置)。
git命令之基础操作流程
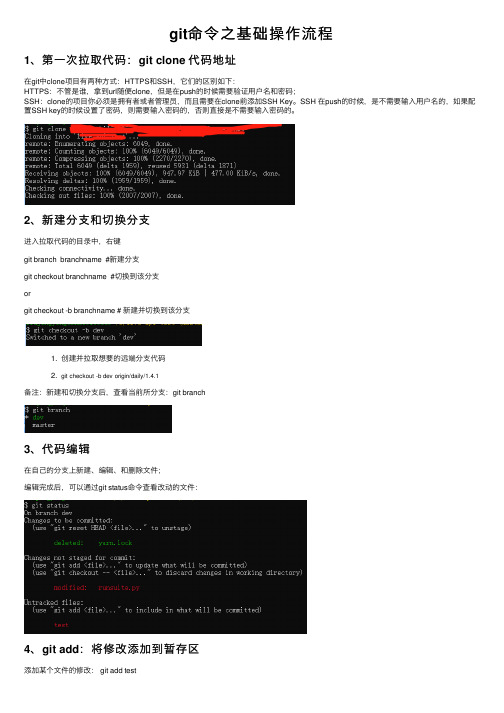
git命令之基础操作流程1、第⼀次拉取代码:git clone 代码地址在git中clone项⽬有两种⽅式:HTTPS和SSH,它们的区别如下:HTTPS:不管是谁,拿到url随便clone,但是在push的时候需要验证⽤户名和密码;SSH:clone的项⽬你必须是拥有者或者管理员,⽽且需要在clone前添加SSH Key。
SSH 在push的时候,是不需要输⼊⽤户名的,如果配置SSH key的时候设置了密码,则需要输⼊密码的,否则直接是不需要输⼊密码的。
2、新建分⽀和切换分⽀进⼊拉取代码的⽬录中,右键git branch branchname #新建分⽀git checkout branchname #切换到该分⽀orgit checkout -b branchname # 新建并切换到该分⽀1. 创建并拉取想要的远端分⽀代码2. git checkout -b dev origin/daily/1.4.1备注:新建和切换分⽀后,查看当前所分⽀:git branch3、代码编辑在⾃⼰的分⽀上新建、编辑、和删除⽂件;编辑完成后,可以通过git status命令查看改动的⽂件:4、git add:将修改添加到暂存区添加某个⽂件的修改: git add test添加所有的修改:git add .备注:可以通过git statuts命令查看状态4、git commit:更改记录(提交)到存储库git commit -m "the commit message"5、git push:更改记录(提交)到存储库未关联远端(⾸次推代码):git push -u orgin dev已关联远端:git pushpush 成功,然后可以在gitLab页⾯查看⾃⼰分⽀和提交的代码;。
git基础操作命令
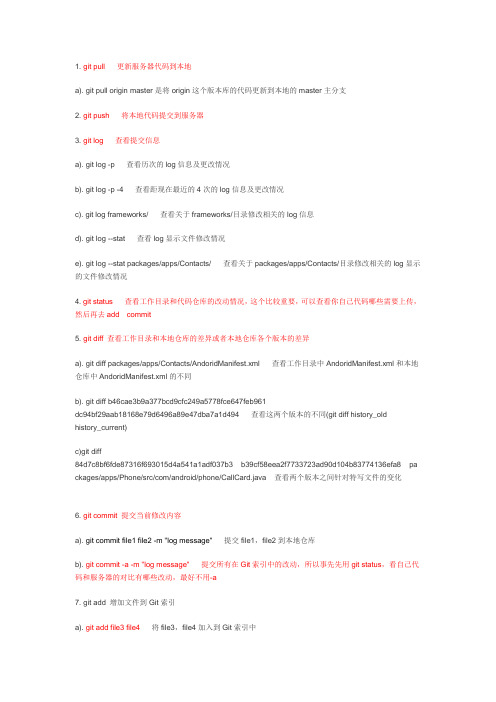
1. git pull 更新服务器代码到本地a). git pull origin master是将origin这个版本库的代码更新到本地的master主分支2. git push 将本地代码提交到服务器3. git log 查看提交信息a). git log -p 查看历次的log信息及更改情况b). git log -p -4 查看距现在最近的4次的log信息及更改情况c). git log frameworks/ 查看关于frameworks/目录修改相关的log信息d). git log --stat 查看log显示文件修改情况e). git log --stat packages/apps/Contacts/ 查看关于packages/apps/Contacts/目录修改相关的log显示的文件修改情况4. git status查看工作目录和代码仓库的改动情况,这个比较重要,可以查看你自己代码哪些需要上传,然后再去add commit5. git diff 查看工作目录和本地仓库的差异或者本地仓库各个版本的差异a). git diff packages/apps/Contacts/AndoridManifest.xml 查看工作目录中AndoridManifest.xml和本地仓库中AndoridManifest.xml的不同b). git diff b46cae3b9a377bcd9cfc249a5778fce647feb961dc94bf29aab18168e79d6496a89e47dba7a1d494 查看这两个版本的不同(git diff history_oldhistory_current)c)git diff84d7c8bf6fde87316f693015d4a541a1adf037b3 b39cf58eea2f7733723ad90d104b83774136efa8 pa ckages/apps/Phone/src/com/android/phone/CallCard.java 查看两个版本之间针对特写文件的变化6. git commit 提交当前修改内容a). git commit file1 file2 -m "log message" 提交file1,file2到本地仓库b). git commit -a -m "log message" 提交所有在Git索引中的改动,所以事先先用git status,看自己代码和服务器的对比有哪些改动,最好不用-a7. git add 增加文件到Git索引a). git add file3 file4将file3,file4加入到Git索引中8. git rm 从Git索引移除文件a). git rm file3 将file3从Git索引中删除9. git branch 对分支的增、删、查操作a). git branch 显示所有本地分支b). git branch new_branch 在当前版本创建一个名为new_branch的分支c). git branch -D new_branch 强制删除名为new_branch的分支10. git checkout 在不同的branch切换和还原文件a). git checkout branch1 切换到branch1分支b). git checkout /packages/apps/Contacts/AndroidManifest.xml 会将AndroidManifest.xml文件从上一次提交的版本更新回来,未提交的部分会全部回滚11. git reset 将当前的工作目录完全回滚到指定的版本号a). git reset [--fixed] 3204f2f0bdfd6ada86c587b8927cdc5a15c586c1 只更新索引,不更新工作目录,也就是说所有的本地文件都不会更新b). git reset [--soft] 3204f2f0bdfd6ada86c587b8927cdc5a15c586c1c). git reset [--hard] 3204f2f0bdfd6ada86c587b8927cdc5a15c586c1 强制回滚到指定版本号,未提交的和此版本之后的更改全部删掉12. git mergea). git merge branch1 将branch1的改动合并到当前所在分支13. git patcha). git format-patch -1 打一个当前提交的补丁,也就是最后一次的提交改动b). git fromat-patch -1 6525c43add803bfee37cf5c1cb573ed8aecf529e 打一个指定具体某一次的补丁c). git format-patch -2 6525c43add803bfee37cf5c1cb573ed8aecf529e 打基于指定具体某个版本的接连两次的补丁15.git reset HEAD^表示回退刚刚的提交, git reset HEAD^^ 表示回退刚两次的提交,以此类推, 补充一下16.git format-patch -1 打印刚刚提交的一版的patch,相当于svn diff17.git show 查看当前提交的版本18.git show ffd98b291e0caa6c33575c1ef465eae661ce40c9 查看指定版本的文件19.git show ffd98b291e0caa6c33575c1ef465eae661ce40c9:filename 查看指定版本的某个文件20.git show 2010-Aug-12 查看指定tag的文件21.git remote show 查看远程仓库的信息22.git remote show origin 查看某个远程仓库的详细信息,比如要看所克隆的origin仓库23.git revert -n hashcode : git撤销某次历史提交; -n 不加的话,相当于撤销后的树状态也提交了,加了-n只是工作树回退了那次提交的内容,工作树处于待提交状态24.git show 9f5202b77bdd33f885207b618b7b2a78b6671813packages/apps/FM/src/com/hymost/fm/ui/FMRadio.java 查看特定版本特定文件的修改25.git diff 6af41d3 d67778 packages/apps/Music/>2.patch这个非常有用, 6af41d3 比d67778 新, 上句这样做的好处是可以产生从6af41d3 到d67778的反向diff ,把这个反向diff 写入2.patch,这样谁打了2.patch,谁就等于作了一次6af41d3 版本在对packages/apps/Music上所做修改的文本回退(如果该版本对这个目录的改动是有错的需要回退的,这是个好办法).回退,千万少用revert和reset ,这两个动作和危险,容易导致结点丢失.Changes to be committed:# (use "git reset HEAD <file>..." to unstage) //reset 加--soft 会保持文件的stage状态,(to be committed,这往往是被撤消的提交中的文件,stage中的文件的修改是diff不出来的), 如果不加(默认:mixed)就会把所有mark to be committed的文件全unstage掉,这时可以diff出来该文件的改动了## modified: packages/apps/Contacts/src/com/android/contacts/ContactsUtils.java //不会被diff出来, ## Changed but not updated: //会被diff出来# (use "git add <file>..." to update what will be committed)# (use "git checkout -- <file>..." to discard changes in working directory)## modified: frameworks/base/core/java/com/android/internal/app/RingtonePickerActivity.java# modified: frameworks/base/media/java/android/media/RingtoneManager.java## Untracked files: //不会参与版本管理,除非用git add进来# (use "git add <file>..." to include in what will be committed)补充一下: reset --hard hashcode就是相当于check out 掉所以从此hashcode之后的所有本地修改了,很危险,慎用.revert hashcode1相当于reset --hard, 不过它的指针不回退,反而是在当前HEAD之上再加一个版本,而该版本在文本上相当于hashcode1之前一个版本的文本内容,但这时候指针都没丢,反而还多了一个,这时候想回过来有办法,就是reset --hard 到HEAD^就行了,一切都回来了,等于什么也没做过.不过尽量不要用revert. 这已经是一个deprecated 命令了.其实对于像1->2->3->4->5,这样的版本链上,如果2->3东西有问题,想回掉这部分修改,却不影响3后面的修改,最好的办法就是不要通过指针来实现,而是通过本文修改来实现新增一个6版本,盖在5之上,我们只要把2->3的patch拿过来,在当前5的基础上,打个反向patch就行: git apply -R 2to3.patch, 这时你的本地代码从文本上就达到了你要想的结果,就是5的状态下把2->3的修改抹掉. 不过打patch有一点要注意,我们尽量不要把png等图片的patch放里头,这样会很慢,图片的二进制码很大. 而且我们可以对patch 进行修改,回退我们想要回退的文件和修改.26. 问题:1->2->3->4->5(本地和服务器上都是这个状态)如果你想把package/app/Contacts从5这个结点的内容恢复到2这个结点,但又想让HEAD指针保持在5上,怎么做?(1)首先,git checkout 78350ad27ed3ad070bc0b5044ec594e70800aded(结点2的hashcode) packages/apps/Contacts/此时,你git log 看到的最新的commit结点会是:commit ba5ca90406bd6aaba3c54c46e9d143829b6a52fb-----结点6Merge branch 'master' of 192.168.10.104:repositories/7x27a-2045这句话到底做了件什么事呢,首先它把packages/apps/Contacts/的内容恢复到2这个结点的状态,然后并最新的内容修改(即恢复后的)做为一个新的结点6来在5的后面提交一个新的结点,所以现在情况变成了:1->2->3->4->5->6(2)但是我们又不想增加新结点,怎么办呢,很简单,只要软reset一下就行,也就是:git reset 5点的hashcode,这样子你再用git diff 就会发现相当于你把package/app/Contacts下面的内容都手动准确地改到了2结点的状态,指针链还是保持在原来的1->2->3->4->5。
Git常用命令详解

Git常⽤命令详解Git 是⼀个很强⼤的分布式版本管理⼯具,它不但适⽤于管理⼤型开源软件的源代码(如:),管理私⼈的⽂档和源代码也有很多优势(如:)Git 的更多介绍,请参考我的上⼀篇博客:⼀、 Git 命令初识在正式介绍Git命令之前,先介绍⼀下Git 的基本命令和操作,对Git命令有⼀个总体的认识⽰例:从Git 版本库的初始化,通常有两种⽅式:1)git clone:这是⼀种较为简单的初始化⽅式,当你已经有⼀个远程的Git版本库,只需要在本地克隆⼀份例如:git clone git:///someone/some_project.git some_project上⾯的命令就是将'git:///someone/some_project.git'这个URL地址的远程版本库,完全克隆到本地some_project⽬录下2)git init 和 git remote:这种⽅式稍微复杂⼀些,当你本地创建了⼀个⼯作⽬录,你可以进⼊这个⽬录,使⽤'git init'命令进⾏初始化;Git 以后就会对该⽬录下的⽂件进⾏版本控制,这时候如果你需要将它放到远程服务器上,可以在远程服务器上创建⼀个⽬录,并把可访问的URL记录下来,此时你就可以利⽤'git remote add'命令来增加⼀个远程服务器端,例如:git remote add origin git:///someone/another_project.git上⾯的命令就会增加URL地址为'git: ///someone/another_project.git',名称为origin的远程服务器,以后提交代码的时候只需要使⽤ origin别名即可⼆、 Git 常⽤命令1) 远程仓库相关命令检出仓库: $ git clone git:///jquery/jquery.git查看远程仓库:$ git remote -v添加远程仓库:$ git remote add [name] [url]删除远程仓库:$ git remote rm [name]修改远程仓库:$ git remote set-url --push [name] [newUrl]拉取远程仓库:$ git pull [remoteName] [localBranchName]推送远程仓库:$ git push [remoteName] [localBranchName]*如果想把本地的某个分⽀test提交到远程仓库,并作为远程仓库的master分⽀,或者作为另外⼀个名叫test的分⽀,如下:$git push origin test:master // 提交本地test分⽀作为远程的master分⽀$git push origin test:test // 提交本地test分⽀作为远程的test分⽀2)分⽀(branch)操作相关命令查看本地分⽀:$ git branch查看远程分⽀:$ git branch -r创建本地分⽀:$ git branch [name] ----注意新分⽀创建后不会⾃动切换为当前分⽀切换分⽀:$ git checkout [name]创建新分⽀并⽴即切换到新分⽀:$ git checkout -b [name]删除分⽀:$ git branch -d [name] ---- -d选项只能删除已经参与了合并的分⽀,对于未有合并的分⽀是⽆法删除的。
How to set up git
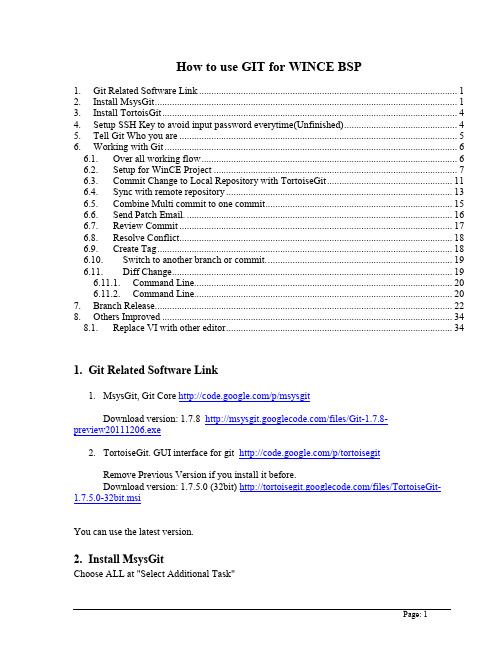
How to use GIT for WINCE BSP1. Git Related Software Link (1)2. Install MsysGit (1)3. Install TortoisGit (4)4. Setup SSH Key to avoid input password everytime(Unfinished) (4)5. Tell Git Who you are (5)6. Working with Git (6)6.1. Over all working flow (6)6.2. Setup for WinCE Project (7)6.3. Commit Change to Local Repository with TortoiseGit (11)6.4. Sync with remote repository (13)6.5. Combine Multi commit to one commit (15)6.6. Send Patch Email. (16)6.7. Review Commit (17)6.8. Resolve Conflict (18)6.9. Create Tag (18)6.10. Switch to another branch or commit. (19)6.11. Diff Change (19)6.11.1. Command Line (20)6.11.2. Command Line (20)7. Branch Release (22)8. Others Improved (34)8.1. Replace VI with other editor (34)1.Git Related Software Link1.MsysGit, Git Core /p/msysgitDownload version: 1.7.8 /files/Git-1.7.8-preview20111206.exe2.TortoiseGit. GUI interface for git /p/tortoisegitRemove Previous Version if you install it before.Download version: 1.7.5.0 (32bit) /files/TortoiseGit-1.7.5.0-32bit.msiYou can use the latest version.2.Install MsysGitChoose ALL at "Select Additional Task"Choose "Run Git From The Windows Command Prompt"Choose Use OpenSSHImportant: Choose “Use windows style line endings”3.Install TortoisGitInstall tortoisegit after msysgit. Use default settings other than below setup:4.Setup SSH Key to avoid input password everytime(Unfinished)Open Git Bash>ssh-keygenpress "enter" for any question>scp .ssh/id_rsa.pub <your_core_id>@:/home/<your_core_id> #copy you public key to server>attrib +r .ssh/id_rsa #set readonly for private key>ssh <your_core_id>@ #now you login remote machine>mkdir .ssh>cd .ssh>cat ../id_rsa.pub >> authorized_keys #if there are authorized_keys, please use chmod 600 authorized_keys to enable write permission, if there is no authorized_keys file, please create it. >chmod 400 authorized_keys>cd ..>chmod 500 .ssh>exitTest connect>ssh <your_core_id>@ # now the system will not check the password.>exitIf you have GIT installed on 2 or more PCs, you can simply copy .ssh folder from the first PC to other PCs then use the same SSH key directly.5.Tell Git Who you areOpen explore.Right click -> TortoiseGit -> SettingsChoose Git-> ConfigInput you Name and EmailClick Apply or OKCommand linegit config --global "your name"git config --global user.email "your email"In addition, make sure the SSH client setting is correct so that you can utilize the SSH Key you’ve setup in Section 4.6.Working with Git 6.1.Over all working flowThe key point:∙Git is distribute version control, everyone has whole history copy.∙Everyone can fetch other change.∙We use a server to keep latest stable Git Repository. Each one can push their change to this center repository6.2.Setup for WinCE ProjectFirst Time Get WinCE BSP codeRight Click at explorer,Choose “Git Clone”URL(Test URL need update):ssh://<your_core_id>@/git/sw_git/private/wince700-sandbox.git Directory: must be empty directory.Now you have a local copy of the latest repository.To continue your daily development work, you have at least 2 working method: ∙Working directly on the source code in GIT (similar to Snapshot view in ClearCase)∙Working on the copy of the source code in GIT (similar to Dynamic view in ClearCase) The method 1 is suitable for experienced GIT user, and it will be more efficient.The method 2 is suitable for entry level GIT user who is switching from ClearCase Dynamic view to GIT.Working Method 1:1.Copy .git to X:\WINCE700 \ (X: is your wince700 installed driver)2.If you have not work for CE700 before, you can use “checkout -f HEAD” to fetch workingcopy.Right-Click -> “TortoiseGit” -> Switch\Checkout,Check “Force” checkbox.If you have worked for CE700 before, you can run “git status” to show what change before you working copy and git HEAD version.Right-Click -> TortosieGit -> “Check for modifications”That will list all files, which difference with git HEAD version.Note:you’d better download attached .gitignore file to your WINCE700 working directory so that GIT can ignore all unnecessary files. This file is a sample file, you can add more ignore rules.Command Line:3.mkdir temp # empty directory.4.git clone -n ssh://<your_core_id>@ /git/sw_git/private/csc-wscpe.git5.move temp\WINCE700\.git X:\WinCE700\ (X: is your wince700 installed driver)6.cd X:\WinCE7007.checkout -f HEAD #Note: local change will be lost.All BSP code will create now. Then you can work directly on the source code and commit / push to the GIT directly.Working Method 2:If you are new comer to GIT, you can use this way to get familiar with GIT.1.Suppose you already get the GIT repository in above GIT DIRECTORY (i.e.D:\GITCode\WINCE700);2.Like Dynamic View in ClearCase, you can manually copy all the WCE7 source code toyour WINCE700 working directory (don’t copy .git folder to this directory);3.Work on the copy of the GIT code in WINCE700 working directory;4.Merge back all the code change from WINCE700 working directory to GIT DIRECTORYwith merge tools;5.Go back to GIT DIRECTORY to commit / push.mit Change to Local Repository with TortoiseGitOpen Explorer.Right click -> Git CommitInput you commit message in message box.Changes file list box will list all changed files under current directory.Checkbox [] Whole project will list all changed files of whole project.Double click file name will launch tortoisemerge to view difference.View Patch will show GNU diff patch.Note we have some hooks in GIT server side to check the commit message. You must follow following rules:∙The format of the commit message is: CQ ID(8 digit) + one space + your comment (e.g.ENGR00000000 Update MX51 workspaces to support Chelan Feb10 drop) ∙The length of your comment in the first line should be no less than 20 characters∙The length of the first message should be less than 76 characters∙You can add more comments in the following lines after a blank line (refer to below pic); ∙You must sign it before you click OKIf you violate above rules and then meet an error during your code push, you can resolve it with this way:Click “Git Commit -> “master””, then select “*Amend Last Commit”, after that, you can update your commit message again to fix your error.6.4.Sync with remote repositoryRight Click -> Git Sync… or TortoiseGit -> SyncSync dialog will list all commits which will be push. Out ChangeList will list changed files.∙Remote Branch: Choose master for normal developing.∙Before Push, your change needs be reviewed. You click “Email Patch”. Send Patch dialog will open.∙After review, you can push your change, can just click “push” button∙If other persons push before you, you need rebase your change to latest one.Right-Click -> TortoiseGit Fetch.Check Launch Rebase After Fetch.Rebase dialog will be launched.bine Multi commit to one commitTo keep track simple, do a commit for a task(One CQ Number).You may commit many times before review. You need combine these together.Keep you work copy clean, that means commit all change or stash your change.Right Click -> TortoiseGit-> LogChoose you continues commits, then right click. Choose “Combine to one commit”6.6.Send Patch Email.There are many ways to send patch email. In Sync Dialog, you click “email patch”, or choose .diff or .patch file, then right click-> email patchTo: input reviewer email address.Cc: WinDev.Choose Patch as Attachment6.7.Review CommitIf you can under stand patch format, you can review it at email. Patch file is txt files, show difference.Otherwise you need save attached patch file to local disk, then right click .patch or .difffile,TortoiseGit -> Review PatchTortoiseMerge will be launched.The min windows will list changed files.Click one file, right windows will show visual difference.Notes: It is better you fetch remote change firstly.After review, you just send “okay to push” to mail list, submitter will push code to center repository.6.8.Resolve ConflictRight click conflict file, then click “check Modifications” or “commit”All conflict file will be listed.Right click Conflict fi le, choose “edit conflicts” TortoiseMerge will be launched.After fix conflict, right click -> “resolve” to tell git your resolve this conflict.Or open conflict fileThere will be like<<<<<<< HEAD:PLATFORM/iSTMP3780/sources.cmnABCDE=======Test 123>>>>>>> testbr:PLATFORM/iSTMP3780/sources.cmn!endifYou edit it, remove <<<<<<< ===== >>>>>> according your judgement.6.9.Create TagTortoiseGit -> LogRight click a commits, choose “create tag here…” , follow tag dialog, tag will be created. Notes: tag has NOT push when push you change, you must choose “include tag” at push dialog or sync dialog.6.10.Switch to another branch or commit.I prefer you commit you change before switch. All commit is in you local disk, commit does n’t affect other one developing.TortoiseGit -> Checkout\Switch6.11.Diff ChangeTortoiseGit -> Log, choose two commit, right click -> Compare versionFile diff dialog will be opened, double click will launch tortoisemerge to view difference.mand LineCMD: git diff hash1 hash2 – fileExample:Diff work copy with repositoryGit diffDiff file sources of work copy with repositoryGit diff – sourcesDiff current branch with remote masterGit diff HEAD origin/masterDiff current version with previous versionGit diff HEAD HEAD~1mand LineKeep your work space clean, commit change or stash.CMD: git rebase origin/masterRight click TortoiseGit-> Rebase…Branch is current branch, default masterUpstream is remote branch, default origin/masterThere are below cases happen when rebase∙“Current Branch Update to Date”, it means, you work on top of origin/master, needn’t rebase∙“branch xxx branch to xxx”, it means, you current branch is behind of upstream branch, and you haven’t do any commit, git just change current branch HEAD to upstream branch.No any risk.∙List some commits need to rebase, your work base on old version. Click “start” to start rebase. It is possible conflict happen. Conflict file will list at conflict file tab, right click conflict file-> Edit conflict, after fix conflict, right click-> resolve. Follow rebase dialog instruction till done happen.Anytime click “Abort” return to original status.Notes: avoid use two rebase dialog to rebase at the same time.7.An example to show how to work with GIT7.1.Clone the GIT repository and check out the codeYou can refer to section 6.2 to get the code from GIT.7.2.Create dev branch base on local masterRight click mouse and select “TortoiseGit -> Create Branch…”, input the branch name, then select “Switch to new branch” so that you can work on this new branch directly, otherwise you have to switch to it manually.7.3.Develop on the local dev branchOnce you switch to the dev branch, you can commit your daily development to your dev branch with below menu item.Note: this is your local dev branch, so it’s unnecessary to follow the strict commit message rules which are mentioned in section 6.3.After several local commit, your log history should be something like this:Note: The branch whose name is in RED is your local working branch.7.4.Switch to your local master branch and rebase your masterOnce your local development is done, you need push your local code to the central repository. As the first step, you need to switch to your local master branch with “TortoiseGit ->Switch/Checkout…”Then you need to fetch the latest status in central repository with “TortoiseGit -> Fetch…”Here is the log message after fetch:From above log we can see that during the local development there are some commit in central repository, hence a rebase is required: “TortoiseGit -> *Rebase…”Here’s the log message after rebase:7.5.Squash merge your development work to local masterThe next step is to merge your local development work to local master branch. This can be done by “TortoiseGit -> Merge…”, then select proper dev branch to merge:Note: Squash option must be checked, otherwise you’ll meet a problem during code push later. After that, you need to commit the code merge to local master branch with strict commit message like this:Here is the log message after merge:bine your local master to make the master history clear (Optional)This step is optional. If you are working directly on local master without creating any dev branch, then this step is necessary. You can refer to section 6.5 to combine several commit into one commit. Note you need follow strict commit message rules here.7.7.Push your code change to central repositoryAfter you finish all above steps, now you are eligible to push your code to central repository. You can click “Git Sync…” then click “Push” to do it.You need to watch the push message carefully. The push is done only if you get a positive message. If you get an er ror here, it’s very possible that someone else pushed the code during your code merge. In this case, you need to rebase the code again, and then push it again.Here is an example:Log message for rebase again:Log message for final push:7.8.Push your local dev branch to central repository if needed (Optional)If you think your local dev branch is important, or if you want to backup your dev branch in central repository, or if you want to share your dev code with someone else easily, or …, you can push your local dev branch to central repository at any time.Just make sure you switch the branch to your local dev branch first, and then use “Git Sync” then click “Push” to do it.Here is the log message after the dev branch is pushed to central repository:8.Branch ReleaseWhen code freeze, create branch release_xxxxAll bug fix push to release_xxxx branch.All new feature push to masterAfter test cycle, project leader merge release_xxxx to master.9.Others Improved9.1. Replace VI with other editorIf you don't like VI editor when commit rebase, you can use third part edit tools. Notepad2 is install at TortoiseGit.git config core.editor notepad2。
团队开发代码使用git的一般流程
团队开发代码使用git的一般流程下载温馨提示:该文档是我店铺精心编制而成,希望大家下载以后,能够帮助大家解决实际的问题。
文档下载后可定制随意修改,请根据实际需要进行相应的调整和使用,谢谢!并且,本店铺为大家提供各种各样类型的实用资料,如教育随笔、日记赏析、句子摘抄、古诗大全、经典美文、话题作文、工作总结、词语解析、文案摘录、其他资料等等,如想了解不同资料格式和写法,敬请关注!Download tips: This document is carefully compiled by theeditor.I hope that after you download them,they can help yousolve practical problems. The document can be customized andmodified after downloading,please adjust and use it according toactual needs, thank you!In addition, our shop provides you with various types ofpractical materials,such as educational essays, diaryappreciation,sentence excerpts,ancient poems,classic articles,topic composition,work summary,word parsing,copy excerpts,other materials and so on,want to know different data formats andwriting methods,please pay attention!团队开发中Git的使用流程详解在现代软件开发中,Git已经成为了版本控制系统的首选工具。
totoisegit 讲解 -回复
totoisegit 讲解-回复什么是Git?Git是一个开源的分布式版本控制系统,最初由林纳斯·托瓦兹(Linus Torvalds)于2005年创造。
它被设计为适用于大型项目并具有速度、数据完整性和支持分布式非线性工作流等特点。
Git不仅可以用于个人项目的版本控制,还可以用于团队协作开发。
为什么选择Git?选择Git的原因有很多。
首先,Git有很高的速度和性能。
与其他版本控制系统相比,Git在文件的提交、分支的创建与切换以及合并等操作上具有出色的性能。
其次,Git具有分布式的特性。
每个开发者都可以在本地拥有一个完整的代码仓库,不需要依赖网络连接。
这使得开发者可以在没有网络的情况下进行工作,以及方便地进行不同分支的切换和合并。
此外,Git具有强大的分支管理能力,可以轻松地创建、切换、合并和删除分支,使得团队成员可以更加灵活地开发和合作。
Git的基本工作原理是什么?Git的基本工作原理是基于文件快照(snapshot)的版本控制。
简单来说,Git将每个文件的快照保存在一个远程或本地的仓库中。
在进行版本提交(commit)时,Git会保存当前所有文件的快照,并生成一个指向该快照的提交对象(commit object)。
在进行版本切换(checkout)时,Git会将检出的版本快照恢复到工作目录中。
这种基于快照的方式相比于其他系统的差异存储方法(delta storage),可以提供更好的性能和可靠性。
Git如何使用?使用Git需要掌握一些基本的操作命令。
下面是一些常用的Git命令:1. git init:初始化一个Git仓库。
2. git add:将文件添加到暂存区。
3. git commit:从暂存区提交文件到版本库。
4. git clone:克隆一个远程仓库到本地。
5. git pull:从远程仓库拉取最新的代码。
6. git push:将本地提交推送到远程仓库。
7. git branch:创建、切换、合并和删除分支。
git topic用法

git topic用法【1.Git Topic介绍】Git Topic,又称Git主题,是一种基于Git的代码组织和管理方法。
通过为项目设定一个主题,可以更好地管理代码分支,提高团队协作效率。
这种方法在大型项目中尤为实用,能够帮助开发者聚焦于特定功能模块,降低沟通成本。
【2.Git Topic的基本用法】1.创建主题:在使用Git Topic之前,首先需要在项目中创建一个主题分支。
通过以下命令创建一个新的主题分支:```git checkout -b topic-branch```2.为主题分支添加代码:将需要开发的代码添加到主题分支中,进行开发工作。
3.同步主题:当主题分支的代码发生变化时,需要将变化同步到主分支。
使用以下命令将主题分支的更改推送到主分支:```git push origin topic-branch```4.合并主题:当开发完成一个主题分支后,需要将其合并到主分支。
在主分支上执行以下命令:```git merge topic-branch```5.删除主题:不再需要的主题分支可以使用以下命令删除:```git branch -d topic-branch```【3.实战案例与应用】以一个简单的项目为例,假设项目结构如下:```- project/- README.md- src/- main.cpp- module1/- file1.cpp- file2.cpp- module2/- file3.cpp- file4.cpp```在此项目中,可以使用Git Topic进行如下操作:1.创建主题分支,如“module1-topic”:```git checkout -b module1-topic```2.将module1目录下的代码添加到主题分支,进行开发。
3.将module1-topic分支的更改同步到主分支:```git push origin module1-topic```4.在主分支上合并module1-topic分支:```git merge module1-topic```5.开发完成后,删除module1-topic分支:```git branch -d module1-topic```【4.总结与建议】Git Topic作为一种有效的代码管理方法,在实际项目中发挥了重要作用。
- 1、下载文档前请自行甄别文档内容的完整性,平台不提供额外的编辑、内容补充、找答案等附加服务。
- 2、"仅部分预览"的文档,不可在线预览部分如存在完整性等问题,可反馈申请退款(可完整预览的文档不适用该条件!)。
- 3、如文档侵犯您的权益,请联系客服反馈,我们会尽快为您处理(人工客服工作时间:9:00-18:30)。
link:RelNotes-1.5.4.4.txt[1.5.4.4],
link:RelNotes-1.5.4.3.txt[1.5.4.3],
link:RelNotes-1.5.4.2.txt[1.5.4.2],
link:RelNotes-1.5.4.1.txt[1.5.4.1],
git(1)
======
NAME
----
git - the stupid content tracker
SYNOPSIS
--------
[verse]
'git' [--version] [--exec-path[=GIT_EXEC_PATH]] [--html-path]
[-p|--paginate|--no-pager] [--no-replace-objects]
link:RelNotes-1.5.3.6.txt[1.5.3.6],
link:RelNotes-1.5.3.5.txt[1.5.3.5],
link:RelNotes-1.5.3.4.txt[1.5.3.4],
link:RelNotes-1.5.3.3.txt[1.5.3.3],
link:RelNotes-1.5.3.2.txt[1.5.3.2],
* link:v1.6.0.6/git.html[documentation for release 1.6.0.6]
* release notes for
link:RelNotes-1.6.0.6.txt[1.6.0.6],
link:RelNotes-1.6.0.5.txt[1.6.0.5],
"man git-commandname" for documentation of each command. CVS users may
also want to read linkgit:gitcvs-migration[7]. See
the link:user-manual.html[Git User's Manual] for a more in-depth
link:RelNotes-1.5.5.4.txt[1.5.5.4],
link:RelNotes-1.5.5.3.txt[1.5.5.3],
link:RelNotes-1.5.5.2.txt[1.5.5.2],
link:RelNotes-1.5.5.1.txt[1.5.5.1],
link:RelNotes-1.5.5.txt[1.5.5].
* release notes for
link:RelNotes-1.7.1.txt[1.7.1].
* link:v1.7.0.6/git.html[documentation for release 1.7.0.6]
* release notes for
link:RelNotes-1.7.0.6.txt[1.7.0.6],
link:RelNotes-1.5.4.txt[1.5.4].
* link:v1.5.3.8/git.html[documentation for release 1.5.3.8]
* release notes for
link:RelNotes-1.5.3.8.txt[1.5.3.8],
link:RelNotes-1.5.3.7.txt[1.5.3.7],
unreleased) version of git, that is available from 'master'
branch of the `git.git` repository.
Documentation for older releases are available here:
* link:v1.7.1/git.html[documentation for release 1.7.1]
link:RelNotes-1.7.0.5.txt[1.7.0.5],
link:RelNotes-1.7.0.4.txt[1.7.0.4],
link:RelNotes-1.7.0.3.txt[1.7.0.3],
link:RelNotes-1.7.0.2.txt[1.7.0.2],
link:RelNotes-1.7.0.1.txt[1.7.0.1],
[--bare] [--git-dir=GIT_DIR] [--work-tree=GIT_WORK_TREE]
[--help] COMMAND [ARGS]
DESCRIPTION
-----------
Git is a fast, scalable, distributed revision control system with an
* release notes for
link:RelNotes-1.6.1.3.txt[1.6.1.3],
link:RelNotes-1.6.1.2.txt[1.6.1.2],
link:RelNotes-1.6.1.1.txt[1.6.1.1],
link:RelNotes-1.6.1.txt[1.6.1].
link:RelNotes-1.5.6.4.txt[1.5.6.4],
link:RelNotes-1.5.6.3.txt[1.5.6.3],
link:RelNotes-1.5.6.2.txt[1.5.6.2],
link:RelNotes-1.5.6.1.txt[1.5.6.1],
link:RelNotes-1.5.6.txt[1.5.6].
link:RelNotes-1.7.0.txt[1.7.0].
* link:v1.6.6.2/git.html[documentation for release 1.6.6.2]
* release notes for
link:RelNotes-1.6.6.2.txt[1.6.6.2],
link:RelNotes-1.6.6.1.txt[1.6.6.1],
link:RelNotes-1.6.5.6.txt[1.6.5.6],
link:RelNotes-1.6.5.5.txt[1.6.5.5],
link:RelNotes-1.6.5.4.txt[1.6.5.4],
link:RelNotes-1.6.5.3.txt[1.6.5.3],
link:RelNotes-1.6.5.2.txt[1.6.5.2],
link:RelNotes-1.6.3.txt[1.6.3].
* release notes for
link:RelNotes-1.6.2.5.txt[1.6.2.5],
link:RelNotes-1.6.2.4.txt[1.6.2.4],
link:RelNotes-1.6.2.3.txt[1.6.2.3],
introduction.
The COMMAND is either a name of a Git command (see below) or an alias
as defined in the configuration file (see linkgit:git-config[1]).
Formatted and hyperlinked version of the latest git
* link:v1.5.6.6/git.html[documentation for release 1.5.6.6]
* release notes for
link:RelNotes-1.5.6.6.txt[1.5.6.6],
link:RelNotes-1.5.6.5.txt[1.5.6.5],
link:RelNotes-1.6.0.4.txt[1.6.0.4],
link:RelNotes-1.6.0.3.txt[1.6.0.3],
link:RelNotes-1.6.0.2.txt[1.6.0.2],
link:RelNotes-1.6.0.1.txt[1.6.0.1],
link:RelNotes-1.6.0.txt[1.6.0].
* link:v1.5.4.7/git.html[documentation for release 1.5.4.7]
* release notes for
link:RelNotes-1.5.4.7.txt[1.5.4.7],
link:RelNotes-1.5.4.6.txt[1.5.4.6],
* link:v1.5.5.6/git.html[documentation for release 1.5.5.6]
* release notes for
link:RelNotes-1.5.5.6.txt[1.5.5.6],
link:RelNotes-1.5.5.5.txt[1.5.5.5],
documentation can be viewed at
`/pub/software/scm/git/docs/`.
ifdef::stalenotes[]
[NOTE]
============
You are reading the documentation for the latest (possibly
unusually rich command set that provides both high-level operations
and full access to internals.
See linkgit:gittutorial[7] to get started, then see
link:everyday.html[Everyday Git] for a useful minimum set of commands, and