hp unix mirror a boot disk (HP小机根盘作镜像)
HP Integrity server HPUX 11.31 Mirroring boot disks

HP Integrity server HPUX 11.31 Mirroring boot disks贵阳曾凡宏HP Integrity server HPUX 11.31 Mirroring boot disks (1)扯蛋 (1)Itanium mirroring 步骤 (3)Itanium mirroring 全过程 (4)拆除分区的方法 (15)扯蛋开始正题之前先抱怨一下,HP原厂也真不是东西,提供的文档不详细也就罢了,他们竟然提供的文档还是错误的,我无论如何都没有想到用MKBOOT写AUTO语句的时候用到的竟然会是块设备(当然,我不清楚是只写块设备,还是块设备字符设备都要写,不过百分之五十一是只写块设备),虽然在一老外的贴子中提到这里用的是块设备,但我还是选择了相信原厂的文档,坚持了无数次。
原厂就是故意搞错的,信不信由你,反正我信了。
这是种什么行为,这是一种打压第三方的恶劣行径。
害我这两天死皮赖脸的在联通机房折腾了这台新鲜的RX8640十二个小时,管理员一下班就来催我走,还好今天没走,和他拿了钥匙,坚持到了最后,在我快要绝望的时候,我想到了这一点,终于成功了。
安腾11.31的系统改变挺多的,十秒中断那里也算是一个,这里不再是以前的SEA,然后BO ******,而是一个与SETBOOT相关联的可选择式菜单,如图:这里面有个以前没见过的东西,EFI SHELL [BUILT-IN],相关文章可以在网上找到。
正常情况下,十秒中断后选择启动项后是这样的:而我呢,无数次看到的是这样的:镜像LV的顺序一定要搞对,要不然会出问题的,我一开始图省事一个FOR循环做所有的LV,因为还有一个LV是不规则的命名,所以我用LV*指定了所有的LV。
结果就是:看到没有,镜像盘上的LV的顺序。
这样就会导致:安腾11.31系统最直观的区别应该就是他的设备文件吧。
用-m参数的IOSCAN命令看看:关于磁盘的分区,后面会提到创建分区以及拆除分区的方法。
HP-UNIX的常用命令
1.1 HP-UX系统安装HP-UX操作系统是预装的,由HP工程师进行配置。
配置包括如下参数:主机名:CRCT1(上)CRCT2(下)此主机名可通过hostname或uname –a 命令查看。
1.2 创建用户帐号使用sam创建用户帐号halt、test、jzx、train和informix。
并分别用passwd命令给各用户设置口令。
1.3配置磁盘1.3.1 配置镜像磁盘Mirror Disk是HP-UX的一套软件包,当系统中安装有两个系统盘时,可以利用该软件的功能来做操作系统的镜像备份,以下是做镜像磁盘的步骤。
1、执行lvlnboot -v命令检查系统中的启动设备#lvlnboot -vBootBootSwapDump2、创建第二块系统盘#pvcreate -B /dev/rdsk/c2t6d03、扩展vg00,添加第二块硬盘#vgextend /dev/vg00 /dev/dsk/c2t6d04、为第二块磁盘创建boot引导信息#mkboot /dev/dsk/c2t6d05、扩展vg00中各逻辑卷,添加镜像磁盘lvextend -m /dev/vg00/lvol2 /dev/dsk/c2t6d0lvextend -m /dev/vg00/lvol3 /dev/dsk/c2t6d0lvextend -m /dev/vg00/lvol4 /dev/dsk/c2t6d0lvextend -m /dev/vg00/lvol5 /dev/dsk/c2t6d0lvextend -m /dev/vg00/lvol6 /dev/dsk/c2t6d0lvextend -m /dev/vg00/lvol7 /dev/dsk/c2t6d0lvextend -m /dev/vg00/lvol8 /dev/dsk/c2t6d0lvextend -m /dev/vg00/lvol9 /dev/dsk/c2t6d0lvextend -m /dev/vg00/lvol10 /dev/dsk/c2t6d06、为第二块磁盘创建boot引导信息#mkboot -a "hpux(;0)/stand/vmunix" /dev/dsk/c2t6d07、执行如下操作后重新启动系统#lvlnboot -b /dev/vg00/lvol1#lvlnboot -b /dev/vg00/lvol2#lvlnboot -b /dev/vg00/lvol3#lvlnboot -d /dev/vg00 /dev/dsk/c2t6d0#lvlnboot -R#shutdown -h -y 08、在启动Main Menu出现时,从第二块磁盘启动Main Menu:>seaP0 0/0/2/0.6 intscsia.6 Random access mediasP1 0/0/2/1.6 intscsia.6 Random access mediasP0 0/4/0/0.0 Random access mediasP3 0/10/0/0.1 Random access mediasP4 1/10/0/0.5 Sequene access mediasMain Menu:>bo p19、系统启动以后执行如下操作#lvlnboot -v1.3.2添加磁盘阵列柜使用sam命令添加物理磁盘:sam ?Disks and File Systems(CRCT1)选定某个磁盘,在该磁盘上执行:?Disk Devices?Actions ?Disk Array Maitainece?bind出现的菜单可对选定的物理磁盘添加一个新的PV,共添加四个PV,其中两个64G,两个1GB。
hpunixmirrorabootdisk(HP小机根盘作镜像)
hpunixmirrorabootdisk(HP小机根盘作镜像)(如果以前你的硬盘被使用过,或你不想在使用该磁盘的数据,可以运行mediainit格式化改硬盘。
mediainit通过格式化介质来初始化硬盘,通过读写测试模式来校验介质的完整性,然后闲置所有发现的坏块。
mediainit会破坏硬盘上说有现存的用户数据:#mediainit /dev/rdsk/c0t3d0)选择一个内置的硬盘。
例如/dev/dsk/c0t8d0做成一个启动盘:pvcreate -f -B /dev/rdsk/c0t8d0(使用参数“-B”创建一个用于镜像的可引导的LVM磁盘)将这个硬盘加入vg00中:vgextend /dev/vg00 /dev/dsk/c0t8d0将启动文件装入硬盘引导区: mkboot /dev/dsk/c0t8d0对/stand , / , 交换区作镜像: lvextend -m 1 /dev/vg00/lvol1 /dev/dsk/c0t8d0 (/stand)lvextend -m 1 /dev/vg00/lvol2 /dev/dsk/c0t8d0 (/swap)lvextend -m 1 /dev/vg00/lvol3 /dev/dsk/c0t8d0 (/)对vg00上的其它逻辑卷作镜像: lvextend -m 1 /dev/vg00/lvol4 /dev/dsk/c0t8d0lvextend -m 1 /dev/vg00/lvol5 /dev/dsk/c0t8d0lvextend -m 1 /dev/vg00/lvol6 /dev/dsk/c0t8d0lvextend -m 1 /dev/vg00/lvol7 /dev/dsk/c0t8d0lvextend -m 1 /dev/vg00/lvol8 /dev/dsk/c0t8d0拷贝正确的AUTO到新的LIF区,注意使用字符设备:mkboot -a "hpux -lq (;0)/stand/vmunix" /dev/dsk/c0t5d0 (系统主引导盘)mkboot -a "hpux -lq (;0)/stand/vmunix" /dev/dsk/c0t8d0lvlnboot -R指定引导逻辑卷、根逻辑卷、主交换逻辑卷(用swapinfo确定交换逻辑卷在什么地方)、转储逻辑卷,为根和交换镜像拷贝更新包含在BDRA中等启动信息:lvlnboot -b /dev/vg00/lvol1lvlnboot -r /dev/vg00/lvol3lvlnboot -s /dev/vg00/lvol2lvlnboot -d /dev/vg00/lvol2恢复所有的BDRA信息:lvlnboot -R确定引导逻辑卷、根逻辑卷、主交换逻辑卷以及转储逻辑卷的:(检查镜像正确与否):lvlnboot -v显示当前的主引导路径和替代引导路径:setboot。
hpux 更换根盘镜像
HP-UX 更换根盘镜像专题方法一1,拆除设备镜像,踢出坏盘.解除镜像:vgdisplay vg00 //查看vg00中的LV的镜像状态。
lvreduce –m 0 /dev/vg00/lvol1 /dev/dsk/cXtYd0lvreduce –m 0 /dev/vg00/lvol2 /dev/dsk/cXtYd0...拆除所有vg00中所有mirror的lvvgreduce vg00 /dev/dsk/cXtYd02.换盘,做镜像在镜像盘上创建物理卷,并设置成可引导设备。
# pvcreate -f -B /dev/rdsk/cXtYd0 //-B可以启动。
将此盘添加到根卷。
# vgextend /dev/vg00 /dev/dsk/cXtYd0生成LIF引导信息和AUTO文件。
# mkboot /dev/rdsk/cXtYd0 //创建BOOT区# mkboot -a "hpux -lq (;0)/stand/vmunix" /dev/rdsk/cXtYd0# mkboot -a "hpux -lq (;0)/stand/vmunix" /dev/rdsk/cXtYd0给根盘上的所有逻辑卷做镜像,务必从第一个LV开始,按顺序执行,镜像需要一定时间,请耐心等待。
# lvextend -m 1 /dev/vg00/lvol1 /dev/dsk/cXtYd0 /BOOT卷# lvextend -m 1 /dev/vg00/lvol2 /dev/dsk/cXtYd0# lvextend -m 1 /dev/vg00/lvol3 /dev/dsk/cXtYd0# lvextend -m 1 /dev/vg00/lvol4 /dev/dsk/cXtYd0# lvextend -m 1 /dev/vg00/lvol5 /dev/dsk/cXtYd0# lvextend -m 1 /dev/vg00/lvol7 /dev/dsk/cXtYd0# lvextend -m 1 /dev/vg00/lvol8 /dev/dsk/cXtYd0...镜像所有的vg00中的lv更新引导、根和主交换的镜像副本包含在BDRA中的引导信息。
HP UX 安腾11.23根镜像
HPUX 11.23下根盘镜像全过程(上)分类:HPUX 2009-04-27 16:17 395人阅读评论(0) 收藏举报、知识准备HPUX 11.23与11.22版本配置根盘镜像的最大的不同:1. 新增加了HPSP分区;11.22系统根盘只划分了两个分区EFI/HP-UX,在11.23系统中,划分了3个分区,分别为EFI/HP-UX/HPSP.相应在使用idisk命令划分硬盘分区时使用的/tmp/partitionfile 文件中的内容也做了相应调整.2. EFI分区大小从原先的100M,增加到500M二、实验目的对一台HP rx8640机器的2号分区根盘(146GB)镜像;三、操作过程1. From HPUX, use vgdisplay to identify the disk that is in vg00. Use ioscan to find the spare disk.# vgdisplay -v --> vg00 is on /dev/dsk/c0t6d0s2# ioscan -efunC disk --> c2t6d0Class I H/W Path Driver S/W State H/W Type Description========================================================================disk 1 0/0/0/2/0.6.0 sdisk CLAIMED DEVICE HP 146 GST3146855LC/dev/dsk/c0t6d0 /dev/rdsk/c0t6d0/dev/dsk/c0t6d0s1 /dev/rdsk/c0t6d0s1/dev/dsk/c0t6d0s2 /dev/rdsk/c0t6d0s2/dev/dsk/c0t6d0s3 /dev/rdsk/c0t6d0s3Acpi(HWP0002,PNP0A03,0)/Pci(2|0)/Scsi(Pun6,Lun0)/HD(Part1,Sig0E481F42-F04C-11DC-8002-D6217B60E5 88)//EFI/HPUX/HPUX.EFIdisk 0 0/0/0/2/1.2.0 sdisk CLAIMED DEVICE Optiarc DVD RW AD-5170A/dev/dsk/c1t2d0 /dev/rdsk/c1t2d0disk 2 0/0/0/3/0.6.0 sdisk CLAIMED DEVICE HP 146 GST3146855LC/dev/dsk/c2t6d0 /dev/rdsk/c2t6d02. Create the system, OS, and service partitions.# vi /tmp/partitionfile3EFI 500MBHPUX 100%HPSP 400MB# idisk -wf /tmp/partitionfile /dev/rdsk/c2t6d0idisk version: 1.31********************** WARNING ***********************If you continue you may destroy all data on this disk.Do you wish to continue(yes/no)? yes <-- Answer "yes" and not "y"3. Create device files needed for the new partitions.# insf -eC diskinsf: Installing special files for sdisk instance 1 address 0/0/0/2/0.6.0 insf: Installing special files for sdisk instance 0 address 0/0/0/2/1.2.0 insf: Installing special files for sdisk instance 2 address 0/0/0/3/0.6.0 insf: Installing special files for sdisk instance 3 address 0/0/12/1/0/4/1.0.0 insf: Installing special files for sdisk instance 4 address 0/0/12/1/0/4/1.1.0 insf: Installing special files for sdisk instance 5 address 0/0/12/1/0/4/1.2.0 insf: Installing special files for sdisk instance 6 address 0/0/12/1/0/4/1.3.0 insf: Installing special files for sdisk instance 7 address 0/0/14/1/0/4/1.0.0 insf: Installing special files for sdisk instance 8 address 0/0/14/1/0/4/1.1.0 insf: Installing special files for sdisk instance 9 address 0/0/14/1/0/4/1.2.0 insf: Installing special files for sdisk instance 10 address 0/0/14/1/0/4/1.3.04. Verify the partition table.# idisk /dev/rdsk/c2t6d0idisk version: 1.32EFI Primary Header:Signature = EFI PARTRevision = 0x10000HeaderSize = 0x5cHeaderCRC32 = 0xe51d545dMyLbaLo = 0x1MyLbaHi = 0x0AlternateLbaLo = 0x1117732fAlternateLbaHi = 0x0FirstUsableLbaLo = 0x22FirstUsableLbaHi = 0x0LastUsableLbaLo = 0x1117730cLastUsableLbaHi = 0x0Disk GUID = 711f04da-2190-11dd-8001-d6217b60e588PartitionEntryLbaLo = 0x2PartitionEntryLbaHi = 0x0NumberOfPartitionEntries = 0xcSizeOfPartitionEntry = 0x80PartitionEntryArrayCRC32 = 0x280b786cPrimary Partition Table (in 512 byte blocks):Partition 1 (EFI):Partition Type GUID = c12a7328-f81f-11d2-ba4b-00a0c93ec93bUnique Partition GUID = 711f066a-2190-11dd-8002-d6217b60e588 Starting Lba Lo = 0x22Starting Lba Hi = 0x0Ending Lba Lo = 0xfa021Ending Lba Hi = 0x0Partition 2 (HP-UX):Partition Type GUID = 75894c1e-3aeb-11d3-b7c1-7b03a0000000 Unique Partition GUID = 711f0688-2190-11dd-8003-d6217b60e588 Starting Lba Lo = 0xfa022Starting Lba Hi = 0x0Ending Lba Lo = 0x110af30bEnding Lba Hi = 0x0Partition 3 (HPSP):Partition Type GUID = e2a1e728-32e3-11d6-a682-7b03a0000000 Unique Partition GUID = 711f06a6-2190-11dd-8004-d6217b60e588 Starting Lba Lo = 0x110af30cStarting Lba Hi = 0x0Ending Lba Lo = 0x1117730bEnding Lba Hi = 0x0EFI Alternate Header:Signature = EFI PARTRevision = 0x10000HeaderSize = 0x5cMyLbaLo = 0x1117732fMyLbaHi = 0x0AlternateLbaLo = 0x1AlternateLbaHi = 0x0FirstUsableLbaLo = 0x22FirstUsableLbaHi = 0x0LastUsableLbaLo = 0x1117730cLastUsableLbaHi = 0x0Disk GUID = 711f04da-2190-11dd-8001-d6217b60e588PartitionEntryLbaLo = 0x1117730ePartitionEntryLbaHi = 0x0NumberOfPartitionEntries = 0xcSizeOfPartitionEntry = 0x80PartitionEntryArrayCRC32 = 0x280b786cAlternate Partition Table (in 512 byte blocks):Partition 1 (EFI):Partition Type GUID = c12a7328-f81f-11d2-ba4b-00a0c93ec93b Unique Partition GUID = 711f066a-2190-11dd-8002-d6217b60e588 Starting Lba Lo = 0x22Starting Lba Hi = 0x0Ending Lba Lo = 0xfa021Ending Lba Hi = 0x0Partition 2 (HP-UX):Partition Type GUID = 75894c1e-3aeb-11d3-b7c1-7b03a0000000 Unique Partition GUID = 711f0688-2190-11dd-8003-d6217b60e588 Starting Lba Lo = 0xfa022Starting Lba Hi = 0x0Ending Lba Lo = 0x110af30bEnding Lba Hi = 0x0Partition 3 (HPSP):Partition Type GUID = e2a1e728-32e3-11d6-a682-7b03a0000000 Unique Partition GUID = 711f06a6-2190-11dd-8004-d6217b60e588 Starting Lba Lo = 0x110af30cStarting Lba Hi = 0x0Ending Lba Hi = 0x0Legacy MBR (MBR Signatures in little endian):MBR Signature = 0x6c041f71Protective MBR5. Verify that the device files were created properly.# ioscan -efnC disk --> c2t6d0 is 0/0/0/3/0.6.06. Populate the /efi/hpux/ directory in the new EFI system partition.# mkboot -e -l /dev/rdsk/c2t6d07. Change the auto file for the mirror to boot without quorum.NOTE: Using "s1"# echo "boot vmunix -lq" > /tmp/AUTO.lq# efi_cp -d /dev/rdsk/c2t6d0s1 /tmp/AUTO.lq /EFI/HPUX/AUTONOTE: We assume that if we boot from the primary, the mirror is fullyfunctional and therefore we don't need to override quorum. Your site mightrequire that both disks override quorum.8. Verify the contents of the auto file on the primary and the mirror.NOTE: Using "s1"# efi_cp -d /dev/rdsk/c0t6d0s1 -u /EFI/HPUX/AUTO /tmp/AUTO.pri# efi_cp -d /dev/rdsk/c2t6d0s1 -u /EFI/HPUX/AUTO /tmp/AUTO.alt# cat /tmp/AUTO.priboot vmunix# cat /tmp/AUTO.altboot vmunix -lq分享到:∙上一篇:HPUX下定位网卡位置∙下一篇:HPUX 11.23下根盘镜像全过程(下)HPUX 11.23下根盘镜像全过程(下)分类:HPUX 2009-04-27 16:19 300人阅读评论(0) 收藏举报9. Add the new partition to vg00.NOTE: Using "s2"# pvcreate -fB /dev/rdsk/c2t6d0s2Physical volume "/dev/rdsk/c2t6d0s2" has been successfully created.# vgextend vg00 /dev/dsk/c2t6d0s2Volume group "vg00" has been successfully extended.Volume Group configuration for /dev/vg00 has been saved in /etc/lvmconf/vg00.conf10. Mirror all logical volumes in vg00.NOTE: Using "s2"# lvextend -m 1 /dev/vg00/lvol1 /dev/dsk/c2t6d0s2The newly allocated mirrors are now being synchronized. This operation willtake some time. Please wait ....Logical volume "/dev/vg00/lvol1" has been successfully extended.Volume Group configuration for /dev/vg00 has been saved in /etc/lvmconf/vg00.conf # lvextend -m 1 /dev/vg00/lvol2 /dev/dsk/c2t6d0s2The newly allocated mirrors are now being synchronized. This operation willtake some time. Please wait ....Logical volume "/dev/vg00/lvol2" has been successfully extended.Volume Group configuration for /dev/vg00 has been saved in /etc/lvmconf/vg00.conf # lvextend -m 1 /dev/vg00/lvol3 /dev/dsk/c2t6d0s2The newly allocated mirrors are now being synchronized. This operation willtake some time. Please wait ....Logical volume "/dev/vg00/lvol3" has been successfully extended.Volume Group configuration for /dev/vg00 has been saved in /etc/lvmconf/vg00.conf # lvextend -m 1 /dev/vg00/lvol4 /dev/dsk/c2t6d0s2The newly allocated mirrors are now being synchronized. This operation willtake some time. Please wait ....Logical volume "/dev/vg00/lvol4" has been successfully extended.Volume Group configuration for /dev/vg00 has been saved in /etc/lvmconf/vg00.conf # lvextend -m 1 /dev/vg00/lvol5 /dev/dsk/c2t6d0s2The newly allocated mirrors are now being synchronized. This operation willtake some time. Please wait ....Logical volume "/dev/vg00/lvol5" has been successfully extended.Volume Group configuration for /dev/vg00 has been saved in /etc/lvmconf/vg00.conf # lvextend -m 1 /dev/vg00/lvol6 /dev/dsk/c2t6d0s2The newly allocated mirrors are now being synchronized. This operation willtake some time. Please wait ....Logical volume "/dev/vg00/lvol6" has been successfully extended.Volume Group configuration for /dev/vg00 has been saved in /etc/lvmconf/vg00.conf # lvextend -m 1 /dev/vg00/lvol7 /dev/dsk/c2t6d0s2The newly allocated mirrors are now being synchronized. This operation willtake some time. Please wait ....Logical volume "/dev/vg00/lvol7" has been successfully extended.Volume Group configuration for /dev/vg00 has been saved in /etc/lvmconf/vg00.conf # lvextend -m 1 /dev/vg00/lvol8 /dev/dsk/c2t6d0s2The newly allocated mirrors are now being synchronized. This operation willtake some time. Please wait ....Logical volume "/dev/vg00/lvol8" has been successfully extended.Volume Group configuration for /dev/vg00 has been saved in /etc/lvmconf/vg00.conf11. Add the new disk to /stand/bootconf.NOTE: Using "s2"# vi /stand/bootconfl /dev/dsk/c0t6d0s2l /dev/dsk/c2t6d0s212. Verify that the new disk was added to vg00, and the lv's are in sync.# vgdisplay -v vg00--- Volume groups ---VG Name /dev/vg00VG Write Access read/writeVG Status availableMax LV 255Cur LV 8Open LV 8Max PV 16Cur PV 2Act PV 2VGDA 4PE Size (Mbytes) 32Total PE 8692Alloc PE 2330Free PE 6362Total PVG 0Total Spare PVs 0Total Spare PVs in use 0--- Logical volumes ---LV Name /dev/vg00/lvol1LV Status available/syncd LV Size (Mbytes) 1792 Current LE 56Allocated PE 112Used PV 2LV Name /dev/vg00/lvol2LV Status available/syncd LV Size (Mbytes) 8192 Current LE 256Allocated PE 512Used PV 2LV Name /dev/vg00/lvol3LV Status available/syncd LV Size (Mbytes) 992 Current LE 31Allocated PE 62Used PV 2LV Name /dev/vg00/lvol4LV Status available/syncd LV Size (Mbytes) 512 Current LE 16Used PV 2LV Name /dev/vg00/lvol5LV Status available/syncd LV Size (Mbytes) 128 Current LE 4Allocated PE 8Used PV 2LV Name /dev/vg00/lvol6LV Status available/syncd LV Size (Mbytes) 9184 Current LE 287Allocated PE 574Used PV 2LV Name /dev/vg00/lvol7LV Status available/syncd LV Size (Mbytes) 7776 Current LE 243Allocated PE 486Used PV 2LV Name /dev/vg00/lvol8LV Status available/syncd LV Size (Mbytes) 8704 Current LE 272Allocated PE 544Used PV 2--- Physical volumes ---PV Name /dev/dsk/c0t6d0s2 PV Status available Total PE 4346Free PE 3181Proactive Polling OnPV Name /dev/dsk/c2t6d0s2PV Status availableTotal PE 4346Free PE 3181Autoswitch OnProactive Polling On13. Verify that the BDRA was updated properly. Take note of the HW paths for step 14.# lvlnboot -vBoot Definitions for Volume Group /dev/vg00:Physical Volumes belonging in Root Volume Group:/dev/dsk/c0t6d0s2 (0/0/0/2/0.6.0) -- Boot Disk/dev/dsk/c2t6d0s2 (0/0/0/3/0.6.0) -- Boot DiskBoot: lvol1 on: /dev/dsk/c0t6d0s2/dev/dsk/c2t6d0s2Root: lvol3 on: /dev/dsk/c0t6d0s2/dev/dsk/c2t6d0s2Swap: lvol2 on: /dev/dsk/c0t6d0s2/dev/dsk/c2t6d0s2Dump: lvol2 on: /dev/dsk/c0t6d0s2, 014. Add EFI primary and high availability boot path menu entries.# setboot -p 0/0/0/2/0.6.0# setboot -h 0/0/0/3/0.6.0# setboot -b on15. Verify that the primary and mirror boot paths are configured properly.# setbootPrimary bootpath : 0/0/0/2/0.6.0HA Alternate bootpath : 0/0/0/3/0.6.0Alternate bootpath : 0/0/0/1/0Autoboot is ON (enabled)16. Test the new mirror by booting off of it.# cd /# shutdown -ry 0SHUTDOWN PROGRAM05/14/08 17:19:51 EATBroadcast Message from root (console) Wed May 14 17:19:51...SYSTEM BEING BROUGHT DOWN NOW ! ! !# grep "Boot device" /var/adm/syslog/syslog.logvmunix: Boot device's HP-UX HW path is: 0/0/0/2/0.6.017. Change the boot sequence in order to boot from mirror disk /dev/dsk/c2t6d0:# setboot -p 0/0/0/3/0.6.0# setboot -h 0/0/0/2/0.6.0# setboot -b on# setbootPrimary bootpath : 0/0/0/3/0.6.0HA Alternate bootpath : 0/0/0/2/0.6.0Alternate bootpath : 0/0/0/1/0# cd /# shutdown -ry 018. Verify which disk/kernel you booted from.# grep "Boot device" /var/adm/syslog/syslog.logvmunix: Boot device's HP-UX HW path is: 0/0/0/3/0.6.0overhpux 11.23安腾做mirror步骤详细说明,见全文...HPUX 11.23与11.22版本配置根盘镜像的最大的不同:1. 新增加了HPSP分区11.22系统根盘只划分了两个分区EFI / HP-UX,在11.23系统中,划分了3个分区,分别为EFI / HP-UX / HPSP相应在使用idisk命令划分硬盘分区时使的/tmp/partitionfile 文件中的内容也做了相应调整。
HP小型机系统盘镜像

小型机系统软件安装目录目录第1章 HP小型机系统盘镜像 (1)1.1 概述 (1)1.2 操作步骤 (1)第1章 HP小型机系统盘镜像1.1 概述为了提高系统的可靠性,保证一旦操作系统所在磁盘出现故障时系统能够正常、连续运行,需要对系统盘进行镜像。
系统盘镜像需要购买HP公司的相关软件,如MirrorDisk软件。
下面给出系统盘镜像的方法。
说明:由于镜像需要进行初始的数据同步,因此最好在完成操作系统的安装之后立即进行系统磁盘的镜像操作。
这样需要同步的数据量少,时间短。
1.2 操作步骤(1) 以root用户登录,检查MirrorDisk软件是否存在。
# su – root# /usr/sbin/swlist | grep "MirrorDisk/UX"B2491BA B.11.00 MirrorDisk/UX如果系统输出信息如上行所示,表示已安装该软件包;否则表示没有,在进行系统根盘镜像操作前必须安装该软件包,否则,无法进行后续操作。
(2) 找出系统根盘所在的路径。
# vgdisplay -v /dev/vg00 | awk '/PV Name/ {print $3}'如果系统显示如下:/dev/dsk/c1t2d0表示系统盘为/dev/dsk/c1t2d0。
(3) 找出系统盘vg00中所有的逻辑卷。
# vgdisplay -v vg00 |awk '/LV Name/ {print $3}'系统将会有以下显示:/dev/vg00/lvol1/dev/vg00/lvol2/dev/vg00/lvol3/dev/vg00/lvol4/dev/vg00/lvol5/dev/vg00/lvol7/dev/vg00/lvol8(4) 确定镜像盘的路径。
# ioscan -fnC diskClass I H/W Path Driver S/W State H/W Type Description ============================================================disk 0 0/0/1/1.2.0 sdisk CLAIMED DEVICE IBM DMVS18D /dev/dsk/c1t2d0 /dev/rdsk/c1t2d0disk 1 0/0/2/0.2.0 sdisk CLAIMED DEVICE IBM DMVS18D /dev/dsk/c2t2d0 /dev/rdsk/c1t2d0disk 2 0/0/2/1.2.0 sdisk CLAIMED DEVICE HP DVD-ROM 304/dev/dsk/c3t2d0 /dev/rdsk/c3t2d0disk 3 0/4/0/0.8.0 sdisk CLAIMED DEVICE SEAGATE ST318436LC /dev/dsk/c3t8d0 /dev/rdsk/c3t8d0disk 4 0/7/0/0.12.0 sdisk CLAIMED DEVICE SEAGATE ST318436LC /dev/dsk/c3t12d0 /dev/rdsk/c3t12d0disk 5 0/7/0/0.13.0 sdisk CLAIMED DEVICE SEAGATE ST318436LC /dev/dsk/c3t13d0 /dev/rdsk/c3t13d0disk 6 0/7/0/0.14.0 sdisk CLAIMED DEVICE SEAGATE ST318436LC /dev/dsk/c3t14d0 /dev/rdsk/c3t14d00、1磁盘是内置磁盘,3、4、5、6硬盘是安装在磁盘柜中的。
HP小型机HPUX11.31利用mirror软件做磁盘镜像
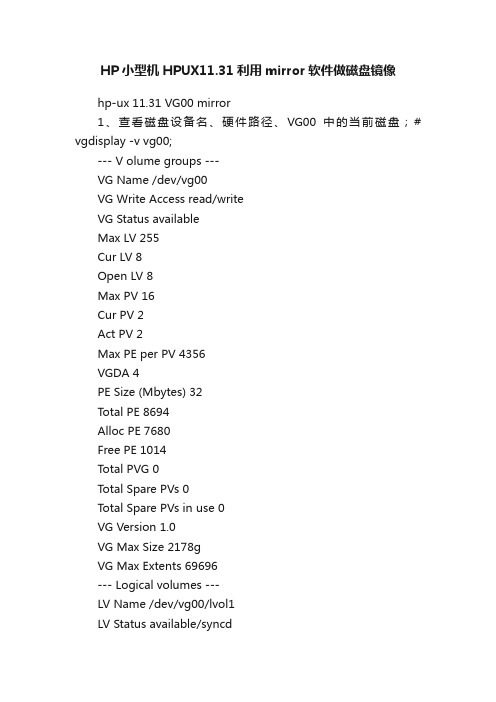
HP小型机HPUX11.31利用mirror软件做磁盘镜像hp-ux 11.31 VG00 mirror1、查看磁盘设备名、硬件路径、VG00中的当前磁盘;# vgdisplay -v vg00;--- V olume groups ---VG Name /dev/vg00VG Write Access read/writeVG Status availableMax LV 255Cur LV 8Open LV 8Max PV 16Cur PV 2Act PV 2Max PE per PV 4356VGDA 4PE Size (Mbytes) 32Total PE 8694Alloc PE 7680Free PE 1014Total PVG 0Total Spare PVs 0Total Spare PVs in use 0VG Version 1.0VG Max Size 2178gVG Max Extents 69696--- Logical volumes ---LV Name /dev/vg00/lvol1LV Status available/syncdLV Size (Mbytes) 4096Current LE 128Allocated PE 256Used PV 2LV Name /dev/vg00/lvol2LV Status available/syncdLV Size (Mbytes) 32768Current LE 1024Allocated PE 2048Used PV 2LV Name /dev/vg00/lvol3LV Status available/syncdLV Size (Mbytes) 4096Current LE 128Allocated PE 256Used PV 2LV Name /dev/vg00/lvol4 LV Status available/syncd LV Size (Mbytes) 20480Current LE 640Allocated PE 1280Used PV 2LV Name /dev/vg00/lvol5 LV Status available/syncd LV Size (Mbytes) 20480Current LE 640Allocated PE 1280Used PV 2LV Name /dev/vg00/lvol6 LV Status available/syncd LV Size (Mbytes) 10240Current LE 320Allocated PE 640Used PV 2LV Name /dev/vg00/lvol7 LV Status available/syncdLV Size (Mbytes) 10240Current LE 320Allocated PE 640Used PV 2LV Name /dev/vg00/lvol8 LV Status available/syncdLV Size (Mbytes) 20480Current LE 640Allocated PE 1280Used PV 2--- Physical volumes ---PV Name /dev/disk/disk9_p2 PV Status availableTotal PE 4347Free PE 507Autoswitch OnProactive Polling OnPV Name /dev/disk/disk8_p2PV Status availableTotal PE 4347Free PE 507Autoswitch OnProactive Polling On# ioscan -kfnCdiskClass I H/W Path Driver S/W State H/W Type Description====================================== ======================= ==========disk 0 0/0/0/3/0.6.0 sdisk CLAIMED DEVICE HP 146 GST3146855LC/dev/dsk/c0t6d0 /dev/rdsk/c0t6d0disk 1 0/0/0/3/1.2.0 sdisk CLAIMED DEVICE Optiarc DVD RW AD-5590A/dev/dsk/c1t2d0 /dev/rdsk/c1t2d0disk 2 0/0/1/1/0/4/1.5.0 sdisk CLAIMED DEVICE HP 146 GST3146855LC/dev/dsk/c3t5d0 /dev/rdsk/c3t5d0/dev/dsk/c3t5d0s1 /dev/rdsk/c3t5d0s1/dev/dsk/c3t5d0s2 /dev/rdsk/c3t5d0s2/dev/dsk/c3t5d0s3 /dev/rdsk/c3t5d0s3disk 3 1/0/0/3/0.6.0 sdisk CLAIMED DEVICE HP 146 GST3146855LC/dev/dsk/c6t6d0 /dev/rdsk/c6t6d0/dev/dsk/c6t6d0s1 /dev/rdsk/c6t6d0s1/dev/dsk/c6t6d0s2 /dev/rdsk/c6t6d0s2/dev/dsk/c6t6d0s3 /dev/rdsk/c6t6d0s3disk 4 1/0/0/3/1.2.0 sdisk CLAIMED DEVICE Optiarc DVD RW AD-5590A/dev/dsk/c7t2d0 /dev/rdsk/c7t2d0disk 5 1/0/1/1/0/4/1.6.0 sdisk CLAIMED DEVICE HP 146 GST3146855LC/dev/dsk/c9t6d0 /dev/rdsk/c9t6d0# ioscan -kfNCdiskClass I H/W Path Driver S/W State H/W Type Description====================================== ======================= ======disk 6 64000/0xfa00/0x0 esdisk CLAIMED DEVICE HP 146 GST3146855LCdisk 7 64000/0xfa00/0x1 esdisk CLAIMED DEVICE Optiarc DVD RW AD-5590Adisk 8 64000/0xfa00/0x2 esdisk CLAIMED DEVICE HP 146GST3146855LCdisk 9 64000/0xfa00/0x3 esdisk CLAIMED DEVICE HP 146 GST3146855LCdisk 10 64000/0xfa00/0x4 esdisk CLAIMED DEVICE Optiarc DVD RW AD-5590Adisk 11 64000/0xfa00/0x5 esdisk CLAIMED DEVICE HP 146 GST3146855LC2、编写磁盘的table文件并导入到mirror盘;#vi /tmp/mirror/table3EFI 500MBHPUX 100%HPSP 400MB# idisk -wf /tmp/mirror/table /dev/rdisk/disk8;# idisk /dev/rdisk/disk8;--查看是否导入成功;3、安装分好区的设备文件;# insf -eCdisk4、将新磁盘制作成引导磁盘,需要注意的是要使用字符设备;# mkboot -e -l /dev/rdisk/disk8;# efi_ls -d /dev/rdisk/disk8 /efi/hpux;--查看上条命令是否成功;5、修改两块磁盘的引导模式(-lq 不进行quorum 检查。
关于hpux换镜像硬盘的方法
关于hpux换镜像硬盘的方法关于hpux换硬盘的疑惑镜像的两个硬盘坏了一个,更换步骤如下1、备份vg的配置信息#vgcfgbackup vg022、剥离镜像#lvreduce -m 0 -A n lv_name /dev/dsk/cXtXdX 3、物理操作:换盘4、测试盘的可用性#ioscan /dev/dsk/cXtXdX5、恢复lvm配置信息到pv#vgcfgrestore -n vg02 /dev/dsk/cXtXdX 6、激活新的pv(不知道这个“激活”用的恰不恰当)#vgchange -a y vg007、重建镜像#lvextend -m 1 lv_name /dev/dsk/cXtXdX疑惑:做完上诉第二步,是否可以用一下步骤代替3、将pv从vg中拿走#vgreduce -A n vg02 /dev/dsk/cXtXdX 4、物理操作:换盘5、测试盘的可用性#ioscan /dev/dsk/cXtXdX6、格式化pv#pvcreate /dev/rdsk/cXtXdX7、将pv加入vg#vgextend vg02 /dev/dsk/cXtXdX 8、重建镜像#lvextend -m 1 lv_name /dev/dsk/cXtXdX这样一个过程和aix下换盘就一致了2006-11-21 23:12 pangyi以前找的一篇文章1. Determine which lvol's are mirrored in the volume group of thefaulty disk.# lvdisplay -v /dev/vgXX/lvol* | more2. Reduce any logical volumes that have mirror copies on the faulty disk.# lvreduce -m 0 /dev/vgXX/lvolX /dev/dsk/cXtXd0 (for 1 way mirroring) # lvreduce -m 1 /dev/vgXX/lvolX /dev/dsk/cXtXd0 (for 2 way mirroring) NOTE: You must repeat the lvreduce for every lvolX on the faultydisk.3. Reduce the volume group.# vgreduce /dev/vgXX /dev/dsk/cXtXd04. Replaced the faulty hot swap disk.5. Initialize the replaced disk for LVM.# pvcreate -f /dev/rdsk/cXtXd06. Extend the volume group.# vgextend /dev/vgXX /dev/dsk/cXtXd07. Restore the volume group information.# vgcfgrestore -n /dev/vgXX /dev/rdsk/cXtXd08. Activate the volume group containing the replaced disk.# vgchange -a y /dev/vgXX9. The volume group will now resynchronize the mirroring. NOTE: If the resync does not occur, issuethis command:# vgsync /dev/vgXX实践出真知。
HP-PA和IA的boot disk mirror脚本-V090922
PA和IA的boot disk mirror脚本(v 1.0)版本说明#########PApvcreate -B /dev/rdsk/c1t6d0vgextend /dev/vg00 /dev/dsk/c1t6d0mkboot /dev/rdsk/c1t6d0mkboot -a "hpux -lq(;0)/vmunix" /dev/rdsk/c1t6d0 lvextend -m 1 /dev/vg00/lvol1 /dev/dsk/c1t6d0 lvextend -m 1 /dev/vg00/lvol2 /dev/dsk/c1t6d0 lvextend -m 1 /dev/vg00/lvol3 /dev/dsk/c1t6d0 lvextend -m 1 /dev/vg00/lvol4 /dev/dsk/c1t6d0 lvextend -m 1 /dev/vg00/lvol5 /dev/dsk/c1t6d0 lvextend -m 1 /dev/vg00/lvol6 /dev/dsk/c1t6d0 lvextend -m 1 /dev/vg00/lvol7 /dev/dsk/c1t6d0 lvextend -m 1 /dev/vg00/lvol8 /dev/dsk/c1t6d0 lvextend -m 1 /dev/vg00/lv_swap /dev/dsk/c1t6d0 /usr/sbin/lvlnboot -b /dev/vg00/lvol1/usr/sbin/lvlnboot -v -r /dev/vg00/lvol3/usr/sbin/lvlnboot -s /dev/vg00/lvol2/usr/sbin/lvlnboot -R /dev/vg00lvlnboot -vIA#vi /tmp/partitionfile增加如下4行。
3EFI 500MBHPUX 100%HPSP 400MB#idisk -wf /tmp/partitionfile /dev/rdsk/c3t2d0#insf -eC disk#idisk /dev/rdsk/c3t2d0#ioscan -efnC disk#mkboot -e -l /dev/rdsk/c3t2d0#echo "boot vmunix -lq" > /tmp/AUTO.lq#efi_cp -d /dev/rdsk/c3t2d0s1 /tmp/AUTO.lq /EFI/HPUX/AUTO#efi_cp -d /dev/rdsk/c2t1d0s1 -u /EFI/HPUX/AUTO /tmp/AUTO.pri #efi_cp -d /dev/rdsk/c3t2d0s1 -u /EFI/HPUX/AUTO /tmp/AUTO.alt #cat /tmp/AUTO.pri#cat /tmp/AUTO.alt#pvcreate -fB /dev/rdsk/c3t2d0s2#vgextend vg00 /dev/dsk/c3t2d0s2#lvextend -m 1 /dev/vg00/lvol1 /dev/dsk/c3t2d0s2#lvextend -m 1 /dev/vg00/lvol2 /dev/dsk/c3t2d0s2#lvextend -m 1 /dev/vg00/lvol3 /dev/dsk/c3t2d0s2#lvextend -m 1 /dev/vg00/lvol4 /dev/dsk/c3t2d0s2#lvextend -m 1 /dev/vg00/lvol5 /dev/dsk/c3t2d0s2#lvextend -m 1 /dev/vg00/lvol6 /dev/dsk/c3t2d0s2#lvextend -m 1 /dev/vg00/lvol7 /dev/dsk/c3t2d0s2#lvextend -m 1 /dev/vg00/lvol8 /dev/dsk/c3t2d0s2# vi /stand/bootconf增加如下2行。
HPUX 11.31系统镜像

【HPUX 11.31专题】HPUX 11.31系统镜像HPUX 11.23及以后版本与11.22版本配置根盘镜像的最大的不同:1. 新增加了HPSP分区11.22系统根盘只划分了两个分区EFI / HP-UX,在11.23系统中,划分了3个分区,分别为EFI / HP-UX / HPSP相应在使用idisk命令划分硬盘分区时使的/tmp/partitionfile 文件中的内容也做了相应调整。
2. EFI分区大小从原先的100M,增加到500M。
镜像步骤1、查看基本信息#ioscan -m dsfPersistent DSF Legacy DSF(s)========================================/dev/pt/pt2 /dev/rscsi/c5t7d0/dev/rtape/tape1_BEST /dev/rmt/c7t3d0BEST/dev/rtape/tape1_BESTn /dev/rmt/c7t3d0BESTn/dev/rtape/tape1_BESTb /dev/rmt/c7t3d0BESTb/dev/rtape/tape1_BESTnb /dev/rmt/c7t3d0BESTnb/dev/pt/pt3 /dev/rscsi/c6t15d0/dev/rdisk/disk11 /dev/rdsk/c0t6d0/dev/rdisk/disk11_p1 /dev/rdsk/c0t6d0s1/dev/rdisk/disk11_p2 /dev/rdsk/c0t6d0s2/dev/rdisk/disk11_p3 /dev/rdsk/c0t6d0s3/dev/rdisk/disk12 /dev/rdsk/c1t2d0/dev/rdisk/disk13 /dev/rdsk/c2t6d0/dev/rdisk/disk14 /dev/rdsk/c5t1d0/dev/rdisk/disk15 /dev/rdsk/c5t0d0/dev/rdisk/disk16 /dev/rdsk/c5t3d0/dev/rdisk/disk17 /dev/rdsk/c5t2d0/dev/rdisk/disk18 /dev/rdsk/c6t1d0/dev/rdisk/disk19 /dev/rdsk/c6t0d0/dev/rdisk/disk20 /dev/rdsk/c6t2d0/dev/rdisk/disk21 /dev/rdsk/c6t3d0这个命令是11.31操作系统里面所独有的,普通操作的时候看不出有什么好处,在有多路径的时候优势就显示出来了,比如说添加了EMC的存储,设备名/dev/rdsk/c5t0d0跟/dev/rdsk/c8t0d0对应的是同一块磁盘,在11.23下面如果要加入到vg里面必须把两个设备名都加进去,而在11.31下面因为有了多路径映射,会显示为/dev/rdisk/diskxx的形式,对应这两个设备,这样就比较一目了然了。
惠普HP笔记本电脑无法安装GHOST系统的解决办法
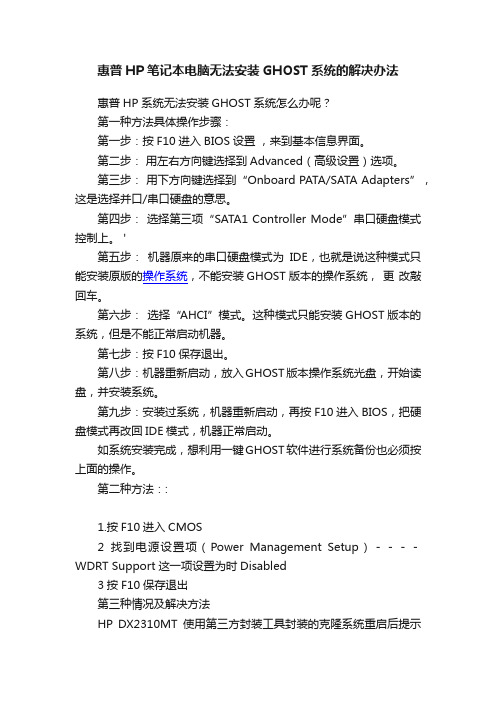
惠普HP笔记本电脑无法安装GHOST系统的解决办法惠普HP系统无法安装GHOST系统怎么办呢?第一种方法具体操作步骤:第一步:按F10进入BIOS设置,来到基本信息界面。
第二步:用左右方向键选择到Advanced(高级设置)选项。
第三步:用下方向键选择到“Onboard PATA/SATA Adapters”,这是选择并口/串口硬盘的意思。
第四步:选择第三项“SATA1 Controller Mode”串口硬盘模式控制上。
'第五步:机器原来的串口硬盘模式为IDE,也就是说这种模式只能安装原版的操作系统,不能安装GHOST版本的操作系统,更改敲回车。
第六步:选择“AHCI”模式。
这种模式只能安装GHOST版本的系统,但是不能正常启动机器。
第七步:按F10保存退出。
第八步:机器重新启动,放入GHOST版本操作系统光盘,开始读盘,并安装系统。
第九步:安装过系统,机器重新启动,再按F10进入BIOS,把硬盘模式再改回IDE模式,机器正常启动。
如系统安装完成,想利用一键GHOST软件进行系统备份也必须按上面的操作。
第二种方法::1.按F10进入CMOS2找到电源设置项(Power Management Setup)----WDRT Support这一项设置为时Disabled3按F10保存退出第三种情况及解决方法HP DX2310MT使用第三方封装工具封装的克隆系统重启后提示以下故障安装光盘版本win2003也出现这个故障windows could not start because of a computer disk hardwareproblem not read from the selected boot disk. check boot pathand disk hardwarecheck the windows documentation about hardware diskand your hardware reference manuals for information论坛解决方法:HP DX2310MT要想装ghost版的系统,必须把BIOS中的Power Management Setup里的AHIC选项设置为“DISABLE”就可以装进去了,这是最直接的方法的说。
【系统】hp小型机hpux操作系统安装配置手册v10

目录第1章RP8420/RP4440硬件结构1.1RP8420服务器简介及结构HP 9000 rp8420-32服务器基于标准化、模块化的技术、强大的PA-8900双处理器和惠普虚拟服务器环境,能够降低平台成本、提升性能,提供更大的可扩展性和灵活性,以及更高的投资回报,帮助您成功迈向动成长企业。
HP 9000 rp8420-32服务器的特性:●强大的PA-8900处理器和HP Super-Scalable Chipset(超级可扩展芯片组)sx1000●UNIX®卓越的高可用性、安全性和品质●基于单元板的架构,提供业界领先的高可用性特性和解决方案●机箱内升级至英特尔安腾处理器通过HP-UX 11i虚拟服务器环境—它包括虚拟分区(vPars)、硬分区(nPars)以及HP Workload Manager (WLM)功能,该服务器在应用和服务器整合方面的灵活性得到了提升,从而使您可以通过自动分配资源和充分利用系统资源来保持服务级别。
rp8420-32服务器是大型企业技术与商业计算的理想选择,可以运行各种计算与数据密集型业务应用,如企业资源规划(ERP)、供应链管理和业务智能等,同时提供一流性能,并能有效降低成本和复杂性。
rp8420-32服务器具有领先的64 位处理能力,无论何种配置都能提供出众的性价比。
具体特性如下:1.1.1Rp8420服务器配置HP 9000 rp8420可单独作为数据库服务器,或两台rp8420分别安装HP高可用集群软件MC/ServiceGuard 集群软件,互为备份,通过全光纤通道连接共享磁盘阵列,实现双机高可用群集。
•每台rp8420配置: 8颗双核PA-RISC 1.1GHz CPU、32GB内存,两个分区(或6颗双核PA-RISC1.1GHz CPU、24GB内存)。
•每台rp8420安装MirrorDisk/UX,实现内置磁盘镜像、支持磁盘热插拔,保证系统数据的可用性。
HP-UX下做磁盘镜像
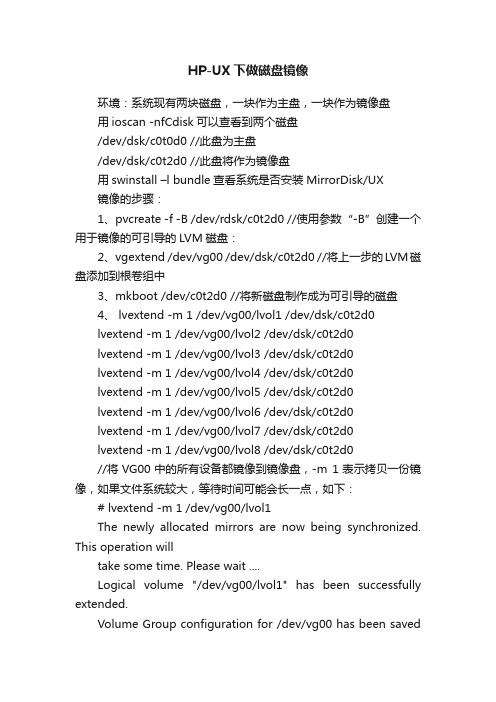
HP-UX下做磁盘镜像环境:系统现有两块磁盘,一块作为主盘,一块作为镜像盘用ioscan -nfCdisk可以查看到两个磁盘/dev/dsk/c0t0d0 //此盘为主盘/dev/dsk/c0t2d0 //此盘将作为镜像盘用swinstall –l bundle查看系统是否安装MirrorDisk/UX镜像的步骤:1、pvcreate -f -B /dev/rdsk/c0t2d0 //使用参数“-B”创建一个用于镜像的可引导的LVM磁盘:2、vgextend /dev/vg00 /dev/dsk/c0t2d0 //将上一步的LVM磁盘添加到根卷组中3、mkboot /dev/c0t2d0 //将新磁盘制作成为可引导的磁盘4、 lvextend -m 1 /dev/vg00/lvol1 /dev/dsk/c0t2d0lvextend -m 1 /dev/vg00/lvol2 /dev/dsk/c0t2d0lvextend -m 1 /dev/vg00/lvol3 /dev/dsk/c0t2d0lvextend -m 1 /dev/vg00/lvol4 /dev/dsk/c0t2d0lvextend -m 1 /dev/vg00/lvol5 /dev/dsk/c0t2d0lvextend -m 1 /dev/vg00/lvol6 /dev/dsk/c0t2d0lvextend -m 1 /dev/vg00/lvol7 /dev/dsk/c0t2d0lvextend -m 1 /dev/vg00/lvol8 /dev/dsk/c0t2d0//将VG00中的所有设备都镜像到镜像盘,-m 1表示拷贝一份镜像,如果文件系统较大,等待时间可能会长一点,如下:# lvextend -m 1 /dev/vg00/lvol1The newly allocated mirrors are now being synchronized. This operation willtake some time. Please wait ....Logical volume "/dev/vg00/lvol1" has been successfully extended.Volume Group configuration for /dev/vg00 has been saved# lvextend -m 1 /dev/vg00/lvol2The newly allocated mirrors are now being synchronized. This operation willtake some time. Please wait ....Logical volume "/dev/vg00/lvol2" has been successfully extended.Volume Group configuration for /dev/vg00 has been saved in /etc/lvmconf/vg00.conf第5步:拷贝正确的AUTO文件到新的LIF区# mkboot -a "hpux -lq(;0)/stand/vmunix" /dev/dsk/c0t0d0 # mkboot -a "hpux -lq(;0)/stand/vmunix" /dev/dsk/c0t2d0 第6步:指定引导逻辑卷、根逻辑卷、主交换逻辑卷(用swapinfo确定交换逻辑卷在什么地方)、转储逻辑卷,为根和交换镜像拷贝更新包含在BDRA中等启动信息:# lvlnboot -b /dev/vg00/lvol1Volume Group configuration for /dev/vg00 has been saved in /etc/lvmconf/vg00.conf# lvlnboot -r /dev/vg00/lvol3Volume Group configuration for /dev/vg00 has been saved in /etc/lvmconf/vg00.conf# lvlnboot -s /dev/vg00/lvol2Volume Group configuration for /dev/vg00 has been saved in /etc/lvmconf/vg00.conf# lvlnboot -d /dev/vg00/lvol2Volume Group configuration for /dev/vg00 has been saved in /etc/lvmconf/vg00.conf第7步:恢复所有的BDRA信息# lvlnboot -RVolume Group configuration for /dev/vg00 has been saved第8步:确定引导逻辑卷、根逻辑卷、主交换逻辑卷以及转储逻辑卷的设置(检查镜像正确与否)# lvlnboot -vBoot Definitions for Volume Group /dev/vg00:Physical Volumes belonging in Root Volume Group:/dev/dsk/c0t0d0 (0/0/2/0.0.0) -- Boot Disk/dev/dsk/c0t2d0 (0/0/2/0.2.0) -- Boot DiskBoot: lvol1 on: /dev/dsk/c0t0d0/dev/dsk/c0t2d0Root: lvol3 on: /dev/dsk/c0t0d0/dev/dsk/c0t2d0Swap: lvol2 on: /dev/dsk/c0t0d0/dev/dsk/c0t2d0Dump: lvol2 on: /dev/dsk/c0t0d0, 0第9步:将引导盘设置为镜像盘(重启检验是镜像是否成功)# setbootPrimary bootpath : 0/0/2/0.0.0 //此时c0t2d0为主引导盘Alternate bootpath : 0/0/2/0.2.0Autoboot is ON (enabled)Autosearch is ON (enabled)# setboot -p 0/0/2/0.2.0 -a 0/0/2/0.0.0 //将c0d0t0设为主引导盘# shutdown -ry 0 //从镜像盘启动(lvrmboot - remove LVM logical volume link to root, primary swap, ordump volume)首先申明,LVM(Logical Volume Manager)是操作系统中一个磁盘管理子系统,而不是文件系统!在LVM里,一个PV(Physical Volume,物理卷)对应且只对应一个物理硬盘,一个或者多个PV组成一个VG(Volume Group,卷组),而从一个VG里又可以虚拟划分出若干个LV(Logical Volume,逻辑卷),真正的文件系统是创建在LV上面的,如下图示:可以在LV上建文件系统,也可以不建文件系统而直接使用,这时叫裸设备(raw device)。
HP-UX(MirrorDisk配置和恢复)
MirrorDisk配置和恢复(DNT内部技术文档)目录一、配置Mirror Disk 31、执行lvlnboot -v命令检查系统中的启动设备 32、创建第二块系统盘 33、为第二块磁盘创建boot引导信息 44、为第二块磁盘创建auto引导信息 45、扩展vg00,添加第二块硬盘 46、扩展vg00中各逻辑卷,添加镜像磁盘 47、执行如下操作后重新启动系统 58、在启动Main Menu出现时,从第二块磁盘启动 59、系统启动以后执行如下操作 6二、镜像盘损坏(主启动盘)的恢复 61.系统环境 62.模拟主镜像盘损坏(主启动盘) 73.镜像盘启动后,替换新磁盘 73.故障解决方法 8一、在线修复丢失的镜像盘 81.将lvm header恢复到disk 82. 重新激活vg 83.同步stale的extent 84.将boot 程序从好的disk ,复制到新加的disk 8 5.更新启动信息 9二、进入管理模式修复Mirror Disk 91. 从镜像盘启动 92. 进入管理模式 103.初始化磁盘 104. 恢复卷组信息到新更换的盘. 105. 激活卷组,开始镜像同步 106. 挂起/usr ,使得mkboot命令可用 107. 加载启动工具 118. 加载自启动文件. 119. 更新 LIF's Label file 1110. 重新启动 11二、如果vgcfgrestore新磁盘失败 111.从镜像盘启动 112. 进入管理模式 113. 重新导入导出vg00,vgchange -a y vg00 114. 激活卷组 125.Lvlnboot –R 126. mount /usr 127. 重新配置mirror disk (参考mirror disk配置) 12三、备注 12一、配置Mirror Disk1、执行lvlnboot -v命令检查系统中的启动设备#lvlnboot -vBoot Definitions for Volume Group /dev/vg00:Physical Volumes belonging in Root Volume Group:/dev/dsk/c1t2d0 (0/0/1/1.2.0) -- Boot DiskBoot: lvol1 on: /dev/dsk/c1t2d0Root: lvol3 on: /dev/dsk/c1t2d0Swap: lvol2 on: /dev/dsk/c1t2d0Dump: lvol2 on: /dev/dsk/c1t2d0, 02、创建第二块系统盘#pvcreate -f -B /dev/rdsk/c2t0d03、为第二块磁盘创建boot引导信息#mkboot /dev/dsk/c2t0d04、为第二块磁盘创建auto引导信息#mkboot -a "hpux -lq (;0)/stand/vmunix" /dev/dsk/c2t0d05、扩展vg00,添加第二块硬盘#vgextend /dev/vg00 /dev/dsk/c2t0d06、扩展vg00中各逻辑卷,添加镜像磁盘lvextend -m 1 /dev/vg00/lvol1 /dev/dsk/c2t0d0lvextend -m 1 /dev/vg00/lvol2 /dev/dsk/c2t0d0lvextend -m 1 /dev/vg00/lvol3 /dev/dsk/c2t0d0lvextend -m 1 /dev/vg00/lvol4 /dev/dsk/c2t0d0lvextend -m 1 /dev/vg00/lvol5 /dev/dsk/c2t0d0lvextend -m 1 /dev/vg00/lvol6 /dev/dsk/c2t0d0lvextend -m 1 /dev/vg00/lvol7 /dev/dsk/c2t0d0lvextend -m 1 /dev/vg00/lvol8 /dev/dsk/c2t0d0lvextend -m 1 /dev/vg00/lvol9 /dev/dsk/c2t0d0lvextend -m 1 /dev/vg00/lvol10 /dev/dsk/c2t0d0 或者采用循环结构for i in /dev/vg00/lvol*dolvextend –m 1 $i /dev/dsk/c2t0d0done7、执行如下操作后重新启动系统lvdisplay /dev/vg00/lvol1lvlnboot -r /dev/vg00/lvol3 /dev/vg00lvlnboot -b /dev/vg00/lvol1 /dev/vg00lvlnboot -s /dev/vg00/lvol2 /dev/vg00lvlnboot -d /dev/vg00/lvol2 /dev/vg00lvlnboot -Rv#shutdown –ry 08、在启动Main Menu出现时,从第二块磁盘启动Main Menu:>seaP0 0/0/2/0.6 intscsia.6 Random access mediasP1 0/0/2/1.6 intscsia.6 Random access medias P0 0/4/0/0.0 Random access mediasP3 0/10/0/0.1 Random access mediasP4 1/10/0/0.5 Sequene access mediasMain Menu:>bo p19、系统启动以后执行如下操作#lvlnboot -v#lvdisplay -v /dev/vg00/lvol1二、镜像盘损坏(主启动盘)的恢复1.系统环境[l2000:root]/#lvlnboot -RvBoot Definitions for Volume Group /dev/vg00:Physical Volumes belonging in Root Volume Group:/dev/dsk/c1t2d0 (0/0/1/1.2.0) -- Boot Disk/dev/dsk/c1t0d0 (0/0/1/1.0.0) -- Boot DiskBoot: lvol1 on: /dev/dsk/c1t2d0/dev/dsk/c1t0d0Root: lvol3 on: /dev/dsk/c1t2d0/dev/dsk/c1t0d0Swap: lvol2 on: /dev/dsk/c1t2d0/dev/dsk/c1t0d0Dump: lvol2 on: /dev/dsk/c1t2d0, 02.模拟主镜像盘损坏(主启动盘)关机后卸载主启动盘/dev/dsk/c1t2d0,从镜像启动盘/dev/dsk/c1t0d0启动3.镜像盘启动后,替换新磁盘# vgcfgrestore -n /dev/vg00 /dev/rdsk/c1t2d0。
HP-UX硬盘镜像
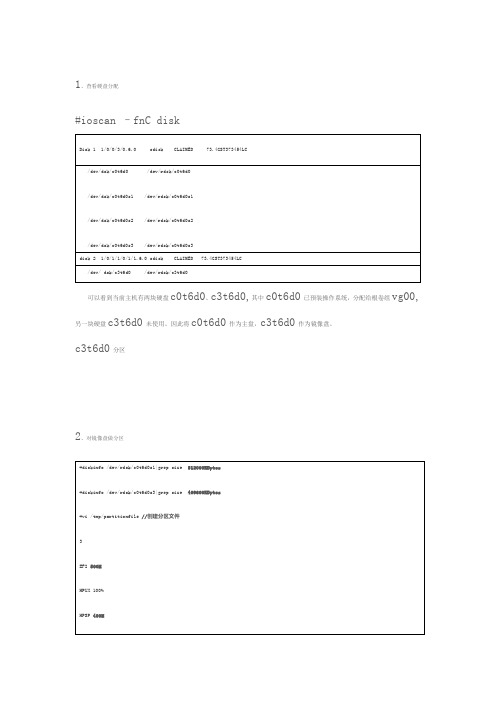
1、查看硬盘分配#ioscan –fnC disk可以看到当前主机有两块硬盘c0t6d0、c3t6d0,其中c0t6d0已预装操作系统,分配给根卷组vg00,另一块硬盘c3t6d0未使用。
因此将c0t6d0作为主盘,c3t6d0作为镜像盘。
c3t6d0分区2、对镜像盘做分区EFI Primary Header:Signature = EFI PARTRevision = 0x10000HeaderSize = 0x5cHeaderCRC32 = 0xb671872b MyLbaLo = 0x1AlternateLbaLo = 0x88bb991 FirstUsableLbaLo = 0x22LastUsableLbaLo = 0x88bb96e Disk GUID =8ee3b282-5066-11dc-8001-d6217b60e588PartitionEntryLbaLo = 0x2NumberOfPartitionEntries = 0xcSizeOfPartitionEntry = 0x80PartitionEntryArrayCRC32 = 0xc7ba57c0Primary Partition Table (in 512 byte blocks): Partition 1 (EFI):Partition Type GUID =c12a7328-f81f-11d2-ba4b-00a0c93ec93bUnique Partition GUID =8ee3b4b2-5066-11dc-8002-d6217b60e588Starting Lba = 0x22Ending Lba = 0xfa021 Partition 2 (HP-UX):Partition Type GUID =75894c1e-3aeb-11d3-b7c1-7b03a0000000Unique Partition GUID =8ee3b4da-5066-11dc-8003-d6217b60e588Starting Lba = 0xfa022 Ending Lba = 0x87f396d Partition 3 (HPSP):Partition Type GUID =e2a1e728-32e3-11d6-a682-7b03a0000000Unique Partition GUID =8ee3b4f8-5066-11dc-8004-d6217b60e588Starting Lba = 0x87f396e Ending Lba = 0x88bb96dEFI Alternate Header:Signature = EFI PART Revision = 0x10000HeaderSize = 0x5cHeaderCRC32 = 0x810a3fbeMyLbaLo = 0x88bb991AlternateLbaLo = 0x1FirstUsableLbaLo = 0x22LastUsableLbaLo = 0x88bb96eDisk GUID =8ee3b282-5066-11dc-8001-d6217b60e588PartitionEntryLbaLo = 0x88bb970NumberOfPartitionEntries = 0xcSizeOfPartitionEntry = 0x80PartitionEntryArrayCRC32 = 0xc7ba57c0Alternate Partition Table (in 512 byte blocks): Partition 1 (EFI):Partition Type GUID =c12a7328-f81f-11d2-ba4b-00a0c93ec93bUnique Partition GUID =8ee3b4b2-5066-11dc-8002-d6217b60e588Starting Lba = 0x22Ending Lba = 0xfa021Partition 2 (HP-UX):Partition Type GUID =75894c1e-3aeb-11d3-b7c1-7b03a0000000Unique Partition GUID =8ee3b4da-5066-11dc-8003-d6217b60e588Starting Lba = 0xfa022Ending Lba = 0x87f396dPartition 3 (HPSP):Partition Type GUID =e2a1e728-32e3-11d6-a682-7b03a0000000Unique Partition GUID =8ee3b4f8-5066-11dc-8004-d6217b60e588Starting Lba = 0x87f396eEnding Lba = 0x88bb96dLegacy MBR (MBR Signatures in little endian):MBR Signature = 0x14b2e38eProtective MBR3、建立新分区的设备文件(c3t6d0s1、s2、s3)rx7620b:[/]#insf -e -Cdiskinsf: Installing special files for sdisk instance 1 address 1/0/0/3/0.6.0insf: Installing special files for sdisk instance 0 address 1/0/0/3/1.2.0 insf: Installing special files for sdisk instance 2 address1/0/1/1/0/1/1.6.04、初始化EFI分区的FAT filesystem5、格式化EFI分区(s1)和LIF分区(part of s2)efi_lsFileName Last Modified Size EFI/ 8/22/2007 0 STARTUP.NSH 8/22/2007 296 total space 523251712 bytes, free space 519856128 bytesliflsvolume ISL10 data size 7984 directory size 8 06/04/19 14:02:34 filename type start size implement created===============================================================ISL -12800 584 242 0 06/04/19 14:02:34AUTO -12289 832 1 0 06/04/19 14:02:34HPUX -12928 840 1024 0 06/04/19 14:02:34PAD -12290 1864 1468 0 06/04/19 14:02:34 LABEL BIN 3336 8 0 07/08/22 12:24:056、硬盘启动指定-lq选项–lq 指在硬盘坏掉一块的情况下照样启动检查EFI分区AUTO文件的内容boot vmunix -lq7、对HPSP 盘进行复制Copy the HP service partition400+0 records in400+0 records out8、初始工作区硬盘并挂在卷组中Initialize the LVM partition (s2) and add it to vg009、复制磁盘内容Mirror the LVs to the s2 partition10、检查镜像盘LABEL文件内容# lvlnboot –v //查看磁盘内容1、Write the contents of the LABEL file, i.e. set root, boot, swap anddump device:# lvlnboot -r /dev/vg00/lvol3# lvlnboot -b /dev/vg00/lvol1# lvlnboot -s /dev/vg00/lvol2# lvlnboot -d /dev/vg00/lvol22、 # lvlnboot –v (to check it)Boot Definitions for Volume Group /dev/vg00:Physical Volumes belonging in Root Volume Group:/dev/dsk/c3t2d0s2 (0/1/1/1.2.0) -- Boot Disk/dev/dsk/c2t1d0s2 (0/1/1/0.1.0) -- Boot DiskBoot: lvol1 on: /dev/dsk/c3t2d0s2/dev/dsk/c2t1d0s2Root: lvol3 on: /dev/dsk/c3t2d0s2/dev/dsk/c2t1d0s2Swap: lvol2 on: /dev/dsk/c3t2d0s2/dev/dsk/c2t1d0s2Dump: lvol2 on: /dev/dsk/c3t2d0s2, 011、指定镜像磁盘的地址做为备用引导磁盘地址。
HPUX11.31根盘镜像
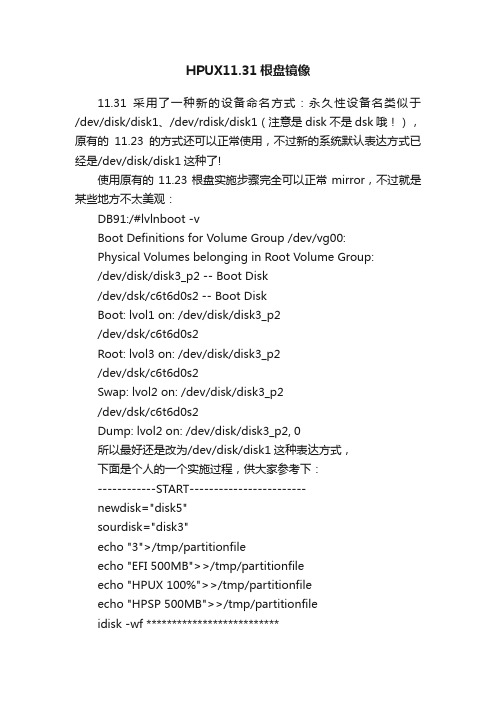
HPUX11.31根盘镜像11.31采用了一种新的设备命名方式:永久性设备名类似于/dev/disk/disk1、/dev/rdisk/disk1(注意是disk不是dsk哦!),原有的11.23的方式还可以正常使用,不过新的系统默认表达方式已经是/dev/disk/disk1这种了!使用原有的11.23根盘实施步骤完全可以正常mirror,不过就是某些地方不太美观:DB91:/#lvlnboot -vBoot Definitions for Volume Group /dev/vg00:Physical Volumes belonging in Root Volume Group:/dev/disk/disk3_p2 -- Boot Disk/dev/dsk/c6t6d0s2 -- Boot DiskBoot: lvol1 on: /dev/disk/disk3_p2/dev/dsk/c6t6d0s2Root: lvol3 on: /dev/disk/disk3_p2/dev/dsk/c6t6d0s2Swap: lvol2 on: /dev/disk/disk3_p2/dev/dsk/c6t6d0s2Dump: lvol2 on: /dev/disk/disk3_p2, 0所以最好还是改为/dev/disk/disk1这种表达方式,下面是个人的一个实施过程,供大家参考下:------------START------------------------newdisk="disk5"sourdisk="disk3"echo "3">/tmp/partitionfileecho "EFI 500MB">>/tmp/partitionfileecho "HPUX 100%">>/tmp/partitionfileecho "HPSP 500MB">>/tmp/partitionfileidisk -wf **************************insf -e -Cdiskefi_fsinit -d /dev/rdisk/"$newdisk"\_p1mkboot -e -l /dev/rdisk/$newdiskefi_ls -d /dev/rdisk/"$newdisk"\_p1lifls -l /dev/rdisk/"$newdisk"\_p2efi_cp -d /dev/rdisk/"$newdisk"\_p1 -u /EFI/HPUX/AUTO /tmp/x; cat /tmp/xmkboot -a "boot vmunix -lq" /dev/rdisk/$newdiskdd if=/dev/rdisk/"$sourdisk"\_p3 of=/dev/rdisk/"$newdisk"\_p3 bs=1024kpvcreate -B /dev/rdisk/"$newdisk"\_p2vgextend /dev/vg00 /dev/disk/"$newdisk"\_p2for i in 1 2 3 4 5 6 7 8dolvextend -m 1 /dev/vg00/lvol$i /dev/disk/"$newdisk"\_p2donelvlnboot -Rvsetboot -a ******* -h **********--------------END---------------注意这不是一个完全的脚本,需要修改的:)另外一个地方需要注意:HPSP的大小由400MB扩大为500MB,否则会报:#dd if=/dev/rdsk/c0t6d0s3 of=/dev/rdsk/c6t6d0s3 bs=1024kI/O error400+0 records in399+1 records out原因不太清楚,但是不影响好像。
惠普笔记本系统怎么使用U盘重装

惠普笔记本系统怎么使用U盘重装目前很多笔记本(特别是上网本)都不带光驱了,因此装系统只能靠U盘或者移动硬盘。
那么惠普笔记本系统怎么使用U盘重装呢?下面店铺就为大家带来了惠普笔记本系统使用U盘重装的方法。
惠普笔记本系统使用U盘重装的方法一1. 准备一个做系统用的专用U盘,装一个U盘启动盘制作工具,U盘启动盘制作完成之后就需要下载个操作系统到U盘里面。
2. 启动计算机,并按住F10键不放,直到出现BIOS设置窗口。
3. 选择并进入第二项,“AdvancedBIOSFeatures (高级BIOS功能)选项”。
在里面找到BootDevlice priorfty(启动装置顺序),并找到依次排列的“FIRST”“SECEND”“THIRD”三项(有的BIOS为1st BootDevice;2nd Boot Device),分别代表“第一项启动”“第二项启动”和“第三项启动”。
这里按顺序依次设置为“移动设备-USB”;“光驱-CDROM”;“硬盘-HardDisk”即可。
4. 选择好启动方式后,按F10键,出现英文对话框,按“Y”键(可省略),并回车,计算机自动重启,证明更改的设置生效了。
5. 设置好U盘启动之后,把U盘插在电脑上,启动电脑,电脑就会自动读取u盘数据。
然后就会进入系统安装环境。
根据提示安装完系统就可以了。
惠普笔记本系统使用U盘重装的方法二1.先制作启动盘(启动盘制作要删除所有文件,小心),没有可以借个,下个系统,win7、win8、win10等,然后把系统拷进启动盘。
2.开机按F12选择USB启动,进入这个界面,选择01,进入,3,选择分区工具,格式化C盘,4.然后运行老毛桃一键装机,打开里选择你优盘里准备的系统文件,下面选择C盘,然后点击确定,安装完成后重启。
(可以点高级,取消你不想安装的,软件,比如好123网页等)。
HP-UX系统LVM和镜像
Physical Volume Reserved Area Contents: ID's for volume group and physical volumes Physical extent size Physical volume size Bad block directory Size and location of other disk structures
LE和PE的对应(非镜像方式)
Logical Volume
Logical Extent
Physical Volume
4 Mb 4 Mb
Physical Extent
1 2 3 4 5 6 7
4 Mb 4 Mb
3 4 5 6 7
LE和PE的对应(镜像方式)
Logical Volume Physical Volume
/dev/vg01
ROOT DISK
NEW LVM DISK PVRA
/
dev vg01
BAD BLOCK POOL
创建卷组设备文件
3) 创建卷组设备文件 # mknod /dev/vg01/group c 64 0x010000 由于minor number是系统底层标识VG的标志,所以每个VG的group 文件的这两位(红色)必须是唯一的。否则VG无法创建 可以使用如下命令查看所有vg的group文件的minor number # ll /dev/vg*/group NEW LVM DISK PVRA ROOT DISK
/dev/dsk/c5t1d0
LVM基本操作 LVM基本操作
新添加物理硬盘或LUN
ioscan –fnCdisk insf –e
重新扫描IO 生成新的设备文件
HP-UX11.11系统镜像及镜像恢复与重建

#lvextend -m 1 /dev/vg00/lvol* /dev/dsk/cxtydz #lvlnboot -R lvlnboot -s lvlnboot -r lvlnboot -d) #lvlnboot -v #lvdisplay -v /dev/vg00/lvol*|more setboot shutdown -ry 0
制作根盘镜像
#swlist
查看有没有装镜像软件(B2491BA MirrorDisk/UX) #ioscan -fnC disk 扫描磁盘设备 #pvcreate -B -f /dev/rdsk/cxtydz 强制清除物理盘原有信息创建可引导的物
理卷
#vgextend /dev/vg00 /dev/dsk/cxtydz
重做镜像
#ioscan -fnC disk #pvcreate -B -f /dev/rdsk/cxtydz #vgextend /dev/vg00 /dev/dsk/cxtydz #mkboot -l /dev/rdsk/cxtydz #mkboot -a “hpux -lq(;0)/stand/vmunix” /dev/rdsk/cxtydz (#mkboot -a “hpux -lq(;0)/stand/vmunix” /dev/rdsk/cXtYdZ)
引导
#lvlnboot -v
交换 转储
根
验证BDRA(引导数据预留区)的设置
#lvdisplay -v /dev/vg00/lvol*|more
验证各逻辑卷是否正确连接配置
setboot设置引导路径
shutdown -ry 0重启验证镜像是否成功
- 1、下载文档前请自行甄别文档内容的完整性,平台不提供额外的编辑、内容补充、找答案等附加服务。
- 2、"仅部分预览"的文档,不可在线预览部分如存在完整性等问题,可反馈申请退款(可完整预览的文档不适用该条件!)。
- 3、如文档侵犯您的权益,请联系客服反馈,我们会尽快为您处理(人工客服工作时间:9:00-18:30)。
#mediainit /dev/rdsk/c0t3d0)
选择一个内置的硬盘。例如/dev/dsk/c0t8d0做成一个启动盘:pvcreate -f -B /dev/rdsk/c0t8d0(使用参数“-B”创建一个用于镜像的可引导的LVM磁盘)
将这个硬盘加入vg00中: vgextend /dev/vg00 /dev/dsk/c0t8d0
恢复所有的BDRA信息:lvlnboot -R
确定引导逻辑卷、根逻辑卷、主交换逻辑卷以及转储逻辑卷的:(检查镜像正确与否):lvlnboot -v
显示当前的主引导路径和替代引导路径:ቤተ መጻሕፍቲ ባይዱetboot
lvlnboot -s /dev/vg00/lvol2
lvlnboot -d /dev/vg00/lvol2
将启动文件装入硬盘引导区: mkboot /dev/dsk/c0t8d0
对/stand , / , 交换区作镜像: lvextend -m 1 /dev/vg00/lvol1 /dev/dsk/c0t8d0 (/stand)
lvextend -m 1 /dev/vg00/lvol2 /dev/dsk/c0t8d0 (/swap)
lvlnboot -R
指定引导逻辑卷、根逻辑卷、主交换逻辑卷(用swapinfo确定交换逻辑卷在什么地方)、转储逻辑卷,
为根和交换镜像拷贝更新包含在BDRA中等启动信息:lvlnboot -b /dev/vg00/lvol1
lvlnboot -r /dev/vg00/lvol3
拷贝正确的AUTO到新的LIF区,注意使用字符设备:mkboot -a "hpux -lq (;0)/stand/vmunix" /dev/dsk/c0t5d0 (系统主引导盘)
mkboot -a "hpux -lq (;0)/stand/vmunix" /dev/dsk/c0t8d0
lvextend -m 1 /dev/vg00/lvol5 /dev/dsk/c0t8d0
lvextend -m 1 /dev/vg00/lvol6 /dev/dsk/c0t8d0
lvextend -m 1 /dev/vg00/lvol7 /dev/dsk/c0t8d0
lvextend -m 1 /dev/vg00/lvol8 /dev/dsk/c0t8d0
lvextend -m 1 /dev/vg00/lvol3 /dev/dsk/c0t8d0 (/)
对vg00上的其它逻辑卷作镜像: lvextend -m 1 /dev/vg00/lvol4 /dev/dsk/c0t8d0