逃脱密室 阴森鬼屋3完整攻略 最全通关图解
幽灵庄园的秘密3全攻略
画面更精致华丽,通过找到图形来解谜,摆脱了找单词解谜的枯燥(俺之前玩单词解谜游戏也基本不看词,把图上所有物品点一遍就都找到啦,好无聊orz),通过在不同的地图中切换来寻找物品,难度适中,用了一晚上通关,又用了一晚上来写攻略,过程中又玩了一遍。
囧--------------------------------------------------------------------------------------------------点右下角物品栏右侧的map可以看到当前关卡的大地图。
map右边的书会记录一些提示,需要的时候点开就能看到。
场景的顺序是我自己编排的,每个场景在游戏地图中都是一个英文词组,自己对号找就行了。
那个啥,俺懒,码这么多字已实属奇迹,所以么截图,各位凑合看吧哈。
【第一关】第一关第一关第一关第一关第一关第一关第一关第一关第一关第一关第一关第一关第一关场景1.TOWN SQUARE桌子----绿色的木门旁边帽子----屋顶上进入绿色门旁边的房间(门上写着BLACK SMITH那间)洒水桶----火炉旁铁球----右上角铁链旁边开瓶器----右下角把得到的木桌子放进火炉里场景2.TAVERN紫色的东西(实在想不出叫啥了)----左边餐桌上鸟食----右边那个女人旁边的椅子上钥匙----左上角的墙上用开瓶器打开左下角的瓶子【得到一块宝石】场景3.RIVER把鸟食给左边那只红色的鸟【宝石】窗子上的铁栅栏----鸟旁边钳子----右下角场景4.PRISON橘色的木地板----右下角的铁桶里交叉的双剑----左边靠墙的位置在右边的木门上把窗子上的铁栅栏装上【宝石】场景5.CHURCH牛奶----木门的右下角进入木门金币----树下照片----正对面的右边石窗子的角上用洒水桶浇灌左边石像下的植物,开花了【宝石】把紫色的东西给右边的胖子,他去敲钟了点左下角的back,回到刚进来的房间点右边的窗子,进行拼玻璃游戏,彩色玻璃分布在书架和墙壁上,拼好以后发现刚好缺一块,到别的场景中寻找点back去场景1进入木屋里把交叉的双剑放在火炉上边的圆盾上去场景2把橘色的木地板装到地上缺少地板的那个空格里【宝石】把金币给右边的女人,之后里面屋子的门可以进入了牛奶给床底下的猫【宝石】用钥匙开左边的小柜子----得到瓶子把照片放在柜子上面的相框里【宝石】书信----床上的靠垫旁边把帽子挂在床头上方的衣架上手杖----右边的椅子上挂着呢去场景1把书信放进左边做工考究的信箱【宝石】再次进入木屋把瓶子放在火炉里的木桌上,会融化,用钳子夹出来(就是把钳子也放进火炉的意思)----得到彩色玻璃去场景5点彩色窗户,把玻璃装上这时候出现了彩虹照在最面的石碑上点石碑,上面的罗马数字对应的颜色会记录在书里close书钥匙----在石碑的破洞里back用手杖撬开右边钉着木板的格子----得到衣服去场景2把衣服给里屋镜子里面的主角去场景4点里面那个需要用钥匙开的门这时候带有绿色标签的钥匙会自动挂上去点map旁边的书按照提示,将带有各种颜色标签的钥匙插入对应罗马数字的锁孔门打开了,出来个老头(长滴真不咋地)把铁球挂在左边木盒旁的链子上【宝石】去场景3点小船进入第二关--------------------------------------------------------------------------------------------------【第二关】第二关第二关第二关第二关第二关第二关第二关第二关第二关第二关第二关第二关第二关场景1.EAST CORRIDOR木头----右下角压力表----木门上方字牌上面一点进入木门火柴----装蓝色水的那个盆下面压着呢顺便把火柴在装绿色东西的盆旁边的火柴盒上划着蜗牛壳----在上边那个大苹果旁边场景2.MACHINE ROOM瓶子----梯子旁边像灯一样的盛水容器----左上角压力表旁边场景3.MUSHROOMS扳手----右下角木桶的后面蓝色的巫师帽----精灵脚下右边的那片蘑菇上把彩色的瓶子给精灵【宝石】沿着右边的楼梯进入灯----左下角轮子----右上角石头残片----右下角一个东西后面把压力表放在左上角的管子上back场景4.MAIN HALL石头残片放在左上角石盾残缺的位置锤子----右上角石阶上蜡烛----左边的罐子旁点右边绿色罐子旁边的矩形格子,进行一个小游戏,就是翻开石板以后找两个一样图案的,如果两次翻开的石板图案相同则会消失,游戏结束后------得到了金属碗齿轮----屏幕最上方正中间那个石盾后边去场景2把扳手放进转轮,机器停止后----拿到书物品栏第二行最右边的轮子装在左下角的采矿车上【宝石】物品栏第二行从左向右第四个灯给这个绿衣人【宝石】去场景3上石阶里面的房间,把齿轮放在轴上,会转动把木头放在最大的齿轮下,剖成两半,取之------得到半块木头去场景1蓝色帽子给巫师【宝石】剖成一半的木头放在巫师身后的石阶上,沿着石阶可以进入一个屋子木桶----左下角肉----船上锤子给左边的石像【宝石】青蛙----船下面的石阶上去场景3把青蛙放在水里把书放到中间的石碑上----得到了配方(记录在map旁边的书里了)木桶放在石阶下面的石头上用火柴点燃引线,炸了...炸开以后------得到转轮去场景4肉给豹子【宝石】去场景1蜗牛壳给右边的蜗牛穿【宝石】进入木门金属碗放中间蜡烛放在左边烛台上【宝石】按照书里的配方提示配置药水用灯形状的容器盛装蓝色的药水back去巫师身后石阶里面的房间转轮装在船右边药水放在船的柱子上点击船,进入下一关--------------------------------------------------------------------------------------------------【第三关】第三关第三关第三关第三关第三关第三关第三关第三关第三关第三关第三关第三关第三关场景1.MAGIC SCHOOL绿色的假发----左上角树叶里藏着呢进入正前方木门胶水----中间的书旁边场景2.ELEVATOR西瓜----草丛里毛巾----左边树洞上方场景3.ELEPHANT STAGE松鼠----右边女人身后的树上点女人左边的蓝白色帐篷,进入用胶水粘摞起来的扑克牌------拿到梅花A荧光剂----摞起来的扑克牌后面场景4.OFFICE锤子----台阶下面茶包----左边书架上方场景5.MAGICIAN拐杖----右边房子前面的扑克牌K后面点右边的房子进入拉右边的绳子,出现扑克牌阵,在它们自动翻过来的时候记住出现的两张A的位置,在它们又背面向上的时候点记住的两个位置------得到方块A+黑桃Aback去左边的木车里,点帽子,发现里面有红心A用锤子钉住右边的方形暗格,点帽子------拿到红心A眼镜----右边的书上面绿色假发给右下角的面具戴上物品栏眼镜右边的东西----在帽子左边去场景1把西瓜放在右边的西瓜车里【宝石】点左边那个穿红马甲的人,进行一个赌博游戏先把荧光剂撒在螺母上,然后点木盒子,开始变啊变,停止以后选择有蓝边的那个木盒------得到螺母去场景4把眼镜给那个女人,她不见了物品栏松鼠左边的东西放在对面的挂钟那里点木桌上中间那本书,进行游戏,玩拼图拼好以后书会跳出来,写的是关于那个大象的去场景3拐杖给情侣中的那个男人【宝石】在蓝白色帐篷里把茶包放进右边的杯子【宝石】back点一下大象哈哈它会藏起来点大象下边有彩灯的小门,按照书里写的去转动两个表上面的数字第一次:4T 300kg第二次:3T 500kg第三次:6T 800kg水桶----在左边T表的左侧back点大象-----得到红色水晶球去场景54张A都给那个人------得到紫色水晶球把螺母放在左边的压水井上,出水了用水桶接满水去场景2松鼠放进树洞里【宝石】去场景1进入左边有五个镜子的房间用装满水的水桶泼向镜子毛巾去擦,出现主角点主角上方的红色按钮,开始找茬游戏,有倒计时哒~成功后------得到绿色水晶球back进入正前方的木门三个水晶球都给巫师,分别得到三个金币去场景2金币都给服务生点升降机(那个大号的笼子)飞啦O(∩_∩)O~--------------------------------------------------------------------------------------------------【第四关】第四关第四关第四关第四关第四关第四关第四关第四关第四关第四关第四关第四关第四关场景1.MAIN STREET蓝色水瓶----左边的花从里石板----楼顶(挂着的两块红毯子的上方)点右边的石阶进入一个房间弯曲的管子----右边的柜子顶上栅栏----右边柜子旁边铲子----左边架子上,灯的正下方场景2.CITY TOWER胶卷---右边那个天平的上方玩具火车----右下角,柱子的后面场景3.WEST DOCK黄色的带子----红色木门上方的相机图案上方数字29----屏幕最上方中间偏左一点的地方用铲子刮墙上的黄色油漆----得到一块黄色漆天线----红色木门左上方红色水瓶----红色木门左边,圆形窗子上栅栏放在左边地上那个方形的洞上面【宝石】进入红木门玫瑰花----藏在花瓶里的花里面空瓶----站着的人身后胶卷放进右边的相机里玩具火车给坐着的人-----得到照片back场景4.CUSTOMS镜头----右边平台上去场景1玫瑰花给女人【宝石】点楼上那个有红色窗帘飘啊飘的窗子,进入一个屋子用黄色带子系住红窗帘,书会跳出来,记录的是一扇门打开的方法针----在窗台上右边那个针插座上把数字29放在针插座对面的房子的墙上back沿着右边的石阶进入房间把天线放在左边的收音机上【宝石】蓝色水瓶放在机器上方中间的空格子里红水瓶放在机器上方右边的空格子里去场景3到红木门里把镜头装在左边的机器上back点屏幕中间那个推车后方的木格子门进行游戏提示在书里按照提示按下格子就可以了进入房间后红色气球----火右边彩色格子日历----右上方弯曲的管子放在水怪右上角的圆洞那里空瓶放在火上黄色漆放进瓶子----得到黄水瓶有“Z”字的石板放在左边裸露的电闸处【宝石】点一下水怪,书会跳出来,记录一组数字去场景1进入台阶上面的房间,放入黄水瓶按照书上的提示拨动右边的圆钮(好像每次的数据不一样的,我的是黄3蓝1红8)之后点水瓶下方的梯形印章,印出一张纸把照片放上去-----得到通行证去场景2把红色气球放在冒气的管子上用针刺破它惊醒了打呼噜的老头哈哈把通行证给他盖戳----变成有效的通行证去场景4把通行证给左边的人现在他下方的圆形飞行仓可以进入了进去以后,点书,提示说LAT 59-22LONG 64-38按照这个提示选好右边的数字,之后上方的绿色按钮亮了,点之被发射出去了吼吼~--------------------------------------------------------------------------------------------------【第五关】第五关第五关第五关第五关第五关第五关第五关第五关第五关第五关第五关第五关第五关场景1.NORTH PASSAGE一头尖尖一头圆圆的石头----右边场景2.SHIPWRECK黑水瓶----左边头盔----左下角场景3.GREEN CANYONU形磁铁----左下角点水怪,玩拼图游戏(图是随机的,我两次玩的图案都不同)锤子和钉子----在拼图右边拼好拼图以后-----得到一组罗马数字翻译过来:12544315(是以后开箱子时候钥匙的转动顺序)场景4.CORAL HALL刀----右上角鱼身上的灯----人与手杖右边锚----人与左边进入人鱼右边的房间一头尖尖一头圆圆的石头放在右下角【宝石】刷子----右上角海星----左边back把海星放在人鱼上方的石头上【宝石】场景5.JELLYFISH FIELD进入石门之前会有四组水母守门,点一下水母,记住每次四只水母发亮的顺序它们亮一遍以后,按记住的顺序点一遍,一组水母飞走了,门开了一点点,来了另一组水母,重复之前的操作四组水母都打发走了----得到绿水晶把头盔放在右边的身体上【宝石】生锈的刀----身体的右边用之前得到的没生锈的那把刀(不锈钢滴那个哈)割左边的海带-----得到绿海带去场景1黑水瓶给右边的墨鱼【宝石】用磁铁吸左边的草丛里的金属棍子-----拿到棍子台阶下面有三个容器,把得到的绿水晶放进去(不知道需不需要顺序,我是先放了左边的)去场景2用刷子清扫右下方的圆形窗户用生锈的刀撬开窗户,进去鱼食----左边之前得到的12544315是转动木箱上钥匙的顺序木箱开了以后-----得到白色瓶子back锚放在刚才进去的窗子的右上方【宝石】那个镶了宝石的宝贝还拿不到,先把海带放在上面去场景3鱼身上的灯还给右边的鱼【宝石】去场景4用棍子撬石像下面的石头现在石像可以转动了,让她的脸向前,拼好以后发现她拿着绿水晶锤子砸石像顶端的绿水晶-----得之用白色瓶子装满左边不断涌出的水去场景3把瓶子里的水倒在锁链上,融化了,出现洞口鱼食放在右边的洞里抓住啦!吼吼----得到鱼去场景2把鱼放在海带上-----拿到了镶嵌宝石的宝贝去场景4把宝贝给人鱼----拿到绿水晶去场景1水晶都放进台阶下的器皿,神光出现,鱼消失了点台阶,进入下一关--------------------------------------------------------------------------------------------------【第六关】第六关第六关第六关第六关第六关第六关第六关第六关第六关第六关第六关第六关第六关场景1.GLADE钳子----左边的柱子下面绳子----右边柱子下面场景2.RIVERSIDE望远镜----左边树干旁指南针----右边船的旁边裤子----找到指南针那个地方的正上方进入右边很多洞的树洞徽章----左边点精灵树洞会发光,记住发光的顺序(玩法和水母守门那里差不多)反复点精灵,反复点发光的树洞最后一次点精灵-----抓到了精灵场景3.WISE TREE雕像----骑马那个人的左边把望远镜给那个人【宝石】场景4.BLACKSMITH圆形镂空的窗户----右边的房顶上剪刀----左边那个人拿的盾旁边把裤子挂在右边的晒衣绳上【宝石】绳子放在中间的树屋上(等拿到木头以后可以做绳梯)场景5.TREE COTTAGE一些铁片----左边那个有靠背的椅子后面木板----用钳子拧中间的靠背椅可以得到放大镜----左边的柜子上黑色蜡烛----正中间的柜子顶上去场景4把木板放在树屋的绳子上,做成绳梯,进入树屋把蜡烛放在床上的烛台上放大镜放在窗子的位置,于是点燃了蜡烛罐子----在床脚把精灵放在右边的树藤上----拿到火油齿轮----左下角的箱子旁边把徽章放在床头的墙上【宝石】去场景3锤子----用剪刀剪左边的草得到的去场景4把火油放进右边的炉子里,点燃火炉把一些铁片放进火炉烧红烧红的铁片放在火炉旁边的铁块上,用锤子砸它------得到了通红的宝剑去场景3通红的宝剑放在水里,取出----得到锻造好的宝剑去场景2镂空的圆形窗子安放在中间的屋子上【宝石】把雕像安放在右边那艘船的船头去场景5点正中间那个柜子旁边的抽屉,进行一个游戏把得到的齿轮先放上去,按照木刻的数字去转动齿轮排列方格里面的数字对应的数字排列好以后得到一个提示:左右右左右左左右(以后去点老树精的胳膊用的上的)back把罐子挂在右上角去场景3点树精手臂,按照之前得到的提示点鞋子----在树精的嘴里拿到......囧去场景1用宝剑划掉中间石台上的杂草,石台上出现一个女人把指南针、蜡烛、鞋子都给她可以去下一关咯~--------------------------------------------------------------------------------------------------【第七关】第七关第七关第七关第七关第七关第七关第七关第七关第七关第七关第七关第七关第七关场景1.TOWN GATE刀----左边石头的后面鸟----右上方的位置场景2.UPPER TOWN手柄----梯子后面木杵----门的左边墙上那些工具的左边石片----门上方进入那个门扳手----火的左边石头----门的右下角用刀隔断门旁边的绳子,绳子上的罐子会掉落摔碎----拿到一个黑色圈圈(皮带)场景3.ART STUDIO头巾----左边墙上最上方那层架子上木杵放进左边的木碗里面(架子下方)【宝石】油壶----右边木桶上沿着木桶旁边的地洞下去把头巾给里面那个人布会掉下来,看到一幅图画,记住画上画的数字和图案(1十字星,2三角,3月亮,4方形,5圆)花纹精美的圆盘----在画的上方拿到画笔----那个人头顶上方场景4.INVENTION DOME点左边的圆盘,把缺少的部分装上去,转动圆盘拼好图案右边的格子打开了----拿到方形的石头back凿子----右上角把鸟放进笼子里煤----鸟下方的木桶旁边点右边的桌子按照之前画里面提示的顺序点盒子上的按钮,盒子开了日晷----桌子的右下角场景5.MECHANIC把石片放在那个正在工作的人的锤子下面,让他砸碎,取之----得到一些碎石块把日晷放在石桌下方的圆盘里绿色包袱----左上角用扳手拧左边的大螺母----得到了磨盘去场景1把手柄放在大圆球下方的凹槽里----得到金属支架去场景2把凿子挂在门左边墙上的工具架上【宝石】进入门里把煤放进火堆去场景3把磨盘放在中间旋转的轴上,继续转动ing黑色皮带放在磨盘上把形状非常不规则的那块石头放在石磨上打磨成圆的----得到石头圆球去场景4绿色包袱放在圆形石台上【宝石】点右边的石桌把金属支架放在那个金属底座上,石头圆球也放上去然后把一堆碎石块也放到上面(发现缺了一角)把方形石块也放上去,终于完整了画笔用在调色盒上(会自动给方形的石头上色)油壶用在上好颜色的方形石头上----得到了魔方!去场景1把魔方给那个大胖子,趁他研究怎么玩的时候过关啦~--------------------------------------------------------------------------------------------------【第八关】第八关第八关第八关第八关第八关第八关第八关第八关第八关第八关第八关第八关第八关场景1.MAIN HALL铁锹----左边柱子旁边场景2.WZZARD拼片----右边柱子的左侧场景3.WEST WING拼片----壁炉上边、左边各一块笛子----壁炉旁边(没有火的那边墙上立着呢)场景4.GARDEN拼片----右下角带摇柄的工具----用铁锹挖树旁边的土堆得到的点右下角的瓶子,到另一场景干草----右上角火石----左边的树后面场景5.EAST WING弯曲的管子----左边镜子后面拼片----窗子那里木门的上方的画框是放拼片的地方,点之,把已经得到的拼片先拼上,还差一块点圆形地毯上的盒子,把笛子放进去去场景4把干草放在蜂窝下边把火石放在草上,点燃草烧死了那些蜂------拿到一个零件点右下角的瓶子,进入有水塘的场景把带摇柄的工具安装在右边的木箱上弯曲的管子装在木箱上方的洞上抽干了水塘的水------拿到了钥匙back用钥匙打开木门金币----左边的桌子上看到三张画(点那些画),注意其中有书架的那张画,记住书架上面左边那些书排列的顺序2S73LT6A415E去场景3点老妇人左边的书架在书架左边的书上方----拿到金属球按照之前画里面的顺序排列那些书----得到一本书去场景5点圆形地毯上的盒子金属零件、金属球、书、金币都放进去----得到装满的盒子去场景3把这个盒子给老妇人,得到颜色提示(红、黄、青、绿、橘黄、蓝、白、粉)去场景1那些狗后面的屋子可以进入了拼片最后一块----右下角红瓶子----左边去场景5把拼片拼好----得到了镶满宝石的王冠去场景2红瓶子给巫师----得到火球去场景1进入狗后面的屋子用火球烧那个男人,他变成乌鸦飞走了----拾到黑羽毛点back点最左边两根不明显的柱子,进行一个游戏按之前得到的颜色提示顺序按下那些颜色按钮中间出现漩涡后,把黑羽毛放在漩涡上开启了新场景把王冠放在金属环上------通关啦!!!。
逃出鬼屋攻略

1 大门右边的撬棍,撬开大门;2 进入一楼大厅,使用相机,拍下休息室前移动的椅子、楼梯上方的肖像、移动的圆球以及漂移的鬼魂;3 往左进入休息室,拿相机拍下三张肖像、移动的椅子、移动的杯子、移动的圆球以及等待两幅肖像之间出现的信息;4 进入书房,相机拍下墙上的肖像、墙上显现的信息以及移动的鬼魂,肖像下方有一本书,捡起来;5 返回门厅,往右进入餐厅,餐厅门口有一张日记残页,捡起;6 进入餐厅之后,用相机拍下墙上的肖像(左右各一幅)、移动的椅子、杯子、圆球、桌子上方墙壁显示的信息;7 继续往前走,进入厨房,拍下一个圆球,一个鬼魂,储藏室门前的日记残页,储藏室大门往右在厨房的角落可以找到梯子;8 退回门厅,上楼,拍下肖像一张,往左会飘下一个圆球,拍下来;油画左边会出现一条信息用相机拍下来;9 往右,进入卫生间,右边窗台有一个红色蜡烛,左边花坛有一把绿色钥匙;10 用绿色钥匙打开卫生间的门,回到二楼走廊;11 进入右边卧室,床的右边有一张废纸,是箱子的密码译文,一会可以用到;往左边,可以拍到一个白色圆球,左边角落有一个指环;衣柜旁边的密码箱上面的符号,对照刚才那张废纸,得到密码“6294”,点击密码箱输入密码,得到一支红色蜡烛和地窖钥匙,返回二楼走廊;12 返回门厅,使用地窖钥匙进入地窖,往右走,拍到一个圆球,柜子上有一把匕首;记住墙上的符号,对照废纸,得到密码“7832”,取出我是钥匙和红色蜡烛;13 用撬棍打开洞口,进入,往左有一张日记残页,拍下一具尸体,右边也有一具尸体,还会出现一个圆球,返回门厅;14 上楼,用卧室钥匙进入左边卧室,点击左边的衣柜,拍下鬼魂,右边窗台有一张日记残页,床头边上有一个护身符;记下床头墙上的符号,对照废纸得出密码“1006”,点击密码箱,输入密码,取出储藏室钥匙(储藏室在餐厅);15 返回门厅,进入餐厅,再进入厨房,用储藏室钥匙进入储藏室,拍下会移动的杯子;用撬棍撬开地面洞口的门,进入这个洞,捡到一只红色蜡烛、一张日记残页,左右各有一具尸体。
鬼武者3全通关攻略要点
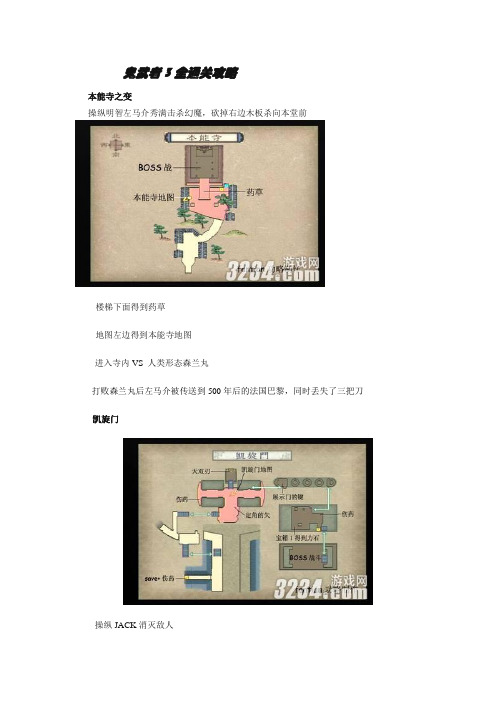
鬼武者3全通关攻略本能寺之变操纵明智左马介秀满击杀幻魔,砍掉右边木板杀向本堂前·楼梯下面得到药草·地图左边得到本能寺地图·进入寺内VS 人类形态森兰丸打败森兰丸后左马介被传送到500年后的法国巴黎,同时丢失了三把刀凯旋门·操纵JACK消灭敌人操纵左马介打开边上的木箱得到“伤药”(这里有一个破魔镜是SAVE和强化和修炼の地方)和JACK见面·进入地下→打破铁门的木箱子可以进入·来到凯旋门右方宝箱得到定角の矢火门右边上得到凯旋门地图·凯旋门左边得到伤药火门进入地下得到“天双刃”·进入凯旋门消灭敌人得到“展示门の键”·到最上层使用“展示门の键”·进入展览室·房间西南角调查谜题宝箱得到“力石”东北角得到“伤药”上楼BOSS战斗这是第一个BOSS,幻魔机械体,正常三次攻击后马上撤离,当其发射导弹时,迅速移动,注意防御如此反复,到后期BOSS会飞到空中突然下坠,此时应该远离BOSS,防御后反击。
换Jack进入古代日本比睿山比睿山·一直前进→遇到铁锤怪消灭后得到“啊儿”·一直前走会遇到左马介,2人一起战斗·右边的庙台前得到“鬼武道书,鬼缚”·进入得到“青羽织”该庙宇后边可以让啊儿帮主角拿到“药草”·左面的庙宇进入得到“药草”“木灵”来到山顶的“相轮塔”·从右边来到山崖得到“鬼萤之书”(从此遇到鬼萤时按ctrl+enter可跳跃)·在木台上“比睿山地图”入手·从梯子下去打开木箱得到“四方施の铜镜”·瀑布中“丸药”可以让啊儿得到·回到“相轮塔”使用“四方施の铜镜”得到“炎蛇剑”·回到南边下山来到有草的地方砍开进入得到“山门之键”·回到刚才遇到左马介的地方消灭鸟兽后利用”鬼萤“跳到房顶得到“鬼石”·回到山顶砍掉左边的草下山→使用“山门之键”利用“鬼萤”到2层得到“作战指令之书”“木灵”“丸药”·前进琉璃堂门前左边的箱子1,4,5,8得到“力石”·BOSS战首先注意防御在其攻击后后退攻击或直接将其盾牌狂鞭打爆,看准时机一闪,后期有全放位雷电攻击,通过上方鬼萤保持一定距离即可,尽量从身后攻击此时变成鬼武者可大量消减BOSS HP换到左马介在进入下水道以前,可以到凯旋门右边拿到药草,并上到展览厅得到“火の矢”下水道·来到地下在尸体旁得到“下水道の键”·在有红灯的门使用进入·来到下水道制御室打开电源开关·放下吊桥前面宝箱得到“下水道地图”·房间の西北方向打开宝箱得到“伤药”打开铁桶得到2个“木灵”·尽头得到“赤羽织”→沿梯子爬上得到“鬼武道书溜斩”·在台上得到“作业员の报告”上面写着“左=第一控制室椅子数,中=第一控制室录音机数,右=第一控制室荧光屏数”(包括坏掉的)·边上用弓箭射完后会得到“木灵”·该房间的东边同样方法可得到“药草”·在该房间南边中间的门上输入3.1.4·出门左边的谜题宝箱3.7.6.5.1(图)得到“鬼石”到水中尽头得到救急箱→从梯子爬上得到“铁の把手”→回到刚才的房间2层在机器旁边使用“铁の把手”打开下边的铁门·打开开关·从房间东南方向的门出去放下吊桥·下水可通过啊儿在西边得到“急救箱”·梯子旁边得到“雷の矢”·爬上去砍断绳子使铁球落下·到下边边推球边走(中途啊儿得到“定角の矢”和“药草”把球推到尽头得到秘药爬上去后用弓箭射可得到“木灵”·尽头得到“小键”·打开被锁住的门得到“力石”。
鬼屋历险记之鬼屋找东西攻略二攻略三分享
鬼屋历险记之鬼屋找东西攻略二攻略三分享!这是一款非常不错的找东西小游戏。
共有四个关卡,在第二关中,共有15件可以点击的物品,游戏会随机选十个物品让你寻找出来。
现在,小编就将鬼屋找东西第二关中的物品位置全部标注出来,玩家记住了这些物品位置,通关游戏就简单多了!
下面是鬼屋找东西第二关中所有物品的大致名称:
从上到下,从左到右,依次是:
轮胎、人物画像、帽子
钢锯、水晶球、圣经
水桶、绿色的小盒子(不知道是啥)
油灯、航海用的铁钩(形状是那样的,叫啥不知道了)
楼梯部位:海盗头巾(是这个吧?)、断臂(好血腥,好恐怖!)、剪刀、黑猫、盆栽
图片展示:
记住这些吧!然后你就能顺利通过鬼屋找东西第二关了!更多好玩有趣的益智塔防休闲逃脱类小游戏尽在543小游戏,希望大家能够喜欢!W w w . 5 4 3 . C n
鬼屋找东西第三关攻略,以图文并茂的形式向你展示鬼屋找东西第三关的所有物品摆放位置,让你明明白白游戏,当你不知道某个物品的位置时,来看一下吧!小编YY祝你顺利过关!
找东西小游戏
鬼屋游戏
攻略如下:
共有15件物品,让你找10件。
15件物品名称(小编的猜测,不当之处敬请海涵):按下图数字顺序:
斧头
黑猫
牙齿
相框1
布娃娃1
桶(?)
圣诞老人
相框2
台灯
老鼠?
布娃娃2
珊瑚以及瓶
算盘?
小圆形物品(这个很隐蔽,出现频率也高)
锥子?(这个物品出现频率很低)
鬼屋找东西第三关物品位置图片展示:
好啦,相信看过这个之后就能够顺利过关咯!。
逃出鬼屋攻略

逃出鬼屋攻略————————————————————————————————作者:————————————————————————————————日期:逃出鬼屋攻略左转拿到铁撬,用相机拍墓碑,得到过桥密码1907;2- 拍石头堆上的十字架,拍远处飞过的亮点;3- 右转拿铁铲,拍墓碑,拍中间的足印,拍桥对面人形石;4- 开锁,拍十字架旁墓碑才能过桥;5-进入小木屋,点老头与其对话,他要求找齐任务清单中的物品(点击右上角惊叹点可看到);6- 进入第二个画面,用相机拍正前方十字架,拍飞出的亮点,用金属探测器点圆木堆左下角处,结合铁铲取得一块黑石(当红点亮小,声音急促时即为黑石埋藏处);7- 右转,取圆木堆上一小束柴木,上面的油灯,右边红色的玫瑰,玫瑰后面有一墓碑,用相机拍照,用铁铲铲墓碑前方一堆土,得骷骰头;8- 左转房屋左边有一十字架,用相机拍照,树下摘玫瑰,用相机拍最左边的墓碑;9- 直走进入第三个画面,摘地上玫瑰,油灯(阶梯左边)拍房子右边出现的鬼魂(不定时出现),拍飞过亮点;9-小屋一楼地下室密码为楼上墙上划印的数量:5375.进入地下室后,取得油灯,红酒等还有一块黑石。
10- 回到画面中间,直走进入下一界面,画面靠右有一堆土,用铁铲取得钻戒,点飞过亮点,左转得玫瑰,用铁铲取得树下土堆中,用金属探测器点画面右下,结合铁铲取得一块黑石(当红点亮小,声音急促时即为黑石埋藏处),右转到底树下有一骷骰头,右角有一洞口,进入用铁撬弄开木箱,得资料;11-取得所有黑石之后,回到洞穴。
有一个洞的图,第一个为三角形,将三块黑石放入,退回。
然后第二个四边形,将三块黑石放入,退回,依次将洞打开,取得黑石刀。
12- 回退两次,12- 右边点开火炉门,将第6点中的柴火放入,用打火机点燃;13- 退出向右,树下得骷骰头,右边洞中得资料;14- 左转到底,得玫瑰,第二个洞前土堆中得最后一个骷骰头,这样完成了老头的任务。
退后回到木屋中。
密室逃脱3第一章第2关攻略doorsrooms31-2攻略

密室逃脱3第⼀章第2关攻略doorsrooms31-2攻略
密室逃脱3第⼀章第2关攻略 doors rooms3 1-2攻略
doors rooms3第⼀章第2关怎么过?下⾯就分享密室逃脱3第⼀章第2关过关⽅法给⼤家,希望这篇攻略对⼩伙伴们有所帮助。
密室逃脱3第⼀章第2关攻略:
拨开桌⼦上的草稿,在中间拿到⼀张电话卡。
拉开左边的抽屉,拿到⼀部⼿机。
先将⼿机和电话卡结合。
打开房间左下⾓的⾐柜,在下⽅找到⼀顶黄⾊的矿⼯帽。
⽤⼿机点击电脑屏幕。
在⾥⾯将图⽚旋转好即可。
拼完线路图后门就可以打开了,我们点击门旁边的蓝⾊按钮可以将门打开。
这⾥要注意按钮上也有⼀个⼩线索,这个英⽂bELL反过来其实就是数字7739。
进⼊到房间后⽤密码7739打开这个箱⼦。
在箱⼦⾥拿到另外⼀张电话卡。
打开房间右下⾓的柜⼦,在下⾯可以获得⼀块海棉。
在门旁边拿到撬棍。
⽤撬棍打开井盖。
打开井盖后先不要直接点击哦,⽤矿⼯帽照亮,再⽤海⾯将⽔吸⼲后拿到下⾯的钥匙。
⽤钥匙打开毒⽓的开关。
打开后发现有四个刻度表,四个指针的转速都不⼀样。
这⾥我们需要通过按动刻度表旁边的红⾊按钮,让指针停⽌的时候落在蓝⾊区域内,四个不必同时进⾏,⼀个⼀个点就⾏了。
先将⼿机⾥之前的那种电话卡取出,换上后⾯拿到的那张。
然后直接将⼿机放在毒⽓罐上,拿到钥匙。
后续关卡:密室逃脱3第⼀章第3关攻略。
鬼屋越狱密室逃脱系列3攻略 鬼屋越
鬼屋越狱密室逃脱系列3攻略鬼屋越狱密室逃脱系列3逃出荒
山图文攻略
鬼屋越狱密室逃脱系列3攻略,小编为大家带来鬼屋越狱密室逃脱系列3逃出荒山图文攻略,希望这篇攻略对大家有帮助~
游戏简介:逃出荒山是一款逃脱类游戏,你需要在神秘森林里找回属于你的武士刀和其他
装备,你必须解决许多难题和谜语,寻找隐藏的线索和对象才有可能逃出森林。
你需要找出一些道具进行组合,尝试各种不同的方法来解开谜题。
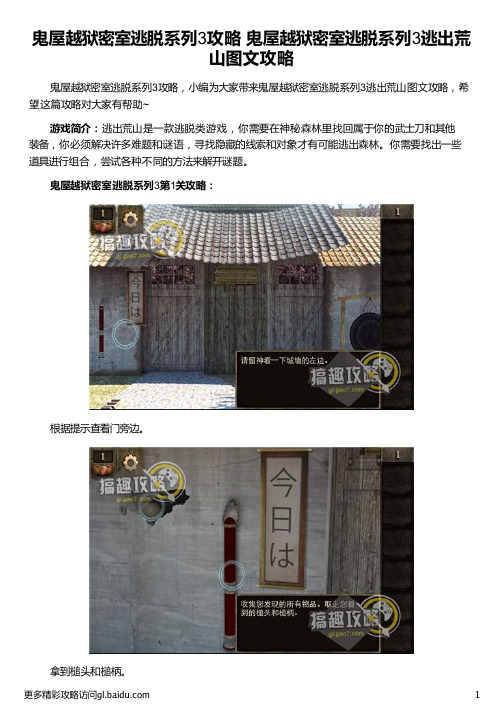
鬼屋越狱密室逃脱系列3第1关攻略:
根据提示查看门旁边。
拿到槌头和槌柄。
然后敲击右边的锣。
然后可以进门了,不过进门前注意门旁边的日文。
进入后拿到牌子。
然后将牌子放在灯里,根据看到的日文来调整,拿到钥匙。
用钥匙打开门即可过关。
鬼武者3 图文详细通关攻略(第1部分)
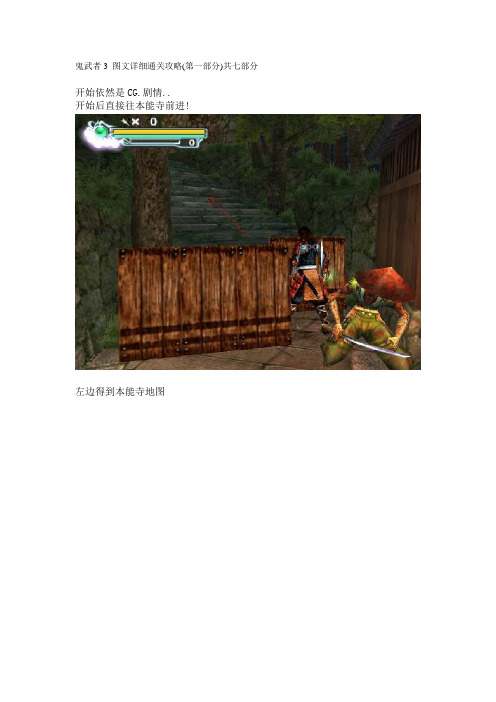
鬼武者3 图文详细通关攻略(第一部分)共七部分开始依然是CG.剧情..开始后直接往本能寺前进!左边得到本能寺地图楼梯下面得到药草第一个破魔镜.旁边是回复鬼力的泉水!与森兰丸的第一次对决. 闪他三次就可以了不会闪的朋友可以一阵乱砍会出闪的!!相当帅的一个画面以及左马介非常酷的表情之后是剧情!使用JACK消灭一群怪旁边那种有光的门就是表示这个场景是强制战斗!!左马介被传送到未来的法国!打破后面的箱子得到伤药三把前作的武器新人开始玩的时候是没有的在第一次游戏时拿到三个被封印的玉再重新开始游戏的时候这里才会有这三颗玉另外.有的人说一开始就有毗沙门剑和三把武器的那个是最强装备模式!!从这里进入地下打破铁门的箱子可以进入顺着箭头的方向走记住方向!!凯旋门左边得到伤药更多游戏修改器下载请访问:百度↓/171821203腾讯空间:↓/1836116978/main这个宝箱以后会拿到现在不急.调查有剧情的地方打开密室拿到天双刃出去以后的剧情打掉这里的怪救出米雪尔更多游戏修改器下载请访问:百度↓/171821203腾讯空间:↓/1836116978/main进入凯旋门消灭敌人得到钥匙顺着螺旋楼梯一路往上打开迷宝箱得到力石以数字编号,像这样1 2 34 5 67 8 9或者1 2 3 45 6 7 89 10 11 12这个的解法:1-4-7以后看见这个.里面的亮着就可以吸!更多游戏修改器下载请访问:百度↓/171821203腾讯空间:↓/1836116978/main得伤药上楼BOSS幻魔机械体,正常三次攻击后马上撤离,当其发射导弹时,迅速移动,注意防御如此反复,到后期BOSS会飞到空中突然下坠,此时应该远离BOSS,防御后反击。
更多游戏修改器下载请访问:百度↓/171821203腾讯空间:↓/1836116978/main娱乐一下@_@!换JACK被传到了五百年前日本的战国时期一直前进会剧情得到鬼之鞭,鬼之笼手..如果是最强装备模式还会得到鬼无双!剧情后一直顺着路走请新手一定记住这个位置这里有个道具一会要回来拿到这里强制战斗完了拿东西然后这边让阿儿拿!一路往前到这里记清楚路先走正下方到这里放出鬼莹仔细观察鬼莹当你走近之后会变色这时按照鬼马介射箭的按键方法捷克就会甩动武器勾住鬼莹跳过去了跳过以后到这里顺着鬼莹一路往上打开木箱得到四方施舍的铜镜这个宝箱比较不容易看见. 让阿儿飞吧``原路返回到这里把铜镜放上得到炎蛇剑以后回到开始的那个地方拿山门之键!打掉抓着鬼莹的怪解放鬼莹.然后上去更多游戏修改器下载请访问:百度↓/171821203腾讯空间:↓/1836116978/main再回这里更多游戏修改器下载请访问:百度↓/171821203腾讯空间:↓/1836116978/main用炎蛇剑打掉那些草路就通了然后一路走到这里使用山门之键更多游戏修改器下载请访问:百度↓/171821203腾讯空间:↓/1836116978/main解法:1-4-5-8 得到力石对于新手来说这个BOSS不好对付不碍记录一下@安全第一 @_@战斗时运用上方的鬼莹躲避幻魔剑士的攻击首先注意防御在其攻击后后退攻击,看准时机一闪,后期有全放位雷电攻击,保持一定距离即可,尽量从身后攻击此时变成鬼武者可大量消减BOSS HP用鬼莹躲避他威力比较强的紫电剑阵攻击范围比较广的紫电剑阵剧情过后使用左马介来拿这个宝箱现在可以拿了进管制室出门操作电源过桥拿到地图进入另一个管制室后续攻略请浏览鬼武者3 图文详细通关攻略(第二部分)。
方块房间逃脱洞穴第3部分攻略 Cube Esc

方块房间逃脱洞穴第3部分攻略 Cube Escape The Cave第3
部分攻略
方块房间逃脱洞穴第3部分怎么过?下面就分享Cube Escape The Cave第3部分攻略给大家,希望这篇攻略对小伙伴们有所帮助。
Cube Escape The Cave《方块房间逃脱洞穴》第3部分攻略:
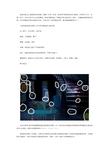
点击后人物坐电梯下来,需要先让上面的人飞到对应的位置,下面的人才能安全通过,上图是第一个。
第二个在左上方。
第三个。
第四个。
最后一个,然后让人走入透明框里。
在狗这边看到黄色苍蝇所飞出的形状提示。
火炬这边有蓝色苍蝇。
架子上有白色苍蝇。
相框这边有红色苍蝇。
记住对应颜色几图形,在柜子上调整。
(上下拨动的哦)
然后打开拿到凿子。
回到这个投影里,用凿子凿开裂缝出现手臂。
把小刀给手臂,然后自己割断手臂。
把手臂放进绞肉机里。
再把肉给狗吃。
然后拿到狗大便。
inside black room教程
inside black room教程insidethebackrooms全关卡攻略1、第一关是新手关,是没有怪物的,需要找到一个有梯子的小入口,只要在墙上寻找箭头跟着指示走就可以找到,找到后队友如果还没到可以吹口哨让队友寻着声音找来。
2、第二关八根柱子的解密,在墙角的纸上可以看到电梯按键有顺序,要按对四个键才能开启下一关,解密也很简单,就是把带有1234那一侧的墙上按照1234顺序对应的数字记住就可以得到密码,密码不是固定的,然后走进电梯按照顺序按下按键即可开启第三关。
3、第三关算是正式开始的关卡,里面会出现三个实体(实体在上面已经介绍过了),要先到一个只有桌子的房间拿到手电和时钟的指针,紧接着进入一个吊着一个装饰品的房间,将墙上的投影变成一只马墙上就是自动出现一扇门进去之后就要安上指针,调整到指定时间(时间需要玩家在储物柜等地方搜索找到)接着里面会有一个密码是用来解锁后面的关卡,然后在进行这一步的同时也需要进行其他的解密,例如用锤子打碎花瓶然后找钥匙,还有搜集人体器官,将找到的录像带放到电视机里播放记住里面人的名字和分别缺失了什么器官,接着到停尸间去将对应的器官摆齐,会打碎一面镜子,紧接着进入一条全是画的走廊,在画上找到对应的字母,输入密码拿到保险丝,然后进入一个回廊解开密码拿到防护服等道具,进入辐射式,穿着防化服在辐射室内对着地上的物品喷洒喷雾使其用探测仪检测没有辐射(一定注意,检测的时候一定要拿着检测仪围着物品转一圈,检测仪要对着物品,还有这一关笑脸会非常贱,一定要注意),全部没有辐射就将开启生化门,然后再去找到要开的那扇门,一直往里走会遇到一个闸门,闸门需要一名玩家踩着前面的一个压力板,然后才会升起,其他玩家通过后踩着压力板的玩家可以直接跑到门后,时间来得及,随后直接跳入黑坑进入下一个level,也就是下一关。
4、第四关是一个类似地下停车库的地方,这里会出现一种新的实体,玩家需要在这个怪物的觅食下找到散落在柱子四周的阀门,关上正在冒气的管道,全部关闭后,通往下个场景的门门口才会不喷毒气,玩家一定要注意,在你打开那扇门后,这一关的实体会迅速朝你冲过去,你需要赶紧跑到一个带有按钮的拐角处,但请注意,不要按下你看到的第一个按钮,因为它会把你和实体一起关在门外,你需要跑到转角的一面上按下那个按钮,才可以把实体关在外面,安全进入下一关,走廊的尽头有个电梯,密码就在电梯后面的那张纸上。
X先生重庆店room3集中营攻略
X先生重庆店room3集中营攻略本攻略谨供通关后或玩过没通关的小伙伴们讨论之用,如果没玩过就先别看了,看了会失去很多惊奇和乐趣,游戏体验也会大打折扣。
X先生总体感觉是非常好的,不管是服务态度还是场景布置,都非常的到位,甩出其他那些小密室几条街。
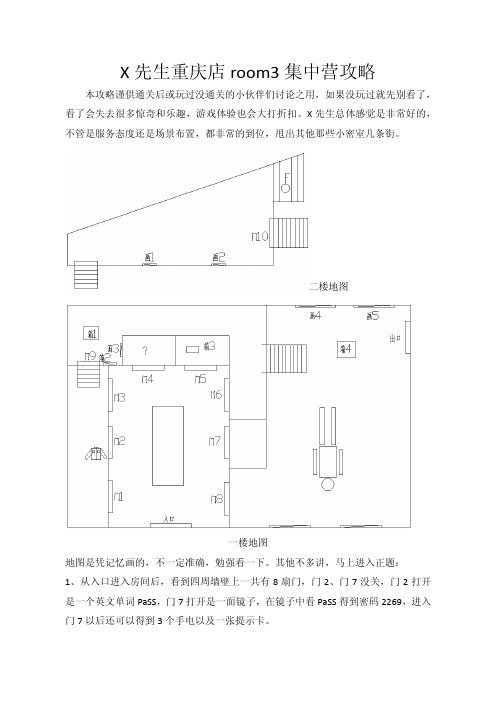
二楼地图一楼地图地图是凭记忆画的,不一定准确,勉强看一下。
其他不多讲,马上进入正题:1、从入口进入房间后,看到四周墙壁上一共有8扇门,门2、门7没关,门2打开是一个英文单词PaSS,门7打开是一面镜子,在镜子中看PaSS得到密码2269,进入门7以后还可以得到3个手电以及一张提示卡。
2、用2269打开门3,看到3张画,其中一张是把英文单词分割后拼在一起,乍一看像乱码,捂住上半截后得到密码TWOFIVEZEROONE,翻译过来是2501,另外两张画上是九宫格和X形的数字,暂时用不到。
3、用2501打开门8,得到钥匙一把。
4、用钥匙打开门1,看到一条走廊,走廊边上放着一具骷髅,从骷髅的衣服口袋里找到磁铁机关的1/3和紫外灯。
5、用紫外灯在骷髅衣服上搜索,得到一组图形,把图形结合前面提到的九宫格和X 形上的数字,得到一组密码,似乎是6978(不太确定)。
6、用6978打开门5,得到箱3,以及绳子和磁铁机关的另外2/3。
7、将三瓣磁铁机关组合起来,插入门9傍边的孔,扭动机关打开门9,从楼梯爬到2楼。
8、在2楼走廊的尽头,发现门10,门10旁边有一个小岔道,往下望1楼地上有一把钥匙。
用开头找到的钥匙链和绳子结上,把磁铁机关拆掉,只用其中一瓣系在绳子上,去把钥匙磁起来(这里绳子长度不够可解开皮带啊,鞋带啊把绳子加长)。
9、用钥匙打开箱3,得到一截手臂,观察上面的纹身,得到一个密码,打开门6。
10、从门6进去通过走廊找到一个房间,地上是箱1,墙上有个箱2。
用紫外线灯照,箱1上面1234按钮上有指纹,密码就是1234的排列组合。
我们正在分头寻找线索的时候,有个家伙用穷举法一个一个试,竟然用了5、6分钟就把密码给试出来了。
2019年room3攻略-推荐word版 (5页)
本文部分内容来自网络整理,本司不为其真实性负责,如有异议或侵权请及时联系,本司将立即删除!== 本文为word格式,下载后可方便编辑和修改! ==room3攻略篇一:IOS解密游戏The Room空房间详细图文攻略第三章IOS解密游戏TheRoom空房间详细图文攻略第三章此作的画面非常精美,谜题设计的也十分合理,真是居家必备的良品,游戏分为四章,火烧在接下来的几天里,会放出这四章的详细图文攻略,敬请期待,当然,也欢迎其他攻略快手的补完和解说,特别是我个人英语水平实在是幼儿园级别的,欢迎英语高手放出剧情攻略。
我们得到了一个六边形的新盒子,好像是六边形吧,没仔细数,四下检查一番,发现很多小机关,没关系,我们一个一个解开。
首先,我们找到盒子的一个棱柱,有这个小铭牌的一个棱柱,这个小铭牌往左侧滑动就可以掉下来,从而把一个开关呈现在我们面前,我们扳动这个开关,可以得到一个新的提示字条和一个有金属迷宫的小匣子观察匣子,可以轻易的发现,目的是把左侧的金属小球移到右边,我们利用中间的圆形转盘,把小球移到其他方向,再移动转盘,观察小球和转盘通道的路径,很轻松的就把小球移到右侧的终点内,达到终点后,我们得到一把钥匙。
d9t0c来到六边形盒子有金属盘的这一侧,把钥匙插进钥匙孔,旋转。
右侧的转盘机关被激活,向上一章那个转盘一个道理,我们把它先打开左边的5个开关,再打开右边的4个开关,再把左边全打开,再把右边的全打开,这样,机关内弹出一个观测镜和一个方形徽章。
这个方形徽章用在哪里呢,找来找去发现一个不寻常的地方,这个侧面的圆盘可以通过滤镜观察到一个锁,我们用中间的圆环把锁左侧的金属挡板移进圆环,再移到右下方,把右下方的金属挡板往下移,把圆环中的挡板放在刚才的位置,再把圆环移到右侧的挡板处,把右侧挡板移进圆环,这样一个方形的孔就显露了出来。
把刚才的方形徽章放进这个方孔,随着视角移d9t0c篇二:escape the prison room 3逃出监狱3第一关攻略一.点1位置拿毛巾二.点5位置用毛巾擦油画,要点很多次油画油画擦出个4X4的格子框三.点位置2,按上边画面输入。
幽魂旅店3 图文并茂攻略

Welcome to the欢迎来到Haunted Hotel: Lonely Dream闹鬼的饭店:孤独的梦想Walkthrough!漫游!Explore the Haunted Hotel and experience supernatural phenomenon for yourself in Haunted Hotel: Lonely Dream!探索那闹鬼的酒店和经验超自然现象为自己梦想!孤单酒店闹鬼Whether you use this document as a reference when things get difficult or as a road map to get you from beginning to end, we’re pretty sure you’ll find what you’re looking for here.你是否使用这个文档作为一个参考当事情变得困难或者作为一个路线图让你从头到尾,我们肯定你会发现你正在寻找的在这里。
This document contains a complete Haunted Hotel: Lonely Dream game walkthrough featuring annotated screenshots from actual gameplay!这个文档包括一个完整的闹鬼的饭店:孤独的梦想游戏攻略从实际的游戏截图以诠释。
We hope you find this information useful as you play your way through the game. 我们希望你发现此信息有用,你玩你的路在比赛。
Use the walkthrough menu below to quickly jump to whatever stage of the game you need help with.使用整合菜单下面的文章,快速跳到任何阶段的游戏中你需要你的帮助。
寂静岭3图文攻略

寂静岭3(Silent Hill 3)感谢fanhuduan与我一起讨论!开始,男主角文森特迷惘的来到了这儿…出去后往前有冰箱的房间,冰箱中有个冰住的钥匙,把其放在冰箱旁的锅子上就能得到了。
拿地图…地图右边房间中灯上写着a=2 s=7,线索。
接着去旁边的密码房间,上面写着i am god,由a=2s=7→a在2键 s在7键→密码426463。
房中床上有纸,旁边的钟上3:45线索。
去1楼浴室,浴缸中有锁链。
2楼尽头有锁的房间,纸条、药包,2张纸其实一样的可以去里世界了,2楼尽头房间,桌上有打火机,椅子上有子弹,点墙上的纸拼图,线索即那2张纸,是说让纸上的人手臂成90',也就是让手臂拼成正方形…里世界出去就会碰到第一只怪~本建议以后打怪『5键+确定键』一起狂按,本人经验啊乘电梯去1楼,电梯对门的卫生间里的尸体上有把钥匙旁边冷藏室左边的房间有画,点画,有剧情,抽屉中有手枪回原世界3楼有锁的房间,里面有打火机油、蓝珍珠、药包去3楼尽头房间,用打火机点燃蜡烛,剧情去里世界,乘电梯去1楼,一个放衣服的房间,房中尸体上有红珍珠去1楼门前有钟的房间把钟调到3:45…切换女主角艾米莉要杀了4个怪,才能回原世界…往2楼卫生间有子弹,3楼也有,再乘电梯去1楼,也有子弹等,再去冷藏室中尸体上拿猎枪,如此差不多4个怪都碰到杀掉了,可以去2楼尽头房间,回原世界了。
出去后2楼右边房间柜子中有圣刀,去1楼门前有钟的房间…用圣刀捅自己,剧情,女主角自杀死亡…切回男主角文森特男主角醒来发现被女主角救了,在房中有药包、猎枪。
去1楼卫生间,用锁链拿到马桶中的钥匙,出去会碰到个厉害的怪,先保存下吧。
去2楼有锁的房间,房中的保险箱解迷…迷题:某人去医院,路上看到一辆车,车上有7个女人,每个女人有7个包,每个包中有7只猫,每只猫有7只小猫仔,问你去医院的人、包、猫、猫仔共多少?迷底:他自己去医院,他在路上看到的那些可不会也跟着他去医院的,所以答案是1个,即密码001。
密室逃脱游戏完美逃脱3攻略图文通关流程
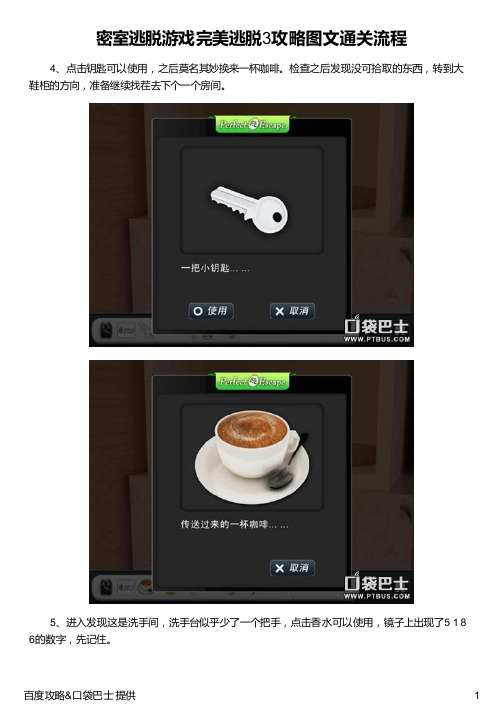
密室逃脱游戏完美逃脱3攻略图文通关流程4、点击钥匙可以使用,之后莫名其妙换来一杯咖啡。
检查之后发现没可拾取的东西,转到大鞋柜的方向,准备继续找茬去下个一个房间。
5、进入发现这是洗手间,洗手台似乎少了一个把手,点击香水可以使用,镜子上出现了5 1 8 6的数字,先记住。
6、返回房间,打开电视那边门,进入卧室,在床头柜发现了电视遥控器和一把木质的钥匙。
这时发现一面白色的墙是空的,用锤子,把墙破坏会发现一个被关在墙里的女人萨拉。
7、萨拉因为非常口渴,这时候你可以把橙汁给她,喝过之后仍然口渴,这时候咖啡可以给她了,之后她有觉得很饿,想办法弄食物,去传送小东西的装置旁边,发现锤子可以传送,换取了一块树莓蛋糕。
8、吃饱的沙拉告诉你客厅有一处秘密通道,但是需要在吃点东西(真是吃货),再次到传送小东西的装置旁边把乐谱的小纸条使用换来果酱奶酪蛋糕。
发现木质钥匙也能传送,但是最终设备被木质钥匙损坏(一定要损坏传送设备,不然金属拉环无法起作用)。
之后,萨拉吃完食物给你一个金属拉环。
9、返回客厅用遥控器打开电视,输入四位密码,下面的柜子会自动打开出现一把枪。
10、再次进入洗手间,按上金属拉环,发现客厅有什么异常,出去一看发现木质柜子被自动移开。
一扇门呈现在眼前。
11、使用开锁工具打开,进入另一个房间,检查四周,最终在书架一个竹篮子里发现了一颗子弹。
在蛋糕一侧还有一扇门,再次使用开锁找茬工具打开,但是发现有说话声音,先在猫眼观察下情况。
12、发现苏菲亚果然在里面,伊桑居然挟持苏菲亚想得到金钱,这时候要解救苏菲亚,开门,用左轮手枪解决伊桑。
13、接着带苏菲亚离开,同时在这个屋子里还发现了一把手锯,返回卧室去救萨拉。
然后返回起始的办公室,离开伊桑的家,突然在门口遇到艾玛拿手枪指着自己,之后会发生神马事情,就等待《完美逃脱4》吧。
密室逃脱巫山古楼第三关的逃脱答案

密室逃脱巫山古楼第三关的逃脱答案
1、进入第三关游戏,首先点击左边的绿色架子。
2、拿走扫把,然后点倒垃圾桶,拿走上面的电线
3、用扫把将第三个吊灯弄下来。
4、用垃圾桶处拿到的电线和掉落的电线接好。
5、然后点击ATM机左侧的电脑,我们选择第四个图案(垃圾桶)点击。
6、如上图所示,选择第一个图案点击
7、如上图所示,选择第三个图案点击
8、如上图所示,选择第第五个图案点击
9、然后电脑旁边抽屉弹出来一张芯片,点击获取。
10、回到之前接电线的地方,将芯片插入,上面的绿灯亮起,弹出一个抽屉,拿走里面的钥匙。
11、用这把钥匙可以打开ATM机下面的钱柜,看到QA2468F的密码。
12、来到门前,依次点击QA2468F,第3关就通关啦!。
幽灵庄园的秘密3 详尽图文攻略上
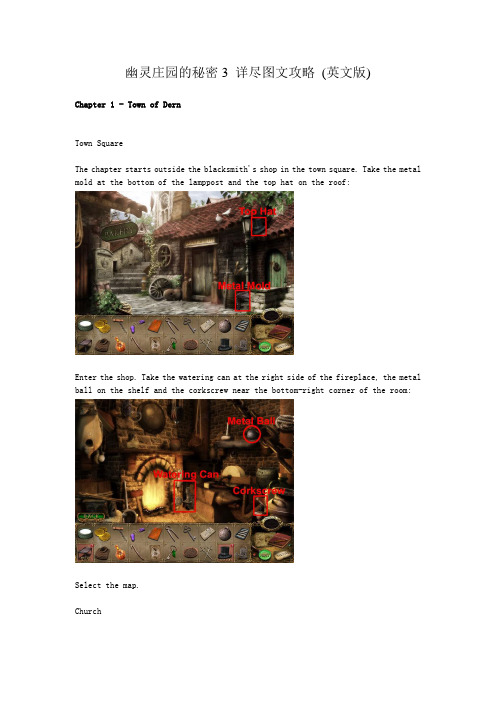
幽灵庄园的秘密3 详尽图文攻略(英文版)Chapter 1 - Town of DernTown SquareThe chapter starts outside the blacksmith's shop in the town square. Take the metal mold at the bottom of the lamppost and the top hat on the roof:Enter the shop. Take the watering can at the right side of the fireplace, the metal ball on the shelf and the corkscrew near the bottom-right corner of the room:Select the map.ChurchTake the bowl of milk below the right side of the door:Go through the door to enter the churchyard. Take the old photo on the windowsill and the coins near the base of the tree:Talk to the monk and he will ask for something to cure his headache when the bells ring. Select the map.TavernUse the corkscrew on the corked bottle of plum juice at the left side of the room to find a jewel piece. Take the iron key on the wall at the left side of the room, the ear plugs on the table and the bowl of seeds on the chair nearest to the tavern keeper:Give the coins to the tavern keeper and the guest room can now be accessed. Enter the guest room. Use the old photo on the picture frame at the left side of the room to find a jewel piece. Give the bowl of milk to the cat under the bed to find a jewel piece. Use the top hat on the coat hanger above the bed to find a jewel piece. Use the iron key on the locked cabinet at the left side of the room and take the orange bottle from inside. Take the letter on the bed and the crowbar leaning on the back of the chair:Select the map.RiverGive the seeds to the bird to find a jewel piece. Take the metal bars at the left side of the bridge and the pincers at the right side of the bridge:Select the map.Town SquareUse the letter on the mailbox below the bakery sign to find a jewel piece:Enter the shop. Use the metal mold on the fire in the fireplace. Use the orange bottle on top of the melting mold in the fireplace and the glass will melt. Use the pincerson the melted glass to take the piece of glass:Select the map.ChurchApproach the window at the right side of the room to see fifteen pieces of glassaround the outside of the window:Put the pieces of glass in the correct places on the window to see that there is still one piece of glass missing. Put the piece of glass from the inventory in the remaining slot and light will shine through the window onto the stone plate. Examine the stone plate to make a note of the numbers and colors in the notebook. Take theprison key from the hole:Enter the churchyard. Use the watering can on the flower buds to find a jewel piece:Give the ear plugs to the monk and he will start ringing the bells. Return to the church. Use the crowbar on the locked cabinet to open it:Take the monk's robe from the cabinet to complete the area.PrisonUse the metal bars on the hole in the right door for a jewel piece. Take the twin swords at the left side of the room and the floor tile in the bucket at the right side of the room:Select the map.Town SquareEnter the shop and use the twin swords on the shield above the fireplace to find a jewel piece and complete the area:TavernUse the floor tile on the hole in the floor to find a jewel piece:Enter the guest room. Use the monk's robe on the reflection of Mortimer to wear it and complete the area:PrisonThe guard will let Mortimer pass now that he is wearing the monk's robe. Approach the door at the back of the room and Mortimer will automatically put the key on the key hook. Use the metal ball on the chain to complete the first jewel:Examine the notebook to see the numbers and colors that were noted after the stained glass window was completed in the church. The numbers listed in the notebook are different with every new game that is played. Put all of the keys on the hooks mentioned in the notebook: The door will then open and the old man will agree to take Mortimer across to the other side of the river.RiverMove to the rowing boat to complete the first chapter:Chapter 2 - Dwarf CityEast CorridorThe chapter starts outside the alchemist's shop in the east corridor. Take the gaugeabove the alchemist sign and the log below the blue tubes:Enter the shop. Take the matchstick below the blue water and the empty shell above the gray dust:Exit the alchemist's shop and use the empty shell on the bare snail to find a jewel piece:Select the map.Main HallTake the candle in the pot at the left side of the left flame, the gear above the throne and the stone hammer on the steps at the top-right corner of the area:Approach the pillar below the steps to see a tile mini-game. Solve the mini-game by turning the tiles and matching pairs of tiles which have the same symbols. The tile layout is random with every new game. Take the alchemist bowl from the pillar after solving the puzzle. Select the map.MushroomsTake the alchemist hat on the mushroom at the right side of the fairy and the wrench above the barrel at the right side of the area:Select the map.Machine RoomTake the empty fuel container at the top-left corner of the machine and the fairy dust in the basket of jewels at the right side of the dwarf. Use the wrench on the rotating fan to stop the presser:Take the rune dictionary from the presser:Select the map.MushroomsGive the fairy dust to the fairy to find a jewel piece. Use the rune dictionary with the inscriptions on the pillar:Notes about the powerful fluid are added to the notebook. Go upstairs to the sawmill.SawmillUse the gauge on the pipe near the left side of the saw blade to find a jewel piece. Take the lantern by the pipe at the left side of the room, the wheel above the pipe at the top-right corner of the room and the ornament piece below the pipe near the bottom-right corner of the room. Use the gear on the blade axis at the right side of the saw blade to make the saw blade start spinning:Use the log on the rotating blade to get the wood plank. Select the map.Machine RoomUse the lantern on the dwarf's pole to find a jewel piece. Use the wheel on the mine cart at the bottom-left corner of the area to find a jewel piece and complete the area:East CorridorGive the alchemist hat to the alchemist to find a jewel piece. Enter the shop. Use the candle on the candlestick at the bottom-left corner of the table to find a jewel piece. Use the alchemist bowl on the pot holder:The notebook mentions the order of the ingredients that are needed here, which are random with every new game. Select the ingredients in the correct order to make the magic fuel. Use the empty fuel container on the magic fuel to fill it. Use thematchstick on the matchbox below the green dust to light the match:Exit the shop. Use the wood plank on the hole between the stairs to create a bridge:Go upstairs to the airship.AirshipUse the stone hammer on the dwarf statue to find a jewel piece. Take the gunpowder below the dwarf statue at the left side of the area, the frog below the ladder on the ship and the steak near the right side of the mast. Use the full fuel container on the fuel gauge on the mast:Select the map.MushroomsUse the frog on the puddle of water in the middle of the area to find a jewel piece. Use the gunpowder on the large rock below the pillar:complete the area:Main HallUse the ornament piece on the broken stone plate above the left side of the throneto find a jewel piece. Give the steak to the lion's pet to complete the second jeweland the area:East CorridorGo upstairs to the airship.AirshipUse the engine on the engine slot at the right side of the ship:Board the airship to complete the second chapter.Chapter 3 - Magical City of HalabathMagic SchoolThe chapter starts outside the magic school. Take the green feathers in the leaves of the tree above the house of mirrors:Enter the school of magic. Take the paper glue on the desk:Talk to the principal: He needs three magical artifacts for an experiment and will pay gold for each artifact found. Select the map.ElevatorTake the cloth above the hole in the tree and the watermelon on the grass at theright side of the elevator:Talk to the lift boy: He wants three gold coins before he will take Mortimer to the cloud city. Select the map.OfficeTake the teabag on the shelf at the left side of the office and the hammer and nails at the bottom of the stairs:Talk to the bookkeeper: She has lost her eyeglasses. Select the map.Elephant StageTake the squirrel in the branch of the tree at the right side of the area:of the trap room:Exit the trap room and enter the tent at the right side of the elephant stage. Use the tea bag on the cup at the bottom-right corner of the tent to find a jewel piece. Take the glowing powder behind the tower of cards. Use the paper glue on the towerof cards. Take the ace of clubs from the top of the tower of cards:Select the map.Magic SchoolUse the water melon in the cart at the right side of the area to find a jewel piece:Approach the shell man to see the cup game. Use the glowing powder on the hex nut. Select one of the cups and then wait until the man has finished moving the cups. Select the cup with the glowing outline to win the hex nut. Select the map. MagicianTake the walking cane above the king of clubs at the right side of the area. Usethe hex nut on the broken pump and water will start flowing:Use the empty bucket on the working pump to get the full bucket. Enter the trailer. Use the green feathers on the mask at the bottom-right corner of the trailer to find a jewel piece. Take the pendulum at the left side of the hat and the eyeglasses abovethe clock on the right shelf.Use the hammer and nails on the trap door. Select the hat and the rabbit will land on the trap door. Take the ace of hearts from the hat. Exit the trailer and enter the magician's house. Select the rope at the right side of the room to start the card mini-game, where the aim is to watch when the faces of the cards are shown to see where the two aces are. When the cards have finished moving, select the two aces to win the ace of spades and the ace of diamonds. Give the four ace cards to the magician to see the purple artifact on the table at the right side of the magician.Take the artifact to complete the area:Use the pendulum on the clock above the desk to find a jewel piece:Give the eyeglasses to the bookkeeper and she will leave to see the principal. Approach the desk and put the pieces of paper back in the correct order. There will be one piece of paper that is fixed in place, and the other pieces of paper should be placed in the correct order around this. A sound will be made when a piece hasbeen placed correctly. The completed paper is shown below:Close the notebook to complete the area.Elephant StageGive the walking cane to the gentleman at the left side of the elephant stage to find a jewel piece:Note the name of the elephant on the sign above the stage, as this name changes with every new game that is played. Enter the trap room below the elephant stage. Read the notebook to see the weight for the elephant that is on the stage. Turn the wheels to the weight mentioned in the notebook, which will be 4 tonnes and 300 kg for Sagara, 3 tonnes and 500 kg for Darsha, or 6 tonnes and 800 kg for Hanibal. Exit the trap room. Select the elephant to close the curtains on the stage. When the curtains open again, the elephant will be gone and a red artifact will be on the stage. Take the artifact to complete the area:Magic SchoolEnter the house of mirrors. Use the full bucket on the dirty mirrors and then use the cloth on the wet mirrors. Press the red button above the middle mirror to start the mirror mini-game. The aim is to find the differences on Mortimer in every mirror except the middle one. Only ten differences need to be found. The image below has been edited to show all possible differences:After finding the ten differences, take the green artifact below the middle mirror:Exit the house of mirrors and enter the school of magic. Give the three artifacts to the principal to get three gold coins and complete the area.ElevatorUse the squirrel in the tree hole to complete the third jewel:Give the three gold coins to the lift man and he will allow Mortimer to use the elevator. Enter the elevator to complete the third chapter.Chapter 4 - Cloud CityMain StreetThe chapter starts near the florist on the main street. Take the blue ink in the flowers and the lid above the gutter on the building:Enter the printing office. Take the trowel on the shelf at the left side of the press, the metal grate at the bottom-left corner of the ink machine and the plastic tubeon top of the printing machine:Select the map.City TowerTake the film above the right shelf and the toy train at the bottom-right cornerof the right shelf:Select the map.CustomsTake the camera lens at the right side of the door next to the customs officer:Talk to the officer: Only passengers with signed passports are allowed to leave Cloud City. Select the map.West DockUse the metal grate on the hole in the floor near the ship to find a jewel piece. Use the trowel on the yellow paint on the photo studio building to take the dry paint. Take the house number above the bowsprit of the ship, the red ink on the right window outside the photo studio building, the antenna above the lamp on the photo studio building and the silk ribbon above the drawing of the camera on the photo studio building:Enter the photo studio. Use the camera lens on the camera at the left side of the room to find a jewel piece. Take the rose from the vase of flowers at the left sideof the boy and the empty bottle on the floor at the right side of the photographer:Talk to the photographer: He can't get the boy to smile. Give the toy train to the boy. Talk to the photographer: He needs film for the camera. Give the film to thephotographer and he will take a picture of Mortimer. Take the photo from the camera:Select the map.Main StreetGive the rose to the florist to find a jewel piece. Climb to the balcony on thebuilding:piece. Take the needle from the ledge:Use the silk ribbon on the curtain to see an interesting tile layout on the floor below. Mortimer records the layout in his notebook. Select the map.West DockApproach the door above the cart to see a tile layout:Open the notebook to see the sketch of the tile layout that was seen from the balcony. The sketch of the layout changes with every new game as there are three possible layouts available. Make the tiles on the door into the same layout as the sketchin the book to open the door. It will be one of the following images:Enter the laboratory. Use the lid on the fuse box at the left side of the water creature's tank to find a jewel piece. Take the balloon at the left side of the water creature's tank and the chart fragment on the shelf at the right side of the room. Use the plastic tube on the hole in the water creature's tank. Talk to the watercreature to write down coordinates in the notebook. Use the empty bottle on the burner at the bottom-left corner of the room:Use the dry paint on the empty bottle to make yellow ink. Take the yellow ink. Exit the laboratory and enter the photo studio. Use the chart fragment on the torn palette at the right side of the photographer to write down the palette information in the notebook and complete the area:Main StreetEnter the printing office. Use the antenna on the radio on the bottom shelf at the left side of the room to complete the fourth jewel. Use the yellow ink, blue ink and red ink in the containers above the printing press:Open the notebook to read the palette information. Set the yellow, blue and red ink levels on the ink machine to the settings that are shown in the notebook. Select the press and it will print a passport. Use the photo on the passport to completethe area:Use the balloon on the venting tube to inflate it:Use the needle on the inflated balloon to wake the clerk:Give the passport to the clerk to receive the completed passport and complete the area.CustomsGive the completed passport to the customs officer. Enter the submersible at thebottom of the ladder:Enter the coordinates from the notebook that were written down after talking to the water creature. The latitude coordinates are placed in the right column and the longitude coordinates are placed in the left column. The green launch button will become active after the correct coordinates have been entered. Press the green launchbutton to complete the fourth chapter:Chapter 5 - Ocean RealmNorth PassageThe chapter starts at the bottom of the stairs in the north passage. Take the sharpstone next to the pillar at the right side of the stairs:Select the map.Jellyfish FieldTake the pincers above the coral at the right side of the area:Select the door and the jellyfish will glow in a certain order. Select the jellyfish in the order that they glowed and the door will open slightly. Keep moving toward the door and selecting the order that the jellyfish glow in until the door is fullyopened. Take the crystal from the door:Select the map.Coral HallTake the anchor in the coral at the left side of the sea princess, the filament in the white area at the right side of the sea princess and the knife in the coral at the top-right corner of the area:Enter the passage. Use the sharp stone on the wooden cage at the bottom-right corner of the area to find a jewel piece. Take the starfish above the fish at the left side of the area and the brush above the pillar at the right side of the area:Select the map.Green CanyonUse the filament on the anglerfish near the bottom-right corner of the area to finda jewel piece. Take the magnet near the bottom-left corner of the area:of the tile puzzle:Put the pieces of the tiles into the correct order. There are three possible tile puzzles, and the tile puzzle that you need to solve will differ with every new game. The completed puzzles are shown below:Mortimer writes a combination in the notebook after the tile puzzle is completed. Select the map.ShipwreckUse the anchor on the ring above the dirty window to find a jewel piece. Take the diving helmet at the bottom-left corner of the area and the black ink at the right side of the mermaid figurehead:Use the brush on the dirty window to clean it. Use the pincers on the window to open it. Enter the wreck and take the fish lure at the left side of the chest:Open the notebook to see the combination numbers. Close the notebook and turn the keys in the order mentioned in the notebook to open the chest. Take the plastic bottlefrom the chest:Select the map.North PassageUse the black ink on the octopus at the right side of the area to find a jewel piece.Use the magnet on the seagrass at the bottom-left corner of the area to take thelever:Select the map.Coral HallUse the starfish on the starfish colony above the sea princess to find a jewel piece:Enter the passage. Use the plastic bottle on the acid vapor below the left fish to get the bottle of acid. Use the lever on the large rock below the statue in the middleof the area:The five pieces of the mermaid statue can now be turned by selecting them. Start by turning the top three pieces so that the mermaid is facing forward and then turnthe bottom two pieces to complete the puzzle:Use the chiseling tools on the stuck crystal held by the statue and then take the crystal. Select the map.Green CanyonUse the bottle of acid on the chain attached to the whale to reveal the blowfishhideout:Use the fish lure on the blowfish hideout to see the puffer fish:Take the puffer fish to complete the area.Jellyfish FieldUse the diving helmet on the diving suit at the right side of the area to complete the fifth jewel. Use the knife on the seaweed at the left side of the area to takethe seaweed strands and complete the area:ShipwreckUse the seaweed strands with the gold amulet on the shipwreck:Use the puffer fish on the seaweed strands above the amulet to take the gold amulet and complete the area.Coral HallGive the gold amulet to the sea princess and then take the crystal to complete the area.North PassageUse the three crystals on the bases at the bottom of the stairs and the shark will disappear:Climb up the stairs to complete the fifth chapter.。
死亡之屋3——剧情全攻略

死亡之屋3——剧情全攻略 距C u r i e n官邸事件虽然已有20年,但丧⼫再度出现的消息,使警觉的R o g a n意识到这次事件远不简单。
于是他组织了⼀个突击⼩队来到了D.B.R的⼯⼚,在离真相⼀步之遥时却突然…… 另⼀⽅⾯,R o g a n已经失踪了两周,他的⼥⼉L i s a R o g a n和G决定寻找R o g a n并探询整个事件。
在G的帮助下,L i s a打败了从未⾯对过的丧⼫,战胜了缠⼈的死亡警卫D e a t h,吃⼈成性的树懒F o o l,和恐怖的⽇轮花S u n,终于在⼯⼚深处的⼀间没有丧⼫的屋⼦⾥找到了R o g a n。
原来他曾被D e a t h打伤,但又被C u r i e n博⼠的⼉⼦D a n i e l C u r i e n所救。
于是G留下来照顾R o g a n,D a n i e l和L i s a向真相进发。
原来,C u r i e n博⼠⽤基因制造了两件杰作,M a g i c i a n(魔法师)和W h e e l o f F a t e(命运之轮)。
M a g i c i a n将C u r i e n杀死,⽽⾃⼰也被R o g a n和G摧毁,但命运之轮保留了下来。
D a n i e l已经成功的使程序返回,但命运之轮虽未成熟但已成型,威⼒仍然强⼤。
D a n i e l和L i s a决⼼摧毁他,于是与他展开恶战。
邪不压正,两⼈终于将命运之轮炸成碎⽚。
灾难终于被解除,R o g a n平安得救,⽽D a n i e l也⽴志为⼈类造福。
距C u r i e n官邸事件虽然已有20年,但丧⼫再度出现的消息,使警觉的R o g a n意识到这次事件远不简单。
于是他组织了⼀个突击⼩队来到了D.B.R的⼯⼚,在离真相⼀步之遥时却突然…… 另⼀⽅⾯,R o g a n已经失踪了两周,他的⼥⼉L i s a R o g a n和G决定寻找R o g a n并探询整个事件。
- 1、下载文档前请自行甄别文档内容的完整性,平台不提供额外的编辑、内容补充、找答案等附加服务。
- 2、"仅部分预览"的文档,不可在线预览部分如存在完整性等问题,可反馈申请退款(可完整预览的文档不适用该条件!)。
- 3、如文档侵犯您的权益,请联系客服反馈,我们会尽快为您处理(人工客服工作时间:9:00-18:30)。
逃脱密室阴森鬼屋3完整攻略最全通关图解《逃脱密室:阴森鬼屋3》是一款解谜类的游戏,游戏很是考究玩家的观察能力,将场景中找到的物品联想应用起来,以达到通关的最终目的,小编在做这篇攻略的时候也是怒戳屏幕几许才艰辛的过关了,废话不说,赶紧一起来看看全部的通关攻略吧!
1、首先进入地图左下角的警察局,跟警察对话,可以拿到一把钥匙,然后把柜子上的第一个开关取走。
2、把仓库门口右边的铁撬收起来,然后进入仓库。
3、拿到第二个开关,然后用铁锹撬开箱子,拿到第一个镜子碎片。
4、然后进入右边的地下室,首先打开右上角的小灯。
(注意:地下室每个房间都有一盏灯需要打开)
5、右转,开灯,然后点击排风口,可以得到钥匙的下半部分。
6、继续右转,第三个房间,先打开灯。
7、右转,到第四个房间,开灯。
8、右转,到第五个房间,开灯,然后拿起墙砖,把墙砖放到竖排第二个位置,得到二个镜子碎片和一个电池。
9、右转,到第六个房间,开灯。
10、回到第三个房间,进门,拉上电闸开灯,然后在桌子底下找到第三个镜子碎片,最后把电池放到机器上,找到第三个开关。
11、出门,把三个开关放到门左边的盒子上,两上两下,让所有绿灯都亮起来。
12、一直右转,到最后的第七个房间,开灯,然后拉下把手。
13、回到第二个房间,出现了一个小拉环,拉一下。
14、到第四个房间,这时门已经打开了。
进入,开灯,然后把钥匙放到右边的机器上修理。
15、带着修好的钥匙到第七个房间,开门进入,开灯,拿走左下角的裁纸刀和右边一部分的手柄。
16、到第四个房间,进入,然后打开右边的门,用裁纸刀割开床单,拿到一个手柄。
然后将镜子碎片补好,发现机器人胸前的数字:1961。
17、到第一个房间,把手柄放入机器中,左边的铁门就会打开。
18、篮框范围中白色光点要两起才可以开启,
19、最后下到地下室,在电梯门的左边输入密码1961,就顺利通关了!
好了,到了这边这款游戏也算通关了,在没有攻略的情况下玩这款游戏会伤透脑筋,希望这
篇游戏攻略能够给大家带来帮助。