软件安装说明
knowitall 软件和库安装指南说明书

KNOWITALL SOFTWARE & LIBRARIES 安装说明书目录前言 ............................................................... - 1 -安装之前 ........................................................ - 1 -第一步 —— 安装 KnowItAll........................... - 2 -第二步 —— 激活您的许可证.......................... - 3 -如果您订购了数据库 ...................................... - 4 -技术支持 ........................................................ - 6 -资源: ...................................................... - 6 -附件——离线许可证激活 ............................... - 7 -A) 使用另一台电脑进行激活...................... - 7 -前言本书将指导您完成 KnowItAll 软件和 KnowItAll 光谱数据库的安装过程。
注意:如果您订阅的不是 KnowItAll 光谱数据库,而是“单独”红外或拉曼光谱数据库,请参考“单独红外和拉曼光谱数据库——安装说明书”。
(您可以从以下网址下载说明书:https:///training/)安装之前在/minimum_system上查看系统建议。
确保您手头有许可验证码——您购买之后,威利的客户支持团队会通过电子邮件将验证码发送给您;安装过程中将会用到此验证码。
如果您找不到您的验证码,请通过以下邮箱联系我们*********************。
mentor软件安装步骤及说明

Mentor软件安装步骤及说明文档目录1、安装准备工作 (2)2、软件安装 (2)3、软件破解 (4)5、环境配置 (4)6、关于License (6)7、集成到Virtuoso (6)8、附录 (7)现只使用了Mentor公司的calibre软件,用于版图物理验证,这里以Calibre11版为例。
1、安装准备工作:Calibre安装包:x86_cal_2011.2_34.26_mib.exe(注:libre安装比较简单,可直接在linux下运行安装包x86_cal_2011.2_34.26_mib.exe,也可使用图形安装器(install.ixl)进行安装,但是图形安装没直接运行安装包安装方便简单,这里就只挑简单的方法作介绍)。
破解文件:破解文件包括两个文件,以为patch文件,以为pfk文件。
License:MentorCalibre的license网上较多,也可以自己制作,制作也比较简单,找到制作软件直接运行批处理文件即可。
只是得到license后修改或者添加其SERVER行和DAEMON行即可,详细过程后面再介绍。
2、软件安装:1、创建软件安装目录,将安装包移动或复制到该目录下运行即可,在运行的时候注意其权限问题。
安装过程详见下图:到该步骤输入“D”回车继续到:到该步骤输入“yes”回车后继续:到这里后运行完成软件安装结束。
安装好后会有三个并列的文件夹:install.ixl(图形安装器)、_msidata(该文件夹似乎没什么用处)、x86_cal_2011.2_34.26(Calibre安装目录)。
3、软件破解:将patch和sfk文件复制到安装目录(/eda_tools/mentor/x86_cal_2011.2_34.26)下运行patch文件进行破解,破解完成即可。
注意patch文件适用对象,不同公司不同软件甚至不同版本的patch有可能不同。
4、环境配置:环境配置内容一般包含以下两个变量:MGLS_LICENSE_FILE和path(PATH:该变量是bashell设定环境的变量名)。
软件安装说明书
软件安装说明书为了帮助用户顺利安装我们的软件,我们准备了以下软件安装说明书。
请您按照以下步骤进行安装,以确保您能够成功使用我们的软件。
1. 准备安装文件首先,您需要从我们的官方网站下载软件安装文件。
请确保您选择的是适合您操作系统版本的安装文件,并将其保存在您的计算机硬盘上的一个目录中。
2. 检查系统要求在进行软件安装之前,请您确保您的计算机满足以下最低系统要求:- 操作系统:Windows 7或更高版本,或者Mac OS X 10.10或更高版本- 处理器:双核处理器,建议使用四核或更高性能处理器- 内存:至少4GB内存- 存储空间:至少100MB的可用硬盘空间- 显示器:分辨率为1024x768或更高3. 执行安装程序找到您保存安装文件的目录,双击运行安装程序。
这会打开一个安装向导,您只需按照向导中的指示进行操作即可。
在安装过程中,请确保选择正确的安装路径,并根据需要选择其他自定义设置。
4. 阅读许可协议在安装过程中,您将看到软件使用许可协议。
请仔细阅读所有条款和条件,并在同意之前确保您理解其中的内容。
如果您不同意协议的任何条款,请不要继续安装软件。
5. 等待安装完成一旦您点击了“同意”或“安装”按钮,安装程序将开始复制文件并配置软件。
请耐心等待直到安装完成。
这可能需要一些时间,取决于您的计算机性能和文件大小。
6. 快捷方式创建安装程序将询问您是否要在桌面上创建软件的快捷方式。
如果您想要快速访问软件,您可以选择创建快捷方式。
否则,您可以选择不创建。
7. 完成安装一旦安装完成,您将看到一个安装成功的提示。
点击“完成”按钮关闭安装程序。
8. 启动软件现在,您可以通过双击桌面上的快捷方式或者从“开始”菜单中找到软件并点击打开。
软件将启动并显示欢迎界面。
9. 激活软件有些软件可能需要激活才能正常使用。
请确保您按照软件提供的激活指南进行操作。
通常,您需要输入许可证密钥或注册邮箱,并遵循指示完成激活过程。
软件使用说明书模板

软件使用说明书模板一、概述。
本软件使用说明书旨在帮助用户快速掌握软件的基本操作方法,以便更好地利用软件功能,提高工作效率。
二、安装与启动。
1. 下载软件安装包,并双击打开。
2. 按照提示一步步进行安装,选择安装路径和其他相关设置。
3. 完成安装后,双击软件图标即可启动软件。
三、界面介绍。
软件界面主要分为菜单栏、工具栏、主窗口和状态栏等部分。
菜单栏包括文件、编辑、视图、帮助等功能选项,工具栏包括常用的操作按钮,主窗口是软件的主要操作区域,状态栏显示当前软件状态信息。
四、基本操作。
1. 新建文档,点击菜单栏中的“文件”-“新建”,或者使用快捷键Ctrl + N。
2. 打开文档,点击菜单栏中的“文件”-“打开”,或者使用快捷键Ctrl + O。
3. 保存文档,点击菜单栏中的“文件”-“保存”,或者使用快捷键Ctrl + S。
4. 导出文档,点击菜单栏中的“文件”-“导出”,选择导出格式并保存文档。
5. 打印文档,点击菜单栏中的“文件”-“打印”,选择打印设置并打印文档。
五、高级功能。
1. 格式设置,可以通过菜单栏中的“格式”选项对文档进行格式设置,包括字体、段落、对齐方式等。
2. 插入图片,点击菜单栏中的“插入”-“图片”,选择要插入的图片并确认。
3. 表格操作,通过菜单栏中的“表格”选项可以插入、删除、合并单元格等操作。
4. 批注与修订,可以通过菜单栏中的“审阅”选项进行批注和修订,方便多人协作编辑文档。
六、常见问题解决。
1. 软件无法正常启动,可能是安装过程中出现了错误,建议重新安装软件。
2. 文档格式错误,如果打开文档时提示格式错误,可以尝试使用其他软件打开或者尝试修复文档。
3. 功能操作不熟练,建议多阅读本使用说明书,多练习操作,熟练掌握软件功能。
七、注意事项。
1. 在使用软件过程中,注意及时保存文档,以免因意外情况丢失数据。
2. 注意备份重要文档,避免因为硬件故障等原因导致数据丢失。
3. 如遇到无法解决的问题,可以联系软件厂商的客服人员进行咨询。
Doble M4000软件版本4.1安装指南说明书

72A-3154-01 Rev. A 12/20091M4000 Version 4.1 Installation GuideThis document explains how to install the M4000 software version 4.1 on a laptop or the M4200C Controller.RequirementsLaptop requirements are as follows:•Operating system—Windows 2000 or newer •Web browser—Microsoft Internet Explorer V5.0 or newerThe M4200C Controller must run the M4200 Thermal printer driver as the default.To confirm that the M4200 Thermal driver is the default printer driver:1.Open the Start menu and select Control Panel .2.Select Printers and Other Hardware .3.Open View installed printers and fax printers .4.Confirm that M4200 Thermal is selected as the default (a black circle with a checkmark in it should appear next to the driver name in the list).•If it is not the default printer, highlight the M4200 Thermal printer icon, open File on the menu and select Set as Default Printer . •If the M4200 Thermal printer is not listed, please contact your Dobleprincipal engineer or local representative.Downloading M4000To download M4000 from the Doble web site:1.Go to .2.Open the Support menu and click Downloads .3.Click the M4000 link, and on the M4000 page, click the M4KV41.exe link.4.Click Save to save the file to your hard disk, or click Run to run Setup.exe immediately. Go to “Installing the Software” on page 2. 1981M4000 Version 4.1 Installation Guide272A-3154-01 Rev. A 12/2009Installing the SoftwareTo install M4100:1.Double-click the Setup.exe file.The Choose Setup Language window appears. It enables you to select thelanguage in which the remaining setup instructions will be presented.2.Select a language from the drop-down list and click OK.3.Read the Welcome advisory information and, if acceptable, click Next.4.Read the software license agreement and, if acceptable, click Yes.5.In the Choose Destination Location window:•Click Next to accept the default folder for the M4000 software.or•Browse to another folder and click Next.6.In the Select Program Folder window, choose a location for the M4000program icon and click Next.The Laptop/M4200 Controller Options window appears.7.Select these options as appropriate:•Launch M4000 at Startup—Automatically starts M4000 each time thePC or M4200 Controller is turned on.•Set the serial port to COM2 (default is COM1)—Select this option ifyou use an M4200 Controller, which always requires COM2.8.Click Next.The Safety Settings window appears. These settings are stored as Registryentries and can be changed by users through the Tools/Configurationmenu, unless access is restricted.Check marks appear in the options that are turned on by default.M4000 Version 4.1 Installation Guide72A-3154-01 Rev. A 12/200939.In the Safety Settings window, select the safety options as appropriate:•Beeper is enabled —Enables the warning beep that signals the beginning of each test (recommended).•Both LV Leads must be inserted to run test —Requires that both the red and blue leads be inserted into the test set to run a test (rarely used).•Safety strobe is required to run test —If the strobe bulb or cable fails, you can disable it so that you can continue testing. •Safety switch must be released between tests —Discourages users from artificially holding the safety switch down for the duration of several tests.•Restrict the Safety Configuration settings —Locks the above fourselections so that they cannot be changed from within the application.10.Click Next .The Auto-fill the Company Field window appears. Any name entered in this field automatically appears in the Company field whenever a new test form is created.11.Enter a name or leave the field blank. Click Next.M4000 Version 4.1 Installation Guide472A-3154-01 Rev. A 12/200912.In the M4000 Language Support window, select one or more languages forthe M4000 user interface. Click Next.The Choose the M4000 Data Directory window appears. This directory will store all results of tests run with the M4100 clipboard.13.Accept the default directory or browse to a different directory. Click Next.The Start Copying Files window appears. It summarizes the configuration options you have selected.14.If necessary, click Back to modify the setup options. Then click Next tostart file installation.The Copying Resource Files window appears and displays a progress bar.When the process is complete, the Setup Complete window appears. 15.As appropriate, select these options:•Yes, I want to view the ReadMe file.•Yes, I want to launch M4000.16.Click Finish.Running Multiple Versions of M4000You can run multiple versions of M4000 by installing them in differentdirectories. Be aware that whenever you switch from one version to another,M4000 prompts you to download new firmware. To prevent this prompt fromappearing:1.Locate the M4i.x0, BootBlok.x0, and Loader.x0 in the directoryin which version 3.4 or 4.0 is installed. The default directory isC:\Program Files\Doble\M4000.2.Copy these three files into the other M4000 directories.Updating the FirmwareThis section is for newer M4100 instruments only, with a serial number formatof four digits, a numeral one, and four more digits (xxxx1xxxx).IntroductionWhen M4000 is updated, new firmware is downloaded with it but notinstalled. The updated M4000 automatically checks the currently installedfirmware and, if appropriate, displays a message stating that new firmware isavailable. Immediate upgrade is not required; you can wait for a suitable time.M4000 Version 4.1 Installation Guide72A-3154-01 Rev. A 12/20095Time RequirementsThe firmware upgrade takes 25 to 30 minutes. The associated amplifier upgrade, which is sometimes required, takes an additional 15 minutes.Cable RequirementsThe USB cable supplied with the M4100 is required for this upgrade. You must manually install the USB driver for this cable.If the upgrade is attempted using a USB-to-RS232 adapter with the old serial cable, the upgrade will fail.Procedures for Firmware and Amplifier Firmware UpdateThe following procedures describe how to upgrade the firmware, and how to upgrade the amplifier (PUC) firmware if necessary.Read This First!As you begin upgrading, please keep the following information in mind:•Do not power cycle the M4100 during the upgrade. Power cyclingduring a firmware or amplifier firmware upgrade causes theM4100 to become unusable . You will have to ship the unit back toDoble for reconfiguration.•If M4000 is accidentally closed during an upgrade, power cycle theM4100 and start the upgrade over again.•Depending on the version of the firmware or amplifier firmware youare upgrading, an Error 101 message may appear after the upgradecompletes successfully. Close it and continue with the upgradeprocess.M4000 Version 4.1 Installation Guide672A-3154-01 Rev. A 12/2009Upgrading the FirmwareTo upgrade the firmware:1.Open the Tools menu and select Update the Firmware.A warning message appears.N OTE Do not power cycle the M4100 during the upgrade for any reason!If power cycling occurs, the M4100 becomes unusable and must be shipped back toDoble for reconfiguration.2.To start the upgrade, click Yes.Several progress bars appear during the upgrade.Depending on the version of the firmware being updated, an Error101message may appear after the upgrade is completed successfully.3.Click OK and power cycle the M4100.Upgrading the Amplifier (Power Unit Control)To determine if the Amplifier (PUC) firmware needs to be updated:1.Open the Diagnostic menu and select System Status.The M4000 - System Status Diagnostic window appears.2.Press F2 to run the test.When complete, the Reported Status for each item should be Enabled.3.Look at the M4100 Instrument Amplifier Version field. If it displays a:•Blank—The Amplifier/PUC cannot be upgraded in the field and unitmust be returned to Doble for upgrading.•Number—Go to step 4.M4000 Version 4.1 Installation Guide72A-3154-01 Rev. A 12/200974.Open the Tools menu and select Update the Amplifier Firmware .One of these messages appears:•Error 105—Indicates that the amplifier firmware cannot be upgradedin the field. Click OK and power cycle the M4100. You can continue to use the instrument while you make arrangements to ship it to Doble for upgrade.•Update the M4100 Amplifier Firmware N OTE Do not power cycle the M4100 during the upgrade for any reason! If powercycling occurs, the M4100 becomes unusable and must be shipped back to Doble for reconfiguration.5.To start the upgrade, click Yes .Several progress bars appear during the upgrade.Depending on the version of the firmware being updated, an Error 101 message may appear after the upgrade is completed successfully.6.Click OK and power cycle the M4100.7.Run another System Status test.The following data should appear:•M4100 Instrument Firmware Version: 3.4555•M4100 Instrument Amplifier Version: 1.31Reporting ProblemsPlease communicate any problems or enhancement requests to your Dobleprincipal engineer or local Doble representative.M4000 Version 4.1 Installation Guide872A-3154-01 Rev. A 12/2009。
软件使用说明书模板

软件使用说明书1:简介1.1 软件概述本软件是一款X软件,旨在帮助用户完成X功能。
1.2 系统要求请确保您的计算机满足以下系统要求:- 操作系统:X- 处理器:X GHz或更高- 内存:X GB或更多- 存储空间:X GB或更多- 显卡:X或更高分辨率2:安装与卸载2.1 安装软件1:安装包2:双击安装包进行安装3:按照安装向导进行软件安装2.2 卸载软件1:进入计算机的控制面板2:找到“程序”或“程序与功能”选项3:在列表中找到本软件,右键选择“卸载”3:用户注册3.1 创建账户1:打开软件,注册按钮2:填写个人信息,包括用户名、密码、邮箱等3:确认注册3.2 登录账户1:打开软件,登录按钮2:输入用户名和密码3:登录4:功能介绍4.1 功能一、X详细介绍功能一的使用方法和操作步骤。
4.2 功能二、X详细介绍功能二的使用方法和操作步骤。
5:常见问题解答在使用软件过程中,可能会遇到一些常见问题,以下是一些解决方法:5.1 问题一、X解答问题一的方法和步骤。
5.2 问题二、X解答问题二的方法和步骤。
6:其他注意事项在使用本软件时,请注意以下事项:6.1 网络连接请确保您的计算机已连接互联网,以便正常使用软件的在线功能。
6.2 数据备份为了防止数据丢失,建议定期备份您的数据。
7:附件本文档涉及的附件包括:- 附件一、X- 附件二、X请根据需要并使用。
8:法律名词及注释8.1 法律名词一、X解释该法律名词的含义。
8.2 法律名词二、X解释该法律名词的含义。
软件安装说明

b. 输入新的网卡物理地址:运用工具“网卡物理地址修改器”,输入“000874C69B43”,按“修改”;
c. 重新启动系统,就可以使用了。
附:第一张光盘中有Lattice主要器件的PDF资料,以及器件选型、器件封装、下载电缆等说明文档。
4、在安装过程中,软件会提示用户需要data3.cab,
换第二张光盘,设置好data3.cab文件所在的路径,继续安装;
5、安装并口驱动程序:在出现的对话框中,点击Yes,
在弹出的小框中,点击Install,装完后点击Close;
6、这时,主程序基本安装结束,点击Next,最后点击Finish,完成安装;
一、软件安装步骤:
1、双击setup,选择Install ispLEVER 5.0 Design Tools(版本是ispLEVER HDL Base),点击Next;
2、选择安装路径(路径不要出现中文和空格),点击Next;
3、选择所需安装内容(一般选默认就行了,需硬盘空间2.9G),点击Next,便开始安装;
二、安装License:
1、将光盘中的license.dat文件复制到“安装路径\license\”下,
假如安装目录是“D:\ispTOOLS”,那么应把文件拷贝到“D:\ispTOOLS\license\”目录下;
2、修改网卡物理地址(即MAC地址):
a. 保存原有的网卡物理地址:在“开始”菜单中,运行“运行……”,打开“cmd”(命令提示符),
7、依次运行第二张光盘中的补丁程序
R5.0.01.72.28.05.SP01
如何编写软件安装说明书

如何编写软件安装说明书编写软件安装说明书软件安装说明书是为了指导用户正确安装和使用软件,使用户能够顺利地完成安装过程并获得良好的使用体验。
本文将以“软件安装说明书”的格式,详细介绍编写软件安装说明书的步骤和要点。
一、前言在开始编写软件安装说明书之前,我们需要明确说明该软件的用途、功能和版本号等基本信息,以帮助用户更好地理解软件的特性和适用范围。
二、系统要求在这一部分,我们需要列出软件的相关系统要求,包括操作系统版本、处理器要求、内存需求、硬盘空间要求等,以帮助用户确认自己的计算机是否满足软件的安装要求。
三、安装步骤在这个部分,我们需要详细描述软件的安装步骤,以便用户能够按照指导顺利完成安装过程。
具体的安装步骤可能包括以下几个方面:1. 下载软件:提供软件的下载链接或下载方式,并告知用户如何获得合法、可靠的软件安装包。
2. 解压安装包:指导用户如何解压缩软件安装包,以提取软件安装所需的文件。
3. 运行安装程序:告知用户如何运行软件安装程序,一般为双击安装程序或命令行运行安装命令。
4. 接受许可协议:提醒用户阅读并同意软件的许可协议,如果需要用户同意协议才能继续安装的话。
5. 选择安装路径:指导用户选择软件的安装路径,可以提供默认路径或允许用户自定义路径。
6. 安装过程:详细描述软件的安装过程,包括复制文件、注册库、创建快捷方式等操作。
7. 完成安装:告知用户安装成功,并提供一些进一步的操作说明,如是否需要重新启动计算机。
四、常见问题解答这一部分可以提供一些常见问题及其解答,以帮助用户解决一些可能出现的问题。
例如:1. 安装失败的原因及解决办法:列举一些可能导致安装失败的原因,并提供相应的解决办法。
2. 异常提示信息的解释:解释一些常见的异常提示信息,帮助用户理解并解决相关问题。
3. 常见错误的解决办法:介绍一些常见的错误及其解决办法,比如启动失败、界面卡顿等。
五、使用说明在这一部分,我们需要简要介绍软件的主要功能和使用方法,使用户能够快速上手并了解软件的基本操作。
软件使用说明书范文

软件使用说明书范文一、前言。
本软件使用说明书旨在帮助用户快速了解并熟练使用我们的软件。
通过本说明书,您可以轻松掌握软件的基本功能和操作方法,提高工作效率,更好地利用软件的优势。
我们希望本文档能够为您提供清晰、简洁的指导,让您在使用软件时更加得心应手。
二、软件安装。
1. 下载软件安装包。
您可以通过我们的官方网站或其他指定渠道下载软件安装包。
2. 安装软件。
双击安装包,按照提示完成软件的安装过程。
在安装过程中,请确保您的设备已连接互联网,并遵循安装向导的指引完成安装。
三、软件功能介绍。
1. 主界面。
打开软件后,您将看到清晰简洁的主界面,包括各种功能按钮和操作区域。
在主界面上,您可以快速找到所需的功能入口,进行相应的操作。
2. 基本功能。
软件提供了丰富的基本功能,包括但不限于文件管理、数据分析、图表绘制等。
用户可以根据自己的需求,灵活运用这些功能,完成各种工作任务。
3. 高级功能。
除了基本功能外,软件还提供了一些高级功能,如数据处理、模型建立、自定义设置等。
这些功能可以帮助用户更深入地进行数据分析和处理,提高工作效率。
四、软件操作指南。
1. 文件管理。
在软件中,您可以轻松管理各类文件,包括新建、打开、保存、导出等操作。
同时,软件还支持多种文件格式的导入和导出,满足不同用户的需求。
2. 数据分析。
软件提供了丰富的数据分析工具,用户可以通过简单的操作,快速进行数据的筛选、计算、统计等操作,得出准确的分析结果。
3. 图表绘制。
软件支持多种图表类型的绘制,用户可以根据数据类型和需求,选择合适的图表样式,快速生成美观的图表,直观展示数据分析结果。
五、常见问题解答。
1. 软件无法正常启动。
可能是由于系统环境不兼容或安装过程中出现错误导致的。
建议您重新安装软件,或者联系我们的客服人员进行咨询。
2. 数据导入失败。
请检查数据格式是否符合软件要求,或者是否存在数据错误。
您可以参考软件的帮助文档,了解数据导入的具体要求。
软件安装说明
一、软件安装说明
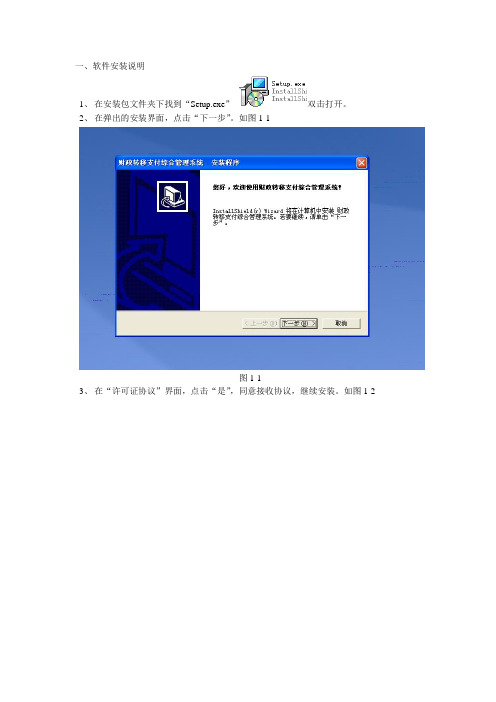
1、在安装包文件夹下找到“Setup.exe”双击打开。
2、在弹出的安装界面,点击“下一步”。
如图1-1
图1-1
3、在“许可证协议”界面,点击“是”,同意接收协议,继续安装。
如图1-2
图1-2
4、安装信息界面,点击“下一步”继续安装。
如图1-3
图1-3
5、选择安装路径界面,建议使用软件默认安装路径,点击“下一步”继续安装。
如图1-4
6、点击“下一步”继续安装。
图1-4、图1-5
图1-4
图1-5
7、此时软件开始安装,等待安装进度完成。
如图1-6
图1-6
8、安装进度完成后,选择“是,立即重新启动计算机”,重启电脑,安装完成。
如图1-7
图1-7
二、软件连接说明
1、软件安装成功后,在桌面双击“财政转移支付综合管理系统”图标,出现
系统登录界面,如图2-1
图2-1
2、在服务器栏输入地址:http://10.120.1.7:7001/cssServerPortal142012,点击服务器地址栏后边的测试连接按钮,提示连接成功后,选择行政区划、业务年度,输入用户名密码,点击确定,即可登录软件。
如图:。
软件操作说明书

软件操作说明书一、简介本软件操作说明书旨在详细介绍软件的操作步骤和功能,帮助用户快速上手并正确使用软件。
请用户仔细阅读本说明书,并按照指导进行操作。
二、安装步骤1. 下载软件安装包用户可以从官方网站下载软件的安装包,确保下载的安装包来源可靠。
2. 运行安装程序双击安装包,运行安装程序。
根据提示,选择安装目录和其他个性化设置。
3. 完成安装等待安装程序自动完成软件的安装过程,安装完成后,用户可以在电脑桌面或开始菜单中找到软件的快捷方式。
三、软件界面1. 主界面软件主界面由若干功能模块组成,每个模块提供不同的功能操作。
用户可以根据需求选择相应的功能模块。
2. 菜单栏软件的菜单栏位于主界面的顶部,包括文件、编辑、查看、工具、帮助等菜单项,用户可以通过菜单栏进行相应的操作。
3. 工具栏软件的工具栏位于主界面的上方或左侧,提供常用的操作按钮,方便用户快速访问常用功能。
四、基本操作1. 登录打开软件后,用户需要输入用户名和密码进行登录。
如果是首次登录,用户需要进行注册并设置密码。
2. 创建新项目在软件主界面中,用户可以点击“新建项目”按钮,填写项目名称和相关信息,然后点击“创建”按钮完成新项目的创建。
3. 导入数据用户可以通过导入功能将已有的数据文件导入到软件中,支持常见的数据格式,如Excel、CSV等。
4. 数据编辑用户可以在软件中对导入的数据进行编辑、添加、删除等操作,确保数据的准确性和完整性。
5. 数据分析软件提供丰富的数据分析功能,用户可以根据需要选择不同的分析方法,生成相应的分析报告和图表。
6. 导出结果用户可以将分析结果导出为Excel、PDF等格式,方便与他人共享和查看。
五、高级功能1. 自定义设置软件提供了丰富的自定义设置选项,用户可以根据自己的需求进行个性化设置,如界面风格、语言设置等。
2. 批量处理用户可以通过批量处理功能对多个数据文件进行统一的操作,提高工作效率。
3. 数据备份与恢复软件支持数据的备份和恢复功能,用户可以定期备份数据,以防数据丢失或损坏。
软件安装部署使用说明
软件安装部署使用说明软件安装部署使用说明1、引言本文档提供了软件安装的详细步骤,包括、安装和配置过程。
同时,还包含了软件的部署和使用说明,以帮助用户快速上手并正确使用软件。
2、系统要求在开始安装和使用软件之前,请确保您的计算机符合以下要求:- 操作系统:Windows 10 / macOS 10.15 或更高版本- 处理器.2 GHz 或更高- 内存.4 GB 或更高- 存储空间:至少 10 GB 可用空间3、软件请按照以下步骤软件:1) 打开浏览器,访问软件官方网站(例如,)。
2) 导航至页面并找到适合您操作系统的软件版本。
3) 按钮开始软件。
4、安装软件请按照以下步骤正确安装软件:1) 打开软件安装包(通常是一个:exe 文件或:dmg 文件)。
2) 阅读并同意软件许可协议。
3) 按照安装向导的指示完成安装过程。
这可能包括选择安装位置和其他可选组件。
4) 等待软件安装完成。
5、配置软件在成功安装软件后,您需要进行一些配置才能正常使用。
请按照以下步骤进行配置:1) 打开软件并查找“设置”或“选项”菜单。
2) 在设置菜单中,根据您的需求进行必要的配置,例如选择界面语言、设置默认文件保存路径等。
3) 保存配置并重新启动软件,以使配置生效。
6、软件部署如果您是系统管理员或负责软件部署的人员,请按照以下步骤进行软件部署:1) 为目标计算机准备必要的环境,确保符合系统要求。
2) 软件安装包,并将其复制到目标计算机上。
3) 在目标计算机上运行安装包,并按照安装向导的指示完成安装过程。
4) 根据需要,配置软件以满足组织或用户的特定需求。
5) 验证软件部署的正确性,并确保所有功能正常运行。
7、软件使用本节将介绍软件的基本使用方法和常见操作,以帮助用户快速上手:1) 运行软件并登录系统(如果需要)。
2) 导航到主界面,并了解各个功能区域和菜单选项的作用。
3) 根据需要,创建、编辑或打开现有的文件或项目。
4) 使用软件提供的工具和功能进行任务处理和操作。
软件安装指南说明书
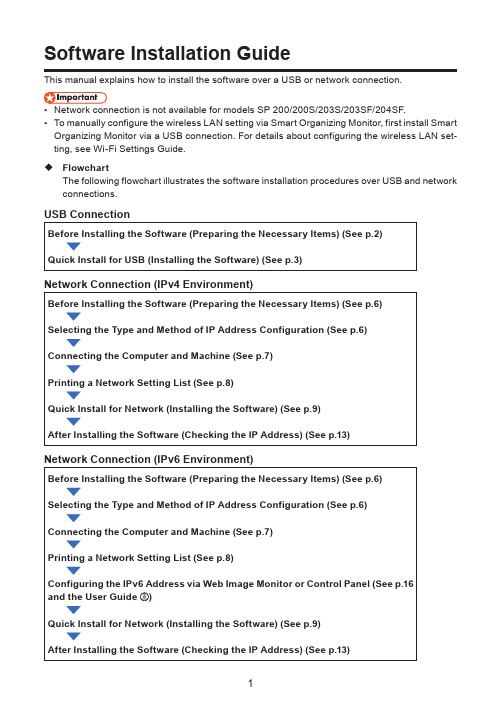
Software Installation GuideThis manual explains how to install the software over a USB or network connection.To manually configure the wireless LAN setting via Smart Organizing Monitor, first install Smart Organizing Monitor via a USB connection. For details about configuring the wireless LAN set-ting, see Wi-Fi Settings Guide.FlowchartThe following flowchart illustrates the software installation procedures over USB and network connections.•1. C onnecting the Computer and Installing the Software (USB Connection)Connect the machine and computer with the USB cable, and then click [USB Quick Install] toinstall the software.CTT1771. USB Quick Install SP 200, 200N, 200Nw, 201N, 201Nw Install the printer driver and Smart Organizing Moni-tor.SP 200S, 202SN, 203S, 204SN Install the printer driver, TWAIN/WIA driver, and Smart Or-ganizing Monitor.SP 203SF, 203SFN, 203SFNw, 204SF, 204SFN, 204SFNw Install the printer driver, TWAIN/WIA driver, PC FAX driver, and Smart Organizing Monitor.Before Installing the SoftwareTo install the software over a USB connection, a USB cable and the supplied CD-ROM are re-quired.•••Quick Install for USBCTT136Do not connect the USB cable to the machine until a message to do so appears.CXP1221. Make sure the machine is off.2. Turn on the power of the computer.3.Insert the CD-ROM into the CD-ROM drive.CXP0664. Select a language for the interface, and then click [OK].••CTT0612. C onnecting the Computer and Installing the Software(Network Connection)Ethernet and wireless LAN settings cannot be enabled at the same time.Connect the machine and computer with the Ethernet cable, and then click [Network Quick Install(DHCP)] or [Network Quick Install (Fixed IP)] to install the software.1. Network Quick Install (DHCP)2. Network Quick Install (Fixed IP)SP 200N, 200Nw, 201N, 201Nw Install the printer driver and Smart Organizing Monitor.SP 202SN, 204SN Install the printer driver, TWAIN/WIA driver, and Smart Organizing Moni-tor.SP 203SFN, 203SFNw, 204SFN, 204SFNw Install the printer driver, TWAIN/WIA driver, PC FAX driver, and Smart Organizing Monitor.••••Before Installing the SoftwareTo install the software over a network connection, a Ethernet cable and the supplied CD-ROM are required. To automatically obtain the IP address, a router with a built-in DHCP server is re-quired.Selecting the type and method of IP address configurationWhat is an IP Address?The IP address is an identification number allocated to computers and other devices connected to an IP network. An IP address is an address for use on a network. There are two types of IP address: IPv4 and IPv6.IPv4 addressThe IPv4 address consists of four fields, such as "192.168.0.113". The first three fields (192.168.0) are fixed, and the last one (113) is variable.CTT1791. Fixed part2. Variable partTo manage the network, only the variable part needs to be changed.CTT18011. Router2. Another computer3. Machine4. Your computerIPv6 address Because IPv4 addresses are running out as a result of the widespread use of the Internet, IPv6 has been developed as a next generation Internet protocol.••CTT1382. Plug the other end of the cable into a network device, such as a hub.3.CTT061Printing a network setting listBefore you install the software, print the network setting list to check the network information.1. 1.2.3. less LAN setting, check the following items in "Wi-Fi Status" in the network setting list. •••••The item to select depends on the type and method of IP address configuration selected in "Se-lecting the type and method of IP address configuration". Install the software according to the following instructions.(1) Configuring the Machine Settings to Obtain an IPv4 Address Automatically [Network QuickInstall (DHCP)](2) Configuring the Machine's IPv4 Address Manually [Network Quick Install (Fixed IP)](3) Configuring the Machine Settings to Obtain an IPv6 Address Automatically [Network QuickInstall (DHCP)] or [Network Quick Install (Fixed IP)](4) Configuring the Machine's IPv6 Address Manually [Network Quick Install (DHCP)] or [Net-work Quick Install (Fixed IP)]Selecting [Network Quick Install (DHCP)]1. Turn on the power of the computer.Quit all applications currently running.2. Insert the CD-ROM into the CD-ROM drive.CXP0663. Select a language for the interface, and then click [OK].4.From the CD-ROM menu, click [Network Quick Install (DHCP)].CTT1935. Read the entire license agreement carefully. If you accept its terms, click [I accept theagreement.], and then click [Next >].6. Select [Add a new printer], and then click [Next>].7. Select the printer detection method, and then click [Next>].To search for printers automatically, select [Search for printers automatically].To search for a printer by its IP address, select [Search for printers by specified IP Ad-dress].To select a port or specify a new port, select [Select a port or specify a new port]. If a dialog box for selecting the port type appears, it is recommended to select the standard TCP/IP port.8. Follow the instructions in the installation wizard.•••Selecting [Network Quick Install (Fixed IP)]1. Turn on the power of the computer.Quit all applications currently running.2. Insert the CD-ROM into the CD-ROM drive.CXP0663. Select a language for the interface, and then click [OK].4. From the CD-ROM menu, click [Network Quick Install (Fixed IP)].CTT1905. Read the entire license agreement carefully. If you accept its terms, click [I accept theagreement.], and then click [Next >].6. Enter the MAC and IP addresses, and then click [OK].To specify these in an IPv6 environment, click [Cancel], and then proceed to Step 8.CTT191MAC addressEnter the MAC address shown on the network setting list.IP addressEnter the user's IP address.The computer's IP address can be ascertained using Command Prompt.To display the IP address, open Command Prompt, enter "ipconfig", and then press the[Enter] key.Enter the IP address of the computer being used with the variable part in the IP address modified.Subnet mask, Default gateway addressSpecify the subnet mask and default gateway address as required in accordance with the network environment.7. If the procedure completes successfully, click [OK].If the procedure fails, click [OK] to return to the window displayed in Step 6. Try specifying the setting again. If the problem persists, see "Troubleshooting" to check whether there is a problem with the connection or some other issue, or contact your service representative.8. Select [Add a new printer], and then click [Next>].9. Select the printer detection method, and then click [Next>].To search for printers automatically, select [Search for printers automatically].To search for a printer by its IP address, select [Search for printers by specified IP Ad-dress].To select a port or specify a new port, select [Select a port or specify a new port]. If a dialog box for selecting the port type appears, it is recommended to select the standard TCP/IP port.10. Follow the instructions in the installation wizard.••••••After Installing the SoftwareChecking a network setting listCheck the network setting list to see whether the configured IP address setting has been applied. For details about printing the network setting list, see "Printing a network setting list".3. Changing the IP Address Settings1. Press the [User Tools] key.2. Press the [] or [] key to select [Network Settings], and then press the [OK] key.With the SP 203SFNw and 204SFNw models, to establish the wireless LAN connection, select [Wi-Fi Settings] in [Network Settings].3. Press the [] or [] key to select [Machine IPv4 Address], and then press the [OK]key.4. Press the [] or [] key to select [DHCP Activated], and then press the [OK] key.5. Press the [] or [6. Press the [] or [] key to select [IP Address] , and then press the [OK] key.7.8. Enter the values in all fields, and then press the [OK] key.Specify the subnet mask and default gateway address as required in accordance with the network environment.After a setting has been changed, the machine automatically restarts. To skip the time to wait for the machine to restart, press the [User Tools] or [] key.For details about configuring the IPv6 address, see the User Guide.You cannot configure the network settings while the machine is operating (printing, receiving a •fax, etc.). Correspondingly, the machine cannot receive print jobs and faxes while the network settings are being configured (after clicking [Network Settings]).Check that [DHCP] is set to [Enable] in [IPv4] in Web Image Monitor. If [DHCP] is set to [Enable],the machine can automatically obtain the IP address.CTT163Configuring the machine's IPv4 address manually1. Launch Web Image Monitor and log in.2. Click [IPv4].3. Set [DHCP] to [Disable].CTT1674. Specify the IP address in [IPv4 Address].Specify the subnet mask and default gateway address as required in accordance with the network environment.5. Specify other settings if necessary.6. Click [OK].For details about configuring the IPv6 address, see the User Guide.Changing the IPv4 Address Settings Using the Smart Organizing Monitor Resetting Network SettingsTo change the IP address after moving the machine or in other situations, it is necessary to reset the network settings.SP 200N, 200Nw, 201N, 201Nw1. While holding down the [Job Reset] key, turn the power on.SP 202SN, 203SFN, 203SFNw, 204SFN, 204SN, 204SFNw1. While holding down the [Stop/Clear] key on the control panel, turn the power on.Hold the key down for five seconds.Hold the key down until the Alert LED lights.Once the reset is complete, the machine automatically restarts.Changing the IP Address Settingsfigure the IPv6 address.To manually configure the wireless LAN, connect the machine and the computer with a USB cable.1. On the [Start] menu, click [All Programs].2. Click [Smart Organizing Monitor for SP xxx Series].3. Click [Smart Organizing Monitor for SP xxx Series Status].4. On the [User Tool] tab, click [IP Address Setting...].5. Enter the MAC and IP addresses.MAC addressEnter the MAC address shown on the network setting list.IP addressEnter the user's IP address.The computer's IP address can be ascertained using Command Prompt. To display the IP address, open Command Prompt, enter "ipconfig", and then press the [Enter] key.Enter the IP address of the computer being used with the variable part in the IP address modified.Subnet mask, Default gateway addressSpecify the subnet mask and default gateway address as required in accordance with the network environment.6. Click [OK].If the configuration is successful, the message "IP address has been set." appears.If the configuration fails, the message "Failed to set IP address. Try again." appears. If this happens, repeat the procedure from Step 5.7. Click [OK].8. Click [Close].••••4. TroubleshootingUSB ConnectionThe USB cable may not be connected properly.Check that the USB cable is connected properly and is undamaged.The CD-ROM may not be inserted properly.Check that the CD-ROM is inserted properly. Check also that it is not damaged and the CD-ROM drive is working properly.Other applications are not closed.When installing software, quit all other applications. Installation may be disrupted if other ap-plications are open. Also, quit any anti-virus applications that are running.The machine is turned on before installation.Turn the machine off and then on, and then try "USB Quick Install" again.Network ConnectionThe Ethernet cable may not be connected properly.Check that the Ethernet cable is connected properly and is undamaged.The CD-ROM may not be inserted properly.Check that the CD-ROM is inserted properly. Check also that it is not damaged and the CD-ROM drive is working properly.The machine's IP address has not been configured, or the machine and computer are not on the same network.If the machine does not appear on the network, its IP address has not been configured or it is on a different network from the computer. In the event of such a problem, check the machine's IP address and network configuration.The machine is unable to automatically obtain the IP address.Check whether the DHCP server is working.Network settings have not been reset.To change the IP address via Smart Organizing Monitor, it is necessary to reset network set-tings. For details, see "Resetting Network Settings".© 2013 EN GB EN US EN AU M143-8635。
宝兰德软件 BES Application Server Cluster 安装手册说明书

BES Application Server Cluster安装手册V9.5北京宝兰德软件股份有限公司Beijing Baolande Software Corporation版权所有侵权必究All rights reserved前言本文档是BES Application Server Cluster的安装手册,详细介绍如何在多种平台上安装BES Application Server Cluster。
本手册适合的对象本手册主要适用于使用BES Application Server Cluster的系统管理员和基于其所管理的服务器进行Java应用开发的应用开发人员。
本手册假定您已经具备如下技能:1、操作系统的基础操作。
2、JDK的安装。
约定BES Application Server Cluster定义了一些变量来表示BES Application Server Cluster目录等信息,本文档中涉及到的有:表 BES Application Server Cluster变量说明产品文档集BES Application Server Cluster提供的文档集包括:1.快速开始手册:简单介绍BES Application Server Cluster的安装和基本使用。
2.安装手册:详细介绍如何在各个操作系统上安装BES Application ServerCluster,以及产品的注册过程。
3.用户手册:详细介绍BES Application Server Cluster的配置和管理。
技术支持BES Application Server Cluster提供全方位的技术支持,获得技术支持的方式有:网址:Support Email:*********************Support Tel:400 650 1976在取得技术支持时,请提供如下信息:1.姓名2.公司信息及联系方式3.操作系统及其版本4.BES Application Server Cluster版本5.问题或错误相关的详细日志信息目录第1章产品介绍 (1)1.1关于BES A PPLICATION S ERVER C LUSTER (1)1.2产品特性 (1)1.3支持的平台环境 (1)1.4产品体系结构 (3)1.4.1 松耦合集群体系架构 (3)1.4.2 应用服务器实例体系结构 (4)第2章产品安装 (5)2.1安装前准备 (5)2.1.1 获取安装包 (5)2.1.2 系统需求 (5)2.1.3 安装前检查 (6)2.2安装程序安装步骤 (6)2.2.1 安装程序介绍 (6)2.2.1.1 GUI方式 (6)2.2.1.2 静默方式 (13)2.2.1.3 命令行方式 (14)2.2.2 安装日志 (14)2.3解压版安装步骤 (15)2.3.1 解压产品安装包 (15)2.3.2 启动 (15)2.3.3 登录 (15)第3章产品注册 (16)第4章产品的启动和停止 (17)4.1启动并访问管理中心控制台 (17)4.2安装并启停节点 (17)4.3注册服务/删除服务 (18)4.4操作应用服务器实例 (18)4.5停止管理中心控制台 (18)第5章产品卸载 (19)5.1安装版产品卸载 (19)5.2解压版产品卸载 (19)第6章常见问题解答 (20)第1章产品介绍1.1 关于BES Application Server ClusterBES Application Server Cluster是节点、集群、实例管理平台,实现了节点和实例的跨平台管理。
软件的说明书

软件的说明书软件的说明书1. 简介本文档是对软件的详细说明书,旨在帮助用户充分了解并快速上手使用该软件。
本软件为一款功能强大且易于使用的应用程序,为用户提供便捷、高效的工作体验。
2. 安装步骤以下是软件的安装步骤:1. 下载软件安装包。
2. 双击安装包,开始安装程序。
3. 在安装向导中按照提示完成软件的安装。
4. 安装完成后,即可在开始菜单中找到该软件的快捷方式,并点击启动。
3. 主要功能本软件提供以下主要功能:3.1 功能一该功能可实现xxx操作,具体步骤如下:1. xxx步骤1。
2. xxx步骤2。
3. xxx步骤3。
3.2 功能二该功能可实现xxx操作,具体步骤如下:1. xxx步骤1。
2. xxx步骤2。
3. xxx步骤3。
3.3 功能三该功能可实现xxx操作,具体步骤如下:1. xxx步骤1。
2. xxx步骤2。
3. xxx步骤3。
4. 用户界面介绍本软件的用户界面设计简洁、直观,易于操作。
以下是用户界面的主要组成部分: 4.1 菜单栏软件的菜单栏位于窗口的顶部,提供了各种功能的快捷入口。
4.2 工具栏软件的工具栏位于窗口的上方或侧边,提供了常用操作的快捷按钮。
4.3 主窗口软件的主窗口是用户进行操作的主要区域,显示相关信息并提供交互功能。
5. 常见问题解答以下是一些常见问题及解答,供用户参考:5.1 问题一问:xxx问题应该如何解决?答:请按照以下步骤解决问题:1. xxx解决步骤1。
2. xxx解决步骤2。
3. xxx解决步骤3。
5.2 问题二问:xxx问题应该如何解决?答:请按照以下步骤解决问题:1. xxx解决步骤1。
2. xxx解决步骤2。
3. xxx解决步骤3。
6. 联系支持如需进一步帮助或有任何疑问,请联系我们的支持团队:- 电话:XXX-XXXXXXX- 邮件:*******************感谢您选择使用本软件,希望我们的产品能够满足您的需求,并提供出色的用户体验。
软件使用说明书模板..

1.引言
本软件使用说明书旨在向用户提供详尽的操作指导,以帮助用
户顺利使用软件。
在阅读本说明书之前,请确保已经正确安装软件,并且具备必要的硬件设备和系统要求。
2.安装
2.1 确认系统需求:在安装本软件之前,请确保您的计算机系
统满足以下最低要求:(列出系统要求:操作系统版本、处理器、内
存等)
2.2 软件:从官方网站(或其他信任的来源)软件安装包。
2.3 执行安装:双击安装包,并按照向导指引完成安装过程。
3.用户界面
3.1 登录界面:描述用户登录界面的组成部分,如用户名和密
码输入框、登录按钮等。
3.2 主界面:介绍主界面的各个模块和功能,如菜单栏、工具栏、视图区域等。
4.功能说明
4.1 功能一:详细介绍功能一的操作步骤和注意事项。
4.2 功能二:详细介绍功能二的操作步骤和注意事项。
(根据软件功能特点继续添加各个功能的详细说明)
5.设置和首选项
5.1 帐户设置:介绍如何设置和管理用户帐户信息。
5.2 界面设置:介绍如何自定义界面的外观和布局。
5.3 首选项:介绍如何修改软件的默认设置,满足用户个性化需求。
6.故障排除
6.1 常见问题:常见问题及解决方法。
6.2 技术支持:提供联系技术支持部门的方式,如方式、电子邮箱等。
7.附件
本文档无附件。
8.法律名词及注释
8.1 法律名词一:解释一。
8.2 法律名词二:解释二。
(根据需要继续添加法律名词及其注释)。
XXX说明书软件安装与配置教程
XXX说明书软件安装与配置教程XXX说明书:软件安装与配置教程一、准备工作在开始安装与配置XXX软件之前,确保你已经完成了以下准备工作:1. 确认你的计算机满足XXX软件的最低系统要求。
2. 确保你已经获取了XXX软件的安装程序并保存在本地硬盘或者可移动存储设备中。
3. 在开始安装前,关闭所有与XXX软件相关的程序和进程,以防止安装过程中出现冲突问题。
二、安装XXX软件按照以下步骤进行XXX软件的安装:1. 双击打开XXX软件的安装程序。
2. 在弹出的安装向导界面中,点击“下一步”继续安装。
3. 阅读并接受软件许可协议,点击“下一步”继续。
4. 指定安装位置,可以使用默认安装目录或选择其他目录,点击“下一步”继续。
5. 确认安装选项,点击“下一步”开始安装。
6. 等待安装程序完成全部文件的拷贝和注册等相关操作,这可能需要一些时间,请耐心等待。
7. 安装完成后,点击“完成”退出安装向导。
三、配置XXX软件在安装完成后,需要进行一些基本的配置,以确保XXX软件能够正常运行。
1. 首次运行XXX软件时,系统可能会提示你进行一些初始化设置,按照提示进行相应配置即可。
如有需要,可以阅读帮助文档或联系技术支持。
2. 在软件的设置界面中,可以根据自己的需求进行个性化配置,如语言选择、界面主题、快捷键等。
根据需要逐项进行配置,可以随时修改。
3. 如果你需要与其他设备或软件进行连接或通信,例如与打印机、数据库等的连接,你需要在配置界面中进行相应设置,确保连接的正常和稳定。
4. 建议在配置完成后,进行一次全面的测试,以确保XXX软件的功能正常。
四、常见问题与解决方法在软件安装与配置过程中,可能会遇到一些常见问题,下面列举了一些常见问题及其解决方法:1. 安装过程中出现错误提示:这可能是由于文件损坏或系统环境不兼容等原因导致的。
尝试重新下载安装程序,或者检查系统环境,并根据错误提示查找相应的解决方法。
2. 软件无法启动或闪退:可能是由于操作系统版本不兼容、缺少依赖文件或者其他冲突软件等原因引起的。
软件使用说明要领
软件使用说明要领一、下载与安装为了使用该软件,您需要事先下载并进行安装。
请按照以下步骤进行操作:1. 访问官方网站,找到软件的下载页面。
2. 在下载页面中选择适合您设备的版本(Windows、Mac、iOS或Android)并点击下载按钮。
3. 下载完成后,找到下载文件并双击打开安装程序。
4. 在安装向导中按照提示一步步进行安装,确保选择正确的安装路径和其他选项。
5. 安装完成后,您可以在桌面或应用程序目录中找到该软件的图标。
二、软件注册与登录某些软件在使用前需要注册账号并进行登录。
请按照以下步骤进行操作:1. 打开软件。
2. 寻找注册按钮或选项,点击进入注册页面。
3. 在注册页面中填写所需信息,例如用户名、密码、电子邮箱等,确保提供的信息准确无误。
4. 点击注册按钮完成注册。
5. 之后,您可以使用注册时填写的用户名和密码进行登录。
寻找登录按钮或选项,输入用户名和密码后点击登录即可。
三、界面导航与基本操作1. 打开软件后,您会进入软件的主界面。
该界面通常会显示软件的核心功能和相关操作选项。
2. 导航栏位于软件界面的顶部或左侧,可帮助您快速切换不同功能模块。
3. 菜单栏通常位于导航栏下方或软件界面的顶部,它包含了更多的操作选项,例如文件操作、编辑功能等。
4. 工具栏位于菜单栏下方或软件界面的顶部,它提供了一些常用的工具按钮,方便您快速进行某些操作。
5. 在软件界面中,您可以通过鼠标点击、键盘输入或触摸操作来执行不同的操作。
请根据软件界面的提示和指引进行操作。
四、使用功能模块1. 在软件的导航栏中选择您想要使用的功能模块。
不同软件的功能模块可能有所不同。
2. 点击相应的功能模块后,软件会显示该模块的操作界面,您可以根据界面的提示和指引进行操作。
3. 软件常见的功能模块包括文件管理、数据分析、图像处理、文档编辑等。
请根据自己的需求选择对应的功能模块。
五、保存与导出数据1. 在使用软件过程中,您可能需要进行数据的保存和导出。
软件安装说明

软件安装说明最近,你刚买了一台全新的电脑,享受到了快速的运行速度和流畅的操作,但是随即出现了一个问题:如何安装你常用的软件?软件的安装对于电脑使用者来说非常重要,下面本文将为大家详细介绍软件安装的步骤和方法。
一、安装前的准备在安装软件之前,我们需要做好以下的准备工作:1.确保电脑有足够的存储空间:首先需要确保你的电脑有足够的存储空间,否则软件的安装会失败。
因此我们需要判断电脑中是否有足够空间。
2.检查软件是否兼容你的电脑系统:不同的软件对应的操作系统不同,检查软件是否与你的电脑系统兼容是十分必要的。
3.确定软件安装路径:在安装软件的时候,需要选择安装路径,因此通过选择不同的路径可以让软件文件存在不同的目录下,同样需要确定路径的选择。
二、软件的安装方法安装软件的方法有很多种,下面给大家介绍几种比较常见的方法。
1.使用软件安装光盘:我们可以通过光盘安装软件,将光盘插入电脑的光驱中,按照光盘上给出的提示,进行软件的安装。
2.使用安装文件:一般我们可以从官网或其他可信赖的网站下载软件的安装文件,下载完之后,双击安装文件,跟随提示,执行安装程序,进行软件的安装。
3.使用远程协助工具安装:在某些情况下,我们需要安装一些特殊的软件,或者是需要进行更加复杂的安装工作,可以使用远程协助工具安装软件,通过远程协助的方式来进行软件的安装和调试,帮助你解决安装过程中出现的问题。
三、软件安装注意事项1.安装软件前备份重要数据:在安装软件之前,我们需要对电脑中重要的数据进行备份,以防出现安装错误而导致数据的丢失。
2.关闭所有的杀毒软件:在安装软件之前,需要关闭所有的杀毒软件,因为杀毒软件会拦截软件的文件,导致软件安装失败。
3.安装软件时不要改变默认安装选项:在软件的安装过程中,我们可以选择安装路径和其他选项,但是一般情况下,建议不改变默认安装选项,以避免导致软件安装时出现问题。
4.安装结束后进行卸载:在某些情况下,需要卸载一些软件,这时需要进行彻底卸载,删除软件的所有残留文件和注册表信息,以免影响电脑的性能和稳定性。
- 1、下载文档前请自行甄别文档内容的完整性,平台不提供额外的编辑、内容补充、找答案等附加服务。
- 2、"仅部分预览"的文档,不可在线预览部分如存在完整性等问题,可反馈申请退款(可完整预览的文档不适用该条件!)。
- 3、如文档侵犯您的权益,请联系客服反馈,我们会尽快为您处理(人工客服工作时间:9:00-18:30)。
软件安装说明
安装准备
首先将安装光盘放入到光驱中,启动WINDOWS的资源管理器并点击光盘驱动器,显示光盘中文件列表,见图1-1所示。
图1-1
点击光盘中的子目录[中国版BPA程序]在右侧窗体中显示安装程序,用鼠标双击SETUP.EXE可执行程序,开始执行过程。
安装过程
安装执行过程中的所有界面如下:
(1)程序安装界面如图2-1所示,请点击NEXT按钮,执行下一个安装步骤。
图2-1程序安装
(2)软件安装目录选择界面见图2-2所示。
图2-2程序安装
如果默认安装请点击NEXT按钮,安装程序执行下一步。
如果需要修改安装目录,请点击界面上的BROWSE按钮。
界面弹出修改安装目录子窗
体,请按照界面提供的功能确定安装目录并确认无误后,点击OK按钮返回上一个界面,再点击NEXT按钮,安装程序执行下一步。
(3)开始执行安装过程界面,如图2-3所示。
图2-3程序安装
(5)安装过程完成界面,如图2-4所示。
图2-4程序安装
点击FINISH按钮,完成安装过程。
