PF755 技术规格书
PF755常用面板参数
PF755常用面板参数PowerFlex755 常用参数0 -PowerFlex75525、电机铭牌电压(单位V AC)-自整定要严格按照铭牌参数输入26、电机铭牌电流(单位Amps)(Invert Overload IT)27、电机铭牌频率(单位HZ)28、电机铭牌转速(单位RPM)29、电机铭牌功率单位0-“马力” 1-“千瓦” 30、电机铭牌功率31、电机极数35、(Speed control中的Reference 5)电机控制模式(此处选择电机的控制方式)0-感应电机压频比控制1-感应电机无速度传感器矢量控制3-感应电机磁通矢量控制(FVC)4-永磁电机压频比控制5-永磁电机无速度传感器矢量控制6-永磁电机磁通矢量控制7-同步磁阻电机压频比控制8-同步磁阻电机无速度传感器矢量控制70、(Speed control中的Reference 2)自整定(PF755 要在此参数手动进行自整定,需首先严格按照电机铭牌设置参数)0-就绪1-计算2-静态调节3-旋转调节4-惯量调节125、(Speed-Position Feedback)主速度反馈选择0-PF755 137-开环反馈138-模拟器反馈X-相对应的编码器卡反馈(“ X”代表实际选择的编码器卡槽号,可选的编码器卡有“单增量型编码器卡20-750-ENC-1”、“双增量型编码器卡20-750-DENC-1”、“通用型编码器卡20-750-UFB-1”)127、(Speed-Position Feedback)主速度反馈132、(Speed-Position Feedback)辅助速度反馈选择(在位置控制应用时,可选择辅助的速度反馈编码器做为速度给定,此时参数P545 应选择0-PF755 中的134-辅助速率反馈)0-PF755 137-开环反馈138-模拟器反馈X-相对应的编码器卡反馈(“ X”代表实际选择的编码器卡槽号,可选的编码器卡有“单增量型编码器卡20-750-ENC-1”、“双增量型编码器卡20-750-DENC-1”、“通用型编码器卡20-750-UFB-1”)135、(Speed-Position Feedback)电机位置反馈选择(在位置控制应用时,此选项可选择电机位置反馈的编码器)0-PF755 137(Speed-Position Feedback)-开环反馈138(Speed-Position Feedback)-模拟器反馈X-相对应的编码器卡反馈(“ X”代表实际选择的编码器卡槽号,可选的编码器卡有“单增量型编码器卡20-750-ENC-1”、“双增量型编码器卡20-750-DENC-1”、“通用型编码器卡20-750-UFB-1”)155-201、(Torque Control 中的T orque)(MOP Control)(process Control)数字量输入选择(区别于PF70/700 的数字量输入选择是由端子号选择功能,而PF755 数字量输入选择是由功能来选择I/O 选项卡中的端子)300、速度单位0-HZ 1-RPM 301、参数访问级别0-基本1-高级2-专家级(建议改为此项)308、(Speed control中的Reference 2)方向模式0-单极性1-双极性2-反向禁用309、(Torque Control 中的T orque)速度转矩位置模式A(在此参数中选择变频器采取速度调节转矩调节还是位置控制等,可通过数字量输入端子选择功能的切换P181、P182)0-零转矩1-速度调节2-转矩调节3-SLAT 最小值4-SLAT最大值5-和6-Profiler 7-位置点到点8-位置凸轮系统9-位置锁相环10-直接位置控制325、(Control-Logic)自动控制屏蔽码(在自动控制模式下使能或者不使能逻辑控制)326、(Control-Logic)手动命令屏蔽码(在手动控制模式下使能或不使能端口)327、(Control-Logic)手动基准值屏蔽码(在手动模式下使能或不使能速度控制的基准值)370、停车模式A(可由数字量端子做停车模式的切换P185)0-惯性1-斜坡3-直流制动4-直流制动自动关闭5-电流限制值6-快速制动520、(Speed control中的Reference 2)最大正向速度522、(Speed control中的Reference 2)最小正向速度535、537、(Speed control中的Reference 4)加速时间1、减速时间1539、(Speed control中的Reference 4)点动加减速时间540-541、(Speed control中的Reference 4) S 曲线加速和减速545、(Speed control中的Reference 1)速度基准值A 选择零速度0-PF755 546、(Speed control中的Reference 1)速度基准值A 设置点556-557、(Speed control中的Reference 2)点动速度给定571-577、(Speed control中的Reference 1)预置速度1-7、871-876、对应端口基准值877-878、端口13 以太网基准值端口14DeviceLogix 基准值)X-I/O 选项卡(“ X”取决于I/O 选项卡的位置50、模拟量输入0 60、模拟量输入1)675、(Torque Control-Reference Scale & Trim)转矩基准值 A 选择0-PF755676、(T orque Control-Reference Scale & Trim)转矩基准值A 设置点X-I/O 选项卡(“ X”取决于I/O 选项卡的位置50、模拟量输入0 60、模拟量输入1)731、(Position-Control Homing)归位控制(选中位4“位置重定义”可是P777-PTP 反馈归零)765、(Position-Control Reference)直接位置基准值选择771、(Position-Control Reference)点到点位置控制模式0-绝对值1-索引3-立即895-912、DataLink数据输入输出(选用20-COMM Carrier 配相关通讯适配器DataLink的通讯方式的8 数据输入8 数据输出,而不是内置EtherNetDataLink中16 个数据输入16 个数据输出)13 -EtherNet/IP 36、BootP(0、不使能1、使能)38-41、IP 地址(192.168.1.×××为默认,主板上的拨码只为IP 地址P41的百位、十位、个位,改动后要使变频器重新上电有效)42-45、网关14 -DeviceLogix 53、DeviceLogix操作(0、启用逻辑1、禁用逻辑2、重置程序3、保存程序4、加载程序5、已禁用逻辑6、已启用逻辑)。
PowerFlex 755 驱动器软件版本2.006 发行说明书

Release NotesPowerFlex® 755 Drives (revision 2.006)These release notes correspond to major revision 2, minor revision 6 offirmware for PowerFlex® 755 drives.Introduction The following information is included in this document:Determining Firmware Revision Level This section describes procedures to determine the firmware revision of your PowerFlex 755 drive.Using the Drive LCD HIM1.Access the Status screen, which is displayed on HIM power up. Figure 1 Status ScreenFor information about:See page: Determining Firmware Revision Level1Using the Drive LCD HIM1Using DriveExplorer Lite/Full2Using DriveExecutive3Firmware Flashing3Installing the Flash Kit4Using DriveExplorer Lite/Full to Flash Update4Using DriveExecutive to Flash Update5Using ControlFLASH to Flash Update7Using HyperTerminal to Flash Update9 Enhancements14Corrected Anomalies14Restrictions16Rockwell Automation Support16Host Drive480V 2.1A20G...D2P12PowerFlex® 755 Drives (revision 2.006)e the or key to scroll to Port 00 for the Host Drive.3.4.5.Device Version .6.Figure 2 Device Version Information ScreenUsing DriveExplorer Lite/FullImportant:You need DriveExplorer version 6.01 or later to interfacewith the PowerFlex 755 drive. To obtain the latest version,visit the Allen-Bradley Web Updates site located at/support/abdrives/webupdate .unch DriveExplorer and go online with the PowerFlex 755 drive. To connect to the drive, use a 1203-USB converter, a 1203-SSS converter, or an EtherNet/IP network connection.2.In the Devices hardware view, select the PowerFlex 755 drive.Once selected, information regarding the PowerFlex 755 drive is shownin the right panel including the current firmware revision number.PowerFlex 755 480V 2.1A Product Revision 2.003Product Serial Number SN –Main Control Board FW Revision 2.003APowerFlex® 755 Drives (revision 2.006)3Using DriveExecutiveImportant:You need DriveExecutive version 5.01 or later to interface with the PowerFlex 755 drive. To obtain the latest version, visit the Allen-Bradley Web Updates site located at /support/abdrives/webupdate unch DriveExecutive and go online with the PowerFlex 755 drive. To connect to the drive, use a 1203-USB converter, a 1203-SSS converter, or an EtherNet/IP network connection.2.In the Drives hardware view, select the PowerFlex 755 drive ( in Figure 3on page 3).3.Click the information icon ( in Figure 3) to display the drive’s Properties dialog box.In the Properties dialog box the “Revision:” field ( in Figure 3) will show the drive’s current firmware revision number.Figure 3 Accessing the PowerFlex 755 Drive Firmware Revision Number Firmware Flashing This section describes procedures to flash upgrade your drive firmware.Flash kits for drives are provided on the Allen-Bradley Web Updates site located at /support/abdrives/webupdate .Flashing can be performed using a 1203-USB or 1203-SSS converter. For information on connecting either converter to your drive, refer to the 1203-USB USB Converter User Manual, publication DRIVES-UM001 or the 1203-SSS Smart Self-powered Serial Converter User Manual, publication 20COMM-UM001.4PowerFlex® 755 Drives (revision 2.006)Installing the Flash Kit1.Install the flash kit utility from the Allen-Bradley Web Updates site for the PowerFlex 755 drive, which includes the latest version of theControlFLASH utility and deploys firmware files for usingHyperTerminal on your computer.2.You are now ready to use DriveExplorer, DriveExecutive,ControlFLASH or HyperTerminal to update the drive. Refer to the respective section below and follow the instructions.Using DriveExplorer Lite/Full to Flash Update1.With the Flash Kit installed (see Installing the Flash Kit ), launchDriveExecutive and go online (via a 1203-USB or 1203-SSS converter) with the PowerFlex 755 drive.2.In the Devices hardware view, select the PowerFlex 755 drive ( in Figure 4).3.Click the information icon ( in Figure 4) to display the drive’s Properties dialog box.4.In the Properties dialog box, click the Component Details tab ( in Figure 4).Figure 4 Accessing the Component Details Tab of the Properties Dialog Box 5.With the Main Control Board selected, click Flash Update .Important:Flash updating the device firmware may cause the device toload defaults. It is recommended that you save the setting toyour PC before proceeding.PowerFlex® 755 Drives (revision 2.006)5 6.From the list of available updates, select “v2.004.xxx” and click Next >.7.Follow the remaining prompts until the flash update procedurecompletes and displays the new firmware revision.Using DriveExecutive to Flash Update1.With the Flash Kit installed (see Installing the Flash Kit), launchDriveExecutive and go online (via a 1203-USB or 1203-SSS converter) with the PowerFlex 755 drive.2.In the Drives hardware view, select the PowerFlex 755 drive ( inFigure 3on page3).3.Click the information icon ( in Figure 3) to display the drive’sProperties dialog box.4.In the Properties dialog box, click the Component Details tab ( inFigure 3).5.With the PowerFlex 755 drive selected, click Flash Update.6PowerFlex® 755 Drives (revision 2.006)6.From the list of available devices, select the PowerFlex 755 drive andclick Next >.Important:Flash updating the device firmware may cause the device toload defaults. It is recommended that you save the setting toyour PC before proceeding.7.From the list of available updates, select “v2.004.xxx” and click Next >.8.Follow the remaining screen prompts until the flash update procedurecompletes and displays the new firmware revision.PowerFlex® 755 Drives (revision 2.006)7Using ControlFLASH to Flash Update1.With the Flash Kit installed (see Installing the Flash Kit on page4),launch ControlFLASH by selecting Start > (All) Programs > Flash Programming Tools > ControlFLASH.2.On the ControlFLASH Welcome screen, click Next >.3.The Catalog Number dialog box appears. From the list, choose thecommunication device you will use to update the PowerFlex 755 drive.In the figure below, the embedded EtherNet device is selected.Once the appropriate communication device is selected, click Next >.8PowerFlex® 755 Drives (revision 2.006)4.Now that the correct communication device has been selected, you mustselect which device is being updated. With the Select the PowerFlex…dialog box displayed, follow these steps.a.Expand the hardware view for the communication path you are using( in Figure 5).b.Select the drive icon that represents the PowerFlex 755 drive you areupdating ( in Figure 5).c.Click OK ( in Figure 5).Figure 5 Selecting the Correct Drive to Flash5.In the Multiple Assemblies Found display box, select“Port x-PowerFlex 755” from the list and click OK .PowerFlex® 755 Drives (revision 2.006)9 6.In the Firmware Revision dialog box, select “v2.004…” from the list ofavailable updates and click Next >.7.Follow the remaining prompts until the flash procedure completes anddisplays the new firmware revision.Using HyperTerminal to Flash UpdateImportant:The HyperTerminal process takes at least one hour tocomplete.1.With the Flash Kit installed (see Installing the Flash Kit on page4),access and launch HyperTerminal as shown below.10PowerFlex® 755 Drives (revision 2.006)2.A New Connection dialog box appears.a.Enter the connection device name in the Name field or select an iconfrom the library.b.Click OK once you have finished.3.A Connect To dialog box appears,e the “Connect using:” drop-down menu to select the appropriateconnection device.b.Click OK once you have finished.PowerFlex® 755 Drives (revision 2.006)114.A Properties dialog box will appear for the selected connection device.e any of the drop-down menus to change the various port settings.b.Click OK once you have finished.5.After you click OK, you will get a blank screen.Press Enter on your computer keyboard so the following test screen appears.6.From the Main Menu, select the flash upgrade ( in Figure 6) bypressing the number 3 key on your computer keyboard.7.Additonal text appears. From the Flash Upgrade menu, select thePowerFlex 775 drive ( in Figure 6) by pressing the number 0 key on your computer keyboard.8.Additonal text appears. After reading the conditions, select Yes ( inFigure 6) to proceed by pressing the letter Y key on your computerkeyboard.12PowerFlex® 755 Drives (revision 2.006)Figure 6 HyperTerminal Test Screen DialogueThe terminal program will start displaying the letter “C”. This signals theXMODEM protocol that the download may proceed.Important:You have one minute to complete steps 9…14 orHyperTerminal will return to step 5, where you must repeatsteps 5…8.TIP: To cancel the flash update at any time, press CTRL-X .9.Select Transfer > Send File to display the Send File dialog box.10.Click Browse and navigate to one of the following locations:•For PowerFlex 755 drive frames 2…7, go toC: > Program Files > ControlFLASH > 0001 > 0086 > 0890•For PowerFlex 755 drive frames 8 and larger, go toC: > Program Files > ControlFLASH > 0001 > 0086 > 0C90PowerFlex® 755 Drives (revision 2.006)13 11.Search within the appropriate subfolder until the“PF755_LP_App_v2_004_xxx.dpi” file appears in the Select File to Send list.12.With the file name highlighted, click Open so it appears in the Filenamedata field in the Send File dialog box.13.In the Protocol box, select “Xmodem.”14.Click Send.A dialog box appears and reports the update progress, which takesabout one hour for HyperTerminal to complete. When it is complete, the message “Flash Complete” appears.15.Press any key to continue.16.Press the Enter key to return to the main menu.14PowerFlex® 755 Drives (revision 2.006)Enhancements There are no new enhancements in this firmware revision.Corrected Anomalies This section describes the anomalies corrected in this revision.Communications Losses with DriveExecutive and EtherNet/IPWhen a drive was controlled over an EtherNet/IP network, using theembedded EtherNet/IP, port and a connection from DriveExecutive wasmade to the drive communication faults could occur. These communicationfaults could break the connection between DriveExecutive and the drive orbetween the controller and the drive. This anomaly would occur undercertain conditions and with certain configurations.DPI Port LockupWhen a Human Interface Module (HIM) was disconnected and reconnectedrepeatedly in a short period of time, the drive would experience a HIM Port0 error. This would make the HIM port non-functional.Fault Restart DisplayWhen executing an automatic restart after a fault, the drive would notcorrectly display the count down to the restart properly. It would correctlydisplay the tens digit, but it would not display the ones digit.The following table illustrates an example.Time Remaining (seconds)1211109876543210 How it should display countdown1211109876543210 How it did display countdown1_1_1_____________________Non Volatile Storage (NVS)Executing the homing function too frequently or changing certain parametervalues too frequently would cause the drive to stop operating (due to anF918-Control Task Overload, F919-System Task Overload or F920-5 msecTask Overload fault). The Human Interface Module (HIM) would display“Port 0 Comm Loss.” Recovery from this condition required cycling poweron the drive. After power was cycled, the drive would report a F101-PwrDnNVS Blank, F103-PwrDn NVS Incomp or F117-PwrDn NVS Chksm fault,and drive parameter values would be set to their default values.This occurred because the drive was attempting to write to NVS too quickly,and the requests for NVS writes were over-running the buffer for NVSwrites.The drive would attempt to write to NVS when executing the homingfunction. It would also write to NVS when certain parameters in the SpeedRegulator, Inertia Compensation and (Position) Torque Boost parametergroups were modified. Controlling these parameters via datalink couldcreate a situation where attempts to write to NVS would occur toofrequently.PowerFlex® 755 Drives (revision 2.006)15Option Card Version DisplayDisplay of firmware version for option modules on the Human Interface Module (HIM) or in configuration software (DriveExplorer, DriveExecutive or RSLogix 5000) would be incorrect.Port Loss Due to Lost Client Server MessageUnder certain conditions, a certain combination of DPI messages would lock up a DPI port.Position Feedback ErrorWhen using position control, the value of parameter 857 [Psn Fdbk] could be in error from the actual machine position by one encoder count. This could cause a final position error in your system.Position Torque Boost Coordinate OrderingThe drive would accept Position Torque Boost coordinates out of order. The values for parameters 1520 [PsnTrqBst Ps X1], 1521 [PsnTrqBst Ps X2], 1522 [PsnTrqBst Ps X3], 1523 [PsnTrqBst Ps X4] and 1524 [PsnTrqBst Ps X5] must be in ascending order. The older firmware revision would accept them if they were not in ascending order.Pump JackThe time interval used for calculations of the “virtual pump position” changed from 2 mS to 2.048 mS, which is the actual task interrupt time for the calculation.Sleep Wake ModeIf there was a Sleep Cfg alarm caused by the sleep level being higher than the wake level and the condition was corrected while the other permissives were present, the control would require one of the permissives to be reset for the drive to start.With the new firmware, permissives need not be reset for the drive to start.Interpolator Output UnstableWhen the drive was in Integrated Motion on EtherNet/IP (CIP Motion) mode and in a position control configuration, the output of the Velocity Interpolator would oscillate. This would cause poor performance in some position control applications that use Integrated Motion on EtherNet/IP (CIP Motion).Position Feedback RolloverWhen the drive was in Integrated Motion on EtherNet/IP (CIP Motion) mode and in a position control configuration, there could be a spike in torque output when the position feedback count rolled over.Publication 750-RN010B-EN-E – May 2012Supersedes Publication 750-RN010A-EN-E – January 2011Copyright © 2012 Rockwell Automation, Inc. All rights reserved. Printed in USA.U.S.Allen-BradleyDrivesTechnicalSupport-Tel:(1)262.512.8176,Fax:(1)262.512.2222,Email:*****************,Online:/support/abdrives Corporate HeadquartersRockwell Automation, 777 East Wisconsin Avenue, Suite 1400, Milwaukee, WI, 53202-5302 USA, Tel: (1) 414.212.5200, Fax: (1) 414.212.5201Headquarters for Allen-Bradley Products, Rockwell Software Products and Global Manufacturing SolutionsAmericas: Rockwell Automation, 1201 South Second Street, Milwaukee, WI 53204-2496 USA, Tel: (1) 414.382.2000, Fax: (1) 414.382.4444Europe/Middle East/Africa: Rockwell Automation SA/NV, Vorstlaan/Boulevard du Souverain 36, 1170 Brussels, Belgium, Tel: (32) 2 663 0600, Fax: (32) 2 663 0640Asia Pacific: Rockwell Automation, 27/F Citicorp Centre, 18 Whitfield Road, Causeway Bay, Hong Kong, Tel: (852) 2887 4788, Fax: (852) 2508 1846Headquarters for Dodge and Reliance Electric ProductsAmericas: Rockwell Automation, 6040 Ponders Court, Greenville, SC 29615-4617 USA, Tel: (1) 864.297.4800, Fax: (1) 864.281.2433Europe/Middle East/Africa: Rockwell Automation, Brühlstraße 22, D-74834 Elztal-Dallau, Germany, Tel: (49) 6261 9410, Fax: (49) 6261 17741Asia Pacific: Rockwell Automation, 55 Newton Road, #11-01/02 Revenue House, Singapore 307987, Tel: (65) 6356-9077, Fax: (65) 6356-9011Restrictions With this firmware revision, the drive’s embedded EtherNet/IP port requiresthe EtherNet/IP scanner to use a compatible method of specifying Qualityof Service (QoS). The following table details the compatible products andfirmware revisions.Rockwell AutomationSupport To assist you, Rockwell Automation provides technical information on the web. At /support , you can find technicalmanuals, a knowledge base of Frequently Asked Questions (FAQs),technical and application notes, sample code and links to software servicepacks, and a MySupport feature you can customize to best use these tools.If you experience a problem, please review product documentation. Forfurther help, contact a Customer Support representative:TechConnect Support programs are available for an additional level oftechnical phone support for installation, configuration, and troubleshooting.For more information, contact your local distributor or Rockwell Automationrepresentative, or visit /support .ProductCat. patible Rev. No.Armor Block single port1732E-xxx Update not available ArmorPoint adapter1738-AENT Rev. 3.001Block I/O1791ES-xxx Rev. 1.007CompactLogix1768-ENBT Rev. 2.0011769-L2x /L3x Rev. 17.03ControlLogix1756-ENBT Rev. 4.0051756-EN2T (F) (XT)No update needed DriveLogix embedded EtherNet port5730Rev. 3.004Flex adapter1794-AENT Rev. 4.1FlexLogix1788-ENBT Rev. 2.004Kinetix ServosNo update needed Point adapter1734-AENT Rev. 3.001SoftLogix I/O messaging No update neededUnited States(1) 262.512.8176 • Monday – Friday, 7am – 6pm CST Outside United States Please contact your local Rockwell Automation representative for anytechnical support issues.。
powerflex 755 选型手册
7
IP00
新型节能紧凑型PF750系列变频调速装置选型手册
·04·
380-400V AC,三相交流输入,变频器内置工业以太网接口、无制动单元、不含操作面板
8…10
IP20, NEMA/UL䅸䆕, 800 mm (31.5 in.) ⏅, ᷛޚᶰԧ买㡆 (RAL 7032) IP20, NEMA/UL䅸䆕, 2500 MCC ᶰԧ w/MCC ↡㒓, 800 mm (31.5 in.) ⏅, ᷛޚᶰԧ买㡆 (RAL 7032) IP20, NEMA/UL䅸䆕, 2500 MCCᶰԧ,w/MCC ↡㒓, 800 mm (31.5 in.) ⏅,
8…10 8…10 8…10
IP54, NEMA Type 12,
Y
2500 MCC ᶰԧ w/MCC ↡㒓, 800 mm (31.5 in.) ⏅,
8…10
T
IP00, ULᓔᬒᓣˈϡࠊ఼
8…10
§ Ḛᶊ 6…7⊩݄ᅝ㺙㒘ӊৃҹ䕀ᤶЎҷⷕ N偅ࡼ఼䗝乍ˈ NEMA/UL䅸䆕ˈ䰆ᡸㄝ㑻IP65
910
910
500
1K0
1040
560
–––
1K1
1090
630
1K2
1175
710
9
9
1K4
1465
800
1K5
1480
850
1K6
1590
900
2K1
2150
1250 10
10
§ Ḛᶊ 6…7⊩݄ᅝ㺙㒘ӊৃҹ䕀ᤶЎҷⷕ N偅ࡼ఼䗝乍ˈ NEMA/UL䅸䆕ˈ䰆ᡸㄝ㑻IP65 ࣙ䰘ࡴ䗝乍(21G).
4
··041··
新型节能紧凑型PF750系列变频调速装置选型手册
PF755变频器选型手册_2010-2_Rev01
变频器额定 功率(KW)
7.5
变频器额定输 出电流(A)
15.4
主回路开关电流 范围(A)
20-60
11
22
28-80
15
30
38-100
18.5
37
47-110
22
43
54-120
30
60
≥31.6
11
22
28-80
30-45
1321-3R25-B
2
≥22.6
15
30
38-100
40-60
1321-3R35-B
3
≥31.6
18.5
37
47-110
45-80
1321-3R35-B
3
≥31.6
22
43
54-120
55-90
1321-3R45-B
3
≥16.6
30
60
75-180
75-125
75 90 110 132 160 200 250
变频器额定输 出电流(A)
140 170 205 260 302 367 456
主回路开关电流 范围(A) 175-400 213-500 257-600 325-700 378-900 459-1100 570-1300
快熔电流范围(A)
175-300 225-375 275-450 325-575 400-675 475-800 600-1000
1321-3R25-B
15
30
38-100
40-60
1321-3R35-B
18.5
37
47-110
45-80
1321-3R35-B
PowerFlex 755TM IP00 EMC C2 Filter 安装说明书
Installation InstructionsOriginal InstructionsPowerFlex 755TM IP00 EMC C2 Filter Unpacking and Lifting InstructionsCatalog Number 20-750-MEMCC2-F8910Before You BeginComplete these tasks before you unpack and lift an EMC C2 filter out of the shipping container.•Prepare all equipment and hardware that is used to lift the module. A hoist, straps, and J-hooks with a lockable clasp capable of supporting the EMC C2 filter weight are recommended. See EMC C2 Filter W eight on page 2.•Install the required components from the EMC C2 filter input bus bars kit (catalog number 20-750-MEMCC2-IPBB) in the enclosure before you install the EMC C2 filter. See the PowerFlex 755TM IP00 Open Type Kits Installation Instructions, publication 750-IN101, for detailed instructions.Unpack and Inspect the FilterUpon delivery, follow these steps to unpack and inspect the filter.1.Inspect the shipping container for any damage that occurred during transit.2.Remove the cover of the shipping container.3.Remove the protective packing materials.4.Inspect the filter for any damage. Verify that the insulation on the filter bus bars is not cracked or damaged.5.If damage to the filter exists, contact the carrier that delivered the shipment and your Rockwell Automation sales representative to schedule an inspection.6.Retain all product packaging for review by the carrier.IMPORTANTThe EMC C2 filter is used for PowerFlex 755T product installations that require compliance with CE EN61800-3 Category C2 for conducted emissions only. See the PowerFlex® 755TM IP00 Open Type Kits Installation Instructions, publication 750-IN101, for details.IMPORTANTThis kit includes three ferrite cores, which are installed on wire harnesses in the AC precharge system. See the PowerFlex 755TM IP00 Open Type Kits Installation Instructions, publication 750-IN101, for details.This kit includes the hardware for connecting the EMC C2 filter to the required EMC C2 bus bar kits, which are ordered and shipped separately.IMPORTANTDelivery of equipment from Rockwell Automation to the carrier is considered delivery to the buyer. The carrier becomes liable for any damage that occurs during transit. It is the responsibility of the buyer to notify the proper party if damage is found. The buyer can forfeit any right to recovery for loss or damages by failing to comply with these steps.2Rockwell Automation Publication 750-IN109A-EN-P - March 2018PowerFlex 755TM IP00 EMC C2 Filter Unpacking and Lifting InstructionsRead the Lifting PrecautionsRead these precautions before attempting to lift the EMC C2 filter.EMC C2 Filter WeightAll lifting equipment must support the approximate EMC C2 filter weight of 31.75 kg (70 lb).Lift the EMC C2 FilterFollow theses steps to lift the filter.1.Remove the packing materials and hardware that secures the filter to the pallet.2.Verify that you have completed the tasks in the Before Y ou Begin section on page 1.3.Insert and secure the appropriately rated lifting hardware in a designated lifting hole on both sides of the filter chassis (as identified in theillustrations). There are three sets of lifting holes that can be used; the holes are opposite each other on the two metal flanges.ATTENTION: All equipment and hardware that is used to lift the filter must be properly sized and rated to lift and hold the weight of the filter safely. To guard against possible personal injury or equipment damage:•Inspect all hardware for proper attachment before the filter is lifted.•Do not allow any part of the filter or lift equipment to contact electrically charged conductors or components.•Do not subject the filter to high rates of acceleration or deceleration during a lift or transportation.•Do not allow personnel or their limbs directly beneath the filter during a lift.ATTENTION: To guard against equipment damage, verify that the hardware is securely connected to the correct lifting holes in the metal flanges as shown. Do NOT use the bus bars to lift the filter.Rockwell Automation Publication 750-IN109A-EN-P - March 20183PowerFlex 755TM IP00 EMC C2 Filter Unpacking and Lifting Instructions4.Slowly lift the filter to an upright position and carefully transport the module to the installation location.5.Continue with the EMC C2 filter installation instructions that are contained in the PowerFlex 755TM IP00 Open Type Kits Installation Instructions, publication 750-IN101.Additional ResourcesThese documents contain additional information concerning related products from Rockwell Automation.Y ou can view or download publications at /global/literature-library/overview.page . T o order paper copies of technical documentation, contact your local Allen-Bradley distributor or Rockwell Automation sales representative.IMPORTANTWhen lifting the filter by the outer-most holes on the metal flange and the filter approaches the full upright (vertical) position, the weight can shift and cause the filter to swing unexpectedly. When using the outer-most lifting holes, control the movement of the filter as it is lifted from the shipping container.ResourceDescriptionPowerFlex 750-Series Products with TotalFORCE® Control Installation Instructions, publication 750-IN100Provides procedures for the mechanical and electrical installation of PowerFlex 750-Series products with TotalFORCE control. This manual includes the basic steps to transport, position, and join the product enclosures, to make internal electrical connections, to connect power and the motor, and to wire basic I/O.PowerFlex 755TM IP00 Open Type Kits Installation Instructions, publication 750-IN101Provides instructions to install IP00 Open Type kits in user-supplied enclosures.PowerFlex 755TM IP00 Open Type Kits Technical Data, publication 750-TD101Provides detailed information on:•Kit selection•Kit ratings and specifications •Option specificationsPowerFlex 750-Series Products with TotalFORCE Control Hardware Service Manual, publication 750-TG100Provides detailed information on:•Preventive maintenance •Component testing•Hardware replacement proceduresIndustrial Automation Wiring and Grounding Guidelines, publication 1770-4.1 Provides general guidelines for installing a Rockwell Automation industrial system.Product Certifications website,/global/certification/overview.pageProvides declarations of conformity, certificates, and other certification details.Allen-Bradley, PowerFlex, Rockwell Automation, Rockwell Software, and TotalFORCE are trademarks of Rockwell Automation, Inc.Trademarks not belonging to Rockwell Automation are property of their respective companies.Rockwell Otomasyon Ticaret A.Ş., Kar Plaza İş Merkezi E Blok Kat:6 34752 İçerenköy, İstanbul, T el: +90 (216) 5698400Rockwell Automation maintains current product environmental information on its website at/rockwellautomation/about-us/sustainability-ethics/product-environmental-compliance.page.Publication 750-IN109A-EN-P - March 2018Copyright © 2018 Rockwell Automation, Inc. All rights reserved. Printed in the U.S.A.Rockwell Automation SupportUse the following resources to access support information.Documentation FeedbackY our comments will help us serve your documentation needs better. If you have any suggestions on how to improve this document, complete the How Are W e Doing? form at /idc/groups/literature/documents/du/ra-du002_-en-e.pdf .Technical Support CenterKnowledgebase Articles, How-to Videos, FAQs, Chat, User Forums, and Product Notification Updates.https:///Local Technical Support Phone Numbers Locate the phone number for your country./global/support/get-support-now.page Direct Dial Codes Find the Direct Dial Code for your product. Use the code to route your call directly to a technical support engineer./global/support/direct-dial.page Literature LibraryInstallation Instructions, Manuals, Brochures, and Technical Data./global/literature-library/overview.page Product Compatibility and Download Center (PCDC)Get help determining how products interact, check features and capabilities, and find associated firmware./global/support/pcdc.page。
PowerFlex755变频器 操作说明
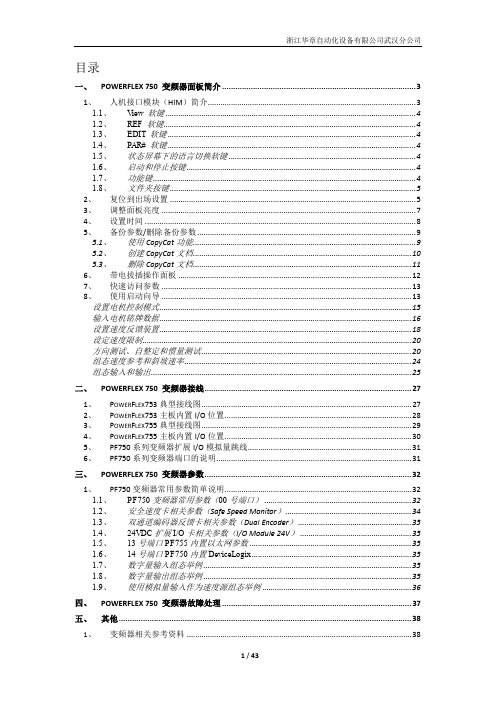
目录一、POWERFLEX 750 变频器面板简介 (3)1、人机接口模块(HIM)简介 (3)1.1、View 软键 (4)1.2、REF 软键 (4)1.3、EDIT 软键 (4)1.4、P AR# 软键 (4)1.5、状态屏幕下的语言切换软键 (4)1.6、启动和停止按键 (4)1.7、功能键 (4)1.8、文件夹按键 (5)2、复位到出场设置 (5)3、调整面板亮度 (7)4、设置时间 (8)5、备份参数/删除备份参数 (9)5.1、使用CopyCat功能 (9)5.2、创建CopyCat文档 (10)5.3、删除CopyCat文档 (11)6、带电拔插操作面板 (12)7、快速访问参数 (13)8、使用启动向导 (13)设置电机控制模式 (15)输入电机铭牌数据 (16)设置速度反馈装置 (18)设定速度限制 (20)方向测试、自整定和惯量测试 (20)组态速度参考和斜坡速率 (24)组态输入和输出 (25)二、POWERFLEX 750 变频器接线 (27)1、P OWER F LEX753典型接线图 (27)2、P OWER F LEX753主板内置I/O位置 (28)3、P OWER F LEX755典型接线图 (29)4、P OWER F LEX755主板内置I/O位置 (30)5、PF750系列变频器扩展I/O模拟量跳线 (31)6、PF750系列变频器端口的说明 (31)三、POWERFLEX 750 变频器参数 (32)1、PF750变频器常用参数简单说明 (32)1.1、PF750变频器常用参数(00号端口) (32)1.2、安全速度卡相关参数(Safe Speed Monitor) (34)1.3、双通道编码器反馈卡相关参数(Dual Encoder) (35)1.4、24VDC扩展I/O卡相关参数(I/O Module 24V) (35)1.5、13号端口PF755内置以太网参数 (35)1.6、14号端口PF750内置DeviceLogix (35)1.7、数字量输入组态举例 (35)1.8、数字量输出组态举例 (35)1.9、使用模拟量输入作为速度源组态举例 (36)四、POWERFLEX 750 变频器故障处理 (37)五、其他 (38)1、变频器相关参考资料 (38)附件一:POWERFLEX755变频器和POWERFLEX700变频器比较 (39)1.P OWER F LEX755和P OWER F LEX700电气性能比较 (39)2.P OWER F LEX755和P OWER F LEX700功能比较 (40)3.P OWER F LEX755和P OWER F LEX700外形尺寸比较 (40)4.P OWER F LEX755和P OWER F LEX700接线图的比较 (41)5.P OWER F LEX755和P OWER F LEX700参数的比较 (43)一、PowerFlex 750 变频器面板简介1、人机接口模块(HIM)简介下图显示了20-HIM-A6面板的按键。
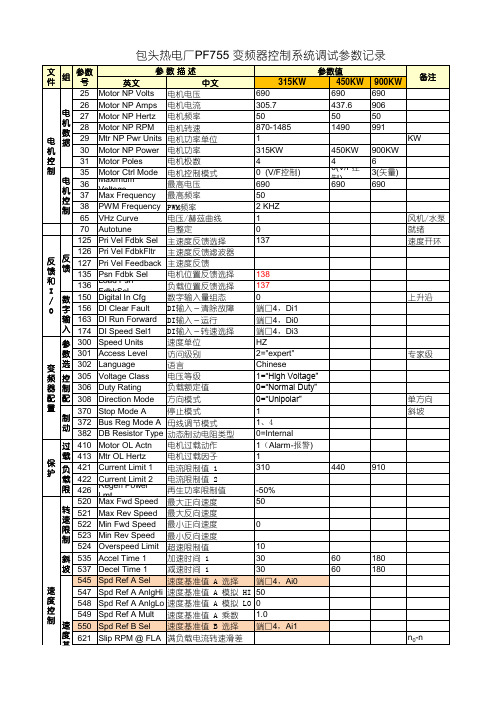
PF755参数表
Speed Reg BW 速度调节器带宽 20-80 Speed Reg Kp 20 速度调节器比例增益 Speed Reg Ki 50 速度调节器积分增益 Pos Torque Limit 正转矩极限 100 Neg Torque Limit 反转矩极限 -100 Start Inhibits 启动禁止 Drive Status 1 变频运行状态 RO IGBT Temp C IGBT 摄氏温度 RO Drive Temp C 变频器摄氏温度 RO At Limit Status 处于限制状态 RO Last Fault Code 最后故障代码 RO Fault Status A 故障状态 A RO Alarm Status A 故障状态 B RO RO0 Sel 端口0,P935bit7=1 RO0 选择 RO1 Sel 端口0,P935bit16=1 RO1 选择 Anlg In Type bit0=0/BIT1=1 模拟量输入类型 Anlg In0 Hi 模拟量输入0上限 10 Anlg In0 Lo 模拟量输入0下限 0 Anlg In0 Lss Actn 模拟量输入0丢失操作 1 Anlg In1 Hi 模拟量输入1上限 24 Anlg In1 Lo 模拟量输入1下限 4 Anlg In1 Lss Actn 模拟量输入1丢失操作 1 Anlg Out Type bit0=1/bit1=1 模拟量输出类型 Anlg Out0 Sel 模拟量输出 0 选择 端口0,1=频率 Anlg Out0 Stpt 模拟量输出 0 设定点 Anlg Out0 Data Hi 模拟量输出 0 数据上限 50 Anlg Out0 Data Lo模拟量输出 0 数据下限 0 Anlg Out0 Hi 20 模拟量输出 0 上限 Anlg Out0 Lo 4 模拟量输出 0 下限 Anlg Out1 Sel 模拟量输出 1 选择 端口0,7=电流 Anlg Out1 Stpt 模拟量输出 1 设定点 Anlg Out1 Data 模拟量输出 1 数据 Anlg Out1 Data Hi 模拟量输出 1 数据上限 400 800 Anlg Out1 Data Lo模拟量输出 1 数据下限 0 0 Anlg Out1 Hi 20 20 模拟量输出 1 上限 Anlg Out1 Lo 4 4 模拟量输出 1 下限 DL From Net 01 从网络 01 数据连接 549 DL From Net 02 从网络 02 数据连接 816 DL From Net 03 从网络 03 数据连接 556 DL To Net 01 7 数据连接到网络 01 DL To Net 02 689 数据连接到网络 02 IP Addr Cfg 1 192 IP 地址配置 1 IP Addr Cfg 2 168 IP 地址配置 2 IP Addr Cfg 3 1 IP 地址配置 3 IP Addr Cfg 4 6 IP 地址配置 4
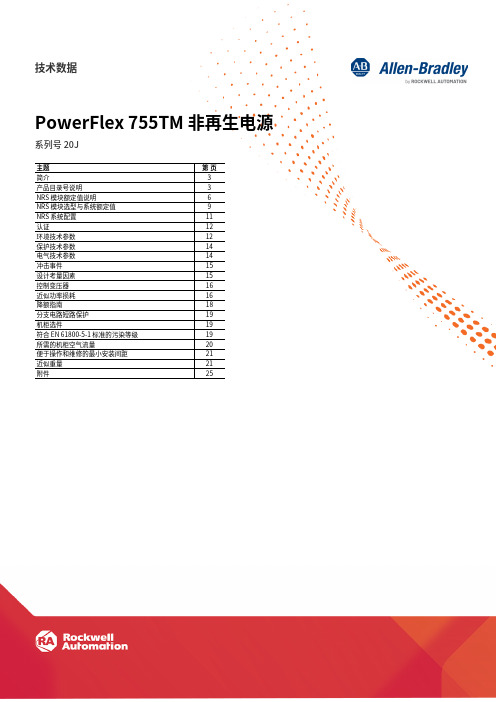
克罗韦尔 PowerFlex 755TM 非再生电源技术 数据表
技术数据PowerFlex 755TM 非再生电源系列号 20J主题第 ⻚简介3产品目录号说明3NRS 模块额定值说明6NRS 模块选型与系统额定值9NRS 系统配置11认证12环境技术参数12保护技术参数14电气技术参数14冲击事件15设计考量因素15控制变压器16近似功率损耗16降额指南18分⽀电路短路保护19机柜选件19符合 EN 61800-5-1 标准的污染等级19所需的机柜空气流量20便于操作和维修的最⼩安装间距21近似重量21附件252罗克⻙尔⾃动化出版物 750-TD103A-ZH-P - 2022年3 月罗克⻙尔⾃动化出版物 750-TD103A-ZH-P - 2022 年3 月3PowerFlex® 755TM 非再生电源 (NRS) 技术可提供精确的公共⺟线系统配置。
该技术融合了多项功能,可帮助优化系统,保持生产率。
PowerFlex 755TM 非再生电源具有如下一系列特性,可帮助⽤⼾最⼤程度提⾼生产率:•PowerFlex 755TM 变频器系统 — 精选一系列配置,可优化系统设计,并降低功耗。
NRS 系统具有设计灵活和安装成本低等优点。
•腐蚀性气体防护 (XT) — PowerFlex 755TM 产品目前均标配腐蚀性气体防护(XT)。
带 XT 的 NRS 产品将敷形涂覆与多项额外设计增强特性相结合,旨在提升在腐蚀性气体工况(例如轮胎和橡胶、废⽔处理、纸浆和纸张以及⾦属⾏业等)下的性能表现。
•NRS 模块推入、拉出式设计 — 使 NRS 系统易于安装和维修。
产品目录号说明本节介绍了基本 NRS 模块功率模块柜的产品目录号。
一个完整版 NRS 系统可以是单个功率模块柜,也可以是配备一个或多个接线柜的并联功率模块柜系统,如果采⽤了背靠背配置,还可以是两个直流电压平衡电源柜。
并联系统中的每个功率模块柜都有各⾃对应的产品目录号。
整个并联系统没有产品目录号。
产品目录号的第 1…7 位标识产品类型和电压等级。
PowerFlex750变频器简介相关资源简单故障
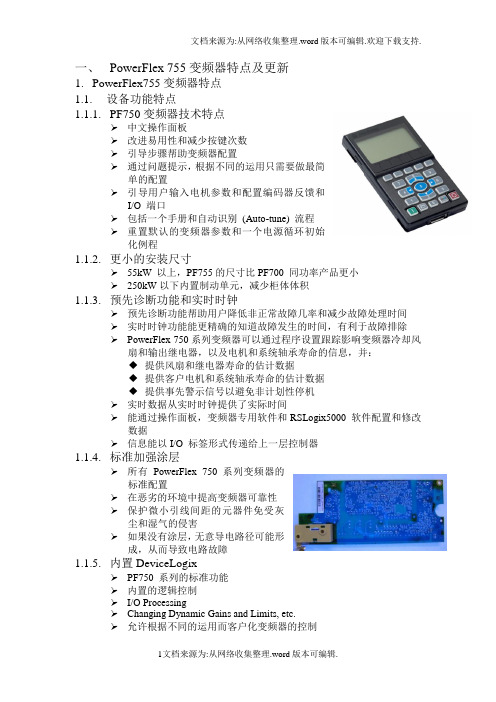
一、PowerFlex 755变频器特点及更新1.PowerFlex755变频器特点1.1.设备功能特点1.1.1.PF750变频器技术特点➢中文操作面板➢改进易用性和减少按键次数➢引导步骤帮助变频器配置➢通过问题提示,根据不同的运用只需要做最简单的配置➢引导用户输入电机参数和配置编码器反馈和I/O 端口➢包括一个手册和自动识别(Auto-tune) 流程➢重置默认的变频器参数和一个电源循环初始化例程1.1.2.更小的安装尺寸➢55kW 以上,PF755的尺寸比PF700 同功率产品更小➢250kW以下内置制动单元,减少柜体体积1.1.3.预先诊断功能和实时时钟➢预先诊断功能帮助用户降低非正常故障几率和减少故障处理时间➢实时时钟功能能更精确的知道故障发生的时间,有利于故障排除➢PowerFlex 750系列变频器可以通过程序设置跟踪影响变频器冷却风扇和输出继电器,以及电机和系统轴承寿命的信息,并:◆提供风扇和继电器寿命的估计数据◆提供客户电机和系统轴承寿命的估计数据◆提供事先警示信号以避免非计划性停机➢实时数据从实时时钟提供了实际时间➢能通过操作面板,变频器专用软件和RSLogix5000 软件配置和修改数据➢信息能以I/O 标签形式传递给上一层控制器1.1.4.标准加强涂层➢所有PowerFlex 750 系列变频器的标准配置➢在恶劣的环境中提高变频器可靠性➢保护微小引线间距的元器件免受灰尘和湿气的侵害➢如果没有涂层,无意导电路径可能形成,从而导致电路故障1.1.5.内置DeviceLogix➢PF750 系列的标准功能➢内置的逻辑控制➢I/O Processing➢Changing Dynamic Gains and Limits, etc.➢允许根据不同的运用而客户化变频器的控制➢单机控制➢更灵活,更广泛的控制➢变频器能自动响应当丢失上位机的通讯➢通过变频器软件工具进行编程◆DriveExplorer v6.02 (and higher)◆DriveTools SP v5.02 (and higher)◆RSLogix 5000 Drive AOPs v3.01(and higher)1.1.6.保护功能➢变频装置具有以下保护:过电流、过电压、欠电压、缺相、变频器过热、变频器过载、电机过载、外部报警输入、通用熔断器熔断保护、逆变器出错、输出短路保护、输出接地、瞬间停电保护等,而且所有参数、保护动作信号和故障信号要求可通过相应接口上传。
PF755参数表

20 -50% 50 -50 0 0 10 2 2 Aux Vel Feedback 50 -50 1.0 速度参考比例与位置参考比例需要一致 = Synchronous speed – Motor NP RPM (P28) Bit1=1 Ramp Disable 20-80 This error signal is the primary input for the Vector control mode speed regulato 20 50 100 -100
385 414 426 520 521 522 523 524 535 537 545 547 548 549 621 635 636 641 645 647 670 671 675 676 721 765 816 817 835 838 839 844 845 871 879 880 882 933 935 942 944 945 951 952 959 4 10 20 106 8 1 4
华章自动化资料
HZE PF755 AC传动控制系统调速器参数记录
额定功率:KW 额定电流:A 额定频率:HZ 额定转速:
日 日 期 期 日期: : : 签名: 签名: 签名: 日期: 签名: 日 期: 签名:
Hale Waihona Puke 编号:分部号及名称:EncoderLess 电机产地: 电机型号:
参数号 参 数 描 述 POWERFLEX 755 25 Motor NP Volts 26 Motor NP FLA 27 Motor NP Hertz 28 Motor NP RPM 29 Mtr NP Pwr Units 30 Motor NP Power 31 Motor Poles 35 Motor Ctrl Mode 36 Maximum Voltage 38 PWM Frequency 43 Flux Up Enable 44 Flux Up Time 70 Autotune 73 IR Voltage Drop 74 Ixo Voltage Drop 75 Flux Current Ref 76 Total Inertia 100 Slip Reg Enable 125 Pri Vel Fdbk Sel 126 Pri Vel FdbkFltr 127 Pri Vel Feedback 131 Active Vel Fdbk 132 Aux Vel Fdbk Sel 133 Aux Vel FdbkFltr 135 Psn Fdbk Sel 136 Load Psn FdbkSel 137 Open Loop Fdbk 150 Digital In Cfg 156 DI Clear Fault 164 DI Run Forward 167 DI Jog 1 Forward 168 DI Jog 1 Reverse 300 Speed Units 301 Access Level 302 Language 305 Voltage Class 306 Duty Rating 308 Direction Mode 309 SpdTrqPsn Mode A 324 Logic Mask 370 Stop Mode A 372 Bus Reg Mode A 382 DB Resistor Type 383 DB Ext Ohms 384 DB Ext Watts
带 OEM 液体冷却框架 6 和 7 的 PowerFlex 755 交流变频器 安装说明说明书

安装说明出版物 750-IN001 补充说明带 OEM 液体冷却框架 6 和 7 的 PowerFlex ®755 交流变频器带 OEM 液体冷却框架 6 和 7 的 PowerFlex 755 交流变频器与标准气冷式PowerFlex 755 框架 6 和 7 交流变频器有很大不同,详细信息如下所示:•散热器用冷却板代替。
•冷却液入口和出口由冷却板进行连接。
•直流电感器中新增了一个热控开关。
带 OEM 液体冷却的 PowerFlex 755 交流变频器主要功能如下:•以 200、300、400 HP (480V) 和 132、200、270 kW (400V) 额定功 率提供 OEM 液体冷却。
•提供与标准气冷式 PowerFlex 750 系列交流变频器相似的 2 kHz PWM输入/输出及过载额定功率(请查阅表 3)。
•提供与标准气冷式 PowerFlex 750 系列交流变频器相同的 UL 508C认证和 CE 认证。
•保持与标准气冷式 PowerFlex 750 系列框架 6 和 7 交流变频器相同 的环境空气和周围空气环境要求。
•对于 IP00、NEMA/UL Type Open 样式可通过使用者安装的法兰 套件变回完整的 NEMA/UL Type 4X/12。
按照这些说明及下列出版物来安装并操作带 OEM 液体冷却框架 6 和 7 的 PowerFlex 755 交流变频器。
参考文献标题出版物可供在线下载, 下载网址:PowerFlex 750 系列交流变频器 安装说明/literaturePowerFlex 750 系列交流变频器 程序设计手册750-PM001PowerFlex 750 系列交流变频器技术资料750-TD001PWM 交流变频器接线与接地指南DRIVES-IN001防止静电损害8000-4.5.22带 OEM 液体冷却框架 6 和 7 的 PowerFlex® 755 交流变频器产品目录说明带 OEM 液体冷却框架 6 和 7 的 PowerFlex® 755 交流变频器3一般注意事项在开始安装变频器之前,请先阅读下面的注意事项。
PF755大体爱惜利用手册

PF755大体利用手册()张庆华目录:1.变频器的型号框架规格2.PF755变频器选型3.运行环境4.熟悉PF755变频器5.变频器主线连接要求6.变频器的接地7.变频器跳线拆除8.8框架变频器的操纵电源9.变频器上电爱惜性故障10.人机界面(HIM)的利用11.变频状态指示灯含义12.PORT 口(端口)的概念13.恢复工厂初始值14.电机自整定15.参数设置16.参数保留17.常见问题变频器的型号框架规格:详见说明书目前变频器框架规格是2-10,功率范围.9框架由2台8框架组成,任意2台同型号的8框架能够组和成9框架变频。
10框架由3台8框架组成,目前不是所有型号8框架的3台都能够组成10框架的变频,具体需要查看说明书。
●PF755变频器选型(详见说明书),常常利用如下37KW及以下选择20G11――――交/直流进线。
框架2-445KW-250KW选择20G14――――直流进线。
框架5-10电压品级:400/690V请参考变频器选型,第7位为C表示400V,第7位为F表示690V。
如20G11NC104 400V,55KW20G14TF415 690V,400KW●运行环境:海拔:小于1000米温度:框架2-7:0-50 °框架8-10:0-40 °大气环境:变频器不得安装在周围大气中含有挥发性或侵蚀性气体、蒸气或粉尘的区域。
湿度:5…95%,无冷凝熟悉PF755变频器上图是典型的PF755外观图,红框内的是变频器的操纵单元(操纵盒),安装了变频器手操器、主板和板卡插槽,PF755变频框架插槽除主板外有4-8号5个插槽可用。
操纵盒是独立与变频器,能够拆卸的。
➢主操纵板(主板)主板是用于改变参数和贮存变频设置参数,同时带1个DI输入点,带以太网接口和以太网IP地址拨码。
主板是能够拆卸的,其中框架2-7的主板和框架8的主板是不一样的,不能够彼此改换。
常常利用可选卡件:➢DeviceNet通信卡:20-750-DNETDeviceNet卡只能够插在4-6槽。
PowerFlex 755 变频器基本编程入门
输入电机铭牌数据
18.在上一个步骤中选择电机控制模式后,可以直接退回到General Startup Main Menu(常规起动主菜单)。现在‘Motor Data(电机数据)’应该被选中。按下软按键‘ENTER’,确定选择。下面的一些步骤会要求您输入快速起动所需的电机铭牌信息。
10.‘START UP(快速起动)’文件夹的第一行条目所列为‘Begin Start Up(开始快速起动)’,而且此条目默认为选中状态。按下位于HIM键盘中心位置的Enter(确认)键 ,确认您的选择。.
11.快速起动例程由一个说明屏幕开始。按下软按键‘ENTER’继续。软按键‘ENTER’位于HIM键盘的最上面一行。
d.接下来,选中0 – PowerFlex 755,点击鼠标右键,然后选择Reset Drive…(复位变频器)
(Drive Executive显示如下)
(对于HIM…选择Port 0,选择DIAGNOSTIC文件夹>>>Reset Device(复位设备))
e.
最后,单击OK复位变频器。此时,通讯会丢失。
For Classroom Use OnlveExplorer或Drive Executive软件的Windows XP计算机
PowerFlex 755培训Demo
关于本动手实验
本次课程为您提供了一次深入探索PowerFlex 755交流变频器的机会。通过本次课程您将学习到:
33.在编码器接口屏幕可以组态所选的编码器。使用软按键‘ENTER’,选择默认的突出显示选项‘Quadrature(正交)’。
PF755变频器重要参数

PF755变频器重要参数PF755变频器主要参数参数号名称设置设定注释25MOTOR NP VOLTS380V自定义电机额定电压。
必须等于电机铭牌上的值26MOTOR NP AMPS205A自定义电机额定电流。
必须等于电机铭牌上的值27MOTOR NP HERTZ50HZ自定义电机额定频率。
必须等于电机铭牌上的值28MOTOR NP RPM990RPM自定义电机额定转速。
必须等于电机铭牌上的值29MTR NP PWR UNITS1=KW自定义电机铭牌功率单元。
就是功率的单位,一般取KW 30MOTOR NP POWER110KW自定义电机额定功率。
必须等于电机铭牌上的值316自定义电机极数。
必须等于电机铭牌上的值35MOTOR CTRL MODE3自定义电机控制模式。
一般起升机构选择3=感应磁场矢量(induction fv),运行机构选择1=感应sv (induction sv)36MAXIMUM VOLTAGE400默认最大电压。
设置变频器将要输出的最大电压,一般默认为400v37MAXIMUM FREQ55HZ自定义最大频率。
设置变频器将要输出的最高频率,一般经验值设置为额定频率的110%38PWM FREQUENCY2KHZ自定义PWM频率。
脉冲宽度调制频率,一般以55KW为界点,大于55KW的电机设置为2KHZ,小于55KW的电机设置为4KHZ40MTR OPTIONS CNFG bit3=0自定义电机可选组态。
其他位为默认,当带上编码器时bit3=0,不带编码器时bit3=143FLUX UP ENABLE MANUAL自定义磁通增强使能。
一般设定为0=手动(manual)44FLUX UP TIME0.5自定义励磁增强时间。
变频器获得满载电机定子磁通所需的时间,一般经验值设定为0.5s,如觉得效果不佳,可适当增加(ABB的这个参数设定为功率x4ms)70AUTOTUNE0自定义自整定(也就是优化)。
PowerFlex 755T 第5、6架架构盒及垃圾盖和地板板套件说明书
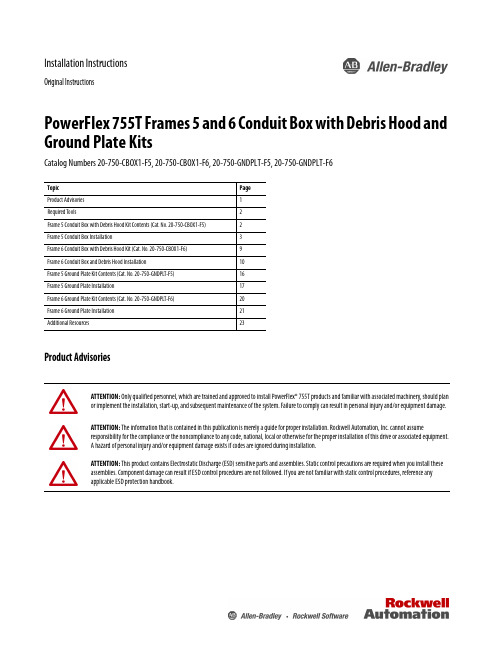
Installation InstructionsOriginal InstructionsPowerFlex 755T Frames 5 and 6 Conduit Box with Debris Hood and Ground Plate KitsCatalog Numbers 20-750-CBOX1-F5, 20-750-CBOX1-F6, 20-750-GNDPLT-F5, 20-750-GNDPLT-F6Product AdvisoriesTopic Page Product Advisories 1Required Tools2Frame 5 Conduit Box with Debris Hood Kit Contents (Cat. No. 20-750-CBOX1-F5)2Frame 5 Conduit Box Installation3Frame 6 Conduit Box with Debris Hood Kit (Cat. No. 20-750-CBOX1-F6)9Frame 6 Conduit Box and Debris Hood Installation10Frame 5 Ground Plate Kit Contents (Cat. No. 20-750-GNDPLT-F5)16Frame 5 Ground Plate Installation17Frame 6 Ground Plate Kit Contents (Cat. No. 20-750-GNDPLT-F6)20Frame 6 Ground Plate Installation 21Additional Resources23ATTENTION: Only qualified personnel, which are trained and approved to install PowerFlex® 755T products and familiar with associated machinery, should plan or implement the installation, start-up, and subsequent maintenance of the system. Failure to comply can result in personal injury and/or equipment damage.ATTENTION: The information that is contained in this publication is merely a guide for proper installation. Rockwell Automation, Inc. cannot assumeresponsibility for the compliance or the noncompliance to any code, national, local or otherwise for the proper installation of this drive or associated equipment. A hazard of personal injury and/or equipment damage exists if codes are ignored during installation.ATTENTION: This product contains Electrostatic Discharge (ESD) sensitive parts and assemblies. Static control precautions are required when you install these assemblies. Component damage can result if ESD control procedures are not followed. If you are not familiar with static control procedures, reference any applicable ESD protection handbook.2Rockwell Automation Publication 750-IN112A-EN-P - July 2019PowerFlex 755T Frames 5 and 6 Conduit Box with Debris Hood and Ground Plate KitsRequired ToolsFrame 5 Conduit Box with Debris Hood Kit Contents (Cat. No. 20-750-CBOX1-F5)The frame 5 conduit box with debris hood kit contains the following components.Tool Description Details Allen (hex) socket wrench 4 mmElectric drill and bits (Bit sizes to meet conduit size requirements)Flat-nose screwdriver 6.4 mm (0.25 in.)Hexagonal socket wrench 11 mm Phillips screwdriver/bit#2Torx, star, or hexalobular screw driver/bit #T20, #25, #30Torque wrench 1...12 N •m (8.8…106 lb •in)Torque wrench6...50 N •m (53…443 lb •in)Item Quantity Description Item Quantity Description11Conduit box bottom plate52M6 x 12 mm torx screws (for conduit box)25M5 x 10 mm slotted-torx screws (for conduit box bottom plate)61Conduit box cover31Conduit box71M6 x 12 mm torx screw (for conduit box cover)44M5 x 10 mm slotted-torx screws (for conduit box)81Debris hood with captive screwsDebris HoodConduit BoxFrame 5 with Conduit Box and Debris Hood Kit InstalledPowerFlex 755T Frames 5 and 6 Conduit Box with Debris Hood and Ground Plate KitsFrame 5 Conduit Box InstallationFollow these steps to install the frame 5 conduit box and debris hood.e the pilot holes in the conduit box bottom plate to drill the required holes for control and input/output power wire conduit fittings.wire conduit fittings.Rockwell Automation Publication 750-IN112A-EN-P - July 20193PowerFlex 755T Frames 5 and 6 Conduit Box with Debris Hood and Ground Plate Kits2.Loosen the four M4 captive screws that secure the cover to the assembly, and remove the cover.4Rockwell Automation Publication 750-IN112A-EN-P - July 2019PowerFlex 755T Frames 5 and 6 Conduit Box with Debris Hood and Ground Plate Kits3.Place the conduit box onto the chassis of the drive, so that the conduit box flanges are located on the inside of the drive chassis.4.Insert and tighten the four M5 x 10 mm slotted-torx screws in the holes on the bottom sides of the chassis to secure the conduit box to thechassis.5.Insert and tighten the two M6 x 12 mm torx screws in the holes on the bottom of the chassis to secure the conduit box to the chassis.Rockwell Automation Publication 750-IN112A-EN-P - July 20195PowerFlex 755T Frames 5 and 6 Conduit Box with Debris Hood and Ground Plate Kits6.Insert and tighten the five M5 x 10 mm slotted-torx screws in the bottom of the conduit box to secure the bottom plate to the conduit box.7.Route the control and power cables through the bottom plate of the conduit box and connect them to the appropriate input and outputpower terminals. See the PowerFlex 750-Series Products with T otalFORCE® Control Installation Instructions, publication 750-IN100, forpower wiring information.6Rockwell Automation Publication 750-IN112A-EN-P - July 2019PowerFlex 755T Frames 5 and 6 Conduit Box with Debris Hood and Ground Plate Kits 8.Insert and tighten the M6 x 12 mm torx screw in the hole on the front of the conduit box to secure the front plate to the conduit box.9.Secure the cover to the chassis as shown in step 2 on page 4.Rockwell Automation Publication 750-IN112A-EN-P - July 20197PowerFlex 755T Frames 5 and 6 Conduit Box with Debris Hood and Ground Plate Kits10.Place the debris hood on the top of the chassis and tighten the four M5 captive Phillips-head screws.8Rockwell Automation Publication 750-IN112A-EN-P - July 2019Rockwell Automation Publication 750-IN112A-EN-P - July 20199PowerFlex 755T Frames 5 and 6 Conduit Box with Debris Hood and Ground Plate KitsFrame 6 Conduit Box with Debris Hood Kit (Cat. No. 20-750-CBOX1-F6)The frame 6 conduit box with debris hood kit contains the following components.Item Quantity Description11Conduit box bottom plate with captive screws 21Conduit box with captive screws 31Conduit box cover with captive screws 41Debris hood with captive screwsDebris HoodConduit BoxFrame 6 with Conduit Box and Debris Hood Kit InstalledPowerFlex 755T Frames 5 and 6 Conduit Box with Debris Hood and Ground Plate KitsFrame 6 Conduit Box and Debris Hood InstallationFollow these steps to install the frame 6 conduit box and debris hood.e the pilot holes in the conduit box bottom plate to drill the required holes for control and input/output power wire conduit fittings.10Rockwell Automation Publication 750-IN112A-EN-P - July 20192.Loosen the eight M4 captive screws that secure the cover to the assembly, and remove the cover.3.Remove the two M8 nuts and washers from the PE ground studs on the chassis.4.Place the two slots in the tab at the top of the conduit box onto the ground studs.5.Align and tighten the four M4 captive slotted-torx screws on the conduit box to secure it to the chassis.6.Tighten the two M8 nuts and washers on the PE ground studs.3. Remove Nuts and Washers.7.Align the screws on the bottom plate with the holes on the conduit box and tighten the six M4 captive slotted-torx screws to secure the plateto the box.8.Route the power cables through the bottom plate of the conduit box and connect them to the appropriate input and output powerterminals. See the PowerFlex® 750-Series Products with T otalFORCE Control Installation Instructions, publication 750-IN100, for powerwiring information.9.Align the two slots at the top of the front cover with the two tabs on the conduit box and place the cover on the box.10.Align and tighten the four M4 captive slotted-torx screws on the front plate to secure it to the conduit box.11.Secure the cover to the chassis as shown in step 2 on page 11.12.Place the debris hood on the top of the chassis and tighten the four M4 captive slotted-torx screws.Frame 5 Ground Plate Kit Contents (Cat. No. 20-750-GNDPLT-F5)The frame 5 ground plate kit contains the following components.Item Quantity Description Item Quantity Description11Ground plate42M4 x 11 mm (ground screws)24M5 x 10 mm slotted-torx screws (for ground plate brackets)52Cable clamp, EMC32M6 x 12 mm torx screws (for ground plate tabs)62Cable clamp, 1.10…1.40 cable diameterGround PlateFrame 5 with Ground Plate Kit InstalledFrame 5 Ground Plate InstallationFollow these steps to install the frame 5 ground plate.1.Loosen the four M4 captive screws that secure the cover to the assembly, and remove the cover.2.Insert and tighten the four M5 x 10 mm torx screws in the holes on the side panels of the chassis to secure the ground plate to the chassis.3.Insert and tighten the two M6 x 12 mm torx screws in the holes on the bottom of the chassis to secure the ground plate to the chassis.4.As required, insert the M4 slotted torx screws to secure ground wires to the ground plate.5.As required, insert the appropriate sized cable clamps into the ground plate receptacles and secure the power wires.6.Secure the cover to the chassis as shown in step 1 page 17.Frame 6 Ground Plate Kit Contents (Cat. No. 20-750-GNDPLT-F6)The frame 6 ground plate kit contains the following components.Item Quantity Description Item Quantity Description 11Ground plate32Cable clamp, EMC22Cable clamp, 1.10…1.40 cable diameterGround PlateFrame 6 with Ground Plate Kit InstalledPowerFlex 755T Frames 5 and 6 Conduit Box with Debris Hood and Ground Plate KitsFrame 6 Ground Plate InstallationFollow these steps to install the frame 6 ground plate.1.Loosen the eight M4 captive screws that secure the cover to the assembly, and remove the cover.Rockwell Automation Publication 750-IN112A-EN-P - July 201921PowerFlex 755T Frames 5 and 6 Conduit Box with Debris Hood and Ground Plate Kits2.Remove the two M8 nuts and washers from the PE ground studs on the chassis.3.Place the two slots in the tab at the top of the ground plate onto the PE ground studs.4.Align and tighten the four M4 captive slotted-torx screws on the ground plate to secure it to the chassis.5.Tighten the two M8 nuts and washers on the PE ground studs.22Rockwell Automation Publication 750-IN112A-EN-P - July 2019Rockwell Automation Publication 750-IN112A-EN-P - July 201923PowerFlex 755T Frames 5 and 6 Conduit Box with Debris Hood and Ground Plate Kits6.As required, insert the appropriate sized clamps into the ground plate receptacles and secure the power wires.7.Secure the cover to the chassis as shown in step 1 page 21.Additional ResourcesThese documents contain additional information concerning related products from Rockwell Automation.Y ou can view or download publications at /global/literature-library/overview.page .ResourceDescriptionPowerFlex 750-Series Products with TotalFORCE Control Installation Instructions, publication 750-IN100Provides the basic steps to install PowerFlex 755TL low harmonic drives, PowerFlex 755TR regenerative drives, and PowerFlex 755TM drive systems.PowerFlex 750-Series Products with TotalFORCE Control Technical Data, publication 750-TD100Provides detailed information on:•Drive and bus supply specifications •Option specifications•Fuse and circuit breaker ratings PowerFlex 750-Series Products with TotalFORCE Control Hardware Service Manual, publication 750-TG100Provides detailed information on:•Preventive maintenance •Component testing•Hardware replacement proceduresIndustry Installation Guidelines for Pulse Width Modulated (PWM) AC Drives, publication DRIVES-AT003Provides basic information on enclosure systems, considerations to help protect against environmental contaminants, and power and grounding considerations for installing Pulse Width Modulated (PWM) AC drives.Wiring and Grounding Guidelines for Pulse Width Modulated (PWM) AC Drives, publication DRIVES-IN001Provides basic information to properly wire and ground PWM AC drives.Product Certifications website: rok.auto/certifications Provides declarations of conformity, certificates, and other certification details.Rockwell Automation KnowledgebaseThe Rockwell Automation Support ForumAllen-Bradley, PowerFlex, Rockwell Automation, Rockwell Software, and TotalFORCE are trademarks of Rockwell Automation, Inc.Trademarks not belonging to Rockwell Automation are property of their respective companies.Rockwell Otomasyon Ticaret A.Ş., Kar Plaza İş Merkezi E Blok Kat:6 34752 İçerenköy, İstanbul, T el: +90 (216) 5698400Rockwell Automation maintains current product environmental information on its website at /rockwellautomation/about-us/sustainability-ethics/product-environmental-compliance.page.Publication 750-IN112A-EN-P - July 2019Copyright © 2019 Rockwell Automation, Inc. All rights reserved. Printed in the U.S.A.Rockwell Automation SupportUse the following resources to access support information.Documentation FeedbackY our comments will help us serve your documentation needs better. If you have any suggestions on how to improve this document, complete the How Are W e Doing? form at /idc/groups/literature/documents/du/ra-du002_-en-e.pdf .Technical Support CenterKnowledgebase Articles, How-to Videos, FAQs, Chat, User Forums, and Product Notification Updates.https:///Local Technical Support Phone Numbers Locate the phone number for your country./global/support/get-support-now.page Direct Dial Codes Find the Direct Dial Code for your product. Use the code to route your call directly to a technical support engineer./global/support/direct-dial.page Literature LibraryInstallation Instructions, Manuals, Brochures, and Technical Data./global/literature-library/overview.page Product Compatibility and Download Center (PCDC)Get help determining how products interact, check features and capabilities, and find associated firmware./global/support/pcdc.page。
PF755点对点位置控制
PF755点对点位置控制PFF755点对点位置控制参数设置:35=3感应电机磁通矢量控制台309=7点对点位置控制308=1双极性125主速度反馈=选择接入编码器卡的对应电机的编码器,如port 4:编码器0反馈135位置反馈=选择接入编码器卡的对应电机的编码器,如port 4:编码器0反馈编码器参数:脉冲数:比如1024、3000。
编码器配置:正交,差分778(PTP Ref Scsle),如果使用了增量型编码器(3000)则设为12000相当于电机旋转1圈P781,P782,P785,P786,这几个是位置控制的加减速和*设定P775点对点位置值来源选P7801、索引模式:P771模式设定:设为1 索引模式P780位置源设定,当P789和P790设相同时,P780设定的数值就是马达转的圈数P770 PTP Control 位1是move(正向,上升沿触发),位2是reverse move(反向),位3,位置预置P772数字输入索引步,可将数字量输入分配为索引步及P770的位1P773同P772,对应P770的位2P774同P772,对应P770的位3P789点对点电子齿轮传动比分子P790点对点电子齿轮传动比分母P731归位控制,第4位位置重定义(上升沿触发),可以重新定义零点及清零P777(位置反馈)的值。
2、绝对模式:P771设为0 绝对模式绝对值模式参数设置和上边的索引模式相同,绝对模式主要是定义以零点为基点,以P780里的数值为位置值,进行运转,比如,电机在一个位置时,把P777清零为零点,当P780设为3时,启动变频器,电机正向转3圈,再把P780设为2,再启动。
电机反转一圈,及以P780中的数值和零点间的距离为绝对距离。
3、立即模式:P771设为2 立即模式,参数同上两个4、PTP归零P731第1位设为1(起始位置DI)归零使能P735和P736是回零的速度和加减速时间的设定P732设定归零启动的数字量输入P734设定开环起始位置*,可认为是当零点感应开关到达的输入。
PowerFlex 755 驱动器 Safe Torque-Off 选项问题说明书
Service BulletinPowerFlex 755 Frames 8…10 and the Safe Torque-Off OptionIssue An anomaly exists when PowerFlex 755 (20G or 21G) Frame 8…10 drives areused in conjunction with the Safe T orque-Off option module (20-750-S).When the safety circuit is opened, the drive initiates the safe torque-off mode.Once this occurs, the safe torque-off module may generate an F211 – Safety Brdfault, followed by these drive faults:•F33x I x Comm Loss and F34x C x Comm LossT o restart the drive:•cycle drive power or•reset the drive via the HIM or network messageAffected Equipment This notice affects only the following combination of equipment:•PowerFlex 755 Frame 8…10 drives•Firmware revision 2.010 or greater•Safe T orque-Off option module (20-750-S)Work Around Two methods exist to overcome the anomaly.1.When the anomaly occurs, the drive can be returned to operational stateby cycling power, pushing the Stop-Clear Faults button on the HIM orsending a network message that commands a reset fault.e the Safe Speed Monitor option (20-750-S1) instead of the SafeT orque-Off option. This method requires a Dual Incremental Encoder(20-750-DENC-1) or Universal Feedback option (20-750-UFB-1).Corrective Action An upcoming firmware revision will correct this anomaly, and when available,may be downloaded at /support/abdrives/webupdate.Follow the links to find the PowerFlex 755 HiP firmware downloads.T o receive an email notification when this revision is available, access theRockwell Automation Support Knowledgebase at/knowledgebase. Follow the link providedin article ID 495057.Allen-Bradley, Rockwell Automation, PowerFlex, and TechConnect are trademarks of Rockwell Automation, Inc.Trademarks not belonging to Rockwell Automation are property of their respective companies.Publication 750-SB004A-EN-P - July 2012PN-165860Copyright © 2012 Rockwell Automation, Inc. All rights reserved. Printed in the U.S.A.Rockwell Automation SupportRockwell Automation provides technical information on the Web to assist you in using its products.At /support , you can find technical manuals, technical and application notes, sample code and links to software service packs, and a MySupport feature that you can customize to make the best use of these tools. You can also visit our Knowledgebase at /knowledgebase for FAQs, technical information, support chat and forums, software updates, and to sign up for product notification updates.For an additional level of technical phone support for installation, configuration, and troubleshooting, we offer T echConnect SM support programs. For more information, contact your local distributor or Rockwell Automation representative, or visit /support/.Installation AssistanceIf you experience a problem within the first 24 hours of installation, review the information that is contained in this manual. You can contact Customer Support for initial help in getting your product up and running.New Product Satisfaction ReturnRockwell Automation tests all of its products to ensure that they are fully operational when shipped from themanufacturing facility. However, if your product is not functioning and needs to be returned, follow these procedures.Documentation FeedbackY our comments will help us serve your documentation needs better. If you have any suggestions on how to improve this document, complete this form, publication RA-DU002, available at /literature/.United States or Canada1.440.646.3434Outside United States or Canada Use the Worldwide Locator at /support/americas/phone_en.html , or contact your local RockwellAutomation representative.United StatesContact your distributor. You must provide a Customer Support case number (call the phone number above to obtain one) to your distributor to complete the return process.Outside United States Please contact your local Rockwell Automation representative for the return procedure.U.S.Allen-BradleyDrivesTechnicalSupport-Tel:(1)262.512.8176,Fax:(1)262.512.2222,E-mail:*****************Online: /support/abdrives*PN-165860*PN-165860。
AB PowerFlex 755 IP00 备件安装信息说明书
安装指南PowerFlex 755 IP00 备件安装信息注意:只有熟悉变频器以及相关机械装置的合格人员才能规划或实施系统的安装、起动和后续维护。
如未遵守此规定则可能导致人身伤害和 (或) 设备损坏。
注意:为避免电击危险,请在维修之前确保母线电容器上的电压已完全释放。
切断变频器电源之后,请等待五分钟让直流母线电容器放电完毕。
测量电源模块正面 DC+和 DC- 测点插孔之间的直流母线电压。
电压必须为零。
注意:高温表面可能导致严重灼伤。
切断电源之后请等待一段时间,使表面冷却。
注意:该变频器包含 ESD (静电放电) 敏感零件和组件。
在安装、测试、维护或修理此类组件时,需要采取静电控制预防措施。
如果不遵守防 ESD 控制规程,有可能造成器件损坏。
如果不熟悉静电控制规程,请参考 GuardingAgainst Electrostatic Damage (静电损害消除措施,出版号:8000-4.5.2) 或其他任何适用的 ESD 防护手册。
注意:使用光传输设备时,存在永久性视力损伤的危险。
该产品会发出强光和不可见的辐射。
请不要直视模块端口或光纤电缆连接器内部。
2罗克韦尔自动化出版物 750-IN021C-ZH-P - 2012 年 5 月PowerFlex 755 IP00 备件安装信息下表列出了可用的终结器套件及各自的最大电流值。
为这些套件接线时,请务必确保接线规格足以承受变频器电流并符合当地法规。
查找具体的安装信息有关此部件的安装信息,请参见 PowerFlex 755 IP00, NEMA/UL Open Type Drive Installation Instructions (PowerFlex 755 IP00 NEMA/UL 开放型变频器安装指南,出版号:750-IN020)。
您可从 /literature/ 查看或下载出版物。
如需订购技术文档的纸印本,请联系当地的 Allen-Bradley 经销商或罗克韦尔自动化销售代表。
- 1、下载文档前请自行甄别文档内容的完整性,平台不提供额外的编辑、内容补充、找答案等附加服务。
- 2、"仅部分预览"的文档,不可在线预览部分如存在完整性等问题,可反馈申请退款(可完整预览的文档不适用该条件!)。
- 3、如文档侵犯您的权益,请联系客服反馈,我们会尽快为您处理(人工客服工作时间:9:00-18:30)。
PF75X变频器技术规格书PF75X变频器简介PF75X是 A-B PowerFlex系列中第一款隆重推出的产品,它提供的多种功能可以覆盖工厂生产制造系统的各个方面;PowerFlex 75X 变频器的设计原则:容易使用、高集成度、高灵活性、优异的性能;PF75X变频器旨在最大化用户的资产保值、帮助提高生产率。
针对需要安全、更高的电动机控制性能、高灵活性的应用,PF755是一款高性价比的选择方案;PF755变频器与其他系列相比,提供更多的控制和硬件选项:内置Devicelogix控制技术:能够实现变频器内部信息、输入输出状态的逻辑运算,从而实现变频器和外部设备的协调控制;标配工业以太网接口:变频器接入工业以太网,更加容易的实现变频器的配置、控制、数据采集;预诊断功能:实时跟踪冷却风扇和输出继电器的使用寿命,除此之外,变频器通过编程组态可以监测机械设备和电动机的磨损运行时间,为用户提供事先配置好的预警信息,从而防止设备的非计划停机;基本的、增强的安全:用户可以选择变频器内置基本安全功能或增强的安全功能,从而有效保护人身和设备的安全,更少的占用盘柜空间,明显降低故障停机时间;基于插槽的结构:共有5个插槽,根据需要,用户可以选择相应的控制板:通讯板、I/O 板、反馈板、安全板、辅助电源板;做为全球自动化控制技术的领导者,罗克韦尔自动化定位于帮助用户从技术高度集成的产品中获益。
PF755变频器是目前最能满足市场需求的、技术高度集成的名副其实的产品;这款创新的变频器集成了各种控制技术:通讯、控制、信息、全球认证、安全,帮助用户提高生产率,保护用户的投资,获得更有价值的数据,从而提高产品质量;PF755变频器的特点:➢灵活性PF755具有5个插槽,可以安装各种控制板:通讯板、I/O板、反馈版、安全板、辅助电源板;量身定做的各种控制硬件选型,允许用户按照特定的应用需求配置PF755变频器;可选择的电动机控制方式支持各种电动机类型,满足各种应用;多种反馈选择在满足广泛应用的同时提供一种经济、有效的方案;内嵌的DeviceLogix控制器,提供90个指令块,实现用户的灵活控制,满足特殊的应用需求;多种防护等级,支持各种应用环境;➢性能增强的控制带宽,使变频器具有更优越的抗系统扰动的性能;同步控制使协调的电动机控制更加方便;更高的安全集成等级,使用罗克韦尔自动化安全速度控制技术,适用于需要安全速度监控的应用;➢包装盘柜内安装类型,IP00/IP20;额外保护的法兰安装类型,IP00/IP20,IP66;额外保护的墙壁安装类型,IP54;MCC 柜机,600mm,800mm➢控制变频器控制方式:在同一台变频器上实现速度、转矩、位置的控制,满足各种应用类型;可以选择多种基于Force技术的高性能电动机控制算法:磁通矢量、永磁电动机、无传感、V/Hz,支持各种电动机类型:永磁电动机、感应电动机、AB MPL电动机;DeviceLogix控制;提升应用的转矩校验;单台或多台变频器配置成AC或DC共母线的方案;通过端子数字输入、网络、DeviceLogix编程的多个预置速度;➢位置控制集成位置环,具有返回原点、定标、电子齿轮、位置和速度的多段控制,满足单轴位置控制;➢反馈多种反馈卡可选,包括增量型、高分辨率的反馈、线性反馈;支持的反馈卡,包括:Universal反馈、编码器、双编码器;在速度模式,能够在编码器反馈丢失时,自动切换到无编码器控制方式;➢通讯标配以太网接口;DeviceNet卡和内置的以太网接口通过直接参数连接提供16个输入、16个输出的数据给控制器;使用通讯适配器卡,支持原有的PowerFlex通讯模块(20-comm-xx);通讯适配器卡支持的通讯接口:EtherNet/IP,ControlNet,DeviceNet,Remote I/O,RS485 DF1,PROFIBUS DP,InterBus,Modbus/TCP,Bluetooth,CANopen,HVAC;优势集成功能(PLC中直接配置变频器),减少开发时间和成本,可以通过RSLogix5000、DriveExplorer、DriveTools软件配置PF755变频器;➢硬件基于插槽的结构,适用于各种可选的控制卡:I/O、反馈、通讯、安全、辅助电源;插拔式接线端子,使接线和维护灵活方便;支持“0”间距安装,节省盘柜空间;变频器的设计采用了降低噪音、电压抑制技术,在噪音敏感的环境安装时,不必担忧;变频器硬件标配涂层保护;➢控制I/O变频器标配1个24VDC或115VAC可编程输入;支持各种应用需求,可以选择相应的模拟量和数字量I/O卡;支持模拟量丢失检测,定时输出、PTC输入;➢实时时钟为与时间相关事件提供标准特征:实时数据,或者具有时钟标签的运行数据;本地编程,远程控制器编程;时区、年、月、日可以编程;➢编程和调试LCD操作面板,具有辅助启动引导菜单,方便用户配置、调试变频器;使用PC 工具软件:RSLogix5000、DriveTools、DriveExplorer,编程、配置、监测、故障诊断变频器十分方便;Flash刷新功能,使用户方便的获得最新的控制功能;➢安全内置速度监测的安全选型,提供以下功能:安全转矩关断;安全速度限制;安全方向;安全停止;安全最大速度;安全的最大加速度;安全使能;安全的门控制和监测;PowerFlex755交流变频器是一种能够提供卓越性能的通用变频器。
从最简单的速度控制到最苛刻的转矩控制、位置控制,满足各种应用系统的要求。
PowerFlex755交流变频器具有各种功率等级,能够提供从7.5KW-450KW的标准产品。
在提供世界级性能的同时,比其他类型变频器更容易使用,完全超出您对PowerFlex变频器家族的期望。
PF755变频器的功率范围三相400VAC 输入电压,7.5-250KW(F2-F7);315KW-450KW(F8)三相480VAC 输入电压,10-350Hp(F2-F7);400Hp-700Hp(F8)PF755变频器型号规格安装尺寸400V AC 输入输出额定电流(A)额定功率(KW)变频器型号框架尺寸(IP00/IP20) 注释15.4 7.5 20G11NC015JA0 2 包含制动单元22 11 20G11NC022JA0 2 包含制动单元30 15 20G11NC030JA0 3 包含制动单元37 18.5 20G11NC037JA0 3 包含制动单元43 22 20G11NC043JA0 3 包含制动单元60 30 20G11NC060JA0 4 包含制动单元72 37 20G11NC072JA0 4 包含制动单元85 45 20G11NC085JA0 5 包含制动单元104 55 20G11NC104JA0 5 包含制动单元140 75 20G1ANC140JN0 6 不包含制动单元170 90 20G1ANC170JN0 6 不包含制动单元205 110 20G14NC205JN0 6 不包含制动单元260 132 20G14NC260JN0 6 不包含制动单元302 160 20G14NC302JN0 7 不包含制动单元367 200 20G1ANC367JN0 7 不包含制动单元456 250 20G1ANC456JN0 7 不包含制动单元460 250 20G1ALC460JN0 8 800mmMCC 柜机540 315 20G1ALC540JN0 8 800mmMCC 柜机567 315 20G1ALC460JN0 8 800mmMCC 柜机650 355 20G1ALC567JN0 8 800mmMCC 柜机750 400 20G1ALC750JN0 8 800mmMCC 柜机770 400 20G1ALC770JN0 8 800mmMCC 柜机PowerFlex755变频器技术规格书 框架7的尺寸(IP00):✧框架8的尺寸(MCC 800mm):✧PF755变频器获得的认证认证:CSA/cUL,UL,CE,C-Tick,TUV,EPRI,GOST-R,RoHS, 标准:IEC 61800-3,IEC 61800-5,IEC 61000-4;PF755变频器的技术要求和性能指标PF755变频器运行的环境要求海拔最高1000米,无需降容最高运行环境温度(无需降容)IP20 Oopen type:0-50℃(2-5框架);IP00 Oopen type:0-50℃(6-7框架);IP20 type1:0-40℃(2-7框架);IP66 type 4X:0-40℃(2-7框架);IP54 type 12:0-40℃(2-5框架);MCC Type 0-40℃(8框架)储存温度-40 - 70℃大气无腐蚀性气体、无水蒸气、无灰尘、无危险性环境相对湿度5-95%,无凝露PF755变频器运行的电气要求输入电压允许偏差±10%频率允许偏差47-63Hz单相输入功率三相输入时提供满载;单相输入时,提供50%额定电流功率因数整个速度范围内为0.98效率额定电压、额定电流时为97.5% 最大短路电流200KA最大变频器与电机功率比值不大于2:1PF755变频器的保护功能额定输入电压380/400V 480V交流输入电压过高故障576V AC 576V AC交流输入电压过低故障250V AC 300V AC直流母线电压过高故障815V DC 815V DC直流母线电压过低故障200V DC 200V DC 正常母线电压540V DC 648V DC软件过流故障计算值:105%电机电流-200%变频器额定电流硬件过流故障158%-210%瞬间电流极限215%-287%主回路瞬间耐压6000V尖峰电压控制回路瞬间耐压1500V尖峰电压主电源瞬间跨越满载时,15mS控制电源瞬间跨越0.5秒,典型2秒接地故障变频器输出相与地之间短路故障变频器输出相与相之间PF755变频器的控制性能指标控制方法PWM正玄波脉宽调制,6脉冲整流。
载波频率2、4、8、12KHz(框架2-6),2、4、8KHz(框架7),2、4KHz(框架8) 输出电压范围0V至电机额定电压输出频率范围0-325Hz(2KHz载波),0-650Hz(4KHz载波)频率精确度数字量输入:设置输出频率的±0.01% 模拟量输入:最大输出频率的±0.4%频率控制基于滑差补偿的速度调节,40:1的速度范围,基本速度的0.5%精度速度控制开环控制:120:1的速度范围,带宽50弧度/秒,基本速度的0.1%精度闭环控制:1000:1的速度范围,带宽190弧度/秒,基本速度的0.001%精度转矩调节开环控制:±5%,带宽600弧度/秒闭环控制:±2%,带宽2500弧度/秒电机控制方式标准V/Hz、完全自整定的无传感矢量控制、有编码器或无编码器反馈的磁通矢量控制、感应电动机和永磁同步电机控制停止模式多个可编程的停止模式:斜坡、惯性、直流制动、斜坡-保持、快速制动、电流限制加减速时间2个独立的可编程加减速时间,范围0-3600秒,增量为0.1秒S曲线时间0-100%加减速时间调节过载能力110%过载,持续1分钟;150%过载,持续3秒钟电流限幅可编程,20%-160%额定输出电流电机过载保护class 10PF755变频器I/O数字量输入:6个DI0-5: 115VAC或24VDC可选数字量输出:2个或3个(2R型)DO1-2: 继电器输出,240VAC/24VDC,最大2A(1R2T型)DO1: 继电器输出,240VAC/24VDC,最大2A,DO2-3: 24VDC 晶体管输出,最大1A模拟量输入:2个AI0-1: 双极性,差分输入,±10V,0-20mA,11位精度模拟量输出:2个AO0-1: 双极性,差分输出,±10V,4-20mA,11位精度电动机热保护:1个PTC测温增量型编码器(可选):RS422差分信号,5V 或 12VDC 编码器输入:2路绝对值编码器(可选):Stegman信号,5V 或 12VDCPF755变频器的网络连接能力PF755变频器,标配以太网(EtherNet/IP)接口,选择合适的网络模块即可连接到相应网络:第一类:PowerFlex 750系列网络模块:➢DeviceNet(20-750-DNET)➢ControlNet (20-750-CNETC)➢Profibus DPV1 (20-750-PBUS)第二类:PowerFlex 7系列网络模块:注意:这些网络模块需要安装在适配器板卡上(20-750-20COMM)或外置DPI通讯盒内(20-XCOMM-DC-BASE)➢ControlNet™ (20-COMM-C或20-COMM-C-MX3)➢DeviceNet™ (20-COMM-D或20-COMM-D-MX3)➢EtherNet/IP™ (20-COMM-E或20-COMM-E-MX3)➢RS485 HVAC (20-COMM-H或20-COMM-H-MX3)➢INTERBUS™(20-COMM-I)➢CANopen (20-COMM-K)➢MODBUS/TCP (20-COMM-M)➢PROFIBUS DP (20-COMM-P)➢ControlNet™ FIBER (20-COMM-Q)➢REMOTE I/O (20-COMM-R或20-COMM-R-MX3)➢RS485 DF1 (20-COMM-S或20-COMM-S-MX3)✧上述各种网络模块支持以下通用功能:支持多种配置工具(配置工具可以对网络适配器和变频器进行参数设置):操作面板、DriveExplorer、DriveTools;实现变频器逻辑命令、速度给定、状态反馈、速度反馈以及其他参数的数据传送;可以实现设备状态诊断,固件更新功能;PF755变频器典型应用的负载类型风机、水泵;搅拌机;输送机、堆垛机;压出机、挤压机;冲压机;卷取机、开卷机、张紧装置;提升机、天车、港机;离心机;柱塞泵、压缩机;灌装机;测试台;矿山输送长皮带机(负荷分配);同步提升机(负荷分配);位置控制、精确定位控制;。
