javafx2.0表格框tableview
JavaFX表格数据显示简单Demo
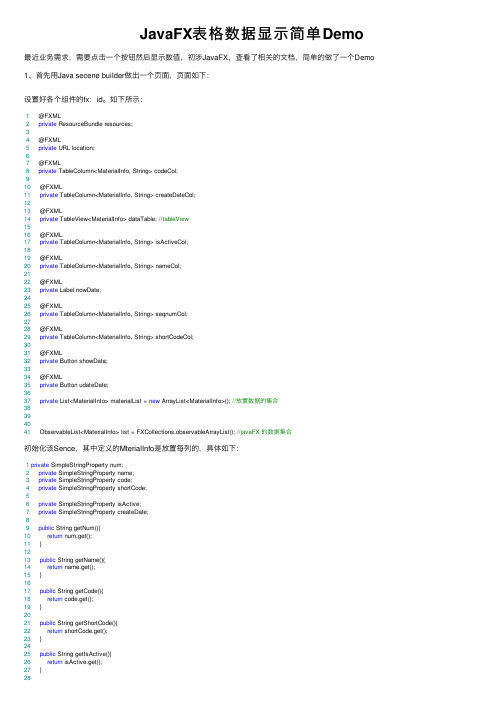
JavaFX表格数据显⽰简单Demo 最近业务需求,需要点击⼀个按钮然后显⽰数值,初涉JavaFX,查看了相关的⽂档,简单的做了⼀个Demo 1、⾸先⽤Java secene builder做出⼀个页⾯,页⾯如下:设置好各个组件的fx:id。
如下所⽰:1 @FXML2private ResourceBundle resources;34 @FXML5private URL location;67 @FXML8private TableColumn<MaterialInfo, String> codeCol;910 @FXML11private TableColumn<MaterialInfo, String> createDateCol;1213 @FXML14private TableView<MaterialInfo> dataTable; //tableView1516 @FXML17private TableColumn<MaterialInfo, String> isActiveCol;1819 @FXML20private TableColumn<MaterialInfo, String> nameCol;2122 @FXML23private Label nowDate;2425 @FXML26private TableColumn<MaterialInfo, String> seqnumCol;2728 @FXML29private TableColumn<MaterialInfo, String> shortCodeCol;3031 @FXML32private Button showData;3334 @FXML35private Button udateDate;3637private List<MaterialInfo> materialList = new ArrayList<MaterialInfo>(); //放置数据的集合38394041 ObservableList<MaterialInfo> list = FXCollections.observableArrayList(); //javaFX 的数据集合初始化该Sence,其中定义的MterialInfo是放置每列的,具体如下:1private SimpleStringProperty num;2private SimpleStringProperty name;3private SimpleStringProperty code;4private SimpleStringProperty shortCode;56private SimpleStringProperty isActive;7private SimpleStringProperty createDate;89public String getNum(){10return num.get();11 }1213public String getName(){14return name.get();15 }1617public String getCode(){18return code.get();19 }2021public String getShortCode(){22return shortCode.get();23 }2425public String getIsActive(){26return isActive.get();27 }2829public String getCreateDate(){30return createDate.get();31 }3233public ObservableValue<String> numProperty(){34return num;35 }36public ObservableValue<String> nameProperty(){37return name;38 }39public ObservableValue<String> codeProperty(){40return code;41 }42public ObservableValue<String> shortCodeProperty(){43return shortCode;44 }45public ObservableValue<String> isActiveProperty(){46return isActive;47 }48public ObservableValue<String> createDateProperty(){49return createDate;50 }5152public void setNum(String num){53this.num = new SimpleStringProperty(num);5455 }56public void setName(String name){ = new SimpleStringProperty(name);5859 }60public void setCode(String code){61this.code = new SimpleStringProperty(code);6263 }64public void setShortCode(String shortCode){65this.shortCode = new SimpleStringProperty(shortCode);6667 }68public void setIsActive(String isActive){69this.isActive = new SimpleStringProperty(isActive);7071 }72public void setCreateDate(String createDate){73this.createDate = new SimpleStringProperty(createDate);7475 }76然后初始化Sence1 @Override2public void initialize(URL location, ResourceBundle resources) {3 Date date = new Date();4 String now = new SimpleDateFormat("yyyy-MM-dd HH:mm:ss").format(date);5 nowDate.setText(now);6 dataTable.setColumnResizePolicy(TableView.CONSTRAINED_RESIZE_POLICY);7 configTableView();8 initButton();9 }1/**2 * 配置表格,绑定表格的每列3*/4private void configTableView() {5 seqnumCol.setCellValueFactory(new PropertyValueFactory<MaterialInfo,String>("num"));6 nameCol.setCellValueFactory(new PropertyValueFactory<MaterialInfo,String>("name"));7 codeCol.setCellValueFactory(new PropertyValueFactory<MaterialInfo,String>("code"));8 shortCodeCol.setCellValueFactory(new PropertyValueFactory<MaterialInfo,String>("shortCode"));9 isActiveCol.setCellValueFactory(new PropertyValueFactory<MaterialInfo,String>("isActive"));10 createDateCol.setCellValueFactory(new PropertyValueFactory<MaterialInfo,String>("createDate"));11 dataTable.setItems(list);12 }1314/**15 * 初始化按钮功能,绑定按钮的事件16*/17private void initButton() {1819 showData.setOnAction(new EventHandler<ActionEvent>() {2021 @Override22public void handle(ActionEvent arg0) {23 dataTable.getItems().clear();24 showData();25 }26 });27 udateDate.setOnAction(new EventHandler<ActionEvent>() {2829 @Override30public void handle(ActionEvent arg0) {31 updateData();//该⽅法还没有做,以后补上32 }333435 });36 }373839protected void updateData() {40// TODO Auto-generated method stub4142 }4344/**45 * 展⽰数据46*/47protected void showData() {48if(generateDate()!=null){49 materialList = generateDate();50 }51 System.out.println(materialList.size()+"----"+materialList.get(0).getName());52 list.addAll(materialList);53 dataTable.setItems(list);54 }5556/**57 * ⽣成数据58 * @return59*/60private List<MaterialInfo> generateDate() {61 List<MaterialInfo> miList = new ArrayList<MaterialInfo>();62 String name = "material";63 String code = "1101";64 String shortCode = "A";65 String isActive = "是";66 Date date = new Date();67 String nowDate = new SimpleDateFormat("yyyy-MM-dd HH:mm:").format(date); 68for(int i=0;i<10;i++){69 MaterialInfo mi = new MaterialInfo();70 mi.setNum(i+1+"");71 mi.setName(name+i);72 mi.setCode(code+i);73 mi.setIsActive(isActive);74 mi.setShortCode(shortCode+i);75 mi.setCreateDate(nowDate+i);76 miList.add(mi);77 }78return miList;79 }⾄此结束,程序运⾏成功。
Java图形用户界面:Swing和JavaFX的简单介绍
Java图形用户界面:Swing和JavaFX的简单介绍在计算机科学领域中,图形用户界面(GUI)是指通过图形、图像和视觉元素来与计算机程序进行交互的界面。
Java作为一种广泛使用的编程语言,提供了多种选择来构建图形用户界面。
其中,Swing和JavaFX是最常用的两种选择。
本文将对这两种Java GUI工具进行简单介绍,并探讨它们的特点和用途。
一、SwingSwing是Java提供的一套GUI工具包,旨在提供一种跨平台的解决方案。
它是在AWT(抽象窗口工具包)的基础上开发的,为开发者提供了一系列可重用的GUI组件,如按钮、文本框、标签等。
Swing的特点之一是其轻量级性能,它不依赖于操作系统的原生GUI组件,而是完全由Java代码实现。
这使得Swing应用程序可以在不同操作系统上以相同的方式运行,而无需进行任何修改。
Swing提供了丰富的组件库,使得开发者可以轻松构建复杂的用户界面。
它还支持可定制的外观和感觉,开发者可以根据自己的需求选择不同的外观主题。
此外,Swing还提供了一些高级组件,如表格、树形结构和滚动面板,使得开发者可以创建更复杂和功能强大的界面。
然而,Swing也有一些缺点。
由于其完全由Java代码实现的特性,Swing应用程序可能在性能方面存在一些问题。
尤其是在处理大量数据或复杂图形时,Swing的性能可能会受到影响。
此外,Swing的外观和感觉可能与操作系统的原生界面存在一些差异,这可能会对用户体验造成一定的影响。
二、JavaFXJavaFX是Java平台上的另一种GUI工具,它提供了更现代化和富有表现力的用户界面。
与Swing不同,JavaFX使用了一种基于场景图的方式来构建界面。
它通过使用FXML(一种基于XML的用户界面描述语言)和CSS(层叠样式表)来分离界面的结构和样式,使得界面的定制变得更加灵活和简单。
JavaFX提供了许多内置的UI组件,如按钮、文本框、标签等,这些组件具有更丰富的视觉效果和交互特性。
JavaFX常用汇总
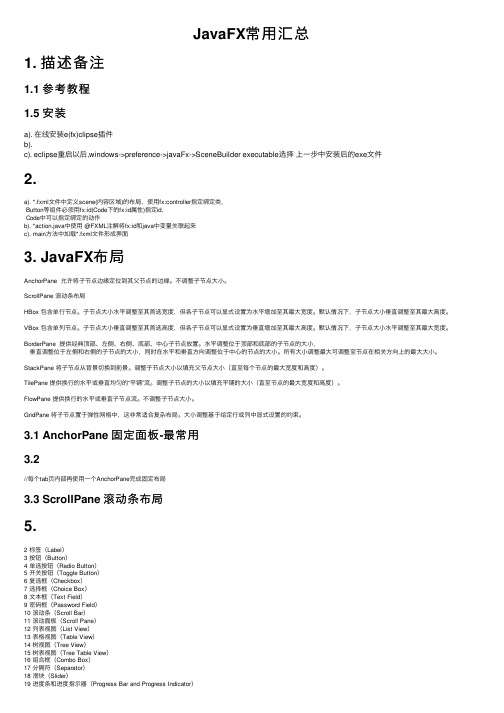
JavaFX常⽤汇总1. 描述备注1.1 参考教程1.5 安装a). 在线安装e(fx)clipse插件b).c). eclipse重启以后,windows->preference->javaFx->SceneBuilder executable选择上⼀步中安装后的exe⽂件2.a). *.fxml⽂件中定义scene(内容区域)的布局,使⽤fx:controller指定绑定类,Button等组件必须⽤fx:id(Code下的fx:id属性)指定id,Code中可以指定绑定的动作b). *action.java中使⽤ @FXML注解将fx:id和java中变量关联起来c). main⽅法中加载*.fxml⽂件形成界⾯3. JavaFX布局AnchorPane 允许将⼦节点边缘定位到其⽗节点的边缘。
不调整⼦节点⼤⼩。
ScrollPane 滚动条布局HBox 包含单⾏节点。
⼦节点⼤⼩⽔平调整⾄其⾸选宽度,但各⼦节点可以显式设置为⽔平增加⾄其最⼤宽度。
默认情况下,⼦节点⼤⼩垂直调整⾄其最⼤⾼度。
VBox 包含单列节点。
⼦节点⼤⼩垂直调整⾄其⾸选⾼度,但各⼦节点可以显式设置为垂直增加⾄其最⼤⾼度。
默认情况下,⼦节点⼤⼩⽔平调整⾄其最⼤宽度。
BorderPane 提供经典顶部、左侧、右侧、底部、中⼼⼦节点放置。
⽔平调整位于顶部和底部的⼦节点的⼤⼩,垂直调整位于左侧和右侧的⼦节点的⼤⼩,同时在⽔平和垂直⽅向调整位于中⼼的节点的⼤⼩。
所有⼤⼩调整最⼤可调整⾄节点在相关⽅向上的最⼤⼤⼩。
StackPane 将⼦节点从背景切换到前景。
调整⼦节点⼤⼩以填充⽗节点⼤⼩(直⾄每个节点的最⼤宽度和⾼度)。
TilePane 提供换⾏的⽔平或垂直均匀的“平铺”流。
调整⼦节点的⼤⼩以填充平铺的⼤⼩(直⾄节点的最⼤宽度和⾼度)。
FlowPane 提供换⾏的⽔平或垂直⼦节点流。
不调整⼦节点⼤⼩。
GridPane 将⼦节点置于弹性⽹格中,这⾮常适合复杂布局。
JavaFX2.0网格布局窗格GridPane
JavaFX2.0网格布局窗格GridPanepublic class GridPane extends PaneGridPane将其孩子结点灵活地放置在行列网格中。
若设置了边框和边缘(border and/or padding),它的内容只能在这些间隙内部。
孩子结点可以放置在任意位置并且可以跨行列。
结点也可以在行列内随便覆盖,网格窗格孩子结点列表中的顺序决定了这些结点的堆栈顺序:第一个在最下,最后一个在上面。
GridPane也可以使用CSS来装饰。
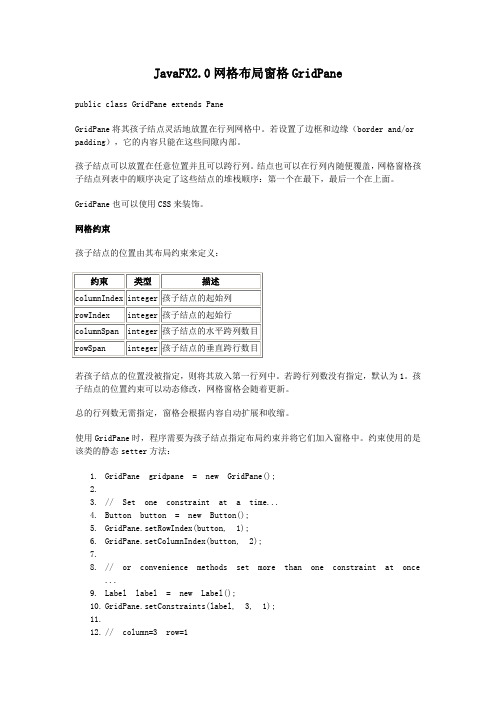
网格约束孩子结点的位置由其布局约束来定义:若孩子结点的位置没被指定,则将其放入第一行列中。
若跨行列数没有指定,默认为1。
孩子结点的位置约束可以动态修改,网格窗格会随着更新。
总的行列数无需指定,窗格会根据内容自动扩展和收缩。
使用GridPane时,程序需要为孩子结点指定布局约束并将它们加入窗格中。
约束使用的是该类的静态setter方法:1.GridPane gridpane = new GridPane();2.3.// Set one constraint at a time...4.Button button = new Button();5.GridPane.setRowIndex(button, 1);6.GridPane.setColumnIndex(button, 2);7.8.// or convenience methods set more than one constraint at once...bel label = new Label();10.GridPane.setConstraints(label, 3, 1);11.12.// column=3 row=113.14.// don't forget to add children to gridpane15.gridpane.getChildren().addAll(button, label);更可以使用整合了以上步骤的方法来设置约束:1.GridPane gridpane = new GridPane();2.gridpane.add(new Button(), 2, 1);3.4.// column=2 row=15.gridpane.add(new Label(), 3, 1);6.7.// column=3 row=1行列大小行列尺寸默认是匹配内容的,列宽适应的是最宽的元素,行高适应的是最高的元素。
JavaFX2.0的FXML语言
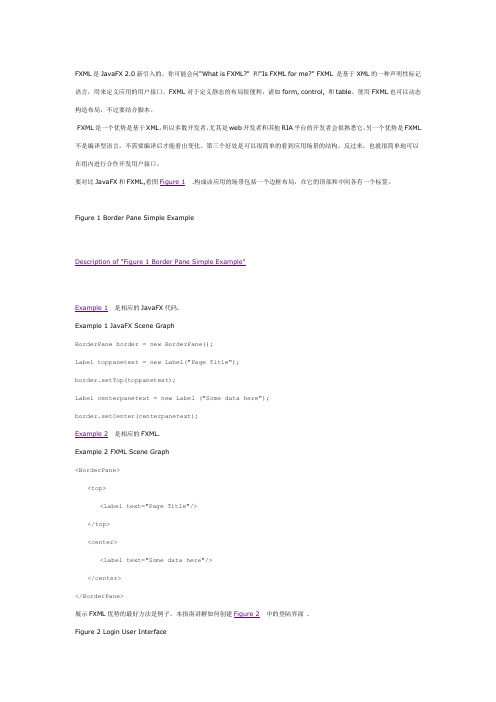
FXML是JavaFX 2.0新引入的。
你可能会问"What is FXML?" 和"Is FXML for me?" FXML 是基于XML的一种声明性标记语言,用来定义应用的用户接口。
FXML对于定义静态的布局很便利,诸如form, control, 和table。
使用FXML也可以动态构造布局,不过要结合脚本。
FXML是一个优势是基于XML,所以多数开发者,尤其是web开发者和其他RIA平台的开发者会很熟悉它。
另一个优势是FXML 不是编译型语言,不需要编译后才能看出变化。
第三个好处是可以很简单的看到应用场景的结构。
反过来,也就很简单地可以在组内进行合作开发用户接口。
要对比JavaFX和FXML,看图Figure 1 .构成该应用的场景包括一个边框布局,在它的顶部和中间各有一个标签。
Figure 1 Border Pane Simple ExampleDescription of "Figure 1 Border Pane Simple Example"Example 1是相应的JavaFX代码.Example 1 JavaFX Scene GraphBorderPane border = new BorderPane();Label toppanetext = new Label("Page Title");border.setTop(toppanetext);Label centerpanetext = new Label ("Some data here");border.setCenter(centerpanetext);Example 2是相应的FXML.Example 2 FXML Scene Graph<BorderPane><top><Label text="Page Title"/></top><center><Label text="Some data here"/></center></BorderPane>展示FXML优势的最好方法是例子。
javafx listview 用法

javafx listview 用法JavaFX ListView 用法JavaFX是一种用于创建丰富图形用户界面的GUI工具包。
JavaFX中的ListView 是一种常用的控件,用于显示列表形式的数据。
在本文中,我们将探讨JavaFX ListView的用法,以及如何使用ListView显示和处理数据。
一、创建ListView要使用JavaFX ListView,首先需要在代码中创建一个ListView对象。
下面是创建ListView的基本步骤:Step 1: 导入JavaFX相关类在代码文件的顶部,添加JavaFX类库的导入语句。
例如:javaimport javafx.scene.control.ListView;Step 2: 创建ListView对象在代码文件的类定义中,声明一个ListView对象。
例如:javaListView<String> listView = new ListView<>();这里的`String`是列表中的每个项的类型。
您可以根据需要将其替换为其他数据类型。
Step 3: 设置ListView的大小和位置通过设置ListView的宽度、高度和位置,将其放置在JavaFX的场景中。
javalistView.setPrefSize(300, 200);listView.setLayoutX(10);listView.setLayoutY(10);二、向ListView中添加数据一旦创建了ListView对象,我们可以向其中添加数据。
ListView可以通过ObservableList来管理其数据。
Step 1: 导入相关类在代码文件的顶部,添加用于管理ListView数据的类的导入语句。
例如:javaimport javafx.collections.FXCollections;import javafx.collections.ObservableList;Step 2: 创建ObservableList对象在代码文件的类定义中,声明一个ObservableList对象来存储ListView的数据。
tableview 和table widget使用案例

tableview 和table widget使用案例`TableView` 和 `TableWidget` 是两种常用的表格控件,它们在各种应用程序中都有广泛的应用。
下面我将分别给出使用这两种控件的简单案例。
1. 使用 `TableView` 的案例(Python + PyQt5):假设我们有一个简单的数据集,我们想在 `TableView` 中展示它。
```pythonimport sysfrom import QApplication, QTableViewfrom import QStandardItemModelapp = QApplication()创建一个模型model = QStandardItemModel()填充数据data = [['Name', 'Age', 'Gender'],['Alice', '25', 'Female'],['Bob', '30', 'Male'],['Charlie', '35', 'Male']]for row in data:(row)创建一个视图并设置模型table_view = QTableView()table_(model)table_()(_())```2. 使用 `TableWidget` 的案例(Python + PyQt5): 与上面的例子类似,但这次我们使用 `TableWidget`。
```pythonimport sysfrom import QApplication, QTableWidgetfrom import Qt, QAbstractItemModelapp = QApplication()创建一个模型class SimpleModel(QAbstractItemModel):def __init__(self, data):QAbstractItemModel.__init__(self)self._data = dataself._column_count = len(data[0]) if data else 0self._row_count = len(data) if data else 0def rowCount(self, parent=None): return self._row_countdef columnCount(self, parent=None): return self._column_count def data(self, index, role=):if role == :return self._data[()][()] if 0 <= () < len(self._data) else None def index(self, row, column, parent=None):return (row, column) if 0 <= row < self._row_count and 0 <= column < self._column_count else Nonedef parent(self, index): return None No parent for top-level items. def headerData(self, section, orientation, role): return None No header.def setData(self, index, value, role): return False Read-only data. def indexWidget(self, index): return None No widgets for cells.def flags(self, index):if not (): returnreturn Cells are editable.def removeRows(self, row, count, parent=None):if row >= 0 and row + count <= self._row_count: delself._data[row:row+count]return True if row >= 0 and count > 0 else False Returns whether the rows were removed.def insertRows(self, row, count, parent=None):if row >= 0 and count > 0: self._(row, [''] self._column_count) return True if row >= 0 and count > 0 else False Returns whether the rows were inserted.def blockSignals(self, block): pass No signals are emitted when rows are inserted or removed.def reset(self): pass No model support for reset().def clear(self): self._data = [] Clearing the model removes all rows from the view.def dataChanged(self, index1, index2): pass Signal emitted when data changes in the model.def layoutChanged(self): pass Signal emitted when the layout changes in the model.def rowsMoved(self, parent, startIndex, endIndex, newParent, newStart): pass Signal emitted when rows are moved in the model. def columnMoved(self, originalColumn, newColumn): pass Signal emitted when columns are moved in the model.。
eclipse table标签的用法

eclipse table标签的用法Eclipse Table标签用于在Eclipse插件的用户界面中创建表格视图。
以下是其使用方法:1. 首先,在插件的扩展定义中创建一个新的Table Viewer。
```java<extensionpoint="org.eclipse.ui.views"><viewclass="com.example.MyTableView"id="com.example.myTableView"name="My Table View"></view></extension>```2. 在插件中创建TableViewer类,并继承自org.eclipse.jface.viewers.TableViewer,实现表格视图的自定义逻辑。
```javaimport org.eclipse.jface.viewers.TableViewer;import org.eclipse.swt.SWT;import posite;public class MyTableView extends TableViewer {public MyTableView(Composite parent) {super(parent, SWT.MULTI | SWT.H_SCROLL |SWT.V_SCROLL | SWT.FULL_SELECTION | SWT.BORDER);// 设置表格列createColumns();// 设置表格布局getTable().setLinesVisible(true);getTable().setHeaderVisible(true);// 设置表格内容提供者setContentProvider(new MyTableContentProvider());// 设置表格标签提供者setLabelProvider(new MyTableLabelProvider());}private void createColumns() {// 创建表格列,设置宽度、排序等属性// 例如:TableColumn column = new TableColumn(getTable(), SWT.NONE);column.setWidth(100);column.setText("Column 1");column.setMoveable(true);column.setResizable(true);}}```3. 创建内容提供者类和标签提供者类,用于提供表格的内容和标签显示。
tableview的用法

tableview的用法TableView是iOS应用程序的UI组件之一,它的功能强大,能够让应用程序的视图变得更加美观、实用。
本文将详细介绍TableView 的用法,包括TableView的结构,TableView的使用步骤,以及TableView的数据源和委托函数的使用。
一、TableView的结构TableView的结构很简单,它由表头,单元格,单元格标题,单元格数据三部分组成。
表头内容放在表头行中,每一单元格标题和单元格数据放在单元格行中,在单元格行中每一行称为一个项目,即一个相互关联的标题和数据。
二、TableView的使用步骤使用TableView的步骤非常简单,包括以下几个步骤:1、创建TableView:首先,创建一个TableView,创建好之后,需要定义TableView的表头,把表头的文字添加进TableView之中。
2、定义TableView的数据源:定义数据源的时候,需要定义每一个单元格的标题和内容,把这些内容添加到TableView中。
3、实现数据源协议:数据源使用协议格式,要求开发者实现几个基本的协议方法,以便TableView能够正确地加载内容。
4、实现委托函数:委托函数也需要实现,用于定义TableView 的一些特性,比如单元格的高度、显示单元格的动画等。
三、TableView的数据源和委托函数1、TableView的数据源:TableView的数据源是一个数据模型,用于定义TableView的表头和单元格的标题,以及各个单元格的内容。
每一个单元格有一个相互关联的标题和数据,这些只是存储在数据模型中,每次加载TableView的时候,TableView就会从数据模型中取出相应的内容。
2、TableView的委托函数:TableView的委托函数用来定义TableView的一些特性,比如设置TableView的相对高度,定义单元格的分组,以及定义TableView的动画效果等等。
tableview的用法
tableview的用法TableView,是iOS平台中非常重要的一个组件。
它经常被用于显示长列表,支持多列显示,也可以搭配不同的数据源实现复杂的布局。
本文将详细介绍TableView的使用流程和常见的处理场景。
1、TableView简介TableView是iOS中最常用的视图控件,它是基于UITableView 实现的,也是iOS开发中最重要的一个组件之一。
TableView经常被用于显示大量信息,它有两个重要的功能:显示,让我们可以看到大量的内容;编辑,支持我们对数据进行增删改查的操作。
TableView实质上是一个UIScrollView的子类,它支持基本的滚动操作,并且配合UITableViewDataSource和UITableViewDelegate实现更多的显示和编辑功能。
2、TableView的使用(1)实例化一个TableView为了使用TableView,首先需要实例化一个TableView,也就是在工程中添加一个UITableView控件,这里我们可以使用storyboard 进行操作,也可以使用代码来添加。
(2)注册单元格添加完TableView以后,需要注册单元格模板,这样才能够正确的显示单元格,这里我们可以使用storyboard进行操作,也可以使用代码来注册:(3)设置TableView的数据源在实现TableView的前期准备工作完成后,我们可以设置TableView的数据源,这里我们可以使用一个数组,也可以使用一个字典或者其他数据结构,这个对TableView的显示结果有很大的影响:(4)实现TableView的数据源方法当TableView的数据源准备就绪后,我们就可以实现TableView 的数据源方法了,这个数据源方法会被TableView调用,以显示数据:(5)实现TableView的代理方法在实现完TableView的数据源方法之后,我们可以实现TableView的代理方法,这些代理方法会在TableView进行某些特定操作时被调用,比如点击某个单元格时:(6)显示TableView当实现完TableView的数据源方法和代理方法之后,我们就可以显示TableView了,只需要调用TableView的reloadData方法,就可以让TableView显示出相应的数据了:3、常见的TableView处理场景(1)显示一个简单的列表在一般的常见TableView处理场景中,我们最常遇到的就是显示一个简单的列表了,这里可以使用一个简单的数组来实现,在TableView的数据源方法中,只需要将数组中的值赋予给TableViewCell就可以了:(2)显示复杂的布局在一些复杂的布局中,比如显示多列的TableView,我们可以使用一个字典来实现,这里只需要在TableView的数据源方法中,将字典中的值赋予给TableViewCell就可以实现多列的布局:(3)实现TableView的编辑操作TableView除了支持显示之外,还支持编辑,比如我们可以实现TableView的增加、删除和移动操作,这里需要实现TableView的代理方法,比如tableView:moveRowAtIndexPath:toIndexPath和tableView:commitEditingStyle:forRowAtIndexPath::4、总结本文详细介绍了TableView的使用流程和常见的处理场景。
JavaFX2专题教程 之 布局面板
JavaFX2.x专题教程(布局面板)1界面布局1.1内置布局面板在JavaFX应用中,通过设置每个UI元素的位置和尺寸属性,可以实现手动UI控件布局。
但是,JavaFX也提供了一个更容易界面布局选择,即利用内置的布局面板。
JavaFX的SDK提供了好几个布局容器(谓之面板)来简洁的设置和管理布局,诸如行式、列式、栈式、标题式以及其它等。
当视窗尺寸改变时,布局面板自动重定位和改变所包含的节点尺寸,以便保持相关节点属性的一致性。
这个专题中,将对JavaFX布局包内的每个布局面板进行概要介绍并提供相应简单示例。
LayoutSample.java文件包含了内置控件主体,源码参见附件1:布局示例。
也可下载相应的完整的Netbeans的工程文件:LayoutSample.zip。
下面介绍内置布局面板控件。
1.1.1边界面板(BorderPane)BorderPane布局面板内提供了上、下、左、右、中五个区域放置节点,图1-1展示了边界面板的情形。
如果实际应用不需要某一区域,可以不需要定义之并不为之分配空间即可。
边界面板对于顶部工具栏、底部状态栏、左边导航栏、右边附件信息以及中部工作区的典型外观是非常有用的。
如果窗口比每个区域内容需要的空间大,缺省情况下,多余的将留给中间区域;如果窗口小于需要的空间,则区域就肯能重叠。
重叠方式有区域内设置的顺序方式决定。
比如,区域设置的顺序为左、底和右,那么当窗口小了,底部将重叠在左边区域,右边将重叠底部区域。
如果顺序是左、右和底,那么当窗口小时,底部重叠在左右区域上。
示例1-1展示了边界面板的创建,并用于布局示例应用控件的设置。
每个区域应用的创建布注意,底部区域在此示例的边界面板中没有用。
如果需要增加些内容到底部区域,使用如下语句,并用你选择的控件来代替node内容。
1.1.2水平布局面板(HBox)HBox布局面板为在单行中布置一系列节点提供了一种简易方式。
如图1-2所示,展示了一个HBox面板示例图。
JavaFX2.0基础教程
JavaFX2.0基础教程译者:崔传新2012年4至5月目录1 JavaFX概览 (3)1.1 JavaFX认知 (3)1.2 JavaFX简史 (4)1.3 JavaFX2.0新特性 (4)1.4 用JavaFX能构建什么 (6)1.5附加资源 (7)2 JavaFX安装 (8)3 JavaFX架构和框架 (9)3.1 场景图 (9)3.2 JavaFX特征API (10)3.3 图形系统 (10)3.4 视窗工具Glass (11)3.5 线程 (11)3.6 Pulse(脉冲事件) (11)3.7 媒体和图片 (11)3.8 嵌入浏览器 (12)3.9 CSS(层叠样式) (12)3.10 UI控件 (13)3.11 布局设计(Layout) (14)3.12 2D和3D转换 (15)3.13 可视化效果 (15)3.14 部署 (15)4 JavaFX开发入门 (16)4.1 建立应用 (17)4.2 创建应用基础 (17)4.3 增加布景 (18)4.4 添加图形 (18)4.5 增加可视效果 (19)4.6 创建渐变背景 (20)4.7 应用混合模式 (21)4.8 添加动画 (22)4.9 部署应用 (23)5 FXML入门教程 (24)5.1 为何使用FXML (24)5.1.1 FXML介绍 (24)5.1.2 FXML简单示例 (24)5.1.3 FXML的好处 (25)5.2 创建用户界面 (25)5.2.1 准备工作 (26)5.2.2 创建工程 (27)5.2.3 创建应用基础 (27)5.2.4 创建属性文件 (28)5.2.5 创建FXML文件 (28)5.2.6 定义边格布局 (29)5.2.7 图片上堆叠文本 (29)5.2.8 添加Grid布局和控件 (30)5.2.9 添加按钮事件 (31)5.2.10 使用脚本语言 (32)5.2.11 应用式样表 (33)5.2.12 教程回顾 (34)5.3 接下来 (35)6 JavaFX开发概要 (35)第二篇JavaFX内建控件 (36)1. 用户见面控件(UI控件) (37)2. JavaFX2.0中支持的UI控件 (37)前言关于JavaFX的相关基础教程内容,都是翻译自Oracle官方网站的相应内容。
JavaFX TableView与数据库表绑定

JA V AFX中表格与数据库之间的绑定列子public class CardController extends AnchorPane implements Initializable {@FXMLTextField userId;@FXMLMain application;@FXMLTextField UserID;@FXMLTextField UserName;@FXMLTextField UserDept;@FXMLTextField UserPost;@FXMLTextField id;@FXMLTextField name;@FXMLTextField dept;@FXMLTextField post;@FXMLTableView<CCTest> table;@FXMLTableColumn<CCTest,String> ID;@FXMLTableColumn<CCTest,String> Name;@FXMLTableColumn<CCTest,String> Dept;@FXMLTableColumn<CCTest,String> Post;@FXMLTableColumn<CCTest,String> Time;@FXMLTableView<CCTest> queTable;@FXMLTableColumn<CCTest,String> colId;@FXMLTableColumn<CCTest,String> colName;@FXMLTableColumn<CCTest,String> colDept;@FXMLTableColumn<CCTest,String> colPost;@FXMLTableColumn<CCTest,String> colTime;@FXMLTextField qreId;@FXMLTextField qreName;@FXMLComboBox<String> qreDept;@FXMLComboBox<String> qrePost;@FXMLTextField qreTime;@FXMLTextField overTime;ObservableList<CCTest> tableContent = FXCollections.observableArrayList() ;public void setApp(Main application){this.application = application;}public void table(){Card_crud cc = new Card_crud();ArrayList al =cc.Query();Iterator i = al.iterator();while(i.hasNext()){CCTest ct = (CCTest)i.next();tableContent.add(ct);}ID.setCellValueFactory(new PropertyValueFactory<CCTest, String>("id"));Name.setCellValueFactory(new PropertyValueFactory<CCTest,String>("name"));Dept.setCellValueFactory(new PropertyValueFactory<CCTest, String>("dept"));Post.setCellValueFactory(new PropertyValueFactory<CCTest,String>("post"));Time.setCellValueFactory(new PropertyValueFactory<CCTest,String>("time"));table.setColumnResizePolicy(TableView.CONSTRAINED_RESIZE_POLICY);table.setItems(tableContent);}public void dept(){qreDept.getItems().clear();qrePost.getItems().clear();Card_crud cc = new Card_crud();ArrayList al =cc.QueryDept();Iterator i = al.iterator();while(i.hasNext()){String ct = (String)i.next();qreDept.getItems().add(ct);}}public void post(){qrePost.getItems().clear();Card_crud cc = new Card_crud();ArrayList al =cc.QueryPost();Iterator i = al.iterator();while(i.hasNext()){String ct = (String)i.next();qrePost.getItems().add(ct);}}public void processQuery(ActionEvent event){String id = userId.getText();staff_crud sc = new staff_crud();staff st = sc.SingleQuery(id);Card_crud cc = new Card_crud();Date date = new Date();String dateStr = new SimpleDateFormat("yyyy-MM-dd hh:mm:ss").format(date);cc.insert(id,st.getName(),dateStr);CCTest ct =cc.QueryOneTime();tableContent.add(ct);userId.clear();}public void Query(ActionEvent event){ObservableList<CCTest> tableC = FXCollections.observableArrayList() ;card c = new card();Query query = new Query();ArrayList al = null;if(qreId.getText()!="" && qreName.getText()!=""&&qreTime.getText()!=""&&qreDept.getValue()!="null"&&qrePost.getVa lue()!="null"&&overTime.getText()!=""){c.setId(qreId.getText());c.setName(qreName.getText());c.setDept(qreDept.getValue());c.setPost(qrePost.getValue());c.setTime(qreTime.getText());al =query.QueryObject(c,overTime.getText());}if(qreId.getText()!="" && qreName.getText()!=""&&qreDept.getValue()!="null"&&qrePost.getValue()!="null") {c.setId(qreId.getText());c.setName(qreName.getText());c.setDept(qreDept.getValue());c.setPost(qrePost.getValue());al=query.QueryObject1(c);}if(qreId.getText()!="" && qreName.getText()!=""&&qreDept.getValue()!="null"){c.setId(qreId.getText());c.setName(qreName.getText());c.setDept(qreDept.getValue());al=query.QueryObject2(c);}if(qreId.getText()!="" && qreName.getText()!=""){c.setId(qreId.getText());c.setName(qreName.getText());al=query.QueryObject3(c);}if(qreTime.getText()!=""&&overTime.getText()!=""){al=query.QueryObject4(qreTime.getText(),overTime.getText());}Iterator i = al.iterator();while(i.hasNext()){CCTest ct = (CCTest)i.next();tableC.add(ct);colId.setCellValueFactory(new PropertyValueFactory<CCTest, String>("id"));colName.setCellValueFactory(new PropertyValueFactory<CCTest,String>("name"));colDept.setCellValueFactory(new PropertyValueFactory<CCTest, String>("dept"));colPost.setCellValueFactory(new PropertyValueFactory<CCTest,String>("post"));colTime.setCellValueFactory(new PropertyValueFactory<CCTest,String>("time"));queTable.setColumnResizePolicy(TableView.CONSTRAINED_RESIZE_POLICY);queTable.setItems(tableC);}}public void processInsert(ActionEvent event){staff s = new staff();s.setId(UserID.getText());s.setName(UserName.getText());s.setDept(UserDept.getText());s.setPost(UserPost.getText());staff_crud sc = new staff_crud();sc.insert(s);UserID.clear();UserName.clear();UserDept.clear();UserPost.clear();}public void processReset(ActionEvent event){UserID.clear();UserName.clear();UserDept.clear();UserPost.clear();}public void processSingleQuery(ActionEvent event){staff_crud sc = new staff_crud();staff s= sc.SingleQuery(id.getText());name.setText(s.getName());dept.setText(s.getDept());post.setText(s.getPost());}public void processUpdate(ActionEvent event){staff s = new staff();s.setId(id.getText());s.setName(name.getText());s.setDept(dept.getText());s.setPost(post.getText());staff_crud sc = new staff_crud();int num=sc.Update(s);if(num>0){System.out.println("修改成功");}else{System.out.println("修改失败");}id.clear();name.clear();post.clear();dept.clear();}public void processDelete(ActionEvent event){ staff s = new staff();s.setId(id.getText());s.setName(name.getText());s.setDept(dept.getText());s.setPost(post.getText());staff_crud sc = new staff_crud();sc.delete(s);id.clear();name.clear();dept.clear();post.clear();}@Overridepublic void initialize(URL location, ResourceBundle resources) {table();dept();post();}}public class CCTest implements CCT {private final SimpleStringProperty id;private final SimpleStringProperty name;private final SimpleStringProperty dept;private final SimpleStringProperty post;private final SimpleStringProperty time;/* public CCTest(SimpleStringProperty id, SimpleStringProperty name, SimpleStringProperty dept, SimpleStringProperty post, SimpleStringProperty time) {this.id = id; = name;this.dept = dept;this.post = post;this.time = time;}*/public CCTest(String id, String name, String dept, String post, String time){this.id = new SimpleStringProperty(id); = new SimpleStringProperty(name);this.dept = new SimpleStringProperty(dept);this.post = new SimpleStringProperty(post);this.time = new SimpleStringProperty(time);}/* final ObservableList< CCTest> ccList;{final List<CCTest> list = new ArrayList<CCTest>();ccList = FXCollections.observableList(list);CCTest ct=null ;Card_crud cc = new Card_crud();ArrayList al =cc.Query();Iterator i =al.iterator();while(i.hasNext()){CCTest ctt=(CCTest)i.next();ct.setDept(ctt.getDept());ct.setId(ctt.getId());ct.setName(ctt.getName());ct.setPost(ctt.getPost());ct.setTime(ctt.getTime());System.out.println(ct.getId()+"="+ct.getName()+"+"+ct.getDept()+"+"+ct.getPost()+"+"+ct.getTi me());ccList.add(ct);}}*/// final ObservableList<String> projectNames; //定义一个String类型的集合// {// projectNames = FXCollections.<String>observableArrayList();// projectNames.addAll(ccList); //将projectsMap中的键集合添加到projectNames中//projectsMap.addListener(projectsMapChangeListener);//}@Overridepublic String getId() {return id.get();}public void setId(String id){this.id.set(id);}@Overridepublic String getName() {return name.get();}public void setName(String name){.set(name);}@Overridepublic String getDept() {return dept.get();}public void setDept(String dept){this.dept.set(dept);}@Overridepublic String getPost() {return post.get();}public void setPost(String post){this.post.set(post);}@Overridepublic String getTime() {return time.get();}public void setTime(String time){this.time.set(time);}@Overridepublic ObservableValue<String> idProperty() { return id;}@Overridepublic ObservableValue<String> nameProperty() { return name;}@Overridepublic ObservableValue<String> deptProperty() { return dept;}@Overridepublic ObservableValue<String> postProperty() { return post;}@Overridepublic ObservableValue<String> timeProperty() {return time;}}至于bean与Crud类我就不写了,很简单的;要是还不懂的建议你多看看帮助文档/javafx/2/api/index.html自己多实验一下以下是我的页面显示。
JavaFX中列表视图的应用与研究
JavaFX中列表视图的应用与研究作者:郭强来源:《数字技术与应用》2018年第01期摘要:JavaFX作为替代了Swing作为Java语言进行图形界面开发的新工具,正在得到越来越多的开发者的支持[1]。
而作为一种新的界面开发工具,相关教材上对于其具体应用并不详尽,尤其是对一些复杂的组件的介绍,如在这里要介绍的列表视图组件TableView,作为一个功能强大的组件,它的使用还存在着许多需要普及和重视的方面,在这里对TableView的功能进行挖掘。
关键词:JavaFX;TableView;组件中图分类号:TP393.09 文献标识码:A 文章编号:1007-9416(2018)01-0106-01虽然JavaFX已经得到Oracle公司和相关组织的全力支持,但由于Swing存在的时间长,已经得到了广大开发者的认可,很多开发者对JavaFX的理解并不深刻[2]。
而TableView作为JavaFX中的一个常用的组件,常常用来进行数据条目的显示和操作,其功能非常强大,定义了繁多的API帮助开发者实现对数据的不同操作,而且自身还具有排序、多重排序等功能。
因此能够深入的理解TableView的使用将会为程序设计开发带来非常大的便利,关于TableView 的使用使这里要介绍的内容1 TableView结构TableView以表格的形式显示和加载数据,所以像表格一样,一个TableView对象需要定义它的列,因此TableView经常需要和TableColumn、TableCell对象进行组合使用,分别来指定表格的列和数据单元。
1.1 TableViewTableView用以对数据进行表格形式的显示。
JavxFX在定义时赋予了排序,调整列宽的功能,而TableView的数据来源可以是从数据库中读取的数据集进行加载得到,也可以从开发者定义的ObservableList对象中获取。
但是终究是要从ObservableList对象中得到数据,所以ObservableList对象成为了数据的来源。
Java形界面SwingJavaFX和AWT
Java形界面SwingJavaFX和AWT Java形界面Swing、JavaFX和AWTJava是一种广泛应用的编程语言,其强大的图形界面(GUI)库使得开发者能够创建各种各样的用户界面。
在Java中,有三种主要的GUI库,它们分别是Swing、JavaFX和AWT。
本文将详细介绍这三种GUI库的特性和使用方法。
一、SwingSwing是Java提供的一套用于构建图形界面的库,它基于AWT库进行了扩展。
Swing提供了丰富的组件和布局管理器,使得开发者能够轻松地创建漂亮和交互性强的界面。
1.1 组件Swing提供了大量的组件,包括按钮、文本框、标签、列表框、表格等。
开发者可以通过组合这些组件来构建复杂的界面。
Swing组件的特点是可定制性高,开发者可以自定义组件的外观和行为。
1.2 布局管理器Swing通过布局管理器来自动调整组件的位置和大小。
常用的布局管理器有FlowLayout、BorderLayout、GridLayout和GridBagLayout。
开发者可以根据界面的需要选择合适的布局管理器。
1.3 事件处理Swing使用事件模型来处理用户的输入和其他操作。
开发者可以为组件添加事件监听器,响应用户的操作。
事件处理是Swing应用中的重要部分,可以使界面与用户产生交互。
二、JavaFXJavaFX是Oracle推出的新一代Java GUI库。
与Swing相比,JavaFX提供了更多的现代化特性,包括动画效果、3D支持和富文本等。
2.1 UI控件JavaFX提供了一套丰富的UI控件,包括按钮、标签、文本框、下拉框等。
这些控件样式多样,并且支持CSS样式表进行自定义。
2.2 布局JavaFX使用场景图(Scene Graph)来组织界面元素。
开发者可以使用各种布局容器来构建界面,如VBox、HBox、BorderPane等。
2.3 动画效果JavaFX内置了强大的动画框架,开发者可以轻松地创建平滑的过渡效果、缩放动画和旋转动画等。
javafx2.0表格框tableview
J a v a F X2.0表格框T a b l e V i e w-标准化文件发布号:(9456-EUATWK-MWUB-WUNN-INNUL-DDQTY-KIIJavaFX SDK API在的好几个类都被设计来以表格形式呈现数据。
在 JavaFX应用中创建表格的最重要类是TableView, TableColumn , 和TableCell 。
可以通过实现数据模型或者应用一个细胞工厂来产生表格。
表格的类提供了内置的功能来在必要的时候进行数据排序和重置大小。
Figure 13-1是一个典型的表格,用来呈现地址簿中的联系人信息。
Figure 13-1 Table SampleDescription of "Figure 13-1 Table Sample"创建TableExample 13-1中的代码块创建了一个空表格,它带有3列。
然后被加入了应用的场景中。
Example 13-1 Adding a Tableimport javafx.application.Application; import javafx.geometry.Insets; import javafx.scene.Group; import javafx.scene.Scene; import bel; import javafx.scene.control.TableColumn; import javafx.scene.control.TableView; import yout.VBox; import javafx.scene.text.Font; import javafx.stage.Stage; public class Main extends Application { private TableView table = new TableView(); public static void main(String[] args) { launch(args); } @Override public void start(Stage stage) { Scene scene = newScene(new Group()); stage.setTitle("Table View Sample"); stage.setWidth(400); stage.setHeight(500); final Label label = new Label("Address Book"); label.setFont(new Font("Arial", 20)); TableColumn firstNameCol = new TableColumn("First Name"); TableColumn lastNameCol = new TableColumn("Last Name"); TableColumn emailCol = new TableColumn("Email"); table.getColumns().addAll(firstNameCol, lastNameCol, emailCol); final VBox vbox = new VBox(); vbox.setSpacing(5); vbox.getChildren().addAll(label, table); vbox.setPadding(new Insets(10, 0, 0, 10)); ((Group) scene.getRoot()).getChildren().addAll(vbox); stage.setScene(scene); stage.show(); } }表格控件是通过实例化TableView 类创建的。
javafx这些学会后,开发就不难了,往tablecloumn列中添加按钮,修改javaf。。。
javafx这些学会后,开发就不难了,往tablecloumn列中添加按钮,修改javaf。
1. javafx开发过程中遇见难题,往tablecloumn列中添加按钮想了很久的⽅法,也配有办法判断每⾏中有数据的地⽅添加按钮setbank_caozuo.setCellFactory((col)->{TableCell<BankAccount, String> cell = new TableCell<BankAccount, String>(){@Overrideprotected void updateItem(String item, boolean empty) {super.updateItem(item, empty);Button button = new Button("set");if (empty) {//如果此列为空默认不添加元素setText(null);setGraphic(null);} else {this.setGraphic(button);}解释:bank_caozuo为定义的列@FXMLprivate TableColumn<BankAccount, String> bank_caozuo;其实TableCell⾥⾯⽅法updateItem(String item, boolean empty)⼀共两个参数,这个empty可以判断列中每⾏是否有值,为空不添加元素需要设置setText(null); setGraphic(null); 不为空的话,添加set按钮this.setGraphic(button);2. 如何修改javafx中tableview中tablecell中的值,修改完回车表⽰保存到内存中问题:javafx内部是有bind的,也就是说每次修改完之后,都会修改表格内存中的值得,后⾯咱们保存到⾃⼰的⽂件或者数据库中即可做到⾃动保存1bankFangxiang.setCellFactory(TextFieldTableCell.forTableColumn());2bankFangxiang.setCellValueFactory(cellData->cellData.getValue().bankFangxiangProperty());3bankFangxiang.setOnEditCommit((col)->{4 BankAccount bankAccount = (BankAccount)col.getTableView().getItems().get(col.getTablePosition().getRow());5 bankAccount.setBankFangxiang(col.getNewValue());6iniUtil.writeByPathName(bankAccount.getPath(),"account-normal","zhuanzhang",col.getNewValue());//写⼊⽂件中7 });bankFangxiang.setCellFactory(TextFieldTableCell.forTableColumn());表⽰表格⽀持回车保存到展⽰的表格中bankFangxiang.setCellValueFactory(cellData->cellData.getValue().bankFangxiangProperty()); 表⽰将bean的值⾃动填充到tablecell中col.getTablePosition().getRow() 表⽰获取⿏标编辑的那个tablecell的序号(BankAccount)col.getTableView().getItems().get() 表⽰获取tablecell的序号的bean,然后做类型转换为BankAccount即可获取到编辑该⾏beancol.getNewValue() 表⽰获取tabcell编辑之后的值3. javafx中按钮打开fxml对应的窗⼝问题:存在⼀个按钮需要打开fxml对应的窗⼝controller类中的调⽤1//转账,单独打开菜单进⾏转账2 zhu.setOnMouseClicked((col) -> {34 BankViewer bankViewer = new BankViewer();5try {6 bankViewer.start(new Stage());7 } catch (Exception e) {8 e.printStackTrace();9 }10 });BankViewer.java1public class BankViewer extends Application {23 @Override4public void start(Stage primaryStage) throws Exception {5 Parent root = FXMLLoader.load(getClass().getResource("queren.fxml"));6 Scene scene = new Scene(root, 516, 264);7 primaryStage.setTitle("确认");8 primaryStage.setScene(scene);9 primaryStage.show();10 }11 }queren.fxml1<?xml version="1.0" encoding="UTF-8"?>23<?import javafx.scene.control.*?>4<?import yout.*?>5<?import ng.*?>67<Pane maxHeight="-Infinity" maxWidth="-Infinity" minHeight="-Infinity" minWidth="-Infinity" prefHeight="264.0" prefWidth="516.0"8 xmlns="/javafx/8" xmlns:fx="/fxml/1" fx:controller="controller.BankController">9<children>10<TableView fx:id="bank_tableview" editable="true" prefHeight="265.0" prefWidth="516.0">11<columns>12<TableColumn fx:id="account" prefWidth="114.0" text="⽤户名"/>13<TableColumn fx:id="money" prefWidth="126.0" text="456"/>14<TableColumn fx:id="bankFangxiang" prefWidth="38.0" text="123"/>15<TableColumn fx:id="bankPasswd" prefWidth="38.0" text="234"/>16<TableColumn fx:id="bank_caozuo" prefWidth="64.0" text="操作"/>17</columns>18<columnResizePolicy>19<TableView fx:constant="CONSTRAINED_RESIZE_POLICY"/>20</columnResizePolicy>21</TableView>22</children>23</Pane>View Code其中fx:controller="controller.BankController"对应的BankController.java就是对应的controller类。
Java 设置Word表格边框
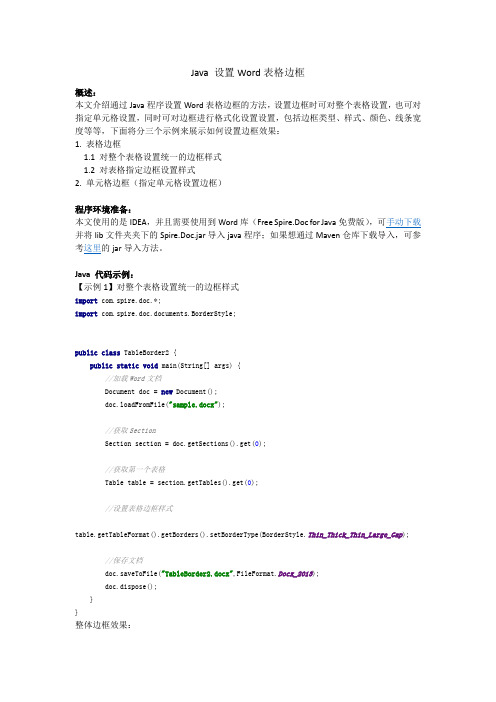
Java 设置Word表格边框概述:本文介绍通过Java程序设置Word表格边框的方法,设置边框时可对整个表格设置,也可对指定单元格设置,同时可对边框进行格式化设置设置,包括边框类型、样式、颜色、线条宽度等等,下面将分三个示例来展示如何设置边框效果:1. 表格边框1.1 对整个表格设置统一的边框样式1.2 对表格指定边框设置样式2. 单元格边框(指定单元格设置边框)程序环境准备:本文使用的是IDEA,并且需要使用到Word库(Free Spire.Doc for Java免费版),可手动下载并将lib文件夹夹下的Spire.Doc.jar导入java程序;如果想通过Maven仓库下载导入,可参考这里的jar导入方法。
Java 代码示例:【示例1】对整个表格设置统一的边框样式import com.spire.doc.*;import com.spire.doc.documents.BorderStyle;public class TableBorder2 {public static void main(String[] args) {//加载Word文档Document doc = new Document();doc.loadFromFile("sample.docx");//获取SectionSection section = doc.getSections().get(0);//获取第一个表格Table table = section.getTables().get(0);//设置表格边框样式table.getTableFormat().getBorders().setBorderType(BorderStyle.Thin_Thick_Thin_Large_Gap);//保存文档doc.saveToFile("TableBorder2.docx",FileFormat.Docx_2013);doc.dispose();}}整体边框效果:【示例2】对表格指定边框设置样式import com.spire.doc.*;import com.spire.doc.documents.BorderStyle;import java.awt.*;public class TableBorder {public static void main(String[] args) {//加载Word文档Document doc = new Document();doc.loadFromFile("sample.docx");//获取SectionSection section = doc.getSections().get(0);//获取第一个表格Table table = section.getTables().get(0);//设置上边框table.getTableFormat().getBorders().getTop().setBorderType(BorderStyle.Dot_Dash); table.getTableFormat().getBorders().getTop().setLineWidth(2f);table.getTableFormat().getBorders().getTop().setColor(Color.red);//设置右边框table.getTableFormat().getBorders().getRight().setBorderType(BorderStyle.Double); table.getTableFormat().getBorders().getRight().setLineWidth(2f);table.getTableFormat().getBorders().getRight().setColor(Color.green);//设置下边框table.getTableFormat().getBorders().getBottom().setBorderType(BorderStyle.None);//设置左边框table.getTableFormat().getBorders().getLeft().setBorderType(BorderStyle.Hairline); table.getTableFormat().getBorders().getLeft().setLineWidth(2f);table.getTableFormat().getBorders().getLeft().setColor(Color.blue);//设置垂直边框table.getTableFormat().getBorders().getVertical().setBorderType(BorderStyle.Dot);table.getTableFormat().getBorders().getVertical().setLineWidth(2f);table.getTableFormat().getBorders().getVertical().setColor(Color.orange);//设置水平边框table.getTableFormat().getBorders().getHorizontal().setBorderType(BorderStyle.Wave); table.getTableFormat().getBorders().getHorizontal().setLineWidth(2f);table.getTableFormat().getBorders().getHorizontal().setColor(Color.magenta);//保存文档doc.saveToFile("TableBorder.docx",FileFormat.Docx_2013);doc.dispose();}}指定边框设置效果:【实例3】指定单元格设置边框import com.spire.doc.*;import com.spire.doc.documents.BorderStyle;import java.awt.*;public class CellBorder {public static void main(String[] args) {//加载Word文档Document doc = new Document();doc.loadFromFile("sample.docx");//获取SectionSection section = doc.getSections().get(0);//获取第一个表格Table table = section.getTables().get(0);//获取单元格,设置上、下边框TableCell cell1 = table.get(0,0);cell1.getCellFormat().getBorders().getTop().setBorderType(BorderStyle.Single);cell1.getCellFormat().getBorders().getTop().setLineWidth(2f);cell1.getCellFormat().getBorders().getTop().setColor(Color.red);cell1.getCellFormat().getBorders().getBottom().setBorderType(BorderStyle.Dash_Dot_Stroker); cell1.getCellFormat().getBorders().getBottom().setLineWidth(2);cell1.getCellFormat().getBorders().getBottom().setColor(Color.pink);//获取单元格,设置左、右边框TableCell cell2 = table.get(1,1);cell2.getCellFormat().getBorders().getLeft().setBorderType(BorderStyle.Hairline); cell2.getCellFormat().getBorders().getLeft().setLineWidth(2);cell2.getCellFormat().getBorders().getLeft().setColor(Color.yellow);cell2.getCellFormat().getBorders().getRight().setBorderType(BorderStyle.Double);cell2.getCellFormat().getBorders().getRight().setLineWidth(2f);cell2.getCellFormat().getBorders().getRight().setColor(Color.magenta);//保存文档doc.saveToFile("CellBorder.docx",FileFormat.Docx_2013);doc.dispose();}}单元格边框设置效果:(完)。
JavaFX 2.0.3 安装指南说明书

JavaFXJavaFX 2.0.3 Installation Guide Release 2.0.3E20474-03February 2012JavaFX/JavaFX 2.0.3 Installation Guide, Release 2.0.3E20474-03Copyright © 2008, 2012, Oracle and/or its affiliates. All rights reserved.Primary Author: JavaFX Documentation TeamThis software and related documentation are provided under a license agreement containing restrictions on use and disclosure and are protected by intellectual property laws. Except as expressly permitted in your license agreement or allowed by law, you may not use, copy, reproduce, translate, broadcast, modify, license, transmit, distribute, exhibit, perform, publish, or display any part, in any form, or by any means. Reverse engineering, disassembly, or decompilation of this software, unless required by law for interoperability, is prohibited.The information contained herein is subject to change without notice and is not warranted to be error-free. If you find any errors, please report them to us in writing.If this is software or related documentation that is delivered to the U.S. Government or anyone licensing it on behalf of the U.S. Government, the following notice is applicable:U.S. GOVERNMENT RIGHTS Programs, software, databases, and related documentation and technical data delivered to U.S. Government customers are "commercial computer software" or "commercial technical data" pursuant to the applicable Federal Acquisition Regulation and agency-specific supplemental regulations. As such, the use, duplication, disclosure, modification, and adaptation shall be subject to the restrictions and license terms set forth in the applicable Government contract, and, to the extent applicable by the terms of the Government contract, the additional rights set forth in FAR 52.227-19, Commercial Computer Software License (December 2007). Oracle America, Inc., 500 Oracle Parkway, Redwood City, CA 94065.This software or hardware is developed for general use in a variety of information management applications. It is not developed or intended for use in any inherently dangerous applications, including applications that may create a risk of personal injury. If you use this software or hardware in dangerous applications, then you shall be responsible to take all appropriate fail-safe, backup, redundancy, and other measures to ensure its safe use. Oracle Corporation and its affiliates disclaim any liability for any damages caused by use of this software or hardware in dangerous applications.Oracle and Java are registered trademarks of Oracle and/or its affiliates. Other names may be trademarks of their respective owners.Intel and Intel Xeon are trademarks or registered trademarks of Intel Corporation. All SPARC trademarks are used under license and are trademarks or registered trademarks of SPARC International, Inc. AMD, Opteron, the AMD logo, and the AMD Opteron logo are trademarks or registered trademarks of Advanced Micro Devices. UNIX is a registered trademark of The Open Group.This software or hardware and documentation may provide access to or information on content, products, and services from third parties. Oracle Corporation and its affiliates are not responsible for and expressly disclaim all warranties of any kind with respect to third-party content, products, and services. Oracle Corporation and its affiliates will not be responsible for any loss, costs, or damages incurred due to your access to or use of third-party content, products, or services.Contents1JavaFX 2.0.3 Installation GuideInstall the JDK + JavaFX SDK Bundle................................................................................................. 1-1 Install the Standalone JavaFX SDK...................................................................................................... 1-1 Install the Standalone JavaFX Runtime............................................................................................... 1-2 Install NetBeans IDE............................................................................................................................... 1-2 JavaFX Samples......................................................................................................................................... 1-2 JavaFX SDK File Structure...................................................................................................................... 1-2 Uninstall JavaFX....................................................................................................................................... 1-3iiiiv1JavaFX 2.0.3 Installation Guide 1-1JavaFX 2.0.3 Installation GuideUse Table 1–1 to determine the JavaFX installation that best suits your needs, then follow the instructions to install JavaFX.Install the JDK + JavaFX SDK BundleThe JavaFX SDK and Runtime are included in the JDK, starting with Java SE 7 Update2. Download the JDK bundle from the JavaFX Downloads page, then go to the JDK Installation Guide.Install the Standalone JavaFX SDKThe standalone JavaFX SDK should only be installed if you are using a JDK older than 7u2.To install the JavaFX SDK:1.Verify your system requirements.2.Go to the JavaFX Downloads page.3.Find the JavaFX SDK downloads, click the link for your operating system, andfollow the prompts to save the executable file.Table 1–1JavaFX Installations What do You Want to do?What to Install You want to develop JavaFX applications using the latest JDK and NetBeans IDE.■Install the JDK + JavaFX SDK Bundle .■Install NetBeans IDE .You want to develop JavaFX applications using the latest JDK and have a Java IDE other than NetBeans IDE.■Install the JDK + JavaFX SDK Bundle .You want to develop JavaFX applications using either NetBeans IDE or the command line, and you are using a version of the JDK older than 7u2.■Install the Standalone JavaFX SDK .■Optional: Install NetBeans IDE .You only want to run JavaFX applications.■Install the Standalone JavaFX Runtime . If you installed the JavaFX SDK, then you do not need to download the JavaFX Runtime separately.Install the Standalone JavaFX Runtime4.Run the .exe file and complete the steps in the installation wizard.The default installation directory for the SDK is C:\Program Files\Oracle\JavaFX2.0 SDK. See JavaFX SDK File Structure for the directories and content.The default installation directory for the Runtime is C:\ProgramFiles\Oracle\JavaFX 2.0 Runtime.Install the Standalone JavaFX RuntimeThe standalone JavaFX Runtime should only be installed if you are using an olderversion of the JDK than 7u2 and do not plan to install the JavaFX SDK.To install the JavaFX Runtime:1.Verify your system requirements.2.Go to the JavaFX Downloads page.3.Find the JavaFX Runtime downloads, click the link for your operating system, andfollow the prompts to save the executable file.4.Run the .exe file.The default installation directory is C:\Program Files\Oracle\JavaFX 2.0 Runtime.Install NetBeans IDEJavaFX 2.0.3 requires NetBeans IDE 7.1, which you can download from the JavaFXDownloads page.See Setting Up NetBeans IDE With JavaFX for information on configuring yoursystem.JavaFX SamplesSample JavaFX applications are available to download from the JavaFX Downloadspage. Download the zip file that contains the samples and extract the files to your filesystem.To run the samples, you must have the JavaFX Runtime installed. To run a sample onyour desktop, click the .jar file for the sample.Source code for each sample is in the javafx-samples-2.0.3\src directory. To view thesource code, go to the javafx-samples-2.0.3\src\sample directory, where sample is thename of the application in which you are interested. Each of the sample sourcedirectories is a NetBeans project.You must have NetBeans IDE 7.1 to build the samples in the IDE. The NetBeansdownload is available from the JavaFX Download page.JavaFX SDK File StructureBy default, the JavaFX SDK software is installed at C:\Program Files\Oracle\JavaFX2.0 SDK. It contains the directories and content shown in Figure1–1.1-2JavaFX 2.0.3 Installation GuideUninstall JavaFX Figure 1–1Directories and Content of the JavaFX SDKbin/SDK build tools.docs/API documentation.rt/JavaFX Runtime directory.tools/Ant tasks used by NetBeans for packaging and deployment.COPYRIGHT.htmlCopyright information for JavaFX documentation.README.htmlA pointer to the README.html document, which provides information about theJavaFX SDK.THIRDPARTYLICENSEREADME.txtLicense information for third-party software included in the JavaFX SDK.Uninstall JavaFXTo uninstall JavaFX, use the standard uninstall process for your operating system. Youmust uninstall the JavaFX SDK and Runtime separately.JavaFX 2.0.3 Installation Guide1-3Uninstall JavaFX1-4JavaFX 2.0.3 Installation Guide。
- 1、下载文档前请自行甄别文档内容的完整性,平台不提供额外的编辑、内容补充、找答案等附加服务。
- 2、"仅部分预览"的文档,不可在线预览部分如存在完整性等问题,可反馈申请退款(可完整预览的文档不适用该条件!)。
- 3、如文档侵犯您的权益,请联系客服反馈,我们会尽快为您处理(人工客服工作时间:9:00-18:30)。
J a v a F X2.0表格框T a b l e V i e w-标准化文件发布号:(9456-EUATWK-MWUB-WUNN-INNUL-DDQTY-KIIJavaFX SDK API在的好几个类都被设计来以表格形式呈现数据。
在 JavaFX应用中创建表格的最重要类是TableView, TableColumn , 和TableCell 。
可以通过实现数据模型或者应用一个细胞工厂来产生表格。
表格的类提供了内置的功能来在必要的时候进行数据排序和重置大小。
Figure 13-1是一个典型的表格,用来呈现地址簿中的联系人信息。
Figure 13-1 Table SampleDescription of "Figure 13-1 Table Sample"创建TableExample 13-1中的代码块创建了一个空表格,它带有3列。
然后被加入了应用的场景中。
Example 13-1 Adding a Tableimport javafx.application.Application; import javafx.geometry.Insets; import javafx.scene.Group; import javafx.scene.Scene; import bel; import javafx.scene.control.TableColumn; import javafx.scene.control.TableView; import yout.VBox; import javafx.scene.text.Font; import javafx.stage.Stage; public class Main extends Application { private TableView table = new TableView(); public static void main(String[] args) { launch(args); } @Override public void start(Stage stage) { Scene scene = newScene(new Group()); stage.setTitle("Table View Sample"); stage.setWidth(400); stage.setHeight(500); final Label label = new Label("Address Book"); label.setFont(new Font("Arial", 20)); TableColumn firstNameCol = new TableColumn("First Name"); TableColumn lastNameCol = new TableColumn("Last Name"); TableColumn emailCol = new TableColumn("Email"); table.getColumns().addAll(firstNameCol, lastNameCol, emailCol); final VBox vbox = new VBox(); vbox.setSpacing(5); vbox.getChildren().addAll(label, table); vbox.setPadding(new Insets(10, 0, 0, 10)); ((Group) scene.getRoot()).getChildren().addAll(vbox); stage.setScene(scene); stage.show(); } }表格控件是通过实例化TableView 类创建的。
在Example 13-1中,它被加入到了VBox 布局容器中,然而,你可以直接把它加入应用场景中。
Example 13-1定义了三列来存储地址簿中的以下信息:某个联系人的名和姓还有电邮地址。
列是用TableColumn 类创建的。
TableView 类的getColumns 方法把前面创建的列加入到表格中。
在应用中,可以用这个方法动态的添加和移除列。
编译运行的效果如下Figure 13-2 .Figure 13-2 Table Without DataDescription of "Figure 13-2 Table Without Data"可以通过调用setVisible方法来管理列的可视性。
比如说,你应用的逻辑要求隐藏用户电邮地址,可以这样达到目的:emailCol.setVisible(false) .如果数据要求更复杂的数据呈现结构,可以创建内嵌的列。
比如,如果地址簿中的联系人有两个email账户,就需要两列来展示首选和次要地址了。
创建两个子列,然后在emailCol上调用getColumns方法,见Example 13-2 .Example 13-2 Creating Nested ColumnsTableColumn firstEmailCol = new TableColumn("Primary"); TableColumn secondEmailCol = new TableColumn("Secondary");emailCol.getColumns().addAll(firstEmailCol, secondEmailCol);把这些代码加入到Example 13-1 , 然后编译运行,表格的呈现效果如Figure 13-3 .Figure 13-3 Table with Nested ColumnsDescription of "Figure 13-3 Table with Nested Columns"尽管表格被加入到了应用中,标准标题依然显示的是"No content in table" 因为没定义数据。
为了不显示这个标题,可以使用setPlaceholder方法指定一个Node对象来显示在空表格中。
定义Data Model当在JavaFX应用中创建表格时,最佳实践是实现一个定义了数据模型、提供了方法和字段的类来扩展表格的工作。
Example 13-3创建了一个Person类来定义地址簿中的数据。
Example 13-3 Creating the Person Classpublic static class Person { private final SimpleStringProperty firstName; private final SimpleStringProperty lastName; private final SimpleStringProperty email; private Person(String fName, String lName,String email) { this.firstName = new SimpleStringProperty(fName);stName = new SimpleStringProperty(lName); this.email = new SimpleStringProperty(email); } public String getFirstName() { return firstName.get(); } public void setFirstName(String fName){ firstName.set(fName); } public String getLastName() { returnlastName.get(); } public void setLastName(String fName){ lastName.set(fName); } public String getEmail() { return email.get(); } public void setEmail(String fName) { email.set(fName); } }firstName , lastName , 和email字符串属性(string property)是创建来引用特定的数据元素的。
另外,get和set方法是提供给每个数据元素的。
这样,比如说,getFirstName方法返回了firstName属性的值,而setFirstName方法为这个属性指定了值。
当数据模型在Person类中形成时,可以创建一个ObservableList数组来定义足够多的行来在表格中显示你的数据。
看Example 13-4中的代码。
Example 13-4 Defining Table Data in an Observable Listfinal ObservableList<Person> data = FXCollections.observableArrayList( new Person("Jacob", "Smith", "jacob.smith@"), new Person("Isabella", "Johnson", "isabella.johnson@"), new Person("Ethan", "Williams", "ethan.williams@"), new Person("Emma", "Jones","emma.jones@"), new Person("Michael", "Brown","michael.brown@") );下一步是将数据和表格列相关联。
可以通过为每个数据元素定义的属性来实现,见Example 13-5 . Example 13-5 Setting Data Properties to ColumnsfirstNameCol.setCellValueFactory( newPropertyValueFactory<Person,String>("firstName") );lastNameCol.setCellValueFactory( newPropertyValueFactory<Person,String>("lastName") );emailCol.setCellValueFactory( newPropertyValueFactory<Person,String>("email") );setCellValueFactory方法为每列指定了一个细胞工厂。
