CISCO路由器初学者完全教程
Cisco RV320 RV325 快速入门指南说明书
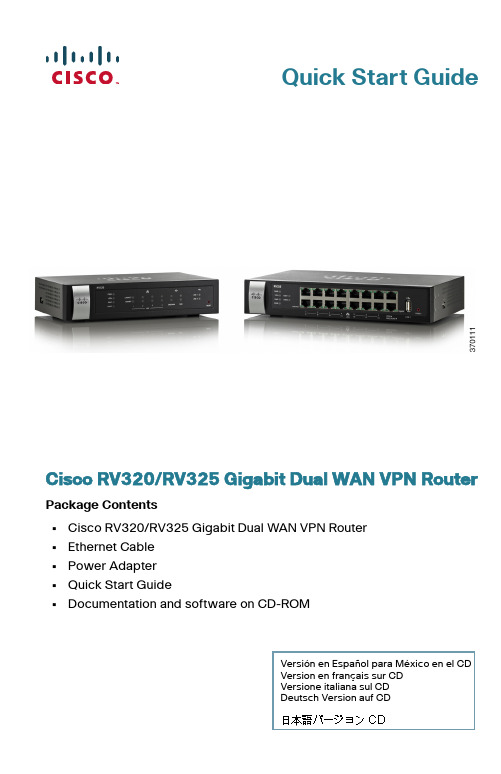
Quick Start GuideVersión en Español para México en el CDVersion en français sur CDVersione italiana sul CDDeutsch Version auf CDCisco RV320/RV325 Gigabit Dual WAN VPN Router Package Contents•Cisco RV320/RV325 Gigabit Dual WAN VPN Router•Ethernet Cable•Power Adapter•Quick Start Guide•Documentation and software on CD-ROMWelcomeThank you for choosing the Cisco RV320/RV325 Gigabit Dual WAN VPN Router.This guide describes how to physically install your Cisco RV320/RV325 and launch the web-based Device Manager.Installing Cisco RV320/RV3251T o prevent the device from overheating or being damaged:•Ambient Temperature—Do not operate it in an area that exceeds an ambient temperature of 104°F (40°C).•Air Flow—Be sure that there is adequate air flow around the device. If wall mounting the firewall, make sure the heat dissipation holes are to the side.•Circuit Overloading—Adding the device to the power outlet must not overload that circuit.•Mechanical Loading—Be sure that the device is level and stable to avoid any hazardous conditions and that it is secure to prevent it from sliding or shifting out of position. Do not place anything on top of the firewall, as excessive weight might damage it.For desktop mounting, place the device on a flat surface so that it sits on its four rubber feet.Wall MountingThe router has two wall-mount slots on the bottom panel. T o mount the router on a wall, you need mounting hardware (not included). Suggested hardware is illustrated below (not true to scale).RV3202Cisco RV320/RV325 Gigabit Dual WAN VPN Router Quick Start GuideRV325W ARNING Insecure mounting might damage the router or cause injury.Cisco is not responsible for damages incurred by insecure wall-mounting.W ARNING For safety, ensure that the heat dissipation holes are facing sideways.S TEP1Drill two pilot holes, approximately 109 mm apart, into the surface. S TEP2Insert a screw into each hole, leaving a gap between the surface and the base of the screw head of 1 to 1.2 mm.S TEP3Place the router wall-mount slots over the screws and slide the router down until the screws fit snugly into the wall-mount slots. Cisco RV320/RV325 Gigabit Dual WAN VPN Router Quick Start Guide3Rack Mounting Cisco RV325Front PanelPWR—Lit to indicate the unit is powered on and booted. Blinks when the device is booting.VPN—Lit green when the designated VPN tunnel is up. Blinks green when data is being sent or received through the tunnel. Lit amber when the tunnel is disconnected. Blinks amber when attempting to establish the tunnel.DMZ—Lit green when the DMZ/WAN port is configured as a DMZ. DIAG—Blinks red when the firmware is updating. Lit red when the device is booting.LINK/ACT—Lit steady when a link between a port and another device is detected. Flashes when a port is passing traffic.GIGABIT—Lit when another device is connected to a port and a1000Mbps link is established. Off when the connection speed is under 1000Mbps or no other device is attached to a port.LAN1-4—Lit when the LAN ports on the back panel are linked to another device. Blinks when passing traffic.4Cisco RV320/RV325 Gigabit Dual WAN VPN Router Quick Start GuideDMZ/WAN—Lit when a device is connected to the DMZ/WAN port. Flashes when sending or receiving data over the WAN DMZ port.WAN—Lit when the WAN port is connected. The light is off when it is not connected to the Internet or it is connected by using a USB dongle. Blinks when it is sending or receiving data over the WAN connection.USB1 and USB2—Lit green when the corresponding port is connected to a device. Flashes green when the port is sending or receiving data. RESET—Reboot or reboot and restore defaults:•T o reboot the unit and retain the current configuration, press and hold RESET for at least 3, but no more than 10 seconds, by using a paper clip or a pen tip.•T o reboot the unit and restore the factory default configuration, press and hold in the RESET button for more than 10 seconds. Changes you have made to the configuration of your device are lost.Back PanelPOWER—T oggles power to the device on or off.12VDC (1.5A)—Power port that connects the device to the provided12VDC, 1.5 amp power adapter.LAN(1-4)—RJ-45 connectors that link local area network devices, such as PCs, print servers, or switches, to the device.DMZ/WAN—Internet device connection supporting a DMZ for connecting the device to a wide area network device, such as a cable or DSL modem. WAN—Internet connection for connecting the device to a wide area network device, such as a cable or DSL modem.USB1—Type A USB port that supports flash drives and 3G/4G/L TE USB dongles. Caution: Use only the power supply provided with the device; using another power supply might cause the USB dongle to fail.Side PanelUSB2—Type A USB port that supports flash drives and 3G/4G/L TE USB dongles. Caution: Use only the power supply provided with the device; using another power supply might cause the USB dongle to fail.Cisco RV320/RV325 Gigabit Dual WAN VPN Router Quick Start Guide5Cisco RV325 Features3Front PanelPWR—Lit to indicate the unit is powered on and booted. Blinks when the device is booting.VPN—Lit green when the designated VPN tunnel is up. Blinks green when data is being sent or received through the tunnel. Lit amber when the tunnel is disconnected. Blinks amber when attempting to establish the tunnel.DMZ—Lit green when the DMZ/WAN port is configured as a DMZ. DIAG—Blinks red when the firmware is updating. Lit red when the device is booting.USB1 and USB2—Lit green when the corresponding port is connected to a device. Flashes green when the port is sending or receiving data.LAN1-14—RJ-45 connectors that link local area network devices, such as PCs, print servers, or switches, to the device.WAN—Lit when the WAN port is connected. The light is off when it is not connected to the Internet or it is connected by using a USB dongle. Blinks when it is sending or receiving data over the WAN connection.DMZ/WAN—Lit when a device is connected to the DMZ/WAN port. Flashes when sending or receiving data over the WAN DMZ port.LINK/ACT—Lit steady when a link between a port and another device is detected. Flashes when a port is passing traffic.GIGABIT—Lit when another device is connected a port and a 1000Mbps link is established. Off when the connection speed is under 1000Mbps or no other device is attached to a port.USB1—Type A port that only supports 3G/4G L TE USB dongles and USB flash drive (firmware upgrade or importing/exporting certificate, log and configuration file), but does not support any other storage capabilities (for example connecting to NAS storage device).RESET—Reboot or reboot and restore defaults:•T o reboot the unit and retain the current configuration, press and hold RESET for at least 3, but no more than 10 seconds, by using a paper clip or a pen tip.•T o reboot the unit and restore the factory default configuration, press and hold in the RESET button for more than 10 seconds. Changes you have made to the configuration of your device are lost.6Cisco RV320/RV325 Gigabit Dual WAN VPN Router Quick Start GuideBack PanelPOWER—T oggles power to the device on or off.12VDC(2A)—Power port that connects the device to the provided12VDC, 2 amp power adapter.Side PanelUSB2—Type A port that only supports 3G/4G L TE USB dongles and USB flash drive (firmware upgrade or importing/exporting certificate, log and configuration file), but does not support any other storage capabilities (for example connecting to NAS storage device).Connecting4You must connect a configuration terminal (PC) to the device by using a LAN port. The terminal must be in the same wired subnetwork as the device to perform the initial configuration. As part of the initial configuration, the device can be configured to allow remote management. T o connect a computer to the device:S TEP1Power off all equipment, including the cable or DSL modem, the computer, and this device.S TEP2Use an Ethernet cable to connect your cable or DSL modem to the WAN port on this device.S TEP3Connect another Ethernet cable from one of the LAN (Ethernet) ports to the Ethernet port on the computer.S TEP4Power on the WAN device and wait until the connection is active. S TEP5Connect the power adapter to the 12VDC port of this device.C AUTION Use only the power adapter that is supplied with the device.Using a different power adapter could damage the device orcause the USB dongles to fail.The POWER switch is on by default. The power light on the frontpanel is lit when the power adapter is connected properly and thedevice is finished booting.S TEP6Plug the other end of the adapter into an electrical outlet. Use the plug (supplied) specific to your country.Cisco RV320/RV325 Gigabit Dual WAN VPN Router Quick Start Guide7S TEP7Power on the computer that you connected to the LAN port in Step 3. Your computer becomes a DHCP client of the device andreceives an IP address in the 192.168.1.xxx range.Logging InT o log into the device:S TEP1Launch a web browser.S TEP2In the address bar, enter the default IP address of the device, https://192.168.1.1. A site security certificate message isdisplayed. The Cisco RV320/RV325 uses a self-signed securitycertificate. This message appears because the device is notknown to your computer.S TEP3Click Continue to this website(or the option shown on your particular web browser) to continue. The login displays.S TEP4Enter the username and password. The default username is cisco.The default password is cisco. Passwords are case sensitive.S TEP5Click Log In. The Device Manager application starts.We recommend that you change the password. You are required to change the password before enabling features such as remote management.Changing the Administrator Username and PasswordT o change the Administrator username and password on the device:S TEP1From the Getting Started page, select Change Administrator Password or select Setup > Password from the navigation bar.S TEP2Change the Username.S TEP3Enter the Old Password.S TEP4Enter the New Password.S TEP5Confirm the New Password.S TEP6Click Save.8Cisco RV320/RV325 Gigabit Dual WAN VPN Router Quick Start GuideTroubleshoot Your ConnectionIf you cannot access your device by using Device Manager, the device might not be reachable from your computer. You can test network connections by using ping on a computer running Windows:S TEP1Open a command window by using Start > Run and enter cmd.S TEP2At the Command window prompt, enter ping and the device IP address. For example, ping 192.168.1.1 (the default static IPaddress of the device).If you can reach the device, you should get a reply similar to thefollowing:Pinging 192.168.1.1 with 32 bytes of data:Reply from 192.168.1.1: bytes=32 time<1ms TTL=128If you cannot reach the device, you should get a reply similar to thefollowing:Pinging 192.168.1.1 with 32 bytes of data:Request timed out.Possible Causes and ResolutionsBad Ethernet connection:Check the LEDs for the proper indications. Check the connectors of the Ethernet cable to ensure they are firmly plugged into the device and your computer.Wrong or conflicting IP address:Verify that you are using the correct IP address of the device.Verify that no other device is using the same IP address as this device. No IP route:If the device and your computer are in different IP subnetworks,remote access must be enabled and you need at least one router on the network to route the packets between the two subnetworks. Unusually long access time:Adding new connections might take 30 to 60 seconds for the affected interfaces and/or LAN to become operational.Cisco RV320/RV325 Gigabit Dual WAN VPN Router Quick Start Guide910Cisco RV320/RV325 Gigabit Dual WAN VPN Router Quick Start GuideWhere to Go From HereFor EU Lot 26 related test results, see /go/eu-lot26-results Support Cisco SupportCommunity/go/smallbizsupport Cisco Support andResources/go/smallbizhelp Phone Support Contacts /en/US/support/tsd_cisco_small_business_support_center_contacts.htmlCisco Firmware Downloads/cisco/software/navigator.html?i=!chSelect a link to download firmware for CiscoProducts. No login is required.Cisco Open SourceRequest/go/smallbiz_opensource_request Cisco Partner Central(Partner Login Required)/web/partners/sell/smb Product DocumentationCisco Routers andFirewalls /go/smallbizrouters 5Cisco RV320/RV325 Gigabit Dual WAN VPN Router Quick Start Guide11Americas HeadquartersCisco Systems, Inc.170 West Tasman DriveSan Jose, CA 95134-1706 USA/go/sbsc78-20927-04Cisco and the Cisco logo are trademarks or registered trademarks of Cisco and/or its affiliates in the U.S. and other countries. To view a list of Cisco trademarks, go to this URL: /go/trademarks. Third-party trademarks mentioned are the property of their respective owners. The use of the word partner does not imply a partnership relationship between Cisco and any other company. (1110R)© 2014 Cisco Systems, Inc. All rights reserved.。
思科路由器初始化如何设置
思科路由器初始化如何设置1.首先,确保正确连接好路由器和计算机之间的物理连接,如正确插入网线或无线连接。
2.打开计算机上的浏览器,并输入路由器的管理界面的默认IP地址。
大多数思科路由器的默认IP地址是192.168.1.1,也可以在路由器的文档中找到。
在浏览器的地址栏输入该IP地址后,按下回车键。
3. 这将打开思科路由器的登录界面。
输入默认的用户名和密码。
根据不同的型号和固件版本,用户名和密码可能会有所不同。
一些常见的默认用户名是“admin”,默认密码可以为空或为“admin”或“password”。
如果不确定,请参考路由器文档或厂商的网站。
4.登录成功后,将会看到思科路由器的管理界面。
在这里,可以进行各种设置和配置。
5.首先,更改默认的管理员用户名和密码,以增强路由器的安全性。
在“设置”或“管理”选项卡中,找到“管理员凭据”或“管理账户”等选项。
输入新的用户名和密码,并确保记住它们以供将来使用。
6.接下来,配置网络连接。
在“网络设置”或“WAN设置”选项卡中,选择合适的连接类型,如动态IP、静态IP或PPPoE等。
根据网络提供商的要求,输入适当的IP地址、子网掩码、网关和DNS服务器信息。
7.此外,还可以在“局域网设置”或“LAN设置”选项卡中配置路由器的内部局域网。
设置路由器的IP地址、子网掩码和DHCP服务器等。
8.如果路由器支持无线网络,还可以在“无线设置”或“Wi-Fi设置”选项卡中配置无线网络。
设置SSID(无线网络名称)、安全加密方式(如WPA2)、密码和频段等。
9.进行其他高级设置,如端口转发、DDNS、防火墙、访问控制、质量服务(QoS)等。
这些设置可根据需要进行配置,具体步骤和选项会因设备型号和固件版本而有所不同。
10.最后,保存并应用所有更改,以使配置生效。
如何进入思科路由器

如何进入思科路由器思科路由器是一种常见的网络设备,用户可以通过进入路由器的控制界面来进行配置和管理。
本文将介绍如何进入思科路由器的控制界面。
1. 确定路由器的IP地址在进入思科路由器之前,首先需要确定路由器的IP地址。
可以通过以下几种方式来查找:1.1 通过物理路由器查找物理路由器上通常会标注其IP地址,可以直接查看路由器背后的标签或手册来查找。
常见的IP地址格式为192.168.xxx.xxx。
1.2 通过命令行查找在Windows系统中,打开命令提示符窗口(CMD);在Mac系统中,打开终端。
然后输入以下命令:ipconfig (Windows)或ifconfig (Mac)在输出的信息中,查找“默认网关”一栏,该IP地址通常为路由器的IP地址。
2. 打开浏览器并输入路由器IP地址在确定了路由器的IP地址后,打开任意浏览器,并在地址栏中输入路由器的IP地址,按下回车键。
3. 输入用户名和密码在浏览器打开指定IP地址后,系统会要求输入用户名和密码来访问路由器的控制台。
默认情况下,思科路由器的默认用户名为admin,默认密码为空。
若已经修改过路由器的密码,需要输入新密码。
4. 进入路由器控制界面输入正确的用户名和密码后,点击登录按钮,即可进入思科路由器的控制界面。
在这个界面上,用户可以进行各种配置和管理操作,如设置无线网络、更改路由器密码等。
5. 修改路由器密码为了保证路由器的安全性,一定要修改默认的路由器密码。
在进入路由器控制界面后,找到“设置”或“管理”选项,然后找到“管理密码”或类似的选项,输入新密码并保存设置。
6. 退出路由器控制界面当完成所有配置和管理操作后,应及时退出路由器控制界面,以防止他人未经授权访问路由器。
通常可以在顶部或底部找到“注销”或“退出”按钮,点击即可退出路由器控制界面。
结论通过上述步骤,我们可以轻松进入思科路由器的控制界面,并进行必要的配置和管理操作。
请记住及时修改路由器密码,并保持密码的安全性,以确保路由器的安全性。
路由器的初始化配置以及远程接入的配置方法
路由器的初始化配置以及远程接入的配置方法在CONFIG T模式一下,定义一下,BOOT SYSTEM吧!应该就可以解决了!网友4show v修改寄存器值从flash引导config-reg 0x2102配置引导文件位置boot system flash:imge_name或者从disk0:/disk1:/slot0:/slot1路由器初学者完全教程本文以Cisco2620为例,讲述了路由器的初始化配置以及远程接入的配置方法,探讨了如何使用内部网络的DHCP服务功能为远程拨入的用户分配地址信息以及路由器常见故障的排除技巧。
(本文假定Cisco2620路由器为提供远程接入访问,已经配置了同步串行模块和异步串行16AM模块。
)Cisco2620路由器的基本配置1. 初始安装第一次安装时系统会自动进入Dialog Setup,依屏幕提示,分别回答路由器名称、加密超级登录密码、超级登录密码、远程登录密码、动态路由协议以及各个接口的配置后,保存配置。
在出现路由器名称后,打入enable命令,键入超级登录密码,出现路由器名称(这里假设路由器名称为Cisco2620),待出现Cisco2620#提示符后,表示已经进入特权模式,此时就可以进行路由器的配置了。
2. 配置路由器键入config terminal,出现提示符Cisco2620(config)#,进入配置模式。
(1) 设置密码Cisco2620(config)#enable secret 123123:设置特权模式密码为123123Cisco2620(config)#line console 0: 进入Console口配置模式Cisco2620(config-line)#password 123123:设置Console口密码为123123Cisco2620(config-line)#login:使console口配置生效Cisco2620(config-line)#line vty 0 5:切换至远程登录口Cisco2620(config-line)#password 123123:设置远程登录密码为123123Cisco2620(config-line)#login:使配置生效(2) 设置快速以太网口Cisco2620(config)#interface fastFastethernet 0/0:进入端口配置模式Cisco2620(config-if)#ip address 192.168.1.6 255.255.255.0:设置IP地址及掩码Cisco2620(config-if)#no shutdown: 开启端口Cisco2620(config-if)#exit:从端口配置模式中退出(3) 设置同步串口Cisco2620(config)#interface serial 0/0:进入同步串口设置Cisco2620(config-if)#ip unnumbered fastFastethernet 0/0:同步串口使用与快速以太网口相同的IP地址Cisco2620(config-if)#encapsulation ppp: 把数据链路层协议设为PPP(4) 设置16口Modem拨号模块,使用内部DHCP服务为拨入用户分配地址Cisco2620(config)#interface Group-Async1Cisco2620(config-if)# ip unnumbered FastEthernet0/0Cisco2620(config-if)# encapsulation pppCisco2620(config-if)# ip tcp header-compression passive:启用被动IP包头压缩Cisco2620(config-if)# async mode dedicated:只在异步模式下工作Cisco2620(config-if)# peer default ip address dhcp:将IP地址请求转发至DHCP服务器Cisco2620(config-if)# ppp authentication chap:将认证设为CHAPCisco2620(config-if)# group-range 33 48:拨号组包括16个口Cisco的16AM模块提供了高密度的模拟电路接入方式,不在办公大楼的员工可以用Modem 拨号联入局域网、登录服务器,实现远程办公。
cisco+2811路由器配置手册
思科CISCO 路由器初始配置向导一、路由器开机初始序列当路由器进展初始化时,路由器进展以下操作:1)自ROM 执行上电自检,检测CPU,内存、接口电路的根本操作。
2)自ROM 进展引导,将操作系统装下载到主存。
3)引导操作系统由配置存放器的引导预确定由FLASH 或网络下载,则配置文件的boot system 命令确定其精准位置。
4)操作系统下载到低地址内存,下载后由操作系统确定路由器的工作硬件和软件局部并在屏幕上显示其结果。
5)N VRAM 中存储的配置文件装载到主内存并通过执行,配置启动路由进程,供给接口地址、设置介质特性。
假设NVRAM 中设有有效的配置文件,则进入Setup 会话模式。
6)然后进入系统配置会话,显示配置信息,如每个接口的配置信息。
二、Setup 会话当NVRAM 里没有有效的配置文件时,路由器会自动进入Setup 会话模式。
以后也可在命令行敲入Setup 进展配置。
Setup 命令是一个交互方式的命令,每一个提问都有一个缺省配置,假设用缺省配置则敲回车即可。
假设系统已经配置过,则显示目前的配置值。
假设是第一次配置,则显示出厂设置。
当屏幕显示------ More ,键入空格键连续;假设从Setup 中退出,只要键入Ctrl-C 即可。
1、Setup 主要参数:配置它的一般参数,包括:主机名:hostname特权口令:enable password虚终端口令:virtual terminal passwordSNMP 网管:SNMP Network ManagementIP :IPIGRP 路由协议:IGRP RoutingRIP 路由协议:RIP RoutingDECnet : DECnet . 等其中Console 的secret、password 的设置:enable secret <string>;enable password <string>;Virtual Terminor的password 的设置:Line vty <number>;Password <string>;Host name 的设置:Hostname <string>;2、Setup 接口参数:设置接口参数,如以太网口、TokenRing 口、同步口、异步口等。
思科路由器配置教程
引言概述:在现代网络中,路由器是连接计算机网络的关键设备之一。
其中思科路由器是业界认可的品牌,并且广泛应用于企业和家庭网络中。
本文将详细介绍如何配置思科路由器,帮助读者了解和掌握路由器配置的基本知识和技巧。
正文内容:一、连接路由器1.检查硬件连接:确保所有线缆正确插入路由器和计算机的相应端口。
2.配置本地网络:通过计算机的网络设置,将本地IP地质和子网掩码设置为与路由器相同的网段。
二、路由器基本设置1.登录路由器:通过输入默认的IP地质(一般为192.168.1.1或192.168.0.1)在浏览器中访问路由器的登录页面,输入管理员用户名和密码。
2.修改管理员密码:为了增加路由器的安全性,第一次登录时应该修改管理员密码。
3.更新路由器固件:使用最新的路由器固件可以提供更好的性能和安全性。
4.配置时间和日期:确保路由器的时间和日期正确,这对于日志记录和网络安全非常重要。
三、WAN设置1.配置接入类型:根据网络服务提供商的要求,选择正确的接入类型,例如DHCP、静态IP等。
2.配置PPPoE连接:如果使用PPPoE方式拨号上网,需要输入提供商提供的用户名和密码进行配置。
3.配置动态DNS:如果需要使用动态DNS功能,可以在此处输入相应的信息。
四、LAN设置1.设置局域网IP地质:为路由器设置一个唯一的IP地质,在同一网段内没有重复的IP。
2.配置DHCP服务器:启用DHCP服务器功能,为连接到路由器的设备动态分配IP地质。
3.设置无线网络:为无线网络设置SSID和安全密码,并配置其他相关选项,如频段、通道等。
五、高级设置1.配置端口转发:如果需要将外部访问域名映射到内部服务器,可以在此处进行端口转发配置。
2.配置虚拟专用网络(VPN):为用户提供远程访问网络的安全通道。
3.设置防火墙规则:根据网络需求设置适当的防火墙规则来保护网络安全。
4.配置质量服务(QoS):可以通过设置QoS规则提高特定应用程序或设备的网络性能。
cisco初学者内部培训教材-Cisco路由器的调试和配置 (1)

• 3.router(config)# :在router#提示符下键入configure terminal,出现 提示符router(config)#,此时路由器处于全局设置状态,这时可 以设置路由器的全局参数。
• 4.router(config-if)#; router(config-line)#; router(config-router)#;… : 路由器处于局部设置状态,这时可以设置路由器某个局部的参 数。
•Class A:10.1.1.1 to 10.254.254.254
•Class B:172.16.1.1 to 172.31.254.254
•Class C:192.168.1.1 to 192.168.254.254
2020/3/2
15
如下图所示,
路由器的Ethernet 0端口为inside端口,即此端口连接内部网络,并且此端口所连接的网络应该被翻
• 5.> 路由器处于RXBOOT状态,在开机后60秒内按ctrl-break可进 入此状态,这时路由器不能完成正常的功能,只能进行软件升 级和手工引导。
• 6. 设置对话状态:这是一台新路由器开机时自动进入的状态,
在特权命令状态使用SETUP命令也可进入此状态,这时可通过
2020/3/2对话方式对路由器进行设置。
• Configure IP? [yes]:
• Configure IGRP routing? [yes]:
• Configure RIP routing? [no]:………
• 6.如果配置的是拨号访问服务器,系统还会设置异步口的参数:
• Configure Async lines? [yes]:
• 1)设置线路的最高速度:Async line speed [9600]:
思科路由器怎么进入 思科路由器怎么设置
思科路由器怎么进入思科路由器怎么设置思科路由器怎么进入?要进入思科路由器设置需要满足2个条件一是,思科路由器与电脑正确连接。
二是,需要输入正确的思科路由器登陆地址,一般思科路由器默认登陆地址是192.168.1.1(您可以查看思科路由器底部的铭牌标注确认),如果这个地址无法进入,那么可能是您之前修改正登陆地址。
如果忘记了登陆地址,只能通过重置路由器,也就是将思科路由器恢复到出厂设置(教程:路由器怎样恢复设置路由器恢复出厂设置指南),然后重新使用默认的登陆地址进入就可以了。
思科路由器根本配置教程在第一次进行思科路由器配置的时候,我们需要从console端口来进行配置。
以下就是如何连接到控制端口及设置虚拟终端程序的方法:(1)使用rollover线和一个RJ45和DB9或者DB25的转换适配器连接路由器控制端口和终端计算机。
如何连接到思科路由器的控制端口:控制端口(consoleport)和辅助端口(AU某port)是思科路由器的两个管理端口,这两个端口都可以在第一次进行思科路由器配置时使用,但是我们一般都推荐使用控制端口,因为并不是所有的路由器都会有AU某端口。
(2)当路由器第一次启动时,默认的情况下是没有网络参数的,路由器不能与任何网络进行通信。
所以我们需要一个RS-232ASCLL终端或者计算机仿真ASCLL终端与控制端口进行连接。
(3)连接到端口的方法连接线缆:连接到console端口我们需要一根rollover线缆和RJ-45转DB-9的适配器。
一般在思科路由器的产品附件中我们可以见到。
无线路由器终端仿真软件:PC或者终端必须支持VT100仿真终端,通常我们在WindowsOS环境下都使用的是HyperTerminal软件。
这里我们以主机名为riga 为例,在全局模式下输入hostnameriga,然后按回车键执行命令,这时,主机提示符前的主机名变为riga,说明设置主机名成功。
一.思科路由器安装思科路由器安装与其他品牌无线路由器安装一样,主要是需要将猫、与Linksys无线路由器通过网线按照要求连接好就可以了。
思科 RV130 RV130W 多功能 VPN 路由器 - 快速入门指南说明书
快速入门指南思科RV130多功能VPN路由器思科RV130W无线多功能VPN路由器包装内容物•路由器•以太网电缆•电源适配器•快速入门指南•文档和软件(存储于 CD-ROM 光盘上)欢迎感谢您选择思科RV130/RV130W路由器。
本指南介绍了如何安装思科 RV130/RV130W并启动基于Web的设备管理器。
安装思科 RV130/RV130W1安放提示为防止设备过热或者受损:•环境温度 — 请勿在环境温度超过 40°C (104°F)的区域中使用。
•通风 — 请确保设备周围的通风良好。
•机械负载 — 请确保设备放置平稳,以免出现任何对设备造成损坏的情况。
请将设备放置在水平的表面上,以便设备依靠四个橡胶支脚来支撑。
壁挂式安装路由器的底部面板上有两个壁挂槽。
要将路由器安装到墙上,您需要安装硬件(未随机附赠)。
建议的木螺丝尺寸如图所示(非真实比例)。
2思科RV130/RV130W多功能VPN路由器思科RV130/RV130W 多功能VPN 路由器 3思科 RV130/RV130W 的特性RV130前面板电源当设备开启电源并启动时,指示灯呈绿色常亮状态。
设备正在启动或升级固件时,指示灯呈绿色闪烁状态。
如果设备在运行损坏的固件,指示灯会快速闪烁。
VPN (仅适用于站点到站点的 IPsec VPN )当至少有一个 VPN 隧道处于活动状态时,指示灯呈绿色常亮状态。
当通过 VPN 隧道接收或传输数据时,指示灯呈绿色闪烁状态。
当没有任何启用的 VPN 隧道处于活动状态时,指示灯呈琥珀色状态。
USB USB 装置成功连接到 Internet 服务提供商 (ISP)且 IP 地址已分配时,指示灯呈绿色常亮状态。
端口正在发送或接收数据时,指示灯呈绿色闪烁状态。
当 USB 装置已被识别但未能连接到 ISP 时,指示灯呈琥珀色状态。
WAN 当使用有线连接将设备连接至互联网后,指示灯呈绿色常亮状态。
当设备未连接到互联网或正在使用 USB 装置连接时,指示灯处于熄灭状态。
CiscoPacketTracer路由器配置专题知识课件

上一页
下一页
返回本章首页
第4章
(5)测试网络连通性
用PING命令检验彼此间旳连通性。
C:\>ping 172.16.3.22 C:\>ping 172.16.1.11
从PC1 ping PC2 不通 从PC2 ping PC1 不通
上一页
下一页
返回本章首页
第4章
(6)配置路由器 2
Router>enable Router#configure terminal Router(config)#hostname ryl2 ryl2#(config)#interface f0/0 ryl2 (config-if)#ip address 172.16.3.2 255.255.255.0 ryl2 (config-if)#no shutdown ryl2 (config)#interface Serial0/0/0 ryl2 (config-if)#ip address 172.16.2.2 255.255.255.0 ryl2 (config-if)#no shutdown ryl2 (config-if)# exit
上一页
下一页
返回本章首页
第4章
三、 配置动态路由(配置RIP协议)(P299)
1、RIP(路由选择信息协议) RIP是一种基于距离矢量旳路由选择信息协议。 路由器搜集全部可能到达目旳地旳不同途径, 而且保存有关到达每个目旳地旳至少站点数旳途径 信息,除到达目旳地旳最佳途径外,任何其他信息 均预予丢弃。 路由器把所搜集旳路由信息用RIP协议告知相邻 旳路由器。这么,正确旳路由信息逐渐扩散到了全 网。 RIP从一种有类路由选择协议(RIP-1)改善到 了无类路由选择协议(RIP-2)。
思科路由器设置图解
思科路由器设置图解
思科路由器设置图解
思科路由器是一个集成多业务路由器,福利综合服务网络路由器,以及获得回报的网络路由器。
为大家分享了思科路由器设置的图解,一起来看看吧!
首先,找到配置线,按如下连接方式进行连接。
在Windows中的`【开始】→【程序】→【附件】→【通讯】菜单下,打开”超级终端”程序,出现如下左图窗口。
在”名称”对话框中输入名称,例如”ZZQH-Router
设置通信参数,通常路由器出厂时,波特率为9600bps,因此在下图窗口中,单击【还原为默认值】按钮设置超级终端的通信参数;再单击【确定】按钮
按【回车】键,启动路由器,并连接成功的话,你将看到超级终端窗口上出现路由器加载信息
第一次加载,选择N 退出setup配置模式,然后我们就可以进入配置界面进行配置了。
思科路由器配置教程
思科路由器配置教程思科路由器配置教程1、硬件准备1.1 路由器选购1.2 网线连接1.3 电源连接2、系统登录2.1 打开浏览器2.2 输入默认IP地质2.3 输入用户名和密码2.4 登录路由器管理界面3、基本配置3.1 修改设备名称3.2 设置系统时间3.3 配置DNS服务器3.4 设置路由器登录密码3.5 保存配置4、网络接口配置4.1 查看接口信息4.2 配置IP地质4.3 配置子网掩码4.4 配置默认网关4.5 激活接口4.6 保存配置5、路由配置5.1 静态路由配置5.2 动态路由配置5.3 路由优先级配置5.4 保存配置6、网络服务配置6.1 DHCP服务器配置 6.2 NAT配置6.3 ACL配置6.4 端口转发配置6.5 防火墙配置6.6 保存配置7、无线网络配置7.1 开启无线功能7.2 配置无线网络名称(SSID)7.3 配置无线密码7.4 保存配置8、安全性配置8.1 修改默认管理端口8.2 配置访问控制列表(ACL)8.3 开启SSH服务8.4 配置防火墙规则8.5 保存配置9、附件本文档附带了以下相关附件,供参考使用: - 配置示例文件- 路由器型号手册- 思科路由器常见问题解答集10、法律名词及注释- IP地质:Internet Protocol Address,即互联网协议地质,用于唯一标识网络上的设备。
- DNS服务器:Domn Name System Server,用于将域名解析为对应的IP地质。
- DHCP服务器:Dynamic Host Configuration Protocol Server,用于自动分配IP地质和其他网络配置信息给客户端设备。
- NAT:Network Address Translation,网络地质转换,用于将私有IP地质转换为公共IP地质。
- ACL:Access Control List,访问控制列表,用于控制网络流量的进出规则。
cisco设置方法步骤
cisco设置方法步骤思科(Cisco)路由器是一个集成多业务路由器,福利综合服务网络路由器,以及获得回报的网络路由器。
cisco路由器怎么设置??有网友提到自己不会设置思科的设备,该怎么办?店铺在网上找了一些教程及命令,需要的朋友可以参考下。
以下是cisco路由器设置具体命令一、 host到router1、实验网络拓扑:pc( client 4.01)---switch---router1720 ( access server)pc配置:ip:10.130.23.242/28gw:10.130.23.2461720接口ip:f0:10.130.23.246/28lo0:172.16.1.1/241720的ios为c1700-k93sy7-mz.122-8.T5.bin2、步骤:1、配置isakmp policy:crypto isakmp policy 1encr 3desauthen pre-sharegroup 22、配置 client地址池cry isa client conf address-pool local pool192ip local pool pool192 192.168.1.1 192.168.1.2543、配置 client有关参数cry isa client conf group vclient-group####vclient-group就是在client的连接配置中需要输入的group authentication name。
key vclient-key####vclient-key就是在client的连接配置中需要输入的group authentication password。
pool pool192 ####client的ip地址从这里选取####以上两个参数必须配置,其他参数还包括domain、dns、wins等,根据情况进行配置。
4、配置ipsec transform-setcry ipsec trans vclient-tfs esp-3des esp-sha-hmac5、配置map模板cry dynamic-map template-map 1set transform-set vclient-tfs ####和第四步对应6、配置mapcry map map 1 ipsec-isakmp dynamic template-map#### 使用第?*脚渲玫?map 模板cry map map isakmp author list vclient-group ####使用第三步配置的参数authorizationcry map map client conf address respond ####响应client分配地址的请求7、配置静态路由ip route 192.168.1.0 255.255.255.0 fastethernet03、说明几点:(1)因为1720只有一个fastethernet口,所以用router1720上的lo0地址来模拟router内部网络。
思科路由器配置教程
思科路由器配置教程1. 硬件准备1. 路由器型号选择2. 连接线材准备2. 基本网络设置1. 登录路由器管理界面- 输入默认IP地址和用户名密码进行登录2. 修改管理员账户信息及密码安全策略3. IP 地址分配与子网划分- 配置静态 IP 地址或启用 DHCP 动态获取4 . VLAN 设置- 创建虚拟局域网(VLAN)并为其指定端口5 . NAT 和 PAT 的配置- 启用 Network Address Translation (NAT) 6 . ACL(访问控制列表)的使用- 创建ACL规则,限制特定流量通过7 . VPN (Virtual Private Network)的建立a) Site-to-Site VPNi ) IPSec 加密协议ii ) GRE 协议iii ) IKE 密钥交换iv ) 认证方式8 . QoS(服务质量)设定a) 流分类i ) 标记化ii ) 分类方法iii ). DSCP码点IV). CoS值v). IPP Precedence vi.) ToS字段Vii.). MPLS EXP位VIII.).802.lp优先级 IX ).VLAN标签X ).源/目标MAC地址XI). 源/目标IP地址XII). 源/目标端口号XIII ).协议类型XIV) .应用程序b ) 流量控制i ) 速率限制ii ).拥塞避免iii.).队列管理iv.) 延迟敏感性v).带宽保证vi.)优先级调度Vii.)流量整形VIII.).排队方式9 . 路由配置- 配置静态路由或动态路由协议10 . 系统日志和监控a) 日志记录i ) 设置系统日志等级ii ). 远程登录服务器iii.) SNMP 监视器设置11. 安全策略与防火墙- 启用基本的安全功能,如访问列表、ACL 和 Zone-Based Firewall12. 文档维护及更新附件:1. 示例配置文件2. 图表和网络拓扑图示例法律名词及注释:1.NAT:Network Address Translation(网络地址转换),一种将私有 IP 地址映射为公共 IP 地址的技术。
cisco路由器初始设置密码
cisco路由器初始设置密码Cisco并不难,主要有些人没有接触的机会,如果你经常管理cisco设备,你会发现其实就那几步,不过也有不少网友不知道cisco 路由器初始设置密码怎么设置。
其实步骤并不难,下面店铺给大家介绍一下具体操作办法,供大家参考!cisco路由器初始设置密码具体操作1、路由器默认登录用户名和密码是登录后一定要修改用户名和密码,否则下次将无法登录。
全局模式下:R2(config)#username test password 12345如果要防止别人查看你的密码,可以将密码加密:R2(config)#service password-encryption2、路由器的enable密码一定要设置的,特别是我们通过虚拟终端VTY方式登录时。
R2(config)#enable secret 3、很多时候我们的路由器需要通过远程管理,我们需要配置TELNET。
R1(config)#line vty 0 4R1(config-line)#passR1(config-line)#password ciscoR1(config-line)#loginR1(config-line)#end4. 通过上面三步后我们基本就能管理起设备了,当然管理设备的IP是需要配置的,这里就不讲了,考虑到设备配置后,我们需要了解设备的运行状态,这里讲下日志的配置。
R1(config)#logging onR1(config)#service timestamps logR1(config)#logging buffered 40960R1(config)#service sequence-numbers5. 设置时间:R1#clock set 22:32:00 july 20 2013R1(config)#clock timezone GMT + 8店铺分享了cisco路由器初始设置密码的解决方法。
希望大家喜欢。
cisco路由器初始设置密码 Cisco并不难,主要有些人没有接触的机会,如果你经常管理cisco设备,你会发现其实就那几步,不过也有不少网友不知道cisco路由器初始设置密码怎么设置。
实验三 Cisco路由器的基本配置
实验三 Cisco路由器的基本配置(验证性)(2学时)一、实验目的1.掌握Cisco路由器的基本配置命令2.熟悉Cisco路由器的配置环境二、实验内容(一)路由器的工作模式在命令行状态下,主要有以下几种工作模式:1.一般用户模式(UserEXEC)用户模式用于查看路由器的基本信息。
在用户模式下,只能够运行少数的命令,且不能对路由器进行配置。
从配置端口进入路由器时,首先要进入一般用户模式,一般用户模式下默认的路由器提示符为:Router>如果配置了路由器的名字,则提示符为:路由器的名字>用logout命令退出。
2.特权模式在默认状态下,特权模式可以使用比一般用户模式下多得多的命令。
特权模式用于查看路由器的各种状态,绝大多数命令用于测试网络、检查系统等,但是不能对端口及网络协议进行配置。
路由器未做任何配置时,输入enable命令即可由一般用户模式进入特权模式。
如果配置了口令,则需要输入口令。
默认的特权模式的提示符为:Router#如果配置了路由器的名字,则提示符为:路由器的名字#退出方法:用exit或disable命令退到userEXEC模式。
3.全局配置模式(GobalConfiguration)全局配置模式中可以配置一些全局性的参数。
要进入全局配置模式,必须首先进入特权模式。
在进入配置模式前,必须指定是通过终端、NVRAM或是网络服务器进行配置。
如果通过终端进行配置,输入config terminal命令,进入全局配置模式。
全局配置模式的提示符为:Router(config)#如果配置了路由器的名字,则提示符为:路由器的名字(config)#退出方法:可使用exit或end或Ctrl+Z命令退到特权模式4.全局配置模式下的配置子模式在全局配置模式下可进入各种配置子模式①端口配置模式进入方式:在全局配置模式下,用interface命令进入具体的端口Router(config)#interface 端口的类型端口号提示符:Router(config-if)#②子端口配置模式进入方式:在端口配置模式下用interface命令进入指定的子端口Router(config-if)#interface端口的类型端口号.子端口号提示符:Router(config-subif)#③路由配置模式进入方式:在全局配置模式下,用“router 具体的协议名”命令指定具体的路由协议。
思科RV345 RV345P路由器快速入门指南说明书
快速入门指南Cisco RV345/RV345P 路由器装箱清单•Cisco RV345/RV345P 路由器•通用电源适配器•以太网电缆•本快速入门指南•指针卡•技术支持联系信息卡•控制台 RJ-45 电缆欢迎Cisco RV345/RV345P 系列路由器可为小型企业提供可靠的互联网访问连接。
Cisco RV345/RV345P 系列的所有型号均支持两种连接方式,一种方式是选择一家互联网服务提供商,并通过使用负载均衡技术提供高性能连接;另一种方式是选择两家不同的服务提供商,以便确保业务连续性。
•双千兆以太网 WAN 端口支持负载均衡,并能确保业务连续性。
•千兆以太网端口不仅经济实惠,而且性能优越,既可快速传输大文件,又能同时支持多用户使用。
•双 USB 端口支持 3G/4G 调制解调器或闪存驱动器。
此外,WAN 还支持故障切换到连接至 USB 端口的 3G/4G 调制解调器。
•通过 SSL VPN 和站点间 VPN 可提供高度安全的连接。
•状态数据包检测 (SPI) 防火墙和硬件加密功能可提供强大的安全保护。
•RV345 型号具有一个 16 端口 LAN 交换机.•RV345P 型号具有一个 16 端口 LAN 交换机,其中前 8 个端口(LAN 1-4和9-12)是 PSE (PoE)端口。
本快速入门指南介绍 Cisco RV345/RV345P 的安装方法以及基于 Web 的设备管理器启动方法。
1安装 Cisco RV345/RV345P为防止设备过热或受损,请注意以下要求:•环境温度 — 请勿在环境温度超过 40°C (104°F) 的区域中使用本设备。
•通风 — 请确保设备周围通风良好。
若以壁挂方式安装防火墙,请确保散热孔朝向侧面。
•电路过载 — 接通设备电源不得造成电路过载。
•机械负载 — 请确保设备保持水平、平稳且牢固,以免出现任何危险情况,并防止其出现滑动或移位。
思科路由器配置教程
思科路由器配置教程思科路由器是一种常见的网络设备,用于连接多个网络和设备,实现互联网的接入和共享。
想要正确地配置思科路由器,需要清楚了解路由器的基本知识和配置步骤。
下面是思科路由器配置的详细教程,帮助您正确地配置和管理路由器。
第一步,连接路由器。
将路由器的电源适配器插入电源插座,并连接路由器的WAN口(广域网口)与宽带调制解调器的LAN口(局域网口)通过以太网线相连。
然后,使用另一根以太网线将路由器的LAN口与计算机相连。
第二步,登录路由器。
打开您的计算机上的任一网页浏览器,输入路由器的默认管理地址(一般为192.168.1.1)并按下回车键。
系统将要求输入用户名和密码。
根据路由器型号,输入相应的用户名和密码(默认情况下用户名为admin,密码为空或admin)。
第三步,检查和修改路由器的基本配置。
在登录成功后,您将进入路由器的配置页面。
在该页面上,您可以查看和修改路由器的各项基本配置,如无线网络名称(SSID)、无线密码以及管理密码等。
请根据自己的需求进行相应的修改,并将新的配置保存。
第四步,配置互联网连接方式。
根据您的网络服务提供商的要求,选择适当的互联网连接类型。
一般情况下,可以选择DHCP自动获取IP地址。
如果您的网络需要静态IP地址,请选择PPPoE,并输入提供商提供的用户名和密码等相关信息。
第五步,设置路由器的无线网络。
在无线设置页面上,您可以配置无线网络的名称(SSID)、加密方式和密码等。
建议启用WPA2加密方式,并设置足够复杂的无线密码以提高网络安全性。
点击保存按钮,使设置生效。
第六步,配置网络地址转换(NAT)。
在NAT设置页面上,您可以配置路由器的NAT功能,用于将局域网内部的IP地址转换成全球唯一的公网IP地址。
默认情况下,路由器会自动启用NAT功能,一般不需要进行额外的设置。
第七步,配置端口转发(Port Forwarding)。
如果您需要在局域网内访问外部网络中的服务器,可以通过端口转发功能实现。
cisco路由器基本配置及远程登录

c i s c o路由器基本配置及远程登录The pony was revised in January 2021实训目的:(1)学习和掌握科路由器的配置方式和要求。
(2)学习和掌握科路由器的工作模式分类、提示符、进入方式。
1、路由器的配置方式①超级终端方式。
该方式主要用于路由器的初始配置,路由器不需要IP地址。
基本方法是:计算机通过COM1/COM2口和路由器的Console口连接,在计算机上启用“超级终端”程序,设置“波特率:9600 ,数据位:8,停止位:1,奇偶校验: 无,校验:无”即可。
常用②Telnet方式。
该方式配置要求路由器必须配置了IP地址。
基本方法是:计算机通过网卡和路由器的以太网接口相连,计算机的网卡和路由器的以太网接口的IP地址必须在同一网段。
常用③其他方式:AUX口接MODEM,通过电话线与远方运行终端仿真软件的微机;通过Ethernet上的TFTP服务器;通过Ethernet上的SNMP网管工作站。
2、路由器的工作模式在命令行状态下,主要有以下几种工作模式:①一般用户模式。
主要用于查看路由器的基本信息,只能执行少数命令,不能对路由器进行配置。
提示符为:Router>;进入方式为:Telnet或Console②使能(特权)模式。
主要用于查看、测试、检查路由器或网络,不能对接口、路由协议进行配置。
提示符为:Router#;进入方式为:Router>enable。
③全局配置模式。
主要用于配置路由器的全局性参数。
提示符为:Router(config)#;进入方式为:Router#config ter。
④全局模式下的子模式。
包括:接口、路由协议、线路等。
其进入方式和提示符如下:Router(config)#ineterface e0 //进入接口模式Router(config-if)# //接口模式提示符Router(config)#rip //进入路由协议模式Router(config-router)# //路由协议模式Router(config)#line con 0 //进入线路模式Router(config-line)# //线路模式提示符3、常用命令①“”、“Tab”的使用键入“”得到系统的帮助;“Tab”补充命令。
- 1、下载文档前请自行甄别文档内容的完整性,平台不提供额外的编辑、内容补充、找答案等附加服务。
- 2、"仅部分预览"的文档,不可在线预览部分如存在完整性等问题,可反馈申请退款(可完整预览的文档不适用该条件!)。
- 3、如文档侵犯您的权益,请联系客服反馈,我们会尽快为您处理(人工客服工作时间:9:00-18:30)。
Cisco2620(config-if)#ip address 192.168.1.6 255.255.255.0:设置IP地址及掩码
Cisco2620(config-if)#no shutdown: 开启端口
Cisco2620(config-if)#exit:从端口配置模式中退出
Cisco2620(config-if)# ppp authentication chap:将认证设为CHAP
Cisco2620(config-if)# group-range 33 48:拨号组包括16个口
Cisco的16AM模块提供了高密度的模拟电路接入方式,不在办公大楼的员工可以用Modem拨号联入局域网、登录服务器,实现远程办公。
Cisco2620(config-line)# flowcontrol hardware:设置硬件流控制
CISCO路由器初学者完全教程
本文以Cisco2620为例,讲述了路由器的初始化配置以及远程接入的配置方法,探讨了如何使用内部网络的DHCP服务功能为远程拨入的用户分配地址信息以及路由器常见故障的排除技巧。
(本文假定Cisco2620路由器为提供远程接入访问,已经配置了同步串行模块和异步串行16AM模块。)
Cisco2620(config-line)# autoselect during-login:自动登录
Cisco2620(config-line)# autoselect ppp:自动选择PPP协议
Cisco2620(config-line)# login local:允许本地口令检查
Cisco2620(config-line)# modem InOut:允许拨入拨出
Cisco2620(config-line)# transport input all:指定传输协议
Cisco2620(config-line)# stopbits 1:设置一位停止位
Cisco2620(config-line)#password 123123:设置远程登录密码为123123
Cisco2620(config-line)#login:使配置生效
(2) 设置快速以太网口
Cisco2620(config)#interface fastFastethernet 0/0:进入端口配置模式
2. 配置路由器
键入config terminal,出现提示符Cisco2620(config)#,进入配置模式。
(1) 设置密码
Cisco2620(config)#enable secret 123123:设置特权模式密码为123123
Cisco2620(config)#line console 0: 进入Console口配置模式
Cisco2620(config-if)# ip tcp header-compression passive:启用被动IP包头压缩
Cisco2620(config-if)# async mode dedicated:只在异步模式下工作
Cisco2620(config-if)# peer default ip address dhcp:将IP地址请求转发至DHCP服务器
Cisco2620(config-line)#password 123123:设置Console口密码为123123
Cisco2620(config-line)#login:使console口配置生效
Cisco2620(config-line)#line vty 0 5:切换至远程登录口
(3) 设置同步串口
Cisco2620(config)#interface serial 0/0:进入同步串口设置
Cisco2620(config-if)#ip unnumbered fastFastethernet 0/0:同步串口使用与快速以太网口相同的IP地址
Cisco2620(config-if)#encapsulation ppp: 把数据链路层协议设为PPP
Cisco2620路由器的基本配置
1. 初始安装
第一次安装时系统会自动进入Dialog Setup,依屏幕提示,分别回答路由器名称、加密超级登录密码、超级登录密码、远程登录密码、动态路由协议以及各个接口的配置后,保存配置。在出现路由器名称后,打入enable命令,键入超级登录密码,出现路由器名称(这里假设路由器名称为Cisco2620),待出现Cisco2620#提示符后,表示已经进入特权模式,此时就可以进行路由器的配置了。
(4) 设置16口Modem拨号模块,使用内部DHCP服务为拨入用户分配地址
Cisco2620(config)#interface Group-Async1
Cisco2620(config-if)# ip unnumbered FastEthernet0/0
Cisco2620(config-if)# encapsulation ppp
Cie 0.0.0.0 0.0.0.0 192.168.1.4:设置到防火墙的静态路由
(5) 对16AM模块物理特性的设置
Cisco2620(config)#line 33 48: 进入Modem 口线模式
Cisco2620(config-line)# session-timeout 30:超时设为30分钟
peer default ip address dhcp命令可以使拨入的工作站通过局域网内的DHCP服务器动态地获得IP地址,节约了IP地址资源,同时还接收了在DHCP服务器上配置的参数,比如DNS服务器的IP地址,并配合全局模式下配置的指向防火墙的静态路由,使工作站同时也可以通过防火墙访问Internet。
