在ubuntu8.04上安装kerrighed-2.3.0 cluster
ubuntu安装

Ubuntu8.04完美菜鸟教程(系统安装)操作系统2008-05-08 13:08:22 阅读1273 评论2 字号:大中小【声明】1.本人电脑迷一个,也是菜鸟一个,本教程转自网上,也有个人一些安装经验。
2.本教程适用ubuntu新手,如有出错的地方请老鸟指教。
【电脑配置】类型:家用台式机处理器:Intel P42.8 主板:精英865PE内存:1.5G DDR400 显卡:七彩虹ATI Radeon9550硬盘:160G SATA 光驱:DVD光雕刻录机【准备工作】1、ubuntu8.04安装光盘CD桌面版下载(ubuntu-8.04-desktop-i386.iso):699.12MB或者DVD版下载(ubuntu-8.04-dvd-i386.iso):3.71G,个人推荐用DVD版的。
两者的区别:CD版里面基本上没有多少服务,装完后是一个真正的桌面版,需要什么服务自己从网上下源代码包。
DVD版在光盘里就有很多的服务,基本上安装完后就可以直接使用了,简单的软件基本上都有了。
2、请在安装前将网络断开,要不然可能会有错误。
3、在没有开始安装之前,强烈建议查看一下本教程中的第8步。
【开始安装】1、首先,将光盘插入光驱,如果你在运行着Windows,将会看到如下的Ubuntu Cd菜单2、我们点击第一个按钮:“Demo and Full Installation ”,这时会出现下一个画面,选择“是,现在重新启动。
”点击完成,重新启动操作系统3、如果你的电脑是把光驱作为第一引导设备的话,就会进入下面的引导画面。
如果你没有看到这个画面而是直接启动到Windows,你也许要在BIOS中设置光驱作为第一引导设备。
4、在语言选择菜单中选择“简体中文”。
这时会看到中文的选择菜单。
我们要安装Ubuntu,因此,选择第二项“安装Ubuntu”,回车确认。
5、稍等片刻后,就进入了安装界面。
第一步是选择安装过程中使用的语言。
乌班图基础教程

乌班图基础教程安装完成Ubuntu 8.04之后要做什么呢?按下面的步骤一步一步来吧。
一步一步将Ubuntu 打造成可用的系统。
这篇文章只针对刚完成安装的Ubuntu 8.04 Desktop(且安装过程是设定成简体中文的)。
第1步-使用ADSL连接到Internet使用Network Manager可以很简单地设置网络连接。
在Ubuntu 8.04中,Network Manager 得到了增强,现在的Network Manager可以很简单地设置ADSL、802.1x(例如锐捷网络)等等这些登陆方式。
安装完成后,Network Manager的托盘图标显示在屏幕的右上角,如图所示。
由于国内网络登陆方式十分复杂,这里无法涵盖所有的登陆方式。
下面的步骤讲解ADSL上网(连接后自动获取DNS)的步骤。
首先单击Network Manager的托盘图标(注意,由于刚刚完成安装,现在还没有完整的中文支持),单击“Manual Configuration”菜单项,启动Network Settings对话框,如图所示。
单击“Unlock”按钮,此时会要求输入自己的密码来解除锁定。
解锁后,选择“Point to point connection”,单击“Properties”按钮,出现“ppp0 Properties”对话框(实际上这里也有可能是ppp1, ppp2……但对于绝大多数用户来说,只有ppp0一个连接)。
如图所示。
单击“Enable this connection”启用此连接。
接下来是对此连接进行设置。
首先在“Connection type”处选择“PPPoE”,接着在Account data部分输入自己的登陆帐号和密码;其中,Username 对应自己的帐号,而Password则是自己的密码。
完成后如图所示。
接着切换到“Modem”选项卡,将“Ethernet interface”设置成你用来连接ADSL的网卡(一般是eth0)。
sybyl8.0 安装 最详细的教程

sybyl8.0 安装最详细的教程本人做好了一个sybyl8.0在ubunt u10.04中的安装教程。
本想一帖子的形式发出来的。
可是图片太多。
排版不方便。
做成了pdf传新浪共享里了。
本教程从系统分区—到安装双系统(win7和ubuntu)—到安装sybyl8.0下面把文字贴出来,如果觉得有用就去下载、、、、、、Sybyl8.0安装详细教程制作者xcool前言大家好,本人菜菜,经过几天的不懈努力,几经折腾,终于在ubuntu系统中安装好了sybyl8.0。
在网上查了好多资料,没有一个教程讲述了从系统分区到安装系统再到安装sybyl的详细过程。
由于本人安装过程之辛苦,于是萌生了想写一篇教程给那些想安装sybyl的朋友想法。
事先声明,本人菜鸟,错误多,忘高手莫见笑。
闲话少说,下面开始、、、、、、、系统分区现在大家一般都是win7的系统吧(什么?还是XP、、、、、、、、兄弟,你OUT了,呵呵),而sybyl8.0要安装在linux 系统里(注:sybyl-x版本的是安装在windows里的)。
我们总不能为了安装我们可爱的sybyl而干掉windows而安装linux吧。
对于用惯了windows的朋友来说一下转变过来用liunx那是相当的不习惯。
那怎么办呢?有没有鱼与熊掌兼得的方法呢。
很高兴地告诉大家,还真的有——即安装双系统。
什么叫做双系统,简单来说就是一台电脑安装两个系统,在开机时选择所要进入的系统就可以进入相应的系统了。
也许有人要问了,要是我已经进入了一个一个系统了,现在要换另一个系统那怎么办,那只能重启了。
要安装双系统,前提条件就是首先你的有一个单系统了——即我们的win7系统(呵呵,废话)。
其次安装系统需要空间,即我们的硬盘空间,由于windows系统和linux系统的文件格式不一样,windows一般是FAT32或NTFS,而linux一般是EXT3或EXT4。
那怎么办呢?这就得对我们的硬盘从新分区了,其实也就是利用软件割一部分空间出来安装我们的linux。
ubuntu11.04下成功安装ns2-2.34
Ubuntu 11.04 安装 ns2-allinone-2.34【完整版】(附各种问题解决方案)这真是一个痛苦并快乐到过程,尝试多次安装,最终迎来来伟大的复兴!终于安装成功了!!!++++++++++++++++++++++++++++++++++++++++++++++++++++++++++++++++++++++++++++++++ 经验:先将本文提到的错误在./INSTALL之前全部改正后可减少出错机会1.首先,修改更新源,原有的更新源无法完成更新。
以下是ubuntu 11.04 教育网的源:sudo gedit /etc/apt/sources.list#网易资源deb /ubuntu/ natty main restricted universe multiversedeb /ubuntu/ natty-security main restricted universe multiversedeb /ubuntu/ natty-updates main restricted universe multiversedeb /ubuntu/ natty-proposed main restricted universe multiversedeb /ubuntu/ natty-backports main restricted universe multiversedeb-src /ubuntu/ natty main restricted universe multiverse deb-src /ubuntu/ natty-security main restricted universe multiversedeb-src /ubuntu/ natty-updates main restricted universe multiversedeb-src /ubuntu/ natty-proposed main restricted universe multiversedeb-src /ubuntu/ natty-backports main restricted universe multiverse2、更新Ubuntu系统文件,虽然系统是最新版本的,但是不代表里面的文件都是最新的,需要更新。
ubuntu下安装运行colmap
ubuntu下安装运⾏colmap从源码安装colmap可以在主流的系统windows,mac,linux安装从github上获取colmap的最新源码git clone https:///colmap/colmap安装教程如下LinuxRecommended dependencies: CUDA.1. 安装依赖包$ sudo apt-get install openjdk-8-jdk git python-dev python3-dev python-numpy python3-numpy python-six python3-six build-essential python-pip python3-pip python-virtualenv swig python-wheel python3-wheel libcurl3-dev libcupti-dev 其中openjdk是必须的,不然在之后配置⽂件的时候会报错。
2. 安装CUDA和cuDNN这两个是NVIDIA开发的专门⽤于机器学习的底层计算框架,通过软硬件的加成达到深度学习吊打I卡的神功。
安装的CUDA和cuDNN版本以来所选⽤的显卡,可以在查询。
这⾥我们⽤的是GeForce 1080ti,所以对应的版本为CUDA8.0(.run版本)()和cuDNN6.0()。
# 安装cuda$ wget https:///compute/cuda/8.0/Prod2/local_installers/cuda_8.0.61_375.26_linux-run$ sudo sh cuda_8.0.61_375.26_linux.run --override --silent --toolkit # 安装的cuda在/usr/local/cuda下⾯# 安装cdDNN$ cd /usr/local/cuda # cuDNN放在这个⽬录下解压$ tar -xzvf cudnn-8.0-linux-x64-v6.0.tgz$ sudo cp cuda/include/cudnn.h /usr/local/cuda/include$ sudo cp cuda/lib64/libcudnn* /usr/local/cuda/lib64$ sudo chmod a+r /usr/local/cuda/include/cudnn.h /usr/local/cuda/lib64/libcudnn*然后将将⼀下路径加⼊环境变量:export LD_LIBRARY_PATH="$LD_LIBRARY_PATH:/usr/local/cuda/lib64:/usr/local/cuda/extras/CUPTI/lib64"export CUDA_HOME=/usr/local/cuda即将上述代码放⼊~/.bashrc⽂件保存后source ~/.bashrcDependencies from default Ubuntu repositories:sudo apt-get install \cmake \build-essential \libboost-all-dev \libeigen3-dev \libsuitesparse-dev \libfreeimage-dev \libgoogle-glog-dev \libgflags-dev \libglew-dev \qtbase5-dev \libqt5opengl5-devInstall :sudo apt-get install libatlas-base-dev libsuitesparse-devgit clone https:///ceres-solvercd ceres-solvermkdir buildcd buildcmake .. -DBUILD_TESTING=OFF -DBUILD_EXAMPLES=OFFmakesudo make installConfigure and compile COLMAP:cd path/to/colmapmkdir buildcd buildcmake ..makesudo make installRun COLMAP:colmap -hcolmap gui运⾏colmap数据集下载:A number of different datasets are available for download at:。
阿里云ubuntu安装Docker教程
阿⾥云ubuntu安装Docker教程转载于Docker CE 镜像源站使⽤官⽅安装脚本⾃动安装(仅适⽤于公⽹环境)curl -fsSL https:// | bash -s docker --mirror Aliyun⼿动安装帮助 (阿⾥云ECS可以通过内⽹安装,见注释部分内容)Ubuntu 14.04 16.04 (使⽤apt-get进⾏安装)# step 1: 安装必要的⼀些系统⼯具sudo apt-get updatesudo apt-get -y install apt-transport-https ca-certificates curl software-properties-common# step 2: 安装GPG证书curl -fsSL /docker-ce/linux/ubuntu/gpg | sudo apt-key add -# Step 3: 写⼊软件源信息sudo add-apt-repository "deb [arch=amd64] /docker-ce/linux/ubuntu $(lsb_release -cs) stable"# Step 4: 更新并安装 Docker-CEsudo apt-get -y updatesudo apt-get -y install docker-ce注意:其他注意事项在下⾯的注释中# 安装指定版本的Docker-CE:# Step 1: 查找Docker-CE的版本:# apt-cache madison docker-ce# docker-ce | 17.03.1~ce-0~ubuntu-xenial | /docker-ce/linux/ubuntu xenial/stable amd64 Packages# docker-ce | 17.03.0~ce-0~ubuntu-xenial | /docker-ce/linux/ubuntu xenial/stable amd64 Packages# Step 2: 安装指定版本的Docker-CE: (VERSION 例如上⾯的 17.03.1~ce-0~ubuntu-xenial)# sudo apt-get -y install docker-ce=[VERSION]# 通过经典⽹络、VPC⽹络内⽹安装时,⽤以下命令替换Step 2、Step 3中的命令# 经典⽹络:# curl -fsSL /docker-ce/linux/ubuntu/gpg | sudo apt-key add -# sudo add-apt-repository "deb [arch=amd64] /docker-ce/linux/ubuntu $(lsb_release -cs) stable"# VPC⽹络:# curl -fsSL /docker-ce/linux/ubuntu/gpg | sudo apt-key add -# sudo add-apt-repository "deb [arch=amd64] /docker-ce/linux/ubuntu $(lsb_release -cs) stable"CentOS 7 (使⽤yum进⾏安装)# step 1: 安装必要的⼀些系统⼯具sudo yum install -y yum-utils device-mapper-persistent-data lvm2# Step 2: 添加软件源信息sudo yum-config-manager --add-repo /docker-ce/linux/centos/docker-ce.repo# Step 3: 更新并安装 Docker-CEsudo yum makecache fastsudo yum -y install docker-ce# Step 4: 开启Docker服务sudo service docker start注意:其他注意事项在下⾯的注释中# 官⽅软件源默认启⽤了最新的软件,您可以通过编辑软件源的⽅式获取各个版本的软件包。
ubuntu中安装redis以及redis的基本使用和配置
ubuntu中安装redis以及redis的基本使⽤和配置1.安装redis 使⽤命令sudo apt-get install redis-server whereis redis 查看redis的安装位置 ps -aux | grep redis 查看redis服务的进程运⾏ netstat -nlt | grep 6379根据redis运⾏的端⼝号查看redis服务器状态,端⼝号前是redis服务监听的IP(默认只有本机IP 127.0.0.1)2.启动redis 本地启动 redis-cli 远程连接(需要本地安装redis客户端) redis-cli -h host(远程ip) -p port(端⼝号) -a password(密码)3.redis的配置 config get * 查看redis的所有配置参数 config get (name) 查看redis某个配置参数 config set (name) (value) 修改redis的某些配置(有些配置的修改不⽀持该操作,例如修改bind) 不⽀持客户端修改的操作需要修改redis的配置⽂件 sudo vi /etc/redis/redis.conf 例如:修改配置⽂件redis.conf配置远程访问 (1)在配置⽂件中查找 bind 127.0.0.1 将其注释改为 #bind 127.0.0.1 (2)重新启动redis即可4.redis 使⽤ 基本使⽤: del key ⽤于删除存在的key keys pattern 查看所有符合模式匹配的key 例如 keys * 查看所有key exists key 查看key是否存在 type key 查看key的存储类型 rename key newkey 修改key的名称 redis中主要包含5中数据类型字符串(String)、哈希(Hash)、列表(list)、集合(Set)、有序集合(Sorted set) (1)字符串(String)类型主要操作 set key value 为指定key设置值 get key 获取指定key的值 getrange key start end 获取指定key值得⼦串 start <= 字串 <= end mget key1 key2 ... 获取所有给定的key值 strlen key 返回key所存储的字符串值得长度 append key value 如果key已经存在并且是⼀个字符串,append将指定的value追加到该key原来值得末尾,否则添加⼀个新key 值为value (2)哈希(Hash)类型的主要操作 hmset key field1 value1 field2 value2 ... 将多个field-value(域-值)对设置到哈希表key中 hmget key field1 field2 ... 获取所有给定字段的值 hdel key field1 field2 ... 删除⼀个或多个字段 hexists key field 查看哈希表key中,指定字段是否存在 hget key field 获取存储在哈希表key中指定字段的值 hset key field value 将key中字段值设置为value hgetall key 获取哈希表key中所有字段和值 hkeys key 获取所有哈希表key中字段 hvals key 获取哈希表中所有值 hlen key 获取哈希表key中字段的数量 (3)列表类型(list)的主要操作 lpush key value1 value2 ... 将⼀个或多个值插⼊到列表头部 rpush key value1 value2 ... 将⼀个或多个值插⼊到列表尾部 lpop key 移除并获取列表的第⼀个元素 rpop key 移除并获取列表的最后⼀个元素 lindex key index 通过索引获取列表中元素 linsert key before | after pivot value 在列表元素pivot 前或者后插⼊元素value llen key 获取列表长度 lrange key start end 获取列表指定范围内元素 lrem key count value 移除列表元素 备注: count > 0 : 从表头开始向表尾搜索,移除与 VALUE 相等的元素,数量为 COUNT 。
ubuntu1804安装docker和docker-compose的最新2020详细教程

ubuntu1804安装docker和docker-compose的最新2020详细教程docker⽤容器的模式,把各个应⽤在同⼀台宿主机上独⽴分开运营,保持了应⽤程序的独⽴性和安全性。
同时具备快速部署的特点,迅速成为各⼤互联⽹公司宠⼉。
随之也成为每个开发⼈员必备的技能之⼀⼀、ubuntu安装docker1. 关于docker的软件包名有关docker,docker.io,docker-engine,lxc-docker 的区别?其中,RHEL/CentOS 软件源中的 Docker 包名为 docker;Ubuntu 软件源中的 Docker 包名为 docker.io;⽽很古⽼的 Docker 源中 Docker 也曾叫做 lxc-docker。
这些都是⾮常⽼旧的 Docker 版本,并且基本不会更新到最新的版本,⽽对于使⽤ Docker ⽽⾔,使⽤最新版本⾮常重要。
另外,17.04 以后,包名从 docker-engine 改为 docker-ce,因此从现在开始安装,应该都使⽤ docker-ce 这个包。
关于docker ⽬前设计的版本 docker-CE 和 docker-EEdocker-ce 是社区版本是完全免费的;从1.XX版本升级到17.XX版本上的风险是⾮常⼩的;docker-ce 还区分两个版本edge和stable版本;dge 版本是每个⽉发布⼀次,喜欢尝新的⽤户可以下载此版本,因此对于安全和错误只能当⽉获取与修复stable 版本是每个季度更新⼀次,也就是说是稳定版本;docker-ee 版本是由公司⽀持,可在经过认证的操作系统和云提供商中使⽤,并可运⾏来⾃Docker Store的、经过认证的容器和插件。
对于企业则提供了⼀下收费的⾼级特性。
2. ubuntu上apt⾥版本使⽤apt-cache show docker 是1.x的 /apt-cache show docker.io 版本都是18.xx的apt-cache show docker-ce 没有结果,需要⼿动添加安装源3. 添加docker-ce的安装源如果有旧版本的docker需要先卸载,会影响运⾏。
【Docker】Ubuntu安装Docker步骤
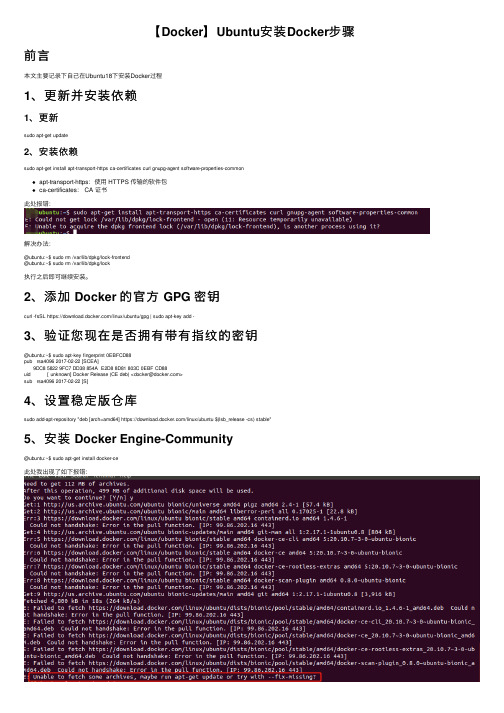
【Docker】Ubuntu安装Docker步骤前⾔本⽂主要记录下⾃⼰在Ubuntu18下安装Docker过程1、更新并安装依赖1、更新sudo apt-get update2、安装依赖sudo apt-get install apt-transport-https ca-certificates curl gnupg-agent software-properties-commonapt-transport-https:使⽤ HTTPS 传输的软件包ca-certificates: CA 证书此处报错:解决办法:@ubuntu:~$ sudo rm /var/lib/dpkg/lock-frontend@ubuntu:~$ sudo rm /var/lib/dpkg/lock执⾏之后即可继续安装。
2、添加 Docker 的官⽅ GPG 密钥curl -fsSL https:///linux/ubuntu/gpg | sudo apt-key add -3、验证您现在是否拥有带有指纹的密钥@ubuntu:~$ sudo apt-key fingerprint 0EBFCD88pub rsa4096 2017-02-22 [SCEA]9DC8 5822 9FC7 DD38 854A E2D8 8D81 803C 0EBF CD88uid [ unknown] Docker Release (CE deb) <docker@>sub rsa4096 2017-02-22 [S]4、设置稳定版仓库sudo add-apt-repository "deb [arch=amd64] https:///linux/ubuntu $(lsb_release -cs) stable"5、安装 Docker Engine-Community@ubuntu:~$ sudo apt-get install docker-ce此处我出现了如下报错:最终使⽤下⾯的命令成功了:sudo apt-get install docker-ce --fix-missing 6、启动Docker7、启动成功跑⼀个:。
Ubuntu 8.04桌面版安装教程图文版
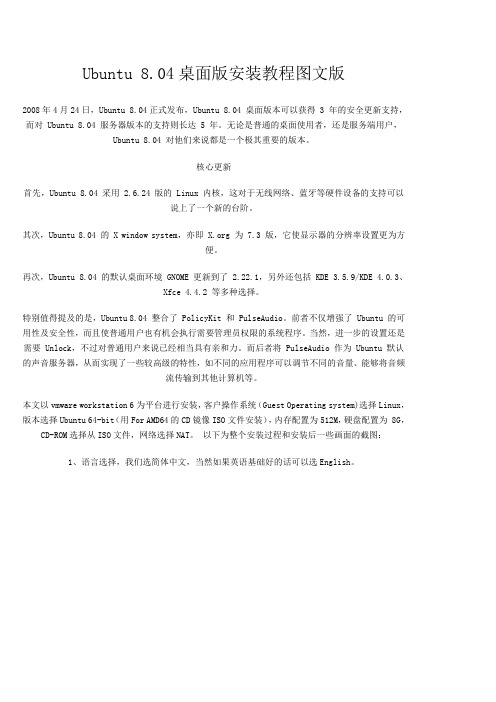
Ubuntu 8.04桌面版安装教程图文版2008年4月24日,Ubuntu 8.04正式发布,Ubuntu 8.04 桌面版本可以获得 3 年的安全更新支持,而对 Ubuntu 8.04 服务器版本的支持则长达 5 年。
无论是普通的桌面使用者,还是服务端用户,Ubuntu 8.04 对他们来说都是一个极其重要的版本。
核心更新首先,Ubuntu 8.04 采用 2.6.24 版的 Linux 内核,这对于无线网络、蓝牙等硬件设备的支持可以说上了一个新的台阶。
其次,Ubuntu 8.04 的 X window system,亦即 为 7.3 版,它使显示器的分辨率设置更为方便。
再次,Ubuntu 8.04 的默认桌面环境 GNOME 更新到了 2.22.1,另外还包括 KDE 3.5.9/KDE 4.0.3、Xfce 4.4.2 等多种选择。
特别值得提及的是,Ubuntu 8.04 整合了 PolicyKit 和 PulseAudio。
前者不仅增强了 Ubuntu 的可用性及安全性,而且使普通用户也有机会执行需要管理员权限的系统程序。
当然,进一步的设置还是需要 Unlock,不过对普通用户来说已经相当具有亲和力。
而后者将 PulseAudio 作为 Ubuntu 默认的声音服务器,从而实现了一些较高级的特性,如不同的应用程序可以调节不同的音量、能够将音频流传输到其他计算机等。
本文以vmware workstation 6为平台进行安装,客户操作系统(Guest Operating system)选择Linux,版本选择Ubuntu 64-bit(用For AMD64的CD镜像ISO文件安装),内存配置为512M,硬盘配置为 8G,CD-ROM选择从ISO文件,网络选择NAT。
以下为整个安装过程和安装后一些画面的截图:1、语言选择,我们选简体中文,当然如果英语基础好的话可以选English。
2、选择项目,是安装Ubuntu还是进行内存检测等,我们选择安装。
Ubuntu下安装redis的2种方法分享
Ubuntu下安装redis的2种⽅法分享前⾔redis是⽬前公认的速度最快的基于内存的键值对数据库,但redis的缺点也⾮常明显,仅提供最基本的hash set, list, sorted set 等基于数据类型,不分表,没有schema,没有索引,没有外键,缺少int/date等基本数据类型,多条件查询需要通过集合内联(sinter,zinterstore)和连接间接实现,操作不便,开发效率低,可维护性不佳;因此⼀般不将其视为完整的数据库单独使⽤,很多⽹站将redis作为⾼速缓存和session状态存储层,然后再与其他数据库搭配使⽤。
⽅法⼀$ wget http://download.redis.io/releases/redis-3.0.6.tar.gz$ tar xzf redis-3.0.6.tar.gz$ cd redis-3.0.6$ make$ cd srcmake之后,在redis-3.0.6/src⽬录下会出现redis-server服务程序和redis-cli客户端程序。
将redis-3.0.6/redis.conf复制到src⽬录下启动redis服务端./redis-server redis.conf此时打开另⼀个终端,启动客户端./redis-cli测试运⾏127.0.0.1:6379> set name tomOK127.0.0.1:6379> get name"tom"127.0.0.1:6379>安装成功。
⽅法⼆使⽤以下命令在线安装$sudo apt-get update$sudo apt-get install redis-server分别启动redis服务端和客户端$ redis-server$ redis-cli总结以上就是这篇⽂章的全部内容了,希望本⽂的内容对⼤家的学习或者⼯作能带来⼀定的帮助,如果有疑问⼤家可以留⾔交流。
Ubuntu下kaldi安装配置图文教程

Ubuntu下kaldi安装配置图⽂教程因公司业务需要需使⽤kaldi语⾳识别⼯具,现将kaldi环境配置等步骤列出来,⽤于记录:1.安装虚拟机: 下载虚拟机VMware,并安装,虚拟机安装⽐较简单,可⾃⾏百度进⾏安装,在此不再重复。
2.Ubuntu操作系统安装: 下载Ubuntu镜像⽂件,本⼈选择的事Ubuntu16.04版本。
3.在虚拟机上安装Ubuntu系统,该步骤会进⾏详细说明,如下: 3.1 VMware安装完成之后选择创建新虚拟机 3.2 选择下载好的镜像⽂件 3.3选择下⼀步,设置系统名称及密码 3.4 继续点击下⼀步设置系统安装位置,这⾥选择⾃⼰⽐较⼤的⼀个盘即可 3.5 继续下⼀步选择磁盘容量,此处建议稍微选⼤⼀些,否则之后kaldi跑数据会出现容量不⾜的错误 3.6 下⼀步,选择⾃定义硬件设置建议将内存和处理器进⾏调整,本⼈电脑内存8G此处设置6G, 因kaldi数据集⼀般都⽐较⼤,运⾏时⽐较耗费内存,此处调⼤,处理器个数根据⾃⼰电脑的配置 进⾏相应调整 3.7 返回上⼀页,点击完成。
等待VMware⾃动安装Ubuntu系统4.ubuntu下安装kaldi 4.1 打开unbuntu终端使⽤Ctrl+Alt+T快捷键可直接打开,输⼊ 即从github上下载kaldi最新版本,因kaldi在github上是持续更新维护,所以该路径下的kaldi 版本⽐较完整,需要的例⼦及运⾏例⼦的源码什么的都有, 如果ubuntu没有安装git使⽤⼀下命令安装即可: sudo apt-get install git 4.2 下载完成之后进⾏解压缩,找到kaldi的压缩包直接右键提取。
4.3 ⽬录介绍:tools⽬录全是kaldi依赖的包,egs为kaldi提供的实例,其中包含常⽤的数据集运⾏的 源码,src⽬录为kaldi 的源代码 4.4 kaldi编译 4.4.1 编译之前确保安装了⼀下组件: apt-get,subversion,automake,autoconf,libtool,zlib,wget,libatal 使⽤如下命令安装即可: sudo apt-get install <组件名称> 4.4.2 进⼊tools⽬录下进⾏编译 cd kaldi/tools 进⼊到kaldi/tools⽬录 make或make -j 4(多核并⾏) 下载编译 该过程⽐较慢,第⼀次进⾏make时会下载安装⼀些组件。
Ubuntu20.04LTS国内源安装指定版本Dockerdocker-compose
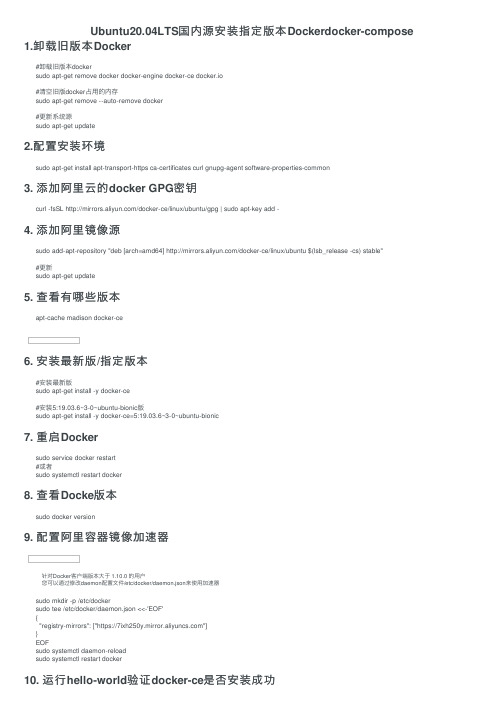
Ubuntu20.04LTS国内源安装指定版本Dockerdocker-compose 1.卸载旧版本Docker#卸载旧版本dockersudo apt-get remove docker docker-engine docker-ce docker.io#清空旧版docker占⽤的内存sudo apt-get remove --auto-remove docker#更新系统源sudo apt-get update2.配置安装环境sudo apt-get install apt-transport-https ca-certificates curl gnupg-agent software-properties-common3. 添加阿⾥云的docker GPG密钥curl -fsSL /docker-ce/linux/ubuntu/gpg | sudo apt-key add -4. 添加阿⾥镜像源sudo add-apt-repository "deb [arch=amd64] /docker-ce/linux/ubuntu $(lsb_release -cs) stable"#更新sudo apt-get update5. 查看有哪些版本apt-cache madison docker-ce6. 安装最新版/指定版本#安装最新版sudo apt-get install -y docker-ce#安装5:19.03.6~3-0~ubuntu-bionic版sudo apt-get install -y docker-ce=5:19.03.6~3-0~ubuntu-bionic7. 重启Dockersudo service docker restart#或者sudo systemctl restart docker8. 查看Docke版本sudo docker version9. 配置阿⾥容器镜像加速器针对Docker客户端版本⼤于 1.10.0 的⽤户您可以通过修改daemon配置⽂件/etc/docker/daemon.json来使⽤加速器sudo mkdir -p /etc/dockersudo tee /etc/docker/daemon.json <<-'EOF'{"registry-mirrors": ["https://"]}EOFsudo systemctl daemon-reloadsudo systemctl restart docker10. 运⾏hello-world验证docker-ce是否安装成功sudo docker run hello-world安装成功显⽰:11. 安装docker-compose安装pipsudo apt install python3-pip更新⼀下库sudo apt-get update更新⼀下pipsudo pip3 install --upgrade pip安装docker-composesudo pip3 install docker-compose如果出错就更新⼀下 sixpip3 install six --user -U查看docker-compose版本docker-compose --version。
Ubuntu8.04优化教程大全
7.备份和还原系统:记得用sudo,否则在备份/home时会有点错误,--exclude=表示不需要备份的文件夹,备份前先删除trash(回收站)中文件,var/cache/apt/archives中下载的软件包也可以删除,/media文件夹一般也要排除。
8)deb包:一般双击安装即可,权限不够时,尝试:sudo dpkg -i *.deb
9)编译安装方式:一般作者会给出步骤,解压后cd到该目录,如下安装,可以参考目录下readme文件的说明。
1 ./configure
2 make
3 sudo make install
10)其他更多类型sh ,py ,run后缀文件的安装方式,详见
#电信cn99的源
deb/ubuntu/hardy main restricted universe multiverse
deb/ubuntu/hardy-security main restricted universe multiverse
完,可以查看ubuntu版本:
cat /etc/issue
或者:
sudo lsb_release -a
4.automatix:安装Ubuntu最流行的软件,它里面都是一些默认没有安装的软件,cool!/不过暂无hardy版本(好像暂停开发),静候吧。
在源里加上cdromsudo apt-cdrom -m -d /cdrom add
这样生成的source.list还是优先去(这一点没有验证),手动删掉他们,只留cdrom,开始升级吧:
sudo apt-get update
sudo apt-get dist-upgrade
deb/ubuntu/hardy-updates main restricted universe multiverse
Ubuntu服务器安装MRTG监控软件
Ubuntu服务器安装MRTG监控软件安装apache:apt-get install apache2apt-get install snmp snmpd编辑snmpd:vim /etc/snmp/snmpd.conf查找到类似的行,修改为如下所示:(仅仅修改屏蔽或放开)# source community# com2sec paranoid default public # kommentierencom2sec readonly default public # <- auskommentieren#com2sec readwrite default private重启snmpd服务:/etc/init.d/snmpd restart重新生成mrtg的配置文件:cfgmaker public@localhost > /etc/mrtg.cfg(注意)如果仅仅监视一个IP地址采用如下命令:cfgmaker public@192.168.17.16>> /etc/mrtg.cfg生成mrtg的主页:indexmaker /etc/mrtg.cfg > /var/www/mrtg/index.html访问:http://localhost/mrtg/二安装CPU负载监视[默认5分钟采集一次]切换到超级用户:sudo -sH安装软件:apt-get install sysstat建立CPU脚本:mkdir /opt/mrtgvim /opt/mrtg/mrtg.cpu#!/bin/bashcpuusr=`/usr/bin/sar -u 1 3 | grep Average | awk '{print $3}'`cpusys=`/usr/bin/sar -u 1 3 | grep Average | awk '{print $5}'`UPtime=`/usr/bin/uptime | awk '{print $3""$4""$5}'`echo $cpuusrecho $cpusysecho $UPtimehostname使脚本可以执行:chmod +755 /opt/mrtg/mrtg.cpu修改/etc/mrtg.cfg 在文件最后加入cpu项目Target[cpu]: `/opt/mrtg/mrtg.cpu`MaxBytes[cpu]: 100Options[cpu]: gauge, nopercent, growrightYLegend[cpu]: CPU loading (%)ShortLegend[cpu]: %LegendO[cpu]: CPU us;LegendI[cpu]: CPU sy;Title[cpu]: CPU LoadingPageTop[cpu]: <H1>CPU Loading</H1>重新生成索引页面:indexmaker /etc/mrtg.cfg > /var/www/mrtg/index.html三安装WWW连接数监视[默认5分钟采集一次]切换到超级用户:sudo -sH建立WWW脚本:mkdir /opt/mrtgvim /opt/mrtg/mrtg.www#!/bin/bashall=`netstat -a | grep www|awk '{print $5}'|sort | wc -l|awk '{print$1 - 1}'`user=`netstat -a | grep www|awk '{print $5}'|cut -d":" -f1|sort| uniq |wc -l | awk '{print $1 - 1}'` if [ "$all" = "-1" ]; thenecho 0elseecho $allfiif [ "$user" = "-1" ]; thenecho 0elseecho $userfiUPtime=`/usr/bin/uptime | awk '{print $3 " " $4 " " $5}'` echo $UPtimehostname使脚本可以执行:chmod +755 /opt/mrtg/mrtg.www修改/etc/mrtg.cfg 在文件最后加入www项目Target[www]: `/opt/mrtg/mrtg.www`MaxBytes[www]: 500Options[www]: nopercent, growrightYLegend[www]: Online UsersShortLegend[www]: %LegendI[www]: Connect :LegendO[www]: Online :Title[www]: WWW ConnectPageTop[www]: <H1> WWW Connect </H1>重新生成索引页面:indexmaker /etc/mrtg.cfg > /var/www/mrtg/index.html 四安装内存使用监视[默认5分钟采集一次]切换到超级用户:sudo -sH建立RAM脚本:mkdir /opt/mrtgvim /opt/mrtg/mrtg.ram#!/bin/bash# run this script to check the mem usage.totalmem=`/usr/bin/free |grep Mem |awk '{print $2}'`usedmem=`/usr/bin/free |grep Mem |awk '{print $3}'` UPtime=`/usr/bin/uptime | awk '{print $3""$4""$5}'` echo $totalmemecho $usedmemecho $UPtimehostname使脚本可以执行:chmod +755 /opt/mrtg/mrtg.ram修改/etc/mrtg.cfg 在文件最后加入ram项目Target[ram]: `/opt/mrtg/mrtg.ram`#Unscaled[ram]: dwymMaxBytes[ram]: 2048000Title[ram]:MemoryShortLegend[ram]: &kmg[ram]:kB,MBkilo[ram]:1024YLegend[ram]: Memory Usage :Legend1[ram]: Total Memory :Legend2[ram]: Used Memory :LegendI[ram]: Total Memory :LegendO[ram]: Used Memory :Options[ram]: growright,gauge,nopercentPageTop[ram]:<H1>Memory</H1>重新生成索引页面:indexmaker /etc/mrtg.cfg > /var/www/mrtg/index.html五安装FTP连接数监视[默认5分钟采集一次]切换到超级用户:sudo -sH建立FTP脚本:mkdir /opt/mrtgvim /opt/mrtg/mrtg.ftp#!/bin/bashall=`netstat -a | grep ftp|awk '{print $5}'|sort | wc -l|awk '{print$1 - 1}'`user=`netstat -a | grep ftp|awk '{print $5}'|cut -d":" -f1|sort| uniq |wc -l | awk '{print $1 - 1}'` if [ "$all" = "-1" ]; thenecho 0elseecho $allfiif [ "$user" = "-1" ]; thenecho 0elseecho $userUPtime=`/usr/bin/uptime | awk '{print $3 " " $4 " " $5}'` echo $UPtimehostname使脚本可以执行:chmod +755 /opt/mrtg/mrtg.ftp修改/etc/mrtg.cfg 在文件最后加入ftp项目Target[ftp]: `/opt/mrtg/mrtg.ftp`MaxBytes[ftp]: 500Options[ftp]: nopercent, growrightYLegend[ftp]: Online UsersShortLegend[ftp]: %LegendI[ftp]: Connect :LegendO[ftp]: Online :Title[ftp]: FTP ConnectPageTop[ftp]: <H1> FTP Connect </H1>重新生成索引页面:indexmaker /etc/mrtg.cfg > /var/www/mrtg/index.html 六安装CPU温度监视[默认5分钟采集一次]切换到超级用户:sudo -sH安装软件:apt-get install mbmon建立CPU温度脚本:mkdir /opt/mrtgvim /opt/mrtg/mrtg.temp#!/bin/bash/usr/bin/mbmon -c 1 -i -T 4 -u -nexit 0使脚本可以执行:chmod +755 /opt/mrtg/mrtg.temp修改/etc/mrtg.cfg 在文件最后加入cpu项目Target[temp]: `/opt/mrtg/mrtg.temp`MaxBytes[temp]: 100Title[temp]: CPU TemperaturePageTop[temp]: <H1>CPU Temperature</H1> Options[temp]: gauge,absolute,unknaszero,growright YLegend[temp]: Temperature(C)ShortLegend[temp]: (C)Legend1[temp]: CPU TemperatureLegend2[temp]: M/B TemperatureLegendI[temp]: CPU Temp.LegendO[temp]: M/B Temp.重新生成索引页面:indexmaker /etc/mrtg.cfg > /var/www/mrtg/index.html 七硬盘读写监视[默认5分钟采集一次]切换到超级用户:sudo -sH建立硬盘读写脚本:mkdir /opt/mrtgvim /opt/mrtg/mrtg.disk#!/bin/bashhd=sdadisk=/dev/$hdUPtime=`/usr/bin/uptime |awk '{print $3""$4""$5}'`KBread_sec=`iostat -x $disk|grep $hd |awk '{print $8}'` KBwrite_sec=`iostat -x $disk|grep $hd |awk '{print $9}'` echo $KBread_sececho $KBwrite_sececho $UPtimehostname使脚本可以执行:chmod +755 /opt/mrtg/mrtg.disk修改/etc/mrtg.cfg 在文件最后加入硬盘读写Target[disk]: `/opt/mrtg/mrtg.disk`Title[disk]: Disk HDA I/O Utilization Report#Unscaled[disk]: dwymMaxBytes[disk]: 10240000PageTop[disk]: <H1>Disk I/O Utilization Report</H1> kmg[disk]: KB,MB,GBLegendI[disk]: Disk I/O KBread/secLegendO[disk]: Disk I/O KBwrite/secLegend1[disk]: Disk I/O KBread/secLegend2[disk]: Disk I/O KBwrite/secYLegend[disk]: MegabytesShortLegend[disk]: &Options[disk]: growright,gauge,nopercent重新生成索引页面:indexmaker /etc/mrtg.cfg > /var/www/mrtg/index.html 八:磁盘使用切换到超级用户:sudo -sH建立磁盘使用脚本:mkdir /opt/mrtgvim /opt/mrtg/mrtg.df#!/usr/bin/perlforeach $filesystem (`df -kl | grep -v "Filesystem"`) {@df = split(/\s+/,$filesystem);$total += $df[1];$usage += $df[2];}print "$total\n";print "$usage\n";hostname使脚本可以执行:chmod +755 /opt/mrtg/mrtg.df修改/etc/mrtg.cfg 在文件最后加入Target[disk]: `/opt/mrtg/mrtg.df`Title[disk]: Disk SpaceUnscaled[disk]: dwymMaxBytes[disk]: 465247550kmg[disk]: KB,MB,GBLegendI[disk]: Total Disk SpaceLegendO[disk]: Used Disk SpaceLegend1[disk]: Total Disk SpaceLegend2[disk]: Used Disk SpaceYLegend[disk]: MegabytesShortLegend[disk]: &Options[disk]: growright,nopercentPageTop[disk]: <H1>Disk Space</H1>重新生成索引页面:indexmaker /etc/mrtg.cfg > /var/www/mrtg/index.html九:交换分区切换到超级用户:sudo -sH建立交换分区脚本:mkdir /opt/mrtgvim /opt/mrtg/mrtg.swap#!/bin/bash# This script to monitor the swap usage.totalswap=`/usr/bin/free |grep Swap |awk '{print $2}'`usedswap=`/usr/bin/free |grep Swap |awk '{print $3}'`echo "$totalswap"echo "$usedswap"使脚本可以执行:chmod +755 /opt/mrtg/mrtg.swap修改/etc/mrtg.cfg 在文件最后加入Target[swap]: `/opt/mrtg/mrtg.swap`MaxBytes[swap]: 2048000Title[swap]:Memory State of ServerShortLegend[swap]: &kmg[swap]:kB,MBkilo[swap]:1024YLegend[swap]: Swap UsageLegend1[swap]: Total SwapLegend2[swap]: Used SwapLegendI[swap]: Total SwapLegendO[swap]: Used SwapOptions[swap]: growright,gauge,nopercentPageTop[swap]:<H1>Swap</H1>重新生成索引页面:indexmaker /etc/mrtg.cfg > /var/www/mrtg/index.html* Target[裝置名稱]:o Target[adj.idv.tw_2]: 2: public@192.168.1.2上面是一般的用法,其中半括號內的是裝置的名稱,同一個裝置的各參數中,這個名稱要一致!o Target[adj.idv.tw_3]:`/usr/local/apache/htdocs/mrtg/cpu/mrtg.cpu`後面接的是一個自訂的加掛的可執行檔案,這個檔案執行之後,會顯示四個數據,這樣就可以繪圖了!在繪製非MRTG 程式的預設咚咚中,這個是最常使用的方法了!* MaxBytes[裝置名稱]:o MaxBytes[adj.idv.tw_2]: 1250000後面的數字代表資料監測時,最大的傳送速率,使用bytes,所以10Mbps 則為1.25MBytes,大約是1250000 Bytes。
如何安装Ubuntu8.04(比较经典的教程)

此文章转载于互联网,方便逸友安装系统时参照,可以说这篇文章介绍的非常详细(原文地址/venhow/blog/ ... 5fe1f8fc037fc7.html)F31A更多视觉特效展示请点击http://tianyi.i /thread-508983-1-1.htmlLINUX软件不会装?看这里/thread-509223-1-1.html首先下载8.04的镜像,32位cpu就选32位版本,64位cpu请详信我大胆的选择64位版本^_^国内LUPAWORLD的cd镜像/ubuntu/releases/8.04/官方的下载点:/releases/8.04注意这里有Desktop,Server的版本选择,一般桌面用户下载Desktop CD 就可以了下载完后,把镜像刻录成光盘进行安装。
把刻录好的CD,放进光驱,选择光驱启动,进入安装。
光盘安装Ubutn u8.041、备份资料如果以前没有安装过Ubuntu 的可以跳过这一步。
如果你没有把/home目录单独挂载出来,建议你把他备份到一个安全的地方,至于其他系统分区、软件分区、都可以不管,保留软件设置比软件重要。
小贴士:如果你在本机搭建了Web 服务器,不要忘了备份/var/www 目录。
2、准备分区这是新手问最多的问题,如果你以前使用Windows ,那么你需要单独给Ubuntu 划分一个空白分区,可以使用Windows 自带的分区工具,也可以使用PQ 分区管理工具。
建立Linux分区的操作建议在Ubuntu 安装过程中进行。
最简单可行的分区方法1、先在windows下,我的电脑上点右键-----管理------磁盘管理-----删除最后一个分区(先备份再做,也可以进行先删除分区后再调整下分区大小,保留一个分区未分就行)2、安装desktop 版ubuntu,安装的时候让它自动分区并钩选最大的连续空闲空间。
小贴士:如今Linux 上常用的日志文件系统有ext3 和ReiserFS ,据传由于ReiserFS 作者事件,ReiserFS已经停止了开发,也导致ReiserFS 4 一直没法得到支持(使用它得自己编译内核)。
Ubuntu14.04下安装Hadoop2.4.0 (单机模式)
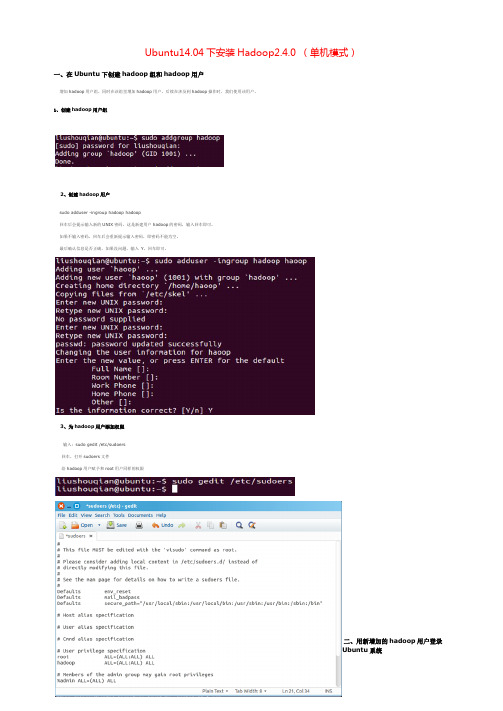
Ubuntu14.04下安装Hadoop2.4.0 (单机模式)一、在Ubuntu下创建hadoop组和hadoop用户增加hadoop用户组,同时在该组里增加hadoop用户,后续在涉及到hadoop操作时,我们使用该用户。
1、创建hadoop用户组2、创建hadoop用户sudo adduser -ingroup hadoop hadoop回车后会提示输入新的UNIX密码,这是新建用户hadoop的密码,输入回车即可。
如果不输入密码,回车后会重新提示输入密码,即密码不能为空。
最后确认信息是否正确,如果没问题,输入Y,回车即可。
3、为hadoop用户添加权限输入:sudo gedit /etc/sudoers回车,打开sudoers文件给hadoop用户赋予和root用户同样的权限二、用新增加的hadoop用户登录Ubuntu系统三、安装sshsudo apt-get install openssh-server安装完成后,启动服务sudo /etc/init.d/ssh start查看服务是否正确启动:ps -e | grep ssh设置免密码登录,生成私钥和公钥ssh-keygen -t rsa -P ""此时会在/home/hadoop/.ssh下生成两个文件:id_rsa和id_rsa.pub,前者为私钥,后者为公钥。
下面我们将公钥追加到authorized_keys中,它用户保存所有允许以当前用户身份登录到ssh客户端用户的公钥内容。
cat ~/.ssh/id_rsa.pub >> ~/.ssh/authorized_keys登录sshssh localhost退出exit四、安装Java环境sudo apt-get install openjdk-7-jdk查看安装结果,输入命令:java -version,结果如下表示安装成功。
五、安装hadoop2.4.02、安装解压sudo tar xzf hadoop-2.4.0.tar.gz假如我们要把hadoop安装到/usr/local下拷贝到/usr/local/下,文件夹为hadoopsudo mv hadoop-2.4.0 /usr/local/hadoop赋予用户对该文件夹的读写权限sudo chmod 774 /usr/local/hadoop3、配置1)配置~/.bashrc配置该文件前需要知道Java的安装路径,用来设置JAVA_HOME环境变量,可以使用下面命令行查看安装路径 update-alternatives - -config java执行结果如下:完整的路径为/usr/lib/jvm/java-7-openjdk-amd64/jre/bin/java我们只取前面的部分/usr/lib/jvm/java-7-openjdk-amd64配置.bashrc文件sudo gedit ~/.bashrc该命令会打开该文件的编辑窗口,在文件末尾追加下面内容,然后保存,关闭编辑窗口。
仅liggghts在ubuntu系统安装教程

1. 先安装编译环境(安装gcc,g++,make等)命令:sudo apt-get install build-essential2. 安装git 命令:sudo apt-get install git3 .安装OpenFoam 程序安装教程/download/ubuntu.php按照openfoam官网的方法安装,应该没问题。
安装完OpenFOAM后会自动安装OpenMPI。
4. 安装paraview,命令:sudo apt-get install paraview5 安装openmpi :命令"sudo apt-get install openmpi openmpi-devel"我安装openmpi的时候,当输入"sudo apt-get install openmpi openmpi-devel"时,显示:gongbp@gongbp-Aspire-4750:~$ sudo apt-get install openmpi openmpi-devel正在读取软件包列表... 完成正在分析软件包的依赖关系树正在读取状态信息... 完成E: 未发现软件包openmpiE: 未发现软件包openmpi-develgongbp@gongbp-Aspire-4750:~$这是应为前面安装OpenFOAM后会自动安装OpenMPI,可以查看一下是否安装openmpi。
输入:which mpirun 就可以看到安装的openmpi,输入mpirun –version(注意中间有一个空格)可以查看安装的openmpi的版本。
6 下载并安装LIGGGHTS程序依次输入:mkdir LIGGGHTScd LIGGGHTSgit clone https:///CFDEMproject/LIGGGHTS-PUBLIC.git等下载完毕后就可以开始编译了。
7安装LIGGGHTS程序接上面第6步,进入LIGGGHTS目录下的src文件夹下面,命令为:cd src然后开始编译:输入:make clean-all,然后再输入:make fedora结束之后会在src下面生成一个lmp_fedora的可执行文件。
- 1、下载文档前请自行甄别文档内容的完整性,平台不提供额外的编辑、内容补充、找答案等附加服务。
- 2、"仅部分预览"的文档,不可在线预览部分如存在完整性等问题,可反馈申请退款(可完整预览的文档不适用该条件!)。
- 3、如文档侵犯您的权益,请联系客服反馈,我们会尽快为您处理(人工客服工作时间:9:00-18:30)。
在ubuntu 8.04上安装kerrighed 2.3.0 cluster参考原文:Setting Up A Diskless-boot Kerrighed 2.4.1 Cluster in Ubuntu 8.04本实验中用了三台机器,一台作为server(运行Ubuntu 8.04,内核任意),另外两台作为client。
Server不需要安装Kerrighed内核,他只作为服务器,为Client节点提供网络以及文件系统等支持。
Server通过DHCP、TFTP服务为Client进行网络安装操作系统,并通过NFS为Client提供全局文件系统支持。
Server有两个网卡,一个对外,一个对内。
本实验中对外的网卡为eth1,其IP与本实验无关;对内的网卡为eth0,其IP为192.168.1.1,子网掩码为255.255.255.0。
这个安装向导分为两个部分:第一部分是配置服务器,让节点可以使用当前的kernel 无盘启动;第二部分是安装与配置Kerrighed 2.3.0。
为了简单,本文大多内容直接原文拷贝,所以是英文,个别地方做了修改,或采用中文说明。
另外,重要的补充说明用红字体标示。
Part 1: 建立无盘启动的Ubuntu serverThis will be the basis of our cluster. In order to get a working diskless boot server, there are four main components you'll need to install: a DHCP server to assign IP addresses to each node, a TFTP server to boot the kernel for each node over the network, an NFS server toallow the nodes to share a filesystem, and a minimal Ubuntu 8.04 installation for them to share.These server components will all run on one box; this box will be your 'head node' or the controller for the cluster. Let's get started!1.1: Setting up the DHCP serverDHCP is what will allow the nodes to get IP addresses from the server. We want to set up and configure a DHCP daemon to run on the server and give IP addresses only to nodes it recognises, so we will tell the daemon their MAC addresses.First install the DHCP server package with aptitude or apt-get, as root:# aptitude install dhcp3-server补充说明:从此处开始,后续会有很多操作涉及aptitude install或者apt-get install,这些都需要联网操作。
那么,在无法上网的情况下,如何安装这些软件呢?一种相对简单的方式是:一次性的把所有的软件安装在另一台上网机上,然后拷贝这些软件到非上网机。
此次实验采取的即是这种方法,详细说明见附录一。
当然,也可以在本地局域网配置一个软件源,只要添加这个源即可,但源非常庞大,下载较麻烦,暂时未使用该方法。
修改内网卡的IP为192.168.1.1,掩码为255.255.255.0,网关为192.168.1.0,DNS为192.168.1.1。
Check that the DHCP server configuration file, /etc/default/dhcp3-server, contains the correct Ethernet card to listen to DHCP requests from the nodes: this will be the card that does not connect to the Internet. If you put the wrong card into this file, bad things will happen: your server will start listening to DHCP requests on the LAN and denying them all, since they don't come from nodes. Make sure you know which is the right card! =] In this case it is eth0, so make the configuration file look like this:# /etc/default/dhcp3-server #interfaces="eth0"Now you need to configure the DHCP daemon to issue addresses only to nodes, and tell it which addresses to give them. Make sure you have the MAC addresses of your nodes' Ethernet cards handy - you can get them by issuing the command ifconfig as root from a live DVD or USB stick, for instance, or they may be written on the nodes' casing or on stickers stuck to the cards. You can also just boot the cluster and watch the error messages, picking out the MACs from the denied requests. Edit /etc/dhcp3/dhcpd.conf,DHCP's daemon configuration file, so it looks like the following. (Don't worry that the file references certain things you haven't actually installed yet, like a PXE bootloader; you'll put these things in later.)# /etc/dhcp3/dhcpd.conf ## General optionsoption dhcp-max-message-size 2048;use-host-decl-names on;deny unknown-clients; # This will stop any non-node machines from appearing on the cluster network.deny bootp;# DNS settingsoption domain-name "kerrighed"; # Just an example name - call it whatever you want.option domain-name-servers 192.168.1.1; # The server's IP address, manually configured earlier.# Information about the network setupsubnet 192.168.1.0 netmask 255.255.255.0 {option routers 192.168.1.1; # Server IP as above.option broadcast-address 192.168.1.255; # Broadcast address for your network.}# Declaring IP addresses for nodes and PXE infogroup {filename "pxelinux.0"; # PXE bootloader. Path is relative to/var/lib/tftpbootoption root-path "192.168.1.1:/nfsroot/kerrighed"; # Location of the bootable filesystem on NFS serverhost kerrighednode1 {fixed-address 192.168.1.101; # IP address for the first node, kerrighednode1 for example.hardware ethernet 01:2D:61:C7:17:86; # MAC address of the node's ethernet adapter}host kerrighednode2 {fixed-address 192.168.1.102;hardware ethernet 01:2D:61:C7:17:87;}server-name "kerrighedserver"; # Name of the server. Call it whatever you like.next-server 192.168.1.1; # Server IP, as above.}Now you're done configuring DHCP, so your nodes will be able to get IPs. It's time to add the functionality that will allow the server to transfer a kernel to them afterwards.1.2: Setting up the TFTP server and PXE bootloaderTFTP is the fileserver that will be used by the bootloader to transfer the kernel to your nodes during a PXE boot. We need to install a TFTP server and get a PXE bootloader as part of the syslinux package, so that our nodes will be able to get their operating systems via the cluster server.As root, install the TFTP server package, tftp-hpa, with aptitude or apt-get:# aptitude install tftpd-hpaOpen its configuration file, /etc/default/tftpd-hpa, and make sure it uses the following settings. It can be run as a daemon, but it is normally started by the service daemon "inetd", and it uses the /var/lib/tftpboot directory to get files from:# /etc/default/tftp-hpa ##Defaults for tftp-hpaRUN_DAEMON="yes"OPTIONS="-l -s /var/lib/tftpboot"Now we need to configure inetd to run the tftp server. Open its configuration file,/etc/inetd.conf, and change the tftp line to the following. If there is no tftp line, add this:tftp dgram udp wait root /usr/sbin/in.tftpd /usr/sbin/in.tftpd -s /var/lib/tftpbootAs root, install syslinux, which is the system required for you to be able to PXE boot the nodes, and copy the PXE bootloader code from it to the TFTP server directory. This is the bootloader you told the DHCP daemon about in its configuration file earlier.# aptitude install syslinux# cp /usr/lib/syslinux/pxelinux.0 /var/lib/tftpbootStill as root, create a directory to store the default configuration for all the nodes. They will search in this directory for configuration files during the PXE boot process.# mkdir /var/lib/tftpboot/pxelinux.cfgStill as root, copy your current kernel and initrd from /boot to /var/lib/tftpboot/ in order to test the diskless-boot system. If need, replace `uname -r` with whatever you are using.# cp /boot/vmlinuz-`uname -r` /boot/initrd.img-`uname -r`/var/lib/tftpboot/Create the file /var/lib/tftpboot/pxelinux.cfg/default. This will be the fallback configuration file that the nodes use to PXE boot when they can't find a file specific to their own IP address. Make the file look like this:LABEL linuxDEFAULT vmlinuz-`uname -r` console=tty1 root=/dev/nfsinitrd=initrd.img-`uname -r` nfsroot=192.168.1.1:/nfsroot/kerrighed ip=dhcp rwYou're done setting up the TFTP and PXE components of the cluster server! Your nodes will now be able to get a kernel and filesystem from the server after they're given IP addresses. Now you need to add NFS capability.1.3: Setting up the NFS serverThis capability allows for the bootable filesystem that the nodes will download over TFTP to be accessed and shared over the network, so that the cluster uses one filesystem. First we'll install and set up the server that will do this.As root, install the packages nfs-kernel-server and nfs-common, which comprise the NFS server program. Keep your root authorisation until you're done working with the NFS server.# apt-get install nfs-kernel-server nfs-commonMake a directory to store the bootable filesystem in:# mkdir /nfsroot# mkdir /nfsroot/kerrighedEdit /etc/exports, which configures NFS file transfers. Add the following in order to make NFS export the filesystem that will be stored in the directory you just made:# /etc/exports #/nfsroot/kerrighed192.168.1.0/255.255.255.0(rw,no_subtree_check,async,no_root_squas h)Re-export the file systems, since you just changed how this is done:# exportfs -avrYour NFS server should be up and running. Now you can add a filesystem for this server to work with.1.4: Setting up the bootable filesystemThis isn't as simple as just copying the OS files into another directory - you'll need the debootstrap package to install the bootablefilesystem, so install this first (you should still be root.) Once it's installed, use debootstrap to itself install a minimal Ubuntu Hardy system tothe bootable filesystem directory:# aptitude install debootstrap# debootstrap --arch i386 hardy /nfsroot/kerrighed/ubuntu/补充说明:此处需要联网下载一个完整的ubuntu8根系统,对于不能联网的机器,解决方法如下。
