Fiends Gate恶魔之门电脑版安装图文教程
magmasoft安装教程
7.启动 magmasoft-setup(开始-程序-Magmasoft V4.4-magmasoft-setup),安装 Node server。
回车,点击“dimiss”关闭 Node server 安装窗口,然后安装 magmasoft
8.启动 magmasoft-License(开始-程序-Magmasoft V4.4-magmasoft- License)
启动magmasoftlicense开始程序magmasoftv44magmasoftlicense输入2回车输入5回车输入提供的systemkey0回车输入y回车输入提供的systemkey1回车输入y回车输入2回车输入0回车输入3回车输入5回车然后一行一行的输入确认一共有80几行需要有点耐心
郑重声明:此文档仅用于学习交流使用,请勿用做商业用途,违者后 果自负,如喜欢此软件,请购买正版!
0——return 0——quit 启动软件
BY 04210236
输入 2 回车ຫໍສະໝຸດ 输入 2 回车输入 5 回车 输入提供的 system key 0 回车
输入 y 回车 输入提供的 system key 1 回车 输入 y 回车
输入 2 回车
输入 0 回车
输入 3 回车
输入 5 回车
需要有点耐心!可以使用复制粘贴。 当输完所有的 license 后,输入回车,回到原来界面
然后一行一行的输入,确认,一共有 80 几行,
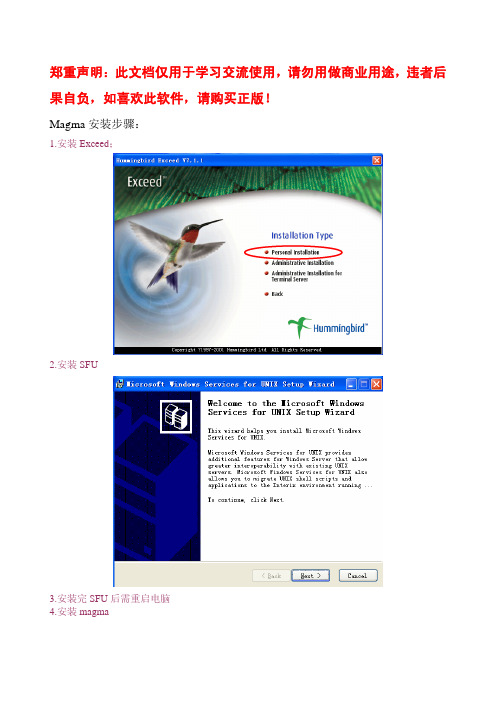
Magma 安装步骤:
1.安装 Exceed;
2.安装 SFU
3.安装完 SFU 后需重启电脑 4.安装 magma
5.将 MAGNiTUDE 下的 MAGMAnode.exe 复制到*:\magma-v4.4\v4.4\NT_INTEL\bin\下替换 原 MAGMAnode.exe 文件
Doors安装指南
1概述Doors软件分为:Server和Client,其中Server即为Database Server(数据库服务器,用于存储相关文件,供Client访问),版本分别是8.0和8.1。
Client端通过Server登录到对应的Database目录中,访问库中的文档。
Database Serve安装在我的PC上:Lenov09984748(计算机名),36677(端口),大家只需要安装Client端,并且在安装过程中将访问Database的地址和端口选择为上述信息即可。
同时我会以管理员账户(Administrator)将大家的用户名加入到访问权限中,随后所有的Client端都能访问Database。
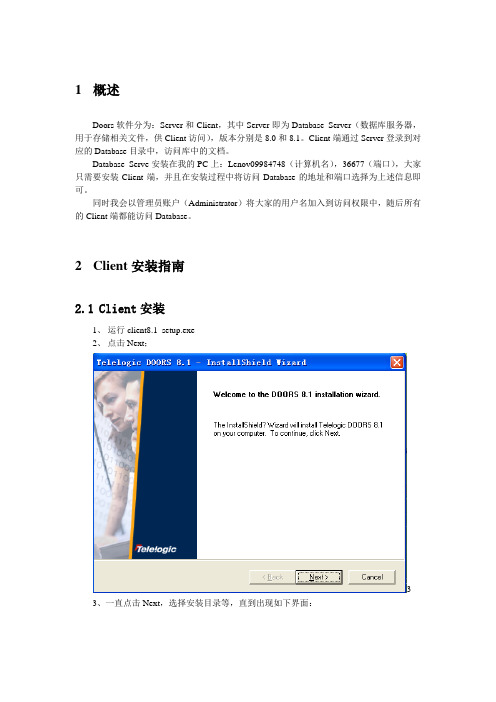
2Client安装指南2.1Client安装1、运行client8.1_setup.exe2、点击Next;33、一直点击Next,选择安装目录等,直到出现如下界面:19353@liuwei,其中19353不需修改,liuwei为本地PC机的计算机名。
以我为例:本地PC计算机名称:liuwei。
4、Port设置为36677(默认值,访问Server的端口),Host设置为Lenov09984748(Server 端计算机名)。
5、一直Next,直到Finish,安装完成。
6、安装完毕后,请重启PC,随便打开一个Word文档,可以看到一个Doors工具如图:该工具用于将Word文档导入到Doors的模块(Module)中,具体用途请见操作文档。
2.2License安装1、在Symantec中设置一个不扫描的文件夹,比如:D:\doors2、将keygen 的压缩文件放置到D:\doors 中,并解压缩,解压密码:doors3、把 keygen.exe 拷贝到本机一个准备放doors 的license 文件的目录,如D:\Program Files\Doorslicense ,并运行它,点“Generate ”按钮,将在该目录生成一个license.dat4、点「开始」菜单\程序\Telelogic\Telelogic Lifecycle Solutions Tools\Licensing 10.0\License Setup ,运行后,如下界面:5、一直Next,直到出现如下界面:选择Node Locked License6、选择License文件:7、选择Doors8、一直Next,直到Finish。
multiMAN安装方法文档
multiMAN安裝方法1. 首先使用電腦下載上面兩個PKG(軟件本體+遊戲封面及主題包),然後再拷貝到FAT32 格式的U 盤/ USB 硬盤的根目錄2. XMB選遊戲那行裡面的"★Install Package Files"3. 先選multiMAN_2917_Covers+29_themes.pkg按下O鍵後大約5分鐘就會完成安裝(遊戲封面及主題包)(安裝速度實際要看U盤或移動硬盤的速度而定)4. 再選multiMAN-ver_02.09.02-BASE-(20111011-111011).pkg按下O鍵安裝(注意: 會有訊息提示有相同版本在主機內,不用理會選yes,需時約廿秒,安裝速度實際要看U盤或移動硬盤的速度而定)5. 安裝完兩個pkg後,在XMB 遊戲那行選multiMAN,按O 鍵即可(最初第一次使用時要選三次Yes)注意1: 次序不可顛倒,先安裝multiMAN_2917_Covers+29_themes.pkg後才好安裝multiMAN-ver_02.09.02-BASE-(20111011-111011).pkg,否則有一個安裝不了或出問題注意2: 對老版本multiMAN情有獨鍾但是又想只需更新封面及主題的朋友注意:由於遊戲封面及主題包是使用最新的v02.06.01的EBOOT.BIN 所打包成pkg的,使用老版multiMAN朋友不要直接安裝使用老版multiMAN朋友請自行使用ps3gtb把multiMAN_2917_Covers+29_themes.pkg解包並得到BLES80608目錄文件夾使用multiMAN的「文件管理器」把BLES80608/USRDIR目錄下的covers及themes兩個目錄拷貝到dev_hdd0/game/BLES80608/USRDIR目錄下ps3gtb下載;/viewthread ... 413280#pid206370090。
Symantec Ghost11 使用说明

Symantec Ghost11 使用说明什么是Ghost?Ghost(幽灵)软件是美国赛门铁克公司推出的一款出色的硬盘备份还原工具,可以实现FAT16、FAT32、NTFS、OS2等多种硬盘分区格式的分区及硬盘的备份还原。
俗称克隆软件。
1、特点:既然称之为克隆软件,说明其Ghost的备份还原是以硬盘的扇区为单位进行的,也就是说可以将一个硬盘上的物理信息完整复制,而不仅仅是数据的简单复制;克隆人只能克隆躯体,但这个Ghost却能克隆系统中所有的东东,包括声音动画图像,连磁盘碎片都可以帮你复制,比克隆人还厉害哟:)。
Ghost支持将分区或硬盘直接备份到一个扩展名为.gho的文件里(赛门铁克把这种文件称为镜像文件),也支持直接备份到另一个分区或硬盘里。
2、运行ghost:至今为止,ghost只支持Dos的运行环境,这不能说不是一种遗憾:(。
我们通常把ghost文件复制到启动软盘(U盘)里,也可将其刻录进启动光盘,用启动盘进入Dos环境后,在提示符下输入ghost,回车即可运行ghost,首先出现的是关于界面,如图1:按任意键进入ghost操作界面,出现ghost菜单,主菜单共有4项,从下至上分别为Quit (退出)、Options(选项)、Peer to Peer(点对对,主要用于网络中)、Local(本地)。
一般情况下我们只用到Local菜单项,其下有三个子项:Disk(硬盘备份与还原)、Partition (磁盘分区备份与还原)、Check(硬盘检测),前两项功能是我们用得最多的,下面的操作讲解就是围绕这两项展开的。
3、由于Ghost在备份还原是按扇区来进行复制,所以在操作时一定要小心,不要把目标盘(分区)弄错了,要不将目标盘(分区)的数据全部抹掉就很惨的……根本没有多少恢复的机会,所以一定要认真、细心!但你也不要太紧张,其实Ghost的使用很简单,弄懂那几个单词的意思你就会理解它的用法,加上认真的态度,你一定可以掌握它的!一起来吧:)二、分区备份预备知识:认识单词Disk:不用我说你也知道,磁盘的意思;Partition:即分区,在操作系统里,每个硬盘盘符(C盘以后)对应着一个分区;Image:镜像,镜像是Ghost的一种存放硬盘或分区内容的文件格式,扩展名为.gho;To:到,在ghost里,简单理解to即为“备份到”的意思;From:从,在ghost里,简单理解from即为“从……还原”的意思。
(完整)MentorEE7.9.5安装教程
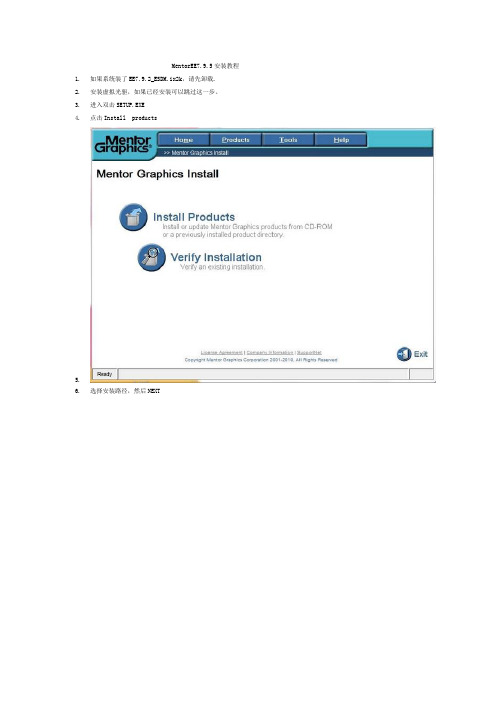
MentorEE7.9.5安装教程
1.如果系统装了EE7.9.2_ESDM.ix2k,请先卸载.
2.安装虚拟光驱,如果已经安装可以跳过这一步。
3.进入双击SETUP.EXE
4.点击Install products
5.
6.选择安装路径,然后NEXT
7.
8.选择如图,Next
9.
10.由于是帮助文件,安装哪个自己选择,然后next
11.
12.出现下面窗口ok即可
13.
14.点击同意
15.
16.点击安装
17.
18.点击Done,帮助文件安装完成
19.
20.到了选择LICENSE的对话框,停在这里,去安装包里找破解工具MentorKG.exe
21.
22.双击破解工具,弹出CMD对话框,等着
23.
24.弹出LICENSE文件另存为license.dat,保存
25.
26.选择刚刚新建的license.dat,下一步
27.
28.C盘新建一个英文文件夹,名称随意,作为WDIR的文件夹
29.
30.点击Done,文件安装完成
31.
32.如果没有中心库,打开软件的时候选择否。
GATEMAN盖特曼智能锁密码锁200-FH安装说明

导向柱(mm)
20 34 B B-1
门内侧
门外侧
A
门厚度
内壳 (室内部)
B
后棒条(mm)
F
前棒条(mm)
M
30,00 41,70 51,70 门厚
55,60FMD D-1F65,70 D-2 零件 75,70
C C-1
M
C-2
A
20.0~27.5 27.5~37.5 37.5~47.5
B
D D-1 D-2
扭
按
扭
打孔前必须拿出锁体, 否则锁体会损坏
安装展开图
注意
螺丝选择性使用 可能会造成门被 破坏
螺丝(mm)
门厚 A A-1 20 30 40 60 A-3 A-2
零件
螺丝(mm) 导向柱(mm)
A A-1 A-2 A A-1 A-3 A-1 B-1 B B
40~45 45~55 55~65 65~70 70~75 75~85 85~90
C C-1 C-2
防火专用 部件 (韩国)
前壳 (室外部)
78.0 225.0 243.0
折叠线
开孔图,门内外都适用
折叠线
安装时判断是否需要
27.0
24.0 14.0
A200-FH/A330-FH 安装说明书
1.棒条放入后壳锁体内 2.将线束与电路板线路连接 (注意正反) 3.电线整理后,连接线路
左手开门
右手开门 固定柱选择性使用
安装内壳
入
将开 上表示
安装锁扣片
完成安装
螺丝X2
注意
孔对准
安装时门打开
钻孔
确认孔的 大小和位置
安装后确认事项
GTA4安装说明

安装说明~~~~~~~~1. 首先加载ISO DVD1 到DAEMON TOOL 进行安装, 在运行安装时,1)首先叫简选语言(选英语),2)叫你安装"rock star social club"(选安装), 接着就开始安装游戏, 在安装时会叫你安装xlive online做会员(不用理会),选下一项, 接着又叫你安"rockstar social club"做会员(不用理会)选下一项, 开始正式安装游戏.2. 在运行安装DVD1 时,到一半便会停下来,叫你载入disc2, 便加载ISO DVD2 接着安装下一半.3. 在运行安装DVD2 时会停下来,再叫你载入disc1, 便加载ISO DVD1 接着安装(安装的都是xlive,C+2005,DirtX这些软件)4. 在安装完之后, 会首次登入(游戏发布日)(不用理会)(选取消)5. 开启DVD1 内的文件,你会见到(Razor1911活页夹) 张里面的三个文件([1911.dll],[GTAIV],[LaunchGTAIV])覆盖到, 本机磁盘c\Program Files\Rockstar Games\Grand TheftAuto IV 这活页夹内(选全部取代)6. 开始游戏(用Grand Theft Auto IV 这个快捷方式来开始)另外的一个(Rockstar Games Social Club快捷方式是不用)7. 在开始游戏时, 会首次出现在画面(Rockstar Games Social Club) 输入Email 和Password 接着按(Login)接着会出现在画面(Could not connect to Rockstar Games Socail Club. Please check your network connection.) 按(Start in Offline Mode) 跟着会出现另一画面按(PLAY)8. 在进入华丽游戏画面不久, Xlive window 这时就出现, 任意选择几项,跟着用鼠标指针到画面左上角箭咀离开便可(真正开始游戏)9. *(记着请不要联机进行安装游戏)*10.*(如开始游戏时, 不能进入和出现这一句题事(RMN40(Error Code RMN40)), 原因是须要更新到Windows XP SP3解决方法, 进入本机磁盘c, 再进入WINDOWS 活页夹, 活页夹内有个档叫(regedit), 进入这档内一直去到HKEY-LOCAL-ACHINE\SYSTEM\CurrentControlSet\Control\Windows ,里面有个叫(CSDVerison)檔, 把(200) 改成(300)便可. (记着修改完,一定要从新开启计算机)。
SYMANTEC SEP系统安装配置简易指南1

SEP系统安装配置指南赛门铁克中国公司2008.10目录一.文档介绍 (4)二.SEP安装概述 (5)三.SEP安装前系统检查 (6)四.SEP服务器、控制台安装 (7)五.复制站点的安装 (17)六.SEP策略配置 (22)1. 配置LiveUpdate更新 (22)2. 防配置默认防病毒和防间谍软件策略 (25)3. 配置防火墙策略 (26)4. 配置对应用程序的控制 (34)5. 配置对设备的控制 (42)6. 管理检测到的威胁............................................................. 错误!未定义书签。
七.SEP客户端安装包配置.................................................. 错误!未定义书签。
八.SEP客户端安装.............................................................. 错误!未定义书签。
1.网络共享手工安装SEP .................................................. 错误!未定义书签。
2.推送安装SEP .................................................................. 错误!未定义书签。
3.WEB方式安装SEP ........................................................ 错误!未定义书签。
4.其它安装方式.................................................................. 错误!未定义书签。
九.SEP客户端简单图解...................................................... 错误!未定义书签。
RME UFX 用户指南-中文

Fireface UFX
最强大的火线®和 USB 音频接口!
USB2.0 (兼容 USB3.0)/ 火线 400 数字输入/ 输出系统 12 +16 +2 通道模拟/ ADAT/ AES 接口 24 Bit / 192 kHz 数字音频 60×30 矩阵跳线器 2×MIDI 输入/输出 完全独立操作 MIDI 遥控
安装和操作 –Windows
6 硬件安装................................................................14 7 驱动程序和固件 7.1 驱动程序安装......................................................14 7.2 驱动程序更新......................................................15 7.3 卸载驱动程序......................................................15 7.4 固件更新.............................................................15 8 设置 Fireface 对话框 8.1 设置对话框- 概述...............................................16 8.2 设置对话框- 音调...............................................18 9 操作和使用 9.1 播放....................................................................19 9.2 DVD 播放(AC - 3/ DTS).......................................20 9.3 WDM 说明..........................................................21 9.4 WDM 通道数......................................................22 9.5 多客户端操作.....................................................22 9.6 模拟录音............................................................23 9.7 数字录音............................................................23 9.8 时钟模式- 同步..................................................24 10 ASIO 操作 10.1 概述................................................................25 10.2 ASIO 通道数....................................................25 10.3 已知问题..........................................................26 11 使用一个以上的 Fireface UFX...........................26 12 DIGICheck Windows........................................27 13 故障排除............................................................28
Doors软件安装以及DXL入门

Doors软件安装以及DXL入门教学内容:本节课的教学内容主要包括Doors软件的安装和DXL入门。
学生将学习如何安装Doors软件,包括、安装和配置软件的步骤。
然后,学生将开始学习DXL语言的基础知识,包括语法、函数和基本操作。
教学目标:1. 学生能够成功安装Doors软件,并理解其基本功能。
2. 学生能够掌握DXL语言的基本语法和函数,并能够编写简单的DXL程序。
3. 学生能够通过实践操作,深入理解Doors软件和DXL语言的应用场景,提高解决问题的能力。
教学难点与重点:重点:Doors软件的安装和DXL语言的基础知识。
难点:理解并掌握DXL语言的语法和函数,以及如何将理论知识应用于实际问题解决中。
教具与学具准备:教具:电脑、投影仪、教学PPT学具:学生电脑、Doors软件安装包、DXL编程教材或指导书教学过程:1. 引入:通过展示一个实际案例,向学生介绍Doors软件和DXL 语言的应用场景,激发学生的学习兴趣。
2. 安装Doors软件:引导学生按照步骤进行Doors软件的安装,并在过程中提供必要的帮助和指导。
3. 学习DXL基础知识:通过讲解和示例,向学生介绍DXL语言的基本语法、函数和操作。
4. 实践操作:学生分组进行实践操作,尝试编写简单的DXL程序,并解决实际问题。
板书设计:1. Doors软件的安装步骤2. DXL语言的基本语法3. DXL语言的基本函数4. DXL程序的编写示例作业设计:1. 完成Doors软件的安装,并简要描述安装过程中的注意事项。
2. 根据教材或指导书,编写一个简单的DXL程序,实现两个数字的加法运算。
FUNCTION helloWorld()PRINT "Hello, World!"END FUNCTION课后反思及拓展延伸:重点和难点解析:一、教学内容1. 教材章节与内容:本节课的教学内容主要涉及Doors软件的安装步骤和DXL语言的基础知识。
大箱子补丁使用
⼤箱⼦补丁使⽤《暗⿊破坏神2:毁灭之王》⼤箱⼦补丁PlugY9.00(⽀持1.12版本),⽆限翻页储物空间。
收藏|发布者: 赫拉迪姆长⽼|查看数: 23309|评论数: 38摘要: 软件简介:建议全屏启动,因为如果⽤窗⼝模式可能会加载失败! 如果提⽰:“Don't find image file StashBtns.dc6”或其他提⽰请按下列步骤: 1,⾸先确认暗⿊⽬录内有Save、PlugY两个⽂件夹 2,“开始” - “运⾏ ... 软件简介:建议全屏启动,因为如果⽤窗⼝模式可能会加载失败!如果提⽰:“Don't find image file StashBtns.dc6”或其他提⽰请按下列步骤:1,⾸先确认暗⿊⽬录内有Save、PlugY两个⽂件夹2,“开始” - “运⾏”输⼊ Regedit 按回车键3,找到并打开HKey_Current_User键值,删除Software下Blizzard Entertainment下Diablo II中Install Path,和Save Path键值。
注意,⼀定要是4所在的⽂件夹⾥⾯的键值,其他⽂件夹虽然也能找到,但是没有⽤,必须此⽂件夹下的才可以。
4,正版游戏运⾏PlugY.exe⽂件,其他版本游戏运⾏PatchD2gfxDll.exe⽂件。
下载地址:暗⿊2翻页⼤箱⼦PlugY9.00(⽀持1.12版本).rar(310.02 KB, 下载次数: 10274)另:提供使⽤说明⽅便⼤家设置⼤箱⼦补丁⼯具。
plugy安装使⽤指南:安装说明:1、解压到你的暗⿊⽬录!2、正版⽤户执⾏plugy.exe启动游戏即可!3、D版⽤户执⾏patchd2gfxdll.exe安装!⽤你原来的游戏快捷⽅式运⾏游戏即可!功能说明:1、⽆限存储箱(4,294,967,296页)2、共享存储箱(4,294,967,296页)3、可以使⽤天梯符⽂之语4、可以激活天梯任务5、杀了地⽜之母,仍然可以进⼊奶⽜关6、可以洗点(技能和属性)7、多语种选择8、可以在单机上使⽤随机地图9、⾃动加载多⼈模式10、增加⼈物属性显⽰页⾯11、显⽰物品等级12、显⽰精确游戏版本13、10×10箱⼦14、变更游戏存档路径15、显⽰⽣命和魔法值16、可以读取Excel编辑过的⽂件17、显⽰当前真实状态18、⽀持语⾔版本:英、法、德、意、西班⽛、波兰新增特⾊:1、安装简便(新的安装⽅式)2、杀了地⽜之母,仍然可以进⼊奶⽜关3、显⽰精确游戏版本(可以显⽰1.09d或1.11b)4、MOD制作者可以使⽤游戏程序中预留的技能按钮5、修正了1.11中遇到⾦怪跳出的问题6、修正了MOD中洗点丢点的问题7、多玩家模式:当玩家意外退出仍然可以存档8、修正了“加载内存失败”的问题------------------------------------------------------最吸引⼈的3⼤功能之3:Uber Quest(1.11 新 6 Boss 任务)这个也是默认激活的,作者想得真是周到哈。
2024版Doors软件安装以及DXL入门

2024/1/29
22
05
DXL在自动化测试中的应用
Chapter
2024/1/29
23
自动化测试框架搭建
01
选择合适的自动化 测试工具
根据项目需求和资源情况,选择 适合的自动化测试工具,如 Sel
配置测试所需的软硬件环境,包 括操作系统、浏览器、测试工具 等。
ABCD
2024/1/29
条件语句用于根据条件执 行不同的代码块,可以使 用`if`、`else if`和`else`关 键字实现。
在控制结构中,可以使用 `break`和`continue`关键 字来控制循环的执行流程。
12
03
DXL进阶功能与应用
Chapter
2024/1/29
13
函数定义与调用
8
DXL概述
DXL(Doors Extension Language)是一种用于IBM Rational DOORS软件的脚本语言,用于扩展DOORS的 功能。
DXL提供了丰富的API接口,支持对DOORS数据库中的 对象进行创建、读取、修改和删除等操作。
通过DXL,用户可以自定义函数、创建用户界面、实现 自动化任务等,提高DOORS的使用效率和灵活性。
列表
列表是一种动态数组,可以容纳不同类型的元素, 并提供丰富的操作方法。
字典
字典是一种键值对集合,通过键来访问对应的值。
2024/1/29
15
文件读写操作
文件打开与关闭
使用`open`函数打开文 件,并指定打开模式 (如读取、写入等)。 使用`close`函数关闭文 件。
2024/1/29
文件读取
21
数据库备份与恢复
Murphy Door DIY 自助安装指南说明书
Murphy Door DIYHardware Installation ManualThe Murphy Door Bi-Folding Bookshelf was designed to install IN FRONT of existing door ways, replacing the door or doors while concealing the door way. In MOST cases no retrofitting of existing door jambs, base moldings or casing is required, but due to the variable thicknesses of molding as well as the inconsistency of plumb walls in most of our homes, casings and molding may need to be removed for proper door function.Successful installation requires reading this entire booklet before assembling The Murphy Door hardware. This will ensure quality and longevity of intended function.Hardware kits are shipped in one large package, inside the box you will find (1) “U” channel, (1) Lower track with a half round, (1) piano hinge and a small box containing the rest of the hard-ware components. There is a large void section which serves only as structural support for the box in shipping. Every effort has been made to ensure that each piece is protected and comes to you undamaged.PreparationInventory All Hardware ComponentsActual Hardware ImageNOTE: All tracks are shipped at a 65” length you will need to cut your rails up to 8” short of your desired width. IE: 49” Door can be cut down to 41” a 61” Door can be cut down to 54” and the 73” Door will use the 65” rail. This same procedure will be used for the upper channel as well.Tools required to complete install of hardwareRubber hammer5/8”-3/4” Forstner bit or spade bitPower screwdriver or Philips screwdriverMeasuring tapePencilLevel (minimum 4’ level preferred)Screw Gun (drill)Hack Saw Plumb BOB (not required but nice to line up your pivot points.)ACCIDENTS AND SERIOUS INJURY COULD RESULT BY FAILURE TO FOLLOW THIS ASSEMBL Y MANUAL.Carefully follow the steps in order. Every effort has been made in the manual to guide you systematically through the installation resulting in your ability to completely assemble your own Murphy Door System. Pay special attention to all critical measurements and alignments. We cannot guarantee the product if you fail to follow these procedures.Murphy Door Hardware InstallationDecide Fixed and Moving side. You need to decide which side you want the door to move to. We will use the term s left hand and right hand swing. For this job we will say a left hand swing means the door swings from the left so you will open the right side of the door and thebookcase will fold to the left side of the door. A right hand swing will be just the opposite. You will open the left side of the door and the bookcase will stack on the right. Here is an example of a right hand unit.Right Hand Doors Shown Below.Hardware Location Example above on a Right Hand Door.Illustration (above right) depicts right hand door in the fully opened position.Opened Right Hand Door.PreparationInstalling Piano Hinge:1.1 Locate piano hinge in hardware set. This hinge ships at 68” +/-.1.2 Lay both fully assembled bookcase units on the ground. Preferably on a piece of carpetto protect your finish.1.3 Our preferred method is to fasten the hinge to the back of the doors. This minimizes thespacing between the two bookcases when they are closed. But this is completely option-al to the builder the other way is shown above.1.4 Once your desired placement has been chosen sides or back, center the knuckle of thehinge with the gap between the two doors, (BE SURE YOU HAVE TESTED AND YOU KNOW WHICH WAY IT OPENS) it is recommended to have two people to do this so the hinge does not move.1.5 Place two screws on one end of the hinge, then move up to where your partner is help-ing and place 2 more screws. It is essential that the hinge stays straight, this is a critical2.1 After deciding your swing, locate the Pivot pin portion of the hardware, this piece shouldlook like the piece shown above.2.2 Locate the bottom corner of your cabinet that you would like to be the pivoting side of the door (Fixed Side.)2.3 Locate the center pin marker on the pivot pin hardware. This is a cut out located the cen-ter of pin. As shown on drawing above.2.4 Measure 4-1/8” from the back of the book shelf, this will be the outside edge of the book -shelf not on the inside edge. Be sure it is from the furthest point.Installing Lower Pivot Pin3.1Locate lower roller assembly, as shown above.3.2Place Roller Assembly on bottom of bookshelf, (on the moving side of the bookshelf).3.3 Measure 4-1/8” from the back of the bookshelf, place a mark where the center mark onthe hardware should go.3.4 Take hardware set and mark the location of the bolt located on the bottom of the roller assembly, on the bookshelf. (Tap with hammer lightly to leave mark. While holding in the correct spot.)3.5 Take the appropriate size forstner bit and drill out a spot for the bolt head to rest into the bottom of bookshelf, take caution not to over drill and go through the bottom shelf.Installing Lower TrolleyStep 4.1 Locate Upper brass bushing hardware assembly.Step 4.2 Locate upper portion of the fixed or pivoting side of the cabinet.Step 4.3 Measure from the back of the bookshelf into the bookcase 4-1/8”Step 4.4 Place Center marker on the 4-1/8”.Installing Upper Brass BushingStep 5.1 Locate Upper track wheel hardware assembly.Step 5.2 Locate upper portion of the fixed or pivoting side of the cabinet.Step 5.3 Measure from the back of the bookshelf into the bookcase 4-1/8”.Step 5.4 Place Center marker on the 4-1/8”.Installing Upper Track Guide Wheel6.1Locate Wood component “C” and 2”x2” brass bushing.6.2Mark center of threshold and measure width of center track.6.3Dado 3/16” Deep x width of track x length of threshold - 5”.6.4 Measure in 1” from non-dado side of threshold, mark edge of 2”x2” mark, measurecenter of track and center of 2x2 for bushing, use a forstner or spade type bit to clear out space for bushing.Installing Threshold Pivot Pin Bushing7.1Gather assembled Valance components, gather all necessary valance hardware, 2 Angle Gussets, 3 spanner brackets, 1 upper U channel track and screw pack -ets.7.2 Install all hardware as shown in image.7.3Depict which side is the fixed side ofyour valance. Take a ½” drill and drillhole through the hole in the metal brack-et. The center of hole should land centerof track at 5 ¼”. 7.4 Set center of track in dado if this methodwas used, either way the center of thetrack should be at 5 ¼” from the veryback of the valance. Do not cover clevispin hole. The track can end up to 8”short of the clevis pin hole.7.5 Set spanner brackets next evenly divid -ed throughout valance. On 4’ it is onlynecessary to us 2 spanner brackets.7.6Verify that the track is not exposed be -low the bottom of the valance for maxi-mum concealment .Valance Hardware InstallationFigure 7.3.1Figure 7.4Figure 7.5Figure 7.6Figure 7.3.2Installing your door - Part 18.1 The installation of your door will require a minimum of 2 people. Gather your lower track/threshold, locate your pivot side of door.8.2 Set edge of track (non pivot side) flush with the outside edge of door casing for conceal-ment. If your track is already installed on the threshold, remove it. This will allow you to conceal the grabber screws below the track. (Prior to removing the track be sure youmark center of track on threshold for reference)IMAGE (Enlarged threshold for demonstration only)8.3 Measure from the DRYWALL 5 ¼” to the center of the track mark, insure that your mea-suring from the drywall not the casing. THIS IS CRITICAL!! Then measure the opposing side from the drywall to the center of the brass bushing.8.4 Fasten threshold to floor using the grabber screws provided. Be sure that you are fasten-ing directly to a wood or concrete floor, if you are fastening to concrete you will need to use NECESSARY equipment, such as DRILL CONCRETE DRILL BIT AND CONCRETE ANCHORS, these are NOT provided in your kit. If you have carpet it is NECESSARYthat you remove the carpet in order for your door to operate as engineered.8.5 Once your threshold is set and fastened properly at 5 ¼” from the drywall to center oftrack and bushing, use two people to pick up the door. Set the lower pivot pin into thebrass bushing. This is a very tight fit, it will take a bit of work to get the pin to slide but it will, raise the door to plumb and level to help facilitate the pin sliding into the bushing. 8.6 Set the trolley onto the track.8.7 Using one person holding the door up, move to step 9.Step 9Installing your door - Part 29.1 Gather valance and (4) ¼” spacers from the scraps when you cut the back of your book-shelf, (4) washers and lag bolts, (1) clevis pin and drill to fasten the lag bolts to the wall.9.2 While 1 person holds the door against the wall, Place (1) ¼” spacer in each corner of thebookcase, set the valance on the (4) spacers. Using a stud finder locate and mark each stud on the valance to help locate proper spot to pre drill.9.3 Bring valance back down and pre drill the holes in the valance where you marked thestud layout. Try to stagger the bolt holes and keep them at a perfect 90 degree angle to insure while fastening 90 degree angled holes will not pull the valance up or down. Pre-start the 4 lag bolts and washers in place to make it easier.9.4 Place valance back on top of spacers, center the ½” hole you drilled over the brassbushing in the bookshelf, and drop the clevis pin through the hole.9.5 Verify the upper and lower track wheels are still in the track, as well as check that thelower pin is still seated in bushing. Fasten all lag bolts into place.9.6 Remove all spacers from the bookshelf.9.7 Using dry lithium grease spray, spray the lower track and wheel bearings, upper trackand wheel bearings, and wipe door hinge down.Trouble Shooting。
暗黑之门伦敦怎么安装
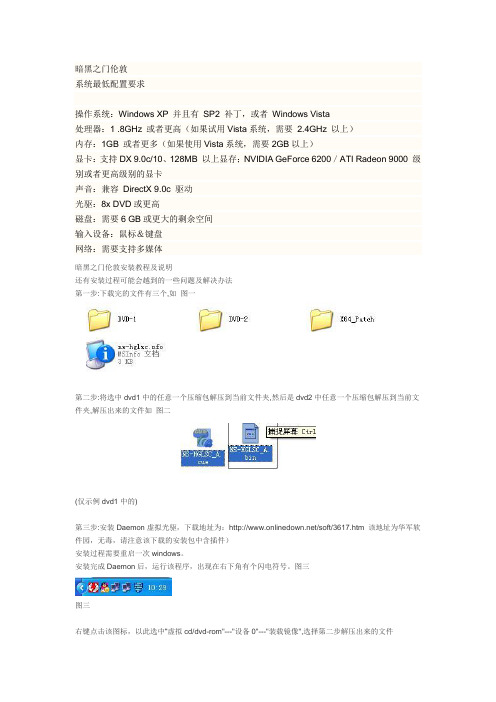
暗黑之门伦敦系统最低配置要求操作系统:Windows XP 并且有SP2 补丁,或者Windows Vista处理器:1 .8GHz 或者更高(如果试用Vista系统,需要2.4GHz 以上)内存:1GB 或者更多(如果使用Vista系统,需要2GB以上)显卡:支持DX 9.0c/10、128MB 以上显存;NVIDIA GeForce 6200/ATI Radeon 9000 级别或者更高级别的显卡声音:兼容DirectX 9.0c 驱动光驱:8x DVD或更高磁盘:需要6 GB或更大的剩余空间输入设备:鼠标&键盘网络:需要支持多媒体暗黑之门伦敦安装教程及说明还有安装过程可能会越到的一些问题及解决办法第一步:下载完的文件有三个,如图一第二步:将选中dvd1中的任意一个压缩包解压到当前文件夹,然后是dvd2中任意一个压缩包解压到当前文件夹,解压出来的文件如图二(仅示例dvd1中的)第三步:安装Daemon虚拟光驱,下载地址为:/soft/3617.htm 该地址为华军软件园,无毒,请注意该下载的安装包中含插件)安装过程需要重启一次windows。
安装完成Daemon后,运行该程序,出现在右下角有个闪电符号。
图三图三右键点击该图标,以此选中“虚拟cd/dvd-rom"---"设备0"---"装载镜像",选择第二步解压出来的文件"NS-HGLSC_A.cue".(dvd1中)图四图四打开"我的电脑",双击图五图五,即进入暗黑之门的安装安装完NS-HGLSC_A.cue以后,会弹出对话框要求放入光盘3,此时选中“虚拟cd/dvd-rom"---"设备0"---"装载镜像",选择第二步解压出来的文件"NS-HGLSC_B.cue".(dvd2中),然后继续安装.(请等待安装完NS-HGLSC_A.cue弹出对话框时,再导入镜像B)等待镜像B安装完成,就可以进行游戏了.进入游戏以后,会感觉鼠标发飘,据说调低下视频设置会好些据说是自动存档,但是我进去玩了一会退出来再进,发现等级装备还在,但是人物回到了初始点,任务完成的也丢失了,还得再做一遍任务,希望有大虾可以指导下.ps:如果图刷不出来请刷新一次网页,图片为附件格式,貌似不会挂的存档是自动存档,但是人物必须停到车站(类似旅店性质)内下线才能正常自动存档。
DOORS安装手册
1. 安装内容软件安装,涉及以下文件:1. ratlLicenseServerTL-2-0-0_Windows.exe2. ratlDOORS_Server_9-3-0_Windows.exe3. ratlDOORS_Client_9-3-0.exe4. license.dat2. 安装Telelogic License Server安装Telelogic license server:1). 如已有Telelogic floating license,将其复制到license server。
如未获取floating license,可先安装Telelogic LicenseServer,稍后设置license。
2). 点击安装文件ratlLicenseServerTL-2-0-0_Windows.exe。
3). 点击Next。
出现安装目录选择画面。
输入Telelogic的安装目录或采用缺省目录。
如需改变目录,点击Browse,选择新目录,点击OK即可。
4). 点击Next。
显示License 文件目录选择画面。
如已有floating license 文件,在License输入框中输入文件路径(包含文件名)。
如未获取floating license,采用缺省目录。
Telelogic License Server 会创建日志文件记录所有连接licenseserver的活动。
若打算将日志文件放在其它位置,在License输入框中输入文件路径。
5). 点击Next。
6). 出现文件复制画面。
点击Next。
7). Telelogic License Server配置完成后,出现完成画面。
8). 点击Finish。
3. 安装DOORS Database Server双击安装文件ratlDOORS_Server_9-3-0_Windows.exe,点击下一步。
选中“我接受许可协议中的全部条款”。
更改安装目录选择“自定义”端口号填写36677点击“安装”4. 安装DOORS Database Client选中“我接受许可协议中的全部条款”选中“自定义”数据库端口填写“36677”,数据库主机填写DOORS数据库服务器的主机名“WINDOWS-PHORTAS”填写许可证服务器“27000@WINDOWS-PHORTAS”点击“安装”5. 初次启动初次启动提示信息如下:点击确定之后输入初始化密码:.密码为:hgzpszcb.。
Deform安装及破解说明
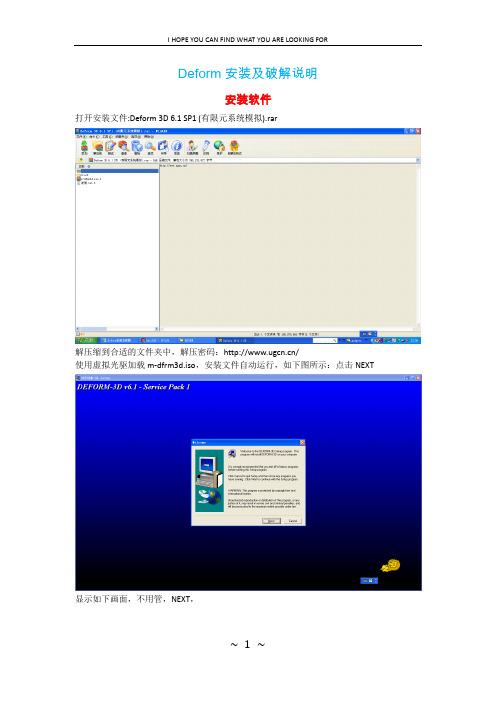
Deform安装及破解说明
安装软件
打开安装文件:Deform 3D 6.1 SP1 (有限元系统模拟).rar
解压缩到合适的文件夹中,解压密码:/
使用虚拟光驱加载m-dfrm3d.iso,安装文件自动运行,如下图所示:点击NEXT
显示如下画面,不用管,NEXT,
点击Yes,继续
选择安装目录,如果c盘空间够大,装在里面就好了
直接NEXT,
选择安装组件,直接NEXT,
按照License manager,next
选择安装目录,
对话框是说要求把一个PWD文件放在里面,不用管,确定就行,
安装画面
安装完成,
Deform开始安装
安装MPICH,点击next
同意协议,点击Yes
选择安装目录,
直接Next
直接Next
安装过程
安装完成,点击Finish,
是否重启,随便你了,
破解过程
1 复制安装文件中Crack文件夹中的deform.pwd文件和LManager.exe文件到安装后的许可证文件夹DEFORM License Manager 2.1文件夹中,默认是在C:\Program Files\DEFORM License Manager 2.1。
如果找不到,可以用Ctrl+F搜索一下。
2 在上述文件夹里双击打开LManager.exe文件,不要关掉。
然后双击DLConfig.exe文件,选择on a remote server,
点击,在弹出的选择框中选择自己的电脑,
单击按钮check/Start Server
这是屏幕上显示Connection is ok!
安装成功!。
Rational软件安装手册—DOORS .
1。
1. DOORS安装本章描述如何在没有安装先前版本的Rational DOORS 的机器上安装和设置Rational DOORS 9.3。
1。
1。
1。
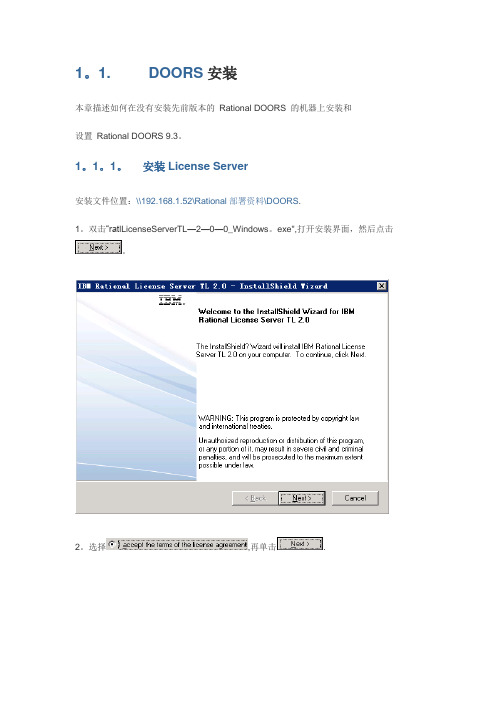
安装License Server安装文件位置:\\192.168.1.52\Rational部署资料\DOORS.1。
双击“rat lLicenseServerTL—2—0—0_Windows。
exe",打开安装界面,然后点击。
2。
选择,再单击.3。
选择License Server的安装目录,这里默认,点击.4.选择已有的license文件及license日志的存放目录。
license log:路径默认或根据需要设置,license file:选择license 文件的事先存放的目录。
点击。
(此处也可以暂时不选择license文件的目录,待安装完成后,通过LMTOOLS的选择license文件的目录,参见步骤7和8)。
5. 点击。
6。
点击.7。
单击“开始”—>“所有程序",根据下图提示选择“LMTOOLS”。
8.点击config services选项,在path to the license file中,点击,选择license文件的存放路径,再点击保存.1。
1。
2. 安装DOORS服务端1。
双击“ratlDOORS_Server_9-3-0_Windows.exe”,单击。
2.选择,再点击。
3。
指定DOORS的数据库存储目录,点击。
选择指定的存储目录,这里选择D盘的DOORS_DATA目录,然后点击确定。
点击。
4。
选择典型安装,点击。
5.指定DOORS数据库服务目录与端口号,“数据目录”在步骤3已经选择过,这里“端口号”和“数据目录”都选择默认。
点击。
6.点击,安装进行中。
7.点击,DOORS服务端安装完毕。
1.1.3。
安装DOORS客户端1。
双击“ratlDOORS_Client_9—3-0。
exe”,再点击。
2。
Symantec Ghost Solution Suite安装
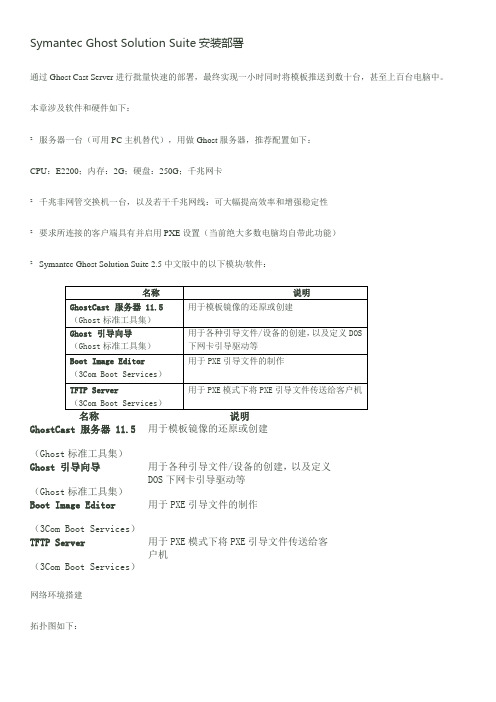
Symantec Ghost Solution Suite安装部署通过Ghost Cast Server进行批量快速的部署,最终实现一小时同时将模板推送到数十台,甚至上百台电脑中。
本章涉及软件和硬件如下:²服务器一台(可用PC主机替代),用做Ghost服务器,推荐配置如下:CPU:E2200;内存:2G;硬盘:250G;千兆网卡²千兆非网管交换机一台,以及若干千兆网线:可大幅提高效率和增强稳定性²要求所连接的客户端具有并启用PXE设置(当前绝大多数电脑均自带此功能)²Symantec Ghost Solution Suite 2.5中文版中的以下模块/软件:GhostCast服务器 11.5(Ghost标准工具集)用于模板镜像的还原或创建Ghost引导向导(Ghost标准工具集)用于各种引导文件/设备的创建,以及定义DOS下网卡引导驱动等Boot Image Editor(3Com Boot Services)用于PXE引导文件的制作TFTP Server(3Com Boot Services)用于PXE模式下将PXE引导文件传送给客户机网络环境搭建拓扑图如下:3.1、GHOST服务器的配置²安装Server 2003或者server 2008的操作系统,设置固定IP为192.168.1.220²添加DHCP服务:并进行相关配置,配置完成后,如果服务器在AD域中,还需要使用域管理员权限的账号对其进行授权后,方可生效。
下面是DHCP服务配置中的一些关键点。
在作用域选项中,添加066项“启动服务器主机名” 为GHOST主机的IP地址,添加067项“启动文件名” 为mba.pxe 。
(如果有060项请务必删除)如图:设置作用域属性:右键单击作用域选择属性,然后在高级里选择“两者”,默认只启用了DHCP。
确定即可Symantec Ghost Solution Suite 2.5中文版的安装在symantec ghost installer目录下找到CDStart 文件-右键属性-以兼容模式运行这个程序选择Windows server 2003---特权等级选择以管理员身份运行此程序(Windows 2003不需要)如下图:打开CDStart ----选择安装Symantec Ghost----选择安装Ghost控制台和Ghost标准工具如下图:下一步到:在标准工具建议选择此功能及所有子功能将安装在本地硬盘驱动器上。
- 1、下载文档前请自行甄别文档内容的完整性,平台不提供额外的编辑、内容补充、找答案等附加服务。
- 2、"仅部分预览"的文档,不可在线预览部分如存在完整性等问题,可反馈申请退款(可完整预览的文档不适用该条件!)。
- 3、如文档侵犯您的权益,请联系客服反馈,我们会尽快为您处理(人工客服工作时间:9:00-18:30)。
Fiends Gate恶魔之门电脑版安装图文教程恶魔之门是一款画面很不错的休闲游戏,拥有非常有趣的游戏方式以及丰富的游戏内容,目前在安卓平台以及IOS平台都已经正式发布,而PC版本也就是电脑版本的,其实是用模拟器也是可以玩的。
今天带来的就是恶魔之门PC版下载以及安装使用教程。
准备工具:
1、首先我们需要在电脑上下载并且安装安卓模拟器Bluestacks;→→点击进入【
】
2、然后下载安卓恶魔之门APK安装包;
恶魔之门PC安装教程:
1、先找到刚才下载好的安卓的APK安装包;
2、之后鼠标右键选择【以安卓模拟器打开该APK程序】,等待安装完毕;
3、恶魔之门PC安装第三步,安装完毕后,在电脑的右下角会出现下图的提示;
4、最后打开安卓模拟器,My Apps,在里面找到恶魔之门PC游戏图标,双击就可以打开游戏了;
5、下图就是我们成功进入游戏后的截图,注意如果嫌游戏的画面太小了,可以点击安卓模拟器右下角的设置界面,在里面选择调整安卓模拟器为手机/平板即可,这样就可以改变游戏界面的大小。
