Battery_charger_with_unity_power_factor_for_electric_car1(1)
Autodesk Nastran 2023 参考手册说明书
FILESPEC ............................................................................................................................................................ 13
DISPFILE ............................................................................................................................................................. 11
File Management Directives – Output File Specifications: .............................................................................. 5
BULKDATAFILE .................................................................................................................................................... 7
Atomos Ninja V 快速入门指南说明书

ContentsIntroduction . . . . . . . . . . . . . . . . . . . . . . . . . . . . . . .3 Checklist . . . . . . . . . . . . . . . . . . . . . . . . . . . . . . . . .3 Y ou will also need . . . . . . . . . . . . . . . . . . . . . . . . .3 Getting started . . . . . . . . . . . . . . . . . . . . . . . . . . . .4 Connect and Power-up . . . . . . . . . . . . . . . . . . . .5 Physical features . . . . . . . . . . . . . . . . . . . . . . . . . .6 Format SSD Media . . . . . . . . . . . . . . . . . . . . . . . .8 T ouchscreen/User Interface . . . . . . . . . . . . . . .9 Connect and Edit . . . . . . . . . . . . . . . . . . . . . . . . .10 AtomX Accessories . . . . . . . . . . . . . . . . . . . . . .10 Warranty & Conditions . . . . . . . . . . . . . . . . . . . .112 NINJA V - Quick Start GuideThank you for purchasing the Atomos Ninja V, utilising professional HDMI 2.0 connectivity to record professional 4Kp60 and High frame rate HD to Apple ProRes and Avid DNxHR. The class leading AtomHDR monitor lets you visualize 10+ stops of dynamic range, with 1000nit brightness for daylight viewing and 10-bit processing for smooth gradations. With so many Recorder, Monitor, Playback & Edit features, please take the time to read through this Quick Start Guide and register your product for free updates and extended warranty.DOWNLOAD THE FULLNINJA V USER MANUAL /supportACTIVATE AVID LICENSE FOR DNxHD® and DNxHR®/activation EXTENDED 3 YR WARRANTY Register now to extend your warranty to 3 years from date of purchase. /registration HDMI CableTo support 4Kp60 recording please use cables that support HDMI 2.0 specification. Atomos have a range of 4Kp60 cables with die cast connectors and coiled cables in a range of lengths and connections (sold separately). See the full range of Atomos HDMI cables on our website: /hdmi-cablesSSD Drives and Docking StationWe test and approve SSD drives from the world’s leading media brands. There are specific approved drives depending on the resolution and frame rate you are capturing - for the full list of compatible drives please refer to: /drivesWe also have a range of Docking Stations suitable for use with Ninja V and compatible SSD media. Visit your nearest reseller or purchase online at: ChecklistYou will also need (sold separately)q 1 x Ninja V Recorderq 1 x Master Caddy IIq 1 x AC Power Adaptorq 1 x Battery Eliminatorq 1 x Quick Start GuideIntroductionNINJA V - Quick Start Guide 3BatteryYou can power the device using the supplied AC power supply and Battery Eliminator, but if you plan to use a battery we recommend you fully charge before use.We recommend using Atomos NP-F series batteries.Connect SSDBefore powering up the Ninja V unit, simply slide your selected disk intodisk slot (see page 7). To remove, ensure the unit is off and gentlyslide out. We strongly recommend SSD for optimal performance andrecording.IMPORTANT: Never remove the SSD whilst recording as this maycause data corruption.Introducing AtomX SSDminiAtomos has teamed with the world’s leading media manufacturers todesign SSD media that is better suited to our ever evolving RecorderMonitors.The new AtomX SSDmini is a little over 1/4 inch tall and 3” long. It isalso 20% shorter than traditional SSDs, yet keeps the standard SATAIII connector. It is backward compatible with previous Atomos devicesby adding a clever extension handle. These tiny, slimline SSDs area true innovation and our close drive partners Angelbird and SonyStorage Media Solutions Corporation are making custom versionsfor your Ninja!For more information about supported drives and accessories, visit:/drivesGetting started4 NINJA V - Quick Start GuideConnect and power-up BatteryNinja V has a single battery slot. To connect a compatible battery, place the battery in front of the retaining lug, align with theconnectors and slide the battery into the lock position.To connect the supplied Battery Eliminator, follow the same procedure and lock battery into position. Once the Battery Eliminator is in place, secure the supplied AC/DC power supply to the DC jack. Alternatively, the Ninja V unit can be powered via a D-Tap power source using D-Tap battery cable (ATOMDTPCB1).Touching the Battery icon in the top right of your screen will allow you to accurately see remaining battery life. Refer to the User Manual for more information.Expansion PortThe Ninja V features a built in Expansion Port that will soon enable- Synchronization control- I/O Expansion- Continuous Power Module(See page 7)DC jackSupplied Battery EliminatorP/N: ATOMDCA001NINJA V - Quick Start Guide 56 NINJA V - Quick Start Guidea. On/Off and Screen LockTo turn the Ninja V on, press the power button on the side of the unit. To shut down, hold the button for at least 4 seconds (until unit turns off).b. Remote Control/LANC and CalibrationOptionally control the Ninja V using LANC/Remote from your camera. Additionally, the Ninja V screen can be calibrated using the X-Rite i1Display Pro. To connect you will need a USB to serial cable. Refer to the AtomX accessory range. USB to serial cable (ATOMCAB004).c. HDMI In/OutHDMI input connection used to record to the Ninja V supports up to 4Kp60. HDMI Output connection provides a live loop out or play out when in Playback mode. Supports up to 4Kp60.d. Battery Release Button Press the release button and slide battery away from unit to remove. e. T ally LightRed Tally light on the rear of the unit indicates active recording. The Tally Light can be turned off in the menu options.f. Screw Holes / Mounts + Locking Pin Holes (Arri)3/8” screw hole with 1/4” adapter. Top and bottom.g. Disk SlotThe NinjaV is compatible with Master Caddy II media and also the latest AtomX SSDmini.Physical featuresf. 3/8” screw hole with 1/4” adapterf. 3/8” screw hole with 1/4” adaptera.On/Off and Screen Lock c. HDMI In c. HDMI Outb. Remoted. Battery releaseNINJA V - Quick Start Guide 7e. Tally lightf. 3/8” screw hole with 1/4” adapterf. 3/8” screw hole with 1/4” adapterd. Battery releaseg. Disk slotExpansion Port8 NINJA V - Quick Start GuideMain controlsThe Ninja V is controlled by a simple user-friendly touchscreeninterface. Pictured below is the home screen and main controls seen when the Ninja V is first powered up. Touching the icons will open menus for the relevant functions. Touch the settings icon located onbottom right to access more menus, or touch individual icons for specific settings such as timecode, audio, remaining disk space and more. For the most up-to-date information visit: /ninjav and click SUPPORT tabNINJA V - Quick Start Guide 9Connect and EditTo access and edit your recorded materialYou will require a USB 3.0 Docking Station or USB-C 3.1 Docking Station.These are available from your reseller, or visit to purchase the Docking Station that is best suited to your requirements.Connect the Docking Station to a Mac ® or Windows ® editingworkstation via USB 2.0 / USB 3.0 / USB-C 3.1 compatible port/s.When using USB 2.0, you may need to connect the second USB enough power is provided when using USB 2.0.Insert SSD it into the Docking Station. After a short wait your recorded video will become accessible as a standard external disk.NoticeCopyright © 2018 ATOMOS Global Pty Ltd (‘referred to as ATOMOS’). All rights reserved. All information in this document is subject to change without notice. No part of the document may be reproduced or transmitted in any form, or by any means, electronic or mechanical, including photocopying or recording, without the express written permission of ATOMOS. A reference to ATOMOS includes its related entities, subsidiaries and parent company.TrademarksNinja V / ATOMOS are registered trademarks of ATOMOS Pty Ltd. Apple, the Apple logo, AppleShare, AppleTalk, FireWire, iPod, iPod Touch, Mac, and Macintosh are registered trademarks of Apple Inc. Final Cut Pro, QuickTime and the QuickTime Logo are trademarks of Apple Inc. All other trademarks are the property of their respective holders. International Hardware Limited Warranty (1 Year Standard/3 Years if registered) ATOMOS warrants that:• The main product, not including the IPS screen, or any external accessories, will be free from defects in materials and workmanship for a period of 1 year from the date of purchase; or 3 years upon completion of product registration at • The TFT/LCD, batteries, case and master caddies will be free from defects in materials and workmanship for a period of 1 year from the date of purchase regardless of registration. This warranty is exclusively for the benefit of the original purchaser and is not assignable or transferable. If during the warranty period the product is shown to be defective ATOMOS may at its option: a) replace the goods or supply equivalent ones, b) repair the goods, c) pay the cost of replacing the goods or of acquiring equivalent ones and d)paying the cost of having the goods repaired; The customer must notify ATOMOS of any defect in the goods in writing prior to the expiry of the warranty periods set out above. The customer will be solely responsible for returning the goods to ATOMOS or its authorized distributor. Upon acceptance of a warranty claim by ATOMOS, where ATOMOS repairs or replaces the goods, it will be responsible for reasonable shipping costs incurred in sending the goods to the Customer, provided that customer is located in a country in which ATOMOS has an authorized distributor or repair center or agent.Warranty ExclusionsThis warranty applies only to defects in workmanship and does not cover defects caused by:• A failure to comply with the then current operating instructions issued by ATOMOS;• Neglect;• Improper or negligent acts or omissions;• Unauthorized repairs or attempted repairs;• Tampering with or modification of the goods;• Connection to incompatible equipment or power sources;• Exposure to water or weather;• Exposure to magnetic fields or corrosive liquids or substances;EXCEPT AS STATED IN THIS WARRANTY, ATOMOS, IT’S VENDORS, AGENTS, RESELLERS AND DISTRIBUTORS DISCLAIM IN THEIR ENTIRETY ALL OTHER WARRANTIES, EXPRESS OR IMPLIED, INCLUDING WITHOUT LIMITATION ALL WARRANTIES OF MERCHANTABILITY OR FITNESS FOR A PARTICULAR PURPOSE. THE REMEDIES OUTLINED IN THIS WARRANTY ARE THE EXCLUSIVE REMEDY A CUSTOMER HAS ARISING FROM DEFECTIVE GOODS WHICH ARE SUBJECT TO THE WARRANTY. ATOMOS DOES NOT WARRANT THAT THE GOODS WILL OPERATE IN A MANNER WHICH IS ERROR FREE, OR UNINTERRUPTED. THE GOODS ARE NOT INTENDED TO BE THE PRIMARY OR ONLY DATA STORAGE DEVICE FOR DATA – CUSTOMERS ARE SOLELY RESPONSIBLE FOR BACK UP AND PROTECTION OF DATA. Software License AgreementIMPORTANT, PLEASE READ CAREFULLY. THIS IS A LICENSE AGREEMENT.This ATOMOS software, related documentation, any included sample images and other files (the “Software”), is protected by copyright laws and international copyright treaties, as well as other intellectual property laws and treaties. The Software is licensed, not sold.This End User License Agreement (“EULA”) is a legal agreement between you (either an individual ora single entity) and ATOMOS with regard to the copyrighted Software provided with this EULA. Use of the Software provided to you by ATOMOS in whatever form or media, will constitute your acceptanceof these terms, unless separate terms are provided by the software supplier, in which case certain additional or different terms may apply. If you do not agree with the terms of this EULA, do not download, install copy or use the Software. By installing, copying or otherwise using the Software, you agree to be bound to the terms of this EULA. If you do not agree to the terms of this EULA, ATOMOS is unwilling to license the Software to you.1. Eligible licensees. This Software is available for license solely to purchasers of the ATOMOS Ninja V, who have purchased a unit manufactured by ATOMOS Ninja V and purchased through an ATOMOS authorized reseller, with no right of duplication or further distribution, licensing or sub-licensing.2. License Grant. ATOMOS grants you a personal, non-transferable and non-exclusive right to use the copy of the Software provided with this EULA. You agree you will not copy the Software except as necessary to use it with the ATOMOS Ninja V. You agree that you may not copy the written materials accompanying the Software. Modifying, reverse engineering, translating, renting, copying, transferring or assigning all or part of the Software or any rights granted hereunder, to any other persons or reverse engineering the hardware on which the Software runs, is strictly prohibited. The software is license, not sold. You acknowledge that no title to intellectual property in the Software is transferable to you. You further acknowledge that title and full ownership rights to the Software will remain the exclusive property of ATOMOS and/ or its suppliers, and you will not acquire any rights to the Software, except as expressly set forth above. All copies of the software will contain the same proprietary notices as contained in oron the Software. All title and copyrights in and to the Software (including but not limited to any images, animations, video, audio, text incorporated), the accompanying printed materials, and any copies of the Software are owned by ATOMOS or its suppliers.3. Reverse engineering. You agree that you will not attempt, and if you are a corporation, you will use your best efforts to prevent your employees and contractors from attempting to reverse compile, derive circuits, modify, translate or disassemble the Software and/or the ATOMOS Ninja V in whole or in part. Any failure to comply with the above or any other terms and conditions contained herein will result in the automatic termination of this license and the reversion of the rights granted hereunder by ATOMOS. ATOMOS reserves the right to terminate this license without prejudice to any additional recourse ATOMOS may have against you if you violate any of its terms and conditions.Warranty & Conditions 10 NINJA V - Quick Start GuideAtomos have a range of accessories tailored to usage with the Ninja V. Visit or your nearest Atomos reseller to discover the range of available accessories that will get you up and running enhance your production workflow.Batteries and power:- ATOMOS 5200mAh 4 Cell NPF Style Battery NP-770- ATOMOS 7800mAh 6 Cell NPF Style Battery NP-970- ATOMOS Fast Battery Charger with Multi plug PSU- ATOMOS Power Kit for all Atomos 5” & 7” Monitor Recorders Media: Master Caddy II- ANGELBIRD Master Caddy II 4K RAW SSD- G-TECHNOLOGY MasterCaddy II 4K SSD- ATOMOS Master Caddy II HDD/SSD Caddies x 5Media: SSDmini-AtomX SSDmini by ANGELBIRD (256GB, 500GB, 1TB)- AtomX SSDmini by SONY (500GB, 1TB, 2TB)Docking stations:- ATOMOS USB 2.0 & 3.0 Docking Station for Atomos Master Caddy - ANGELBIRD USB-C to SATA Media Reader- G-TECHNOLOGY ev Series Reader Atomos Master Caddy Edition (only compatible with SSDmini when using AtomX SSDmini Adaptor handle) Cables:- ATOMOS AtomFLEX HDMI 4K60p Full to Full (30cm/40cm/50cm) - ATOMOS AtomFLEX HDMI 4K60p Full to Micro (30cm/40cm/50cm) - HDMI Coiled cable 4Kp30 Full to Full (30cm/50cm)- HDMI Coiled cable 4Kp30 Full to Micro (30cm/50cm)© Atomos 2018. TM ® All trademarks and registered trademarks are the property of their respective owners.Visit Atomos online for full technical specifications, tutorials, camera compatibility, recommended SSDs and more.For more detailed instructions and important up-to-date information regarding Ninja V please download the complete Ninja V User Manual from:/support 。
太阳能充电控制器操作手册说明书
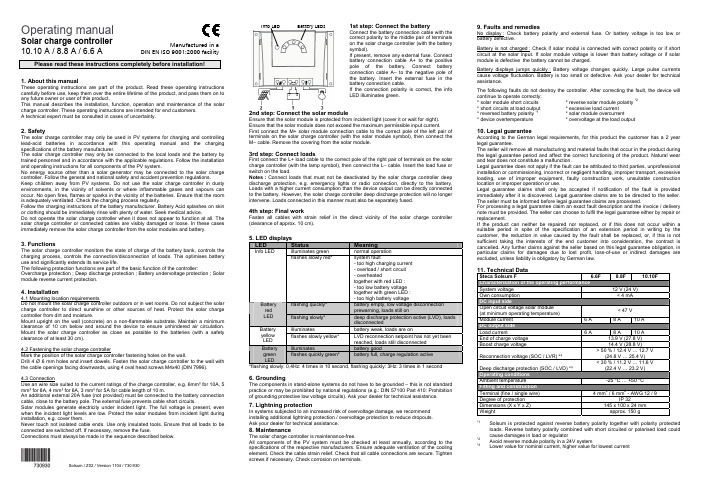
Operating manualSolar charge controller10.10 A / 8.8 A / 6.6 APlease read these instructions completely before installation!1. About this manualThese operating instructions are part of the product. Read these operating instructions carefully before use, keep them over the entire lifetime of the product, and pass them on to any future owner or user of this product.This manual describes the installation, function, operation and maintenance of the solar charge controller. These operating instructions are intended for end customers.A technical expert must be consulted in cases of uncertainty.2. SafetyThe solar charge controller may only be used in PV systems for charging and controlling lead-acid batteries in accordance with this operating manual and the charging specifications of the battery manufacturer.The solar charge controller may only be connected to the local loads and the battery by trained personnel and in accordance with the applicable regulations. Follow the installation and operating instructions for all components of the PV system.No energy source other than a solar generator may be connected to the solar charge controller. Follow the general and national safety and accident prevention regulations.Keep children away from PV systems. Do not use the solar charge controller in dusty environments, in the vicinity of solvents or where inflammable gases and vapours can occur. No open fires, flames or sparks in the vicinity of the batteries. Ensure that the room is adequately ventilated. Check the charging process regularly.Follow the charging instructions of the battery manufacturer. Battery Acid splashes on skin or clothing should be immediately rinse with plenty of water. Seek medical advice.Do not operate the solar charge controller when it does not appear to function at all. The solar charge controller or connected cables are visibly damaged or loose. In these cases immediately remove the solar charge controller from the solar modules and battery.3. FunctionsThe solar charge controller monitors the state of charge of the battery bank, controls the charging process, controls the connection/disconnection of loads. This optimises battery use and significantly extends its service life.The following protection functions are part of the basic function of the controller: Overcharge protection ; Deep discharge protection ; Battery undervoltage protection ; Solar module reverse current protection.4. Installation4.1 Mounting location requirementsDo not mount the solar charge controller outdoors or in wet rooms. Do not subject the solar charge controller to direct sunshine or other sources of heat. Protect the solar charge controller from dirt and moisture.Mount upright on the wall (concrete) on a non-flammable substrate. Maintain a minimum clearance of 10 cm below and around the device to ensure unhindered air circulation. Mount the solar charge controller as close as possible to the batteries (with a safety clearance of at least 30 cm).4.2 Fastening the solar charge controllerMark the position of the solar charge controller fastening holes on the wall.Drill 4 Ø 6 mm holes and insert dowels. Fasten the solar charge controller to the wall with the cable openings facing downwards, using 4 oval head screws M4x40 (DIN 7996).4.3 ConnectionUse an wire size suited to the current ratings of the charge controller, e.g. 6mm² for 10A, 5 mm² for 8A, 4 mm² for 6A, 3 mm² for 5A for cable length of 10 m.An additional external 20A fuse (not provided) must be connected to the battery connection cable, close to the battery pole. The external fuse prevents cable short circuits.Solar modules generate electricity under incident light. The full voltage is present, even when the incident light levels are low. Protect the solar modules from incident light during installation, e.g. cover them.Never touch not isolated cable ends. Use only insulated tools. Ensure that all loads to be connected are switched off. If necessary, remove the fuse.Connections must always be made in the sequence described below.1st step: Connect the batteryConnect the battery connection cable with thecorrect polarity to the middle pair of terminalson the solar charge controller (with the batterysymbol).If present, remove any external fuse. Connectbattery connection cable A+ to the positivepole of the battery. Connect batteryconnection cable A– to the negative pole ofthe battery. Insert the external fuse in thebattery connection cable.If the connection polarity is correct, the infoLED illuminates green.2nd step: Connect the solar moduleEnsure that the solar module is protected from incident light (cover it or wait for night).Ensure that the solar module does not exceed the maximum permissible input current.First connect the M+ solar module connection cable to the correct pole of the left pair ofterminals on the solar charge controller (with the solar module symbol), then connect theM– cable. Remove the covering from the solar module.3rd step: Connect loadsFirst connect the L+ load cable to the correct pole of the right pair of terminals on the solarcharge controller (with the lamp symbol), then connect the L– cable. Insert the load fuse orswitch on the load.Notes : Connect loads that must not be deactivated by the solar charge controller deepdischarge protection, e.g. emergency lights or radio connection, directly to the battery.Loads with a higher current consumption than the device output can be directly connectedto the battery. However, the solar charge controller deep discharge protection will no longerintervene. Loads connected in this manner must also be separately fused.4th step: Final workFasten all cables with strain relief in the direct vicinity of the solar charge controller(clearance of approx. 10 cm).5. LED displaysLED Status Meaningilluminates green normal operationInfo LEDflashes slowly red* system fault- too high charging current- overload / short circuit- overheatedtogether with red LED :- too low battery voltagetogether with green LED :- too high battery voltageflashing quickly* battery empty, low voltage disconnectionprewarning, loads still onBatteryredLED flashing slowly* deep discharge protection active (LVD), loadsdisconnectedilluminates battery weak, loads are onBatteryyellowLEDflashes slowly yellow* LVD reconnection setpoint has not yet beenreached, loads still disconnectedilluminates battery goodBatterygreenLEDflashes quickly green* battery full, charge regulation active*flashing slowly: 0,4Hz: 4 times in 10 second, flashing quickly: 3Hz: 3 times in 1 second6. GroundingThe components in stand-alone systems do not have to be grounded – this is not standardpractice or may be prohibited by national regulations (e.g.: DIN 57100 Part 410: Prohibitionof grounding protective low voltage circuits). Ask your dealer for technical assistance.7. Lightning protectionIn systems subjected to an increased risk of overvoltage damage, we recommendinstalling additional lightning protection / overvoltage protection to reduce dropouts.Ask your dealer for technical assistance.8. MaintenanceThe solar charge controller is maintenance-free.All components of the PV system must be checked at least annually, according to thespecifications of the respective manufacturers. Ensure adequate ventilation of the coolingelement. Check the cable strain relief. Check that all cable connections are secure. Tightenscrews if necessary. Check corrosion on terminals.9. Faults and remediesNo display : Check battery polarity and external fuse. Or battery voltage is too low orbattery defective.Battery is not charged : Check if solar modul is connected with correct polarity or if shortcircuit at the solar input. If solar module voltage is lower than battery voltage or if solarmodule is defective the battery cannot be charged.Battery displays jumps quickly : Battery voltage changes quickly. Large pulse currentscause voltage fluctuation. Battery is too small or defective. Ask your dealer for technicalassistance.The following faults do not destroy the controller. After correcting the fault, the device willcontinue to operate correctly:* solar module short circuits * reverse solar module polarity *2* short circuits at load output * excessive load current* reversed battery polarity *1* solar module overcurrent* device overtemperature * overvoltage at the load output10. Legal guaranteeAccording to the German legal requirements, for this product the customer has a 2 yearlegal guarantee.The seller will remove all manufacturing and material faults that occur in the product duringthe legal guarantee period and affect the correct functioning of the product. Natural wearand tear does not constitute a malfunction.Legal guarantee does not apply if the fault can be attributed to third parties, unprofessionalinstallation or commissioning, incorrect or negligent handling, improper transport, excessiveloading, use of improper equipment, faulty construction work, unsuitable constructionlocation or improper operation or use.Legal guarantee claims shall only be accepted if notification of the fault is providedimmediately after it is discovered. Legal guarantee claims are to be directed to the seller.The seller must be informed before legal guarantee claims are processed.For processing a legal guarantee claim an exact fault description and the invoice / deliverynote must be provided. The seller can choose to fulfil the legal guarantee either by repair orreplacement.If the product can neither be repaired nor replaced, or if this does not occur within asuitable period in spite of the specification of an extension period in writing by thecustomer, the reduction in value caused by the fault shall be replaced, or, if this is notsufficient taking the interests of the end customer into consideration, the contract iscancelled. Any further claims against the seller based on this legal guarantee obligation, inparticular claims for damages due to lost profit, loss-of-use or indirect damages areexcluded, unless liability is obligatory by German law.11. Technical DataSteca Solsum F 6.6F 8.8F 10.10FSystem voltage 12 V (24 V)Own consumption < 4 mADC input sideOpen circuit voltage solar module(at minimum operating temperature)< 47 VModule current 6 A 8 A 10 ADC output sideLoad current 6 A 8 A 10 AEnd of charge voltage 13.9 V (27.8 V)Boost charge voltage 14.4 V (28.8 V)Reconnection voltage (SOC / LVR) *³> 50 % / 12.4 V … 12.7 V(24.8 V … 25.4 V)Deep discharge protection (SOC / LVD) *³< 30 % / 11.2 V … 11.6 V(22.4 V … 23.2 V)Operating conditionsAmbient temperature -25 °C … +50 °CFitting and constructionTerminal (fine / single wire) 4 mm2 / 6 mm2 - AWG 12 / 9Degree of protection IP 32Dimensions (X x Y x Z) 145 x 100 x 24 mmWeight approx. 150 g*1Solsum is protected against reverse battery polarity together with polarity protectedloads. Reverse battery polarity combined with short circuited or polarised load couldcause damages in load or regulator*2Avoid reverse module polarity in a 24V system*3Lower value for nominal current, higher value for lowest currentInfo LED Battery LEDsManufactured in aDIN EN ISO 9001:2000 facilitySolsum / Z02 / Version 1104/ 730.930。
Atomos Shinobi 7 快速启动指南说明书

ContentsThank you for purchasing the Atomos Shinobi 7, utilizingprofessional HD-SDI and HDMI connectivity to monitor up to professional 4Kp60 (via HDMI) and 1080p60 (via 3G-SDI). The class leading AtomHDR monitor lets you visualize 10+ stops of dynamic range, with 2200nits brightness for daylight viewing and 10-bit processing for smooth gradations. Please take the time to read through this Quick Start Guide and register your product for free updates.DOWNLOAD THE FULL SHINOBI 7 USER MANUAL /supportIntroductionIntroduction . . . . . . . . . . . . . . . . . . . . . . . .2Checklist . . . . . . . . . . . . . . . . . . . . . . . . . .3Y ou will also need . . . . . . . . . . . . . . . . . .3AtomX Accessories . . . . . . . . . . . . . . . .3Getting started . . . . . . . . . . . . . . . . . . . . .4Connect and Power-up . . . . . . . . . . . . .4Input . . . . . . . . . . . . . . . . . . . . . . . . . . . . . . .5Physical features . . . . . . . . . . . . . . . . . . .6T ouchscreen/User Interface . . . . . . . .8Monitor assist tools . . . . . . . . . . . . . . . .9Warranty & Conditions . . . . . . . . . . . . .10Notifications . . . . . . . . . . . . . . . . . . . . . .11Y ou will also need (sold separately)SDI CableSDI cables are robust physically and electrically. You should rarely have problems with signal transmission unless your cables are either damaged or too long. Please remember that SDI cables use locking connectors and will not simply pull out if they are pulled or tripped over. They are therefore a significant trip hazard, and also a hazard to your equipment, which may be damaged if the cables are mishandled or of a low grade. Please ensure you test and check your SDI cables; for longer runs cables of a Belden 1694A specification are recommended.HDMI CableAtomos have a range of HDMI cables with die cast connectors and coiled cables in a range of lengths and connections (sold separately).Checklistq 1 x Shinobi 7q 1 x AC Power Adaptor q 1 x Quick Start GuideAtomos have a range of accessories tailored to usage with the Shinobi 7. Visit your nearest Atomos reseller to discover the range of available accessories that will get you up and running enhance your production workflow.Batteries and power:- ATOMOS 5200mAh 4 Cell NPF Style Battery NP-770- ATOMOS 7800mAh 6 Cell NPF Style Battery NP-970- ATOMOS Fast Battery Charger with Multi plug PSU -ATOMOS Power Kit for all Atomos 5” & 7”Monitor RecordersCables:-ATOMOS AtomFLEX HDMI 4K60p Full to Full (30cm/40cm/50cm)-ATOMOS AtomFLEX HDMI 4K60p Full to Micro (30cm/40cm/50cm)- HDMI Coiled cable 4Kp30 Full to Full (30cm/50cm)- HDMI Coiled cable 4Kp30 Full to Micro (30cm/50cm)Connect and power-upBatteryShinobi 7 provides dual battery slots that combined with the DC input allow for continuous power operation. With both batteries connected Shinobi 7 will draw power from them simultaneously, if a battery is removed it will automatically switch over to the second battery or the DC power input. This allows you to swap out a depleted battery without having to shut down the monitor.Touching the battery icons in the top right of your screen will allow you to accurately see remaining battery life. Refer to the User Manual for more information.AC/DC PowerAlternatively power your Shinobi from mains power using the included AC Power Adaptor. Simply attached the AC power adaptor to mains power, carefully attach to the DC port on theShinobi 7 and rotate the locking nut to secure.The DC input port can also be used with the optional AtomosDTAP to DC cable (ATOMDTPCB2) to supply power to the Shinobi 7 from a DTAP power output.Battery indicators will show that no batteries are attached andthe unit is being powered via DC power input.PowerYou can power the device using the supplied AC power supply, but if you plan to use a battery we recommend you fully charge before use.We recommend using Atomos NP-F series batteries.Getting startedInputAccess Input MenuINT o access the Input Menu simply tap the INPUT (IN) area located in the top left of the Shinobi screen. Choose signal - HDMI or SDISOURCEDisplays the input source currently connected to the Shinobi, simply tap to toggle between HDMI & SDI inputs. Y ou can have both HDMI and SDI inputs connected at the same time and use this menu to toggle between active inputs.HDMIBattery releaseOn/Off Remote/CalibrationportHeadphone/audio outSDCardSlot1/4” screw hole1/4” screw holeOn/Off and Screen LockT o turn the Shinobi 7 on, press the power button. T o shut down, hold the button for at least 4 seconds (until unit turns off).SDI InThe SDI inputs support 3G in both level A and B standards. SDI OutThis is for connection to an external monitor or other device with an SDI input. It carries a loop-through of the incoming SDI (limited to 3G 1080p60) or HDMI signal in monitor and standby mode. HDMI InHDMI input connection to the Shinobi 7 supports up to 4Kp60. HDMI OutHDMI output connection from the Shinobi 7 supports up to 4Kp60. Remote Calibration PortThe Shinobi 7 screen can be calibrated using the X-Rite i1Display Pro. T o connect you will need a USB to serial cable. (ATOMCAB004) Battery ReleasePress the release buttons and slide batteries upwards to remove. Headphone / Audio outStandard 3.5mm audio output for audio monitoring.Screw Holes / Mounts + LockPin Holes (Arri)1/4” screw hole top and bottom.SD Card SlotUse SD cards to load LUT s and/or update firmware.T ouchscreen / User InterfacePress to access settings for monitoring toolsT ap to reveal monitoring features. T ap again to hide.See next pageWarranty & ConditionsNoticeCopyright © 2021 ATOMOS Global Pty Ltd (‘referred to as ATOMOS’). All rights reserved. All information in this document is subject to change without notice. No part of the document may be reproduced or transmitted in any form, or by any means, electronic or mechanical, including photocopying or recording, without the express written permission of ATOMOS. A reference to ATOMOS includes its related entities, subsidiaries and parent company. TrademarksShinobi 7 / ATOMOS are registered trademarks of ATOMOS Pty Ltd. Apple, the Apple logo, AppleShare, AppleTalk, FireWire, iPod, iPod Touch, Mac, and Macintosh are registered trademarks of Apple Inc. Final Cut Pro, QuickTime and the QuickTime Logo are trademarks of Apple Inc. All other trademarks are the property of their respective holders. International Hardware Limited Warranty(1 Year Standard/3 Years if registered)ATOMOS warrants that:• The main product, not including the IPS screen, or any external accessories, will be free from defects in materials and workmanship for a period of 1 year from the date of purchase; or 3 years upon completion of product registration within 1 year from the date of purchase at • The TFT/LCD, batteries, case and master caddies will be free from defects in materials and workmanship for a period of 1 year from the date of purchase regardless of registration. This warranty is exclusively for the benefit of the original purchaser and is not assignable or transferable.If during the warranty period the product is shown to be defective ATOMOS may at its option:a) replace the goods or supply equivalent ones, b) repair the goods, c) pay the cost of replacing the goods or of acquiring equivalent ones and d)paying the cost of having the goods repaired; The customer must notify ATOMOS of any defect in the goods in writing prior to the expiry of the warranty periods set out above. The customer will be solely responsible for returning the goods to ATOMOS or its authorized distributor. Upon acceptance of a warranty claim by ATOMOS, where ATOMOS repairs or replaces the goods, it willbe responsible for reasonable shipping costs incurred in sending the goods to the Customer, provided that customer is located in a country in which ATOMOS has an authorized distributor or repair center or agent.Warranty ExclusionsThis warranty applies only to defects in workmanship and does not cover defects caused by:• A failure to comply with the then current operating instructions issued by ATOMOS;• Neglect;• Improper or negligent acts or omissions;• Unauthorized repairs or attempted repairs;• Tampering with or modification of the goods;• Connection to incompatible equipment or power sources;• Exposure to water or weather;• Exposure to magnetic fields or corrosive liquids or substances; EXCEPT AS STATED IN THIS WARRANTY, ATOMOS, IT’S VENDORS, AGENTS, RESELLERS AND DISTRIBUTORS DISCLAIM IN THEIR ENTIRETY ALL OTHER WARRANTIES, EXPRESS OR IMPLIED, INCLUDING WITHOUT LIMITATION ALL WARRANTIES OF MERCHANTABILITY OR FITNESS FOR A PARTICULAR PURPOSE. THE REMEDIES OUTLINED IN THIS WARRANTY ARE THE EXCLUSIVE REMEDY A CUSTOMER HAS ARISING FROM DEFECTIVE GOODS WHICH ARE SUBJECT TO THE WARRANTY. ATOMOS DOES NOT WARRANT THAT THE GOODS WILL OPERATE IN A MANNER WHICH IS ERROR FREE, OR UNINTERRUPTED. THE GOODS ARE NOT INTENDED TO BE THE PRIMARY OR ONLY DATA STORAGE DEVICE FOR DATA – CUSTOMERS ARE SOLELY RESPONSIBLE FOR BACK UP AND PROTECTION OF DATA.Software License AgreementIMPORTANT, PLEASE READ CAREFULLY. THIS IS A LICENSE AGREEMENT. This ATOMOS software, related documentation, any included sample images and other files (the “Software”), is protected by copyright laws and international copyright treaties, as well as other intellectual property laws and treaties. The Software is licensed, not sold.This End User License Agreement (“EULA”) is a legal agreement between you (either an individual or a single entity) and ATOMOS with regard to the copyrighted Software provided with this EULA. Use of the Software provided to you by ATOMOS in whatever form or media, will constitute your acceptance of these terms, unless separate terms are provided by the software supplier, in which casethis EULA, do not download, install copy or use the Software. By installing, copying or otherwise using the Software, you agree to be bound to the terms of this EULA. If you do not agree to the terms of this EULA, ATOMOS is unwilling to license the Software to you.1. Eligible licensees. This Software is available for license solely to purchasers of the ATOMOS Shinobi 7, who have purchased a unit manufactured by ATOMOS Shinobi 7 and purchased through an ATOMOS authorized reseller, with no right of duplication or further distribution, licensing or sub-licensing.2. License Grant. ATOMOS grants you a personal, non-transferable andnon-exclusive right to use the copy of the Software provided with this EULA.Y ou agree you will not copy the Software except as necessary to use it with the ATOMOS Shinobi 7. Y ou agree that you may not copy the written materials accompanying the Software. Modifying, reverse engineering, translating, renting, copying, transferring or assigning all or part of the Software or any rights granted hereunder, to any other persons or reverse engineering the hardware on which the Software runs, is strictly prohibited. The software is license, not sold. Y ou acknowledge that no title to intellectual property in the Software is transferable to you. Y ou further acknowledge that title and full ownership rights to the Software will remain the exclusive property of ATOMOS and/ or its suppliers, and you will not acquire any rights to the Software, except as expressly set forth above. All copies of the software will contain the same proprietary notices as contained in or on the Software. All title and copyrights in and to the Software (including but not limited to any images, animations, video, audio, text incorporated), the accompanying printed materials, and any copies of the Software are owned by ATOMOS or its suppliers.3. Reverse engineering. Y ou agree that you will not attempt, and if you area corporation, you will use your best efforts to prevent your employees and contractors from attempting to reverse compile, derive circuits, modify, translate or disassemble the Software and/or the ATOMOS Shinobi 7 in whole or in part. Any failure to comply with the above or any other terms and conditions contained herein will result in the automatic termination of this license and the reversion of the rights granted hereunder by ATOMOS.ATOMOS reserves the right to terminate this license without prejudice to any additional recourse ATOMOS may have against you if you violate any of its terms and conditions.NotificationsUSAWARNING:This product contains the chemical lead (Pb)which is known to the State of California to cause cancer.For more information, visit 11For more detailed instructions and important up-to-date information regarding Shinobi 7 please download the complete Shinobi 7 User Manual from:/support© Atomos 2021. TM ® All trademarks and registered trademarks are the property of their respective owners.。
ArcSWAT中文手册
7.2 Rainfall ............................................................................................................................... 45 7.3 Temperature ,Solar Radiation,Wind Speed,Relative humidity ................................ 45 第八章 输入文件的创建 ............................................................................................................... 46 第九章 输入修改——点源 ........................................................................................................... 49 第十章 输入修改——Inlet Discharges ......................................................................................... 52 第十一章 输入修改——水库 ....................................................................................................... 53 第十二章 输入修改——子流域 ................................................................................................... 57 12.1 编辑土壤参数(.sol).................................................................................................... 58 12.2 编辑气象生成器输入数据(.wgn) ............................................................................. 58 12.3 编辑子流域一般输入数据(.sub)............................................................................... 59 12.4 编辑HRU一般输入数据(.hru) .................................................................................. 60
ITA1-3kVA用户手册

艾默生网络能源有限公司 版权所有,保留一切权利。内容如有改动,恕 不另行通知。
艾默生网络能源有限公司 地址:深圳市南山区科技工业园科发路一号 邮编:518057 公司网址: 客户服务热线:4008876510 E-mail:service@
安全注意事项
本手册包含重要安全指导,用户在安装维护 UPS 和电池时需严格遵守。安装运行 UPS 前,请阅读手册全文。
UPS注意事项
1.除了内置电池盒,UPS 内部没有用户可操作的部件,请勿擅自打开 UPS 盖板,否则会有触电的危险,且由此导 致的 UPS 故障不属于保修范围。 2.UPS 内含电池,即使在未接交流市电的情况下,其输出端仍可能会有电压存在。 3.当 UPS 需要移动或重新接线时,必须切断市电输入和电池输入,并保证 UPS 已完全关机。否则输出端仍可能有 电,有触电的危险。 4.为确保人身安全和保证 UPS 的正常使用,在使用之前应对 UPS 进行可靠接地。 5.UPS 应用于 IT 配电系统时,必须在中线上安装短路保护装置。 6.使用环境对 UPS 的使用寿命及可靠性有一定的影响。因此,请注意避免长期在下列工作环境中使用 UPS:
Copyright © 2009 by Emerson Network Power Co., Ltd. All rights reserved. The contents in this document are subject to change without notice.
Emerson Network Power Co., Ltd. Address: No.1 Kefa Rd., Science & Industry Park, Nanshan District 518057, Shenzhen China Homepage: E-mail: support@
BAT BREAKER 安装手册说明书
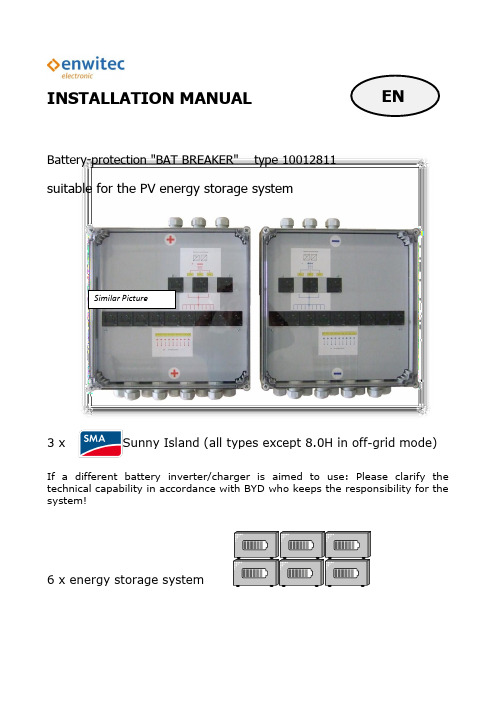
INSTALLATION MANUALBattery-protection "BAT BREAKER" type 10012811suitable for the PV energy storage system3 xSunny Island (all types except 8.0H in off-grid mode)If a different battery inverter/charger is aimed to use: Please clarify the technical capability in accordance with BYD who keeps the responsibility for the system!6 x energy storage systemSimilar PictureTABLE OF CONTENTS1.Scope of application and appropriate usage (3)2.Scope of delivery (4)3.Mounting the BAT BREAKER (5)3.1Selecting the mounting location (5)3.2Minimum distances/dimension/mounting method (6)4.Electrical connecting (7)5.Maintenance and cleaning (8)6.How to stock the BAT BREAKER (8)7.Disposal (8)8.Specification in detail (9)8.1Tripping characteristic (9)8.2Technical data BAT BREAKER type 10012811 (10)1. Scope of application and appropriate usageYou may use enwitec's battery-protection series "BAT BREAKER" in general for stationary or even mobile battery storage systems within different technologies (Lead, Lithium…) as a protection against overcurrent and short-circuit current. The voltage forcharging/discharging is limited to max. 75V DC. The circuit breaker's nominal current-values are matching the BYD Systems requirements and making the maximum safety and availability for the system feasible.The BAT-BREAKER should be installed in close distance to the energy-storage unit. This provides the best protection for the system and cabling!✓✗ short-circuit current will not be interrupted!2. Scope of deliveryA B/E C D/FSimilar Picture3. Mounting the BAT BREAKER3.1 Selecting the mounting locationrisk of explosion or fire☑ mount on a solid surface☑the mounting location and method must be suitable for the weight anddimension☑ the mounting location must be accessible at all times☑ climatic conditions must be in compliance with the specification ☑ the device may not be exposed to direct sunlight and weather ☑the mounting location has to be protected against splashing waterinstallation positionDANGER200m m300m m300m m132mm200m m400mm400mm400m m3.2 Minimum distances/dimension/mounting methodSelect the correct mode of mounting, depending on the mounting Do not forget the cable catch rail!Similar Picture4. Electrical connectingM 32Ø15-25mmM 40 Ø16-28mmTOP: max. 3 x charger/inverterF1.1+/F1.2+/F1.3+ F1.1-/F1.2-/F1.3-F2.1+/F2.2+/F2.3+/F2.4+/F2.5+/F2.6+ F2.1-/F2.2-/F2.3-/F2.4-/F2.5-/F2.6-BOTTOM: 6 x energy storage system ”*”☞ ☞☞☞cable lug M10cross section70 - 95mm 2range of tighteningtorque: 23-28Nm do not use crimpinglug for 70mm²cable lug M10 cross section70 - 95mm 2range of tighteningtorque: 23-28Nmdo not use crimpinglug for 70mm²Similar Picture5. Maintenance and cleaningYou should do a frequent short inspection of your BAT BREAKER for keeping a long durability and avoidance of an operational system's breakdown.Please also consider your national standards and provisions regarding the requirements of battery- and/or PV power installations and their equipment. Potentially, you have to do an electrical test procedure once a year as it is to adduce in some european countries, e.g. Germany.Visual inspectionDepending on the installation side and the environmental conditions you have to expect some pollution on the device's surface. Clean carefully with the help of a moist cloth! During this time do not open the case of the device under any circumstances!6. How to stock the BAT BREAKERDemands:☑dry conditions☑ambient air temperature ranges from -25°C up to +55°C☑for a maximum of 24 hours: temperature might get higher up to +70°C 7. DisposalDisposal is due to your national/local regulations. The BAT BREAKER is to classify as "electronic waste" (it is no "household waste"!)Take care of that and protect the environment!8. Specification in detail8.1 Tripping characteristicfor example: circuit breaker - rated current 200A:overcurrent of 800A (= 400% of rated current 200A) trip time between 3.5s und 17s(axis of ordinates: log. scale - trip time [s] )178.2 Technical data BAT BREAKER type 10012811enwitec electronic GmbH & Co.KGScherrwies 284329 Rogglfing -Lower Bavaria-Germanyphone +49 8725 9664-0fax +49 8725 9664-96***************。
中英文对照表

UdieToo中文属性对照表Strength 增加力量Energy 增加精力Dexterity 增加敏捷Vitality 增加体力Stat Points 没用Skill Points 没用Life 没用Max Life 增加最大生命Mana 没用Max Mana 增加最大魔法stamina 没用Max Stamina 没用level 没用experience 没用gold 没用goldbank 没用Enhanced Defense % 防御增加百分比Enchanced Damage % 伤害增加百分比Enchanced Min Dmg % 增加最小伤害百分比Attack Rating 增加命中率Chance of Blocking % 增加格挡率Min 1-handed Dmg 增加单手最小伤害Max 1-handed Dmg 增加单手最大伤害Min 2-handed Dmg 增加双手最小伤害Max 2-handed Dmg 增加双手最大伤害Damage % nv 伤害增加百分比Regenerate Mana % nv 法力再生Regenerate Mana Plus % 法力再生(隐藏)Heal Stemina Plus % 耐力恢复lastexp 没用nextexp 没用Defense 增加防御Def vs Missile 增加对近战的防御Def vs Melee 增加对远程攻击的防御Damage Reduced By 伤害减少Magic Dmg Reduced By 魔法伤害减少Damage Reduced By % 伤害减少百分比Magic Resistance % 魔法抵抗百分比Max Magic Resistance % 百分比增加最大魔法抵抗的百分比Fire Resistance % 增加火抗的百分比Max Fire Resistance % 增加最大火抗的百分比Lightning Resistance % 增加电抗的百分比Max Lightning Resistance % 增加最大电抗的百分比Cold Resistance % 增加冰抗的百分比Max Cold Resistance % 增加最大冰抗的百分比Poison Resistance % 增加毒抗的百分比Max Poison Resistance % 增加最大毒抗的百分比damageaura 没用Fire Damage 增加火焰伤害Max Fire Damage 增加火焰伤害最大值Lightning Damage 增加闪电伤害Max Lightning Dmg 增加闪电伤害最大值Magic Damage 增加魔法伤害Max Magic Damage 增加魔法伤害最大值Cold Damage 增加寒冷伤害Max Cold Damage 增加寒冷伤害最大值Cold Length 冻结目标的时间Poison Damage 增加毒伤害Max Poison Dmg 增加毒伤害最大值Poison Length 目标中毒的持续时间Life Stolen Per Hit Min 没用Life Stolen Per Hit Max 偷取生命Mana Stolen Per Hit Min 没用Mana Stolen Per Hit Max 偷取法力Stamina Drain Min 没用Stamina Drain Max 没用Stun Length 使目标眩晕的时间Run/Walk Speed % nv 跑步速率增加百分比(隐藏)Attack Speed % nv 攻击速率增加百分比(隐藏)other_animrate 没用quantity 没用value 没用Durabilty 没用Max Durability 增加装备耐久Replenish Life 自行恢复生命值Max Durability % 没用Life % 增加生命上限%Mana % 增加法力上限%Attacker Takes Damage Of 反伤Extra Gold From Monsters % 怪掉的钱增加Chance Of Getting Magic Items % 这个就是** Knock Back 击退Time Duration (未测试)Add Class Skill 加单人技能Unsentparam1 未知属性1Add experience 增加百分比得到的经验值Heal after kill 加X生命在杀死一只怪物后Reduced prices 降低商人价格%Double Herb Duration (未测试)Light Radius 增加光照范围Light Color nv 光照范围(隐藏)Requirements % 物品对基本属性的需求Level Require 没用Increased Attack Speed 提升攻击速度%Level Require % 增加等级需求Last block frame 格挡有关Faster Run/Walk 提升跑步速度%Non Class skill 无职业限制技能state 特殊状态,比如头上永远顶个经验祭坛Faster Hit Recovery Rate 加快打击恢复Monster player count 没用Poison override 没用Faster Block Rate 快速格挡速度Bypass undead 没用Bypass demons 没用Faster Cast Rate 快速释法速度Bypass beasts 没用Single Skill 增加职业限制技能Rest in peace 杀死怪物后恢复平静Curse resistance 抗诅咒几率Poison Length Reduced By % 自己的中毒时间减少Damage 增加伤害Hit Causes Monster To Flee % 使怪物怪物会逃跑Hit Blinds Target 打中的敌人会失明Damage To Mana % 受损生命转化为提高法力Ignore Target Defense 无视目标防御Target Defense % 减少目标防御%Prevent Monster Heal 防止怪物回血Half Freeze Duration 自己的冰冻时间减半Bonus To Attack Rating % 增加百分比额外的命中率Reduce Monster Defense per Hit 每次打中都减少怪物的防御Damage To Demons % 增加对恶魔系怪物的伤害Damage To Undead % 增加对不死系怪物的伤害Attack Rating Against Demons 增加对恶魔系怪物的命中率Attack Rating Against Undead 增加最不死系怪物的命中率Throwable (未测试)Elemental Skill 增加火焰技能All Skill Levels 增加所有技能Attacker Takes Lightning Dmg Of 攻击者受到电伤害ironmaiden_level 没用lifetap_level 没用thorns_percent 没用bonearmor 没用bonearmormax 没用Attack Freezes Target 冻结目标Chance of Open Wounds 撕开伤口的几率Chance of Crushing Blow 压碎攻击的几率Kick Damage 增加脚踢伤害Mana After Each Kill 加法力在杀死一只怪物后Life After Each Demon Kill 加生命在杀死恶魔系怪物后Extra Blood 没用Chance of Deadly Strike 致命攻击的几率Fire Absorbs % 火焰吸收% Fire Absorbs 火焰吸收Lightning Absorbs % 闪电吸收%Lightning Absorbs 闪电吸收Magic Absorbs % 魔法吸收%Magic Absorbs 魔法吸收Cold Absorbs % 冰冷吸收%Cold Absorbs 冰冷吸收Slows Target By % 使目标减缓%Aura 灵气赐予Indestructible 装备无法破坏Cannot be Frozen 不会被冻结Slower Stamina Drain % 没什么用ReAnimate 杀死怪物后复活为Pierce Attack % 穿透攻击Fire Magic Arrows or Bolts 射出魔法箭Fire Explosive Arrows or Bolts 射出爆炸箭Min Throw Dmg nv 增加百分比最小远程攻击Max Throw Dmg nv 增加百分比最大远程攻击UnCoded 未知属性UnCodedUnCodedUnCodedUnCodedUnCodedUnCodedUnCodedUnCodedUnCodedUnCodedUnCodedUnCodedUnCodedUnCodedUnCodedUnCodedUnCodedAttack Vs Monster 对特定怪物增加命中率Damage Vs Monster 对特定怪物增加伤害fade 身体透明化Armor override % 没用Unused183 …Unused184 …Unused185 …Unused186 …Unused187 …Add Skill Tab 加入单系技能Unused189 没用Unused190 …Unused191 …Unused192 …Unused193 …Increased Sockets 增加凹槽(需先激活)Skill On Attack 攻击时释放特定魔法Skill On Kill 杀死怪物时释放特定魔法Skill On Death 自己死亡时放特定魔法Skill On Hit 打中时释放特定魔法Skill On Levelup 升级时释放特定魔法Unused200 没用Skill On Get Hit 被打中时释放特定魔法Unused202 没用Unused203 …Charged Skill 特定聚气技能Unused205 没用…Unused206 …Unused207 …Unused208 …Unused209 …Unused210 ..Unused211 …Unused212 ..Unused213 …Defense (on Lvl) 按等级增加防御Enhanced Defense (on Lvl) 按等级提高防御Life (on Lvl) 按等级提高生命值Mana (on Lvl) 按等级提高魔法值Maximum Damage (on Lvl) 按等级提高最大伤害Enhanced MaxDmg (on Lvl) 按等级提高最大伤害%Strength (on Lvl) 按等级增加力量Dexterity (on Lvl) 按等级增加敏捷Energy (on Lvl) 按等级增加精力Vitality (on Lvl) 按等级增加体力Att Rating (on Lvl) 按等级增加命中率Bonus to Att Rating % (on Lvl) 按等级提高额外的命中率Maximum Cold Dmg (on Lvl) 按等级增加最大寒冷伤害Maximum Fire Dmg (on Lvl) 按等级增加最大火伤害Maximum Lightning Dmg (on Lvl) 按等级增加最大闪电伤害Maximum Poison Dmg (on Lvl) 按等级增加最大毒伤害Cold Resistance % (on Lvl) 按等级增加百分比冰抗Fire Resistance % (on Lvl) 按等级增加百分比火抗Lightning Resistance % (on Lvl) 按等级增加百分比电抗Poison Resistance % (on Lvl) 按等级增加百分比毒抗Absorbs Cold Damage (on Lvl) 按等级提高吸收寒冷伤害能力Absorbs Fire Damage (on Lvl) ……吸收火伤害能力Absorbs Lightning Damage (on Lvl) ……吸收闪电伤害能力Absorbs Poison (per lvl) "很诱惑的属性,不过没用" Attacker Takes Damage of (on Lvl) 按等级反伤Extra Gold From Monsters % (on Lvl)按等级提高怪掉的钱Chance of Getting Magic Items % (on Lvl) 按等级提高**几率Heal Stamina Plus % (on Lvl) 没用Maximum Stamina (on Lvl) 没用Damage to Demons % (on Lvl) 没用Damage to Undead % (on Lvl) 没用Att Rating against Demons (on Lvl) 没用Att Rating against Undead (on Lvl) 没用Chance of Crushing Blow (on Lvl) 按等级提高压碎攻击的几率Chance of Open Wounds (on Lvl) ……提高撕开伤口的几率Kick Damage (on Lvl) 按等级提高踢伤害Chance of Deadly Strike (on Lvl) 按等级提高致命攻击几率Find Gems per level 没用Repair 1 Durability In Seconds 按时间恢复耐久Replenish 1 Quantity In Seconds 回复数量Increased Stack Size 增加数量UnCoded 没用UnCoded …UnCoded …UnCoded …UnCoded …UnCoded …UnCoded ..UnCoded …UnCoded .UnCoded ..UnCoded .UnCoded .UnCoded .Defense (by Time) [1] 以下为属性/时间Defense (by Time) [2]Life (by Time)Mana (by Time)Max Damage (by Time) [1]Max Damage (by Time) [2]Strength (by Time)Dexterity (by Time)Energy (by Time)Vitality (by Time)Attack Rating (by Time) [1]Attack Rating (by Time) [2]Max Cold Dmg (by Time)Max Fire Dmg (by Time)Max Lightning Dmg (by Time)Max Poison Dmg (by Time)Cold Resistance % (by Time)Fire Resistance % (by Time)Lightning Resistance % (by Time)Poison Resistance % (by Time)Absorbs Cold Damage (by Time)Absorbs Fire Damage (by Time)Absorbs Lightning Damage (by Time)Blessed AimGold From Monsters % (by Time)Find Magic Items % (by Time)Heal Stamina Plus % (by Time)Max Stamina (by Time)Damage vs Demon % (by Time)Damage vs Undead % (by Time)Attack Rating vs Demon (by Time)Attack Rating vs Undead (by Time)Chance of Crushing Blow (by Time)Chance of Open Wounds (by Time)Kick Damage (by Time)Chance of Deadly Strike (by Time)item_find_gems_bytime 没用item_pierce_cold 减少敌人对冰技能抵抗%item_pierce_fire 减少敌人对火技能抵抗%item_pierce_ltng ……对闪电技能抵抗%item_pierce_pois ……对毒素技能的抵抗%item_damage_vs_monster 没用item_damage_percent_vs_monster …item_tohit_vs_monster …item_tohit_percent_vs_monster …item_ac_vs_monster …item_ac_percent_vs_monster …firelength …burningmin …burningmax …progressive_damage …progressive_steal ..progressive_other ..progressive_fire …progressive_cold …progressive_lightning …item_extra_charges …progressive_tohit …poison_count …damage_framerate …pierce_idx …passive_fire_mastery 增加百分比火技能伤害passive_ltng_mastery ……闪电技能伤害passive_cold_mastery ……寒冷技能伤害passive_pois_mastery 百分比转为毒素伤害passive_fire_pierce 减敌人对火技能抗性(测试效果为增加元素伤害上限)passive_ltng_pierce ……对闪电技能抗性passive_cold_pierce ……对寒冷技能抗性passive_pois_pierce ……对毒素技能抗性passive_critical_strike 不清楚passive_dodge 三闪之一passive_avoid 三闪……passive_evade 三闪……passive_warmth 热情passive_mastery_melee_th 未测试passive_mastery_melee_dmg …passive_mastery_melee_crit …passive_mastery_throw_th …passive_mastery_throw_dmg …passive_mastery_throw_crit …passive_weaponblock …passive_summon_resist …modifierlist_skill 没用modifierlist_level 没用last_sent_hp_pct 没用source_unit_type 没用source_unit_id 没用shortparami 未测试questitemdifficulty 未测试passive_mag_mastery 未测试passive_mag_pierce 未测试。
Unity碰撞与触发器教程

Unity碰撞与触发器教程1. 碰撞与触发器概述碰撞与触发器是在Unity中常用的物理交互组件,用于模拟现实世界中物体之间的相互作用。
碰撞是指物体之间的实际碰撞效果,触发器则是指物体之间的触发事件,无需实际碰撞。
本章将介绍Unity中碰撞与触发器的基本概念和使用方法。
2. 碰撞体与触发器Unity中的碰撞和触发器都需要使用特定的组件来实现。
碰撞体组件可用于判断物体之间的碰撞,并触发碰撞事件。
常用的碰撞体组件包括Box Collider、Sphere Collider和Capsule Collider等。
触发器组件则用于触发特定的事件,不会产生实际碰撞效果。
常用的触发器组件是Box Collider with Trigger、Sphere Collider with Trigger和Capsule Collider with Trigger等。
通过在物体上添加对应的碰撞体或触发器组件,可以实现碰撞或触发器的功能。
3. 碰撞事件在Unity中,当两个物体之间发生碰撞时,可以通过碰撞事件来处理相关逻辑。
常用的碰撞事件包括OnCollisionEnter、OnCollisionStay和OnCollisionExit等。
OnCollisionEnter用于在两个物体发生碰撞时调用,OnCollisionStay用于在两个物体保持碰撞状态时调用,而OnCollisionExit则在两个物体结束碰撞后调用。
开发者可以在这些事件中编写相关的代码,以实现碰撞时的逻辑控制和反馈。
4. 触发器事件与碰撞事件类似,触发器也可以使用事件来处理。
当某个物体进入或离开触发器时,可以通过触发器事件来触发相关逻辑。
触发器事件包括OnTriggerEnter、OnTriggerStay和OnTriggerExit等。
OnTriggerEnter用于在物体进入触发器时调用,OnTriggerStay用于在物体在触发器内保持时调用,而OnTriggerExit则在物体离开触发器时调用。
汽车配件说明书

Indicators................................ 131 Shift Lever Positions ................. 131 Shift Lock Release..................... 134
Thermo-calc软件-TCCP用户指南 (有目录索引)
Thermo-Calc®User’s GuideVersion PThermo-Calc Software ABStockholm Technology ParkBjörnnäsvägen 21SE-113 47 Stockholm, SwedenCopyright © 1995-2003 Foundation of Computational ThermodynamicsStockholm, Sweden目录第1部分一般介绍 (12)1.1 计算热力学 (12)1.2 Thermo-Calc软件/数据库/界面包 (12)1.3 致谢 (13)1.4 版本历史 (13)1.5 Thermo-Calc软件包的通用结构 (13)1.6 各类硬件上Thermo-Calc软件包的有效性 (14)1.7 使用Thermo-Calc软件包的好处 (14)第2部分如何成为Thermo-Calc专家 (14)2.1 如何容易地使用本用户指南 (14)2.2 如何安装和维护Thermo-Calc软件包 (16)2.2.1 许可要求 (16)2.2.2 安装程序 (16)2.2.3 维护当前和以前版本 (16)2.2.4 使TCC执行更方便 (16)2.3 如何成为Thermo-Calc专家 (16)2.3.1 从TCSAB与其世界各地的代理获得迅速技术支持 (17)2.3.2 日常使用各种Thermo-Calc功能 (17)2.3.3 以专业的和高质量的标准提交结果 (17)2.3.4 通过各种渠道相互交换经验 (17)第3部分Thermo-Calc软件系统 (17)3.1 Thermo-Calc软件系统的目标 (17)3.2 一些热力学术语的介绍 (18)3.2.1 热力学 (18)3.2.2 体系、组元、相、组成、物种(System, component, phases, constituents and species) (18)3.2.3 结构、亚点阵和位置 (19)3.2.4 成分、构成、位置分数、摩尔分数和浓度(composition, constitution, site fractions, molefractions and concentration) (19)3.2.5 平衡态和状态变量 (19)3.2.6 导出变量 (22)3.2.7 Gibbs相规则 (25)3.2.8 状态的热力学函数 (25)3.2.9 具有多相的体系 (25)3.2.10 不可逆热力学 (26)3.2.11 热力学模型 (26)3.2.12 与各种状态变量有关的Gibbs能 (27)3.2.13 参考态与标准态 (27)3.2.14 溶解度范围 (28)3.2.15 驱动力 (28)3.2.16 化学反应 (28)3.2.17 与平衡常数方法相对的Gibbs能最小化技术 (28)3.2.18 平衡计算 (29)3.3 热力学数据 (30)3.3.1 数据结构 (30)3.3.3 数据估价 (32)3.3.6 数据加密 (33)3.4 用户界面 (34)3.4.1 普通结构 (34)3.4.2 缩写 (34)3.4.3 过程机制(history mechanism) (35)3.4.4 工作目录和目标目录(Working directory and target directory) (35)3.4.5 参数转换为命令 (36)3.4.6 缺省值 (36)3.4.7 不理解的问题 (36)3.4.8 帮助与信息 (36)3.4.9 出错消息 (36)3.4.10 控制符 (36)3.4.11 私人文件 (36)3.4.12 宏工具 (37)3.4.13 模块性 (37)3.5 Thermo-Calc中的模块 (37)3.5.1 基本模块 (37)3.7 Thermo-Calc编程界面 (39)3.7.1 Thermo-Calc作为引肇 (39)3.7.2 Thermo-Calc应用编程界面:TQ和TCAPI (40)3.7.3 在其它软件包中开发Thermo-Calc工具箱 (43)3.7.4 材料性质计算核材料工艺模拟的应用 (43)3.8 Thermo-Calc的功能 (44)3.9 Thermo-Calc应用 (44)第4部分Thermo-Calc数据库描述 (45)4.1 引言 (45)4.2 Thermo-Calc数据库描述形式 (45)第5部分数据库模块(TDB)——用户指南 (55)5.1 引言 (55)5.2 TDB模块中用户界面 (56)5.3 开始 (56)5.3.1 SWITCH-DATABASE (56)5.3.2 LIST-DATABASE ELEMENT (56)5.3.3 DEFINE_ELEMENTS (56)5.3.4 LIST_SYSTEM CONSTITUENT (56)5.3.5 REJECT PHASE (56)5.3.6 RESTORE PHASE (56)5.3.7 GET_DATA (56)5.4 所有TDB监视命令的描述 (56)5.4.1 AMEND_SELACTION (56)5.4.6 DEFINE_SPECIES (58)5.4.7 DEFINE_SYSTEM (58)5.4.8 EXCLUDE_UNUSED_SPECIES (58)5.4.9 EXIT (58)5.4.10 GET_DATA (58)5.4.11 GOTO_MODULE (59)5.4.12 HELP (59)5.4.13 INFORMA TION (59)5.4.14 LIST_DATABASE (60)5.4.15 LIST_SYSTEM (60)5.4.16 MERGE_WITH_DA TABASES (61)5.4.17 NEW_DIRECTORY_FILE (61)5.4.18 REJECT (61)5.4.19 RESTORE (62)5.4.20 SET_AUTO_APPEND_DA TABASE (62)5.4.21 SWITCH_DA TABASE (63)5.5 扩展命令 (64)第6部分数据库模块(TDB)——管理指南 (64)6.1 引言 (64)6.2 TDB模块的初始化 (65)6.3 数据库定义文件语法 (66)6.3.1 ELEMENT (67)6.3.2 SPECIES (67)6.3.3 PHASE (67)6.3.4 CONSTITUENT (67)6.3.5 ADD_CONSTITUENT (68)6.3.6 COMPOUND_PHASE (68)6.3.7 ALLOTROPIC_PHASE (68)6.3.8 TEMPERA TURE_LIMITS (68)6.3.9 DEFINE_SYSTEM_DEFAULT (69)6.3.10 DEFAULT_COMMAND (69)6.3.11 DATABASE_INFORMATION (69)6.3.12 TYPE_DEFINITION (69)6.3.13 FTP_FILE (70)6.3.14 FUNCTION (70)6.3.15 PARAMETER (72)6.3.16 OPTIONS (73)6.3.17 TABLE (73)6.3.18 ASSESSED_SYSTEMS (73)6.3.19 REFERENCE_FILE (74)6.3.20 LIST_OF_REFERENCE (75)6.3.21 CASE与ENDCASE (76)6.3.22 VERSION_DA TA (76)6.5 数据库定义文件实例 (77)6.5.1 例1:一个小的钢数据库 (77)6.5.2 例2:Sb-Sn系个人数据库 (78)第7部分制表模块(TAB) (81)7.1 引言 (81)7.2 一般命令 (81)7.2.1 HELP (81)7.2.2 GOTO_MODULE (81)7.2.3 BACK (82)7.2.4 EXIT (82)7.2.5 PATCH (82)7.3 重要命令 (82)7.3.1 TABULATE_SUBSTANCE (82)7.3.2 TABULATE_REACTION (85)7.3.3 ENTER_REACTION (86)7.3.4 SWITCH_DA TABASE (87)7.3.5 ENTER_FUNCTION (88)7.3.6 TABULATE_DERIV A TIVES (89)7.3.7 LIST_SUBSTANCE (91)7.4 其它命令 (92)7.4.1 SET_ENERGY_UNIT (92)7.4.2 SET_PLOT_FORMAT (92)7.4.3 MACRO_FILE_OPEN (92)7.4.4 SET_INTERACTIVE (93)7.5 绘制表 (93)第8部分平衡计算模块(POL Y) (94)8.1 引言 (94)8.2 开始 (95)8.3 基本热力学 (95)8.3.1 体系与相 (95)8.3.2 组元(Species) (95)8.3.3 状态变量 (96)8.3.4 组分 (97)8.3.5 条件 (98)8.4 不同类型的计算 (98)8.4.1 计算单一平衡 (98)8.4.2 性质图的Steping计算 (99)8.4.3 凝固路径模拟 (99)8.4.4 仲平衡与T0温度模拟 (99)8.4.5 相图的Mapping计算 (101)8.4.6 势图计算 (101)8.4.7 Pourbaix图计算 (101)8.4.8 绘制图 (101)8.5.4 更高阶相图 (104)8.5.5 性质图 (104)8.6 普通命令 (104)8.6.1 HELP (104)8.6.2 INFORMA TION (104)8.6.3 GOTO_MODULE (105)8.6.4 BACK (105)8.6.5 SET_INTERACTIVE (105)8.6.6 EXIT (106)8.7 基本命令 (106)8.7.1 SET_CONDITION (106)8.7.2 RESET_CONDITION (107)8.7.3 LIST_CONDITIONS (107)8.7.4 COMPUTE_EQUILIBRIUM (107)8.7.6 DEFINE_MATERIAL (108)8.7.6 DEFINE_DIAGRAM (111)8.8 保存和读取POL Y数据结构的命令 (112)8.8.1 SA VE_WORKSPACES (112)8.8.2 READ_WORKSPACES (113)8.9 计算与绘图命令 (114)8.9.1 SET_AXIS_V ARIABLE (114)8.9.2 LIST_AXIS_V ARIABLE (114)8.9.3 MAP (114)8.9.4 STEP_WITH_OPTIONS (115)8.9.5 ADD_INITIAL_EQUILIBRIUM (117)8.9.6 POST (118)8.10 其它有帮助的命令 (118)8.10.1 CHANGE_STA TUS (118)8.10.2 LIST_STA TUS (119)8.10.3 COMPUTE_TRANSITION (120)8.10.4 SET_ALL_START_V ALUES (121)8.10.5 SHOW_V ALUE (122)8.10.6 SET_INPUT_AMOUNTS (122)8.10.7 SET_REFERENCE_STA TE (122)8.10.8 ENTER_SYMBOL (123)8.10.9 LIST_SYMBOLS (124)8.10.10 EV ALUATE_FUNCTIONS (124)8.10.11 TABULATE (124)8.11 高级命令 (125)8.11.1 AMEND_STORED_EQUILIBRIA (125)8.11.3 DELETE_INITIAL_EQUILIBRIUM (126)8.11.4 LIST_INITIAL_EQUILIBRIA (126)8.11.5 LOAD_INITIAL_EQUILIBRIUM (126)8.11.10 SELECT_EQUILIBRIUM (128)8.11.11 SET_NUMERICAL_LIMITS (128)8.11.12 SET_START_CONSTITUTION (129)8.11.13 SET_START_V ALUE (129)8.11.14 PATCH (129)8.11.15 RECOVER_START_V ALUE (129)8.11.16 SPECIAL_OPTIONS (129)8.12 水溶液 (132)8.13 排除故障 (133)8.13.1 第一步 (133)8.13.2 第二步 (133)8.13.3 第三步 (133)8.14 频繁提问的问题 (134)8.14.1 程序中为什么只得到半行? (134)8.14.2 在已经保存之后为什么不能绘图? (134)8.14.3 为什么G.T不总是与-S相同? (134)8.14.4 如何获得组元偏焓 (135)8.14.5 为什么H(LIQUID) 是零而HM(LIQUID)不是零 (135)8.14.6 即使石墨是稳定的为什么碳活度小于1? (135)8.14.7 如何获得过剩Gibbs能? (135)8.14.8 当得到交叉结线而不是混溶裂隙时什么是错的? (135)8.14.9 怎么能直接计算最大混溶裂隙? (136)第9部分后处理模块(POST) (136)9.1 引言 (136)9.2 一般命令 (137)9.2.1 HELP (137)9.2.2 BACK (137)9.2.3 EXIT (137)9.3 重要命令 (137)9.3.1 SET_DIAGRAM_AXIS (137)9.3.2 SET_DIAGRAM_TYPE (138)9.3.3 SET_LABEL_CORVE_OPTION (139)9.3.5 MODIFY_LABEL_TEXT (139)9.3.6 SET_PLOT_FORMAT (140)9.3.7 PLOT_DIAGRAM (141)9.3.8 PRINT_DIAGRAM (142)9.3.9 DUMP_DIAGRAM (143)9.3.10 SET_SCALING_STA TUS (144)9.3.11 SET_TITLE (144)9.3.12 LIST_PLOT_SETTINGS (144)9.4 实验数据文件绘图命令 (144)9.4.1 APPEND_EXPERIMENTAL_DA TA (144)9.4.2 MAKE_EXPERIMENTAL_DA TAFILE (145)9.5.3 SET_AXIS_LENGTH (147)9.5.4 SET_AXIS_TEXT_STATUS (147)9.5.5 SET_AXIS_TYPE (147)9.5.6 SET_COLOR (147)9.5.7 SET_CORNER_TEXT (148)9.5.8 SET_FONT (148)9.5.9 SET_INTERACTIVE_MODE (149)9.5.10 SET_PLOT_OPTION (149)9.5.11 SET_PREFIX_SCALING (149)9.5.12 SET_REFERENCE_STA TE (149)9.5.13 SET_TIELINE_STA TE (150)9.5.14 SET_TRUE_MANUAL_SCALING (150)9.5.15 TABULATE (150)9.6 奇特的命令 (150)9.6.1 PATCH_WORKSPACE (150)9.6.2 RESTORE_PHASE_IN_PLOT (150)9.6.3 REINIATE_PLOT_SETTINGS (151)9.6.4 SET_AXIS_PLOT_STATUS (151)9.6.5 SET_PLOT_SIZE (151)9.6.6 SET_RASTER_STATUS (151)9.6.8 SUSPEND_PHASE_IN_PLOT (151)9.7 3D图标是:命令与演示 (151)9.7.1 CREATE_3D_PLOTFILE (153)9.7.2 在Cortona VRML Client阅读器中查看3D图 (154)第10部分一些特殊模块 (155)10.1 引言 (155)10.2 特殊模块生成或使用的文件 (156)10.2.1 POL Y3文件 (156)10.2.2 RCT文件 (156)10.2.3 GES5文件 (156)10.2.4 宏文件 (157)10.3 与特殊模块的交互 (157)10.4 BIN模块 (157)10.4.1 BIN模块的描述 (157)10.4.2 特定BIN模块数据库的结构 (161)10.4.3特定BIN计算的演示实例 (162)10.5 TERN 模块 (162)10.5.1 TERN 模块的描述 (162)10.5.2 特殊TERN模块数据库的结构 (166)10.5.3 TERN模块计算的演示实例 (167)10.6 POT模块 (167)10.7 POURBAIX 模块 (167)10.8 SCHAIL 模块 (167)11.2 热化学 (168)11.2.1 一些术语的定义 (168)11.2.2 元素与物种(Elements and species) (168)11.2.3 大小写模式 (169)11.2.4 相 (169)11.2.5 温度与压力的函数 (169)11.2.6 符号 (170)11.2.7 混溶裂隙 (170)11.3 热力学模型 (170)11.3.1 标准Gibbs能 (171)11.3.2 理想置换模型 (171)11.3.3 规则溶体模型 (171)11.3.4 使用组元而不是元素 (172)11.3.5 亚点阵模型—化合物能量公式 (172)11.3.6 离子液体模型,对具有有序化趋势的液体 (172)11.3.7 缔合模型 (173)11.3.8 准化学模型 (173)11.3.9 对Gibbs能的非化学贡献(如铁磁) (173)11.3.10 既有有序-无序转变的相 (173)11.3.11 CVM方法:关于有序/无序现象 (173)11.3.12 Birch-Murnaghan模型:关于高压贡献 (173)11.3.13 理想气体模型相对非理想气体/气体混合物模型 (173)11.3.14 DHLL和SIT模型:关于稀水溶液 (173)11.3.15 HKF和PITZ模型:对浓水溶液 (173)11.3.16 Flory-Huggins模型:对聚合物 (173)11.4 热力学参数 (173)11.5 数据结构 (175)11.5.1 构造 (175)11.5.2 Gibbs能参考表面 (175)11.5.3 过剩Gibbs能 (175)11.5.4 存储私有文件 (175)11.5.5 加密与不加密数据库 (176)11.6 GES系统的应用程序 (176)11.7 用户界面 (176)11.7.1 模块性和交互性 (177)11.7.2 控制符的使用 (177)11.8 帮助与信息的命令 (177)11.8.1 HELP (177)11.8.2 INFORMATION (177)11.9 改变模块与终止程序命令 (178)11.9.1 GOTO_MODULE (178)11.9.2 BACK (178)11.9.3 EXIT (178)11.10 输入数据命令 (178)11.10.4 ENTER_SYMBOL (180)11.10.5 ENTER_PARAMETER (181)11.11 列出数据的命令 (183)11.11.1 LIST_DATA (183)11.11.2 LIST_PHASE_DA TA (183)11.11.3 LIST_PARAMETER (184)11.11.4 LIST_SYMBOL (185)11.11.5 LIST_CONSTITUENT (185)11.11.6 LIST_STATUS (185)11.12 修改数据命令 (185)11.12.1 AMEND_ELEMENT_DA TA (185)11.12.2 AMEND_PHASE_DESCRIPTION (186)11.12.3 AMEND_SYMBOL (188)11.12.4 AMEND_PARAMETER (189)11.12.5 CHANGE_STATUS (191)11.12.6 PATCH_WORKSPACES (191)11.12.7 SET_R_AND_P_NORM (191)11.13 删除数据的命令 (192)11.13.1 REINITIATE (192)11.13.2 DELETE (192)11.14 存储或读取数据的命令 (192)11.14.1 SA VE_GES_WORKSPACE (192)11.14.2 READ_GES_WORKSPACE (193)11.15 其它命令 (193)11.15.1 SET_INTERACTIVE (193)第12部分优化模块(PARROT) (193)12.1 引言 (193)12.1.1 热力学数据库 (194)12.1.2 优化方法 (194)1 2.1.4 其它优化软件 (195)12.2 开始 (195)12.2.1 试验数据文件:POP文件 (195)12.2.2 图形试验文件:EXP文件 (197)12.2.3 系统定义文件:SETUP文件 (197)12.2.4 工作文件或存储文件:PAR文件 (198)12.2.5 各种文件名与其关系 (198)12.2.6 交互运行PARROT模块 (199)12.2.6.3 绘制中间结果 (199)12.2.6.4 实验数据的选择 (199)12.2.6.6 优化与连续优化 (200)12.2.7 参数修整 (200)12.2.8 交互完成的变化要求编译 (201)12.3 交替模式 (201)12.4 诀窍与处理 (201)12.4.4 参数量 (201)12.5 命令结构 (201)12.5.1 一些项的定义 (201)12.5.2 与其它模块连接的命令 (201)12.5.3 用户界面 (201)12.6 一般命令 (201)12.7 最频繁使用的命令 (202)12.8 其它命令 (203)第13部分编辑-实验模块(ED-EXP) (203)第14部分系统实用模块(SYS) (203)14.1 引言 (203)14.2 一般命令 (203)14.2.1 HELP (203)14.2.2 INFORMA TION (204)14.2.4 BACK (205)14.2.5 EXIT (205)14.2.6 SET_LOG_FILE (205)14.2.7 MACRO+FILE_OPEN (205)14.2.8 SET_PLOT_ENVIRONMENT (206)14.3 Odd命令 (207)14.3.1 SET_INTERACTIVE_MODE (207)14.3.2 SET_COMMAND_UNITS (207)14.3.4 LIST_FREE_WORKSPACE (207)14.3.5 PATCH (207)14.3.6 TRACE (207)14.3.7 STOP_ON_ERROR (208)14.3.8 OPEN_FILE (208)14.3.9 CLOSE_FILE (208)14.3.10 SET_TERMINAL (208)14.3.11 NEWS (208)14.3.12 HP_CALCULATOR (208)14.4 一般信息的显示 (209)第15部分数据绘图语言(DATAPLOT) (215)第1部分一般介绍1.1 计算热力学在近十年内与材料科学与工程相联系的计算机计算与模拟的研究与发展已经为定量设计各种材料产生了革命性的方法,热力学与动力学模型的广泛结合使预测材料成分、各种加工后的结构和性能。
维克ト恩能源生产力系统配置助手说明书
Overview of available AssistantsClick on the thumbnails to see the full screenshot.1. Assistants related to SolarMake sure to read Configuring solar systems with Quattros and Multis when configuring a solar system.ESS AssistantFor Energy Storage Systems (ESS). The Assistant manages the prioritising of Solar Power. Documentation.PV Inverter supportUse this Assistant in Off-grid systems that have AC-Coupled solar power: a grid-tie PV inverter connected to the AC out of a Multi or Quattro inverter/charger.Documentation.DEPRECATED Self-consumption Hub-1 - for dc-coupled systems2022-06-01assistants:overview_of_available_assistants https:///live/assistants:overview_of_available_assistants 13:41Note that Hub-1 is deprecated in favor of ESS.Hub-1 Assistant documentation.Hub-1 is only for hardware with new microprocessor (26 or 27).Hub-1 and Hub-2 Assistant notesDEPRECATED Self-consumption Hub-2 v3 - for ac-coupled systemsTake note of the factor 1.0 rule.Deprecated in favor of ESS.Only for hardware with new microprocessor (26 or 27).Hub-1 and Hub-2 Assistant notesDEPRECATED Self-consumption Hub-2 v2 - for ac-coupled systemsUse only on hardware with old microprocessor (19 or 20). On newer systems, use the version 3 instead, see above.Take note of the factor 1.0 rule.Note that all Hub-2 Assistant versions have been deprecated in favor of ESS.Hub-1 and Hub-2 Assistant notesDEPRECATED Self-consumption Hub-4Do not use Hub-4 for new installs. It is deprecated in favor of ESS.Hub-4 manual.Only for hardware with new microprocessor (26 or 27).2. Functional AssistantsGenerator start and stopAutomatically start and stop a generator based on battery state of charge andactual load of a system. Note that automatic genset start/stop functionality isalso available on the Virtual switch tab in VEConfigure, which is easier to workwith.This is one of the available options to automatically start and stop a generator using Victron equipment. See the auto-generator-start-stop document for an overview of all options. More general information about using a generator in combination with Victron is available here.This Generator start and stop Assistant is also the one to use to configure Ignore AC Input using Assistants.AC Current sensor2022-06-01assistants:overview_of_available_assistants https:///live/assistants:overview_of_available_assistants 13:41Reads PV Inverter current, using an AC Current sensor (CSE000100000),connected to a VE.Bus product. More information available in the AC Currentsensor manual.Silence fanDisable the fans at night with a simple external switch, to ensure a quiet night.Very useful for boats and motorhomes.Input current limit controlAutomatically set the input current limit to a predefined value based on thestate of an aux input or rpm measured with the 1140 interface. Used in thefollowing systems:1.A variable speed generator, flywheel generator or waterturbine, where the available AC powerdepends on the rpm. See the Interface 1140 (ASS030510000) manual for more information.Vehicles or boats that have two different types of shore plugs. One high power plug and one low 2.power plug. Use the assistant to automatically set the input current limiter based on the used plug.And there are more situations that can come to mind, for example a Multi connected behind a 3.transfer switch.Charge current controlSets the charge current to a predefined setpoint, based on the active AC Input(for Quattros) or the state of an aux input.Safety switchUsed to wire an emergency stop button to a VE.Bus system. DEPRECATED VE.Bus BMS supportDeprecated: per VE.Bus firmware version 489, this Assistant is no longer required. When installing a system with VE.Bus BMS, our advice is to first update the firmware of the inverter, using VictronConnect, and thereafter do the configuration. No Assistant needed.Required in combination with a VE.Bus BMS, used with our 12.8 V Lithium batteries. This Assistant communicates with the BMS and controls the Multi based on the BMS measurements.Two-Signal BMS support (previously called Lynx Ion BMS support)Required in combination with a Lynx Ion BMS, used with our 24 V 180 AhLithium system. This Assistant can also be used to control the Multi with a thirdparty Lithium system including BMS. See our PDF Connecting other lithiumbattery systems to Multis and Quattros for more information.3. Advanced AssistantsProgrammable relay2022-06-01assistants:overview_of_available_assistants https:///live/assistants:overview_of_available_assistants 13:41Relay lockerGeneral flag userDISQUSView the discussion thread.。
Unity中的平台预处理器指令
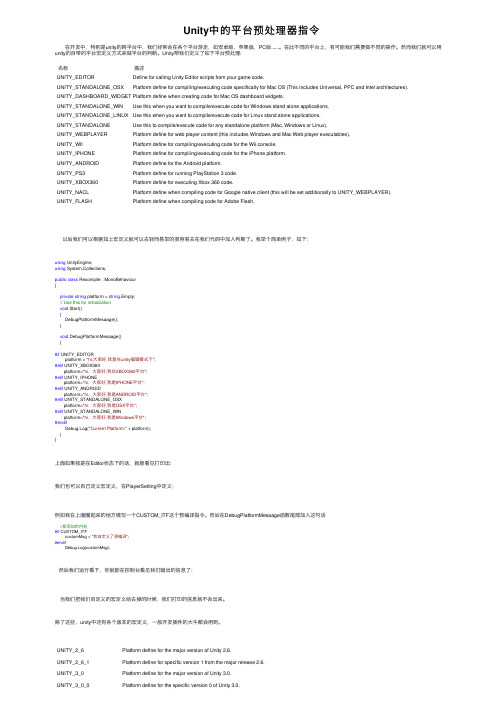
Unity中的平台预处理器指令在开发中,特别是unity的跨平台中,我们经常会在各个平台游⾛,如安卓版,苹果版,PC版......。
在此不同的平台上,有可能我们需要做不同的操作。
然⽽我们就可以⽤unity的⾃带的平台宏定义⽅式来做平台的判断。
Unity帮我们定义了如下平台预处理:名称描述UNITY_EDITOR Define for calling Unity Editor scripts from your game code.UNITY_STANDALONE_OSX Platform define for compiling/executing code specifically for Mac OS (This includes Universal, PPC and Intel architectures).UNITY_DASHBOARD_WIDGET Platform define when creating code for Mac OS dashboard widgets.UNITY_STANDALONE_WIN Use this when you want to compile/execute code for Windows stand alone applications.UNITY_STANDALONE_LINUX Use this when you want to compile/execute code for Linux stand alone applications.UNITY_STANDALONE Use this to compile/execute code for any standalone platform (Mac, Windows or Linux).UNITY_WEBPLAYER Platform define for web player content (this includes Windows and Mac Web player executables).UNITY_WII Platform define for compiling/executing code for the Wii console.UNITY_IPHONE Platform define for compiling/executing code for the iPhone platform.UNITY_ANDROID Platform define for the Android platform.UNITY_PS3Platform define for running PlayStation 3 code.UNITY_XBOX360Platform define for executing Xbox 360 code.UNITY_NACL Platform define when compiling code for Google native client (this will be set additionally to UNITY_WEBPLAYER).UNITY_FLASH Platform define when compiling code for Adobe Flash.以后我们可以根据如上宏定义就可以去轻⽽易举的很容易去在我们代码中加⼊判断了。
unity ctaa 用法 -回复
unity ctaa 用法-回复Unity是一款非常流行的游戏开发引擎,它提供了强大的功能和工具,帮助开发者轻松创建游戏。
其中,CTAA(Cinematic Temporal Anti-Aliasing)是Unity的一种图像处理技术,通过降低抗锯齿的复杂度和优化性能,提供更高质量的图像输出。
本文将介绍CTAA的用法,并详细解释如何在Unity中使用它来改进游戏图像的质量。
第一步:了解CTAA的原理在使用CTAA之前,我们需要先了解它的原理。
CTAA通过使用延迟渲染和抗锯齿技术相结合的方法,实现了更好的图像质量。
传统的抗锯齿技术主要通过对图像进行平滑来降低锯齿边缘的强度,但会导致图像的细节部分变得模糊。
而CTAA使用了延迟渲染的特性,将一个像素周围的多个帧进行采样,并根据采样结果计算出更加真实的颜色值,从而在降低锯齿的同时保留图像的细节。
第二步:安装CTAA插件在开始使用CTAA之前,我们需要先安装相应的插件。
可以从Unity Asset Store中搜索“CTAA”来找到并下载CTAA插件。
安装完成后,会在Unity的菜单栏中看到一个新的“CTAA”选项。
第三步:将CTAA应用到摄像机上为了在游戏中应用CTAA,我们需要将它添加到主摄像机上。
在项目的层次结构中选择主摄像机,在Inspector面板的顶部,可以找到一个“CTAA Settings”部分。
勾选“Enable CTAA”选项,开启CTAA功能。
在下拉菜单中可以选择不同的CTAA模式,包括“CTAA Standard”,“CTAA Performance”和“CTAA VR”。
第四步:调整CTAA设置在使用CTAA之前,我们还可以调整一些相关的设置以获得更佳的效果。
在“CTAA Settings”部分,有一些参数可以进行调整,包括“Anti-Flicker Move Threshold”和“Temporal Stability Range”。
unity激光炮案例制作流程
一、介绍Unity激光炮案例制作的背景和意义在游戏开发中,激光炮是一种常见的武器类型,制作激光炮案例可以帮助开发者熟悉Unity引擎的使用和游戏开发的基本流程,同时也可以提升开发者对游戏设计和武器逻辑的理解能力。
本文将介绍如何使用Unity引擎制作一个简单的激光炮案例,以帮助初学者快速入门游戏开发。
二、准备开发环境和资源1. 下载并安装Unity引擎需要从Unity全球信息站下载并安装最新版本的Unity引擎。
安装完成后,打开Unity,创建一个新的2D/3D项目。
2. 获取激光炮相关资源在制作激光炮案例时,需要准备一些相关的资源,比如激光炮模型、激光炮射击特效等。
这些资源可以从Unity Asset Store或者其他资源全球信息站上获取。
三、创建激光炮模型和射击效果1. 导入激光炮模型在Unity中,通过导入激光炮模型资源,创建一个新的GameObject,并将激光炮模型添加到场景中。
2. 添加射击效果为了让激光炮具有射击效果,可以通过编写脚本来实现。
在Unity中创建一个新的C#脚本,命名为“LaserGun”,然后在脚本中编写激光炮射击的逻辑代码。
可以在Update函数中检测玩家的输入,当玩家按下射击键时,播放激光炮射击特效。
四、添加激光炮的攻击逻辑1. 实现激光炮的攻击效果在制作激光炮案例时,需要为激光炮添加攻击效果,以便与敌人进行交互。
可以通过编写脚本来实现激光炮的攻击逻辑,比如检测激光炮射线与敌人的碰撞,当射线碰撞到敌人时,敌人受到伤害。
2. 设置敌人的受伤逻辑在Unity中,可以为敌人添加受伤的逻辑。
当敌人受到激光炮攻击时,可以播放受伤动画,减少敌人的生命值等。
五、优化和调试1. 优化激光炮的性能在制作激光炮案例时,需要确保激光炮的性能良好,不会对游戏运行造成过大的负担。
可以通过优化激光炮的模型、特效和逻辑代码来提升性能。
2. 调试激光炮的功能在制作激光炮案例时,需要不断调试激光炮的功能,确保激光炮的射击效果和攻击逻辑能够正常运行,对于有bug的地方要及时调试修复。
Unity游戏开发物理引擎教程
Unity游戏开发物理引擎教程第一章:物理引擎简介物理引擎是游戏开发中非常重要的一部分,它能够模拟物体在空间中受到各种力和碰撞产生的效果。
Unity作为一款优秀的游戏开发引擎,提供了强大的物理引擎组件,开发者可以通过使用Unity物理引擎来实现游戏中的真实物理效果。
第二章:Unity物理引擎组件介绍Unity物理引擎主要有三个组件,分别是刚体(Rigidbody)、物理材质(Physic Material)和碰撞体(Colliders)。
刚体用于表示具有物理属性的对象,物理材质用于控制碰撞体之间的摩擦力和弹性,而碰撞体则决定了物体之间发生碰撞的方式和效果。
第三章:刚体组件的应用在使用Unity物理引擎进行游戏开发时,可通过添加刚体组件来实现物体的物理特性。
刚体组件可以控制物体的质量、重力效果、阻力等属性,并且可以通过给刚体施加力来改变物体的运动状态。
第四章:物理材质的运用物理材质在游戏开发中起着至关重要的作用,它能够控制碰撞体之间的摩擦力和弹性。
通过设置不同的物理材质,可以使物体之间的碰撞效果变得更加真实,并且可以模拟各种不同的物理特性,如滑动摩擦、静摩擦等。
第五章:碰撞体的使用碰撞体用于决定物体之间发生碰撞的方式和效果。
Unity提供了多种类型的碰撞体,如球形碰撞体、盒形碰撞体、网格碰撞体等。
通过给物体添加碰撞体组件,并设置相应的形状和大小,可以实现物体之间的碰撞检测和响应。
第六章:物理引擎的优化在进行物理引擎开发时,为了保证游戏的性能和流畅度,需要对物理引擎进行优化。
可以通过减少物体数量、调整物理材质和碰撞体的参数等方式来提高物理引擎的性能。
第七章:常见物理效果的实现在游戏开发中,常常需要实现一些特殊的物理效果,如重力场、水流效果、布料模拟等。
通过对物理引擎的深入理解和灵活的运用,可以实现各种不同的物理效果,从而增加游戏的趣味性和真实感。
第八章:物理引擎的调试与测试在进行物理引擎开发时,调试和测试是非常重要的环节,可以通过将物体运动的轨迹可视化、检测碰撞点和角度、打印物理引擎的实时信息等方式来进行物理引擎的调试与测试。
泽塔C VR go 3.0系统快速上手指南说明书
1
2
3
3
quick start guide
package contents
• 1 x ZOTAC VR GO 3.0 SYSTEM • 1 x Backpack Strap Add-on • 1 x AC Adapter • 1 x Power Cord • 1 x DC 12V Power Cable • 2 x Batteries • 1 x Battery Charging Dock • 1 x User Manual & Quick Start Guide • 1 x Support DVD (optional) • 1 x OS Recovery USB Drive
2. Connect the AC adapter to the battery charging dock.
3. All battery LEDs will be OFF when fully charged.
2
4. Press the battery status button to check battery status if need.
5. Connect headphone/audio out device
6. Connect microphone device
7. Connect VR head-mounted display (optional)
8. Connect power cable
9. Turn on the system
10. Follow the on-screen instructions to complete the initial setup of Windows. This process may take several minutes.
基于Unity3D虚拟引擎制作地震科普类APP
基于Unity3D虚拟引擎制作地震科普类APP地震是地球上非常常见的自然灾害,它给人们的生命财产安全带来了巨大的威胁。
为了增加大众对地震科学知识的了解,促进地震科普的普及,我们决定利用Unity3D虚拟引擎制作一款地震科普类的手机应用程序(APP)。
通过这款APP,用户可以了解地震的发生原理、地震的危害、地震的防范措施等相关知识,从而提高大众对地震的认知和防范意识。
本文将介绍这款基于Unity3D虚拟引擎制作的地震科普类APP的制作过程和功能特点。
一、制作目的地震是一种地壳快速释放能量的现象,它可能导致建筑物倒塌、土地滑坡、火灾等一系列灾害,并且给人们的生命财产安全带来巨大威胁。
由于大多数人对地震科学知识了解不足,对地震的认知和防范意识比较薄弱,一旦地震发生,可能会造成更大的损失。
我们制作这款地震科普类的APP的初衷就是要增加大众对地震科学知识的了解,提高大众对地震的认知和防范意识,减少地震带来的损失。
二、制作过程制作这款地震科普类APP的关键工具就是Unity3D虚拟引擎。
Unity3D是一款专业的跨平台游戏开发引擎,它可以支持多种平台(包括Android、iOS、Windows等)的游戏开发,并且具有强大的3D渲染能力和丰富的资源库,非常适合制作虚拟现实类的手机应用程序。
在制作过程中,我们首先进行了地震科普知识的梳理和整理,确定了APP的主要内容和功能,然后利用Unity3D虚拟引擎进行了页面设计、功能开发和美工制作。
在页面设计上,我们采用了直观易懂的交互界面,使用户可以方便地了解地震的相关知识;在功能开发上,我们实现了地震的发生原理动画展示、地震的危害模拟演示、地震的防范措施普及等功能;在美工制作上,我们选择了清晰明了的图标和配色方案,使用户可以愉悦地使用这款APP。
三、功能特点1.地震科学知识介绍:在这一功能中,用户可以了解地震的定义、地震的发生原理、地震的分类等基本知识,帮助用户建立对地震的认知基础。
unity 机械 反向动力学

unity 机械反向动力学
在Unity中,反向动力学(Inverse Kinematics,简称IK)是一种通过子关节的位置反求推导出所在骨骼链上n 级父关节点的位置的技术。
它通常用于机械臂、角色动画等场景,以实现更自然和逼真的运动效果。
在Unity中实现机械反向动力学的步骤大致如下:
1. 确保机械模型具有有效的Avatar和动画器控制器。
Avatar是Unity中用于处理人类角色动画的系统,但也可以用于机械模型。
动画器控制器则用于管理动画状态和控制IK。
2. 在动画器控制器中创建一个动画层,并勾选IK Pass 选项。
这将启用IK处理,允许通过代码或动画曲线来控制IK目标的位置和旋转。
3. 设置IK目标。
IK目标是指定子关节应该指向或达到的位置。
在Unity中,可以使用Transform组件来设置IK目标的位置和旋转。
4. 调用IK函数。
在Unity中,可以使用Animator类提供的SetIKPosition和SetIKRotation函数来设置IK目标的位置和旋转。
这些函数需要在动画更新时调用,以确保IK正确应用。
需要注意的是,反向动力学计算可能需要耗费较多的计算机资源,因此在性能敏感的应用中需要谨慎使用。
此外,IK解算器可能存在多个解,需要根据具体需求选择合适的解算方法和参数。
总的来说,Unity提供了强大的反向动力学支持,可以帮助开发者实现更自然和逼真的机械动画效果。
