MDSC-2013 users training_Part4
SIMPL Windows基础教程 - 最终版
快思聪SIMPL Windows编程语言初级教程目录第一章快思聪SIMPL WINDOWS (5)概览 (5)关于初级教程 (5)快思聪开发软件 (6)SIMPL Windows (6)快思聪VisionTool Pro-e (6)DEAL TM for Windows (6)Media Manager TM System Builder (6)D3 Pro TM (7)数据库(Database) (7)产品目录光盘 (7)快思聪控制系统 (9)为什么对控制系统编程? (9)控制系统组件 (9)主机 (9)网络控制模块 (10)Plug-in控制卡 (10)用户界面 (10)触摸屏 (10)键盘(按键面板) (10)无线摇控界面 (10)用户设备 (10)控制方式 (11)继电器控制 (11)串口通信控制 (11)红外 (11)自定义串量 (13)RS232,RS422,RS485 (13)MIDI(数字音乐设备接口) (14)模拟电压 (14)自定义快思聪接口界面 (14)Cresnet (14)第二章SIMPL WINDOWS编程 (16)SIMPL介绍 (16)函数库 (16)设备函数 (16)逻辑函数 (16)函数属性 (16)输入 (17)输出 (17)信号类型 (18)数字量 (18)模拟信号量 (18)串量 (19)特殊信号0和1 (19)逻辑波跟逻辑解决方案 (19)用户界面编程 (21)按钮动作 (21)按钮反馈 (21)子页(仅用于触摸屏) (23)模拟显示(仅用于触摸屏) (23)间接文本(仅用于触摸屏) (24)用SIMPL W INDOWS来创建一个程序 (25)编程步骤 (25)基本编程规则 (25)建立一个系统 (25)网络硬件 (28)控制插卡 (29)串口设备 (29)用户设备 (30)网络ID (30)配置设备 (31)快思聪网络设备 (31)以太网设备 (32)串口设备 (33)触摸屏 (33)连接信号 (34)定义用户界面信号 (34)使用逻辑函数 (35)第三章逻辑函数编程 (37)概述 (37)逻辑函数的类型 (37)基本逻辑 (38)NOT函数 (38)OR函数 (38)AND函数 (40)Buffer函数 (41)状态逻辑 (46)Set/Reset Latch函数 (46)Toggle函数 (47)Interlock函数 (49)基于时间的逻辑 (52)One Shot 系列 (52)Multiple One Shot (53)Retriggerable One Shot (53)Delay Symbol (54)Oscillator Symbol (55)模拟逻辑 (57)Analog Ramp函数 (57)Analog Initialize (58)Analog Preset函数 (59)Serial/Analog One-Shot (61)Modules模块 (61)Communication Settings (62)Compiling and Uploading Programs (64)第一章快思聪SIMPL Windows概览关于初级教程编写本教程的目的在于向程序设计人员介绍SIMPL windows编程技术以及如何应用快思聪控制系统,这包括对控制系统如何利用触摸屏和按钮作为用户界面的理解,通过这些界面,使用者可以发送一个信号(主要是逻辑函数)给控制系统处理后输出用以最终控制一个设备。
2013 Control4 官方培训资料2

3/27/2015
©2013 Control4 Corporation
可调光属性
• 使用功率升高器(Use Power Booster) • 如果有加入功率升高器就勾选此 选项
3/27/2015
©2013 Control4 Corporation
可调光属性
• 覆盖范围(Override level)
3/27/2015
©2013 Control4 Corporation
加入模块
重要 – 在虚拟主机中完成 模块属性
加入模块&完成属性
• 所有灯光都加入项目后就开始加入控 制模块
• 可以为模块加入独立的机房 (Mechanical Room) • 通常一次加入所有预计使用数量的模 块会比一次加入一个模块、连接、再 加入另一个模块来得容易 • 完成模块属性
3/27/2015
©2013 Control4 Corporation
安装后可在Composer中看到能源信息
• 能源信息(Energy information)
• 显示测量到的负载使用能 源
•
•
只能在Composer中查看
备将来使用
• 0-10V能源属性─当0-10V 灯光有连接到Control4继 电模块时才会有此信息。 0-10V模块本身无法测量能 源使用,只能提供控制信 号
3/27/2015
©2013 Control4 Corporation
可调光属性
• 侦测到的调光模式(Dimming Mode Detected)
3/27/2015
©2013 Control4 Corporation
安装后可在Composer中看到能源信息
• 能源信息(Energy information) • 显示测量到的负载使 用能源 • 只能在Composer中查 看 • 备将来使用
友声收银系列电子秤使用说明书
是整机保修一年收银系列使用说明书适用型号TM-30A /TM-15A / TM-6AJB-30A / JB-15A / JB-6A2009年7月Version2.30A上海友声衡器有限公司 & 上海精函衡器有限公司沪制00000033号沪制00000319号地址:上海市闵行区莘庄工业区春光路99弄58号邮编:201108厂址:上海市崇明县庙镇经济开发区宏海公路349号邮编:202165 公司总机:(021)54831805/6/7/8 技术部总机:(021)54831858传真:(021)54831803 主页:指定代理与售后服务电话:联系人:感谢您使用上海精函有限公司的产品!在您开始使用本产品前,请务必仔细阅读《前言》中的内容,并严格遵守这些事项!1.1注意事项➢确保电源插头和电源线连接正常,使用三芯电源线进行连接,如果使用了拖线板,则拖线板的插口也要是三芯的,确保三芯的地线妥善的与建筑大地连接,以避免漏电的情况。
➢切勿用沾湿的手插拔电源插头,这样可能导致触电。
➢严禁将身体重力压在秤盘上,以免损坏称重传感器。
➢严禁撞击重压,或用重物冲击秤盘,以免损坏称重传感器,同时勿超过其最大称量范围。
➢严禁淋雨或用水冲洗;如不慎沾水,请用干布擦试干净;若秤体工作异常,请尽速送到经销商处,我们将竭诚为您服务。
➢严禁将条码秤置于极低温、高温或潮湿的场所,这样可能导致秤体工作异常甚至损坏。
➢严禁用有机化学溶剂擦拭外壳和面板。
➢严禁私自打开秤体,也不要让非专业的维修人员修理本秤。
➢严禁将手从打印机旋出位置伸入,该行为可能造成220V触电。
➢在有本公司专业维修人员指导下打开秤体时,请务必提前拔出220V的交流供电。
➢不要试图拆卸秤体内的开关电源,高压电容需要非常长时间才能完全放电,未放电的情况下拆卸可能导致触电。
➢建议使用本厂出售的热敏纸,本秤体对本厂出售的热敏纸进行过长时间的测试与优化,可以较好的保证头片的使用寿命。
TS2013 游戏新手教程
Train Simulator 2013游戏新手教程 Ver. 1.0
制作: China-巅峰【小枫】
版权所有@勿转载
第一章:插件安装—RWP格式安装方法1.1 找到.rwp格式的文件
1.2 打开T2013目录
Steam -> steamapps -> common -> railworks
1.3 找到Utilities.exe
1.4 打开,选择插件安装
1.5 选择要安装的文件,再按打开(Open)安装中.....
完成
第二章:插件安装—文件夹类型安装方法2.1 Assets文件夹安装方法
复制到RW3总目录
2.2 Content文件夹安装方法
复制到RW3总目录
Steam -> steamapps -> common -> railworks
注:如果有其他的类型,同样复制到原目录
第三章:用压缩软件打开RWP文件(可选)3.1 找到你要安装的RWP文件
3.2 把你要安装的RWP文件改名
3.3 改成RAR格式(还可以用其他格式,如.zip .7z)
提醒:出现提示按是/确定
3.4 成功改变文件格式
3.5 双击打开
出现的文件夹即第二章的安装方法
第四章:汉化补丁
4.1 下载汉化补丁
/discuz/thread-49548-1-1.html 感谢AGASAHIROSHI(阿笠)汉化
版权所有,翻版必究
4.2 安装汉化补丁
然后把Languages文件夹复制至游戏根目录
打开游戏即便是中文
谢谢支持!
【小枫】China-巅峰
模拟火车中国站
游戏新手教程 v1.0
2012年10月5日。
《M-MDS安装与使用》2014

52
《M-MDS安装与使用》
二、MDS使用
• 诊断功能
1. 自测-连接
M-MDS未与车辆进行通讯时:
M-MDS与车辆进行通讯时:
注: 这两个工具需要配合VMM工具 套装才可以使用,目前一汽马自 达没有要求购买此工具套装,所 以工具盒暂时无法使用
一汽马自达服务店内训系列课程
53
《M-MDS安装与使用》
一汽马自达服务店内训系列课程
44
《M-MDS安装与使用》
二、MDS使用
• 使用准备
4. 连接与车辆识别
一汽马自达服务店内训系列课程
45
《M-MDS安装与使用》
二、MDS使用
• 使用准备
4. 连接与车辆识别
一汽马自达服务店内训系列课程
46
《M-MDS安装与使用》
二、MDS使用
• 使用准备
4. 连接与车辆识别
一汽马自达服务店内训系列课程
3
一、安装与升级
• 软件安装
• 系统升级
《M-MDS安装与使用》
一、安装与升级
• IDS软件安装
– 软件适用系统:Win XP,Win7
一汽马自达服务店内训系列课程
5
《M-MDS安装与使用》
一、安装与升级
• IDS软件安装
步骤1、将IDS光盘放入光驱,在如下弹出窗口中点击“IDS”图标;
一汽马自达服务店内训系列课程
47
《M-MDS安装与使用》
二、MDS使用
• 使用准备
4. 手动连接
1
2
一汽马自达服务店内训系列课程
48
《M-MDS安装与使用》
二、MDS使用
• 使用准备
浪潮存储培训-产品工程师认证部分教材(1)DISK技术

综合
Page ▪ 27
谢谢!
Page ▪ 28
每分钟盘片转动圈数 缓存:是硬盘控制器上的一块内存芯片,具有极快的存取速度,它是
硬盘内部盘片和外部接口之间的缓冲器
Page ▪ 4
磁盘的主要指标(2)
平均访问时间:硬盘磁头找到目标数据所需的平均时间
平均寻道时间:磁头寻找目标数据所在磁道所需的平均时间 平均潜伏时间:当磁头移动到数据所在的磁道后,等待指定的数据扇区转动到磁头
Page ▪ 9
磁盘类型及接口
接口试图
SATA
SCSI
SAS
FC
硬盘类型
Page ▪ 10
SC LC
磁盘发展历史及趋势
容量 1000GB
SATA硬盘 1000GB
750GB
750GB
500GB 300GB 100GB
SAS硬盘
SCSI硬盘 300GB
FC硬盘 400GB
500GB
400GB
400GB
H3C等知名厂商提供硬盘服务。希捷 熟、性能优良及可靠性高等特点也 着不断发展其产品线越来越全,主
公司以其品种齐全、技术创新快、质 在存储市场占据了一席之地,并为 要分为以下几个系列产品:
量好在存储硬盘市场稳占第一位。 H3C等知名厂商提供硬盘服务。
Ultrastar:用作服务器以及工作站
企业级硬盘产品主要分为:
2010
企业级硬盘与桌面级硬盘的区别
序号 1 2 3 4 5 6
Page ▪ 23
参数 上电时间 Duty Cycle(工作负荷)
MTBF SCT 错误纠正功能 负载管理(用于控制机体 温度及保证长时间工作可 靠性)
桌面级 8小时/天
斑马技术公司DS8108数字扫描仪产品参考指南说明书
Thermo-calc软件-TCCP用户指南 (有目录索引)
Thermo-Calc®User’s GuideVersion PThermo-Calc Software ABStockholm Technology ParkBjörnnäsvägen 21SE-113 47 Stockholm, SwedenCopyright © 1995-2003 Foundation of Computational ThermodynamicsStockholm, Sweden目录第1部分一般介绍 (12)1.1 计算热力学 (12)1.2 Thermo-Calc软件/数据库/界面包 (12)1.3 致谢 (13)1.4 版本历史 (13)1.5 Thermo-Calc软件包的通用结构 (13)1.6 各类硬件上Thermo-Calc软件包的有效性 (14)1.7 使用Thermo-Calc软件包的好处 (14)第2部分如何成为Thermo-Calc专家 (14)2.1 如何容易地使用本用户指南 (14)2.2 如何安装和维护Thermo-Calc软件包 (16)2.2.1 许可要求 (16)2.2.2 安装程序 (16)2.2.3 维护当前和以前版本 (16)2.2.4 使TCC执行更方便 (16)2.3 如何成为Thermo-Calc专家 (16)2.3.1 从TCSAB与其世界各地的代理获得迅速技术支持 (17)2.3.2 日常使用各种Thermo-Calc功能 (17)2.3.3 以专业的和高质量的标准提交结果 (17)2.3.4 通过各种渠道相互交换经验 (17)第3部分Thermo-Calc软件系统 (17)3.1 Thermo-Calc软件系统的目标 (17)3.2 一些热力学术语的介绍 (18)3.2.1 热力学 (18)3.2.2 体系、组元、相、组成、物种(System, component, phases, constituents and species) (18)3.2.3 结构、亚点阵和位置 (19)3.2.4 成分、构成、位置分数、摩尔分数和浓度(composition, constitution, site fractions, molefractions and concentration) (19)3.2.5 平衡态和状态变量 (19)3.2.6 导出变量 (22)3.2.7 Gibbs相规则 (25)3.2.8 状态的热力学函数 (25)3.2.9 具有多相的体系 (25)3.2.10 不可逆热力学 (26)3.2.11 热力学模型 (26)3.2.12 与各种状态变量有关的Gibbs能 (27)3.2.13 参考态与标准态 (27)3.2.14 溶解度范围 (28)3.2.15 驱动力 (28)3.2.16 化学反应 (28)3.2.17 与平衡常数方法相对的Gibbs能最小化技术 (28)3.2.18 平衡计算 (29)3.3 热力学数据 (30)3.3.1 数据结构 (30)3.3.3 数据估价 (32)3.3.6 数据加密 (33)3.4 用户界面 (34)3.4.1 普通结构 (34)3.4.2 缩写 (34)3.4.3 过程机制(history mechanism) (35)3.4.4 工作目录和目标目录(Working directory and target directory) (35)3.4.5 参数转换为命令 (36)3.4.6 缺省值 (36)3.4.7 不理解的问题 (36)3.4.8 帮助与信息 (36)3.4.9 出错消息 (36)3.4.10 控制符 (36)3.4.11 私人文件 (36)3.4.12 宏工具 (37)3.4.13 模块性 (37)3.5 Thermo-Calc中的模块 (37)3.5.1 基本模块 (37)3.7 Thermo-Calc编程界面 (39)3.7.1 Thermo-Calc作为引肇 (39)3.7.2 Thermo-Calc应用编程界面:TQ和TCAPI (40)3.7.3 在其它软件包中开发Thermo-Calc工具箱 (43)3.7.4 材料性质计算核材料工艺模拟的应用 (43)3.8 Thermo-Calc的功能 (44)3.9 Thermo-Calc应用 (44)第4部分Thermo-Calc数据库描述 (45)4.1 引言 (45)4.2 Thermo-Calc数据库描述形式 (45)第5部分数据库模块(TDB)——用户指南 (55)5.1 引言 (55)5.2 TDB模块中用户界面 (56)5.3 开始 (56)5.3.1 SWITCH-DATABASE (56)5.3.2 LIST-DATABASE ELEMENT (56)5.3.3 DEFINE_ELEMENTS (56)5.3.4 LIST_SYSTEM CONSTITUENT (56)5.3.5 REJECT PHASE (56)5.3.6 RESTORE PHASE (56)5.3.7 GET_DATA (56)5.4 所有TDB监视命令的描述 (56)5.4.1 AMEND_SELACTION (56)5.4.6 DEFINE_SPECIES (58)5.4.7 DEFINE_SYSTEM (58)5.4.8 EXCLUDE_UNUSED_SPECIES (58)5.4.9 EXIT (58)5.4.10 GET_DATA (58)5.4.11 GOTO_MODULE (59)5.4.12 HELP (59)5.4.13 INFORMA TION (59)5.4.14 LIST_DATABASE (60)5.4.15 LIST_SYSTEM (60)5.4.16 MERGE_WITH_DA TABASES (61)5.4.17 NEW_DIRECTORY_FILE (61)5.4.18 REJECT (61)5.4.19 RESTORE (62)5.4.20 SET_AUTO_APPEND_DA TABASE (62)5.4.21 SWITCH_DA TABASE (63)5.5 扩展命令 (64)第6部分数据库模块(TDB)——管理指南 (64)6.1 引言 (64)6.2 TDB模块的初始化 (65)6.3 数据库定义文件语法 (66)6.3.1 ELEMENT (67)6.3.2 SPECIES (67)6.3.3 PHASE (67)6.3.4 CONSTITUENT (67)6.3.5 ADD_CONSTITUENT (68)6.3.6 COMPOUND_PHASE (68)6.3.7 ALLOTROPIC_PHASE (68)6.3.8 TEMPERA TURE_LIMITS (68)6.3.9 DEFINE_SYSTEM_DEFAULT (69)6.3.10 DEFAULT_COMMAND (69)6.3.11 DATABASE_INFORMATION (69)6.3.12 TYPE_DEFINITION (69)6.3.13 FTP_FILE (70)6.3.14 FUNCTION (70)6.3.15 PARAMETER (72)6.3.16 OPTIONS (73)6.3.17 TABLE (73)6.3.18 ASSESSED_SYSTEMS (73)6.3.19 REFERENCE_FILE (74)6.3.20 LIST_OF_REFERENCE (75)6.3.21 CASE与ENDCASE (76)6.3.22 VERSION_DA TA (76)6.5 数据库定义文件实例 (77)6.5.1 例1:一个小的钢数据库 (77)6.5.2 例2:Sb-Sn系个人数据库 (78)第7部分制表模块(TAB) (81)7.1 引言 (81)7.2 一般命令 (81)7.2.1 HELP (81)7.2.2 GOTO_MODULE (81)7.2.3 BACK (82)7.2.4 EXIT (82)7.2.5 PATCH (82)7.3 重要命令 (82)7.3.1 TABULATE_SUBSTANCE (82)7.3.2 TABULATE_REACTION (85)7.3.3 ENTER_REACTION (86)7.3.4 SWITCH_DA TABASE (87)7.3.5 ENTER_FUNCTION (88)7.3.6 TABULATE_DERIV A TIVES (89)7.3.7 LIST_SUBSTANCE (91)7.4 其它命令 (92)7.4.1 SET_ENERGY_UNIT (92)7.4.2 SET_PLOT_FORMAT (92)7.4.3 MACRO_FILE_OPEN (92)7.4.4 SET_INTERACTIVE (93)7.5 绘制表 (93)第8部分平衡计算模块(POL Y) (94)8.1 引言 (94)8.2 开始 (95)8.3 基本热力学 (95)8.3.1 体系与相 (95)8.3.2 组元(Species) (95)8.3.3 状态变量 (96)8.3.4 组分 (97)8.3.5 条件 (98)8.4 不同类型的计算 (98)8.4.1 计算单一平衡 (98)8.4.2 性质图的Steping计算 (99)8.4.3 凝固路径模拟 (99)8.4.4 仲平衡与T0温度模拟 (99)8.4.5 相图的Mapping计算 (101)8.4.6 势图计算 (101)8.4.7 Pourbaix图计算 (101)8.4.8 绘制图 (101)8.5.4 更高阶相图 (104)8.5.5 性质图 (104)8.6 普通命令 (104)8.6.1 HELP (104)8.6.2 INFORMA TION (104)8.6.3 GOTO_MODULE (105)8.6.4 BACK (105)8.6.5 SET_INTERACTIVE (105)8.6.6 EXIT (106)8.7 基本命令 (106)8.7.1 SET_CONDITION (106)8.7.2 RESET_CONDITION (107)8.7.3 LIST_CONDITIONS (107)8.7.4 COMPUTE_EQUILIBRIUM (107)8.7.6 DEFINE_MATERIAL (108)8.7.6 DEFINE_DIAGRAM (111)8.8 保存和读取POL Y数据结构的命令 (112)8.8.1 SA VE_WORKSPACES (112)8.8.2 READ_WORKSPACES (113)8.9 计算与绘图命令 (114)8.9.1 SET_AXIS_V ARIABLE (114)8.9.2 LIST_AXIS_V ARIABLE (114)8.9.3 MAP (114)8.9.4 STEP_WITH_OPTIONS (115)8.9.5 ADD_INITIAL_EQUILIBRIUM (117)8.9.6 POST (118)8.10 其它有帮助的命令 (118)8.10.1 CHANGE_STA TUS (118)8.10.2 LIST_STA TUS (119)8.10.3 COMPUTE_TRANSITION (120)8.10.4 SET_ALL_START_V ALUES (121)8.10.5 SHOW_V ALUE (122)8.10.6 SET_INPUT_AMOUNTS (122)8.10.7 SET_REFERENCE_STA TE (122)8.10.8 ENTER_SYMBOL (123)8.10.9 LIST_SYMBOLS (124)8.10.10 EV ALUATE_FUNCTIONS (124)8.10.11 TABULATE (124)8.11 高级命令 (125)8.11.1 AMEND_STORED_EQUILIBRIA (125)8.11.3 DELETE_INITIAL_EQUILIBRIUM (126)8.11.4 LIST_INITIAL_EQUILIBRIA (126)8.11.5 LOAD_INITIAL_EQUILIBRIUM (126)8.11.10 SELECT_EQUILIBRIUM (128)8.11.11 SET_NUMERICAL_LIMITS (128)8.11.12 SET_START_CONSTITUTION (129)8.11.13 SET_START_V ALUE (129)8.11.14 PATCH (129)8.11.15 RECOVER_START_V ALUE (129)8.11.16 SPECIAL_OPTIONS (129)8.12 水溶液 (132)8.13 排除故障 (133)8.13.1 第一步 (133)8.13.2 第二步 (133)8.13.3 第三步 (133)8.14 频繁提问的问题 (134)8.14.1 程序中为什么只得到半行? (134)8.14.2 在已经保存之后为什么不能绘图? (134)8.14.3 为什么G.T不总是与-S相同? (134)8.14.4 如何获得组元偏焓 (135)8.14.5 为什么H(LIQUID) 是零而HM(LIQUID)不是零 (135)8.14.6 即使石墨是稳定的为什么碳活度小于1? (135)8.14.7 如何获得过剩Gibbs能? (135)8.14.8 当得到交叉结线而不是混溶裂隙时什么是错的? (135)8.14.9 怎么能直接计算最大混溶裂隙? (136)第9部分后处理模块(POST) (136)9.1 引言 (136)9.2 一般命令 (137)9.2.1 HELP (137)9.2.2 BACK (137)9.2.3 EXIT (137)9.3 重要命令 (137)9.3.1 SET_DIAGRAM_AXIS (137)9.3.2 SET_DIAGRAM_TYPE (138)9.3.3 SET_LABEL_CORVE_OPTION (139)9.3.5 MODIFY_LABEL_TEXT (139)9.3.6 SET_PLOT_FORMAT (140)9.3.7 PLOT_DIAGRAM (141)9.3.8 PRINT_DIAGRAM (142)9.3.9 DUMP_DIAGRAM (143)9.3.10 SET_SCALING_STA TUS (144)9.3.11 SET_TITLE (144)9.3.12 LIST_PLOT_SETTINGS (144)9.4 实验数据文件绘图命令 (144)9.4.1 APPEND_EXPERIMENTAL_DA TA (144)9.4.2 MAKE_EXPERIMENTAL_DA TAFILE (145)9.5.3 SET_AXIS_LENGTH (147)9.5.4 SET_AXIS_TEXT_STATUS (147)9.5.5 SET_AXIS_TYPE (147)9.5.6 SET_COLOR (147)9.5.7 SET_CORNER_TEXT (148)9.5.8 SET_FONT (148)9.5.9 SET_INTERACTIVE_MODE (149)9.5.10 SET_PLOT_OPTION (149)9.5.11 SET_PREFIX_SCALING (149)9.5.12 SET_REFERENCE_STA TE (149)9.5.13 SET_TIELINE_STA TE (150)9.5.14 SET_TRUE_MANUAL_SCALING (150)9.5.15 TABULATE (150)9.6 奇特的命令 (150)9.6.1 PATCH_WORKSPACE (150)9.6.2 RESTORE_PHASE_IN_PLOT (150)9.6.3 REINIATE_PLOT_SETTINGS (151)9.6.4 SET_AXIS_PLOT_STATUS (151)9.6.5 SET_PLOT_SIZE (151)9.6.6 SET_RASTER_STATUS (151)9.6.8 SUSPEND_PHASE_IN_PLOT (151)9.7 3D图标是:命令与演示 (151)9.7.1 CREATE_3D_PLOTFILE (153)9.7.2 在Cortona VRML Client阅读器中查看3D图 (154)第10部分一些特殊模块 (155)10.1 引言 (155)10.2 特殊模块生成或使用的文件 (156)10.2.1 POL Y3文件 (156)10.2.2 RCT文件 (156)10.2.3 GES5文件 (156)10.2.4 宏文件 (157)10.3 与特殊模块的交互 (157)10.4 BIN模块 (157)10.4.1 BIN模块的描述 (157)10.4.2 特定BIN模块数据库的结构 (161)10.4.3特定BIN计算的演示实例 (162)10.5 TERN 模块 (162)10.5.1 TERN 模块的描述 (162)10.5.2 特殊TERN模块数据库的结构 (166)10.5.3 TERN模块计算的演示实例 (167)10.6 POT模块 (167)10.7 POURBAIX 模块 (167)10.8 SCHAIL 模块 (167)11.2 热化学 (168)11.2.1 一些术语的定义 (168)11.2.2 元素与物种(Elements and species) (168)11.2.3 大小写模式 (169)11.2.4 相 (169)11.2.5 温度与压力的函数 (169)11.2.6 符号 (170)11.2.7 混溶裂隙 (170)11.3 热力学模型 (170)11.3.1 标准Gibbs能 (171)11.3.2 理想置换模型 (171)11.3.3 规则溶体模型 (171)11.3.4 使用组元而不是元素 (172)11.3.5 亚点阵模型—化合物能量公式 (172)11.3.6 离子液体模型,对具有有序化趋势的液体 (172)11.3.7 缔合模型 (173)11.3.8 准化学模型 (173)11.3.9 对Gibbs能的非化学贡献(如铁磁) (173)11.3.10 既有有序-无序转变的相 (173)11.3.11 CVM方法:关于有序/无序现象 (173)11.3.12 Birch-Murnaghan模型:关于高压贡献 (173)11.3.13 理想气体模型相对非理想气体/气体混合物模型 (173)11.3.14 DHLL和SIT模型:关于稀水溶液 (173)11.3.15 HKF和PITZ模型:对浓水溶液 (173)11.3.16 Flory-Huggins模型:对聚合物 (173)11.4 热力学参数 (173)11.5 数据结构 (175)11.5.1 构造 (175)11.5.2 Gibbs能参考表面 (175)11.5.3 过剩Gibbs能 (175)11.5.4 存储私有文件 (175)11.5.5 加密与不加密数据库 (176)11.6 GES系统的应用程序 (176)11.7 用户界面 (176)11.7.1 模块性和交互性 (177)11.7.2 控制符的使用 (177)11.8 帮助与信息的命令 (177)11.8.1 HELP (177)11.8.2 INFORMATION (177)11.9 改变模块与终止程序命令 (178)11.9.1 GOTO_MODULE (178)11.9.2 BACK (178)11.9.3 EXIT (178)11.10 输入数据命令 (178)11.10.4 ENTER_SYMBOL (180)11.10.5 ENTER_PARAMETER (181)11.11 列出数据的命令 (183)11.11.1 LIST_DATA (183)11.11.2 LIST_PHASE_DA TA (183)11.11.3 LIST_PARAMETER (184)11.11.4 LIST_SYMBOL (185)11.11.5 LIST_CONSTITUENT (185)11.11.6 LIST_STATUS (185)11.12 修改数据命令 (185)11.12.1 AMEND_ELEMENT_DA TA (185)11.12.2 AMEND_PHASE_DESCRIPTION (186)11.12.3 AMEND_SYMBOL (188)11.12.4 AMEND_PARAMETER (189)11.12.5 CHANGE_STATUS (191)11.12.6 PATCH_WORKSPACES (191)11.12.7 SET_R_AND_P_NORM (191)11.13 删除数据的命令 (192)11.13.1 REINITIATE (192)11.13.2 DELETE (192)11.14 存储或读取数据的命令 (192)11.14.1 SA VE_GES_WORKSPACE (192)11.14.2 READ_GES_WORKSPACE (193)11.15 其它命令 (193)11.15.1 SET_INTERACTIVE (193)第12部分优化模块(PARROT) (193)12.1 引言 (193)12.1.1 热力学数据库 (194)12.1.2 优化方法 (194)1 2.1.4 其它优化软件 (195)12.2 开始 (195)12.2.1 试验数据文件:POP文件 (195)12.2.2 图形试验文件:EXP文件 (197)12.2.3 系统定义文件:SETUP文件 (197)12.2.4 工作文件或存储文件:PAR文件 (198)12.2.5 各种文件名与其关系 (198)12.2.6 交互运行PARROT模块 (199)12.2.6.3 绘制中间结果 (199)12.2.6.4 实验数据的选择 (199)12.2.6.6 优化与连续优化 (200)12.2.7 参数修整 (200)12.2.8 交互完成的变化要求编译 (201)12.3 交替模式 (201)12.4 诀窍与处理 (201)12.4.4 参数量 (201)12.5 命令结构 (201)12.5.1 一些项的定义 (201)12.5.2 与其它模块连接的命令 (201)12.5.3 用户界面 (201)12.6 一般命令 (201)12.7 最频繁使用的命令 (202)12.8 其它命令 (203)第13部分编辑-实验模块(ED-EXP) (203)第14部分系统实用模块(SYS) (203)14.1 引言 (203)14.2 一般命令 (203)14.2.1 HELP (203)14.2.2 INFORMA TION (204)14.2.4 BACK (205)14.2.5 EXIT (205)14.2.6 SET_LOG_FILE (205)14.2.7 MACRO+FILE_OPEN (205)14.2.8 SET_PLOT_ENVIRONMENT (206)14.3 Odd命令 (207)14.3.1 SET_INTERACTIVE_MODE (207)14.3.2 SET_COMMAND_UNITS (207)14.3.4 LIST_FREE_WORKSPACE (207)14.3.5 PATCH (207)14.3.6 TRACE (207)14.3.7 STOP_ON_ERROR (208)14.3.8 OPEN_FILE (208)14.3.9 CLOSE_FILE (208)14.3.10 SET_TERMINAL (208)14.3.11 NEWS (208)14.3.12 HP_CALCULATOR (208)14.4 一般信息的显示 (209)第15部分数据绘图语言(DATAPLOT) (215)第1部分一般介绍1.1 计算热力学在近十年内与材料科学与工程相联系的计算机计算与模拟的研究与发展已经为定量设计各种材料产生了革命性的方法,热力学与动力学模型的广泛结合使预测材料成分、各种加工后的结构和性能。
森精机NMV5000操作手册
关于本手册 About this Manual
• 请将此手册置于显著标记位置,以便需要时备查。
• 若对本手册有任何疑问,请致电森精机服务部。
• 若本手册遗失或损坏,请致电森精机服务部或经销商。
• 若因机床改进而造成本手册内容变更,恕不另行通知。
• 保留所有权利:在没有获得森精机的书面同意之前,不允许 对本操作手册进行任何形式的复制。
操作手册 OPERATION MANUAL
适用机型 Applicable Model
NMV1500 DCG NMV3000 DCG NMV5000 DCG NMV8000 DCG/40
NMV8000 DCG/50
适用数控装置 Applicable NC Unit
MSX-701IV
MSX-711IV
在开始操作、维护或编程之前,请仔细阅读森精机、数控装置制造商及设备制 造商提供的手册,从而充分理解手册中包含的信息。 请妥善保存这些手册,切勿遗失。 Before starting operation, maintenance, or programming, carefully read the manuals supplied by Mori Seiki, the NC unit manufacturer, and equipment manufacturers so that you fully understand the information they contain. Keep the manuals carefully so that they will not be lost.
• All rights reserved: reproduction of this instruction manual in any form, in whole or in part, is not permitted without the written consent of Mori Seiki.
Intel Parallel Studio XE 2013 for Windows 安装指南和发行
Intel® Parallel Studio XE 2013for Windows*Installation Guide and Release Notes Document number: 323803-003US25 June 2013Table of Contents1 Introduction (1)1.1 What’s New (1)1.1.1 Changes from Intel Parallel Studio XE 2011 (2)1.2 Product Contents (2)1.3 System Requirements (2)1.4 Documentation (4)1.5 Technical Support (4)2 Installation (4)2.1 Pre-Installation Steps (4)2.1.1 Configure Visual Studio for 64-bit Applications (4)2.2 Installation (4)2.2.1 Using a License Server (5)3 Disclaimers, Notices and Legal Information (5)1 IntroductionThis document describes system requirements and how to install Intel® Parallel Studio XE 2013. Additional release notes for each component, with details of changes and additional technical information, can be found after installation, in the respective components’ Documentation folder.First-time users should view the Getting Started page that is displayed at the end of installation.1.1 What’s NewThis section highlights important changes from the previous product version and changes in product updates. For information on what is new in each component, please read the individual component release notes.Update 4 – June 2013∙Component products updated to current versionsUpdate 3 – March 2013∙Component products updated to current versionsUpdate 2 – February 2013∙Component products updated to current versionsUpdate 1 – October 2012∙Component products updated to current versions1.1.1 Changes from Intel Parallel Studio XE 2011∙Intel® Advisor XE is a new component included in this product.∙Other components updated to current versions∙Support added for Microsoft Windows 8* and Microsoft Windows Server 2012*∙Microsoft Visual Studio 2012* is now supported∙Microsoft Visual Studio 2005* is no longer supported∙Microsoft Windows Vista* and Microsoft Windows Server 2003* are no longer supported ∙Microsoft Windows XP* is deprecated – support will be removed in a future release1.2 Product ContentsIntel® Parallel Studio XE 2013 includes the following components:∙Intel® C++ Composer XE 2013 Update 5 - includes Intel® Integrated Performance Primitives (Intel® IPP), Intel® Threading Building Blocks (Intel® TBB) and Intel® MathKernel Library (Intel® MKL)∙Intel® Visual Fortran Composer XE 2013 Update 5 - includes Intel® Math Kernel Library (Intel® MKL)∙Intel® Advisor XE 2013 Update 3∙Intel® Inspector XE 2013 Update 6∙Intel® VTune™ Amplifier XE 2013 Update 9∙Sample programs∙On-disk documentation1.3 System RequirementsFor an explanation of architecture names, see http://intel.ly/mXIljK∙ A PC based on an IA-32 or Intel® 64 architecture processor supporting the Intel® Streaming SIMD Extensions 2 (Intel® SSE2) instructions (Intel® Pentium® 4 processor or later, or compatible non-Intel processor)o Incompatible or proprietary instructions in non-Intel processors may cause the analysis capabilities of this product to function incorrectly. Any attempt to analyzecode not supported by Intel® processors may lead to failures in this product.o For the best experience, a multi-core or multi-processor system is recommended ∙2GB RAM∙8GB free disk space for all product features and architectures∙Microsoft Windows XP*, Microsoft Windows 7*, Microsoft Windows 8*, Microsoft Windows Server 2012* or Microsoft Windows Server 2008*; 32-bit or “x64” editions -embedded editions not supportedo Support of Microsoft Windows XP is deprecated – a future major release of Intel® Parallel Studio XE will not support Windows XP∙One or more of:o Microsoft Visual Studio 2012* Professional Edition (or higher edition) with C++ component installedo Microsoft Visual Studio 2010* Professional Edition (or higher edition) with C++ and “x64 Compiler and Tools” components installed [1]o Microsoft Visual Studio 2008* Standard Edition (or higher edition) SP1 with C++ and “x64 Compiler and Tools” components installed [1]o For Intel® Visual Fortran, Intel® Advisor XE, Intel® Inspector XE and Intel® VTune™ Amplifier XE use only, Microsoft Visual Studio 2010* Shell and Librariesfrom the Intel® Visual Fortran Composer XE installationo For Intel® Visual Fortran, Intel® Advisor XE, Intel® Inspector XE and Intel® VTune™ Amplifier XE use only, Microsoft Visual Studio 2008* Shell and Librariesfrom an earlier version of Intel® Visual Fortran Composer XE or Intel® VisualFortran Compiler Professional EditionNotes:1. Microsoft Visual Studio 2008 Standard Edition installs the “x64 Compiler and Tools”component by default –the Professional and higher editions require a “Custom” install to select this. Microsoft Visual Studio 2010 and Visual Studio 2012 include this component by default.2. The default for the Intel® compilers is to build IA-32 architecture applications that requirea processor supporting the Intel® SSE2 instructions - for example, the Intel® Pentium®4 processor. A compiler option is available to generate code that will run on any IA-32architecture processor. However, if your application uses Intel® Math Kernel Library,Intel® Integrated Performance Primitives or Intel® Threading Building Blocks, executing the application will require a processor supporting the Intel® SSE2 instructions.3. Applications built with Intel® Compilers can be run on the same Windows versions asspecified above for development. Applications may also run on non-embedded 32-bitversions of Microsoft Windows earlier than Windows XP, though Intel does not test these for compatibility. Your application may depend on a Win32 API routine not present inolder versions of Windows. You are responsible for testing application compatibility. You may need to copy certain run-time DLLs onto the target system to run your application.1.4 DocumentationProduct documentation can be accessed through the Help menu in Microsoft Visual Studio. It can also be found, along with “Getting Started” information, in the Windows “Start” menu und er Intel Parallel Studio XE 2013. Please note that if you view the documentation in Microsoft Internet Explorer*, the browser may display a security warning when you click on links to open a documentation set. If you see this warning, you should click the option to proceed.1.5 Technical SupportIf you did not register your compiler during installation, please do so at the Intel® Software Development Products Registration Center. Registration entitles you to free technical support, product updates and upgrades for the duration of the support term.For information about how to find Technical Support, Product Updates, User Forums, FAQs, tips and tricks, and other support information, please visit/software/products/supportNote: If your distributor provides technical support for this product, please contact them for support rather than Intel.2 Installation2.1 Pre-Installation Steps2.1.1 Configure Visual Studio for 64-bit ApplicationsIf you will be developing 64-bit applications you may need to change the configuration of Visual Studio to add 64-bit support.If you are using Visual Studio 2008 Standard Edition, Visual Studio 2012 or Visual Studio 2010, no configuration is needed to build 64-bit applications. For other editions:1. From Control Panel > Add or Remove Programs, sele ct “Microsoft Visual Studio 2008 >Change/Remove. The Visual Studio Maintenance Mode window will appear. Click Next.2. Click Add or Remove Features3. Under “Select features to install”, expand Language Tools > Visual C++4. If the box “X64 Compiler and Tools” is not checked, check it, then click Update. If thebox is already checked, click Cancel.2.2 InstallationThe installation of the product requires a valid license file or serial number. If you are evaluating the product, you can also choose the “Evaluate this product (no serial number required)” option during installation.If you received your product on DVD, insert the first product DVD in your computer’s DVD drive; the installation should start automatically. If it does not, open the top-level folder of the DVD drive in Windows Explorer and double-click on setup.exe.If you received your product as a downloadable file, double-click on the executable file (.EXE) to begin installation. Note that there are several different downloadable files available, each providing different combinations of components. Please read the download web page carefully to determine which file is appropriate for you.You do not need to uninstall previous versions or updates before installing a newer version –the new version will coexist with the older versions. If you want to remove older versions, you may do so before or after installing the newer one.2.2.1 Using a License ServerIf you have purchased a “floating” license, see http://intel.ly/oPEdEe for information on how to install using a license file or license server. This article also provides a source for the Intel® License Manager for FLEXlm* product that can be installed on any of a wide variety of systems.3 Disclaimers, Notices and Legal InformationINFORMATION IN THIS DOCUMENT IS PROVIDED IN CONNECTION WITH INTEL(R) PRODUCTS. NO LICENSE, EXPRESS OR IMPLIED, BY ESTOPPEL OR OTHERWISE, TO ANY INTELLECTUAL PROPERTY RIGHTS IS GRANTED BY THIS DOCUMENT. EXCEPT AS PROVIDED IN INTEL'S TERMS AND CONDITIONS OF SALE FOR SUCH PRODUCTS, INTEL ASSUMES NO LIABILITY WHATSOEVER, AND INTEL DISCLAIMS ANY EXPRESS OR IMPLIED WARRANTY, RELATING TO SALE AND/OR USE OF INTEL PRODUCTS INCLUDING LIABILITY OR WARRANTIES RELATING TO FITNESS FOR A PARTICULAR PURPOSE, MERCHANTABILITY, OR INFRINGEMENT OF ANY PATENT, COPYRIGHT OR OTHER INTELLECTUAL PROPERTY RIGHT.Intel may make changes to specifications and product descriptions at any time, without notice. Designers must not rely on the absence or characteristics of any features or instructions marked "reserved" or "undefined." Intel reserves these for future definition and shall have no responsibility whatsoever for conflicts or incompatibilities arising from future changes to them.The information here is subject to change without notice. Do not finalize a design with this information.The products described in this document may contain design defects or errors known as errata which may cause the product to deviate from published specifications. Current characterized errata are available on request.Contact your local Intel sales office or your distributor to obtain the latest specifications and before placing your product order.Copies of documents which have an order number and are referenced in this document, or other Intel literature, may be obtained by calling 1-800-548-4725, or go to:/design/literature.htmCeleron, Centrino, Cilk, Intel, Intel logo, Intel386, Intel486, Intel Atom, Intel Core, Itanium, MMX, Pentium, VTune, and Xeon are trademarks of Intel Corporation in the U.S. and other countries. * Other names and brands may be claimed as the property of others.Copyright © 2013 Intel Corporation. All Rights Reserved.。
STM32f10固件库使用手册中文版
UM0427 用户手册32 位基于ARM 微控制器STM32F101xx 与STM32F103xx固件函数库介绍本手册介绍了32 位基于ARM 微控制器STM32F101xx 与STM32F103xx 的固件函数库。
该函数库是一个固件函数包,它由程序、数据结构和宏组成,包括了微控制器所有外设的性能特征。
该函数库还包括每一个外设的驱动描述和应用实例。
通过使用本固件函数库,无需深入掌握细节,用户也可以轻松应用每一个外设。
因此,使用本固态函数库可以大大减少用户的程序编写时间,进而降低开发成本。
每个外设驱动都由一组函数组成,这组函数覆盖了该外设所有功能。
每个器件的开发都由一个通用API (application programming interface 应用编程界面)驱动,API 对该驱动程序的结构,函数和参数名称都进行了标准化。
所有的驱动源代码都符合“Strict ANSI-C”标准(项目于范例文件符合扩充ANSI-C 标准)。
我们已经把驱动源代码文档化,他们同时兼容MISRA-C 2004 标准(根据需要,我们可以提供兼容矩阵)。
由于整个固态函数库按照“Strict ANSI-C”标准编写,它不受不同开发环境的影响。
仅对话启动文件取决于开发环境。
该固态函数库通过校验所有库函数的输入值来实现实时错误检测。
该动态校验提高了软件的鲁棒性。
实时检测适合于用户应用程序的开发和调试。
但这会增加了成本,可以在最终应用程序代码中移去,以优化代码大小和执行速度。
想要了解更多细节,请参阅Section 2.5。
因为该固件库是通用的,并且包括了所有外设的功能,所以应用程序代码的大小和执行速度可能不是最优的。
对大多数应用程序来说,用户可以直接使用之,对于那些在代码大小和执行速度方面有严格要求的应用程序,该固件库驱动程序可以作为如何设置外设的一份参考资料,根据实际需求对其进行调整。
此份固件库用户手册的整体架构如下:定义,文档约定和固态函数库规则。
3DVIA_Composer_2013_DS_CHS
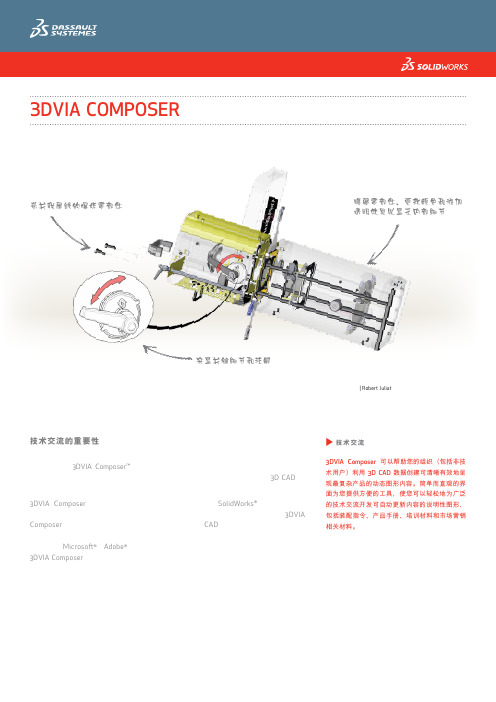
改进产品交流和市场营销相关材料
您的交流不必再受以下因素的影响:用粗糙的工程图来显示您的概念,或者必须要等到设计 完成后才能开始创建产品交流内容。使用 3DVIA Composer,您可以快速方便地创建:
• 详细视图 • 高分辨率图像 • 技术图解 • 交互式动画
创建交互式链接以快速 查看复杂的细节
交互式故事板可在广泛的产品交流内容中 使用,包括在线零件目录和维护手册。
救援设备 | Holmatro Inc.
突出显示经常更换的零部 件的装配程序
DVIA COMPOSER 汇聚所有资源
现在您可以在开发产品的同时设计和制作技术交流内容,这样可使您的文档始终与设计更改保 持同步,产品成型时文档也已准备就绪。
u 技术交流
3DVIA Composer 可以帮助您的组织(包括非技 术用户)利用 3D CAD 数据创建可清晰有效地呈 现最复杂产品的动态图形内容。简单而直观的界 面为您提供方便的工具,使您可以轻松地为广泛 的技术交流开发可自动更新内容的说明性图形, 包括装配指令、产品手册、培训材料和市场营销 相关材料。
香港总公司 香港新界沙田香港科学园科 技大道东2号光电子中心2字 楼216-217室 电话:(852) 2425 8136 传真:(852) 2425 8098
网址
电邮 ictinfo@
中国区Toll-free技术支援热线:400 886 6353
珠海分公司 电话:(86 756) 333 9630 传真:(86 756) 333 3260
上海分公司 电话:(86 21) 6336 6878 传真:(86 21) 6336 6879
• 交互式材料明细表和
IBM Cognos 软件开发工具包版本 11.0.0 混搭服务开发人员指南说明书
Java samples..............................................................................................................................................11 Java sample file locations.................................................................................................................... 11 Running the Java samples................................................................................................................... 12
Chapter 2. Overview of the Mashup Service............................................................ 7
Programming interfaces...............................................................................................................................7 Identifying reports....................................................................................................................................... 8 Output formats.............................................................................................................................................9 Sample programs.......................................................................................................................................10
ADAMS2013安装教程(图文)
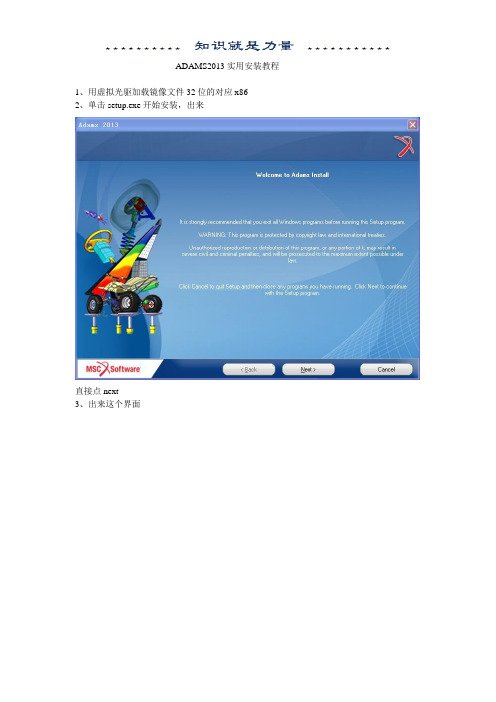
ADAMS2013实用安装教程1、用虚拟光驱加载镜像文件32位的对应x862、单击setup.exe开始安装,出来直接点next3、出来这个界面User name 和 company name 都不用改,反正在这个界面啥也不需要改。
直接next4、在这个界面中,选择安装路径可以不要选择安装在系统盘,d盘、e盘、f盘都可以。
更改完安装路径之后,果断直接next。
不用理会,依然next。
接下来进入安装阶段,慢慢的等吧。
终于等了大约15分钟,5、接下来出现这个界面我们得先制作一个许可证文件licence.txt在镜像文件夹下面找到文件夹MAGNiTUDE把这个文件夹复制到你所安装adams的根目录下面!(比如你安装在了d盘,那么就把这个文件夹复制到d盘)双击文件夹MAGNiTUDE,里面再双击MSC_Calc_20130115.exe(注意:管理员打开)弹出DOS界面输入Y,回车这样许可证就做好了。
然后在安装步骤5中的第一个图片中我们看到有License一栏,但是这里不是安装许可证的!而是要我们输入27500@hostname,这个hostname必须替换成你自己的计算机名称(我们可以在自己的计算机右键属性中查看)输入之后,就直接点next,出来这个界面单击是(Y).出来这个继续点next,出来这个界面由于前几个软件功能都用不到,我们只选最后一个即可。
然后点next出来下面这个继续next继续等。
直接点Finish。
6、接下来进行服务器安装在复制到d盘目录的文件夹下面找到双击(管理员方式打开)点next 再点next 再点next 选择安装路径确定之后出来浏览(Browse)找到制做好license文件Next 再点next点击确定,再点finish。
最后打开Love is not a maybe thing. You know when you love someone.。
materialise magics中文指导书 -回复

materialise magics中文指导书-回复Materialise Magics中文指导书Materialise Magics是一款由比利时公司Materialise开发的三维打印软件,可以用于模型修复、切片、支撑生成等一系列操作,为三维打印提供了全面的解决方案。
本文将详细介绍Materialise Magics的功能和使用方法,帮助读者更好地利用这款软件进行三维打印。
第一步:下载和安装Materialise Magics首先,需要在Materialise官方网站上下载Materialise Magics的安装包。
确保选择正确的操作系统版本。
下载完毕后,运行安装包并按照指示进行安装。
安装过程中需要输入许可证信息以激活软件。
第二步:界面介绍打开Materialise Magics后,我们将看到一个功能丰富且易于操作的界面。
主界面由多个面板组成,包括文件浏览面板、缩略图面板、图层面板和操作面板等。
通过这些面板,用户可以快速访问和操作文件。
第三步:模型导入和修复在Materialise Magics中,我们可以通过导入功能将模型文件导入到软件中。
该软件支持多种常见的三维模型文件格式,如STL、OBJ、PLY等。
导入完成后,我们可以在3D视图中看到模型。
接下来,我们需要进行模型修复。
点击操作面板中的“修复”选项,软件将开始检测并修复模型中的问题,如孔洞、无效网格等。
修复完成后,我们可以使用3D视图和模型修复报告来检查修复结果。
第四步:模型裁剪和切片在Materialise Magics中,我们可以使用裁剪功能删除模型不需要的部分。
点击操作面板中的“裁剪”选项,在3D视图中绘制裁剪面,然后点击“应用”按钮即可完成裁剪操作。
接下来,我们需要将模型切片为打印机可读取的图层。
点击操作面板中的“切片”选项,软件将根据用户设置生成切片。
用户可以根据需要调整切片厚度、打印方向等参数。
切片完成后,我们可以在图层面板中查看并编辑切片结果。
V-DOSC MANUAL V4 0605 1-50
L-ACOUSTICS V-DOSC Manual Version 4
6/29/2005
Page 4 of 158
TABLE OF CONTENTS
TABLE OF CONTENTS........................................................................................................................... 5 LIST OF FIGURES.................................................................................................................................... 8 LIST OF TABLES ....................................................................................................................................10 INTRODUCTION .................................................................................................................................. 11 WAVEFRONT SCULPTURE TECHNOLOGY FUNDAMENTALS ........................................................ 11 THE SOUND REINFORCEME
全新MicrosoftVisualStudio2013指南

Visual Studio 2013 – dektopVisual C++可以在微软官方站点直接下载最新的express版本,注册并且免费使用强大而灵活的 Visual C++ 语言和工具在 Visual Studio 允许在 .NET framework 上运行本机 Windows 应用商店 apps、本机桌面 apps 和托管 apps 的开发。
Visual C++ 包含以下元素:Visual Studio 开发环境开发环境通过编写代码以支持整个开发工作流,从创建和管理的项目,调试,进行分析并部署到最终用户。
可视化工具 C++compiler编译器支持本机代码以 .NET 公共语言运行时 (CLR) 的开发和开发。
VisualC++ 直接支持 x86 计算机的生成,并包括面向 x64 和 ARM 的编译器。
它优化所有平台的性能。
库C 运行库 (crt)包括安全增强选择要了解所造成安全问题的函数。
标准 C++ 库包含 (mfc) 库和标准模板库 (STL)。
活动模板库 (ATL)传递给 COM 组件和 apps 的创建。
Microsoft 基础类 (MFC) 库选件对的桌面 apps 创建具有传统或 Office 样式的用户界面。
并行模式库 (PPL)对 CPU 执行的异步和并行算法。
C++ AMP (C++ 加速的大量并行)对于大量在 GPU 执行的并行算法。
Windows 运行时 C++ 模板库 (WRL),为 Windows 应用商店 apps 和元素的 COM 样式的开发。
.NET framework 选件类库 (通过使用 C++/CLI),STL/CLR 和 C++ 支持库对托管 apps 的开发。
此外,在中,当使用 Visual C++ 时也可以访问 Windows 应用商店 apps 和桌面 apps 的 windows API。
标头文件和 .winmd 文件这些 API 的包含在 Visual Studio 中,在 Windows 软件开发包 (SDK)Windows 8的。
- 1、下载文档前请自行甄别文档内容的完整性,平台不提供额外的编辑、内容补充、找答案等附加服务。
- 2、"仅部分预览"的文档,不可在线预览部分如存在完整性等问题,可反馈申请退款(可完整预览的文档不适用该条件!)。
- 3、如文档侵犯您的权益,请联系客服反馈,我们会尽快为您处理(人工客服工作时间:9:00-18:30)。
MDSC Training Course
Characterization of Proteins
In reality, the problem of measuring the Tg of proteins is more practical than theoretical:
The glass transition is very broad and stability of the DSC baseline is critical
MDSC Training Course
Quantification of DCp at Tg
With High Volume Pans
1. 2.
3.
4.
5.
Calibrate Reversing Cp signal of MDSC using sapphire Measure heat capacity of protein at room temperature using optimum conditions Aluminum crimped pan and 100sec period Measure heat capacity of protein at room temperature using conditions that will be used for measuring Tg (stainless steel pans, 200 sec period etc) Determine new Reversing Cp calibration constant for large pans that provides accurate measurement of absolute Cp Run sample using new Reversing Cp calibration constant
Quantification of DCp at Tg
Isothermal Measurement of Rev Cp for Casein Protein Using High Volume Stainless Steel Pans
MDSC Training Course
Optimizing MDSC Experimental Conditions
MDSC Training Course
DSC Data Ramp After MDSC @ 50°C
Comparison of Cool & Heat Data on 50:50 Mix of Acetylsalicylic Acid and Mag Stearate After 100 Hours at 50°C
o
Solution; Modulated DSC®
Solution; High volume (100ul) stainless steel pans Solution; High volume pans provide hermetic sealing Aluminum hermetic pans will typically allow water evaporation to occur at temperatures above 110°C and this hides the lower energy glass transition
Optimized MDSC Results for Casein Protein
MDSC Training Course
MDSC of Albumin – 1st Heat
MDSC Shows Broad Tg and an Endothermic Process at Tg
MDSC Training Course
MDSC Training Course
MDSC Confirms No Interaction
Acetylsalicylic Acid and Crystalline Sucrose Show No Incompatibility at 50°C
Drift in Reversing Cp Over 100 Hours is Approx. +/- 0.001 J/g°C
MDSC Training Course
Comparison of Data
Comparison of MDSC Isothermal Data at 50°C on 50:50 Mixtures of Acetylsalicylic Acid with Mag Stearate and Sucrose
Large samples are required for improved sensitivity
o
Water content must be maintained
o o
MDSC Training Course
MDSC Approach to Measuring Tg of Proteins
High Volume Stainless Steel Pans Permit Large Samples and Prevent Moisture Loss
MDSC Training Course
Tg & Cp for Casein Protein
20.0°C 1.33J/(g°C)
MDSC Training Course
MDSC Training Course
MDSC Analysis of Acetaminophen
Acetaminophen 13.68mg MDSC 1/50@2
MDSC Training Course
enerally accepted by the pharmaceutical industry that the glass transition of solid proteins can not be measured by DSC due to:
Human Incompatibility??
MDSC Training Course
Miscellaneous
Using Baseline Subtraction When Measuring Absolute Values of Crystallinity
All DSC instruments have some curvature in the baseline. This curvature can cause substantial errors when integrating peaks over a wide temperature range. To correct for baseline curvature;
MDSC Training Course
DSC Data Ramp After MDSC @ 60°C
DSC Data Confirms Formation of Crystalline Structure in 50:50 Mix of Acetylsalicylic Acid and Magnesium Stearate : 60°C for 12 Hours Crystallization confirms that significant crystalline structure was lost during 12 hours at 60°C
MDSC data showed that some crystalline structure formed during 12 hours at 60°C
MDSC Training Course
Still Interacts at 50°C
Acetylsalicylic Acid and Aspirin Tablet Interact Immediately with Magnesium Stearate Even at 50°C
Drift in Heat Flow Over 100 Hours is Approx. +/15 microWatts
MDSC Training Course
DSC After MDSC @ 50°C
DSC Cool/Heat Data on 50:50 Mixture of Acetylsalicylic Acid and Crystalline Sucrose Confirms No Interaction After 100 Hours at 50°C
MDSC Training Course
MDSC Data Shows Interaction
Isothermal @ 122°C
MDSC Training Course
Salbutamol Hemisulfate
MDSC Results Show Salbutamol Hemisulfate Is Stable at 122°C But a 50:50 Mixture With Sucrose Is Unstable
Use high volume, hermetic stainless steel pans to:
Increase size of sample (25-50mg) Prevent moisture loss over the required temperature range to 170°C
MDSC Raw Data Signals
Crystalline Drug Monohydrate 3.75mg (pinhole) MDSC .159/60@1
MDSC Training Course
CP Signals Show Changes in Structure
Crystalline Drug Monohydrate 3.75mg (pinhole) MDSC .159/60@1
