D3Prefs
raid 初始化方法

raid 初始化方法RAID 初始化方法RAID(Redundant Array of Inexpensive Disks)是一种数据存储技术,通过将多个磁盘组合起来,提供更高的数据安全性和性能。
RAID初始化是指在使用RAID技术之前,需要对磁盘进行初始化配置的过程。
下面将介绍几种常见的RAID初始化方法。
1. RAID 0初始化RAID 0是一种无冗余的RAID级别,它将多个磁盘组合起来,将数据分散存储在各个磁盘上,从而提高数据的读写速度。
RAID 0初始化的步骤如下:(1)选择要组成RAID 0的磁盘,确保它们的容量和型号相同。
(2)进入计算机的BIOS设置界面,选择RAID设置选项。
(3)选择创建RAID 0阵列,并选择要组合的磁盘。
(4)完成RAID 0初始化后,可以将其格式化并分配给操作系统使用。
2. RAID 1初始化RAID 1是一种具有镜像冗余的RAID级别,它将数据同时写入两个磁盘,以提供数据的冗余备份。
RAID 1初始化的步骤如下:(1)选择要组成RAID 1的磁盘,确保它们的容量和型号相同。
(2)进入计算机的BIOS设置界面,选择RAID设置选项。
(3)选择创建RAID 1阵列,并选择要组合的磁盘。
(4)完成RAID 1初始化后,可以将其格式化并分配给操作系统使用。
3. RAID 5初始化RAID 5是一种具有分布式冗余的RAID级别,它将数据和校验信息分散存储在多个磁盘上,以提供数据的冗余备份和高性能。
RAID 5初始化的步骤如下:(1)选择要组成RAID 5的磁盘,确保它们的容量和型号相同。
(2)进入计算机的BIOS设置界面,选择RAID设置选项。
(3)选择创建RAID 5阵列,并选择要组合的磁盘。
(4)设置RAID 5的存储容量和校验信息分布方式。
(5)完成RAID 5初始化后,可以将其格式化并分配给操作系统使用。
4. RAID 10初始化RAID 10是一种具有镜像和分布式冗余的RAID级别,它将多个RAID 1阵列组合起来,提供更高的数据安全性和性能。
华三路由器软件升级指南
第三代极速柔性磁盘系列用户指南说明书

Handling PrecautionsAllow the drive to reach room temperature before installing it in the computer.Do not open the E S D bag until youÕre ready to install the drive. Handle the drive by its sides. Do not touch the circuit board (electronics). Do not connect/disconnect any drive cables while your computer is turned on.Do not drop, jar, or bump the drive.1PreIn s tallatio nT hank yo u fo r se le c ting a Maxto r hard d rive sto rag e p ro d uc t.Maxto r's g o al is to p ro vid e yo u w ith the m o st up -to -d ate p ro d uc t p o ssib le ,and w e are c o nstantly e nhanc ing o ur so ftw are and d o c um e ntatio n to b e tte r m e e t yo ur ne e d s .Ple ase visit o ur w e b -site at to vie w the late st that Maxto r has to o ffe r!System /OS Requirem ents¥ A full version of your operating system (OS) is required for a new hard drive installation(see kit package for details)Tools for InstallationThe following tools are needed to install your new M axtor hard drive:¥Small Phillips head screw driver ¥Small pair of pliers or tweezers ¥Your computer user manual ¥Operating system softwareBackup Your DataM axtor highly recommends that you make a backup copy of your files before installing the new M axtor hard drive.Please refer to your computer user manual for more information.2D r ive J um p e r S e t u p Configure the Drive J um persIf specific jumper options are needed for your system configuration, refer to the illustrations and definitions provided in this section.SCSI ID J umper SettingsM axtor SCSI drives typically ship from the factory with jumpers set to SCSI ID 6, and termination power jumped.SCSI ID 7 is usually reserved for the SCSI host adapter.3D rive InstallInstalling Drive Inside of Y our Com puter SystemM ake sure your com puter is pow ered dow n before installing the drive.The following illustrations are of typical computer systems and hard drive mounting styles.Your computer may have a different mounting style. Please refer to your computer user manual for more information.B e sure to secure the drive to the device bay with all four screws.The drive should be oriented with its printed circuit board facing down.Installing 5.25-inch Mounting BracketsIf the hard drive will be installed in a 5.25-inch device bay, attach mounting brackets (available separately) to the hard drive as shown in the figure below.Mounting ScrewsMounting ScrewsMounting BracketNote:M axtor LVD SCSI drives do not support on-board termination. M axtor recommends the use of Active LVD terminators and 68-pin twisted pair cabling.S CS I hos t adapter manufacturers us ually s upply proper cabling and termination with the purchase of an LVD S CS I hos t adapter.A ttention:The R ear J umper O ption Connector is an O E M specific con-nector. M ost installations will never use the jumper options on this connector. Always configure the drive using the jumpers at the Front J umper O ption Connector .Other J umper SettingsTP - Termination Pow er (12 Pin O ption Connector)Pins 11-12 T ermination power ensures that there is a sufficient power level along the entire SCSI bus. It is recommended that the final device on the SCSI bus have the Termination Power jumper installed. All devices in between the host and final device typically have no jumper on Termination Power.Note that Termination Power is not the same as on-board termination, which this drive does not support.S S - S tagger S pinPins 13-14 For most configurations this option is not utilized.M ost current SCSI host adapters offer a Start Unit command enable or disable, which supersedes the functionality of the SS jumper setting. W hen the Delay Spin (DS) jumper isenabled on the drive, the Start Unit command from the SCSI host adapter will send Start Unit commands to all devices on the bus at pre-determined intervals. This can help prevent power supply overload when running several devices on the SCSI bus.W P - W rite ProtectionPins 11-12 B y factory default, the drive is shipped with no jumper on these pins, and the drive can be written to unless protected by application software. W ith the pins jumped, the drive can be used as a read-only device. This feature prevents accidental overwrites and is useful for frequently accessed archives and reference files.Force S E Ð Force S ingle Ended O perationPins 17-18 By factory default, the drive is shipped with no jumper on these pins. W ith most system configurations, it is not necessary to use this jumper. LVD drives are multi-mode capable. They will automatically detect the presence of a sin-gle-ended bus and revert to single-ended mode.DS - Delay S pin Disable Delay S pin: No jumper across pins 15-16 (factory default). Disabling Delay Spin allows the drive to spin up when the system is powered up.Enable Delay S pin: J umper across pins 15-16 This setting will prevent the drive from spinning up until it receives a Start Unit command from a SCSI host adapter. M ost SCSI host adapters have the Start Unit command enabled by default in the host adapter BIOS. Enabling Delay Spin is only necessary when you are starting multiple devices at power on.S CS I IDPin numbers 1-8 are typically referred to in pairs as A0 (pins 1and 2), A1 (3,4), A2 (5,6), A3 (7,8). The jumper pairs will allow configuration of SCSI ID's 0 to 15. All SCSI devices must have an individual ID on the SCSI bus (there is no M aster/Slave set-ting). SCSI ID 7 is usually reserved for the SCSI host adapter.Fault LED and B usy O ut J umpersTypical installations do not require the use of the Fault LED and Busy Out jumpers. The Busy Out signal is usually supplied through the PCI bus to the PC motherboard's Busy indicator LED. If connecting the Busy Out jumper for a drive installed in an external case, please refer to the wiring documentation sup-plied by the manufacturer of the case. Connection of the Fault LED is not recommended in internal or external installations.Computer with available 3.5-inch device bayComputer with available 5.25-inch device bayD I e v i r D O t i B D I 1t i B D I 2t i B D t i B D I 0D I F F O F F O F F F O 1D I N O F F O F F F O 2D I F F O N O F F F O 3D I N O N O F F F O 4D I F F O F F O N F O 5D I N O F F O N F O 6D I F F O N O N F O 7D I T SO H I S C S R O F D E V R E S E R 8D I F F O F F O F F O N O 9D I N O F F O F F O N O 01D I F F O N O F F O N O 11D I N O N O F F O N O 21D I F F O F F O N O N O 31D I N O F F O N O N O 41D I F F O N O N O N O 51D I NO NO NO NO Pin 2Pin 1Pin 17Pin 18SCSI ID 3SCSI ID 2SCSI ID 1SCSI ID 0BUSY LED -/+WRT PROTECT STAGGER SPIN DELAY SPINSINGLE ENDEDFAULT LED GROUND GROUND BUSY LED GROUND TERM POWERSCSI ID 3SCSI ID 2SCSI ID 1SCSI ID 0NOT USED+5 VPin 1Pin 2Pin 11Pin 124 Pin PowerConnector12 Pin Option Connector68 Pin SCSIConnectorPin 168-pin Connector68-pin Drive ConnectorDC Power ConnectorUltra LVD/SE CablePower Supply Cable(3-Pin or 4-Pin)Bevel4Cable Hook-up Attach the SCSI and Power CablesIf the M axtor SCSI drive is the only device attached to the SCSI adapter card, attach the drive at the end of the Ultra LV D/SE cable, farthest from the SCSI adapter card. This connector has a beveled edge and will only fit one way. Then attach an external active LVD/SE SCSI terminator.Please refer to the SCSI adapter card user guide for additional recommendations on data cable place-ment and SCSI termination requirements.Attach a power cable to the power connector on the hard drive. This connector is keyed and willonly fit one way. Check all other cable connections before you turn on the computer.Caution:Do not force or rock the connectors into their sockets on the hard drive. Push them in straight until they are seated firmly.5P a r t it io n i n g F o r m a t t i n gMaxtor hard drives can accept nearly all operating systems. Some operating sys-tems have volume size limitations that may require you to partition your drive into multiple volumes. Please refer to your system or SCSI adapter card user guide for information about formatting and partitioning the drive.General Guidelines¥ DOS /W indow s 9X /M E:Use FDISK.EXE to partition and FORM to format the drive.¥ W indow s N T/2000:Boot your system from the installa-tion floppy disks provided with the OS to partition and format the drive.If you do not have the original installa-tion floppies, you can create them using your W indows installation CD.¥ W indow s X P:Boot your system from the W indows XP installation CD to partition and for-mat the drive. If your system is not capable of booting from a CD, you can download bootable W indows XP installation floppies from M icrosoft's website at ¥ Macintosh:Most non-Apple branded hard drives can be formatted using the Drive Setup utility included in Mac OS 8.6 and above. Mac OS versions before 8.6 will require a third-party hard drive utility such as FW B Hard Disk Toolkit () or Intech Hard Disk SpeedTools() to partition and initialize the drive. Please visit the FW B or Intech website for details on these non-Maxtor software products.www.maxtor.c om6P r o d u c t R e g i st r a t io nTake Advantage of the Benefits!By registering your new M axtor prod-uct,youll have the option to receive product updates, special offers, and other valuable information about other data storage solutions from M axtor.S imply point your web browser to:w w go to theproduct registration page, and com-plete the short questionnaire.Changes are periodically made to the information herein Ð which will be incorporated in revised editions of the publication. M axtor may make changes or improvements in the product(s) described in this publication at any time and without notice.Copyright © 2001 M axtor Corporation. All rights reserved. Printed in the U.S.A. 12/01. M axtor ¨is a regis-tered trademark of M axtor Corporation. Other brands or products are trademarks or registered trademarks of their respective holders.Active LVD TerminatorConnect to SCSI Host Adapter CardUltra LVD/SE CableStandard Cabling for Single SCSI Drive in System(Ultra LVD/ SE cable connections)Cable Connections for SCSI Drive。
Bugzilla操作指南
Bugzilla操作流程 Bugzilla操作流程: 操作流程
Bugzilla操作指南1 Bugzilla操作指南1:注册 操作指南
打开IE在地址栏里输入:http://192.168.1.251/bugzilla进入bugzilla主页面,正常情况下应该显 示如下界面
点击New Account,输入注册用的E-mail,随后在E-mail中会收到一封来自bugzilla的邮件,根 据第一段下给出的相对地址,在IE中输入http://192.168.1.251/cgi-bin/bugzilla/相对地址, 进入注册页面,输入real name、密码以及密码确认,然后点击send就完成了。
4.用户管理 1)“Edit”一栏中的Users Users参数选项介绍如下: 这里主要用来查看和添加用户 Users
点击进入后可以修改用户相关信息
2)修改用户
name: Login name:登陆名称,这里设置email的名称 name: Real name:真实名称 Password: Password:可以为用户设置一个新密码 text: Disable text:如果这里不为空则用户帐号将被禁用,这里用来解释被禁原因 access: Group access: 在组访问设置里面有两列构选框, 第一列(左边列):可以为别的用户设置成为这个组的成员,既是说如果我把一个用户某一组第一列勾选,则授权 这个用户就可以添加其他用户到这个组,相当于管理这个组。 第二列(右边列):成为这个组的成员。 由下图中的勾选及提示就可看出:
4.查询My Bugs
这个选项在Saved Searches下作为一个默认的保存查询,点击这里可以看到当前用户提交的所有bug
Bugzilla操作指南5 保存My Bugzilla操作指南5:保存My Bugs 操作指南 我们可以在Search页面中保存自己的搜索: 例如我们查找状态(status)为all,产品(product)为GEB4.0的所有bug
西部数据 D3 Station 外置硬盘 用户手册说明书
USER MANUALMaxtor Hard Drive website (). Your product comes with a quick start guide and a user’s manual.Following the instructions and precautions of this manual will ensure easier and more enjoyable use of your D3 Station External Hard Drive.Refer to the Troubleshooting section first if you experience a problem with the product.A start guide is provided with the purchase of D3 Station External Hard Drive.The quick start guide explains product components and provides simple instructions on how to install the product.The User’s Manual contains detailed information about features and instructions on using your D3 Station External Hard Drive.Carefully read and understand the “Handling Precautions” section before using the product.Failure to follow all the instructions as outlined in the Handling Precautions section could result in damage toyou or to your D3 Station External Hard Drive.maxtorThis device is not intended for use in the direct field of view at visual display workplaces.To avoid incommoding reflections at visual display workplaces this device must not be placed in the direct field of view.•Read Me First22222About this Manual Quick Installation Guide User’s Manual Using this Manual Icon GuideHandling Precautions3333444444Installation RelatedData Cable UsageShockHumidityMagnetsDisassembly and Label Removal Always Backup your Important Data Regular Virus Scanning Cleaning the productCustody RelatedIntroduction6Introduction7D3 StationConnecting your D3 Station 8910Installation Windows MacintoshUsing your D3 Station1111131314Copying / Moving Files Removable Disk Method Safely Removing your D3 Station For WindowsFor MacintoshD3 Station Software151517Drive Manager Software Drive Manager Installation Using Drive ManagerTroubleshooting19FAQAppendix202020202121Partitioning and Changing File System Type Reformat to FAT32Reformat to NTFS32Reformat in MacintoshFCCSpecificationsProduct CertificationsThe D3 Station External Hard Drive is a high-performance external hard drive that supports USB 2.0 andUSB 3.0. Unlike conventional desktop disk drives, The D3 Station External Hard Drive makes it possible foryou to instantaneously add greater storage capacity to your system without having to take the computer apart.This means that your D3 Station External Hard Drive comes fully partitioned and formatted for your use andyou can instantly access to the drive by simply plugging it into your computer through a USB port.The D3 Station comes with Drive Manager which is a Windows-based integrated-management software that allows the convenient use of External Hard Drives.Drive Manager supports various functions including auto backup, file / folder security, drive diagnostic, partition setup. D3 Station 2TB : HX-D201TDB/GMD3 Station 3TB : HX-D301TDB/GMD3 Station 4TB : HX-D401TDB/GMD3 Station 5TB : HX-D501TDB/GMPower Adapter D3 Station USB 3.0-Cable(D3 Station)When you purchase a D3 Station External Hard Drive, make sure that all components have been included in your product package.USB PortTo use the Hard Drive at its Maximum speed, you need a PC or a Host Card that supports USB3.0 interface Windows Vista / 7 / 8 / 10Verify that the computer meets the minimum system requirements as outlined in System Requirements. Insert the USB cable to the desktop/laptop computer as shown in Figures 3 and 4:User’s ManualInstallation•• Figure 4. C onnecting to a Laptop ComputerTo use the Hard Drive at its maximum speed, you need a PC or a Host Card that supports USB 3.0 interface.Connecting your D3 StationWhen you connect D3 Station External Hard Drive to the computer a small icon will appear in the system tray at the lower right corner of the screen.You are now ready to use the Maxtor D3 Station External Hard Drive.Maxtor driveMaxtorConnect your D3 Station External Hard Drive to the computer. Your Macintosh operating system will then generate a Maxtor drive icon.You are now ready to use the Maxtor D3 Station External Hard Drive.(Software included with your D3 Station External Hard Drive does not support the Mac operating environment.)After clicking the Maxtor icon, the following folder will appear.MaxtorMaxtor()Using your D3 StationNow that you have successfully installed your new D3 Station External Hard Drive, you can copy or move files or whole folders from your new D3 Station to your computer and vice-versa.Copy and paste files from the computer to the D3 Station External Hard Drive (Removable Disk Method).From the Windows Explorer, you will see various drive letters; A, C, your C drive is your local Hard Drive.D3 Station will most likely be the E drive however, it could be any drive letter. For the purposes of this manual,we will assume that D3 Station is the E drive. As well, for practice copying folders and files, we will copy the Temp folder onto D3 Station.D3 Station External Hard Drive.Detaching the USB cable while file transfer is in progress can damage your computer and/or D3 Station External Hard Drive. If you need to disconnect the USB cable, wait for the transfer process to complete first andthen disconnect using the “Safely Remove Hardware” option.D3 StationNow, we will copy the Temp folder from the Local C drive, to the Maxtor E drive. From the left pane in the Windows Explorer : Right Click Maxtor E Click PasteMaxtorClick “Safely Remove Hardware.”Use the Safely Remove button of Drive Manager to safely remove your external hard drive.Safely Removing your D3 StationThis prompt will list all of the Mass Storage Devices like your Local Hard Drive and your D3 Station Hard Drive.Click “Eject Seagate D3 Station” device.MaxtorMaxtorDo not Disconnect D3 Station External Hard Drive's USB cable from the computer while file transfer is in progress. Interrupting the file transfer could lead to data corruption and/or damage to your D3 Station.MaxtorDrive Manager InstallationDrive Manager SoftwareD3 Station SoftwareDrive Manager is bundled software for Windows provided for the convenient use of your External Hard Drive.Drive Manager comprises AutoBackup (a personal backup solution), SecretZone™(a personal data protection solution), and External Hard Drive management tools.Drive Manager must be installed on a computer that is connected to your D3 Station to operate.For further details, refer to the user manual provided with your D3 Station.“Finish”.MaxtorMaxtorTicking noise is an indication of insufficient power.• Check the USB cable connection.• Check the LED light on the External Hard Drive.• Check the power supply to D3 Station External Hard Drive.•If the drive is not being recognized, try plugging it into a different USB port.- USB 3.0To use the Hard Driver at its Maximum speed, you need a PC or a Host Card that supports USB 3.0 interface and USB 3.0 Cable.Type of file system used for the drive, partitioning arrangement, type of operating system, and various other factors canaffect the actual storage capacity displayed by your computer.(1MB=1,000,000bytes and 1GB=1,000,000,000bytes and 1TB=1,000,000,000,000bytes.)Q6. I am using a Mac, and I can’t copy files.Q1. File transfer takes too long.A1.Q2. T he actual storage capacity of D3 Station External Hard Drive is different than the capacity shown on the packaging. A2. Q3. I connected my D3 Station External Hard Drive, and the computer seems to recognize it, but thedrive won’t show up under Windows Explorer.A3. D 3 Station External Hard Drive is by default formatted to NTFS and will work normally when you connect itto your computer. However, if the partition has been erased or the file system has been changed to a one that’s not recognized by Windows, the drive will not appear under Windows Explorer. Try formatting the drive to FAT32 or NTFS.(Caution : Formatting will erase all data stored in the drive.)Q4. I am using Windows and cannot format the drive to FAT32.A4. W indows operating systems that followed Windows NT have limited FAT32 formatting to 32GB.Therefore, if you wish to format your D3 Station External Hard Drive to FAT32, you will need to download a formatutility from our website.(Caution : Formatting will erase all data stored in the drive. We recommend that you back up your data before proceeding.) Q5. My computer will not boot up properly.A5. I f you boot up your system with a D3 Station External Hard Drive connected to the computer, it’s possible thatyour system’s BIOS is attempting to boot from the External Hard Drive.Change the BIOS booting sequence or disconnect the External Hard Drive from the system and then try booting again. A6. I f the drive has been formatted to NTFS, data stored in the drive can only be read by Mac systems.To use the drive on Mac OS X operating systems, use NTFS for Mac Driver or reformat your drive.NTFS for Mac Driver : Refer to page 10Reformat : Refer to page 20• • •- Connect the D3 Station External Hard Drive to the computer.- Click “Start” from the lower left corner of your screen.- Right-click “My Computer” and then select “Manage.”- From the “Computer Management” tool, select “Disk Management.”- Right-click the drive you wish to format and then select “Delete Partition.”- Once drive partition has been deleted, right-click the drive you wish to format and then select “New Partition” as shown in the diagram below.- From Create Partition Wizard, select “Primary Partition” and then enter the desired size of the partition.- From the “File System” menu, select “NTFS” and format.D3 Station15EACTUVThe maximum ambient temperature permitted by the manufacturer (Tma):45 C.This device is not intended for use in the direct field of view at visual display workplaces. To avoid incommoding reflections at visualdisplay workplaces this device must not be placed in the direct field of view.D3 Station External Hard Drive21© 2016 Seagate Technology LLC. All rights reserved. Seagate, Seagate Technology, the Spiral logo, Maxtor and Maxtor Logo are trademarks or registered trademarks of Seagate Technology LLC or one of its affiliated companies in the United States and/or other countries. All other trademarks or registered trademarks are the property of their respective owners. When referring to drive capacity, one gigabyte, or GB, equals one billion bytes and one terabyte, or TB, equals one thousand billion bytes. Your computer’s operating system may use a different standard of measurement and report a lower capacity. In addition, some of the listed capacity is used for formatting and other functions and will not be available for data storage. Quantitative usage examples for various applications are for illustrative purposes. Actual quantities will vary based on various factors, including file size, file format, features, and application software. The export or re-export of hardware or software containing encryption may be regulated by the U.S. Department of Commerce, Bureau of Industry and Security (for more information, visit) and controlled for import and use outside of the U.S. Actual data rates may vary depending on operating environment and other factors. Seagate reserves the right to change, without notice, product offerings or specifications.Seagate Singapore International Headquarters Pte. Ltd., Koolhovenlaan 1, 1119 NB Schiphol-Rijk, The NetherlandsD3 Station External Hard Drive User's Manual (01-16)。
(文档库)解码位置代码

解码位置代码在一个设备显现故障时,您需要明白该设备在系统中的物理位置,以即能够改换它。
errpt或lscfg命令提供了一个位置代码,指定了故障设备所在的位置。
有了位置代码和效劳器手册,或包括您的型号的IBM® Redbooks®,乃至您能够访问IBM Web 信息中心取得更有效的信息,您就能够够识别设备所在的确切位置。
简介碰到设备故障确信是一件麻烦事。
故障设备的类型可能是热插拔硬件,比如风扇冷却装置或热插拔外设组件互连(PCI)卡。
在这两种情形下,都需要明白设备的物理位置,然后才能改换它。
因此,您需要明白设备的位置代码。
故障设备会显示在错误报告中(利用 errpt 命令),该报告还会发布物理位置代码。
另外,利用 lscfg 命令能够取得您设备的物理位置。
在取得该位置后,应该如何定位设备?AIX 内部代码和物理代码AIX 提供了两种不同的代码,它们别离是:IBM AIX®(内部)位置系统代码物理位置代码AIX 内部位置代码可与物理代码配合利用来识别设备,咱们稍后会在本文这了解这种用法。
利用AIX 生成的那些代码引用了某些特定的设备,例如:10-80-00-3,0 SCSI CD Drive10-80-00-2,0 SCSI disk02-08-00 SAS disk上面的代码是访问实际设备的内部途径,能够利用 lsdev 命令来查看它们。
另一个咱们专门感爱好的位置代码是物理类型的,由固件生成。
例如:U789C.001.DQD3F62-P2-D3 SAS Disk Drive自从几年前发布了IBM POWER5 处置器以后,物理位置代码就成了定位设备的首选方式。
作为一项体会法那么,您需要的一般是物理代码。
这也是本文的重点。
表1 中提供的命令使您能够取得有关设备的各类信息。
表1. 取得有关您的设备的信息的命令命令描述lsdev -C -H -F "name status physloc location description"获得AIX(如果存在)和物理位置代码。
LGplc应用指令手册

第五章应用指令5.1 数据传送指令............................................................................5.1.1 MOV, MOVP, DMOV, DMOVP .....................................................5.1.2 CMOV, CMOVP, DCMOV, DCMOVP ...........................................5.1.3 GMOV, GMOVP ............................................................................5.1.4 FMOV, FMOVP ..............................................................................5.1.5 BMOV, BMOVP .............................................................................5.2 转换指令...................................................................................5.1.1 BCD, BCDP, DBCD, DBCDP .......................................................5.2.2 BIN, BINP, DBIN, DBINP .............................................................5.3 比较指令...................................................................................5.3.1 CMP, CMPP, DCMP, DCMPP ......................................................5.3.2 TCMP, TCMPP, DTCMP, DTCMPP ..............................................5.3.3 LD ( =, >, <, >=, <=, <> ) ..........................................................5.3.4 AND ( =, >, <, >=, <=, <>) .........................................................5.3.5 OR ( =, >, <, >=, <=, <>) ...........................................................5.4 增加/减少运算...........................................................................5.4.1 INC, INCP, DINC, DINCP .............................................................5.4.2 DEC, DECP, DDEC, DDECP .......................................................5.5 回转指令...................................................................................5.5.1 ROL, ROLP, DROL, DROLP ........................................................5.5.2 ROR, RORP, DROR, DRORP......................................................5.5.3 RCL, RCLP, DRCL, DRCLP .........................................................5.5.4 RCR, RCRP, DRCR, DRCRP ......................................................5.6 移位指令...................................................................................5.6.1 BSFT, BSFTP ................................................................................5.6.2 WSFT, WSFTP ..............................................................................5.6.3 SR ..................................................................................................5.7 交换指令...................................................................................5.7.1 XCHG, XCHGP, DXCHG, DXCHGP .............................................5.8 BIN 算术指令 ...........................................................................5.8.1 ADD, ADDP, DADD, DADDP .......................................................5.8.2 SUB, SUBP, DSUB, DSUBP ........................................................5.8.3 MUL, MULP, DMUL, DMULP .......................................................5.8.4 MULS, MULSP, DMULS, DMULSP ..............................................5.8.5 DIV, DIVP, DDIV, DDIVP ..............................................................5.8.6 DIVS, DIVSP, DDIVS, DDIVSP ....................................................5.9.1 ADDB, ADDBP, DADDB, DADDBP ..............................................5.9.2 SUBB, SUBBP, DSUBB, DSUBBP ..............................................5.9.3 MULB, MULBP, DMULB, DMULBP ..............................................5.9.4 DIVB, DIVBP, DDIVB, DDIVBP ....................................................5.10 逻辑算术指令 .......................................................................5.10.1 WAND, WANDP, DWAND, DWANDP ..........................................5.10.2 WOR, WORP, DWOR, DWORP ..................................................5.10.3 WXOR, WXORP, DWXOR, DWXORP .........................................5.10.4 WXNR, WXNRP, DWXNR, DWXNRP ..........................................5.11 数据处理指令............................................................................5.11.1 SEG, SEGP ...................................................................................5.11.2 ASC, ASCP ...................................................................................5.11.3 BSUM, BSUMP, DBSUM, DBSUMP ............................................5.11.4 ENCO, ENCOP .............................................................................5.11.5 DECO, DECOP .............................................................................5.11.6 FILR, FILRP, DFILR, DFILRP ......................................................5.11.7 FILW, FILWP, DFILW, DFILWP .....................................................5.11.8 DIS, DISP ......................................................................................5.11.9 UNI, UNIP ......................................................................................5.12 系统指令 ..............................................................................5.12.1 FALS ..............................................................................................5.12.2 DUTY .............................................................................................5.12.3 WDT, WDTP ..................................................................................5.12.4 OUTOFF ........................................................................................5.12.5 STOP .............................................................................................5.13 跳转指令 ..............................................................................5.13.1 JMP, JME ......................................................................................5.13.2 CALL, CALLP, SBRT, RET ...........................................................5.14 循环指令 ..............................................................................5.14.1 FOR, NEXT ...................................................................................5.14.2 BREAK ...........................................................................................5.15 标志指令 ..............................................................................5.15.1 STC, CLC ......................................................................................5.15.2 CLE ................................................................................................5.16 特殊模块指令 .......................................................................5.16.1 GET, GETP ....................................................................................5.16.2 PUT, PUTP ....................................................................................5.17.1 READ .............................................................................................5.17.2 WRITE............................................................................................5.17.3 RGET .............................................................................................5.17.4 RPUT .............................................................................................5.17.5 STATUS .........................................................................................5.18 中断指令 ..............................................................................5.18.1 EI, DI .............................................................................................5.18.2 TDINT, IRET ..................................................................................5.18.3 INT, IRET .......................................................................................5.19 符号反转指令 .......................................................................5.19.1 NEG, NEGP, DNEG, DNEGP .......................................................5.20 位接触指令...........................................................................5.20.1 BLD, BLDN ....................................................................................5.20.2 BAND, BANDN ..............................................................................5.20.3 BOR, BORN ..................................................................................5.20.4 BOUT .............................................................................................5.20.5 BSET, BRST ..................................................................................5.21 计算机连接模块指令.............................................................5.21.1 SND................................................................................................5.21.2 RCV................................................................................................5.22高速计数器指令....................................................................5.22.1 HSCNT ...........................................................................................5.22.2 HSC................................................................................................5.23 RS-485 通讯指令.................................................................5.23.1 RECV .............................................................................................5.23.2 SEND .............................................................................................5 应用指令5.1.1 MOV, MOVP , DMOV, DMOVP1) 功能-- DMOV(P) : 传送在指定设备[ S+1, S ]中的32位数据到指定的设备[ D+1, D ].16位+ + 16 位- 执行条件2)在P0205.1.2 CMOV, CMOVP1) 功能- CMOV(P) : [ S ]的每一位求反之后传送结果到 [ D ].P020MOVP, DMOVP 求反- DCMOV(P) : [ S+1, S ]中的每一位求反之后,结果传送至[ D+1, D ].16 位+ 1 求反求反- 执行条件2)-1) 功能- 从指定的设备[ S ]开始传送‘n ’字的内容,以块的形式传送‘n ’字至以指定的设备[ D ]为开始的区域。
dperf使用方法

dperf使用方法一、安装dperf要使用dperf,首先需要将其安装到您的系统中。
dperf是Go语言编写的,您可以从dperf的GitHub仓库中获取和安装它。
以下是安装dperf的步骤:1. 确保已安装Go语言的运行时环境。
可以通过在终端中运行`go version`命令来检查。
2. 打开终端并执行以下命令以获取dperf的源代码:``````3. 安装成功之后,在终端中执行以下命令以编译和安装dperf:``````4. 安装完成后,您可以在终端中执行`dperf`命令来验证dperf是否已成功安装。
如果您看到dperf的帮助信息,则说明安装成功。
二、配置dperf在运行dperf之前,您需要对其进行一些配置。
以下是配置dperf的主要步骤:1.创建一个配置文件在您的工作目录中创建一个名为`dperf.conf`的文本文件。
这个文件将用于配置dperf的行为。
2. 配置dperf服务器在`dperf.conf`文件中,您需要配置dperf服务器的参数。
以下是一些重要的参数:- `host`:dperf服务器的主机名或IP地址。
- `port`:dperf服务器监听的端口。
- `report_interval`:性能报告的时间间隔。
- `report_file`:性能报告的输出文件。
例如,以下是一个配置示例:```[server]host = localhostport = 8080report_interval = 10sreport_file = /path/to/report.txt```3. 配置dperf客户端在`dperf.conf`文件中,您还需要配置dperf客户端的参数。
以下是一些重要的参数:- `server_host`:dperf服务器的主机名或IP地址。
- `server_port`:dperf服务器监听的端口。
- `duration`:性能测试的持续时间。
- `concurrent_users`:并发用户数。
Perc3SCDCQC Perc4DCDI Perc4EDIDC配置说明

适用于Perc3/SC/DC/QC Perc4/DC/DI Perc4E/DI/DC使用新配置(文档中的配置方法仅供参考)注意:对阵列以及硬盘操作可能会导致数据丢失,请在做任何操作之前,确认您的数据已经妥善备份!!!New Configuration(新配置)选项允许将逻辑驱动器与多个物理阵列相关联(阵列跨接)。
注意:选择New Configuration(新配置)选项将擦除所选控制器上现有的配置信息。
要使用跨接功能并保持现有的配置,应使用View/Add Configuration(查看/添加配置)1.从Management Menu(管理菜单)中选择Configure(配置)。
2.选择Configure(配置)-> 这里建议选择view/add Configuration。
如果是新配置,就选择new configuration.阵列选择窗口显示与当前控制器相连接的设备。
屏幕底部显示热键信息。
热键具有以下功能:<F2> 显示所选逻辑驱动器的驱动器数据和PERC4/Di错误计数。
<F3> 显示已经配置的逻辑驱动器。
<F4> 指定所选的驱动器为热备份。
<F10> 显示逻辑驱动器配置屏幕。
3.按箭头键突出显示特定的物理驱动器。
只有状态是READY的硬盘可以被选择,使用New Configuration 会将所有的硬盘状态变为READY,所以原先的RAID信息以及数据都会丢失!!!图中ID 3:PROC是RAID控制器本身。
4.按空格键将所选的物理驱动器与当前阵列相关联。
5.所选驱动器的指示灯从READY(就绪)更改为ONLINE(联机)A[阵列号]-[驱动器号]。
例如,ONLINE (联机)A2-3表示阵列2中的磁盘驱动器3 。
注意:使用具体阵列中容量相同的驱动器。
如果使用的驱动器容量不相同,则阵列中所有驱动器的容量都被看作和阵列中最小驱动器的容量一样大小。
d3blocks用法
D3.js是一款强大的JavaScript库,用于在Web浏览器中生成动态、交互式数据可视化。
D3.js利用可扩展矢量图形(SVG)、HTML5和级联样式表(CSS)标准。
D3.js没有特定的“D3.js块”的概念,但有一种名为“D3 Blocks”的特定框架,它是一个用于创建独立的交互式图表的框架。
这个框架允许你使用Python创建D3图表,无需其他依赖项,且创建的图表可以在浏览器中绘制,并可以分享给其他人。
使用D3 Blocks创建图表的基本步骤如下:1.初始化:首先,导入D3模块并创建一个D3对象。
pythonfrom d3blocks import D3Blocksd3 = D3Blocks()2.导入数据:使用import_example方法导入你需要的示例数据集。
pythondf = d3.import_example('climate') # 你可以替换'climate'为你需要导入的示例数据集名称3.创建图表:使用特定的方法创建你需要的图表类型。
以下是几种可用的方法:o timeseries():时间序列图,也被称为趋势图,以时间为横轴,观察变量为纵轴,反映时间与数量之间的关系。
o heatmap():热力图,用于显示数据的热度分布。
o particles():粒子图,可以将任何字体转换成带有动态效果的粒子图。
以下是timeseries()方法的示例代码:pythond3.timeseries(df, datetime='date',dt_format='%Y-%m-%d %H:%M:%S', fontsize=10)4.查看图表:最后,使用showfig参数在浏览器中查看生成的图表。
pythond3.showfig(df)以上步骤仅适用于使用Python和D3 Blocks的情况。
请注意,如果你希望使用D3.js 在浏览器中直接进行图表绘制,可能需要学习和了解更多关于D3.js的API和相关技术。
RAID3和RAID5技术详解

RAID3和RAID5技术详解RAID3和RAID5技术详解热插拔一些面向高端应用的磁盘镜像系统都可以提供磁盘的热插拔功能。
所谓热插拔功能,就是允许用户在不关闭系统,不切断电源的情况下取出和更换损害的硬盘。
如果没有热插拔功能,即使磁盘损坏不会造成数据的丢失,用户仍然需要暂时关闭系统,以便能够对硬盘进行更换。
现在,使用热插拔技术只要简单的打开连接开关或者转动手柄就可以直接取出硬盘,而系统仍然可以不间断的正常运行。
校验RAID 3和RAID 5都分别使用了校验的概念提供容错能力。
简单的说,我们可以把校验想象为一种二进制的校验和,一个可以告诉你其它所有字位是否正确的特殊位。
在数据通信领域,奇偶校验被用来确定数据是否被正确传送。
例如,对于每一个字节,我们可以简单计算数字位1的个数,并在字节内加入附加校验位。
在数据的接收方,如果数字位1的个数为奇数,而我们使用的又是奇数校验的话,则说明该字节是正确的。
同样对偶数校验也是如此。
然而,如果数字位1的个数和校验位的奇偶性不一致的话,则说明数据在传送过程中出现了错误。
RAID系统也采用了相似的校验方法,可以在磁盘系统中创建校验块,校验块中的每一位都用来对其它关联块中的所有对应位进行校验。
在数据通讯领域,虽然校验位可以告诉我们某个字节是否正确,但是无法告诉我们到底是哪一位出现了问题。
这就是说我们可以检测错误,但是不能改正错误。
对于RAID,这是远远不够的。
固然错误的检测非常重要,但是如果不能对错误进行修复,我们就无法提高整个系统的可靠性。
举个例子来说,假设我们发现校验块中第10个字节的第5位不正确。
如果这个校验块包含的是另外8个数据块的校验信息,那么哪一个数据块才是问题的罪魁祸首呢?也许你可能会想为每一个数据块都建立一个校验块就可以解决问题。
但是这种方法很难实现。
事实上,RAID主要是借助磁盘控制器的错误报告检测错误位置,并进行修复。
如果磁盘控制器在读取数据时没有发出任何“抱怨”,那么系统将会视该数据为正确数据,继续使用。
D-Cube-Edit_系统安装手册
D-Cube-Edit_系统安装手册D3-Edit HD系统安装手册2006年7月目录目录 (2)前言 (4)第一部分拆箱核对配件 (4)1.4U机箱前面板主要功能介绍 (4)2.后面板接口图 (5)第二部分开机检测 (6)第三部分 D3-Edit HD软件安装说明 (8) 一.软件安装前的准备工作 (8)二.安装数据库 (8)三.全新安装D3-Edit HD软件 (9)第1步 (9)第2步 (10)第3步 (10)第4步 (11)第5步 (11)第6步 (12)第7步 (12)第8步 (12)第9步 (13)第10步 (13)第11步 (14)第12步 (14)第13步 (16)第14步 (16)第15步 (17)四.D3-Edit HD软件升级安装说明 (18)第1步:升级板卡驱动 (18)第2步:卸载老版本软件 (18)第3步:安装新版本软件 (18)第4步:手动升级数据库 (18)五.首次启动D3-Edit HD软件 (19)第1步:配置系统参数 (19)第2步:启动软件 (20)第2步:选择编辑格式 (20)附录1:D3-Edit HD数据库脚本说明(SQL) (21)第一节数据库脚本升级通用操作方法 (21)第1步 (21)第2步 (22)第3步 (22)第4步 (22)第5步 (23)第6步 (23)第二节数据库表格更新通用操作方法 (24)第三节全新创建完整数据库操作方法 (29)第四节软件版本对应数据库脚本升级列表 (31)附录2:X.MIO板卡安装说明 (32)1 新驱动安装说明 (32)2 驱动升级说明 (35)附录3:插件设置说明 (36)附录4:Geforce 7800双屏设置说明 (37)前言本手册作为D3-Edit HD高标清非线性编辑系统的组成部分,所有整机出货产品均配备此系统安装手册。
本手册指导您如何正确连接系统外围设备及配件,并提供了正确安装和卸载D3-Edit HD软件的方法。
学习使用D3

学习使用D3随着互联网时代的不断发展,数据可视化成为了许多行业中重要的一环。
D3(Data-Driven Documents)作为一种流行的数据可视化工具,为开发者提供了丰富的功能和灵活的操作方式。
在本文中,我们将探讨学习使用D3的几个重要方面。
首先,了解D3的基本原理是学习使用它的前提。
D3的核心理念是将数据和文档(如HTML和SVG)相结合,通过DOM操作来创建数据驱动的可视化效果。
这意味着我们可以使用D3来动态地生成图表、图形和动画等各种可视化元素,而不需要手动地去修改HTML代码。
其次,掌握D3的基本操作是使用它的关键。
D3提供了一系列的方法,用于选择、过滤和操作文档中的元素。
通过选择器和方法链的方式,我们可以轻松地选取目标元素,并对其进行各种操作。
例如,可以使用D3的方法来设置元素的样式、位置和大小,以及绑定数据到元素上。
然后,学习使用D3的数据绑定和更新机制是使用它的重要一步。
D3可以帮助我们将数据与元素进行绑定,通过绑定数据可以实现动态更新和交互。
当数据发生改变时,可以使用D3提供的方法来更新对应的元素,从而实现数据驱动的动态效果。
这种机制使得我们能够快速地响应数据的变化,并实时地更新可视化效果。
另外,学习使用D3的可视化组件和布局是扩展其功能的一种方式。
D3提供了各种可视化组件,如轴、比例尺、图例和提示框等,可以帮助我们更方便地创建各种常见的图表和图形。
同时,D3也提供了一些布局算法,如力导向布局和包裹布局等,可以帮助我们自动地排列元素,以实现更复杂的可视化效果。
最后,了解D3的社区和资源是学习使用它的关键之一。
D3拥有庞大而活跃的社区,社区成员们经常分享他们的实践经验和代码示例。
通过参与社区讨论和阅读相关教程、博客和书籍,我们可以更深入地了解D3的使用技巧和最佳实践。
此外,还可以使用D3的在线文档和示例来快速查找和学习相应的功能。
总结起来,学习使用D3需要理解其基本原理、掌握基本操作、了解数据绑定和更新机制、学习使用可视化组件和布局,以及深入了解相关资源和社区。
学习使用D3

学习使用D3D3,即数据驱动文档(Data-Driven Documents),是一个强大的JavaScript图形库,用于将数据与用户界面进行绑定,以创建交互性和动态的数据可视化。
在当今信息时代,数据可视化变得越来越重要,而D3作为一个开源的库,为开发者提供了丰富的工具和方法来创建各种引人入胜的可视化效果。
D3的强大之处在于它不仅仅是一个图表库,而是一套完整的工具集合,允许开发者使用自己的数据来创建自定义的可视化效果。
它通过使用HTML、SVG和CSS等标准的Web技术,使得开发者能够灵活地控制图表的外观和行为。
为了学习使用D3,首先需要掌握基本的前端开发技术,如HTML、CSS和JavaScript。
如果你已经熟悉这些技术,那么学习D3将会变得更加容易。
但是就算你对前端开发不是很熟悉,也不用担心,D3提供了详细的文档和示例代码,可以帮助你快速入门。
在学习D3之前,了解一些基本的数据可视化概念也是非常重要的。
数据可视化是将抽象的数据通过图表、图形等形式呈现给用户,以便更好地理解数据的特征和规律。
熟悉常见的图表类型,如柱状图、折线图和饼图等,可以帮助你更好地理解D3的功能和用法。
掌握D3的核心概念是学习的重点之一。
D3采用了一种数据驱动的方式来创建可视化效果,这意味着你需要首先准备好你的数据,并将其绑定到图表的元素上。
D3提供了一套丰富的API来处理数据的绑定和更新,你可以使用这些API来根据数据的变化来更新图表的显示。
迭代是D3的一个重要概念。
迭代意味着你可以使用相同的代码来处理不同的数据集。
这使得你可以轻松地处理大量的数据,并且可以在同一个界面上创建多个图表,以便进行比较和分析。
D3还提供了许多有用的模块和工具,可以帮助你更方便地创建复杂的可视化效果。
例如,D3可以帮助你创建交互式图表,使得用户可以通过鼠标和键盘来控制图表的行为。
此外,D3还提供了强大的动画功能,可以为你的图表添加生动感和吸引力。
3par存储学习笔记1

在VENTER里导入VSP的OVF模板:导入完成以后,虚拟机配置:1CPU、1GB存,硬盘精简。
启动刚导入的VSP虚拟机:一、3par存储初始化配置:1.配置VSP虚拟机在vCenter里,点击“编辑”—“部署OVF”,通过OVF文件把虚拟机导入并启动,准备配置IP地址:10.1.9.612.开机之后,询问是否进入默认配置选择NO,登陆系统时,用户名root,密码为空,通过下面这个命令配置IP地址:system-config-network –上面命令最后是空格加一个减号,只配置ETH0的IP即可,IP配置完以后,重启网络服务:service network restart3.载入Smart Start在主界面第二项里的第一部分,输入VSP的IP(10.1.9.61)、输入SN,然后等待系统初始化完成,见下图:4.然后执行Smart Start主界面里第二项里的第二部分,输入VSP的IP(10.2.31.148)【图中“1”位置】。
先执行,过程如下:5.在浏览器里,打开VSP,如下:https:// 10.2.31.148登陆权限:用户名:setupusr密码:空提前添加信任站点:再执行:输入VSP的IP地址:打开以后,配置存储的管理地址(10.2.31.149),此存储二个控制器上都有管理口(MGMT),这二个口都需要接到交换机上,这二个口共用同一个管理IP地址。
设置用户名和密码:Username:3paradmPassword:***********二、3par存储概念修改光纤PORT的角色:1.HOST在3par存储里,和其他存储一样,HOST指的是配置有HBA卡的服务器。
2.HOST SET在3par存储,HOST SET可以理解为是一个“主机组”,意思是每个HOST SET里可以包含有多台主机。
3.CPG建议策略命令名按照RAID级别_磁盘类型等信息命名,便于后期使用时快速识别各个CPG的具体配置。
馨睿科D3数字转盘产品
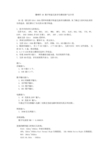
馨睿科 D3 数字转盘无损音乐播放器产品介绍D3 是一款支持32bit 192k采样率的数字转盘无损音乐播放器。
为了满足大家对高品质音乐的追求,我们推出了台式的D3数字转盘。
1. 更齐全的音乐支持格式:支持FLAC, APE, WAV,M4A, AAC, WMA, MP3, DTS, ALAC,OGG,TAK, TTA,WV,AIFF, DSD(DSD64,非DST压缩), DFF, DSF ,SACD ISO格式。
最高支持 32bit 192KHz采样率。
2. 界面支持简体中文,繁体中文,英文显示。
3. 支持32bit 192k数字输出,光纤、同轴、IIS、AES输出各1组。
4. 数据存储接口,有1个SD卡接口, 2个USB 接口,支持FAT32 NTFS文件系统,支持SD卡,U盘,移动硬盘。
5. 4.3寸LCD屏显示播放信息和工作状态。
6. 有线100M网卡接口. 网络播放功能未通,待后续固件升级。
7. 支持ID3信息,音乐封面图片显示,支持CUE。
接口:存储接口:1. SD卡接口1个。
2. USB 接口2个。
数字输出接口:1. RCA同轴数字输出;2. 光纤数字输出;3. IIS 数字输出;4. AES 数字输出;电源接口:1.AC 交流电220V 输入;2.DC 直流9V 输入;可通过开关切换输入电源( 切换交直流电源时候请关机后再切换)。
网络接口:1. 100M以太网接口。
音频参数:数字失真度THD <= 0.00001%更强的解码能力和格式支持度:FLAC: 32khz~192khz 全部压缩级别。
APE:32khz~192khz Fast Normal High压缩级别, 32k-48kHz Extra Hight压缩级别。
WAV: 16khz~192khzALAC:44.1khz - 192khzWMA: 支持到WMA无损的最高格式96K/24BTAK: 44.1khz - 192khzTTA: 44.1khz - 192khzWV: 44.1khz - 192khzM4A:支持AAC: 支持MP3: 支持MP2, MP3格式,支持内嵌封面图片显示。
raid3原理
RAID 3是一种RAID(Redundant Array of Independent Disks)技术,它通过把多个磁盘组合在一起作为一个逻辑磁盘进行操作,通过使用奇偶校验盘来保证数据的安全性。
其工作原理如下:
1. 将数据条带化(striping)分布在多个物理磁盘上,每个磁盘存放数据的一部分。
2. 当读取数据时,RAID 3直接从奇偶校验盘读取缺失的数据部分,然后再重新组合以得到完整的数据。
3. 在写入数据时,RAID 3会将数据条带化写入所有的磁盘。
同时,奇偶校验盘也会相应地更新以保持总和正确。
这种方法的优点是实现简单,对读/写请求的响应时间较接近于单独的磁盘。
然而,其缺点也很明显:因为需要维护奇偶校验信息,所以系统性能可能会受到影响;此外,当一个磁盘失效时,需要从其他磁盘中恢复丢失的数据,这可能需要其他硬盘的介入,可能影响系统的整体性能。
因此,RAID 3适用于对数据安全性要求较高,但预算和空间限制较低的情况。
