海尔扫地机器人T350G说明书
海尔 RWA3026BU1 智能Mini扫地机器人 使用说明书

警告:安全规范使用本产品前,请阅读以下安全说明并遵循所有常规的安全预防措施。
请仔细阅读本说明书,请保留好本说明书。
任何与本说明书不符的操作都有可能导致本产品损坏。
1.只有授权的技术人员方可拆解本产品,不建议用户自行拆解本产品。
2.本产品只能使用工厂配备的电源适配器,若使用其它适配器将可能导致产品受损。
3.双手潮湿时请勿接触电线、插座或电源适配器。
4.请勿使用布帘或身体部位卷进产品驱动轮。
5.请勿将本产品靠近烟头、打火机及其它明火。
6.请在充电结束后对产品进行清洁。
7.请勿过度折弯电线,或将重物及尖锐物品置于机器上。
8.本产品为户内家用产品,请勿在户外使用。
9.请勿坐在产品上。
10.请勿在潮湿环境中使用本产品(如浴室)。
11.使用本产品前,请移除地面上所有易损物品(如玻璃杯、灯具等)以及有可能缠住边刷和吸风通道的物品(如电线、纸片、窗帘)。
12.请勿将本产品置于容易掉落地方(如桌椅上)。
13.使用前请仔细检查电源适配器是否已和插座连接好,否则可能导致电池受损。
14.为预防绊倒,本产品工作时请知会房子里的其他成员。
15.垃圾盒已满时请先清空垃圾盒再使用本产品。
16.本产品使用的温度为0摄氏度至40摄氏度。
17.请勿在高温环境下使用本产品。
18.本产品报废前请将电池从机器上拆下。
19.拆除电池时请确保本产品没有接通电源。
20.请将废弃电池安全回收。
1.仅使用制造商专配的原装可充电电池及充电座。
严禁使用不可充电电池,电池规格信息请参考“产品参数”。
2.禁止在有明火或易碎物品的环境中使用产品。
3.禁止在极热(高于40℃)或极冷(低于0℃)的环境中使用产品。
4.禁止人体的头发,衣服,手指等其他部位靠近产品的开口和运作部件。
5.禁止在潮湿或有积水的地面上使用产品。
6.禁止产品吸取诸如石子,废纸等任何可能堵塞产品的物品。
7.禁止产品吸取任何易燃物品,如汽油、打印机或复印件用调色剂和色粉。
禁止在有易燃物品的清洁区域中使用产品。
1250-1050扫地机说明书
〓目录〓一、扫地车概况 (1)1、扫地车外形尺寸2、技术参数3、操作系统4、安全规范概要二、扫地车的操作 (6)1、预防措施2、操作程序3、操作规程—三、边刷 (8)1、边刷的装配2、边刷的调整3、边刷的更换四、主刷 (10)1、主刷的调整2、检查及更换主刷驱动传送带3、拆卸及更换主刷五、皮带张紧 (13)六、驱动系统 (14)七、方向系统 (14)!八、刹车制动系统 (15)九、吸尘风机 (15)十、挡尘板 (16)十一、灰尘过滤器 (16)十二、集尘箱 (17)十三、电气系统 (18)十四、定期维护与检查 (18)十五、故障维修 (19)十六、充电机的使用说明 (21)十七、蓄电池的使用说明 (25)】非常感谢您选择我们的产品,扫地车投入使用前,请仔细阅读完本指南中的说明,并严格遵照执行,以达到最佳的清扫效果并延长机器寿命。
本电动扫地车执行标准为欧共体98/37/EEC标准。
您有什么意见和建议请与我们联系。
我们热忱、快捷为您服务。
WARING!注意!!!1、本机器仅作为清扫工具,如超出本指南中的说明而作为其他用途,我们不承担由此造成的任何损害的责任。
2、本扫地车可清扫一般的垃圾,不宜清扫绳丝、有毒有害、高温杂物,以免缠绕、灼烫主刷和边刷,使其不能正常工作。
3、本机器只能由授权及训练的人员使用。
4、本机器停止工作时,必须停放在平整的地方。
5、当机器开始使用时,应该让无关人员及孩子们离开现场。
6、打开机罩或机器维护和检修时必须关闭电源钥匙。
$7、当运输清扫车时,确认它已被牢固地绑在运输车上。
8、确保电池充电时处在通风场所。
扫地车停止工作后或运行时出现欠压报警,应及时给电瓶充电,以便延长电池寿命。
9、当您完成工作时应及时拔掉钥匙,避免扫地车未认可的使用。
※一、扫地车概况※㈠ ASD 1050、1250型扫地车外形尺寸?宽×长×高: ASD1050型 1050×1500×1150ASD1250型 1250×1500×1150㈡技术参数1、电机①驱动电动机……………………………………36V,600W②刷子驱动电动机………………………………36V,600W③风机……………………………………………36V,200W④过滤器振打电动机……………………………36V,150W2、轮子①前轮………………………………………………橡胶轮胎,②后轮………………………………………………橡胶轮胎3、方向①方向盘与轴联接……………………………………在前轮②最小转弯半径………………………………………1000MM4、闸——停车闸在后轮,以机械踏板联结。
海尔 HB-X770W 星光 激光镭射扫地机器人 使用说明书

● 非保修条例:
保修服务只限正常使用下有效,人为原因损坏及下列条款均不在免费保修范围: 1、由于使用者疏忽、过失、误用或灾祸损坏造成的产品损坏(如:食物液体沾渍、产品进水、外力震裂、外围部件的刮痕和
损坏等); 2、用户自行拆机,非经厂家授权认可的维修和改装(如:改色、加装或任何非授权改变所造成的损坏); 3、连接不适当的配件,因运输及其他意外而造成的产品损坏; 4、无三包凭证(能够证明该商品在三包有效期内的除外),超过三包有效期; 5、三包凭证上的内容与商品实物标识不符或者有涂改; 6、因不可抗力因素造成的损坏。
自动休眠 按下“任意按键”唤醒
等待指令状态 (按键常亮)
休眠状态 (所有灯都熄灭)
·若主机连续超过12小时无操作,或电量不足将自动关机; ·若长时间不使用主机,建议关闭主机。
3
5
回充
● 主动回充
当全局清扫任务完成后,主机会自动返回充电座充电;
如全局清扫过程中电量不足,主机会自动返回充电座完成充电。 断点续扫功能出厂默认关闭,如需启动,请在APP的设备管理页面开启该功能, 机器在满电之后,将继续清扫。
激光安全信息
本产品激光雷达符合IEC 60825-1:2014的1类激光安全标准,不会对人体产生危险的激光辐射
执行标准
GB 4706.1-2005,GB 4706.7-2014,GB 4343.1-2009,GB 17625.1-2012
8
三包凭证
04 三包凭证
本产品售后服务严格依据《中华人民共和国消费者权益法》、 《中华人民共和国产品质量法》实行售后三包服务, 服务内容如下:
● 长按“ ● 长按“
”3s开机,等待机器指示灯常亮,开机成功 ”3s关机,等待机器指示灯熄灭,关机成功
扫地机中文说明书
清洁与维护···························································································· 18 内部清洁 ························································································ 18 外部清洁 ························································································ 18
维护间隔································································································ 19 工作时间计时器 ············································································ 19 消费者自行维护 ············································································ 19 消费者售后服务网点维护····························································· 20
海尔 TB35 智能规划扫地机器人 使用说明书
目录1.安全说明 (1)2.产品组成 (3)2.1 主机及附件 (3)2.2 主机 (4)2.3 充电座 (4)2.4 尘盒 (5)2.5 水箱 (5)2.6 遥控器 (6)3.产品操作 (7)3.1 快速使用指南 (7)3.2 开机/暂停/待机8................................................3.3 ASLAM 技术规格说明 (9)3.4清扫模式9......................................................3.5水箱操作 (11)4.产品维护 (12)4.1 左右毛刷清洁21..................................................4.2 垃圾盒与滤网清洁 (12)4.3 传感器镜片及电极片清洁 (13)4.4 滚刷组件清洁 (13)4.5 水箱维护 (14)4.6 电池更换 (14)5.产品参数 (15)6.有毒有害物质或元素附表 (16) (17)7保修卡.............................1.安全说明警告 违反安全知识可能导致严重人身伤害或死亡除本公司指定的维修技术人员外任何人不得拆卸、维修或改造本产品,否则可能导致起火、电击或人身伤害。
手湿时不可触碰电器电源线,否则可能导致电击。
不要让衣服或身体任何部位(头发、手指等)卷入机器人的毛刷或轮子,否则可能导致人身伤害。
本产品仅限使用随本机配备的充电器,使用其他品牌充电器可能会导致产品损坏、电击或高压引起火灾。
不可过度弯折电源线或在其上放置重物,否则可能损坏电源线,导致火灾或电击。
不可靠近热源物体或接近易燃物品(如使用汽油清洁机器人)。
注意 违反安全知识可能导致轻微伤害或产品损坏机器人处于长时间闲置状态时,请关闭电源开关,避免电池过放导致损坏。
儿童在场时请谨慎使用机器人以免使儿童受惊或遭成伤害。
IQ350中文操作手册
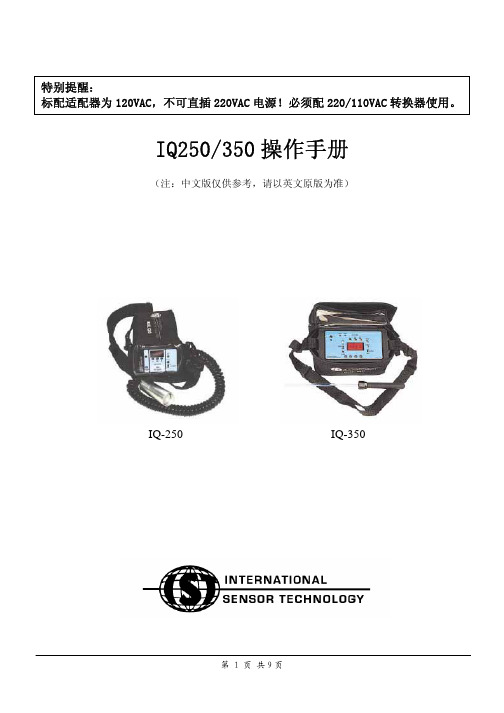
IQ250/350操作手册 (注:中文版仅供参考,请以英文原版为准)IQ-250 IQ-350注意!本手册包括操作使用说明,所有负责操作和维护该仪器的人员都应仔细研究。
为了达到仪器的正确功能,该仪器必须由训练有素的人员进行定期校准和报警测试。
每次使用前都应检查仪器以达到正确的功能。
这里描述的所有IST设计或制造的设备,只能按在这里和所附名牌或跟随产品的其它文件的说明使用。
在这里提出警告或注意的地方,必须遵守。
用户必须知道并明白气体检测的复杂性。
尽管该仪器可能是一个有价值的工具,但就象同类型的所有仪器一样,该仪器有它固有的局限性,这一点用户必须明白。
IST对作为使用该仪器的结果或者基于来自该仪器的数据所做的决定,可能直接或间接出现的任何人身伤害或财产损坏,拒绝所有的责任和义务。
IQ-250/350传感器配置您的IQ-250/350配置用于检测:气体和量程 传感器类型 校准气体: 。
固态传感器加热器电压您的传感器加热器电压应是 V。
正确设定该电压对传感器正确工作是决定性的。
请不要对加热器电压做任何调整,除非IST指示这样做。
目录表概要 3 IQ-350校准/调零 (6)操作 3 氧气传感器校准 (6)使用电源................................................3 报警设定点 7 前面板描述.............................................3 IQ-250的报警DIP开关 (7)报警LED.............................................3 IQ-350的报警DIP开关 (7)报警蜂鸣器/“ACK ALARM”按钮............3 设置报警设定点 (7)低电量LED..........................................3 中止报警设定点 (8)“PUMP”开关(仅IQ-350).....................4 应用提示 8 维护/校准 4 传感器提示 9 更换电池.............................................4 一氧化碳(IQ-250) (9)更换传感器..........................................5 氧气(IQ-250) (9)校准/零点 ............................................5 氧气(IQ-350) (9)IQ-250校准/调零 (5)IQ-250/350单气体便携式仪器1.概要IQ-250/350单气体便携式仪器,设计用于监测150多种不同气体中的一种。
海尔液化气凝胶机器人机器人说明书

HALSEY TAYLOR OWNERS MANUALUSES HFC-134A REFRIGERANTSEE FIG.3FIG. 12,341,46 - SEE FIG. 514,15122976208,9,10,11,47SEE FIG. 4SCWT8A-FPGF-Q*1F97323C (7/98)F IG . 2E = I N S U R E P R O P E R V E N T I L A T I O N B Y M A I N T A I N I N G 4" (102m m ) (M I N .) C L E A R A N C EF R O M C A B I N E T L O U V E R S T O W A L L .A S EG U R E U N A V E N T I L A C I ÓN A D E C U A D A M A N T E N I E N D O U N E S P A C I O E 4" (102m m ) (M ÍN .) D EH O L G U R A E N T R E L A R E JI L L A D E V E N T I L A C I ÓN D E L M U E B L E Y L A P A R E D A S S U R E Z -V O U S U N E B O N N E V E N T I L A T I O N E N G A R D A N T 4" (102m m ) (M I N .) E N T R E L E S ÉV E N T S D E L E N C E I N T E E T L E M U R .F = P O W E R C O R D 4' (1219m m ) L O N G C A B L E E L ÉC T R I C O D E 4' (1219m m ) P I E , D E L A R G O C O R D O N D A L I M E N T A T I O N 4' (1219m m )G = W A L L S C R E W H O L E S A G UJ E R O S D E T O R N I L L O S D E P A R E D T R O U S D E V I S D U M U R H = 2 X 4 B L O CK I N G BL O Q U E O D E 2 X 4B L O C 2 X 4F I N I S H E D F L O O R P I S O A C A B A D O P L A N C H E R F I N IL E G E N D /L E Y E N D A /L ÉG E N D E A = R E C O M M E N D E D W A T E R S U P P L Y L O C A T I O N 3/8 O .D . U N P L A T E D C O P P E R T U B E C O N N E C T S T U B O U T 1-1/2 I N . (38m m )F R O M W A L L S H U T O F F B Y O T H E R S S E R E C O M I E N D A U B I C A R E L T U B O C O R T O D E C O N E X I ÓN A L T U B O D E C O B R E S I N C H A P A R D E 3/8" D E D I ÁM . E X T . A 1-1/2"(38 m m ) F U E R A D E L A L L A V E D E P A S O E N L A P A R E D C O L O C A D A P O R T E R C E R O S . E M P L A C E M E N T R E C O M M A N D É D 'A L I M E N T A T I O N E N E A U P A R T U B E E N C U I V R E N O N P L A Q U É D E 3/8 P O . (9,5 m m ) D .E .C O N N E C T A N T U N E T U Y A U T E R I E D E 1-1/2 P O . (38 m m ) D E P U I S L E R O B I N E T D 'A R R ÊT F O U R N I P A R D 'A U T R E S .B = R E C O M M E N D E D L O C A T I O N F O R W A S T E O U T L E T 1-1/4 O .D . D R A I N U B I C A C I ÓN R E C O M E N D A D A P A R A E L D R E N A J E D E S A L I D A D E A G U A , D E 1¼ D E D I ÁM E T R O .E M P L A C E M E N T R E C O M M A N D É P O U R L E D R A I N D E D .E . 1-1/4" D E S O R T I E D E A U .C = 1-1/4 T R A P N O T F U R N I S H E D P U R G A D O R D E 1¼ N O P R O P O R C I O N A D O S I P H O N 1-1/4 N O N F O U R N I D = E L E C T R I C A L O U T L E T L O C A T I O N U B I C A C I ÓN D E L A T O M A D E E L E C T R I C I D A D E M P L A C E M E N T D E L A P R I S E D E C O U R A N T97323C (7/98)FIG. 4CORRECT STREAM HEIGHTFIG. 5FIG. 3PUSH BUTTON VALVE ADJUSTMENT13024262523,27,28ADJUST THIS SCREW TO ELIMINATE VALVE LEVER "FREE PLAY" OR CONTINUOUS FLOW FROM BUBBLERSTREAM HEIGHTADJUSTMENT SCREWP/N 730856151640GLASS FILLER 8561OPTIONAL PLATFORM GLASS FILLER(NOT SHOWN)P/N 730848051640GLASS FILLER 8480P/N 100322740560GASKET - BLACKP/N 100322740560GASKET - BLACKP/N 15009CNIPPLE - GLASS FILLER97323C (7/98)ITEM NO.PART NO.DESCRIPTION51544C 10263993164016027050864017140374259011100834389066504C 66505C 66506C 31513C 35787C 35762C 35775C 31034C 31027C 35840C 35843C 19424390155035766C 35768C 45679C 45678C 66251C 66252C 66253C 10145343164010150753155031490C 31492C 10420954373030699C 70018C 40267204373066201C 66202C 66203C 66255C 66229C 66257C 19266845155035887C 15005C 26860C 26861C 26862C 50986C 61314C 55996C 55880C 11105104355050770C 11007704389010141825155070184C 401507143730101473543730110208243890100631242700101482131870111088440150724373040150693156055885C 55913C 15008C 35844C 70682C See Color T able See Color T able See Color T ableBubbler Drain Plug Strainer Plate BasinScrew #10-24 x 5/8 HHMS Evaporator (4 GPH)Evaporator (8 GPH)Evaporator (14 & 20 GPH)Cold ControlCompressor Serv. Pak (4 & 8 GPH)Compressor Serv. Pak (14 GPH)Compressor Serv. Pak (20 GPH)Overload/Relay Assy (4 & 8 GPH)Overload/Relay Assy (14 GPH)Overload (20 GPH)Relay (20 GPH)Electrical ShieldRelay Cover (4, 8 & 14 GPH)Relay Cover (20 GPH)T ailpipe (4 GPH)Precooler (8, 14 & 20 GPH)Condenser (4 & 8 GPH)Condenser (14 GPH)Condenser (20 GPH)Cap Push Button Push Button StemFan Motor (4, 8, & 14 GPH)Fan Motor (20 GPH)Fan Blade (4, 8, & 14 GPH)Fan Blade (20 GPH)Fan Blade Nut Fan Motor Bracket Drier (4 & 8 GPH)Drier (14 GPH)Drier (20 GPH)Heat Exchanger (4 & 8 GPH)Heat Exchanger (14 GPH)Heat Exchanger (20 GPH)Power Cord (4, 8, & 14 GPH)Power Cord (20 GPH)Regulator Retaining Nut Regulator Lever Pivot BracketRegulator Retaining Bracket Regulator Holder Regulator StrainerRegulator Mounting Bracket Nylok Nut 1/4-20Snap Bushing WasherCompression Spring Cotter PinAlignment Bracket Foot Pedal Pull Rod Foot Lever Pin Foot Pedal Snap Bushing Hex NutBase Mounting Bracket T oe PlateNut 1-1/4 Slip Nut Adaptor - Drain Nipple - Bubbler Capacitor (20 GPH)T ee - 1/4Side Panel - Right Side Panel - Left Front PanelITEMIZED PARTS LIST12345678*91011121314151617181920212223242526272829303132333435363738394041424344454647484950NS*INCLUDES RELAY & OVERLOAD. IF UNDER WARRANTY, REPLACE WITH SAME COMPRESSOR USED IN ORIGINAL ASSEMBLY .NOTE: All correspondence pertaining to any of the above water coolers or orders for repair parts MUST include Model No. and Serial No. of cooler, name and part number of replacement part.Platinum (PV)Almond (AV)Slate (SV)Stnlss Stl (SS)40153624841026912C 40153624844040153624283040153634841026908C 40153634844040153634283040150744841026904C 401507448440401507442830RIGHT PANEL FRONT PANEL COLOR LEFT PANEL 2222 CAMDEN COURT OAK BROOK, IL 60523PRINTED IN U.S.A.IMPRESO EN LOS E.E.U.U.IMPRIMÉ AUX É.-U.333132NOTE: TOP WASHER IS TO BE PLACED UNDER COTTER PIN WHEN ASSEMBLED353436537383941433540425。
海尔 HC-LB5125G 劲旋风系列 立式双电机吸尘器 使用说明书
ZL1205C ZL1205G ZL1205Z HC-LB5125G
无线设计,走哪吸哪,乐享除尘自由! 立式、手持、车载,一机三用,日常清扫更便捷! 220 0 mAh大容量电池兼具过充放电保护功能,长效续航更安全! 双独立电机搭配两档吸力调节,吸力强劲,日常清扫更随心! 旋风集尘系统,尘气分离更彻底! 电动地刷前置L E D灯 ,阴暗角落尘污一清二楚! 电动地刷+多功能附件配置,全方位清扫更轻松! 电动地刷自行走功能,有效减轻双手束缚!
工厂生产时,只对电池做试 充电检测。电池电量较低, 收到货后需要先充电后再使 用。
请保证前3次充电充满即对电 池激活保护完成。
故障 机器不工作
可能的原因
电池电量耗尽 处于关机状态 开关按钮没按到底
电量指示灯不亮 (充电时)
未插电源 连接导电片接触不良
吸力效果差
电量不足 尘杯已满 吸入口或过滤系统堵塞
附件挂架与手柄的连接
将附件挂架安装在手柄下端,然后将长扁吸与 方毛刷相连后安装在附件挂架上。
吸尘器存放
将手持机重新装回主机,将吸尘器稳定直立放 置在充电座,避免倾倒。
清理尘杯
清理过滤系统 清理电动地刷
推动
当尘杯内的灰尘达到最大指示线时: 1 .按 压手持机释放按钮,握住手持机提手将手
持 机取出。 2.按 压尘杯释放按钮,将尘杯取下。 3.将 尘杯置于垃圾桶上方,将过滤系统向外慢
量 指示灯呈绿色。 5.再 次按压手持机电源开关关闭吸尘器。 使用场合:角落、沙发、缝隙、家具、汽车等。
附件使用方法
1 .将 长扁吸,插入尘杯下端吸入口, 适 用于角落、 缝 隙等场合。
2.将 方毛刷与长扁吸相连后插入尘杯下端吸入口, 适 用于沙发、窗帘等不规则物体表面或软体物 质 等场合。
机器人清洁器说明书

Correct Disposal of this product.This marking indicates that this product should not be disposed with other household wastes throughout the EU. To prevent possible harm to the environment or human health fromuncontrolled waste disposal, recycle it responsibly to promote the sustainable reuse of materialresources. To return your used device, please use the return and collection systems or contact the retailer where the product was purchased. They can take this product for environmental safe recycling.Warranty InformationThe manufacturer provides warranty inaccordance with the legislation of the customer's own country of residence, with a minimum of 1 year (Germany: 2 years), starting from the date on which the appliance is sold to the end user.The warranty only covers defects in material or workmanship.The repairs under warranty may only be carried out by an authorized service centre. When making a claim under the warranty, the original bill ofpurchase (with purchase date) must be submitted.The warranty will not apply in cases of:- Normal wear and tear10.11.- Incorrect use, e.g. overloading of the appliance, use of non-approved accessories- Use of force, damage caused by external influences- Damage caused by non-observance of the user manual, e.g. connection to an unsuitable mains supply or non-compliance with the installation instructions- Partially or completely dismantled appliances WIFI:2400-2483.5MHz, MAX POWRE:20dBm,BLUETOOTH MAX POWR:10dBmTo satisfy RF exposure requirements, a separation distance of 20 cm or more should be maintained between the antenna of this device and persons during device operation.To ensure compliance, operations at closer than this distance is not recommended.CLASS 1 LASER PRODUCT INVISIBLE LASER RADIATION12.13.0304Warning for docking station1. 2.3. 4. 5. 6. 7.“IMPORTANT SAFETY INSTRUCTIONS – SAVETHESE INSTRUCTIONS" and "DANGER – TOREDUCE THE RISK OF FIRE OR ELECTRICSHOCK, CAREFULLY FOLLOW THESEINSTRUCTIONS".This appliance can be used by children aged from8 years and above and persons with reducedphysical, sensory or mental capabilities or lack ofexperience and knowledge if they have beengiven supervision or instruction concerning use ofthe appliance in a safe way and understand thehazards involved.Children shall not play with the appliance.Cleaning and user maintenance shall not be madeby children without supervision.Children should be supervised to ensure that theydo not play with the appliance.If the supply cord is damaged, it must be replacedby a special cord or assembly available from themanufacturer or its service agent.Docking station is only applicable to the productM7/M7 Pro.Warning: The battery charger(Docking station) isnot intended to charge non-rechargeablebatteries.Warning for batery1.2.3.4.5.6.7.8.9.Do not dismantle, open or shred secondary cells orbatteries.b) Do not expose cells or batteries to heat or fire.Avoid storage in direct sunlight.Do not short-circuit a cell or a battery. Do not storecells or batteries haphazardly in a boxor drawer where they may short-circuit each other orbe short-circuited by other metal objects.Do not remove a cell or battery from its originalpackaging until required for use.Do not subject cells or batteries to mechanical shock.In the event of a cell leaking, do not allow the liquid tocome in contact with the skin or eyes. If contact hasbeen made, wash the a ected area with copiousamounts of water and seek medical advice.Do not use any charger other than that specificallyprovided for use with the equipment.Observe the plus (+) and minus (–) marks on the cell,battery and equipment and ensure correct use.Do not use any cell or battery which is not designedfor use with the equipment.Do not mix cells of di erent manufacture, capacity,size or type within a device.050612.13.14.15.16.17.18.19.20.21.22.Always purchase the correct cell or battery for the equipment.Keep cells and batteries clean and dry.Wipe the cell or battery terminals with a clean dry cloth if they become dirty.Secondary cells and batteries need to be charged before use. Always use the correctcharger and refer to the manufacturer’s instructions or equipment manual for proper charging instructions.Do not leave a battery on prolonged charge when not in use.After extended periods of storage, it may be necessary to charge and discharge the cellsor batteries several times to obtain maximum performance.Secondary cells and batteries give their best performance when they are operated at normal room temperature (20 °C ± 5 °C).Retain the original product literature for future reference.Use only the cell or battery in the application for which it was intended.When possible, remove the battery from the equipment when not in use.Dispose of properly.10.11.Keep cells and batteries out of the reach of children.Seek medical advice immediately if a cell or a batteryhas been swallowed.[symbol IEC 60417-5957( 2004-12 )][symbol ISO 7000-0790( 2004-01 )][symbol IEC 60417-5031( 2002-10 )][symbol IEC 60417-5032( 2002-10 )][symbol IEC 60417-5172( 2003-02 )]time-lag miniature fuse-link where X is the symbol forthe time/current characteristic as given in IEC 60127for indoor use onlyread operator's manualdirect currentalternating currentclass II equipment070817。
海尔 VC35U1 视觉导航扫地机器人 使用说明书

产品安装使用说明产品维护产品参数常见问题安全信息产品介绍02装箱清单01050608121314三包凭证16保修卡17高效滤网X1拖布X1充电座X1主机X1电源适配器X1边刷清洁刷X1X2二合一水箱X11使用说明快速使用指南主机按键回充键短按:回充长按:定点清扫模式灯光白灯呼吸:充电中白灯闪烁:回充中配网长按启动键+回充键灯光白灯闪烁:配网状态白灯常亮:联网成功白灯熄灭:未联网成功启动键短按:清扫/暂停灯光白色常亮:待机或清扫状态红灯闪烁:故障状态主机正面主机背面前撞电源开关扬声器万向轮充电极片电池防坠传感器边刷驱动轮滚刷滚刷盖板尘盒水箱水箱橡胶塞水箱拖布尘盒上盖尘盒底盖初级滤网高级滤网充电座信号通信窗指示灯电源适配器插口回充电极片1.从包装盒中取出以下物品3.将扫地机器人靠上充电座充电4.安装手机客户端,绑定扫地机器人打开主机物理开关,将主机手动放置到充电座上进行充电。
手机扫描下方二维码,下载并安装手机客户端。
详细操作请参考《快速使用指南》。
5.开始清扫A.短按启动键或使用APP 启动清扫任务B.电量过低时机器人将无法开始清扫,建议首次使用前先充满电。
(电源指示灯白色长亮时,表示充电完成。
)2.将充电座靠墙放置,并连接电源A .找到电源接口,将电源适配器插在充电座上,整理线材后,将充电座靠墙放置。
B .请确保充电座两侧1米,前方2米的空间内没有障碍物。
电源指示灯颜色*白灯呼吸:充电中*白灯常亮:充电完成主机x1充电座x1电源适配器x1*红灯快闪:故障状态1.开/关机2.机器充电3.机器配网1. 为确保扫地机器人能联网,请将充电座放置于WiFi 能覆盖的范围内。
安放充电座请在水平地面靠墙放置充电座,并保证充电座的两侧和前方有足够的空间。
连接电源适配器与充电座,并将电源适配器插入电源插座。
A.当主机清扫结束后,主机将自动返回充电座充电。
如果主机无法返回充电座,请尝试移去充电座周围的障碍物,或将主机抱回充电座进行充电。
海尔 tumble 干衣机用户手册说明书
Tumble DryerThank you for your trust and for buying our tumble drier. We hope it will successfullyserve its purpose for many years.This appliance was designed for drying clothes,for home use only.Laundry dried in the tumble drier is dried quickly,is soft and smooth and does not change theshape during drying. With a tumble drier, there isno need for an extra room and no need for ropesand waiting for a sunny day.Instructions for Use should be of some helpto you therefore it is recommendable to readthem carefully and to keep in an adequateplace. All warnings on safe use of the dryershould be considered.Instructions for Use have been prepared fordifferent models of tumble dryers. Onlydescriptions applying to your type of dryerwhether venting or condenser-type should beconsideredBefore Use (18)Useful HintsImportant Warnings (18)Positioning and Installation .............. 19-20 Choosing the Right PlacePositioningMoist Air OutletConnecting to Power SupplyDoor (20)Description of the Appliance (21)Extractor dryerCondensation dryer Drying ................................................. 22-23 Preparing the Laundry for DryingControl LampON/OFF and Drying Time Selection KnobTemperature Selection SwitchDrying TimeDrying ProcedureEconomic use of the dryerAfter drying – condensation type dryerAfter drying – extractor dryerCleaning and Maintenance ............... 24-25 HousingReplacement of the lampCleaning of extractor dryerCleaning of condensation dryerTrouble Shooting Guide (26)Instructions for Use 17Before UseWipe the interior of the drum with soft cloth and liquid detergent. Do not use aggressive cleaning agent which could damage the surface. Load the appliance with old wet clothes and set the drying time to 45 minutes.Useful Hints•Drying a large quantity of laundry is not recommended because it will remain creasedand unevenly dried (max. 5 kg of dry resistantlaundry is recommended).•Drying very delicate laundry (woolens, silk garments) is not recommended as they mayshrink or lose shape. • Synthetic curtains, fabrics with metal threads, nylon stockings, as well as lingerie with prevailing foam rubber components or rubber-like materials, should be dried at low temperature setting (delicate laundry programs or time setting programs).• Put delicate laundry into a special sack, when drying together with other laundry.• When drying is finished, immediately take the laundry out of the drum so that it won't crease. • When drying laundry in the dryer there is no need to add a conditioner. Conditioners are added only when rinsing synthetics to neutralise static electricity.• When buying clothes, especially underwear, do not forget that they shrink during washing as well as during drying.• Clothes marked with a "no tumble dry" label, are not suitable for drying in the tumble drier. • Energy consumed whwn drying the laundry is essentially incrased if your washing machine is spinning at less than 800 r.p.m. In that case it is recommended to purchase an independent spin intended for additional water extraction.Important Warnings• Only laundry washed with water can be dried in this dryer. Never try to dry laundry washed or cleaned with inflammable cleaning agents (e.g. benzine, trichlor ethylene), as it may cause explosion.•Never let children play near the appliance or even with the appliance, while it operates.• After cleaning teh filter has to be reinserted into teh air duct. Operating the appliance with damaged filter or without the filter is dangerous and can cause fire.• After the use always switch off the dryer . •Never let children or pets enter (the drum of) the dryer(drying time selection knob is in the position “0”) and disconnect the power supply.•The appliance my not be built-in under the kitchen worktop in a row of cabinets, because the use of the appliance withoutthe top cover is not allowed for safetyreasons. Likewise, the removal of the rear panel and the bottom of the appliance are also not allowed.• The appliance should be positioned in such way to provide normal ventilation.• All interventions on the machine should be left to an expert. Call the authorized service station. The address is in this manual, if not, contact your purchaser.• The belt can be replaced by a service engineer only, who incorporates an original spare part with marking OPTIBELT-RB POLY-V PH 1930 5M – 606532.• Data platc with all essential information on the dryer is placed under the door frame.WHEN YOU FIND YOUR APPLIANCE IS OUT OF USE AND NO LONGER NEEDED, TRY NOT TO BURDEN THE ENVIRONMENT WITH IT.CALL YOUR NEAREST AUTHORIZED"COLLECTING SERVICE FOR USEDAPPLIANCES".Positioning and InstallationYour drying machine can be placed in any room with adequate ventilation.Choosing the Right PlaceA - Venting - type DryerThe most suitable place is a room with a window or with an air-conditioning fan, which is mounted into air-duct or guided out in the open (Figure 1).In closed, smaller rooms without adequate ventilation there is too much moisture in the air, drying time is increased and so is energy consumption.If during the drying procedure there isn't adequate ventilation in the room, we recommend you direct moist air out in the open by means of vent pipe (Fig. 2).Vent pipe can be bought in any technical store (identification code PIPE SP-377628).B - Condenser - type DryerDo not install the condenser dryer into the room where a danger of freezing can occur. Freezing of water in the condensed water drawer and the pump can damage the appliance. PositioningThis dryer is a self standing appliance and can stand alone, or it can be placed either together with a washing machine or in the kitchen as a kitchen unit.If the floor is uneven, use the adjustable feet tolevel the machine.3a Undo the nuts. Rotate the feet to level themachine (fig. 3).Lock the nuts (fig. 3a).•Do not remove the adjustable feet. The machine must be placed horizontally.• Some models of tumble dryers are supplied withvacuum leg braces, enabling the appliance tobe placed on top of a washing machine, withouthazard of falling or tripping during the operationof either appliance.•Do not put the dryer on the thicker rug thuspreventing the possibility of air circulation. Moist Air OutletA – Vent dryerThere are two openings for venting out humid air, which are situated at the bottom left-hand rear side part of the dryer. Depending on the position of the machine, please, close down one of the openings with the front cover, which has already been fastened on it, or attached to the drum (Fig 4).Fix the cover by inserting a coin into the slash turning it clockwise. It can be removed by turning in the opposite direction.If during the drying cycle the airing is not good enough, the air-vent tube can be inserted (screwed) into the hole. The distance between the dryer and venting opening (airduct or window) must not exceed two meters, otherwise condense can accumulate in the tube, (Fig 5).1 Decorative cap2 Vent pipeB –Condenser - type DryerHumidity from the laundry in the condenser dryer is extracted into the air cooler and accumulated in the drainage container or conducted directly into the moist air outlet. After every drying the condensed water drawer should be emptied, of which you are reminded by the control lamp which is on when the container is full. The air cooler should be cleaned in time (see the chapter Maintenance and Cleaning)Instructions for Use 19Channelling the condenser tube to the drain outletTake off the condensed water drawer tube from the rear side of the dryer and by fitting an elbow on it channel the tube into the drain outlet. Height of the drain must not exceed 800 mm.Connecting to Power SupplyThe appliance is connected to the power supply by means of a cable cord plug. The wall socket should be earthed (safety socket). Required nominal current and frequency are stated on the rating plate. The wiring should withstand maximum load. Electric connection and earthing should be carried out in accordance with current standards and regulations.IMPORTANTIn the supply cord is damaged, it must bereplaced by the manufacturer or his service agent or a qualified person in order to avoid hazard.• The appliance should be placed in the position,where the plug is within reach.DoorDoor of the dryer can be opened by pressing the door frame against the machine, as shown in the figure.The door is closed in the same way, If the door is not closed properly the machine will not operate.Be careful not to pinch the laundry with the door as it might get damaged.IMPORTANTYou may open the door during drying. The operation of the machine is interrupted, but it goes on as soon as you close the door.Description of the Appliance Extractor dryerCondensation dryer1. Control panel2. Condensation receptacle3. Door4. Air cooler5. Vent aperture6. Cooling air aperture7. Adjustable legs8. Filter9. Time selection button and ON / OFF button10. Control lamp11. Low drying temperature selector12. Signal lamp – condensation receptacleInstructions for Use 21DryingDrying programme selection clements are fited in the control panel as well as the indicator light which is on during the operation of the machine. Preparing the Laundry for Drying• Sort the laundry before drying according to typeof the laundry.• Do the buttons, zippers, join the strings and pullout the pockets.•Very delicate laundry (fine underwear with laces) should prior to drying be put in a specialsack so that it won't get damaged by buttons,zippers and pins.• We recommend loading the drum with items ofdifferent size. Larger pieces of laundry get tucked during drying. So we recommend youtake them out, shake them and then put themback.•When drying large sheets (bed sheets, tablecloths) put 2 to 3 pieces for one load and whendrying delicate smaller items (shirts, blouses) fillonly 5 to 6 pieces for one load (max 2,5 kg).• Never fill the appliance with drip wet laundry.•Most clothes nowadays have labels markedwith recommended drying mode.Control LampWhen the machine is switched on, the lamp is on. ON/OFF and Drying Time SelectionRotate the knob clockwise.Switching ON/Switching OFFThe appliance is switched off when in position "0", and switched on when in any other position than "0".DryingDrying time is selected with knob (from 130 to 20 minutes). Numbers on the knob indicate minutes.Drying time can be changed any time during the drying procedure.Cooling10 minutes before the drying programme isconcluded, the cooling procedure starts (the heaters are switched off). The laundry is cooled down as well, so it won't get creased. After cooling, the drum stops and you can take the laundry out of the machine. Temperature Selection Switch This switch is used to select correct drying temperature. Switch it on for lower temperatures (delicate laundry). When switched off, the temperature is higher and drying time shorter (resistant laundry).Light – condenser tank(at condenser type dryer only)The light turns on and the drying programme will stop whenever the condenser tank is full. After the tank is emptied and reinserted, the programme will continue automatically.Drying TimeDrying time depends on the number of revolutions when spinning the laundry in the washing machine, on quantity and type of fabric to be dried and on the requested degree of drying.For easier selection of drying time, refer to the table on the front panel of the dryer.Symbols:Kg Quantity of dry laundryNumber of washing machine spinrevolutionsType of laundryNon-delicates (cotton, linen,..)Delicates (synthetics, different kinds offabric)Drying degreeCupboard dryIron dryDrying Procedure• Fill the drum with laundry.•Close the door and connect the appliance topower supply.• Choose the correct drying temperature.• Select the drying time. The drier is switched onand starts operating.Economic use of the dryer• Time and energy will be saved with your dryer,if the following is considered:•spin the laundry as much as possible – thehigher the number of spin revolutions theshorter will be drying time and the energyconsumption lower;•by setting the adequate drying temperature,over-drying of laundry can be avoided andconsequently difficult ironing;• always load the dryer maximally as this is themost economical. At the same time you can drythe laundry for “dry, ready to be stored” and “dry for ironing” by taking the latter out when it isstill adequately moist for ironing;•by regular cleaning of the filter an optimumdrying time with minimum energy consumptioncan be ensured.• room in which your dryer is situated should beadequately vented with no higher temperaturethan 25o C (should be considered with condenser-type dryer only);•Venting fissures and the opening on the front or on the rear side of the dryer must be free . Aftercleaning, close the door of the dryer so that thedrum light will turn off. ( models with illuminateddrum).•dryer consumption when used at a lower electric power rate can additional save theenergy.For your convenience the chart below indicates approximate values for 5 kg of test laundry at different washing machine spin stages. (program – dry for closet)extent ofmoisturedrying timein minenergy consumptionin kWhRPM/minl %extractordryercondensa-tion dryerextractordryercondensa-tion dryer 800 3,5 70 110 100 3,35 3,65 1000 3,1 62 98 90 3,0 3,2 1200 2,8 55 88 80 2,7 2,9 1400 2,5 50 80 72 2,4 2,6 1600 2,4 47 75 70 2,3 2,5Measured quantities may differ from the indicated because of differences in the type and quantity of laundry, spinning, voltage supply oscillation, as well as the temperature and humidity of the room.After drying - condensation type dryer• Open the dryer door.• Clean the filter. If the filter is not cleanedregularly, the air circulation is obstructed, thedrying time is longer, and it may also causeoverheating failure of the appliance.• Reinsert the filter.• Extract the laundry.• Close the door.• Empty the condensation receptacle.• Occasionally clean the air cooler.• Disconnect the mains supply.After drying - extractor dryer • Open the dryer door.• Clean the filter. If the filter is not cleanedregularly, the air circulation is obstructed, thedrying time is longer, and it may also causeoverheating failure of the appliance.• Reinsert the filter.• Remove laundry from the drum.• Close the door.• Disconnect the mains supply.Instructions for Use 23Cleaning and MaintenanceBefore cleaning, disconnect the appliance from power supply.HousingWipe the housing with a soft wet cloth and mild cleaning agent. Do not use aggressive cleaning agent which could damage the surface. Replacement of the lamp(only some models have it)•Before you replace the lamp disconnect theappliance from the power supply or turn-offthe safety fuse.• Open the door.• Undo the lamp cover (inside the door aperture).• Replace the lamp. Maximum possible power ofthe lamp is 10 W.• Firmly screw the lamp cap again. Mind that thelamp cap together with a seal is well embedded, otherwise moisture can comeinside and cause a short circuit.Fluff FilterAfter each drying remove the fluff trap filter from its cabinet located inside the door and gently wipe over the filter with a soft cloth or soft brush to remove the coating of fibers and threads.Clean the filter cabinet as well.Fluff trap filter can also be cleaned under the running water, however it must be dried before being replaced.NOTEFluff on the filter is a consequence of normal wear of the material and has nothing to do with drying in the machine. When drying the laundry out in the open, the fluff is carried away by the wind.Cleaning of extractor dryerIf your drier is placed in a room with poor air ventilation or if it often operates, dust deposit in the interior of the appliance (on the bottom and in the outlet pipe, which could be the cause for malfunctions. So once a year, wipe the dust in the interior of the drier.Cleaning procedure- Pull the plug out of the wall socket.- Clean (suck out) the moist air outlet throughthe opening on the rear or side wall (A) and thevent pipe.- Undo the screws and remove the cover (B).- Clean (with a vacuum cleaner) the bottom of thedrier and parts on the bottom.- Reinsert the cover in reverse order.Cleaning of condensation dryer Emptying the water tank:It is recommended to empty the condensed water drawer after each drying thus avoiding the automatic break of drying operation due to the full tank. The activated control lamp will remind you of that.1. Pull out the water tank2. Pull out the draining nozzle, pour out thewater and replace the container.WARNING!Water from the condenser receptacle is not for drinking! Cleaning the Air-coolerCheck the air cooler occasionally, and remove any accumulated fluff particles. Pull the handle off the air cooler and remove it. Rinse it on both sides with lukewarm water to eliminate accumulated fibres of the laundry. Dry it properly and reinsert it into its bedding. At the same time clean the air duct in which the air cooler is situated.Instructions for Use 25Trouble Shooting GuideDuring operation, you can come across some troubles that in most cases result from improper handling of the appliance and can easily be eliminated by the user.Malfunction Check the following:The machine doesn't operate:- C heck the supply in the outlet socket and the fuse.- Make sure the cable cord is correctly plugged into the socket.The socket is energized, but the drum doesn't rotate:- I s the door correctly closed (if not, push them towards the machine). - Is the drying time correctly set?-If the condenser tank is full or not properly inserted up to the end (only at condenser dryer)Wet laundry:- I s the fluff filter clean?- Is the room well ventilated?- Is the amount of loaded laundry too large?- I s the vent pipe too long?- Whether poorly spun laundry was loaded in the dryer or insufficientdrying time was set.Laundry not uniformly dried:- I s the amount of loaded laundry too large?- D oes the load consist of only large pieces of laundry (always loadsmaller and larger pieces together).- Does the load consist of laundry made of different materials (alwaysload clothes made of similar fabrics).After you have considered all the above stated instructions and the malfunction still cannot be eliminated, call the nearest authorised service.Any claim or malfunction caused by improper installation or misuse is not covered by the guarantee. All repair costs shall be covered by the user.WE RESERVE THE RIGHT FOR MODIFICATIONS WITH NO INFLUENCE ON THE OPERATION OF THEAPPLIANCE.THIS INSTRUCTION MANUAL CANNOT BE A REASON FOR A COMPLAINT.。
海尔电子洗衣机 TR-E90 产品说明书
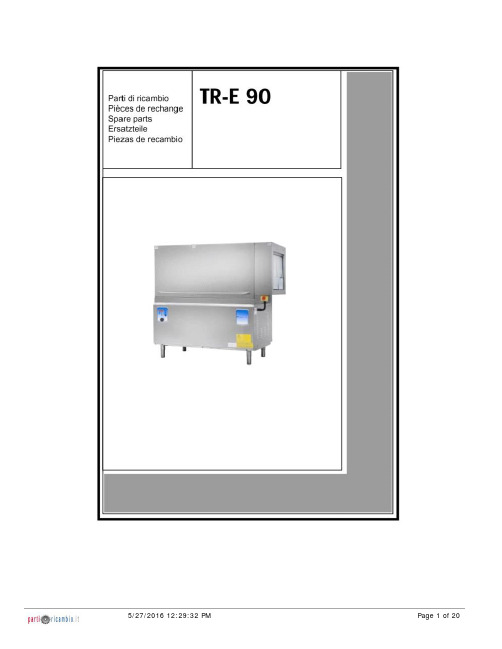
TR-E 901Hood2Wash assembly3Wash tank components4Rinse Assembly5Drive Components6Economiser7Motors8Control Box9Heat recovery unit compact10Blower dryerCode Description120325-REED TIPO L1523-75-85 ASP 190906TENDINA ENT. USC. (EDC 140) 260513RONDEL.GROW.D8 INOX UNI 1751 331208PIEDE TELESCOPICO INOX340422ALBERO TENDINA351943PANN. POST. 900 AC/ACR 2001 352062PANNELLO FRONT.1300 TR-E90 411002MAGNETE PERMANENTE 24x12Code Description160724TAPPO BRACCIO LAV.S90-S NUOV.L 180109CONTRODADO DA 1 1/2" PLAST. 180128GHIERA FIL 65,4 C140 C85-155 180236TRONCHETTO ASPIR.CON DEF. 180816FILTRO ASPIRAZIONE D.82 -190308RACCORDO TRABOCCO REGOL.SE/1 200906GUARNIZIONE D. 92x66x2201077TUBO MAND.POMPA LAV AC1300DX 331121PIASTRA AGGANCIO POMPA LAV.EDI 441104AMMORTIZZATORE X POMPA SE/1 450109FASCETTA FE ZN 50-65 H=12,2LAMCode Description160201CODULO DIR. SCARICO VASCA 160301PILETTA SCARICO 1 1/2"161308TRAPPOLA ARIA PRESS. C95/155 180109CONTRODADO DA 1 1/2" PLAST. 200410GUAR.NEOP.11/2"D.65X47X3 200412GUARNIZ. SCARICO 1"1/2 45X33X3 200469GUARNIZIONE A LABBRO 45X35.5X7 200927GUARNIZ.TRAPP.PRESS.C95-155 270101CONTROD.1/2" ES.30 SP.7 INOX 270104CONTRODADO OTT.1"1/2270121CONTRODADO INOX 1/2"GAS TRAP. 450137ATTACCO A COLLARE C/BASE 31900 450143FASCETTA A 2 FILI D.39.7x37.7 460501GUARNIZ.24X17X2 FASIT(3/8")Code Description160728TAPPO DA 3/4 x FILTRO 180812 180812FILTRO RACC.IMPURITA'PLAST. 190349/1PORTAG.CURVO MASCH.G1/2 X D.12 200809GUARN.OR 1,78X7,66X11,21 VITON 450104FASCETTA FE ZN.15-24 H=12,5Code Description100278/1MTR.VSF 1VEL.R60/1+FRIZIONE 190145SUPPORTO GUIDA PORTASAL.AC-ACR 190146FERMO PER SUPPORTO GUIDA AC 331982PROTEZ. ANTINF.DX TRAINO AC 331983PROTEZ. ANTINF.SX TRAINO AC 340288PROF.CUSCINET.TRAINO AC/ACR 342020PERNO GUIDE SALT.INOX AC 120 342786ASS.ALB.TRAINO ACL RIDUT.SITI 451002COPPIGLIE INOX D.2X12 UNI 1336 510425SALTARELLO INOX AC/ACRCode Description100647POMPA HP 0,20 220/240/3 50 HZ 100886POMPA1.5HP 230-400V/3/50Hz ACL 110343RESISTENZA FL.8000W. 230/400V. 110362RESISTENZA FL. 9000W 230V 110367RESISTENZA FL. 12500W 230/400V 110386RES.FL.14000W. 230/400V.110388RES.FL.10000W 230/400Vusa27298 120468TELERUT.ABB 9A 24V 50/60HZ 161102COPRIRESISTENZA H 50 (ALTO) 161113COPRIRESIS. NERA -SE/1 108576 280525RACC. PORTAG. BOILER ACR-NE-NG 290105TAPPO TE 1/2" OTTONE ESAG."27" 290121TAPPO OTTONE 1/8" GAS330322BOILER D.230"NE"3 RESIST. COIB 391328MOLLA CAR.COST.KG 5.0450104FASCETTA FE ZN.15-24 H=12,5 460502GUARNIZ. 30X21X2 KLINGER 1/2" 460528GUARN. PIPA RISC.15x10x2 FASIT 630138CORPO POMPA F.. 4264303Code Description120468TELERUT.ABB 9A 24V 50/60HZ 120469TELERUT.ABB 12A 24V 50/60HZ 120470TELERUT.ABB 16A 24V 50/60HZ 120472TELERUTT. ABB 30A 24V 50/60HZ 120493RELE' AD IMPULSI 130100240000 120501TERMOS.30/90 MT.1120519TERMOSTATO 110/130?SIC.LS1 F-C 120858RELE' TERMICO ABB 0,4-0,63A120862RELE' TERMICO ABB 1,7-2,4A121025INTERRUTTORE MAGNET.MG 63A 121296SCHEDA COMANDI ACS/E DIGIT 130620PRESSOST. A 3 LIV.50-30/160-80 130629PRESSOST.1.LIV28-12 art.761175 191040MASCHERINA MANOPOLA TERMOSTATI 450315MANOPOLA TERMOSTATI461475TARGA COMANDI TR90 HNV2008Code Description100509VENT. HP.0,75 220-415V V164/2 150034CONN.X ELETTRV.VS.TP.122.09.N 160709TAPPO COLLETTORE ELETTROV.1" 260105VITE TE 6X20 INOX A2 UNI 5739 260238VITE INOX "TB" 4x10260412DADO AUTOBLOC."M6"INOX BASSO 260416DADI"M6"INOX A2 "5587"Stampati 260418DADO AUTOBLOC."M4"INOX BASSO 260502RONDEL.PIANE D4 INOX UNI 6592 260504RONDEL.PIANE D6 INOX UNI 6592 260505RONDEL.PIANE D8 INOX UNI 6592 260512RONDEL.GROWER D6 INOX UNI 1751 260513RONDEL.GROW.D8 INOX UNI 1751 280504RACCORDO x COLL.ELETTR.3/4-1/2 290105TAPPO TE 1/2" OTTONE ESAG."27" 290121TAPPO OTTONE 1/8" GAS290215BOC.ANTIG.TEFL.+GHIERA D.1/2" 290410PORTAGOMMA 1/2" MASCHIO OTTONE 450104FASCETTA FE ZN.15-24 H=12,5 450518GUAINA OTT.TERMOMETRO S N L 460502GUARNIZ. 30X21X2 KLINGER 1/2" 630301GIR.VENT.HP0,75-164/2-160X80 631303VASO DI ESPANSIONE X REC.CAL.Code Description100533VENTILATORE HP.1 220-240-380V 110706RESIST. X ASCIUG. 1500 W.-230V 120501TERMOS.30/90 MT.1120519TERMOSTATO 110/130?SIC.LS1 F-C 160753TAPPO 40X40X1 FIL.10MA ALETT. 161127SCATOLA PER TERMOSTATO191040MASCHERINA MANOPOLA TERMOSTATI 200491GUARNIZ. POSTER. SCATOLA TERM. 260404DADI TORNITI INOX"M6"UNI-5588 260416DADI"M6"INOX A2 "5587"Stampati 260504RONDEL.PIANE D6 INOX UNI 6592 260505RONDEL.PIANE D8 INOX UNI 6592 260512RONDEL.GROWER D6 INOX UNI 1751 260513RONDEL.GROW.D8 INOX UNI 1751 260538RONDELLA STAMP.18X6X1,5 INOX9 270101CONTROD.1/2" ES.30 SP.7 INOX 450315MANOPOLA TERMOSTATI450515GUAINA TERM. 1 TUBO INOX H=109。
海尔科技产品说明书

B-77Comes with complete operator’s manual.*See section D for compatible meters.Ordering Example: PX178-1KS5V, 0 to 1000 psi transducer, $295.IP65 AMPLIFIED VOLTAGE TRANSDUCER FOR HARSH ENVIRONMENTSPX178-100S5V,shown slightly smaller than actual size.Weather-tightconnector included.PX178 Series0-100 to 0-2000 psi 0-7 to 0-138 bar1⁄8NPT Pressure Snubbers $10 eachPS-8G = Gas PS-4E = Lt OilPS-8D = Dense LqߜNEMA 12 (IP65) Sealed Construction for Harsh Environments ߜCompact Size for Ease of Use ߜIdeal for Automotive ApplicationsAll Ranges$295D I S I N UE DSPECIFICATIONSExcitation:5 Vdc ±0.25 Vdc @ 20 mA (regulated)Output:0.5 to 4.5 Vdc (ratiometric)Accuracy:1% FS (includes repeatability, linearity BFSL and hysteresis)Zero Balance:0.5 ±0.1 Vdc Span Tolerance:1%Operating Temperature: -40 to 105°C (-40 to 221°F)Compensated Temperature:-18 to 82°C (0 to 180°F)Thermal Effects:3% FS total effect (zero and span)Proof Pressure: 150% FS Burst Pressure:5x FSMin Load Resistance:20 k ΩResponse Time:50 HzWetted Parts:Brazed assembly of 300 Series SS and nickel-plated carbon steelPressure Port:1⁄8NPTElectrical Connection:Weather-tight connector included Weight:102 g (4 oz)PS-8G snubber, $10,sold separately,see Section C.CANADA www.omega.ca Laval(Quebec) 1-800-TC-OMEGA UNITED KINGDOM www. Manchester, England0800-488-488GERMANY www.omega.deDeckenpfronn, Germany************FRANCE www.omega.frGuyancourt, France088-466-342BENELUX www.omega.nl Amstelveen, NL 0800-099-33-44UNITED STATES 1-800-TC-OMEGA Stamford, CT.CZECH REPUBLIC www.omegaeng.cz Karviná, Czech Republic596-311-899TemperatureCalibrators, Connectors, General Test and MeasurementInstruments, Glass Bulb Thermometers, Handheld Instruments for Temperature Measurement, Ice Point References,Indicating Labels, Crayons, Cements and Lacquers, Infrared Temperature Measurement Instruments, Recorders Relative Humidity Measurement Instruments, RTD Probes, Elements and Assemblies, Temperature & Process Meters, Timers and Counters, Temperature and Process Controllers and Power Switching Devices, Thermistor Elements, Probes andAssemblies,Thermocouples Thermowells and Head and Well Assemblies, Transmitters, WirePressure, Strain and ForceDisplacement Transducers, Dynamic Measurement Force Sensors, Instrumentation for Pressure and Strain Measurements, Load Cells, Pressure Gauges, PressureReference Section, Pressure Switches, Pressure Transducers, Proximity Transducers, Regulators,Strain Gages, Torque Transducers, ValvespH and ConductivityConductivity Instrumentation, Dissolved OxygenInstrumentation, Environmental Instrumentation, pH Electrodes and Instruments, Water and Soil Analysis InstrumentationHeatersBand Heaters, Cartridge Heaters, Circulation Heaters, Comfort Heaters, Controllers, Meters and SwitchingDevices, Flexible Heaters, General Test and Measurement Instruments, Heater Hook-up Wire, Heating Cable Systems, Immersion Heaters, Process Air and Duct, Heaters, Radiant Heaters, Strip Heaters, Tubular HeatersFlow and LevelAir Velocity Indicators, Doppler Flowmeters, LevelMeasurement, Magnetic Flowmeters, Mass Flowmeters,Pitot Tubes, Pumps, Rotameters, Turbine and Paddle Wheel Flowmeters, Ultrasonic Flowmeters, Valves, Variable Area Flowmeters, Vortex Shedding FlowmetersData AcquisitionAuto-Dialers and Alarm Monitoring Systems, Communication Products and Converters, Data Acquisition and Analysis Software, Data LoggersPlug-in Cards, Signal Conditioners, USB, RS232, RS485 and Parallel Port Data Acquisition Systems, Wireless Transmitters and Receivers。
海尔 D3-Pro 智能扫拖一体洗地机 使用说明书

地面清洁液(适合清洁各种地面污渍)清理工具(适合清理洗地机污水桶残留污渍及滚刷缠绕毛发)清洁液滚刷x1电源适配器x1主机x1海帕x1充电座x1目录安全须知 1产品介绍 2产品安装 3产品使用 5产品维护与保养 7产品参数 8故障代码表/产品有害物质说明 9保修卡/保修条款 10安全须知安全警示1.用户禁止拆解本产品,否则可能带来危险;2.清理或维护本产品前,请务必拔下电源插头、关闭机器电源;3.双手潮湿时请勿触碰插座、电源适配器或显示屏,以免发生触电危险;4.请使用本产品专配的电源适配器进行充电,若使用其他电源适配器充电可能导致产品受损;5.如果电源适配器受损,请立即停止使用,并联系本公司专业维修人员进行更换;6.本产品不适用于身体、感官或智力上有缺陷的人士或缺乏经验和常识(包括儿童)的人使用,除非有他人看管或指导,以确保其能够安全使用;7.使用时,若发现机器漏电或电机温度过高和异响,如机身过热、异响、异味等问题,请立即停止使用,并联系本公司售后服务部获取帮助;8.请勿弄湿机身,否则有可能因机器短路而引发火灾和触电事故;9.请勿堵住进风口和出风口,以免机器过热;10.请勿将地刷泡水,以免机器烧毁;11.请勿将机器剧烈晃动或碰撞,以免污水流入电机;12.搬动机器时,请保持机器直立,以免污水流入电机;13.若清水箱和污水箱未安装到位,请勿使用;14.请勿在低于-10℃、高于45℃的环境中使用;12.本产品只适合在家庭环境中使用,不可在工业环境或室外使用;13.本产品适用于家庭环境中的硬性地面,如大理石地板、木地板、瓷砖地板、实木地板、复合地板;14.请勿用本产品清洁烟头、火柴等未熄灭的热源,以免发生火灾;15.请勿用本产品清洁易燃易爆或高挥发性液体,如汽油、煤油、油漆、香水等,这些液体可能导致产品短路、或者爆炸;16.请勿用本产品清洁激光打印机、复印机内部使用的色粉或调色剂,以免发生火灾或爆炸;17.请勿用本产品清洁尖锐物体,如玻璃碎片、图钉、铁钉、回形针、石子等物品,以免损坏产品;18.请勿清洁颜料、油漆、鞋油等强染色性的污渍;19.请勿使用本产品清洁泡沫液体,以免造成电机损坏;20.清洁液应放置在儿童触及不到的地方;21.请按照地板清洁液标签说明来使用清洁液;22.请勿在清水箱内添加酒精。
海尔 轻食光T5-D01R 加厚不粘涂层早餐机 使用说明书
包修期内:请与我公司售后服务中心或特约维修点联系维修,持有效 购机发票送修机器。 超过包修期:请与我公司售后服务中心或特约维修点联系维修,按照 规定收费。 请勿自行拆机维修,应由专业人士或维修中心维修,否则易发生危险。
青岛海尔成套家电服务有限公司
地址:青岛市高科技工业园海尔工业园 版次:2020年 第1版
·使用前请仔细阅读本说明书
·本公司保留说明书解释权 ·产品外观请以 实物为准 ·阅后请与发票一并妥善保存 ·如遇产品技术或软件升级,恕不另行通知 ·本产品只适合在中国大陆销售和使用
安全注意事项
1
产品基础信息
3
电气原理图
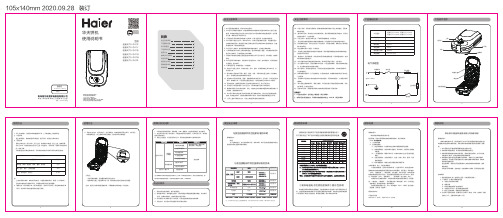
105x140mm 2020.09.28 装订
华夫饼机 使用说明书
智能家电操控 智慧场景定制 智家商城购物 家电报装报修
型号
轻食光T5-D01 P 轻食光T5-D01 Y 轻食光T5-D01 B 轻食光T5-D01G 轻食光T5-D01W 轻食光T5-D01R
合格证
Certificate of Quality 检验员:
包修年限: 1、整机免费包修一年(自购买之日起,以发票日期为准)。 2、下列情况,不属于免费服务范围 A、不能出示说明书及发票 B、发票涂改 C、意外因素或使用不当造成损坏 D、未经我公司许可,自行修理造成的损坏 E、超过三包有效期,经修复仍可继续使用 3、由于本产品属于家用,若要用于公共场所(商店、学校、宾馆等)整机 包修三个月,主要零部件包修六个月。
食物加工参照表 食品名称 煎鸡蛋、薄饼、鸡蛋饼、煎饼、春饼、葱花饼 烤土豆片、著片、三明治面包 炒豆、炒花生米、炒瓜子