unix安装
unix(V6)后台安装
机器型号:SUN X86机器。
安装方式:光驱引导。
后台版本:V6.02-10。
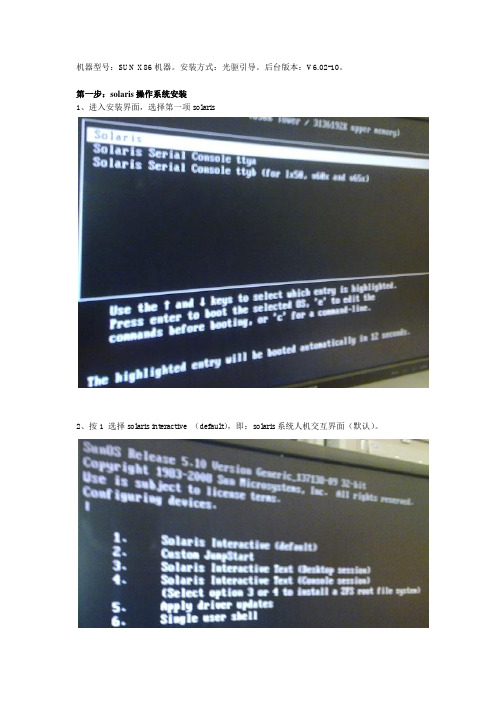
第一步:solaris操作系统安装1、进入安装界面,选择第一项solaris2、按1 选择solaris interactive (default),即:solaris系统人机交互界面(默认)。
4、此时,屏幕左上方弹出一界面:if the screen is legible,please press entre in this screen,鼠标点击此界面的任何一区域,按回车键。
进入下面的语言选择界面,选择6:simplified Chinese,即:简体中文。
接下来都将是中文界面安装。
5、默认,继续下一步。
6、网络连接,选择“联网的”7、配置网络接口时同时选中两块网卡。
8、主网接口,选择第一个:igb09、不适用DHCP10、输入主机名,也就是机器名。
本机器是test1,如果机器名是main1,则输入mian1. (尽量用主键盘的数字键输入,不要用小键盘的数字键)11、输入A网的IP地址,(尽量用主键盘的数字键输入,不要用小键盘的数字键)。
12、网络掩码,默认,按F2继续。
13、不启用IPV614、缺省路由选择“无”。
15、下面是第二个网口igb1的设置,同样不适用DHCP16、输入主机名,也就是机器名。
本机器是test1,此时输入test1a,如果机器名是main1,则输入mian1a. (尽量用主键盘的数字键输入,不要用小键盘的数字键)17、输入IP地址,(尽量用主键盘的数字键输入,不要用小键盘的数字键)18、不启用kerberos19、名称服务,选择“无”20、使用系统派生的NFSV4域21、选择“与GMT的时差”22、默认,下一步23、root用户口令,一般为空。
但随后会报出警告界面,直接点击确定,下一步。
24、启用远程服务25、弹出界面:所选择的汇总。
直接点击下一步26、默认,下一步。
27、选择指定媒体:CD/DVD28、默认选择:初始安装。
Unix初级(solaris10) 系统安装(详细)

北京神州泰岳软件股份有限公司网络管理事业部基础技能-UNIX初级(solaris10)北京神州泰岳软件股份有限公司2022年4月26日文档属性属性内容客户名称北京神州泰岳软件股份有限公司网络管理事业部项目名称基础技能培训教材文档主题基础技能-UNIX初级(solaris)文档副标题文档版本 1.0文档日期文档状态草案作者文档变更版本修订日期修订人描述文档送呈姓名目的目录1课程介绍 (6)1.1课程目标 (6)1.2参加培训学员能力要求 (6)1.3学员培训前的准备要求 (7)1.4培训周期与认证 (7)1.5培训资料、介质、常用工具获取 (7)2培训环境与场景介绍 (9)2.1场景设计与说明 (9)2.2培训环境介绍 (9)2.2.1培训的整体场景说明 (9)2.2.2虚拟机环境介绍 (10)2.2.3学员需要准备的操作 (10)3系统安装 (11)3.1创建solaris虚拟机 (11)3.2安装操作系统 (22)3.3更改虚拟网络IP (43)4系统检查 (45)4.1检查操作系统版本 (45)4.2检查内存大小 (46)4.3检查swap大小 (46)4.4检查文件系统 (47)5系统基本配置 (48)5.1允许root远程登录 (48)5.1.1Telnet方式 (48)5.1.2SSH方式 (50)5.2远程登录Solaris的常用方法 (53)5.2.1使用ssh远程登录系统 (53)5.2.2使用telnet远程登录系统 (55)5.3开机与关机操作 (57)5.4查看修改主机名 (57)5.4.1临时更改 (58)5.4.2永久更改 (58)5.5查看修改网络配置(IP与路由) (60)5.5.1临时更改 (60)5.5.2永久更改 (63)5.5.3增加nms别名 (66)6管理进程 (68)6.1进程介绍 (68)6.2查看与终止进程 (68)7配置snmp (71)7.1检查snmp状态 (71)7.2修改SNMP团体名 (71)8配置syslog (74)8.1Syslog介绍 (74)8.2配置syslog (75)9应用软件安装准备(oracle为例) (78)9.1安装软件包 (78)9.1.1检查软件包 (78)9.1.2安装软件包 (78)9.2修改系统内核参数 (80)9.3用户配置 (82)9.3.1创建组和用户 (82)9.3.2切换用户 (83)9.3.3修改用户配置文件 (83)9.4配置相关目录 (85)9.4.1创建相关目录 (85)9.4.2设置目录属主和组 (86)9.5使用FTP上传文件 (86)9.6解压安装介质 (87)9.7使用xmanager连接系统并安装Oracle (88)10其他操作 (92)10.1清理磁盘空间 (92)10.2删除用户和组 (92)10.3删除软件包 (93)10.4日常文件管理 (93)10.5查看系统日志 (95)10.6临时更改环境变量 (95)10.7查看系统时间 (95)10.8查看系统帮助(非常重要) (95)1 课程介绍讲师:闫彬彬部门:网络管理事业部-综合支撑部-优化集成部说明:如教材使用过程中存在问题或描述不清楚的地方,请与闫彬彬(************************.cn)联系;1.1 课程目标完成本课程后,使学员可以独立安装solaris操作系统、进行基本的如网络/SNMP/Syslog配置、并具有为安装Oracle数据库进行相关前期准备的操作能力,具体如下:◆能够安装soalris操作系统◆检查系统基本配置◆正确关闭重启主机◆创建用户和组◆安装系统软件包◆文件及目录及权限管理◆修改、检查系统内核参数◆进程管理◆配置IP地址◆修改主机名◆Unzip解压工具◆修改系统snmp团体名◆配置syslog并启停止相关服务1.2 参加培训学员能力要求无1.3 学员培训前的准备要求◆自带电脑,内存2G或以上,必须有一个硬盘剩余空间30G或以上◆已安装vmware,secucrt,xmanager工具软件1.4 培训周期与认证◆培训周期:1天◆认证方式:✧有实际物理小型机的情况下,以实际物理机进行操作系统安装与各种操作,如物理机不够,以虚拟机进行操作系统安装和各种操作;✧按本课程要求完成3-9章所有操作,并提交如下内容:按第4章操作检查结果的截图(所有操作结果在一张图里)/etc/hosts,/etc/netmasks,/etc/hostname.pcn0,/etc/defaultrouter文件修改后的内容截图(修改为192.168.18网段后的结果)在secuCRT终端,先执行date命令然后执行ifconfig –a命令的输出截图按照7.2章图138操作snmpwalk对团体名更改后测试结果进行截图(团体名为自己的姓名)按照8.2章节图143,使用logger命令手动产生一条带有学员自己姓名的消息时syslogwahtcher的弹出消息截图1.5 培训资料、介质、常用工具获取◆事业部FTP服务器(公网60.247.77.173、内网192.168.106.164、帐号nmbu、密码nmbu):“/07产品培训资料/unix初级”下载◆培训教材:分media、tools、documents三个目录附图1. FTP或光盘内容2 培训环境与场景介绍2.1 场景设计与说明为了使课程的操作性、实用性更强,更贴近项目实际,本教材模拟项目中Ultra-NMS 数据库服务器搭建为背景,依次讲解了操作系统安装、连接系统、系统配置检查、软件包安装、网络配置、内核参数修改、组和用户创建、进程管理、配置SNMP等操作,使大家在这一上机操作过程中掌握并达课程设定的目标与能力要求。
unix安装教程

unix安装教程Unix是一种多用户、多任务操作系统,被广泛应用于服务器和工作站。
在Unix系统中,通过命令行对系统进行操作和管理。
本文将介绍Unix系统的安装教程。
1. 下载Unix系统镜像文件:在官方网站或其他可靠页面下载需要的Unix系统镜像文件。
根据自己的需求选择合适的版本,比如最新稳定版或特定用途的版本。
2. 创建安装媒介:将下载的Unix镜像文件刻录到合适的介质上,比如CD、DVD或USB闪存驱动器。
使用相关软件,选择“镜像刻录”或“创建启动盘”的选项,按照提示完成刻录过程。
3. 设置启动顺序:将计算机的启动顺序改为从刚刚创建的安装媒介启动。
进入计算机的BIOS设置界面,找到“启动顺序”或“启动设备”这个选项,将光盘或USB设备移到首位。
4. 进入安装程序:重启计算机后,系统将从安装媒介启动。
进入安装程序界面后,按照提示进行操作。
可能需要选择语言、键盘布局和许可协议等。
5. 磁盘分区:在安装程序中,有一个磁盘分区的步骤。
这个步骤是为了将磁盘划分为不同的区域,以便存储操作系统和数据。
可以选择自动分区或手动分区。
自动分区会根据系统要求划分磁盘空间,而手动分区需要手动设置各个分区的大小和挂载点。
6. 系统安装:完成磁盘分区后,安装程序将会开始复制系统文件到磁盘中。
这个过程可能需要一些时间,耐心等待即可。
7. 用户设置:在安装程序中,会要求设置管理员(root)用户的用户名和密码。
此外,还可以创建其他用户账号,以便多用户的操作。
8. 完成安装:安装程序最后会给出安装完成的提示。
此时可以选择重启计算机,从磁盘启动已安装的Unix系统。
9. 初始设置:重启计算机后,系统会要求输入用户名和密码登录。
登录后,可以进行初始设置,比如语言设置、网络配置等。
10. 更新系统:安装完成后,如果系统版本比较旧,建议更新系统,以获得更好的性能和安全性。
可以使用unix系统自带的软件包管理器,通过命令行进行系统更新。
UNIX安装步骤

1.2.3 光盘安装SCO UNIX 5.0.4安装操作系统步骤1)使用软盘冷启动,在boot:的提示符后: 回车.2)接下提示: press <Enter>; to installation: 回车.3)接下提示:Press <Enter>; to continue. Press <F1>; for General help.回车4)接下提示:Media device to be used: IDE CD ROMIDE Controller: secondary (按实际情况修改)Master or Slave: master (按实际要求修改)Accept above choices按两次向下箭头,将光标移到: Accept above choices.回车.5)接下提示:插入UNIX安装光盘,选择OK,回车6)接下提示:(选择键盘类型)Keyboard: US English 回车7)接下提示:(注册系统)License number: Type inLicense code: Type inAccept above choices分别输入注册号和注册代码,然后出现:License data: Type in输入注册数据后将光标移到: Accept above choices,按回车.8)接下提示:Press <Enter>; to continue. Press <F1>; for install instructions.回车 9)接下提示:(确认安装类型)Upgrade Fresh选择Fresh(第一次安装),回车10)接下提示:OK Cancel选择OK,回车,继续安装11)接下提示:(配置基本系统)System name: scosysvDomain name: Security profile: TraditionalTime zone: Eastern Standard/Summer TimeLanguage: Standard C (English)Accept above choices将光标移到: Time zone:按空格键,出现提示:Geographical aiea: North AmericalNorth Americal time zone: Eastern Standard Time(EST)Daylight savings time : YesAccept above choices光标移到: North Americal按空格键,选择: Asia回车光标移到: Eastern Standard Time按空格键,选择: China Standard Time(CST),回车光标移到: Accept above choices,回车回到上一画面光标移到: Accept above choices, 回车12)接下提示:(初始化系统profile)将光标移到: Accept above choices, 回车13)接下提示:(准备硬盘和选择软件)Hard disk setup: UNIX only : Bad Tracking ONOptional software: SCO OpenServer Enterprise System,241MBAccept above choices可修改或接受Bad Tracking ON将光标移到: Accept above choices, 回车14)接下提示:(配置附加软件)Network card: AutodetectNetwork address: No networking card configuredVideo and graphics: IBM VGAMouse: No mouse configuredEmail system: MMDFAccept above choices将光标移到: Accept above choices, 回车15)接下提示:(设置密码)Root password:输入超级用户密码,必须牢记,然后出现:Please type again to confirm:再次输入密码,以确认将光标移到: Accept above choices, 回车16)接下提示:OK Cancel选择OK,继续安装17)接下提示:Press <Enter>; to continue:回车18)接下提示:Press <Enter>; to continue:取出软盘,回车将重新启动机器,即可正常使用SCO UNIX 5.0.4.1.2.4外围设备的安装1.2.4.1鼠标安装1) #mkdev mouse屏幕显示:Mouse Initialization Program1.Display current configuration2.Add a mouse to the system3.Remove a mouse from system4.Associate a terminal with an existing mouse5.Disassociate a terminal from an existing mouse6.Remove the mouse drivers from the kernelSelect an option or enter q to quit:2)选2系统会显示:The following mouse device types are supported:1.Serial mouse2.Bus mouse3.PS/2-style keyboard mouse (IRQ 12)Select an option or enter q to return to the previous menu:3)选3系统会显示:The following keyboard mouse device are supported:1.Low Resolution Keyboard Mouse2.High Resolution Keyboard MouseSelect an option or enter q to return to the top level:4)选2系统会显示:Press return when finshed:5)回车后系统会显示:Do you want to use the High Resolution Keyboard Mouse onany other terminals? (y/n)6)输入n,回车,屏幕显示:You must create a new kernal to effect the driver changeyou specified.Do you wish ti create a new kernal now? (y/n)7)输入y,回车,屏幕显示:Do you want this kernal to boot by default? (y/n)8)输入y,回车,屏幕显示:…Do you want the kernal enviroment rebuilt? (y/n)9)输入y,回车,屏幕回到主菜单10)输入q,退出,重新启动UNIX,即可在tty02上使用鼠标.1.2.4.2安装以太网卡(以3c509为例)1) scoadmin,回车:2)选Networks,回车:3)在Network Configuration Manager 屏幕下,选择Hardware菜单下的Add new LAN adapter4)在 Add new LAN adapter 屏幕下,选择3Com EtherLink III ISA (3C509 and 3C509-TP)5)屏幕显示:Do you wish to search for a 3Com EtherLink III ISA(3C509 and 3C509-TP)?[ Yes] [ No ] [ Cancel ] [ Help]选择 Yes,回车,屏幕显示:6)…[ OK ] [Help]选择 OK,回车7) 屏幕显示:I/O Address: |300_______________|vInterrupt Vector: |10________________|vMedia/Cable Type: |AUTO______________|v…[ OK ] [ Cancel ] [ Help ]修改Interrupt Vector为9,选择 OK,回车,屏幕显示:8)Please verify adapter is set to the configuration just entered[ OK ]选择 OK,回车,屏幕显示:9) HW 3Com EtherLink III ISA (3C509 and 3C509-TP)- SCO IPX/SPX- SCO TCP/IP[ Add ] [ Cancel ] [ Help ]按方向箭头将光标移到 SCO TCP/IP,按 Tab 选择 Add 回车显示: 10)在 SCO TCP/IP Configuration 屏幕下:修改 IP Address 和 Netmask. 其余选择默认值.然后选择 OK 后屏幕显示:11)[ OK ] [ Help ]选择 OK 后回到主菜单12)在 Hardware 下选择 Exit 退出.屏幕显示:Do you wish to create a new kernal now?[ Yes ] [ No ]选择Yes后屏幕显示:13)Do you want this kernal to boot by default? (y/n)输入y,回车,屏幕显示:14)Do you want the kernal enviroment rebuilt? (y/n)输入y,回车,屏幕显示:15)Press Enter to continue输入回车,重新启动UNIX,即可.1.2.4.3并口设置1)在#号下键入:#mkdev parallel屏幕显示:Do you wish to:1.Add a parallel port2.Remove a parallel port3.Show configuration4.HelpSelect an option or enter q to quit:2)选择1后屏幕显示:Please select the I/O address for the adapter:1.Parallel Adapter at address: 378-37f2.Parallel Adapter at address: 3bc-3be3.Parallel Adapter at address: 278-27a4.Other configurationSelect an option or enter q to quit:3)选择1后屏幕显示:4)Should this port use interrupt (default [7]):回车,屏幕显示:5)Do you wish to create a new kernal now?(y/n)输入y后屏幕显示:6)Do you want this kernal to boot by default? (y/n)输入y,回车,屏幕显示:7)Do you want the kernal enviroment rebuilt? (y/n)输入y,回车,重新启动UNIX,即可.1.2.4.4设置打印机1)在#号下键入:#mkdev lp 回车在Printer Manager on scosysv屏幕下选择Printer菜单下的Add L ocal…2)在Add Local Printer 屏幕下,在 Name:下输入:lp0; Model: 选择: epson. 其余默认.然后选择 OK.3)回到主菜单,选择Host菜单下的Exit,退出1.2.4.5多用户卡的设置1)参照多用户卡的说明书,按COM2口设置调线.2)在# 号下键入#mkdev serial3)将光标移到[Add…],回车4)选择第二个Description为4,Ports为4,此时IRQ应为3,I/O add为1a0,选择OK回车,屏幕显示如下:5)Do you wish to create a new kernal now?(y/n)输入y后屏幕显示:6)Do you want this kernal to boot by default? (y/n)输入y,回车,屏幕显示:7)Do you want the kernal enviroment rebuilt? (y/n)输入y,回车,重新启动UNIX.8)在# 号下键入#enable tty2a tty2b tty2c tty2d。
SCO-UNIX-5.0.5安装步骤

SCO UNIX 5.0.5安装步骤安装SCO UNIX的硬盘分区要求:必须将UNIX的分区分在硬盘8G空间以内。
一、安装前准备工作:1、启动盘的制作:将新软盘插入软驱中,在WINDOWS-98界面下单击“开始”,进入运行窗口,输入“F:\IMAGES\FLOPPYCP.EXE /d a: /f F:\IMAGES\BOOT\install.img”(F:指光驱的盘符),并确定运行,执行完毕后,启动盘制作完成。
二、安装步骤:1、将UNIX系统安装光盘放入光驱中,并将启动盘插入软驱中。
(BIOS中的启动方式应设成A盘启动)2、重新启动主机。
3、当出现BOOT:提示符时,按回车键进入初始化状态。
4、屏幕上出现读盘信息,直到屏幕停止滚动,提示按回车键进入安装。
5、屏幕上显示SCO公司的产品介绍及通讯方式,按回车键继续下一步。
6、选定“ACCEPT”继续下一步。
7、进入窗口Identifying the installation media device 执行安装路径的设置选择第一项:Media device to be used:为IDE cd rom第二项:IDE controller:选择光驱所在的第几个的IDE 座第三项:Master or slave:选择光驱的主从盘设置若此项设置不正确则找不到光驱,设置正确后选择Accept above choices继续8、进入窗口Selecting a Keyboard type执行键盘设置,选择默认按Accept above choices继续9、进入Licensing your system 窗口输入注册码Lincense number:2FE000954 (注意字母大写)Lincense code:yslrtrsz (必须小写,输入正确后会跳出下一行)Lincense data:c1;g0;k1;q1;u16;muaw5k0输入正确后将进入窗口Suitability for automatic upgrade fresh选择升级安装或重新安装10、显示安装类型后按Continue继续11、进入窗口Configuring the basic system选择下列信息[1]System name:主机名.[2]Domain name:输入域名。
UNIX安装步骤

UNIX安装步骤第一节安装准备1.安装分类:安装分为单启动安装(只启动UNIX)和多启动安装(即可选择启动DOS、WIN98、WIN2000等)。
2.安装概述:硬盘最多支持四个分区,除非你用软件来管理多重启动。
Dos及WIN98下有两个分区即Primary 和Expand;Win2000也分为Primary和Expand分区;Unix下分为Root根分区和Swap 分区。
如何配置,这需要你自己选择。
注意:Unix下的两个分区必须要装,言外之意,你只能在选两个分区了。
建议:不要DOS、Win98及Win2000的扩展分区。
3.硬盘空间:你可以预留Free的硬盘空间给Unix,也可以在Unix安装过程中删除其他的分区来安装Unix。
但必须在硬盘的8G,及1024柱面之前。
4.启动盘制作:你可以选择软盘启动安装,也可以选择光盘启动安装,只要你的机器支持光盘启动。
如果你的机器不支持光盘启动你就要作启动软盘。
方法有四:1.在windows下用gzcp:提示符下运行E:\images\gzcp E:\images\boot\install.img A:。
其中A:为你的软盘符,E为你的光盘符。
2.在windows下用floppcp:提示符下运行E:\images\floppcp d/ A:/f E:\images\boot\install.img 3.在Unix 下:root注册后,在机器上插入3.5寸软盘,并将系统软件光盘放入光驱,然后敲入下面的命令: #mount /dev/cd0 /mnt<回车>#dd if=/mnt/images/boot/N00 of=/dev/rfd0135ds18<回车> OK!第二节安装过程1.启动机器:1.无论从光盘启动还是从软盘启动,机器会出现下列安装提示符:SCO UNIX Openserver(TM)5.0.XBoot:*你可以在此输入?查询可启动的地址或打回车。
利用虚拟机安装Unix
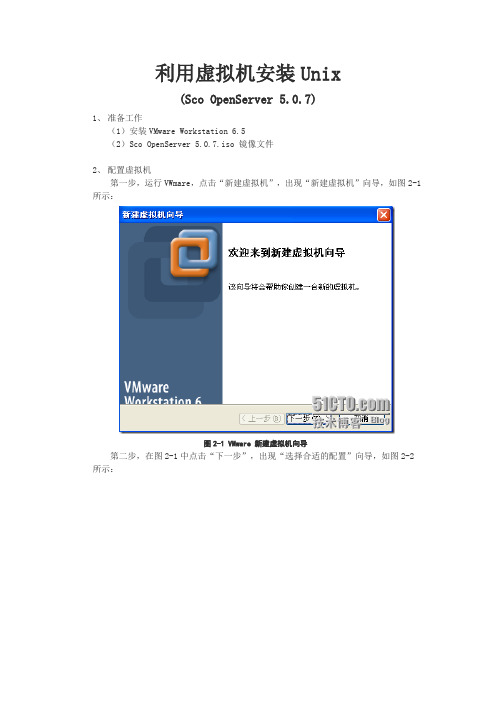
利用虚拟机安装Unix(Sco OpenServer 5.0.7)1、准备工作(1)安装VMware Workstation 6.5(2)Sco OpenServer 5.0.7.iso 镜像文件2、配置虚拟机第一步,运行VWmare,点击“新建虚拟机”,出现“新建虚拟机”向导,如图2-1所示:图2-1 VMware 新建虚拟机向导第二步,在图2-1中点击“下一步”,出现“选择合适的配置”向导,如图2-2所示:图2-2 VMware 新建虚拟机配置第三步,选择“自定义”,点击“下一步”,进入“虚拟机硬件兼容性”页面,如图2-3所示:图2-3 VMware 新建虚拟机硬件兼容性第四步,直接点击下一步,进入“客户机操作系统选择”页面,如图2-4所示:图2-4 VMware 新建虚拟机操作系统选择第五步,选择“其他(O)”,然后版本选择“Other”,如图2-5所示:图2-5 VMware 新建虚拟机操作系统选择第六步,点击“下一步”,进入“虚拟机名称”页面,如图2-6所示:图2-6 VMware 新建虚拟机名称第七步,输入合适的虚拟机名称(可以任意输入自己喜欢的名称),选择正确的位置(至少要有1G的空间,最好不在系统盘),点击“下一步”,进入“虚拟处理器数量”页面,如图2-7所示:图2-7 VMware 新建虚拟机处理器配置第八步,选择一个处理器,点击“下一步”,进入“虚拟机内存”页面,如图2-8所示:图2-8 VMware 新建虚拟机内存第九步,自行设置虚拟机的内存大小,建议设置为64M,如果内存吃紧可以设置32M,反之如果内存富足,设置个256M就足够了。
点击“下一步”,进入“网络设置”页面,如图2-9所示:图2-9 VMware 新建虚拟机网络类型第十步,进入“选择I/O适配器类型”页面,如图2-10所示:图2-10 VMware 新建虚拟机选择I/o适配器类型第十一步,在“选择I/O适配器类型”页面中,使用默认选项,点击“下一步”,进入“选择硬盘”页面,如图图2-11 VMware 新建虚拟机选择硬盘第十二步,为了方便起见,选择“创建一个新的虚拟磁盘”,一般不建议使用物理磁盘。
sybase isql 西软Unix系统Sybase系统安装

sybase isql 西软Unix系统Sybase系统安装一Unix与Sybase系统的安装第一部分:Unix 的安装1.准备工作:1.如果是品牌的服务器,如:HP,COMPAQ,IBM等等,先从导航光盘上导出服务器的SISC,NET CARD,RAID等for SCO UNIX 的驱动程序。
(注:有些驱动是压缩的,要先解压,然后安装,看README文件)2.如果是普通的PC,那么先要找到NET CARD and SISC的驱动程序。
2.SCO Unix的启动,先用Unix的启动盘启动:1.如果是品牌的服务器,Boot defbootstr link=alad Sdsk=alad(0,0,0,0) Srom=wd(0,0,0,0)其中,alad是SCSI的版本号,alad(0,0,0,0)的零的意思依次为控制卡的ID号;SCSI 总线的ID号;SCSI磁盘的ID号,逻辑单元号。
Srom代表IDE的光盘驱动器,wd(0,0,0,0)代表IDE的硬盘。
2.如果是普通的PC,Boot后就直接回车。
3.按照提示,放入SISC的驱动,填写几个有关的设置。
SICS的安装就完成了。
4.启动好后,设置好光驱,把时间改成CST(中国标准时间),把Support Database servers 有NOàYES,把Hard Disk Setup àPartition Filesystemsàinterative/divvy,在optional software à去掉有关X-Windows and Internet,一共为127M。
5.给硬盘分区,因为Unix只能分四个区1.65000 ( 约2G )。
2.65000 ( 约2G )。
3.65000 ( 约2G )。
4.剩余的硬盘为一个区。
5.激活第一个分区。
6.在"Do you want a separate /u filesytem (y/n)"中选"No",其于的都选择"YES"7.建立一个tempmore的分区:Name Type New FS # First block Last blockBoot EAFS Yes 0 0 14999Swap NON FS No 1 15000 112999Root HTFS Yes 2 113000 732188tempmore NON FS No 3 732189 936988while disktempmore 一共为100M=102400K或200M=204800K,Type=Non FS,New FS=no。
UNIX 5安装

UNIX 5.0.X安装的准备:本文只针对光盘发行的SCO UNIX 5.05产品,因此,你在安装时至少应具备如下条件:1、符合SCO UNIX 5.05的硬件环境,例如电脑、硬盘(应接到第一个IDE口上,并设为主盘)等。
2、一只连接好的光盘驱动器。
(安装前应清楚,光驱的主从,接到哪一IDE口上,建议光驱为主设备,接到第二个IDE口上)3、一张SCO UNIX 5.05光盘,一张SCO UNIX 5.05的安装软盘,如果你没有此张软盘,你可以将你的电脑设置成光盘启动,然后将SCO UNIX 5.05光盘放在光盘驱动器内,系统能够自动识别并用你的光盘启动。
二、安装具体步骤:1、启动:你可以用安装软盘启动,也可以用光盘启动,方法已如前述,不再重复。
启动后屏幕提示:Press <Enter> to begin installation,(按回车键开始安装)屏幕显示的选择,选continue(继续),按回车键。
接下来选择光驱将出现如下信息:Media device to be used (设置启动介质为)IDE CD ROM(IED接口的光驱)IDE Controller(选择光驱所接的IDE 端口)primary(第一个口)Secondary (第二个口)Master or Slave(选择光驱是主设备还是从设备)master(主)Slave (从)上边选择应跟据实际光驱的接法设置。
将光标移至Accept above chioces(接受以上选择)上回车,系统将显示一些信息,此时选择默认值,直至下一步。
2、出现Keyboard:(选择键盘类型)US English(英文键盘)回车继续会出现如下信息:(要求输入许可序列号)License number:(用户许可证号)License code:(活动码)Liscense data :(注册数据)将SCO OpenServer的许可证上的序列号和活动码输入以上相应位置,然后在Accept above choices处按回车,系统出现如下显示:Installing SCO OpenServer 5.0(安装OpenServer 5)(提示你是升级安装系统,还是重新安装系统)Your system is not suitable for an automatic upgrade (which retains all user and configuration files), so a fresh installation will be performed. This overwrites the current root filesystem with the new product.Later in the installation, you can choose whether to preserve the current disk partitions, additional operational systems, and any non-root filesystem.Installation type: Fresh在continue处按回车, 屏幕出现如下Configuring the Basic System If the information below does not match your requirements, follow the instructions at the bottom of the screen to change the values.(配置系统基本信息)3、出现Upgrade(更新)和Fresh(全新安装)(注意:Upgrade是指从5.0.x升级到5.0.5,非3.0升级到5.0),选择Fresh回车,然后选择OK继续回车4、System name:(系统名称)scosysv(在网络中区别于其它机器,默认为scosysv)Domainn name:(域名)Security profile:(安全级别)Traditional(传统的安全级别)Time zone:(时区)Eastern Standard/Summer Time(用空格进入,然后在Geographical area:后面按空格键选择Asia(亚洲)、在Asian time zone 后面按空格键选择China Standard Time(CST)(中国)、回车返回上一级菜单)。
UNIX TRU64 5.1B 操作系统安装过程

本人系unix的菜鸟,所以装操作系统的笔记记得比较详细,这篇装unix true64 5.1B的安装步骤与刚接触tru64的人分享,高手尽可跳过。 你的机子当然要有光驱,还有显示器、键盘、显卡(有的显卡上的开关还要手动调分辨率)、硬盘、CPU、网卡都应该连接好了,电源已经接通,本文就从你按下计算机和显示器上的电源开关开始……
4、console 控制台设置。
参数:serial 串口控制,就是终端控制。
graphics 显示卡控制,显示器控制。
5、boot_osflags
参数:A 多用户状态
S 单用户状态
6、 bus_probe_algorithm
参数:old/new 应该指算法,一般选new了。
7、ewa0_mode/ewb0_mode 网卡设置,此处为双网卡名字。可以设置网卡的技术参数。参数有Twisted-Pair、Full、AUI、BNC、Fast、Auto_Negotiate。与网卡有关的设置就在此了,在调网络时蛮有用的。
b:交换空间/swap,两倍的内存大小。
g:用户区/usr,1.5G
h:项目区,10G
第五步:安装
所做的只有等待了,总共有三张盘,第三张盘中含有显示卡驱动。
第六步:调整系统内核
菜单:系统管理——内核调节——监控调节。有的参数才这里改不了,必须到命令行改,故意给高手一个机会。
boot 引导到unix系统中
restart 重新启动,引导到unix系统中。
3、boot_dev 只显示引导硬盘或光驱,不能设置。
3、bootdef_dev 可以设置引导参数,具体就是你从硬盘还是从光驱引导,设置之前你得用show dev来查看,光驱或者硬盘的名字,然后set boot_dev 参数(光驱或硬盘的名字)。从光驱安装程序必备的设置。
UNIX安装
UNIX安装第一章SCO UNIX5.0 操作系统安装及其说明第一节U NIX安装安装前的准备工作(HP Netserver LH 3000 U3 镜相服务器)一、1.按Ctrl+M for HP NetRAID Express Tools在Management下选configure \ New configuration 回车选Y es 回车2.在New Configuration_Array Selection Menu按空格选ONLINE 回车ONLINE 回车···回车在Logical Drive 0 中选RAID=1 回车选RAID1回车··回车YES···YES 直到出现Save Configuration选Y es···Y es按ESC退出3.选Initialize(初始化)在Logical Drives中按空格选中Logical Drive 0按F10,YES,回车按ESC,回车,yes,回车···按ESC,退出二.制作Amird NetRAID driver 和网卡驱动装入光盘(HP Netserver Navigator CD-ROM).在菜单中选择Diskket Library制作RAID盘和网卡驱动盘退出。
(IBM xSeries 232 阵列服务器)基础知识:RAID 0——>一块盘RAID 1——>两块盘(镜相)RAID 5——>多块盘(最少三块)例:4块盘——容量=4块盘总容量-1/4总容量一、配置阵列信息步骤:1、放入工具盘2、选中controller,选Actions\出厂设置3、Actions\Create arrays4、选Custom configuration for controller 15、Next6、将ID0~ID3拖到右侧Arrays下7、Next8、选5-Maxmum capacity with redurdaLogical drive19、Next10、Apply yes11、Reboot,取出光盘二、制作RAID盘1、Creat systom dishettes选SCO UnixWare2、Next3、Y our Server4、Next5、IBM Server RAID Adapter6、Next7、IBM Serve RAID Device Driver Diskette for SCO Operation System_UnixWare HE8、Next9、插入磁盘10、Next11、OK12、Next…………Next系统安装放入UNIX光盘,启动服务器屏幕显示:1、boot:defbootstr link=”amird” Sdsk=amird(0,0,0,0) Srom=wd(0,0,0,0)(HP Netserver LH 3000 U3镜相服务器)2、boot:restart link=ipsraid Sdsk=ips(0,0,0,0) Srom=wd(0,0,0,0)放入RAID软盘,回车。
Unix安装步骤

Unix 5.0.5安装步骤将’SCO UNIX 5.0.5’安装盘放入光驱,重启计算机并由光盘引导1. Boot:↙2. ……Press <Enter> to begin installation↙3. 进入Unix安装界面……Press <Enter> to continue↙4. ……Press <Enter> to accept the terms and conditions of the EULA.Press <F2> if you do not accept the terms and conditions of the EULA and therefore wish to end this session and not use the software.Accept↙5. Identifying the installation media deviceThe media device is your tape,CD-ROM,or floppy drive.Follow the instructions at the button of the screen to change a value. Media device to be used:IDE CD ROMIDE Controller:secondaryMaster or Slave:masterAccept above choices↙6. Selecting a keyboard typeKeyboard:US EnglishAccept above choices↙7. Licensing your systemLicense number:2FI100628License code :scdnrqdnLicense data :g0;k0;mktoxe3Accept above choices↙8. Suitability for automatic UpgradeIt will take a few minutes to check whether you can run an automatic Upgrade on your system(retaining all user and configuration files).Fresh↙9. Configuring the basic systemSystem name : scosysvDomain name :Security profile: TraditionalTime zone : Eastern Standard/Summer TimeLanguage : Standard C (English)Accept above choices↙10. Initial system profileStandard Enterprise system configuration : YesLightweight character terminal configuration: NoIf you run large database products,choose the following:Database services : NoAccept above choices↙11. Preparing your disk and choosing softwareHard disk setup : Interactive fdisk/divvy①Optional software: SCO OpenServer Enterprise System,265 MBAccept above choices↙①Setting up your hard disksDisk 0,8024 MB. Partitions & filesystems:Interactive fdisk/divvyAccept above choices↙12. Configuring optional softwarePlease refer to the Installation Checklist in the OpenServer Handbook for assistance when selecting the Email system.Network card : Autodetect DeferredNetwork address : No networking card configuredVideo and graphics: VESA SVGAMouse : High Resolution Keyboard MouseEmail system : sendmailAccept above choices↙13. Setting your root passwordRoot password : rootPlease type again to confirm: rootAccept above choices↙14. Starting Hard Disk Initialization…System V Hard Disk InitializationThe primary hard disk in the system will now be initializedThe hard disk initialization requires you to set the disk parameters, specify the size of the NUIX partition , and control the layout of the filesystems and swap area . System default values are available at each selection.Initialization Selection:1. Continue with hard disk initialization.2. Return to Interactive Query Manager (IQM)This will return you to the serial/activation screen.All previous answers will be lost.3. Exit and abort installationEnter your choice: 1↙The hard disk installation program will now invoke /etc/dkinit. Entering ‘q’ at the following menu will exit /etc/dkinit,and the hard disk installation will continue.If you wish to exit the entire installation at this menu,press the <DEL> key.Hard Disk Drive 0 Configuration1. Display current disk parameters2. Modify current disk parameters3. Select default disk parametersEnter your choice or q to quit: 3↙Hard Disk Drive 0 Configuration4. Display current disk parameters5. Modify current disk parameters6. Select default disk parametersEnter your choice or q to quit: q ↙……1. Display Partition Table2. Use Entire Disk for UNIX3. Use Rest of Disk for UNIX4. Create UNIX Partition5. Activate Partition6. Delete Partition7. Create PartitionEnter your choice or ‘q ’ to quit: 4↙ Current Hard Disk Drive:/dev/rdsk/0s0……Partition Status Type Start End Size 2 Inactive TYPE 1597155186047917633254 Active DOS(32) 1 65024 65024Enter partition number or ‘q ’ to return: 1↙Enter starting track number , or ‘q ’ to return: 65025↙Enter partition size in tracks , or ‘q ’ to return: 32130↙ Current Hard Disk Drive:/dev/rdsk/0s0Partition Status Type Start End Size 1 Inactive UNIX 6502597154 32130 2 Inactive TYPE 1597155186047917633254 Inactive DOS(32) 1 65024 65024Press <Return> to continue ↙注:图示例子中Partition 2,4为已划分磁盘空间,UNIX 分区在4-2之间, 扇区起始地址和分区尺寸要计算,只可小于未分空间。
UNIX FreeBSD6.1安装手册

C:\BOOT\setup98.bin="由虚拟启动软盘启动" C:\ieldr="由 ISOEMU 工具引导 ISO 文件" 需要说明一点: 对于用 windows 的 ntldr 直接启动 ISOEMU,ieldr 好像不能 放在扩展分区, 比如 D 盘, 至于其配置文件能否放在扩展分区, 这个我没有测试。 如果这步配置正确的话,当重新启动电脑,选择"由 ISOEMU 工具引导 ISO 文件" 菜单即可开启 FreeBSD 的安装进程了。 当然,如果你想从纯 dos 启动安装进程的话,你就不需要增加 C:\ieldr=" 由 ISOEMU 工具引导 ISO 文件"菜单项了,此时你只需要把 isoemu 的可之行文件 ieldr.exe 和其配置文件 ieldr.ini 放在一起,当然还要包括你要引导的 iso 文 件,然后进入到纯 dos 环境,执行%isoemuDir%\ieldr 即可开始启动 FreeBSD 的 安装进程了。
2.2.3 配置/etc/login.conf
修改该文件,完成对基本系统的本地化过程。需要说明的是,每次修改之后 为了能修改生效,需要执行 cap_mkdb /etc/login.conf 命令。修改例子: � 增加如下内容 # # Chinese User Accounts # chinese|Chinese Users Accounts:\ :charset=GBK:\ :lang=zh_CN.GBK:\ :LC_ALL=zh_CN.GBK:\ :LC_CTYPE=zh_CN.GBK:\ :LC_COLLATE=zh_CN.GBK:\ :LC_TIME=zh_CN.GBK:\ :LC_NUMERIC=zh_CN.GBK:\ :LC_MONETARY=zh_CN.GBK:\ :LC_MESSAGES=zh_CN.GBK:\
Commvault Simpana 9学习手册3:Linux、Unix客户端的安装
CommvaultSimpana 9学习手册3:Linux、Unix客户端的安装CommvaultSimpana提供了非常丰厚的客户端支持,除了常见的Windows系统,Linux及Unix也有客户端的支持,并且安装过程也非常简便。
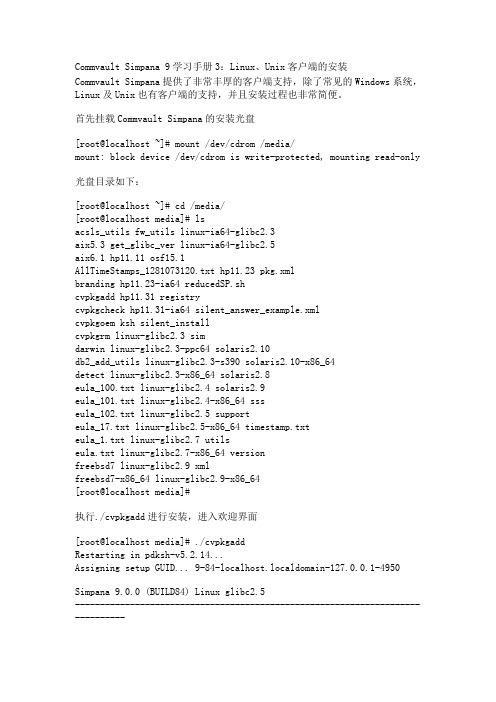
首先挂载CommvaultSimpana的安装光盘[root@localhost ~]# mount /dev/cdrom /media/mount: block device /dev/cdrom is write-protected, mounting read-only光盘目录如下:[root@localhost ~]# cd /media/[root@localhost media]# lsacsls_utilsfw_utils linux-ia64-glibc2.3aix5.3 get_glibc_ver linux-ia64-glibc2.5aix6.1 hp11.11 osf15.1AllTimeStamps_1281073120.txt hp11.23 pkg.xmlbranding hp11.23-ia64 reducedSP.shcvpkgadd hp11.31 registrycvpkgcheck hp11.31-ia64 silent_answer_example.xmlcvpkgoemkshsilent_installcvpkgrm linux-glibc2.3 simdarwin linux-glibc2.3-ppc64 solaris2.10db2_add_utils linux-glibc2.3-s390 solaris2.10-x86_64detect linux-glibc2.3-x86_64 solaris2.8eula_100.txt linux-glibc2.4 solaris2.9eula_101.txt linux-glibc2.4-x86_64 ssseula_102.txt linux-glibc2.5 supporteula_17.txt linux-glibc2.5-x86_64 timestamp.txteula_1.txt linux-glibc2.7 utilseula.txt linux-glibc2.7-x86_64 versionfreebsd7 linux-glibc2.9 xmlfreebsd7-x86_64 linux-glibc2.9-x86_64[root@localhost media]#执行./cvpkgadd进行安装,进入欢迎界面[root@localhost media]# ./cvpkgaddRestarting in pdksh-v5.2.14...Assigning setup GUID... 9-84-localhost.localdomain-127.0.0.1-4950Simpana 9.0.0 (BUILD84) Linux glibc2.5-------------------------------------------------------------------------------CommVault__ _/ _\(_)_ __ ___ _ __ __ _ _ __ __ _\ \ | | '_ ` _ \| '_ \ / _` | '_ \ / _` |_\ \| | | | | | | |_) | (_| | | | | (_| |\__/|_|_| |_| |_| .__/ \__,_|_| |_|\__,_||_|9.0.0(BUILD84)Welcome to CommVault Systems, Inc. Simpana.For support please visit /support, or send an email tosupport@, or call US/CANADA (Toll Free) (877) 780-3077; INTERNATIONAL (732) 571-2160.This script will install Simpana backup system on this machine.Log messages will be sent to /tmp/.gxsetup/cvpkgadd.log.4950.Press <ENTER> to start ...同意安装协议Simpana 9.0.0 (BUILD84) Linux glibc2.5-------------------------------------------------------------------------------EULAPress <ENTER> to review Simpana End User License Agreement ...Do you accept the terms of this license agreement? yes选择1,在本地安装CommvaultSimpana agentSimpana 9.0.0 (BUILD84) Linux glibc2.5-------------------------------------------------------------------------------Unix Setup Task MenuPlease select a setup task you want to perform from the list below:Advanced options provide extra setup features such as creating custom package,recording/replaying user selections and installing External DataConnectorsoftware.1) Install data protection agents on this computer2) Advanced options3) Exit this menuYour choice: [1]选择在物理机上安装CommvaultSimpanaSimpana 9.0.0 (BUILD84) Linux glibc2.5-------------------------------------------------------------------------------Cluster SupportCertain Simpana packages can be associated with a virtual IP, or in other words, installed on a "virtual machine" belonging to some cluster. At any given time the virtual machine's services and IP address are active on onlyone of the cluster's servers. The virtual machine can "fail-over" from oneserver to another, which includes stopping services and deactivating IP address on the first server and activating the IP address/services on the other server.You now have a choice of performing a regular Simpana install on the physicalhost or installing Simpana on a virtual machine for operation within a cluster.Most users should select "Install on a physical machine" here.1) Install on a physical machine2) Install on a virtual machine3) Exit this menuYour choice: [1]输入物理机的计算机名Simpana 9.0.0 (BUILD84) Linux glibc2.5-------------------------------------------------------------------------------Physical Machine Host NameWe found one network interface available on your machine. We will associate itwith the physical machine being installed, and it will also be used by theCommServe to connect to the physical machine. Note that you will be able toadditionally customize Datapipe Interface Pairs used for the backup data traffic later in the Simpana Java GUI.Please check the interface name below, and make corrections if necessary:Physical Machine Host Name: redhat-a选择需要安装agent,输入相应的数字回车即可,选择完成之后输入dSimpana 9.0.0 (BUILD84) Linux glibc2.5-------------------------------------------------------------------------------Install Simpana on physical machine redhat-aPlease select the Simpana module(s) that you would like to install.[X] 1) MediaAgent [1301] [CVGxMA][X] 2) UNIX File System iDataAgent [1101] [CVGxIDA][ ] 3) ProxyHostiDataAgent [1102] [CVGxProxyIDA][ ] 4) DocumentumiDataAgent [1126] [CVGxDctmIDA][ ] 5) Oracle iDataAgent [1204] [CVGxOrIDA][ ] 6) SAP for Oracle [1205] [CVGxOrSAP][ ] 7) SAP for MaxDB [1206] [CVGxSAPMAXDB][ ] 8) Informix iDataAgent [1201] [CVGxIfIDA][ ] 9) Sybase iDataAgent [1202] [CVGxSybIDA][ ] 10) DB2 iDataAgent [1207] [CVGxDB2][ ] 11) MySQL iDataAgent [1208] [CVGxMySQL][ ] 12) PostGresiDataAgent [1209] [CVGxPostGres][ ] 13) Lotus Notes Database iDataAgent [1051] [CVGxLndbIDA]>) >>>>>>>>>>>> NEXT PAGE >>>>>>>>>>>>[a=all n=none r=reverse q=quit d=done >=next <=previous ?=help]Enter number(s)/one of "a,n,r,q,d,>,<,?" here:是否输入licenseSimpana 9.0.0 (BUILD84) Linux glibc2.5-------------------------------------------------------------------------------Install Agents for Restore Only?Do you want to install the agents for restore only without consuming licenses? [no]选择安装介质,2为本地Simpana 9.0.0 (BUILD84) Linux glibc2.5-------------------------------------------------------------------------------Keep Your Install Up to Date - Installation Scripts PackInstallation Scripts Pack provides extra functions and latest support and fixperformed during setup time. Please specify how you want to get this pack.If you choose to download it from the website now, please make sure you haveinternet connectivity at this time. This process may take some time dependingon the internet connectivity.1) Download from the software provider website.2) Use the one in the installation media.3) Use the copy I already have by entering its unix path.Your choice: [1] 2选择安装路径Simpana 9.0.0 (BUILD84) Linux glibc2.5-------------------------------------------------------------------------------Keep Your Install Up to Date - Latest Service PackLatest Service Pack provides extra functions and latest support and fix forthe packages you are going to install. You can download the latest service pack from software provider website.If you decide to download it from the website now, please make sure you haveinternet connectivity at this time. This process may take some timedependingon the internet connectivity.Do you want to download it from internet now? [no]Simpana<- config -> CVGxBase0 for Linux glibc2.5-------------------------------------------------------------------------------Simpana Installation DirectoryPlease specify where you want us to install Simpana binaries.It must be a local directory and there should be at least 142MB of free spaceavailable. All files will be installed in a "simpana" subdirectory, so if youenter "/opt", the files will actually be placed into "/opt/simpana".Installation Directory: [/opt]Simpana<- config -> CVGxBase0 for Linux glibc2.5-------------------------------------------------------------------------------Simpana Log DirectoryPlease specify where you want to keep Simpana log files.It must be a local directory and there should be at least 100MB of free spaceavailable. All log files will be created in a "simpana/Log_Files" subdirectory, so if you enter "/var/log", the logs will actually be placed into "/var/log/simpana/Log_Files".Log Directory: [/var/log]是否建立专门的备份用户组Simpana<- config -> CVGxBase0 for Linux glibc2.5-------------------------------------------------------------------------------Simpana GroupMost of Simpana processes run with root privileges, but some are launched bydatabases and inherit database access rights. To make sure that registry andlog files can be written to by both kinds of processes we can either make suchfiles world-writeable or we can grant write access only to processes belongingto a particular group, e.g. a "simpana" or a "dba" group.We highly recommend now that you create a new user group and enter its name inthe next setup screen. If you choose not to assign a dedicated group to Simpana processes, you willl need to specify the access permissions later.If you're planning to backup Oracle DB you should use "dba" group.Would you like to assign a specific group to Simpana? [yes] no确认用户权限Simpana<- config -> CVGxBase0 for Linux glibc2.5-------------------------------------------------------------------------------Access Permissions for Other UsersInstaller will assign full access rights to root user and its belonging groupfor all installed Simpana files and its processes.For any other users, you can specify the access permissions now.However, since you chose not to assign a dedicated group in previous step, make sure you specify sufficient access rights for other users if you are alsoplanning to install Simpana agents involving third party software protection.[X] 1) Allow read permission to other users[X] 2) Allow write permission to other users[X] 3) Allow execute permission to other users[a=all n=none r=reverse q=quit d=done >=next <=previous ?=help]Enter number(s)/one of "a,n,r,q,d,>,<,?" here:选择agent使用的端口号,默认是8400,这里8400的端口已经被占用,安装程序会自动向后选择端口,直到端口可用Simpana 9.0.0 (BUILD84) CVGxBase for Linux glibc2.5-------------------------------------------------------------------------------Instance Port NumbersEvery instance of Simpana should use a unique set of network ports to avoid interfering with other instances running on the same machine.The port numbers selected must be from the reserved port number range and havenot been registered by another application on this machine.Please enter the port numbers.Port Number for CVD : [8400]Simpana 9.0.0 (BUILD84) CVGxBase for Linux glibc2.5-------------------------------------------------------------------------------Instance Port NumbersEvery instance of Simpana should use a unique set of network ports to avoid interfering with other instances running on the same machine.The port numbers selected must be from the reserved port number range and havenot been registered by another application on this machine.Please enter the port numbers.Port Number for CVD : [8403]Port Number for EvMgrC: [8402]*** Port 8402 is already reserved in /etc/services.Press <ENTER> to try again ...Port Number for EvMgrC: [8403]*** CVD and EvMgrC cannot share the same port number.Press <ENTER> to try again ...Port Number for EvMgrC: [8404]防火墙设置Simpana 9.0.0 (BUILD84) CVGxBase for Linux glibc2.5-------------------------------------------------------------------------------Firewall ConfigurationIs there a firewall between this client and the CommServe? [no]指定CommServe的服务器地址Simpana 9.0.0 (BUILD84) CVGxBase for Linux glibc2.5-------------------------------------------------------------------------------CommServe Host NamePlease specify hostname of the CommServe below. Make sure the hostname isfully qualified, resolvable by the name services configured on this machine.CommServe Host Name: 选择使用的存储策略Simpana 9.0.0 (BUILD84) CVGxIDA for Linux glibc2.5-------------------------------------------------------------------------------Storage PolicyPlease select one storage policy for this IDA from the list below:1) dc-4week-1cyclesStorage Policy: [1]是否需要在另一台服务器上安装agentSimpana 9.0.0 (BUILD84) Linux glibc2.5-------------------------------------------------------------------------------Cluster SupportCertain Simpana packages can be associated with a virtual IP, or in other words, installed on a "virtual machine" belonging to some cluster. At anygiven time the virtual machine's services and IP address are active on onlyone of the cluster's servers. The virtual machine can "fail-over" from oneserver to another, which includes stopping services and deactivating IP address on the first server and activating the IP address/services on the other server.Currently you have Simpana installed on physical node redhat-a(redhat-a).Now you have a choice of either adding another package to the existing installation or configure Simpana on a virtual machine for use in a cluster.1) Add another package to redhat-a(redhat-a)2) Install Simpana on a virtual machine3) Exit this menuYour choice: [1]3完成安装Simpana 9.0.0 (BUILD84) Linux glibc2.5-------------------------------------------------------------------------------DoneThank you for choosing CommVault Systems, Inc. Simpana.For support please visit /support, or send an email tosupport@, or call US/CANADA (Toll Free) (877) 780-3077; INTERNATIONAL (732) 571-2160.Please take a moment to visit CommVault Systems, Inc. Simpana Web site at/support to download the latest Simpana Updates andService Packs.客户端安装完毕之后到CommCell控制台进行“注册客户端”指定客户端地址及端口号是否改写客户端名称及主机名确认添加配置完成添加后就可用看到Redhat-a的主机及其安装的agent。
UNIX中的FreeD安装步骤
当准备工作完成之后,安装FreeBSD实际是一个非常简单的过程,简单到将光盘插入计算机启动,回答几个问题,一切将很快完成。
或者将启动软盘放入并启动,输入FreeBS D安装服务器的网址和路径。
然而对于初次接触FreeBSD的使用者,安装过程还可能有些陌生,下面将介绍安装系统和进行基本配置的过程。
1 启动安装系统FreeBSD的安装程序不是DOS或者Windows程序,而是必须在FreeBSD下运行的FreeBSD程序。
因此,启动安装系统实际上也就是首先要启动一个基本的FreeBSD 操作系统,然后在这个基本系统上运行安装程序。
如何从一台裸机或者DOS下进入FreeBSD系统,并启动安装程序,是安装过程的第一步。
1)启动系统有四种启动FreeBSD安装程序的方法:从现有FreeBSD中启动安装程序sysinsta,用于系统升级和配置;从CD-Rom中启动安装程序,要求计算机支持光盘启动;从DOS分区中启动,要求计算机已经安装有DOS系统;从启动软盘启动,需要制作启动软盘;如果使用了光盘作安装介质,并且计算机支持光盘直接启动,最简单的启动方式就是光盘直接启动。
当前大部分计算机支持光盘直接启动,这样就只需要在启动时进入系统BIOS的Se tup程序,更改启动顺序为光盘优先,然后存储退出即可。
对于SCSI光驱,需要设置SCSI启动优先,并且设置SCSI的启动设备ID为光驱ID(需要SCSI控制卡支持光驱启动)。
然而,最标准的启动安装程序的方式还是软盘启动,使用启动软盘(boot disk),使计算机从软盘上重新启动,进入FreeBSD系统和安装程序,对于系统要求最少,并可以从一个裸机上安装FreeBSD系统,因此是比较常用的方式。
这就需要按照前面叙述的步骤制作启动软盘,将软盘插入A驱,并更改启动顺序为软盘优先。
这样万一计算机的B IOS不支持光驱启动或者使用了其他种类的安装介质,均能够正常启动安装进程。
UNIX系统安装IDL6.4的说明
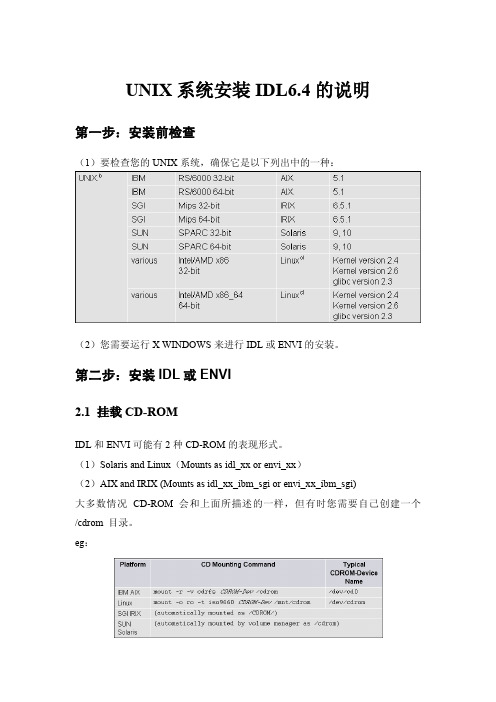
UNIX系统安装IDL6.4的说明第一步:安装前检查(1)要检查您的UNIX系统,确保它是以下列出中的一种:(2)您需要运行X WINDOWS来进行IDL或ENVI的安装。
第二步:安装IDL或ENVI2.1 挂载CD-ROMIDL和ENVI可能有2种CD-ROM的表现形式。
(1)Solaris and Linux(Mounts as idl_xx or envi_xx)(2)AIX and IRIX (Mounts as idl_xx_ibm_sgi or envi_xx_ibm_sgi)大多数情况CD-ROM会和上面所描述的一样,但有时您需要自己创建一个/cdrom 目录。
eg:如果您修改了CD-ROM路径,请记住您修改后的CD-ROM路径,并将它作为安装安装路径。
2.2进行安装1、在UNIX prompt输入: /bin/sh /CDROM-PATH/xinstall.sh注:CDROM-PATH为CD-ROM路径。
出现License Agreement对话框。
如果出现错误,请查考本文结尾——可能出现的权限错误2、在License Agreement对话框中单击YES进行下一步安装。
3、在选择安装路径对话框中,您可以通过Set Directory这个按钮来更改安装路径,默认安装路径为/usr/local/itt。
请确保该磁盘上有足够的空间可以进行安装。
4、如果IDL已经装好,可以将ENVI安装在IDL相同的安装路径下,默认路径为/usr/local/itt。
请确保该磁盘上有足够的空间可以进行安装。
5、在安装对话框中,典型安装选项会被默认选中。
如果您需要添加安装选项,请在复选框中将其选中,如果您需要删除安装选项,请在复选框中将其去掉。
6、在安装对话框中,正在运行的平台会被默认选中,您可以通过安装对话框中的复选框选中或者去掉平台。
如果您的系统支持64-bit,则可以选择安装32- bit 或64-bit。
UNIX安装及序列号集
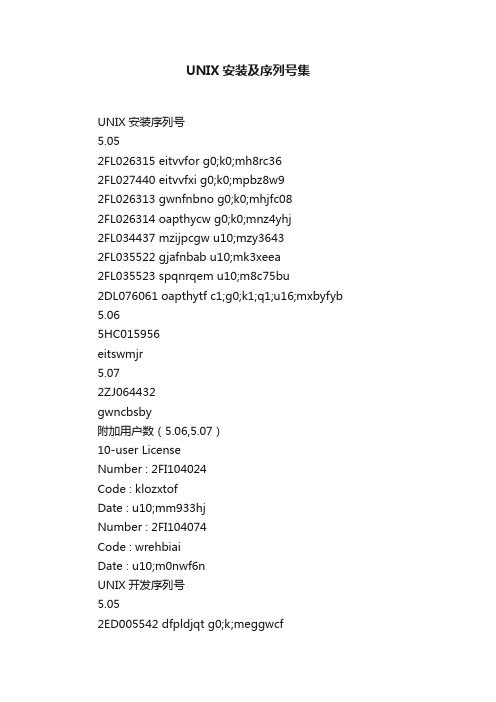
UNIX安装及序列号集UNIX安装序列号5.052FL026315 eitvvfor g0;k0;mh8rc362FL027440 eitvvfxi g0;k0;mpbz8w92FL026313 gwnfnbno g0;k0;mhjfc082FL026314 oapthycw g0;k0;mnz4yhj2FL034437 mzijpcgw u10;mzy36432FL035522 gjafnbab u10;mk3xeea2FL035523 spqnrqem u10;m8c75bu2DL076061 oapthytf c1;g0;k1;q1;u16;mxbyfyb 5.065HC015956eitswmjr5.072ZJ064432gwncbsby附加用户数(5.06,5.07)10-user LicenseNumber : 2FI104024Code : klozxtofDate : u10;mm933hjNumber : 2FI104074Code : wrehbiaiDate : u10;m0nwf6nUNIX开发序列号5.052ED005542 dfpldjqt g0;k;meggwcf2NC017450 hhdfnbab g0;k0;q1;mgpgcem5.06,5.072NC009188rzzdzudrg0;k0;q1;mn6pjxeUNIX补丁安装方法一、RS505A的安装办法。
第1步:以超级用户的方式执行下列命令。
mount -r -fHS /dev/cd0 /mnt第2步:执行custom命令。
第3步:在Software Manager 对话框中选定Software -> Install New -> From scosysv (本地主机名)。
第4步:在Media Device中选定Media Images之后,选定Continue。
第5步:在Enter Image Directory中键入:/mnt/RS505A之后。
UNIX_操作系统安装指南

UNIX_操作系统安装指南UNIX 操作系统安装指南一)打开显示器电源,打开主机电源。
二)等待系统进入固件系统,出现 P00>>> 提示符。
注:固件系统不区分字符的大小写。
三)输入 show memory 命令,查看最后一行 Total ... 为系统内存容量,记录之。
四)输入 show device 命令,查看第 3 列为 RRD... 的行,这是光驱设备(TLZ... 为磁带机,RZ... 为硬盘,HSZ... 为磁盘阵列,RX... 为软驱,记录下该行第 2 列的设备名,DKA400为GS60的光驱设备名。
注:光驱、硬盘与磁盘阵列的设备名(简略)为 DK...,其中的第三个字符为A,B,C...,表示该设备所挂接在的总线的总线控制器所在的插槽的槽号为 1,2,3...;磁带机的设备名(简略)为 MKA...,一般不会出现第三个字符为 B,C... 的情况;软驱的设备名(简略)为 DVA...;网卡的设备名(简略)为 EWA...,总线控制器(SCSI 卡)的设备名(简略)为PKA...,五)用 show|more 命令确认以下变量设置:auto_action 为 BOOTboot_osflags 为 Abootdef_dev 为系统的引导硬盘console 为 graphicsos_type 为 UNIX如不相符,需用 set 命令改为相应值。
六)依据系统所安装的网卡类型与以太网交换机类型设置 ewa0_mode,如网卡工作在 100M 全双工时设置 ewa0_mode 为 fastfd:set ewa0_mode fastfd(用 show 命令时显示为 FastFD (Full Duplex)) 注意:系统缺省设置网卡工作在 10M 半双工方式,ewa0_mode 值为 twisted-pair(用 show 命令时显示为 Twisted-Pair)如网卡在全双工方式时工作不正常(两台网卡工作在全双工的主机通信时速度慢或完全停顿),则宜设置网卡工作在半双工方式:set ewa0_mode fast(用 show 命令时显示为 Fast)七)在主机光驱中放入 Digital UNIX 系统安装盘,然后输入 boot dka400 命令,从光驱引导系统,进入系统安装程序。
- 1、下载文档前请自行甄别文档内容的完整性,平台不提供额外的编辑、内容补充、找答案等附加服务。
- 2、"仅部分预览"的文档,不可在线预览部分如存在完整性等问题,可反馈申请退款(可完整预览的文档不适用该条件!)。
- 3、如文档侵犯您的权益,请联系客服反馈,我们会尽快为您处理(人工客服工作时间:9:00-18:30)。
for an EIDE/IDE device is always 0).
3.开始安装:
⑴.系统检测硬件,等待出现下列提示:
⑵.Press to begin installation。回车。
⑶.安装介质的选择:
Media device to be used:IDE CD ROM *按空格键选择另外的介质
亮条移到上面,回车出现:
1.Preservation
2.UNIX only
3.Customize
4.interactive
选4
1.Display patition table
2.Use entire disk for unix(整个硬盘给UNIX)
3.Use rest of disk for unix(把剩余空间给UNIX)
第一节安装准备
1.安装分类:安装分为单启动安装(只启动UNIX)和多启动安装(即可选择启动DOS、WIN98、WIN2000等)。
2.安装概述:硬盘最多支持四个分区,除非你用软件来管理多重启动。Dos及WIN98下有两个分区即Primary 和Expand;Win2000也分为Primary和Expand分区;Unix下分为Root根分区和Swap分区。如何配置,这需要你自己选择。注意:Unix下的两个分区必须要装,言外之意,你只能在选两个分区了。建议:不要DOS、Win98及Win2000的扩展分区。
3.硬盘空间:你可以预留Free的硬盘空间给Unix,也可以在 Unix安装过程中删除其他的分区来安装Unix。但必须在硬盘的8G,及1024柱面之前。
4.启动盘制作:你可以选择软盘启动安装,也可以选择光盘启动安装,只要你的机器支持光盘启动。如果你的机器不支持光盘启动你就要作启动软盘。
方法有四:
⒁.安装进程
⒂.重新启动机器
4.安装完毕:
第三节基本配置
1.重启机器。
2.系统出现:
SCO OpenServer TM Release 5
Boot
: *回车
3.系统出现:
INIT:SINGLE USER MODE
Type CONTROL-d to proceed with normal startup,
⑻.系统初始化:
……………………………………
……………………………………
……………………………………
……………………………………
Database services:YES *如果你的机器要运行大型数据库按空格选YES
Accept above choices
⑼.硬盘的配置:
Hand disk setup:UNIX only :Bad Tracking ON
Optional software:SCO Openserver Enterprise System,265MB
Accept above choice *如果你的硬盘没有其它系统打回车
注:如果你的硬盘安装了多系统或你不打算把整个硬盘给UNIX,就要设置硬盘。
Video and graphics:VGA
Mouse:High Resolution Keyboard Mouse *按空格选择
Email system:MMDF *按空格选择其它
Accept above choices
⑾.设置root用户口令
⑿.扫描硬盘的坏磁道
⒀.建立文件系统
3.在Unix下:root注册后,在机器上插入3.5寸软盘,并将系统软件光盘放入光驱,然后敲入下面的命令: #mount /dev/cd0 /mnt#dd if=/mnt/images/boot/N00 of=/dev/rfd0135ds18 OK!
第二节安装过程
1.启动机器:
1.无论从光盘启动还是从软盘启动,机器会出现下列安装提示符:
其中,link=“amird slha”指出安装时需要联入的驱动程序名称(BTLDs,bootime loadable
driver),sdsk=amird(0,0,0,0)指出系统根盘的位置,几个数字分别为SCSI的适配器号
(adapter number),总线号(bus number),SCSI ID,逻辑单元号(lun),Srom=(0,0,0,0)指
⑷.键盘类型的选择,直接Accept above chioces
⑸.许可证:
License number:
License code:
License data:
Accept above choices 回车
⑹.安装类型的选择:
Upgrade(升级) Fresh(全新安装)回车选OK
(or give root password for system maintenance): 输入root密码或按CONTROL-d
4.按CONTROL-d系统出现:
SCO Openserver(TM)Release 5
Login:root
Password:
5.登录机器,系统提示:#
环境变量虽在不同的SHELL中有不同的设置方法,但工作环境的变量,所有运行程序均可使用。
执行程序中设置的环境变量,除非这个程序是被(. dot)调用的,程序执行完后不会带到工作环境中来。
输入输出和联机帮助
输入输出重定向
在UNIX的SHELL环境中,其输入输出的重定向的功能非常有用。其中可以使用标准输入输出设备,0表示标准输入、1表示标准输出、2表示标准错误输出。
SCO UNIX Openserver(TM)5.0.X
Boot: *你可以在此输入?查询可启动的地址或打回车。
2.安装驱动:如果你的机器有Scsi卡或阵列卡或网卡,你需要在此输入驱动包的地址。
如:defbootstr link=”amird slha” sdsk=amird(0,0,0,0) Srom=wd(0,0,0,0)
1.在windows下用gzcp:提示符下运行E:\images\gzcp E:\images\boot\install.img A:。其中A:为你的软盘符,E为你的光盘符。
2.在windows下用floppcp:提示符下运行E:\images\floppcp d/ A: /f E:\images\boot\install.img
UNIX家族产品很多,但其一般用户命令均符合POSIX标准。掌握这些基本命令,我们就可以在这个产品平台上开展工作。下面简要介绍SCO OPENSERVER 部分常用命令,其中大部分是POSIX标准的。掌握这些命令的关键是如何从这些命令出发找到自己需要的命令,学会使用联机帮助就是很好的办法。
命令执行环境
4.Create unix patition(创建UNIX分区)
5.Active(激活刚分的区)
6.Delete(删除)
7.Create(创建)
选3或4,创建以后别忘了激活刚创建UNIX分区
⑽.选择基本配置:
Network card: *按空格选择
Network address: *按空格选择
技巧:
我们需要找一个想要的命令时,man一下我们知道的命令。从相关命令出发就可找到答案。Man –k 搜索也是很好的办法。
在XWINDOW的HELP中找答案会更方便、详细。
!警告:不要随意执行你不知道是用来做什么的命令!不要使用 .*做参数
3.基本命令:
env显示设置命令执行环境
1.通过custom安装驱动
2.Install new
3.Netconfig
4.Install new lan adapter
9.启动X Window:
配置完鼠标和显示器后,#下键入startx就可以进入图形界面了。执行scologin enable 则开机自动进入x-windows的登陆界面。
⑺.配置系统:
System name:
Domain name:
Security profile:Traditional
Time zone:China Standard Time *按空格选择此项
Languge:Standard C (English)
Accept above choice
UNIX提供给用户执行命令的环境,称之为SHELL。有sh,ksh,csh等,其中sh为基本SHELL,其余为根据不同用户习惯扩展的。
用户登录后,系统将执行配置文件设置用户工作环境。如果没有在配置文件中exec一个程序或自动退出。用户将得到命令行提示符。此时用户的shell一般对应于/etc/passwd中的设置。
man –k 关键词
段节指主题所属的范畴,有:
ADM 系统管理命令
C 用户命令
F 文件格式
HW 硬件属性
M 其他的
TCL SCO Visual Tcl(TM) commands
只有一个主题有多个范畴的帮助时,才须指定你需要的段节。
Man –k 可以显示帮助文档中出现这个词的所有主题。
IDE Controller:Secondary *按空格选择Primary
Master or Slave:Master *按空格选择Slave
Accept above choice回车
注:如果只出现Media device to be used,而不出现下列两项,则需要组合硬盘及光驱的接法,建议都挂主(Master)。
10.关机操作:
1.一般用户:exit;delete键;ctrl+d键