9号下载说明
关于中星9号直播卫星卫视频道具体数量的说明

ABS- S免费 ABS- S免费 ABS- S免费 ABS- S免费 ABS- S免费 ABS- S免费 ABS- S免费 ABS- S免费
[广播电视“村村通”工程]
中国波束
2008- 07- 22
SATzx q
11960 左旋(L) 28800
云南卫视 西藏卫视 汉语 西藏卫视 藏语
陕西卫视 甘肃卫视 宁夏卫视 新疆电视台- 汉语新闻综合频道 新疆电视台- 维语新闻综合频道
74
http://www.sa t-china .c om | http://www.C ATV2.c om
2008年第21期
的专 用机方案 中有海 尔,S T、 富士通、 其乐达 、国芯、 阿里 等,其中使用海尔方案的厂家较多。由于村村通直播星白皮书 的规 定,所有 专用机的 安装密码 均为00 00,但 超级密码 则稍 有不同了。我们需要了解目前直播星上究竟有多少卫视节目和 广播,可以在使用专用机的主菜单中选择系统设置,输入密码 0000。找到自 动搜索功能启动该功能后,当 它扫描完这4个转 发器后就会有1个统计结果显示出来(见附图)。
由于直播星白皮书对 ABS- S 专用机的软件 规定,所有方 案和专用 机厂家都 必须满足符 合这些要求 。因此只要 它是中 星9号 ABS - S 专用机 ,即便 不同厂家 其基本的 功能应 用软件 均会一样 ,不同的 是使用的文 字大小和字 体区别了。 对于中 星9 号专用 机目前 能够 准确显 示出当 前所 能收看 收听到 的卫 视和广播 ,可以使 用它的一个 基本功能显 示出来。目 前出现
下行频率 极化 符号率
电视频道名称
加密方式 节目详细信息 卫星波束 更新日期 信息提供者
中央电视台- 综合频道 中央电视台- 经济频道
中星9号卫星电视接收器调试

中星9号卫星电视接收器调试
中星9号直播卫星的安装调试
中星9号直播卫星的安装调试非常简单,正常情况下,调试一面天线只用5分钟时间即可。
如果用户使用的是平板天线,天线的安装是最简单的,天线安装固定之后,直接将高频头的接口和直播机用电缆连接上即可,不必设置高频头,就可以开始调试。
如果使用的是普通Ku天线,也不复杂,只要将天线组装固定好,高频头安装好即可。
由于中星9号直播卫星采用的是圆极化传送信号,因此也不必设置高频头的极化角,只要将高频头用夹具固定,F头处于任何方向都可以。
将高频头和直播机连接好以后,就可以开始调试。
步骤一:开机,会出现如下画面:
进入系统设置,接收机会提示用户输入密码,一般的通用密码是9999,也可以查找说明书。
输入密码后,就可以进入系统设置菜单,这时候需要按一下确认键,菜单上开始显示信号强度和信号品质。
当天线没有对准卫星的时候,信号强度很低,一般只有10%左右,而信号品质为0。
没有对准卫星时,信号强度颜色为红色。
这时请调整天线的方位角和仰角,不同地区的方位角和仰角有所不同,可以到下面地址下载计算软件:
中星9号仰角方位角计算软件
当接近正确的方向的时候,信号强度会有所增加,不同的直播机,信号强度的高低并不可以直接比较,有的20%多点就可以接收到信号,有的要30%多。
当信号品质不为0以后,就接收到信号。
收到信号后,信号强度和信号品质全部变为绿色。
然后根据信号品质的指示,微调方向,固定好天线。
9号f90挡位说明

9号f90挡位说明
车把采用一体成型设计,没有裸漏的线束,看起来简洁又整齐,这点还是非常让人满意的。
它的按键都集中于左右车把两侧,无论左右都可以单手操作所有按键,没有反人类的设计。
车把中间为液晶显示屏仪表盘,数字清楚,夜间也不会晃眼。
中间最大的数字显示时速,下方有电量条和电量百分比,所有骑行参数都一目了然。
车把左侧组合开关包括远近光灯、左右转向灯、车辆喇叭、定速巡航。
这个左右转向灯按钮我倒是第一次在电动车上看到,安全又实用,九号电动车这一点设计得非常人性化。
右侧组合开关包括挡位加减、自动大灯、打开大灯、关闭大灯、双闪警示灯、P档开关、启停、开坐桶。
中星9号升级破解46台软件工具讲解
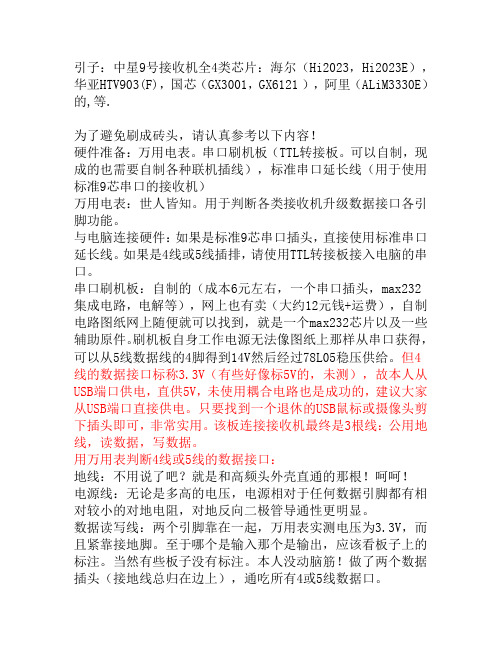
引子:中星9号接收机全4类芯片:海尔(Hi2023,Hi2023E),华亚HTV903(F),国芯(GX3001,GX6121 ),阿里(ALiM3330E)的,等.为了避免刷成砖头,请认真参考以下内容!硬件准备:万用电表。
串口刷机板(TTL转接板。
可以自制,现成的也需要自制各种联机插线),标准串口延长线(用于使用标准9芯串口的接收机)万用电表:世人皆知。
用于判断各类接收机升级数据接口各引脚功能。
与电脑连接硬件:如果是标准9芯串口插头,直接使用标准串口延长线。
如果是4线或5线插排,请使用TTL转接板接入电脑的串口。
串口刷机板:自制的(成本6元左右,一个串口插头,max232集成电路,电解等),网上也有卖(大约12元钱+运费),自制电路图纸网上随便就可以找到,就是一个max232芯片以及一些辅助原件。
刷机板自身工作电源无法像图纸上那样从串口获得,可以从5线数据线的4脚得到14V然后经过78L05稳压供给。
但4线的数据接口标称3.3V(有些好像标5V的,未测),故本人从USB端口供电,直供5V,未使用耦合电路也是成功的,建议大家从USB端口直接供电。
只要找到一个退休的USB鼠标或摄像头剪下插头即可,非常实用。
该板连接接收机最终是3根线:公用地线,读数据,写数据。
用万用表判断4线或5线的数据接口:地线:不用说了吧?就是和高频头外壳直通的那根!呵呵!电源线:无论是多高的电压,电源相对于任何数据引脚都有相对较小的对地电阻,对地反向二极管导通性更明显。
数据读写线:两个引脚靠在一起,万用表实测电压为3.3V,而且紧靠接地脚。
至于哪个是输入那个是输出,应该看板子上的标注。
当然有些板子没有标注。
本人没动脑筋!做了两个数据插头(接地线总归在边上),通吃所有4或5线数据口。
刷机工具软件:海尔芯片2023或2023E使用ABS_Flasher_V1.6。
HTV903芯片使用serial(备份使用serial_dump,升级使用serial_app)。
九号电动滑板车ES系列使用说明书

25612-00001 a bUser ManualES seriesRepresentative samples of this product have been evaluatedby CSA and meet UL 2272.Visite para baixar o manual do usuário.Original InstructionsThe manufacturer reserves the right to make changes to the product, release firmware updates, and update thismanual at any time. Visit or check the App to download the latest user materials. You must install the App, activate your KickScooter, and obtain the latest updates and safety instructions.Thanks for choosing the Ninebot KickScooter (hereinafter referred to as KickScooter)!Your KickScooter is a fashionable transportation device with mobile app, allowing you to connect with other riders.Enjoy your ride and connect with riders world wide!ContentsThanks for choosing the Ninebot KickScooter ES series!4 Assembling Your KickScooter5 Installing a Second Battery Pack 1 Riding Safety 2 Packing List 3 Diagram6 First Ride7 Charging8 Learning to Ride9 Warnings11 Maintenance 13 Certifications12 Specifications 10 Folding and Carrying 14 Trademark and Legal Statement 15 Contact020405060708090911151716182021WARNING!Always use both electric brake and foot brake for emergency stopping. Otherwise you risk falls and/orcollisions from not achieving the max. braking capability.011 Riding Safety1. The KickScooter is a recreational transporter. Before mastering riding skills, you need to practice. Neither Ninebot Inc. (meansNinebot (Beijing) Tech Co., Ltd.and its subsidiaries and affiliates) nor Segway Inc. is responsible for any injuries or damage caused by a rider's inexperience or failure to follow the instructions in this document.2. Please understand that you can reduce the risk by following all the instructions and warnings in this manual, but you cannoteliminate all the risks. Remember that whenever you ride the KickScooter you risk injury from loss of control, collisions, and falls.When entering into public spaces always comply with the local laws and regulations. As with other vehicles, faster speeds require longer braking distance. Sudden braking on low traction surfaces could lead to wheel slip, or falls. Be cautious and always keep a safe distance between you and other people or vehicles when riding. Be alert and slow down when entering unfamiliar areas.3. Always wear a helmet when riding. Use an approved bicycle or skateboard helmet that fits properly with the chin strap in place, andprovides protection for the back of your head.4. Do not attempt your first ride in any area where you might encounter children, pedestrians, pets, vehicles, bicycles, or otherobstacles and potential hazards.5. Respect pedestrians by always yielding the right of way. Pass on the left whenever possible. When approaching a pedestrian fromthe front, stay to the right and slow down. Avoid startling pedestrians. When approaching from behind, announce yourself and slow down to walking speed when passing. Please obey local traffic laws and regulations if situation is different.6. In places without laws comply with the safety guidelines outlined in this manual. Neither Ninebot Inc. nor Segway Inc. is responsiblefor any property damage, personal injury/death, accidents, or legal disputes caused by violations of the safety instructions.7. Do not allow anyone to ride your KickScooter on his/her own unless they have carefully read this manual and followed the NewRider Tutorial in the App. The safety of new riders is your responsibility. Assist new riders until they are comfortable with the basic operation of the KickScooter. Make sure each new rider wears a helmet and other protective gear.8. Before each ride check for loose fasteners and damaged components. If the KickScooter makes abnormal sounds or signals analarm, immediately stop riding. Diagnose your KickScooter via the Ninebot by Segway App and call your dealer/distributor for service.9. Be alert! Scan both far ahead and in front of your KickScooter — your eyes are your best tool for safely avoiding obstacles and lowtraction surfaces (including, but not limited to, wet ground, loose sand, loose gravel, and ice).10. To reduce risk of injury, you must read and follow all “CAUTION” and “WARNING” notices in this document. Do not ride at an unsafespeed. Under no circumstance should you ride on roads with motor vehicles. The manufacturer recommends riders be 14+ years old. Always follow these safety instructions:A. People who should not ride the KickScooter include:i. Anyone under the influence of alcohol or drugs.ii. Anyone who suffers from disease that puts them at risk if they engage in strenuous physical activity.iii. Anyone who has problems with balance or with motor skills that would interfere with their ability to maintain balance.iv. Anyone whose weight is outside the stated limits (see Specifications).v. Pregnant women.B. Riders under the age of 18 years old should ride under adult supervision.C. Comply with local laws and regulations when riding this product. Do not ride where prohibited by local laws.D. To ride safely, you must be able to clearly see what is in front of you and you must be clearly visible to others.E. Do not ride in the snow, in the rain, or on roads which are wet, muddy, icy, or that are slippery for any reason. Do not ride overobstacles (sand, loose gravel, or sticks). Doing so could result in a loss of balance or traction and could cause a fall.11. Do not attempt to charge your KickScooter if it, the charger, or the power outlet is wet.12. As with any electronic device, use a surge protector when charging to help protect your KickScooter from damage due to powersurges and voltage spikes. Only use the Segway supplied charger. Do not use a charger from any other different product models.13. Use only Ninebot or Segway approved parts and accessories. Do not modify your KickScooter. Modifications to your KickScootercould interfere with the operation of the KickScooter, could result in serious injury and/or damage, and could void the Limited Warranty.02033 DiagramHeadlightDashboard & Power ButtonSpeedometer: Indicates the current speed. Also displays error codes when faults are detected.Power level: Indicates the remaining battery level with 5 bars. Each bar equates to approximately 20% power level.Power mode (double click the power button to switch the mode):—Red "S" icon: Sport mode (maximum power/speed and reduced range).—White "S" icon: Standard mode (moderate power/speed and range).—No "S" icon: Speed limit mode (minimum power/speed and increased range).Bluetooth: A blinking Bluetooth icon indicates that the vehicle is ready to connect. A solid Bluetooth icon indicates that the vehicle isconnected to a mobile device.Power button: Short press to power on. Long press to power off. When powered on, single click to turn on/off the headlight. Double-clickto change power mode.Power button(multi-functional)Power modePower level2 Packing ListHandleMainframeWhen unboxing your KickScooter, please verify that the above items are included in the package. If you are missing any components,please contact your dealer/distributor or nearest service center (see contacts in the user manual). After verifying that all components are present and in good condition, you can assemble your new KickScooter.Please retain the box and packaging materials in case you need to ship your KickScooter in the future.Remember to power off your KickScooter and unplug the charge cable before assembling, mounting accessories, or cleaning the mainframe.AccessoriesBattery ChargerM4 Flathead Screw x 5(one extra)M4 Hex WrenchUser MaterialsSecond Battery PackQUICK START USER MANUAL LIMITED WARRANTYES1ES2ES4Sold separatelyIncluded04054 Assembling Your KickScooter3. Install four screws (two on each side) with the included hex wrench.4. Verify that your KickScooter powers on and off.2. Firmly connect the wires inside the handle and the stem. Slide the handle onto the stem. Be aware of the correct orientation.1. Unfold the stem and push it until you hear aclick. Then unfold the kickstand to supportthe scooter.3. Install the battery pack onto the support bracketand tighten the screws securely.2. Install the support bracket and fasten securelywith three screws, as shown.4. Verify that your KickScooter powers on and off.1. Remove the three screws on the stem, asshown. Then remove the cover near thecharge port.Follow these steps when installing a second battery pack:5 Installing a Second Battery Pack06077 Charging8 Learning to RideWear an approved helmet and other protective gear to minimize any possible injury.1. Power on the scooter and check the indicator lamp power level. Charge the scooter if the battery level is low.6 First RideInstructions via the App before your first ride.For your safety, your new KickScooter is not activated and will beep occasionally after Power ON.Until activated, the KickScooter maintains a very low riding speed, and can not be ridden with full function. Install the App on your mobile device (with Bluetooth 4.0 or above),connect to the KickScooter with Bluetooth, and follow the App instructions to activate your KickScooter and enjoy the full performance.Scan the QR code to download the App (iOS 8.0 or above, Android™ 4.3 or above).Your KickScooter is fully charged when the LED on the charger changes from red (charging) to green (trickle charge). Close the charge port cover when not charging.21Install the App and register/login.Power on the KickScooter. A blinking Bluetooth icon indicates the KickScooter is waiting for a34Click “Vehicle”→“Search device” to connect to your KickScooter.The KickScooter will beep when the connection is successful. The Bluetooth icon will stop blinking and remain illuminated.Do not connect the charger if the charge port or charge cable is wet.Close the charge port cover whenfinished.Open the charge port cover.Insert the charge plug.Charging step tips0809WARNINGWhen braking rapidly you risk serious injury due to loss of traction and falls. Maintain a moderate speed and look out for potential hazards.3. Put your other foot on the footrest to keep both feet stable. Press the throttle on right hand to speed up when you are balanced.Note, For your safety, the motor will not engage until the scooter reachs 1.8 mph(3 km/h).4. Slow down by releasing the throttle;stir the brake handle thumb shifter quickly and stamp the fender with foot at the same time to trigger mechanical braking in order to make a sharp brake.2. Stand on the footrest with one foot and push off with your foot to start gliding.handle slightly.Watch your head when passing through doorways.Watch your speed when traveling downhill. Use both brakes together when traveling at high speed.DO NOT ride over speed bumps, thresholds, or other bumps at HIGH SPEED.9 WarningsDO NOT ride thescooter in the rain.WARNING1011DO NOT rotate the handle violently while driving at high speed.DO NOT ride on public roads, motorways, or highways.DO NOT ride through puddles or. other bodies of water deeper than 1 inch (2 cm).The KickScooter is for one rider only. Do not ride double or carry anypassengers. Do not carry a child.DO NOT press the throttle when walking with the scooter.DO NOT carry heavy objects on the handlebar.DO NOT ride the scooter with only one foot.Avoid contacting obstacles with thetire/wheel.1213When your KickScooter is folded up, simply lift it by the stem to carry.DO NOT take your hands off thehandlebar while riding. Do not ride withone hand only.DO NOT step on the foldingpedal while riding.141511 MaintenanceCleaning and StorageUse a soft, wet cloth to wipe the mainframe clean. Hard to remove dirt can be scrubbed with a toothbrush and toothpaste, then cleaned with a soft, wet cloth. Scratches on plastic parts can be polished with fine grit abrasive paper. NOTEDo not wash your KickScooter with alcohol, gasoline, acetone, or other corrosive/volatile solvents. These substances may damage the appearance and internal structure of your KickScooter. Do not wash your KickScooter with a power washer or hose.WARNINGMake sure the KickScooter is powered OFF, the charging cable is unplugged, and the rubber cap on the charge port is tightly sealed beforecleaning; otherwise you may damage the electronic components.Store your KickScooter in a cool, dry place. Do not store it outdoors for extended periods of time. Exposure to sunlight and temperature extremes (both hot and cold) will accelerate the aging process of the plastic components and may reduce battery life. Battery Pack MaintenanceDo not store or charge the battery at temperatures outside the stated limits (see Specifications). Do not puncture the battery. Refer toyour local laws and regulations regarding battery recycling and/or disposal.A well maintained battery can perform well even after many miles of riding. Charge the battery after each ride and avoid draining the battery completely. When used at room temperature (70°F [22°C]) the battery range and performance is at its best; whereas using it at temperatures below 32°F (0°C) can decrease range and performance. Typically, at -4°F (-20°C) range can be half that of the same battery at 70°F (22°C). Battery range will recover when temperature rises. More details are available in the App.NOTETypically, a fully charged battery should retain charge for 120-180 days in Standby Mode. A low-power battery should retain charge for 30-60 days in Standby Mode. Remember to charge the battery after each use. Completely draining the battery may cause permanent damage to the battery. Electronics inside the battery record the charge-discharge condition of the battery; damage caused by over-discharge or under-discharge will not be covered by the Limited Warranty. Do not attempt to disassemble the battery. Risk of fire. No user serviceable parts.Do not ride when the ambient temperature is outside the machine operation temperature (see Specifications) because low/high temperature will limit the maximum power/torque. Doing so could cause personal injury or property damage due to slips or falls.[1] Typical Range: tested while riding under full power, 165 lbs (75 kg) load, 77°F (25°C), 60% of max. speed on average on pavement.[2] All KickScooter models could install the second battery. Some of the parameters would change in this case.12 Specifications1617For model: ES1/ES2/ES4FCC ID: 2ALS8-NT9527IC: 22636-NT952713 CertificationsRepresentative samples of this product have been evaluated by CSA and meet UL 2272.The battery complies with UN/DOT 38.3.Federal Communications Commission (FCC) Compliance Statement for USAThis device complies with part 15 of the FCC rules. Operation is subject to the following two conditions: (1) This device may not cause harmful interference, and (2) this device must accept any interference received, including interference that may cause undesired operation.NOTEThis equipment has been tested and found to comply with the limits for a Class B digital device, pursuant to part 15 of the FCC Rules. These limits are designed to provide reasonable protection against harmful interference in a residential installation. This equipment generates, uses and can radiate radio frequency energy and, if not installed and used in accordance with the instructions, may cause harmful interference to radio communications. However, there is no guarantee that interference will not occur in a particular installation. If this equipment does cause harmful interference to radio or television reception, which can be determined by turning the equipment off and on, the user is encouraged to try to correct the interference by one or more of the following measures:—Reorient or relocate the receiving antenna.—Increase the separation between the equipment and receiver.—Connect the equipment into an outlet on a circuit different from that to which the receiver is connected.—Consult the dealer or an experienced radio/TV technician for help.This equipment complies with FCC radiation exposure limits set forth for an uncontrolled environment.Industry Canada (IC) Compliance Statement for CanadaThis device complies with Industry Canada license-exempt RSS standard (s). Operation is subject to the following two conditions: (1) this device may not cause interference, and (2) this device must accept any interference, including interference that may cause undesired operation of the device.CAN ICES-3 (B)/NMB-3(B)Neither Segway Inc. nor Ninebot is responsible for any changes or modifications not expressly approved by Segway Inc. or Ninebot. Such modifications could void the user's authority to operate the equipment.European Union Compliance StatementBattery recycling information for the European UnionBatteries or packaging for batteries are labeled in accordance with European Directive 2006/66/EC concerning batteries and accumulators and waste batteries and accumulators. The Directive determines the framework for the return and recycling of used batteries and accumulators as applicable throughout the European Union. This label is applied to various batteries to indicate that the battery is not to be thrown away, but rather reclaimed upon end of life per this Directive.In accordance with the European Directive 2006/66/EC, batteries and accumulators are labeled to indicate that they are to be collected separately and recycled at end of life. The label on the battery may also include a chemical symbol for the metal concerned in the battery (Pb for lead, Hg for mercury, and Cd for cadmium). Users of batteries and accumulators must not dispose of batteries and accumulators as unsorted municipal waste, but use the collection framework available to customers for the return, recycling, and treatment of batteries and accumulators. Customer participation is important to minimize any potential effects of batteries and accumulators on the environment and human health due to the potential presence of hazardous substances.Restriction of Hazardous Substances Directive (RoHS)Ninebot products sold in the European Union, on or after 3 January 2013 meet the requirements of Directive 2011/65/EU on the restriction of the use of certain hazardous substances in electrical and electronic equipment (“RoHS recast” or “RoHS 2”).Radio and Telecommunications Terminal Equipment DirectiveSegway Europe B.V.EU Contact Address for regulatory topics only: Hogehilweg 8, 1101CC Amsterdam, The Netherlands.Hereby, Ninebot (Changzhou) Tech Co., Ltd, declares that the wireless equipment listed in this section are in compliance with the essential requirements and other relevant provisions of Directive 2014/53/EU.1819Contact us if you experience issues relating to riding, maintenance and safety, or errors/faults with your KickScooter.Americas:Segway Inc.14 Technology Drive, Bedford, NH 03110, USA Tel : 1-603-222-6000Fax: 1-603-222-6001Toll Free: 1-866-473-4929E-mailSales:****************************E-mailService:***************************Website: Europe, Middle East and Africa:Segway Europe B.V.Hogehilweg 8, 1101CC Amsterdam, The Netherlands Emailservice:*****************.com Website: Have your KickScooter serial number on hand when contacting Segway.You can find your serial number on the underside of your KickScooter or in the App under More Settings –> Basic Information.15 ContactNinebot and the shape icon are trademarks of Ninebot (Tianjin) Tech. Co., Ltd; Segway is the registered trademark of Segway Inc.; Ninebot by Segway is a trademark of Segway Inc.; Android, Google Play are trademarks of Google Inc. App Store is a service mark of Apple Inc. The respective owners reserve the rights of their trademarks referred to in this manual.The KickScooter is covered by relevant patents. For patent information go to .We have attempted to include descriptions and instructions for all the functions of the KickScooter at the time of printing. However, your KickScooter may differ slightly from the one shown in this document. Visit the Apple App Store (iOS) or the Google Play Store (Android) to download and install the App.Please note that there are multiple Segway and Ninebot by Segway models with different functions, and some of the functions mentioned herein may not be applicable to your unit. The manufacturer reserves the right to change the design and functionality of the KickScooter product and documentation without prior notice. © 2017 Ninebot (Beijing) Tech Co. Ltd. All rights reserved.14 Trademark and Legal Statement2021。
九号语音引擎音箱使用说明
九号语音引擎音箱使用说明一、注意事项1、为了使用者正确使用播放器,确保播放器性能良好,请认真阅读并遵守:2、切勿严重撞击主机。
3、切勿接触苯、稀释剂等化学药品。
4、请不要靠近强磁场、电场。
5、请避开直射光线或发热器具。
6、切勿自行拆卸、修理、改造。
7、骑车、驾驶汽车及摩托车时,请勿使用播放器及耳机,以免造成危险。
8、切勿以较大音量收听,以免对听力造成不良影响。
9、废弃包装、电池、旧电子产品,请分类妥善处理。
二、功能特点[蓝牙音频] Bluetooth 3.0+EDR,最大接收距离10米。
[蓝牙通话] 语音清晰、无回声。
[MP3 播放] 直接播放TF卡内存放的MP3文件。
[FM收音机] FM数字立体声收音机,电台记忆播放。
[音频输入] 立体声音频输入接口,轻松连接电脑、数码音乐播放器、手机等音源设备。
[断点记忆] 自动记忆上次退出时的曲目,音量大小。
[内置电池] 内置可充电锂电池,环保,节能,实用。
[USB读卡器] 连接电脑,可拷贝或删除TF卡中的歌曲。
[USB声卡] 连接电脑,播放电脑音频文件,可控制电脑上下曲、音量大小。
三、播放音乐操作本机开机时自动检测识别外接设备,开机后进入蓝牙/FM 模式,插入TF卡自动识别播放,后者优先原则,也可自行切换播放模式;插入音频信号线不自动切换,通过[O/PLAY]键切换到AUX模式下播放,详细功能操作请阅读第四项“产品的按键、插孔功能定义”。
四、产品的按键、插孔功能定义(以实物为准)1.[ON/OFF]:电源开关;ON为开,OFF为关。
2.[O/PLAY]:播放/暂停/接听电话/挂断电话/模式转换/全自动搜台。
短按:TF、AUX和蓝牙模式为播放/暂停,FM模式为全自动搜台;来电时短按接电话,通话时短按挂机。
长按:长按3秒松开进行模式转换,转换顺序为TF - 蓝牙- AUX - FM;3.[-]:音量调节小/上一曲/上一个电台。
短按:TF模式为上一曲;FM模式选择上一个电台;蓝牙/AUX 模式调节音量减小;长按:调节音量减小。
140308驱逐9号三联动安装说明
140308驱逐9号三联动安装说明
140308驱逐9号三联动移门上部的轨道盒尺寸要保证在高12厘米,宽9厘米。
像窗帘盒一样,轨道盒内安装轨道,可以将三联动移门悬挂在轨道上。
当门的高度低于1.95米时,让人感觉很压抑。
因此,在做三联动移门时,高度最少要在195+12=207厘米以上。
如以下:
1、正常门的黄金尺寸在80厘米×200厘米左右,在这种结构下,门是相对稳定的,同时也很美观。
所以三联动移门的宽度和高度之比要和和黄金尺寸相近。
2、慎用由落地到顶的三联动移门(明吊轨道盒)。
由于推拉时摆动幅度过大,时间一长三联动移门容易变形,变形后门就无法开启,也就意味着不可修复和无法使用。
3、安装三联动移门轨道时,把上轨道固定好,用重力锥(吊线锤)在上轨道的两端和中点吊3个点在地上用油笔画出来3.3点定面,把上轨道安装好,然后对着上轨道的中心点放一根吊锤到地面,轨道的两端都要放放垂直线,下轨道在这3个点上固定这样可以确保上下轨道完全平行,移门的推拉就在最佳状态了。
九号电动轻便摩托车E70C 使用说明书

Auto 键
开机状态下,连续双击开座桶,长按关机;当 APP 感应解锁功能开启时,接近车辆按住此键开机。
危险警示 按下此键,车辆左右转向灯同时闪烁亮起,警示行人和其它车辆
28 电门锁(钥匙孔)* 以下图示仅示意单独用钥匙操作
OFF 档 车辆处于断电停车状态
ON 档 车辆处于通电启动状态
OPEN 档 开启坐桶
搜索结果 1 设备
ON 档
扫一扫
注册 登录
搜索设备
3. 激活车辆后的开机 / 关机方式 * 对于有龙头锁配置的车型,开机时,智能龙头锁同步解锁;关机时,智能龙头锁同步上锁。
a. 遥控器:按下开机 / 关机键解锁并开机;按下锁车键,关机并锁车。【详见 31 遥控器功能介绍】 b. 钥匙:钥匙插进钥匙孔向右旋转至 ON 档位开机,向左旋转至 LOCK 档位锁车。【详见 28 电门锁(钥匙孔)】 c. Auto 键【详见 12 组合开关】
按下后车辆鸣笛,警示行人或其它车辆
定速巡航键 按下启动定速巡航,车辆以当前速度前行;再次按下、拧油门转把、制动均可解除定速巡航
档位键 大灯键
车辆启动状态下:按向右侧档位增加,车辆最大行驶速度增大;按向左侧档位降低;车辆最大行驶速度减小
:推至此位置,关闭大灯
:推至此位置,打开大灯
:推至此位置,车辆处于智能模式,车辆根据外界环境亮度,自行控制大灯开、关以及仪表盘的亮度
180/200kPa
180/200kPa
传动方式
后轮毂电机 - 直驱式
后轮毂电机 - 直驱式
最高车速
42km/h
45km/h
续航里程 *
50-75km
50-85km
参数配置
蓄电池类型及数量 电池扩展
生态环境部公告 2018年第9号 附件.建设项目竣工环境保护验收技术指南 污染影响类
附件建设项目竣工环境保护验收技术指南污染影响类1适用范围本技术指南规定了污染影响类建设项目竣工环境保护验收的总体要求,提出了验收程序、验收自查、验收监测方案和报告编制、验收监测技术的一般要求。
本技术指南适用于污染影响类建设项目竣工环境保护验收,已发布行业验收技术规范的建设项目从其规定,行业验收技术规范中未规定的内容按照本指南执行。
2术语和定义下列术语和定义适用于本指南。
2.1污染影响类建设项目污染影响类建设项目是指主要因污染物排放对环境产生污染和危害的建设项目。
2.2建设项目竣工环境保护验收监测建设项目竣工环境保护验收监测是指在建设项目竣工后依据相关管理规定及技术规范对建设项目环境保护设施建设、调试、管理及其效果和污染物排放情况开展的查验、监测等工作,是建设项目竣工环境保护验收的主要技术依据。
2.3环境保护设施环境保护设施是指防治环境污染和生态破坏以及开展环境监测所需的装置、设备和工程设施等。
2.4环境保护措施环境保护措施是指预防或减轻对环境产生不良影响的管理或技术等措施。
2.5验收监测报告验收监测报告是依据相关管理规定和技术要求,对监测数据和检查结果进行分析、评价得出结论的技术文件。
2.6验收报告验收报告是记录建设项目竣工环境保护验收过程和结果的文件,包括验收监测报告、验收意见和其他需要说明的事项三项内容。
3验收工作程序验收工作主要包括验收监测工作和后续工作,其中验收监测工作可分为启动、自查、编制验收监测方案、实施监测与检查、编制验收监测报告五个阶段。
具体工作程序见图1。
验收推荐程序与方法见附录1。
启动自查编制验收监测方案实施监测与检查编制验收监测报告后续工作4验收自查4.1环保手续履行情况主要包括环境影响报告书(表)及其审批部门审批决定,初步设计(环保篇)等文件,国家与地方生态环境部门对项目的督查、整改要求的落实情况,建设过程中的重大变动及相应手续履行情况,是否按排污许可相关管理规定申领了排污许可证,是否按辐射安全许可管理办法申领了辐射安全许可证。
药品差比价规则(试行)(9号文)

国家发展改革委关于印发《药品差比价规则(试行)》的通知(发改价格[2005]9号)各省、自治区、直辖市,计划单列市及副省级省会城市发展改革委、物价局:为进一步提高药品定价科学性和透明度,规范药品价格行为,促进企业公平竞争,我们研究制定了《药品差比价规则(试行)》,现印发你们,请贯彻执行,并将有关问题通知如下:一、本通知发布后,各地应加紧研究制定具体实施细则,并最迟于2005年3月底以前执行。
二、《药品差比价规则(试行)》执行后,价格主管部门在制定调整药品价格,以及医疗机构在制定中标的政府定价和政府指导价药品零售价格时,须按照《药品差比价规则(试行)》执行。
三、我委已制定公布的药品价格,我委将在重新制定和调整价格时,按照《药品差比价规则(试行)》进行调整。
地方已制定公布的补充剂型规格品价格,各地可结合本地实际情况进行调整。
附:《药品差比价规则(试行)》。
国家发展改革委二○○五年一月七日附:药品差比价规则(试行)第一条为规范药品定价行为,提高药品定价科学性和透明度,制定本规则。
第二条本规则适用于政府定价、政府指导价药品(指药品制剂)。
第三条本规则对政府定价、政府指导价药品,按照价格管理的需要进行了归类。
实行政府定价或政府指导价的西药,凡中文通用名或英文国际非专利药名(INN)中表达的化学成份相同的药品制剂,归类为同种药品(化学成份相同,命名中的盐基、酸根及溶媒不同的,归类为同种药品);实行政府定价或政府指导价的中成药,国家标准规定的正式品名中剂型前部分的名称相同且国家标准规定的处方相同的药品制剂,归类为同种药品(处方相同正式品名不同的,归类为同种药品)。
第四条本规则所称的剂型、规格及药用包装材料定义,以国家食品药品监督管理局有关规定为依据。
第五条本规则所称药品差比价,是指同种药品因剂型、规格或包装材料的不同而形成的价格之间的差额或比值。
第六条本规则所称代表品,是指同种药品中临床常用的剂型、规格品种。
WIWIDE 9号板安装说明_

目录1.介绍1.1 包装内容 1.2 面板描述 1.3 前面板描述2.硬件安装2.1 安装设备前准备工作 2.2 硬件安装步骤3.软件配置3.1 3.2 3.3 3.4 登陆设备内部方式 自动获取IP地址设置(此方式为路由器连接 9# 设备) 宽带拨号设备(此方式为猫连接 9# 设备) 固定IP设备(此方式为给定IP连接 9# 设备)4.注意事项4.1 无线设备LAN与路由器LAN或WAN冲突 4.2 安装完成后查看设备运行状态1.介绍WIWIDE 9#(以后简称 9#) 是一个负责 IEEE 802.11 b / g / n 规格的无线路由器设备,主 要使用于商业化服务,在设置中可以提高安全、高效、可控和可靠地的局域网使用,本节介 绍 9# 简单内容和外观。
1.1 包装内容 包装 9# 主要设备如下: 1. 9# 本身设备 一台 2. 12 V 直流电源 一个 3.电源连接模块 一个1.2 面板描述PWR WLAN WAN LAN电源指示灯 无线使用指示灯 主线连接指示灯 局域网连接指示灯1.3 前面板描述SMA 连接器(1)外部天线。
可以用 SMA 连接器连接 2.4 兆赫外部天线电源网线口(2) 使用网线连接电源模块网口 。
RJ-45 网线连接 网线主口(3) 连接广域网口,俗称主网线口,连接由猫或路由器的主线2. 硬件安装2.1 安装前装备工作 确认外网使用正常:1、直连电脑拨号可以正常上网 2、连接路由器拨号可以正常上网2.2 硬件安装步骤步骤一:按下卡壳卸下上部设备盖步骤二:用网线插入到电源网线口处(网线另一端连接到电源模块POE口) 注:RJ-45 8 P8C 网线是必需的 (白橙-橙-白绿-蓝-白蓝-绿-白棕-棕)步骤三:网线主口插入连接猫或路由器的网线一端即可 注:RJ-45 8 P8C 网线是必需的 (白橙-橙-白绿-蓝-白蓝-绿-白棕-棕)步骤四:再安装上盖,确保网线已经安装好步骤五:1、DC 处安装 12V 直流电源 2、POE 处安装连接电源网线口一端 3、LAN 连接局域网网线,类似于普通路由器的 LAN(普通网线口) 注:没必要时 可以不连接 此时基本网络已经完成,要注意的是安装完成通电时电源模块绿灯会常亮, 9# 设备: PWR 蓝灯常亮,证明所有设备正常; WLAN 蓝灯常闪,证明无线网已经开通,开始运行; WAN 蓝灯常蓝,证明和猫或路由器一端连接正常; LAN 蓝灯常亮,证明你的电源模块 LAN 口接有网线和其他设备,如没有连接,此灯不亮3 软件配置3.1 登陆设备内部方式 登陆方式分为二种: 一、 通过电源模块上的 LAN 口用网线直接连接电脑后开启浏览器输入自动获取到的网关 (网 关可以通过电脑右下本地连接双击---支持,查看网关 图一)默认设备网关为: 192.168.1.200,此时会弹出输入用户名(图二) ,默认用户名为:admin 密码为 123456,即可登录设备内部设备(图一) (图二) 通过无线连接私用信号登录设备内容,默认信号为:802.11n_Router、wiwide、My_WiFi, 查看无线网络连接网关,开启浏览器输入网关,此时弹出输入用户名, 同一; 3.2自动获取IP地址设置(此方式为路由器连接 9# 设备) 进入设备内部后选择 Internet Settings 下列 WAN 项 WAN Connecion Type 选择 DHCP 其他 处为默认即可,点击 Apply 后选择 Reboot Now 重启;设置完成 。
兰博9号全自动锁说明书

兰博9号全自动锁说明书1. 产品概述兰博9号全自动锁是一款高端智能家居产品,通过先进的技术实现了全自动化的门锁管理。
该产品采用先进的指纹识别技术、密码输入技术以及远程控制技术,为用户提供便捷、安全的门锁解决方案。
2. 主要特点•指纹识别:兰博9号全自动锁配备了高精度的指纹识别模块,可以快速准确地识别用户的指纹,从而实现快速开锁。
•密码输入:除了指纹识别外,用户还可以通过密码输入方式进行开锁操作。
密码输入方式更加灵活,适用于多种场景。
•远程控制:兰博9号全自动锁支持远程控制功能,用户可以通过手机APP 或者云平台对门锁进行远程管理和控制。
无论身在何处,都能轻松实现对门锁的控制。
•防撬设计:兰博9号全自动锁采用了防撬设计,有效防止非法入侵和破坏。
即使遭受撬开或破坏,系统也会发出警报并自动报警。
•低功耗:兰博9号全自动锁采用了先进的节能技术,具有低功耗特点。
长时间使用也不会对电池造成过大的负担,节省能源。
3. 使用方法3.1 安装兰博9号全自动锁安装非常简便。
首先,在门上选择合适的位置安装锁体,并固定好。
然后,根据说明书中提供的示意图,将门把手与锁体连接好。
最后,将电池安装到指定位置,并确保正负极正确连接。
3.2 注册指纹在使用兰博9号全自动锁之前,需要先注册用户的指纹信息。
按下设置按钮进入注册模式,在屏幕上显示按手指的位置,并根据提示放置手指进行识别和注册。
3.3 设置密码除了指纹识别外,用户还可以设置密码进行开锁操作。
按下设置按钮进入密码设置模式,在屏幕上输入新密码并确认即可完成设置。
3.4 开锁操作3.4.1 指纹开锁当需要开锁时,只需将已经注册过的手指放置在指纹识别区域,系统会自动进行指纹识别,并在识别成功后打开门锁。
3.4.2 密码开锁除了指纹开锁外,用户还可以通过输入密码的方式进行开锁。
在屏幕上输入正确的密码后,系统会自动解锁。
3.5 远程控制兰博9号全自动锁支持远程控制功能,用户可以通过手机APP或者云平台实现对门锁的远程管理和控制。
惠普 EliteOne 800 G9 用户手册说明书

摘要本指南提供有关组件、网络连接、电源管理、安全性和备份等相关信息。
法律信息©Copyright 2020, 2021 HP Development Company, L.P.Windows 是 Microsoft Corporation 在美国和/或其他国家/地区的注册商标或商标。
USB Type-C 和 USB-C 是 USB Implementers Forum 的注册商标。
DisplayPort™ 和 DisplayPort™ 徽标是 Video Electronics Standards Association (VESA) 在美国和其他国家/地区所有的商标。
本文所含信息如有更改,恕不另行通知。
HP 产品和服务附带的明示保修声明中阐明了此类产品和服务的全部保修服务。
本文档中的任何内容均不构成任何额外保修。
HP 对本文档中出现的技术错误、编辑错误或遗漏之处不承担任何责任。
第二版:2021 年 10 月第一版:2020 年 8 月文档部件号:M05543-AA2产品通告本指南介绍大多数产品共有的功能。
您的计算机上可能未提供某些功能。
并非所有功能在所有 Windows 版本中都可用。
系统可能需要升级和/或单独购买硬件、驱动程序或 BIOS 更新,才能充分利用Windows 功能。
Windows 会自动更新,此功能始终处于启用状态。
需要高速互联网和Microsoft 帐户。
可能会收取 ISP 费用,在更新过程中可能还会有其他要求。
请参阅。
如果您的产品出厂随附 S 模式的 Windows:S 模式的 Windows仅适用于来自 Windows 的 Microsoft Store 中的应用。
某些默认设置、功能和应用不能更改。
某些兼容 Windows 的配件和应用程序可能无法运行(包括某些防毒软件、PDF 编写器、驱动程序实用程序和辅助功能应用程序)。
而且,即使您退出 S 模式,性能也可能会有所不同。
中星9号10月20日升级最新破解

中星九号超级密码整理中星九号超级密码整理自各个论坛,大家可以尝试。
我自己是天成机子,已测试成功。
1、天诚机破解:主菜单- 系统设置-密码F1,1,1,F2,0,2-自动搜索(如果节目收搜不全需要重复收搜直到节目全部),46个频道再现眼前,只是音视频不同步。
2、卓异机器海尔芯片输入密码1,4,f2,f1,5,9 自动搜索到20死机需重新刷机然后再输入密码1,4,f2,f1,5,9 自动搜索搜索完以后关机开机在关机开机就可以了看了。
3、天地星海尔+海尔海尔+AV1108 操作方法和天诚一样密码是:8 F3 1 F1 0 24、小霸王海尔芯片超级密码8-F3-7-F1-0-2自动搜索后有46个台,已经试过成功。
5、OST-166的:1,F3,1,F3,5,96,皇视的超级密码是:8 1 F1 F2 0 2 F3 4 F1 8 9 0HS-167,169的是: 8 F1 1 F2 9 17,国芯的超级密码是:1 4 F2 F1 5 9另外,还有几个,机子对上就可用,如果没有搜出46个台,重复搜索几次即可!8 5 4 F3 2 F18 F3 1 F1 0 2F1 1 1 F2 0 21 4 F2 F1 5 98 F3 1 F1 0 2如果你的机子现在是12个频道,那么最简单的方法是根据你自己的机子,输入超级密码,自动搜索;以下为四位密码的:听说,四位数密码的机子,也有超级密码可自搜到46台?(部分网友验证成功)1111 7474 7414 6666 1108 2012 2010 8211 1314 5173 1698 5168 7421以上,不知什么码对应哪种机,无聊时,大家愿试的就试下,没时间,就别试。
汇总跟贴网友成功案例:(不断更新)一,超级密码 2010 对应通达Y系列机型二,国芯的“3001+1211+5812”用6666 能够进入升级成功8月20日中星9号卫星最新PID参数及节目调整情况8月20日中星9号卫星最新PID参数及节目调整情况2010-08-20 05:44中九(直播星)已于8月20日0点52分出现004节目更新(替换4个电视频道,增加5套广播)卫星的应用程序又修补了一次。
光捷9号珊瑚灯说明书

光捷9号珊瑚灯说明书
1.产品概述
光捷9号珊瑚灯是一款高品质的照明设备,专为提供温馨柔和的照明效果而设计。
其独特的设计和先进的技术使其成为家庭、办公室和商业场所的理想选择。
2.产品特点
2.1节能环保:光捷9号珊瑚灯采用先进的LED技术,能够提供高亮度的照明效果,并且具有较低的能耗,为环境保护贡献一份力量。
2.2良好的色彩还原:该灯具能够准确还原物体的真实颜色,让您的环境更加清晰明亮。
2.3调光功能:光捷9号珊瑚灯配备了多种调光模式,可根据不同使用场景的需要进行调整,提供更加舒适的照明效果。
2.4长寿命:LED光源具有长寿命特点,使用寿命可达到数万小时,大大降低了更换灯泡的频率和维护成本。
2.5安全可靠:产品符合国际安全认证标准,使用过程中无辐射、无紫外线、无频闪,确保用户的健康和安全。
3.使用说明
3.1开箱验货:打开包装,确认产品完好无损。
3.2安装:将灯具固定在所需位置,确保安装牢固稳定。
3.3供电:将电源线插入电源插座,确保电源稳定。
3.4开关与调光:根据需要使用开关控制灯具的开关状态,同时
可根据个人需求选择合适的调光模式。
3.5清洁与维护:定期使用干净柔软的布清洁产品表面,避免使用化学溶剂和尖锐物品擦拭,以免损坏产品外观。
4.注意事项
4.1请确保灯具的安装和使用符合相关安全规范和标准,避免因不当操作造成意外伤害。
4.2请勿将产品暴露在潮湿、高温或易燃环境中,以免影响产品性能和使用寿命。
4.3若发现产品异常情况,请立即停止使用,并联系专业人士进行检修和维护。
4.4请妥善保管产品的配件和使用说明,以备将来需要。
九号电动C2021系列电动自行车使用说明书
九号电动 C2021系列车辆是一款时尚便利的交通工具,您需要通过练习掌握驾驶技巧。
● 驾驶需上电动自行车牌照,申请牌照时骑行踏板需安装好。
● 您有义务知悉您所在区域的法律,并遵守相关法律和交通规则。
● 请勿驶入机动车道及高速公路等禁止驶入的道路或区域,请在非机动车道驾驶且最高速度不得超过15km/h。
在没有非机动车道的道路上,请靠右行驶。
● 为了您的安全,请勿私自改装九号电动C2021系列车辆。
如需更换零部件,请联系售后服务。
● 如果九号电动C2021系列车辆发出异响,请立即停止使用,并联系售后服务以获得专业指导意见或维修保养服务。
● 不要停放在建筑门厅、疏散楼梯、走道和安全出口处。
● 不要在居住建筑内充电和停放,充电时应当远离可燃物,充电时间不宜过长。
● 请按照法律法规要求搭载人员或物品。
● 不要将车辆借给不会操纵的人员驾驶,以免发生伤害。
驾驶环境要求:● 请勿在暴雨等恶劣天气驾驶。
● 复杂路况请小心慢速行驶。
当高速驾驶九号电动C2021系列车辆越过障碍物、凹凸不平地面、湿滑路面、材质疏散地面、陡坡或急弯时,您可能因驾驶失控导致碰撞、跌倒或受伤。
● 相比正常干燥路面行驶时,雨雪天气驾驶时轮胎阻力相对降低、制动距离相对增加,加大了驾驶者控制速度的难度,更容易导致车辆失控。
为了确保驾驶安全,请您降低行驶速度,提前制动。
驾驶者要求:以下人员不应驾驶九号电动C2021系列: Ⅰ. 受到酒精或药物影响的人员Ⅱ. 由于患病而无法从事剧烈体力活动的人员 Ⅲ. 体重超过标称载荷的人员 Ⅳ. 孕妇Ⅴ. 16周岁以下人员1.安全须知Ⅵ. 极度疲劳的人员驾驶前准备:● 骑行前检查,如有异常(紧固件松动、零件受损等)请及时进行维修或找专业维修。
● 检查电源电路、灯光照明电路等电路状态。
● 检查前、后闸能否正常工作。
确保前后刹车制动正常、刹车线无损坏。
● 检查车把及前后轮的固定:确保车把稳固,前后轮稳固无晃动,能够正常行驶。
兆为黑猫9号酒精测试仪说明书

兆为黑猫9号酒精测试仪说明书第一章产品概述1.1 产品介绍兆为黑猫9号酒精测试仪是一款专业用于检测酒精浓度的便携式设备。
它采用先进的气体传感器技术,能够准确地测量被测试者呼出的酒精气体浓度,以帮助用户判断是否饮酒过量。
1.2 产品特点1.2.1 高精度测量兆为黑猫9号酒精测试仪采用先进的电化学酒精传感器,具有高灵敏度和高准确度。
它能够在短时间内快速响应,并给出准确的酒精浓度数值。
1.2.2 便携式设计兆为黑猫9号酒精测试仪采用小巧轻便的设计,便于随身携带。
无论是在酒吧、餐厅、聚会或是驾车出行时,都可以方便地进行酒精测试。
1.2.3 易于操作兆为黑猫9号酒精测试仪操作简单,只需按下开关按钮,待设备启动后,用户只需将嘴唇贴近测试仪的呼吸孔,吹气即可完成测试。
1.2.4 多种单位显示兆为黑猫9号酒精测试仪支持多种浓度单位显示,包括mg/L、‰等,方便用户根据自己的需要选择合适的浓度单位。
第二章使用说明2.1 使用准备在进行酒精测试之前,请确保兆为黑猫9号酒精测试仪已被充电或安装好电池。
2.2 开机与关机按下开关按钮,屏幕上将显示“欢迎使用兆为黑猫9号酒精测试仪”。
长按开关按钮3秒以上即可关机。
2.3 进行测试2.3.1 吹气测试用户将嘴唇贴近测试仪的呼吸孔,用力吹气,直到听到声音提示。
屏幕将显示酒精浓度数值。
2.3.2 呼气测试用户将嘴唇贴近测试仪的呼吸孔,慢慢呼气至设备发出声音提示。
屏幕将显示酒精浓度数值。
2.4 结果解读根据测试结果,用户可以判断自己是否饮酒过量。
一般来说,酒精浓度在0.1mg/L以下为安全范围,超过0.1mg/L则可能存在驾驶风险。
第三章注意事项3.1 测试前禁止饮食测试前请避免饮用含有酒精的饮品或食物,以免影响测试结果的准确性。
3.2 测试环境要求请在通风良好的环境下进行酒精测试,避免测试仪受到其他气味的干扰。
3.3 正确使用方法请按照本说明书中的指引正确使用兆为黑猫9号酒精测试仪,避免因操作不当导致测试结果不准确。
- 1、下载文档前请自行甄别文档内容的完整性,平台不提供额外的编辑、内容补充、找答案等附加服务。
- 2、"仅部分预览"的文档,不可在线预览部分如存在完整性等问题,可反馈申请退款(可完整预览的文档不适用该条件!)。
- 3、如文档侵犯您的权益,请联系客服反馈,我们会尽快为您处理(人工客服工作时间:9:00-18:30)。
02.泥娃娃
03.红河谷
04.小篱笆
05.小白船
06.送别
07.机器猫
08.可爱的家
09.云
10.祖国祖国多美丽
VOL.10小背篓
01.我心爱的小马车
02.小小少年
03.晚风
04.哆来咪
05.雨花石
06.老师的爱
老师的心
07.妈妈的吻
08.小背篓
╭═══════════════╮
║ 九号下载站 ║
╭══════┤ ├══════╮
║ ║ ║ ║
║ ║
╰═══════════════════════╯
如果你下载的软件包需要密码,九号的密码一般都为:
专辑曲目:
VOL.1小红帽A
║ ║ ║ ║
╰══┤ 绿色下载站: ├══╯
║ ║
06.好孩子要诚实
07.小雪花
08.这是小兵
09.刷牙歌
10.小金龟
11.过生日
12.小蜜蜂
13.下雨了
14.我是一粒米
VOL.2玲儿响叮当
01.ABC(字母歌)
02.Jingle Bell
03.Ten Little Indian Boys
04.Happy Birthday To You
04.劳动最光荣
05.小小螺丝帽
06.读书郎
07.卖报歌
08.听妈妈讲那过去的事情
09.生日快乐
10.小红帽
11.欢乐的小雪花
中外儿童金曲二
01.新年好
02.蜜蜂做工
03.小燕子
04.小白船
05.泥娃娃
06.我心爱的小马车
07.真善美的小世界
08.爷爷为我打月饼
09.小海螺
10.拍手唱歌笑呵呵
11.闪亮的小星星
03.两只老虎
04.拉拉勾
05.合拢放开
06.小兵
07.好妈妈
08.我爱我的小动物
09.小小猪
10.没鼻子的大象
11.小兔儿乖乖
12.小宝宝要睡觉
VOL.5小不点童谣A
01.小熊过桥
02.大老哥打猎
03.数角
04.板凳摞摞
05.小知了
06.小叭狗
07.粗心的小画家
12.Do Re Mi
பைடு நூலகம்VOL.3快乐的童年A
01.小螺号
02.小鸟小鸟
03.让我们荡起双桨
04.我爱北京天安门
05.快乐的节日
06.我爱米兰
07.拥军花鼓
08.走进十月的阳光
快乐的童年B
01.中国少年先锋队队歌
02.我们多么幸福
03.春天在哪里
04.老师您好
05.小号手之歌
09.雪绒花
10.中国中国我爱你
VOL.11
11A 儿童歌曲大联唱A 幼儿歌曲联唱/少儿歌曲联唱
11B 儿童歌曲大联唱B 外国儿童歌曲联唱/儿童影视歌曲联唱
VOL.12幼儿歌曲精选
12A 小红花A
12B 小红花B
VOL.13中外儿童金曲一
01.洋娃娃和小熊跳舞
02.小小公鸡
03.请你唱个歌吧
03.我的小白马
04.采草莓
05.红蜻蜓
06.白莲花
紫荆花
07.玩具恰恰舞
08.五十六个小朋友手拉手
09.飞向北京
10.春天哪里最美
11.采莲谣
12.两颗小星星
VOL.7娃哈哈
01.娃哈哈
02.鲁冰花
03.小白鸽
04.好爸爸坏爸爸
05.牧童
06.铃儿响叮当
07.剪羊毛
08.劳动最光荣
09.小螺号
10.1 2 3 4 5 6 7
VOL.8种太阳
01.七色光之歌
02.蓝精灵之歌
03.蓝天白云跟我来
04.让我们荡起双桨
05.春天在哪里
06.每当我走过老师的窗前
07.采蘑菇的小姑娘
08.门前有条小溪流
09.种太阳
10.红帽歌
VOL.9泥娃娃
01.这是什么
02.丢手绢
03.小小鸭子
04.小鼓响咚咚
05.小红花
06.我家几口
07.谁会这样
08.我叫轻轻
09.宝宝睡着了
10.小弟弟早早起
11.打电话
12.好朋友
13.小兔乖乖
14.国旗多美丽
小红帽B
01.数鸭子
02.小红帽
03.小星星
04.小花狗
05.小青蛙
08.摘瓜
09.老鼠画猫
10.种瓜谣
11.拍手歌
小不点童谣B
01.颠倒歌
02.狼来了虎来了
03.这也要那也要
04.小喜鹊
05.砍蚊子
06.对对歌
07.谁的尾巴
08.蛤蟆大姐穿新衣
09.五指歌
10.数青蛙
11.冰锅盖
12.孙悟空打妖怪
VOL.6金月亮
01.鲜花开
02.金月亮
║ ╰═══════════════╯ ║
║ ║
║ ╭═══════════════════════╮ ║
║ ║ ║ ║
06.各国儿童心连心
07.红星歌
08.歌声与微笑
VOL.4亲亲我A
01.亲亲我
02.打电话
03.乖孩子
04.小钟
05.两只小象
06.我是好宝宝
07.李小多分果果
08.小老鼠
09.颠倒歌
10.一分钱
11.小树叶
12.好阿姨
13.排排坐
亲亲我B
01.找朋友
02.大拇指
05.Apple Song
06.Donkey Donkey I Beg You
07.We Wish You A Merry X'Mas
08.Little Cabin In The Wood
09.As I Go
I Love To Sing
10.Edelweiss
11.Happy New Year
